mikiek
-
Posts
2,276 -
Joined
-
Last visited
Content Type
Profiles
Forums
Gallery
Events
Everything posted by mikiek
-
 Thanks John - it may not seem like much, but as much as I was disliking all the stains I tried, it was really a big load off my mind to find a winner. It was kind of one of those "duh" moments. I didn't like any color, so what about no color. Thinking about it now, I am surprised at how many other tasks were on hold until I could get the deck resolved.
- 843 replies
-
- 3
-

-
- niagara
- model shipways
- (and 2 more)
-
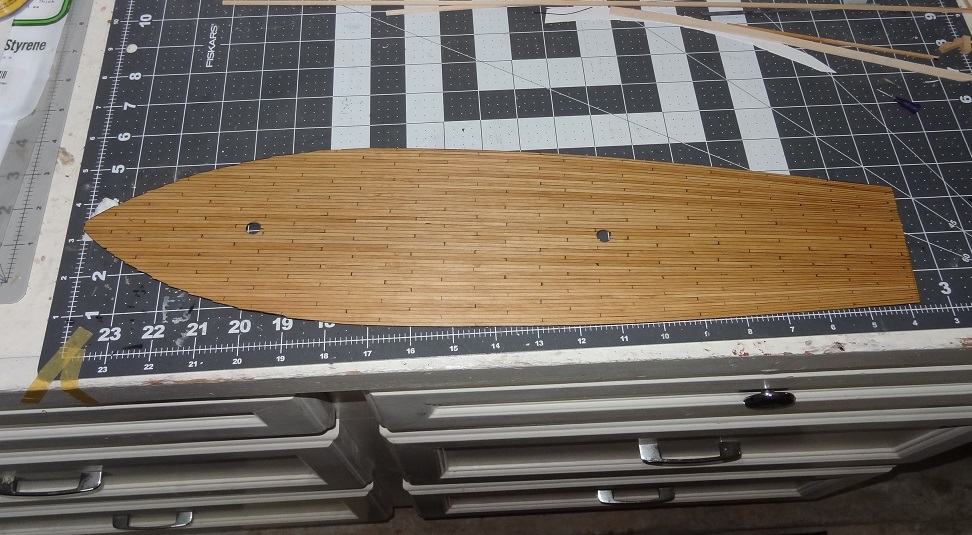
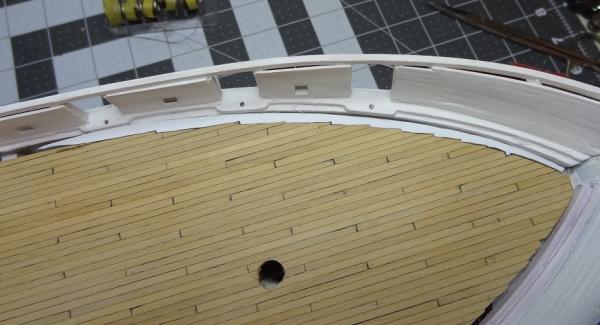
Thanks Elijah - I wish ya'll could see it in person. It really came out exactly as I was imagining. Add to that the boxwood deck planks have some color variation, and since they're cut as 20' planks rather than one strake, the variations are randomly scattered throughout. I've put down one coat of varnish this morning. Will let that dry and then sand. Expecting to do 3 coats.
- 843 replies
-
- 3
-
-
- niagara
- model shipways
- (and 2 more)
-
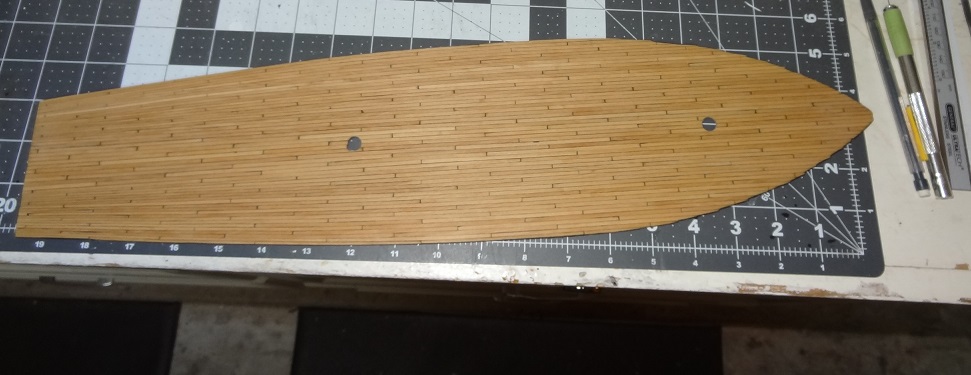
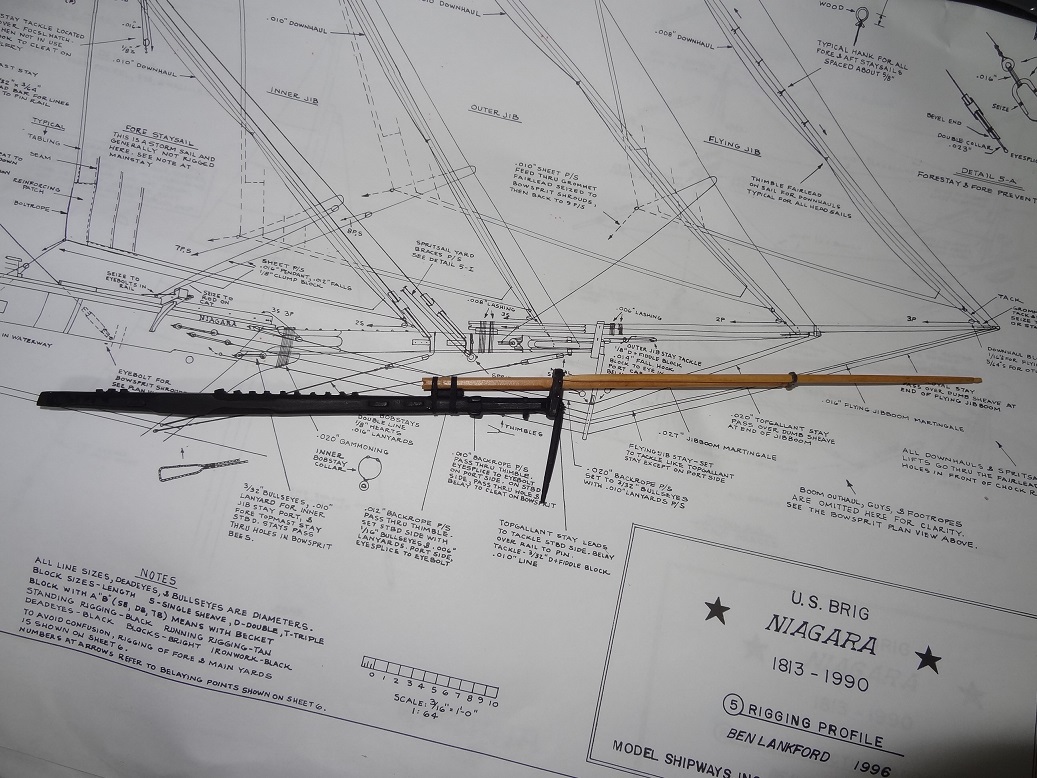
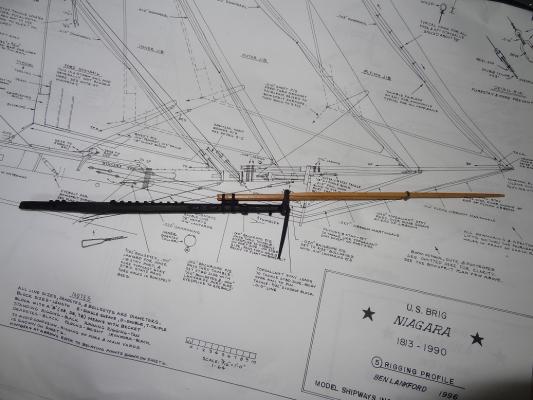
I believe I have the coloring situation resolved. Since I didn't like any stain I was testing on the boxwood, I went with a color called Natural. No real pigmentation, it just gives sort of a wet look. I love it! Pix below but as usual they don't do justice to colors. I have pre-treated and then stained the deck. For the nibbing strake I did go ahead with the Bright Cherry stain I mentioned earlier. I've also resolved not to use any more basswood on the deck. Using the same stain, the color difference between basswood and boxwood is noticeable - at least to me. Also below is the bowsprit with booms. I think I'll try more of the rigging on this structure. I would think it needs to be pretty solid (and mounted) before masts can be stepped and rigged.


- 843 replies
-
- 4
-
-
- niagara
- model shipways
- (and 2 more)
-
Well I hit one of those "chicken and egg" situations. I wanted to glue the basswood nibbing strake to the deck edge but then I began thinking about coloring. On thought lead to another. Several problems: 1. I still don't have a stain I like for the boxwood deck 2. Any stain I use is going to look different on basswood vs boxwood. 3. I want a decent sized gap between the strake and deck so I can add a good filling of "caulking" (probably PA glue with coloring) 4. Whatever the caulking ends up being, I'm afraid the basswood and to a lesser extent the boxwood could absorb some of the coloring. If so I probably lose the nice clean edges as the coloring soaks into the interior of the planks. 5. Considered different colored stains for deck and strake. If so then each needs to be colored and finished before gluing together. Hey at least I'm thinking ahead A few ideas towards these problems: 1. I will hit the paint store on the way home today. I WILL find something I like today. 2. Decided to use a completely different stain on the nibbing strake. We used a stain called Bright Cherry on all the cabinetry in our house. I love the color - kind of a light redwood. I plan to use this for all deck structures so I will use it for the strake as well 3. I think if I get the deck and strake stained and lacquered (sealed), any colored filler would wipe off much better and would not be absorbed. 3B. I might consider using black construction paper in the gap rather than a liquid filler. I installed the jib boom on the bowsprit. No glue so far. Just lashed the heel to the boom saddle per the plans. MY FIRST RIGGING!!!
- 843 replies
-
- 3
-
-
- niagara
- model shipways
- (and 2 more)
-
Sounds like the price is right on the veneer. It should help to get you a smoother surface and finish. My only reason for suggesting basswood was to keep the cost down. Other than that, I am liking basswood less and less. Carry on Young Man.......
- 701 replies
-
- 2
-
-
- phantom
- model shipways
- (and 1 more)
-
I have the same problem with photos. Wait until you start painting.
-
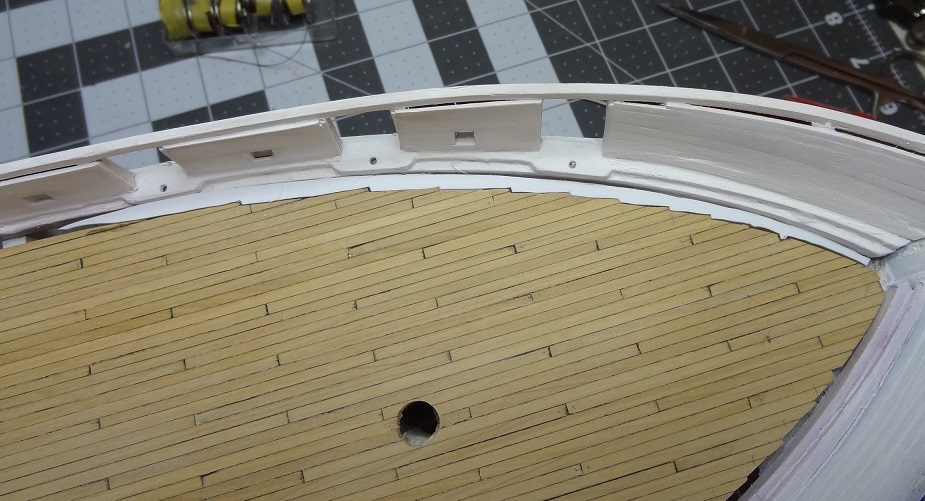
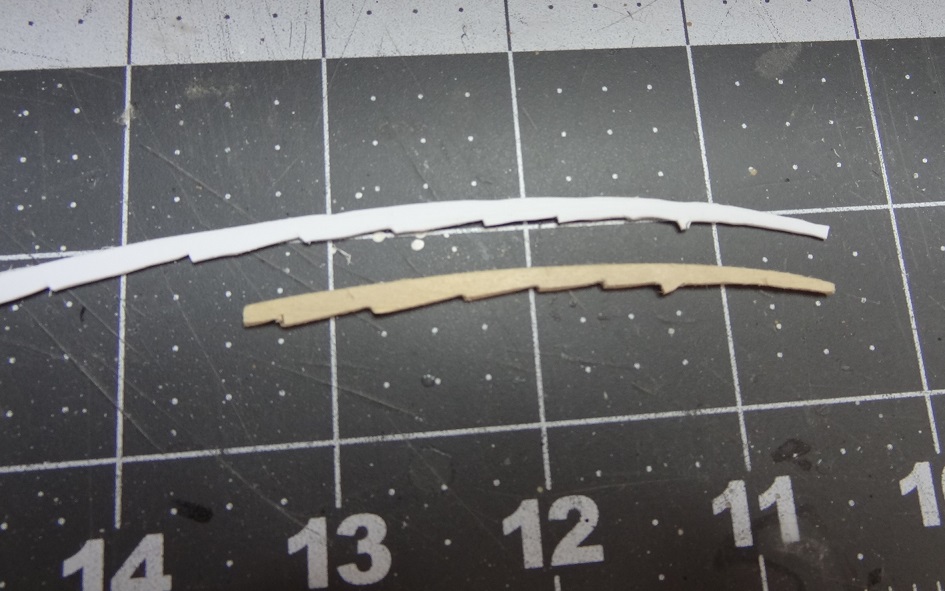
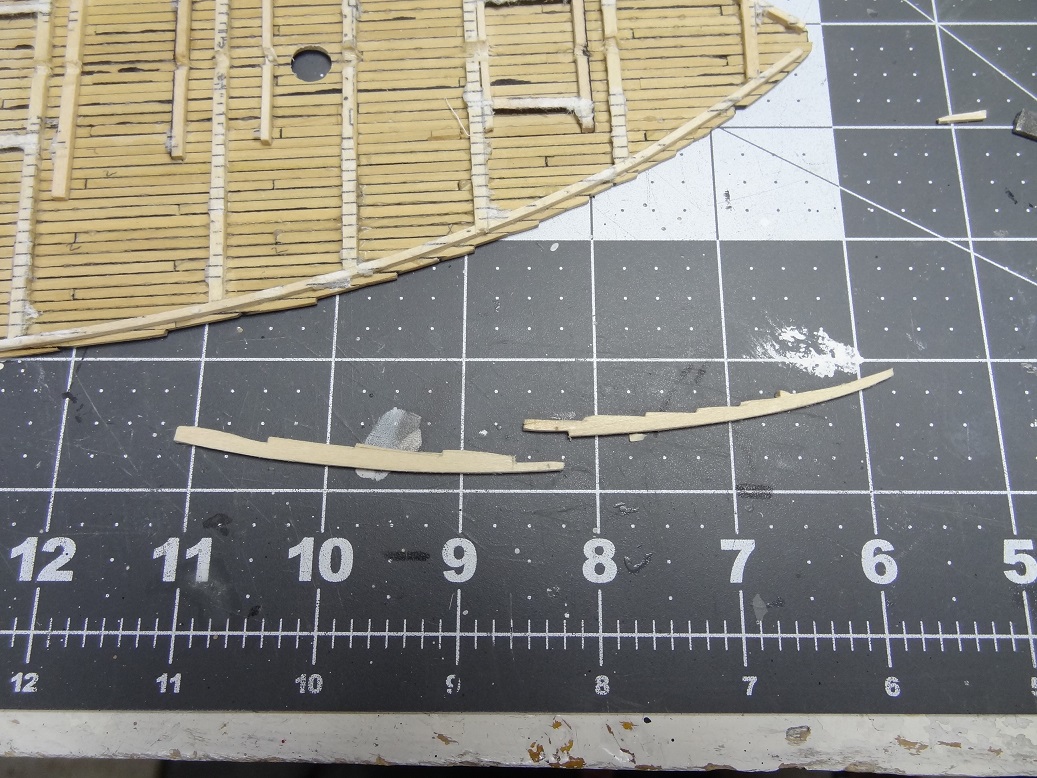
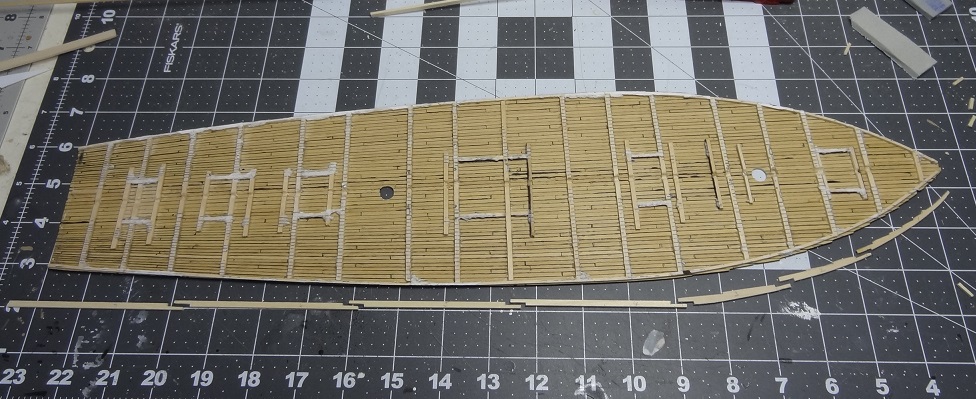
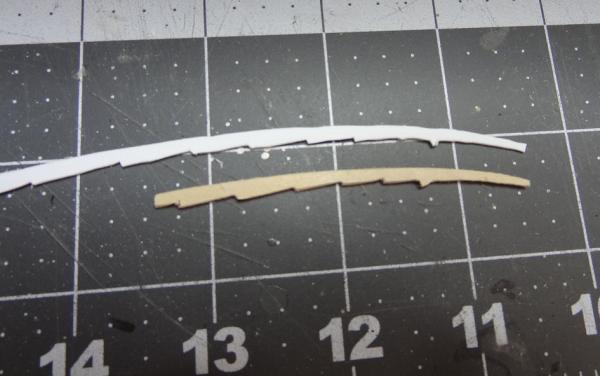
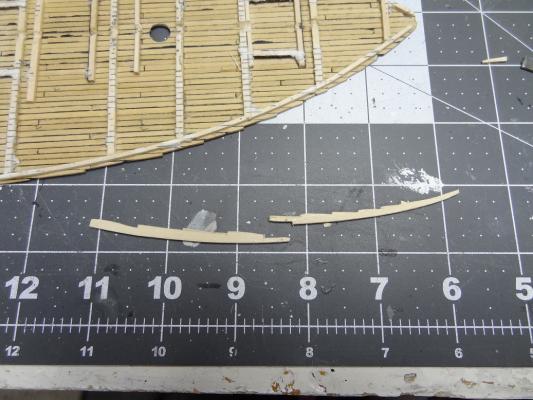
I feel like I accomplished something today. I put together a nibbing strake. First I traced out the deck edge on a sheet of styrene. Then I drew an arc about 3/8" above that, and cut that out. It took a little filing to get it sized. You can see it dropped in place. Next I had to decide where to break up the strake. Not as easy as it sounds, as the scarph joints require a certain amount of width and the strake is not all that wide. After drawing the joints out on the styrene it was time to start cutting the actual pieces. At the bow - where all the nibbing ugliness is - I used a 1/4"x1/16" plank. I went with basswood since I figured it would be a little easier to shape. Cut the pieces one by one adding a simple scarph joint to each end. The final product. When I got to the straight pieces I switched to 1/8"x1/16" planks. I wish I could just take these parts (the port side) and copy them for the starboard but there are some slight variances so I will have to go thru the exercise again. The outer edge of the strake will still need to be shaped to fit snug to the waterway. I'm thinking of gluing the pieces to the deck edge and then filing the outer edge as required. All in all I'm fairly happy with the outcome. This all seemed to go pretty smoothly, almost too much so. Let me know if you can think of something I haven't considered. I'm also priming and sanding the bulwarks again. I'm looking forward to getting that painted again.
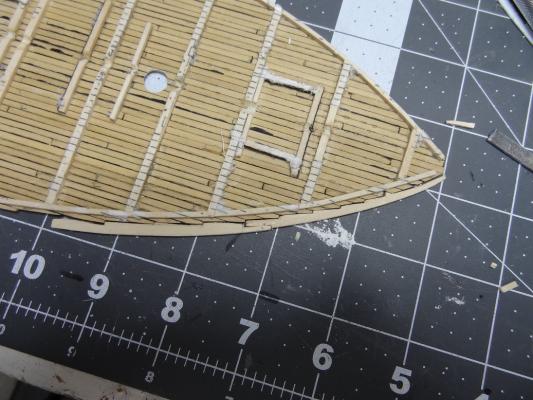

- 843 replies
-
- 3
-
-
- niagara
- model shipways
- (and 2 more)
-
Elijah - since you are painting the hull I would consider basswood. My Niagara kit came with some 1/32"x3/32" planks that would not add too much width. The price is right. Whether your cap rails would need to be wider is your call. If so you could order a couple of wider replacement planks at the same time. Actually, a well stocked hobby/craft store might even have your sticks so you would not have to order. Glad you're feeling better....
- 701 replies
-
- 2
-
-
- phantom
- model shipways
- (and 1 more)
-
That would look awesome and give you some experience with planking. Your question from earlier still holds true. It will add width to your hull albeit a small amount. Will this matter for anything else? I can think of things like railings if the Phantom has them. There might need to be a little more overhang to cover the edge of the planks. There may be other considerations. One other thought, if the hull is to be painted then don't spend to much money on the planks. A lot of the better woods have nice grain and are meant to be stained and lacquered. If you are going to paint then you lose all that and probably could get away with a less expensive choice. I'm not saying don't do it - just think ahead and know that there might be adjustments to make. Carry on Young Man.................
- 701 replies
-
- 3
-
-
- phantom
- model shipways
- (and 1 more)
-
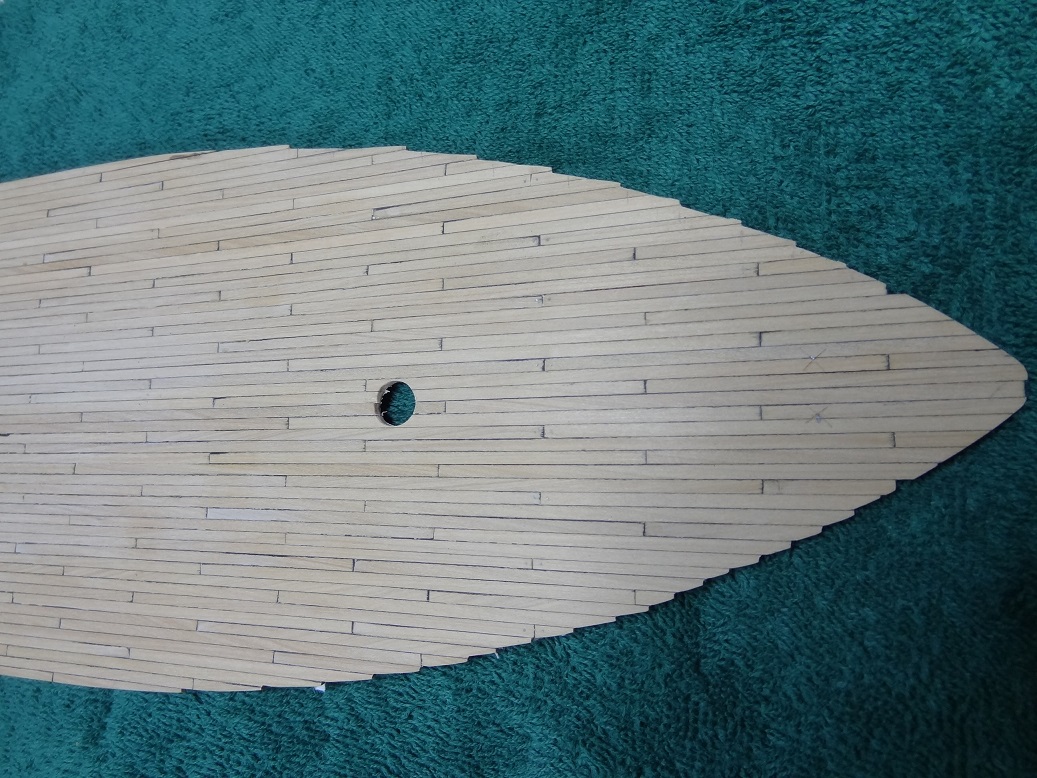
Most of the evening so far has been spent just putzing around. I have made one executive decision. Well maybe two. I have been struggling with how to make a real nibbing strake. It is going to have to be in pieces so getting the right planks or sheet has been an issue. The actual cutting of the nibs I see to be pretty difficult given that at the bow, each plank has a nib. Realistically, I think trying to cut something like that and have it presentable is more than I want to deal with now. So, to reduce the effort I am sanding the nib off every other plank. This leaves more space between nibs which should make cutting them less intense. I've done that to one side and you can judge from the pic. I think I will also first trace and cut the pattern in some styrene. Then I can use that as a template to figure out how/where to join some real planks. Since there is not much space between the deck and the waterway, there has been a question of where to put the joints. Scarph joints take up some room on their own so placing them will be part of the process.

- 843 replies
-
- 3
-
-
- niagara
- model shipways
- (and 2 more)
-
John - the pix on your site really helped today. Was looking how the bowsprit mounts on the deck and the plans are not helpful. At least to someone at my skill/knowledge level. Even Googling Samson Post didn't really give me an idea of what it is supposed to look like on Niagara. As it turns out it's pretty simple.
- 843 replies
-
- 3
-
-
- niagara
- model shipways
- (and 2 more)
-
That's a gorgeous build Joel! Very nice and it looks like they now offer a practicum on CD and a book. I might add that the kit plus specs is very reasonably priced. The "semi-kit" sounds like a good interim step towards scratch building. I think this one is coming home. And thanks for setting me straight on the history. My impatience showing through. A little more up front research would do me well. I'm sure the British renditions are good kits - I've seen the Caldercraft Cruiser - but the Continental version is what I was after. Charlie - I'm with you on the 1:64. They have enough detail to be challenging and still small enough so you don't need an entire wall to display it.
-
You didn't mention how big your parts are but could you flux it up and then melt solder over it? I just did that by mistake on some brass parts. They are just as silver looking as they can be.
-
Rivet decals
mikiek replied to MartinOwen's topic in Painting, finishing and weathering products and techniques
Martin - Here is another possibility. A company called RPToolz makes a punch set for rivets. The kit is expensive in the States because they are Czech or Polish. Could be cheaper there. You can punch rivet heads from brass or styrene. The kit makes either 10 or 12 different sizes. Check out my post here. -
I use the Tamiya white putty also. Rather than waiting for it to dry and then sanding, I apply it wait about 5 minutes then wipe it down with lacquer thinner on a paper towel. You'll find that a lot of the putty wipes off with no sanding - what's left smooths out nicely. Also the paper towel is rough enough to leave a bit of texture to what's left. If you do your last wipes following the wood grain, the texture kind of steaks with the grain. What putty is left looks a little like a wood surface. Just be sure to do this in a well ventilated area.
-
mog - Rattlesnake looks fantastic! I'm particularly impressed with your coloring. Great job! The Snake box is on my shelf - next in line after I finish Niagara. I'd like to follow along and see how you end up.
-
WOW Elijah!!!I didn't realize you were building the pilot boat. It sounds like you have things well in control and are making good progress. I was considering that build for displaying next to some books on a shelf. What a great thing to be doing at your age! I wish I had that opportunity. It might have helped keep me out of trouble. I know I'm joining the party late, but I would like to follow along.
- 701 replies
-
- 2
-
-
- phantom
- model shipways
- (and 1 more)
-
In a post another post I have, Dan mentioned Aeropiccola. They look to be out of business but their kits are still available
-
Cool Dan - never heard of Aeropiccola before. Looks like they are not in business anymore although their kits are still available. Does anyone know anything about their "Wood fibre" parts?? Is that something like MDF? I didn't see a Lexington but did see an Essex which is another boat I am interested in. I got a little confused - NatureCoast has the Essex and lists it at 42" in length. A German site also sells it but their pix show one of those cut away section models. I have another post regarding the smaller manufacturers. I am going to add Aeropiccolo to that post
-
More rework today - I tore into the gunwale that was misaligned. Suprisingly I was able to loosen it up. The end that stops at the transom was literally 1/8" too high. I got that re-glued but of course this caused a gap between the gunwale and the bulwark planking above it. So I ended up ripping out some of the planking and then re-laying new planks on top of the repositioned gunwale. I hate tearing up perfectly good work!!! At least I'm getting back on course with everything.
- 843 replies
-
- 2
-
-
- niagara
- model shipways
- (and 2 more)
-
I checked out the Korbel kits on the hobbyterra site Jolley Roger provided. I'm not wild about the bulwark planking - all one piece. The grain is contiguous even though they carved or marked a plank edge.
-
Thanks guys - honestly, I'm really liking the 1:64 scale, at least as long as I stay with kits. I have no room to display a 4'-5' model so going larger isn't an option. But it also sounds like going smaller is not a great thing. The kit in question was the Mamoli Lexington. I like the boat and I want to pick up a Mamoli kit while there is still a decent selection. Guess I'll keep looking.
-
My current Niagara build (my first) is 1:64. I have 2 kits on the shelf that also happen to be 1:64 . It seems that scale is manageable but still has a reasonable level of detail. I've been looking at a kit that is 1:100 . The size of the actual boat was about the same size as Niagara. 1:64 vs 1:100 seems like a pretty significant reduction in size so I'm wondering what do you lose at that scale? Granted all kits will be different, but I would think at the least there would be less rigging. What other kinds of differences do you run into when going smaller?
-
Don - Thanks for the reinforcement. I am considering several of the MarisStella offerings. I haven't been in this hobby long enough yet to get a feel for who the reliable players are. I am building a Model Shipways kit and have another MS kit on the shelf. I think MS is a reliable company for starters like myself. I just received the Victory Brig Mercury. So this is my second exposure to a manufacturer. I give Victory high marks, but I suppose they still fall into the "big name" group. The MarisStellas of the world have a tough time with customers like me. I find it difficult to buy a kit that I can find almost no information about. On the flip side people have to buy the product for the information to get out there. That's why I have really appreciate your latest log. Not only are you documenting your build process, you are getting the information out there for folks like me.
-
Experience with BlueJacket metal toners?
mikiek replied to Cathead's topic in Metal Work, Soldering and Metal Fittings
Cathead - I add a coat of matte lacquer after blackening. It doesn't add shine and it helps keep the black on your metal not your hands.