


crabbersnipe
-
Posts
28 -
Joined
-
Last visited
Content Type
Profiles
Forums
Gallery
Events
Posts posted by crabbersnipe
-
-
-
Thanks for the advise Roger, will be removing the sonar dome shortly and re-attach once the fibreglass is put on.
I suspect the same logic applies to the flat stern piece vs the hull ? Am considering covering the stern first, and then proceed with the rest of the hull thereafter - again because of the corners.
E
- Roger Pellett and mtaylor
-
 2
2
-
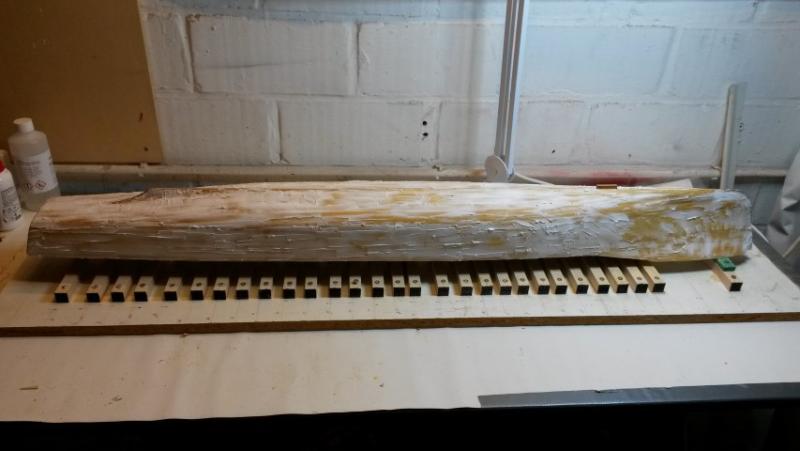
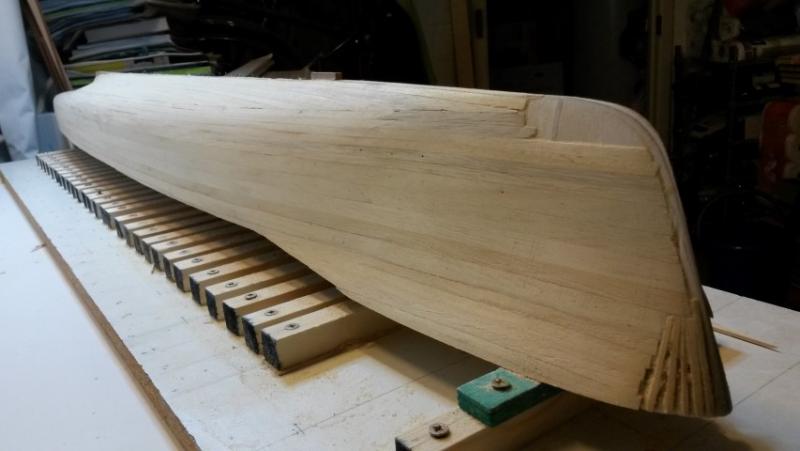
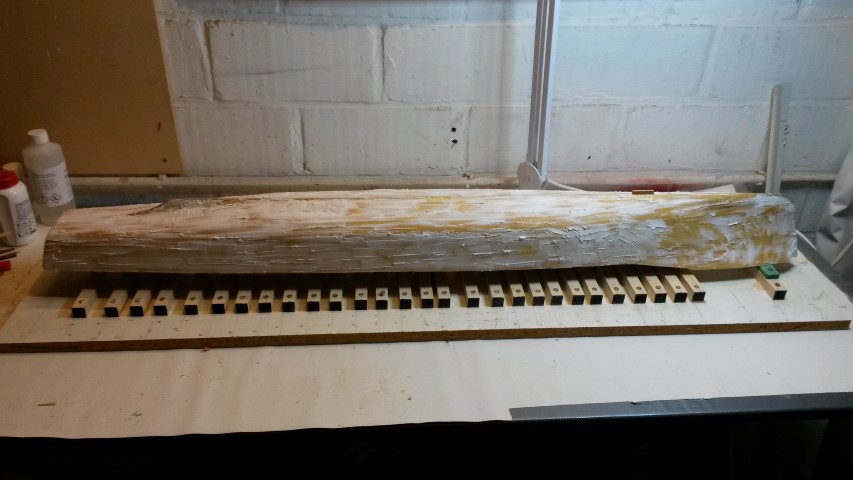
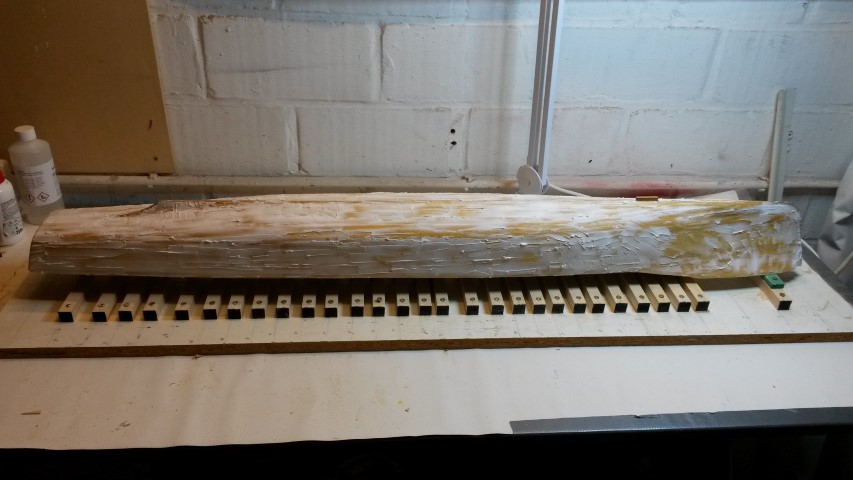
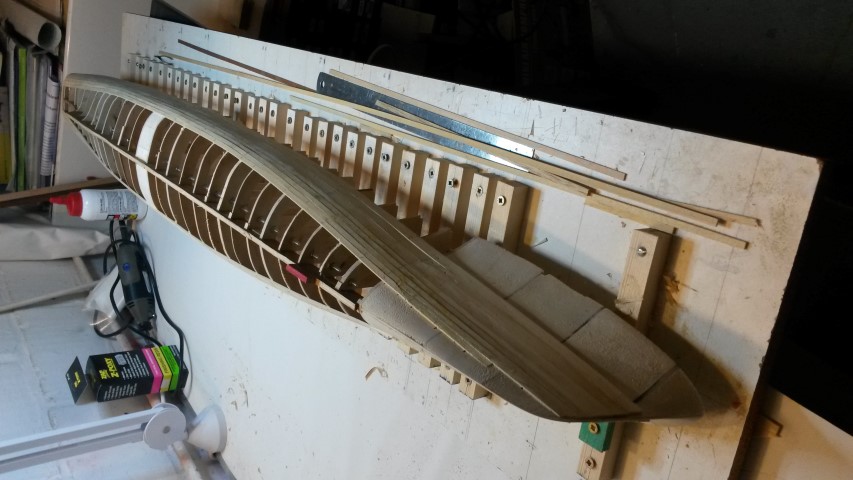
Argonaut sailed through some cottage cheese today - applied the first coat of filler...snowwhite !
Then sanded most of it off again....
E
-
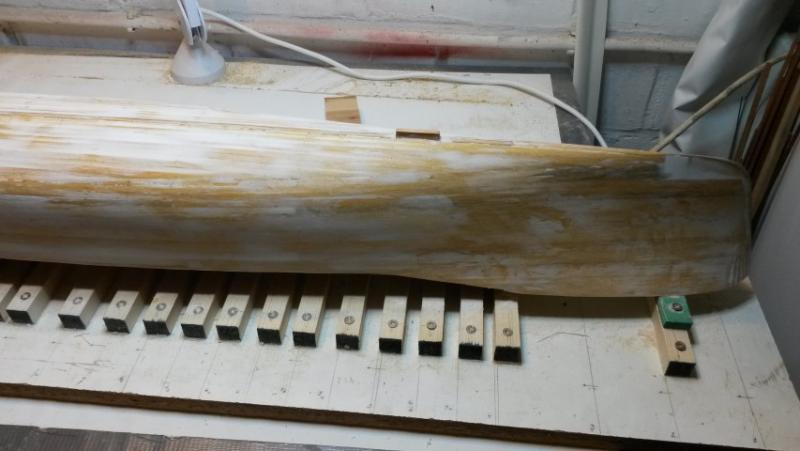
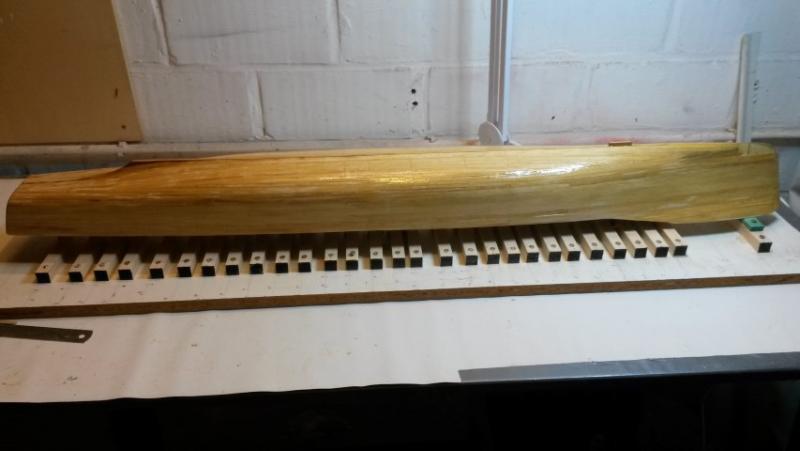
Gave the hull a first coat of resin + hardener, worked especially into the joints and where the seams are slightly opened between the various planks.
Will rub this down once fully dried out and then proceed with filler and body primer - heading for a lot more sanding no doubt !
Glass matt have been ordered and are on their way, so no time to waste.
Am pondering whether to remove the sonar dome (that is part of my keel assembly) to facilitate the matting of the hull, and re-attach later & separately. Seem to think this protuberance will stand in the way of a neat glassfibre cover......
E
-
Thanks Jon, lovely lines these ships had - some great curves :-)
- mtaylor, Old Collingwood and Omega1234
-
3
-
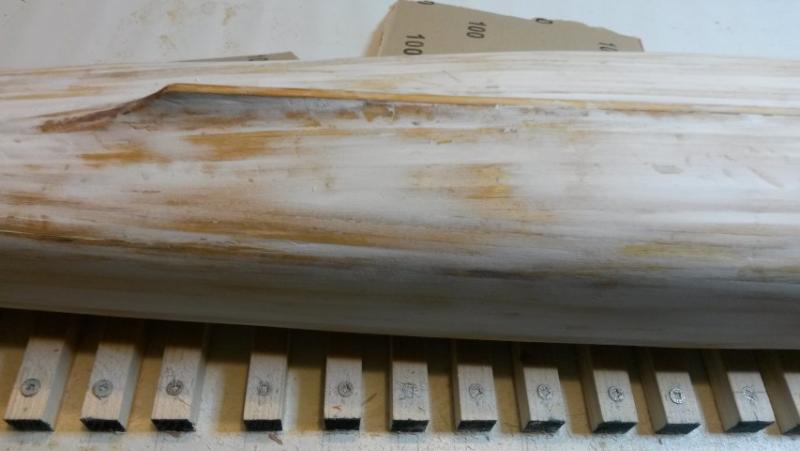
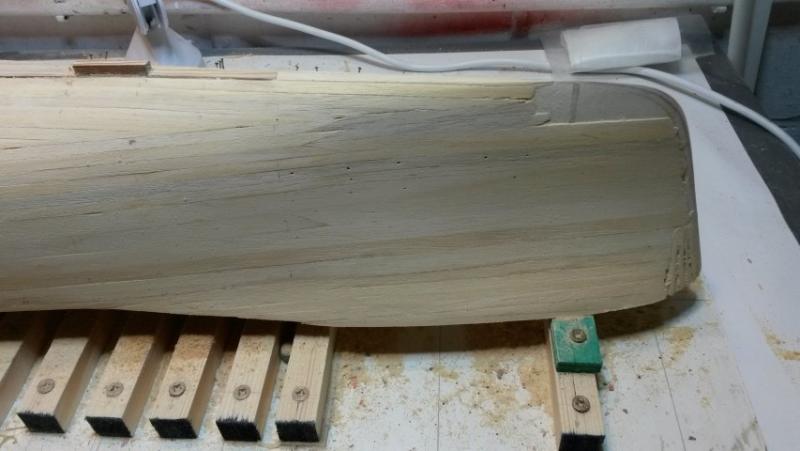
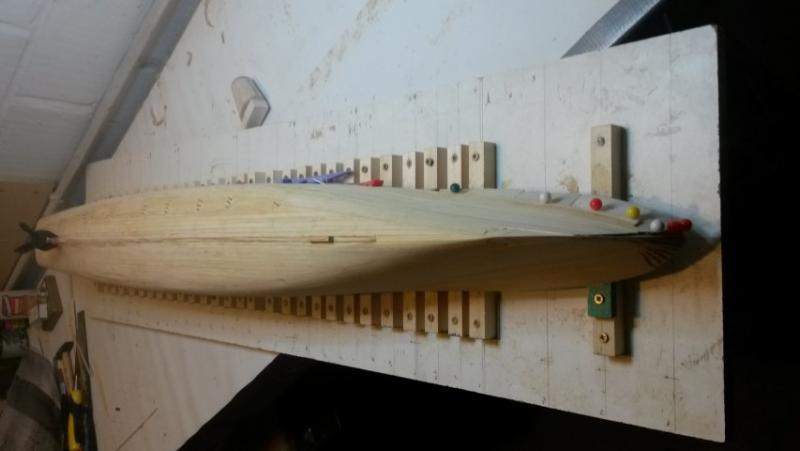
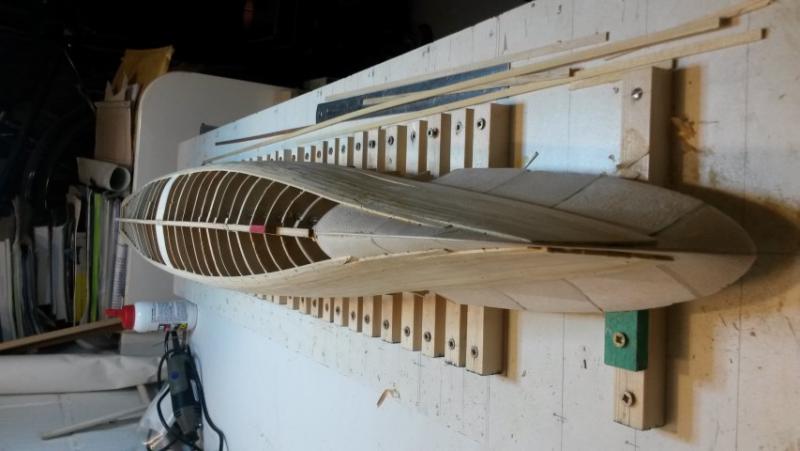
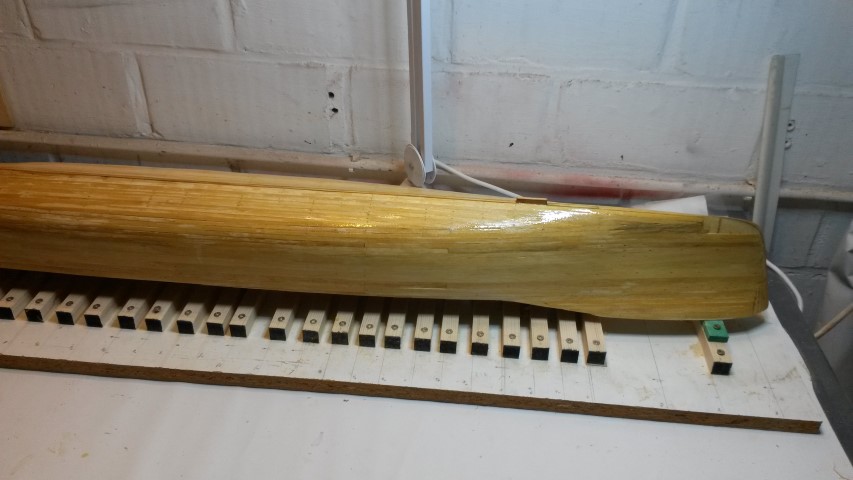
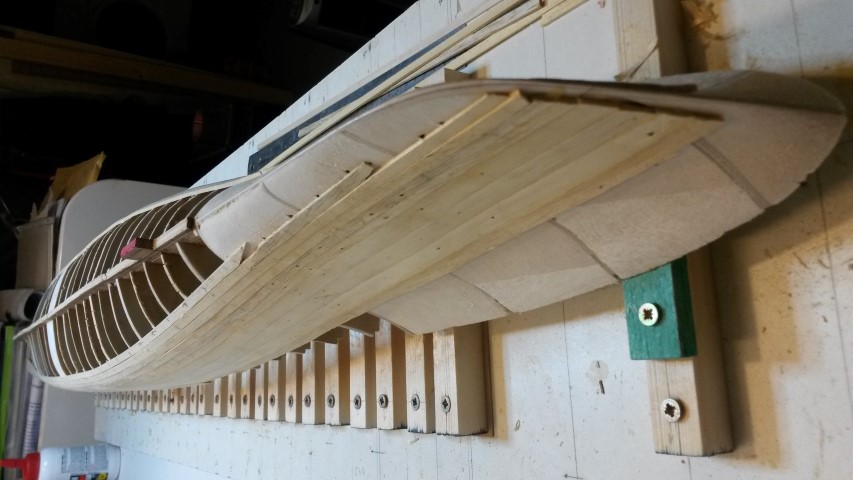
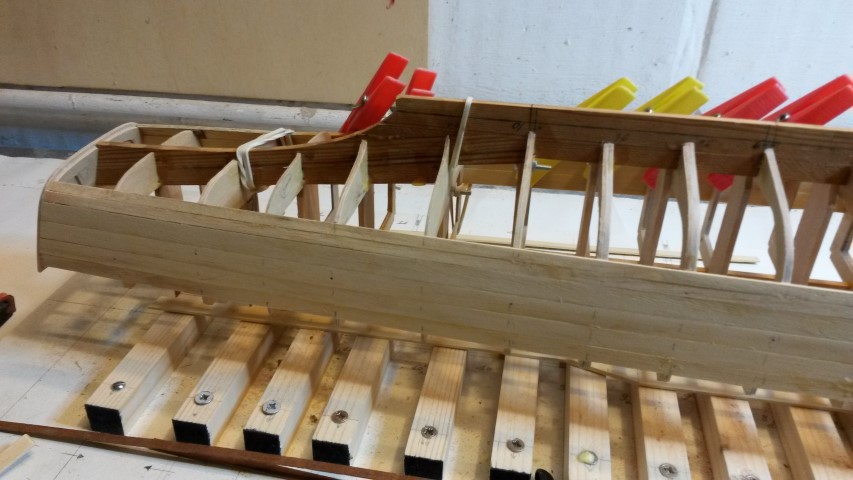
Completed the hull planking, quite happy with things so far - need to do some finishing touches to the bow still (used some vertical strips that need sanding), and next step will be a rough sanding using 60 grade grit, before applying some resin into the joints.
After than some more sanding and applying filler where needed.
E


- Old Collingwood, gieb8688, mmdd and 12 others
-
15
-
Thanks for your advice Roger, very useful intel, especially your comment about the pumps and different types of hardeners.
I reckon I will be trying my hand in a week or two.
Funny you should mention canoe building, was having a browse the other day about doing this plank-on-frame + fibreglassing exercise on a bigger scale and build myself a Canadian canoe !
Thanks again,
E
- mtaylor, Mike Y and Old Collingwood
-
3
-
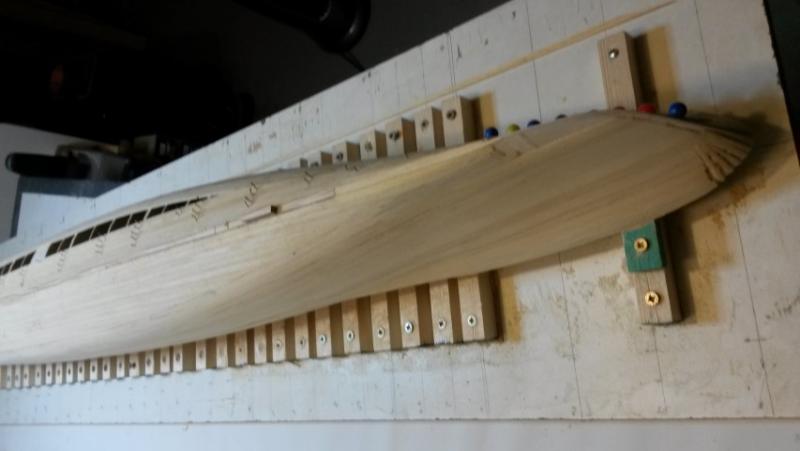
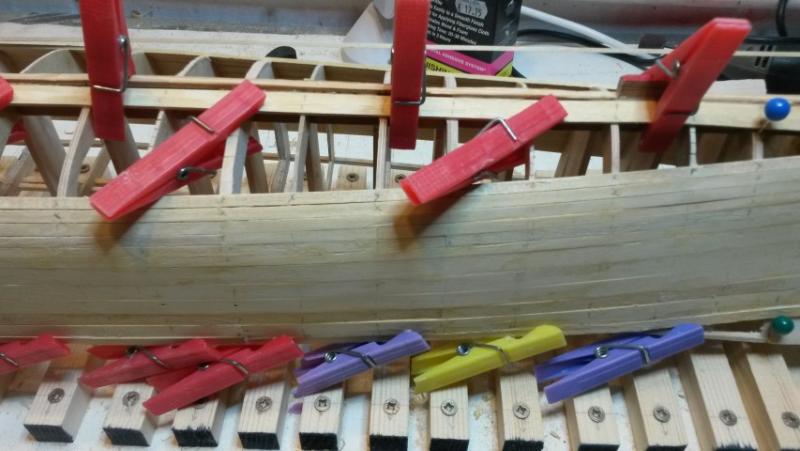
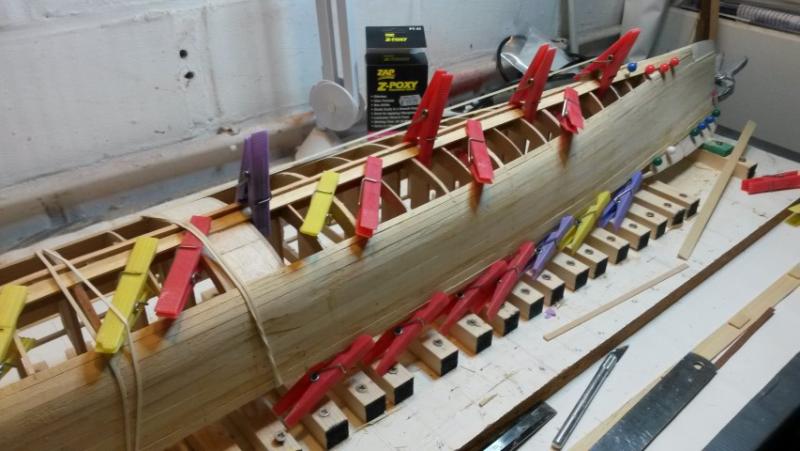
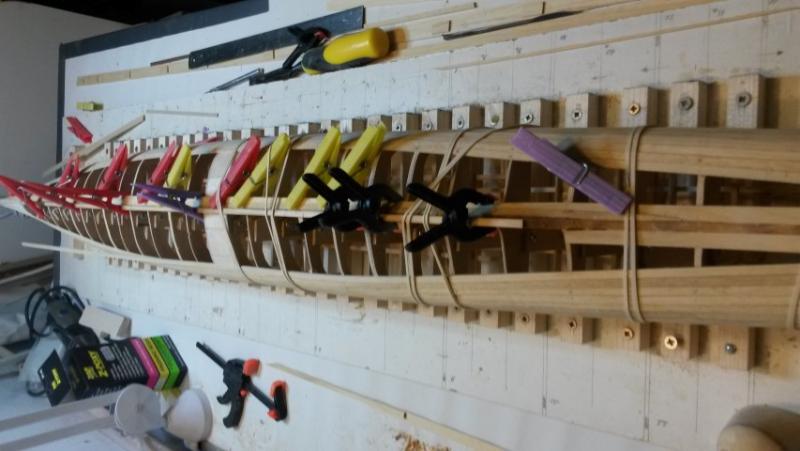
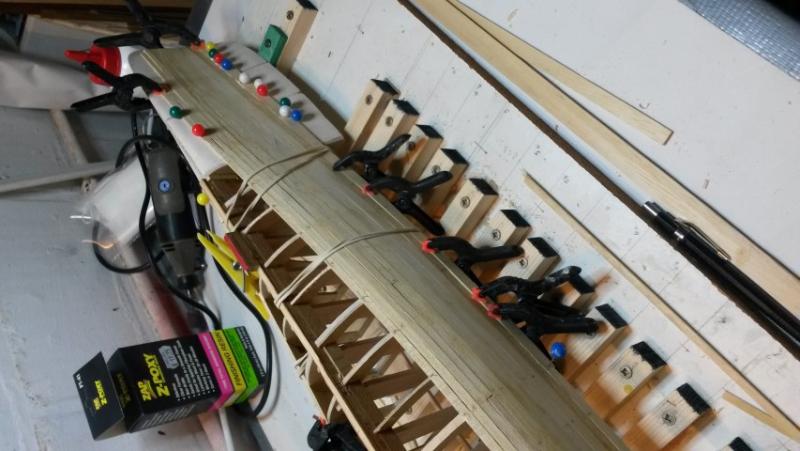
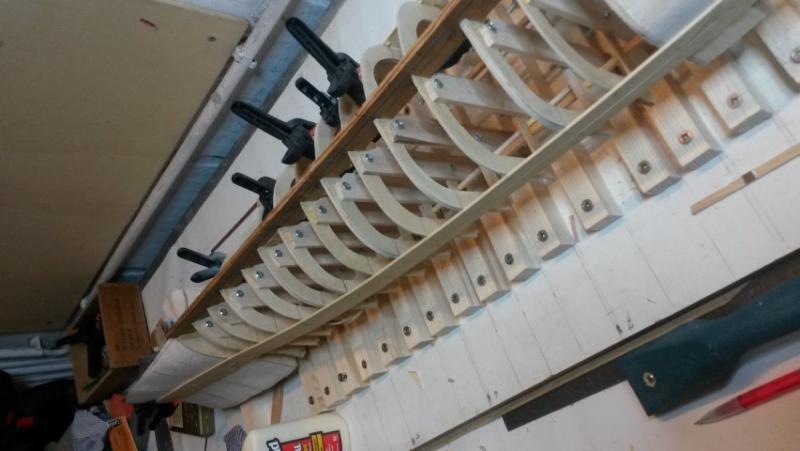
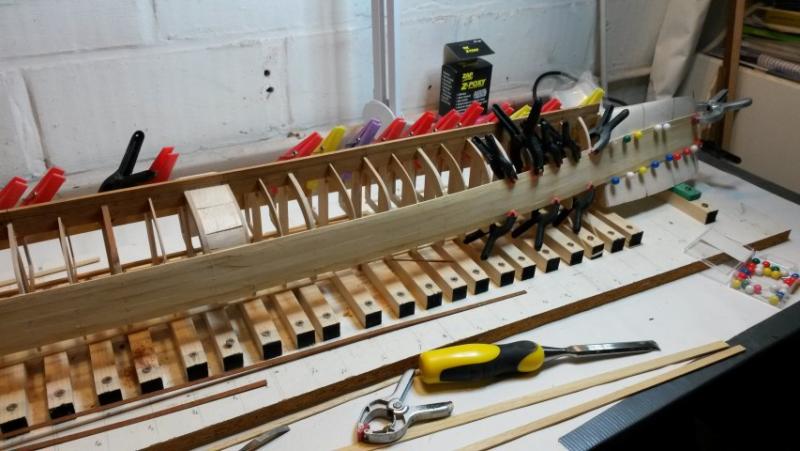
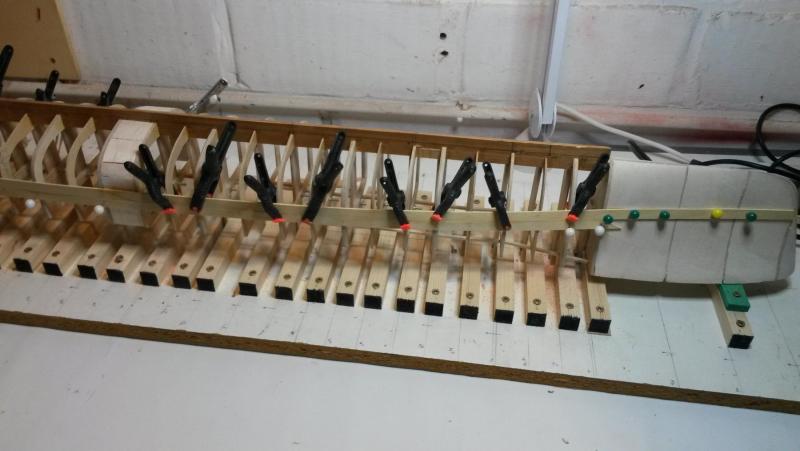
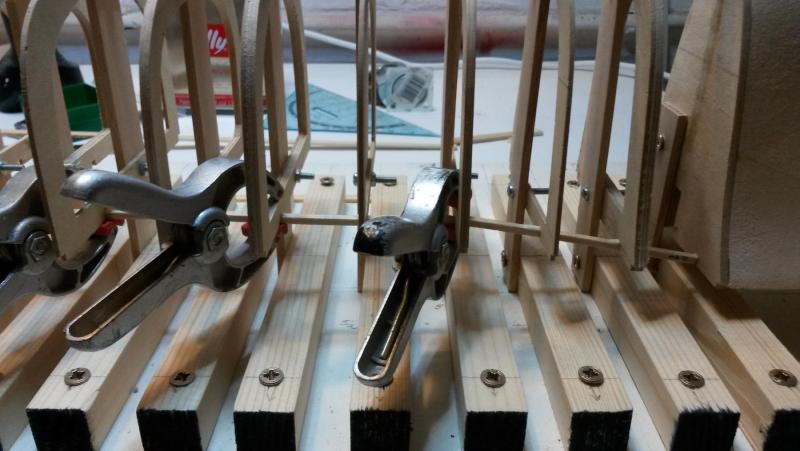
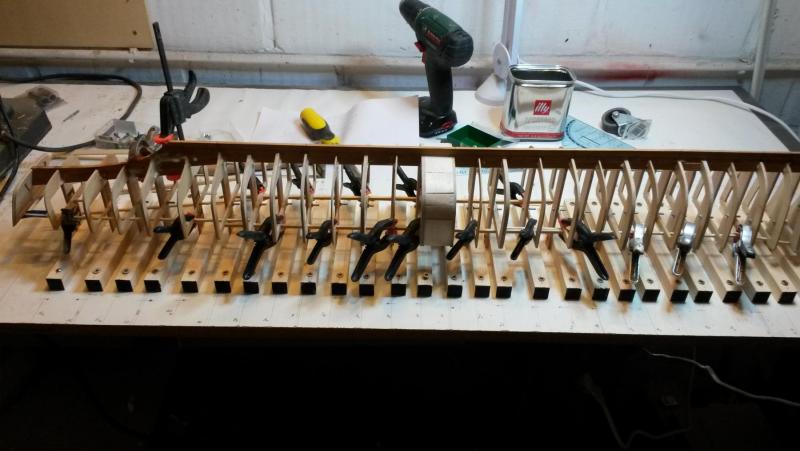
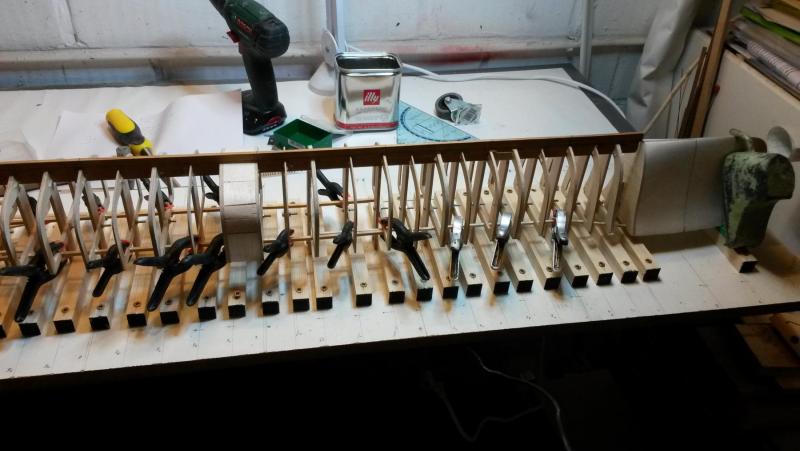
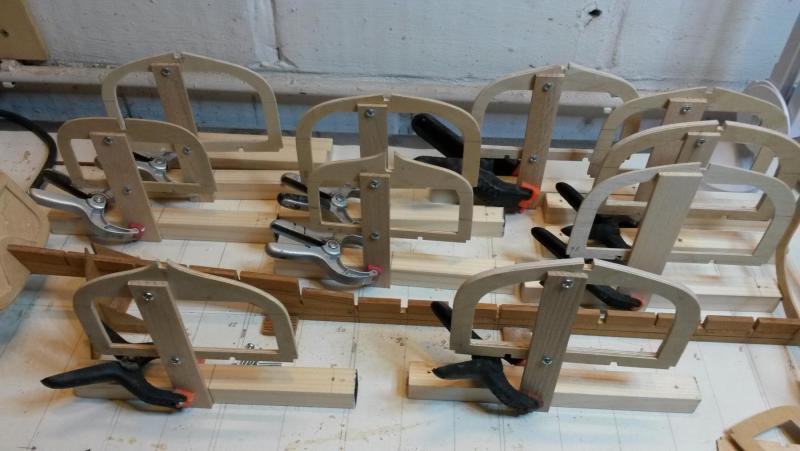
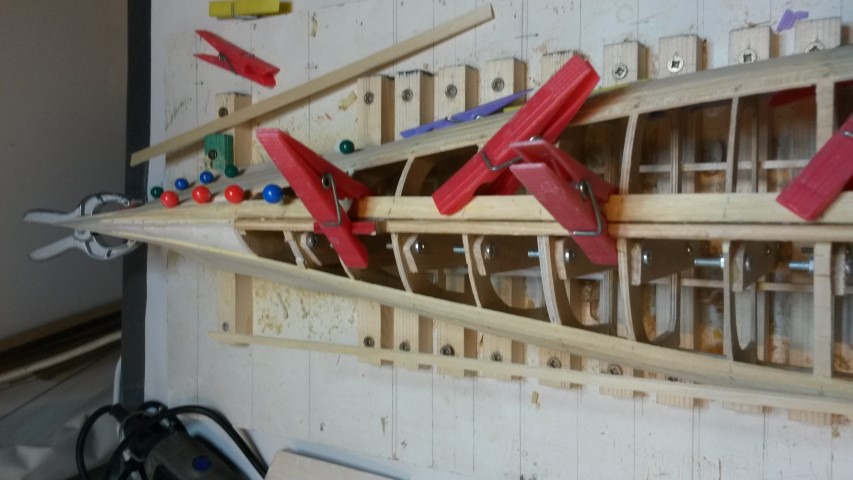
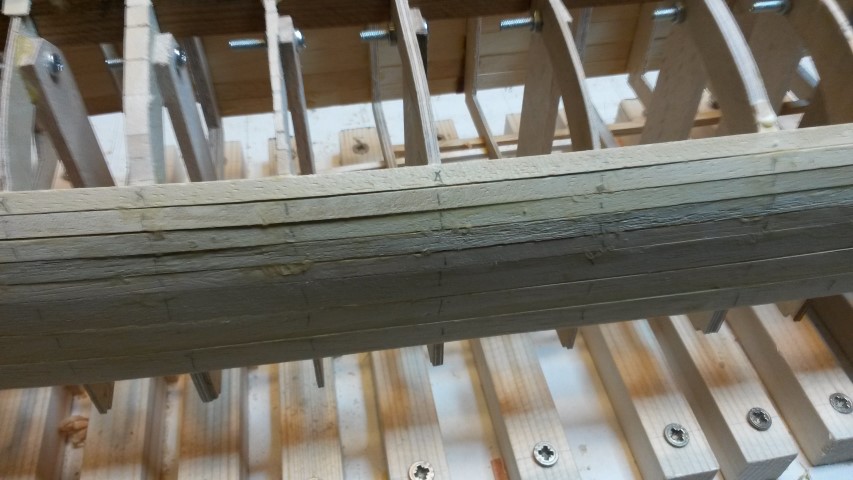
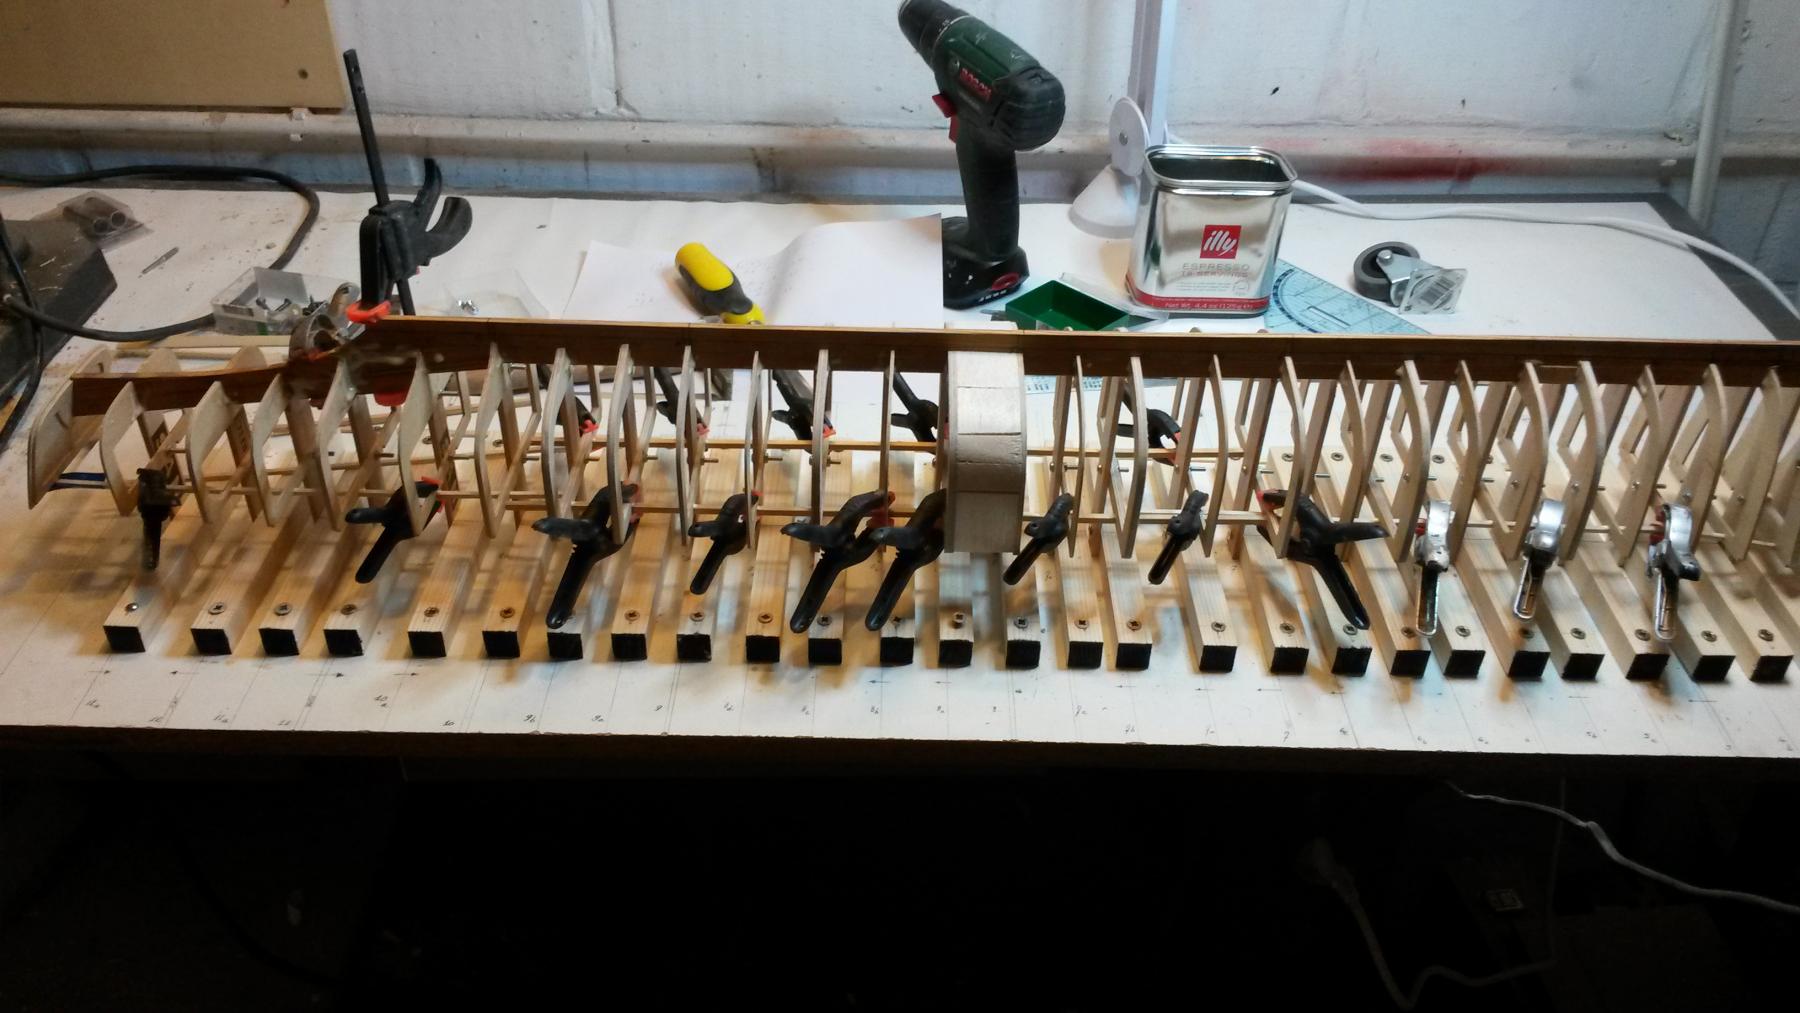
A few more shots - almost there, started planking from the keel down now - also needed to start using nails to keep things in place, the clamps do not have enough grip any more.
E


- Old Collingwood, mmdd, PeteB and 5 others
-
8
-
Thanks a lot Greg,
Just the sort of advise I needed, there seems to be as many ways of doing this as there are modellers, but there is definitely no substitute for hard-won experience !
It certainly is a slightly daunting prospect but once mastered I think I can imagine myself doing all my hulls myself from here on - it certainly was fun getting this far.
Will have a look at the EC stuff and will keep you posted on my experiences in a few weeks time.
Lovely model by the way, what is it - quite big as well it seem ?
Cheers
E
- mtaylor and Old Collingwood
-
2
-
Hi forum
I will shortly be finishing the planking of my hull and need to start thinking of how best to proceed in term of coating everything with glassfibre cloth.
Can I call on some of your experiences on how best to proceed from here ? Some of the questions I have are as follows:
- will be sanding and filling the planks
- will I need a primer coat first, before putting on the glassfibre ?
- and if so, should that be 'any' primer or are there specific advantages to using 'car body primers' ?
- in terms of glass fibre cloth, I suppose I had best go for the finest woven cloth presumably ?
- regarding epoxy resins, does anyone have any experience with the West System product range ?
- what would be the recommended 'curing' time for a model of this size, bearing in mind that
* I have never attempted this before and therefore will need sufficient time
* will be doing this in one continuous process, i.e. the entire hull with one piece of cloth
Thanks a million for any help you can provide, will be most obliged
E
-
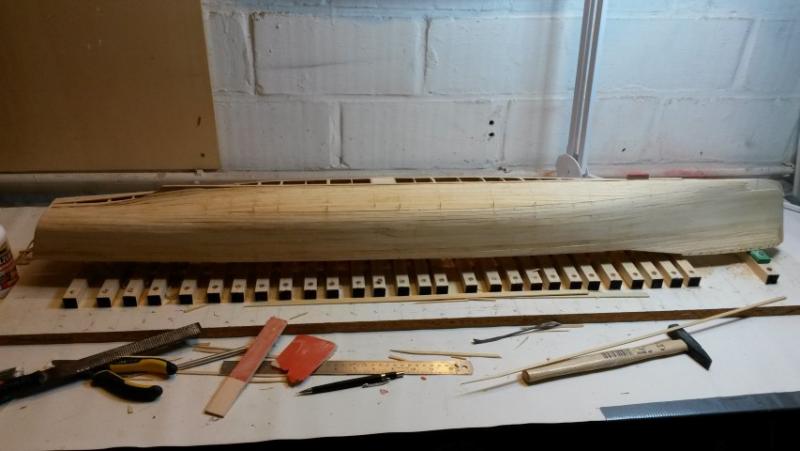
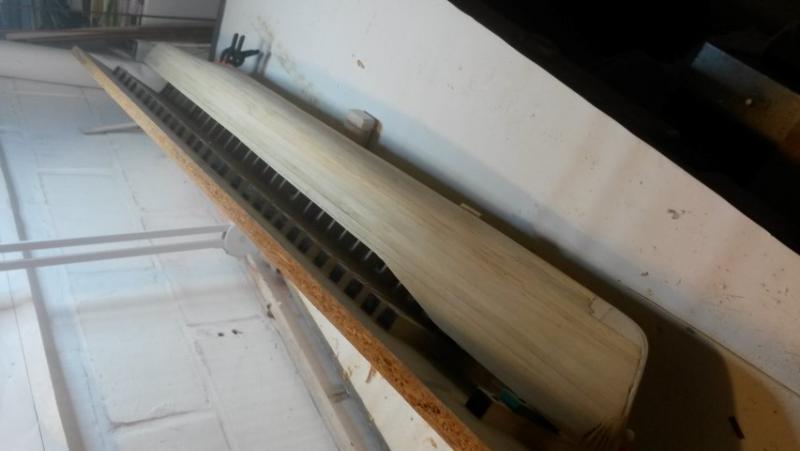
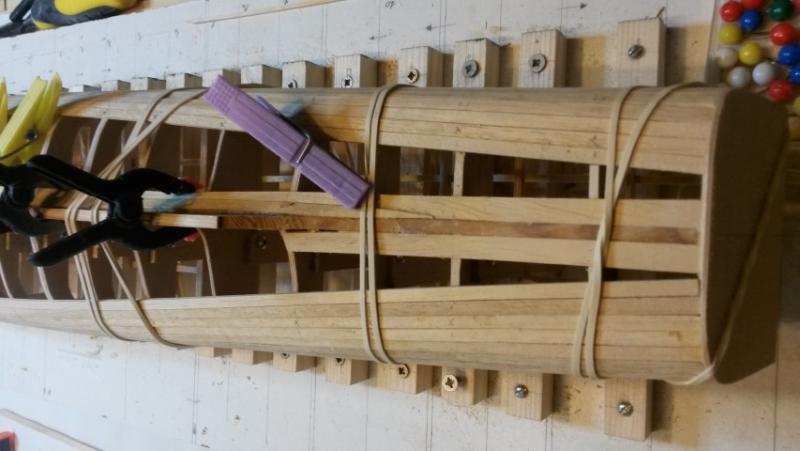
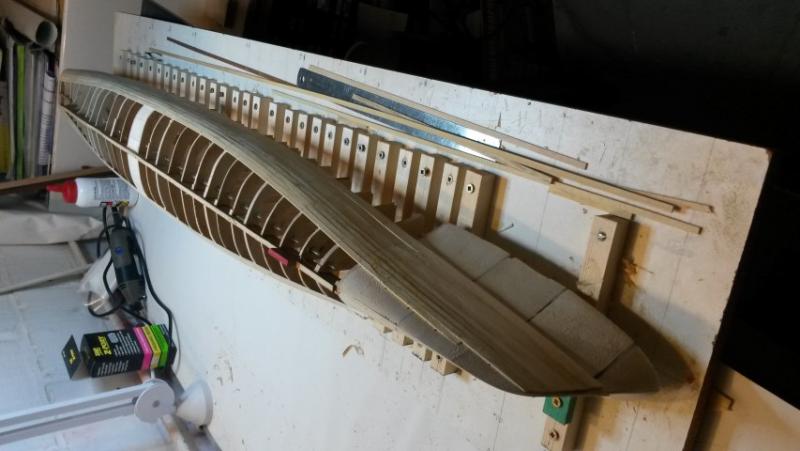
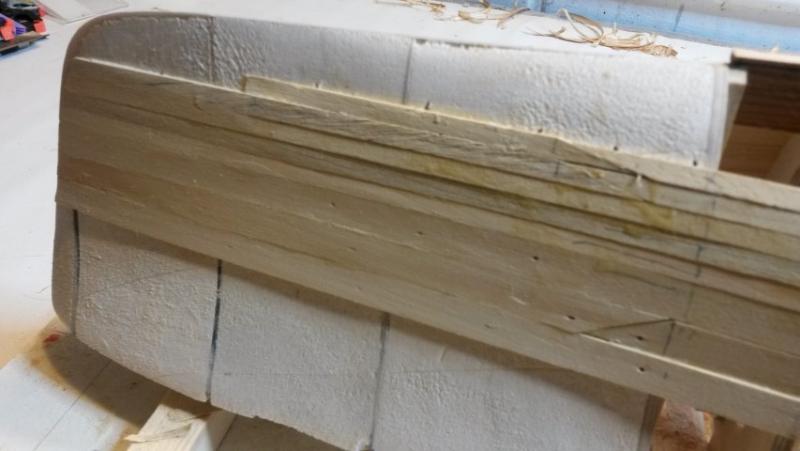
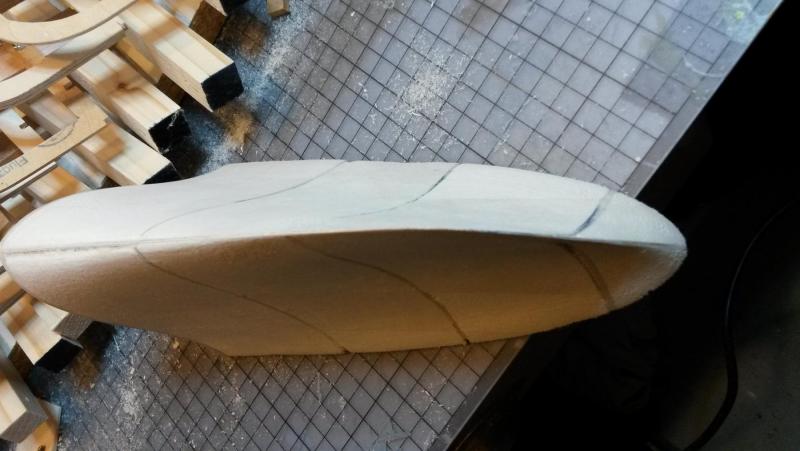
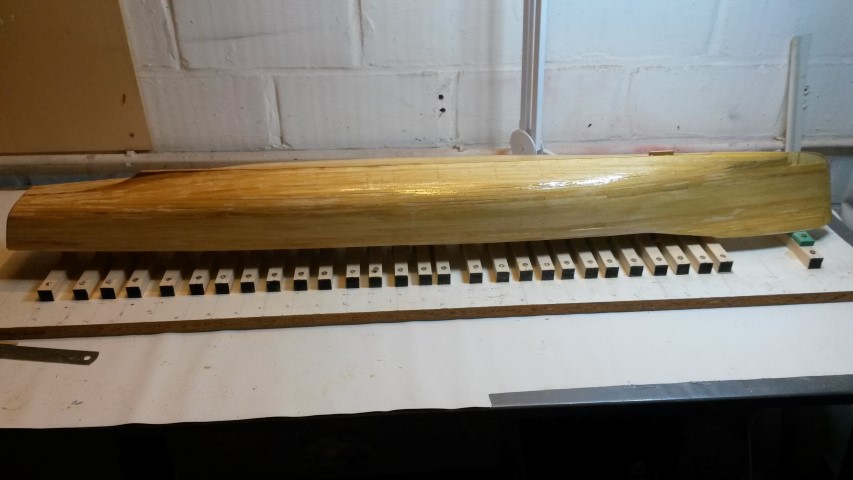
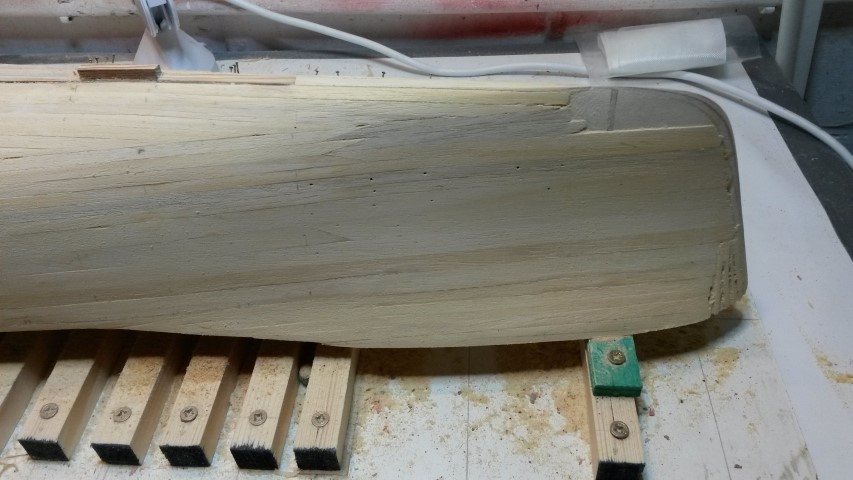
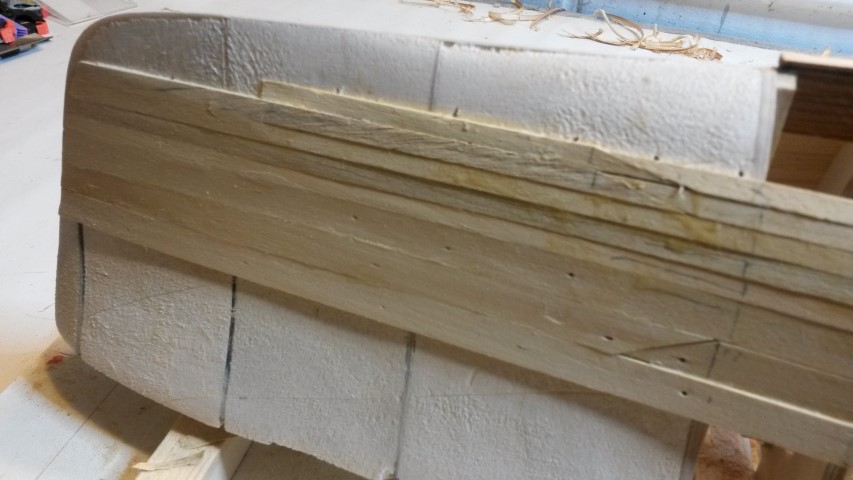
Bit of an update, showing progress to date. Partially sanded some bow sections and will clearly need some filler and putty between some of the planks.
Distortion of the planks is still manageable, despite getting nearer to the keel - am considering working 'downwards' from here, using stealers for the remaining gaps. Need to do some more thinking.
E


-
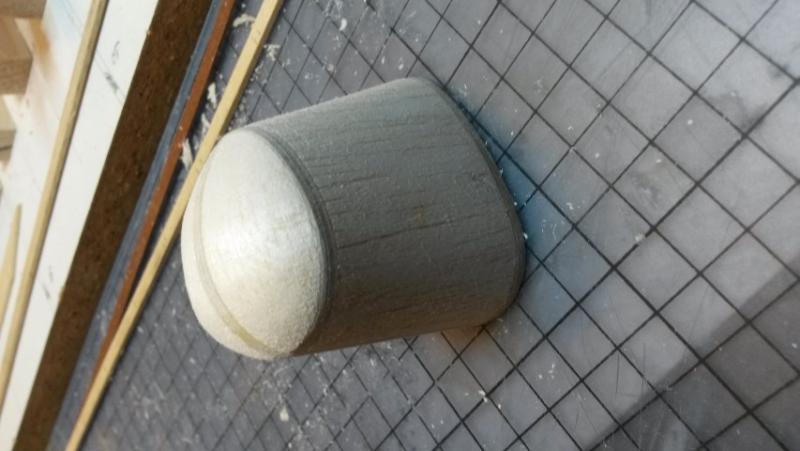
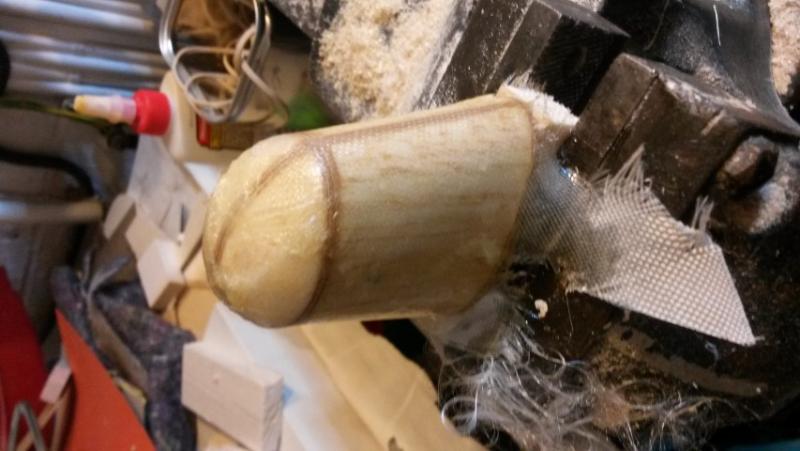
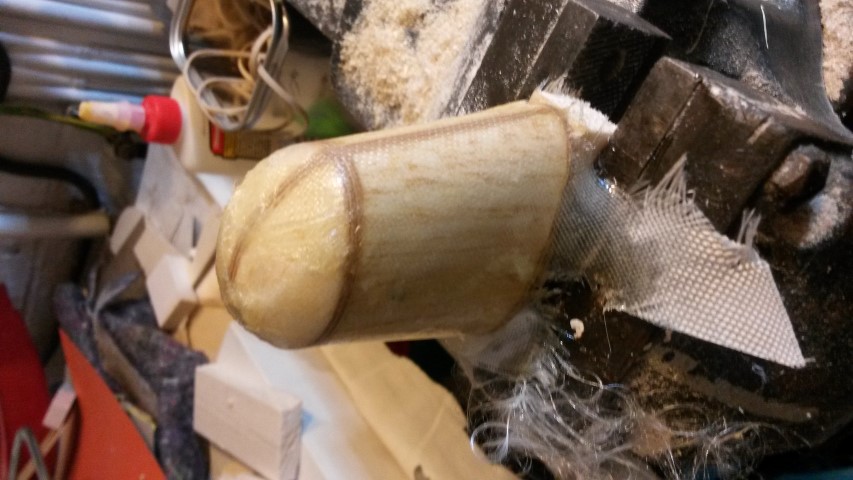
A few more planks added and also tried my hand a fibreglassing the funnel - resin took a long time to cure but fully dried out after hrs, will be sanding tomorrow


-
Thanks John, so far so good - things will get a little trickier from here on, where I hit all the various curves, twists and bends.
E
- Old Collingwood and mtaylor
-
2
-
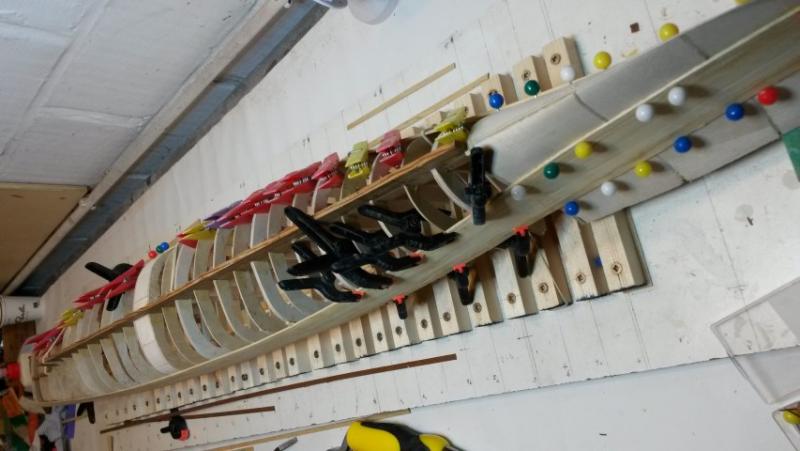
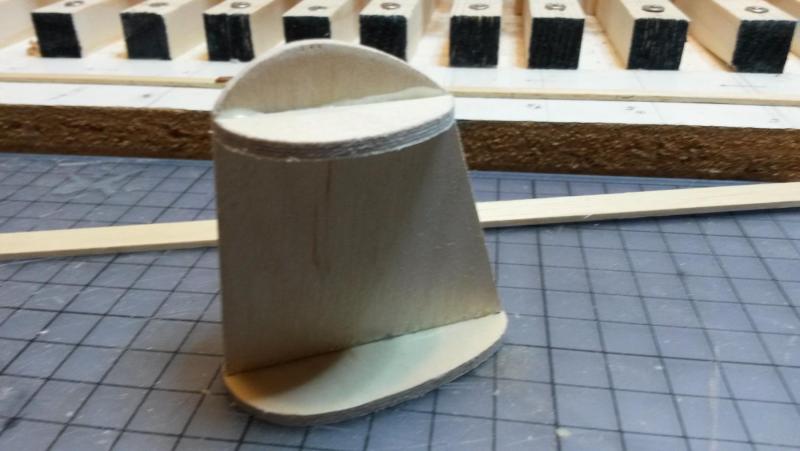
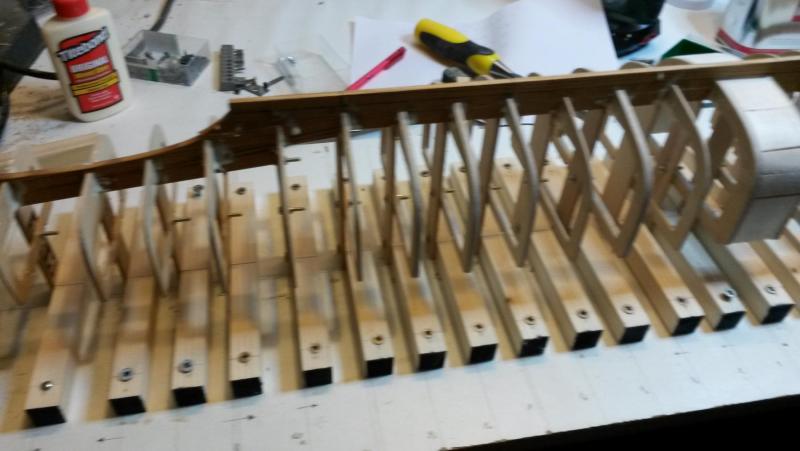
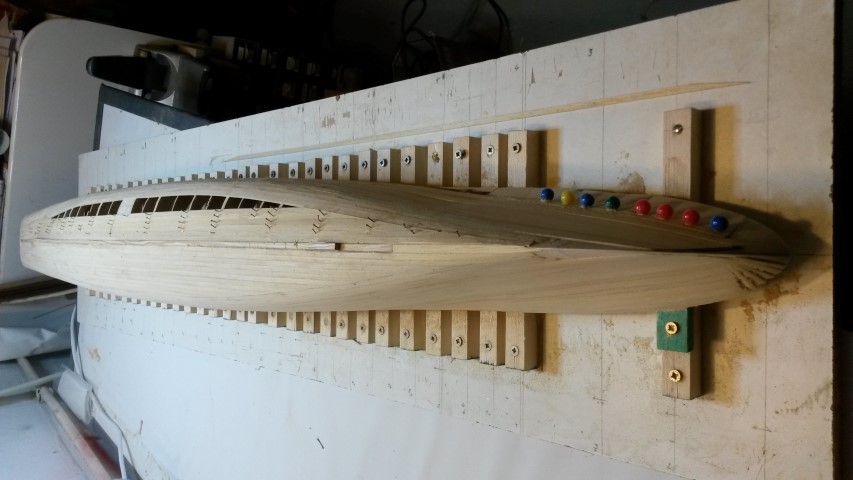
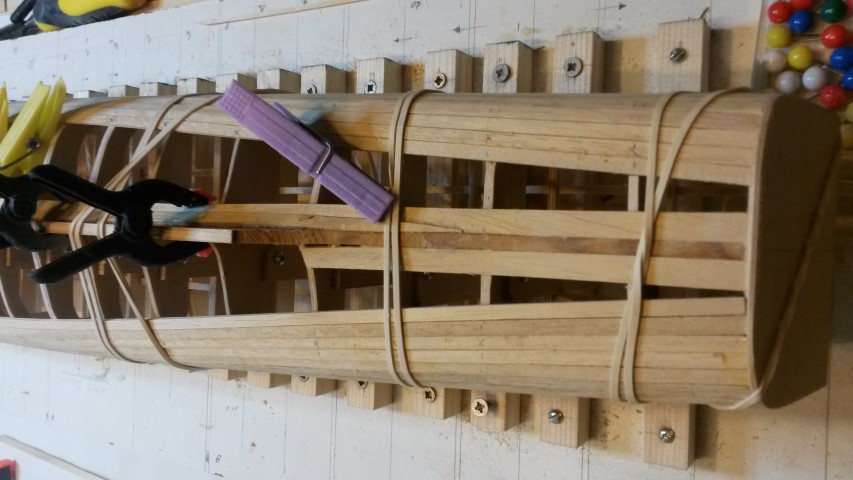
Gradually continuing the planking. Am thinking of how best to proceed with the fibre glassing once the hull is completed and started doing my internet research.
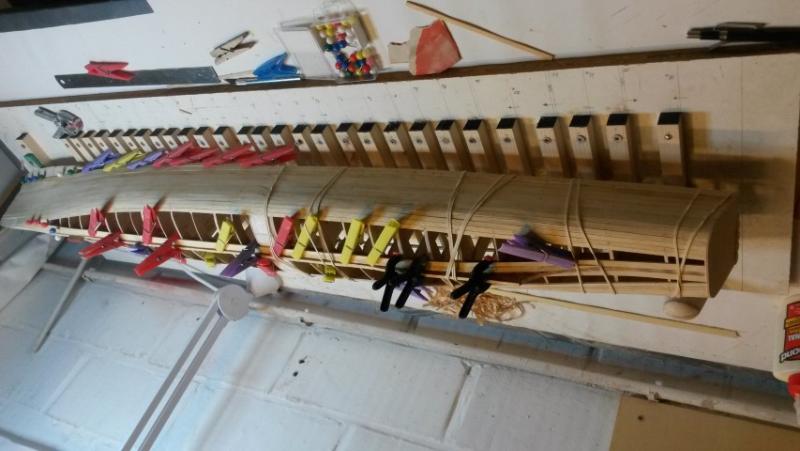
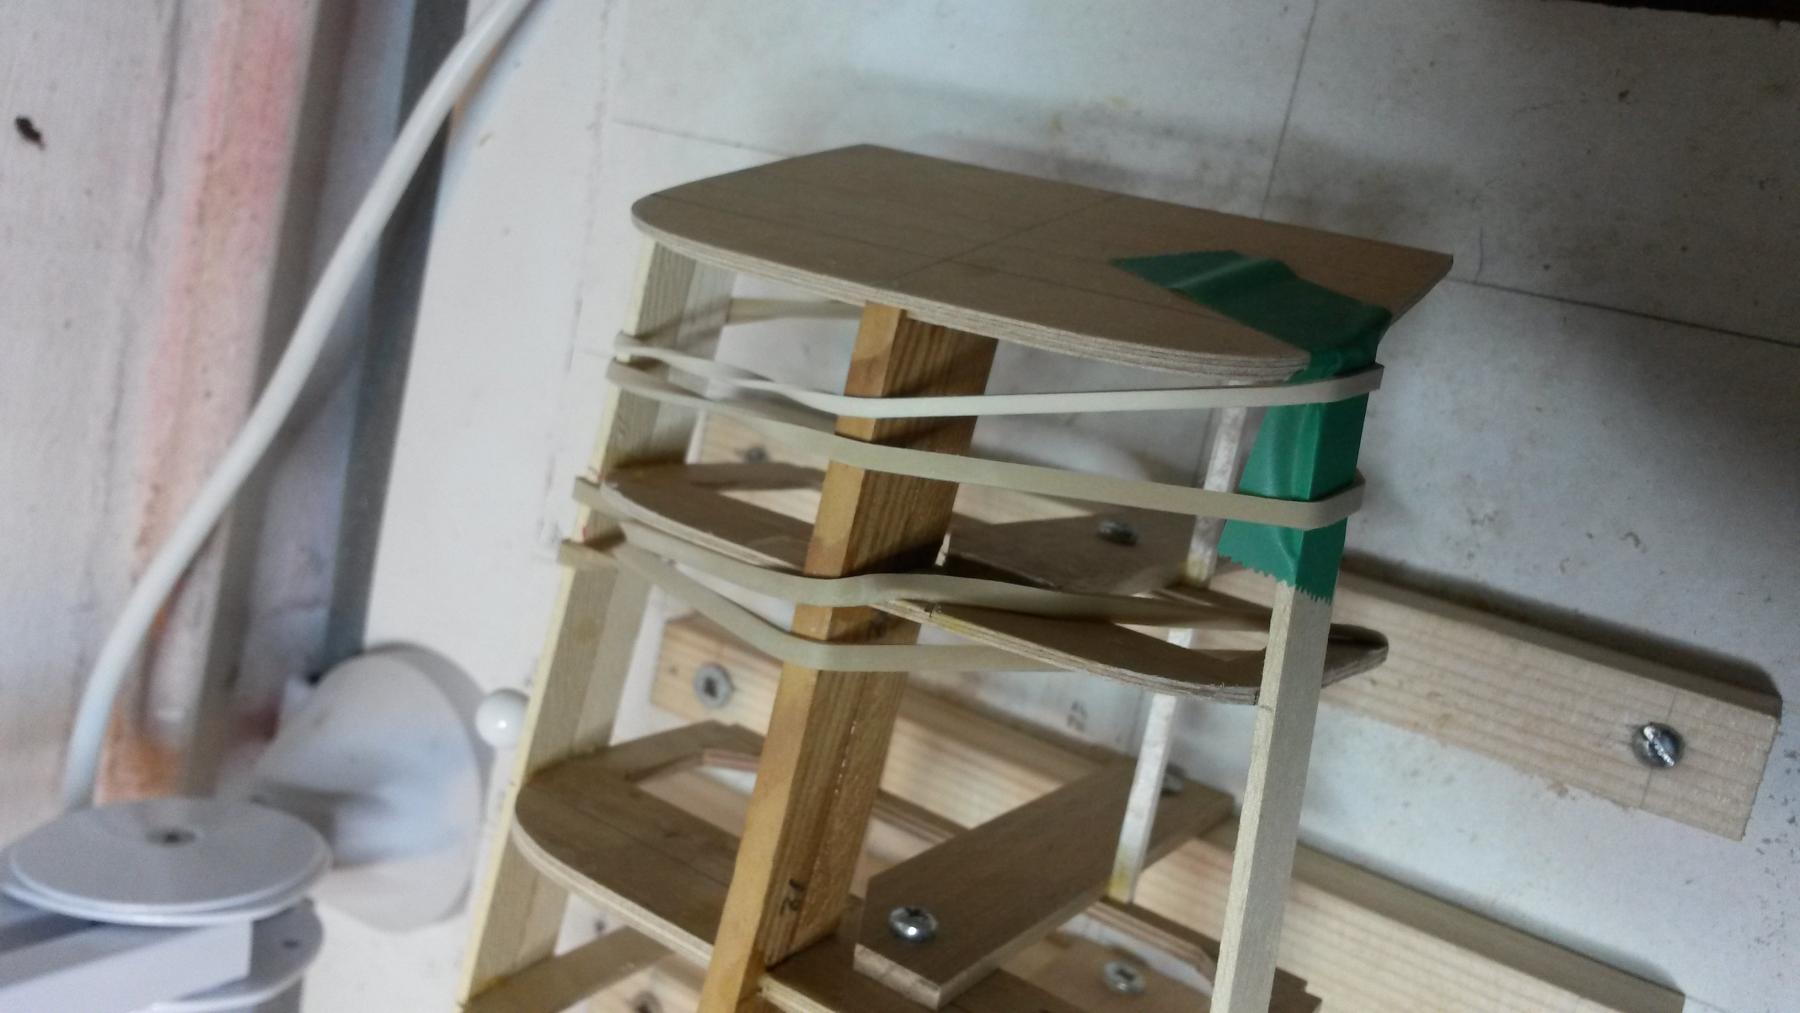
Bought a fine mesh fibre mat at my local modelbuilder's to give it a try and thought the funnel would be a good start - have started work on this and the idea is to coat this balsa/ plywood structure to see how well this goes, before doing the same on the hull.
Must confess this is a bit of a daunting prospect, and notwithstanding a lot of research done so far, still something totally new to me.
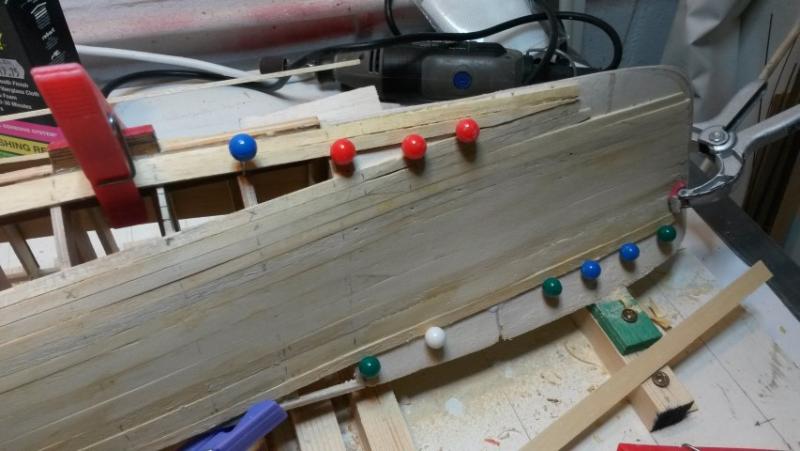
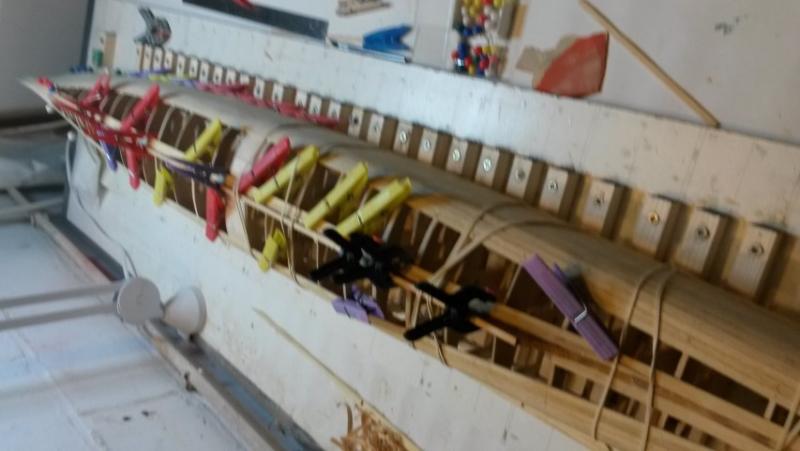
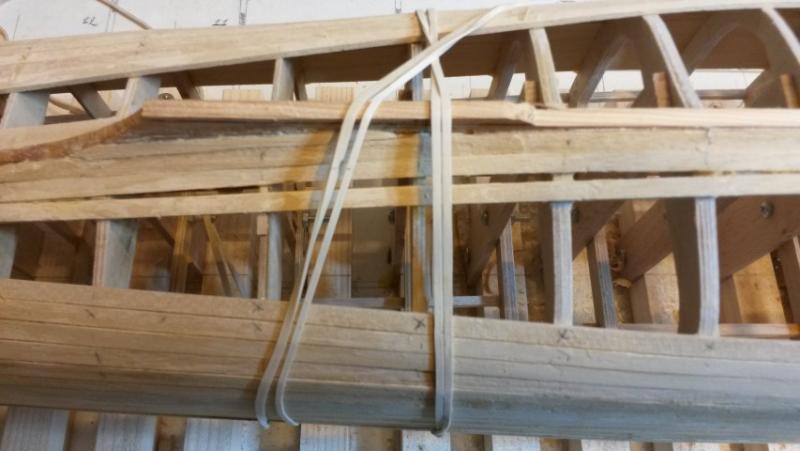
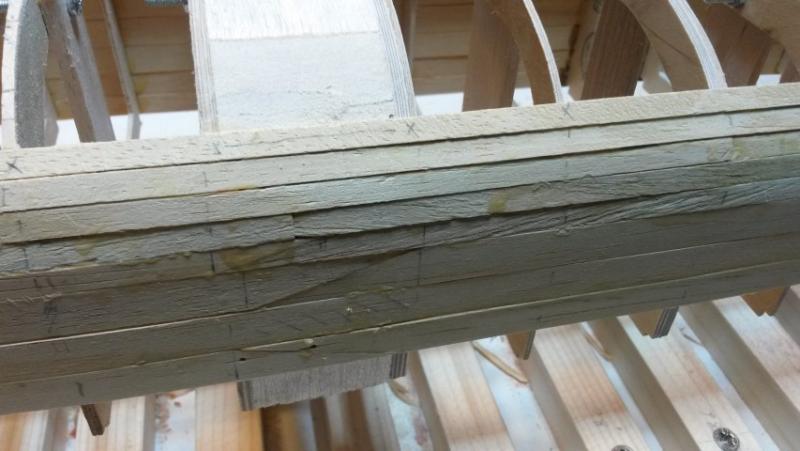
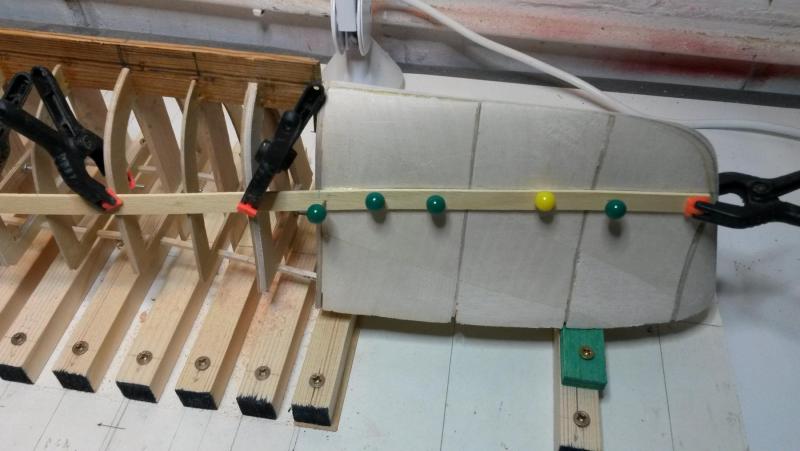
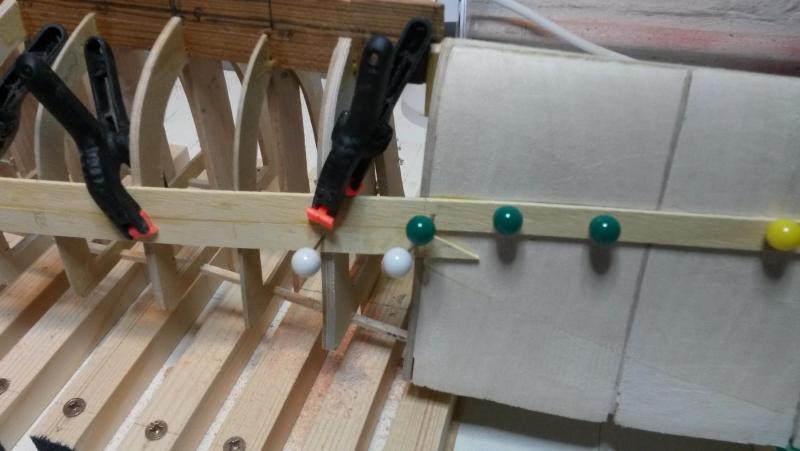
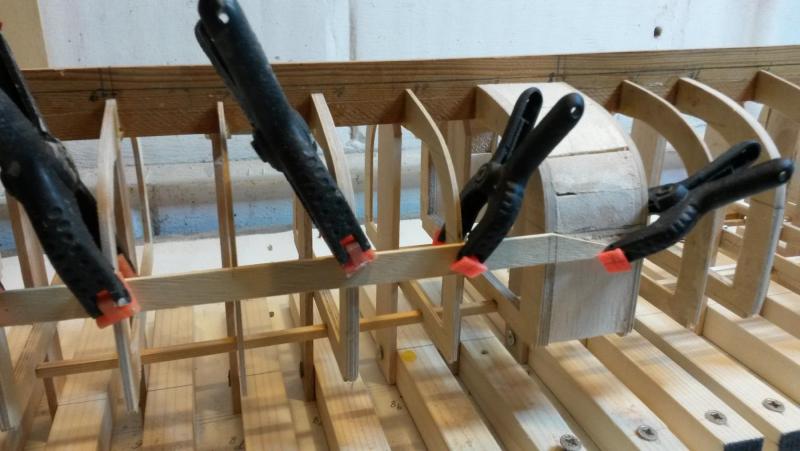
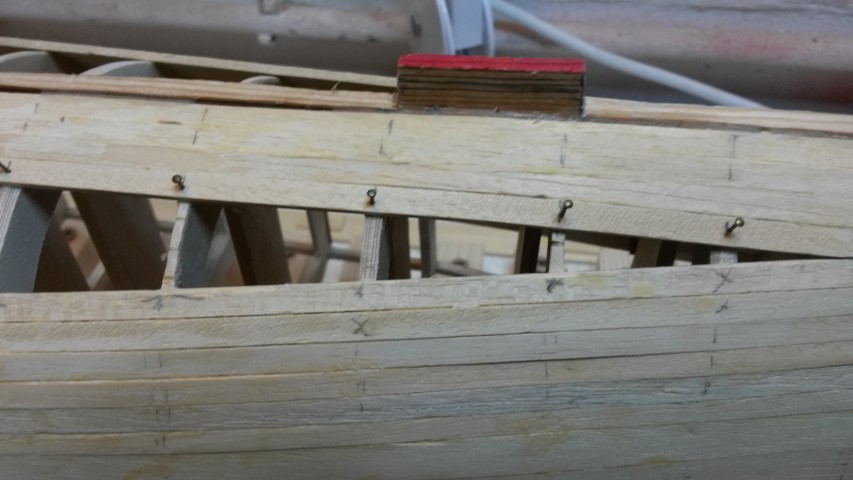
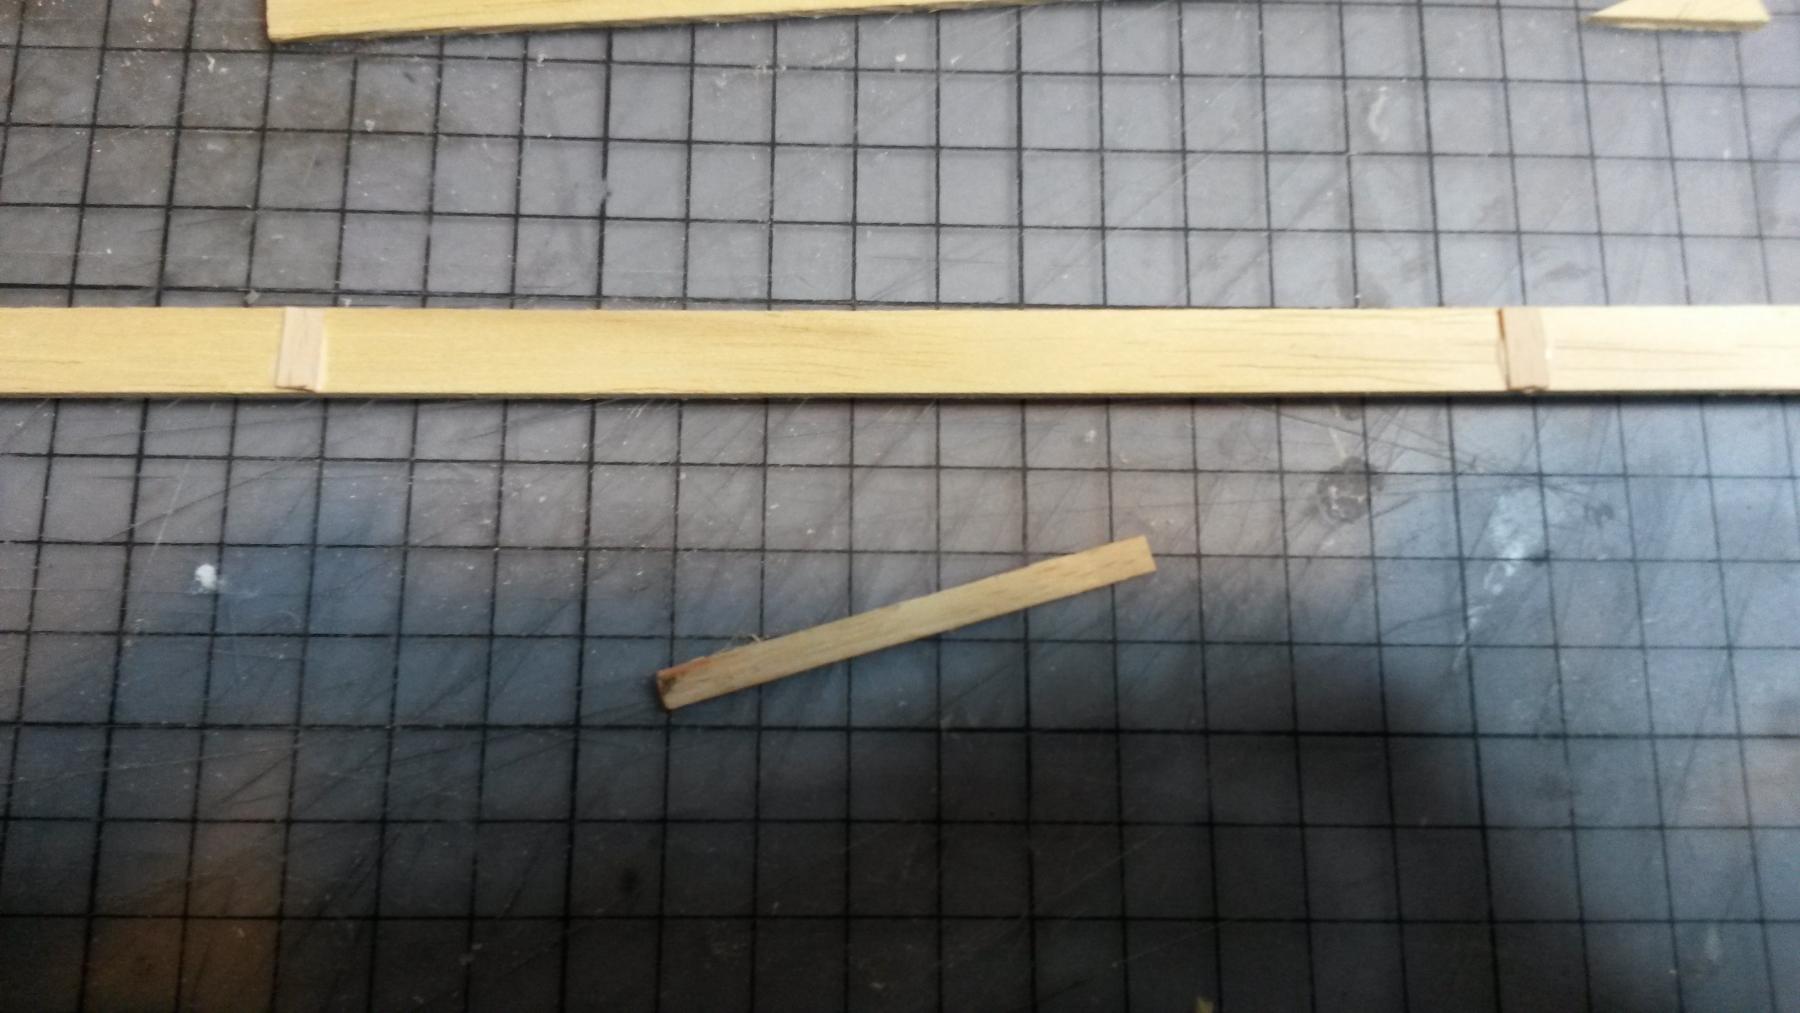
Am finding rubber bands quite handy to hold the planks together, in combination with the coloured pins which are pushed trough the obechi planks. Progress is steady and have struck up a good rhythm, but am expecting to lose more time as I get nearer the keel. Second photograph (a little blurry) shows where I have added filler pieces, to be sanded to the correct thickness prior to the plank being fixed in place.
E

- mmdd, WackoWolf, SailorGreg and 5 others
-
8
-
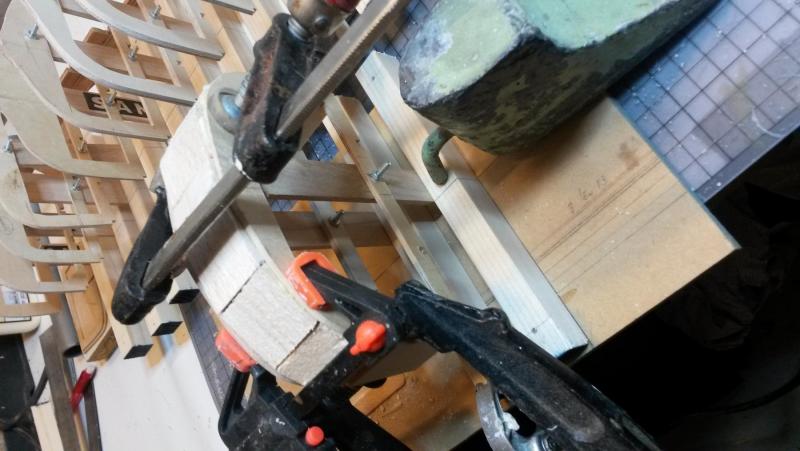
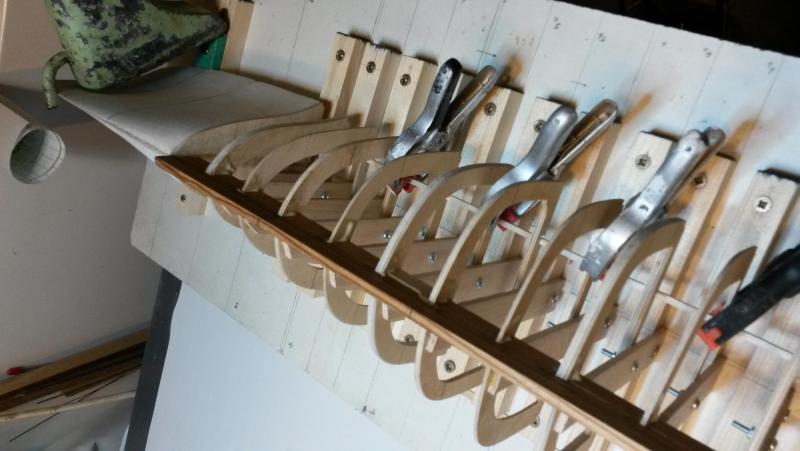
Fitted my first plank today, but not before a lot of bevelling on some of the frames, Am generally quite pleased with how most have turned out, but there were still a number which were slightly oversized and causing gaps behind the plank on some of the other frame stations.
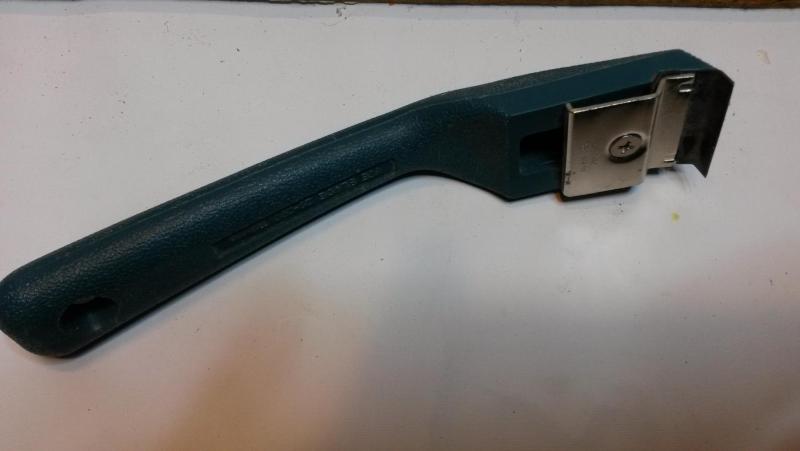
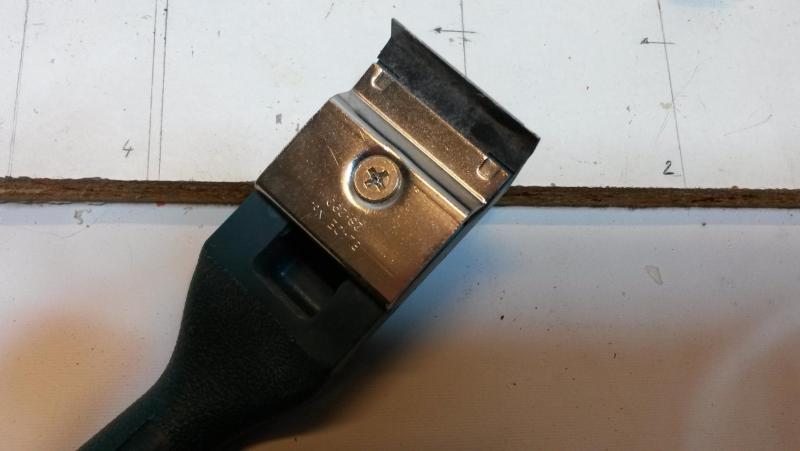
Tried a number of ways to bevel things quickly and efficiently, and have now come to the conclusion that:
- manual sanding is way too slow
- the dremel is quick enough but risks 'skidding' and thus distorting the original frame outline
- started using a chisel in a scraping motion
- finally ended up the paint scraper in the last photograph as probably the best method: sufficient control yet swift enough progress
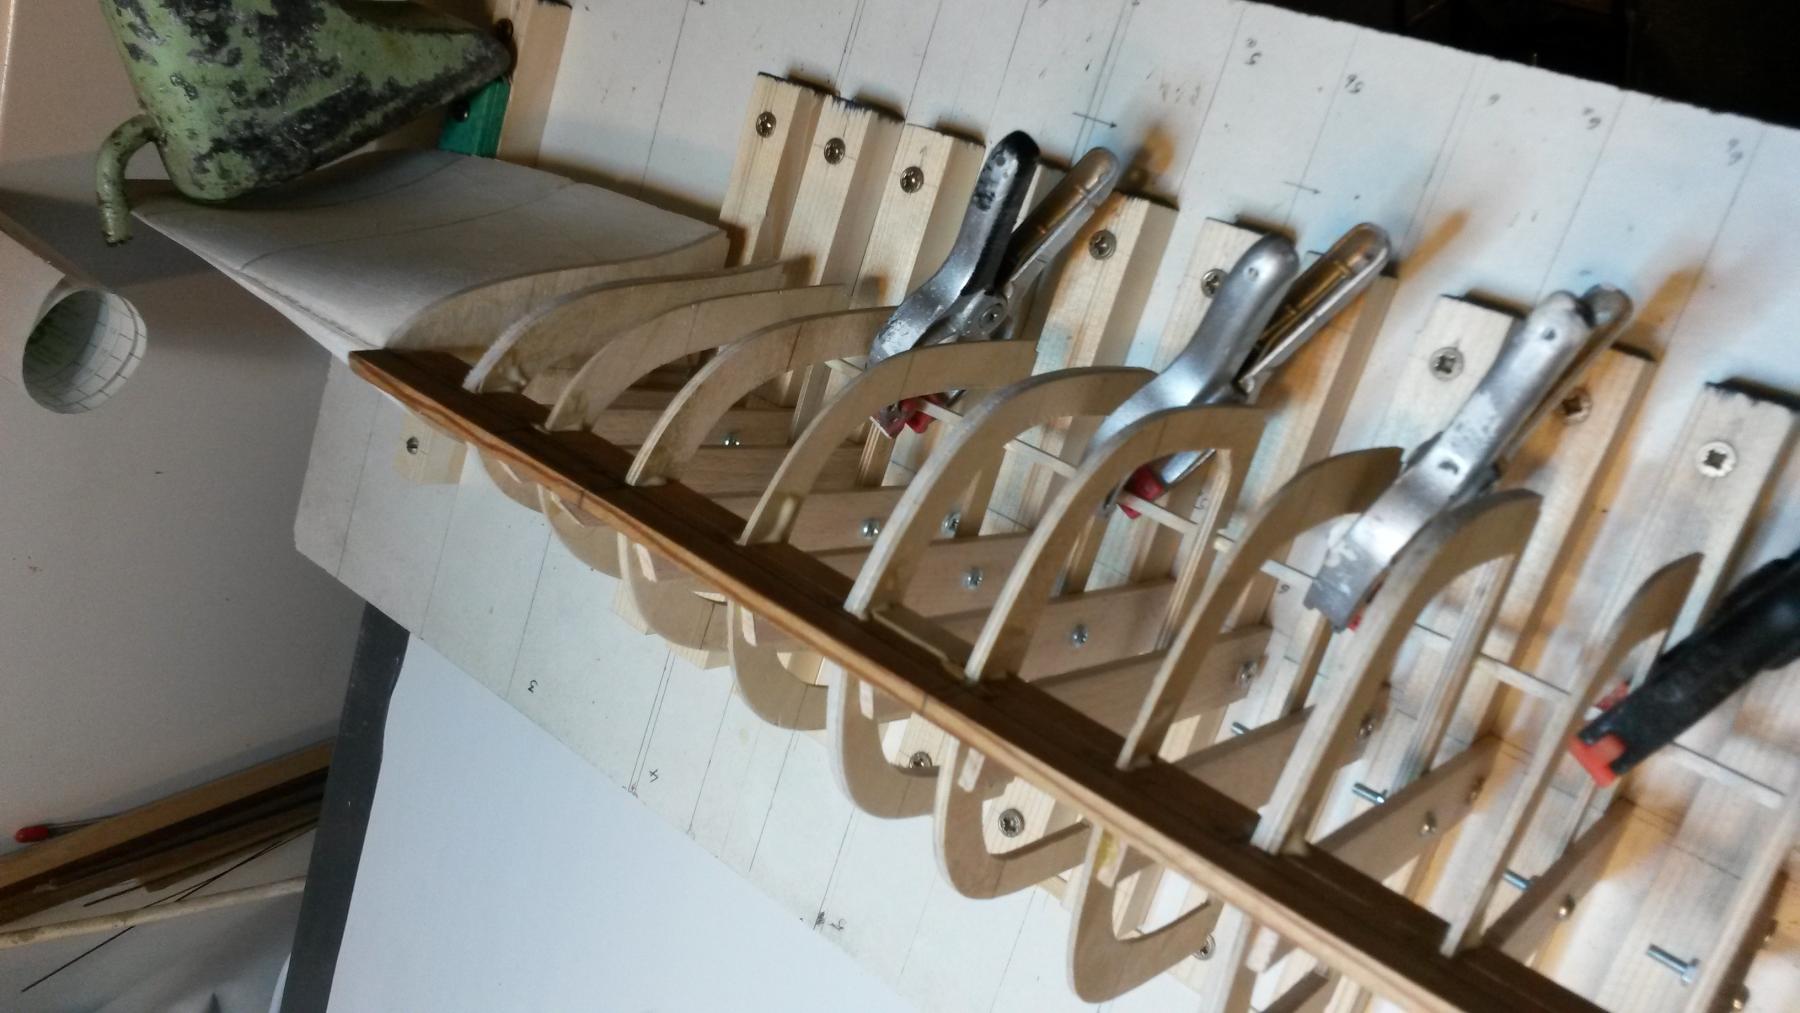
The first plan was laid along the rear section of the hull (the length of the strips I am using not being enough to run the entire length of the hull), using a 4mm wide obechi strip. Will only need to insert a thin piece of wood as additional support on one undersized frame, but that is easy enough.
Letting things rest for 24 hrs now to see how smooth the curvature is, where to insert thin wood strips, etc...and then complete the front section.
Have picked the waterline as my first plank datum line, as probably the line with the least distortion or twisting.
E

- mtaylor, Old Collingwood and hexnut
-
3
-
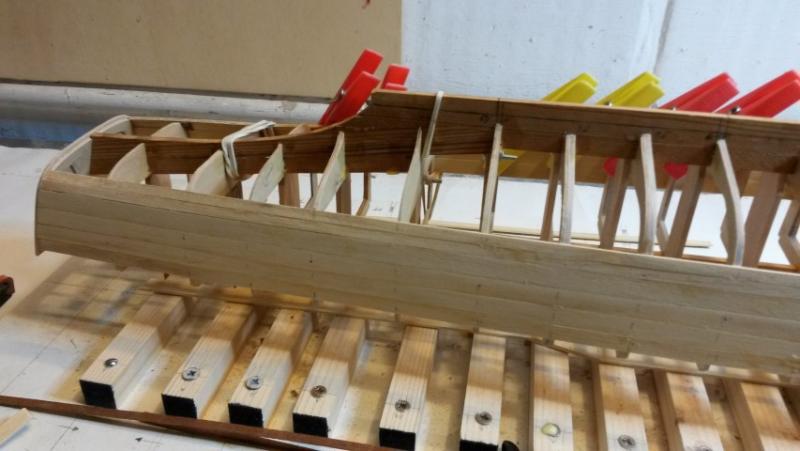
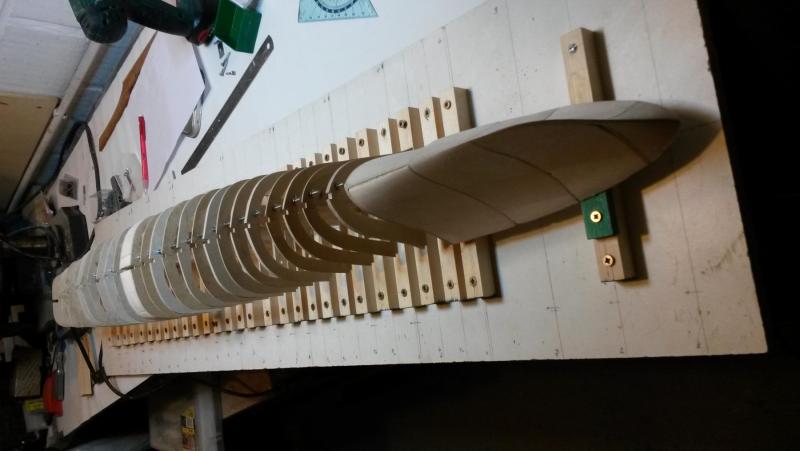
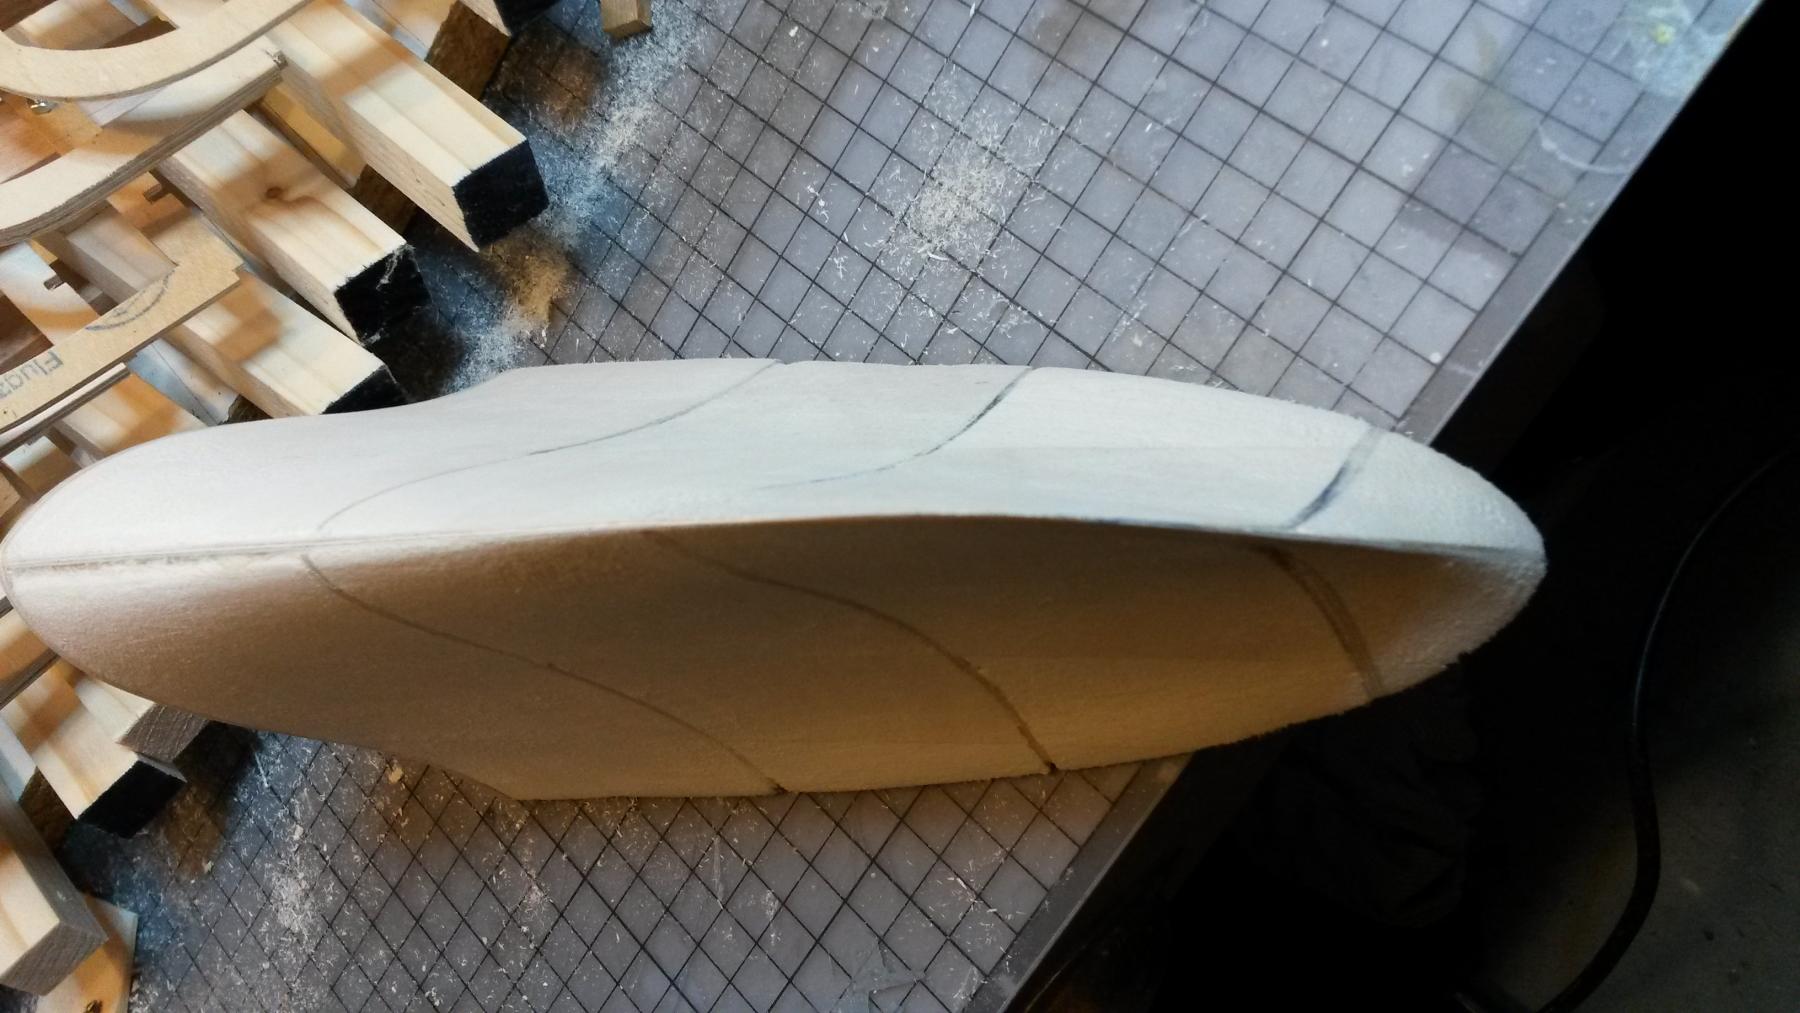
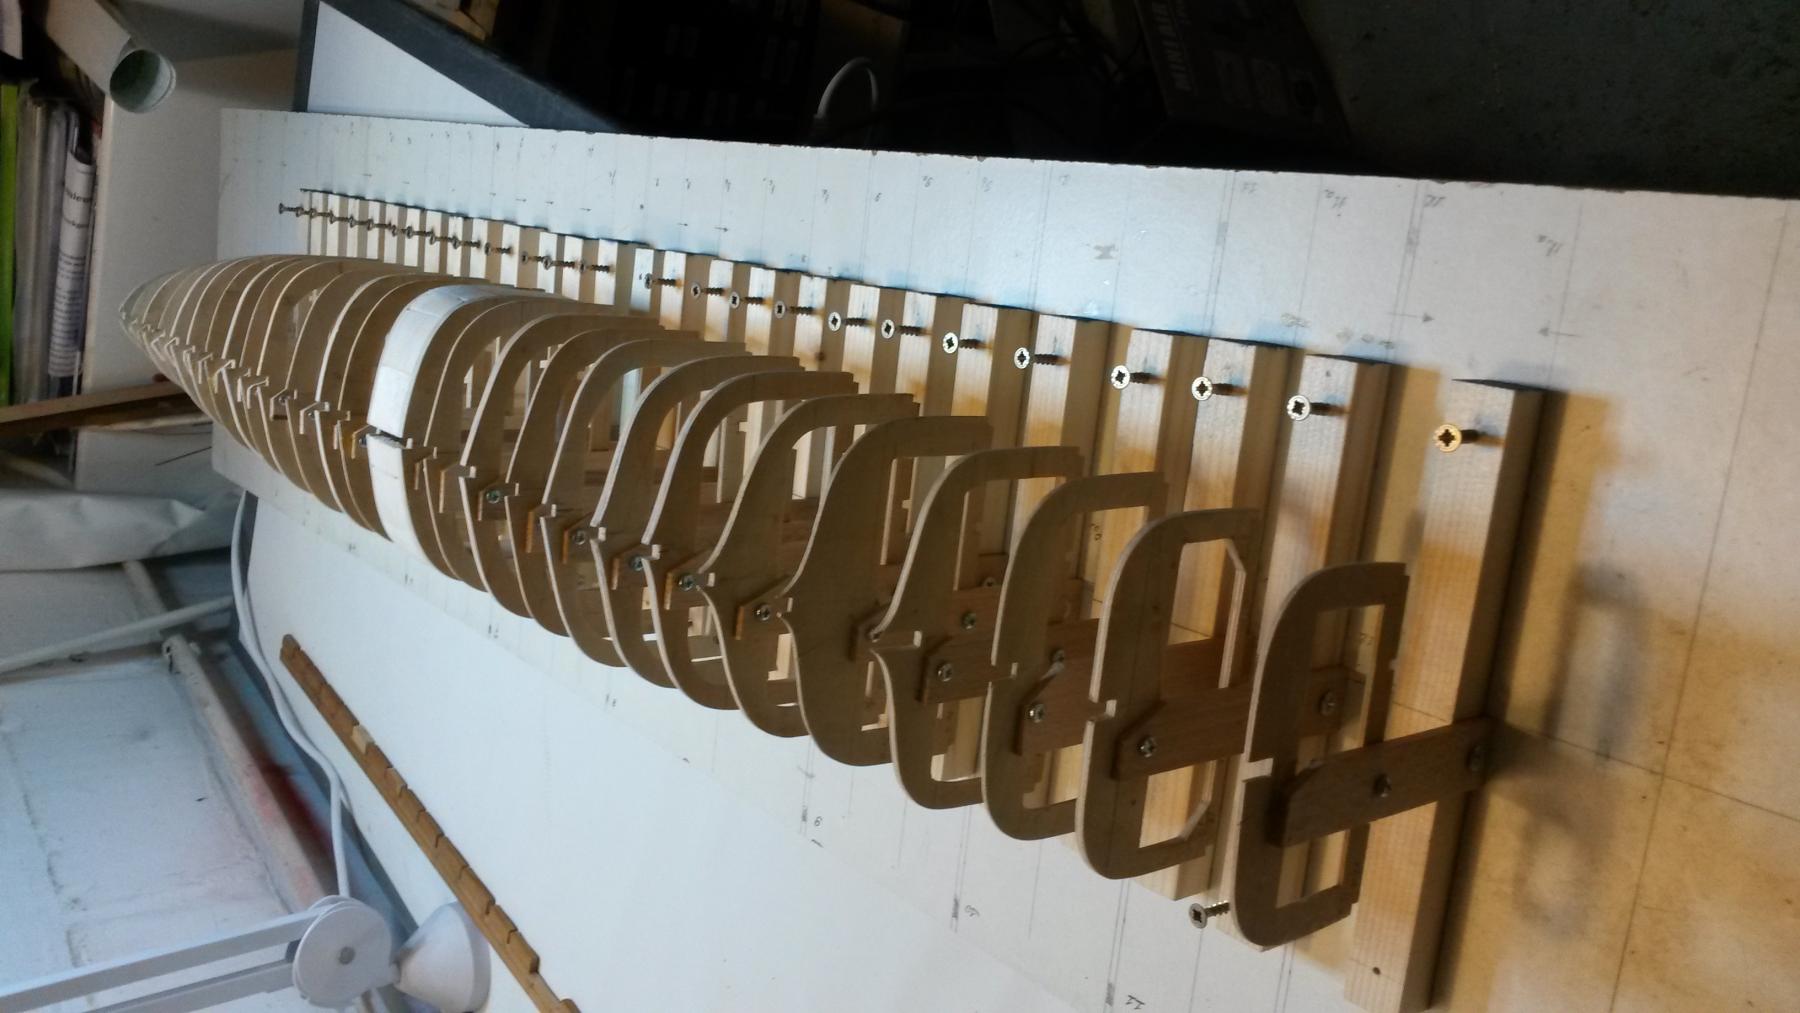
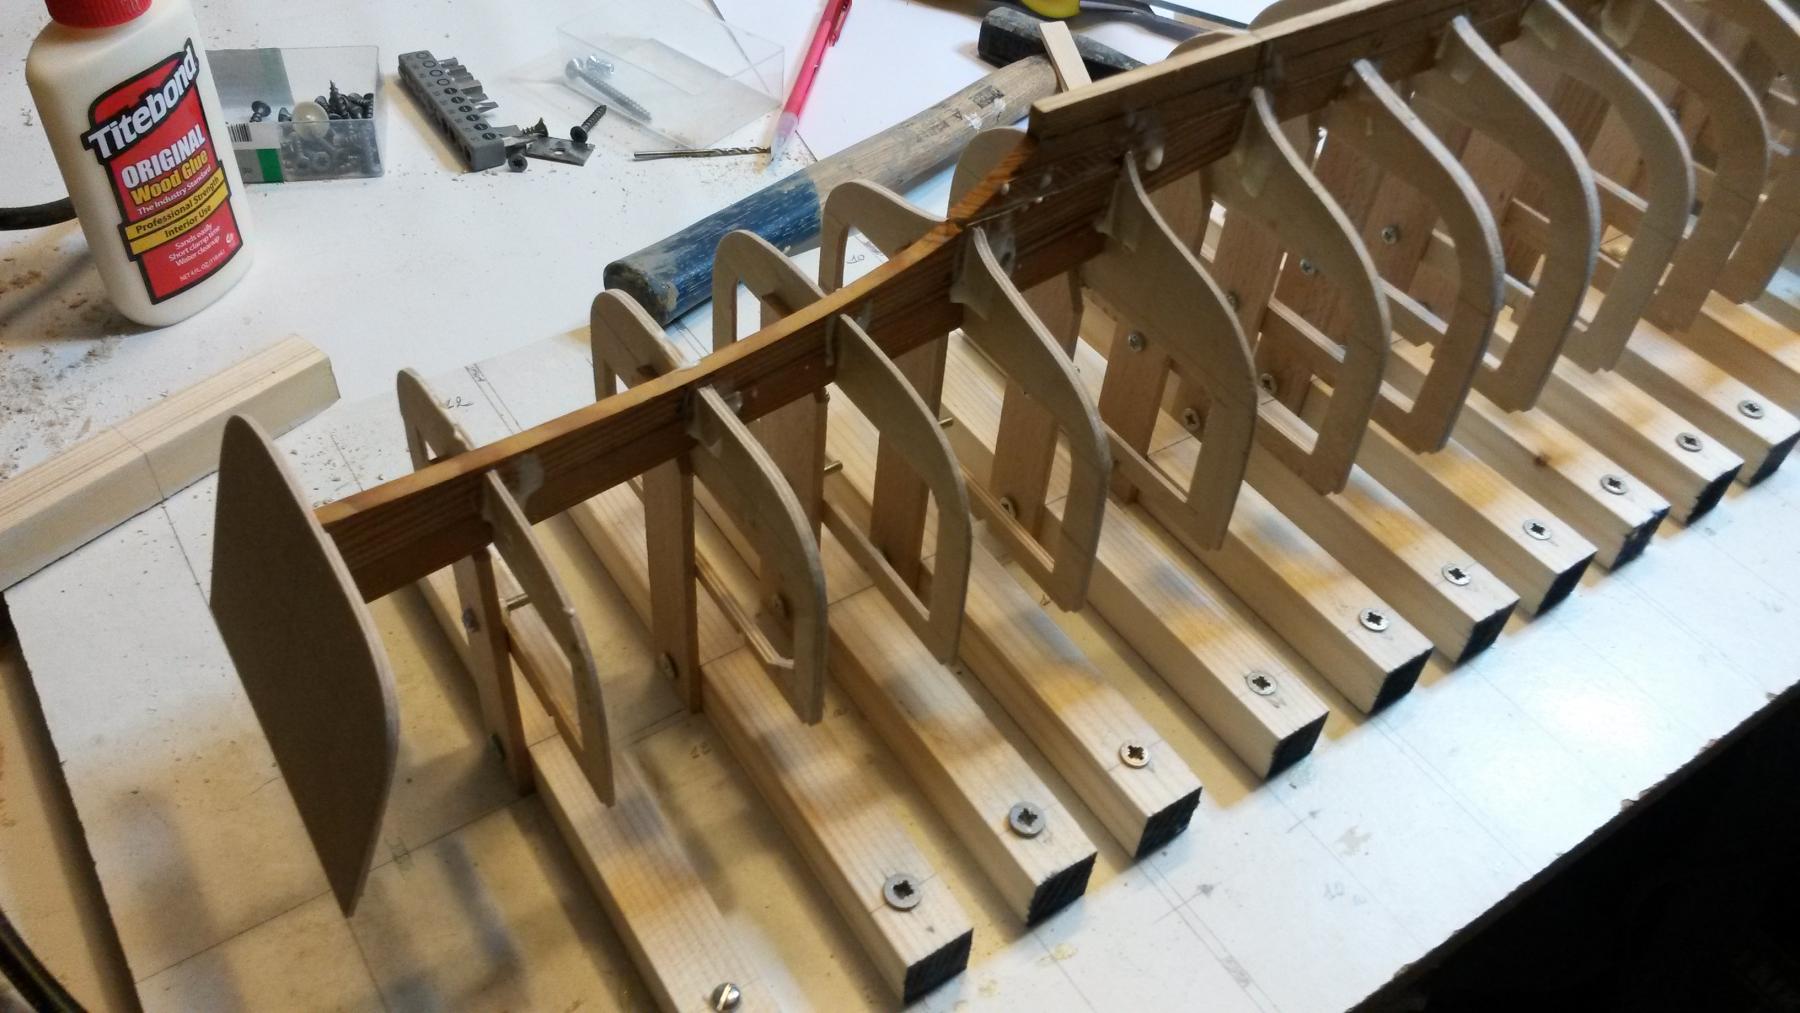
Gave the portside of the bow a final sanding and starting mounting the various frames - quite pleased with the result.
The shape of the bow section is interesting, took me a lot of sanding and checking but this is the quintessential feature of the Leanders so had to get this right.
Started adding the deckstringers and will be completing the remainder tomorrow.
Next step will be planking, but will first need to sand the frames to allow for the curvature of the planks and hull - one or two are considerably under size, but this can be remedied and will be adding filling pieces where needed.
As will be seen, I have filled up the space between frames 8 and 9 with some pieces of balsa - reason for doing so is that this is the half-way point and since my wood strips are not long enough to cover the entire length of the hull, this part will avoid me having to stop all the planking at the very same point.
E


-
-
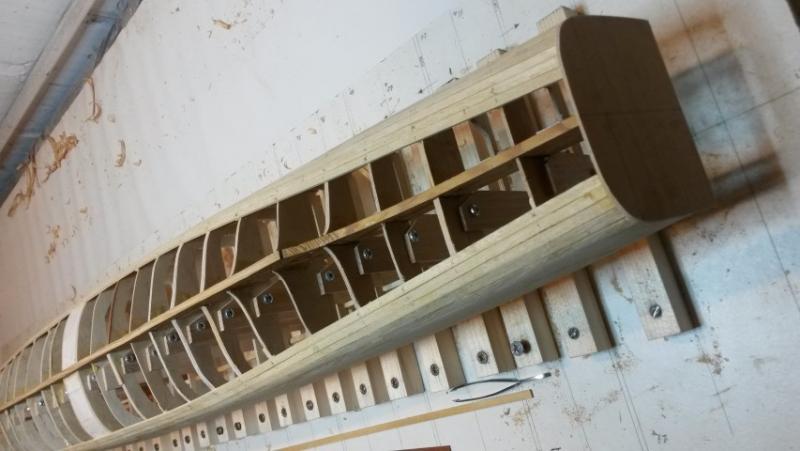
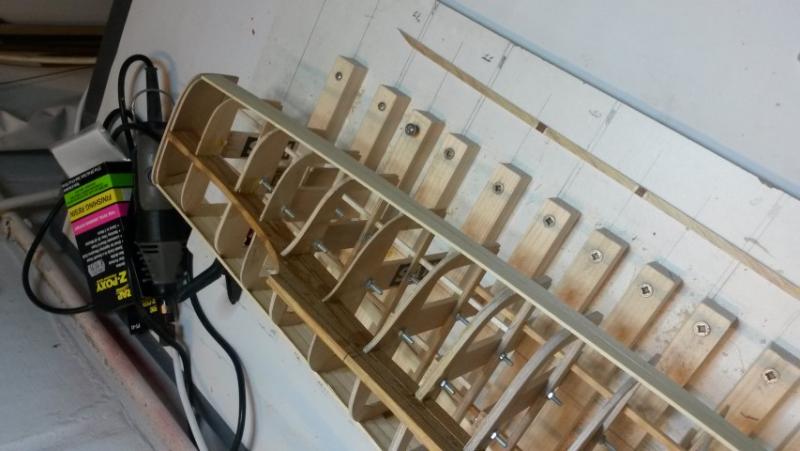
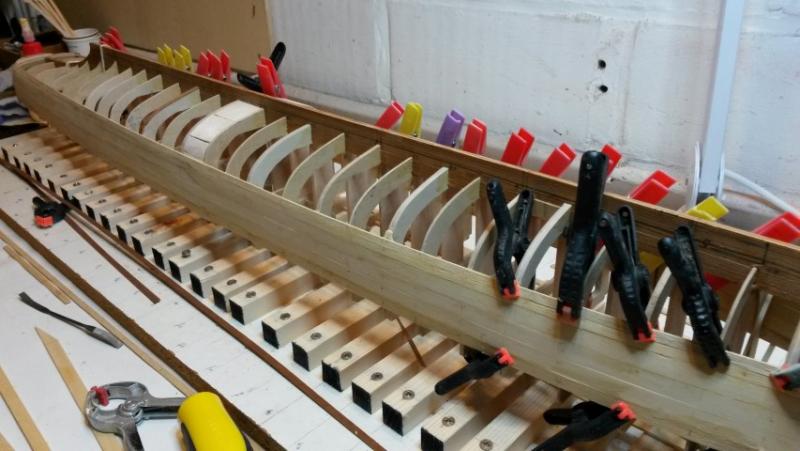
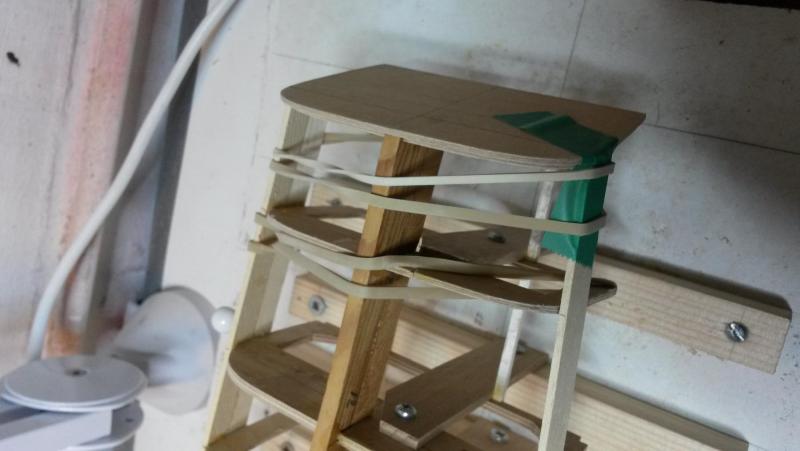
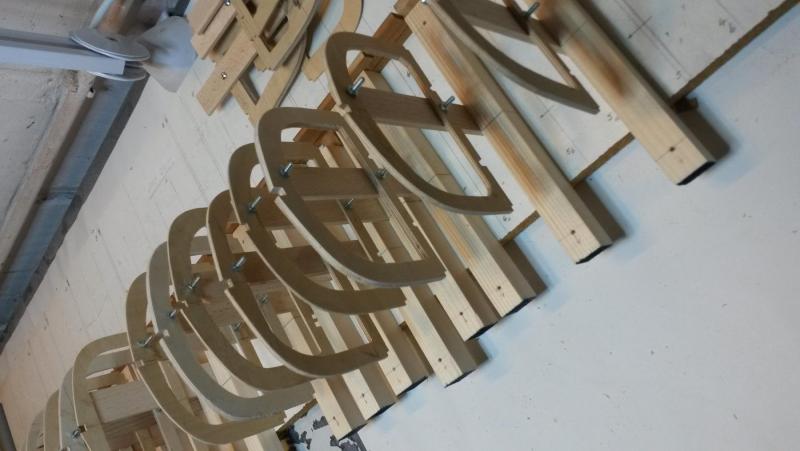
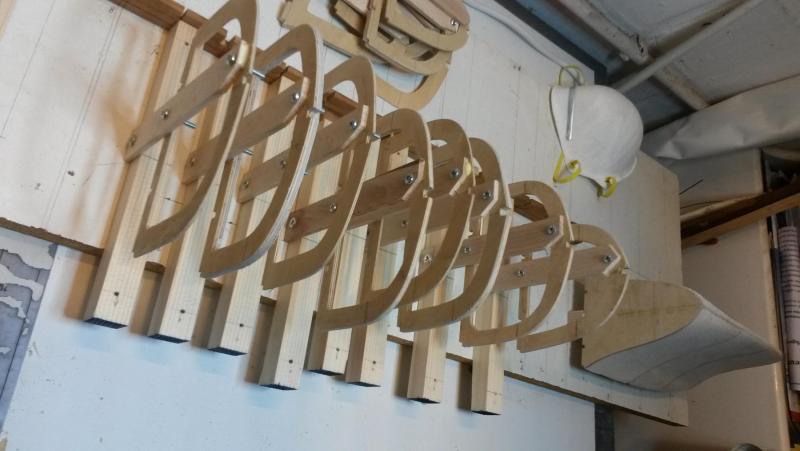
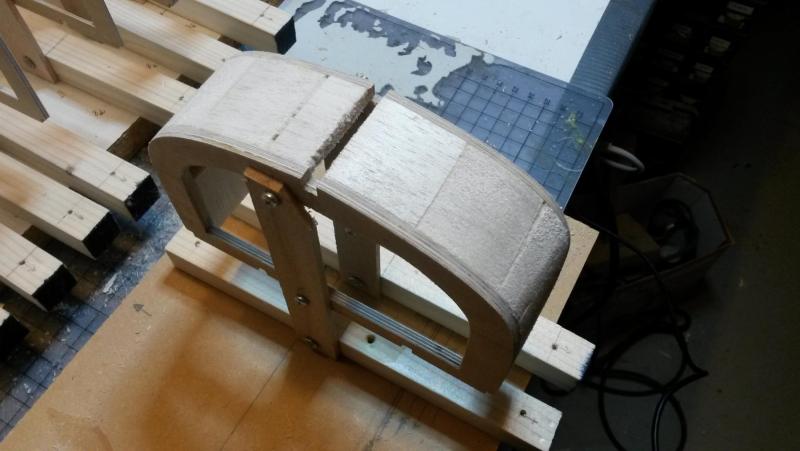
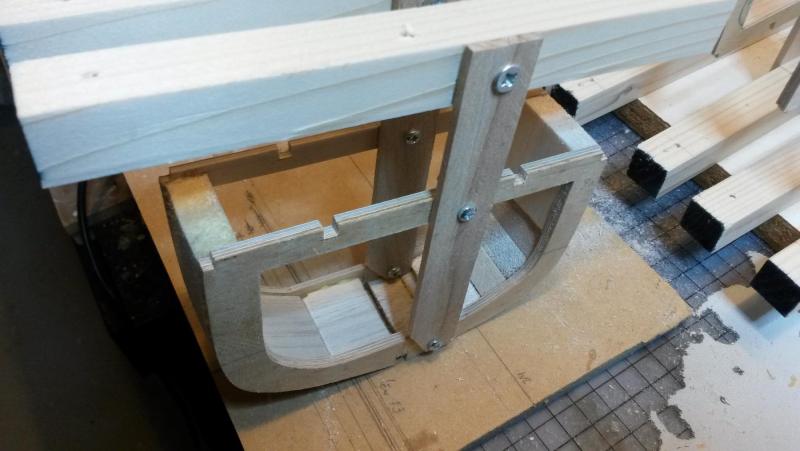
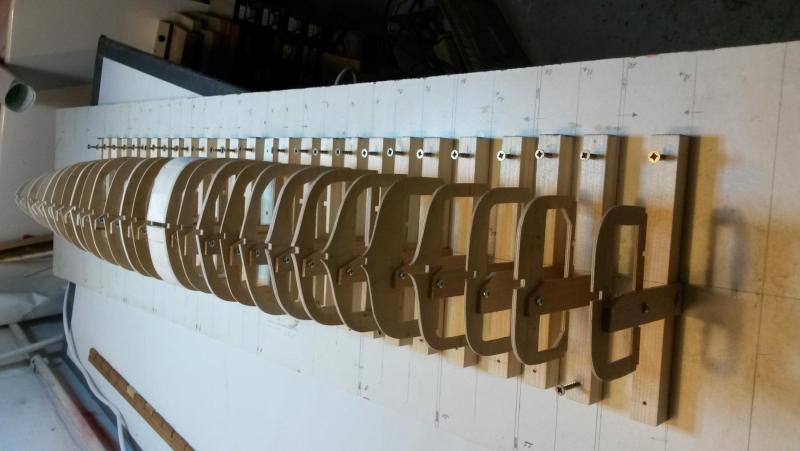
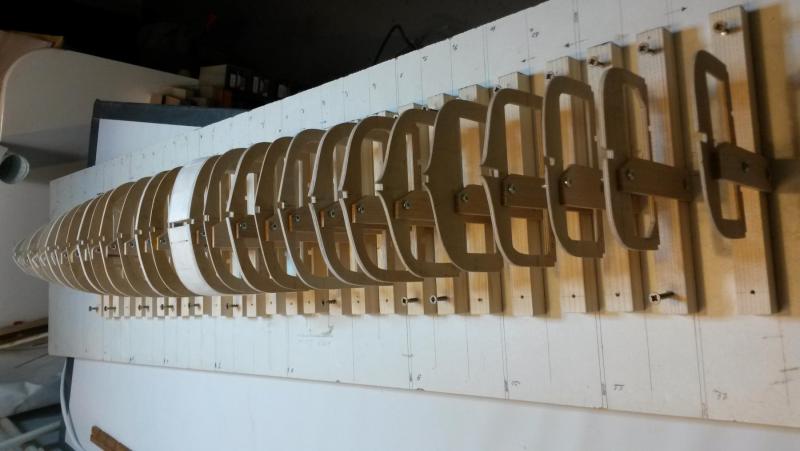
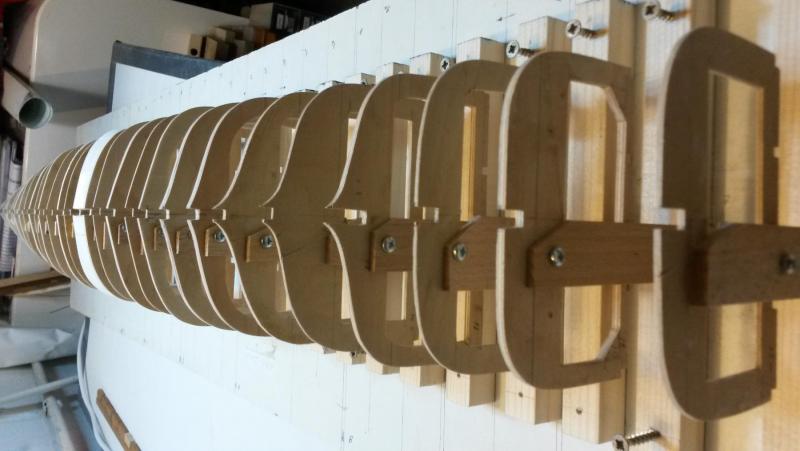
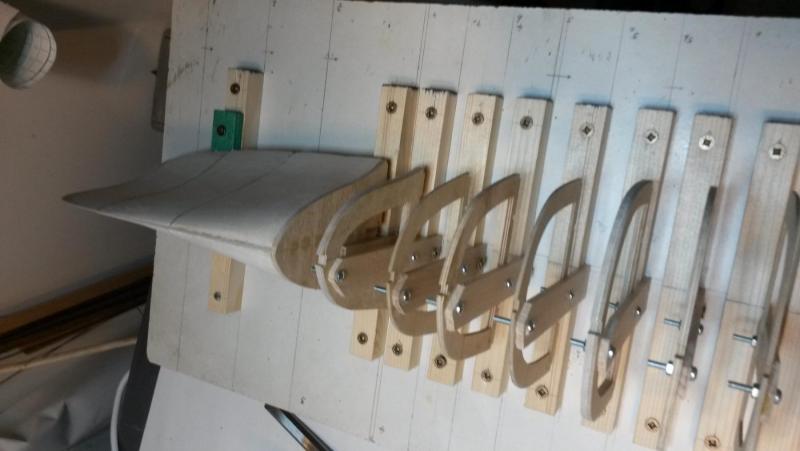
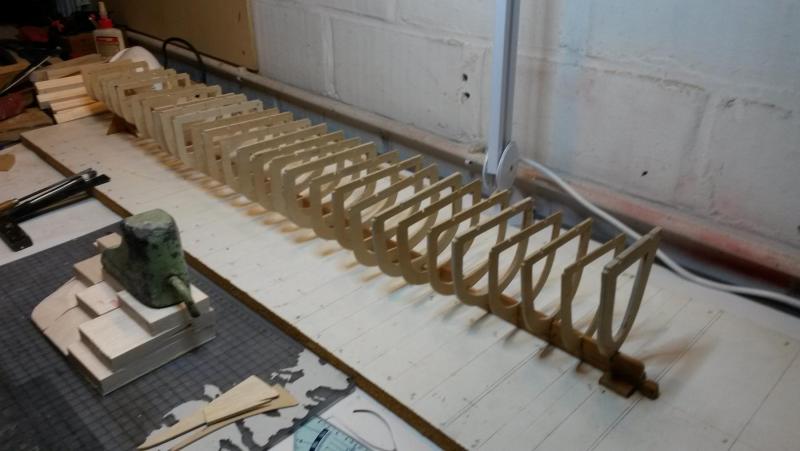
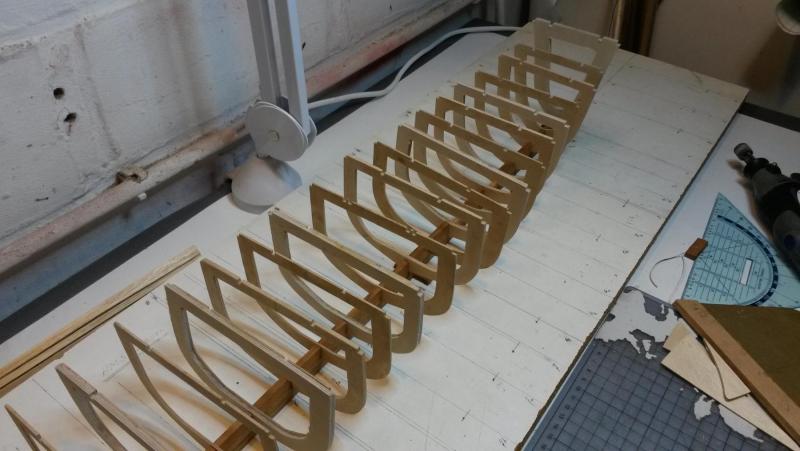
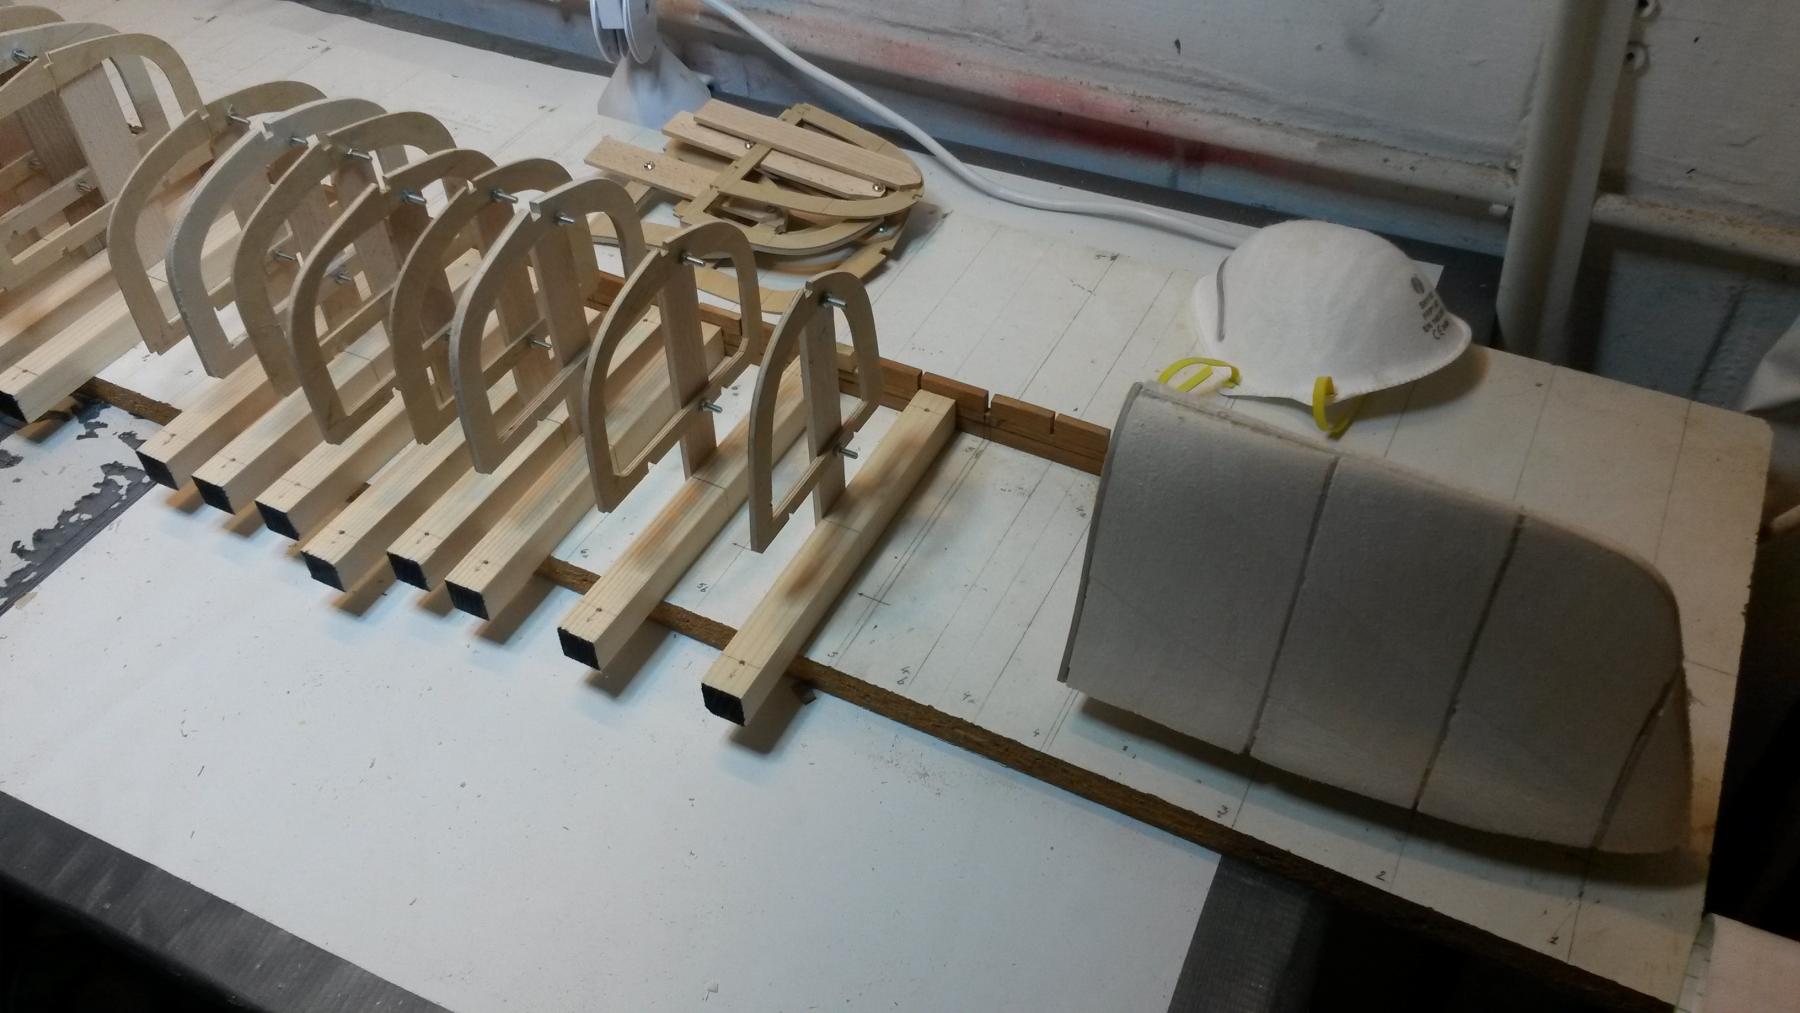
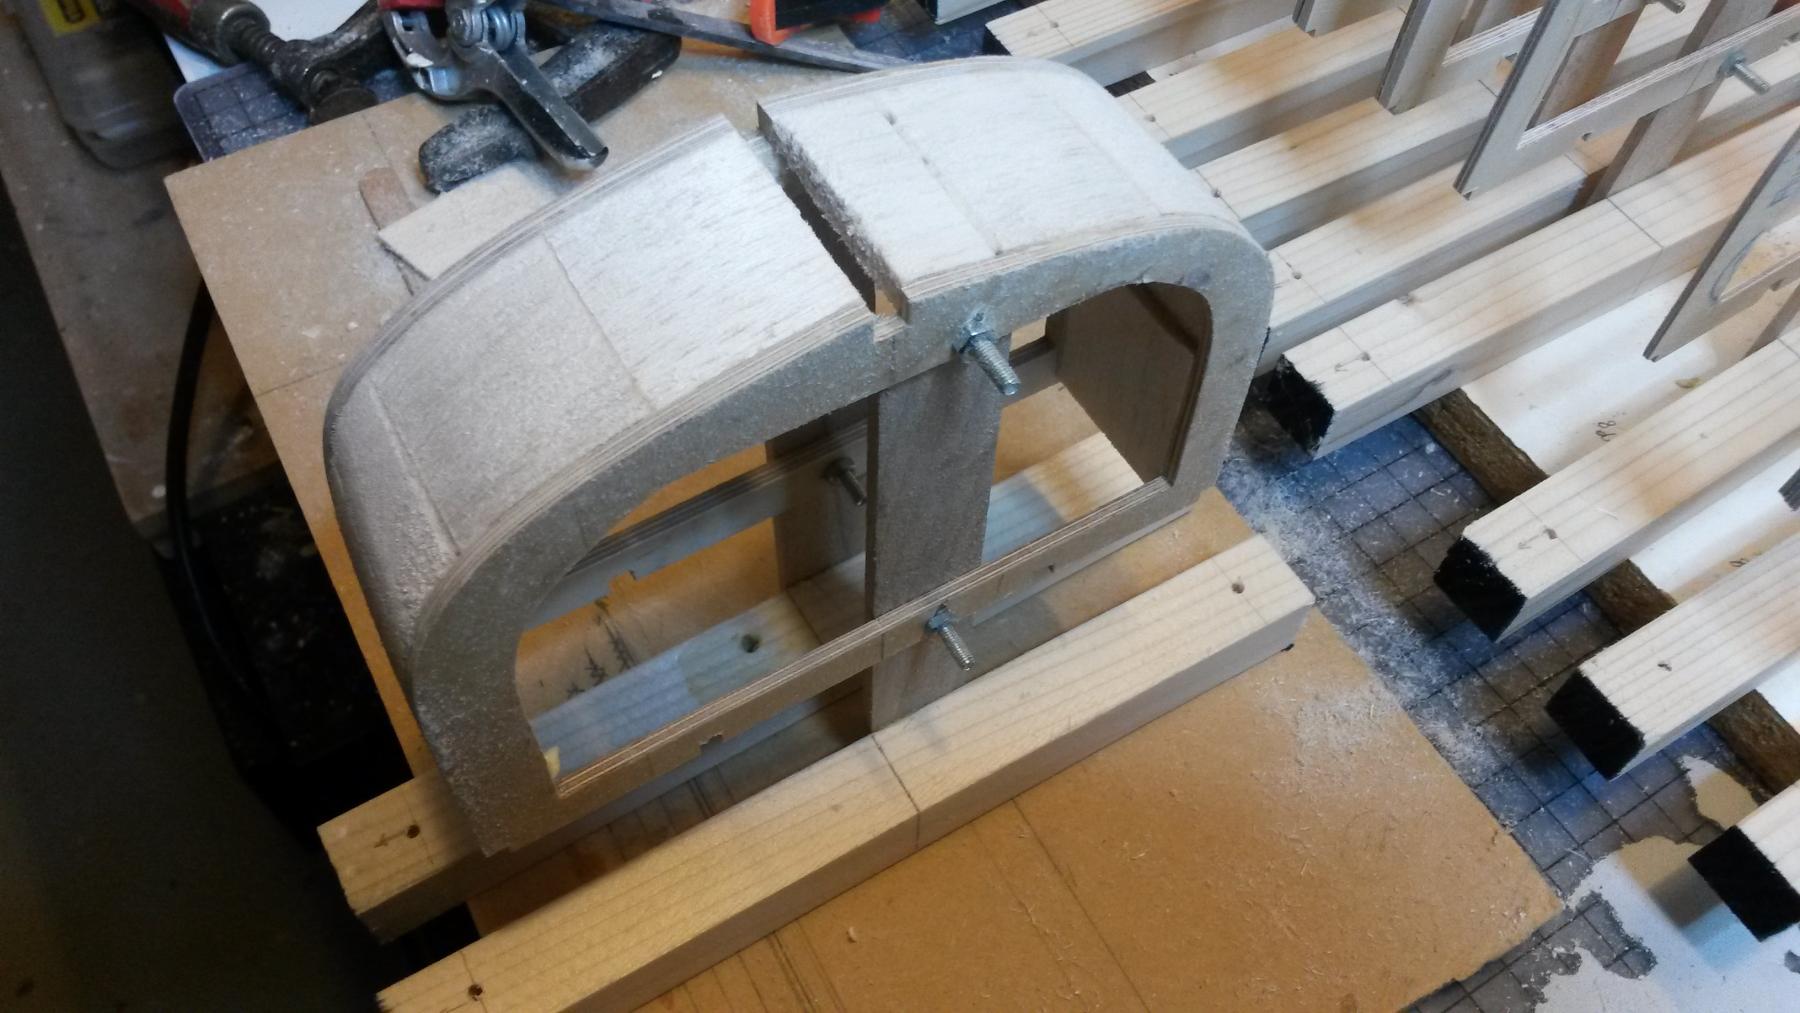
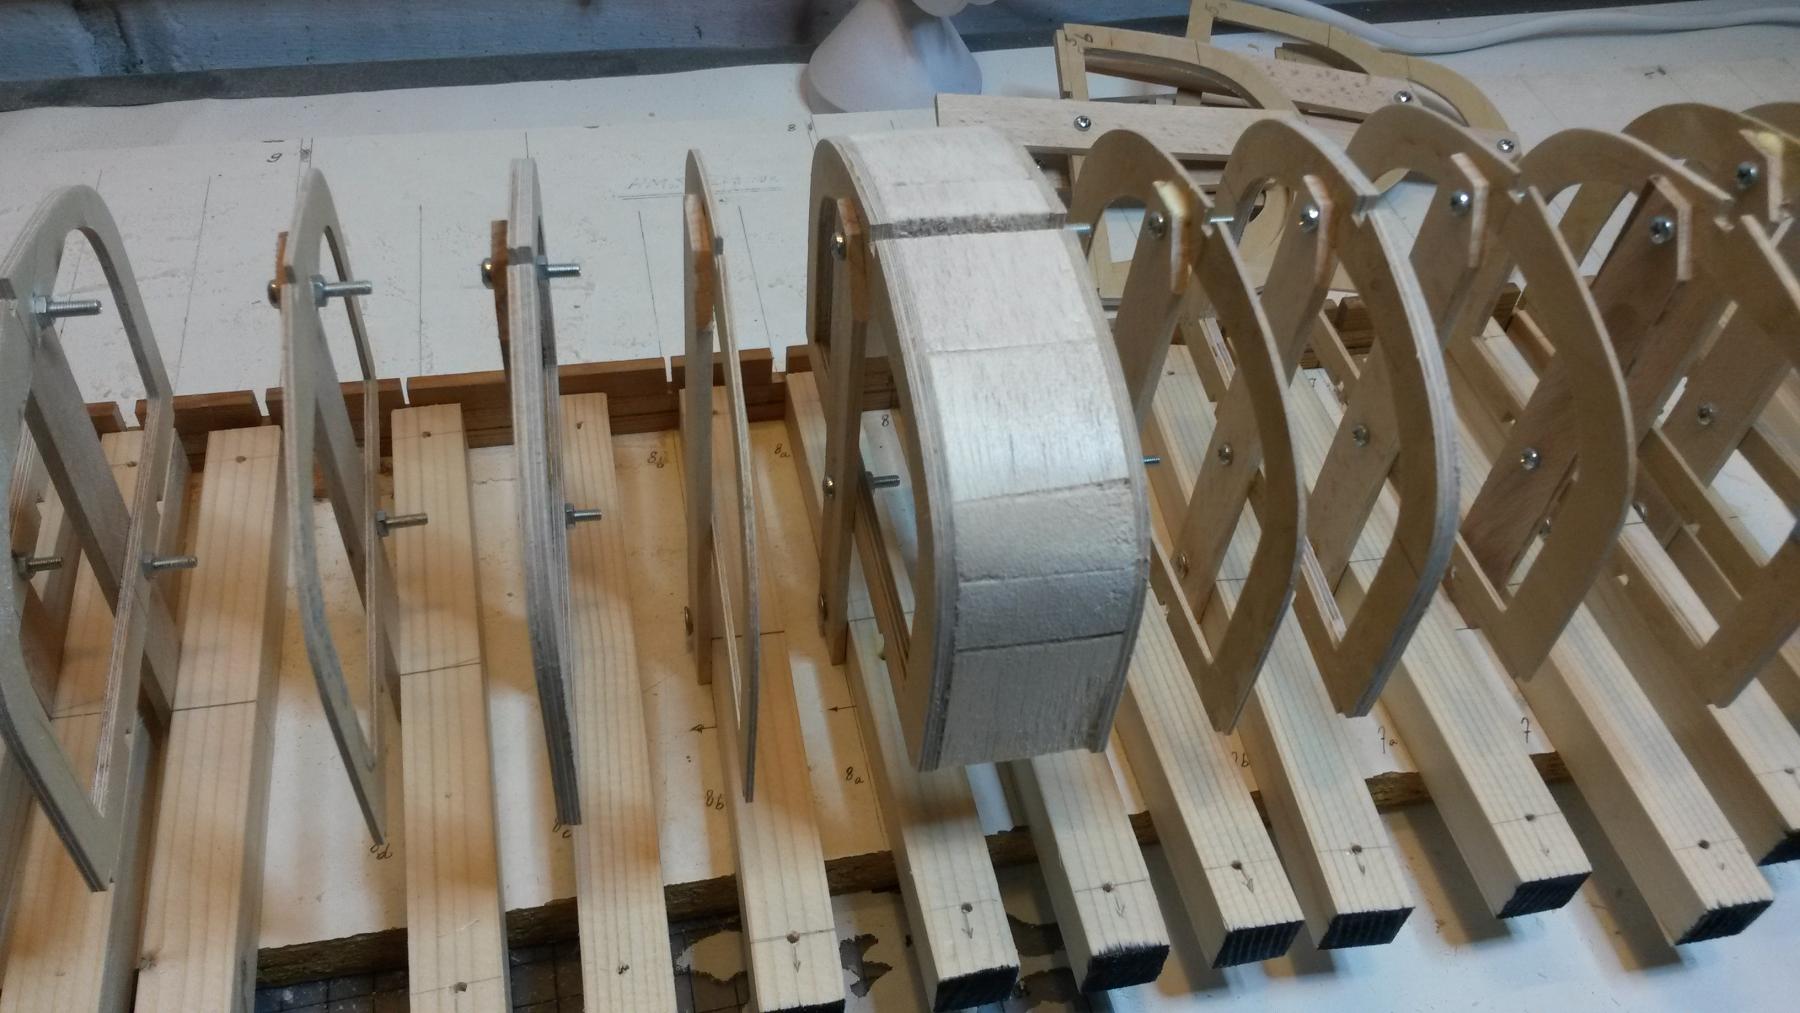
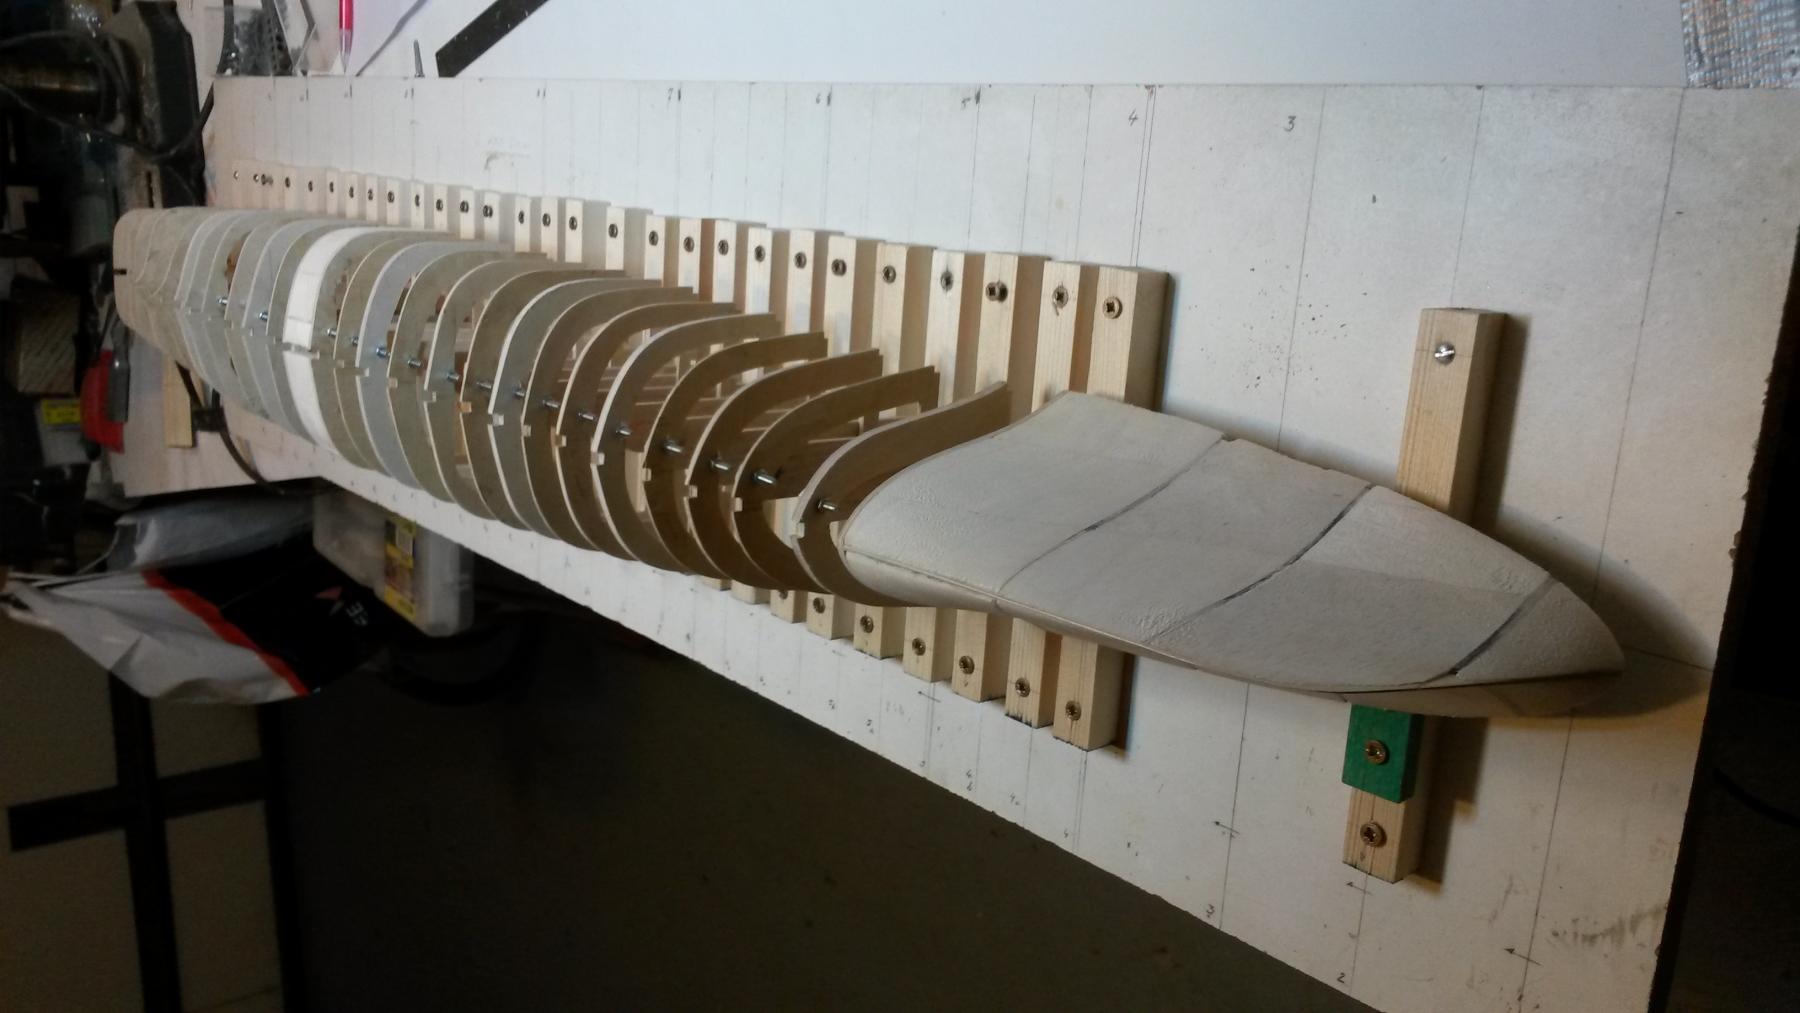
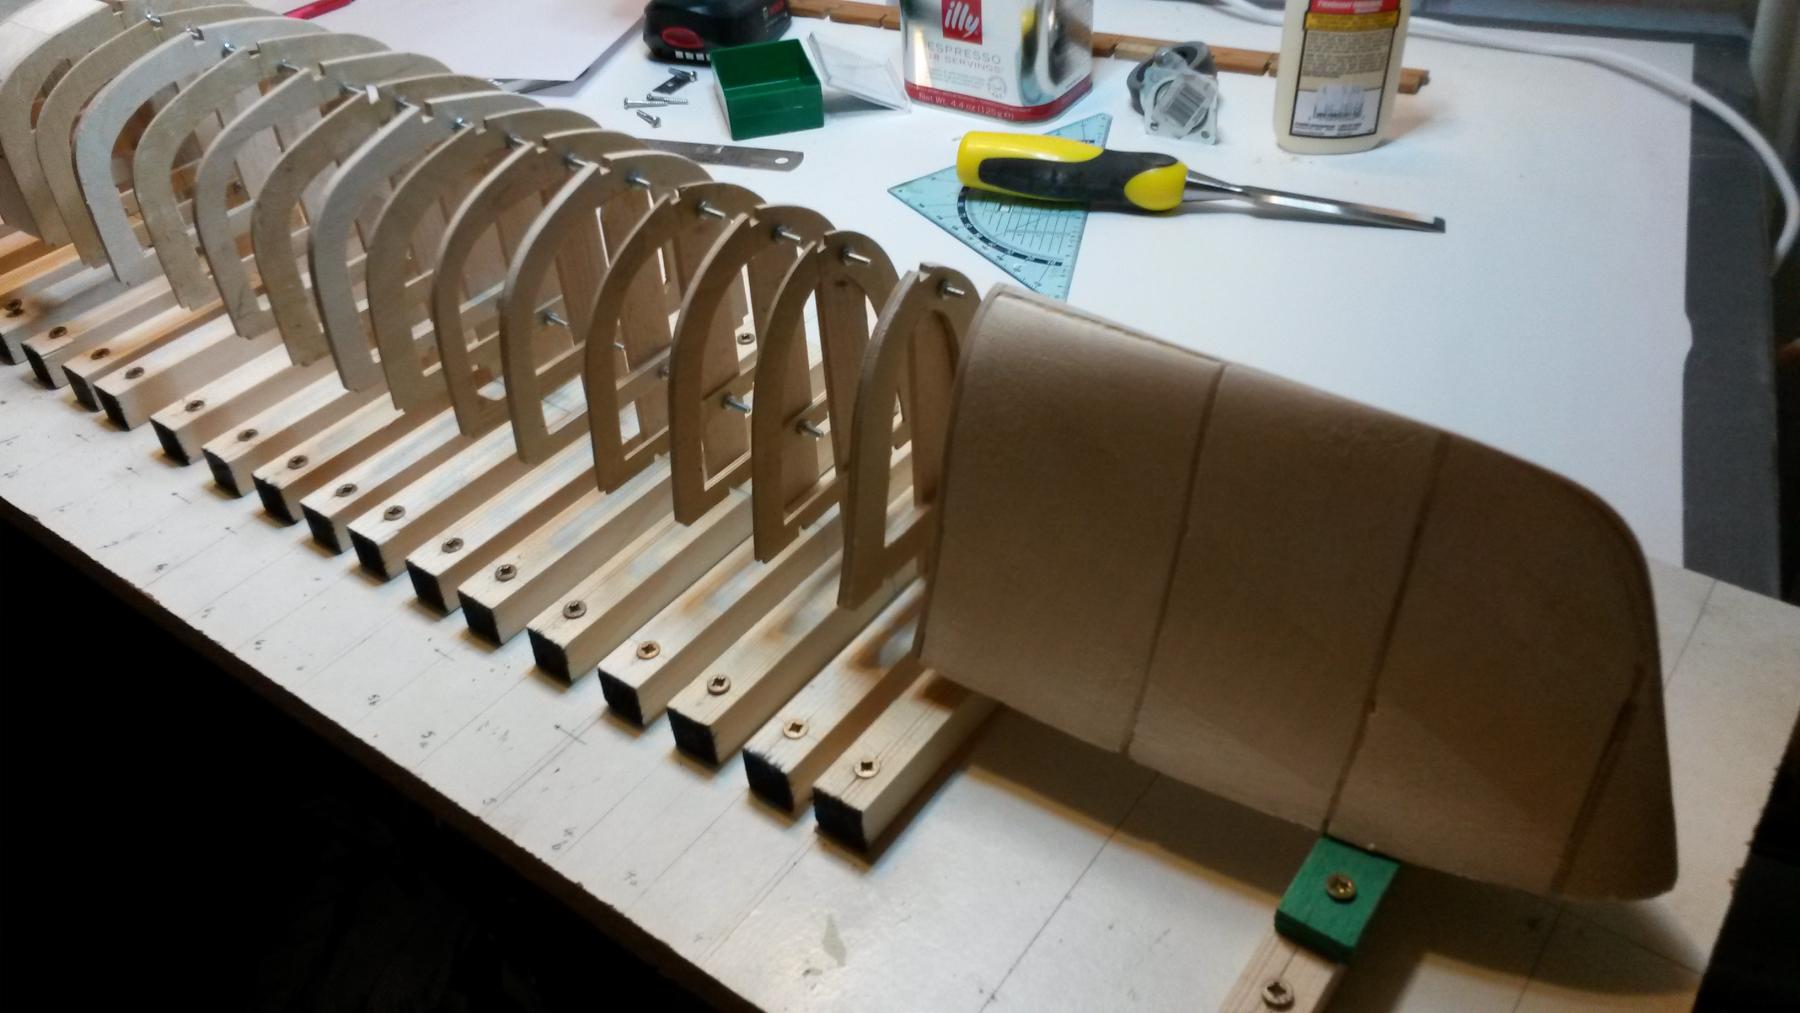
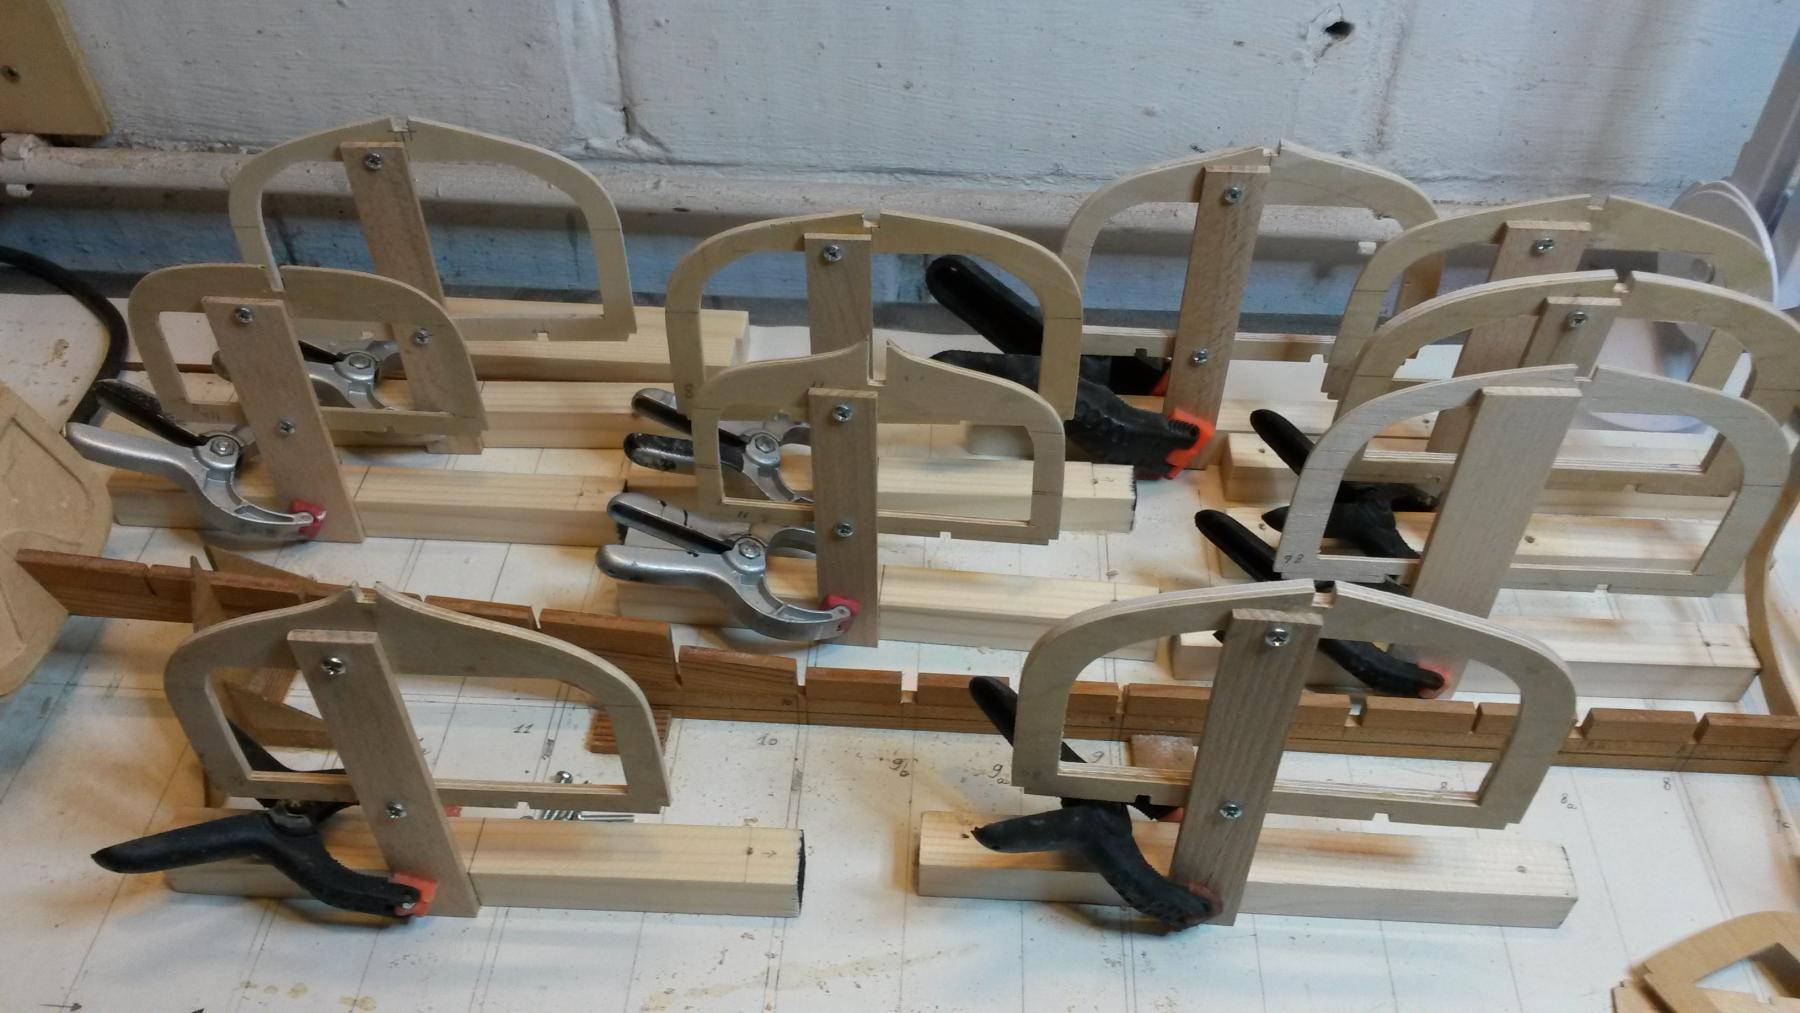
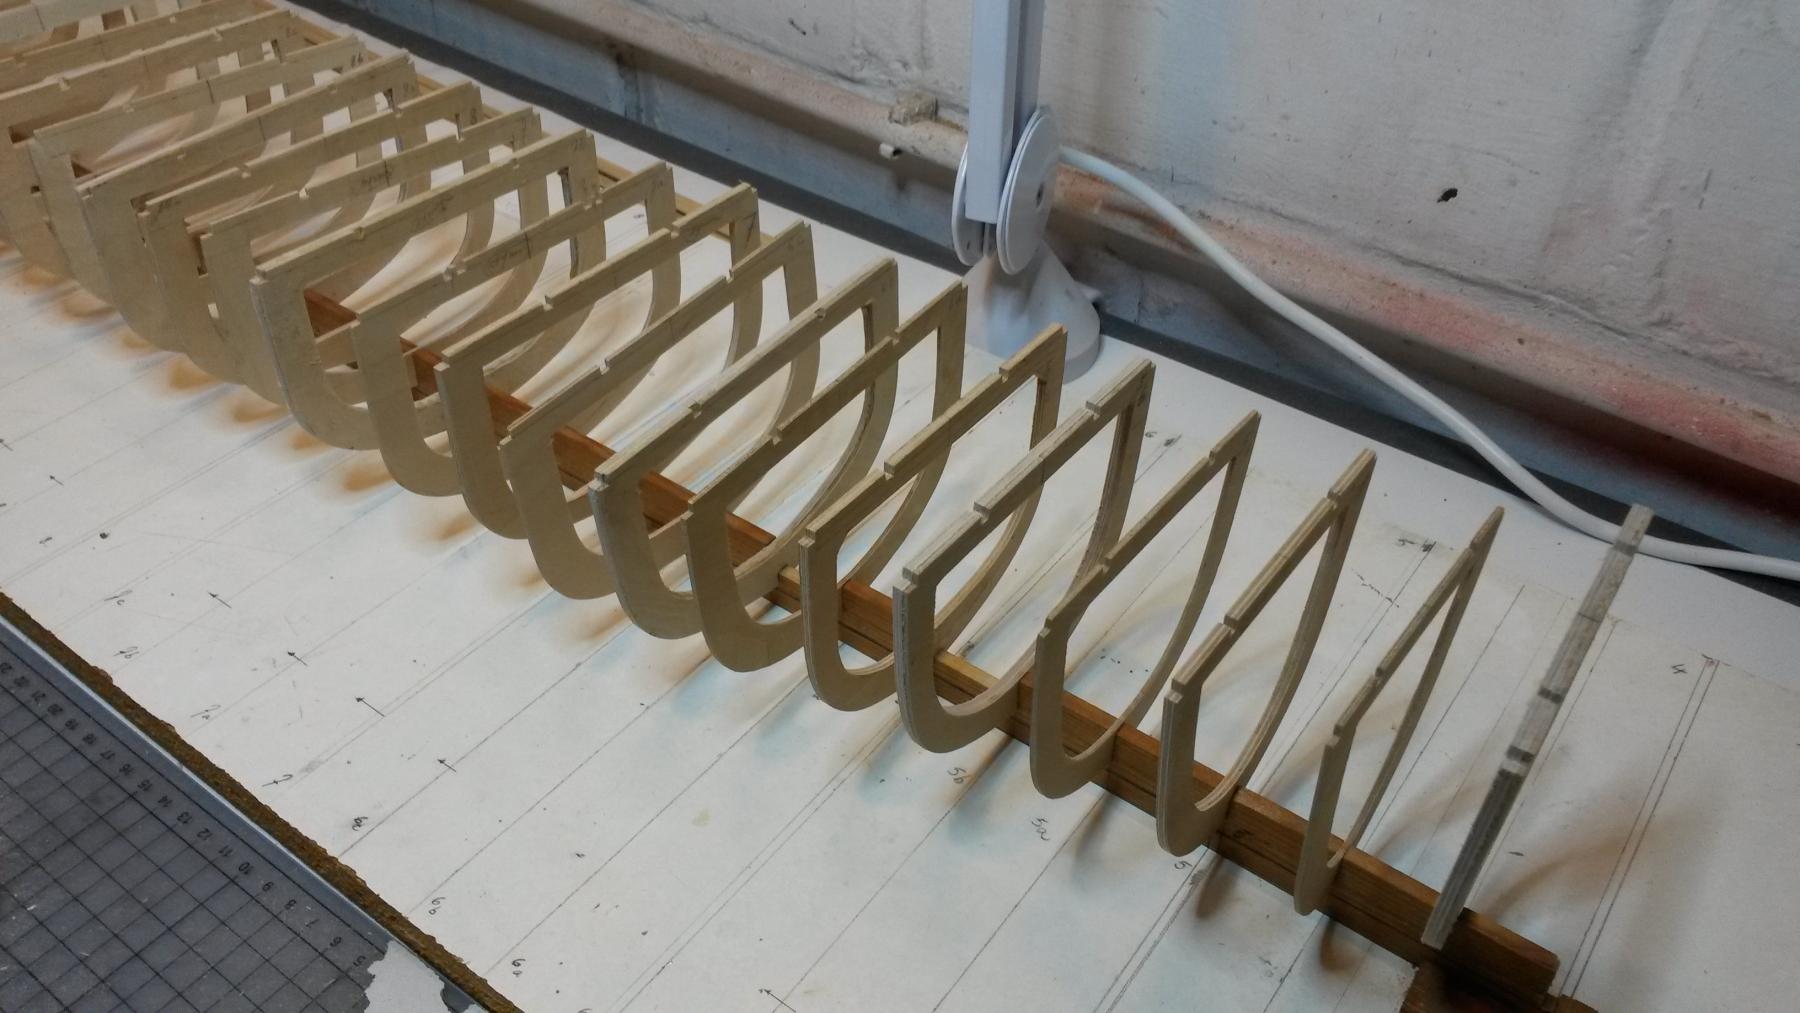
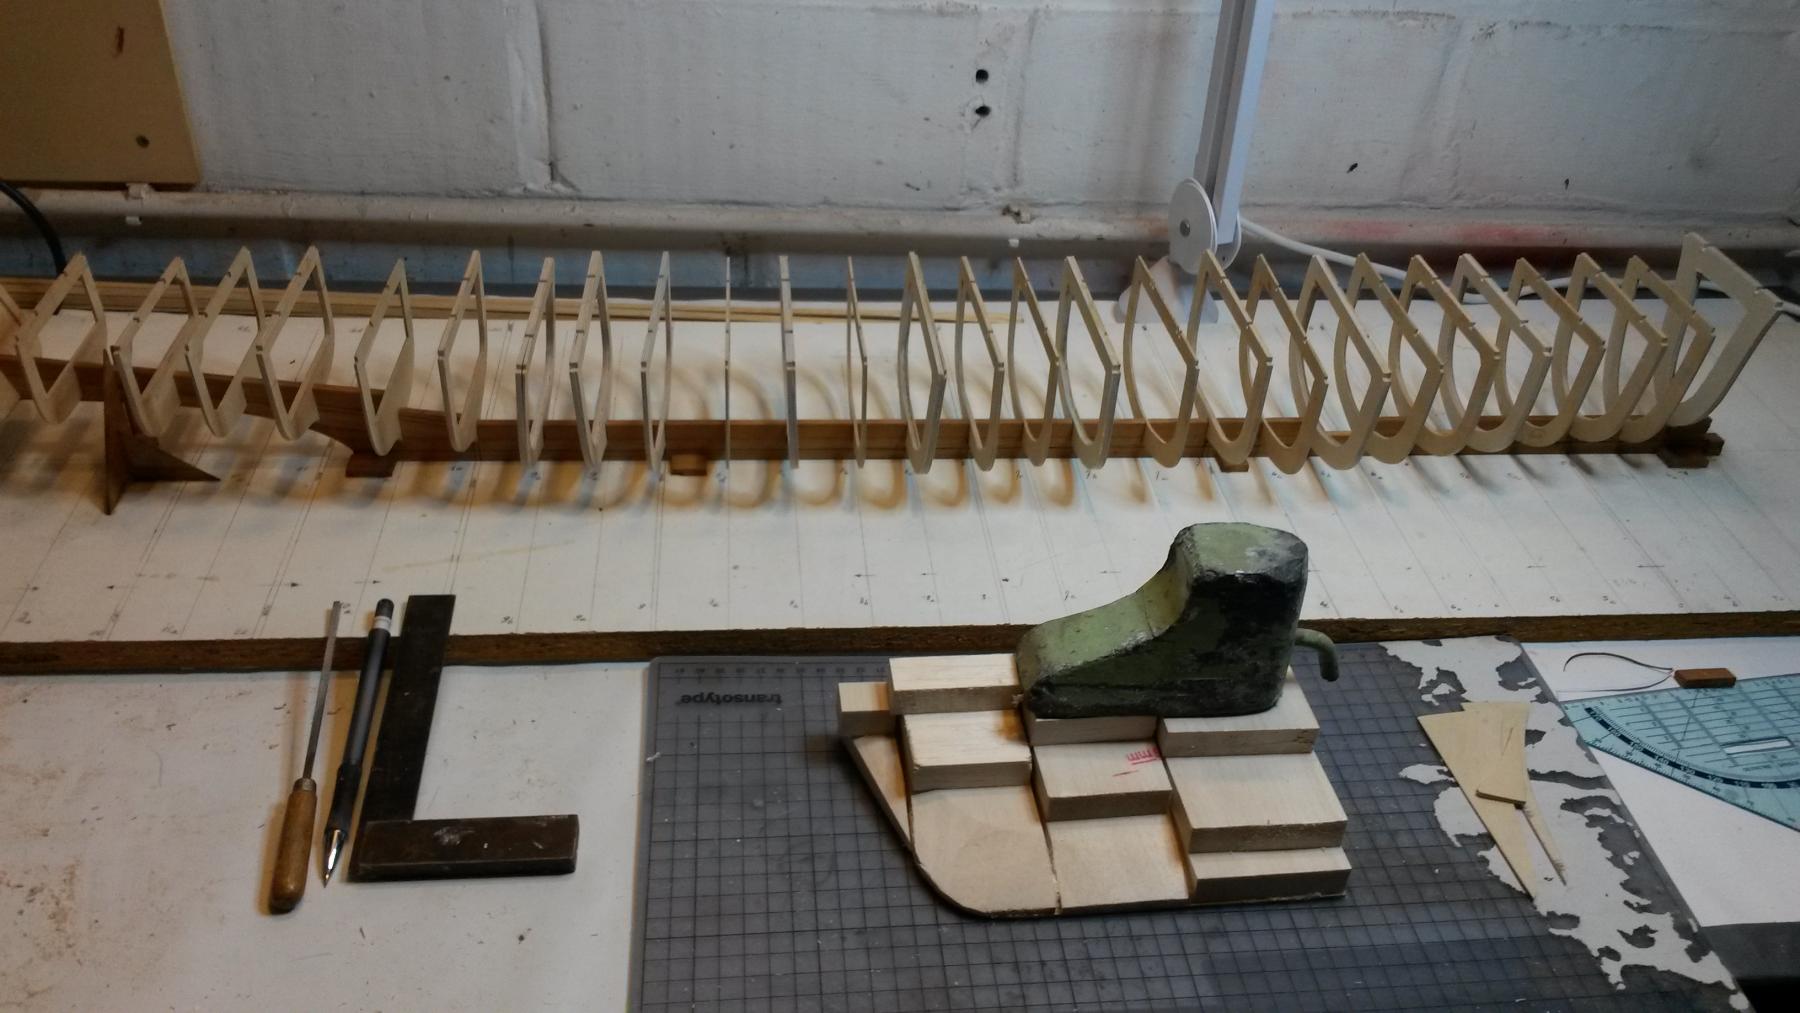
Have decided to build the model upside down as this will make planking an easier process. Have therefore inverted all of the frames and installed them upside down on a pedestal, which will vary in length according to the height of the hull for every frame along the length of the waterline. As there is a fractional difference between the depth of the keel viz the waterline I am making allowance for that as well, but especially for the noticeable raised forecastle so typical of the Leanders.
There are really 4 different parts to the hull, two of which fall between the flush deck making up the larger part of the hull starting from the stern on the one hand, and the raised forecastle on the other : one is a very gentle upward slope along the front end of the superstructure and under the gun, the other the 'step' containing the rear set of breakwaters and leading up to the forecastle itself.
A lot of calculations and careful fixing followed ! Each of the frames has been attached to a vertical piece of wood, which will then in turn be fixed at a square angle to a bar which will be screwed into the base board at the exact framing spot. The keel and stringers can then be attached thereto once all the frames are in place.
I have used nuts and bolts so as to facilitate the removal of the support struts once the hull is fully planked and turned back to normal, before starting on the decks.
After that I will be able to start planking the hull, hopefully next weekend if I manage to get a few evenings work in this week !
Some photographs to show progress....slow but getting there.
E
- mtaylor, hexnut, SailorGreg and 5 others
-
8
-
Hi Jason,
Now there is a coincidence, if ever I need some info on some tiny bit of undocumented kit I will call on you :-) Were you with her in San Carlos
Been doing some sanding on the bow section, a lot of dremel and manual work, with a dust cloud to match ! Still not quite there but started to get cramp in my arm....
- Old Collingwood, hexnut, mmdd and 3 others
-
6
-
Did a dry-assembly of the various frames on the keel and did some more work on the bows - filling the gaps between the first 3 frames, ready for sanding.
On second thoughts, I am now considering building her upside down, as this will make the planking process a lot easier I think. Need to have a ponder on how best to fix the frames so as to ensure a perfect fit with the keelson.
E


-
Caught out Bob, funny you should mention it - my dad was a shipbuilder, hence the provenance - you also taught me something, didn't know they were called 'ducks' - very useful piece of kit I find....
- mtaylor, Old Collingwood, hexnut and 1 other
-
4
-
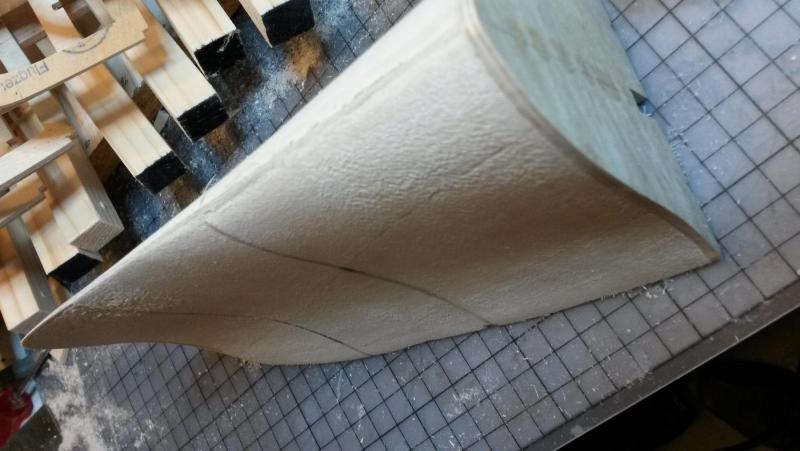
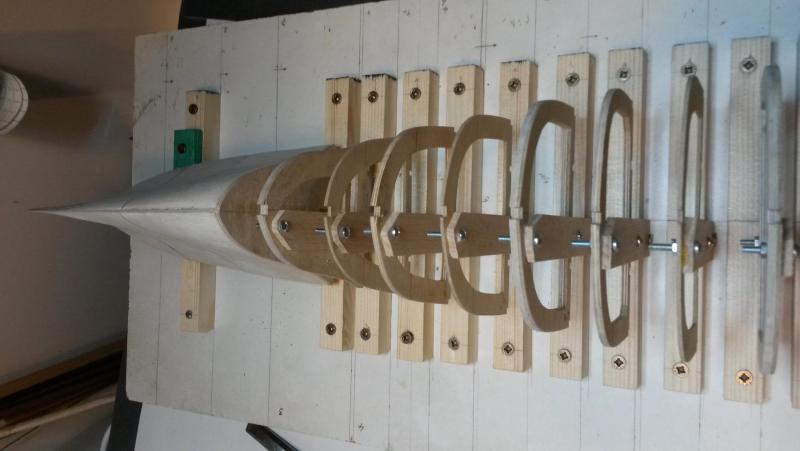
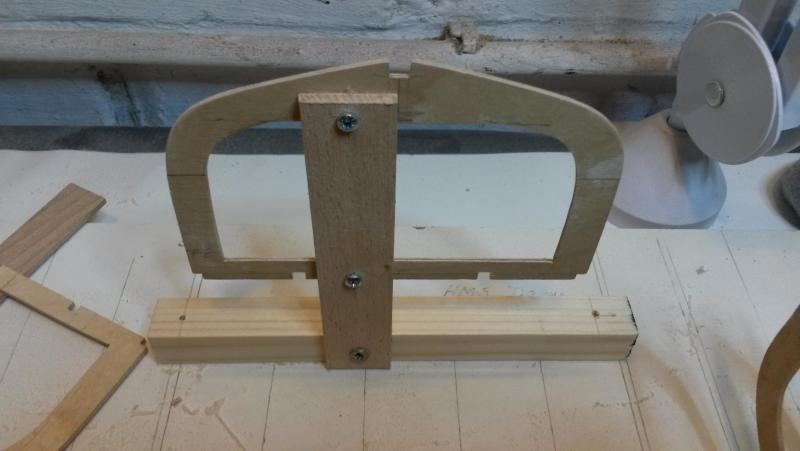
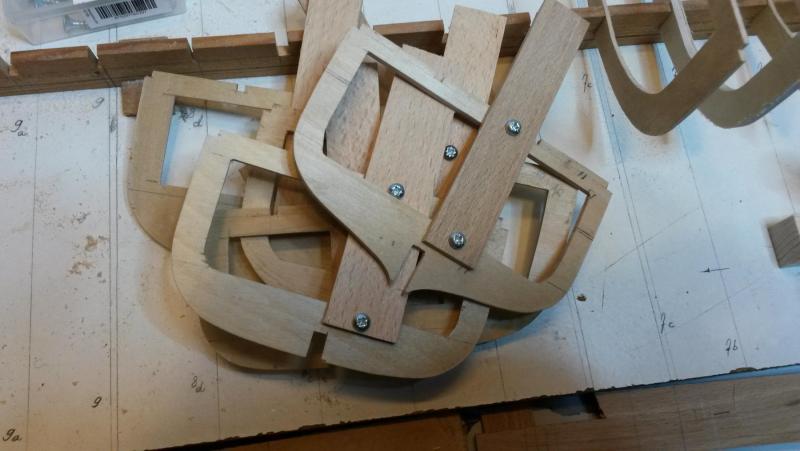
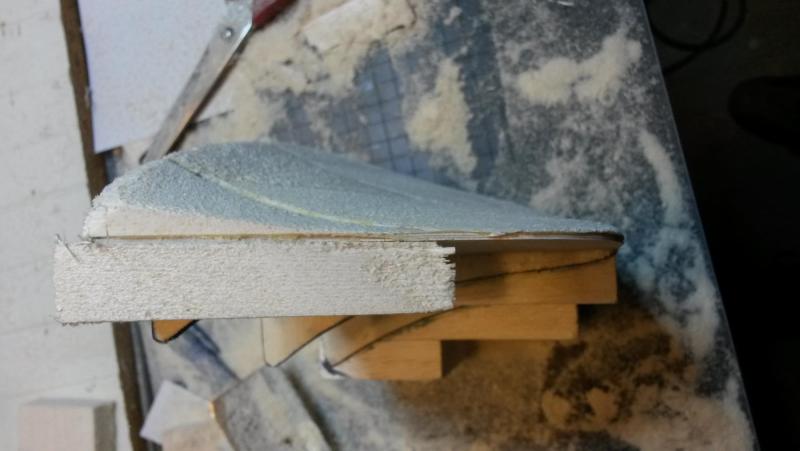
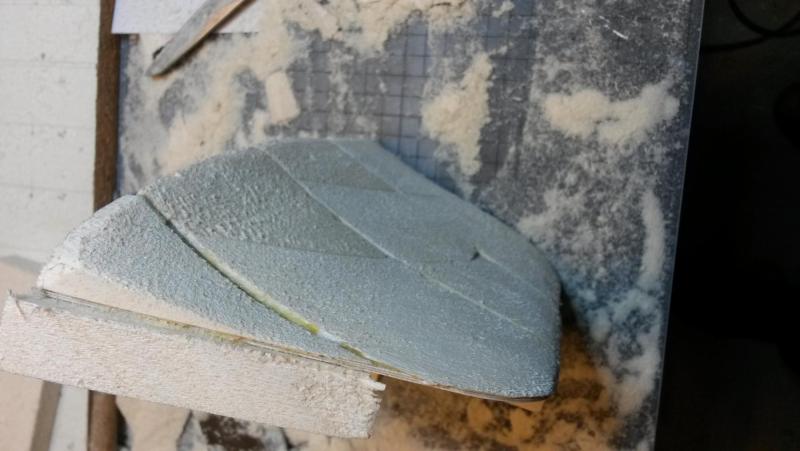
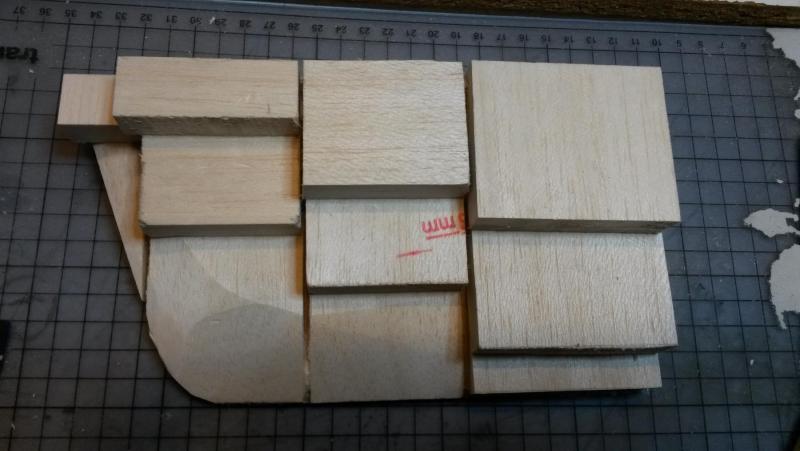
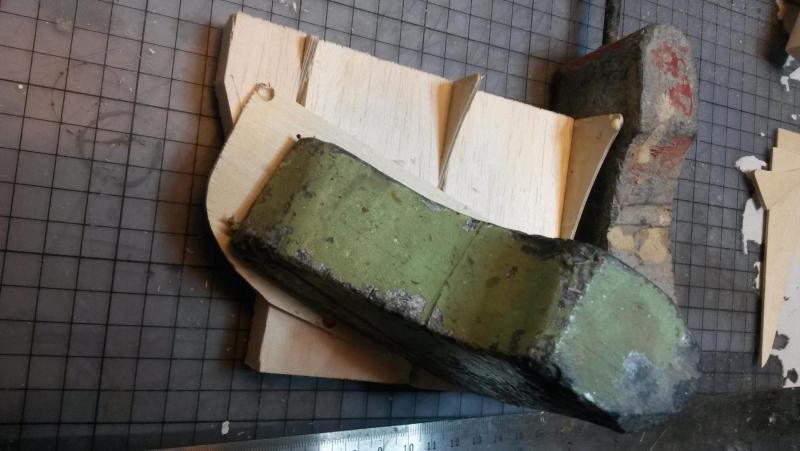
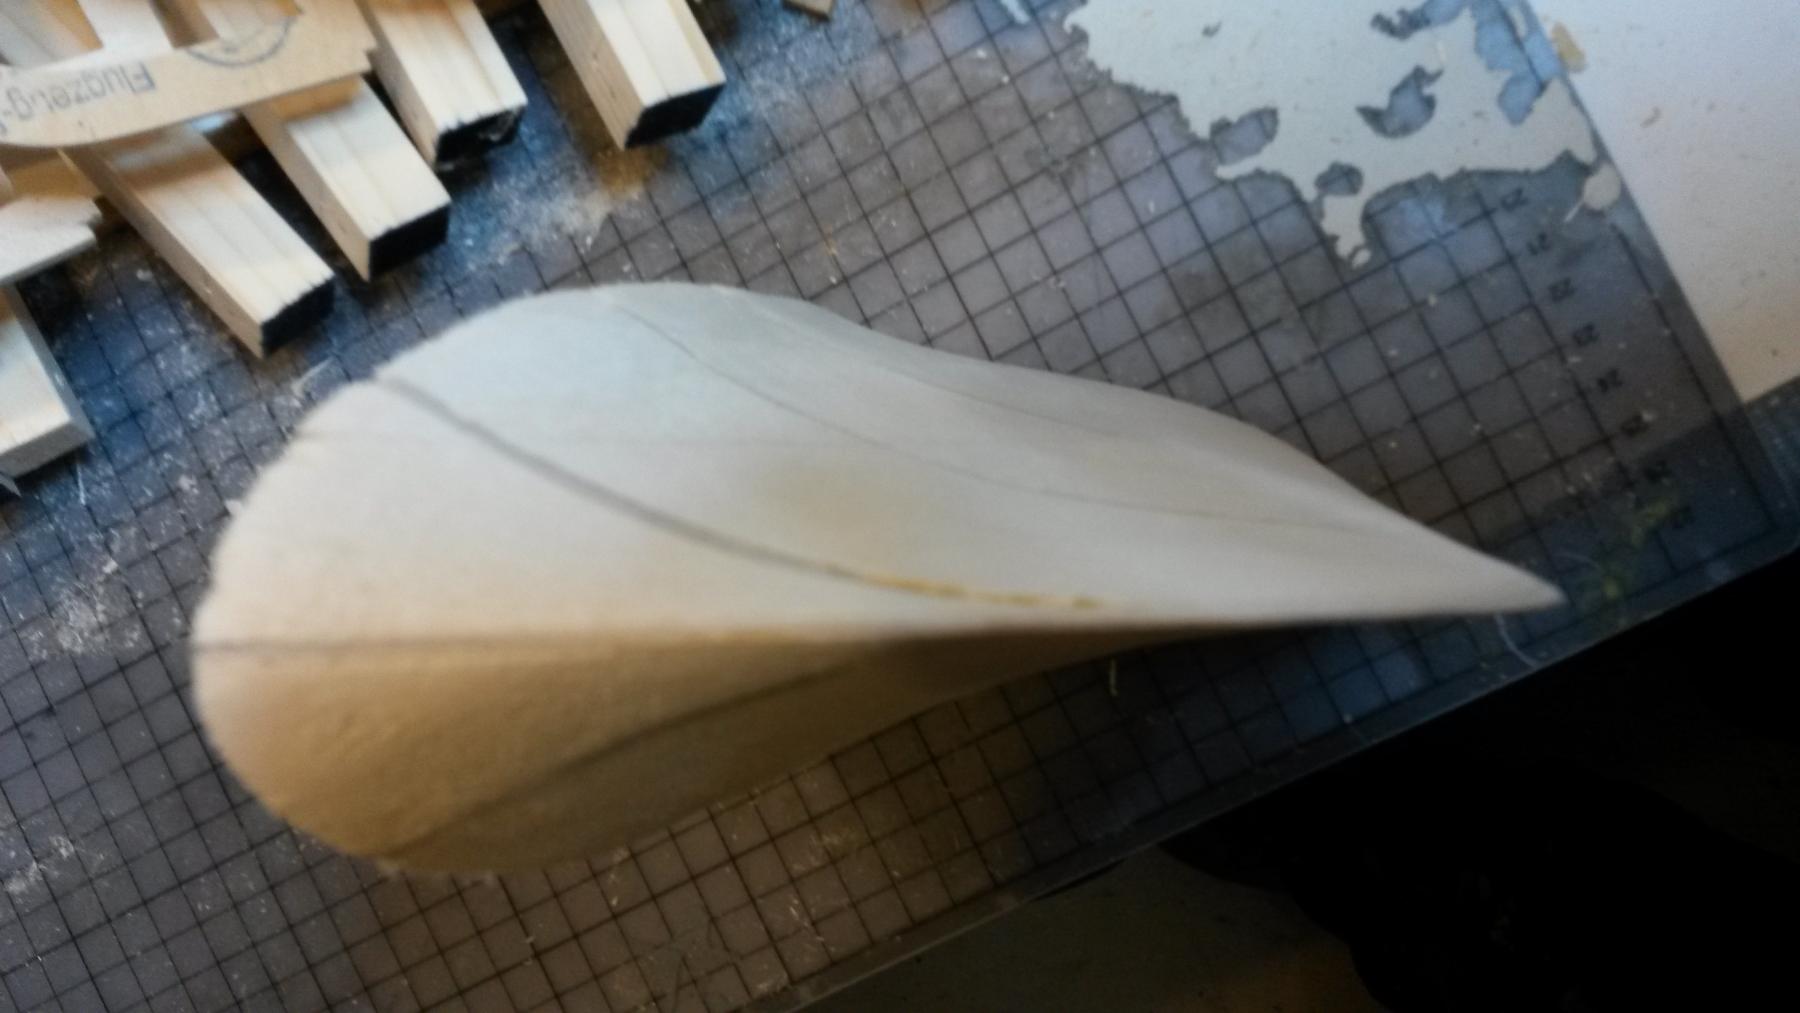
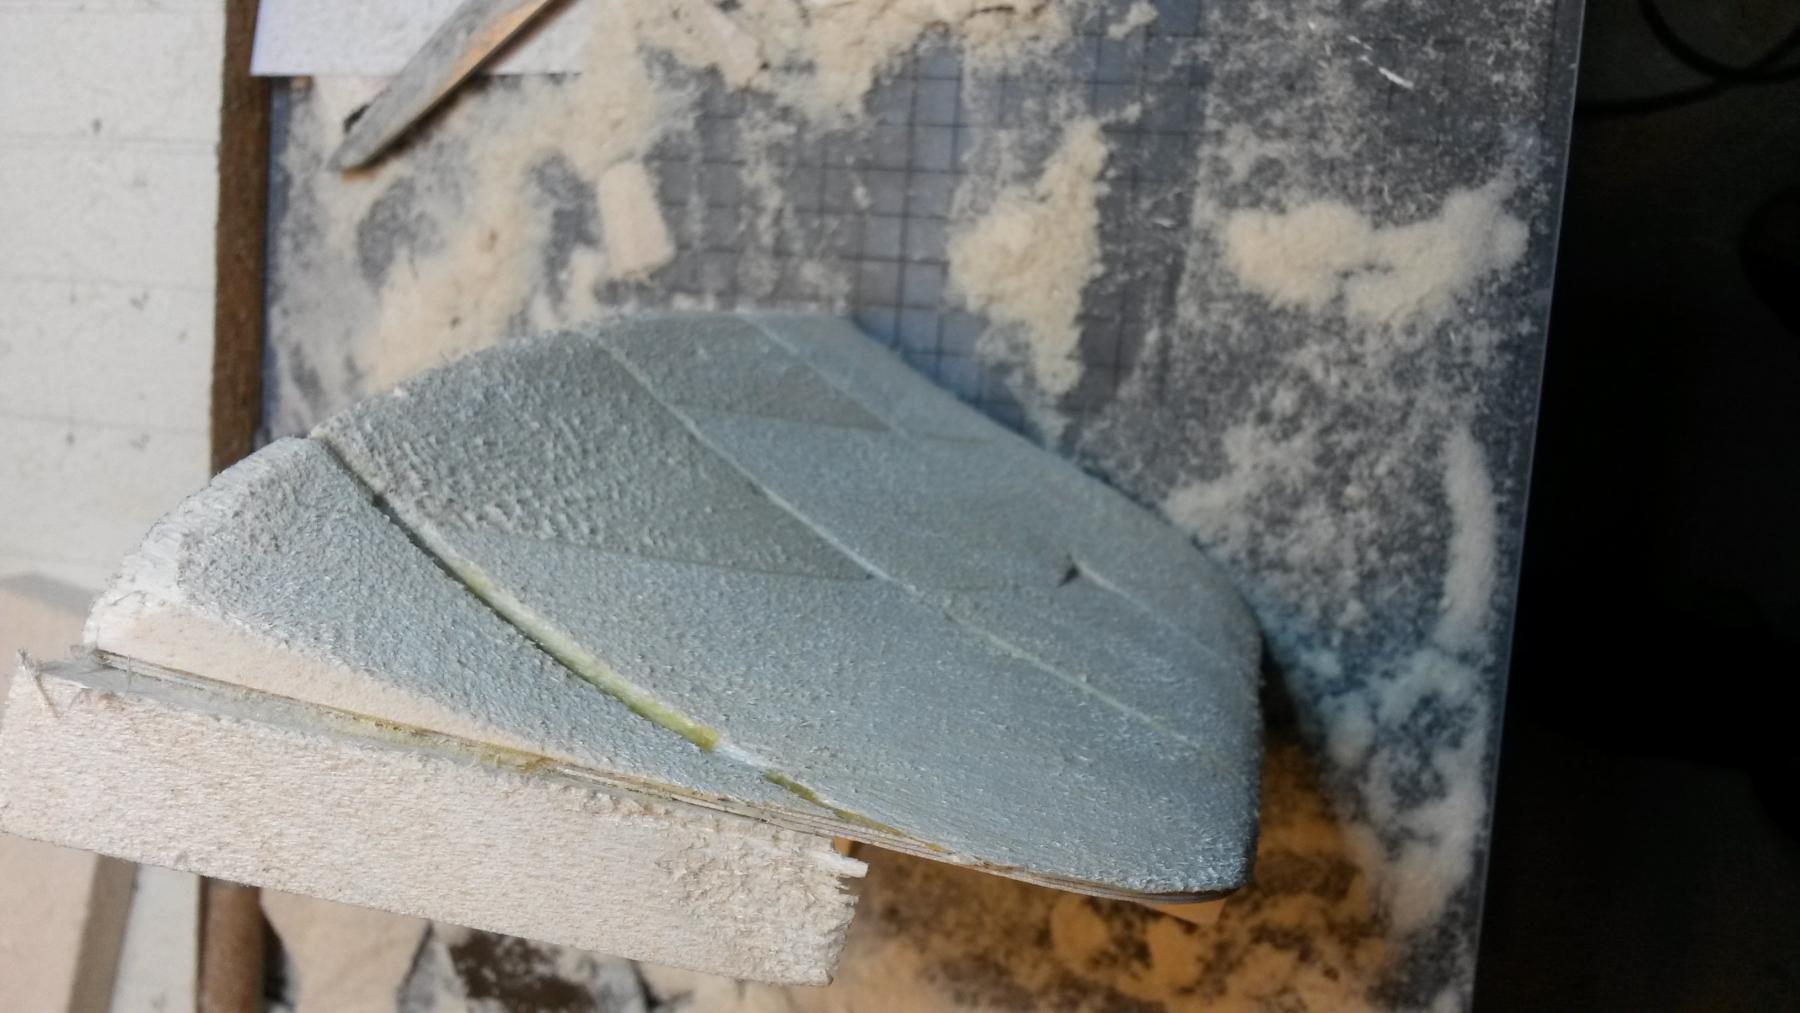
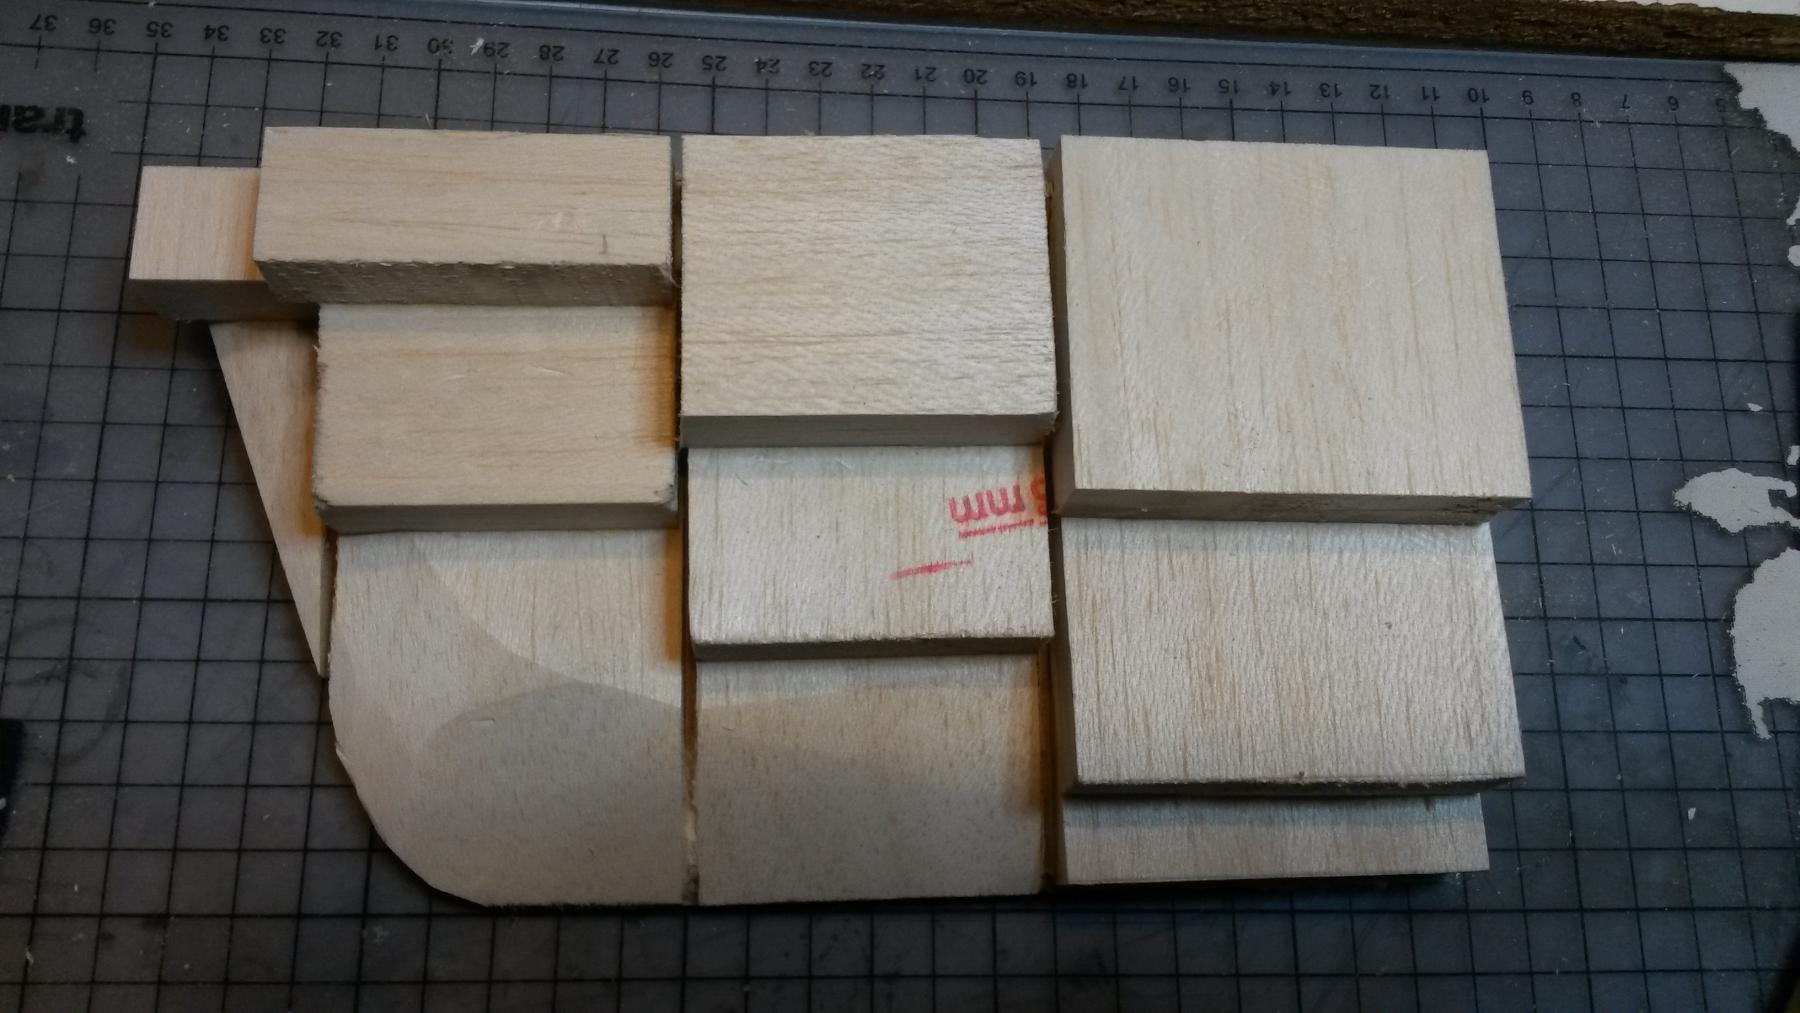
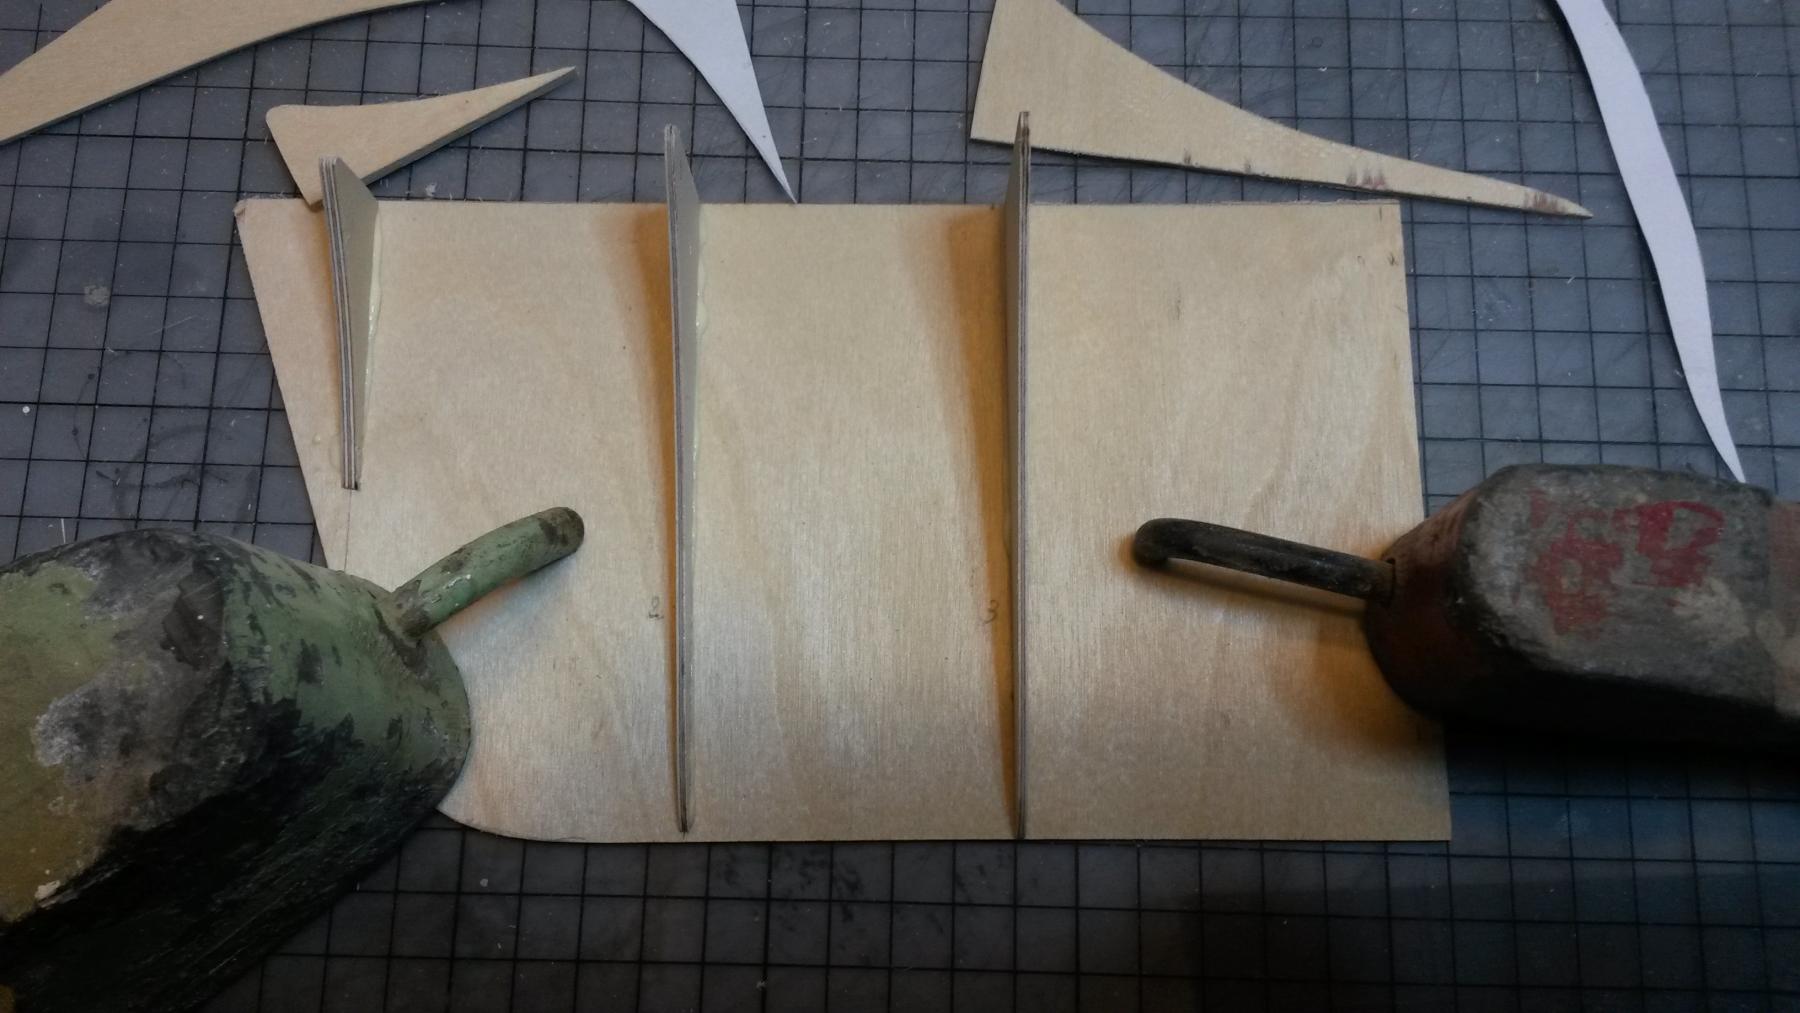
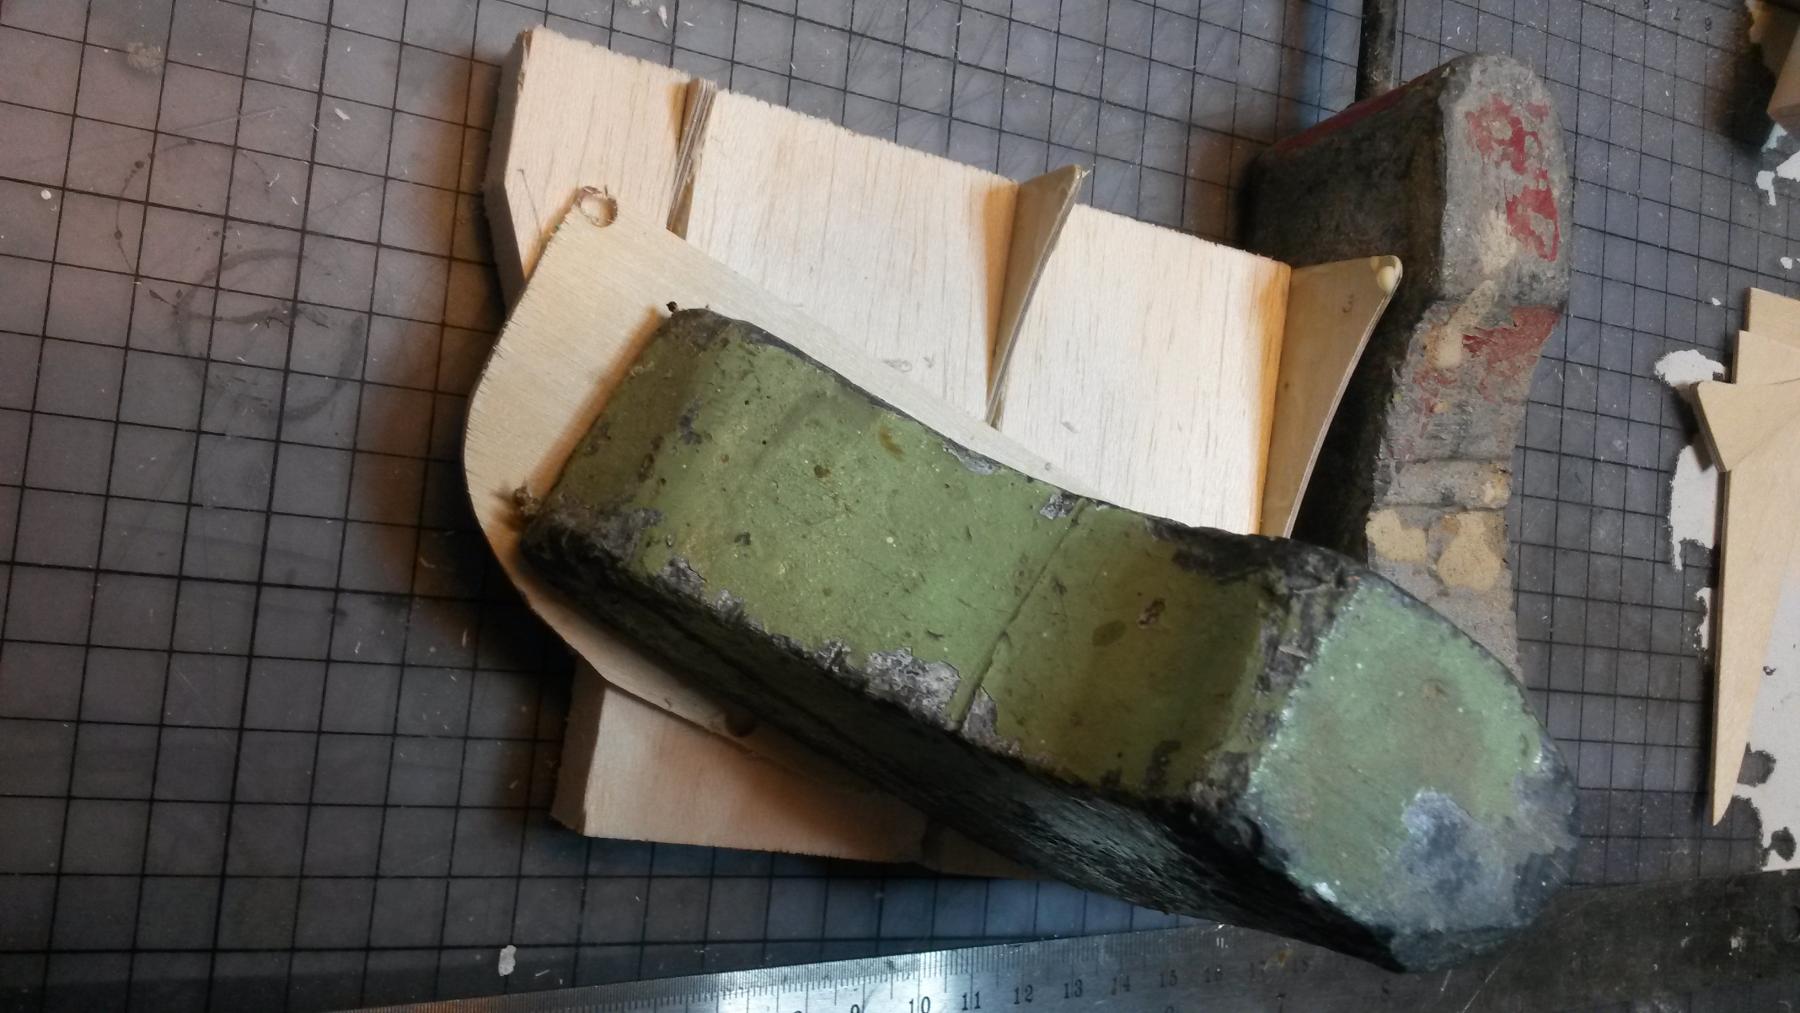
 Did some more work last night and a couple of snapshots to show how I went about the concave frames making up the bow section.
Given the likely problem planking this area, I will be adding extra supports between the three foremost frames, using balsa blocks which I intend to sand to shape before the planking comes on top.
Am using a fairly standard sanding mill together with my Dremel to get the frames in the right shape - quite handy and speedy process really.
The bow section is probably the most difficult part of the hull but absolutely critical to get right, as this epitomises the 'elegance' of the Leander class.
I am not sure if there are any experts on this platform but have also stumbled into an area that I need to research further; the ship's drawings show two small sonar domes jutting out of the keel, but the commercially available GRP hulls only display one ? Does anyone know what the real ships had, just one or two domes and does anyone have photographs of same ?
Thanks a lot
E
-
Thanks guys, will be good to compare notes.
Tom, I am not too sure but believe GRP stands for Glass Reinforced Plastic, basically fibrecloth drenched in resin and applied as a cloth. Need to do some further research regarding the application, yet another bridge to cross at some point.
E
- Old Collingwood, Omega1234 and mtaylor
-
3
-
I thought I'd try my hand at my own full framed and planked model for a change, rather than procure a GRP hull off the shelf.
Have full a full frames and sheer line drawings for a Leander class GP frigate, and am considering one of the first batch of narrow-beam and gun Leanders, probably in their mid 70's guise.
Am still considering the name of the exact vessel, as I am hesitating between a Variable Depth Sonar ship or not - no two Leanders were alike. I have decided that my model will have a rounded stem, as again, some of the later variants had a straight stem - I would be indebted to anyone who could provide me with a list of ships that fall in either category, as this is only partially documented.
As I have a good set of photographs of HMS Argonaut, I will temporarily dub this build as this vessel, but I may still change the name as I go along.
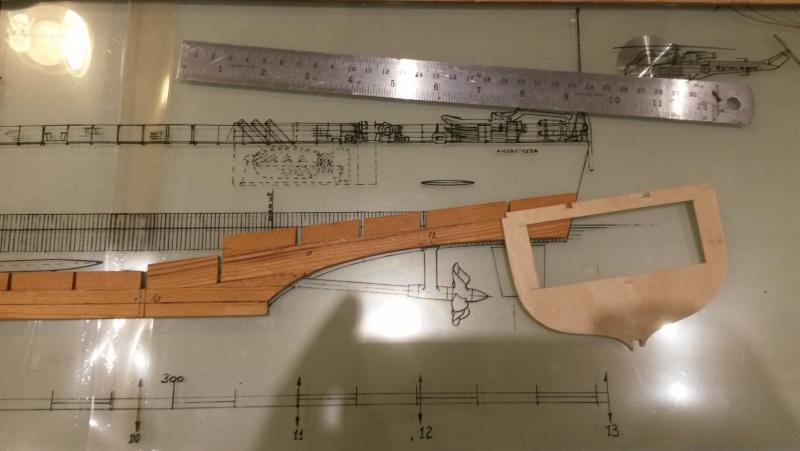
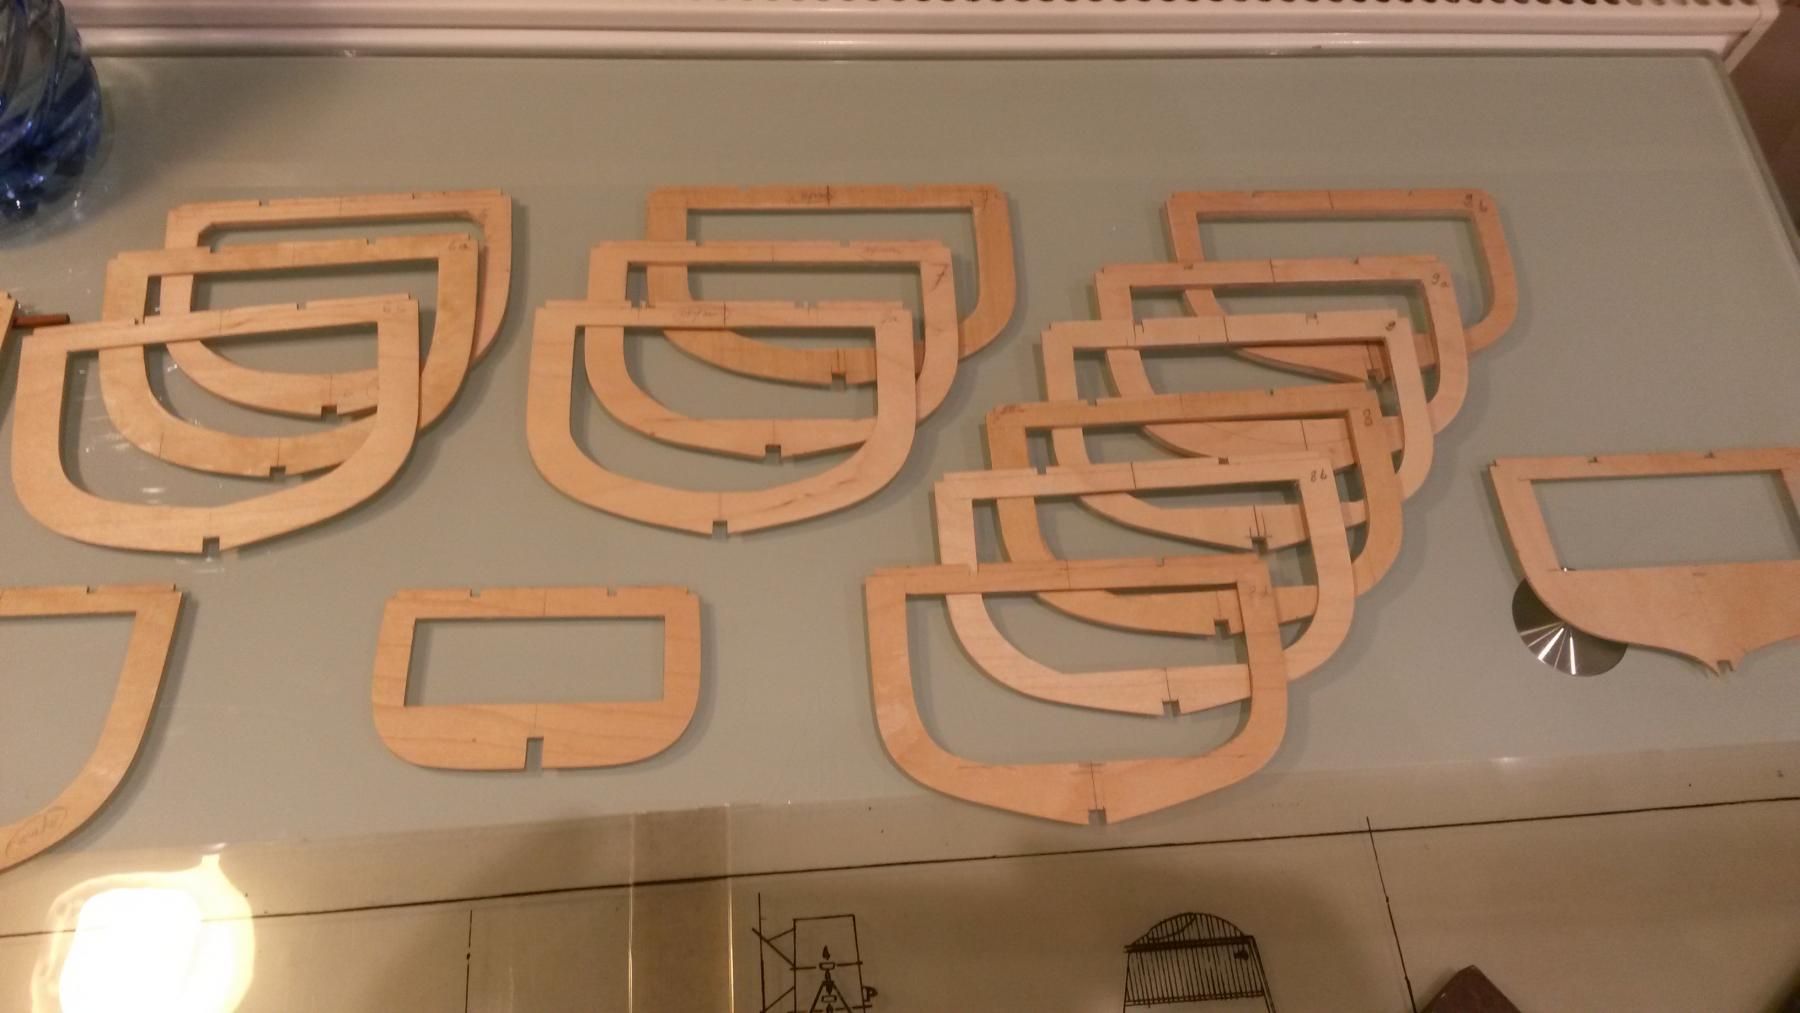
The photographs show the first set of frames, as well as a copy of the ship's plan. I am working off the Jecobin drawings, which are really good.
The frames are cut from 2 mm plywood, but it is clear that the main frames will need to be thicker and am doubling them up so as to get to 3 and 4 mm thickness. I am using the thinner ones a in-between supports along the hull.
As this model may become R/C, I have also been cutting out the insides of the frames to allow for motors and batteries.
This is a bit of a quantum leap in terms of my skills, never having tried a fully planked hull, and especially not one with as may convex and concave lines as a Leander but hey ho, can only fail once :-). Once planked I intend to cover everything with GRP, which will be another first.
The goal is to have the hull finished towards the end of winter.
Will keep you posted, and will no doubt be asking you forum members for tonnes of advice between now and then !
Eric

- GrantGoodale, hexnut, Omega1234 and 7 others
-
10


HMS Argonaut (F56) by crabbersnipe - 1/96th - Leander-class frigate
in - Build logs for subjects built 1901 - Present Day
Posted
Can't believe 4 years have lapsed since first starting this model but sadly this build started to slacken after a while due to various circumstances. However, pleased to advise we have picked things up again and whilst I am sure there is a considerable gap in my photo record let me already share the very latest to show where I am with things - finished the 4.5' gun turret last night, worked on the funnel and gave the superstructure some colour. Enjoy,
E