
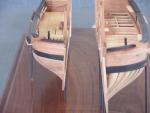
Supplies of the Ship Modeler's Handbook are running out. Get your copy NOW before they are gone! Click on photo to order.
×

dgbot
-
Posts
3,993 -
Joined
-
Last visited
Reputation Activity
-

 dgbot got a reaction from Omega1234 in SS Kaiser Wilhelm der Grosse 1897 by Mirabell61 - FINISHED - scale 1:144 - POF - first German four stacker of the Norddeutscher Lloyd line
Fantastic work Nils. I wonder if you have ever done any resistance soldering?
David B
-
 dgbot reacted to captainbob in SS Kaiser Wilhelm der Grosse 1897 by Mirabell61 - FINISHED - scale 1:144 - POF - first German four stacker of the Norddeutscher Lloyd line
Beautiful work. You are always showing us new ways to do things.
Bob
-
dgbot reacted to Mirabell61 in SS Kaiser Wilhelm der Grosse 1897 by Mirabell61 - FINISHED - scale 1:144 - POF - first German four stacker of the Norddeutscher Lloyd line
update
Build log part 30
today I`m starting with the forecastle railing, 8mm high in scale 1:144.
Base for soldering on is a L-shape brass profile, the railing is from 0,3 mm thick photoetched copper, the soldering is done with the small gas tourch, electronic solder and paste-typ flux
The brass L-profile is gently bent to follow the rim of the deck planking
Nils
L-type profile
0,3 mm photoetched copper railing
Shaping / bending the L-profile
positioning for to solder, little bits of solder every 15 mm appart
carefuly handling the heat flow.....
soldering done, and primercoat applied
the aft side (forecastle) still needs to be dressed
trust this shall be a sufficient way of fastening the railing
-
 dgbot got a reaction from maggsl_01 in Endeavour by maggsl_01 - FINISHED - OcCre - 1:54
Congrats Max. your version of the Endeavor is fabulous.
David B
-
dgbot reacted to Turatopgun in Sir Winston Churchill by Turatopgun - Billing Boats
Thanks for the info Guys.
I have sanded all the bulkheads and found that whilst the burn from the laser has been sanded off, the centre part of the ply retains a dark colour which may appear to look burnt. The planking so far appears to have held, but I have also run a smidgin of glue on the inside of each bulkhead where the planks touch.
You will note from the photo which shows the planking done so far, that the planks at each end appear uneven. This is how they are; however, they are flat to the bulkhead and have enough thickness to be sanded evenly. As I mentioned previously I am taking things easy and slowly with regard to the planking and will attempt to dry run it before finally glueing. Hopefully I will not let you down,
Thanks again
PhillB
-
dgbot reacted to SawdustDave in Sovereign of The Seas by SawdustDave - FINISHED
Quick update....
The first pic is the way the port side looked before I began ripping it apart....
Here's how it looks now....after moving moldings, trims, windows, and either moving or replacing all of the original carvings....
And here's the little badge I've been working on the last few days....
That big blank panel to the left is the next focus.... not sure what will go there yet, but feel it has to be pretty special considering the size and prominent location.
-
dgbot reacted to rwiederrich in Young America 1853 by EdT - FINISHED - extreme clipper
fine work Ed. Very Fine. Being in the dental Field..the lost wax cast method of reproducing quantity is a great direction if you have the oven and the casting machine. Many Dental supply houses have older/used equipment that can be had relatively inexpensively. But like you said...it's kinda tough asking folk to do that. I usually make/fashion a master and then duplicate it in silicone and then pour/cast plastic/acrylic replicates myself. I gave up on fashioning metal parts for my vessels a while ago(Unless it's a special part)......High impact acrylic is easier to work and finish and once painted is just as convincing. IMV
I applaud your skill and application of it.
Rob
-
dgbot reacted to maggsl_01 in Endeavour by maggsl_01 - FINISHED - OcCre - 1:54
Hello my friends
yes - it is done. My interpretation of Mr Cooks famous Endeavour is ready. I finished the build, only a stand (ordered) and a hood will be necessary. But this is just a final moment.
It is almost one year that I spent with the Occre kit. The building was always a fun to do although there were some tricky steps to take. Especially the instructions are something to criticize - and here indeed the instructions for rigging and the sails. They are too superficial and do not show the details for many things.
Nevertheless - all at all I would recommend this kit with good conscience to a modeller with some expierence. You can improve the model with additional items like the buoys for the anchors, the covers for the windows or additional rigging like the backstays for the topgallants. Therefore it's good to take a look at the AOTS Endeavour.
I will later take pics when the stand is done and create a gallery. The next time I will take a break until the next model will be on the desk. I am not sure if I start with the Friedrich Wilhelm zu Pferde by Euro Model orf the Fregatte Berlin by Corel. Well, let's see
CU
Cheerio
Max
-
 dgbot got a reaction from Elijah in Sir Winston Churchill by Turatopgun - Billing Boats
Phil, another thing you can do is fill in between the bulkheads. This will give you more glue surface and make it so that your planks will lie properly,
David B
-
dgbot reacted to Omega1234 in Majellan by Omega1234 - FINISHED - 1/200 - Luxury 37 m Motor Yacht - Miniature
Thanks Piet!
I hope that I'm up to it, too. Otherwise, if it looks crappy, I'll make sure that my photos will be 'accidentally-but-purposefully' blurry!!!!!
Let's hope not, though! But, it'll be fun, nonetheless.
Cheers and all the best.
Patrick
-
dgbot reacted to Landlocked123 in Tool for Shaping Brass Strip
Joel, Mark, et al,
Scroll down in this forum and you will see a thread called re-hardening brass. The basic answer is: one can't.
I'm having a bit of a hard time imagining when you would need to do it. Under almost all circumstances where I'm worried about strength, I'm sure to silver solder my bands, eye-bolts, or whatever. There's a small learning curve but I now find it easier than soft soldering.
Best,
John
Joel,
Here's the pic.s and links
http://www.micromark.com/parallel-jaw-plier-flat-nose-with-straight-jaws,11523.html
-
dgbot reacted to janet bode in Red Dragon by janet bode - Artesania Latina
To all who may have been following my build of the Red Dragon,i must apologize for no more pictures.At this moment i am very unwell,i had two
heart attacks in 2012 from which i have recovered,unfortunatly i was prescribed Statins these i have taken since then.If any one
has read the Sunday newspapers you will realise this medication has devestated my life,a completly and a fully untested drug has
put me in a wheelchair and at this moment i can do very little for myself.As i have now ceased taking this drug i hope in time i will
recover to further enjoy this wonderfull hobby. My Dearest Regards to all. Janet B
-
dgbot reacted to druxey in Greenwich Hospital barge of 1832 by druxey - FINISHED - 1:48 scale
Well, there's been a little progress made between other projects. I decided to revise the scheme of planking butts and I'm happier with the new layout. The plug has been cut back along the central spine (arrowed) to ensure that it will not become accidentally glued to the plug while planking. The tiny transom has also been added and bevelled to conform to the plug's contours. The overall photo shows six small brass pins in place to secure the keel while installing the garboard strakes.
Next up will be to wax the plug, then cut some very thin planking stock to ¾" thickness.
-
dgbot reacted to druxey in Greenwich Hospital barge of 1832 by druxey - FINISHED - 1:48 scale
After some re-working of the planking runs, I've devised a scheme for the shift of the butts and marked these on the plug.
Now that the 'non-boat' work is almost complete, it's time to get back to the actual model. I needed to devise a method of keeping the keel straight on the plug. If not stabilized, it will deflect as I fit the garboard strake. My solution is to drill small holes at intervals along the plug, then set sharp-ended pieces of hard brass wire, points uppermost. The keel will be pressed down onto these points. The resulting holes will be hidden under the keelson later on.
-
dgbot reacted to mtaylor in 18th Century Longboat by BobF - FINISHED - Model Shipways - 1:48 - Tri-Club
There is Bob. It's called MSW.
-
dgbot reacted to BobF in 18th Century Longboat by BobF - FINISHED - Model Shipways - 1:48 - Tri-Club
Thanks, Toni. I have to admit that I was already having second thoughts. I noticed this odd fitting at the bow. What could it be for? Hmmmm.
I wonder if there is a support group for addicted kit bashers?
BobF
-
 dgbot got a reaction from Canute in Echo by Maury S - FINISHED - Cross-Section
Maury, blackening metal can be problematic at times. A few years ago a club member gave a demo/talk on blackening metal at a club meeting that I think would help out a little. Once the part as been cleaned and degreased it was pickled in a hot Sparex bath. According to the member this gave the part some tooth and allowed the blackening agent to work. And he used Caseys Brass Black. Since the stuff is a mild acid I think a long soak in white vinegar might do the same thing and be a little safer.
David B
-
dgbot reacted to foxy in HMS Victory by foxy - Heller - 1/100 - PLASTIC - with Dafi's etch & resin set
Cheers Daniel and Lawrence, much appreciated matey's
Well have mounted both fore and main lower yards, then its the Mizzen lower.
This will have no sails,(better visibility).
Main yard.
Over all picture of the progress.
With the weather turning very cold and with two heaters, its been hard on me old bones.
Very pleased with the progress so far.
The next stage is the upper yards, these with full sail is the plan.
Plus the top sails.
foxy
-
dgbot reacted to Livingstoneman in USS Constitution by Livingstoneman - Model Shipways
Today I finished the gun ports on the starboard. Took 3 days but I am satisfied. Now to do the port side.
-
dgbot reacted to RGL in SMS Emden by RGL - FINISHED - Revell - 1/350 - PLASTIC
There are coal bunker vents on the plans but not on the kit, so i used some coal scuttles on the sides to represent these. As you can see the Eduard Etch is engraved, but the addition of actual doors and windows makes a world of difference, these will need to be washed and dry brushed yet, but a lot of these details will be hard to see on the completed ship.
I still need to add some more hatches and fire hoses but they do not need to go on yet.
-
dgbot reacted to RGL in SMS Emden by RGL - FINISHED - Revell - 1/350 - PLASTIC
Now going off the Huff plans, I decided to start painting and detailing. As you can see from the plans, there is very little difference but very little detail. the MK1 designs german doors was also added the ever increasing list of aftermarket.
-
 dgbot got a reaction from WackoWolf in Echo by Maury S - FINISHED - Cross-Section
Maury, blackening metal can be problematic at times. A few years ago a club member gave a demo/talk on blackening metal at a club meeting that I think would help out a little. Once the part as been cleaned and degreased it was pickled in a hot Sparex bath. According to the member this gave the part some tooth and allowed the blackening agent to work. And he used Caseys Brass Black. Since the stuff is a mild acid I think a long soak in white vinegar might do the same thing and be a little safer.
David B
-
 dgbot got a reaction from riverboat in Sir Winston Churchill by Turatopgun - Billing Boats
Phil, planking on a model is the same wheather it is a k or scratch built. I would go with Chuck's tutorial before Billings. Plus show what you have done so we can follow along.
David B
-
dgbot reacted to Cannon Fodder in Swift 1805 by Cannon Fodder - FINISHED - Artesania Latina - Scale 1:50 - Second ship built
Here is the current state of this build. It is on hold due to my 4.5 yo daughter getting a hold of a black felt tip marker and making some enhancements. I was able to sand much of it off, but there is still work to be done. I am also still stick on the wood business from above. I started a mother model in the meantime.
-
dgbot reacted to Turatopgun in Sir Winston Churchill by Turatopgun - Billing Boats
Well this is it. I have started Sir Winston after reading so many logs and build instructions, after buying the necessary tools and finding all the various web sites re wooden sailing ships. I spent the first few hours (and they went so quickly) on cutting out the bulk heads and sanding them. The next day I glued them in. I used an old paint brush and 'Titebond' wood glue. Worked very well too.I made a couple of small errors but fixed them up and all is ok. Yesterday I started the planking and am following the method suggested by Billings and by looking at the photos provided. It appears to be going ok although I have only put on two planks...hmmmm. Reading Chucks planking guide it appears that his is more for scratch built boats so I am just going ahead the way Billings suggest. We shall see if it works. I am enjoying it at the moment and can't wait to get into it today. I will attempt to take a photo and upload it for my next log in.
Critical comments are welcomed as long as they are positive criticisms.
PhillB
(Turatopgun)