HOLIDAY DONATION DRIVE - SUPPORT MSW - DO YOUR PART TO KEEP THIS GREAT FORUM GOING! (89 donations so far out of 49,000 members - C'mon guys!)
×


EJ_L
-
Posts
2,246 -
Joined
-
Last visited
Content Type
Profiles
Forums
Gallery
Events
Everything posted by EJ_L
-
 Something I would suggest doing is to switch out the nails for wooden dowels. With the dowels being of a softer material that should prevent those bands and any indentations that the nails make. With bending remember that heat is your friend. With it, most of the wood used in ship kits will bend quite easily and so only a a few points are needed to physically bend the wood around. Check out this thread. It contains a video of planking by Chuck that is worth watching for a few tips on bending planks.
 -
Beautiful work! I am really enjoying seeing the different construction techniques you have been using. It is nice when I get to learn something new and I am doing that with your build. I am looking forward to seeing more of it as you progress.
-
Looks like you are off to a good start. I always enjoy getting in at the start of a build so I think I will pull up a seat and follow along.
-
Thanks Don. I agree, this stage will be a lot needle files, tweezers and knife work and not much in the way of power tools needed here. If something comes up I do still have my Dremel handy so I'm not completely powerless.
- 608 replies
-
- 4
-

-
- la couronne
- corel
- (and 1 more)
-
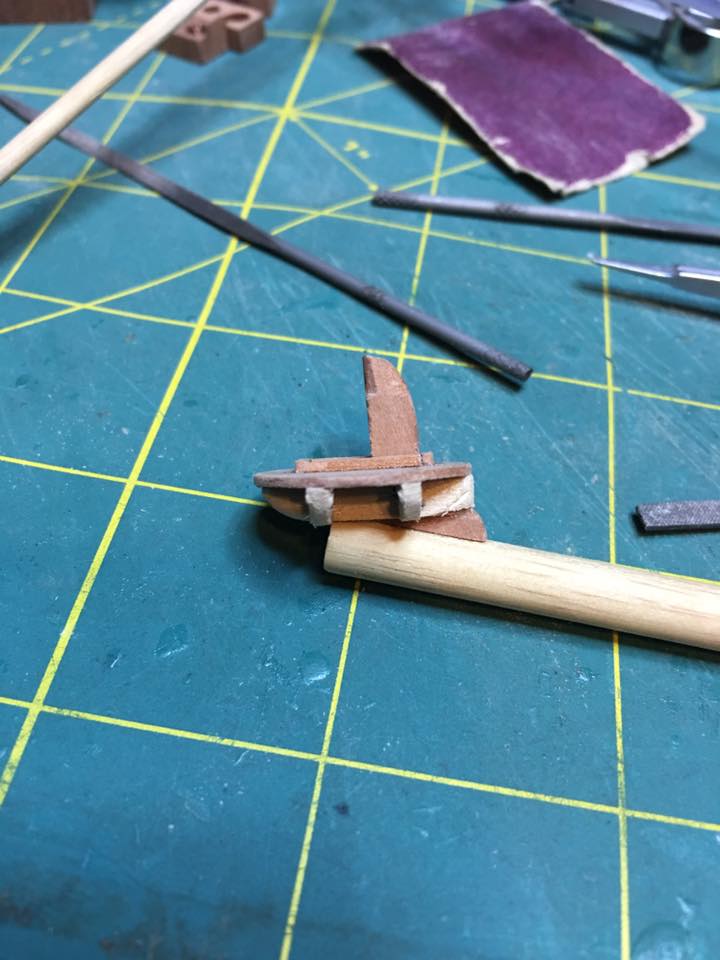
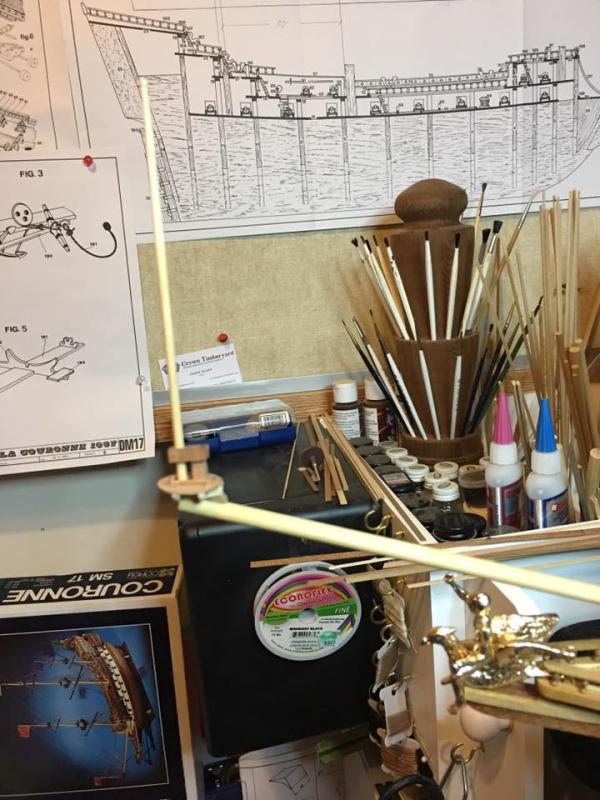
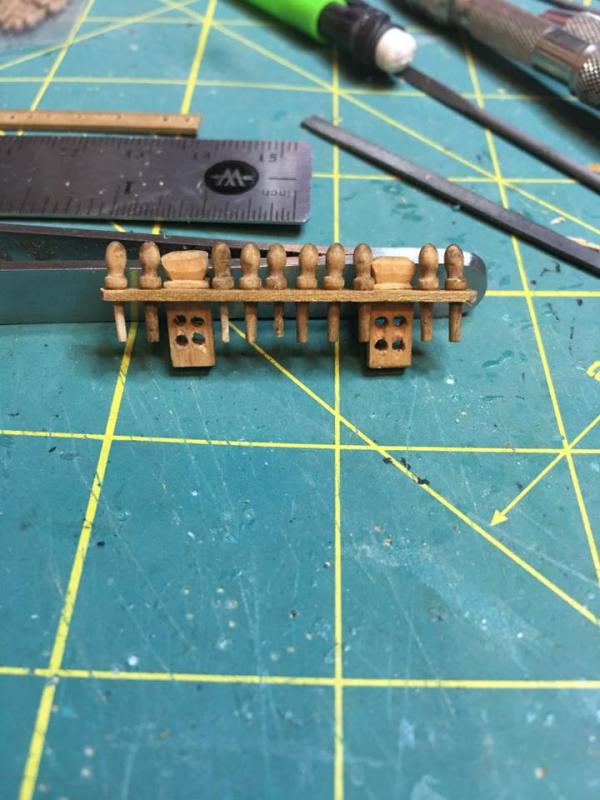
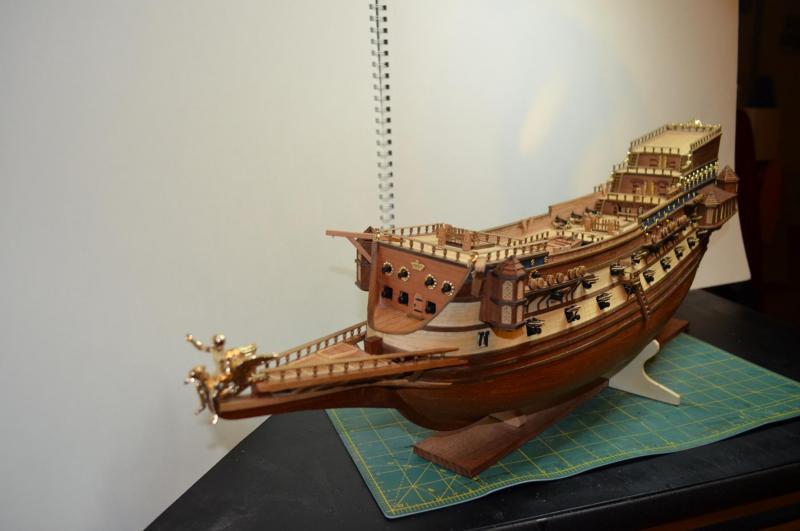
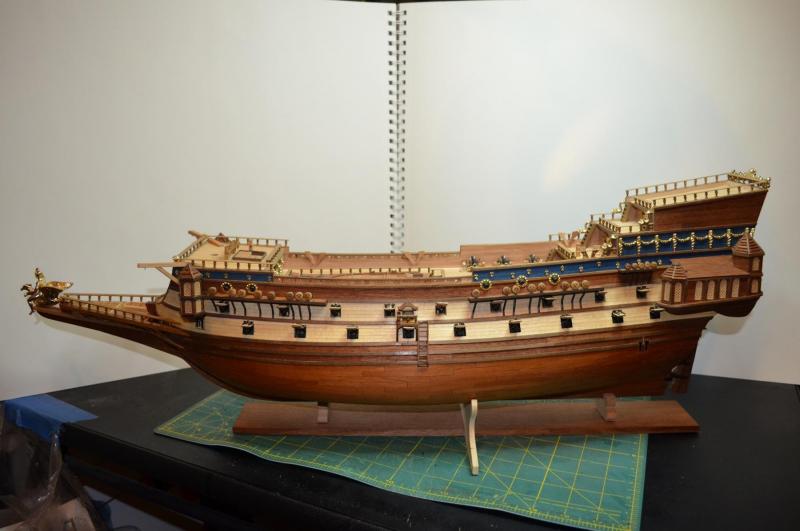
Been far from idle last night and this evening. Bowsprit is shaping up with the cross trees and knee mounted as well as the top platform. I have also test fitted the topmast as the out of focus picture shows. I will be making the railings and their supports next. Lots of delicate work involved in those. Wish me luck!


- 608 replies
-
- 12
-
-
- la couronne
- corel
- (and 1 more)
-
I've used rustoleum on many projects and have always been happy with the results.
- 213 replies
-
- 3
-
-
- la couronne
- 74 gun
- (and 2 more)
-
I will taper both ends slightly, just enough to knock the lower edge back in under the upper edge. Any further tapering I do is on the edge of the new plank butting against the previous one. This can vary depending on the curve of the hull. The more curvature, the more tapering is needed.
-
Whew! You still have a hefty list of things to do and I can't wait to see them! That is going to be a top notch ship for sure when you get her done. Well said about kit modifications. There is nothing wrong with building them straight from the box as many kits will make great models and are often excellent backbones for even better models. I think manufacturers know this and I would imagine that while they are proud of what they produce, to see it taken those extra steps and turned into something even more incredible while still maintaining the essence of their design, that has to make them prouder still.
- 473 replies
-
- 7
-
-
- greek bireme
- dusek
- (and 1 more)
-
I'm with Joe! Every year I hope for a nice dry winter. Snow is bad enough but here we end up with tons of ice which is even worse. Don't get me wrong, I think snow is beautiful. I love seeing it on pictures and in movies from my nice warm house. On the other hand, snow does give me time off work as well so that does mean more ship building..... Hmmm.... May have to rethink my stance on my anti-snow policy.
- 653 replies
-
- 4
-
-
- trabakul
- marisstella
- (and 1 more)
-
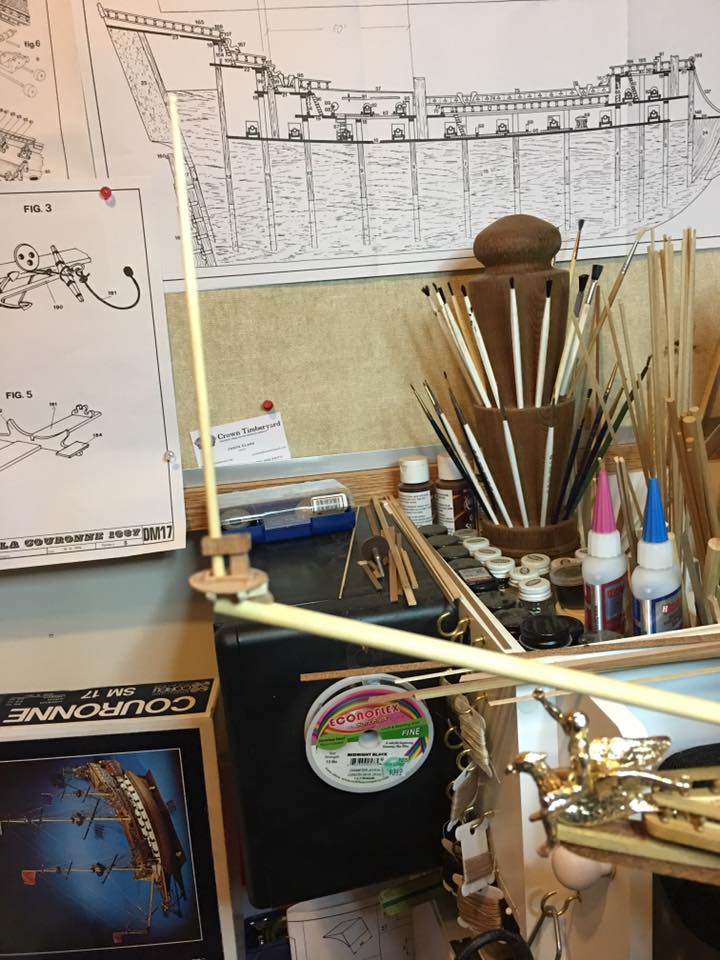
They have both been rapidly climbing my list of must haves for me and are now at the top of that list. Too many things I keep wanting to build and the need for more precision at the small sizes that we model in are making things difficult with my current set up of full size tools. Hopefully I can get USS Visa out of dry dock some time soon and take her for a cruise. In other news, the bowsprit construction has begun. After three long hours of work and reading I have managed to get it cut to length and carved the knee for the top mast. I have to give a lot of credit to Mr. R.C. Anderson for his works in both The Rigging of Ships in the Days of the Spritsail Topmast and Seventeenth Century Rigging as these have been priceless to me in figuring out both how to build the various masts but also in the rigging for them. His drawings and diagrams are excellent especially in Seventeenth Century Rigging as it has larger fold out pages with detailed drawings of many joints, connections, and rigging methods. Also the photos of actual models of the era are a great addition as it adds the three dimensional element which can sometimes make more sense than a two dimensional sketch. I would highly recommend these books to anyone building ships of this era.
- 608 replies
-
- 5
-
-
- la couronne
- corel
- (and 1 more)
-
Off to a great start! The pictures are nice and definitely help us to give you advice. Plus we all enjoy seeing updates of the progress even if it is only part way done. When you get to the last few planks and clamps will not hold, that is when you are forced to rely more on nails and pins to hold the boards down or you can just use CA glue and hold hem in place with your fingers for the minute it takes the glue to set up. That is what I usually do as it takes longer to set nails or other clamping devices then it does for the glue to set. As you come around the curve in the hull, make sure to taper the edges of the planks so that the top edges meet nice and flush with no gaps. That will make sanding easier later as you will not need any filler between them.
-
That is why I position a lot of my pictures so at least part of my bar is in the background. Always have a something to refresh my crew with after a long day at the ship yard and maybe a splash or two for the foreman when no one is looking... Excellent work! You sure are packing a lot of nice details into a small ship. I'm enjoying every update!
- 473 replies
-
- 5
-
-
- greek bireme
- dusek
- (and 1 more)
-
Great idea using those paper punch outs as shingles. Looks very time consuming placing them one by one but that is what makes a great model! You may have to do some mixing to get the right shade as most of the ready made copper paints I have are all on the bright side.
- 213 replies
-
- 4
-
-
- la couronne
- 74 gun
- (and 2 more)
-
She sure is looking good! Really like her colors. Just rain here but unfortunately I am at work which means no ship yard time till tonight. At least I can still use my lunch time to read up on all the fine builds going on out there!
- 653 replies
-
- 6
-
-
- trabakul
- marisstella
- (and 1 more)
-
I've got two lathes already! A full size and and a mini but unfortunately until we move to the new house, hopefully next month, my shop is shut down as it is now a storage unit. lol As for Christmas and new tools, I am really wanting a Byrnes table saw. I have a very nice full size saw for my regular wood working but I really want a mini that I can use to mill more of my own lumber with closer tolerances and a lot less waste than what I can do now.
- 608 replies
-
- 3
-
-
- la couronne
- corel
- (and 1 more)
-
I have had that happen, I think it is just a bad habit I need to break of waiting till after it breaks to fix it instead of being proactive. Robin, we all learn from each other and sometimes the new guy can say or ask something that gives even the most experienced (which I am not) a chance to learn a new way or see something in a different light. That is why questions and comments are vital to the continued growth of this hobby.
- 608 replies
-
- 3
-
-
- la couronne
- corel
- (and 1 more)
-
Excellent! Your bireme has been very educational to watch come together and I am looking forward to watching those triremes come together for the same reason.
- 473 replies
-
- 5
-
-
- greek bireme
- dusek
- (and 1 more)
-
I usually just glue them however, I have in the past gone in with actual pins that I drilled into the bottom of the posts and into the decks. In all reality, to actually pin them is the better course of action. The more I'm typing this the more I'm thinking about changing them to actually pinned and not just glued for the additional strength. Easier to do now than later when I usually have to fix stuff.
- 608 replies
-
- 4
-
-
- la couronne
- corel
- (and 1 more)
-
On the paper clips, all I do is remove the handles off of one clip then insert one of those handles into the jaws of another so that it lays flat on the base of the jaw. This allows the rounded head to stick out of the jaws to the side. Now when I clamp them to the frame, the clips have a ledge that can be place on top of the plank to provide downward pressure. If you are still unsure I can post a pictire tonight when I get home. I have not used water to close up nail holes myself. It sounds good other than I wonder what happens when the wood dries out. Doest it open back up? That may be worth testing for future knowledge. Small amounts of wood filler can also be used to fill in the holes. The thing to keep in mind with fillers is what kind of finish are you planning? A painted or coppered hull hides things very well and therefore the type and amount of filler is less important. A stained or just varnished hull allows the natural wood colors to come through however, using a minimum of filler and one that matches the wood color is a must so that it isn't as noticable. Both are great choices as ships usually were painted to help protect the wood as well as display a countries colors. Using natural wood coloring takes a bit more planning as you have to think about how different woods look with each other and it is less forgiving but when cleaned up and varnished provides a unique beauty in itself. Personnaly I like natural wood but I have done both and again, no right or wrong to this. It is all the builders preference but ot is something to think about to know what your options are for planking mistakes and repairs.
-
In response to nailing I will first ask are you single or double planking the hull? The reason this matters is for the final appearance of the wood. When you use nails to secure the planks you are left with holes in your planks that then need to be filled. On a double planked hull, the first layer gets covered up so no problems with nail holes. On a single and on the second planking of a double, you do not want to drive nails through the boards as then you are left with oversized nail holes. Options to prevent this are many so I will tell you what I do. Again, look through build logs at various other methods also and decide what works best for you. What I use are modified paper clamps that will clamp onto the frames and hold down the plank to the frame. (See build log for pictures) When extra pressure is needed I will sometimes drive a nail above the plank so that it puts downward pressure on the edge of the plank not in the plank itself. I also use a mixture of glues. I will lay a thin bit of wood glue and use CA glue provide a fast, hard bond while the wood glue sets up. This also helps eliminate the need to nail the boards down as I only need a temporary hold for just a few minutes. Now to answer your question about nailing without a nailer, one methos that I use is first predrill the hole for the nail as this helps to prevent the wood from splitting. To actually place the nail I will use either tweezers or needle nose pliers to hold the nail and then use a finish or jewelers hammer to actually drive the nail. Hope this helps!
-
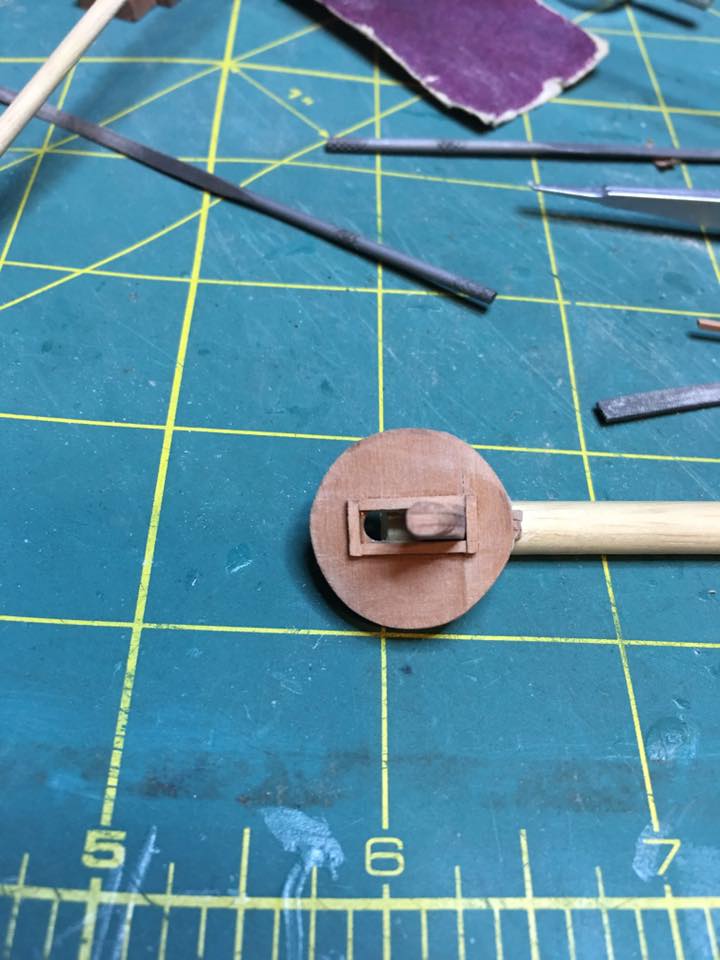
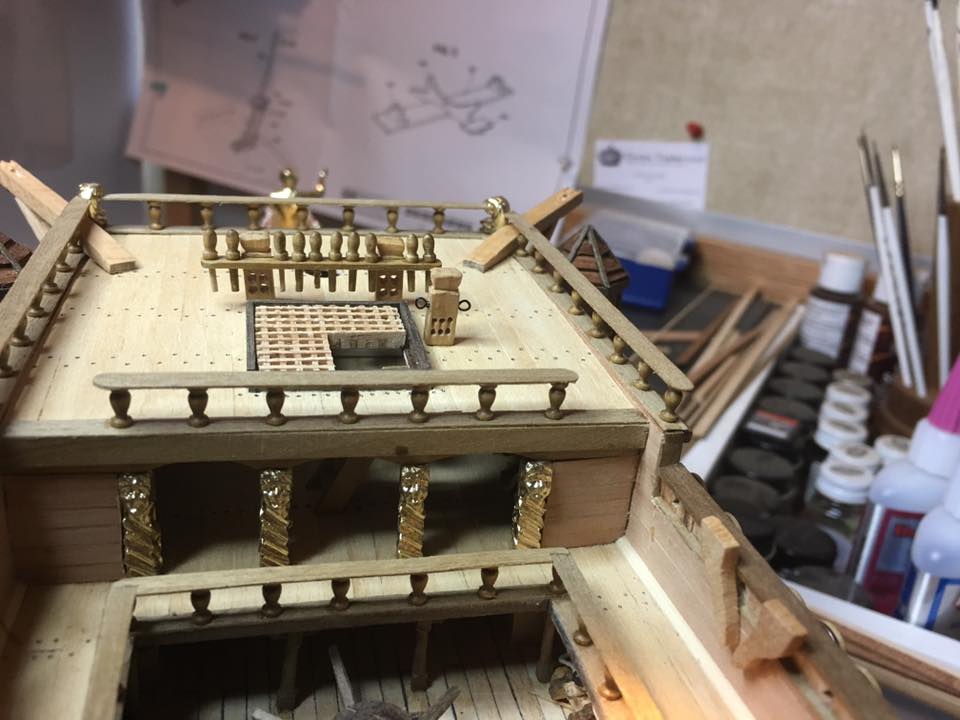
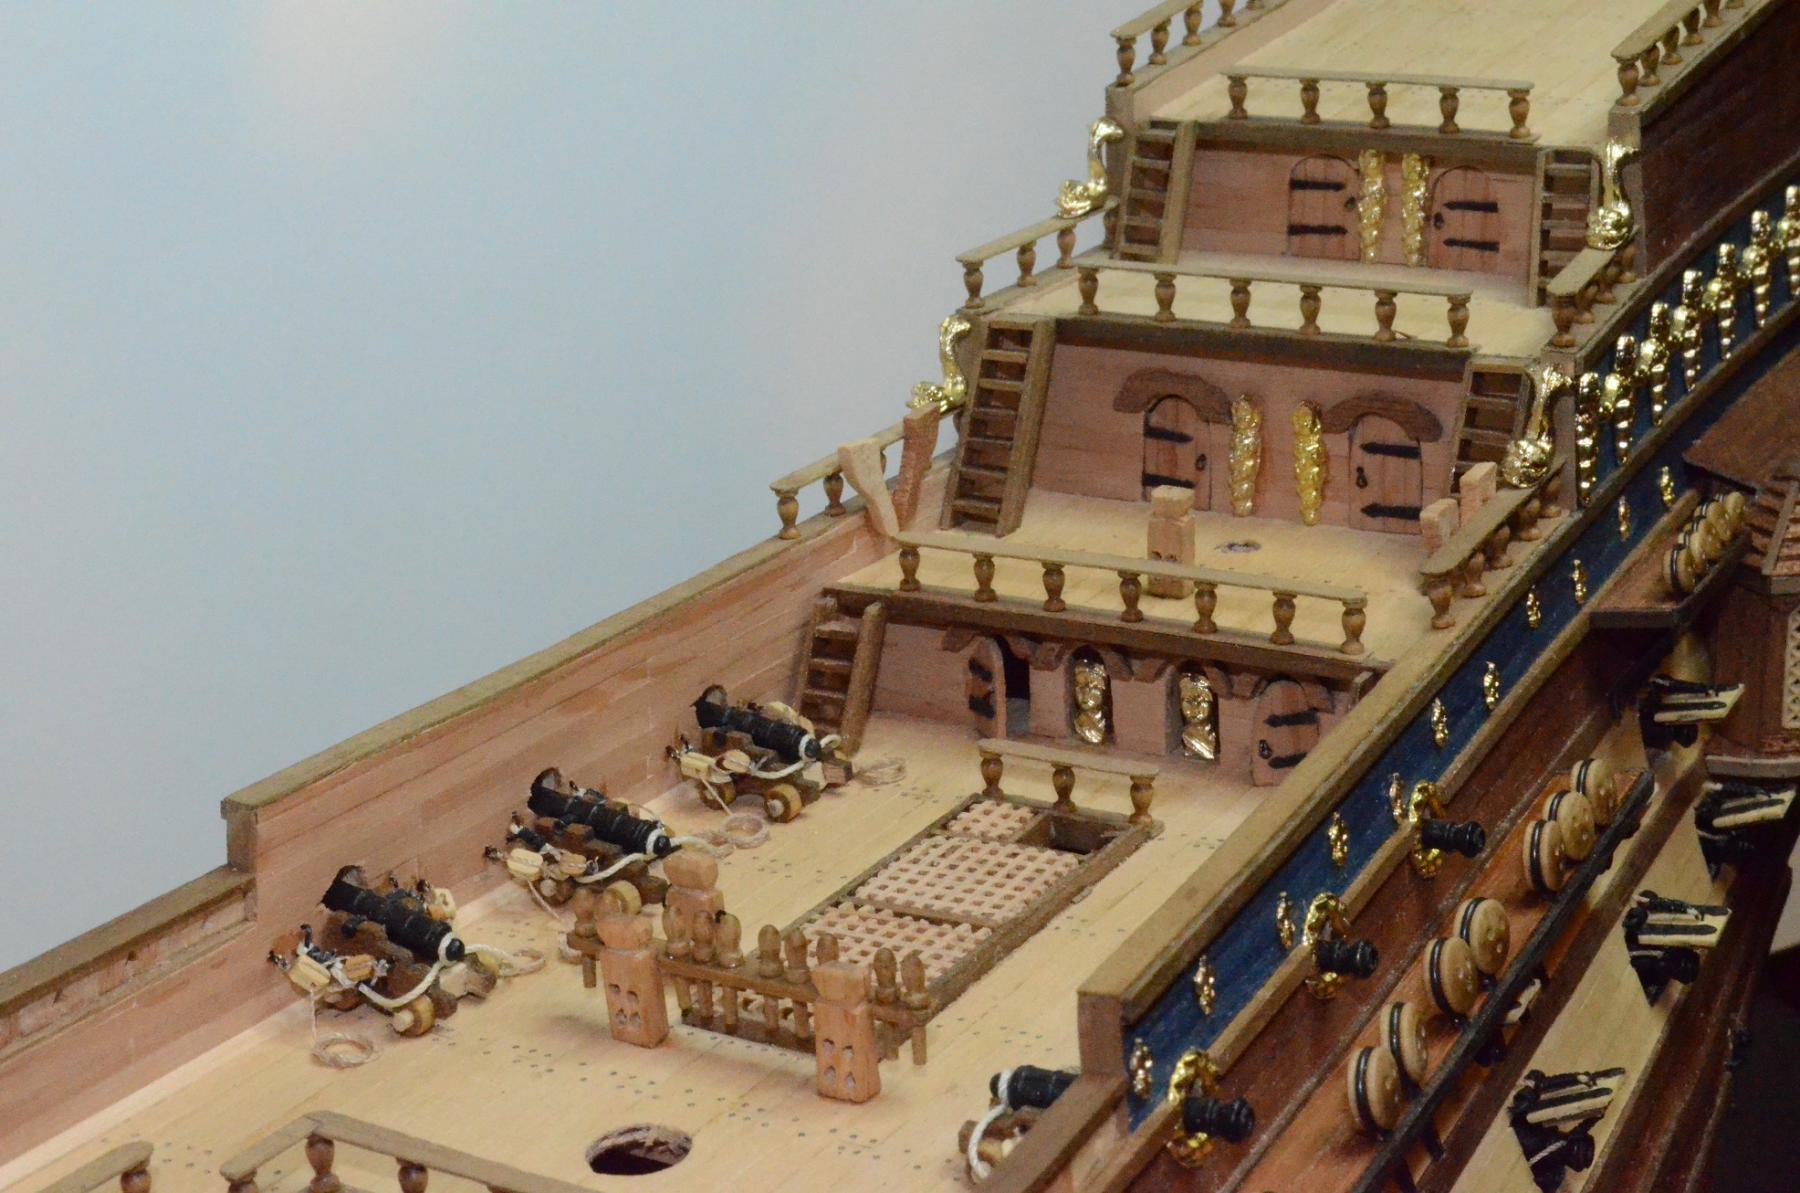
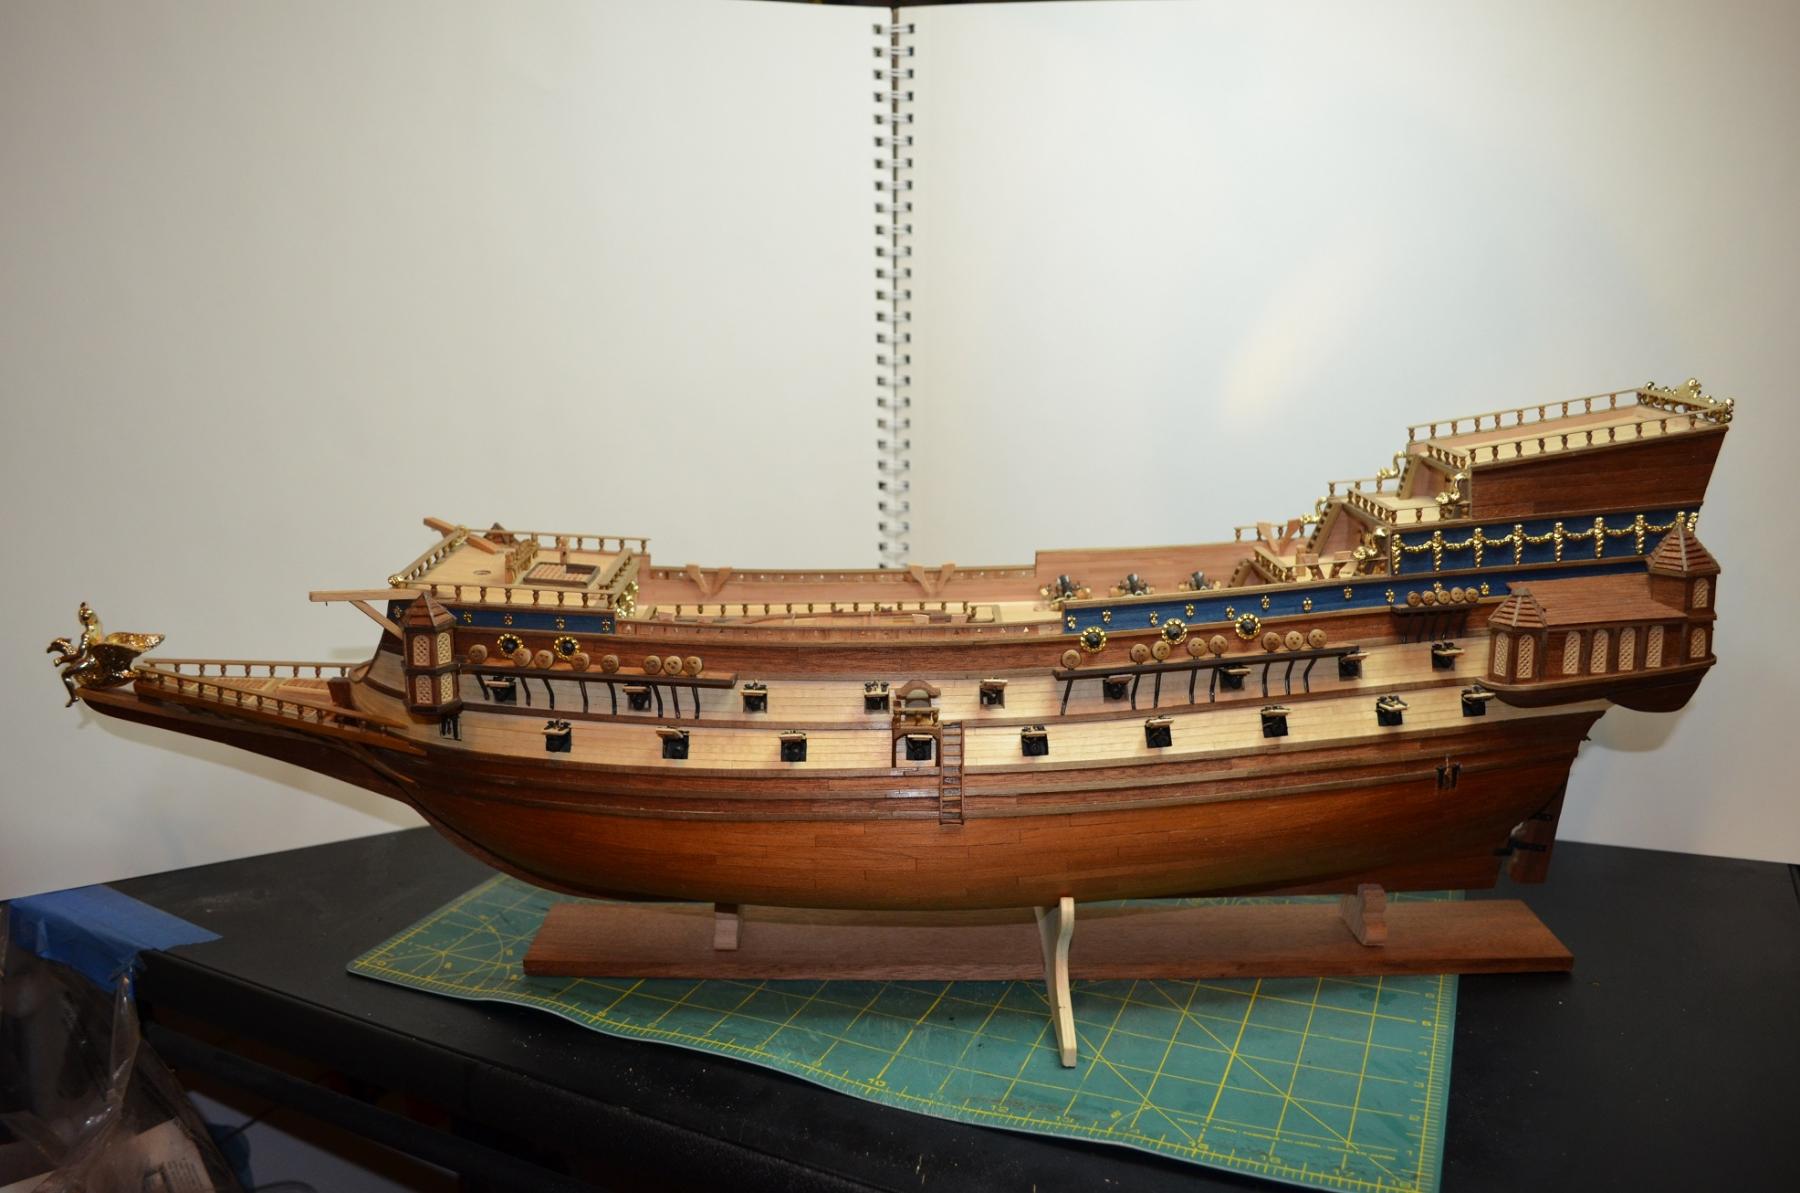
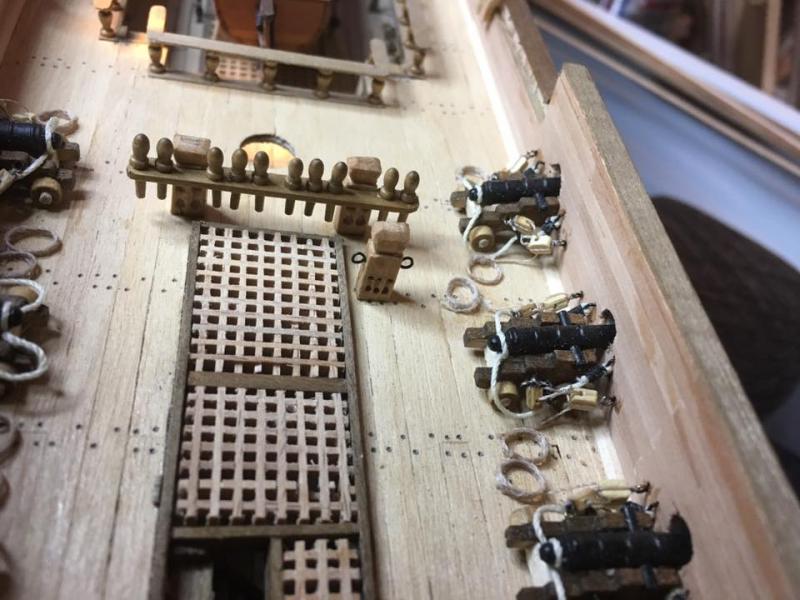
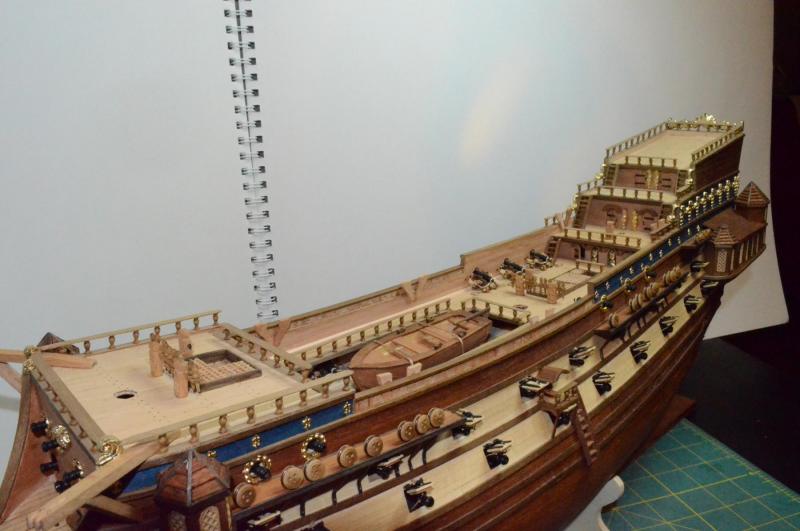
Thanks Bill! Much appreciated. Been a productive day today between cooking and ship building. House smells delicious and the bits have been built and installed. Still have a few odds and ends to add but I have also begun to plan and build the bowsprit. This will also be my first challenge with the round platforms that the ships of this era had. I will be relying heavily on Michael's (md1400cs) work on his Wasa build as the platforms on it are the same design used on la Couronne. Now for the entertainment! Enjoy the pictures!


- 608 replies
-
- 11
-
-
- la couronne
- corel
- (and 1 more)
-
Don't ever worry about asking to many questions. We all had them at the start of our building and we found our answers by asking too. As with most answers on here there is rarely one way only to do things. On a real ship a strake would not be a single piece of wood running the entire length of the ship. You would not find trees big enough nor straight enough to do that. So all strakes were made up of smaller planks. Now, in model building, you have the advantege of having wood stips long enough to run each strake in a single piece. This is an acceptable way to plank a hull and many people will do this and then simple cut the individual planks into the wood later. Some advantages to this method is that the planking gets done faster and it is easier to bend a long board than a short board. Personally, I prefer to cut my boards into the individual planks and assemble them that way. An advantage to this is I only have to fit a small piece at a time and if something screws up I only have to remove a couple smaller boards. Measuring is more crucial though as you need accurate guidelines to make sure you stay on track and in alignment. As to dry fitting all the strakes in place before gluing, that is a good idea if you can make it work. Due to the curvature of the hull, I am not sure they would stay in proper place long enough or without a lot of frustration. However, just because I do not know does not mean it can't be done! Your hull is much smaller than the one I am building and so you may be able to get them to stay easier as you have far less strakes than I. If you have marked out on the edges of your frames each strake and they are the same number of strakes on each frame and you follow your marks when installing, you will be fine. Just take your time and make sure each piece fits properly before gluing.
-
We all work at different speeds. It may be slow but wow!!! Incredible work and workmanship. When you look at all the details, big and small, and high quality of your work and finish it is easy to see why it takes so long to build. In any event, even if it takes another 4 years, you will have one outstanding model and we are all going to enjoy seeing you put her together.
-
One thing I will highly suggest doing before you plank would be to add filler blocks to the bow and stern areas. With the curvature of the hull in those areas the fillers will help you by giving more places to anchor planks to. Check out the start of almost any build log, mine included and you will see them for reference. As for letting the planking run long, my question is, does your kit provide a stem, keel and stern pieces to attach to the false keel? If so then yes, leaving them long to trim back later is a good idea as you can easily cut and sand them to allow the stem and stern pieces to go into place. If not, then You will need to cut a rabbit into the false keel to allow the planks to tuck into the wood and you will need to cut them to fit. As to the numbering and order of planking, this is all personal preference. After I have my layout and know where my lowermost wale will be, I flip her over and plank from the keel upward. I have found that this allows me more forgiveness in hiding mistakes as I can always adjust as I go up and hide things easier under the wales than if I go down as there is no forgiveness at the keel. Again, this is personal preference only. As to deck alignment, yes, planks would typically be aligned with the deck. This is often used if a person chooses to plank from top down to the keel as the deck provides a good reference point. Also this allow for one full plank to lay under the gun ports and form a base point in measuring those openings. See how your layout looks with your planking. More than likely it will work out the way it is supposed to if you measure right. I would concentrate more on making sure all your planks are going to lay right and and run without having to add stealers and drop planks at this point. How the planks align to the deck is far less of an issue especially on your first build.
-
I agree with Michael on taking the opportunity to learn the skill. The more practice you take the easier and quicker it becomes. One of the reasons I like double planked hulls. I try to build both layers as if they were the finish layer so that hopefully one day I can just single plank my hulls like they should be. I'm not that good yet. Always give your planking your best and that will also aid in making a nice smooth finish for you copper which if something becomes a whoops can cover right up. Something else to keep in mind with coppering is that glues do not always want to stick to wood fillers, plaster, sheet rock mud or many types of smoothing agents that are used when compared to raw wood. Having your hull with as minimal of filler on it is definitely a worth while goal to help out later. In any event, I know you will make a great looking ship!