EJ_L
-
Posts
2,246 -
Joined
-
Last visited
Content Type
Profiles
Forums
Gallery
Events
Everything posted by EJ_L
-
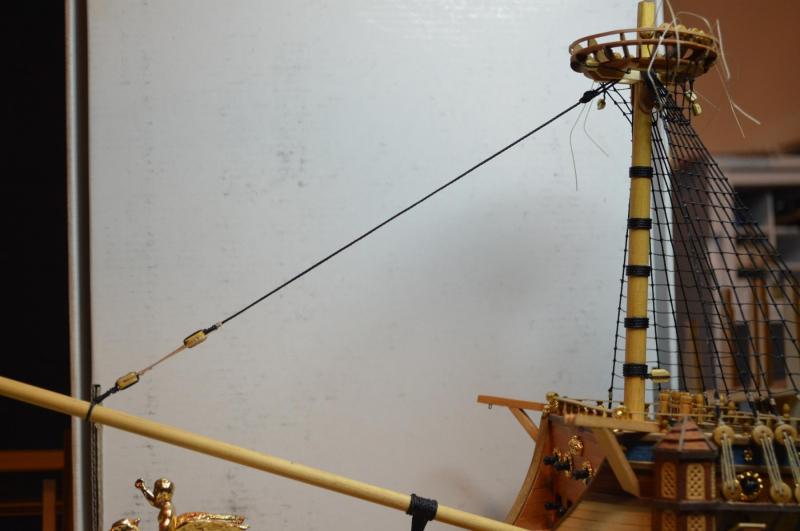
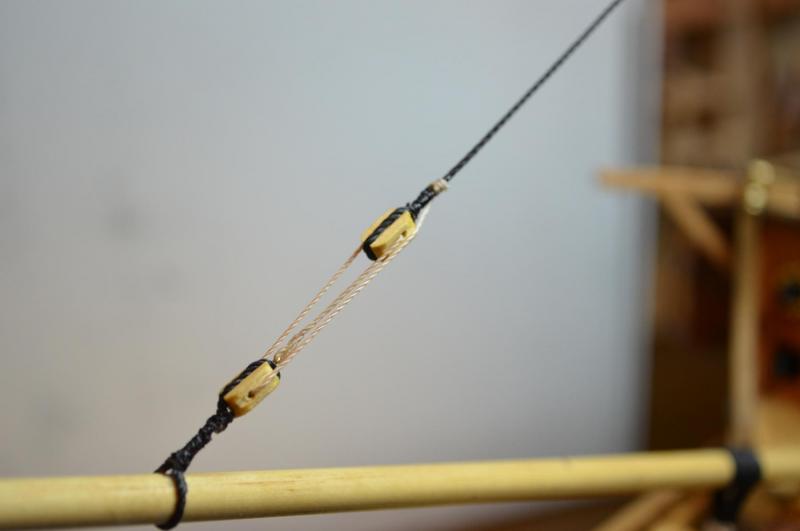
 From what I have read, the mouse should be about even or a little behind the leading edge of the top. I test fitted the stay and used a hemostat clamp to mark the line just in front of where I wanted the mouse to go. This gave me not only the location but a good way to hold the line as I put the clamp in a vise to hold it upright as I made the mouse.
- 608 replies
-
- 3
-

-
- la couronne
- corel
- (and 1 more)
-
Not really sure if there are any "easy" planking ships but it does get easier to do with practice. Water and heat and woods that will bend easy are your friends to be sure. Mostly though it is just a lot of patience and trial fit, soak, heat, bend trial fit and repeat as needed. I know that doesn't really help but it does get better. In a few weeks I will be starting the planking of my newest build, Le Soleil Royal. When I do I will try to do a better job of taking and posting instructional pictures to better explain my methods than I did before. Keep on trying and it will get there!
-
Spent some hours today gluing together the frames and the two false decks. Everything squared up nicely which was an improvement over the last build which had it's false keel twisted. Attached the canon barrel supports on the false decks and started to fair the hull. Still searching for the box of filler blocks that is now lost somewhere in the cluster of boxes and things that is currently my wood shop. Hopefully they will surface this week and if not then I will just run out and get some more. I definitely need something at the bow as that is a rather large empty space that I need to make a fairly sharp curve on. I'm also going to have to mock up the stern galleys so I can start to plan for the lights I want to put in them as well as the interior designs. Lots of planing and testing ahead on this build. I will be making a better cradle for her soon too. The one I normally use for this stage of the build is too small for Soleil Royal and so something different is needed. I have some good ideas just really needing access to my tools.

- 961 replies
-
- 14
-
-
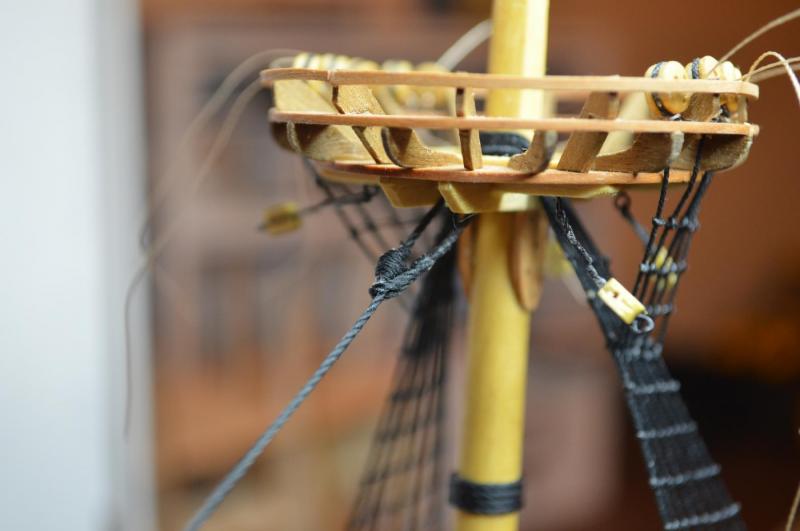
Had a nice full day in the new shipyard today. It was great to be back. After working on the framing for Soleil Royal I resumed rigging La Couronne. Not a lot done but I did get the foremast fore stay rigged. The mouse was a tricky piece of rigging. I made it by parting the strands of the rope and inserting a small bead and then wrapping the bead and rope with a small diameter thread. I think it turned out good and seems to be working like it is supposed to. Main mast work will be starting tomorrow so a lot of what I have just done on the foremast will get to be repeated though hopefully it will be a little easier and faster as I have a better idea of how I'm going to do it. Here are a few pictures of today's progress. Should be getting more regular updates again.
- 608 replies
-
- 11
-
-
- la couronne
- corel
- (and 1 more)
-
Your hatchways look good and I like most of us here are looking forward to seeing her out of the jig. I also agree that the cradle is a smart way to go especially while you are still working on her. They provide much better stability than the pedestals do. I hope the transfer goes smoothly!
-
This is my first kit from Sergal. I tend to bounce around on manufacturers. Ive done a Constructo, Model Shipways, Corel and now Sergal. As long as they are a reputable company and the kit appears to be of good quality and contains the detail level I am looking for, I'm good to go. So far I am impressed with the kit. While I know none of them are perfect, nor do I really care as I always plan on changing things anyway, so far Sergal seems to have put together a nice packaged kit. The instructions like most are not made for beginers but this whole kit is not meant for beginers and so that shouldn't matter. I may change my opinion as the build progresses but right now I would have to say they did well and I would recommend their products.
-
With all the detail you are putting into the sail, having it deployed may be the way to go. On the other hand, it is not uncommon for us model ship builders to put in lots of details in places that will never be seen...
- 473 replies
-
- 5
-
-
- greek bireme
- dusek
- (and 1 more)
-
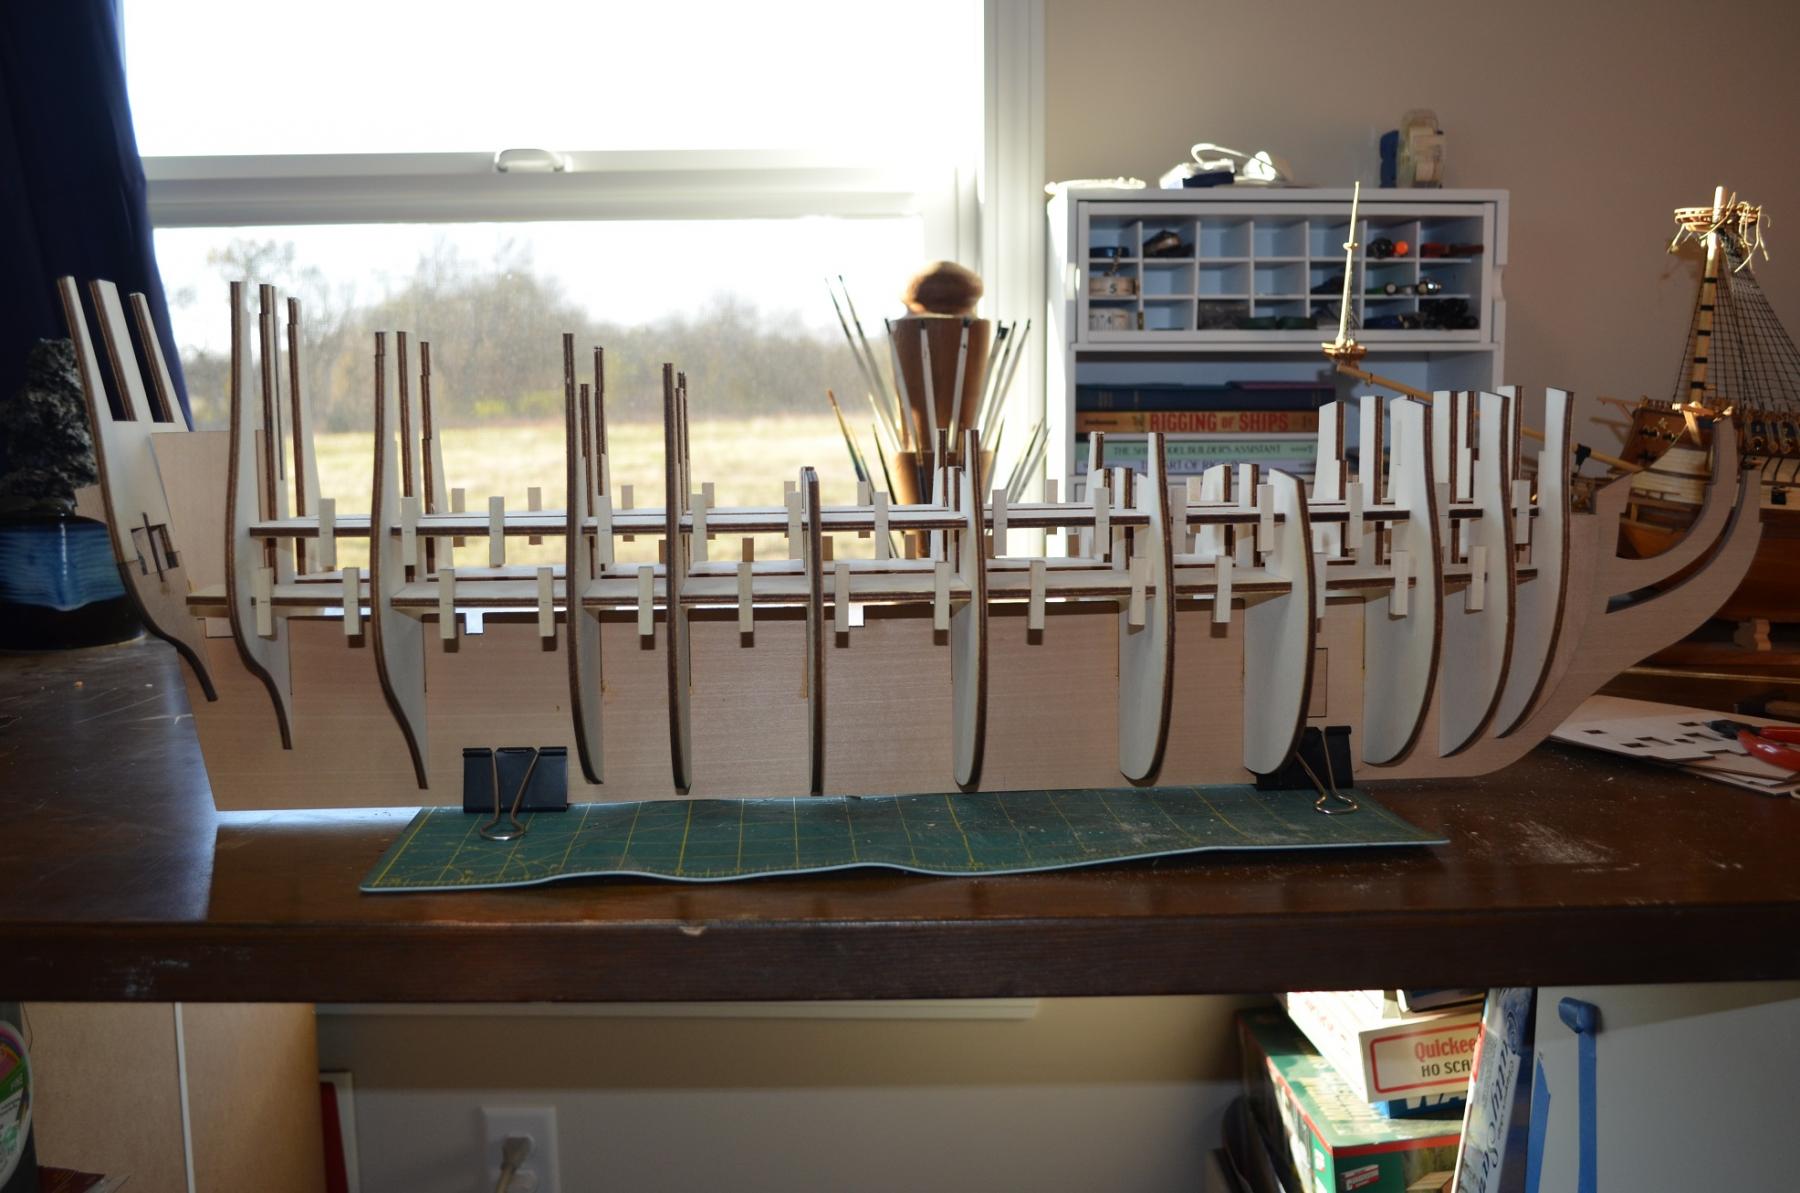
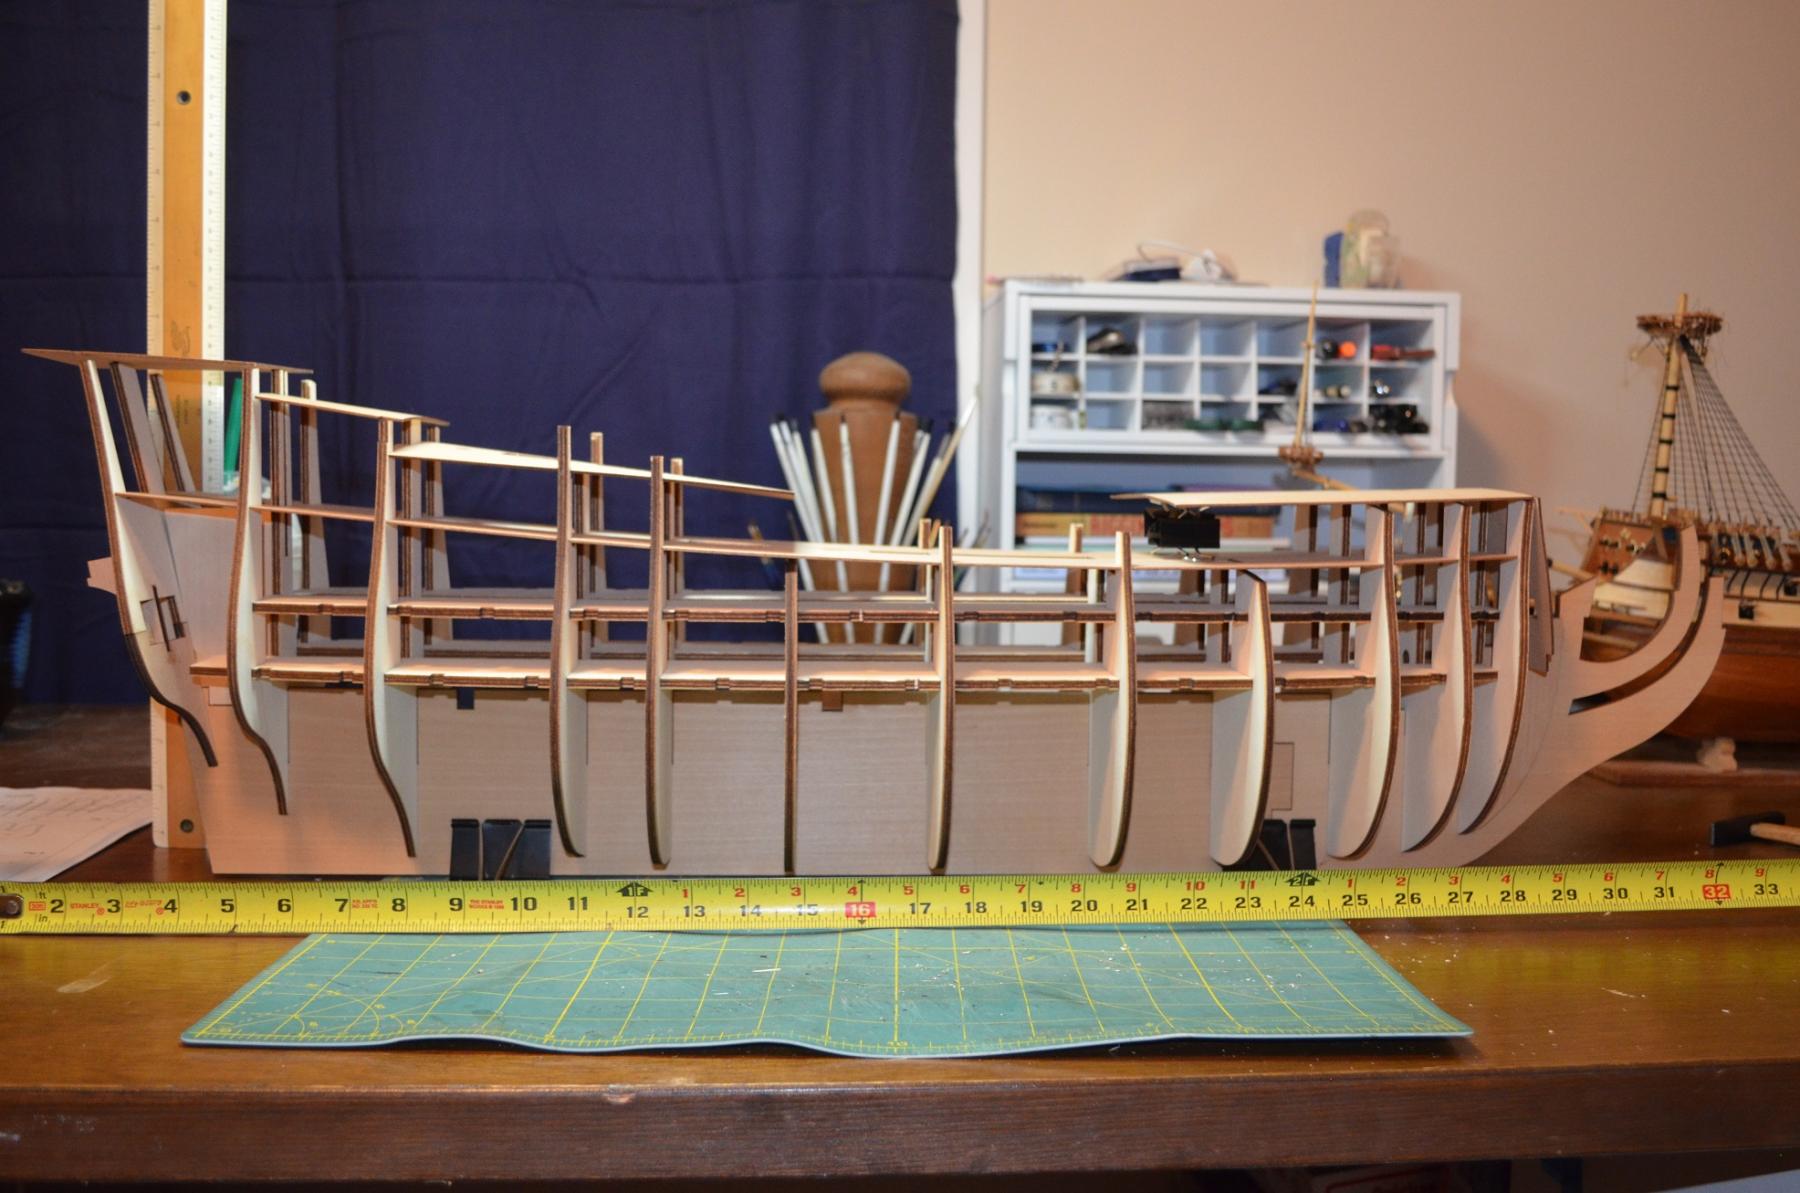
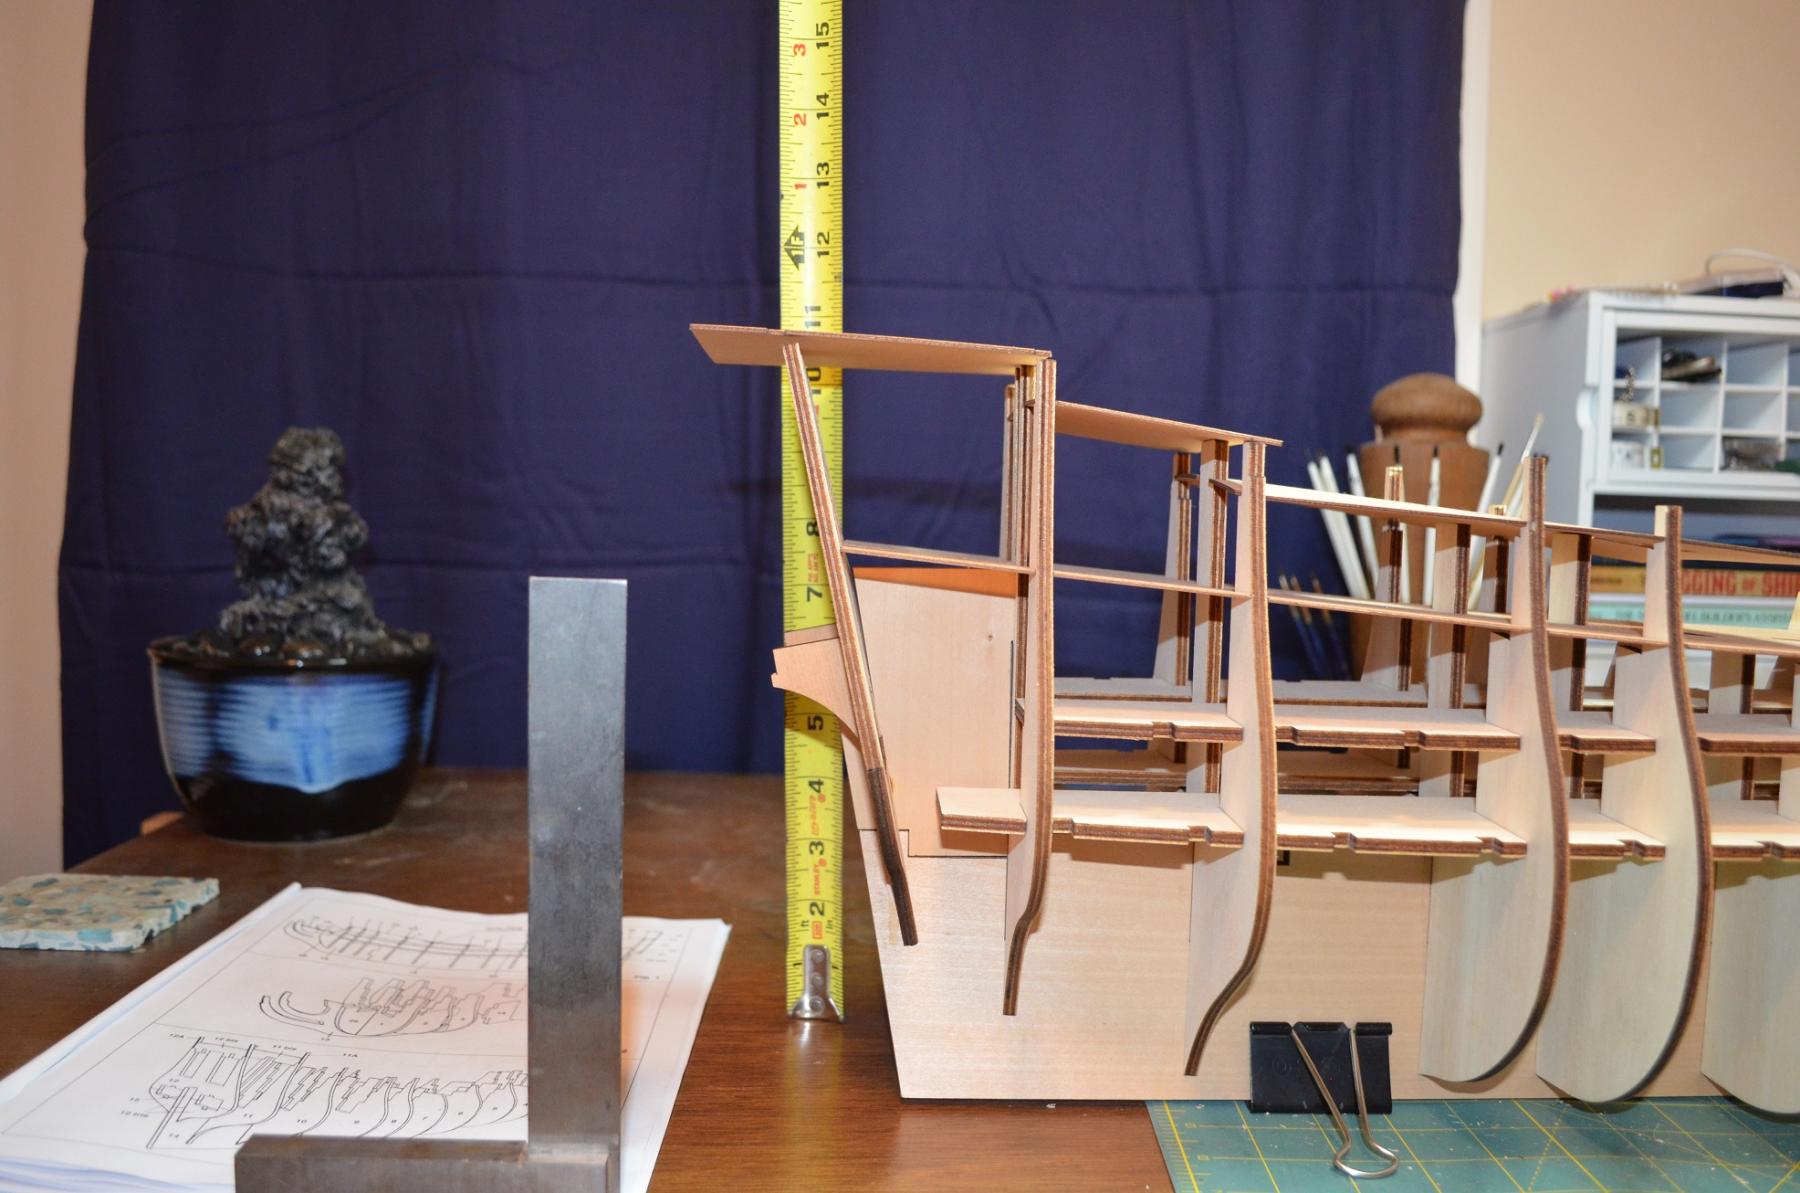
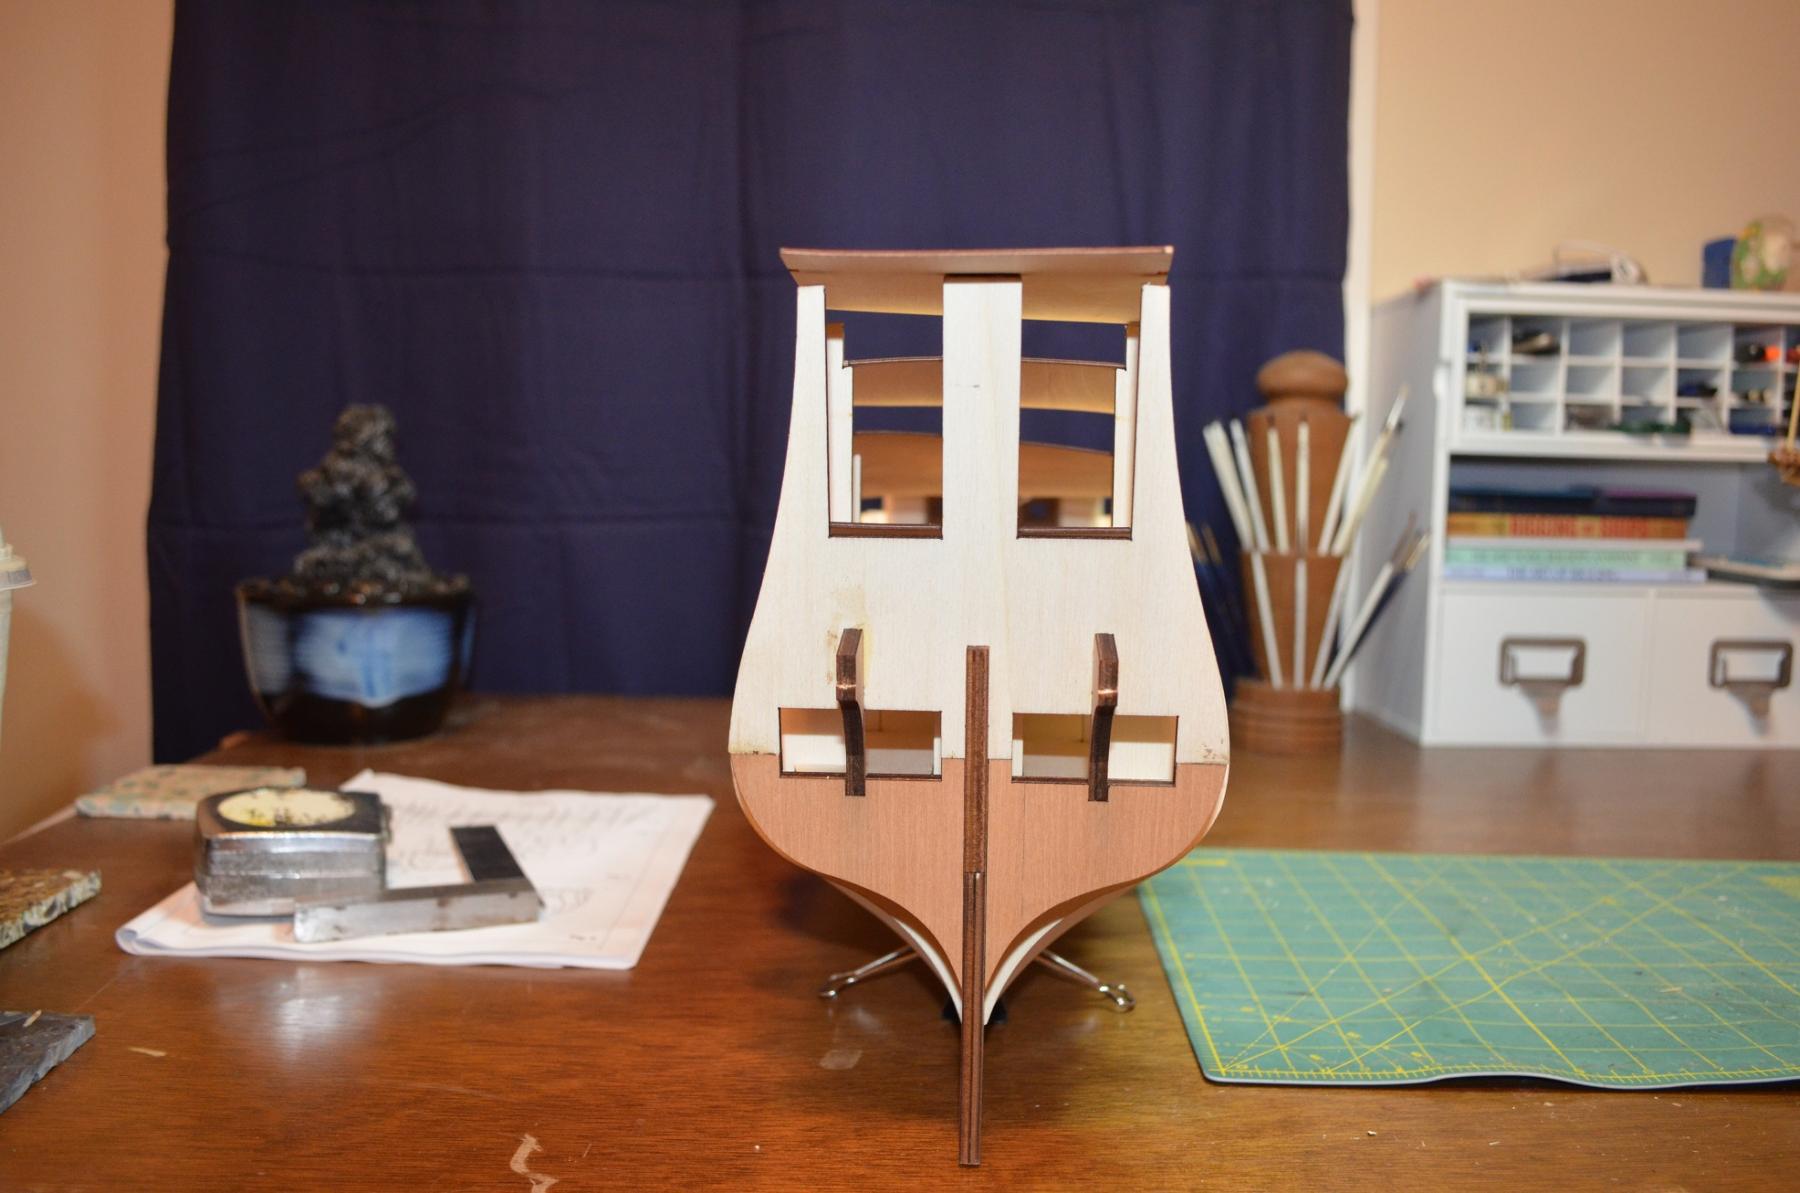
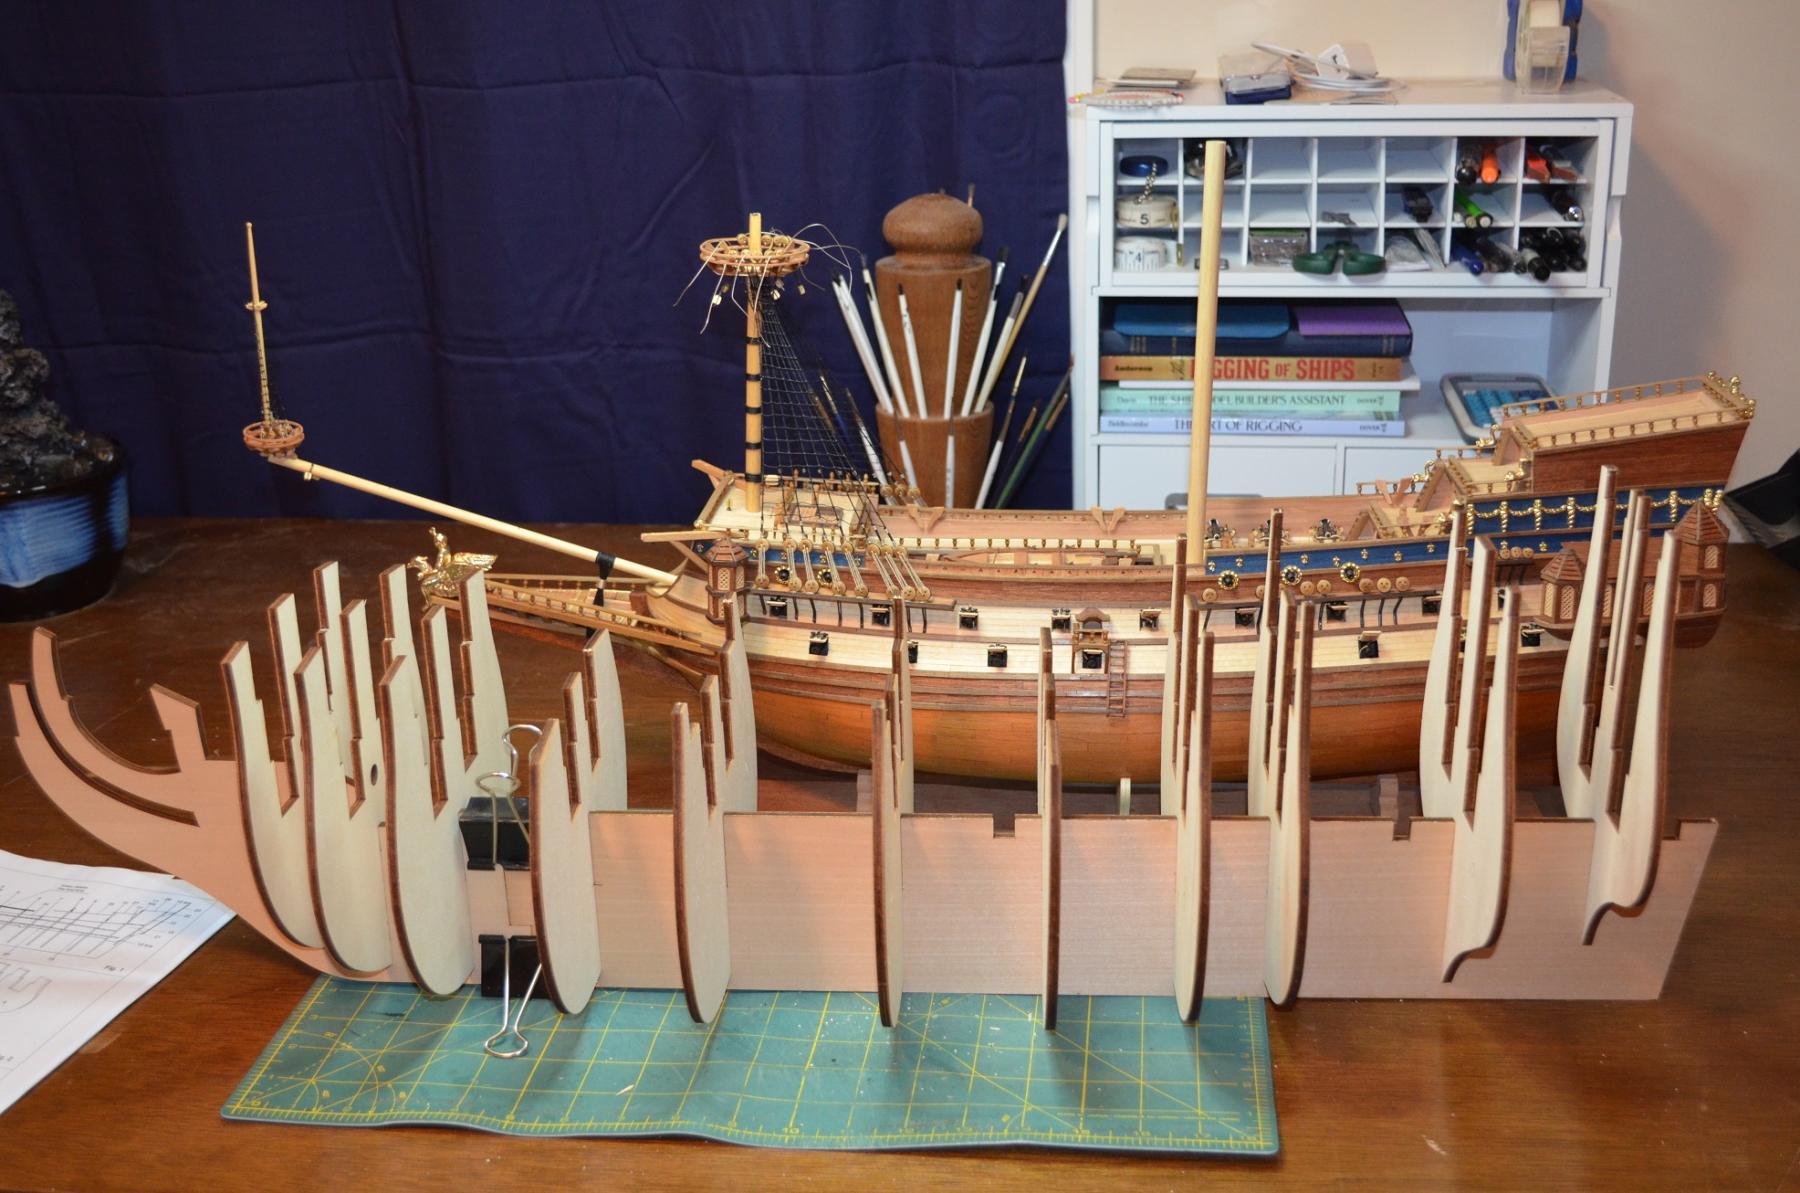
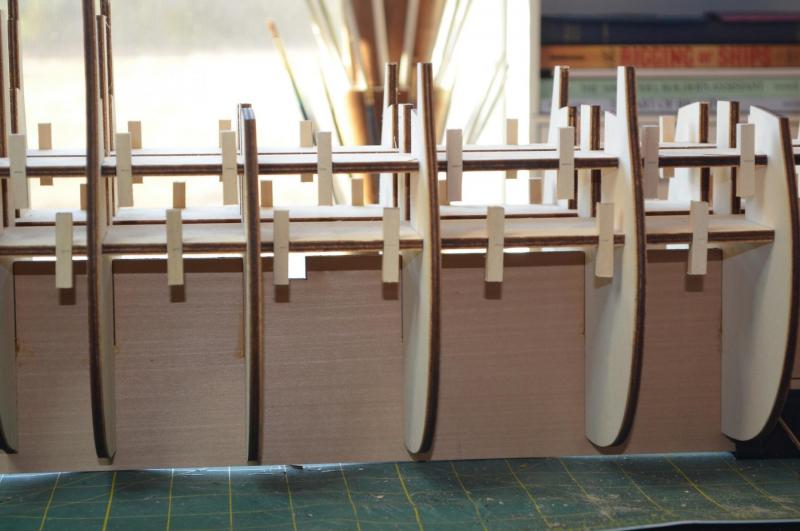
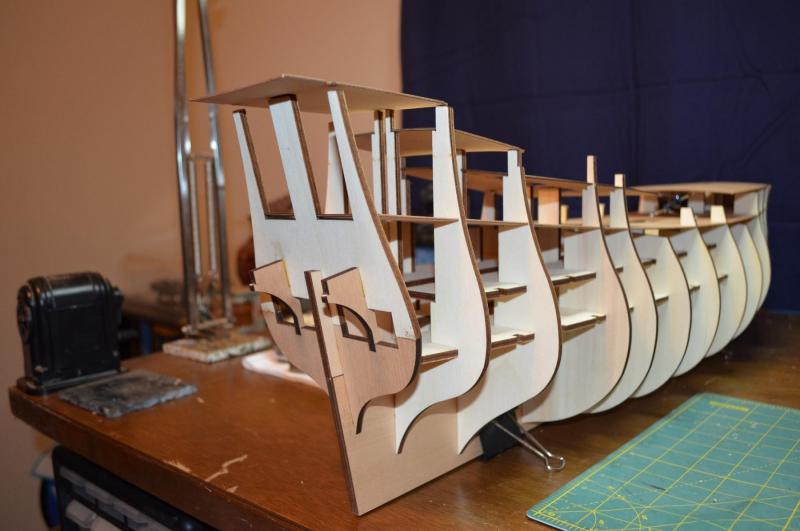
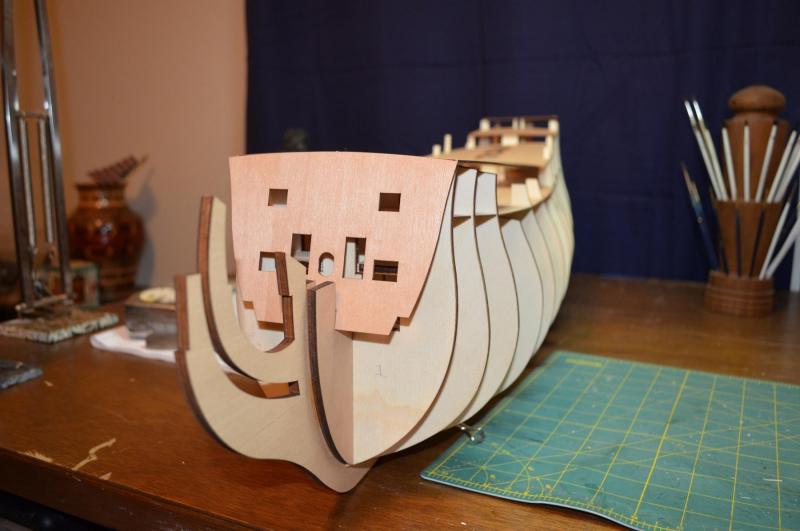
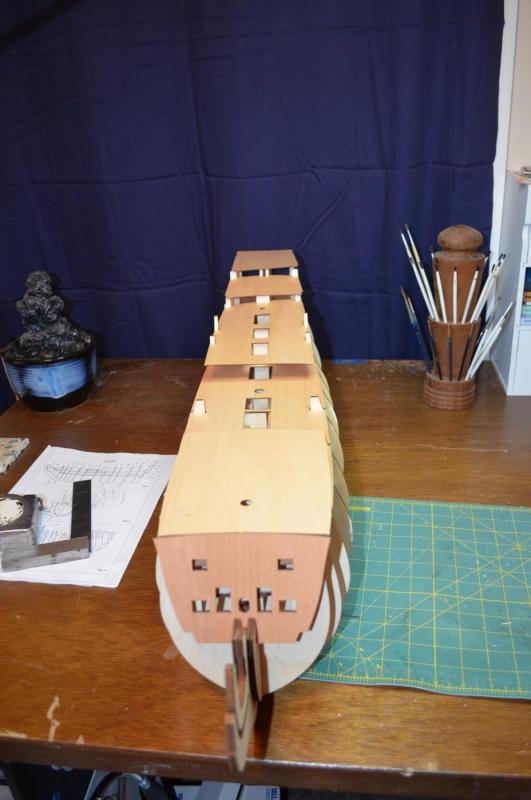
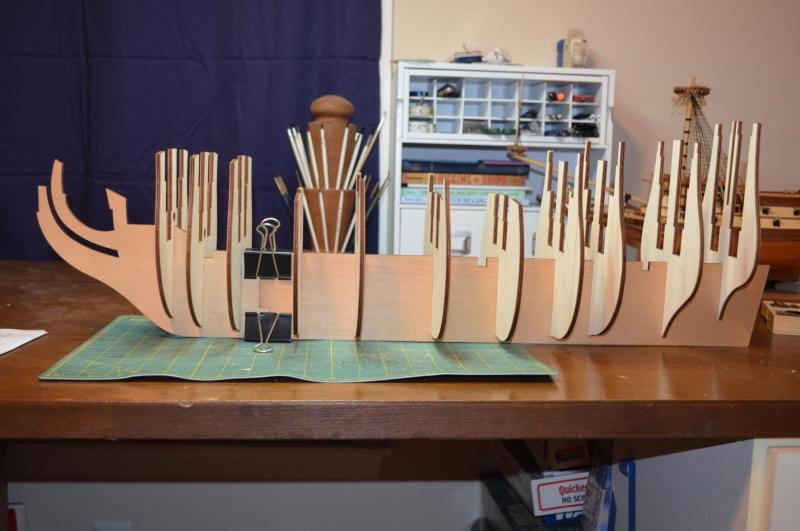
A few more hours and I have managed to dry fit all the frames and decks to check fit. While the thin upper decks are warped a little and will of course have to be shaped to fit the curve of the deck, the two false decks and the bulkheads all line up almost perfectly and will go together well. The only parts that have been glued so far are the two small filler blocks on either side of the bow. I will be adding more fillers here just as soon as I unpack my wood blocks. The other parts that have been glued are the stern post and the aft bulkhead. This bulkhead was in three pieces and had to be glued in place in order for it to stay up. The forecastle and quarter decks are still lacking a lot of their supports. There are quite a few frame extensions that have to be installed in order to get them into their final position. Also the poop deck will be higher up than what it is now by about another inch. As I have now done about all the dry fitting that I can really do and I'm happy with how everything is lining up, I will now take her back apart and start gluing the bulkheads to the false keel. Wood glue for strength and clamps to keep them all straight and I will be off and running. Till then, here are some pictures. I have also included some with measurements shown for height and length of the hull as is. Completed she will be larger on both dimensions.


- 961 replies
-
- 17
-
-
Excellent work. The patience required to make all of those is unbelievable. As with all things you have been doing, the effort will pay out immensely in the end and we will be further amazed with the finished product.
-
I was going to say clew and bunt lines also. Those are the terms that I have seen them called on most ships but, due to the era and region of your particular ship they could be called something else. Excellent work on the sail, mast and rigging so far. I agree that I love rigging the first mast also... after that well....
- 473 replies
-
- 5
-
-
- greek bireme
- dusek
- (and 1 more)
-
Those hatch covers are awesome And the rope handlesare a great addition. Thanks for the details on how you made them also. Very well done!
- 653 replies
-
- 5
-
-
- trabakul
- marisstella
- (and 1 more)
-
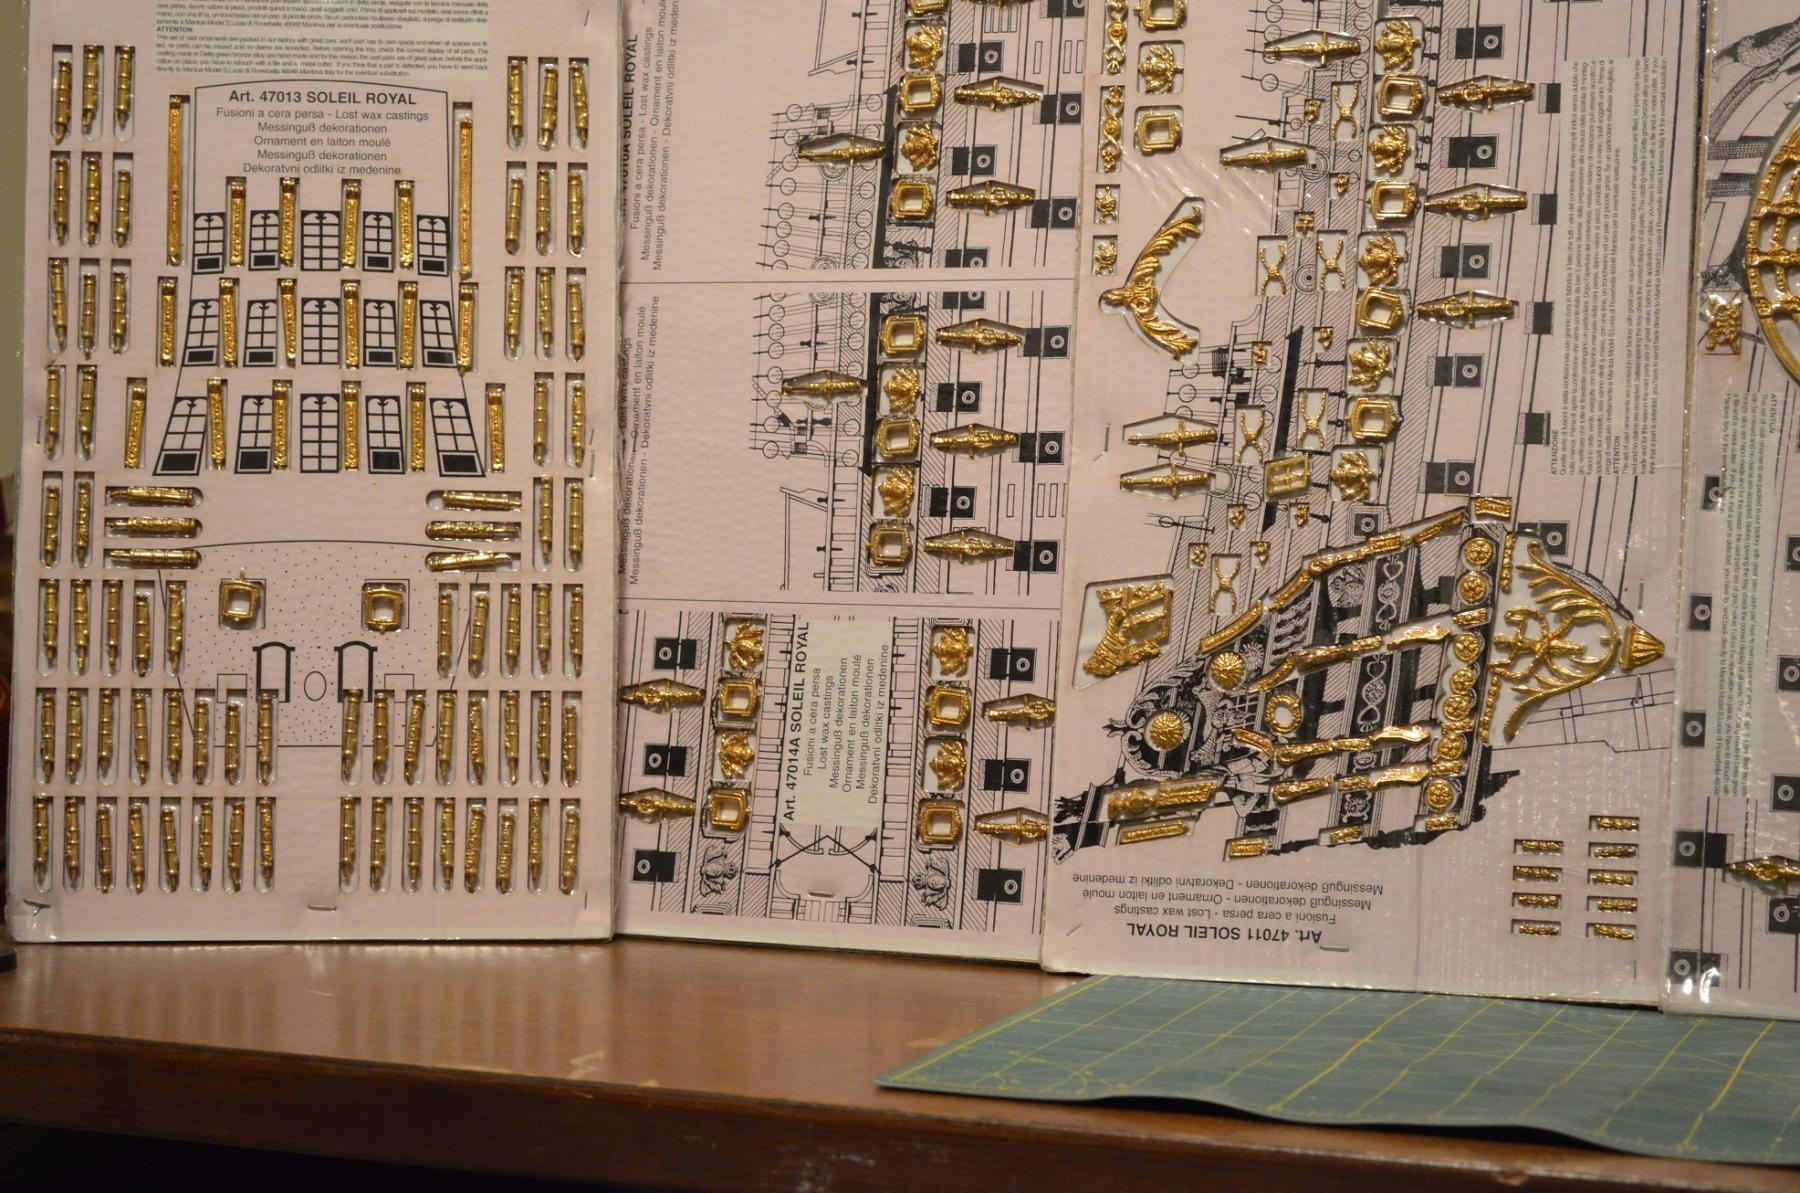
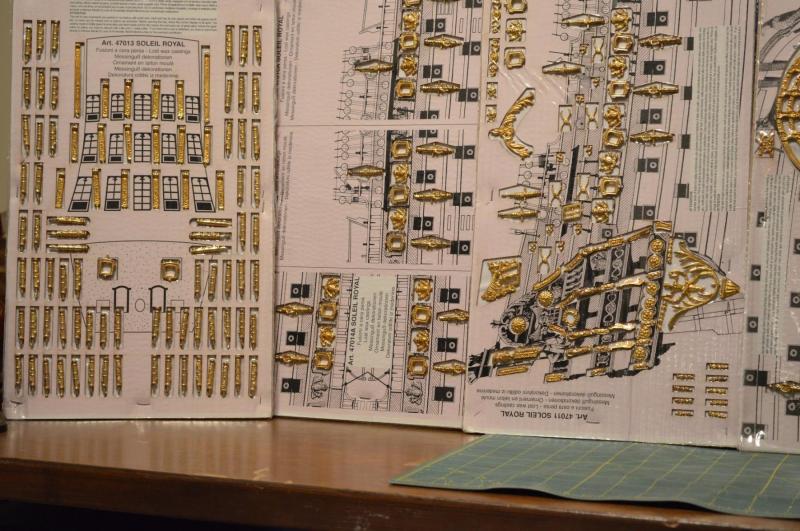
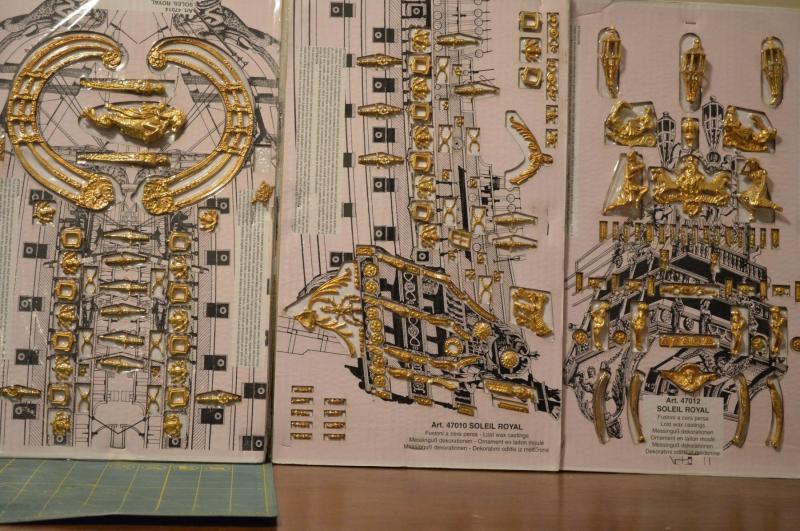
Zoltan, Don, Pierre, Scott, welcome! She will indeed be a big one. 44 inches long, and about 31 inches tall. There are a considerable number of decorations on her. Out of curiosity I weighed the fittings and they came out to about 4 pounds. That may not sound like a lot but on a model that is a lot of weight. As for the wood count, I did get a lot of it but will it be enough?... we will see! It is a double planked hull and while I don't think they allow for a lot of mistakes, I do think that there will be enough wood to properly cover her. Filler blocks are the one thing that I did not get enough of. Fortunately I have plenty of scrap out in the wood shop to make some with so that is one of my first priorities once the shop is back up and running.
-
JPAM, Thanks for the kind words. The hull itself is about 20 inches from stem to stern. The overall length from the tip of the bowsprit to the aft most point is about 32 inches. Zoltan, More space is always a plus even without the windows. My old yard lacked both but if I had to choose I think I would rather the space as lights can always be added. Looking forward to seeing you back at your builds also!
- 608 replies
-
- 3
-
-
- la couronne
- corel
- (and 1 more)
-
Oh yes, those blocks will be replaced with some of Chuck's fine blocks or if I'm feeling up to the challenge I may make my own as I will soon have my wood shop back up and running. Though that does remind me that I need to order some for La Couronne...
-
So I have reopened the shipyard tonight as I managed to get a lot more done than I was planning on the unpacking side of life. As a reward I decided to start Le Soleil Royal. La Couronne will still be taking priority but this allows me to slow down on my frame building and planking as well as make the modifications I want while still working on rigging. So please join me on the new journey and with any luck I will have two nice builds to keep us all entertained.
- 608 replies
-
- 5
-
-
- la couronne
- corel
- (and 1 more)
-
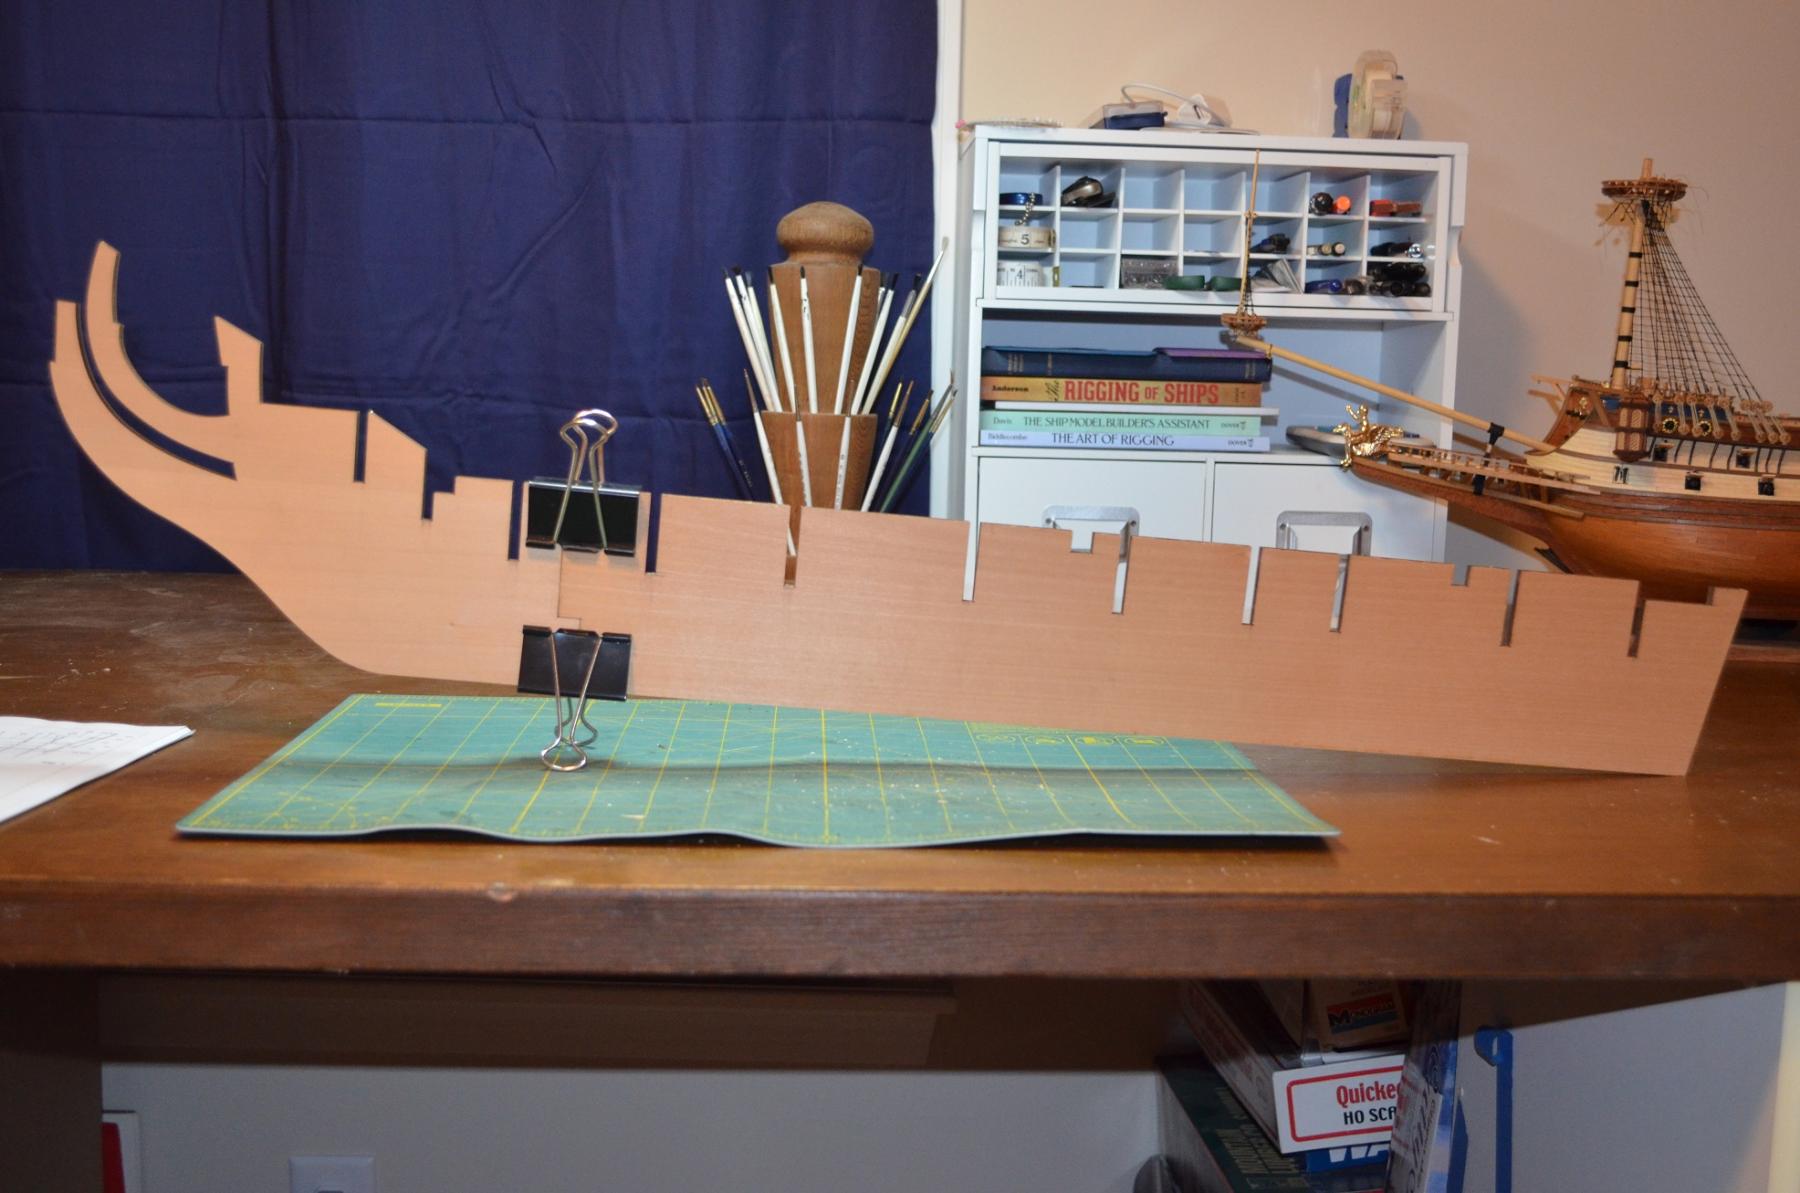
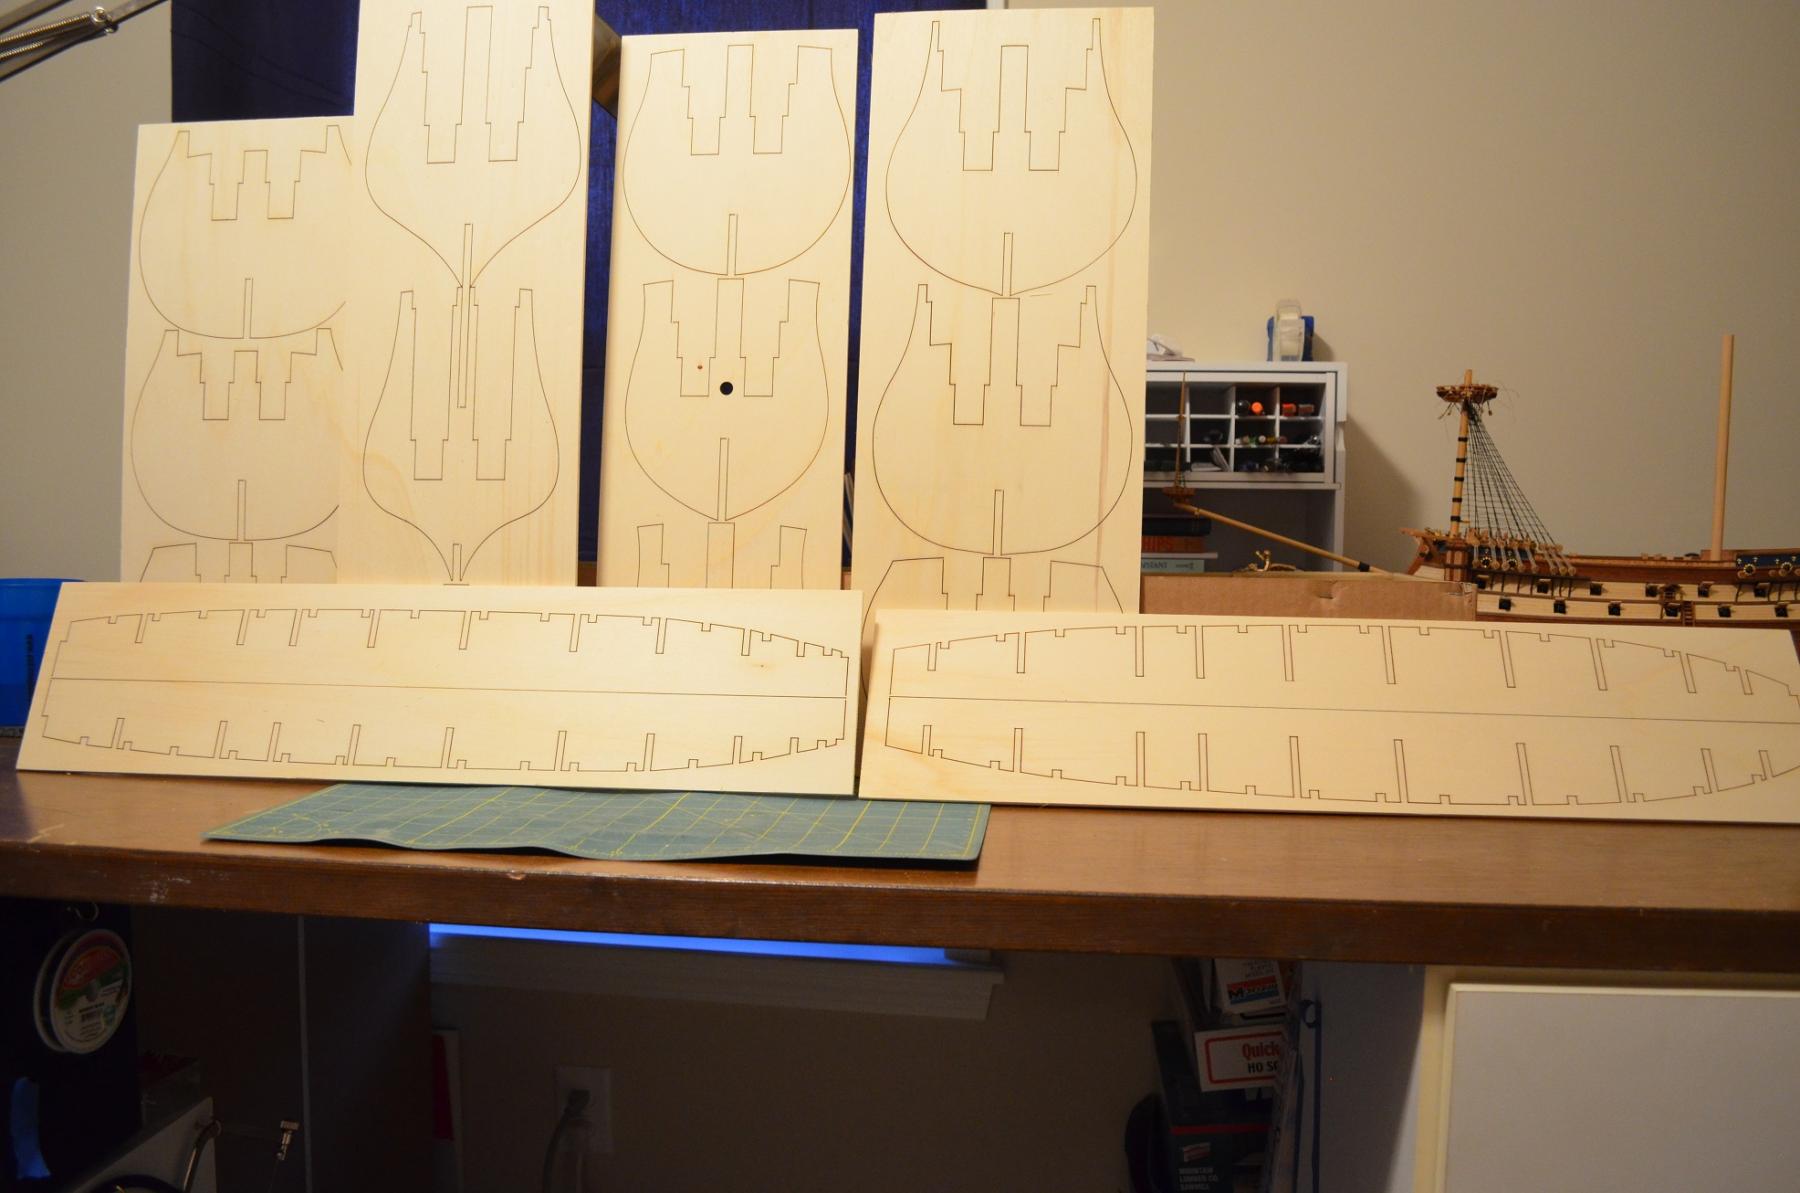
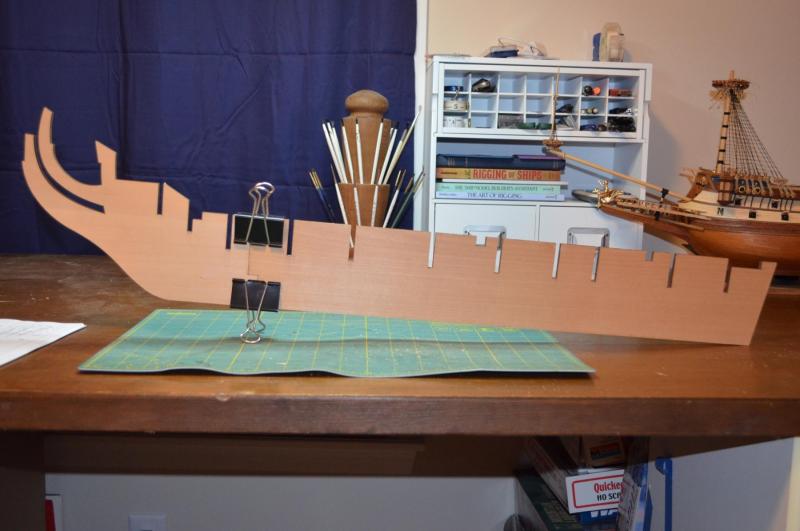
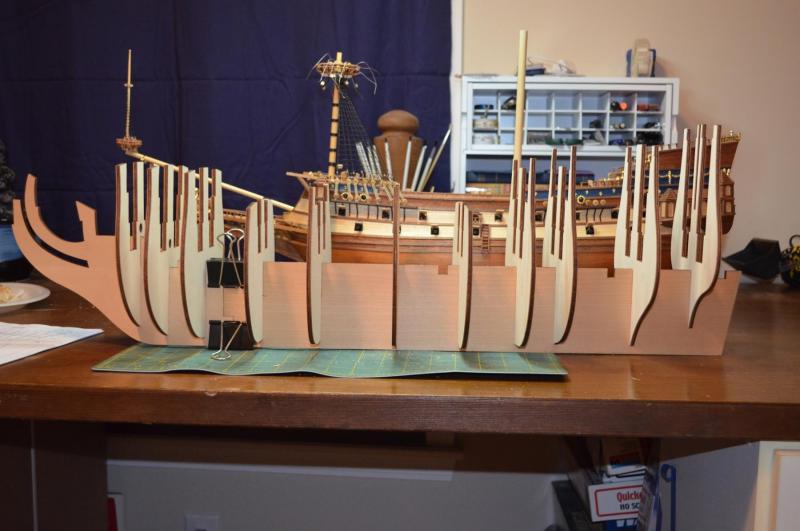
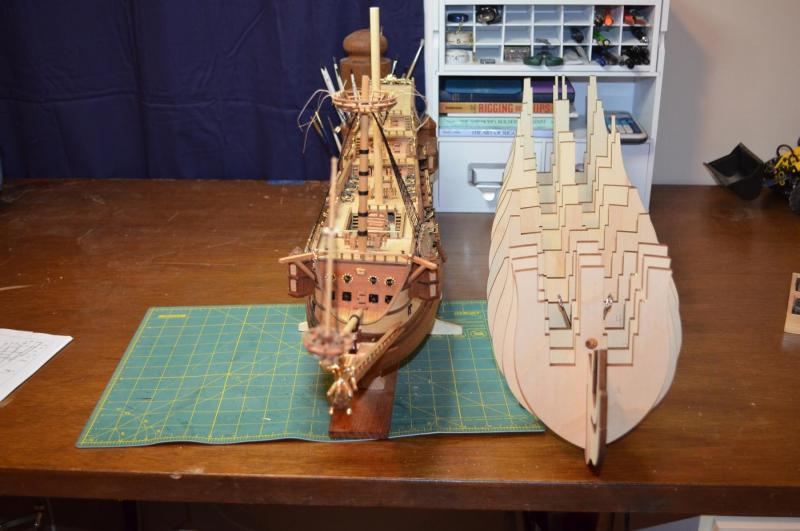
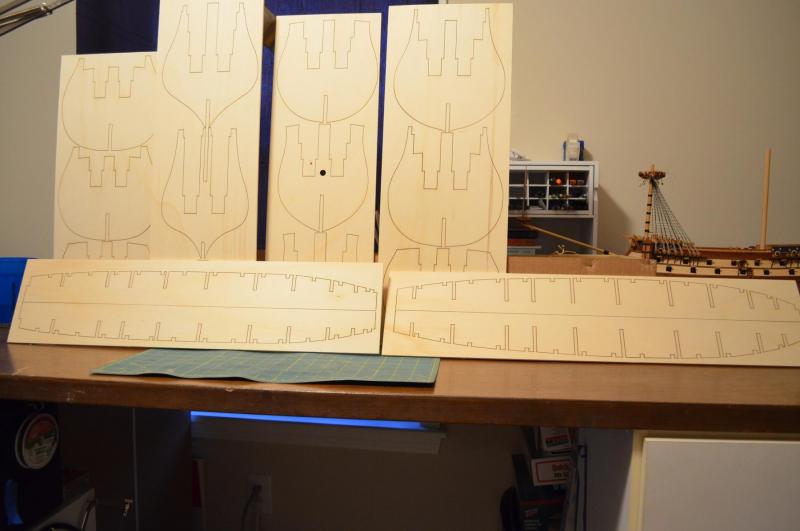
Actually started building tonight also. Glued the false keel together and removed the bulkheads from the sheets and dry fitted them to the keel. I will hold off on actually gluing them together for a while as I want to test fit the decks and see what changes I need to make for some of the things I want to do. The main change that I know will require some extensive rework will be in the cabins. I would like to detail the cabins out and I have some LEDs to simulate lantern light to illuminate the cabins so those details can be seen. As a curiosity I wanted to compare the scales of la Couronne (1:100) to Soleil Royal (1:77). This is not a comparison of the actual ships to each other as the scales are different but mostly to see how much larger of a model I am building compared to the last. I still have no idea where they will eventually find berth at but as I still have plenty of time to figure that out and build a display for them. So please, pull up a chair and enjoy the very long journey I am starting out on.

- 961 replies
-
- 20
-
-
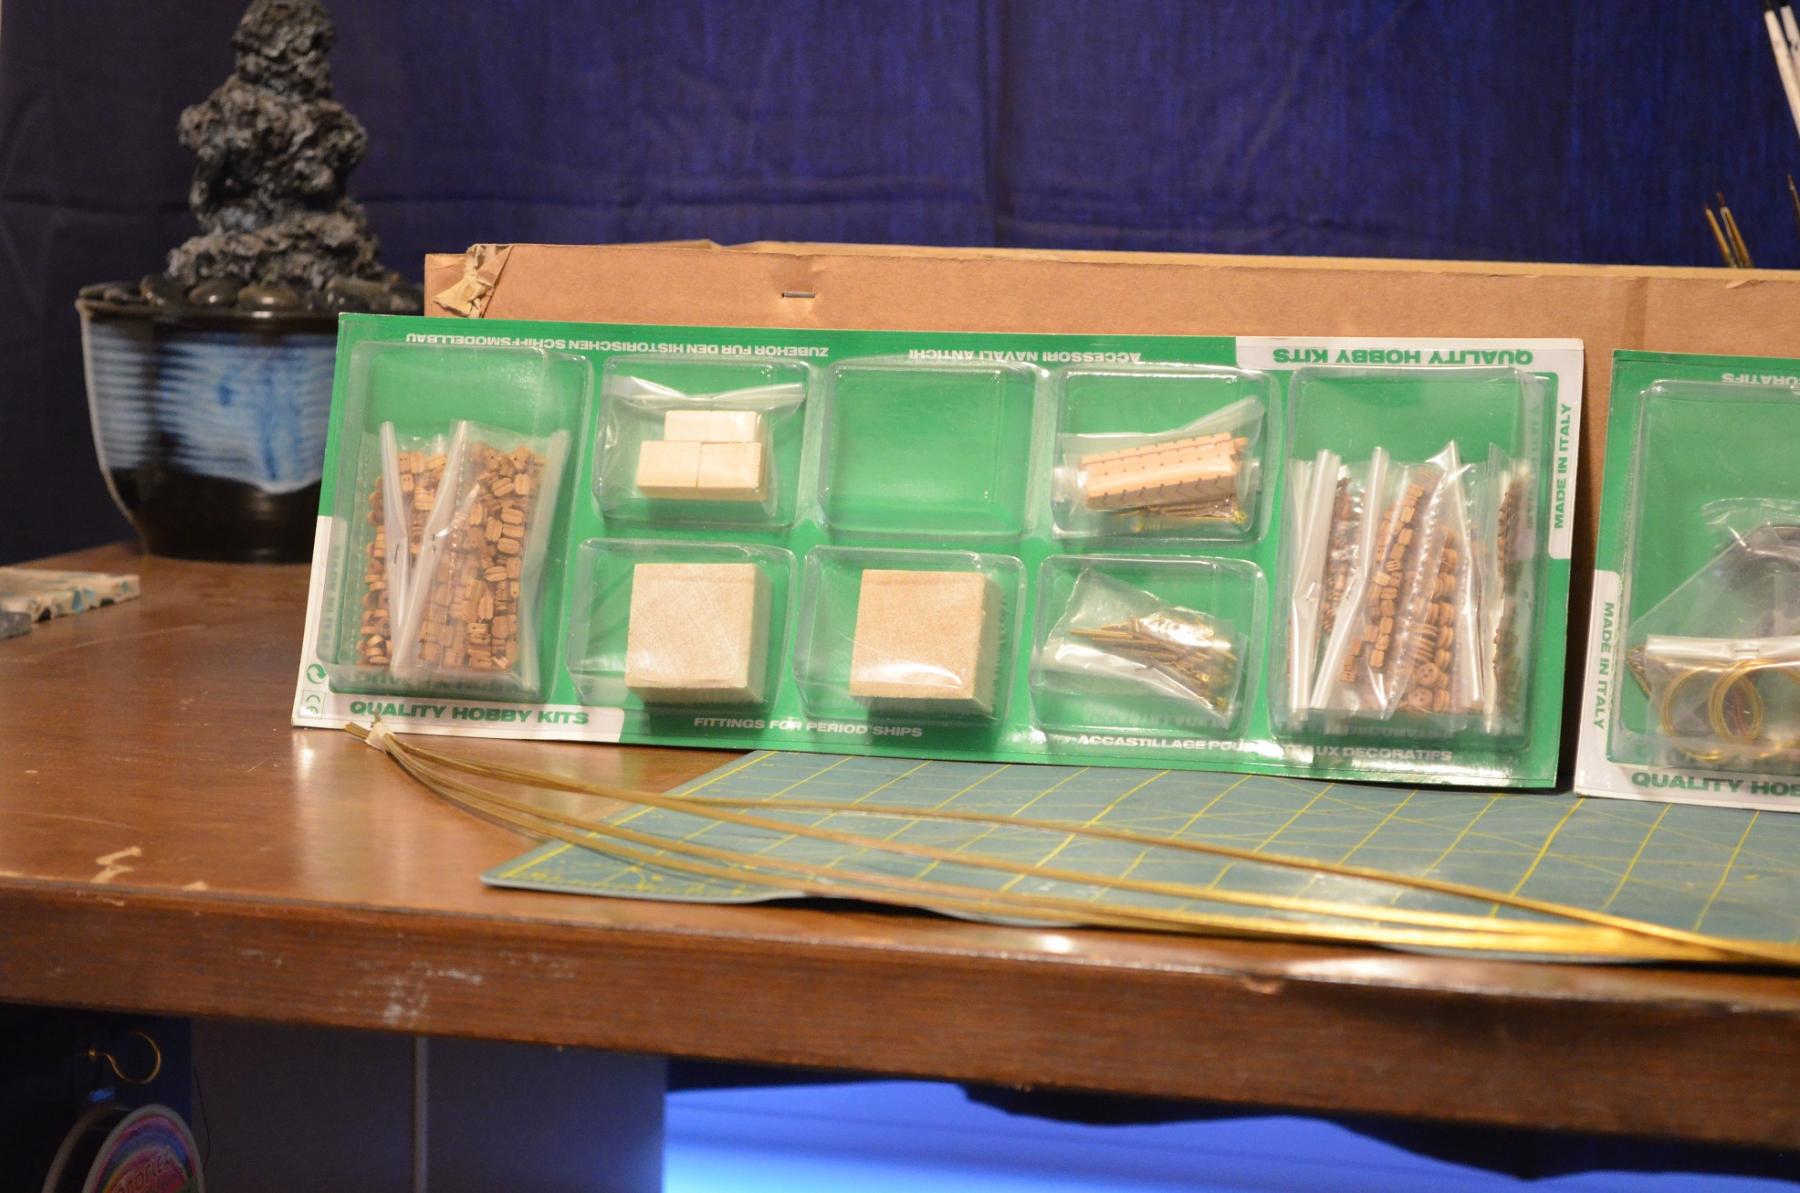
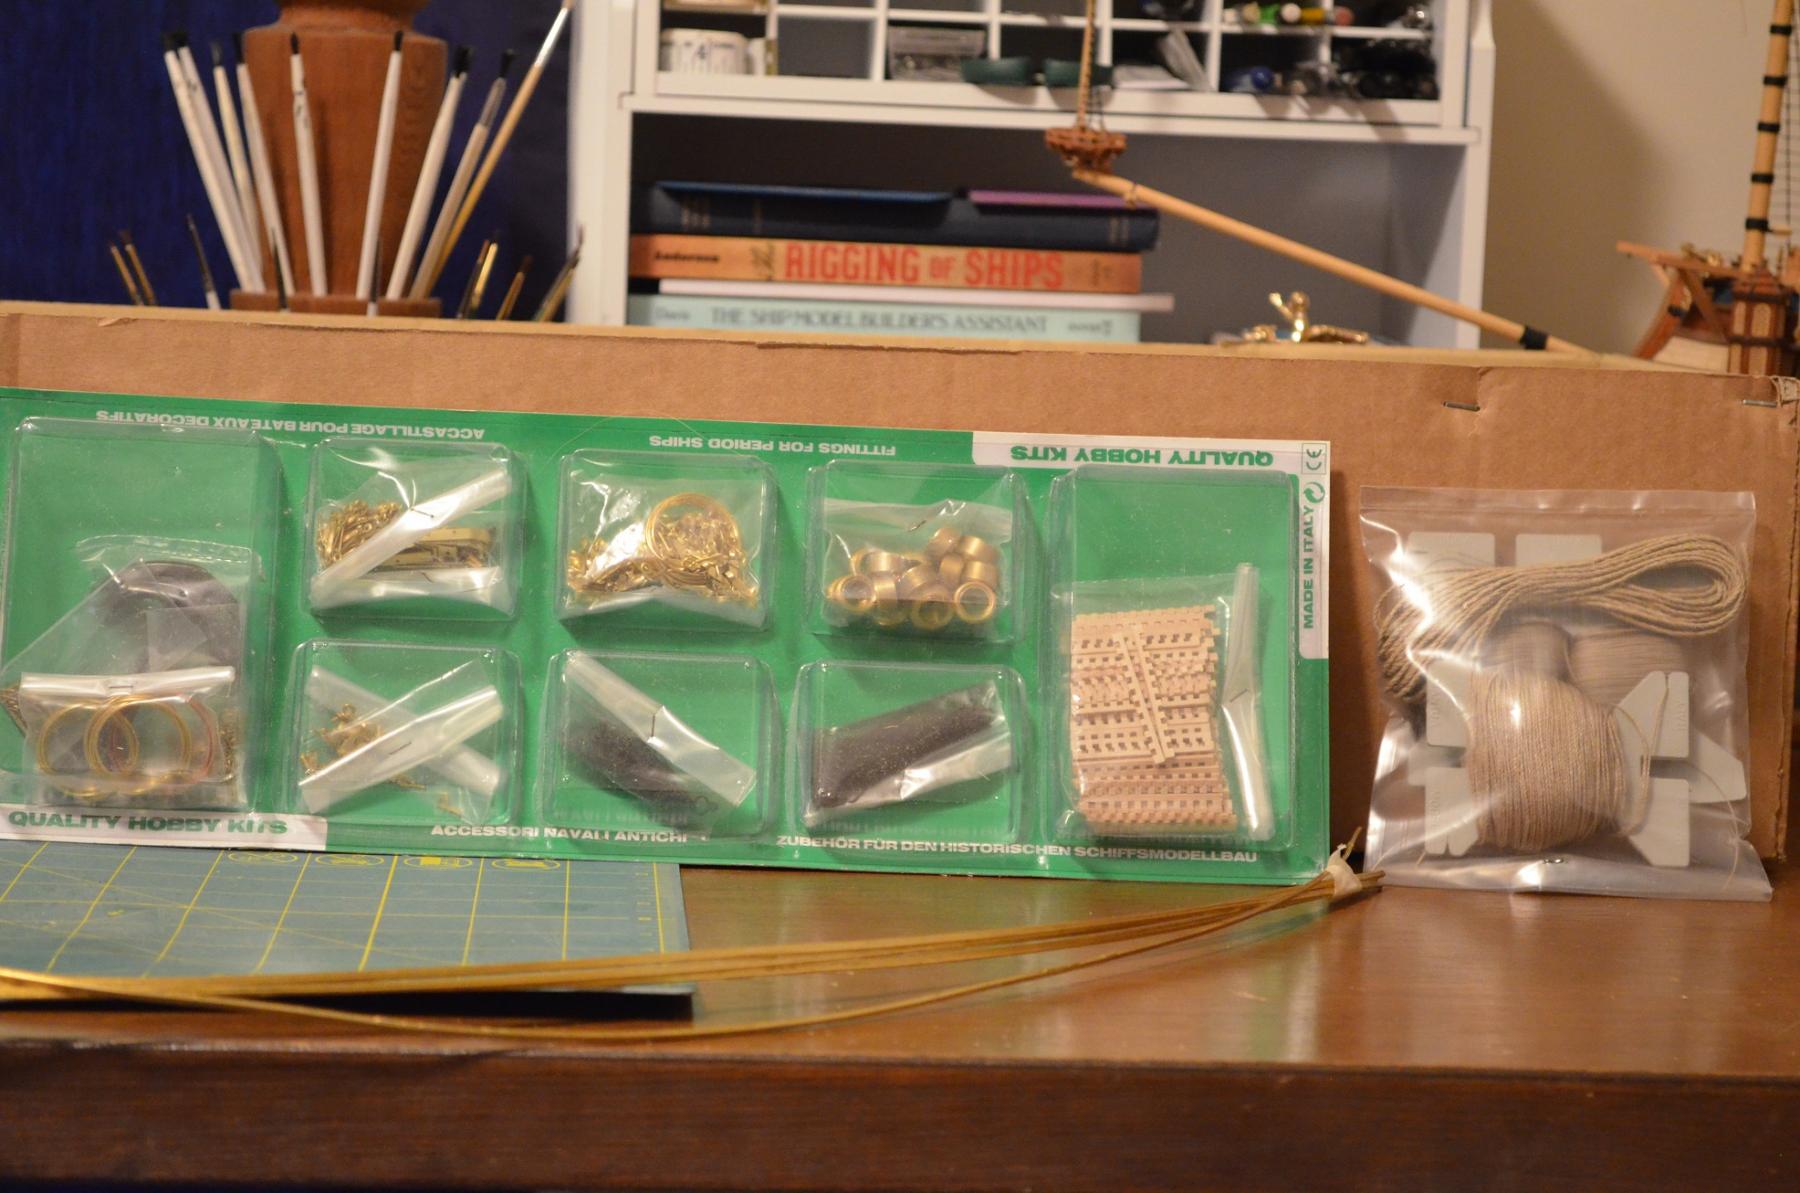
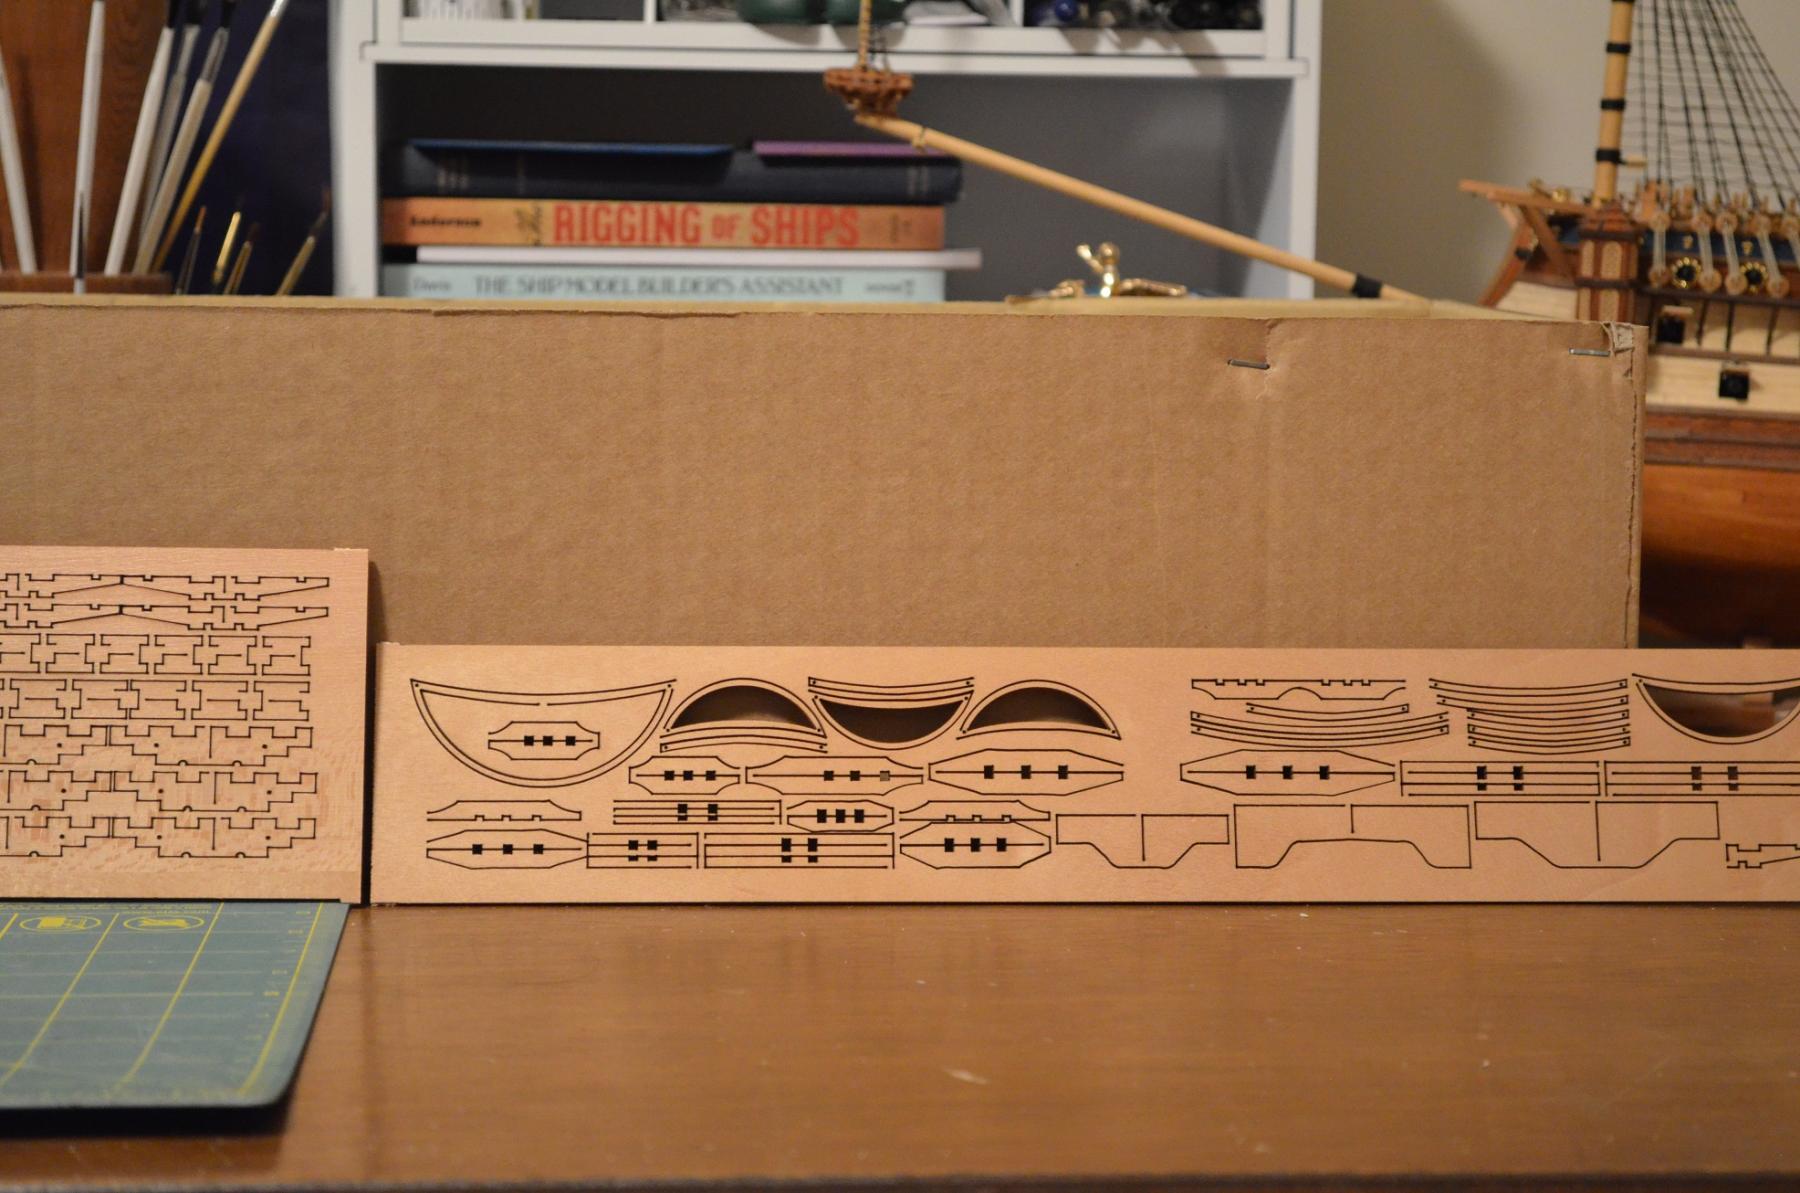
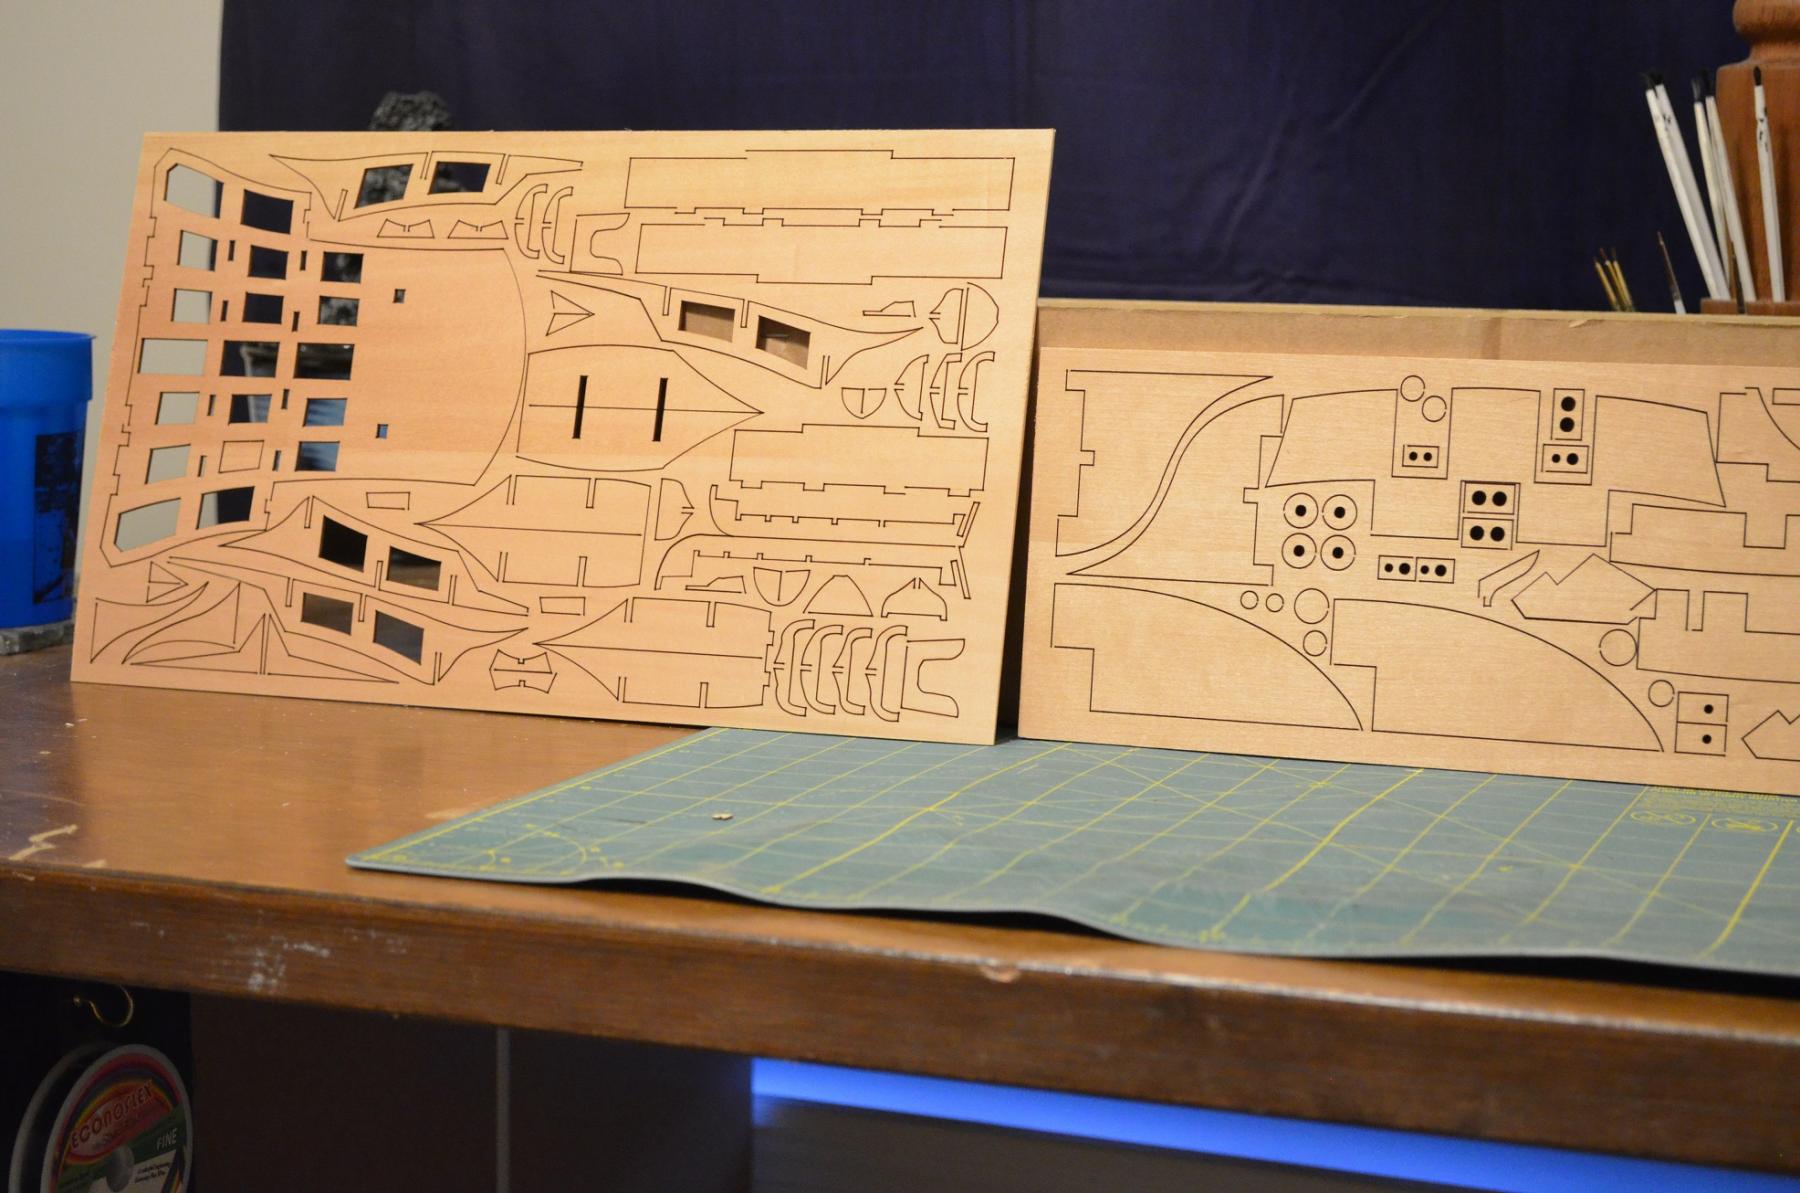
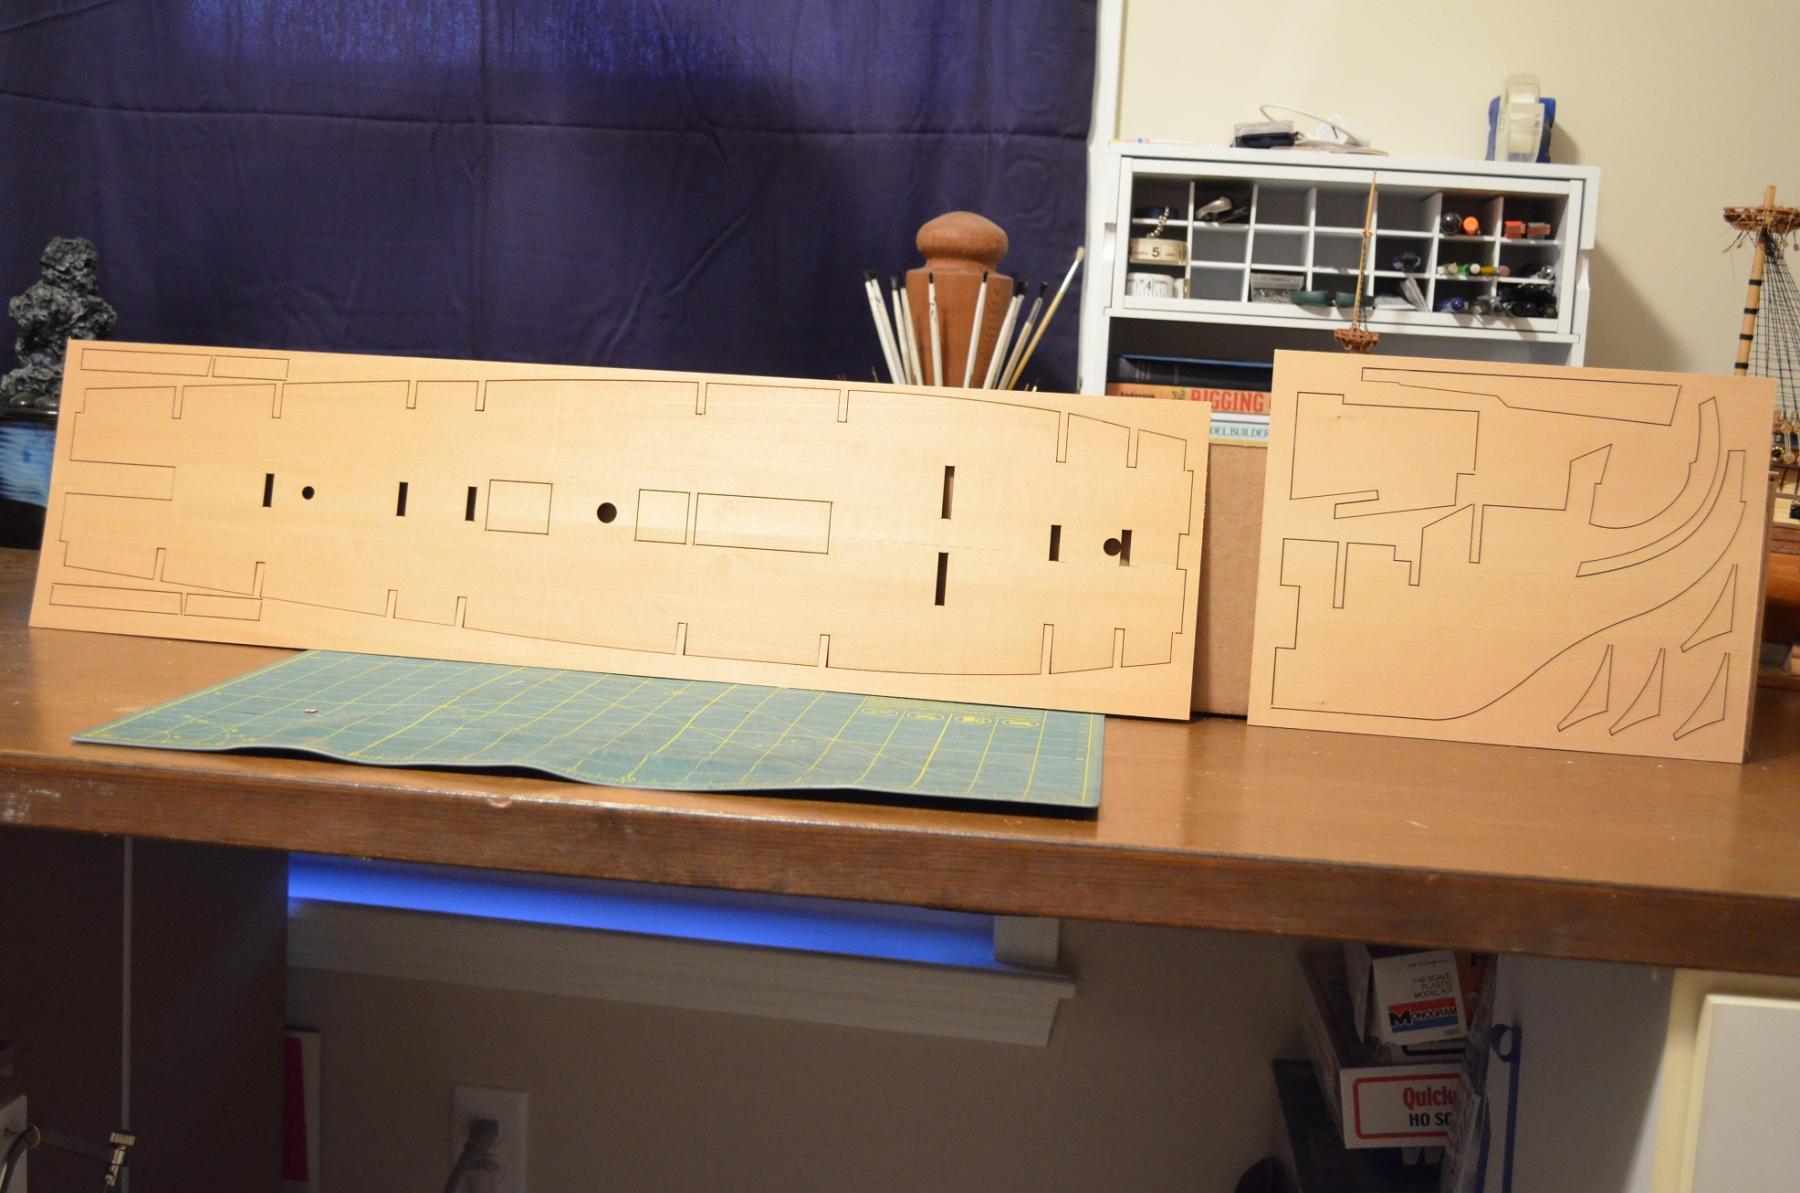
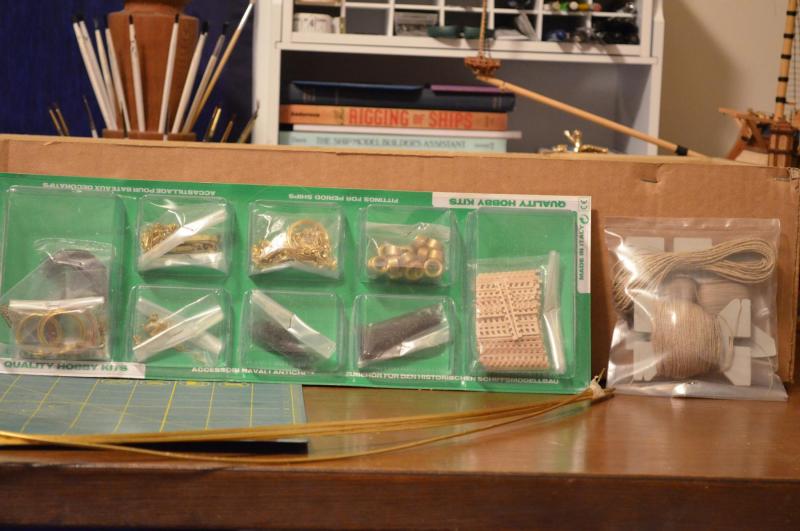
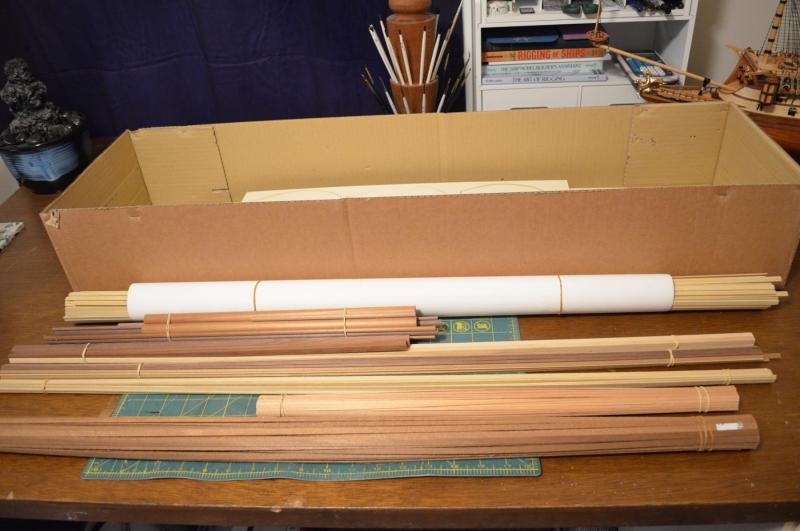
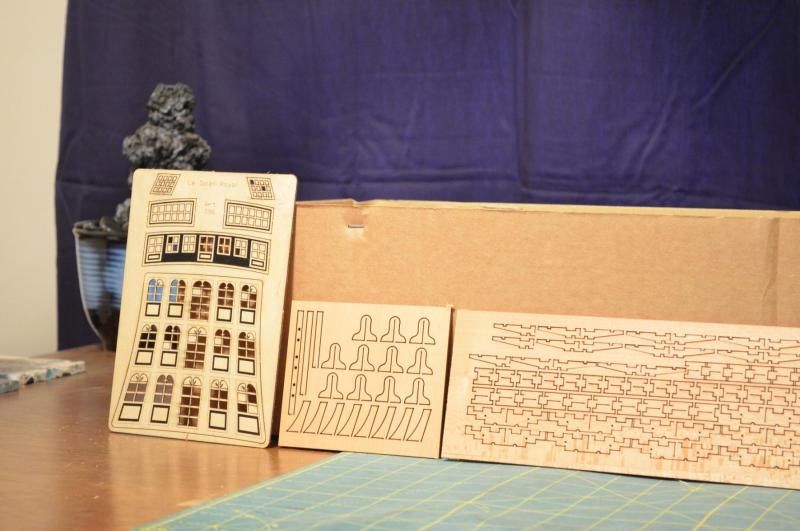
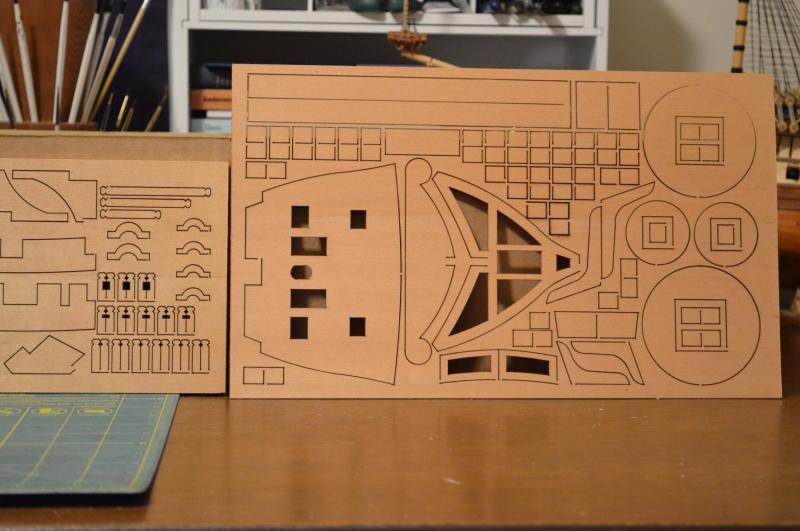
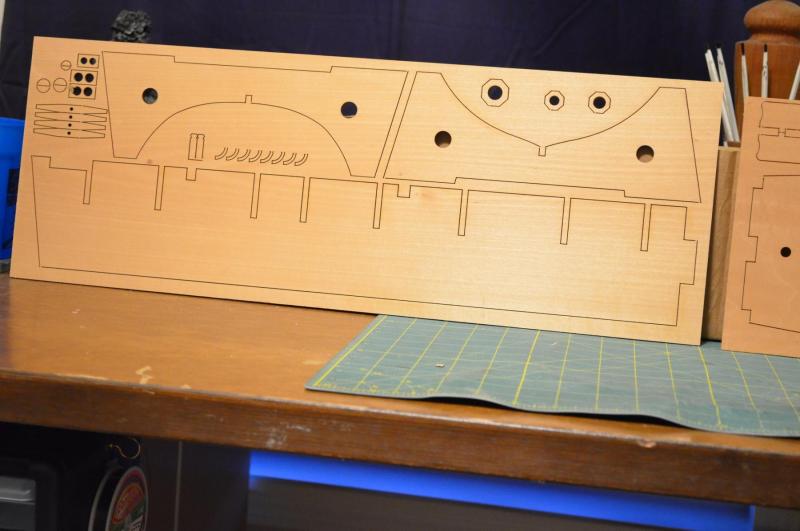
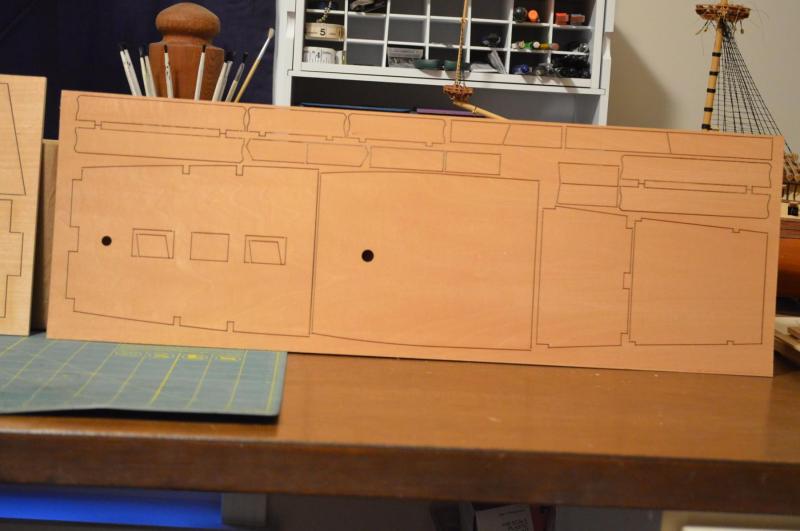
I managed to get more accomplished with unpacking at the new house today and so I decided that I needed a reward. Therefore, I have started my build of Le Soleil Royal. This will probably be a slow build as I am still working on La Couronne and she still gets priority but, as I plan on making a lot of changes to the kit, things will work out well. So to get started, here are the pictures of the contents of the kit. The parts all appear to be usable. The wood is of good quality and the laser cut parts are very clean. The metal fittings look usable as well though as with most, they could be improved. The instruction book is about what is expected in a kit. Plenty of information to build the ship but further research and knowing how to gather additional information from the drawings will be needed. Something nice that was included is a very large, clear and full color picture of the completed model. This helps to make some of the details a little easier to see. Here are the pictures!


- 961 replies
-
- 21
-
-
Either way is acceptable. Can you measure across the deck on your plan sheets to see what that dimension is? If it is the same width then I would add the shims and if it is smaller than sand the deck down. As long as you keep the hull shape and the fairing of the bulkheads true then whichever method you choose is fine.
- 291 replies
-
- 2
-
-
- bounty
- billing boats
- (and 1 more)
-
Planking looks great! I really like the blood wood accent you put in there. I have quite a bit of it out in the wood pile. May have to rip some down and see what I can do with it on a future build. I know that feeling of being ready for planking to be done. The first couple hundred planks is exciting, then the next couple hundred are routine and monotonous but those last couple hundred are tiring and you just want to be done!
- 653 replies
-
- 5
-
-
- trabakul
- marisstella
- (and 1 more)
-
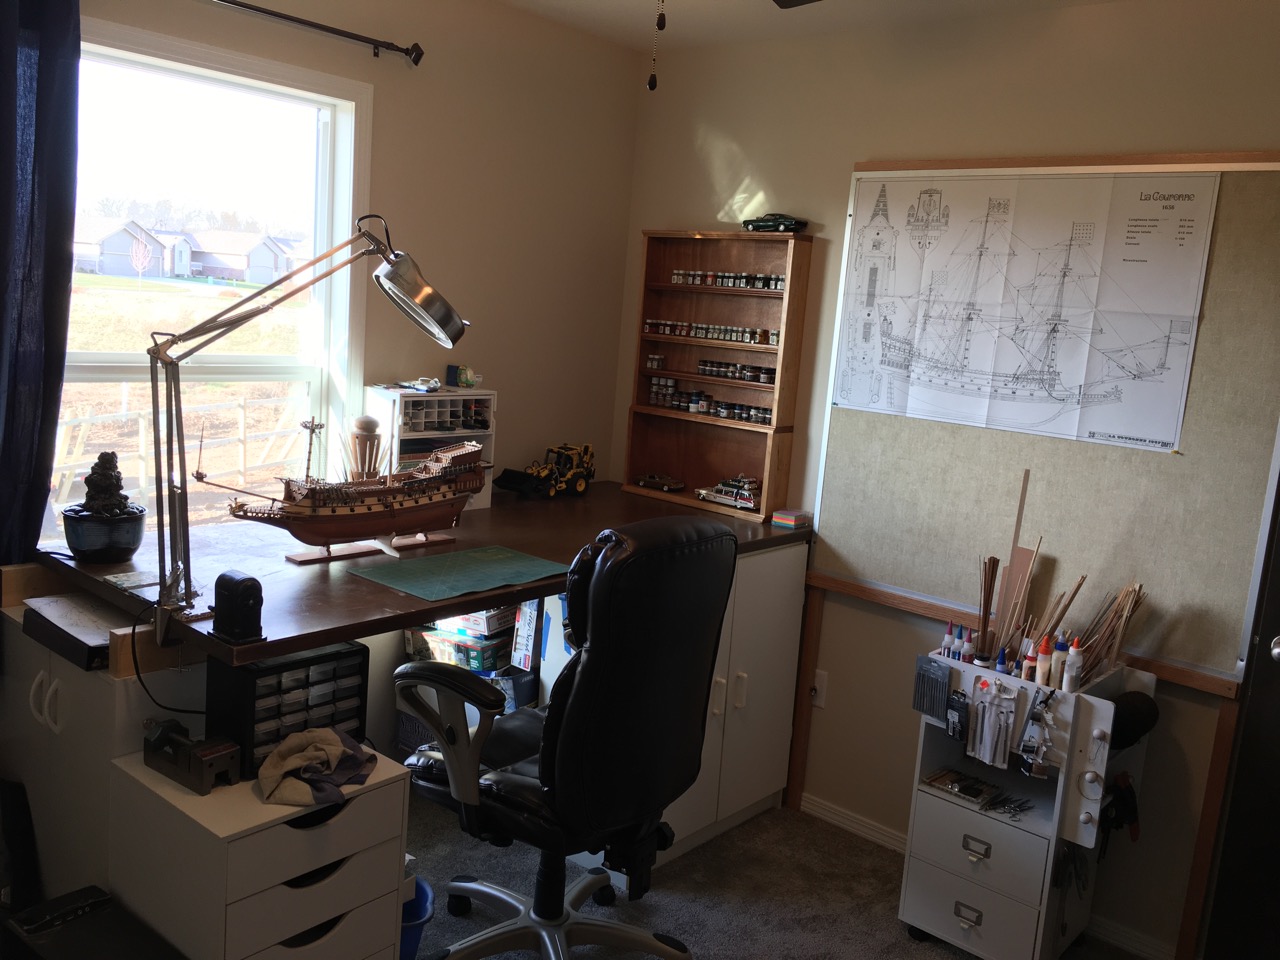
Yes, the window is one of my favorite things too as my last spot was down in a dark basement with no windows and little light. Now I don't need nearly as many lamps on. No fear, that clean desk will soon be back to its normal cluttered mess. I like to attempt to keep things organized but too clean means nothing is happening and that is bad.
- 608 replies
-
- 6
-
-
- la couronne
- corel
- (and 1 more)
-
Moving and setting up is going well. The new shipyard is almost ready for work to resume with La Couronne in her place and the area for Soleil Royal ready to go. Still have a lot of work to do throughout the rest of the house and the wood shop is no where near ready but we are happily in the new house and hopefully in the next few days work can resume.

- 608 replies
-
- 14
-
-
- la couronne
- corel
- (and 1 more)
-
Those tool boxes are most excellent. Beautiful work and a great way to store your ship yard and tools. Looks like your plankng is off to a good start on the deck. I am becoming more and more in favore of skipping the trenails also. Unless you are working in a very large scale they can easily look too large and overwhelm a model. Plus as I have seen pointed out on a few discussions, most treenails would not be easily visable as they would be plugged and that plug would be of a very similar color to the surronding wood instead of the often modeled black. I think you will be happy with that decision in the end.
- 291 replies
-
- 3
-
-
- bounty
- billing boats
- (and 1 more)
-
Brian, that is a good plan and is sually how I glue my planks as well. Just keep the wood glue spread evenly and thin on the plank. This will keep ot from pushing up between the edges and making a mess. A little goes a long way.