

samson
-
Posts
177 -
Joined
-
Last visited
Content Type
Profiles
Forums
Gallery
Events
Posts posted by samson
-
-
Hi John .
of course - just go ahead
Cheers
Jens.
-
Hello John
thank you for the nice words about my model .I am very surprised and honored to be compared to one of the great filmmakers,
 but I can see what you mean by being cast in another time and place - it is a big part of building model.


that with the power - there I must disappoint you - the power supply is cable connected, but with very thin wires,
which is not seen in the picture

unfortunately i have no battery now - it is made for 12 wolt when i used dasbord bulb in the beginning. later i found out i
could use led light .
the current goes via cables ( 0,3 mm virer )to the cradle where the plus and minus are at each end and attached to a small screw when the model is right in the cradle the
screws touch two metal plates in the bottom of the keel.
.thumb.JPG.e68ebffa405cb19aa61dfd4d47ba67c6.JPG)
.thumb.JPG.e1ed95135470825dec314a1041bc6644.JPG)
.thumb.JPG.39a7b691ced773e156b1866a7f6fc1fa.JPG)
.thumb.JPG.2ece47baa855c654976512cb9ab0318f.JPG)
I hope this detection does not disappoint you - even though I thought it was brilliant to be able to use vieres for cable - the navigation light is powered by the support for bulvork where the plus and minus are twisted together as a support and painted white.thumb.JPG.5bfb503a01617f1b5059fbc8fec2885b.JPG) Well but I hope this is understandable what I write - it is with the help of google translate and therefore it can be a bit strange - I hope it worksCheers .Jens
Well but I hope this is understandable what I write - it is with the help of google translate and therefore it can be a bit strange - I hope it worksCheers .JensÅbn i Google Oversæt Webresultater
- popeye the sailor, etubino, JayCub and 1 other
-
 4
4
-
Hi Denis 🙂
I'm glad to hear from you again. yes I think you have long since finished the fishing cutter "Norden". so what are you building on now? I am still preparing to raise the mast but there are many shortcomings I have skipped earlier which must now be done before it is to raise the mast - otherwise it will be inaccessible to reach. Here is the main mast stays attachment on the deck, which I made this morning - I have run into a little dry time so I am now on the computer.
")
I had to remove the bench to get to
the brackets consist of a brass nail, one piece 2 x 2 mm plate from my brass platter and then some cut-off from some billing bots fiting.
It all happens here at the rowing shop
.thumb.JPG.361a78b82ba958bc1c1a5e0c6d86d4fb.JPG)
one piece soldet
.thumb.JPG.41122e67b2fc05fa537abb6f5b5fed61.JPG)
here with 1 mm brass wire bent to rings
.thumb.JPG.51d5ab4540672b7ffa4cda5e303c6460.JPG)
and then just wait until they are dry 😁Cherrs All.
Jens .
even if they don't come on yet, I just have to do a test. and, as feared, the space is very tight - but it might just be there
.thumb.JPG.e0bec79b5ec5599b69a4f50b2bed2720.JPG)
.thumb.JPG.f537a784b3b5f56b50eaacd7768835ea.JPG)
- JayCub, etubino, Vladimir_Wairoa and 3 others
-
6
-
-
smukt arbejde - meget autentisk
-
Hi a little updating. a lot of work goes into preparation to finally raise the masters but I thought myself I have come a long way with the form mast. - why a yard is placed is because it is a whole ring that connects it to the mast and therefore must be on before being closed over it
.thumb.JPG.3e300d4564582542918c62eeca5a2b53.JPG)
.thumb.JPG.00ac5b1613e40f1fcc5d131fcab266ea.JPG)
.thumb.JPG.893720a313a83f32a9a77b3c35fa1eba.JPG)
.thumb.JPG.a7eb06ccfa2dd67e3451203ac799022c.JPG)
.thumb.JPG.f61b181b20e85845642a19d6b601ce59.JPG)
.thumb.JPG.0a5e5a97533802710db6cb02b524e5c9.JPG)
Well.
still a lot of work to do then back to the workbench
Cheers All.
Jens
- GrandpaPhil, Charter33, JayCub and 2 others
-
5
-
lovly work you really do the ship honor
-
nice looking rigging - well don .
-
Hi
I started mounting the rig but it takes time, so to start with the easy one I started with the bowsprit just to get started.
.thumb.JPG.da886a1f664abd722f1c02845b303933.JPG)
.thumb.JPG.af8bd5fedb722db58ec6f3cff332ff24.JPG)
.thumb.JPG.920e22b429e8bd69179abf8462413fc9.JPG)
.thumb.JPG.101bc521f3109655739c7c9077205426.JPG)
Cheers All.
Jens.
- popeye the sailor, JayCub, etubino and 3 others
-
6
-
then we are two who build without a professional background, but if you stick to the drawings and many photos of the details then we can probably com thrug this vith stile .
Jens.
- jud, NenadM, popeye the sailor and 1 other
-
4
-
it is now almost 4 years since I put dead eyes on C.S. and much has happened and learned since then and now I have broken the code to make ok dead eyes and have therefore changed them all.
Before :
.thumb.JPG.757655d9e351230574c53dfd4fe555fa.JPG)
.thumb.JPG.472856087416165438a34a4a16319093.JPG)
After
.thumb.JPG.56c5302e43acca568cd63f0924c692a3.JPG)
.thumb.JPG.ea0ce3337ffdf6182a083d462e27142f.JPG)
and thus the work continues indefinitely
Cheers All
Jens.
- popeye the sailor, hof00, etubino and 3 others
-
6
-
Hello everyone I have finished the lower fore topsail with its special bearing support device. I've made it movabel like on the real ship - unfortunately, one thing that won't be seen when it's all finish one day, but I'm glad to know that it's working properly.
.thumb.JPG.1184e92f662e3006599ea2b1bf2296c0.JPG)
.thumb.JPG.55d73e53a81d823a734b6a037d0c3abc.JPG)
.thumb.JPG.2e4f4031e268b5b8444668348e857943.JPG)
.thumb.JPG.a7ee50dc4183f780c16d963328a81c17.JPG)
-
Hi Denis
the weather here in denmark is the past most for indoor pursuits so it helps a little at the work on cutty sark.
cheers.
Jens.
-
4 hours ago, petervisser said:
Hello Jens. Really nice work on your masts and yards. I especially like all the fittings you made. Where did you learn to make such detailed fittings?
PeterHi Peter
Thanks for your nice words.
I took part in a 14 day jewelery course which was very instructive in terms of learning to sand cast and to solder etc. and the best part was that I was one man among 12 sweet ladies on that course
-
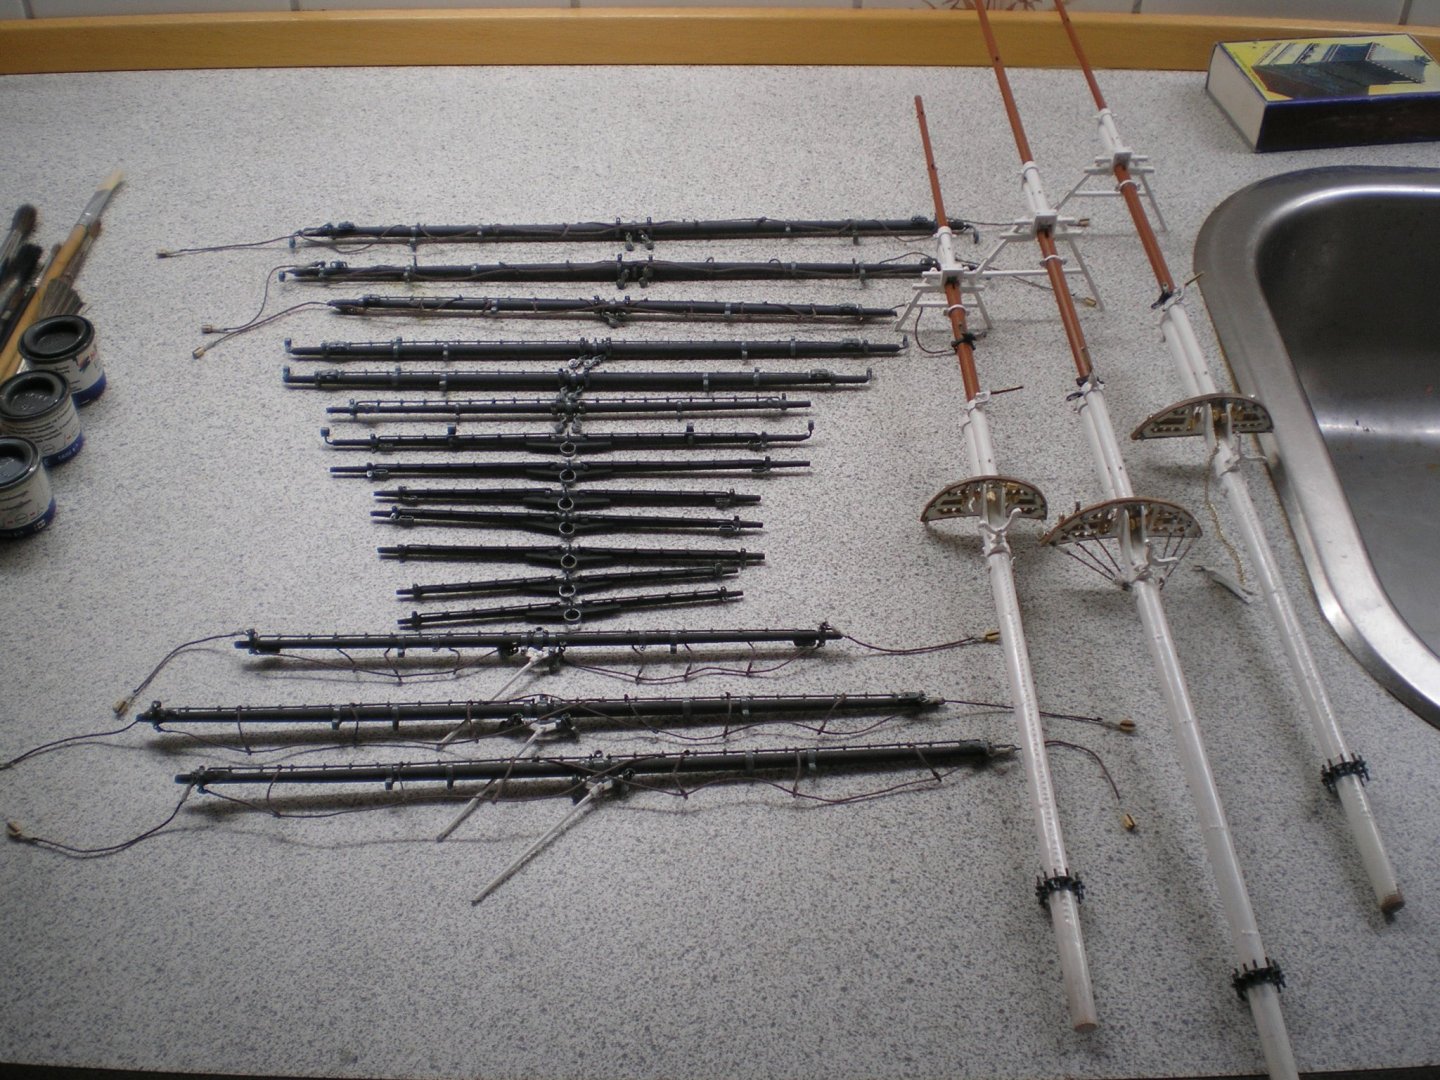
Hello everyone . I have spent many hours on this mast project. and have now reached where I want to mount the yards and make the top mast ladders and so on ,but still only one at a time -the picture with all the masts is just to boast
.thumb.JPG.fb8060a554f23dc33aac9b150154780c.JPG)
.thumb.JPG.d4dfc4d5631d5df53c8ae0f76a2a6e42.JPG)
.thumb.JPG.481748c2c11a6d22630ca3c4381f34cc.JPG)
I look forward to the great work being done now that the masters "get together"
Cheers All.
Jens .
-
Hi Etubino and Guy 😃😄
thank you for your nice words. I appreciate it
Cheers Jens
her a small update :
.thumb.JPG.59b6fe49121d755cbfe755d5d83501a3.JPG)
I just made thise "dont know the name "but fits to thed ends of the yards .
-
then all yards are formed - 16 in total, the last 10 still missing the yard strengthansers rope. but at least I'm back on track after a long break. it's nice to get started again and get the dust off the "old lady".
-
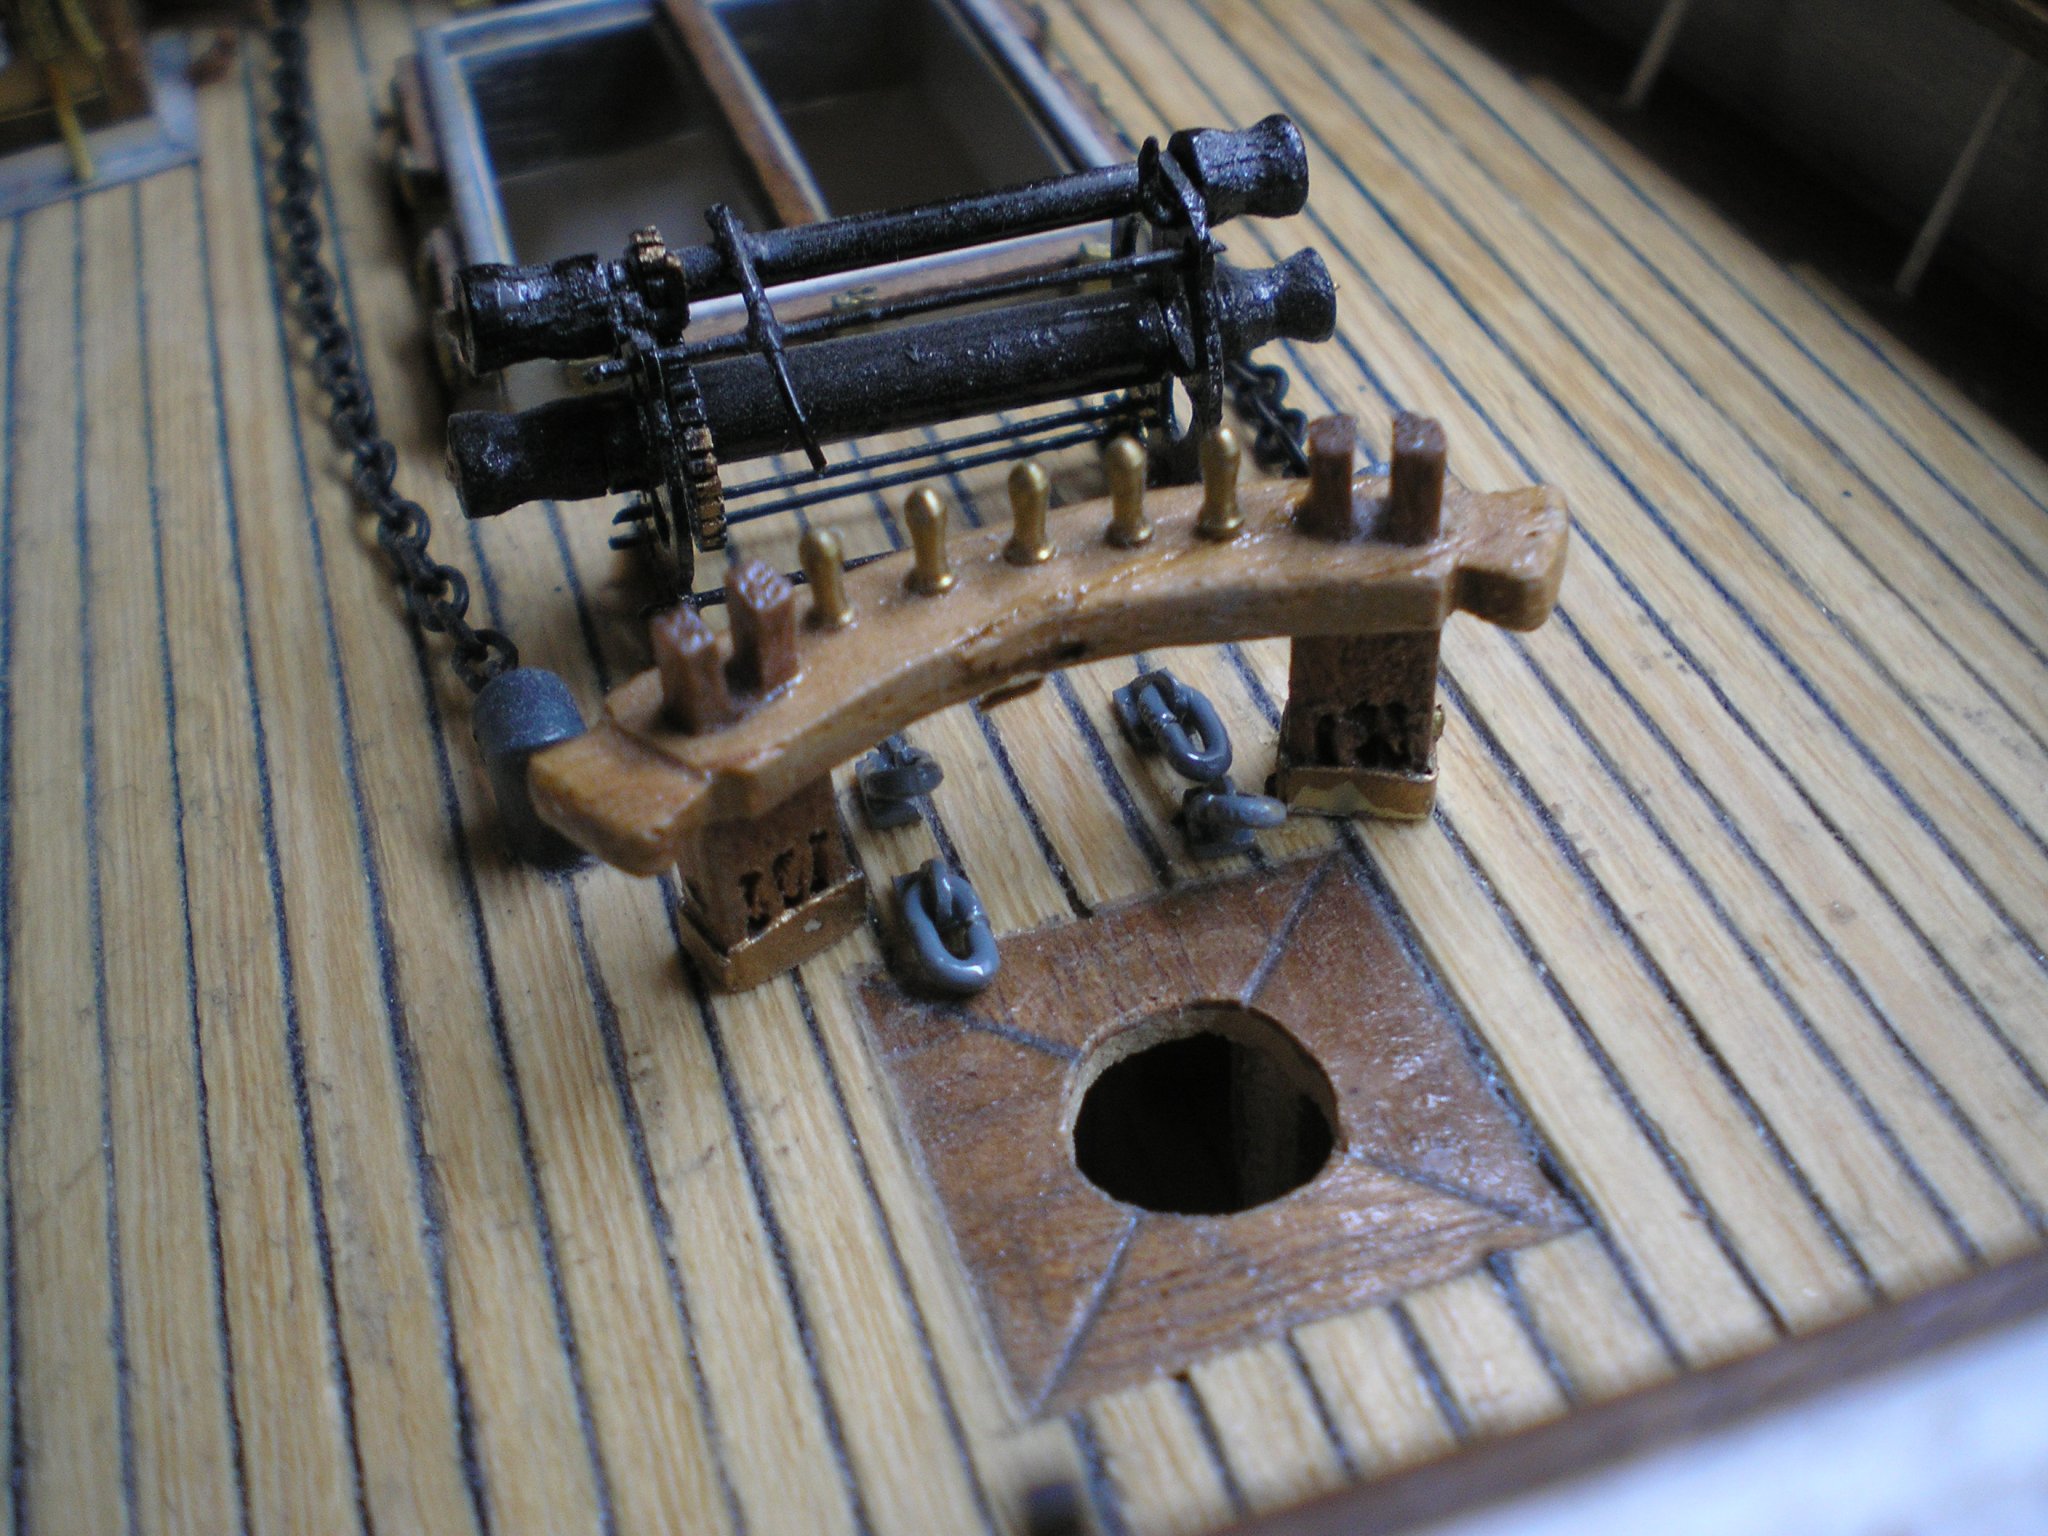
I have also omitted this detail for the same reason - a skilled shipmaker does everything to avoid seeing these wood plugs in the deck so that they hardly are seen in real size so it seems extra grotesque to highlight them in scale 1:84
Of course it is only my opinion.Jens.
-
-
beautiful work I look forward to new great updates
")
-
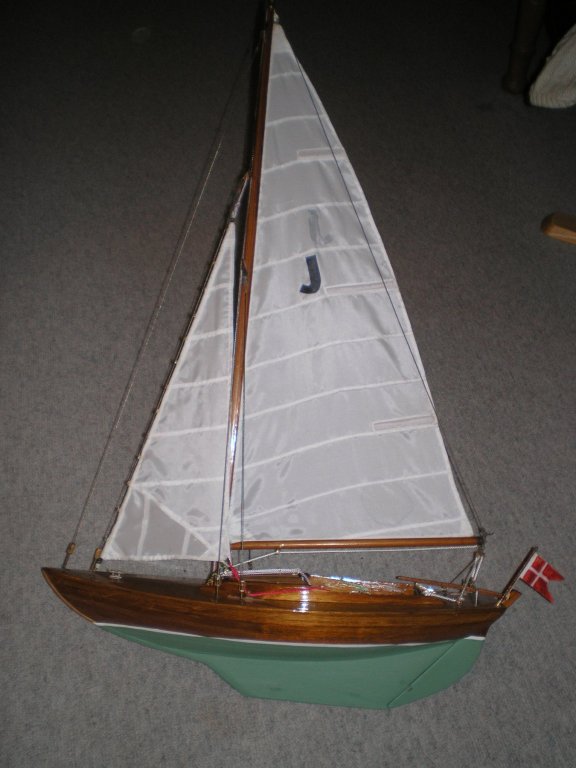
thank gentlemen

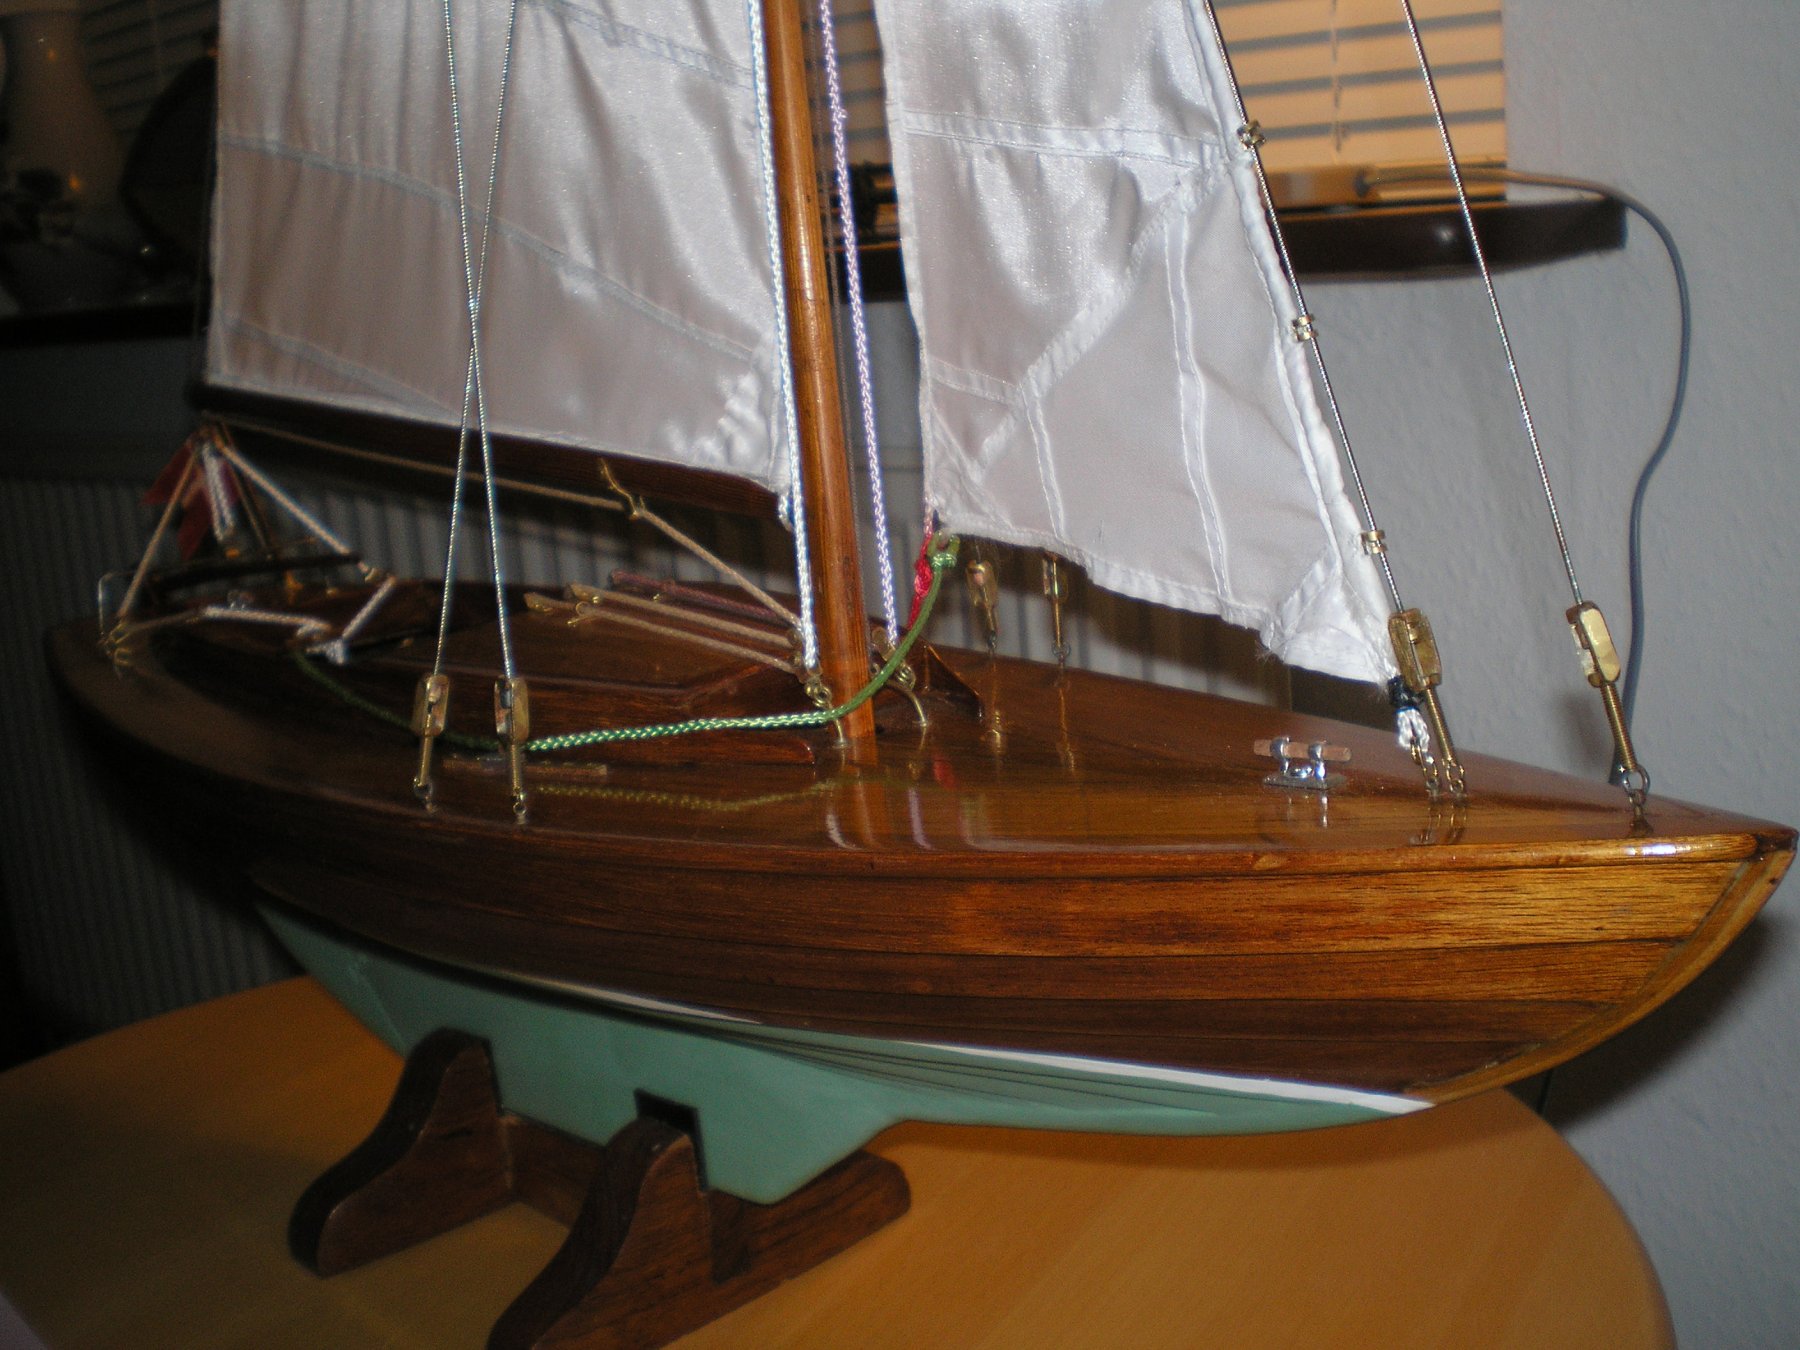
It has also been a great pleasure to rebuild the well-built model, I could immediately see that it was something special and that only little fittings should be added, and of course new sails, I could have done more at the mast, but with respect for the "model builder" I keep what is because it all seems quite good, and then I can just build my own junior boat from scratch and see if I can do it all better - that could be a challenge.
Thank you all for looking in and leaving a commentary
CheersJens.

- Mark Pearse, Valeriy V, mtaylor and 3 others
-
6
-
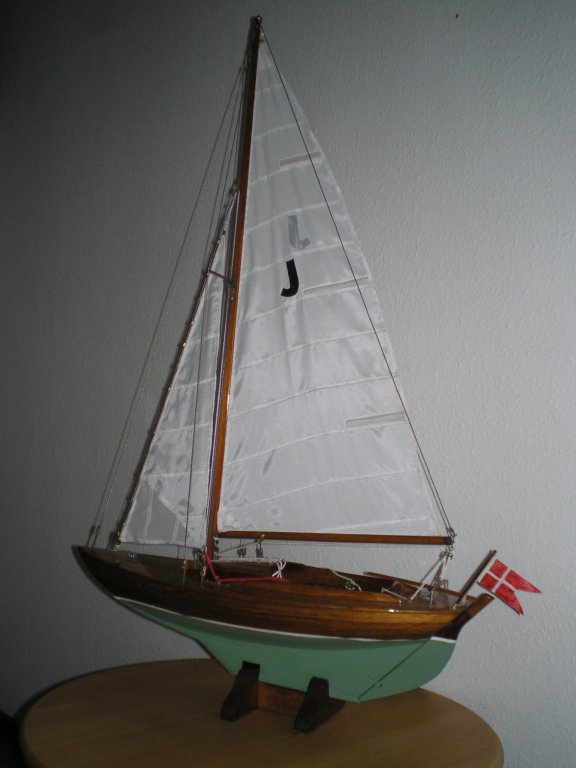
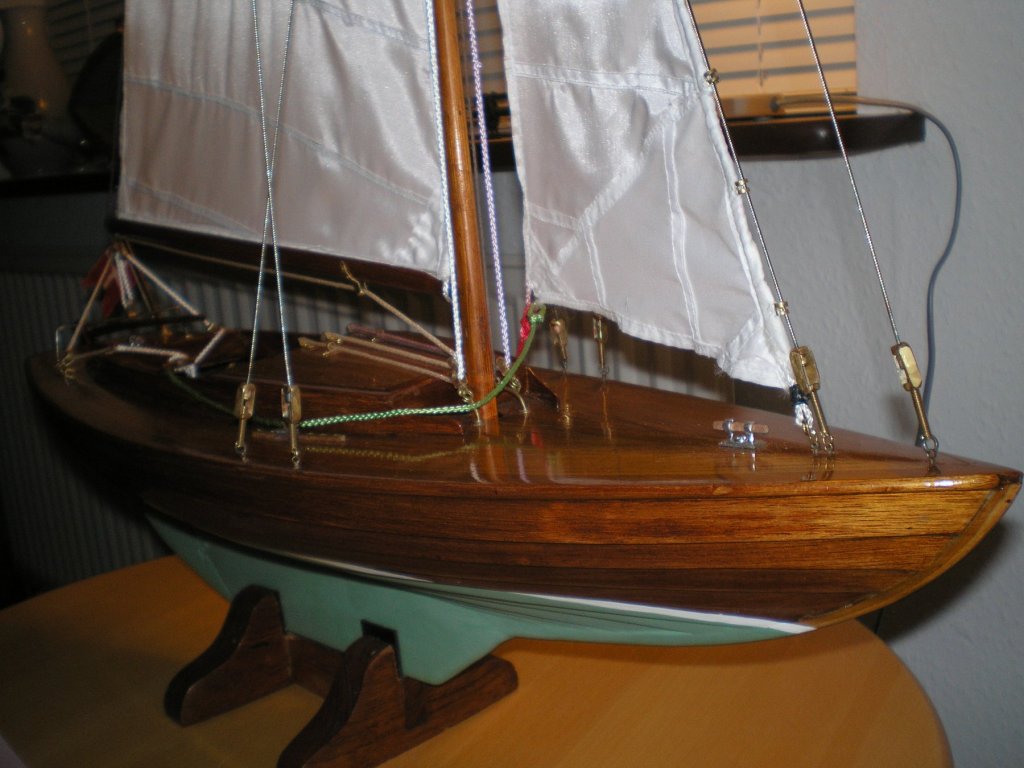
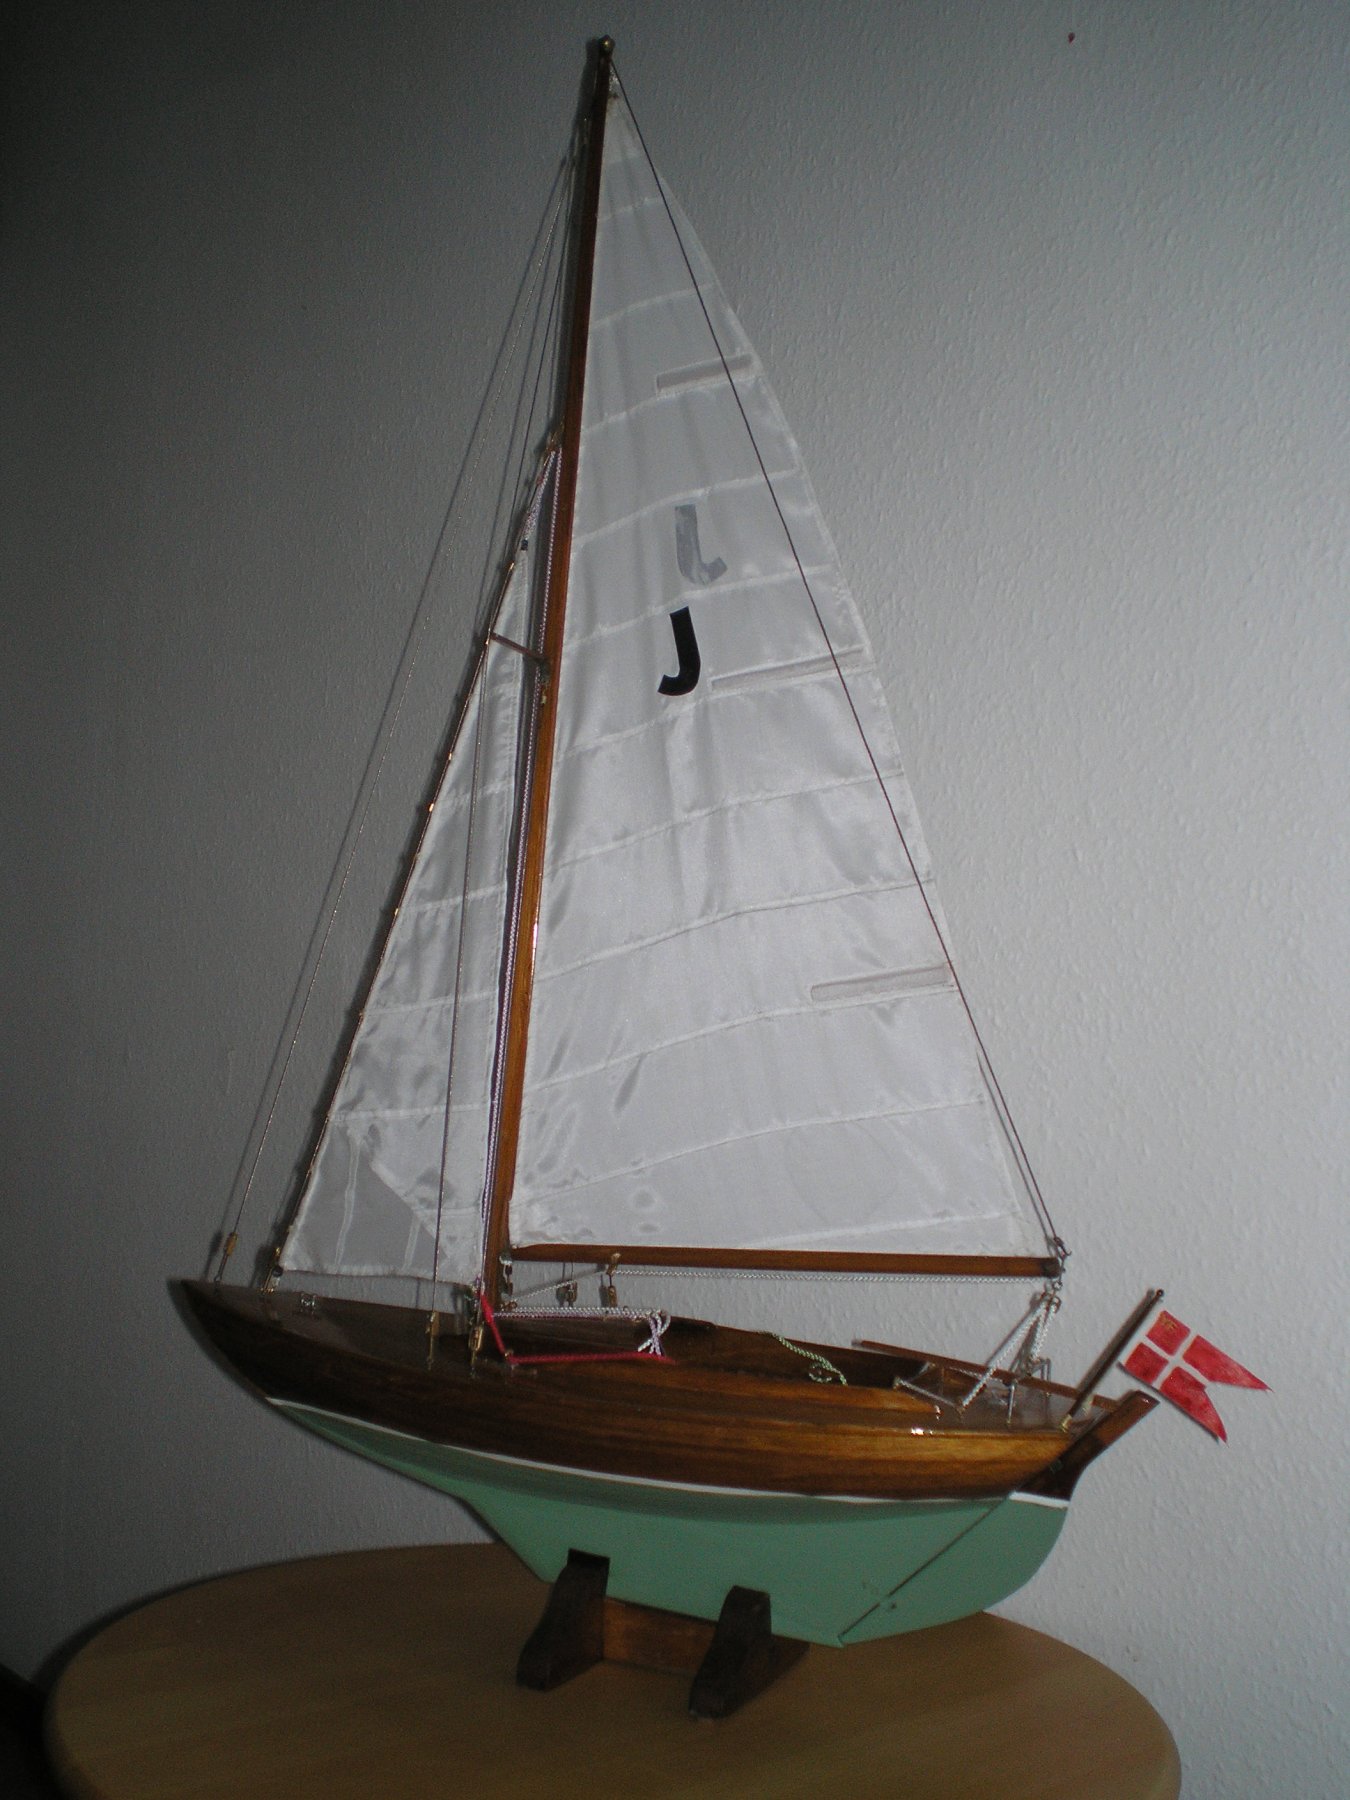
I consider the project to be completed. I have a couple before and after pictures. What I most like to emphasize is that I have changed keel and rudder to a more real desine and then to change steel wire to really braided wire. that can be tightened up. And then of course new sails - probably the most significant improvement.
.thumb.JPG.a9315ac12573c37331dfbb7c1ad680cd.JPG)
.thumb.JPG.0ef04a321b06b20756255a634fe9681f.JPG)
.thumb.JPG.7d7d0fe0680ce7ea3ee08c1a587250a8.JPG)
- Mark Pearse, GrandpaPhil, mtaylor and 3 others
-
6
-
yes it is right but also the keel changes in the same period from 390kg to 290kg
-
Hi Mark thanks for your fine coment on my build .
i look op the pagde and i hope this is the right tiddel :
https://digitaltmuseum.org/search/?aq=topic:"Fritidsbåt","pojkbåt"
Hawe fun
")
.JPG.a4e4e85949696bae219e435495610342.JPG)
.JPG.8480fc8cf7206a6f388c8c96c6cbe0c0.JPG)
.JPG.db03f8e23a886fdce4effe21b6467813.JPG)
.JPG.2d65df06669eba56439ce598392f903e.JPG)
.JPG.7329a54bd6c9a90d39c5fb03e4ab7361.JPG)
.JPG.98acd5e3a7238f5aab94537e987c2f91.JPG)
.JPG.b49c3f47099e484dc1bed07430380a08.JPG)
.JPG.d61673425bc19aa281bc26bf925a5f1a.JPG)
.JPG.f51400efcca7782282afb9367d76bac2.JPG)
.JPG.ad4494f647fb3e11ac6e2833f20460b1.JPG)
.JPG.c8100749d05665b312468efd900fa7f2.JPG)
.JPG.415f19921e5429b84f9c7bff1eb1b0c6.JPG)
.JPG.126d2dd8549b19bef3195fe7f6efb056.JPG)
.JPG.d83a79752b2fdc27c5e927bb09880350.JPG)
.JPG.3274dddd40730c73bc5d4beacec53368.JPG)
.JPG.eaf03e1b2c9ba204e7699036bfdb3dc5.JPG)
.JPG.006e8c9471d878fadede3b14528228a5.JPG)
.JPG.266079fb7d30c27f4759e2d42be805fd.JPG)
.JPG.f9995aa2788ac47812c7699a9bdb26f2.JPG)
.JPG.404842cb10d1beaf0f13052cfb51edd2.JPG)
.JPG.75b2708b1f170e1c3185c1eed6284b67.JPG)
.JPG.f3a9ad9fe78f043adb04fca4cbeda487.JPG)
.JPG.23a491ef32ef07fa6ea7321b9d663fa2.JPG)
.JPG.af6910b1cbefbb9d850a066bb4ef4c25.JPG)
.JPG.ae386f5bc503afae35c76dbaa9b77033.JPG)
.JPG.223bea2741b157851251421dc17a5c9b.JPG)
.JPG.ddc94e7d8809a31594798bee45b91a28.JPG)
.JPG.d20fff24e79d00a2dc541b9ad1d7dc99.JPG)
.JPG.39cceefd662466bd38ce82d094d9ba1b.JPG)
.JPG.26f4704c1c79da8daf36600a14be1bb5.JPG)
.JPG.b01b849173baff5ae3074dc38e472d40.JPG)
.JPG.f8d7e4c1e30381cf5ec680034add9e29.JPG)
.JPG.1f0143128b86305ae3f6fc5ea65b5abf.JPG)
.JPG.bdb7439cbd0cf9bb564cbca4812675b2.JPG)


.JPG.f2314bb75ba51d133f3b76791d926987.JPG)
.JPG.e804e45332da3b73f6cd17c667d54fb2.JPG)

.JPG.dd9ad8dbd452a32fadd20ddae857756d.JPG)
Cutty Sark by samson - Billing Boats
in - Kit build logs for subjects built from 1851 - 1900
Posted
hello etubino")
thanks for your comment i appreciate it
I am currently raising the mast - here are just a few pictures of it. I also just made me a new space holder for the rat lines (modifede the old more pricese ) which I will soon be busy with..thumb.JPG.26014283e4191dbf1ca8b6460a4e0782.JPG)
.thumb.JPG.7be2b27d56097157b5c140531b0e9b1d.JPG)
Her is a pic. of my old space holder but the drills always catses the tread , and get stok in the other riggin . so now i changed the dril with to small woodstiks - hope it wil bee bedther .😁
the old one
The new on.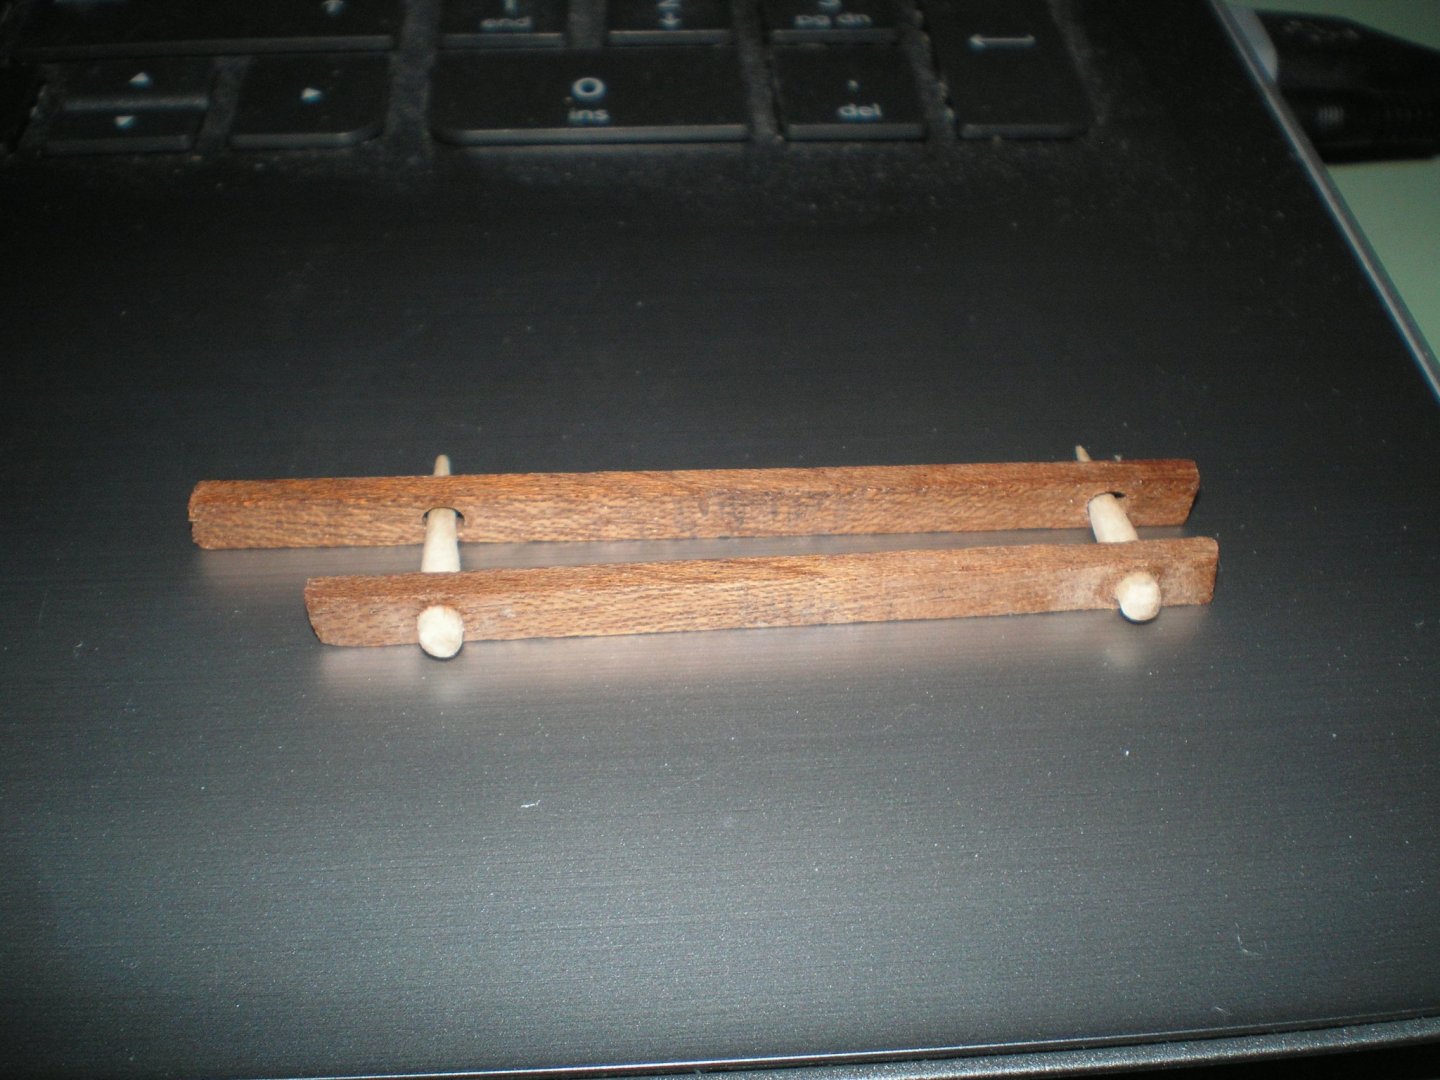
Cheers