


Overworked724
-
Posts
1,263 -
Joined
-
Last visited
Content Type
Profiles
Forums
Gallery
Events
Everything posted by Overworked724
-
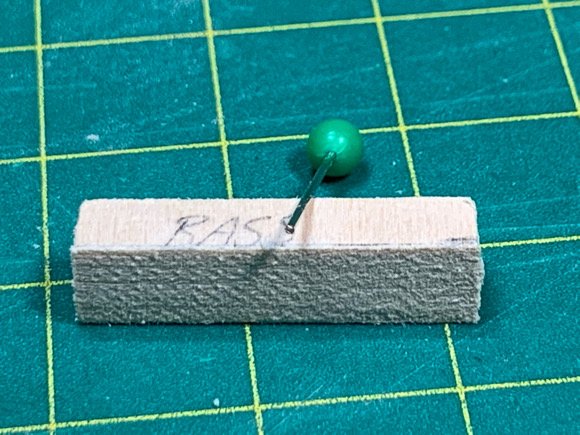
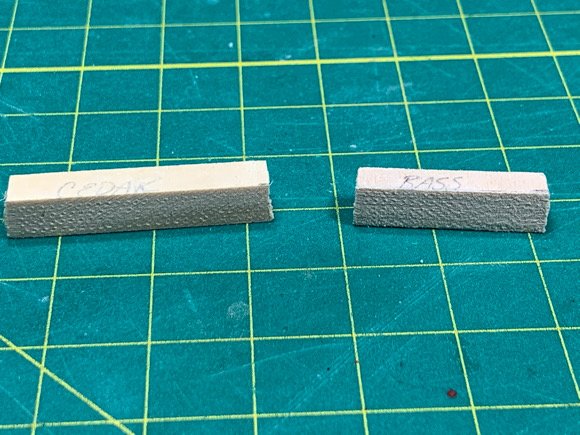
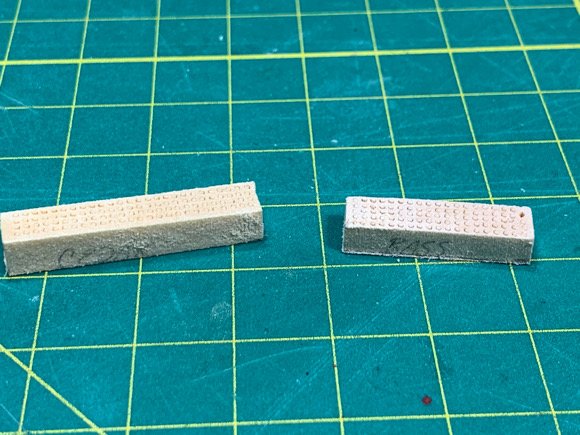
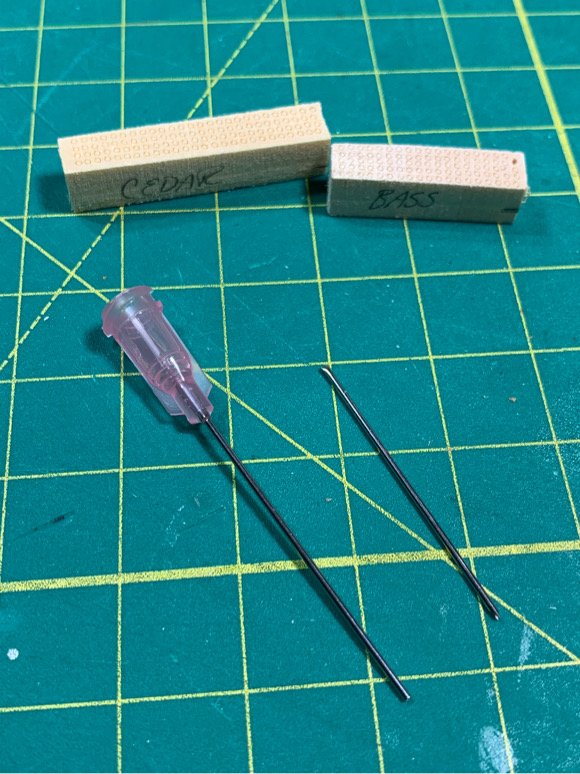
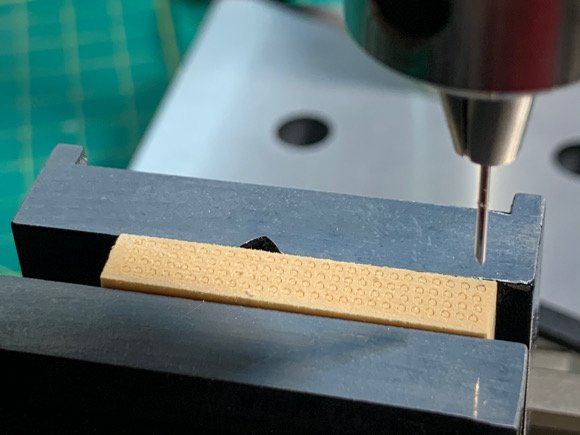
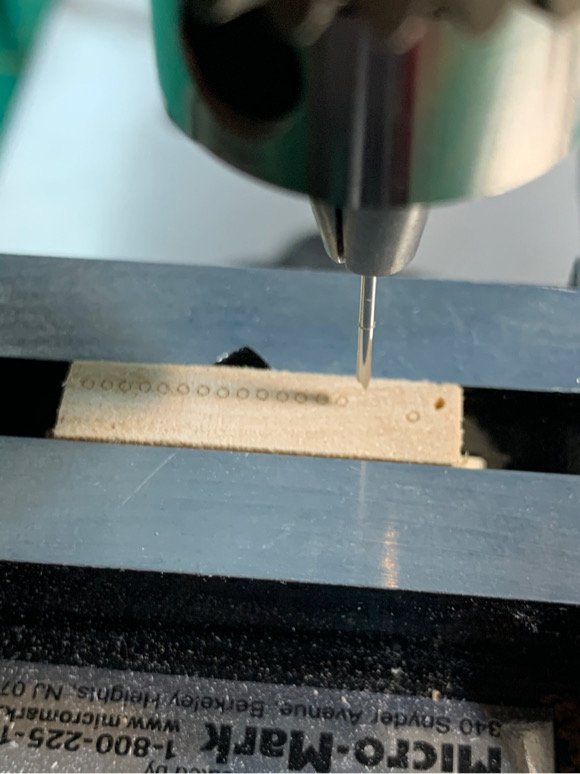
 Last night tragedy struck my Syren. I'm typing this in so that folks know that these things simply happen. Live and learn. I was working on the starboard side bulkhead planking when I noticed the top of the stem was slightly askew. Upon closer look, the top of the stem was detaching from the rabbet. I think my problem was using that PVA glue which turns translucent upon drying (Titebond translucent wood glue) instead of normal carpenters wood glue when attaching the rabbet strip and stem/keel. I noticed some slight glue residue along the seams of the rabbet after my discovery and noticed that is was not solid but a 'gummy' type of residue. Great... What I think happened was that some of the planks at the bow still retained some slight 'curvature' and when pressed into the rabbet was applying slight lateral pressure on the stem due to the wood strip want to retain it's original shape...add that minor force over multiple planks and you get a lot of torque pushing the stem 'away' from the bow. ... which is what was happening. No pics here because I'm a bit pissed at myself. I simply reinforced the stem with additional spot glue and clamped it to kingdom come. I am also ensuring to use my heated plank bender to ensure the remaining planks have no curvature which might put additional strain on the stem. It all looks ok as of my writing this...but aside from tearing the whole bloody thing apart to fix a problem I can only guess...so, I'll be pressing on. I decided to take a break from planking and revisit my intention to use toothpicks for treenails. I used them on the Sultana and made them by pushing the toothpick through a draw plate. Tedious, irritating, and tiring. I do not want to revisit that process. Chuck's method of using filler does offer a good alternative. However, I like using wood, and the stain really makes the treenails pop out. So, I looked along the forums and found a good process for treenails using a needle and a drill press. You can use pretty much any needle size. I used a medium gauge needle - used my Dremel disc sander to bevel both sides of the needle to create the 'coring shaft'. Placed it in my drill press with above a 1/4" wood strip (ensure the wood grain is vertical to the ground...so you are creating the nail 'cores' with the grain). Make sure you don't punch all the way through - leave some wood for the core to remain 'attached' inside the wood block. This way the core maker won't get jammed. I tried using both basswood and cedar. Both worked well. Then I just used a sanding stick to take off the wood 'backing'. Then I used a pin (the tip was squared off with the sander so it would not damage the end of the nails) to push the nails out the other side of the block into a container. It's amazing how easy this was...it took me 5 min to make each pre-punched wood block, about 2-3 min to sand down the opposite side and expose the cored out nails, then 2-3 minutes to push the nails out! Making the needle 'punch' takes all of 30 seconds. (I made 100 each of the basswood and cedar) I can only imagine how many hours of tree nail making I could have saved on my Sultana if I had done it this way. I won't take credit...I saw this posted by another member but can't find his name. I've already identified the drill bit size and will make more when I'm ready. Off to bed...no more planking for today. Moving on...but quite irritated with the wood glue.
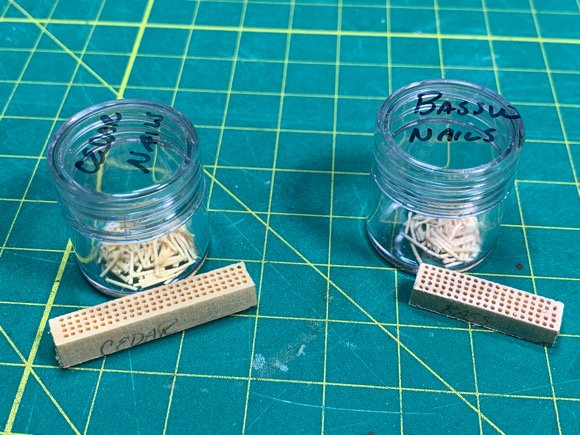
-
I think it looks really good!
-
Really nice work, Steve! So clean and crisp!
-
Me as well! Welcome to the forum! I’m sure you’ll be glad you are posting. It helps greatly and you get a lot of supports and helpful comments.
-
By the way...coming from you ... I take this as a great compliment!!! Your Syren is beautiful!
-
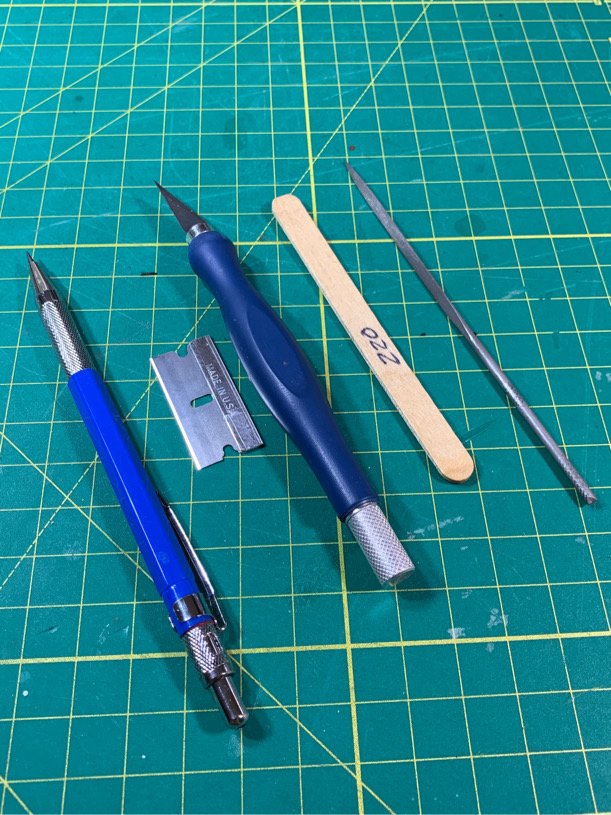
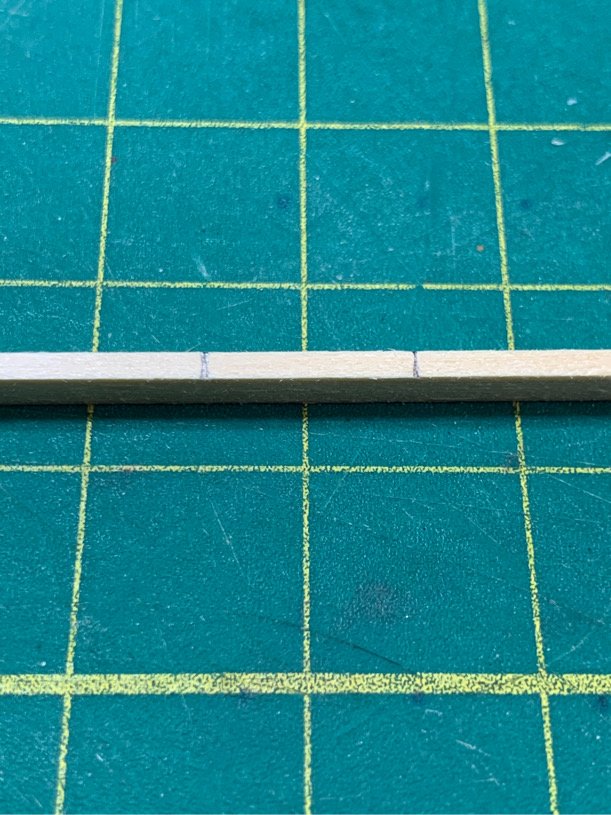
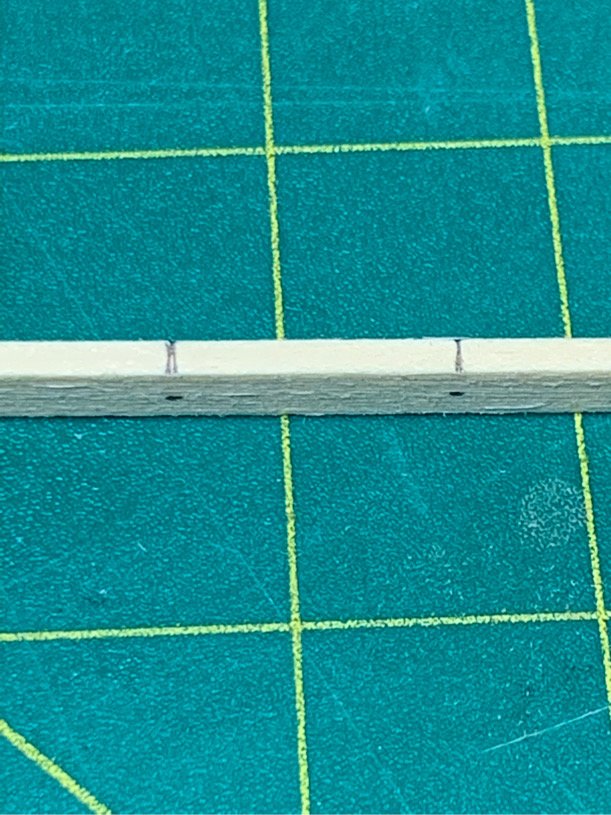
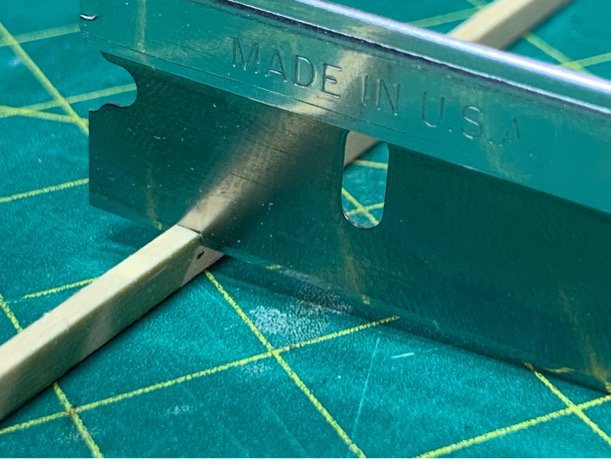
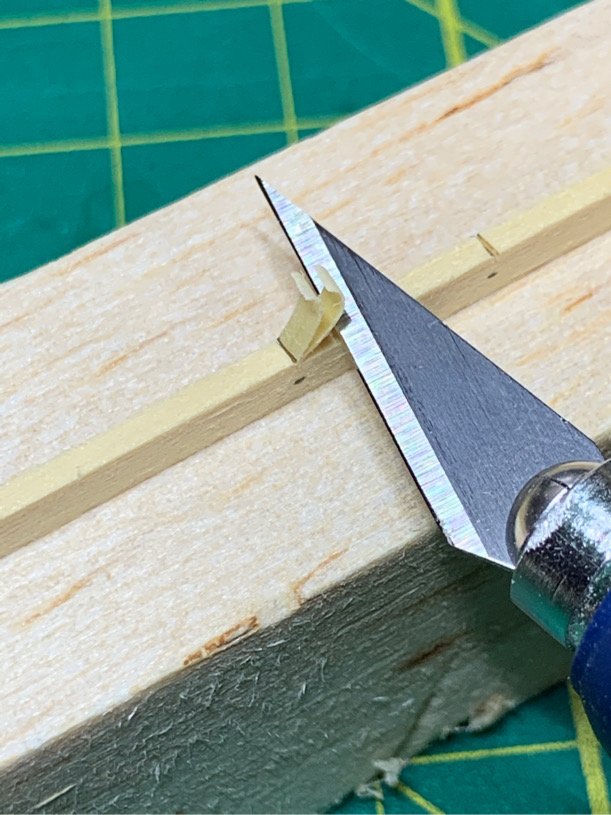
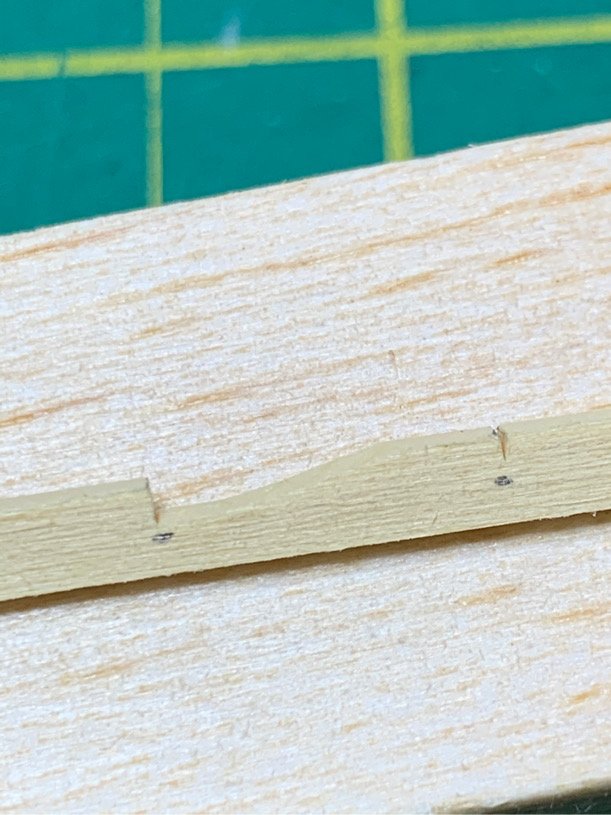
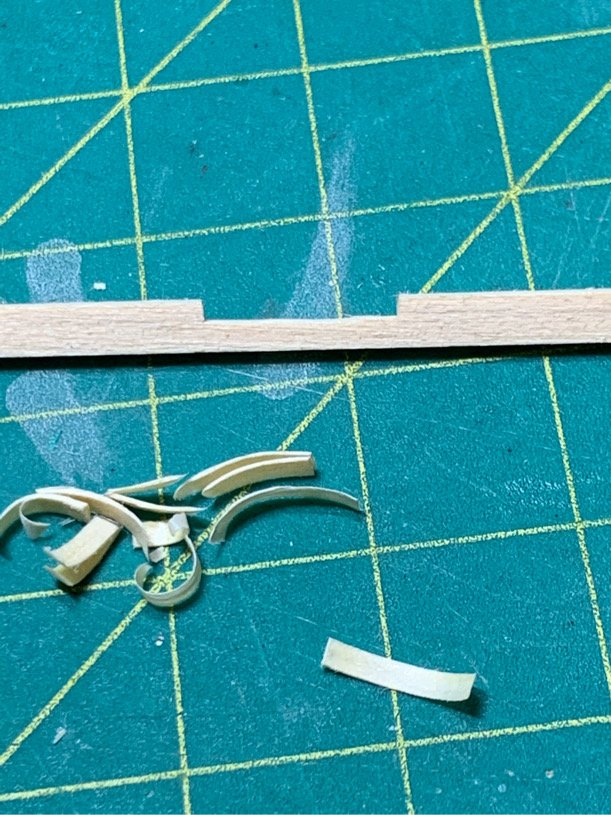
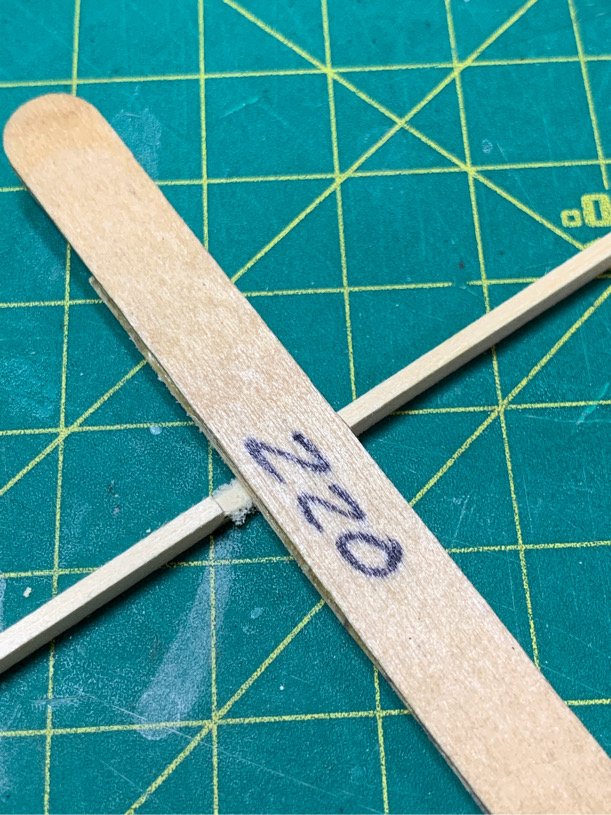
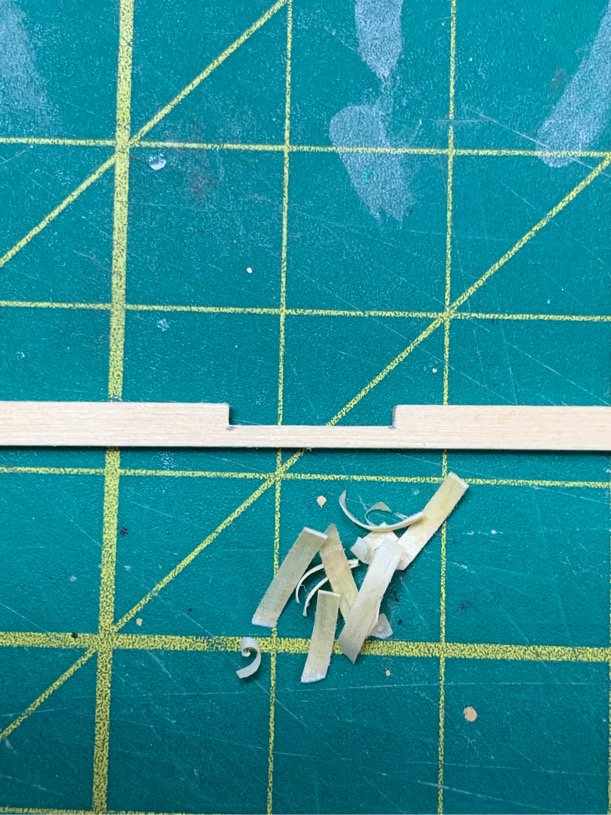
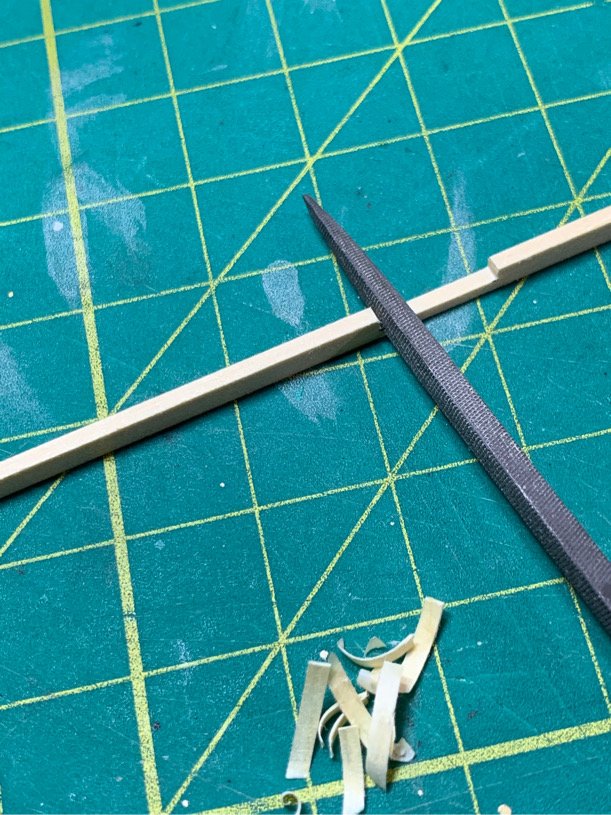
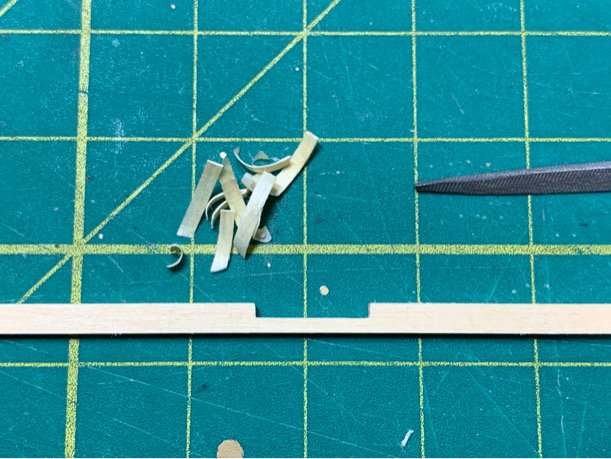
Here is how I carved my planks. Guessing it’s similar to others, but the cedar made all the difference. Tools include a triangular (not square) micro file. Mark where you want the gap Mark how deep you want the gap to be Use a straight razor to etch the wood up to (but not past) the point of depth. I went slightly less than the required depth. Got good results. Use a #11 to chip out the meat. I use a block to set the plank on to ensure the blade is square with the surface of the cutting edge. Do one side of the meat then the other. I use a 220 grit sanding stick (popsicle stick) to take out the roughness. Use the triangular file for the corners and the trim up the vertical edges. That might be a novice way of doing it. But it works for me. The wood makes all the difference. Try this with basswood and you are in for a world of frustration. It’s just too brittle and soft. The cedar really holds an edge. 👍🏽
-
Awesome. Lots of shipmates here building the Syren! Enjoy your journey! 👍🏽
-
By the way...I think it would look beautiful!
-
It's actually much easier with cedar. I'll send some pics in another post. But I tried this is basswood and it is simply too soft and it falls apart. With cedar...it's easy. More to follow.
-
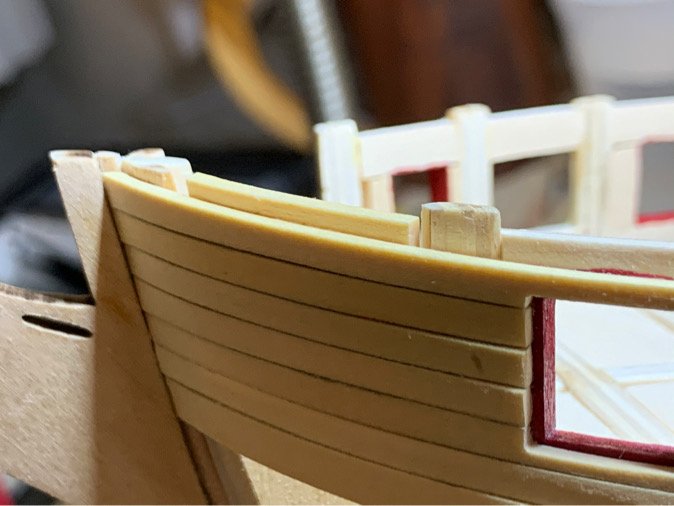
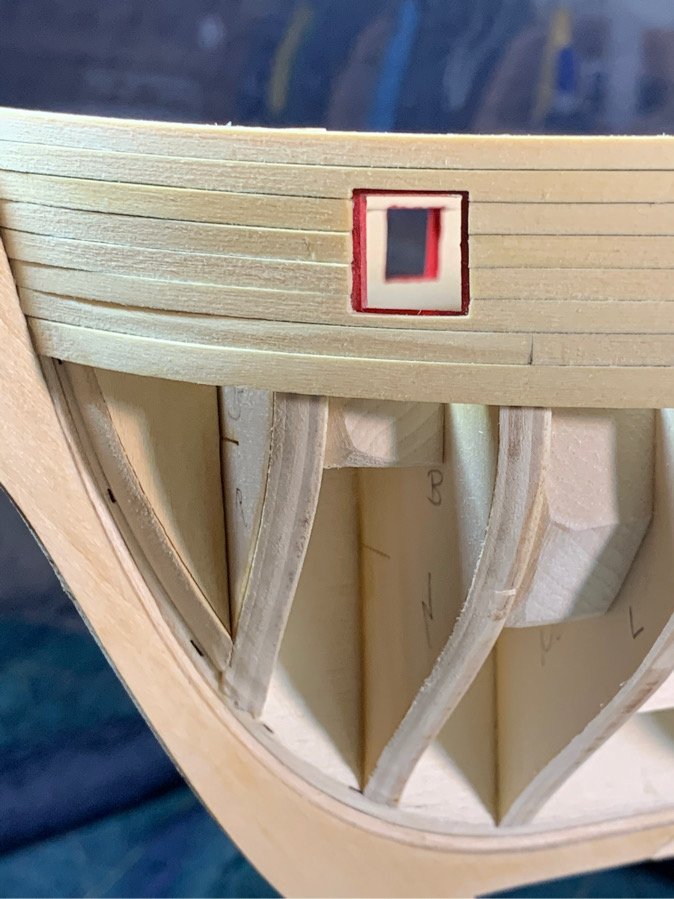
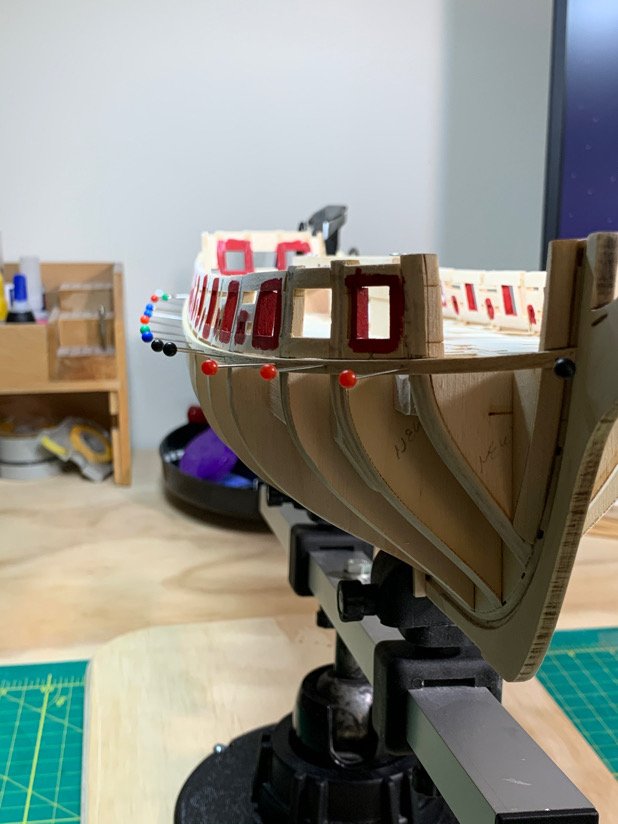
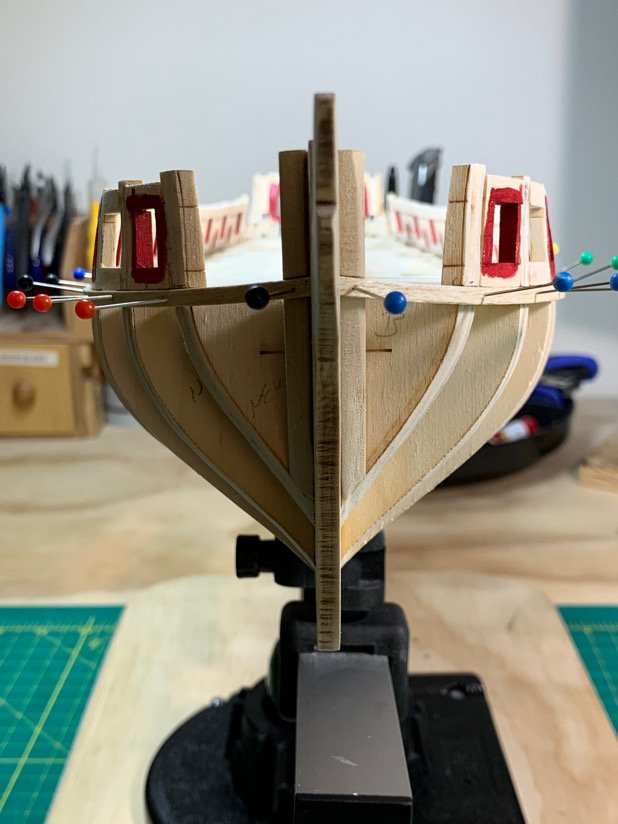
A bit of weekend-rainy day progress. After getting my top row of wales in (using Alaskan cedar), my intention was to focus on the exterior bulkhead planking. Rather than alternating port/starboard in a row by row fashion, I found myself pursued by the Muse of Completion and simply could not stop once I started the port side. Frankly, Since the bulkhead framing is so stable and supported, I'm not sure that the ship will be pulled out of alignment by completely planking only one side of the bulkhead at one time. If I screw up my model, I'll consider it a valuable lesson learned! In the meantime, I was more focused on trying to determine if my seventh row of planks was in jeopardy due to the 'upsweep' I saw when placing the wales in the bow section. Short answer is 'Yes'. I'll get to that... I decided since I had such accurately cut planks, to treat each section between the ports as a separate section...and trust in the Good Lord that my accuracy in cutting my planks was as good as I had hoped. So I started with the initial plank with required the 'sill' cut outs for the ports... Progressed to the easier 'between port' sections.... And found myself cutting out the 'lintels' in the top plank of the ports (6th plank above the wales)...only to see that the bulkhead framing near the bow was a too short for secure placement of the seventh plank...by about 2mm or so...roughly the height of that marginal upsweep I had posted a concern over in my past entry. So, I decided to glue an 'extender' plank in the inside of the 6th plank to offer some gluing surface area before fiddling with the seventh plank. I can easily remove this later if needed...but I've learned surface area is everything when glueing...and I'm still a beginner! I need as much help as I can get... This actually worked very well. The seventh plank slid on with no issue and seems the overall layout seems to be pretty close to the plans. It's also much more sturdy - you can feel it. Sanding the interior won't seem like such a horrendously sensitive task now (but I'll still be very careful). There is some sanding to be done in the bow. The planks tended to relaxed a bit... But luckily my cedar plank strips are slightly wider than 1/18"...by a nanometer or two! The unevenness in the bow will be addressed by sanding very easily, but I'll wait until I've done with the starboard bulkhead planking and placed the other two wale strips before I start mucking about with sanding. There is a LOT of sanding still in my future - and why rush it. One nice thing to note...I am really enjoying working with the cedar wood. This is my first time using a wood other than basswood and I can truly understand now why modelers don't prefer basswood. The cedar has a tighter grain, and leaves a much cleaner cut, and does not get all 'thready'. I've already decided that I prefer the yellowish color. So I'll be a bit different and leave the natural wood color....so I'll stain with Minwax Natural stain and follow it up with tung oil...when I get to that point. I will redo my 'faux' deck using cedar to match the main deck. I'll be using toothpicks for trunnels. Moving on...to the starboard side...and praying that the work and plank alignment will match!!!
-
If you are checking with a spare piece of planking, and the run of the plank looks OK on the faired piece, you should be OK. Just from looking at it, it looks alright. But you won't really know until you need to bend the strip around the corner and see how it lays. Looking good though!
-
You did a beautiful job on the redo. Very clean work!!!!
-
Some very small progress. Took me a while to convince myself the batten to align the upper wale was correct. I checked and rechecked the plans vs Chuck’s practicum. I finally resigned myself to the “every ship is different” motto and stuck in the pins and marked my hull. I’m glad I got some cedar sheets from Chuck’s Syren company a while back. I love the smell, and the planks really do hold an edge. They cut very easily and they are blessedly not as hairy and thready as basswood. Once I got the upper wale in, I Noticed a slight upsweep at the bow. Not sure if it will cause problems, but at least they are symmetrical. Moving on...slowly slowly.
-
My bad... 😫 I checked as well. No boxwood. Sorry about that. On the bright side, your work in basswood (as crappy as basswood can be) is awesome. 👍🏽
- 950 replies
-
- 2
-

-
- syren
- model shipways
- (and 1 more)
-
Hmmm. Might be wrong, but I thought stem and stern pieces were boxwood. 🤔 (And I am wrong quite often...so apologies if I gave faulty info!!!)
- 950 replies
-
- 1
-
-
- syren
- model shipways
- (and 1 more)
-
Hey...just thinking outside the box(wood)...the kit comes with some pieces laser cut in boxwood I believe. If you kept the fragments, I’m sure you could layer them to give you a good foundation for carving. Kind of like the ship’s boat. You could just layer the fragments and cut out the block size you need for carving. 👍🏽
- 950 replies
-
- 2
-
-
- syren
- model shipways
- (and 1 more)
-
I think it's a completely different skill set. If you take time to learn it, you can't un learn it...and you'll only get better. What a fun challenge!! Besides, do you really want to slap those metal monstrosities on the side of your ship? LOL. Looks great! (Already better than the metal pieces.)
- 950 replies
-
- 2
-
-
- syren
- model shipways
- (and 1 more)
-
That’s got to be a relief! Getting those on and aligned can be a bear. Very nice result. She looks beautiful!
- 950 replies
-
- 1
-
-
- syren
- model shipways
- (and 1 more)
-
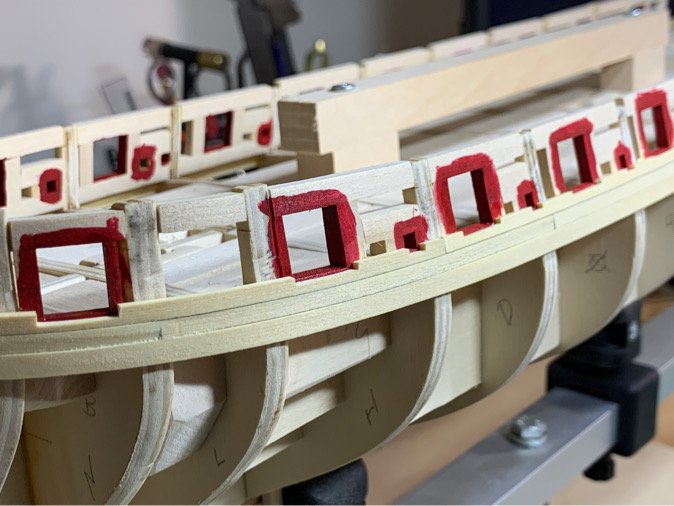
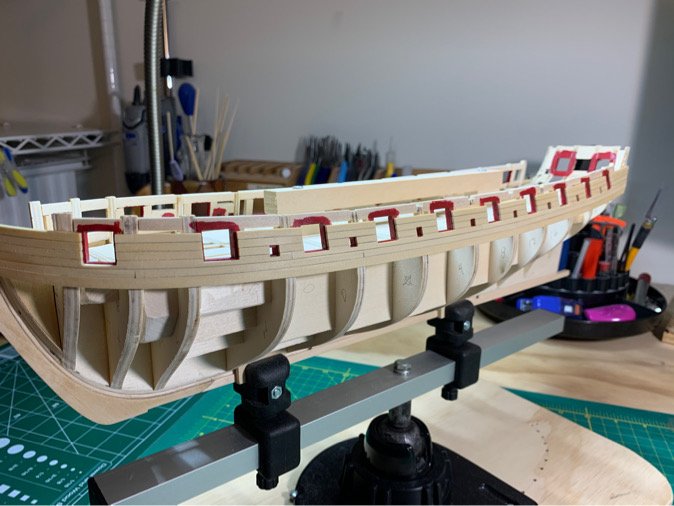
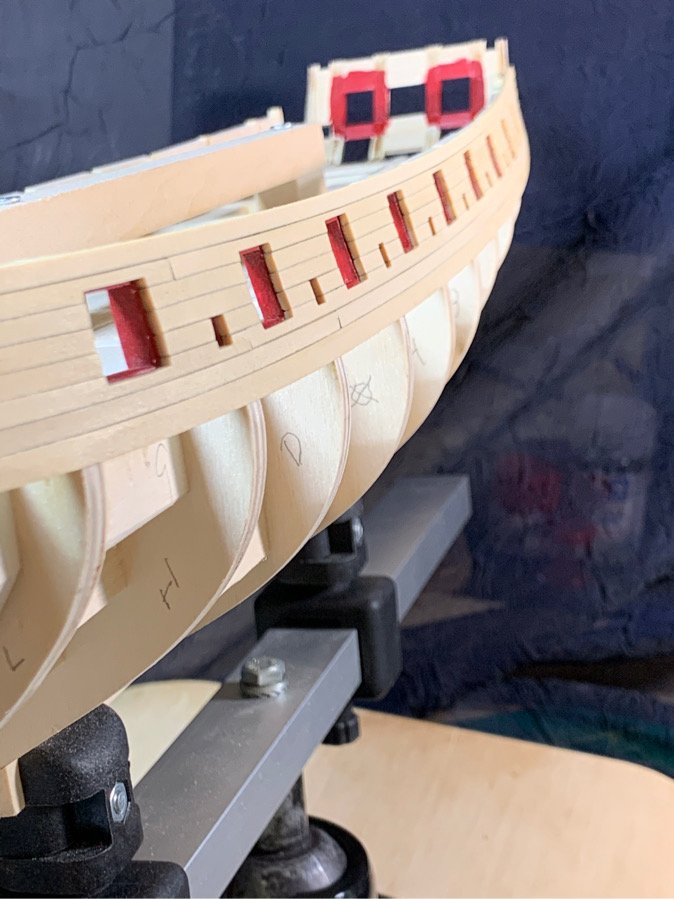
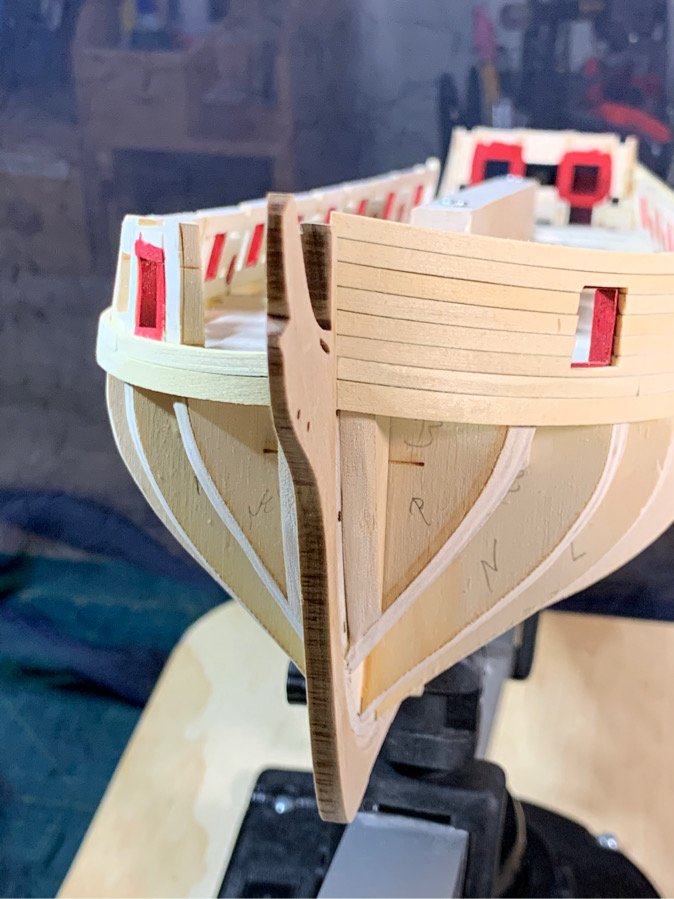
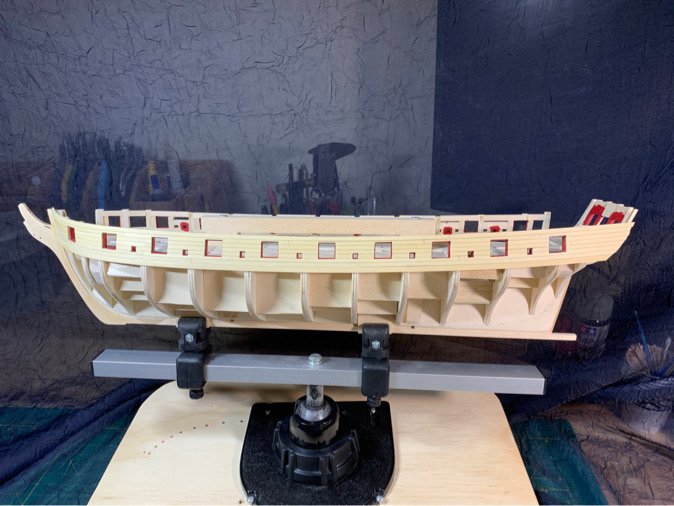
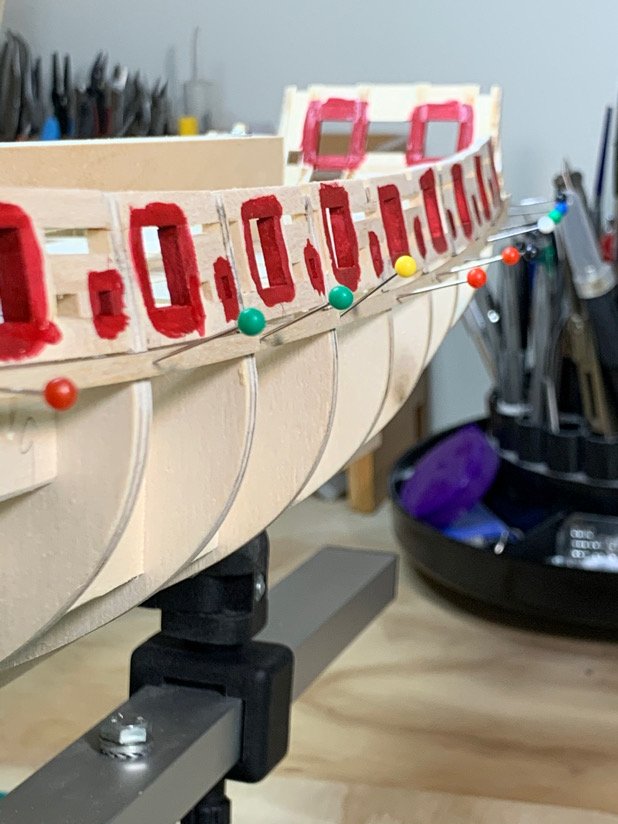
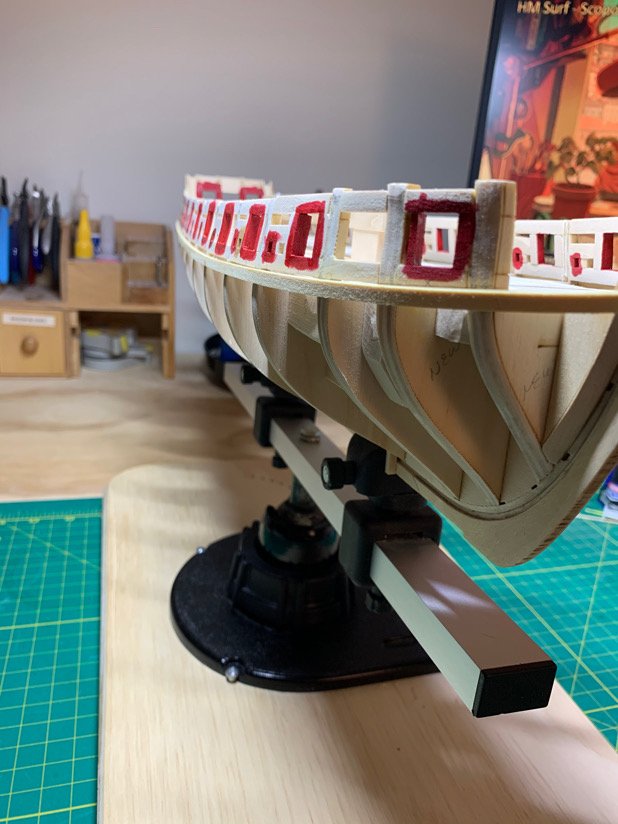
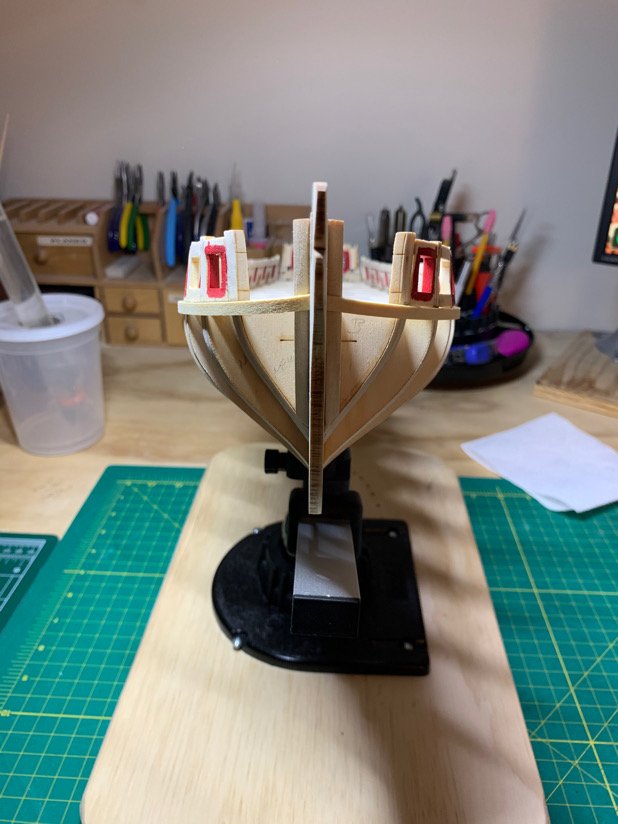
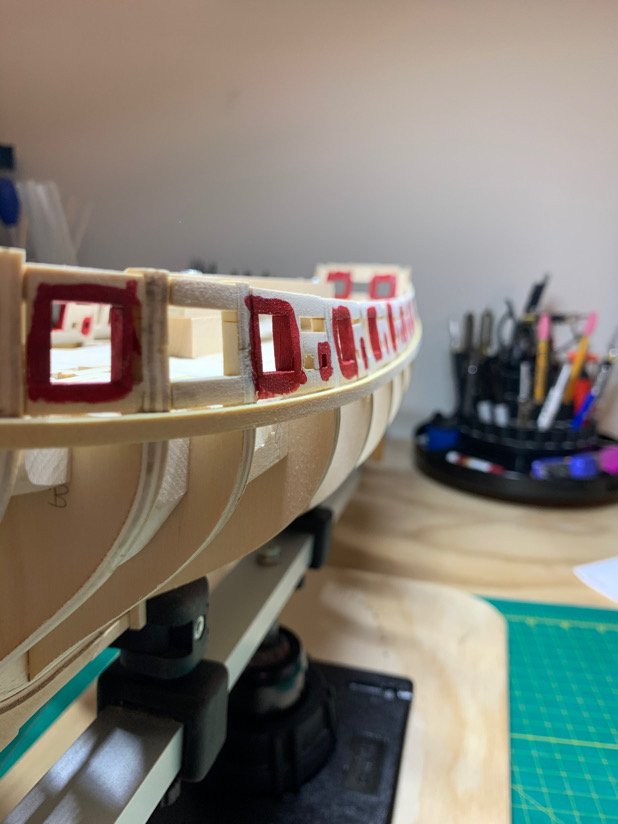
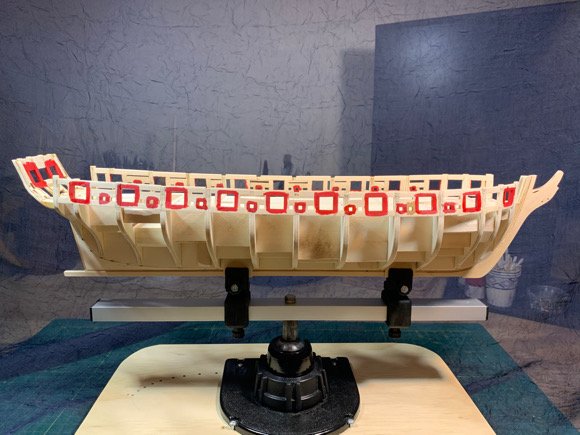
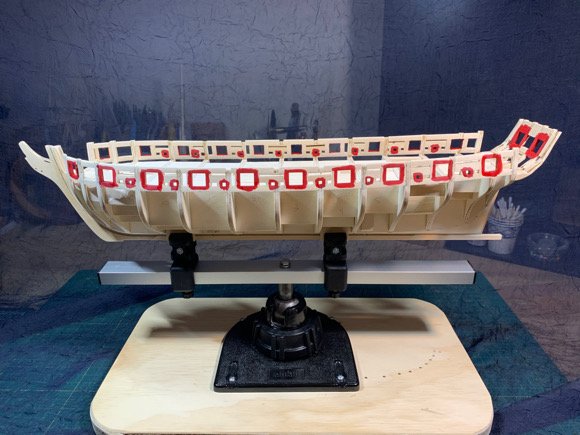
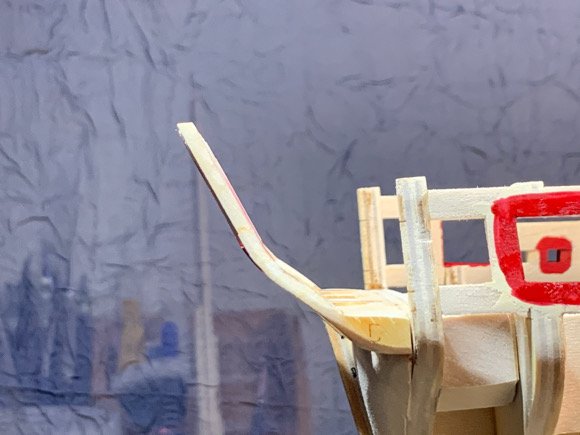
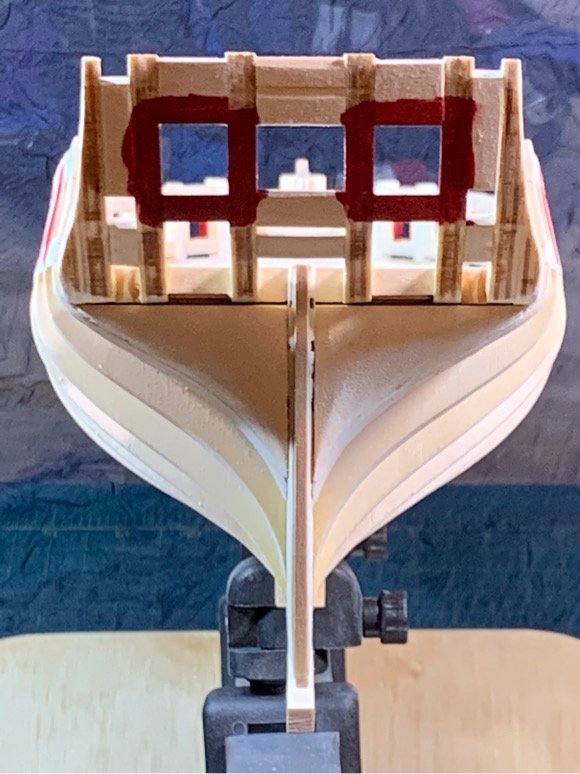
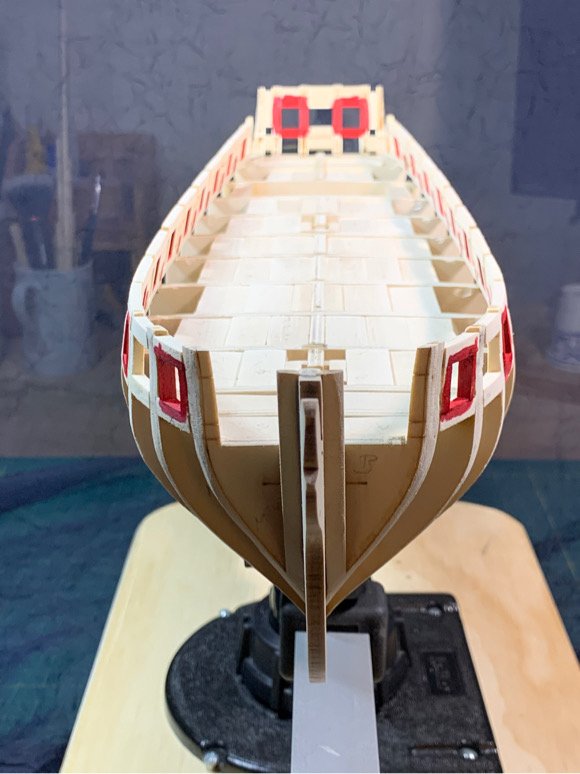
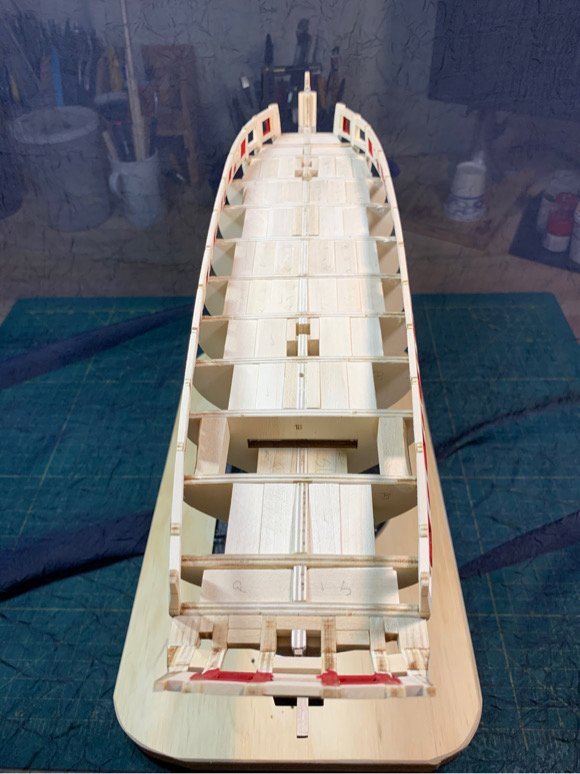
A bit more progress. Touched up a few of the ports with filler...a couple were pretty rough. Smoothed out OK. Didn't go hog wild with the paint, but I made sure I got full coverage on the exterior and interior walls. I even painted the interior walls of the sweep ports - until I remembered I still had considerable interior wall sanding to do.... Took the plunge and attached the stern framing...I almost didn't want to do it! Once I glued the piece in, and ensured it was square and set, it really sticks out as one of those pieces that's screams, "Hey! Knock me off! I dare you!" As flimsy as it looks, the filler pieces supports it perfectly, and the stern assembly is supported and glued to both it and to the last frame (26). So it's pretty locked in...but it still looks like a hook from the side. So I'll be relieved to get the bulk head planking underway to give to additional support. Here are some baby pics. It looks remarkably like most other Syren builds at this stage. Although the paint shows up as 'red' - it's actually a darker red or vermillion. I wanted something a bit less gaudy, and bright cherry red is my least favorite color. So I added a few drops of 'gunmetal grey' and 'desert yellow' to a 'red' pot of Tamiya paint. It looks pretty close to blood, even though the pics don't reflect it...and I prefer the darker hue. Moving on...
-
Really crisp work! Beautiful!!
-
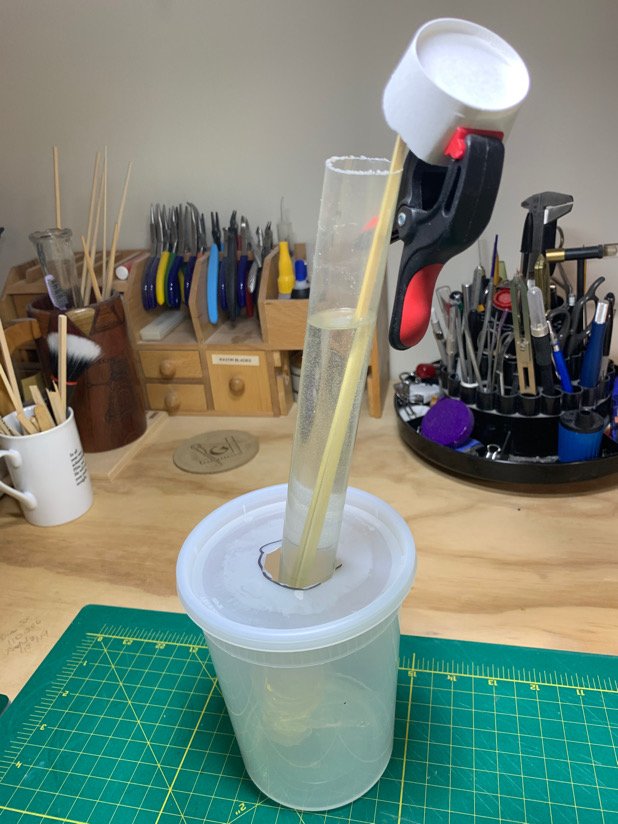
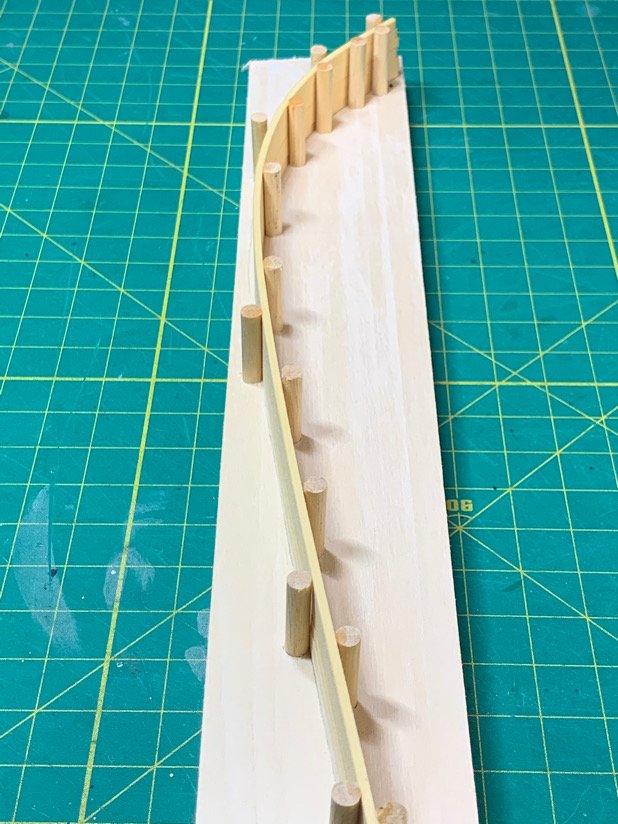
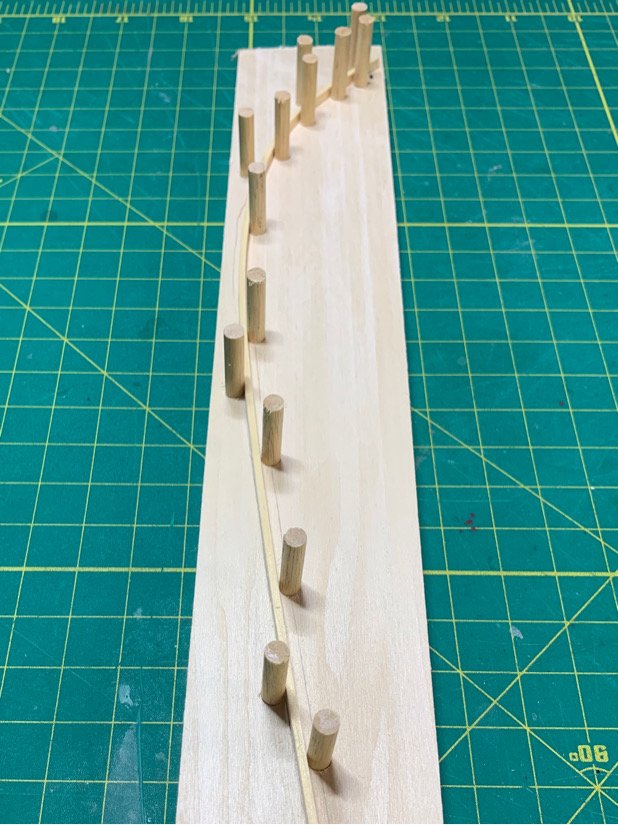
In my efforts to procrastinate for permanently attaching the stern framing, I decided to make a plank bender. Chuck references using screws but I had some 3/16” dowels handy and thought I’d make a mass (7x plank) bender! First I made a little plank soaker using an old tube. Since the planks want to float up, a Dixie cup with a clamp acts as a impromptu weight. My first trial run worked fine...but upon inspection noticed I had cut the dowels a bit short. Ok...so it’s a 6x plank bender. Moving on...

-
Thanks, Will! It’s slow but steady!
-
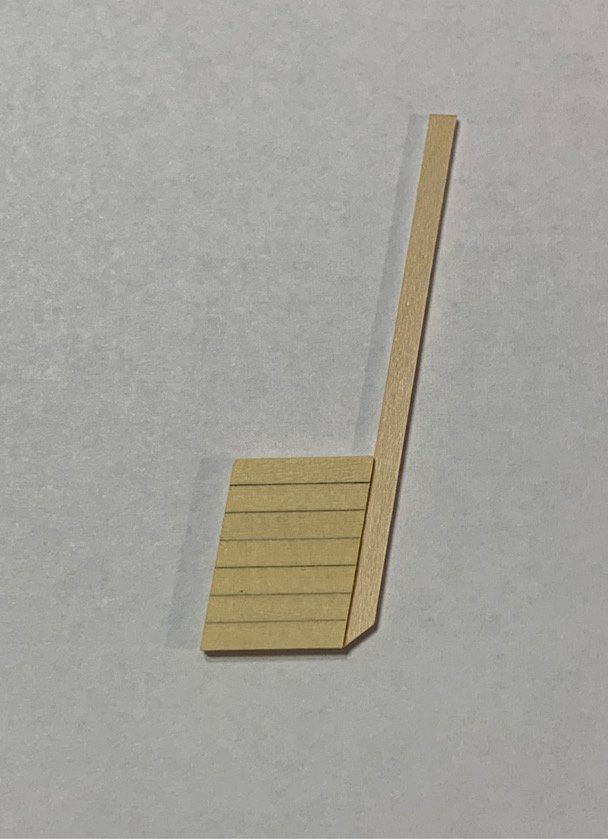
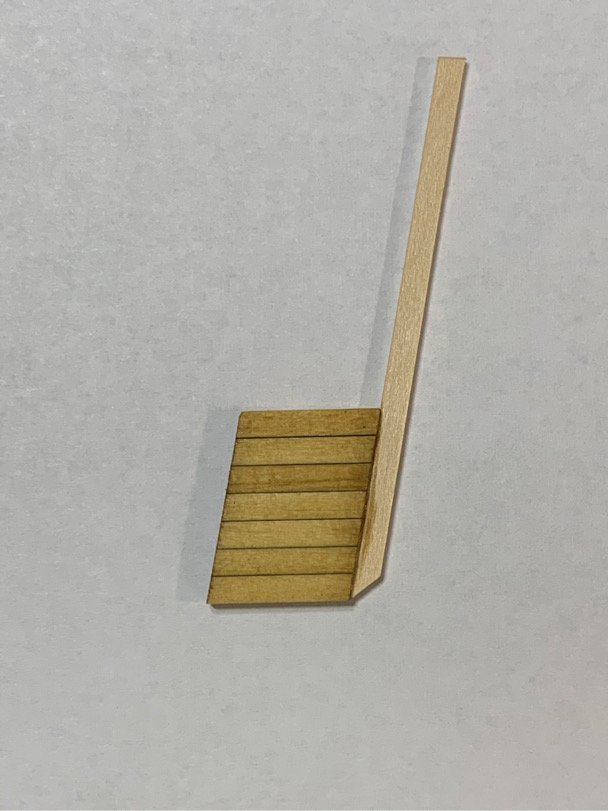
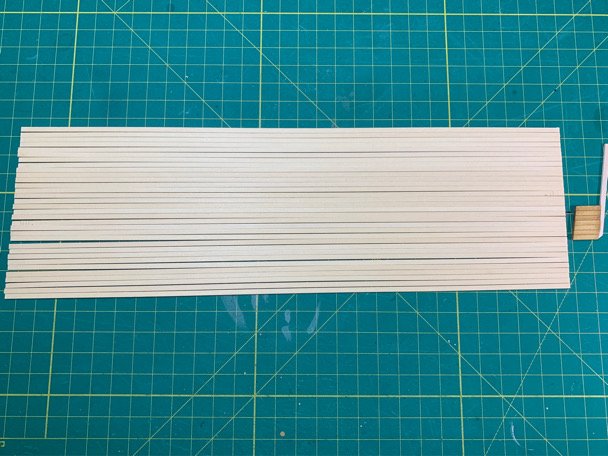
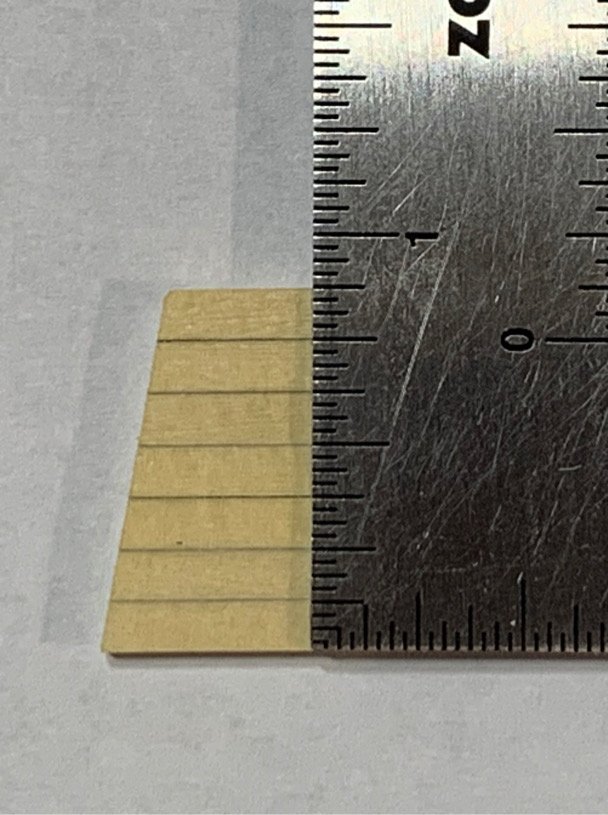
After incredibly serious deliberation assisted by several beers, I’ve decided to use some of the stock of Alaskan cedar to plank the exterior bulkheads. I actually enjoyed cutting my 1/16” sheets into plank strips. The cedar has a pleasant aroma and is a soft and even yellowish cream color. Most importantly...I am SURE of the dimensions of the strips, and used them to create a 7 plank guide per Chuck’s practicum. The strips won’t run the full length of the ship, but that’s ok...I cut 32 15” strips so I have more than enough to plank above the wales. The wales and the rest of the lower planking of the ship will be done in basswood. I also went ahead and tried the golden oak stain on the template and I like how evenly the stain absorbed. Moving on...
-
Outstanding...another Syren build! Watching with interest!