


Overworked724
-
Posts
1,253 -
Joined
-
Last visited
Content Type
Profiles
Forums
Gallery
Events
Posts posted by Overworked724
-
-
1 hour ago, CPDDET said:
Never used sculpy but wondered if one could pack it into an appropriate sized brass tube, then push it out with a dowel rod and bake. Might result in perfectly round rod? Just a thought, didn't mean to stick my nose into your more than capable build techniques.
I might try that!!! Play Do for ship modelers!!!! -
Honestly….I preshaped my garboard and first three after the garboard for 24 hours each. The placed them on the shop….pinned/clamped them in…and watched a movie.
Be patient. If you get them preshaped…glueing is easy.
-
Interesting note. When I trimmed off the sculpy sheaves from the sculpy rod I baked, it’s hard to make them “clean” (i.e. perfectly cylindrical). This became more of an issue with the outside sheave.
So….I ended up again using some double sided tape on a popsicle stick and stuck them on. Then used a fine emery board to fair them up and take off the uneven edge to give them uniform thickness. Worked perfectly.
👍🏽
Live and learn…sculpy is fun stuff.
-
-
15 hours ago, Redshadowrider said:
Thanks PRS. Since posting my question, I have found tools called Glue Loopers and they look like they will fit the bill. I will also look at getting the one from Micro mark. 👍
There are also CA glues of differing viscosity from water like to gel. They can be bought at Lowe’s. I like the medium CA from Lock Tite. Then I use a long toothpick to touch on the spot I need to glue.
For the water like CA, which I used often for rigging or siezing knots, I use a large needle 🪡 with the end clipped to make a U. The CA will wick into the U and then you have conttol on where to apply. I used a dowel as a handle…and just jammed the needle into the end.
-
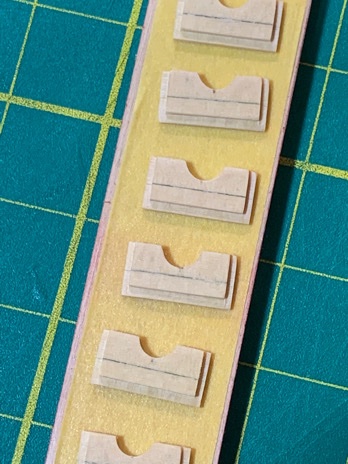
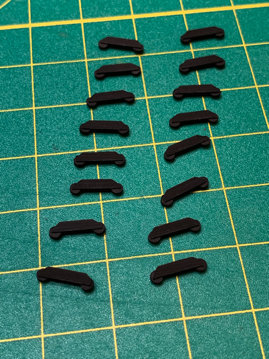
Finished off remaking the gun port doors. Shown below stuck to some Tamiya tape. This time I left out the rabbet on the side with the gun indent. I think it looks better and also didn’t think that edge needed a rabbet. 😁
Also made the ring handles (not shown). Will paint the doors tomorrow and size out a drill bit for installing the faux hinges.
In the background…working out the plan for the P&G’s. It’s coming along.

-
So…I could start on my coppering any time. The only thing holding me back…are the pintles and gudgeons. Because here is the thing…I struggled with the Sultana for the same reason.
How to mount the things without creating a mess? Even more critical with coppering which can get marred/bruised just by looking crossways at it!
But…I have an idea! Finally…
So my next side project while I whittle through my plan of attack on my P&G’s will be… STERN cannon of course! 🤣
Moving on…with a plan.
-
Remade the gunport doors. No pics yet, but glad I did it. The reason being was the gun port doors were about 0.5 to 1mm too narrow…when mounted they would have looked off. When I was dry fitting them to set up the hinges and start the mounting process I noticed the visual disparity and it was pretty obvious.
I think it happened because I didn’t consider the loss of wood during the cuts. So…my bad.
Live and learn. On a positive note…I’ve got a crap ton of scrap doors to play with to get the technique down for the hinges and rings.
Moving on…
-
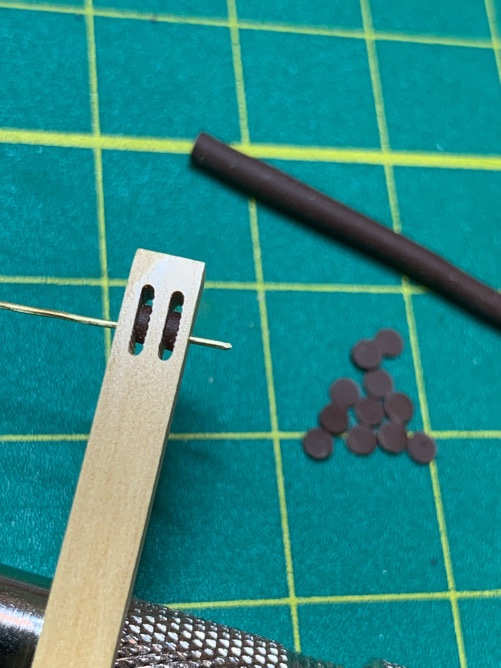
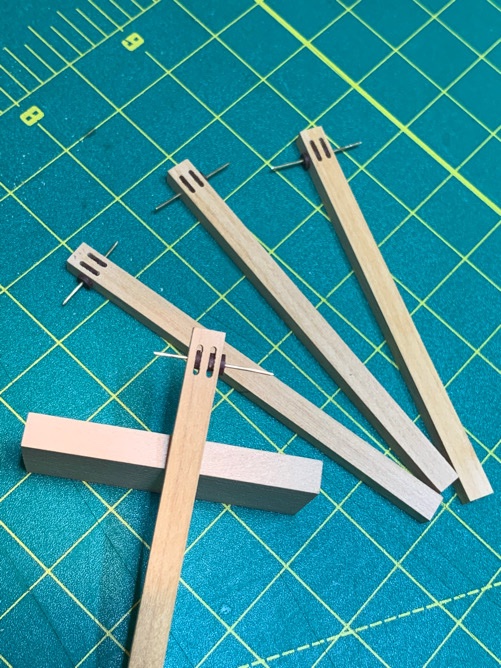
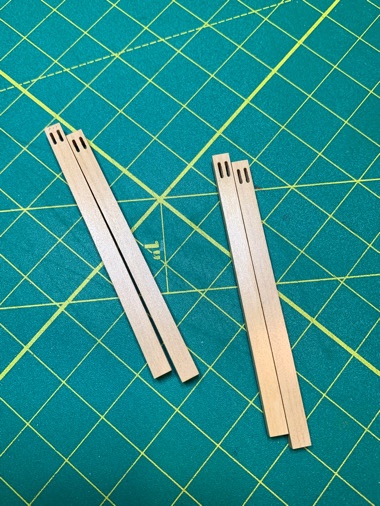
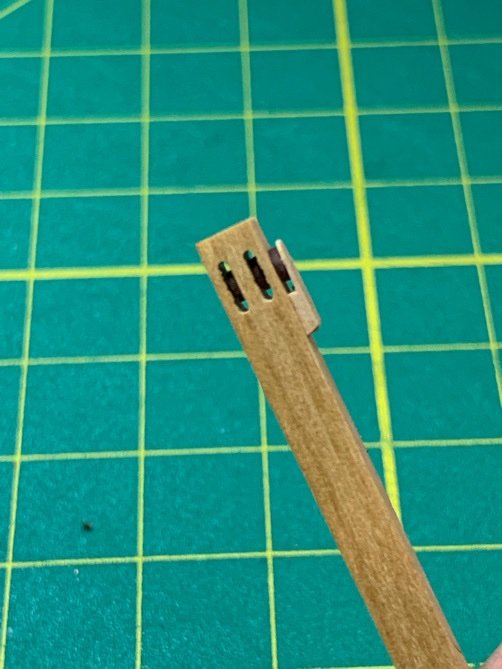
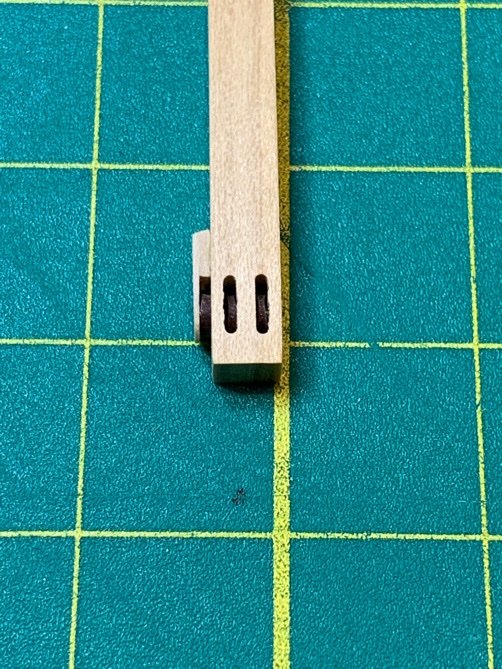
Just messing around with the uncut cathead lumber. Figured since I drilled out the holes for the sheaves, might as well drill the axle hole and fit in the Sculpy sheaves. This was identical to how I made the bulkhead sheave blocks. So it was pretty quick work. I also slid in the external sheaves which will be covered by wood framing later.
Like I mentioned, I made 2 sets of cathead lumber but can always mak more if I screw up. 😁
Gratuitous pics…
Moving on to other distractions. 👍🏽
-
-
8 hours ago, Gahm said:
Great carronades! They are very well done!
Thomas
Thanks, Gahm. Your build is one of my inspirations! Appreciate the kudo. 😁 -
Some good news and bad news. Bad news first…I think I need to redo my gun port doors. Sh*t…
Good news…my frustration at the doors made look into something I CAN do…so I prepped the lumber for the catheads. Made 2 sets because I don’t trust myself. Will add the sheaves/axles a bit later.
x-y tables in a mini-Drill press for the win. 🥸
-
Woohoo! Another Syren build! I'll follow along with interest!!!
-
-
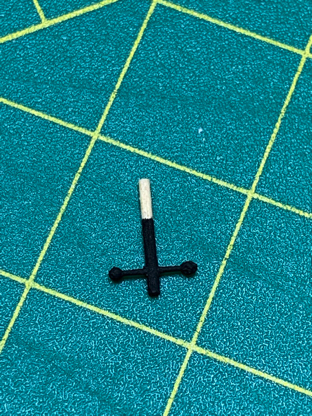
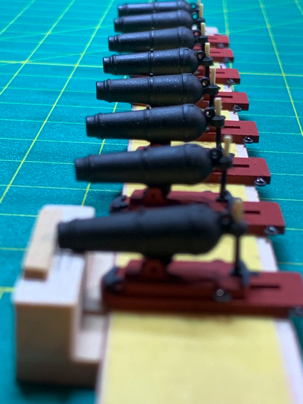
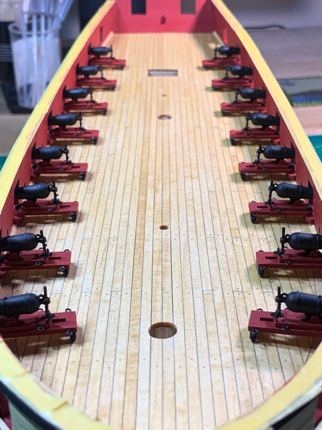
Well...finally got around to finishing the carronade side project using the 3D printed cannon. They aren't perfect, and some are a tad tilted...But I did pretty good for my first attempt at cannons and it was fun working around the little problems.

Drilled in the small holes in the elevation screws for the 'handles' and threaded them on a piece of wire.
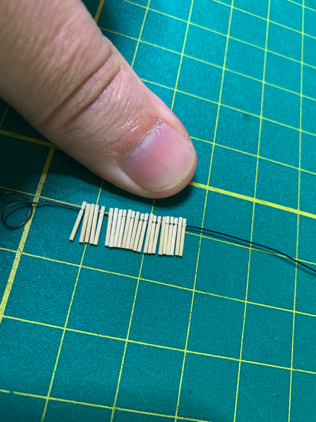
The used a touch of CA to lock each 'screw' as I slid them off and clipped them off the wire...taadaaa...instance handle.
Used a little piece of wood to set the pieces in and 'glued' the little round handles on each end followed by painting. I left the upper part unpainted so I could thread the screw into the carronade when I was locking them in place.

Got the metal pieces and eyebolts set in...then loaded up the carronades.
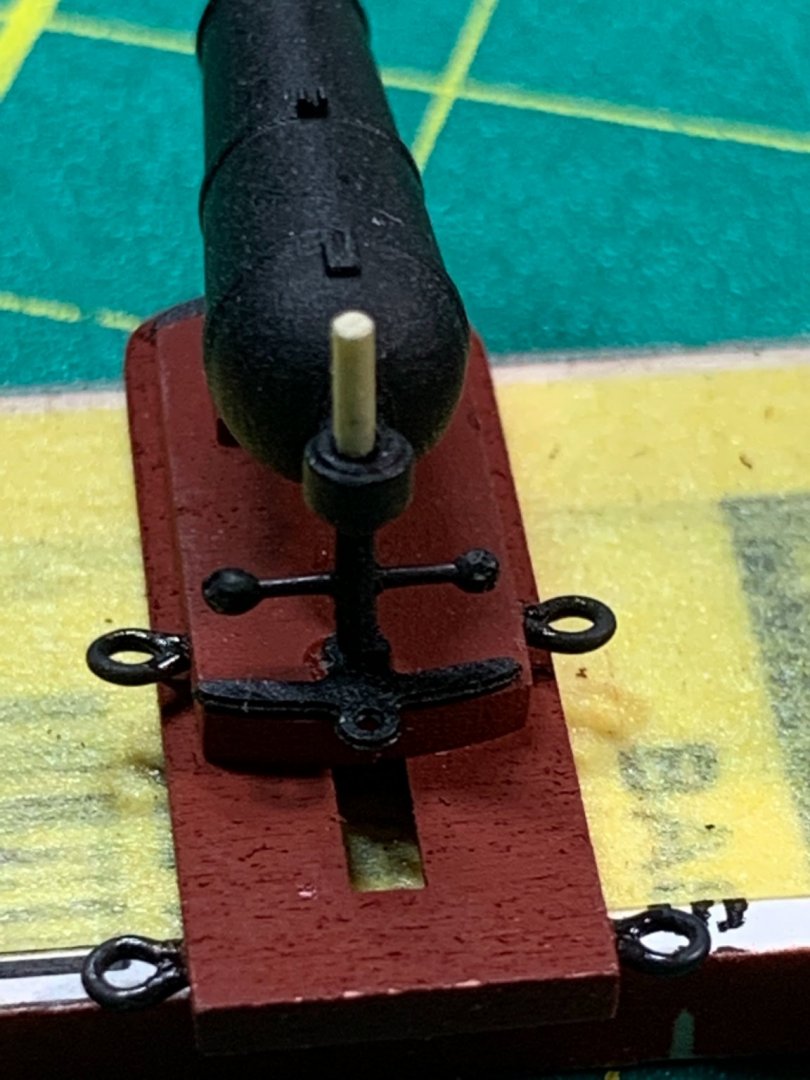
After that, just touch up painted the tops of the elevation screws and reconsidered leaving the wheels brackets unpainted. The brackets themselves would have been metal, so decided to paint them black...which also gave it a cleaner look. Still glad I made my own wheel assemblies.
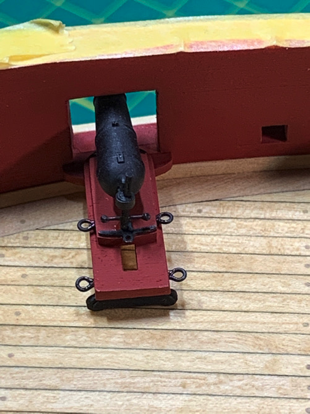
The proof was in the pudding...using a little jig to ensure my cannon were set at the same depth/angle, as well as how the wheels assemblies were mounted gave a nice appearance. The pins in the front slide right into the little holes in the swivel brackets - so gluing them in later will be a breeze...
Moving on to new challenges....!

- Duanelaker, CiscoH, Gahm and 3 others
-
 6
6
-
-
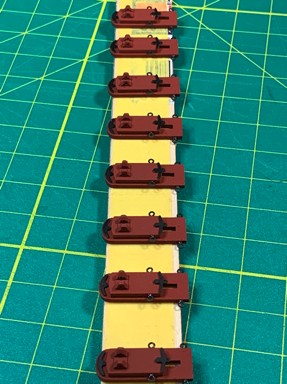
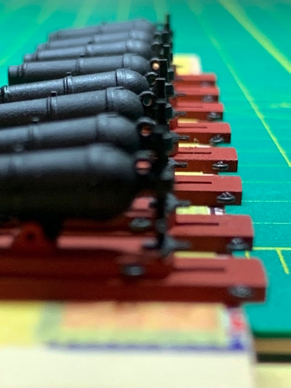
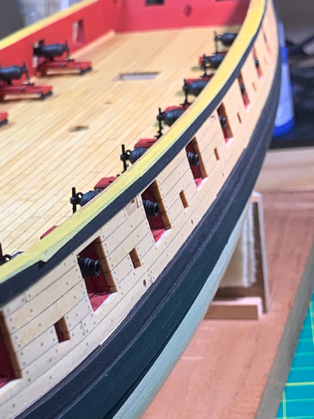
Well...life has certainly gotten in the way these past few months. But...no negative waves, just trying to focus on positives. I'm slowly plunking away at the carronades.
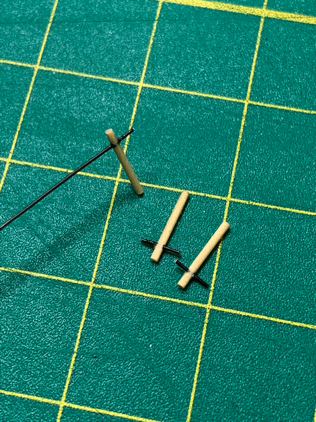
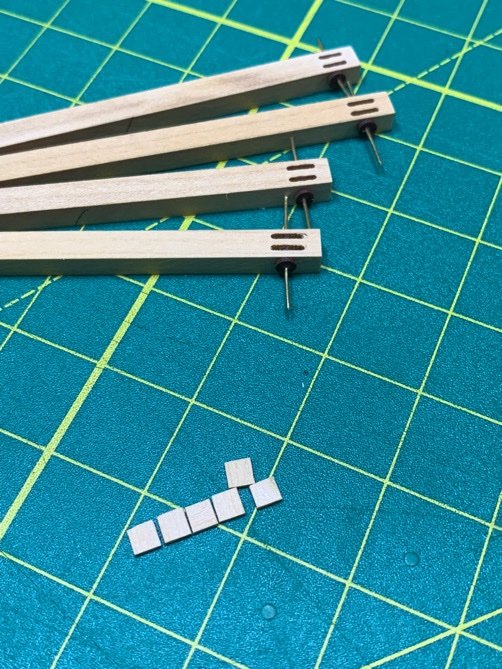
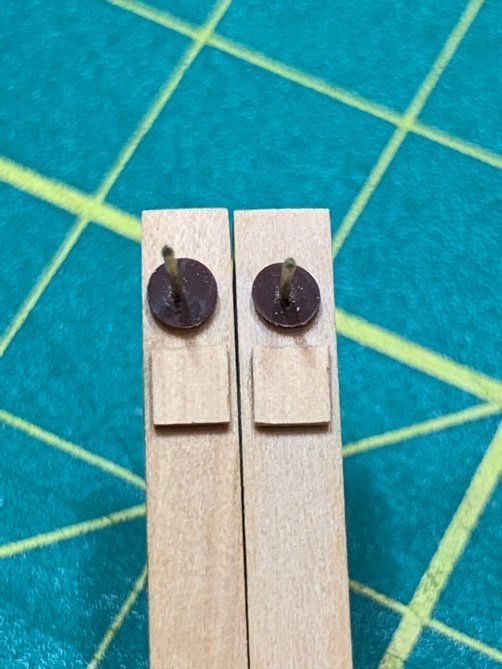
Decided to mount the carronade brackets on the sleds and prep for painting. So Assembled the sleds and predrilled the eyebolt holes:
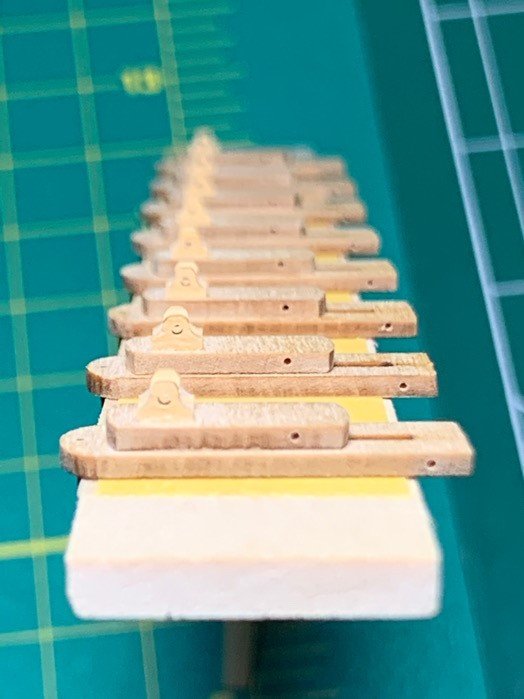
You might notice I added a pin (used brass wire) in the front of the sleds to ensure when I glue them on the swivel brackets they are easy to align by setting the pin in the little hole in the swivel bracket.
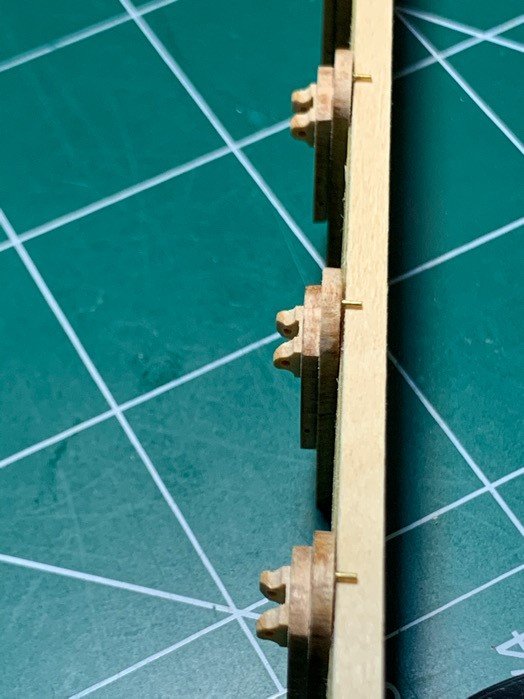
I also slightly sanded the inside edges of the carronade mounts to make the carronade fit a bit better....seems to look ok on my test carronade...but the proof will be in the pudding. Once painted (which is next), the photoetched sled components which are glued to the front of the sled (and also behind the carronade) will completely cover the brass pin (if it's even visible under the paint).
I'm using double sided tape with Tamiya masking tape on top to make my 'painting board'. The parts come up easily and I don't need the bottom painted.
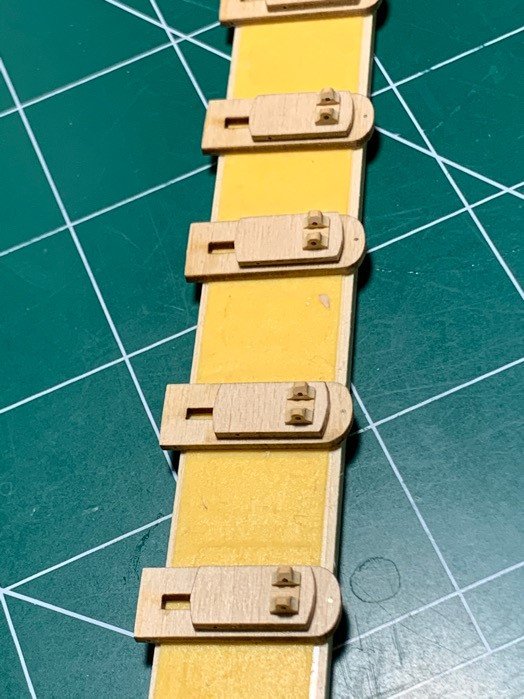
Getting there...
-
I think it's looking great, Bill! Keep in mind you'll be sanding/staining, adding the cap rails, channels, cat heads, port doors, carronades, etc. There a ton of visual noise which a viewer will see and ignore the small things. You see them because your are the modeler and you suffer the same curse as the rest of us...perfection is the only bar! 😃 But don't shoot for perfection....shoot for enjoyment....it's a lot more fun. You're doing superbly!!
-
MRI results indicate my pitching career may be over. Surgery next month and the 6 weeks in a sling. 😑
Only one thing to do...build as much as I can before the official downtime. 👍🏽
-
-
Excellent rope! One less thing you need to worry about!!! 😊
-
Time to log Ridiculous Idea #942...or somewhere around that number! Work has been getting in the way of the Syren, no surprise. Better busy than not, I reckon'.
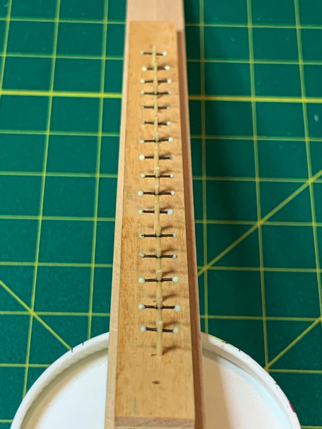
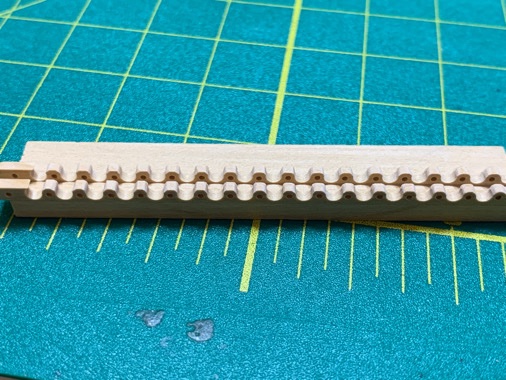
I've been noodling over the carronade mounts. And once my mind grabs onto a problem, it's like an irritating terrier which won't let go of a pant leg. So, I decided to try and replace those ridiculous laser cut things they call 'parts' that came with the kit. I know some have used them, but they are so damned small, and the laser char and wood seams are simply too difficult for me to manage. So I went off the beaten path to try and make my own. Got a fairly good result.
Use some 3/32" thick, 3/16" wide boxwood strips.
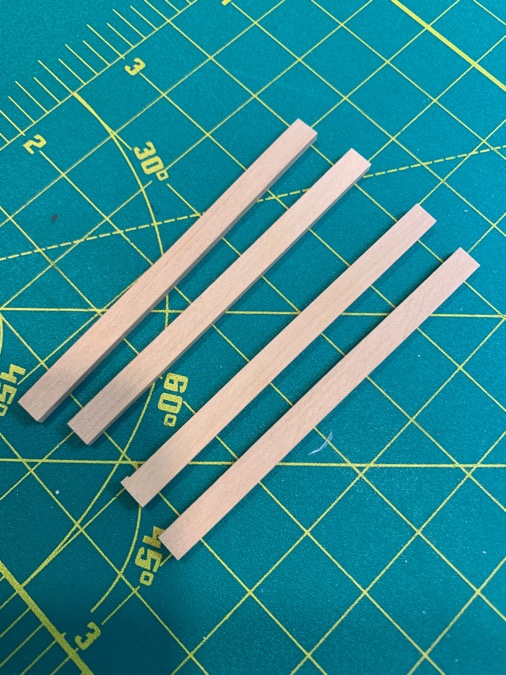
Cut a 1/16" groove through the center using my table saw, adjusted to just enough clearance to leave a bit of wood connecting the two sides.
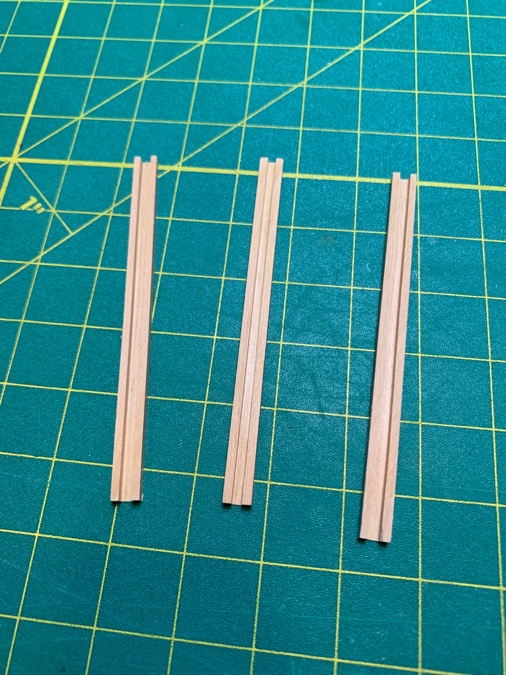
Made sure the wooden fin on the bottom of the carronade fit into the slot.
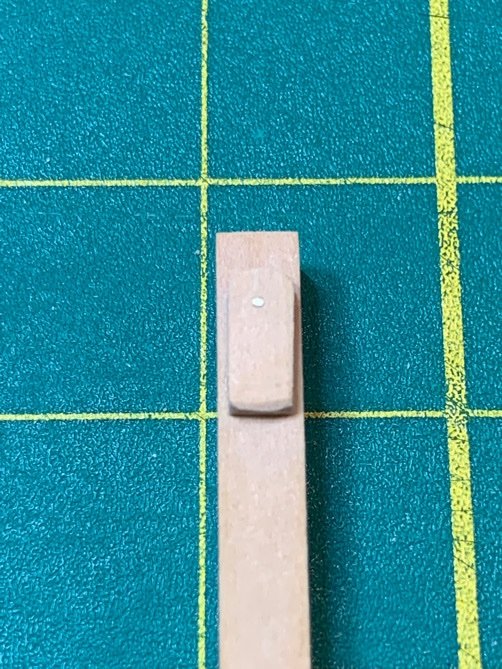
Mounted the strips sideways between two pieces of wood. I used some double sided tape to adhere the strip to the side without the slot...reason for this...you'll see later. And drilled in the mounting pin holes.
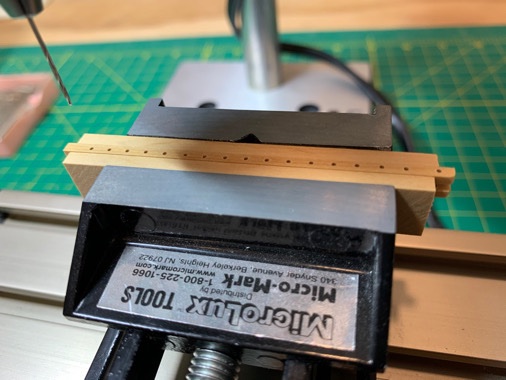
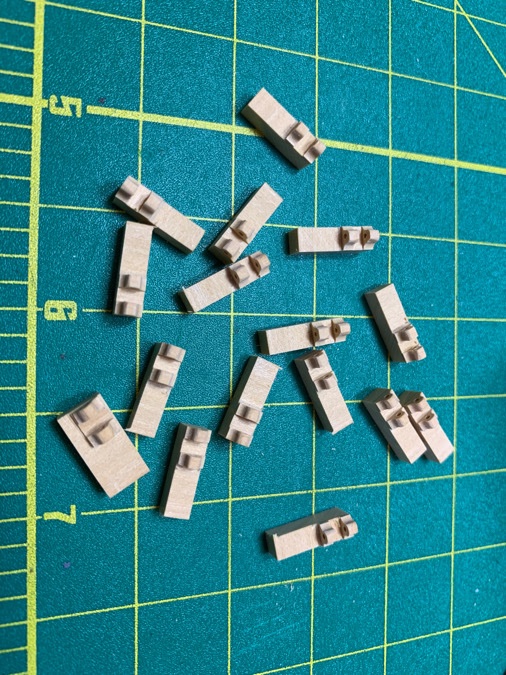
Next, I drilled some 1/16" holes on either side of the mounting pin holes.
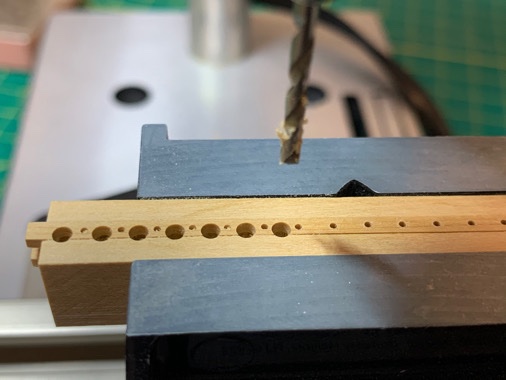
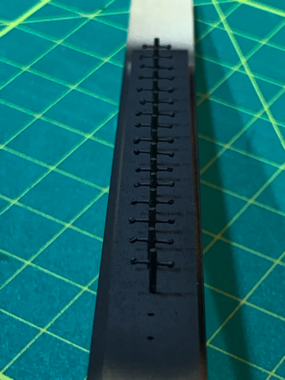
Then removed from the drill press. The wood without the double sided tape was discarded. The drilled boxwood strip stayed in place on the other support piece of wood via the double sided tape. (Yay!)
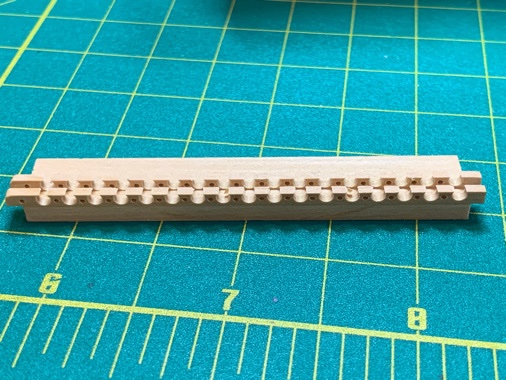
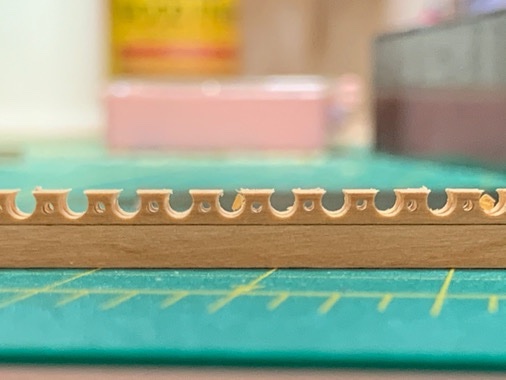
I used a sanding stick to round off the 'tops' of the mounts.
Then I cut them apart - bit by bit - with my mini table saw...
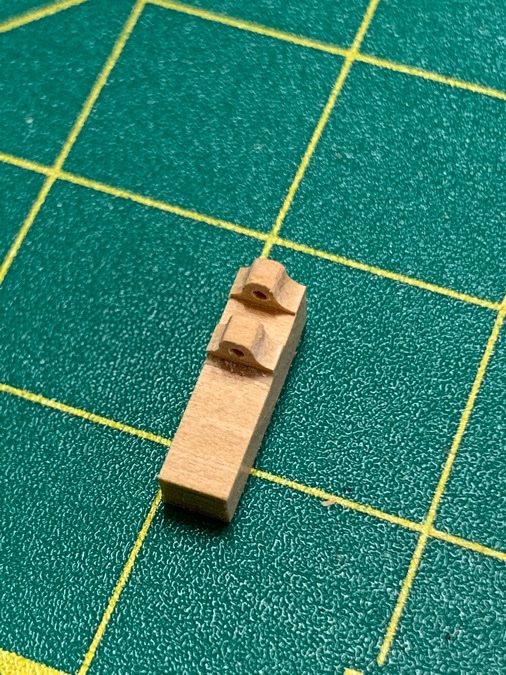
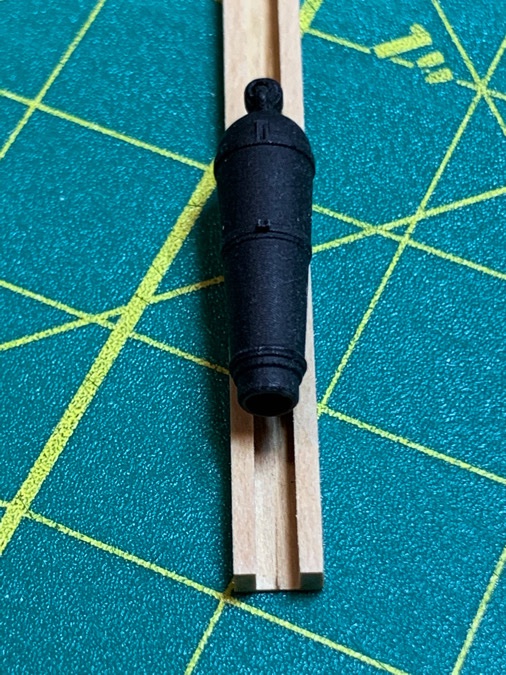
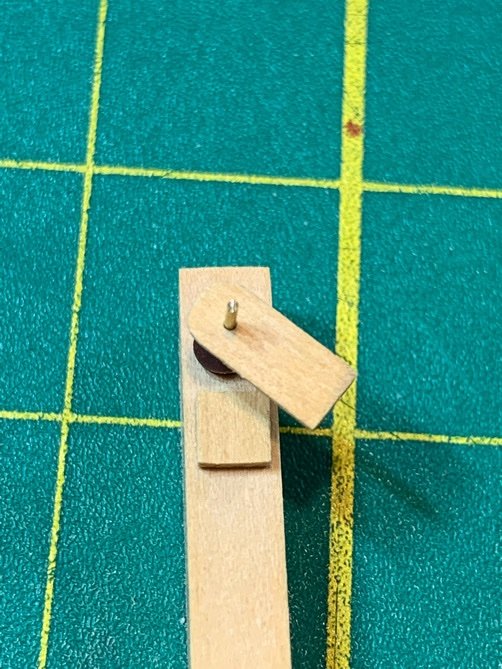
Then I test fit one of the carronades with a pin (literally) to see if the thing would work.
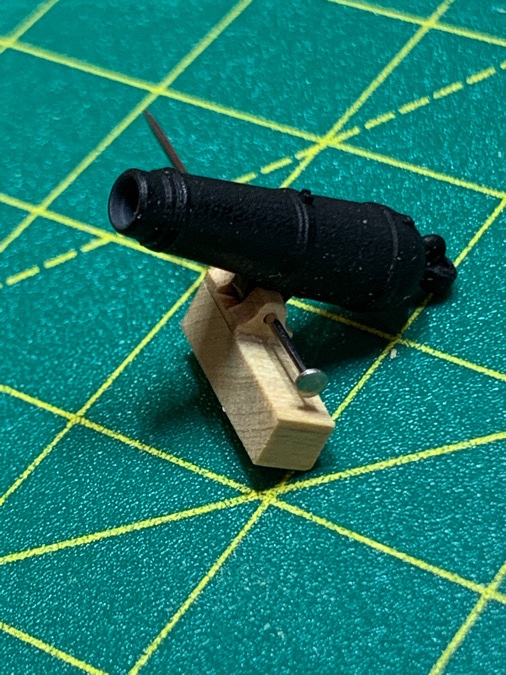
TaaaDaaa!!! Now I can paint/stain the mounts depending on my mood. Since the mounts have a single flat bottom, I can mount the carronade/mount together on the sled, or separately. I'll probably do separately, so I am sure of good alignment between the carronade sleds. The nice thing about this approach is that the mounts are much easier to handle. I'm not certain if there will be elevation issues due to that 'spare wood' adding some height (~0.3mm) to the mounts, but if there is, the discrepancy should be too small to notice. (He said hopefully)
I'll make one more set of mounts for giggles...and move on to the pintles and gudgeons. I feel like I have a clear path to victory for completing my carronade sleds now.
Moving on....ever so slooooowly!!!! Copper plates made and waiting.
-
Dave...that’s some beautiful work!!!!
-


US Brig Syren 1803 by Overworked724 – Model Shipways – Scale 1:64
in - Kit build logs for subjects built from 1801 - 1850
Posted · Edited by Overworked724
Bingo!!!! And since I don’t have a mill or a lathe, modeling with the sculpy gave me an opportunity for realistic illusion. Might not be wood or metal, but I think it looks pretty bloody good for a first attempts at catheads with sheaves (sans lathe).
By the way…I’ll give all the credit to my knowledge and fearless attempts at ridiculous but fun uses of this stuff to Chuck since he used this stuff in his Sultana Practicum (my first and only build). 👍🏽