Ian_Grant
-
Posts
2,100 -
Joined
-
Last visited
Content Type
Profiles
Forums
Gallery
Events
Everything posted by Ian_Grant
-
 Greg, amazing model which I just stumbled across! Truly a work of art! I'm working on an RC model of HMS Lion also from WWI and have been wondering for a long time how to represent the coiled torpedo net; your idea of braided wire is brilliant! I had not thought of that though it seems so obvious now. Many thanks for this great idea!!
 -
CA (cyanoacrylate) "super glue"
Ian_Grant replied to Dr PR's topic in Modeling tools and Workshop Equipment
I've been using Lepage's CA for years, both liquid and gel, in these small 2ml tubes. Never hardened in the tube except once when I stepped away from a model for nearly a year. On the other hand, once you puncture the end foil with the screw cap, I find I get nice glue for the first few squeezes, then a bit of air, then glue again but the tube is really collapsed. Kind of like a bag of potato chips. https://www.homedepot.ca/product/lepage-gel-multi-purpose-super-glue-adhesive-no-drip-dries-clear-2-x-2ml/1001537908 -
No, the 1060 doesn't have complex programming like the 1080; it just has two simple jumpers one of which selects "driving " mode (brake/no brake etc; for boats we select simply Fwd/Rvrs), the other of which selects battery type. I asked tech support and they told me for lead-acid just set the jumper to NiMH mode. I must say this simplicity appeals. Also, the 1080 is $25 more, $50 more for a pair to run my pair of motors. I downloaded the 1080 user manual; programming is done via a single push button and an indicator LED which blinks different numbers of times depending on where you are in the programming flowchart and what you have selected. From my experience trying to program "Cateye" bicycle computers in a similar low-tech programming approach, this might be ok or it might be an exercise in frustration. They do mention, though, that selecting a higher PWM frequency will increase ESC heating since it is "on" more often. I know what you're saying about the whine, though. I will ask the club members who recommended the 1060 if they have this problem. I'm still inclined toward the 1060 but hope I won't regret it. In related news, my 12V motors arrived today! I need a 12V battery then I could buy a pair of ESCs at the local shop (they have both the 1060 and 1080) and try them out. All new to me! For reference, here is a link to the 1080 user manual. There are 15 programmable functions. https://cdn.shopify.com/s/files/1/0109/9702/files/Manual_QUICRUN_WP-1080_G2-Brushed.pdf?v=1670441020
-
Found this museum steam launch; gives a nice colour scheme to use. I also like the Hotchkiss gun, the mount for which is molded into the printed boat. I wondered what it was for........

-
Actually on closer inspection the vents and funnel are pretty good, once you cut off the little "filament hairs" that the head spun between them while flitting around. The launch seems detailed enough for me at this scale; I don't plan to add railings. I don't think....
-
Kevin, I've forgotten most of what I learned (and all of what I didn't understand!) in second year electric machines class. I just took a look around on this topic and you're really opening a can of worms. I never realized how expensive motors can be. As you say, for a tumbler the word on the street says 1/3hp to 1/2hp to provide the torque to turn a barrel with (xx?) pounds of rocks in it. OK I thought, let's look for some. Brand new ones are several hundred dollars, which I guess is why you asked the question. There are many tumbling hobbyists recommending pulling an old motor out of a washing machine; seemingly a decent motor outlasts the washer. Apparently the "National Geographic" tumblers, which are pretty economical, are economical because the motors they use cannot cut the mustard in tumbling applications and soon burn out. Sorry I can't recommend a motor; perhaps ddp has his eye on something suitable?
-
Hi Kevin; Do have happen to have specs/model number for your motor? If it's getting hot I suspect it lacks the horsepower to tumble pounds of rocks.
-
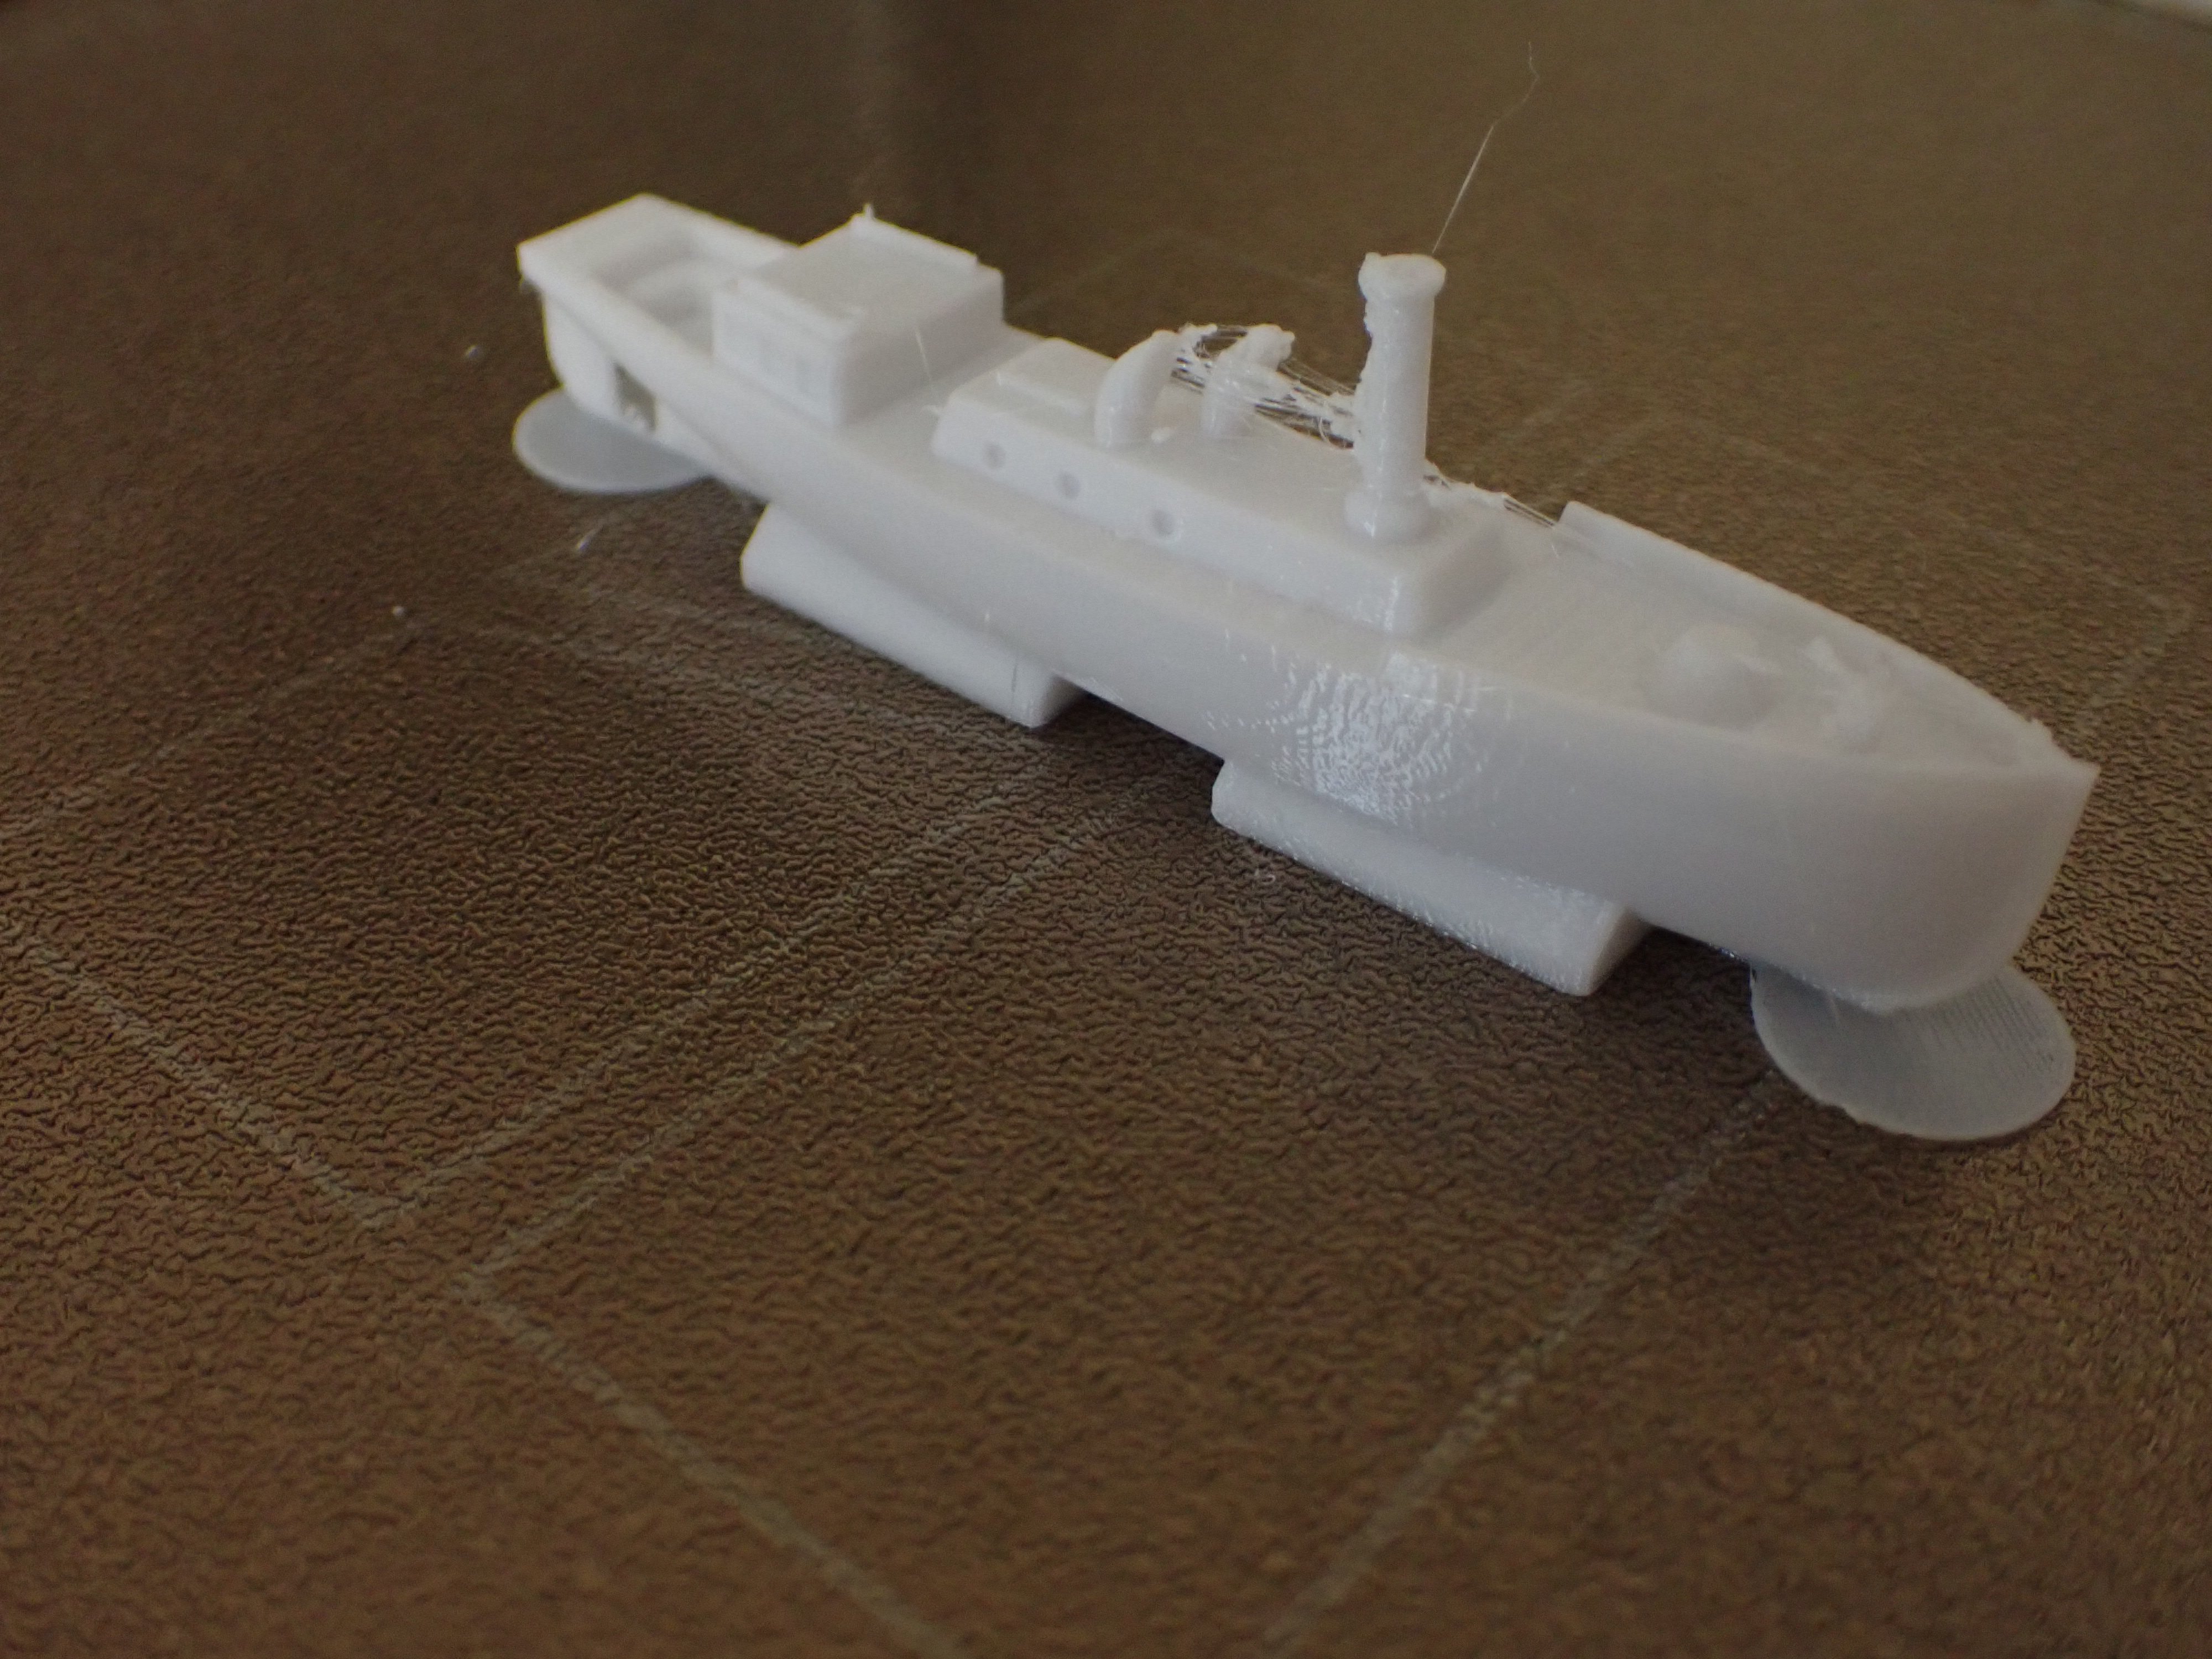
Wow!! Thanks for the great tip! They have three designs for the steam launches; 40ft, 45ft, 51ft. I picked the 45ft because I think it's the prettiest plus I only needed to scale it down by 7% (to 3-3/4" long) to be the size needed. Incidentally, I see my drawing calls them "Steam Picket Launches". Here are pics of one sitting on the build plate, and in situ. The funnel and vents didn't come out too well but I can replace them. I'll need to cut off the circular pads at bow and stern; stern might be tricky as the rudder looks pretty fragile. Need I gimp up a prop somehow.....?? There will be another on the opposite side of the engine room vent hatches. There will also be a pair of large launches outboard of the steam pickets.


-
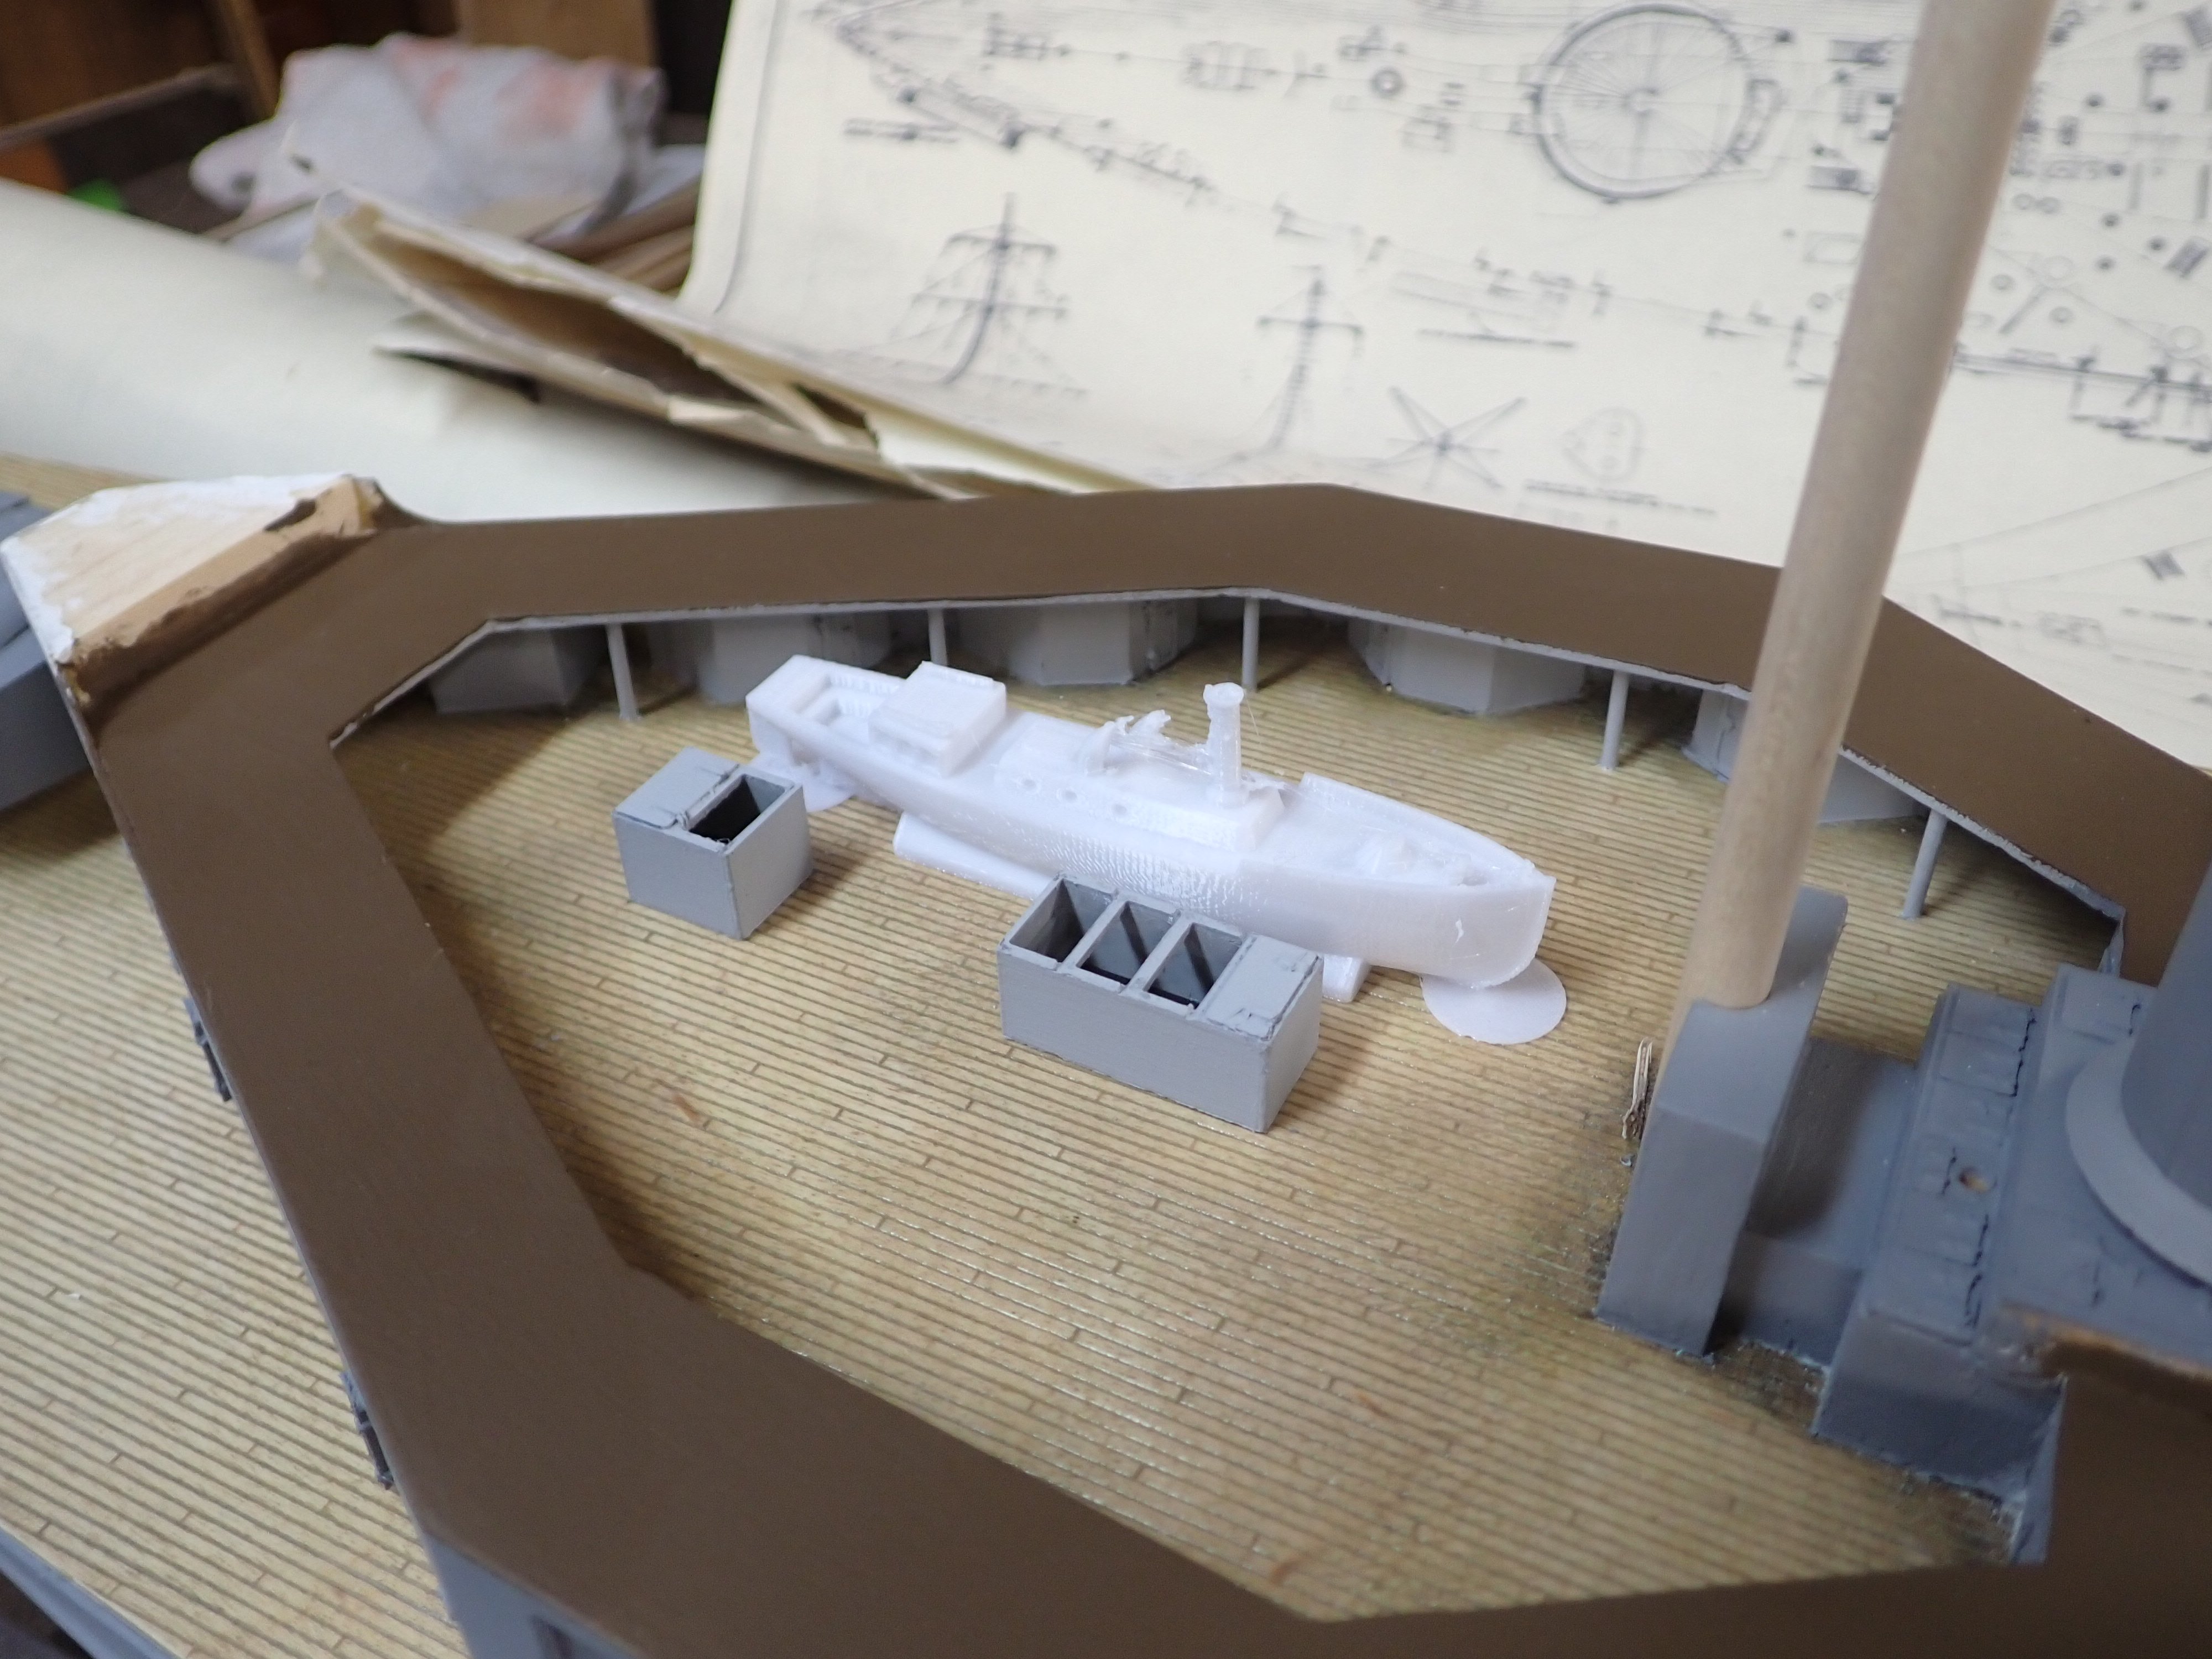
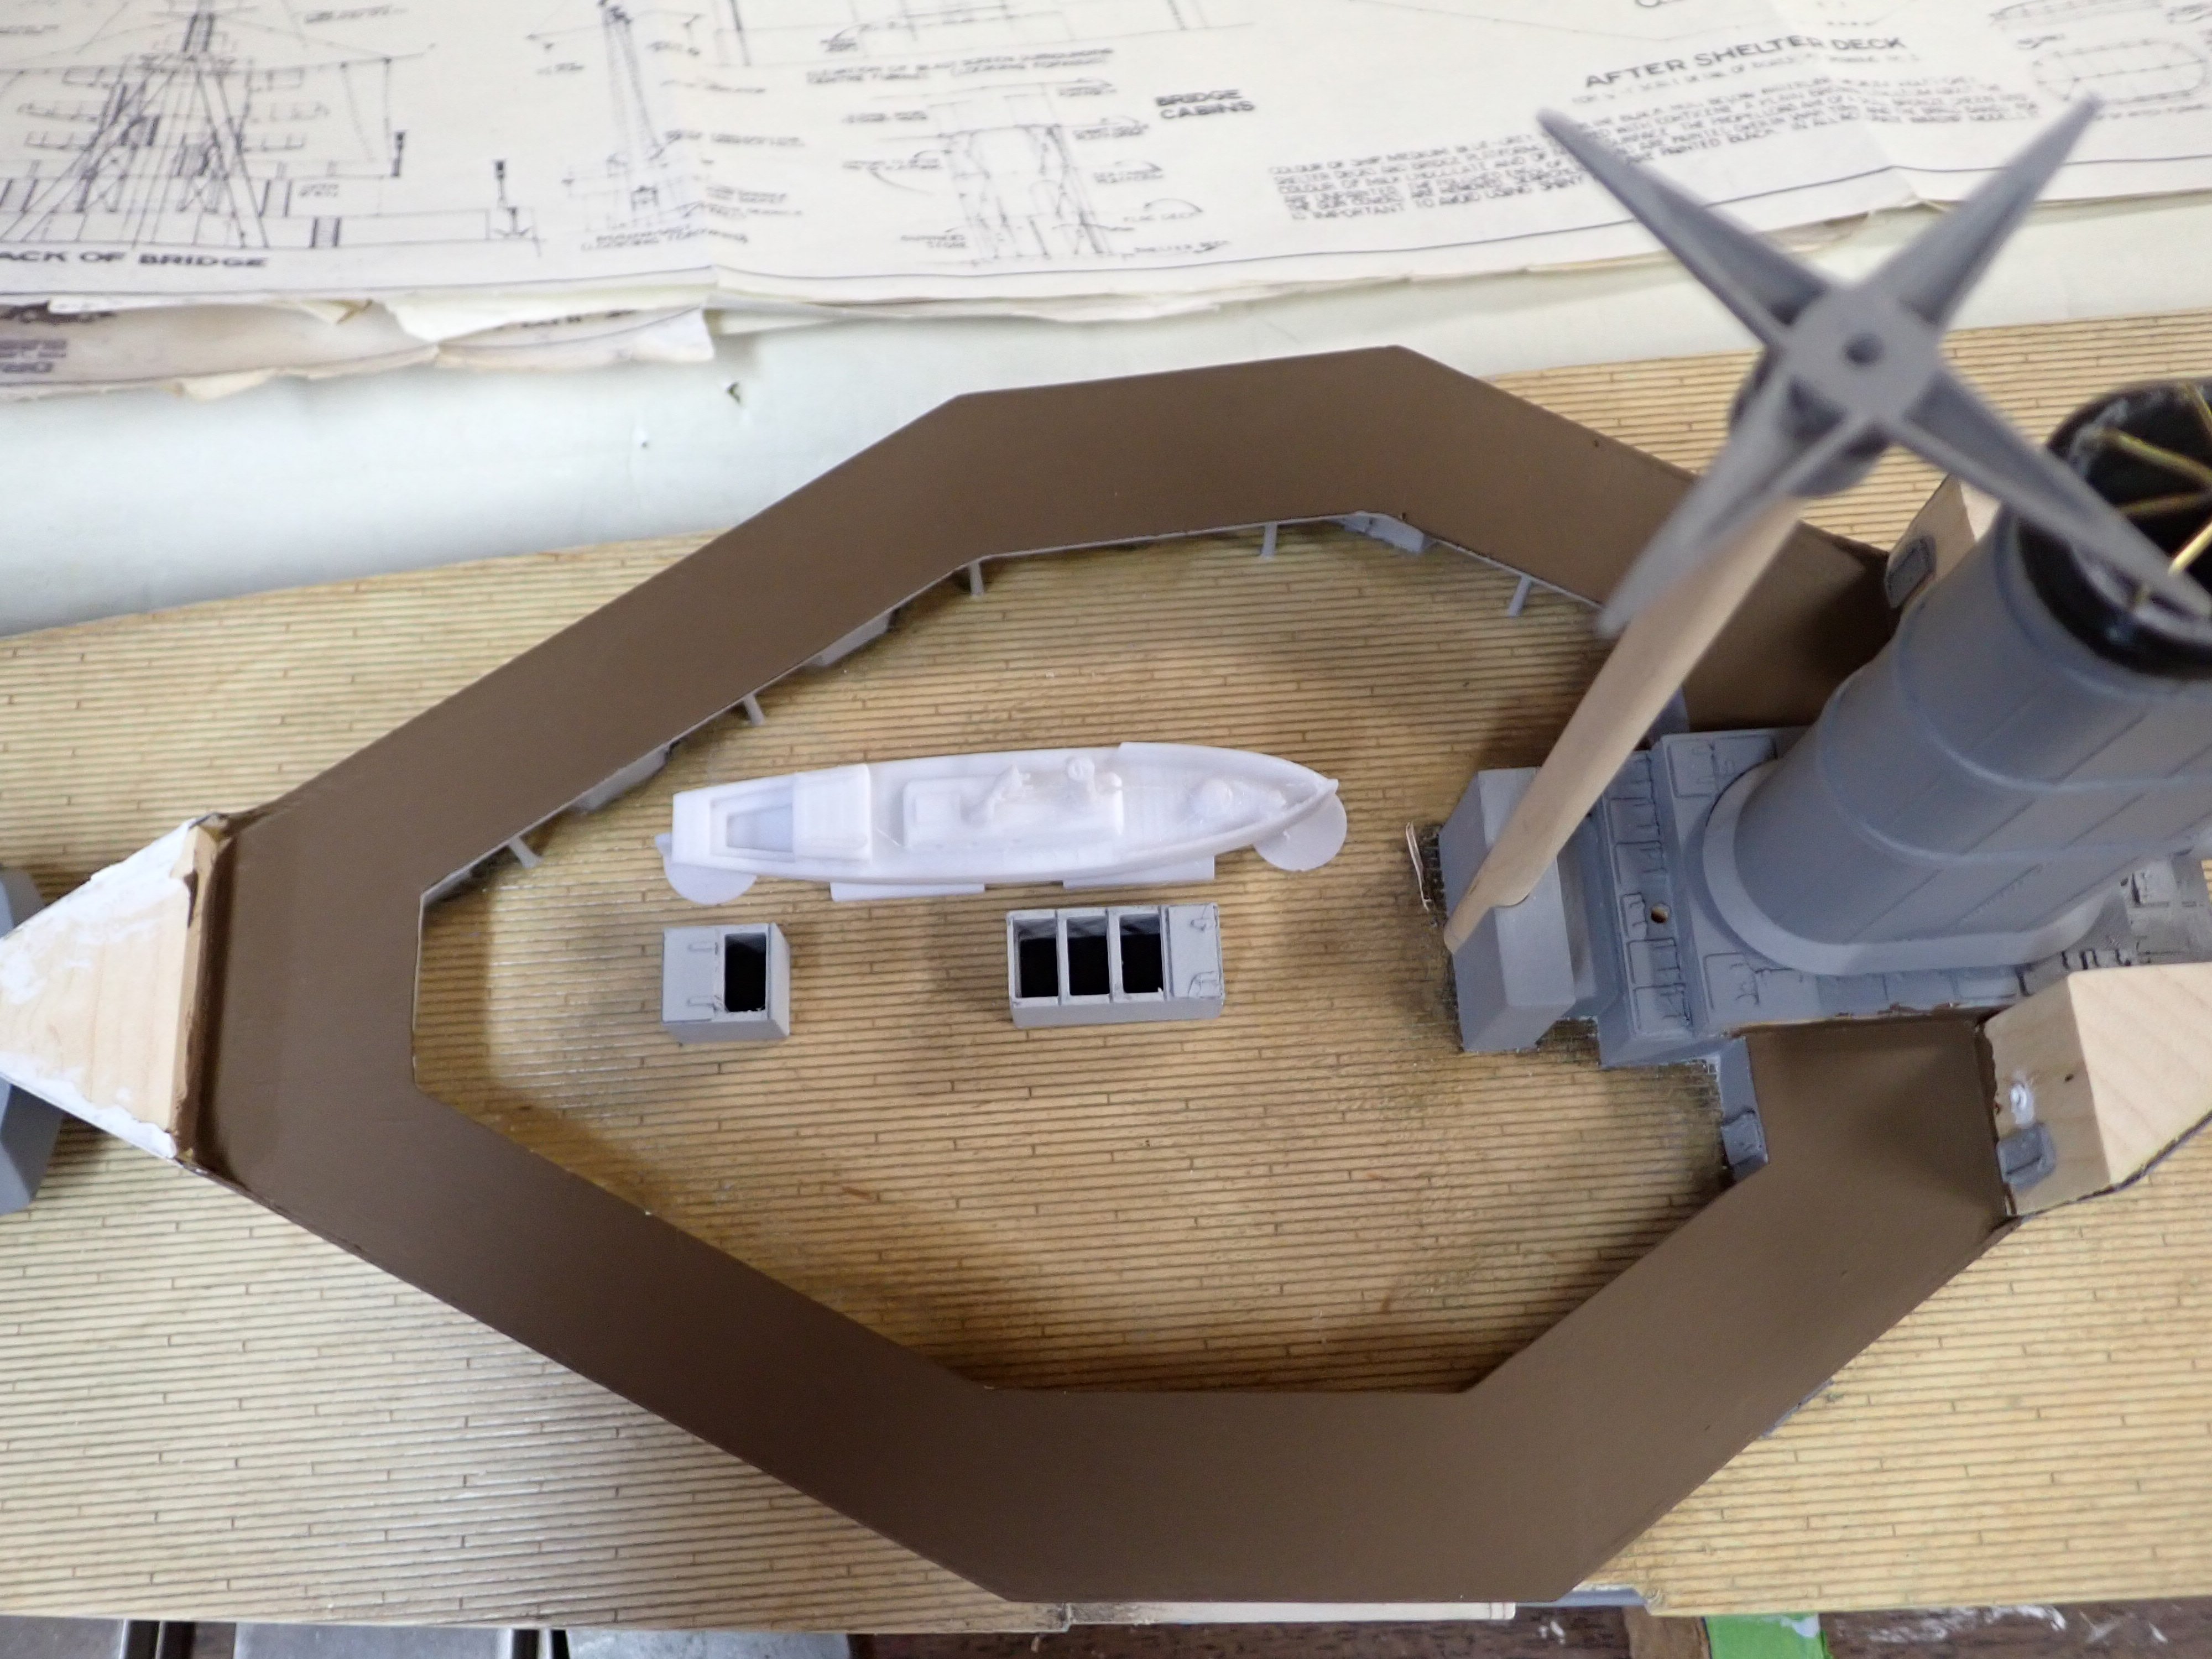
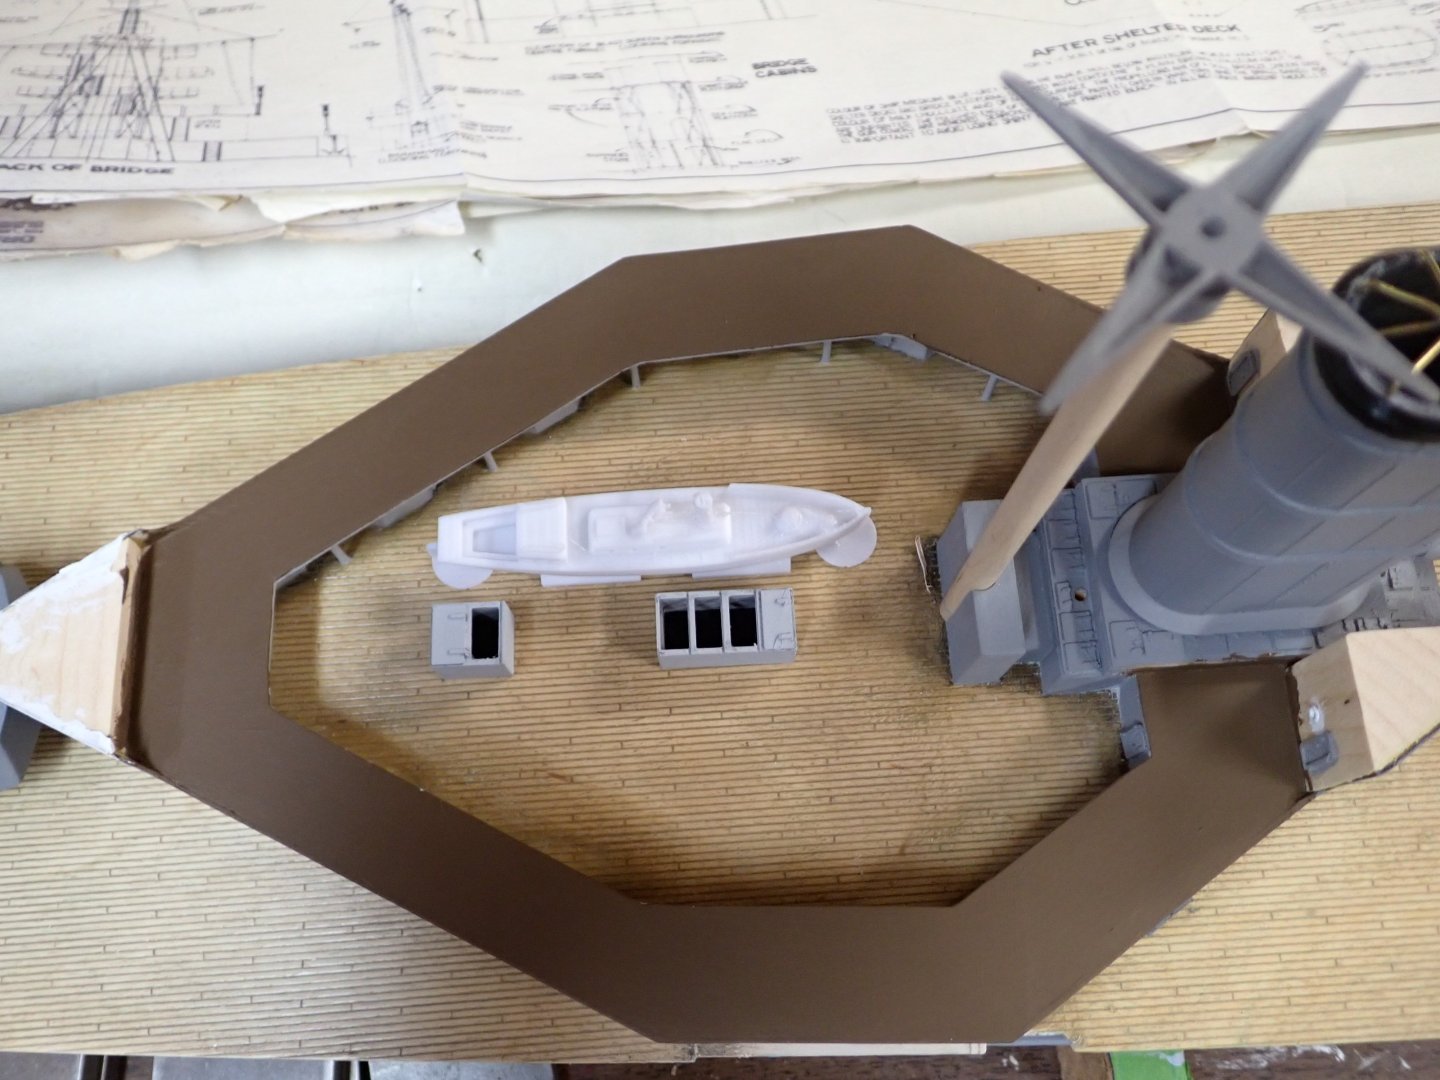
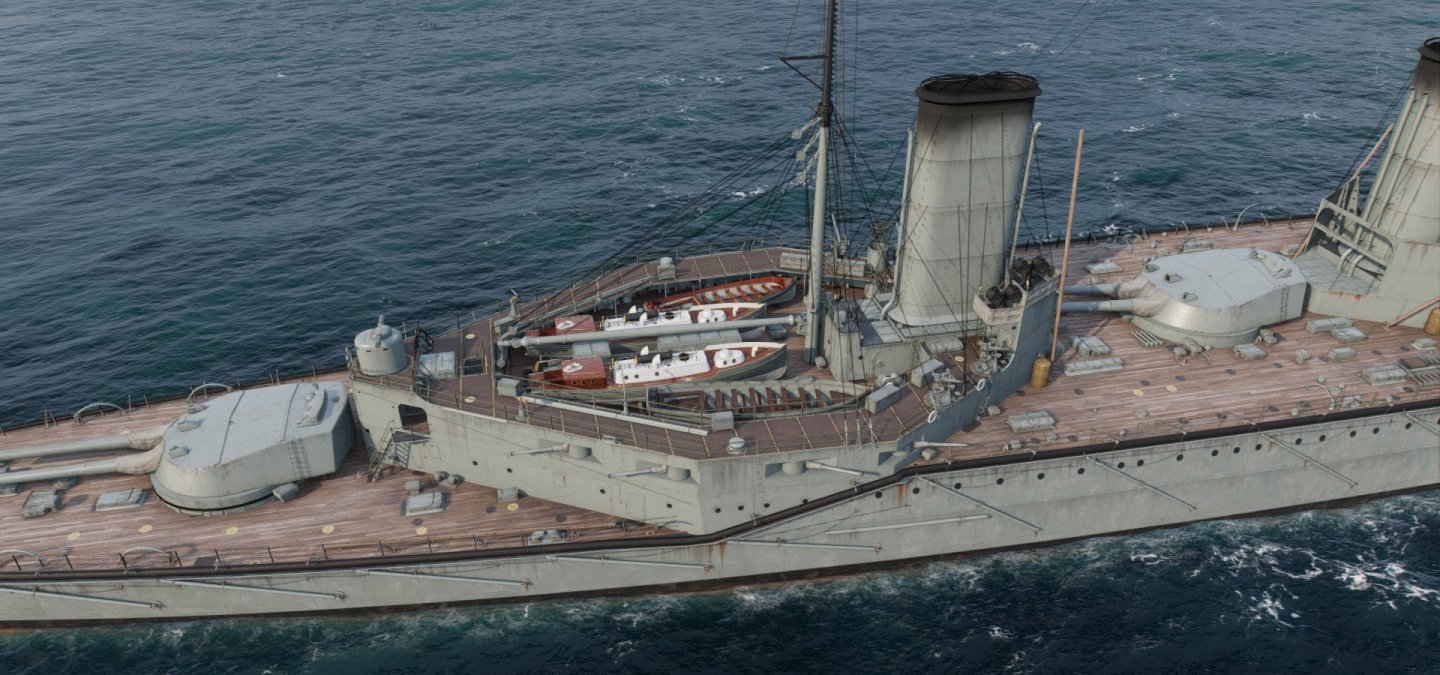
The boats vary in size. All my drawings show is dotted outlines in the top view with notes as to length/type. Many are stored between the fore and main funnels, some in stacks of three, sheltered from Q turret by the blast shields. The well deck in the aft superstructure contains larger boats like the admiral's barge and the pair of identical steam launches, as here: In a wild coincidence, a chap contacted our model boat club last month, offering his father's old drawings of various things among which was plans for the Royal Navy steam launch circa 1915! I contacted him tho we're yet to meet for an exchange. As for the other boats, I'm hoping to find 3D files of generic boats with/without flat sterns and print their hulls suitably scaled for the various sizes. Then I'll have to add seats at the correct scale. My drawing doesn't show any inflatables but I have photos of them in such places as attached to the blast shields by Q turret!
-
Hi Glen; yes RC has its own "techie" jargon. "ESC" = "Electronic Speed Control". They have two wires input from battery; two wires output to motor; and a plug-in connection to the RC Receiver on whichever channel you select as "throttle". Move the Transmitter's stick and the ESC varies the voltage to the motor.
-
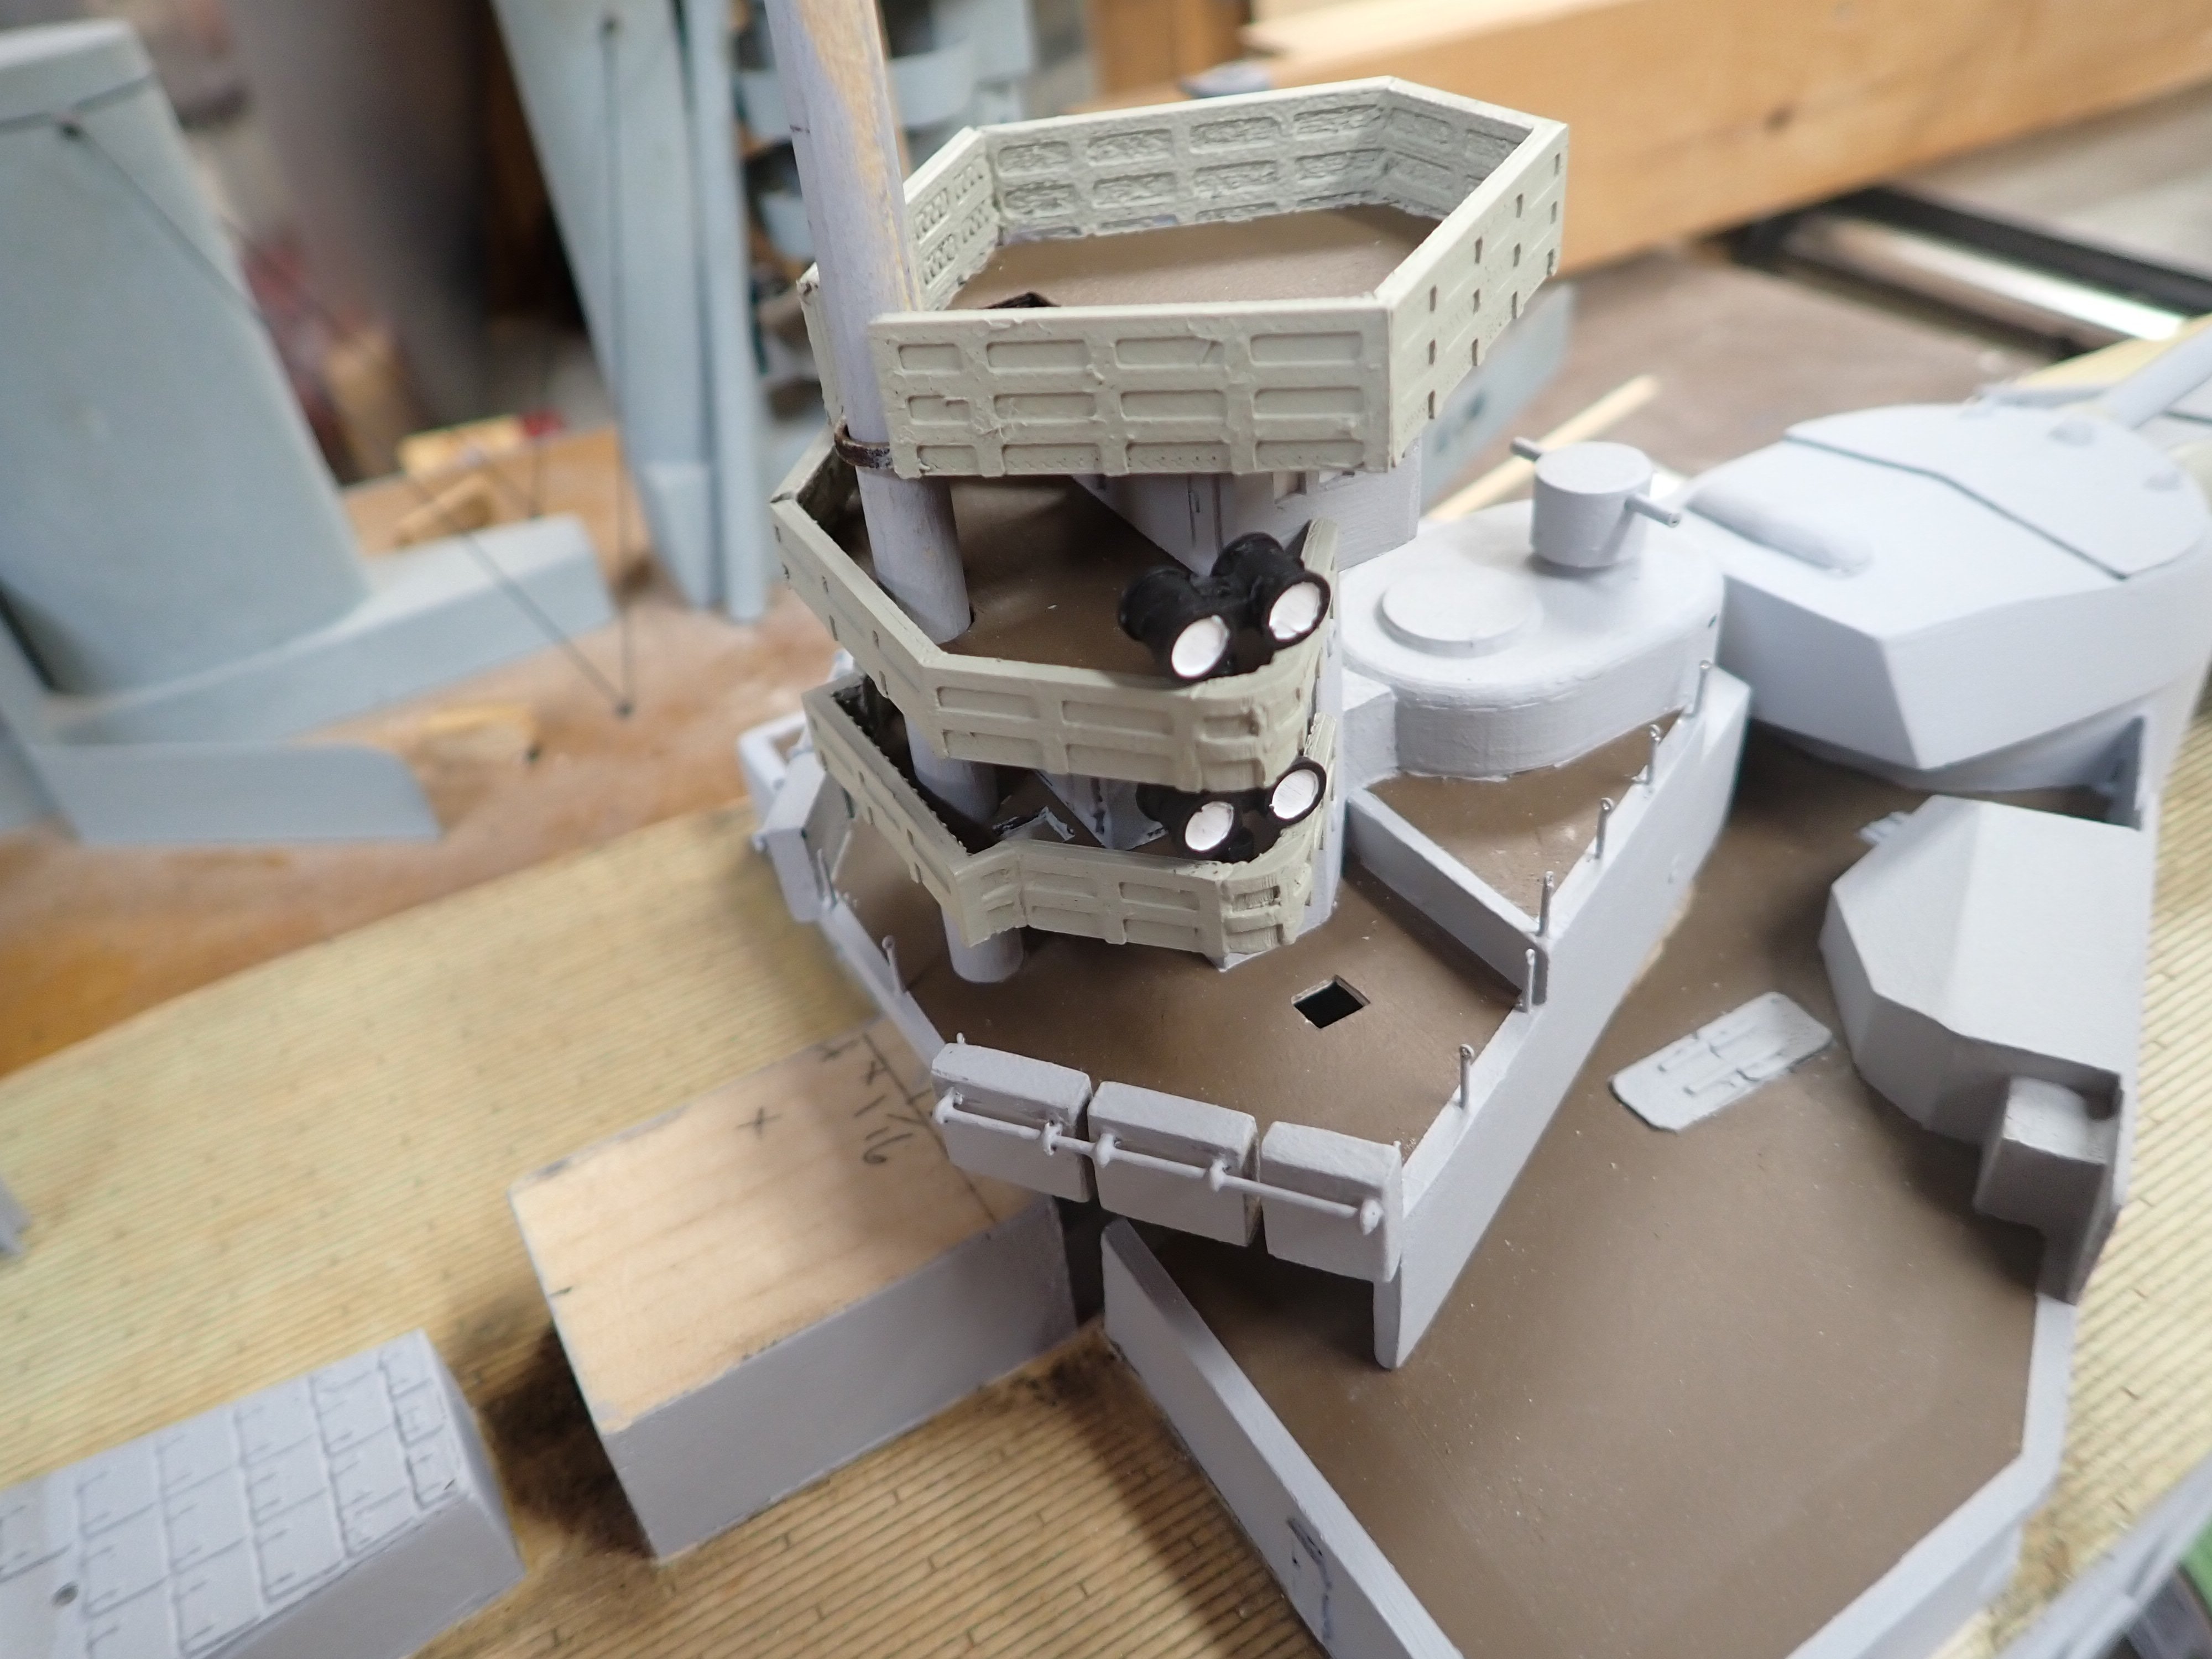
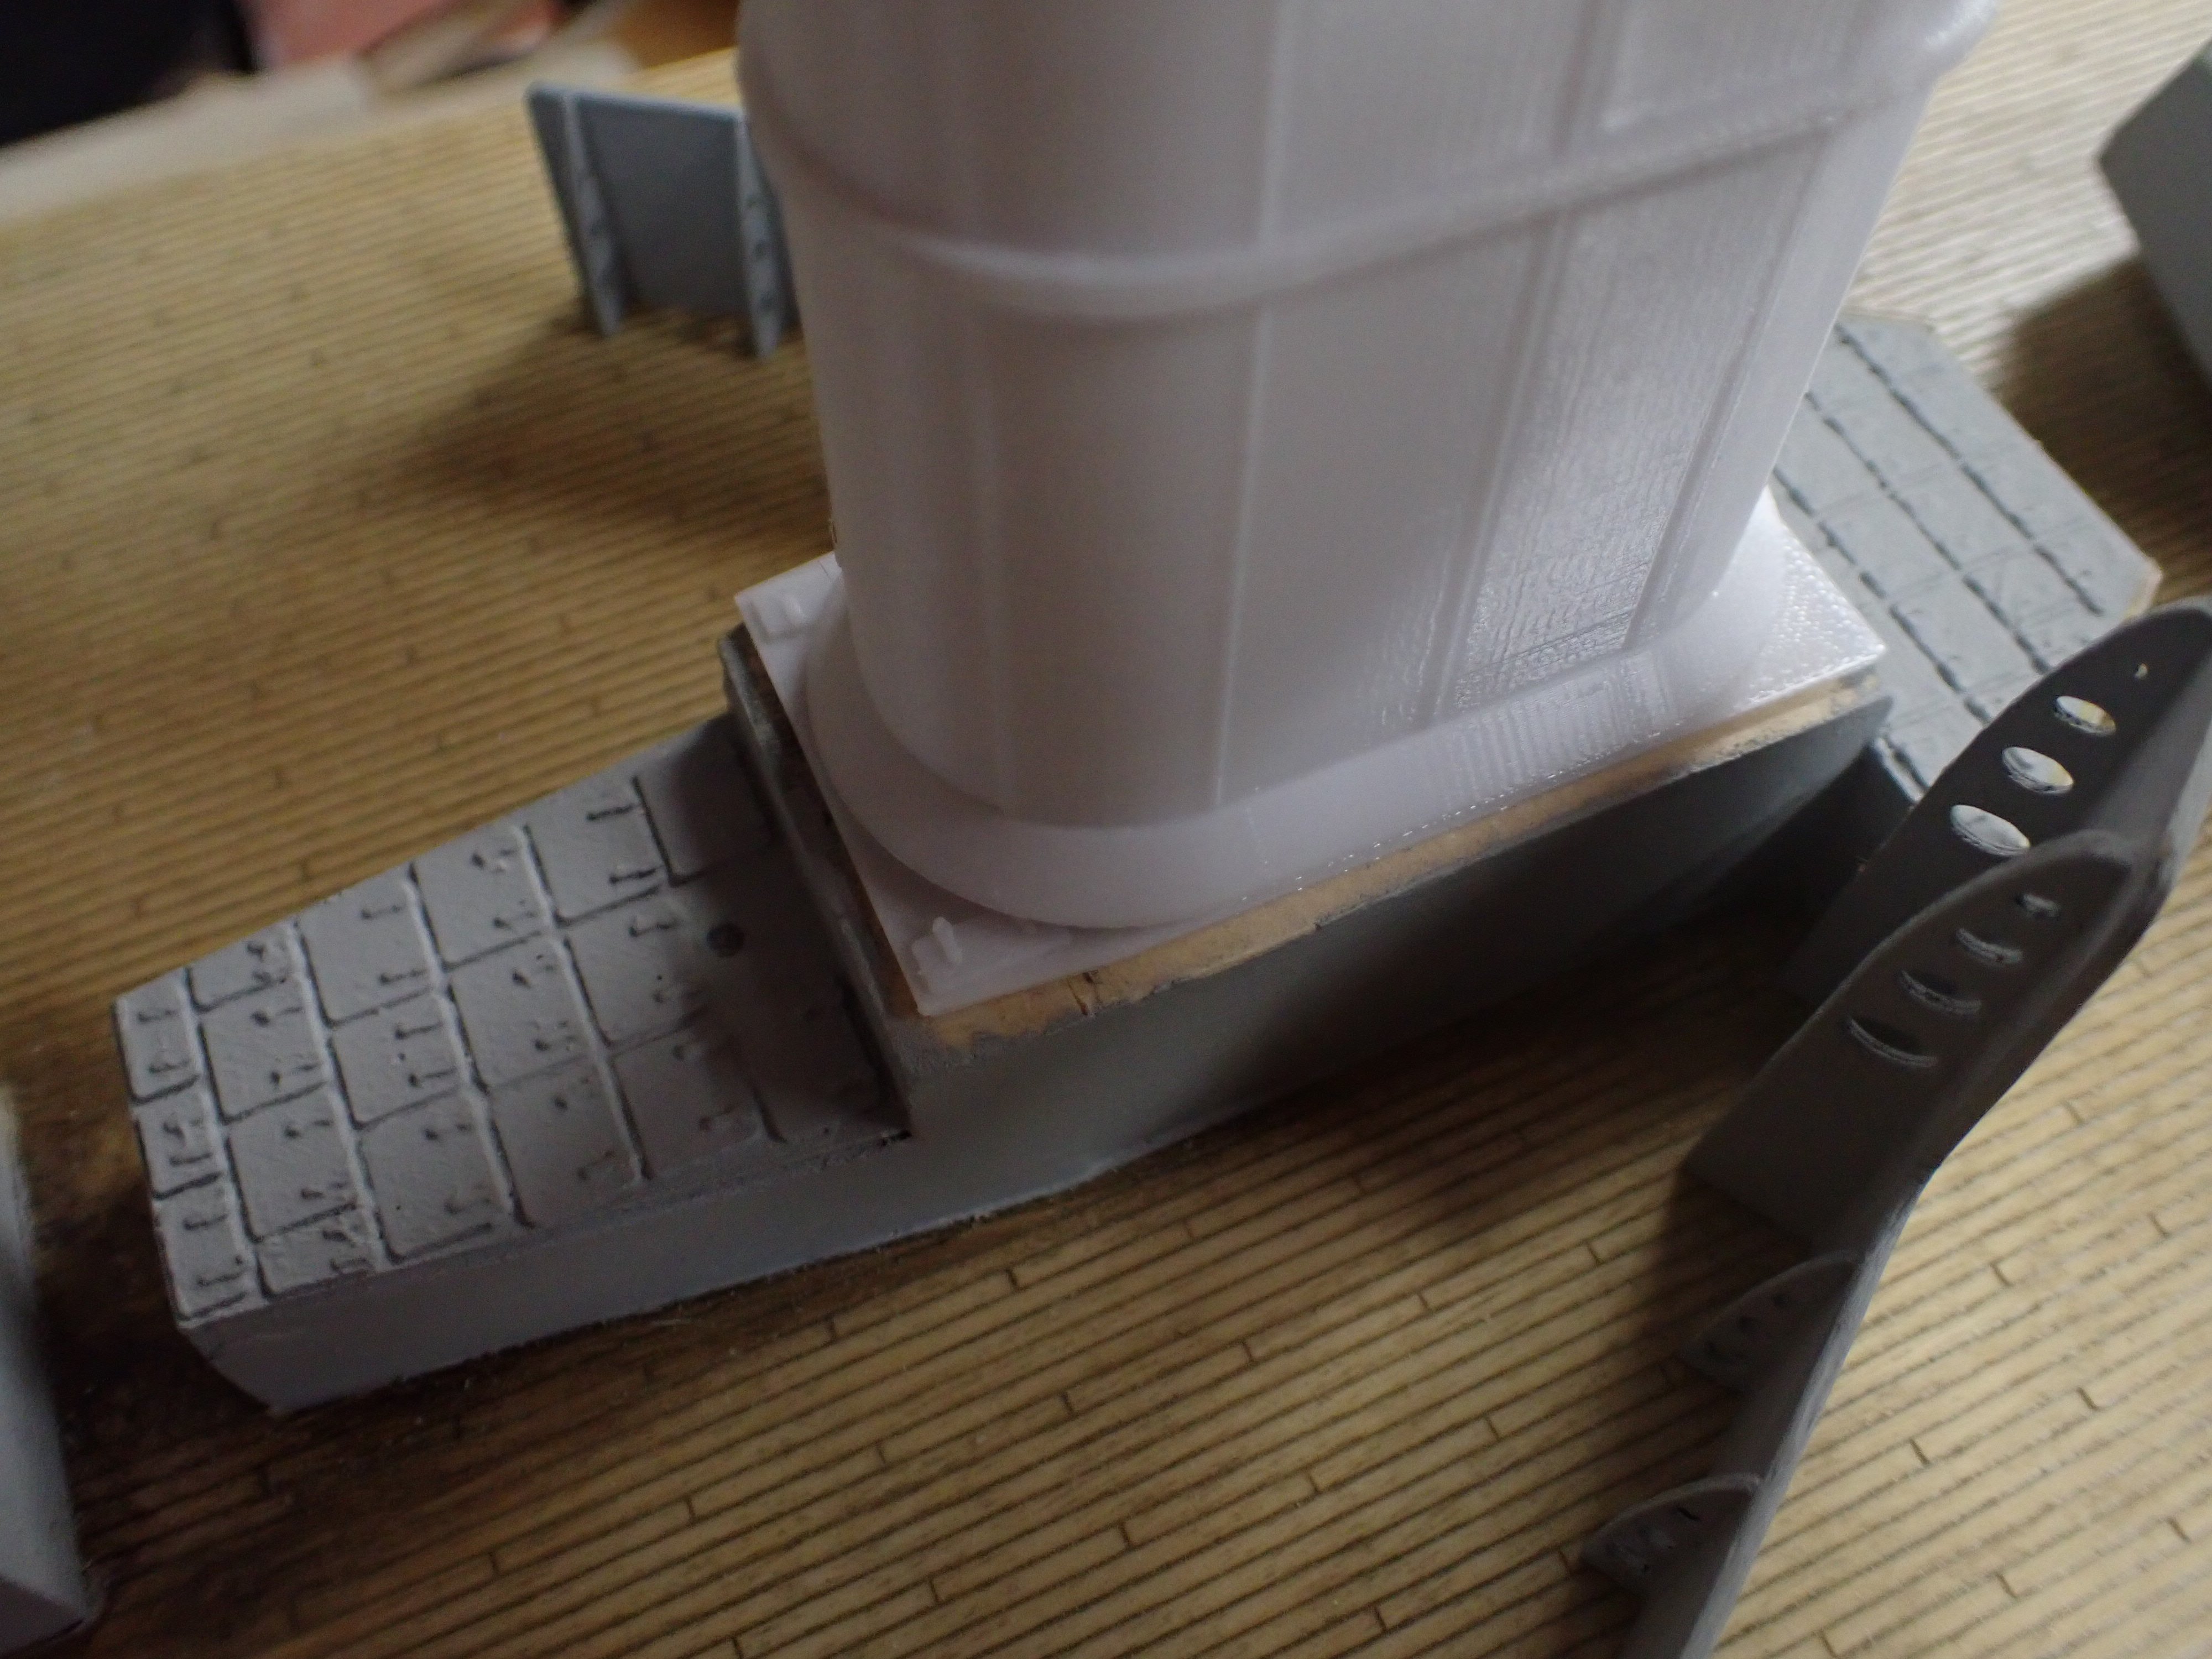
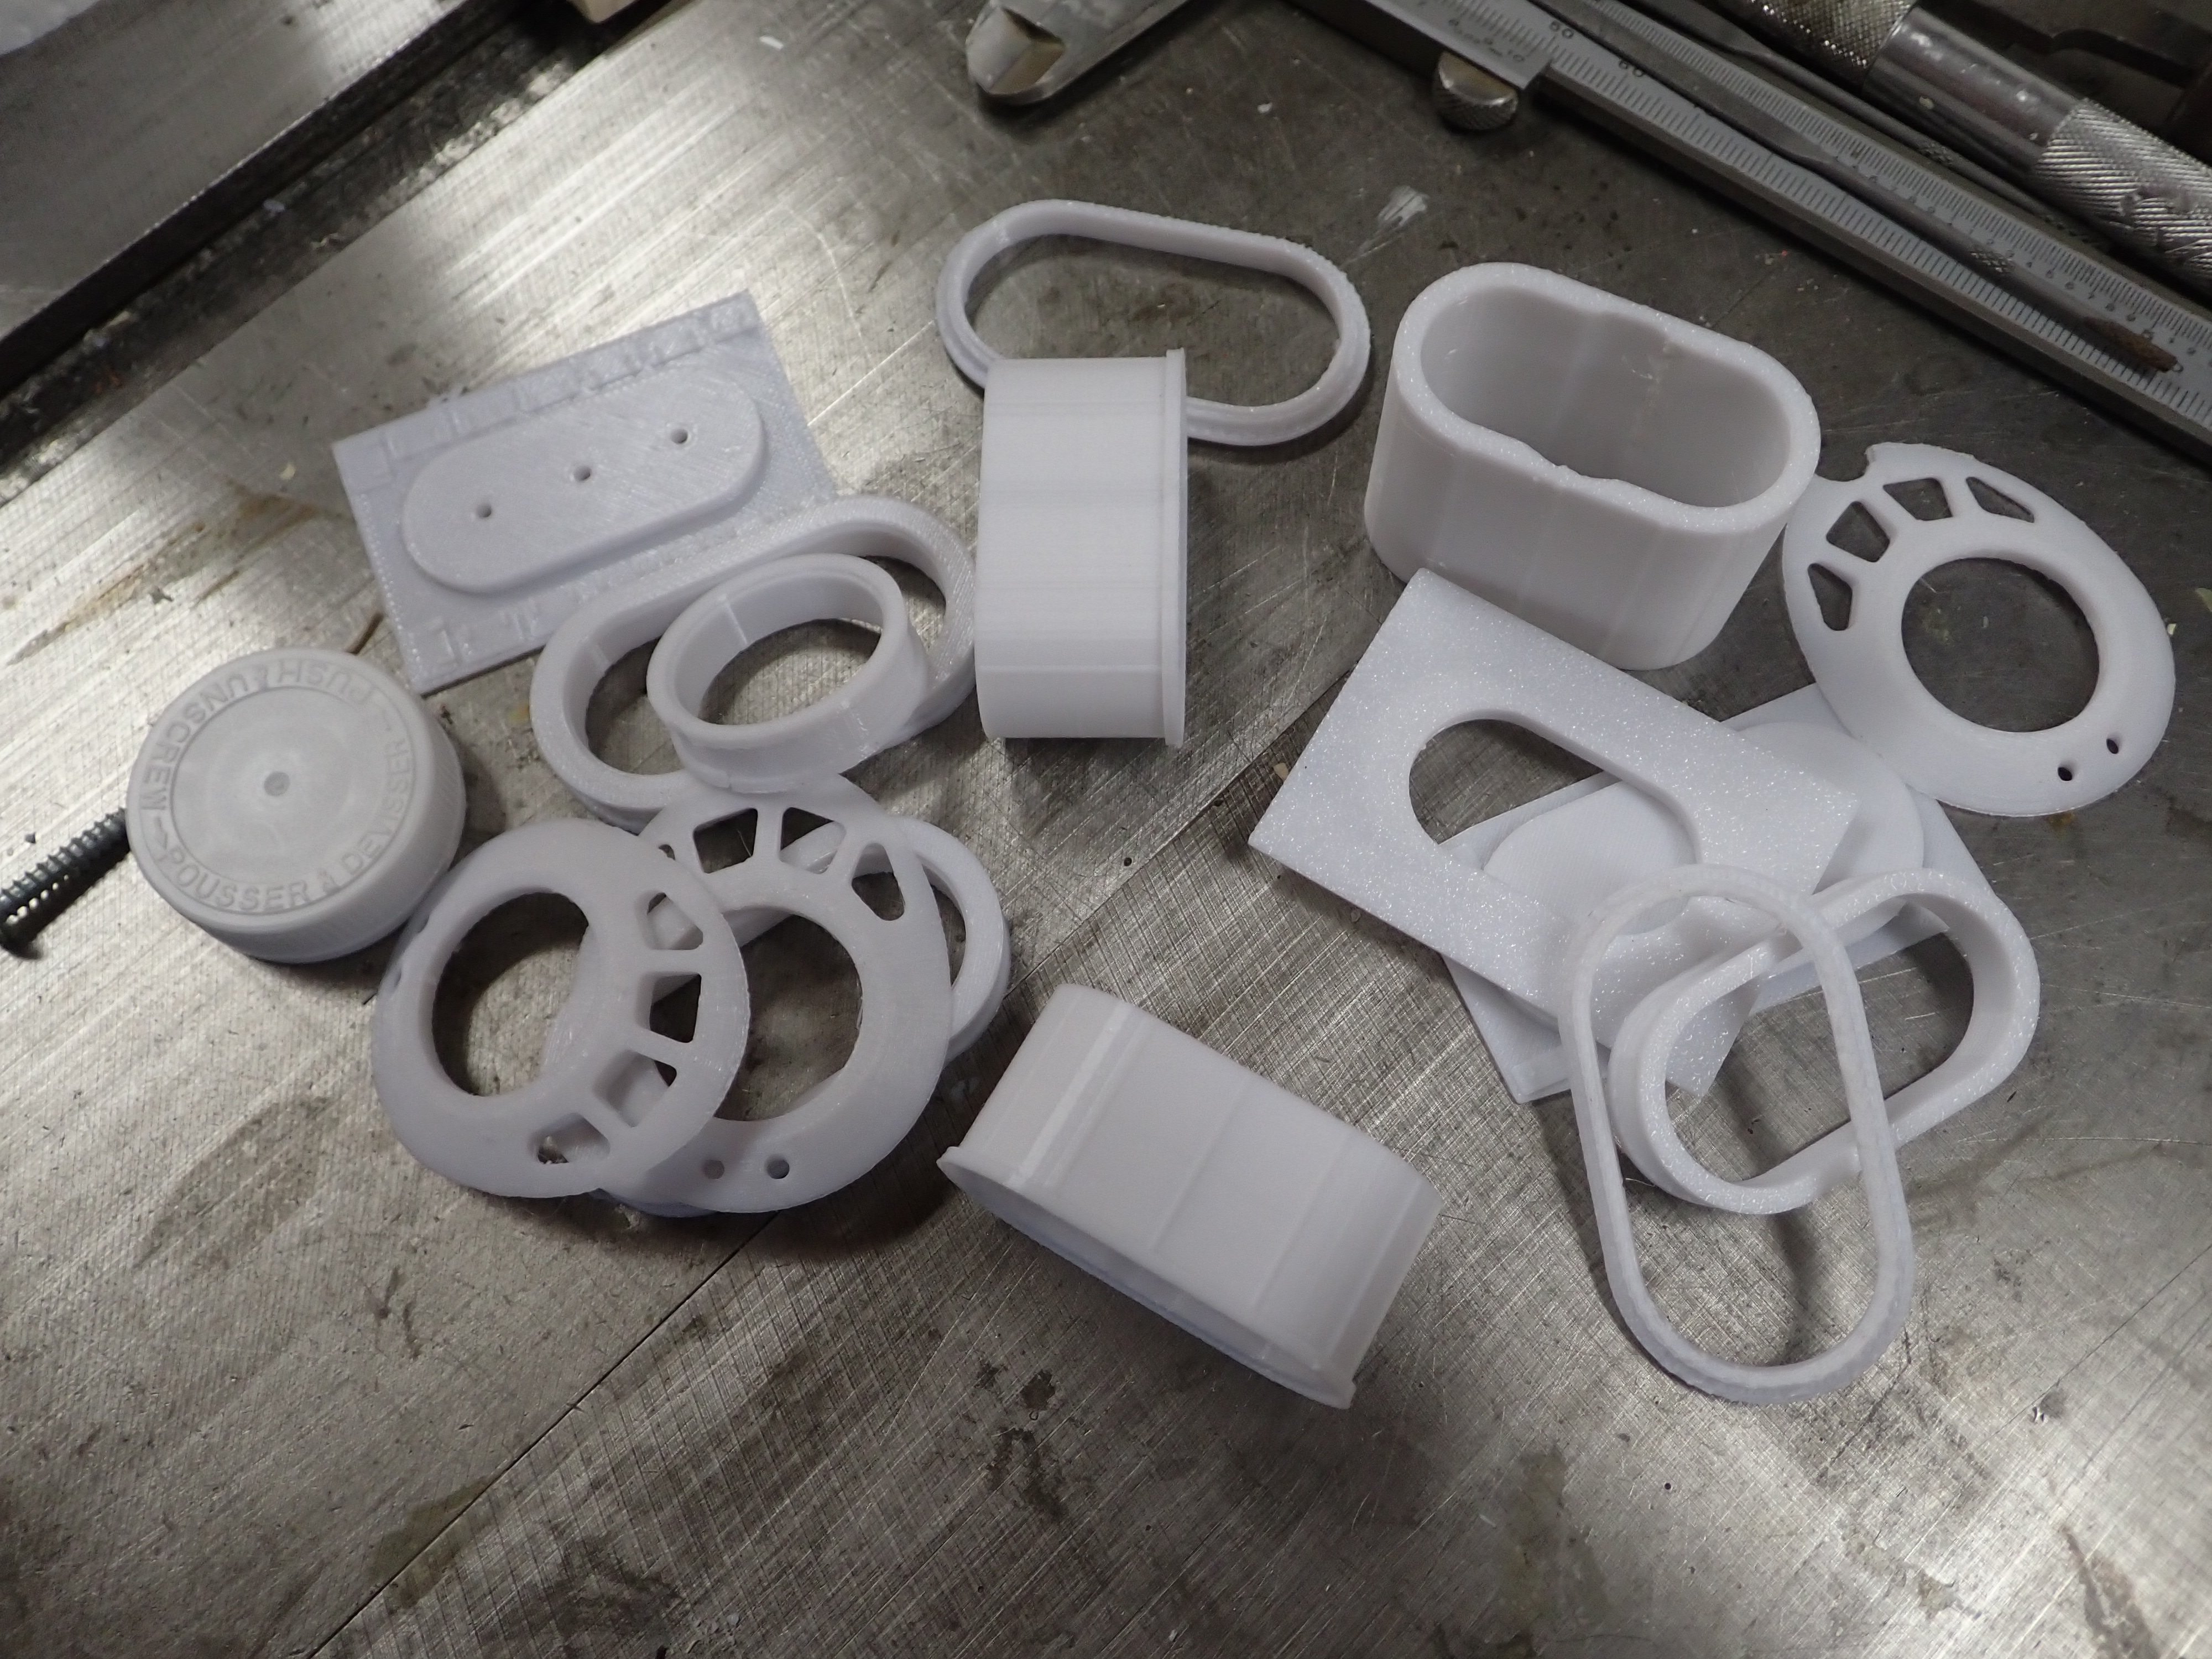
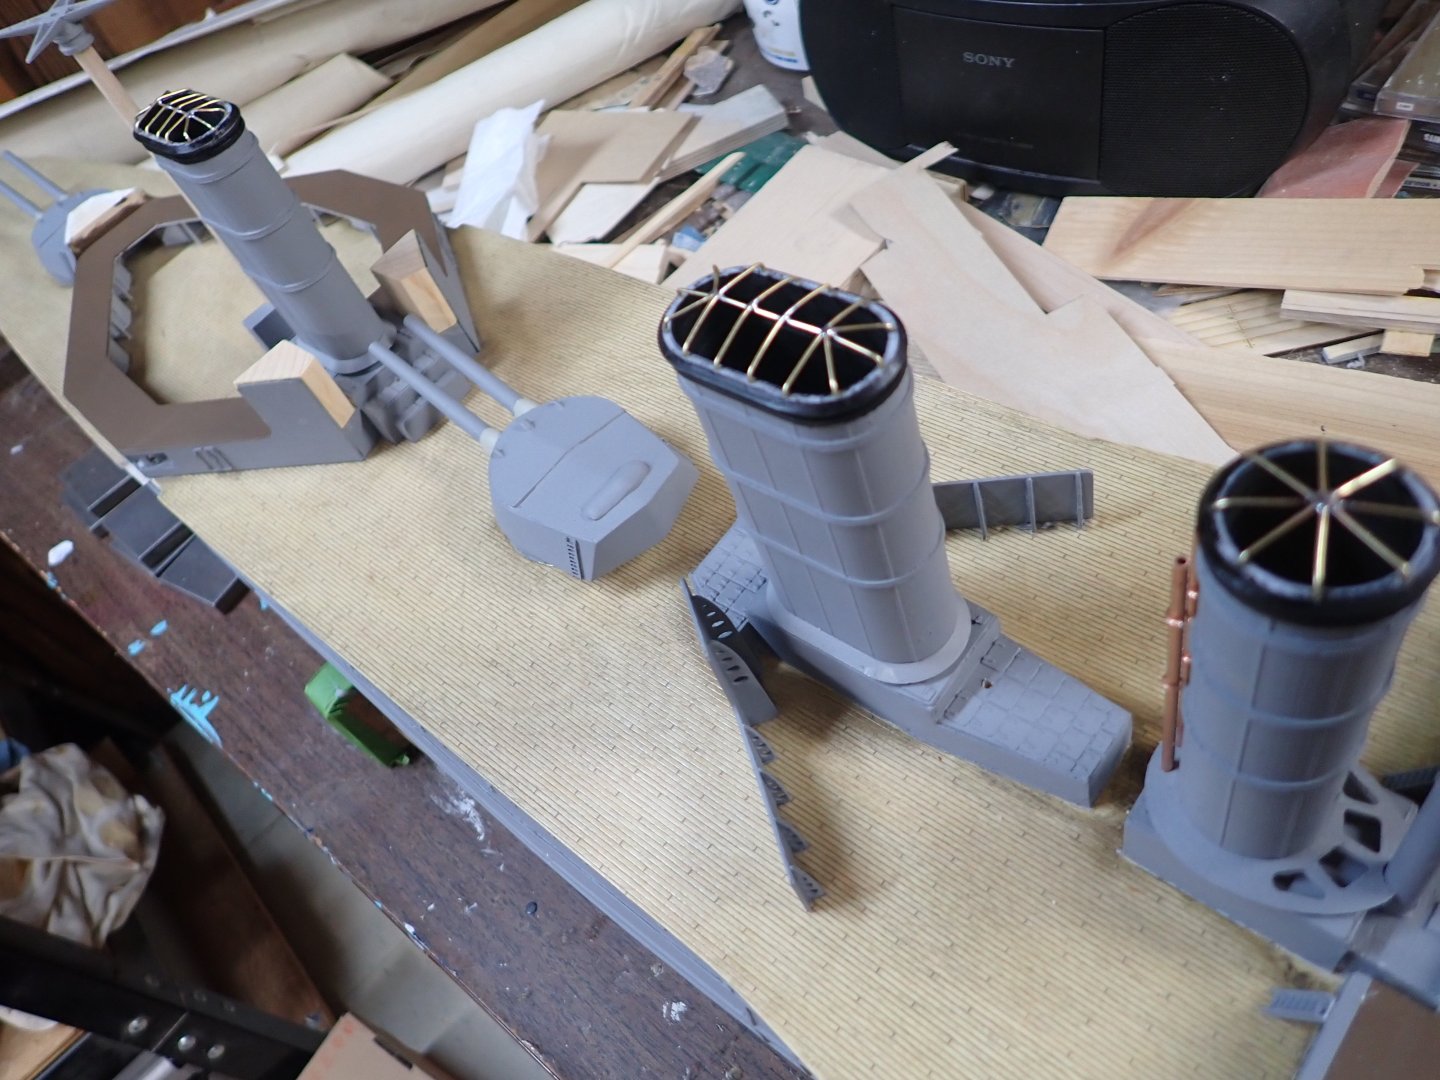
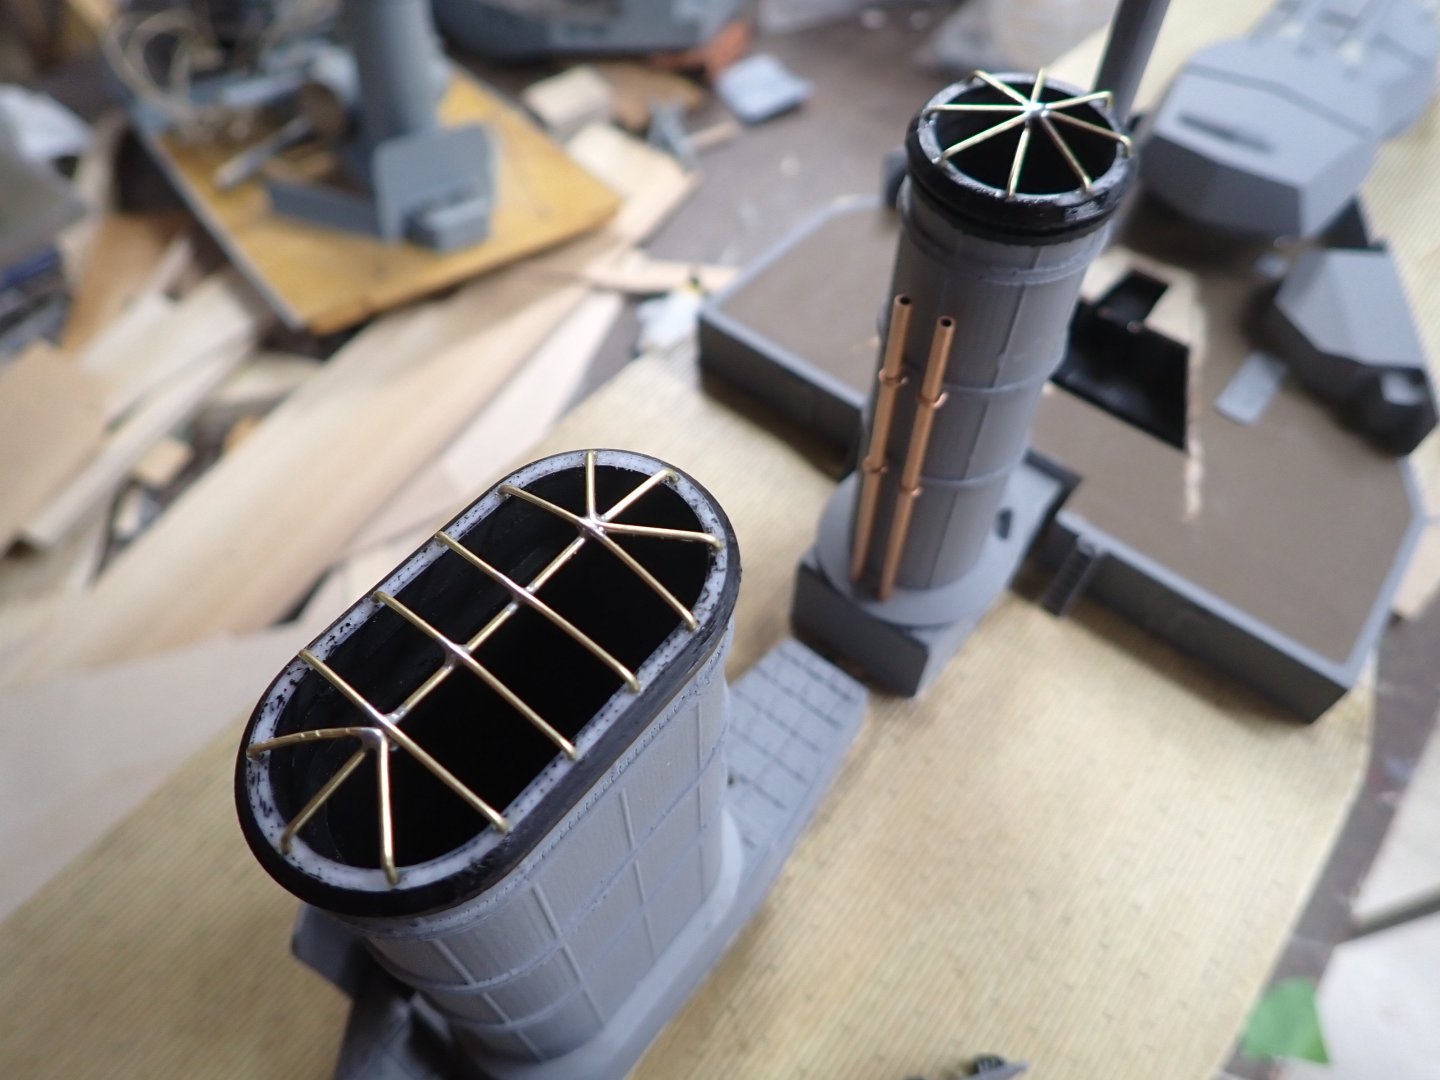
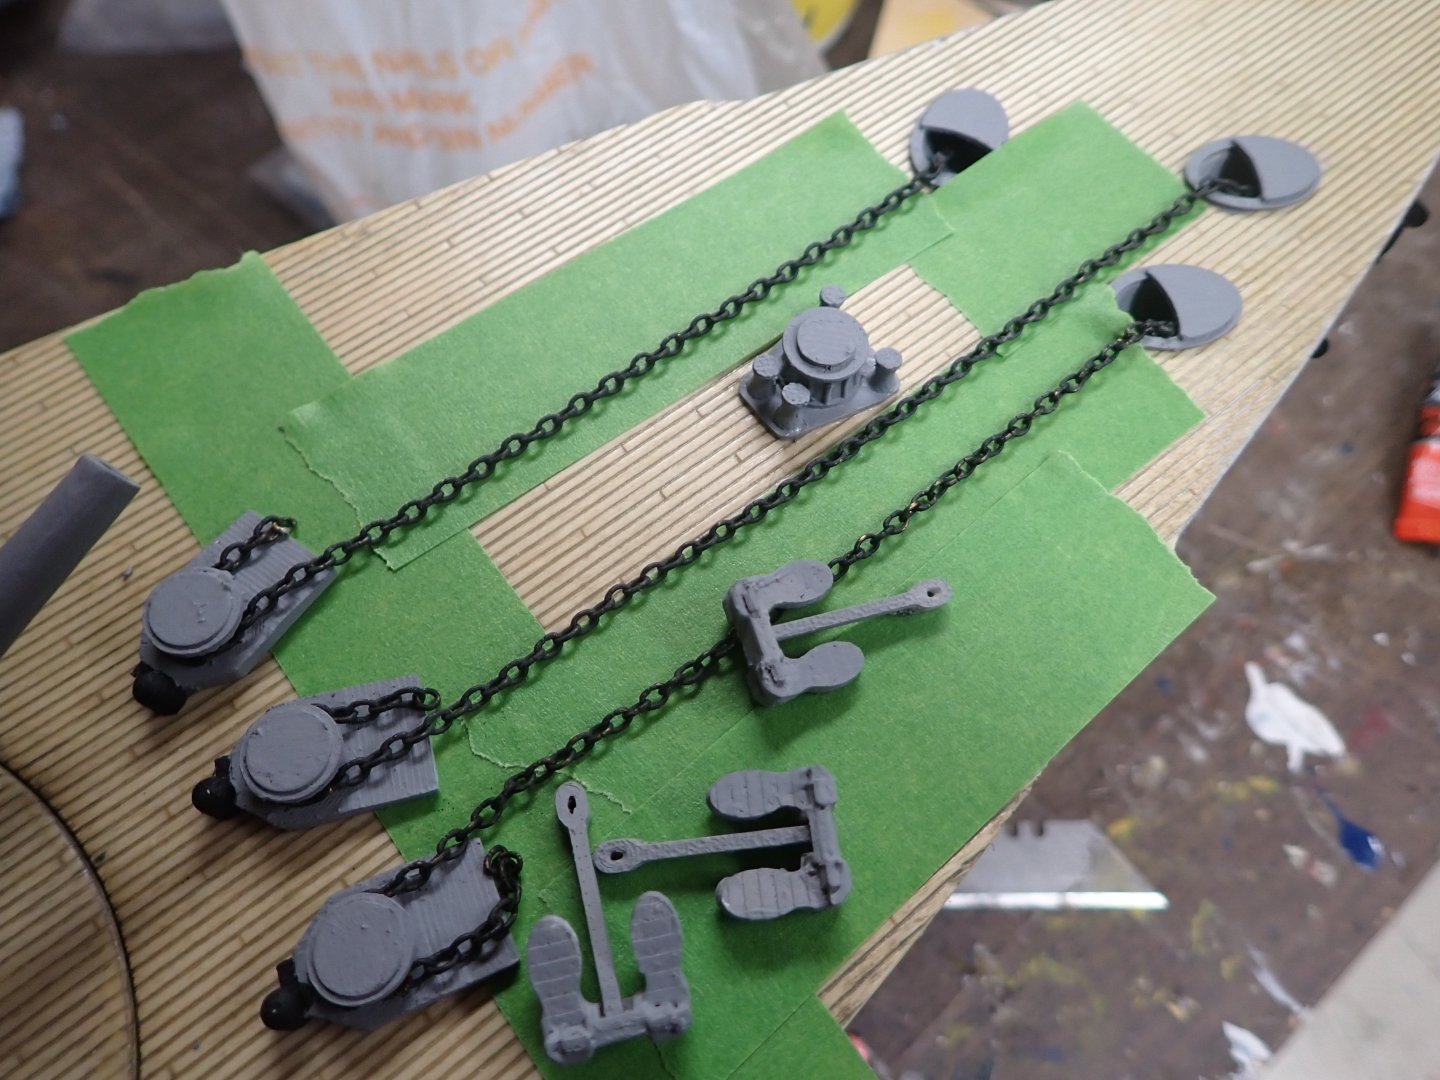
Been a while since I posted. A giant overnight wind blew over part of my fence, and part of my neighbours. I don't mind putting fences together, but I hate digging to reset posts. 🙄 I had a major re-think about the electronics. I was unable to find an ESC from an esteemed manufacturer which would happily run on a 6V lead-acid battery to run my 70's decaperm motors. Members of my RC club recommended the Quicrun 1060 ESC but they all operate on 12V. I decided to bite the bullet and buy a pair of new 12V brushed motors to use with the 1060, one per motor. These motors come with planetary gear reduction with many available ratios. The company specs the motor's rpm and torque; using this data I selected 5:1 reduction which should give me the same max propeller revs as the Decaperms. I selected the 5:1 version from this family: https://www.mfacomodrills.com/pdfs/942D-series.pdf I will be acquiring a pair of theseESCs, driven from the Receiver via a y-harness: https://www.hobbywingdirect.com/products/quicrun-10-brushed-esc The water is back in at my club's pond so weekly meets started this week! Summer has caught me with Lion still not ready to get wet so I'm trying to get more done. When I have the propulsion system in I will go to the pond meets and add details as the summer progresses. One large question is how I am going to make all the ship's boats and the two steam launches.......🤔 Here are some pics of the funnels with the "cages" on top, made from 1/32" brass rod, which support canvas covers when boilers are drawn. I printed some jigs to bend them consistently but even so it was a bit of a pain. Cages will be painted black. Also added two copper steam pipes at the fore funnel. These are the simplest; no bends. The other six steam pipes on the main/after funnels require bending for which I will print some jigs. These will be painted grey. Also printed hawsehole covers, main windlass, anchors (with pivoting shafts), and anchor winches. Started to plan how to place them but it's been days since I looked at this aspect of the build. Looking at the pic, I see I will have to sand the little ridges off the flukes to improve their appearance. Also, I noticed during this that teenage Ian made a mistake on the hawseholes - there should be a pair up front then a single behind the starboard one, i.e. the port hawsehole should have been even with the forward starboard one. Too bad I didn't notice this before I added the laser-etched deck. I am not going to attempt to correct this now.
-
Jim, she's going to be stunning! Your work definitely "goes to 11". 😉 Remind me of her scale again, please?
-
I'm always amazed at the finished appearance of your card models. I should try one...........🤔
-
Michael, it's nearly beyond belief, at this scale. As always, amazed by your fine work (and your eyesight!).
- 297 replies
-
- 3
-

-

-
- Sovereign of the Seas
- Airfix
- (and 1 more)
-
Masked everything off and applied a darker grey. I'm a much happier camper now. Here the funnels, in various stages of priming/painting, are just sat on minus their lower flanges except the fore. They need more detailing (drilling for steam vent pipe supports) which is easier done off the ship. I had to print a new fore funnel after noticing that the cap did not quite click-in when I glued it and was thus a little bit crooked. Still need to put darker grey on the flag deck and bridge tower parts. The grey is actually slightly darker than it appears here.
-
Glen's video reminded me of this National Geographic footage from earlier on. Continuing the digression, but hey, it's my build log.
-
And now we take a brief break from the build for some humour. Today's topic, and I know this will be appreciated by Keith and Glen, is the penguins of the Heard and Mcdonald Islands. Here are a few pics.


- 235 replies
-
- 11
-

-
-
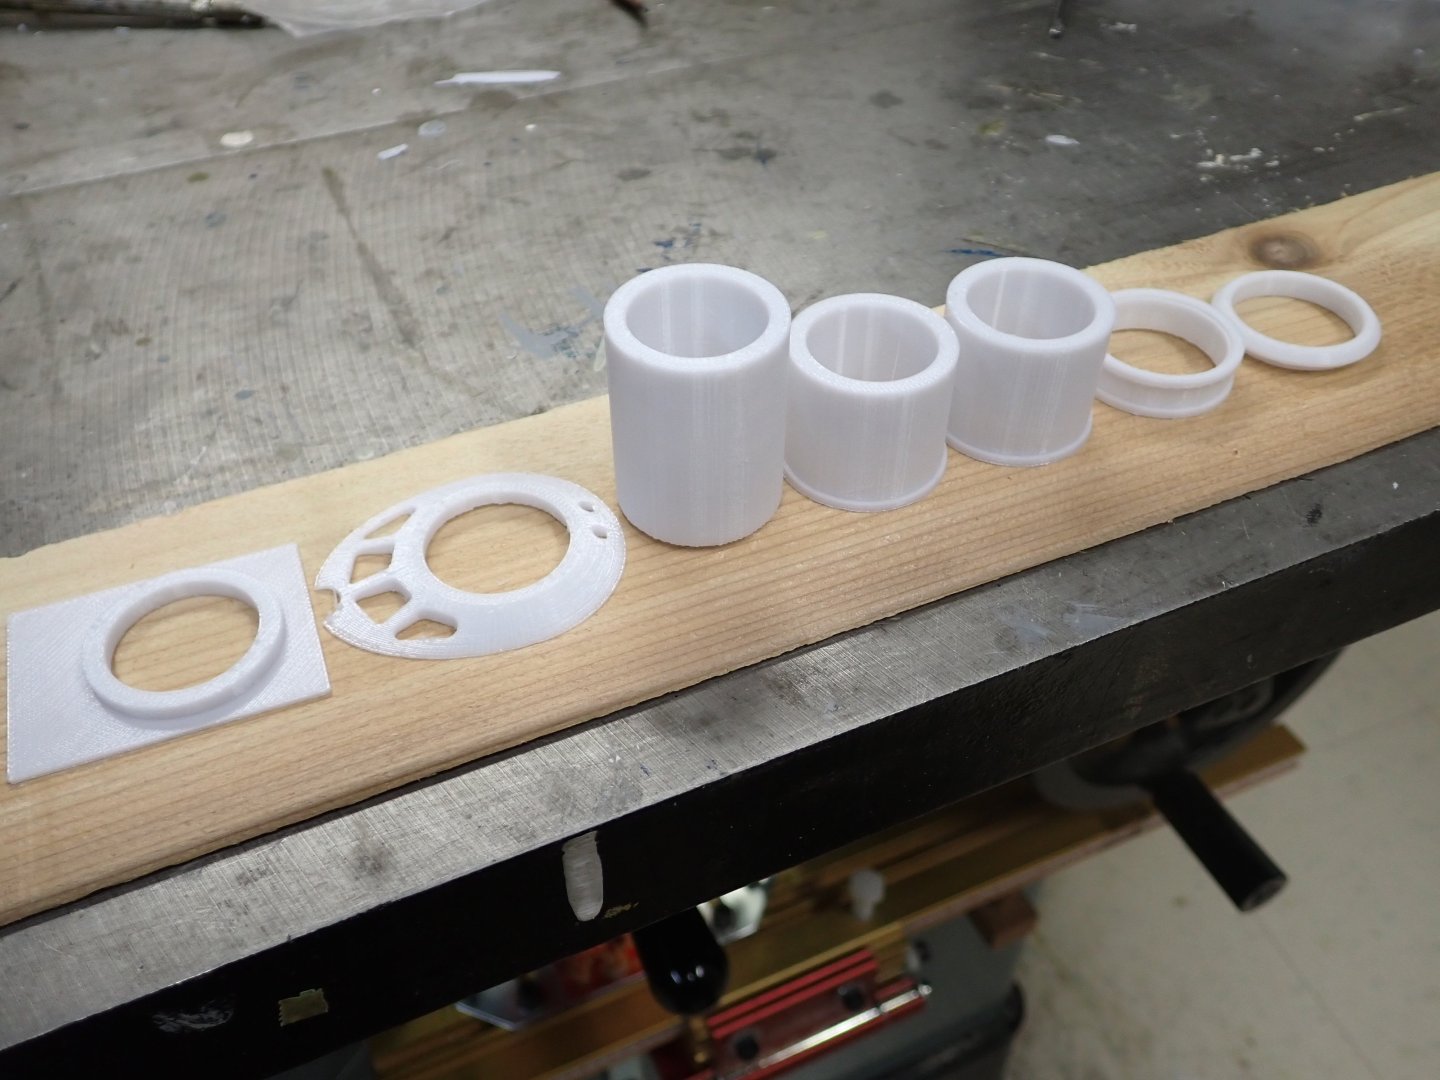
Actually those were only funnel scraps. There is lots of other scrap, including on the floor of the model room. I wonder about their future; I'll toss them and they'll end up in a landfill. Am I generating future microplastic particles? Yes, still TinkerCAD. I think I will stick with it as I have no ambitions to loft a hull or something similar.
-
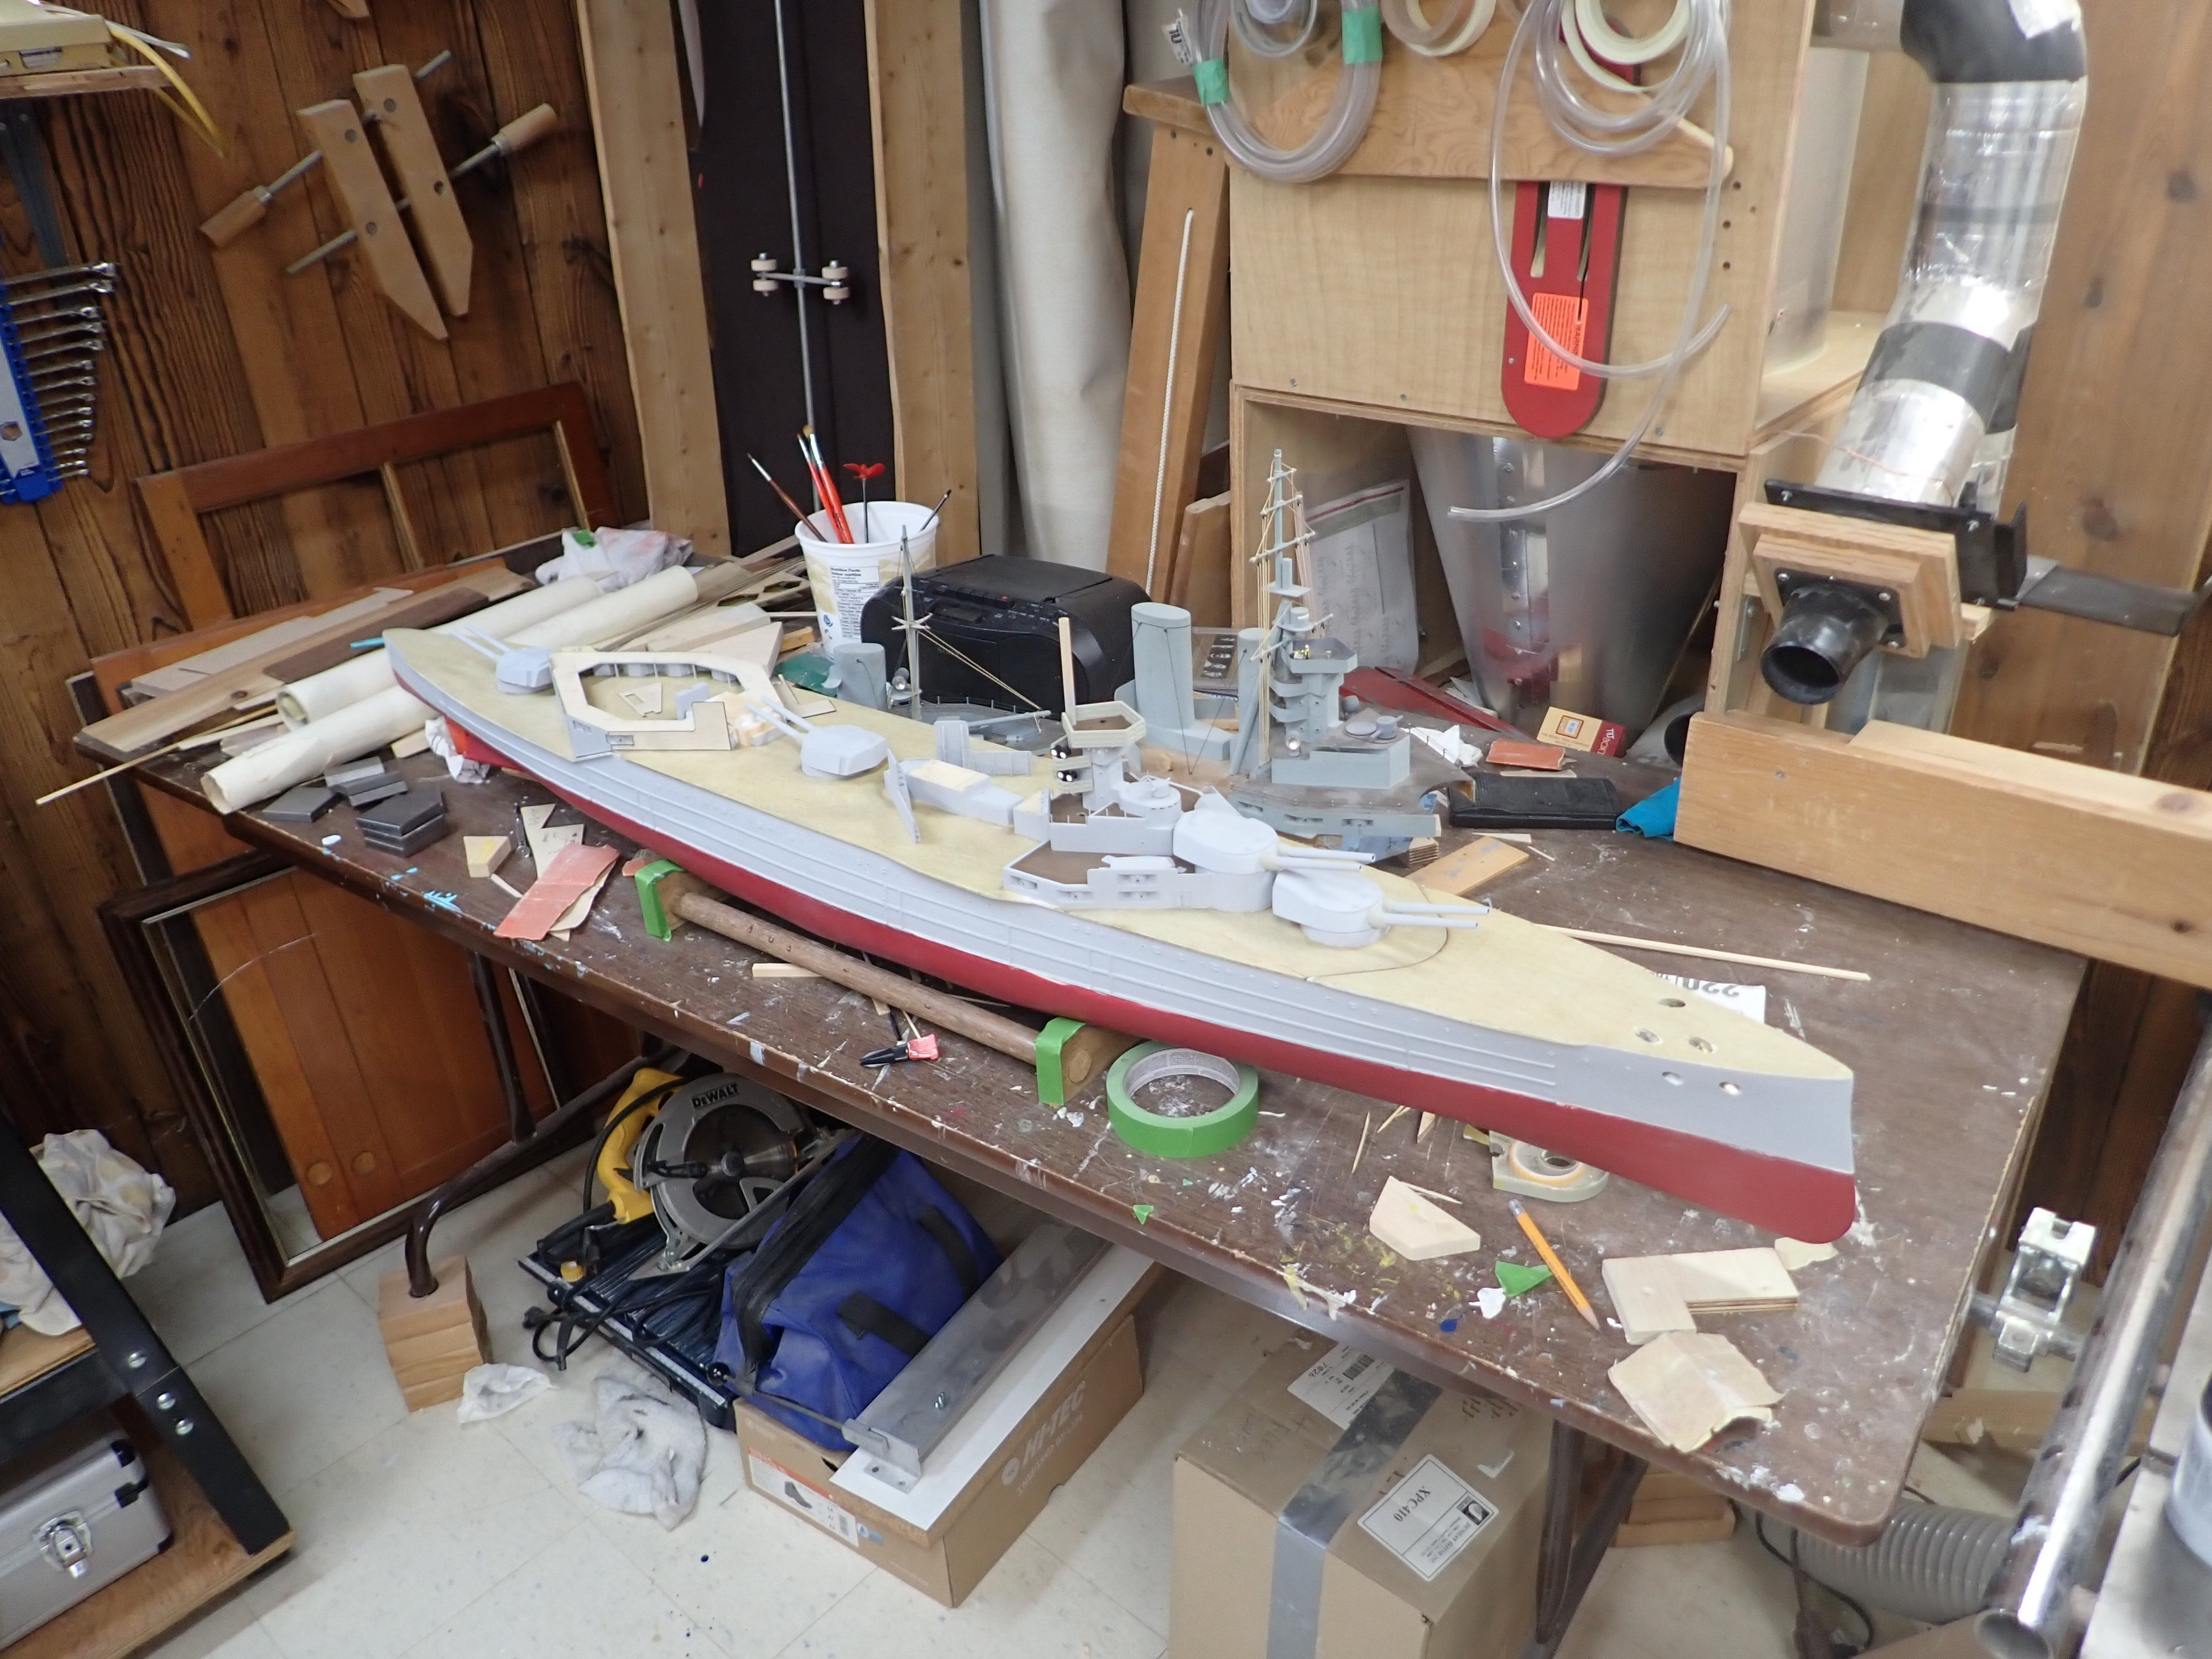
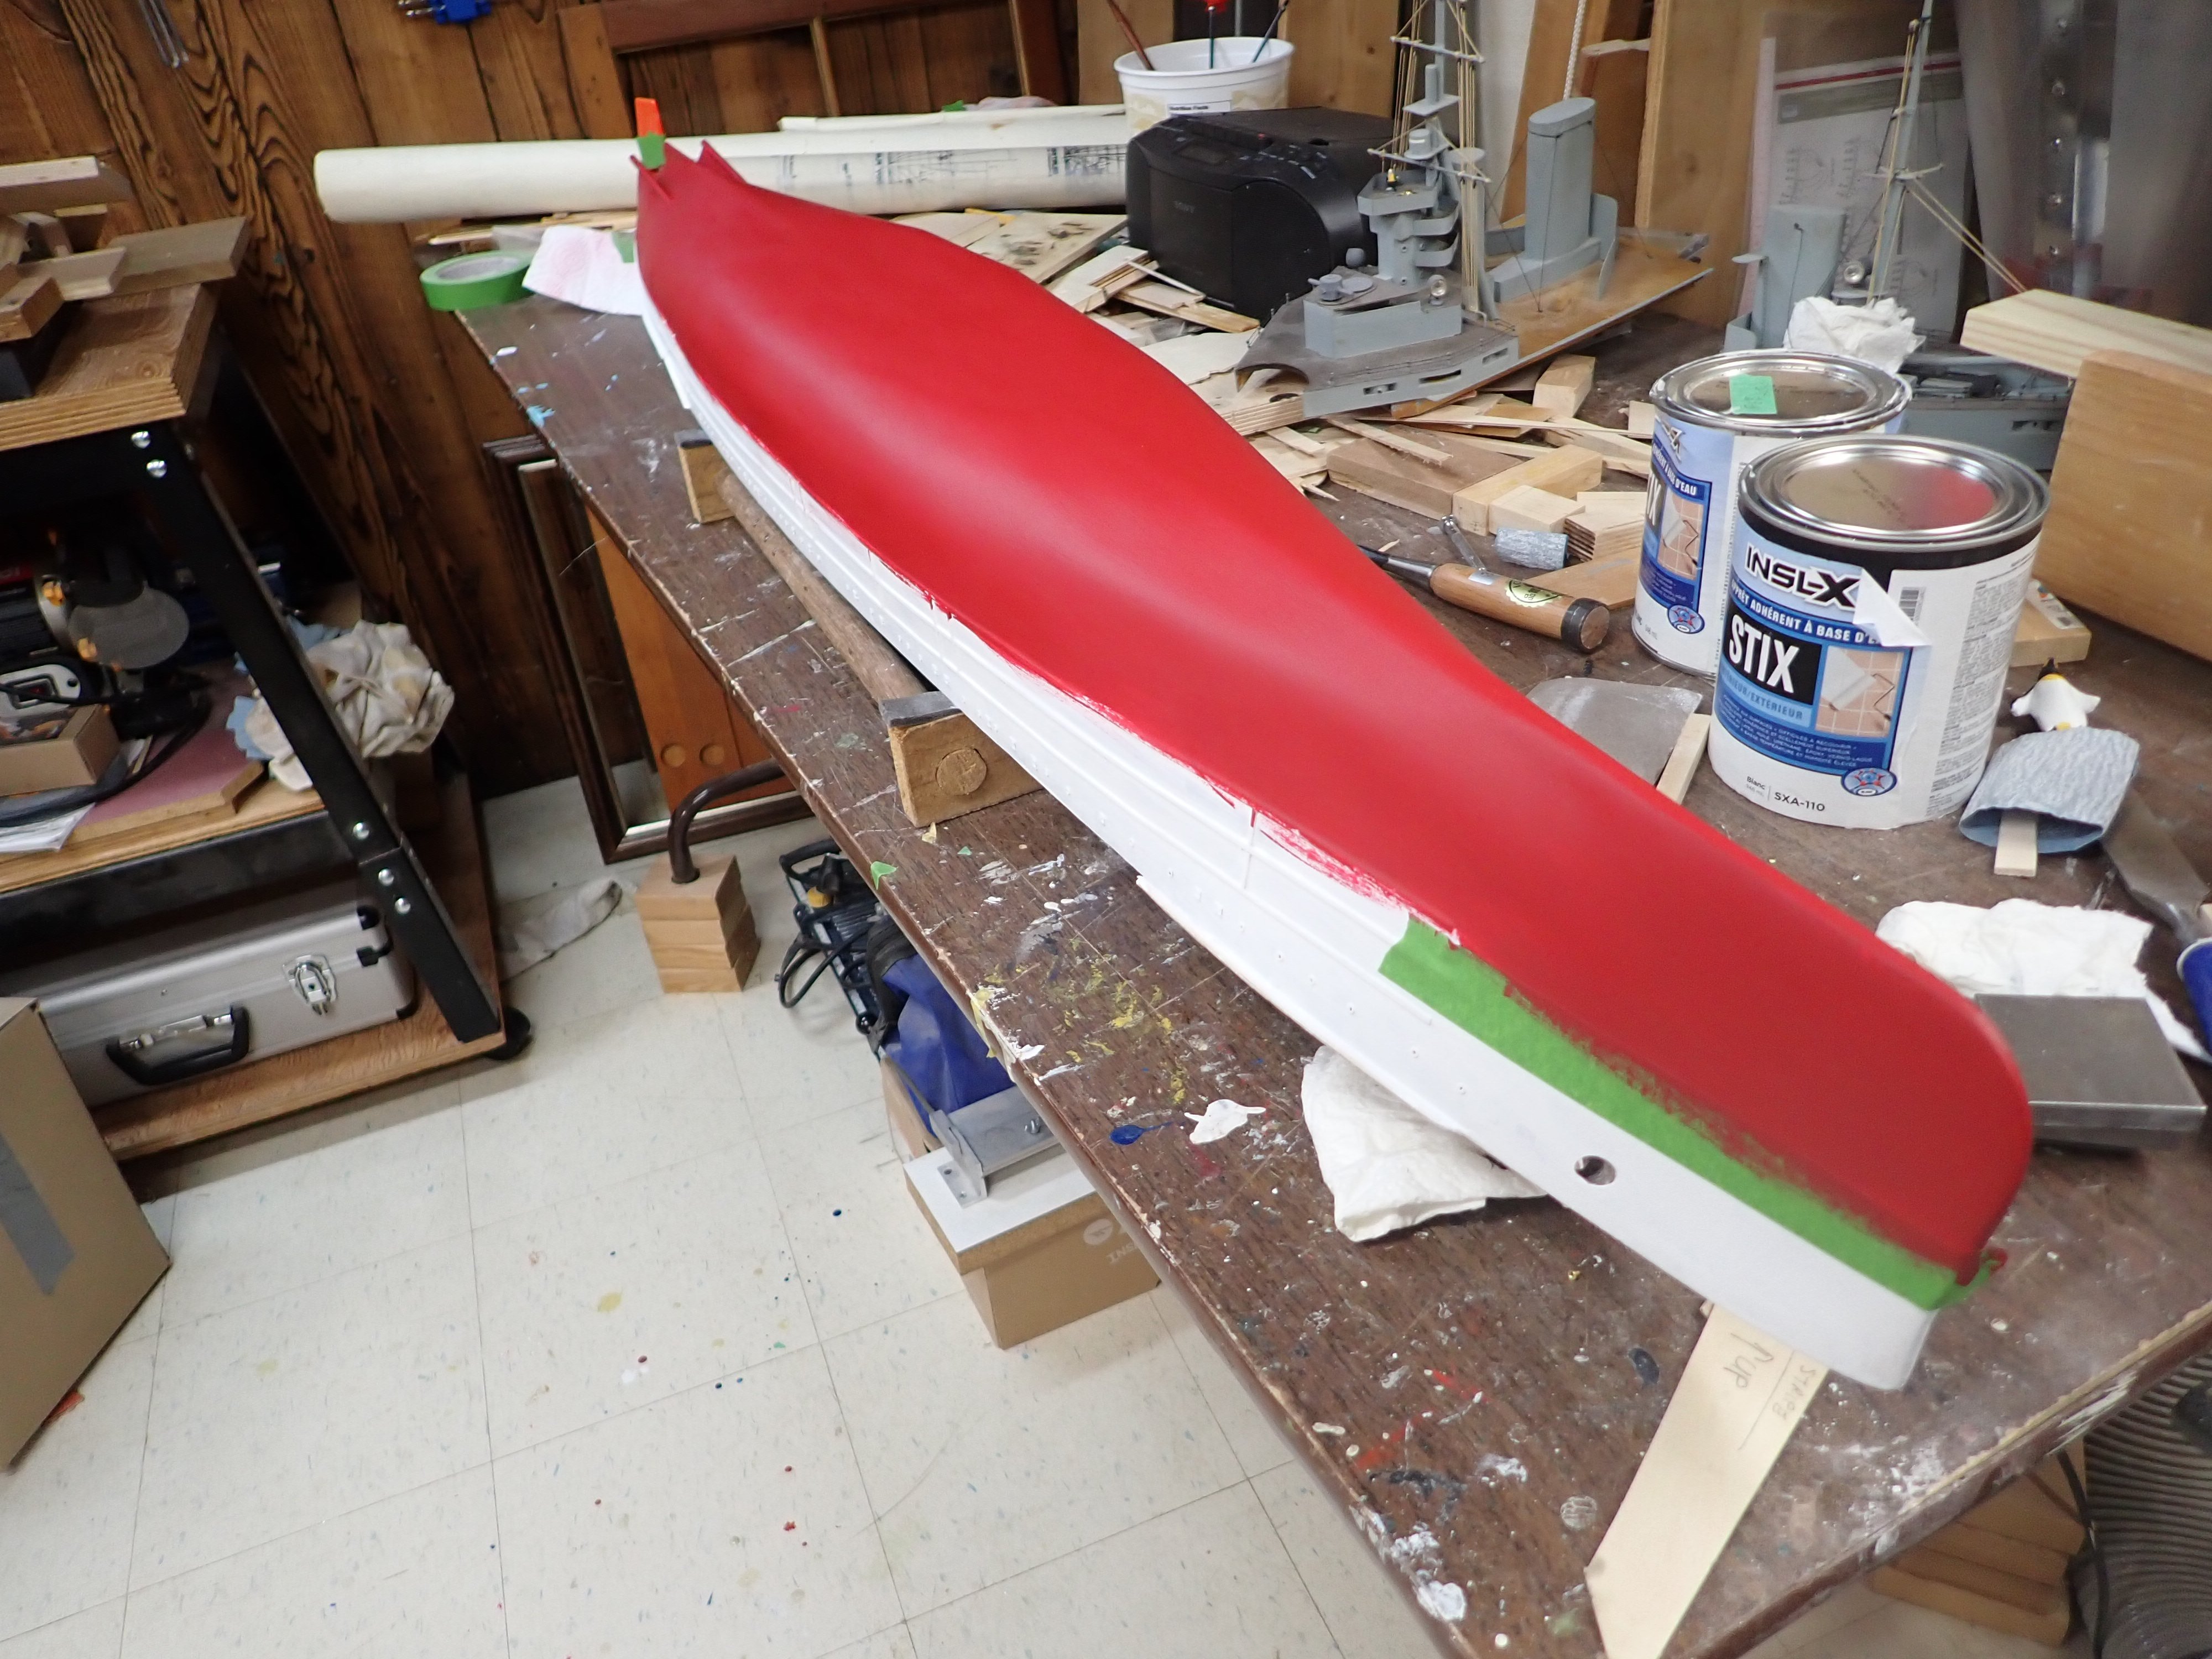
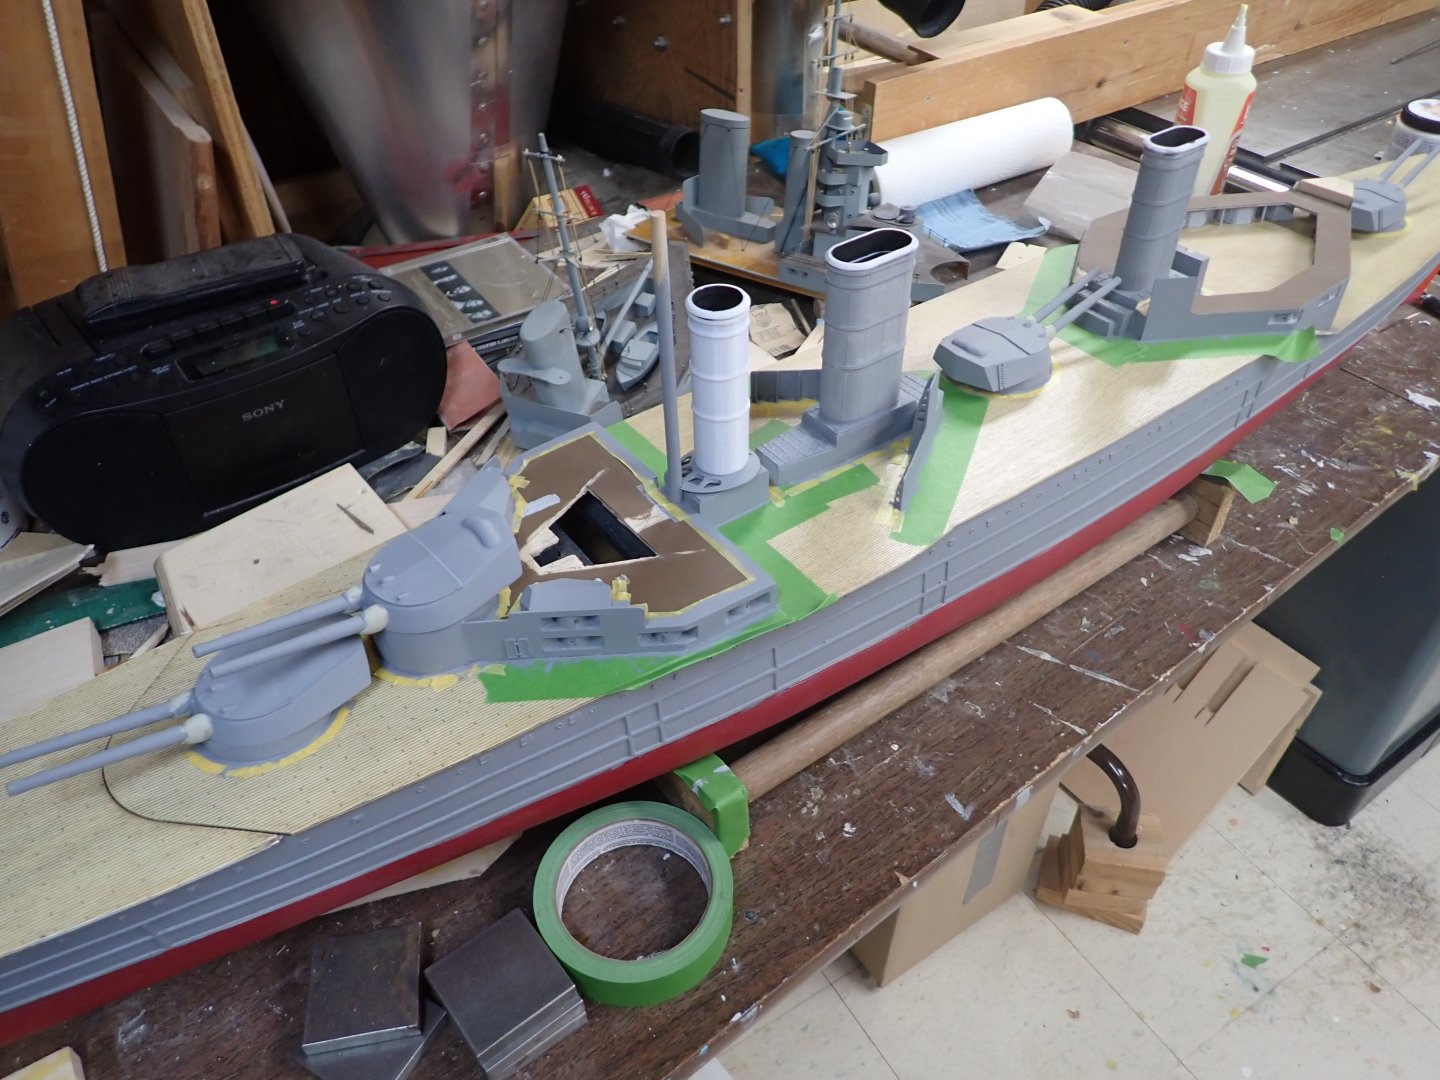
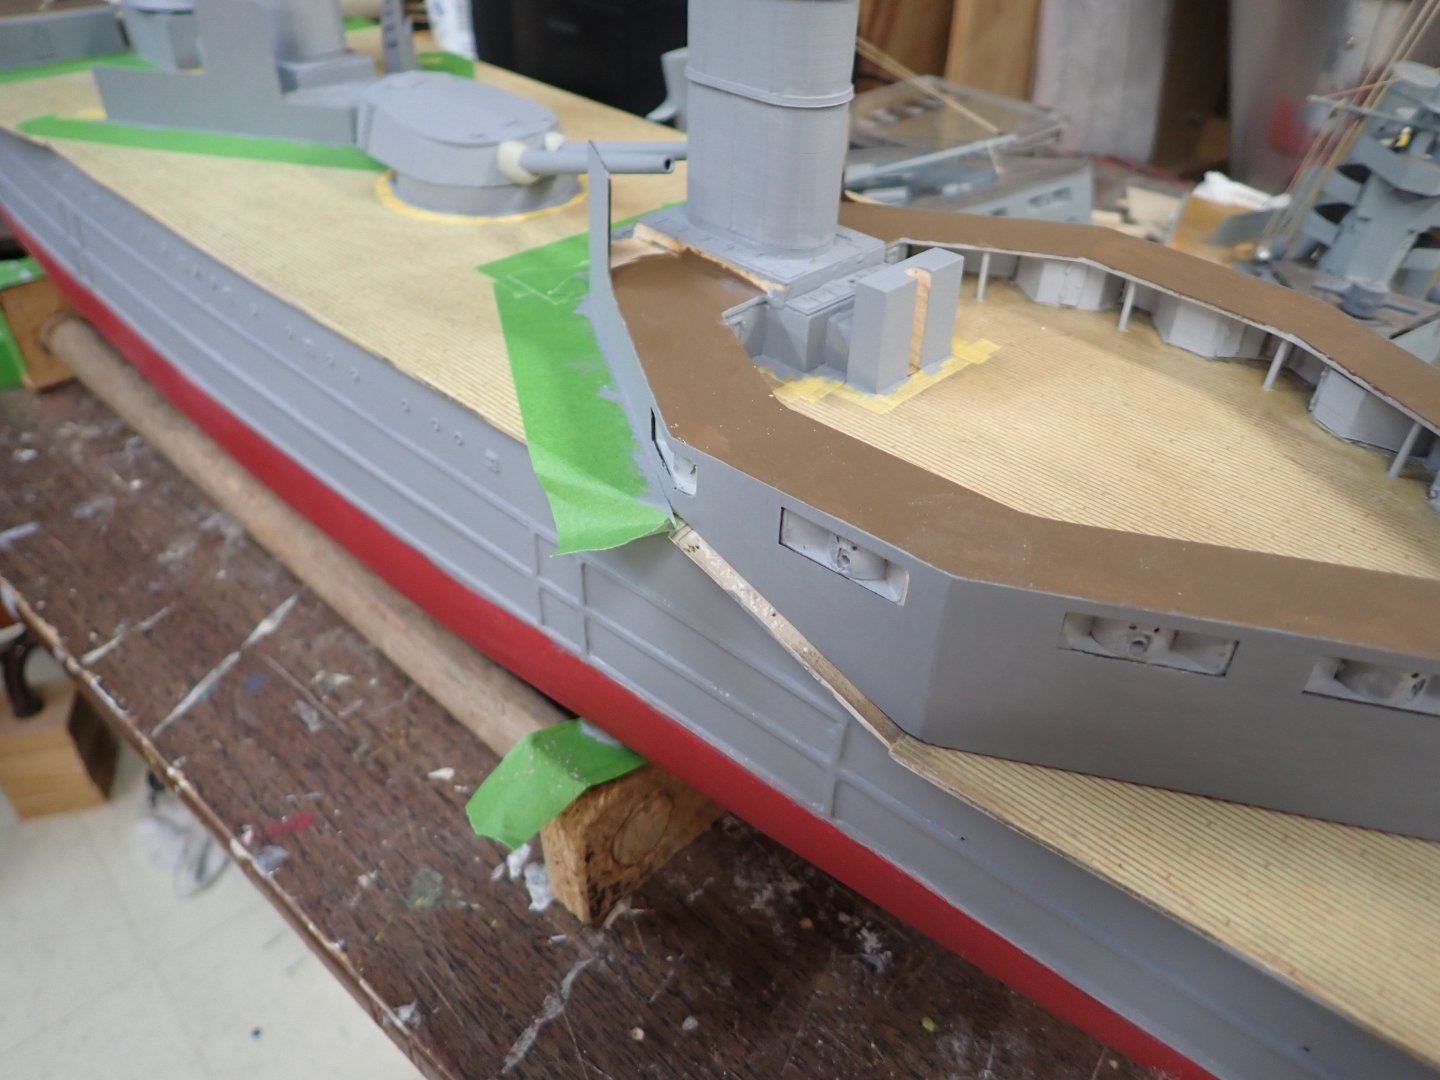
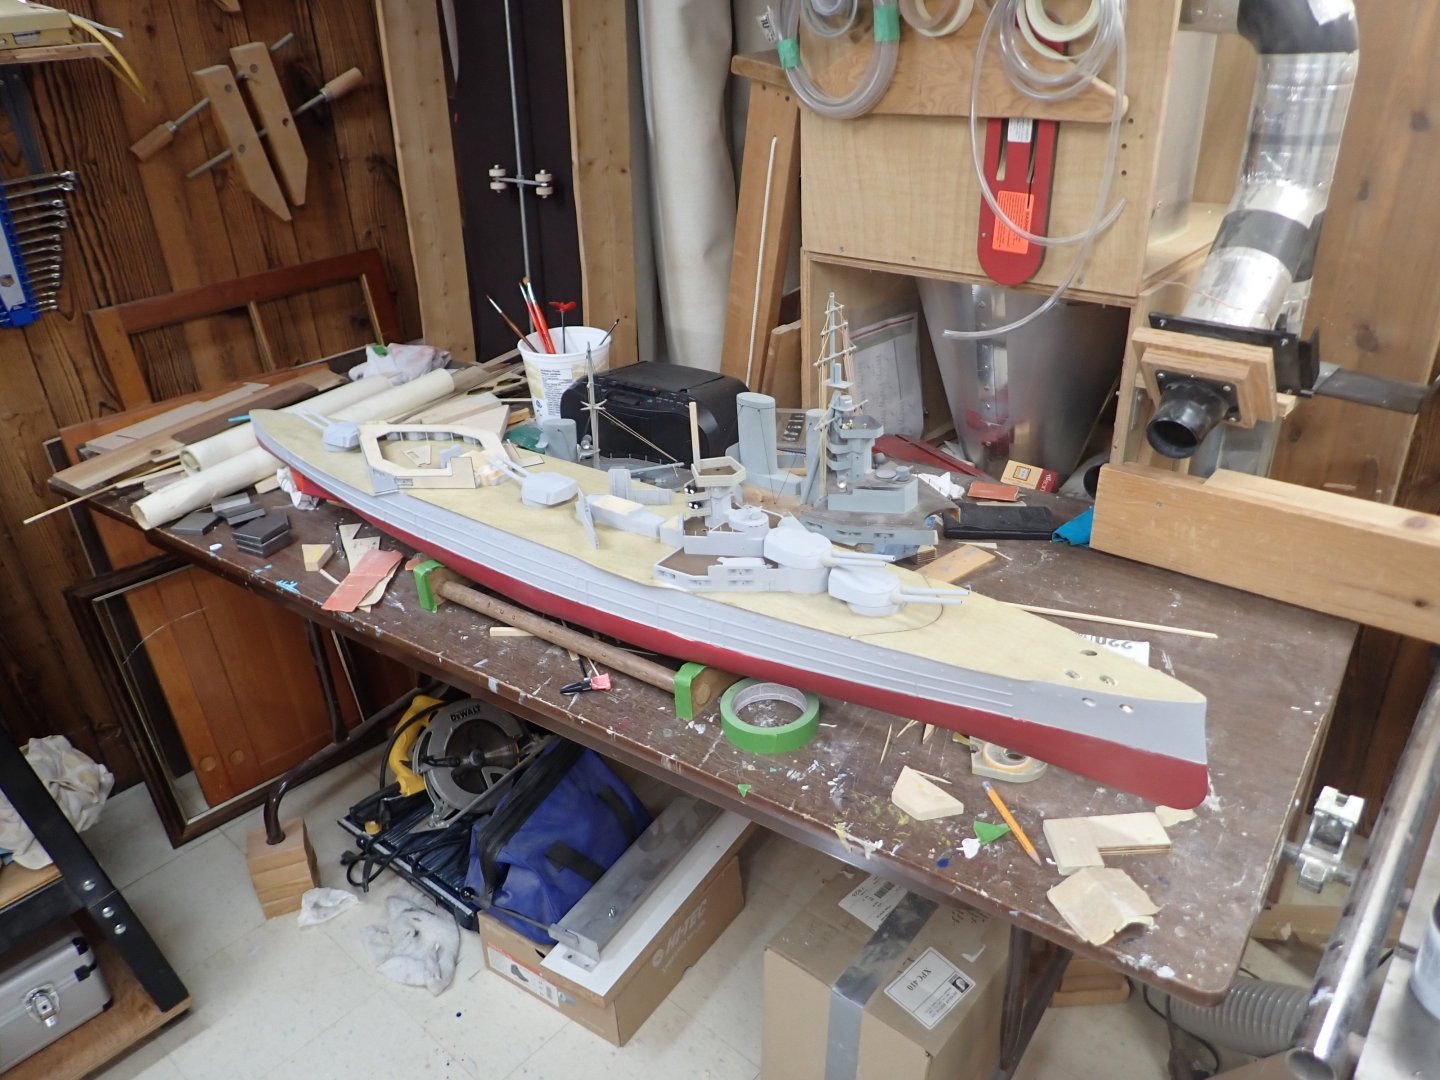
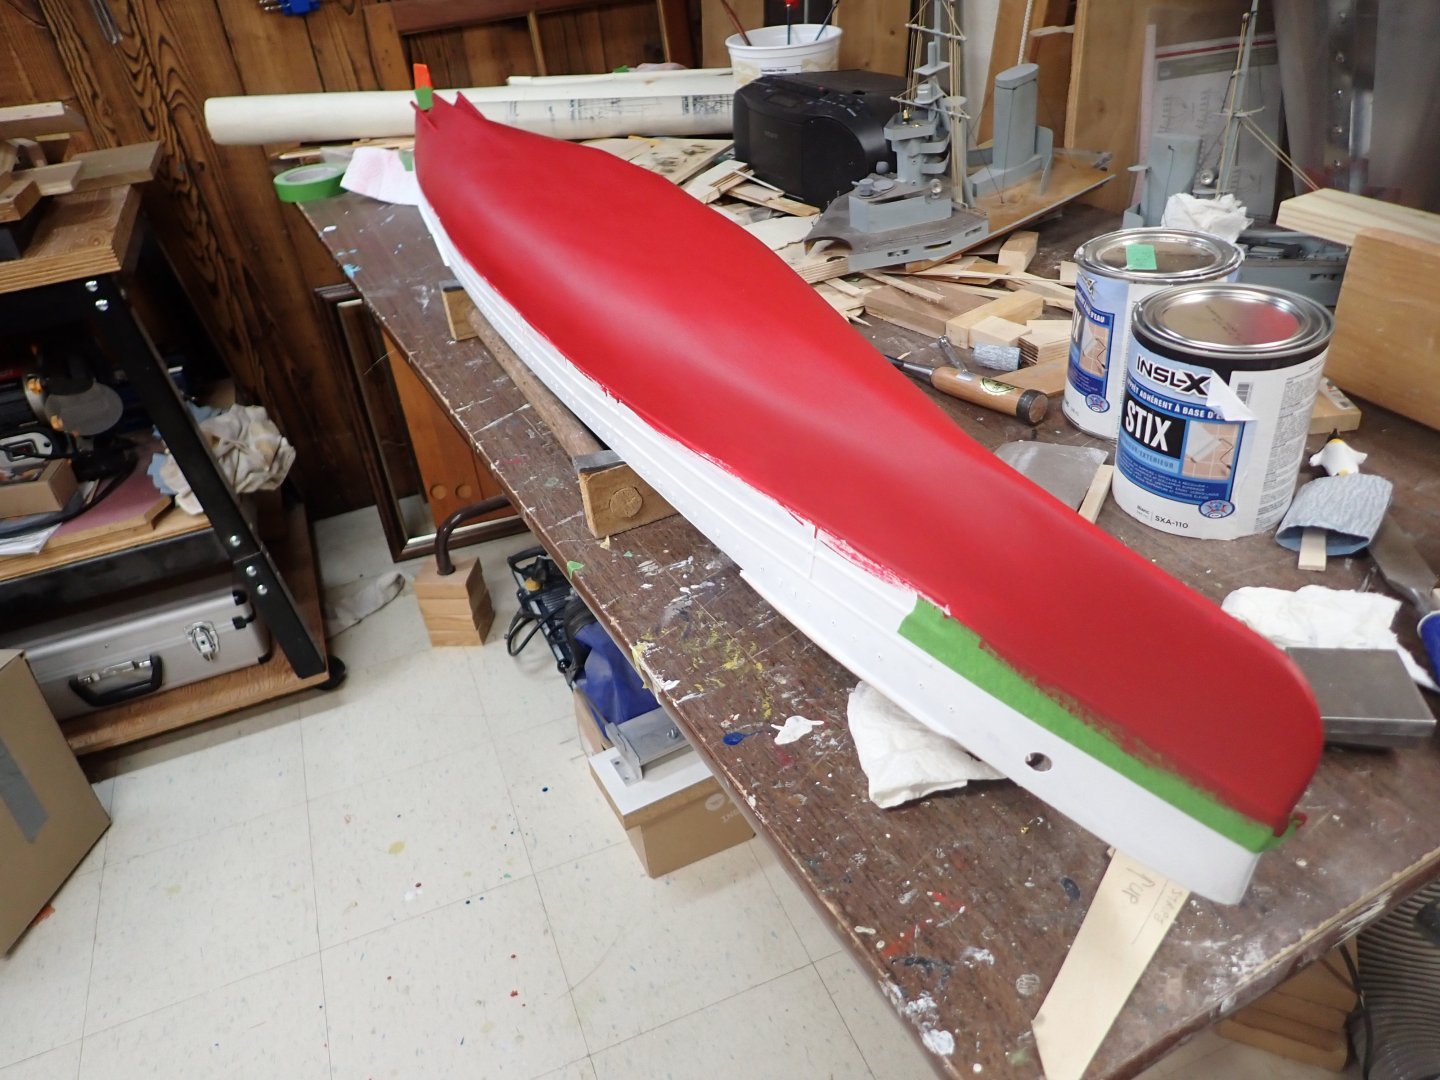
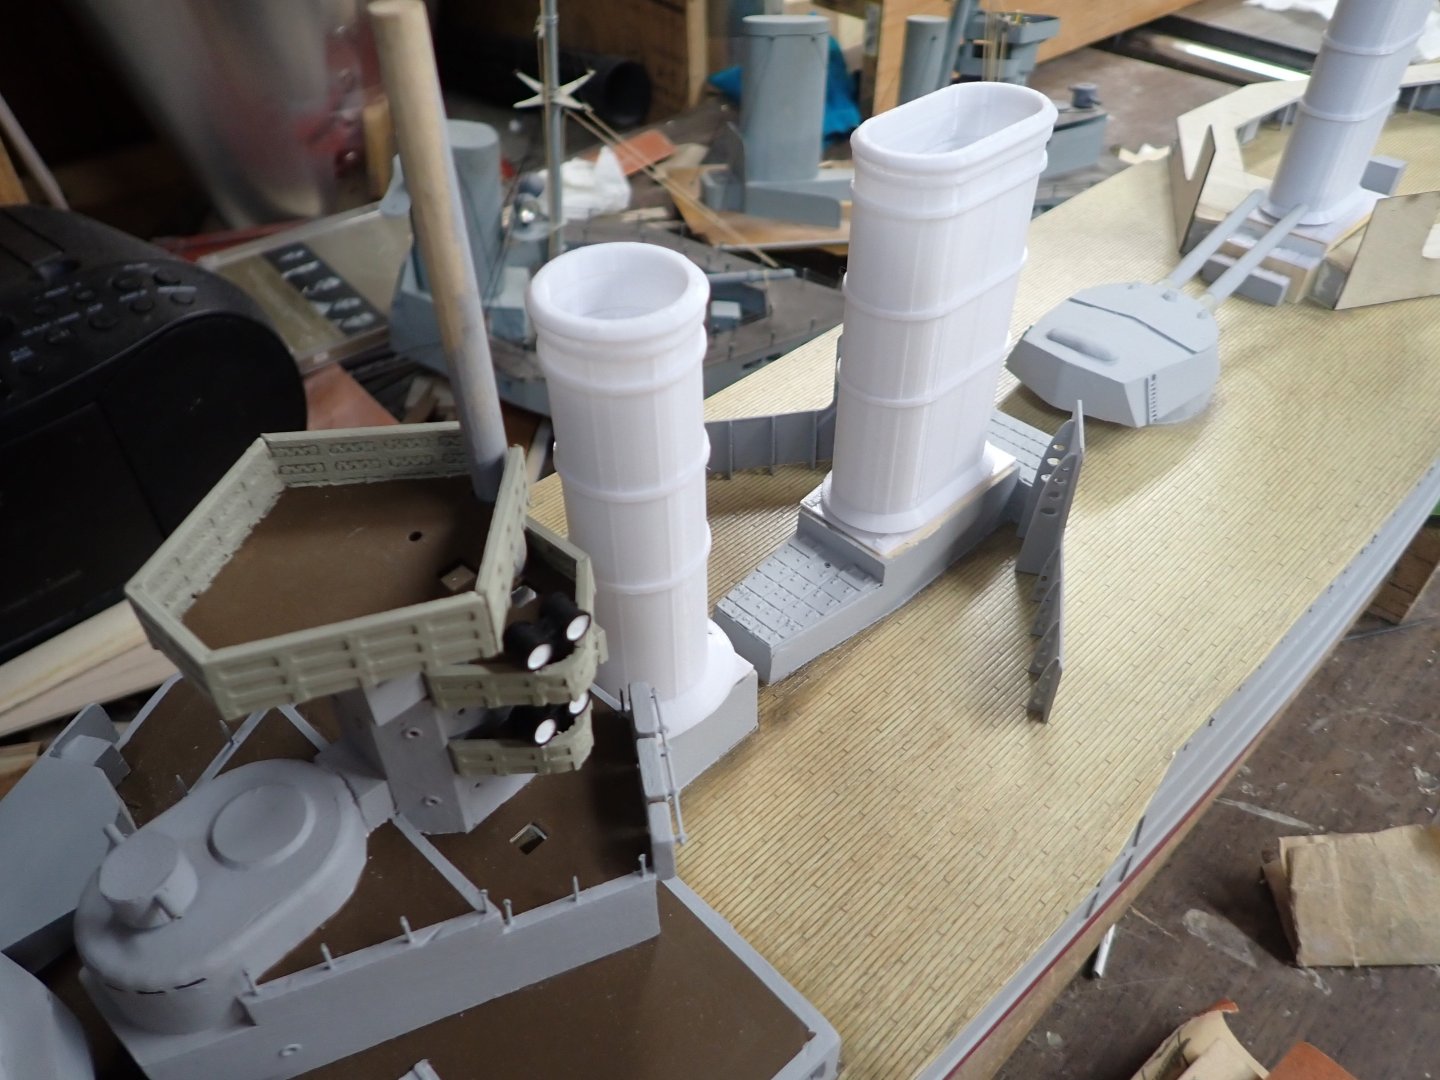
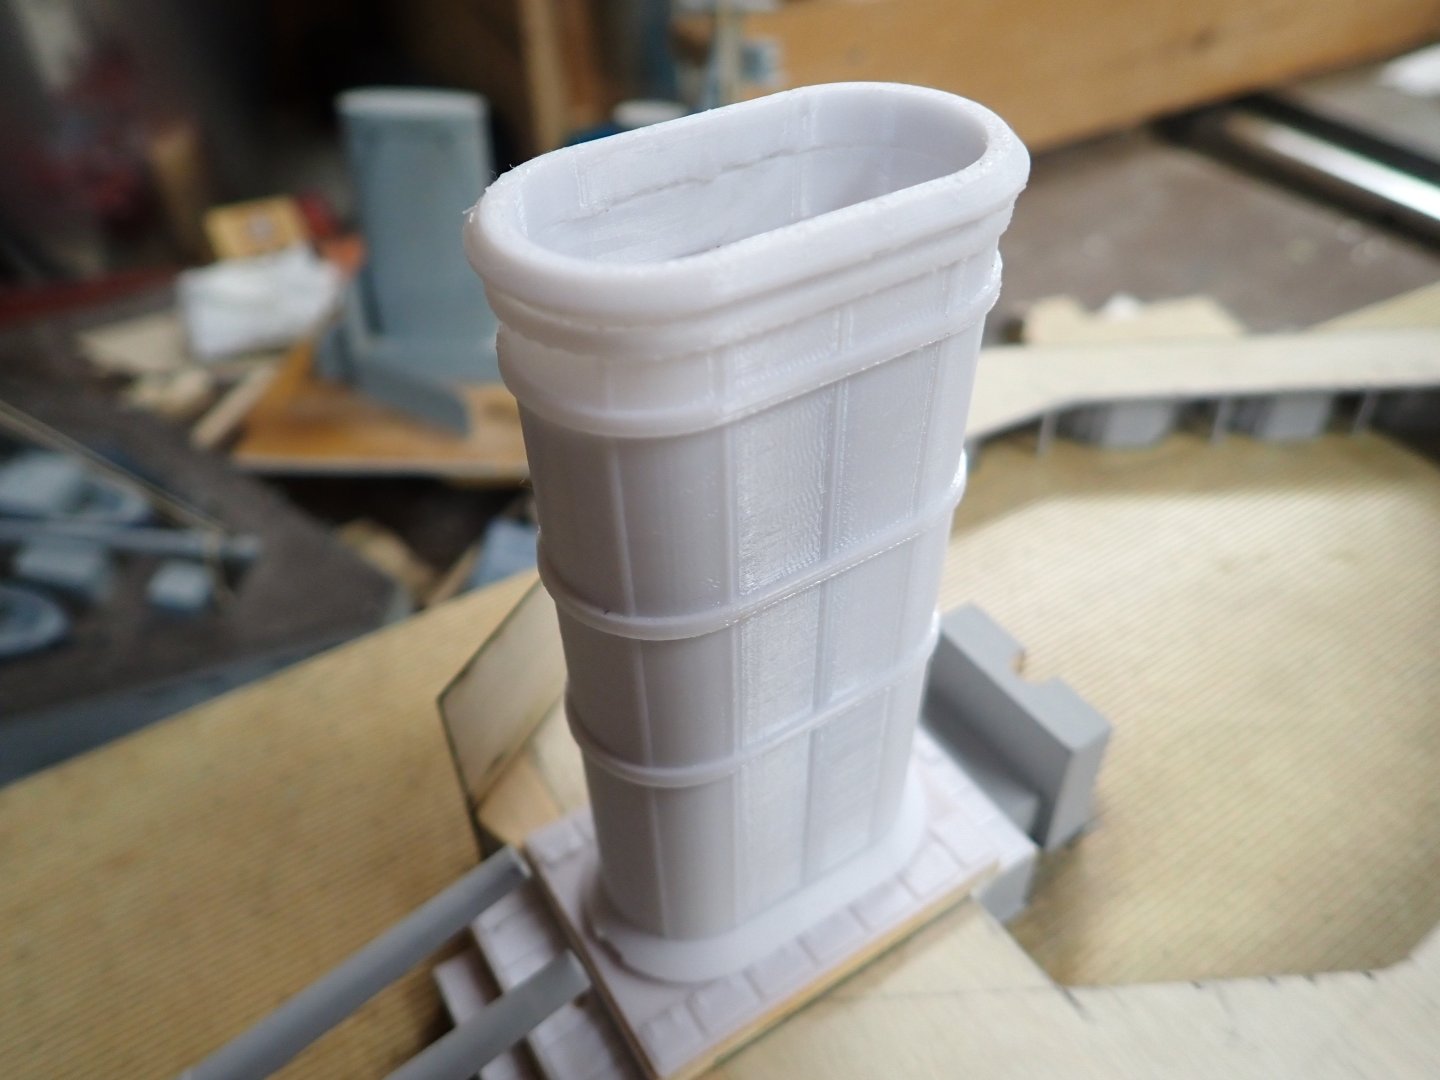
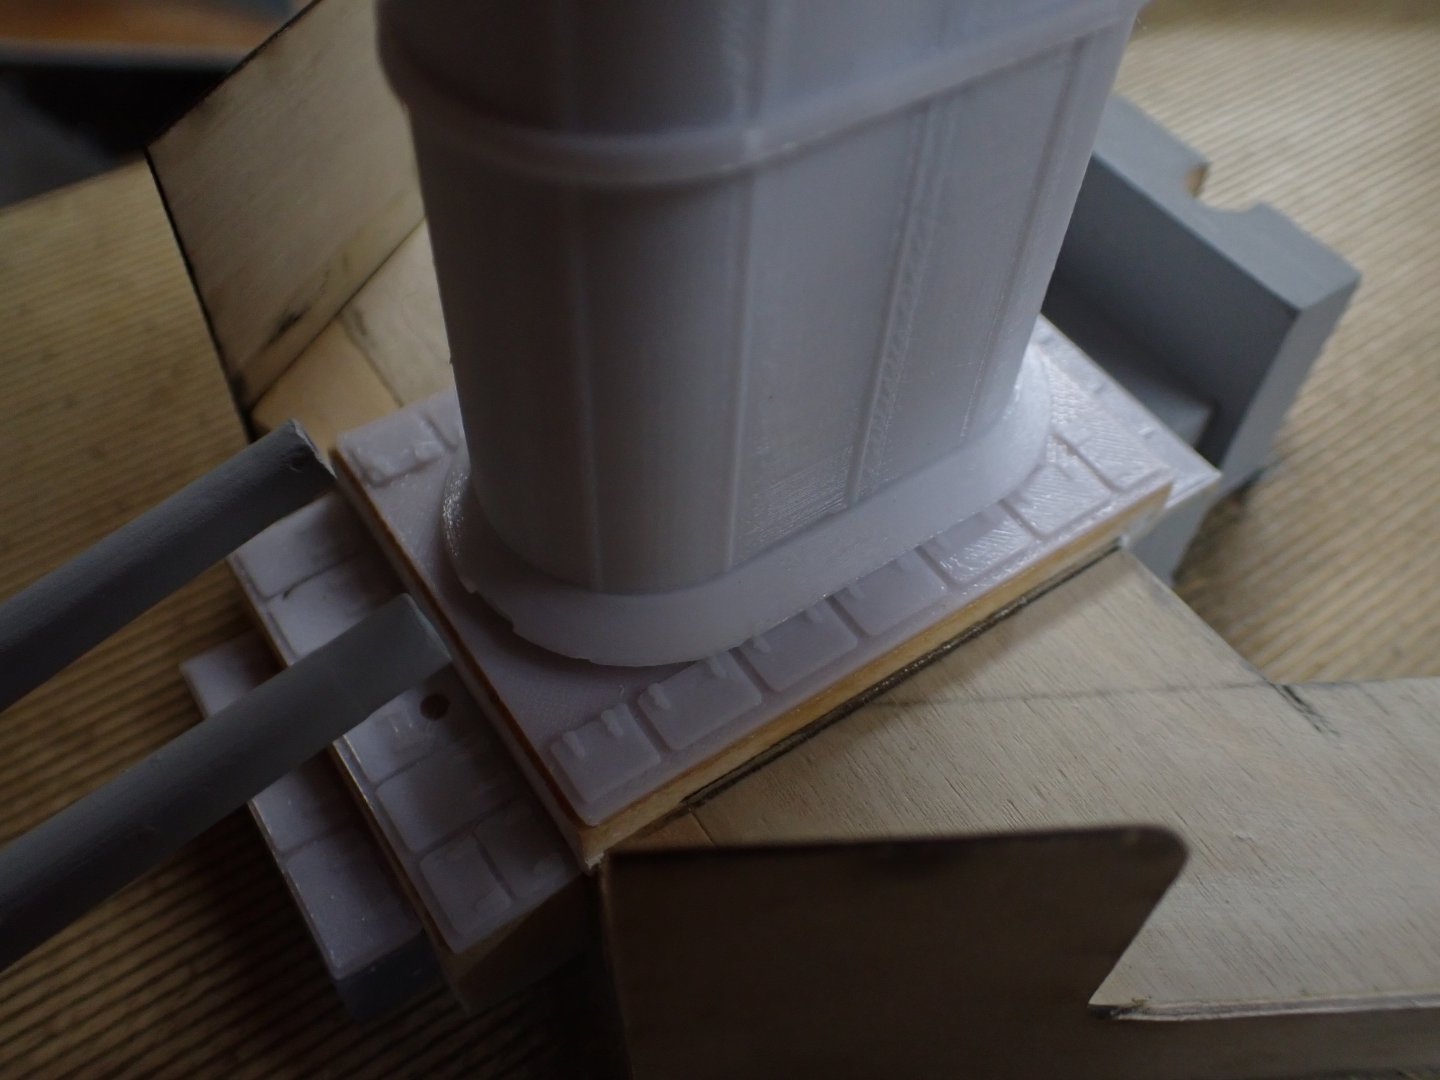
Making slow progress. Painted the red u/w hull and grey above; yet to add the wide black bootstripe. Kind of washed out in this pic. Note, I'm again having second thoughts about the grey colour thinking it is too pale. Need to decide before I assemble bridge structure which would be impossible to repaint afterwards. Speaking of the bridge structure: Lowest brown deck is the forward shelter deck. - Above that is the flag deck; navigating officer' cabin, flag lockers at back. I intend to terminate the signal halyards from aloft on the rail attached to them. Note the stanchions. - Next up is the sea cabin platform, with captain's and admiral's sea cabins and two twin 24" searchlights. - Above that is the chart house platform with (obviously) chart house and another pair of searchlights. = On top we have the compass platform, magnetic compass, gyro compass, chart table, range finder (all to be added). This is all just dry assembled with the foremast passing through holes in all the decks. Note also my 3D printer representation of "kapok" anti-splinter matting attached to the railings of the platforms. Boy the camera hides nothing; looks better to the eye. I've spent lots of time this week working on the funnels. Deceptively simple looking but I was many hours in CAD drawing the three individual sizes, two different-sized ovals and one round. Each funnel consists of seven pieces which "click lock" at positions hidden by the horizontal bands. Nothing is glued together yet. They're all hollow to give the possibility of running pipes up them from a "steam" generator. Boiler room ventilation hatches at base of main stack. Some of the engine room ventilation hatches at base of rear stack. Pieces require to build the forward, round, funnel. The second piece, the lower flange, was especially problematic to draw, with the continuously changing bevel radius in the forward half. I tried making it with various attempts at truncated, tilted cones but could never get it right. I ended up drawing a series of narrow wedges rotated in two degree increments which worked out in the end. Since then I've realized I could probably have done it by stretching a cone out to an elliptical base and adjusting base size, and height, to suit. Probably would work; never thought of it as I was trying to do it with tilted but circular cones.🙄 Previous versions of parts rejected at revisions of files.


-
Fantastic - immaculate - not a single glue mark!!!!
-
Great job on the pikes. I expect to see them on your upcoming SIB too, mind! 😁
- 301 replies
-
- 3
-
-
- Constitution
- Bluejacket Shipcrafters
- (and 1 more)
-
Too bad you're on the opposite side of the world......I have two copies! I thought I'd lost the first, bought the second, then found the first months later. I suppose I should try to sell it on. It's a limited market.
- 178 replies
-
- 1
-
-
- Flying Cloud
- Mamoli
- (and 1 more)
-
Harry, do you have a copy of Underhill's "Masting and Rigging the Clipper Ship and Ocean Carrier"? A great reference for such ships. I bought it to help with rigging my Preussen.
- 178 replies
-
- 1
-
-
- Flying Cloud
- Mamoli
- (and 1 more)
-
Nice print!
-
Rigging looks daunting, but as you go through it in manageable pieces it all comes together in the end, so long as you have good instructions. 😏
- 178 replies
-
- 1
-
-
- Flying Cloud
- Mamoli
- (and 1 more)