HOLIDAY DONATION DRIVE - SUPPORT MSW - DO YOUR PART TO KEEP THIS GREAT FORUM GOING! (Only 20 donations so far - C'mon guys!)
×


Ian_Grant
-
Posts
2,113 -
Joined
-
Last visited
Content Type
Profiles
Forums
Gallery
Events
Everything posted by Ian_Grant
-
 I actually used Evergreen 0.005" sheet to make steel hull plates for my "Preussen" build, because Heller only engraved them above the waterline. Yes, Evergreen is very handy! Bill, I sense some upcoming kit bashing..........
 -
Bill, I have no opinion about the port hinges, I left it with the kit version. My only comment about the gunport lids as supplied is the actual ship's port hinges place the hinge pin just outside the hull, centred along the crack between the port's upper edge and the hull. So when you want to display an open port on the model, proper placement of the port lid means that the only contact to the hull is the top edge of the hull opening just "kissing" the top outer edge of the port lid. Hard to explain without a picture, I hope the preceding sentence makes sense. If one glues the port lid to the top surface of the port opening, it means pushing the port lid into the opening a little and then the port lid looks too small to close the port opening completely. I ended up gluing very small strips of evergreen along the port lids' top edges, then gluing this evergreen to the top of the port opening, leaving all the port lid outside the hull. I painted this evergreen red inside the port lid, and left bare to glue to the port opening tops (which I did not paint red way back after lining the ports, for this reason). I did add four brass etch eyes to each lid, two inside and two outside.
-
Marc, On the recommendation of someone on the old Pete Coleman HMS Victory web site, I ordered various sizes of Amati rigging thread. For the forestay and mainstay I could not get the required diameter in black (was it 1.6mm ?? I think??) but it was available in natural so I dyed it with fabric dye. If you want to view more of the looks of Amati thread there are more pictures in my Victory pseudo-log, added here after the demise of Pete Coleman's HMS Victory web site on which I had a detailed log. I must say rope walks look interesting especially for larger ropes in scales say 1:100 and greater, but my current 1:150 build only needs small threads so the surface is less important. Especially to my ageing eyes 😉
-
Uummmmm........did we mention that all these options are on top of the obligatory purchase of better thread and wood blocks and deadeyes? 😁 I did not total my expenses on this ship, or tell my wife, but the enhancements were far more than the kit cost. And worth every penny. LATER EDIT: I was telling my wife about this discussion and she snorted and said, "All those packages from Europe? I figured you spent quadruple the model price on extra stuff". I told her it was actually only about triple 😁
-
Bill, Pete's message has reminded me: also ask about his knighthead part - worth getting too! 🙂 The kit is also short of the smaller anchors and I think he may have them too. Or you can order suitably sized ones elsewhere. Sorry to bombard you with info!🤪 EDIT: I just looked and he has expanded his production since my day!!!! Beautiful anchor buoys come with the anchors, and his resin figurehead shield - WOW!!!!!! I would love to have had that to paint with its crisp relief.
-
John, the SR is in my stash but I keep putting it off and starting other models. I love your quarter gallery modifications and the re-purposed lower gallery in the stern, also the figurehead colours. I will be referring back to this log of yours whenever I get around to mine. If I ever do 🙄
-
Hi Hubac, or "Marc", is that correct? First time my model has been described as "eye candy", especially by someone who crafts such an incredible model as your SR; thank you! 😲 Yes wood deadeyes are pretty much de rigueur for this kit as the plastic ones don't have a groove around their perimeter and so are pretty much impossible to attach to the shrouds. You have a sharp eye to notice the belfry roof. I find Humbrol metallic paints hard to apply convincingly; you almost need to have the can stirring continuously to keep the metal flakes mixed. So I used copper tape for the belfry roof, and didn't bother applying a verdigris patina. I also wrapped the bell itself in silver metallic duct tape; looks very nice but not really accurate as a bronze casting.
-
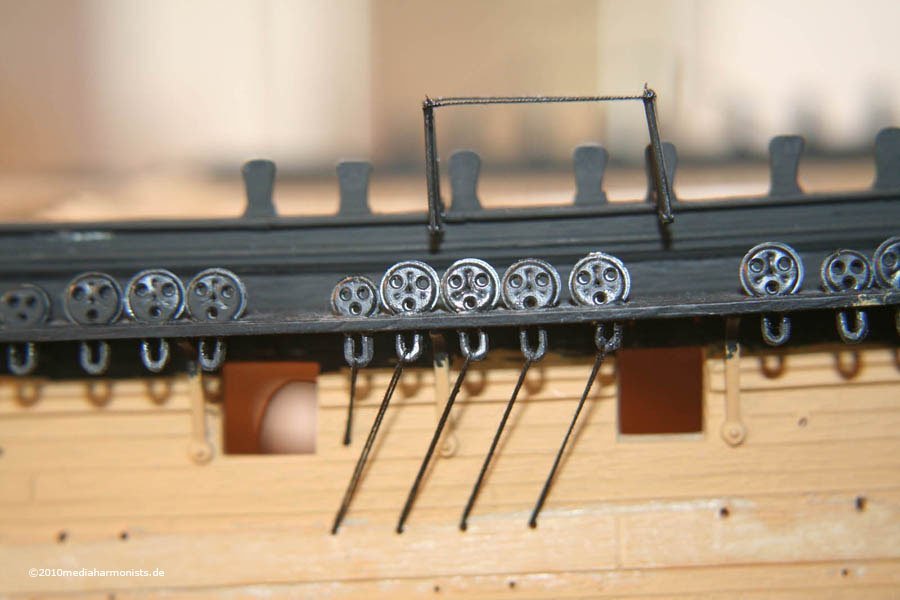
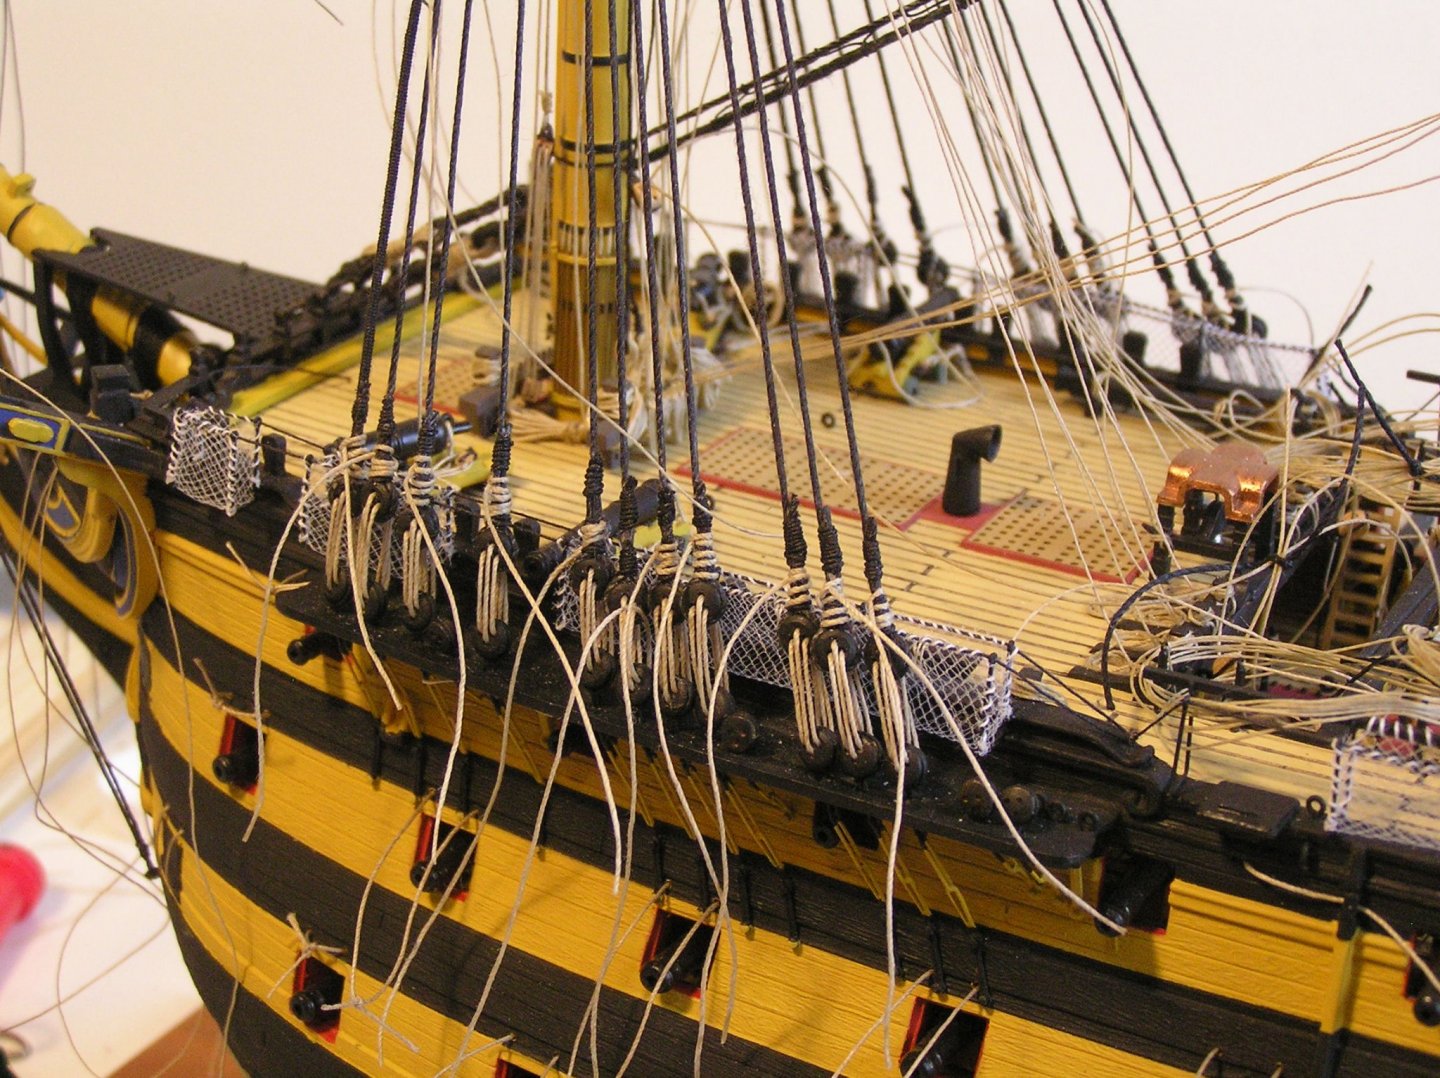
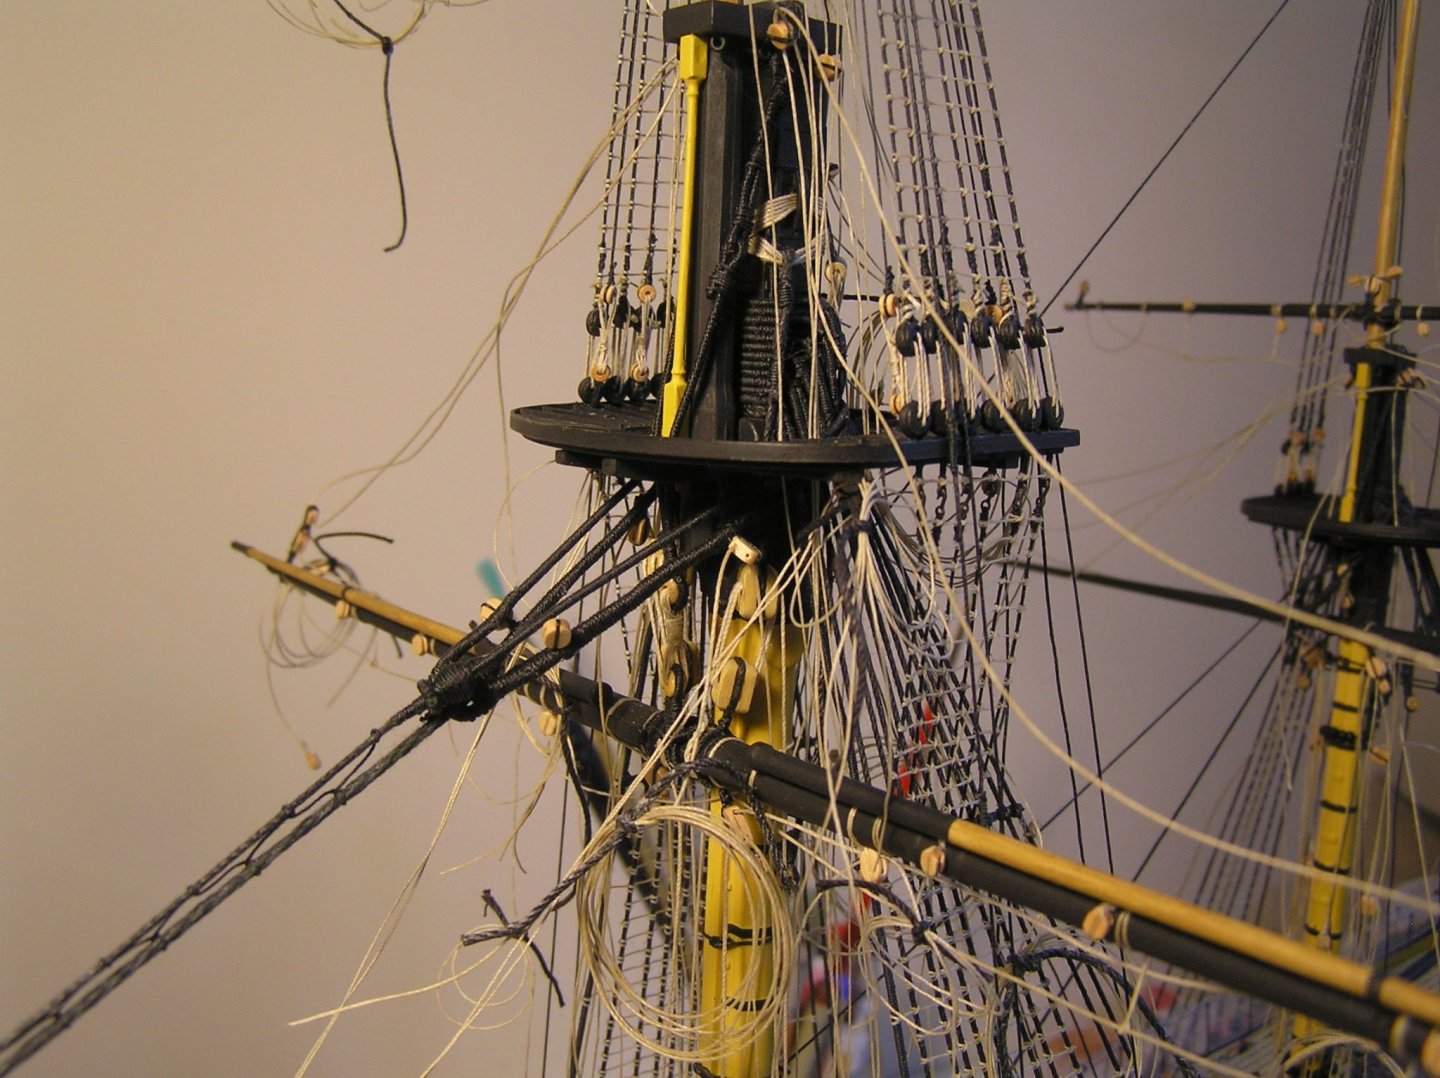
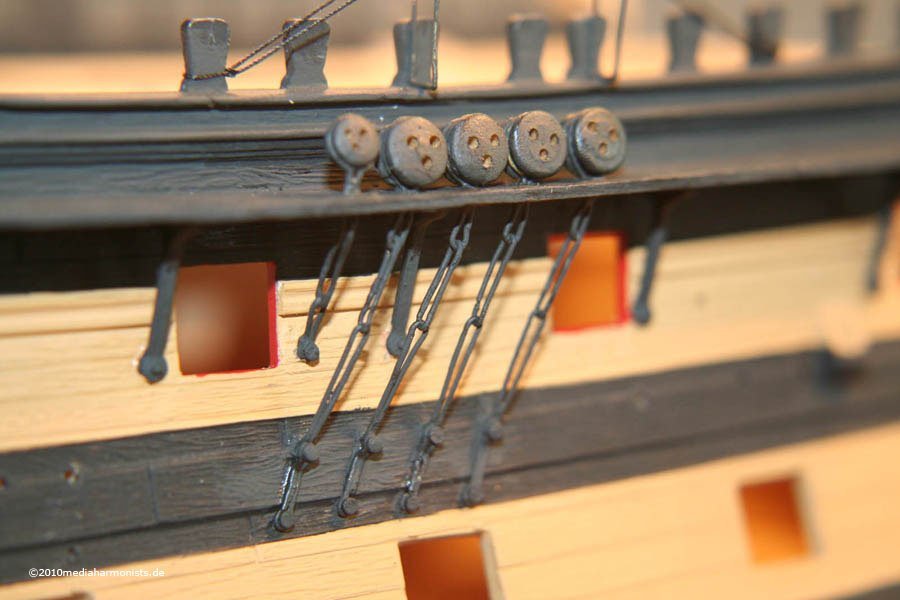
Hi Bill, The advantage of etched brass is that they can form tiny details that cannot be molded in plastic due to strength issues. As you say, the purpose of the brass etch sheets is not to add bling, but to enhance detail. They can also help with functionality. Example (1): The plastic hammock stanchions included in the kit have no molded eyes at their top ends, rendering them very difficult to rig neatly with the ropes that run along their tops to support the nettings. Plus they are necessarily molded over-size to have some strength. Daniel's stanchions are simplicity itself to rig with the netting support ropes. Also, when you inevitably knock them during the build, they bend instead of breaking and are easily straightened. Example (2): The kit provides nothing for the lower chains. In fact, the hull doesn't even have the preventer plates molded on. Heller would have you tie strings to the very clunky-looking strops on their lower deadeyes and pass them through the holes in the hull. The result is to say the least crap looking. Daniel's brass parts replicate the three links of the chains and provide the preventer plates. Here is the Heller method (image from Dafi's log): and here are Dafi's chains (image from Dafi's log): Here are Dafi's chains on my model; note the preventer plates (the etch stanchions are also seen): Example (3): I don't even recall how Heller would have you strop the lower deadeyes in the tops. As I mentioned before their deadeyes are unusable anyway. Dafi's etch sheet that provides the lower chains also provides neat strops for the wood deadeyes you need to buy for the topmast shrouds (smaller than the lower mast deadeyes), and associated hooks to attach the futtock shrouds. Here is an image of my model; if you look carefully you can see the hooks attaching the futtock shrouds to the deadeye strops: Example (4): the sheet with the stanchions includes a new binnacle and skylight. I don't have detailed closeups of them but here is a shot of my model which includes the etch skylight which you can compare to the Heller rendition: The two sheets I recommended earlier provide all these, and more. For instance, gun locks for the cannon and new stunsail boom irons neither of which I used. Hope I have shown you how you can enhance your model considerably!
-
Not to interject here with nonsense (I hope), but do we "know" Viking shields had bosses? I thought bosses were originally a central metal part with a "knob" on the inside as a hand hold, until some genius thought of strapping shields to forearms to make use of shoulder and upper arm muscles instead of straining just the wrist? I stand ready to be refuted.....😉 Love your model, Cathead!
-
Bill, Yes your gunport linings are looking good. Tedious but the results are worth it. Like you plan, I only lined the lower two gun decks. Though the instructions say to paint the lower and middle gun decks, in reality nobody will ever see them unless they poke an optical fiber through a gunport. If you do paint them you end up scraping paint off to cement the gun trucks to the deck. I left them as is. One can barely see the gun carriages through the ports, much less the decks. If you do want to paint them I suggest gluing the guns in first. When you get to the main deck, I think (? it's been a while) the latest analysis of remaining paint layers carried out by the restorers showed the main deck bulwarks were yellow ochre. Had you heard about the other colour changes they determined from this analysis? The bee lines are no longer yellow ochre on the real ship but a new colour which has some pink in it.You can read up on this at hms-victory.com ps I still recommend you get a copy of Longridge's "Anatomy of Nelson's Ships" and forget the Heller instructions as regards rigging.
-
Yes, they might balk at being covered in paste..........😁
- 185 replies
-
- 3
-

-

-
- queen anne barge
- Syren Ship Model Company
- (and 1 more)
-
I don't remember seeing your user name before, but I do remember Mr. Myxyzptlyk from 60's Superman comics! 😁😃As I recall, he would appear from time to time to foment mischief, and Superman had to trick him into saying his name backwards which forced him to return to his own dimension or some such.🤪
-
Hi Bill, As Hubac says, Heller provides fine molded lines for the ochre stripes and they do not follow the wales. But I seem to recall some inaccuracies in their locations where they meet the quarter galleries and even I think between the two sides. Best check photos of the actual ship. Are you going to frame the gunports inside with some evergreen strips? This replicates the actual hull thickness and adds "heft" to the visual appearance. I didn't see anyone answer your query about Dafi's brass etch.....yes definitely you want to blacken them. I haven't had much luck with blackener in the past (I've since learned one must pickle them first to remove oxide coating) so I painted them. I've been out of touch with your build, but now you have a new follower. 😃
-
Beautiful model! It's a shame to hide your first class main deck below the boats, but the boats are very nice too. Must be a huge model at the scale...😀. Love your sails.
-
Further to my earlier post, we now must add "dressmaker" as well as "hairstylist" to your formidable list of skills, B.E. 😁 Queen Anne looks great! Looking forward to seeing what you do about oarsmen!
- 185 replies
-
- 2
-
-
- queen anne barge
- Syren Ship Model Company
- (and 1 more)
-
Hello, I am a rank newbie as far as 3D CAD goes, in fact I have only ever used TinkerCAD. I wanted to build a small CAD file of an assembly made with structural and linear motion components from ServoCity, just to examine overall dimensions. They provide zipped "STEP" files for all their parts. However, when I download these zipped STEP files, right-click and select "EXTRACT" the resulting file is designated as an Adobe file (doesn't sound right to me) which TinkerCAD can't "see" as a valid item to import. So my questions are 1) Do I need to download some other app to extract zipped STEP files, as opposed to whatever windows does? 2) Is TinkerCAD even capable of importing mechanical part files like these? I'm hoping not to have to learn Fusion360 or equally complex tools. Thanks, Ian
-
I disagree with Louie; I thought Parkinson's "letter from Hornblower" was a great addition to the Hornblower genre, demonstrating his ruthlessness when necessary. And the revelation about Mr. Wellard - Wow! I agree the recent TV series was less than great. The wholesale departure from the books to ridiculous plots was irksome. I'd rather watch the old Gregory Peck movie, any time.
-
Lovely job on the model. Should those chains not be a little more taut though? Looking forward to more.
- 273 replies
-
- 1
-
-
- panart
- amerigo vespucci
- (and 1 more)
-
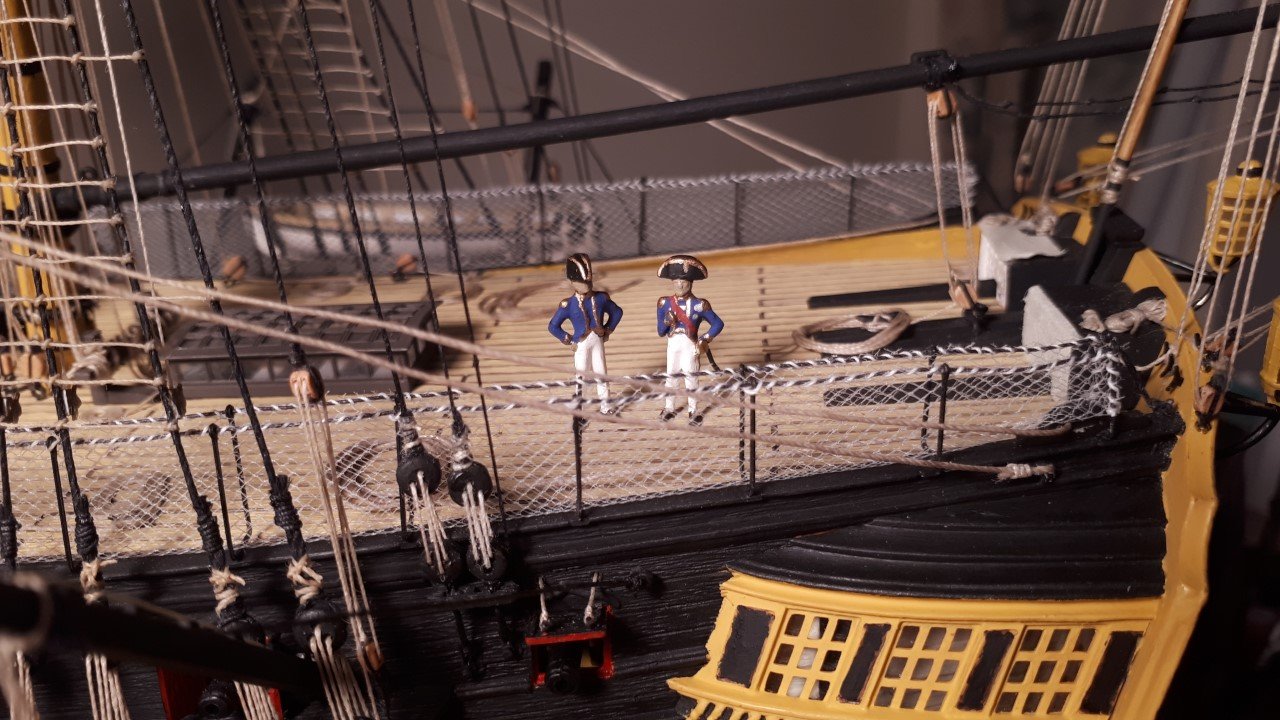
Beautiful model! Love your hammock netting; I recall many hours with the head magnifier stitching the nets along the thread between cranes, on my Heller plastic build. I am in awe of your workmanship..... Ian
-
George, Looking forward to seeing her on water. I'm contemplating my first RC build in 40 years (!?). Where does one obtain lead shot nowadays?
-
I need my tubes cut
Ian_Grant replied to brunelrussell's topic in Metal Work, Soldering and Metal Fittings
I'd love to see some progress shots of your "Great Eastern".............. -
She looks great, Robert! Wish I could build half as fast as you, while keeping up quality workmanship too.
- 22 replies
-
- 1
-
-
- Heller
- Royal Louis
- (and 2 more)
-
Wow they have great looking scale bricks - who knew? Keep up the good work Colin!
-
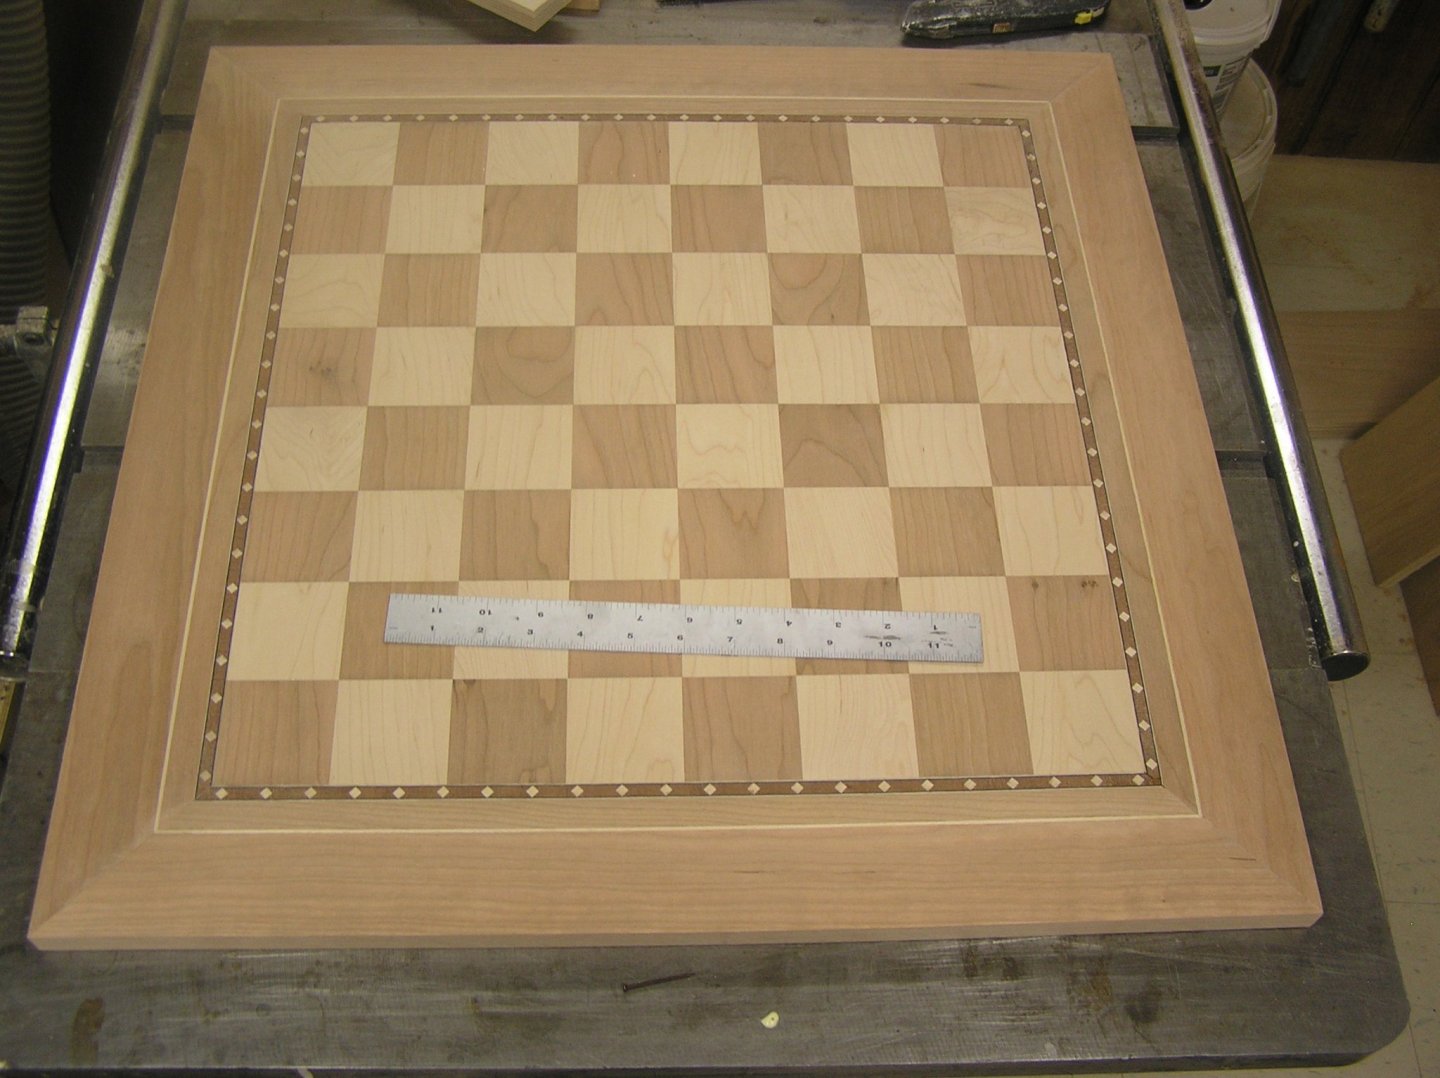
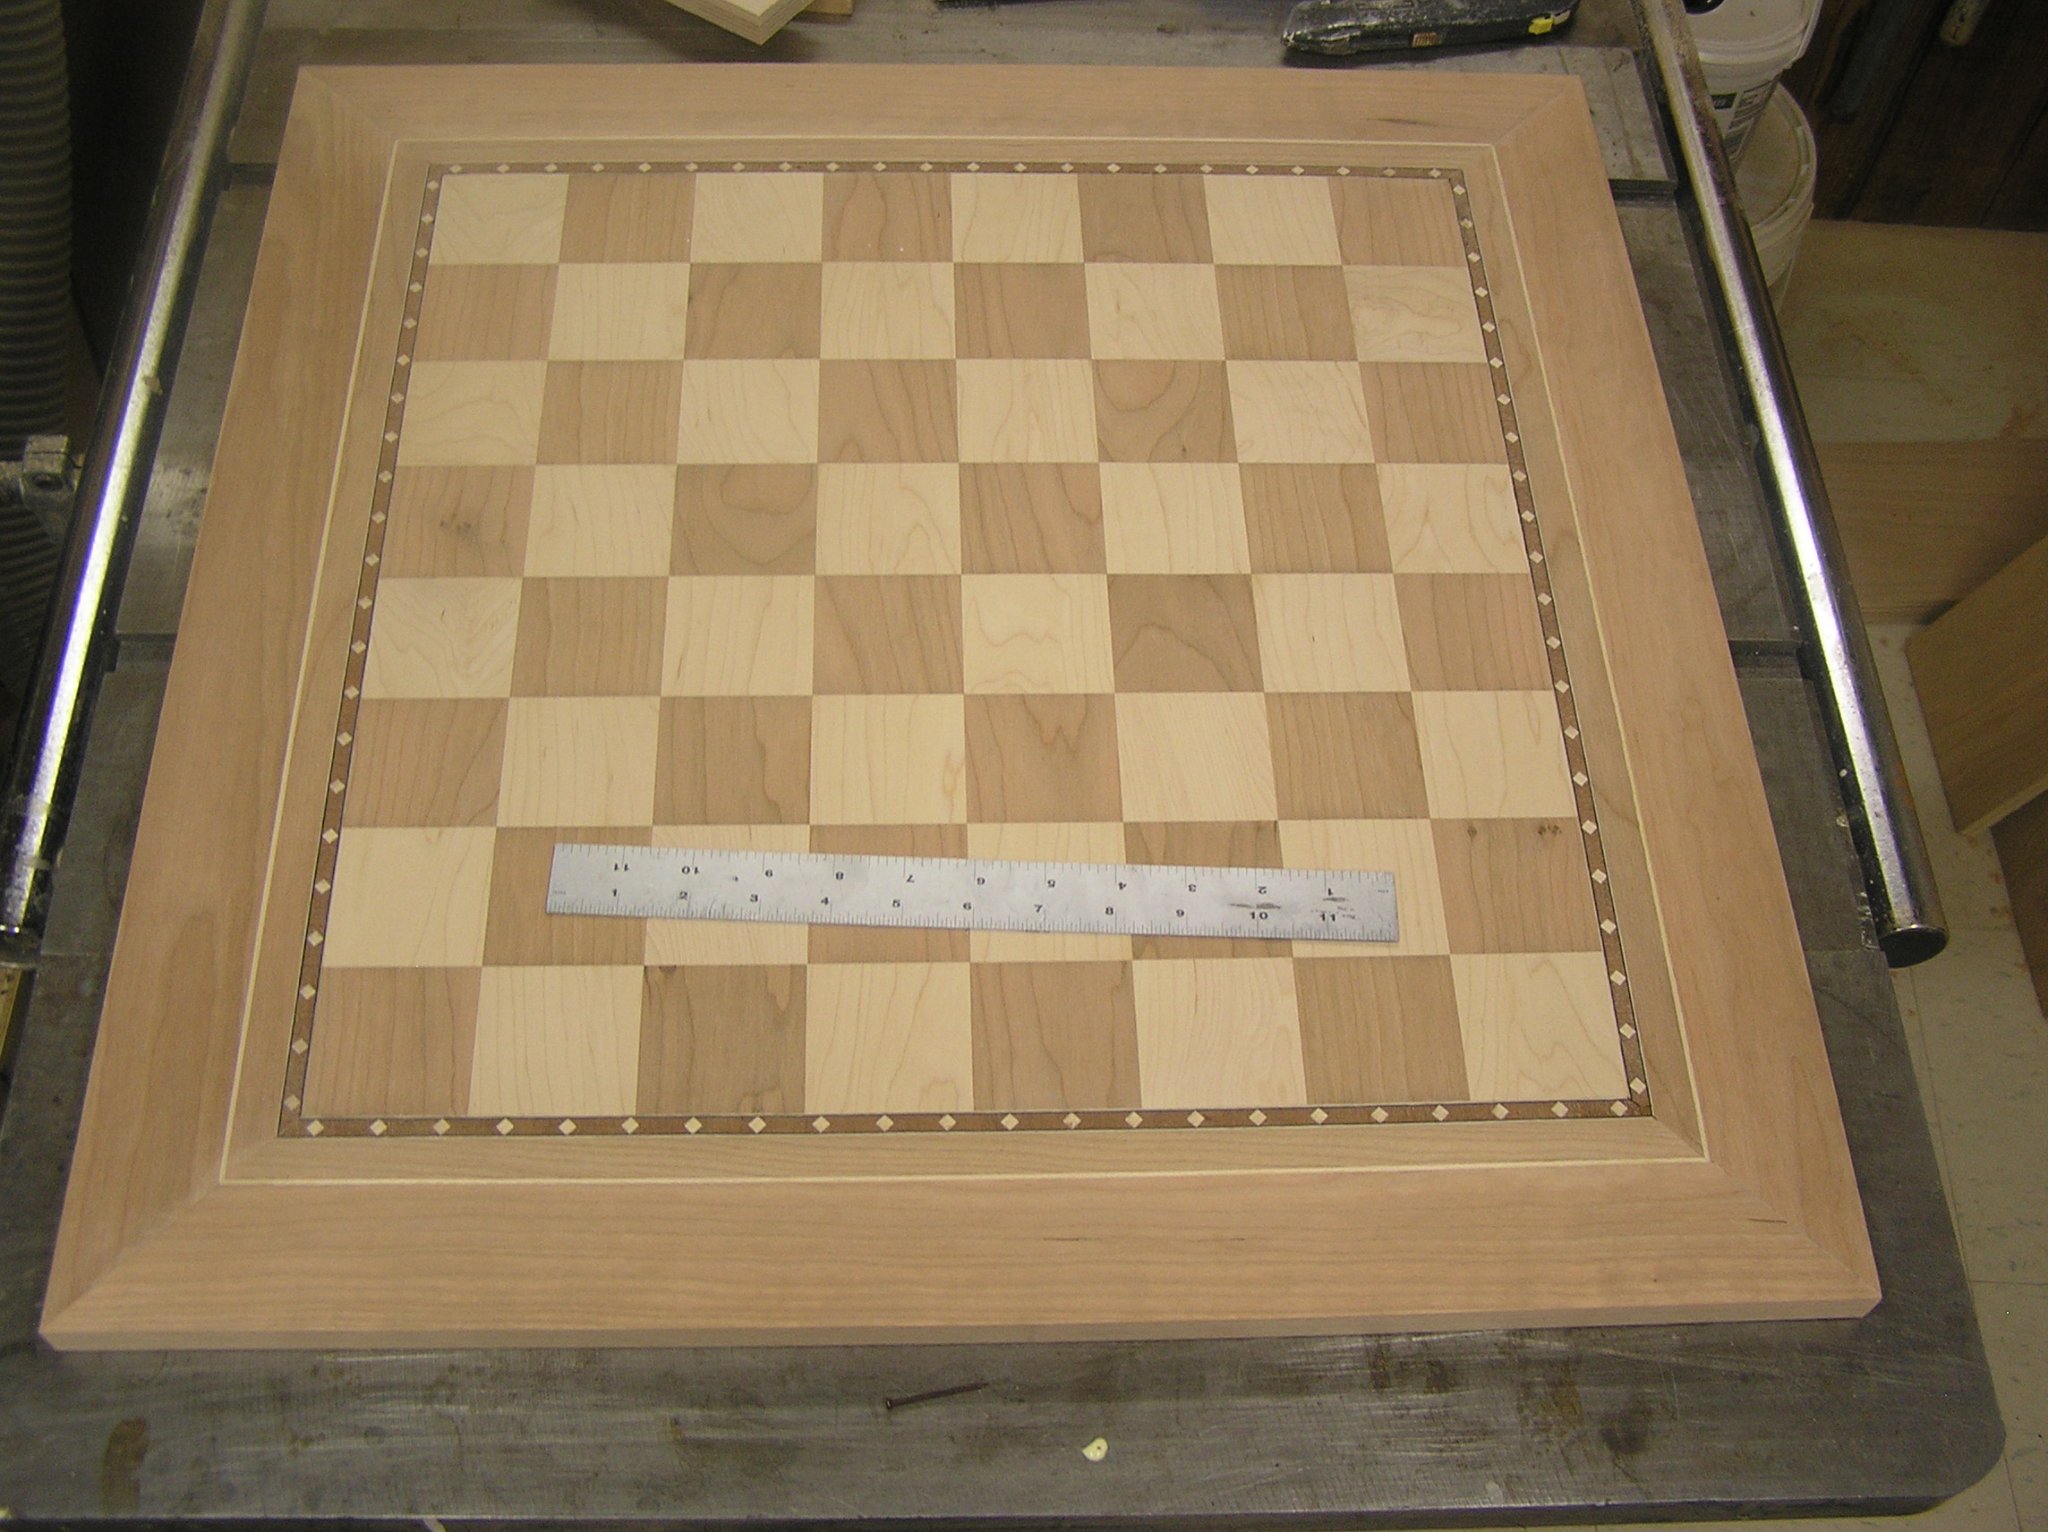
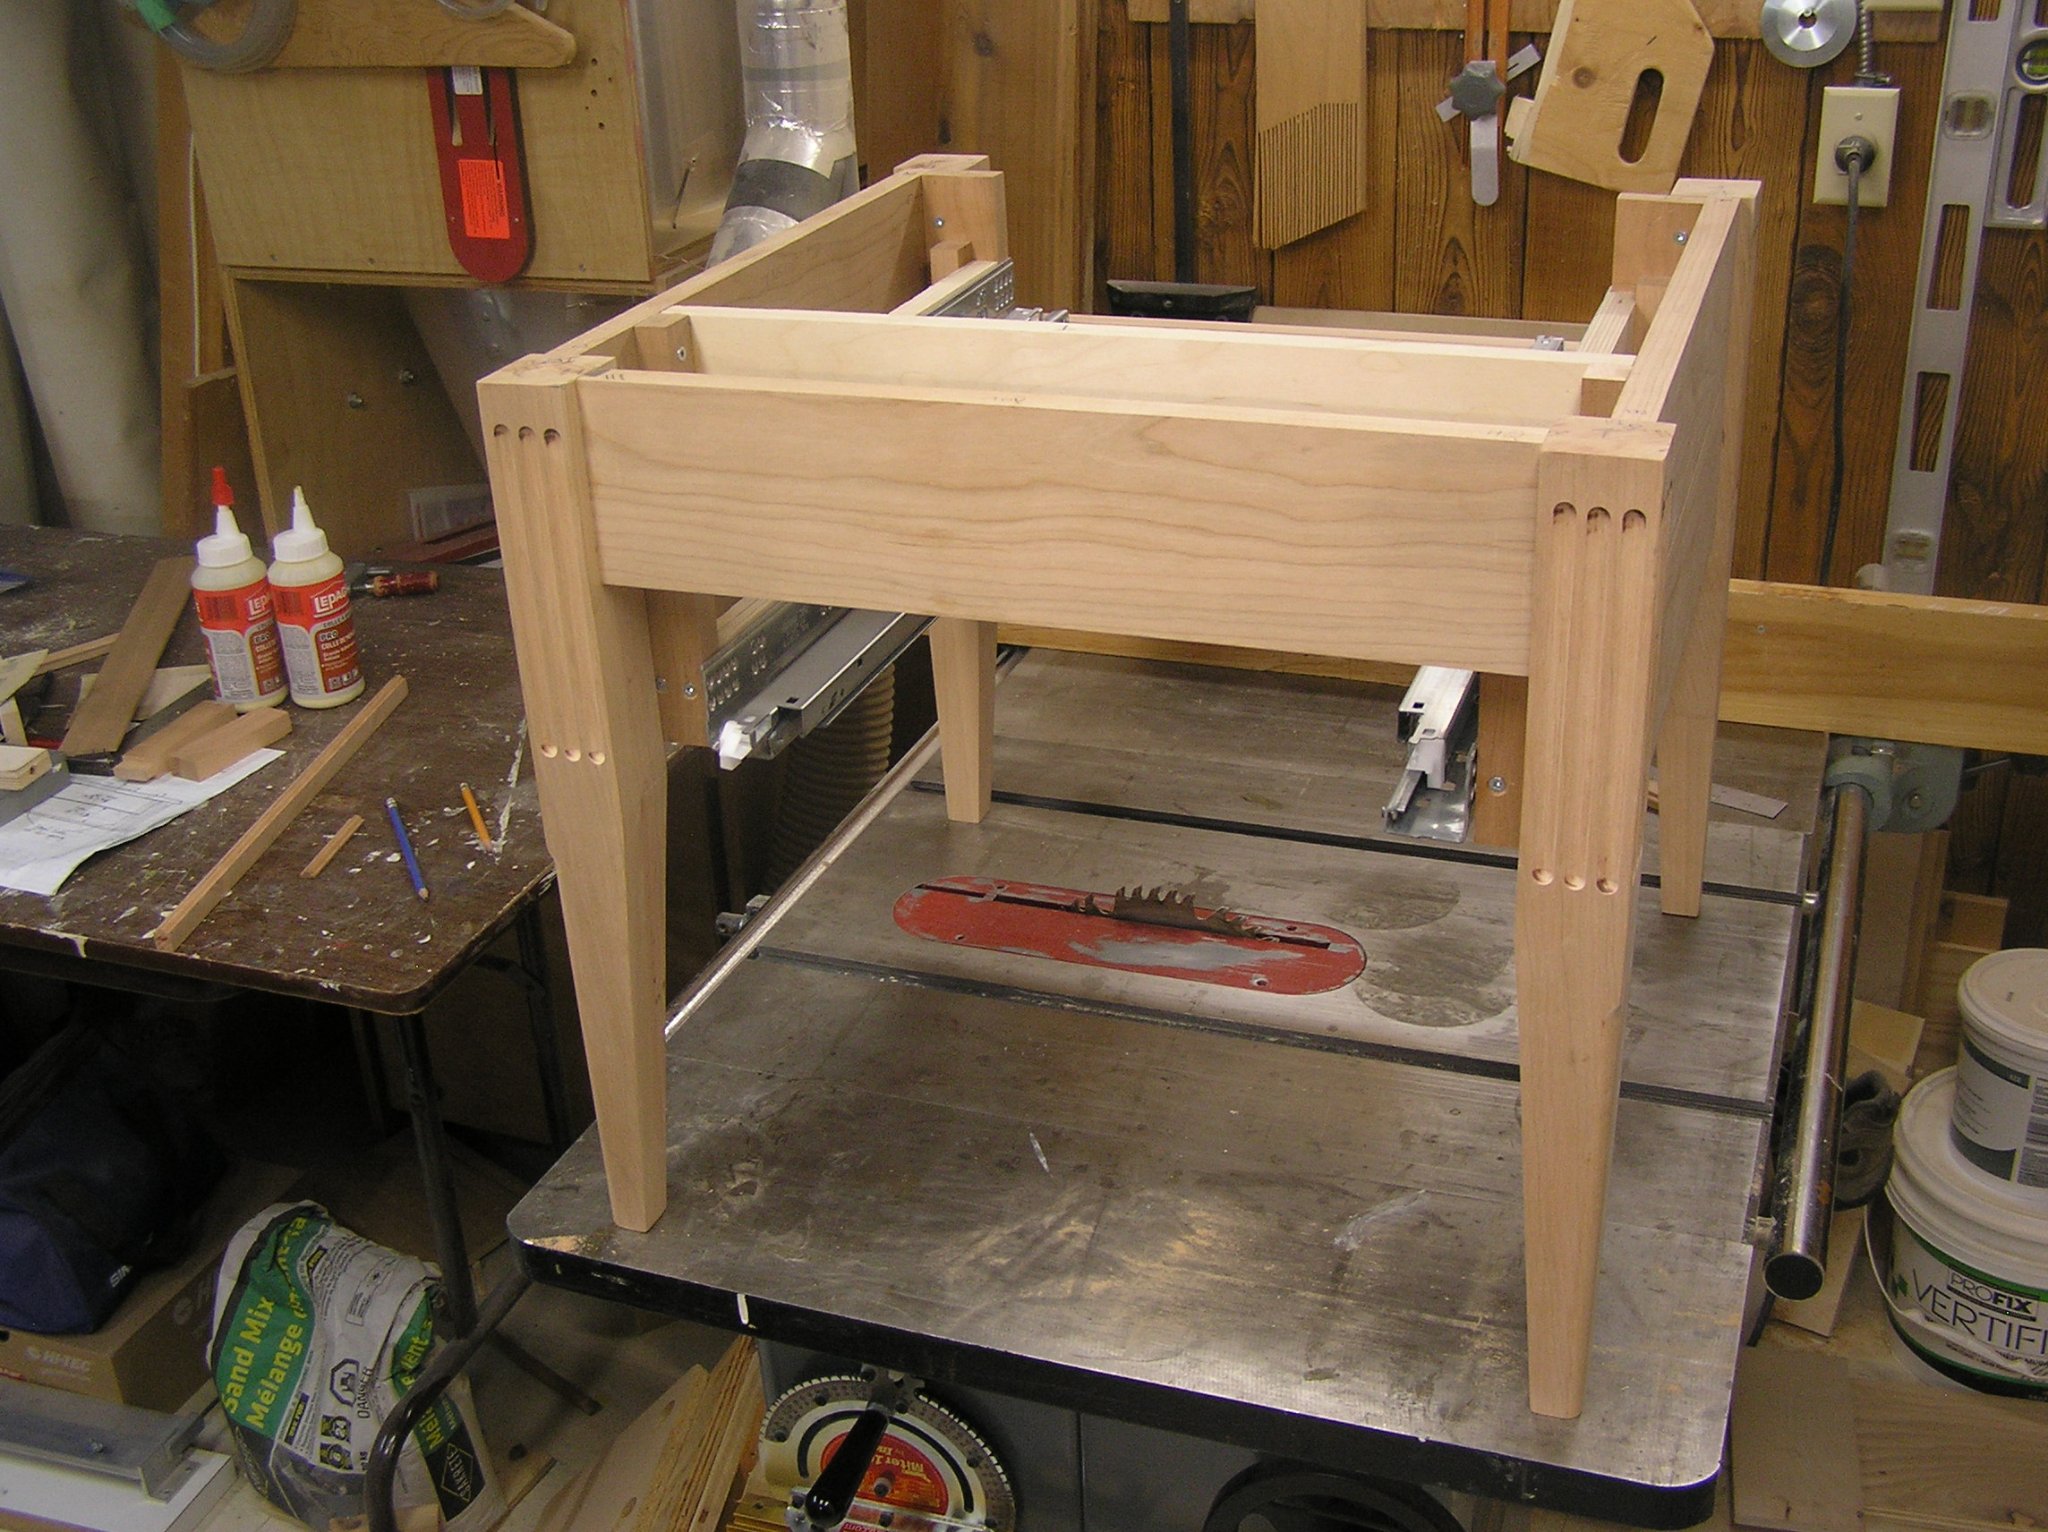
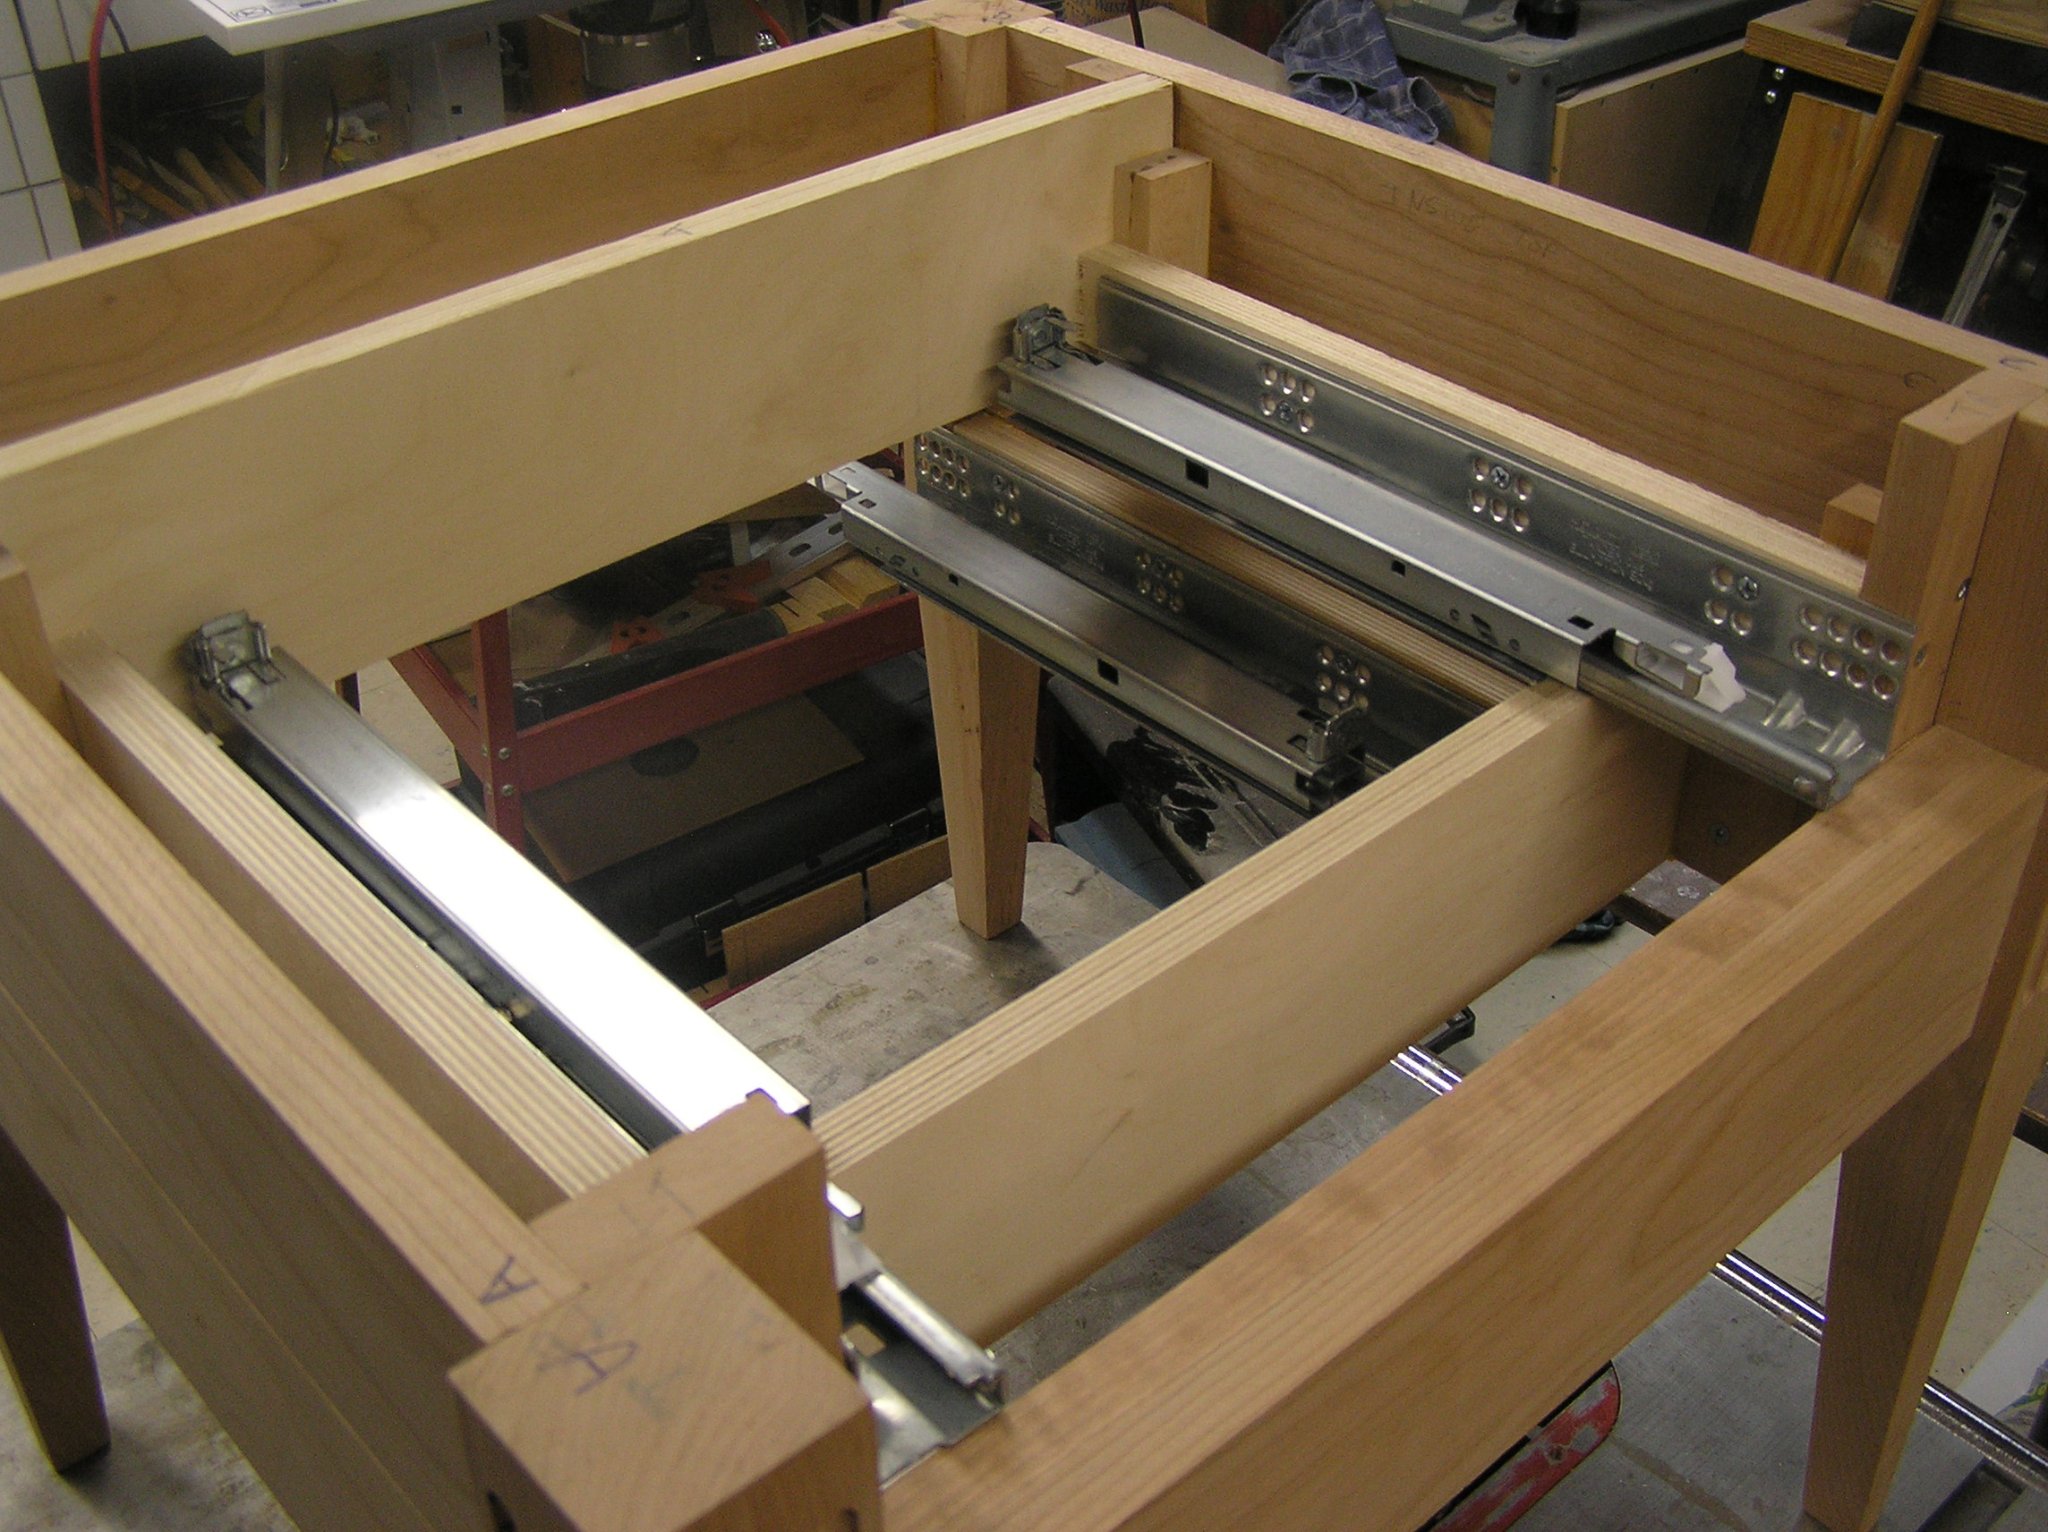
Bill, nice to hear from you. How is your Potosi build going? After poking around, I see it's actually www.hismodel.com whereas the site you quoted is completely different. Those sails do look nice, but at $300CDN I will rig bare poles as planned 🤪 My balls are seemingly not as big as Victor estimates as I have decided there is no way I am rigging 300 blocks on this model. I plan to use wood blocks for the tackle on lower yard lifts and topsail sheets, and for the braces on the lower yards leading to the winches, but for most of the rest I will just tie a knot and slide a seed bead over it to represent a block. I have some very small seed beads which are smaller than Syren's 2mm blocks, from a bead store in the neighbourhood. I just received, finally, my brass and copper eyes order so I am once again equipped to continue with Preussen. However, while waiting I started building a chess table for a nice chess set I bought years ago in Germany. I want to finish it first. Also, I want to build a rudimentary galley cross section with oars so I can test out my oar-driving setup and write the required Arduino code, before deciding whether to build an actual RC galley. All this to say it may be a while before I get back to Preussen. Unless we get a week of 40C humidex; that'll drive me indoors! For interest, if any, here are a couple of shots of the chess table in progress. There will be two drawers, one above the other, opening opposite ways to hold the chess men. The top: Cherry and maple with inlaid banding from Lee Valley. That's a 12" rule on it. The carcass with drawer slides: