Modeler12
-
Posts
1,716 -
Joined
-
Last visited
Content Type
Profiles
Forums
Gallery
Events
Everything posted by Modeler12
-

Landlubber Mike's technique for furled sails
Modeler12 replied to Landlubber Mike's topic in Masting, rigging and sails
One more comment, Mike. You are right, of course, about the furled sails being gathered, rather than being rolled. Imagine those guys up on the yard gathering the sail up and furl it. That is the time when the wind picks up and there is no time to 'roll' the heavy canvas. Here is where I am on my first try.
-
Landlubber Mike's technique for furled sails
Modeler12 replied to Landlubber Mike's topic in Masting, rigging and sails
The poor Vasa probably never had furled sails anyway, Ulises. -
Landlubber Mike's technique for furled sails
Modeler12 replied to Landlubber Mike's topic in Masting, rigging and sails
Mike, at one point you asked the question about lines attached to the clue points and what they were. One is the clue line, which is used to haul the sail up into the furled position. For large sails this would go through a block at the clue and back up to the top of the spar. On smaller sails such as the royal they probably did not need a block and tackle. The second line would be the sheet (to control the set of full sails. It would go downwards to a sheave in the spar below. It is probably the one you were thinking of. However, I really think that to add both of these lines would make things more complicated. I am using them for the full topsails on my model, but the whole thing is very 'busy'. I am starting to use your method to at least add some furled sails for the royal and topgallant positions. Thanks again for posting your excellent work! -
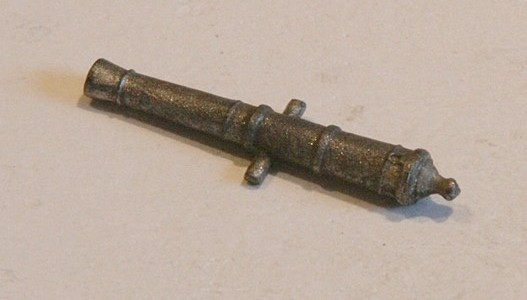
If you have bought the blackening agent, don't give up too soon on using it. There was a thread dealing with a compound similar to yours. http://modelshipworld.com/index.php?/topic/1240-another-type-of-blackening-agent-and-some-experiments/?hl=blackening The main thing to keep in mind is that the metal has to be cleaned. Most brass wire, for example, has a polymer coating that has to be 'steel wooled'. Brittany castings have a release agent that comes off with some soap and water (small brush helps). Enz. I don't know about your amati cannons, but below is what I used on the inexpensive castings. Solid brass would take real well also but could take a bit longer than brass wire. After the second treatment the coating was darker (if that is what is wanted).
-
Ken, to explain this here would take some time. If you have never soldered before, I would suggest you read up a bit, then invest a couple bucks to buy an inexpensive (small) soldering iron, some solder and flux. Give it several tries (with expected failures) using some scrap brass or copper wire until you get the hang of it. Don't try to solder large copper pipe, for example, unless that is what you want to shoot for. Our modeling will require small stuff, patience and lots of practice. Here are a couple references, but again, don't try to read all of this, just get the basics and try it. http://en.wikipedia.org/wiki/Soldering http://www.youtube.com/watch?v=YwbZMGn9bHw BTW the video above goes into a lot of detail. Don't bother with the 'desolder' tape at first and don't be intimidated by the 'big' soldering iron. I have and still use a very small electric iron with a homemade rheostat to control the temperature a bit better. What I was referring to in the thread is 'silver soldering' as apposed to the more common 'tin soldering'. The difference means higher temperatures for the silver (hence my use of a small torch). However, try the common approach first.
-
A video about attaching blocks to spars and masts
Modeler12 replied to Modeler12's topic in Masting, rigging and sails
Glyn, don't feel bad about overdoing any kind of adhesive. I am sure we all have done that many times. With time and practice I have learned to be very stingy with adhesives and solder as well. Glad the video helped you. -
Thank you for putting this in proper perspective. In my opinion; we, modelers and hobby wood workers, should be careful, but not get overly concerned when making 'saw dust' so once in a while. While making furniture I have made oak dust numerous times, breathed it (never eaten oak), and I also know that other chemicals I have used may cause the dreaded disease. Now I do wear a simple dust mask (as well as having a dust collector on my sander). But it is not something I get overly concerned about. Age 77 next month and going for 100.
-
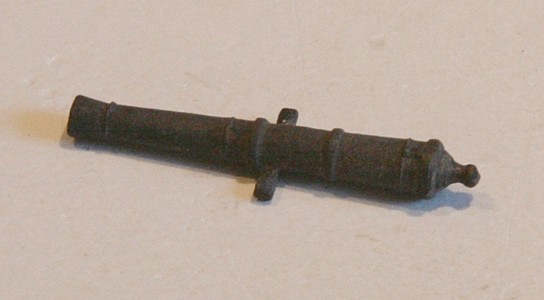
Indeed, Harvey, for battle ships like the Connie, I am sure the lines were not neatly coiled on deck. My guess is that they were loosely tossed around a pin when not in use. However, during a battle there were probably two (or more) guys who handled these lines to reposition the cannon. I coiled mine just for looks, I guess. Even the USS Constitution in Boston has the lines cut short and wrapped around the lanyards. Probably to keep the tourists from tripping.
-
I wonder how many women have read an MSDS when using nail polish, and even worse, nail polish remover. Even some lipsticks have 'chemicals' that may be 'hazardous to your health'. I am not negating the importance of safety when handling chemicals, but most of the time, all it takes is some common sense. As mentioned, carefully reading one of those data sheets takes a while and I don't bother any longer.
-
The Dutch Boeier De Sperwer- The 'James Bond Yacht'
Modeler12 replied to Salty Sea Dog's topic in Nautical/Naval History
I also want to send you my thanks for those great pictures. It is (was) a wonderful class of ships. What I also found interesting is that the 'lee-boards' of those sailing ships was not just for 'show'. For those not familiar with the North Sea in this area, the depth of the waters west of Friesland (north-east of Amsterdam) are shallow and, because of tides, boats will often run aground. A center board would be dangerous and the lee-board remedies that. When a boat runs aground on a sandbank, you just wait. All of this is besides the point, but I do like all the details presented here with those neat pictures. Thanks again Wefalck -
Landlubber Mike's technique for furled sails
Modeler12 replied to Landlubber Mike's topic in Masting, rigging and sails
Mike, this is one for the books. Great work and a marvelous presentation. I wished I had done this on my Connie. One question, something that has bothered me in the past. You show the gaff furled and also along the mizzen mast. But where is the boom? It seems the boom is stored or missing in a couple other places that I have seen. In fact, one famous modeler has a flag pole at the stern rail, which would interfere with a spanker or driving boom. -
And the tray drawer in the back should have some 'stuff' inside. What is he doing, any way?
-
Silver Soldering Tools
Modeler12 replied to bundybear1981's topic in Metal Work, Soldering and Metal Fittings
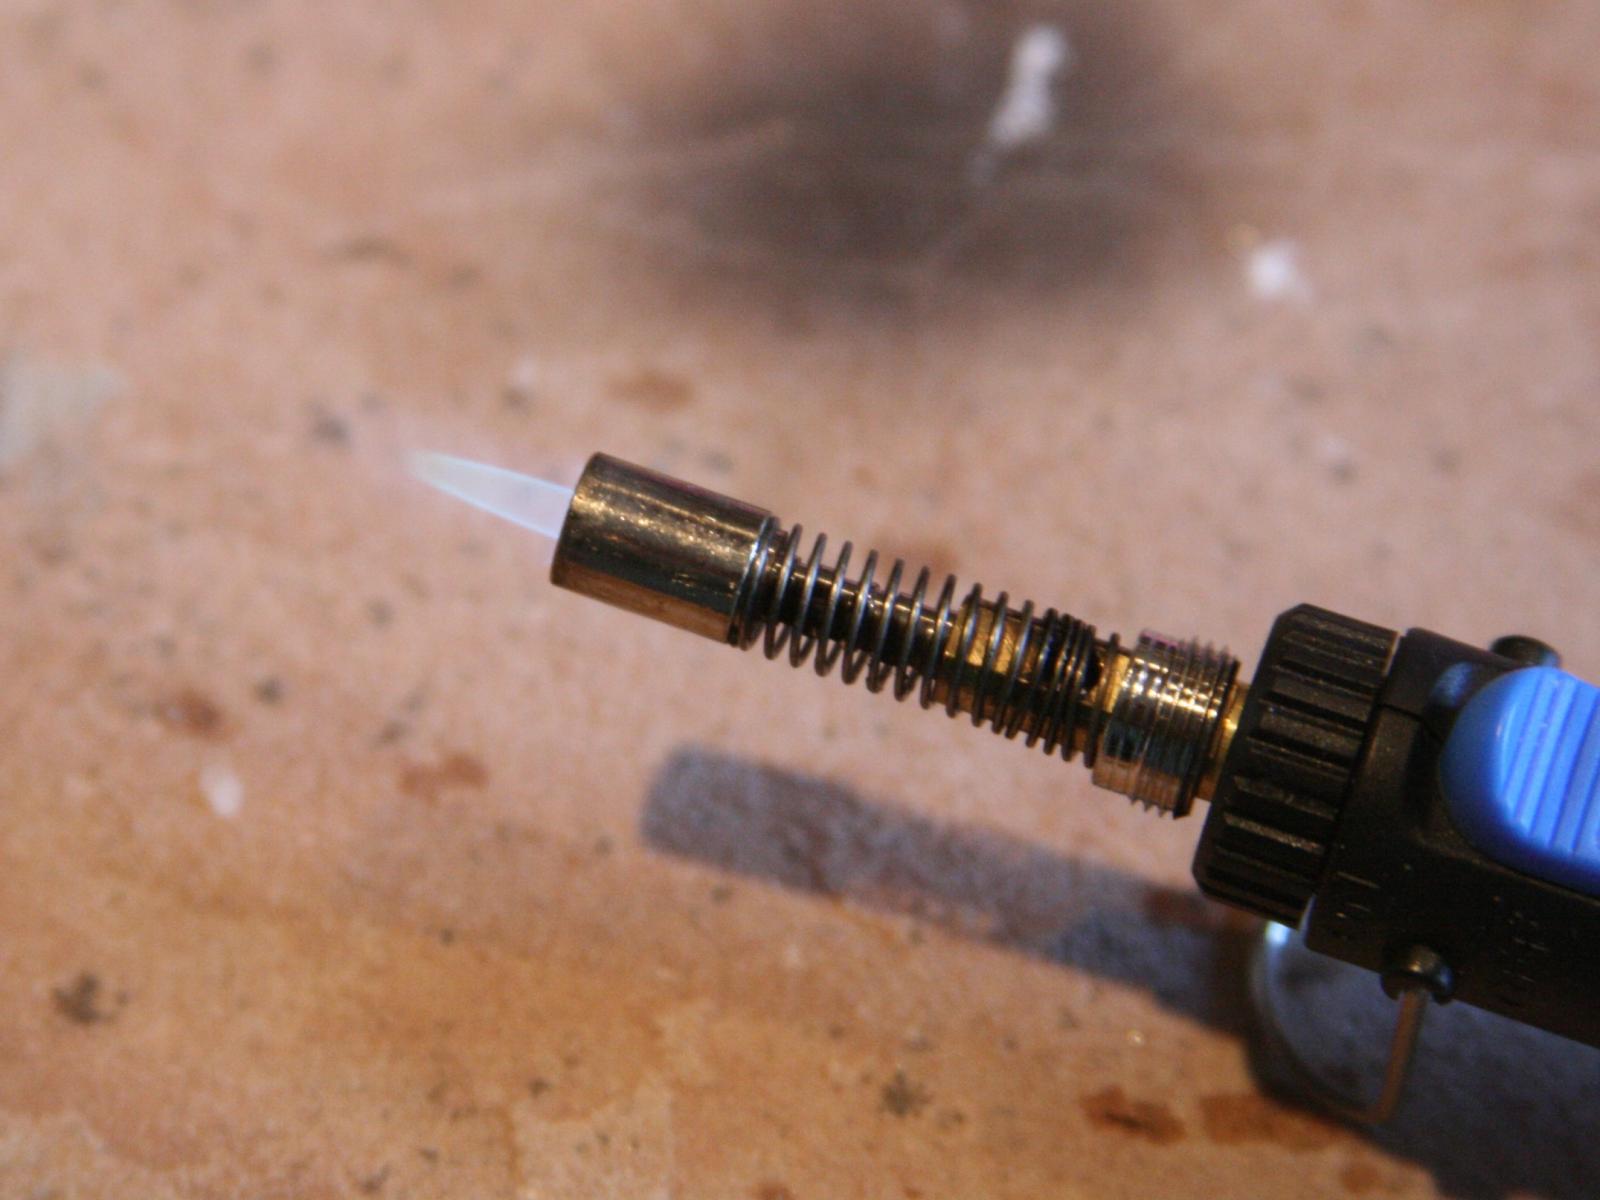
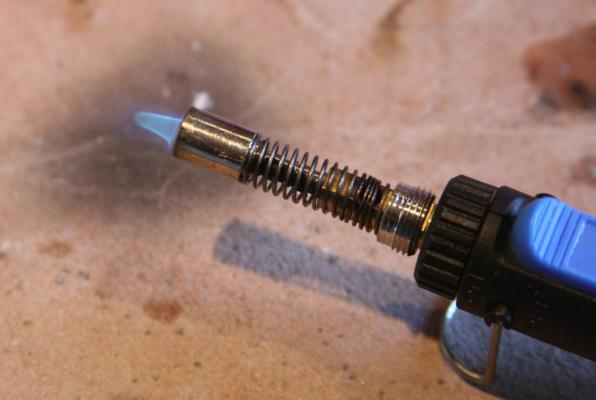
Tip number three: Don't hold the flame too long or you get the following: Indeed, practice a bit, but it is not difficult.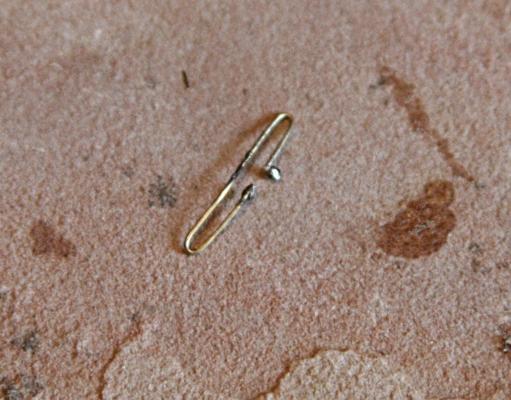
-
Silver Soldering Tools
Modeler12 replied to bundybear1981's topic in Metal Work, Soldering and Metal Fittings
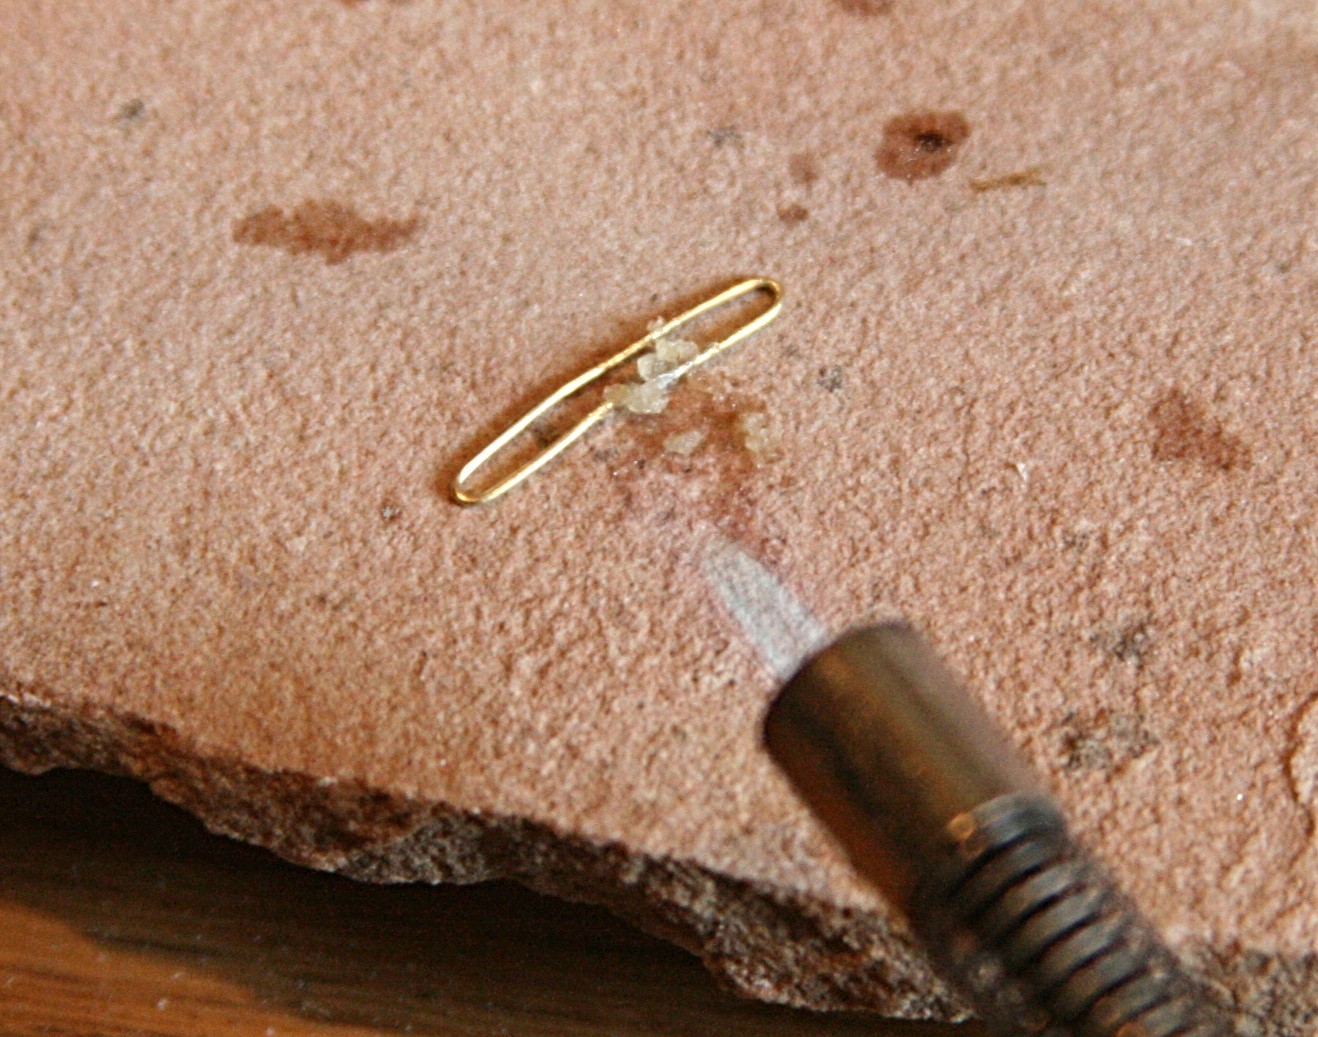
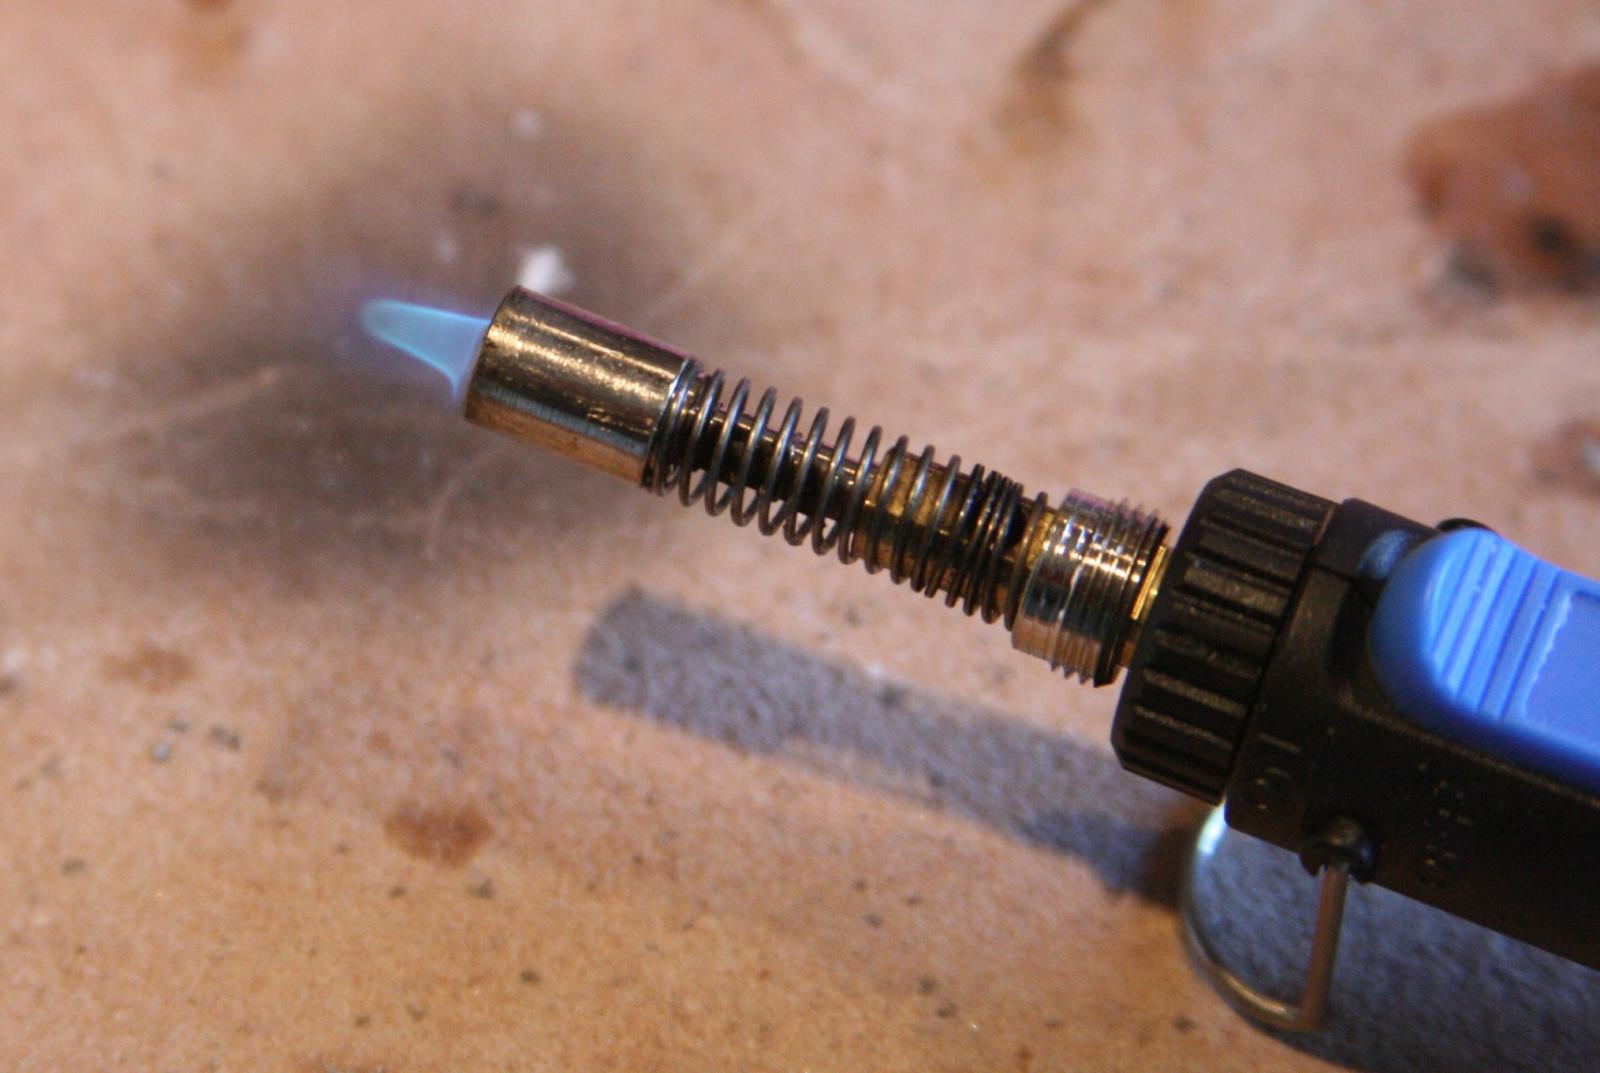
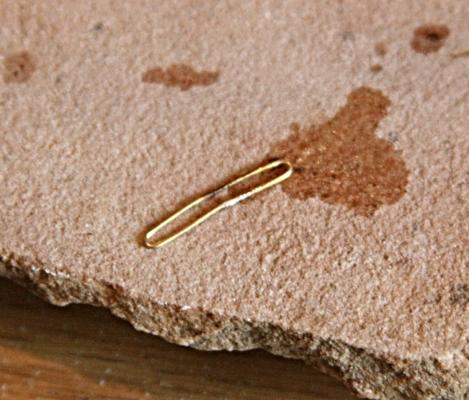
Here is one more tip. If you should add too much solder to a joint, you can redo it or cut away some of the extra solder, apply some plain flux and reheat the joint as shown below. You could even cut the joint, remove the extra silver and remake the joint with plain flux. In the following picture I have cut away the extra solder with some snips and small file, then I applied some plain flux (a bit too much again, I am afraid). It caused some discoloration on the opposite side as shown in the last picture.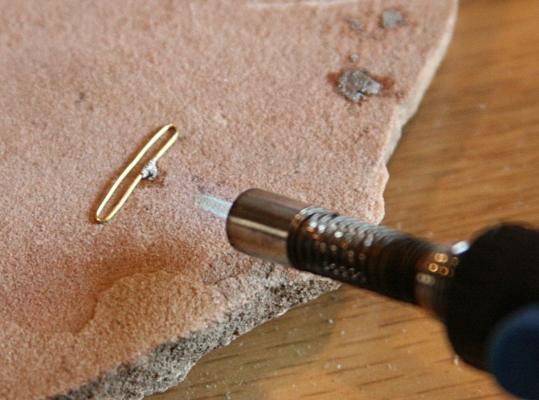

-
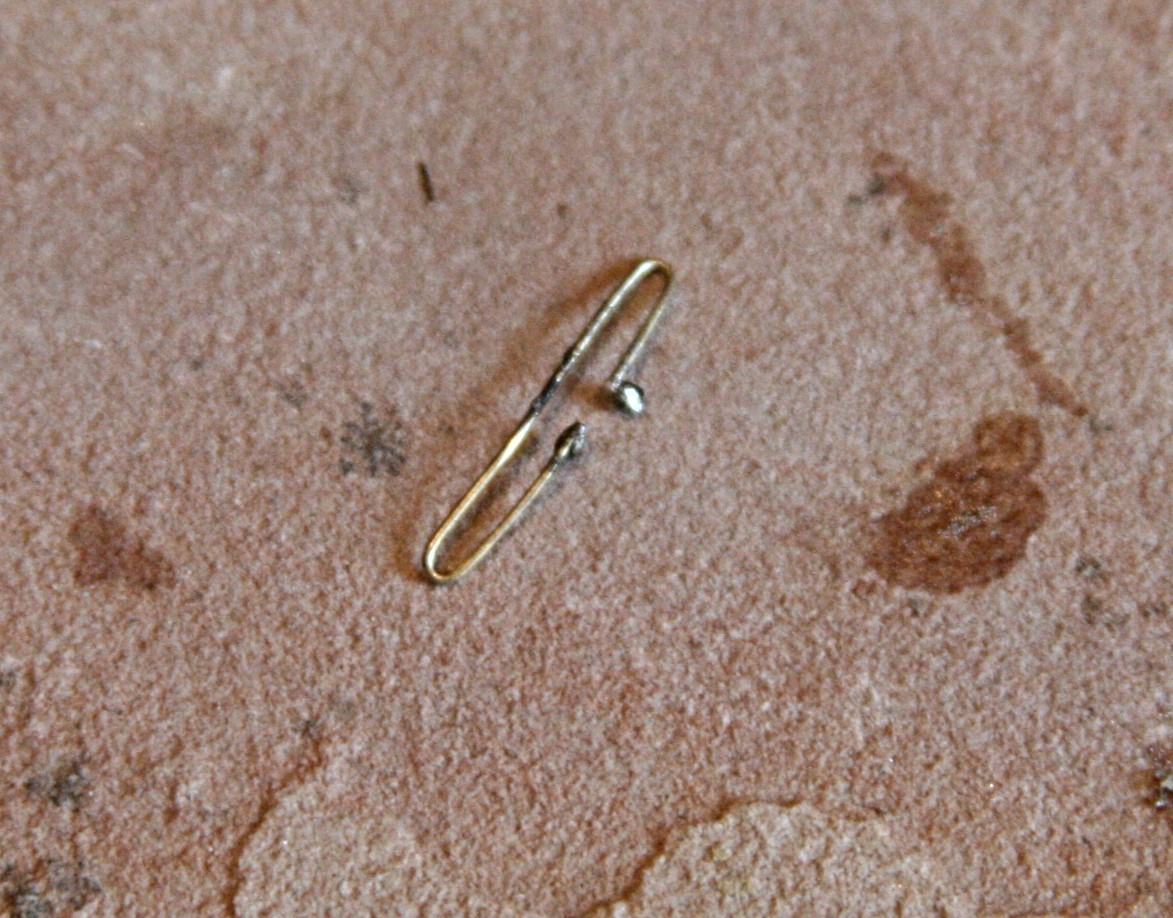
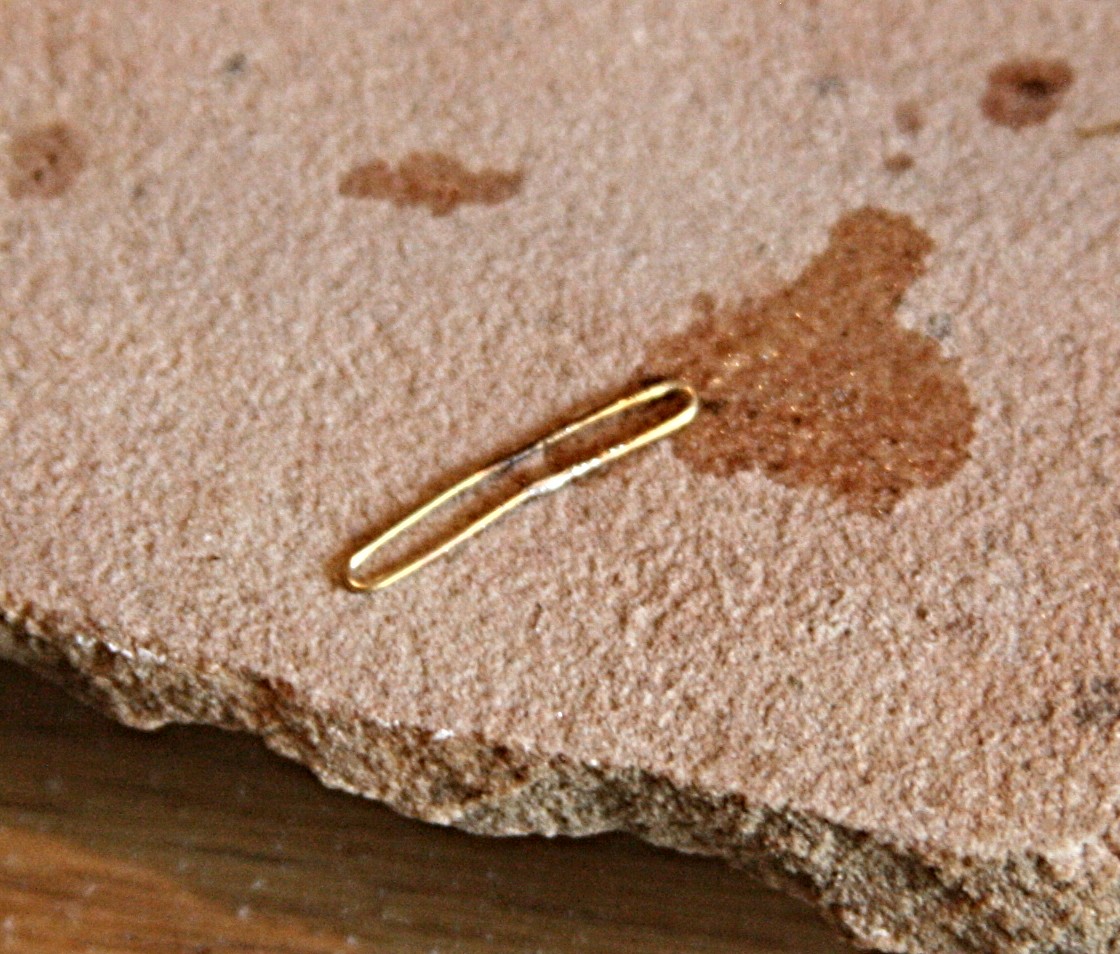
Silver Soldering Tools
Modeler12 replied to bundybear1981's topic in Metal Work, Soldering and Metal Fittings
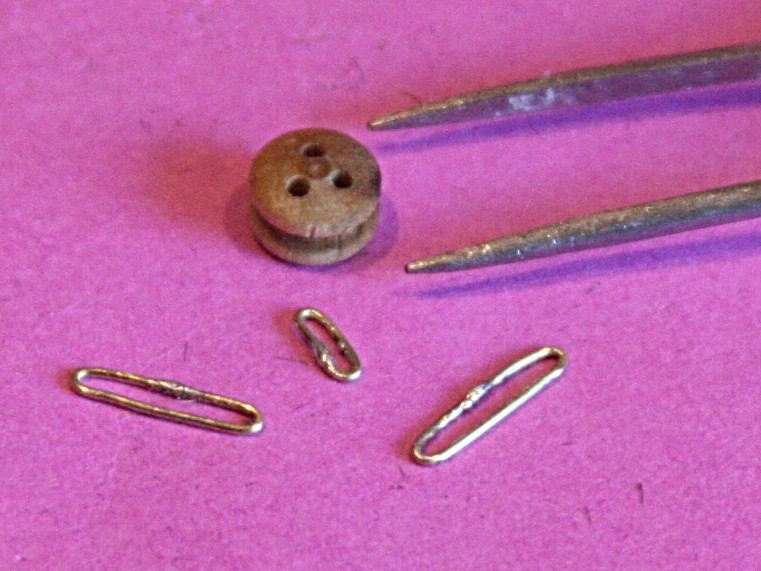
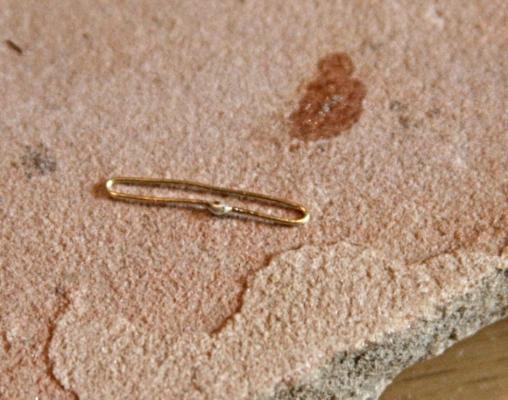
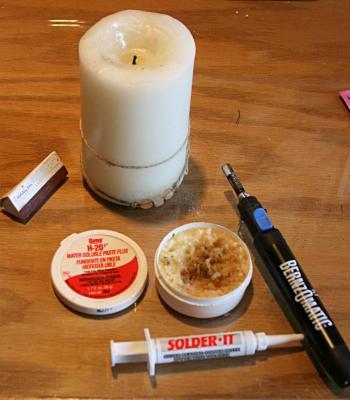
Here are a couple pictures showing how I silver braze or solder very thin wire. The brass is 0.016 inch in diameter. I have made a few loops to be used for chain plates with deadeyes. I use a small handheld torch shown. It does not have a self igniter (too small), so I use a candle when I have to light the torch repetitively. The solder comes premixed in the 'solder it' dispenser. It has the flux incorporated and a tiny bit goes a long way. I apply it with the tip of a round toothpick. Then I hold the flame of the torch very close to the joint and watch the silver flow. It takes a second or two. My torch has an adjustable flame. Shown are medium and small flames. I use medium for most work on small items. Here is a tip. When I have to break the joint (I may have forgotten to link pieces together as shown above), I can re-solder the joint using some old paste flux and the silver that was still in the old joint. Using the 'solder-it' again adds too much silver. Earlier I showed a video about silver soldering, but that was before someone suggested using the premixed flux/solder.

-
-
I, for one, totally disagree. First of all why use oil based stain to begin with? Are you going to expose your model to the outdoors for a long time, or is it sitting inside? Water based stains (and finishes) have become the standard in my furniture making and I use it on models as well. I have no problems with 're-staining' or adding more color, and PVA or wood glue sticks very nicely to it. I used oil based stains in the past and decided they are difficult to clean, take some care to apply, are 'smelly', and not dry fast, and they usually do not take a good 'bond' with PVA, etc. Besides they are not 'green'. In either case, be sure to sand away the remaining glue if you bond first and than try to stain. So, why not stain first and then glue? However, if you are putting down planking on a deck, for example, don't bother staining until you have sanded the deck smooth. Then stain! There have been several threads here about stains. Have a look, and then try it yourself. Experiment!!!
-
Here is a source in the US for hemostats (also called forceps). Their price is as low as $1.68, which you cannot beat. But also check out all the others that are available. Search 'forceps'. http://www.micro-tools.com/store/P-650FS/Forceps---Straight-Stainless-Steel-5in.aspx
-
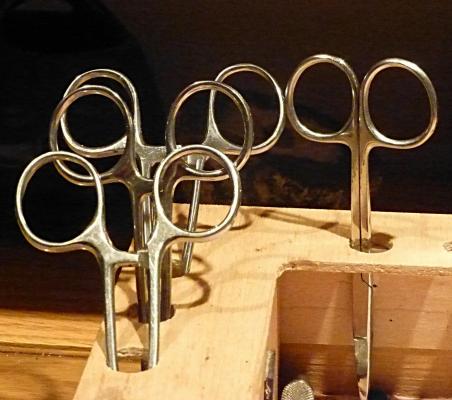
I have used these pliers for a lot of different situations and never had a real problem with the serrations. They certainly are a lot better in that regards than the 'alligator clips', sometimes referred to as a 'third hand'. I have shown a couple uses in the videos I showed on this forum, but they are mostly to hold blocks, lines and other thin objects while whipping or soldering parts to them. The three I have were quite 'tight' and would apply a lot of pressure on blocks for example. To overcome that I carefully bent one or both 'handles' to open up the grip and still be able to use the two snap-lock features. Mine came from a surgical outfit and I don't know about the quality of other suppliers. But as long as you can bend the handles without breaking them and still have good holding power, it would seem to me they are workable.
-
When to stain wood?
Modeler12 replied to Keith_W's topic in Painting, finishing and weathering products and techniques
I don't see any problem re-staining after you sand. It certainly is better than gluing first and then stain. Also it works better if you use water based stain, as you indicated. PVA bonded to an oil-based stain is not as strong as when you use water based stain. But be sure to try it first on a piece of scrap. -
Looks good JPett. That goes to show how versatile that little vise is.
-
I use the Panavise a lot for almost all the rigging operations, holding small parts such as blocks and a multitude of other tasks, but not to hold the frame during planking. While planking, the hull of the model has to be in the up-side-down position and clamping the keel is not practical. After all. the planks have to go around the keel as well. I rested mine on several layers of old towels. The rail along the sides, the rail on the stern and part of the bow supported the hull with the tip of the bow hanging over the edge of my workbench.
-
Jud, I don't see this 'yacht' as being a 'working vessel' and as JSF above mentioned it was and still is very common to use coils on the deck. I have used the coils for the numerous gun tackles on my model and I couldn't see any other way to handle those lines. If that was not the way it was done on the original 'too bad' is my view.
-
I used your method to make a few deadeye chain plates and it worked very nicely. I took it a step further and made a fixture out of aluminum stock with steel pins to locate the deadeye and the bending of the wire around that. To hold the deadeye in place, I partly drilled a 1/4 inch hole in the aluminum right next to the two pins. That gave me a stable platform and parts that were all very closely matched. I used silver brazing to make the joint and a pair of self clamping tweezers to hold the wire around the deadeye. At first I found some burn marks on the wooden deadeye, but then I covered the wood with a small piece of aluminum foil to prevent the flame from hitting the wood and also to have some more of a 'heat sink' (besides the tweezers). That helped. For my next build I will continue using this method. Thank you very much Daniel for this presentation and publishing your neat idea.
-
Veel geluk en plezier, Patrick. As many now have mentioned, you are in good company here on this forum and, although there may not be any who are doing the same model, the advice on several details should be helpful to you.