


Modeler12
-
Posts
1,716 -
Joined
-
Last visited
Reputation Activity
-

 Modeler12 got a reaction from SUBaron in USS Constitution by Modeler12 - FINISHED - Model Shipways
Thank you all for your nice comments.
If it had not been for this forum and all the great members and their contributions, I would not have come to this point with this model.
There were several times that 'priorities' took the best of my time. But then I came back and worked on something that can be relaxing, mind boggling at times, and kept my interest and skills at a high level.
I gave up golf several years ago because my frustration level gets high. With this hobby I can sit back right now and say, 'Calm down, enjoy, have another look (or beer).' And it works.
Now it is on to the cross section for more details, more problems to solve and more mind boggling things to solve.
-
 Modeler12 got a reaction from FrankWouts in Ryland Craze's Carving Attempts - #11 Blades
Nice bit of carving, Ryland.
Why go back to the same old Longboat shipyard when you have a future in carving?
-
 Modeler12 got a reaction from Django in Seizing or whipping a line. Here is how I have done it.
I have made numerous seizings on the strop or line that goes around a block. The cannon riggings on my USS Constitution is one example. There are twenty-two guns with four blocks each. Lots of time to practice.
I put a short video clip together for those interested in my approach.
Of course, there are many other places where this seizing is used. The top of shrouds as they go around the mast is another one. There are also variations to the 'common whipping', but in all cases the idea is the same.
-
 Modeler12 got a reaction from ibozev in Making rope coils
MSW 1 had a couple topics about making rope coils. I would like to review some of that and perhaps others can add to this.
There are at least two types of rope coils. The first is the spirally wrapped one that might lie on deck. The second is the coil that is part of belaying a line on a cleat or belaying pin. I'll cover them one at a time.
There is a fellow (help??) who made a fixture to make the flat coils. I took a similar approach with some materials on hand. I took a piece of plastic that is not kind to PVA glue, made a wooden block with a hole in it and a nail. I coated the line with a thinned bit of glue. Then using the nail I pushed the line through the hole of the plastic and into the hole of the wood. Now I have a sandwich with the line being the lunch meat.
Instead of wrapping the line around, I turned the block while holding the sandwich loosely together so the meat does not fall out.
When I think I have about enough, I let the whole thing sit a while (but not too long!) You can see that some are not perfect, but good enough.
I'll cover the second type of coil in the next thread.
-
 Modeler12 got a reaction from zoran in Making rope coils
MSW 1 had a couple topics about making rope coils. I would like to review some of that and perhaps others can add to this.
There are at least two types of rope coils. The first is the spirally wrapped one that might lie on deck. The second is the coil that is part of belaying a line on a cleat or belaying pin. I'll cover them one at a time.
There is a fellow (help??) who made a fixture to make the flat coils. I took a similar approach with some materials on hand. I took a piece of plastic that is not kind to PVA glue, made a wooden block with a hole in it and a nail. I coated the line with a thinned bit of glue. Then using the nail I pushed the line through the hole of the plastic and into the hole of the wood. Now I have a sandwich with the line being the lunch meat.
Instead of wrapping the line around, I turned the block while holding the sandwich loosely together so the meat does not fall out.
When I think I have about enough, I let the whole thing sit a while (but not too long!) You can see that some are not perfect, but good enough.
I'll cover the second type of coil in the next thread.
-
 Modeler12 got a reaction from Patrick B in Modeler12 carving attempt - Me too; I am willing to try almost anything.
Happy New Year
-
 Modeler12 got a reaction from Bill Morrison in Is there a better #11 blade handle
I know this is going to open Pandora's Box, but I use the old Exacto knifes in a rubber handled holder and never had a problem of the blade slipping, etc. I don' t remember where or when I got this holder, but it should not be that unusual.
What I do want to mention is that I don't change blades that often. I find it easier and quicker to give the edge and tip of the blade a quick touch up with a diamond coated 'brush'. It works for me
-
 Modeler12 got a reaction from Glomar in Is a waterline marker useful?
In my opinion the type of marker is not as important as setting up your model such that the waterline is parallel with the table on which it sits. In other words the waterline at the bow and stern should be at an even height. Likewise the line should be the same on both sides. This requires propping up those points until they are at the level as defined in the plans.
Below are two pictures showing how I did this with my Connie. The table top was level, hence the sides could be leveled as shown. The fore and aft points were located and you can see the small wooden shim towards the bow.
I put small pieces of masking tape on the hull, made a wooden block to the correct height and used that to make my marks.
-
 Modeler12 got a reaction from popash42 in Modeler12 carving attempt - Me too; I am willing to try almost anything.
One more thing about carving tools. Earlier I showed the set of knives and gouges that I bought from Flexcut. They work extremely well, hold an edge quite long and only need an occasional stropping. The only one I seldom use in the set is the curved knife.
However, for detailed work I needed some small chisels. I ordered a set of four Flexcuts ranging from 1/16 to 1/4 inch wide. Again they did a nice job of cutting away the background material for the tulip that I am playing around with. I am referring to the narrow channels between the leaves and flower. They still need some 'cleanup work'.
I am not trying to sell the brand, I know Flexcut tools are expensive. But now I have what I need when it comes to relief carving.
The 'practice board' has moved to a larger design as you can see. The actual tulip will be fun to bring out next.
btw. The grain direction has given me some hick-ups.
But after a while I got used to the idea of grain in this piece.
Notice that the center of the branch is in the bottom left corner of the tulip. It is a dark patch.
-
Modeler12 got a reaction from popash42 in Modeler12 carving attempt - Me too; I am willing to try almost anything.
Here are a couple more of my trial board carving.
I am a bit shaky and that does not help. It takes a steady, continues cutting action when using the chip knife.
The cross grain try to the far left was done with a V-gouge and the results also leaves a lot to be desired.
But a little more practice should be in order.
I think I will leave the rest for later. This is not the right place for this discussion.
-
Modeler12 got a reaction from popash42 in Modeler12 carving attempt - Me too; I am willing to try almost anything.
Tools:
Perhaps I am going too deep into this discussion with the trial cutting.
But let me explain my situation about 'wood working' tools for carving>
I have collected a few chisels, bought some 'dogs', but settled on a few that I have used over the years.
Now comes Chuck and his promise to make us all into expert carvers of micro sculptures:
and what do I have to work with?
The two to the left are part of a series of wood-working chisels, not carving chisels (and there is a difference).
But I have used them for my carving attempts.
Then I decided to buy some 'micro carving tools'.
I know a better way is to buy individual tools as-needed, but for a novice I took the plunge.
Those are the ones I am now using for the 'practice board' mentioned above. I am slow, so bear with me.
The 1.5 inch squares in a piece of basswood could not be easier to cut you think.
Hold on. I stripped a couple of those borders very nicely and will ignore borders for now. There is also the issue of grain direction!!
The idea with part of the board is to carve concave and convex surfaces. The more I did this, the braver I got and went deeper. I am getting the hang of those gouges, not pretty but satisfying.
-
.jpg.d84ec4dad1d7791e855dca06210ab6f3.thumb.jpg.f45209242e851d4409eca1a09293165b.jpg) Modeler12 got a reaction from hollowneck in What is the name for the netting under the bowsprit
Modeler12 got a reaction from hollowneck in What is the name for the netting under the bowsprit
You might go to a fabric shop such as Joann's. I bought some 'netting' that I used for the Constitution railing nets and also for the railing on the tops and it looks about right.
-
.thumb.jpeg.fc5d633a7b34428fcf19419a73d56d55.jpeg) Modeler12 got a reaction from EricWilliamMarshall in What are your most interesting and/or useful books
Modeler12 got a reaction from EricWilliamMarshall in What are your most interesting and/or useful books
Thank you all for all those suggestions. I will try to find all or most of them through my library.
When I posted this thread I was thinking of where I was a couple years ago when I started this model ship building. I had sailing experience, did some minor model building but was totally ignorant of all the terminology and the in-and-outs of old sailing ships. Since then many of you helped me with good references (such as Petersson's book on rigging).
So, what I had in mind were some books for beginners in this hobby. Something that could be used in addition to the plans and explanations provided in kits.
I found one book that serves that purpose (at least in my opinion). It is 'The Visual Encyclopedia of Nautical Terms Under Sail'. The tittle continues with 'An illustrated guide to the language of the great sailing ships and the men aboard them'.
The book is full of great drawings, photographs, explanations of the various parts of sailing ships, etc. etc. Although not related to modeling, it even has a wonderful section about navigation, its history, tools and the mathematics involved. Below is one page picked at random.
-
 Modeler12 got a reaction from AJohnson in how to work with teeny blocks???
Here is another way to use a clamp or hemostats to hold the block while attaching a line around it. The video is primarily intended to show what seizings are all about but it also shows how I hold the block. I have five of these clamps (some with a curved end) and have adjusted the gap by carefully bending one of the handles using a vise. That way I can clamp parts of various thicknesses. Shop around and you can find them at lots of different places for a couple dollars each.
-
 Modeler12 got a reaction from Tim Holt in A video about making metal hooks and . . . . .
I have made a short video about making various parts out of metal wire. Some of the topics I included seem to be of interest right now, but I also included some hints, how to blacken metals and a few others.
I show what I typically do and don't want to give the impression that it is the best or only way, of course. In fact, I welcome suggestions and your input about how to . . . .
After all, that is what this forum is all about.
-
 Modeler12 got a reaction from Archi in Can i live without a BYRNES TABLE SAW
I just received my table saw from Jim and like what I see and have done with it thus far.
Here are a few comments, not necessarily critical but suggestions for improvements in the 'instruction sheets' that are part of the package.
1. Page 2 'Operation'. The 1/4 inch allen key is huge (too long) and the diagram does not show it nor where it is supposed to go into.
2. Some pictures would help to identify the components. The diagram included is a good start but not enough.
3. The Lubrication of the shaft and knuckles of the u-joint is fine, but where are they? You have to turn the machine on edge to see the large opening in the base and locate those parts. When you do, you can see how the yoke swings the blade up or down and also the locking bolt at the pivot point.
4. To change blades I had to remove the table insert, then loosen the two nuts (next to the blade and at the end of the shaft). Then I turned the machine on edge to get to the blade and washers. This is not difficult but it took me a while to see how to do this.
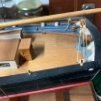
I took the following pictures for my own benefit. Notice the plywood table insert which I use with the fine blade as a 'zero clearance' table. I will use the carbide blade for rough and large cuts and then this fine blade for cutting strips. So, changing blades will happen often.
To be sure, the machine is great and the cuts I have made are nice and uniform.
One thing I have added is a simple cover for the large opening in the base. This is where saw dust came through and spread all over the counter top. The dust port does not work well unless you do that.
-
 Modeler12 got a reaction from thibaultron in Miniature Russian carving tools
Looks like great carving tools.
I also would like the email address and was wondering how payments and shipping are handled.
In particular, I like to see more details of the shape of each tool and if I could order some individually rather than a whole set.
For 23 of those at $360 total I assume a price of $18 each would not be unreasonable.
-
.thumb.jpg.9b9e7a7246b971562249e229b3f2c5ad.jpg) Modeler12 got a reaction from Pogy647 in Sanding off laser burn from bulkheads?
Modeler12 got a reaction from Pogy647 in Sanding off laser burn from bulkheads?
OK, here is what I did and the results.
I clamped the glued up piece (started with the 'burnt to bare') in a wood vise. I used another piece of wood leaning against the top part and hit it with my calibrated hammer. I did the same thing with the other two, hitting it with about the same force.
All three pieces sheared where I had clamped it and none broke at the glue joint.
I then tried to break the remaining parts with pliers. Indeed the 'bare to bare' splintered some more but not at the glue line (top left). The 'burnt to burnt' (right) broke a sliver at the glue line, and the third one ('burnt to bare') did break through the burnt joint leaving burn marks on the bare side.
It felt like it took about the same amount of force to break each one.
My conclusion is that it makes very little difference if you sand the burnt edge or not. Al least with the glue I used. I suggest that others might try something like this with other adhesives.
-
 Modeler12 got a reaction from Marcus.K. in Making cloth flags
Let us rebuild. But where to start?
Prior to the ‘2013 collapse’ we had a section dealing with making flags. Let me refresh what at least my approach was after receiving input and help from other members of this forum. I am terrible with names, but one fellow in Hilversum, the Netherlands, led the way with his approach. Here is what followed:
A flag printed on one side of a sheet of paper was the start, but not very interesting. See first picture below. Other suggestions on the forum dealt with hand painting and even using crumpled cans. But
the one that I liked best was to use transfer paper. The idea is to print the mirror image of a flag on this special paper and transferring it to a piece of light weight cloth using a hot iron with lots of pressure. The first pictures below show the paper flag and my first tries using the transfer paper made by the Dharma Trading Co. It took some practice and several rejects. Printing on one side of the cloth did
not transfer well to the back. Our Dutch friend (help me Lou) showed how he had done this process on both sides. That led me to the following approach.
Scale the flag to the size you want and make one real and one mirror image. Print both of these on a sheet of the transfer paper. Take one and with a very hot iron (your wife’s will do) and no steam, press the image onto the cloth. Carefully slide the iron across to make sure the whole area is pressed uniformly. After the recommended time, let the cloth cool and remove the blue backing. You should
have a clear image on the cloth.
Trim the second image part way as shown below. This makes it easier to index and position the second pressing. Lou made four targets which I tried also but did not need. After the second pressing has cooled, peel off the backing and now you should have a nice flag that can be trimmed and folded (wrinkled) or whatever you decide to do with it.
A couple comments about ‘mistakes’. If the flag has printed words, print one image with the mirror image of the words and deleted the words on the second side. It is very difficult to align both sides.
Be sure to align front and back in the same order. The blue admiral flag below was flipped the wrong way and the result did not look like stars.
-
Modeler12 got a reaction from Marcus.K. in The Kit-Basher's Guide To The Galaxy
Steve, you present several interesting ideas. Keep it up.
However, the 'crumbled aluminum can' idea was not mine to start with. It was an old one proposed by . . .
I don't remember.
What I suggested was to use very thin cloth and go from there per: http://modelshipworld.com/index.php?/topic/89-making-cloth-flags/?hl=%2Bmaking+%2Bflags
More importantly: I wish all of you people a Merry Christmas and a Happy New Year.
If Christmas is not on your agenda, I hope that your God or believe will allow us to pursue more friendship and common enterprises through this great forum and other venues.
-
Modeler12 got a reaction from EricWilliamMarshall in Grand Banks dory by Cap'n'Bob - FINISHED - 1:32 - SMALL
Bob, lapstrake is not only easier but much more authentic. I love what you are doing.
It reminds me of the little sailboat I had in the SF Bay. It was a 'junior folkboat' (built in Denmark) and had mahogany lapstake planking on the hull. The 'problem' was that the outside was varnished and we had to haul her out twice a year to redo the hull and topsides. Lot's of sanding, but boy did it get some attention!!!
Are you familiar with the dories used by Powell when he went down the Colorado River? They look about the same?????
-
 Modeler12 got a reaction from peterbrowne in What are your most interesting and/or useful books
Thank you all for all those suggestions. I will try to find all or most of them through my library.
When I posted this thread I was thinking of where I was a couple years ago when I started this model ship building. I had sailing experience, did some minor model building but was totally ignorant of all the terminology and the in-and-outs of old sailing ships. Since then many of you helped me with good references (such as Petersson's book on rigging).
So, what I had in mind were some books for beginners in this hobby. Something that could be used in addition to the plans and explanations provided in kits.
I found one book that serves that purpose (at least in my opinion). It is 'The Visual Encyclopedia of Nautical Terms Under Sail'. The tittle continues with 'An illustrated guide to the language of the great sailing ships and the men aboard them'.
The book is full of great drawings, photographs, explanations of the various parts of sailing ships, etc. etc. Although not related to modeling, it even has a wonderful section about navigation, its history, tools and the mathematics involved. Below is one page picked at random.
-
.thumb.jpeg.d239701c2f7247a100a3f432822c4eda.jpeg) Modeler12 got a reaction from rkwz in A video about making metal hooks and . . . . .
Modeler12 got a reaction from rkwz in A video about making metal hooks and . . . . .
I have made a short video about making various parts out of metal wire. Some of the topics I included seem to be of interest right now, but I also included some hints, how to blacken metals and a few others.
I show what I typically do and don't want to give the impression that it is the best or only way, of course. In fact, I welcome suggestions and your input about how to . . . .
After all, that is what this forum is all about.
-
 Modeler12 got a reaction from flying_dutchman2 in Seawatch Books outside of the US
Ok how about this?
You pick the book you want to buy, let me know and I buy it for you in the US. I receive it and open the book and look through it, put it in a postal box and send it to you in Europe as 'used book' estimated value $8. Postal rate priority mail $12.35. What and where do the import duties come into play? Would your postman collect?
I know this is rather naive, but could it work?
-
 Modeler12 got a reaction from clogger in The Kit-Basher's Guide To The Galaxy
A word about needle threaders.
They are fine if the hole you want the line to go through is big enough. However, if you are using the tiny blocks for rigging the hole is just about the diameter of the line. That means it is impossible to pull the doubled line plus wire through. Rigging the blocks for a cannon is one example.
I have given up on needle threaders a long time ago. Instead I put a tiny drop of CA glue on the end of the line and smear it along for about 1/2 inch. It only takes ten seconds or so and you can clip the stiff end of the line at an angle to give it some body and a point. It should slip right through.