petervisser
-
Posts
578 -
Joined
-
Last visited
Content Type
Profiles
Forums
Gallery
Events
Everything posted by petervisser
-
 Fantastic progress Julian. She looks spectacular! Peter
 -
Beautiful work! So much intricate detail to admire. Looks like a real labour of love. Congratulations on such a fine build! Peter
- 97 replies
-
- 1
-

-
- Corel
- Große Jacht
- (and 2 more)
-
Well done Jerry! Congratulations on your fine Bounty! Peter
-
Quite an array of yards! As with any stage in a model of this type, it's easy to be overwelmed by all the major tasks involved in the model's completion. But you're making great progress, judging by your build log. I look at it as taking bite size pieces and before long another stage of the build is complete! All the best going forward! Peter
- 200 replies
-
- 1
-

-
- Flying Cloud
- Mamoli
- (and 1 more)
-
Always a pleasure to see the added detail you have added to your Cutty Sark Ron. Al;ready looking forward to the next installment. Peter
-
Congratulations on your very fine Cutty Sark! A thing of beauty to be sure. Good to see it under glass and well protected from dust and inquisitive fingers.😉
-
Just amazing what you have done to add such fine detail to your Cutty Sark! I visited the CS in 1998 before the fire. At the time the model was not really on my radar. I would love to see her again, despite the new arrangements of her display. An elegant example of the evolution of the ship. Your model is also a prime example of what can be accomplished in this amazing hobby! Looking forward to your rigging efforts! All the best, Peter
- 103 replies
-
- 1
-
-
- Cutty Sark
- Sergal
- (and 1 more)
-
Truer words have not been said! Your ten points should be included in every model ship kit. Thanks for the insights Jared! Peter
- 431 replies
-
- 1
-
-
- Flying Fish
- Model Shipways
- (and 2 more)
-
Congratulations Jared on your fine model. A real accomplishment for sure! Time to splice that mainbrace! Cheers, Peter
- 431 replies
-
- 1
-
-
- Flying Fish
- Model Shipways
- (and 2 more)
-
An amazing piece of work Rick. A stunning model so far. And the pictures really show off your workmanship. Peter
- 360 replies
-
- 1
-
-
- Flying Fish
- Model Shipways
- (and 1 more)
-
Hi Rob. I find this scale manageable but 1:96 scale would be too challenging for me. I also have a frigate in 1:75 scale which I would love to display next to CS but I’m getting ALOT of pushback from a certain someone about the so called clutter of ship models around the house. Girls….😉
- 207 replies
-
- 2
-

-

-
- billing boats
- cutty sark
- (and 1 more)
-
Hi Rob. It is the Billing 1:75 kit of a rather old vintage produced in the 70’s I’m guessing. The scale is hiding in the title of the log.😉 Thanks for looking in. Cheers, Peter
-
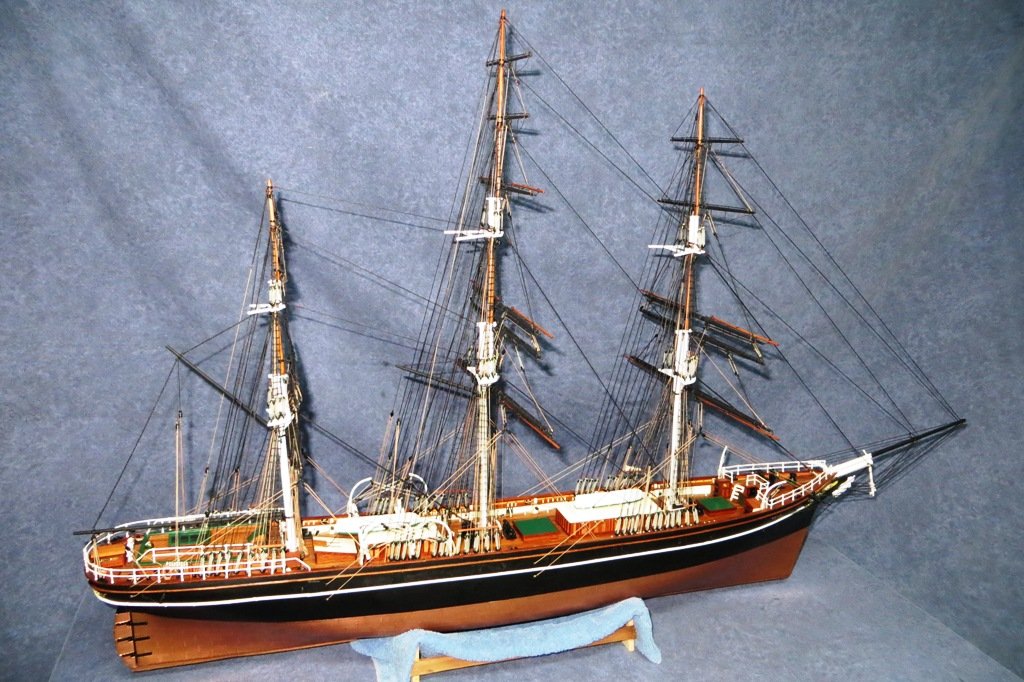
After tying about 900 clove hitches to complete the ratlines, the model is ready for the last phase of rigging. Phew! I can now begin rigging the braces at last. What with the hot weather here in Victoria, my workshop which is semi-sub ground level is one of the coolest rooms in the house. This has allowed me to work on the model, despite the sunny weather. Here's a photo showing the current status...
- 207 replies
-
- 10
-
-
-
- billing boats
- cutty sark
- (and 1 more)
-
Like you I am starting to do minor repairs to my model as the project nears the end. What with the complexity and vastness of the rigging it is so easy to snag yards and rigging when concentrating on another aspect of the model. Nice save with your predicament! I am also nearing the stage of installing the braces to the yards and now that I have seen yours, I'm getting antsy to start mine! All the best with the finishing touches, she looks great! Peter
- 431 replies
-
- 1
-
-
- Flying Fish
- Model Shipways
- (and 2 more)
-
Wowser, that is a stunning wheel. An excellent addition to an excellent model. Way to go! Peter
- 103 replies
-
- 1
-
-
- Cutty Sark
- Sergal
- (and 1 more)
-
Looking really good! I think the chain really adds some character to the rigging. Are you adding sails to your model? I'm guessing not, as the yards are attached to the masts already. All the best going forward. Peter
-
Hi HOF. Just saw your latest post and see that you're rigging anchors. You might want to take a look at Prince de Neufchatel by Coyote_6 – Constructo – 1/58 scale - American privateer. I ran across his build log and he has rigged his just recently. I will be following his procedure which appears to me as being the most accurate method. Cheers, Peter
- 200 replies
-
- 1
-
-
- Flying Cloud
- Mamoli
- (and 1 more)
-
Thanks Steve, for the mini tutorial on how to stow an anchor. I was pondering how I might mount the anchors on my own model, and presto, I ran across your build log. Cheers, Peter
-
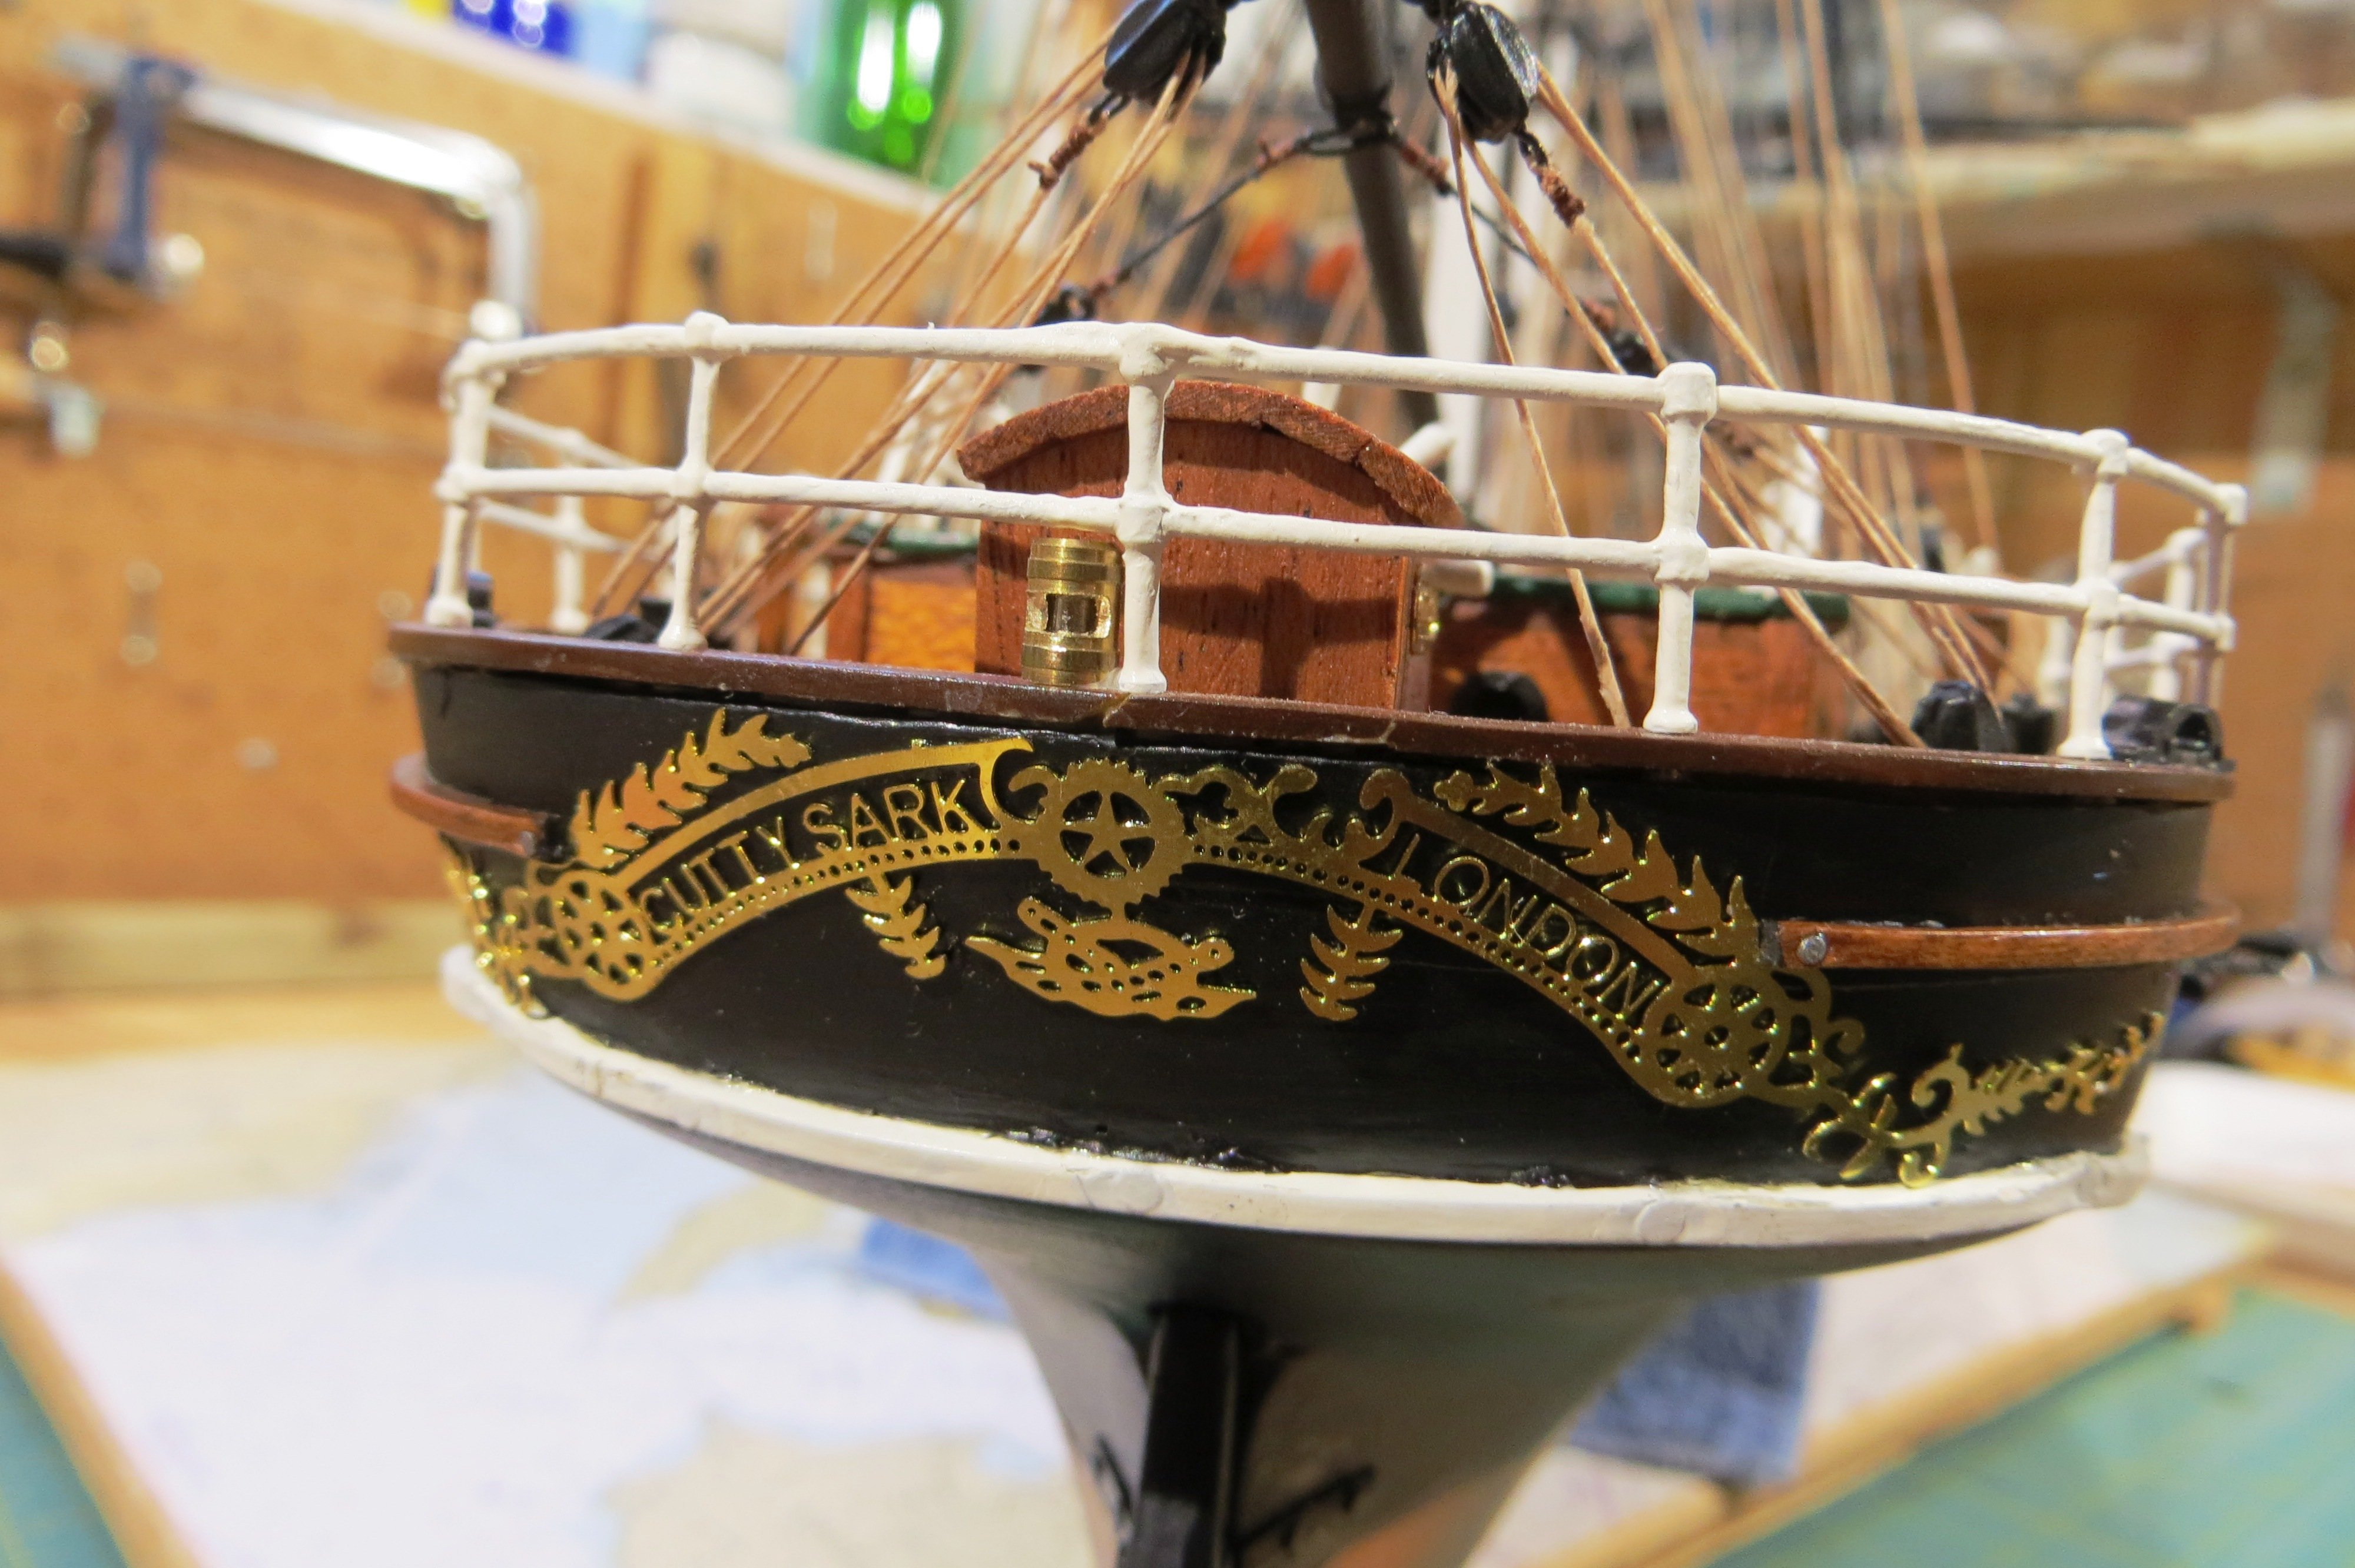
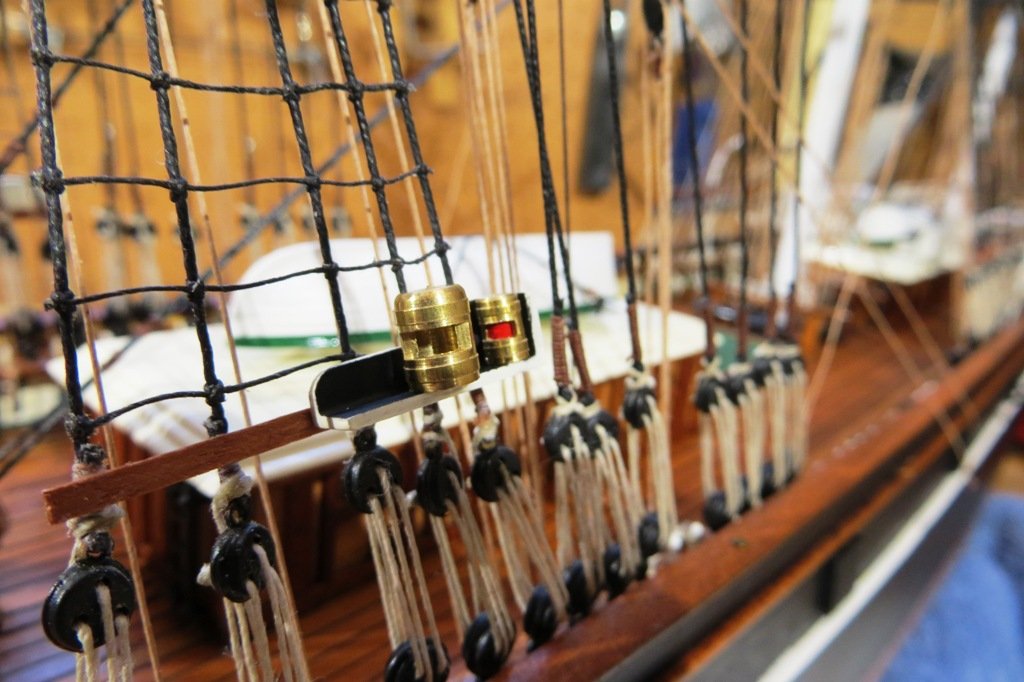
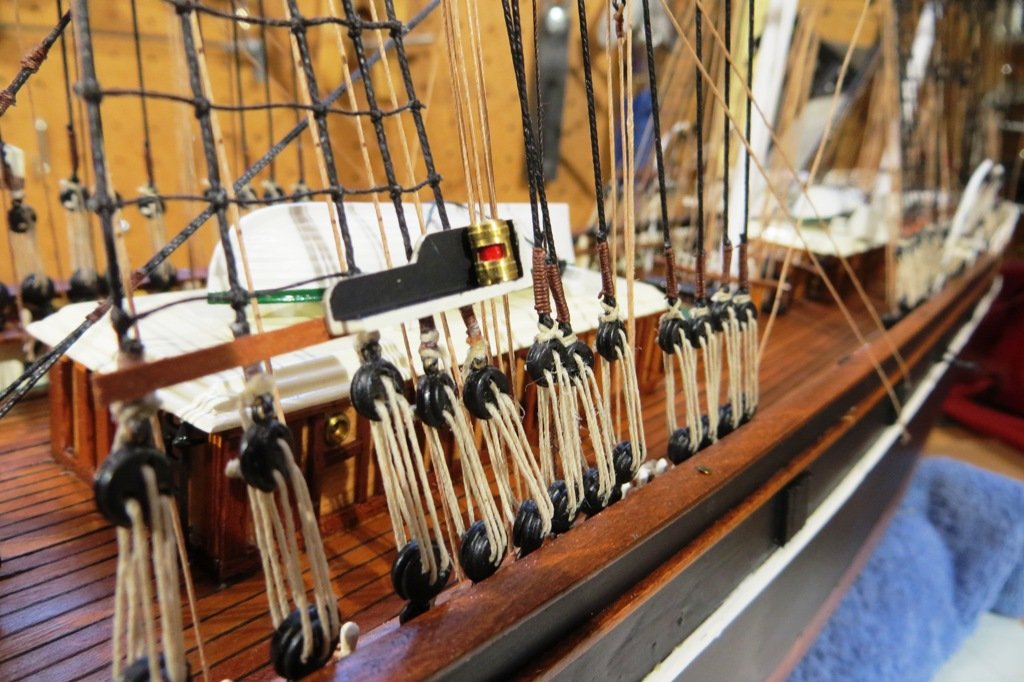
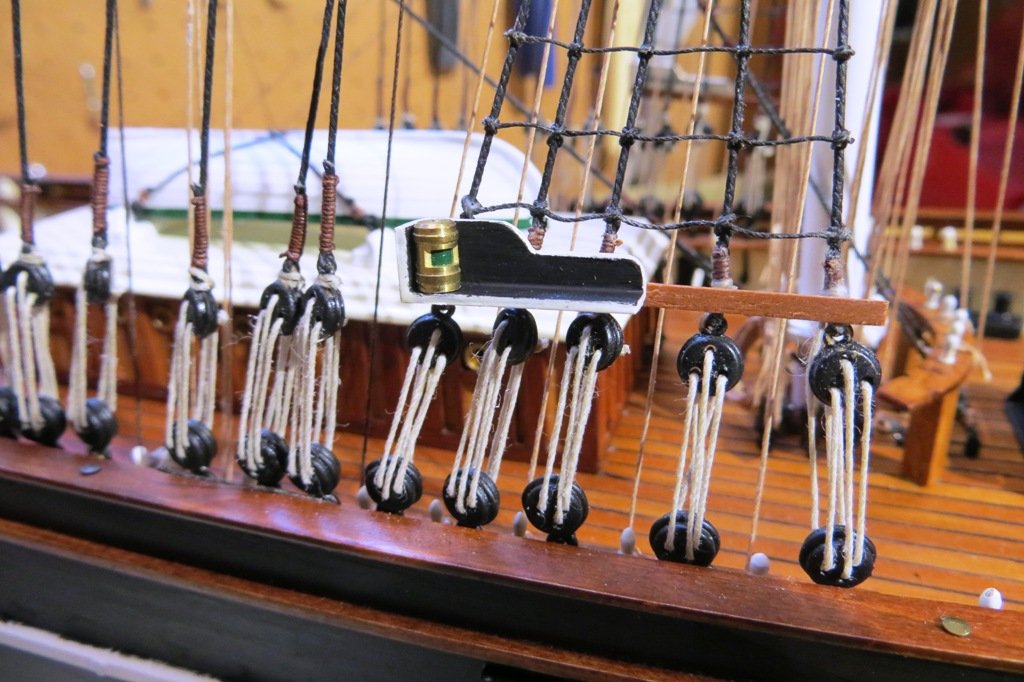
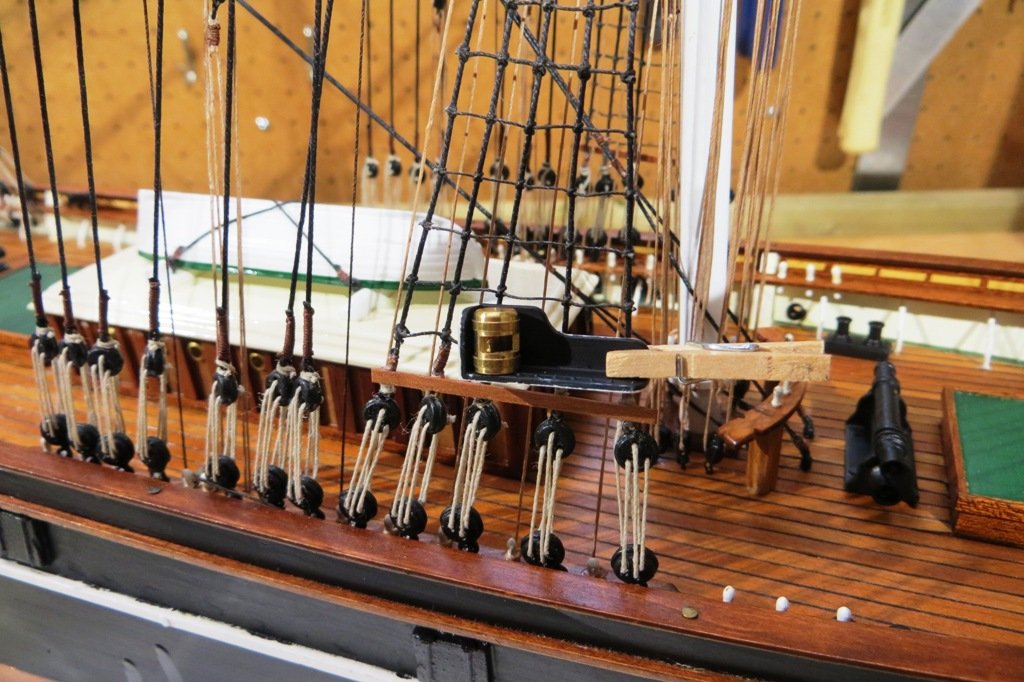
Work continues albeit at a slower pace now that spring has arrived. Between the installation of the running rigging, I have added the running lights which the Cutty Sark would have shown in her early days. The kit did provide 2 lanterns and sidelight screens, but they were not of the correct scale. This became evident when dry fitted onto the shrouds. Thankfully, I had some brass lanterns which were scavenged at some point and they seemed to be the perfect size. The screens were therefore modified and reduced in size accordingly. The kit did not provide a sternlight which to me seems a major oversight. Here are some photos of the results.

- 207 replies
-
- 10
-
-
- billing boats
- cutty sark
- (and 1 more)
-
That said, I'm not really prepared to purchase copies and mail them overseas as I am not sure how I would process payments. I am but a simple ship model builder...😉
Peter
-
Hi Mary. The bookstore where I purchased my copy doesn't normally mail books or magazines I believe. People normally visit the store to order and pick up their purchases. They had about a half dozen copies when I was in the store, so not a huge stock. I could ask them if they expect more if you like.
Cheers,
Peter
-
I was surprised to find this publication in a local bookstore in Sidney, B.C. What a treat as I wasn't willing to pay the delivery cost. Needless to say it is now in my workshop where it will be put to good use. Thanks to all the contributors for this collection of "how-to's". Very much appreciated! Peter
-
A stunning piece of work Patrick. Well done! Peter
-
So the rigging journey begins! It's been a treat to watch your model progress. I'm sure your masting and rigging will also be of a high standard. All the best going forward. Peter
-
Did I ruin my brush?
petervisser replied to MBerg's topic in Painting, finishing and weathering products and techniques
For a deep clean of your paint brushes, you might want to try TSP which you can purchase at Canadian Tire, seeing as you're in Canada. Give give the paint brushes a soak overnight using the recommendations on the container and rinse with water. I hope this is a help. Cheers, Peter