HOLIDAY DONATION DRIVE - SUPPORT MSW - DO YOUR PART TO KEEP THIS GREAT FORUM GOING! (Only 51 donations so far out of 49,000 members - C'mon guys!)
×


petervisser
-
Posts
574 -
Joined
-
Last visited
Content Type
Profiles
Forums
Gallery
Events
Everything posted by petervisser
-
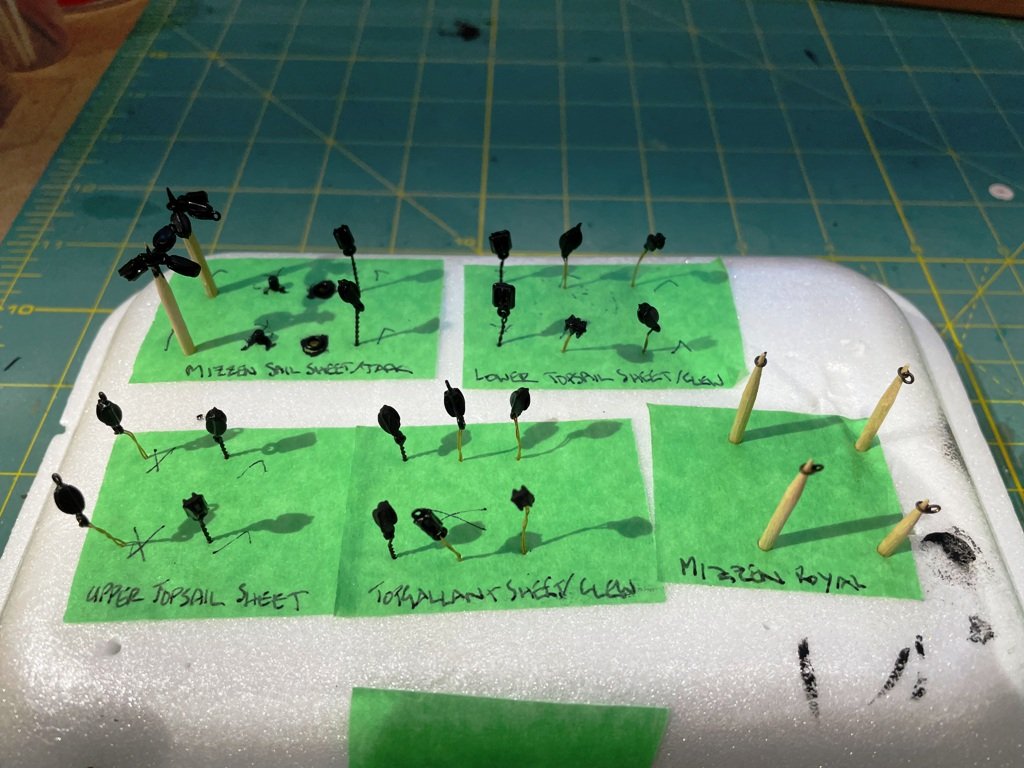
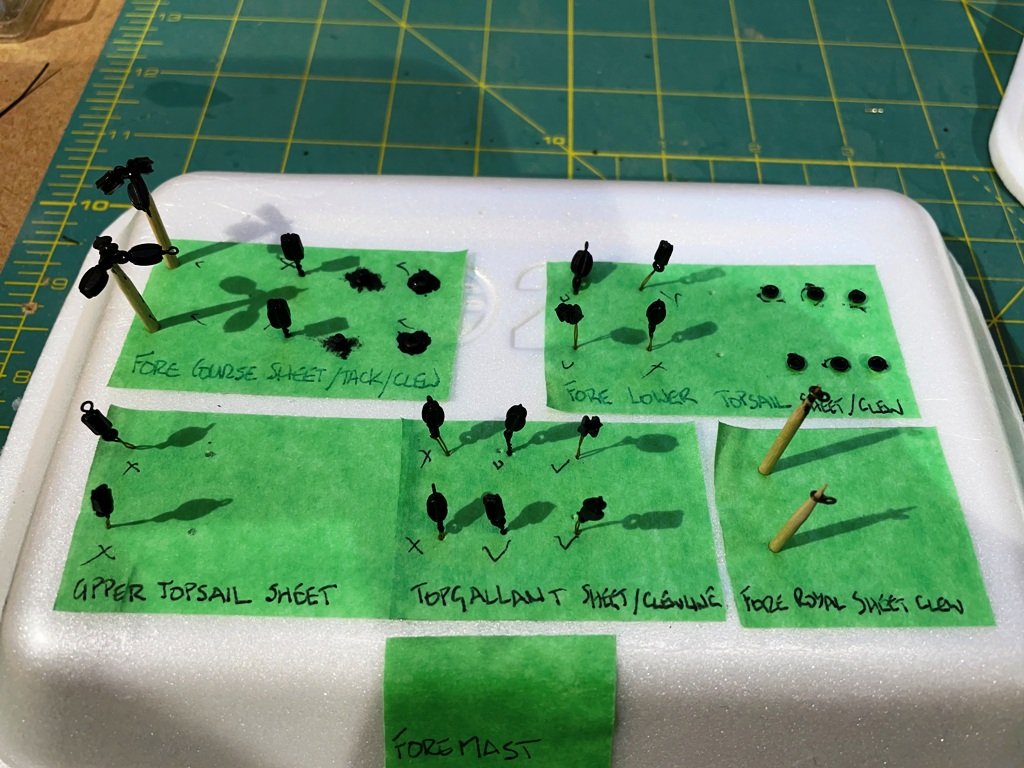
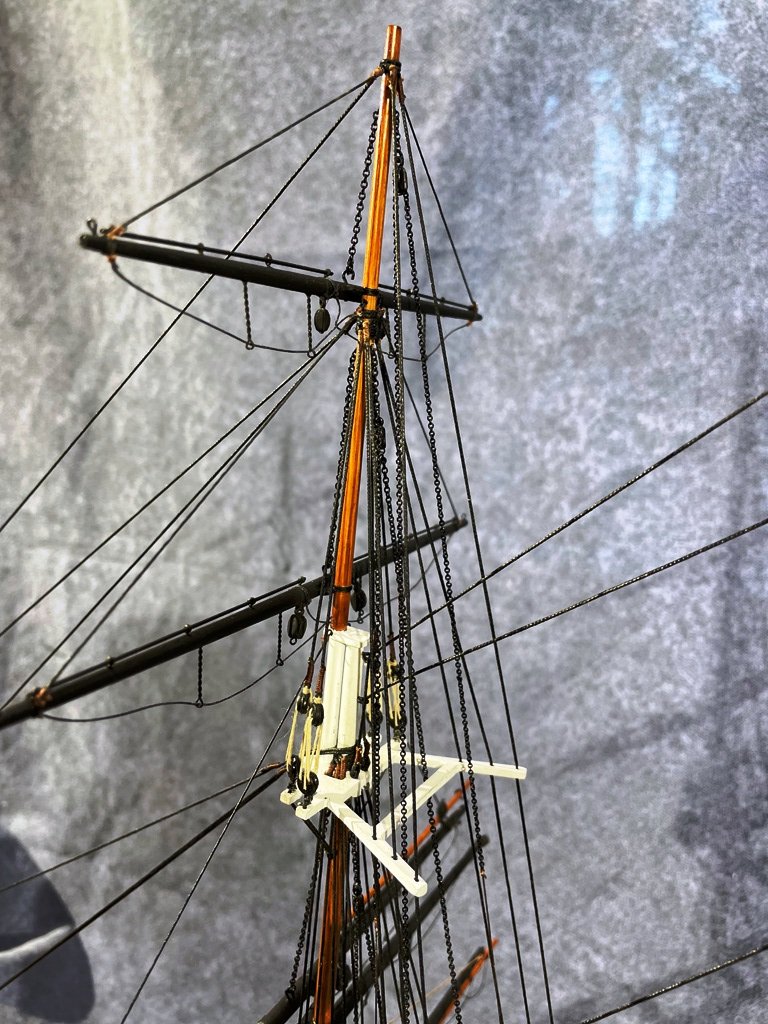
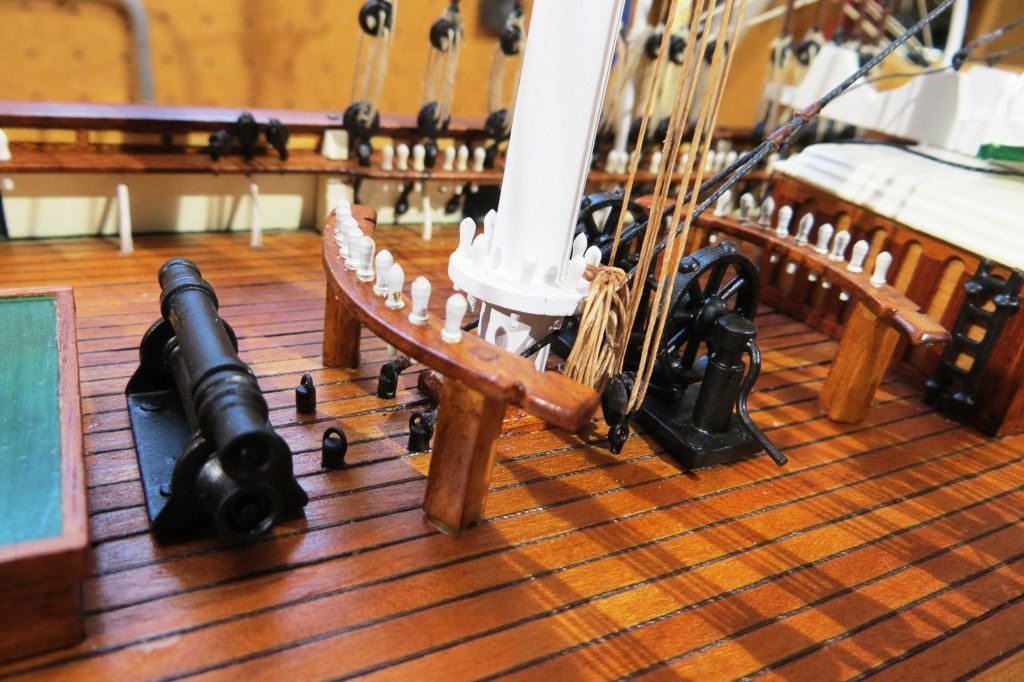
 On to the next phase of rigging the yards. I have prepped all the blocks for the sheets, tacks and clew lines. Because of the use of the stock blocks that come with a Billing kit, I have painted them all black with 2 coats of Humbrol paint. A bit tedious to say the least but worth the effort. There are also a number of coils ready to hang from the belaying pins once the rigging starts.
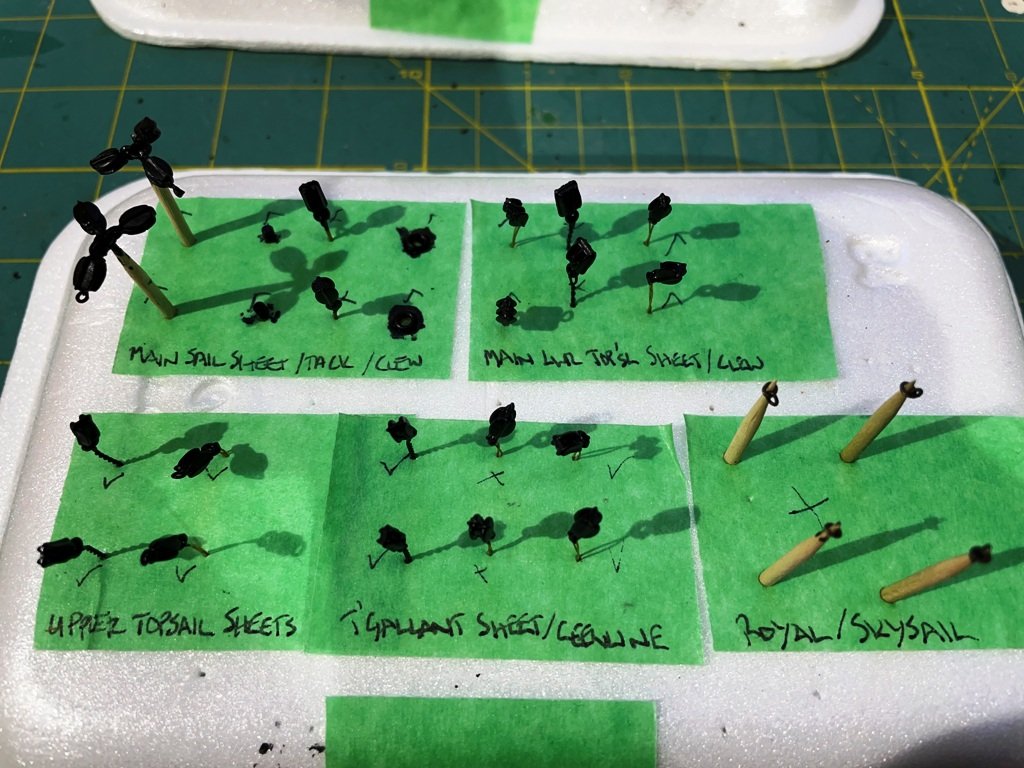
- 207 replies
-
- 5
-

-
- billing boats
- cutty sark
- (and 1 more)
-
It’s always rewarding to see a tall ship get tall! There’s an amazing amount of prep work in assembling the masts and yards but you have a good handle on that. All the best with the rest! Peter
-
Congratulations on your fine model. You did a masterful job and she looks terrific! You are a brave builder to put a full suit of sails on. It doubles the amount of rigging and at this scale it is not the easiest to reach all the areas as you point out. But the results look amazing. Well done! Peter
-
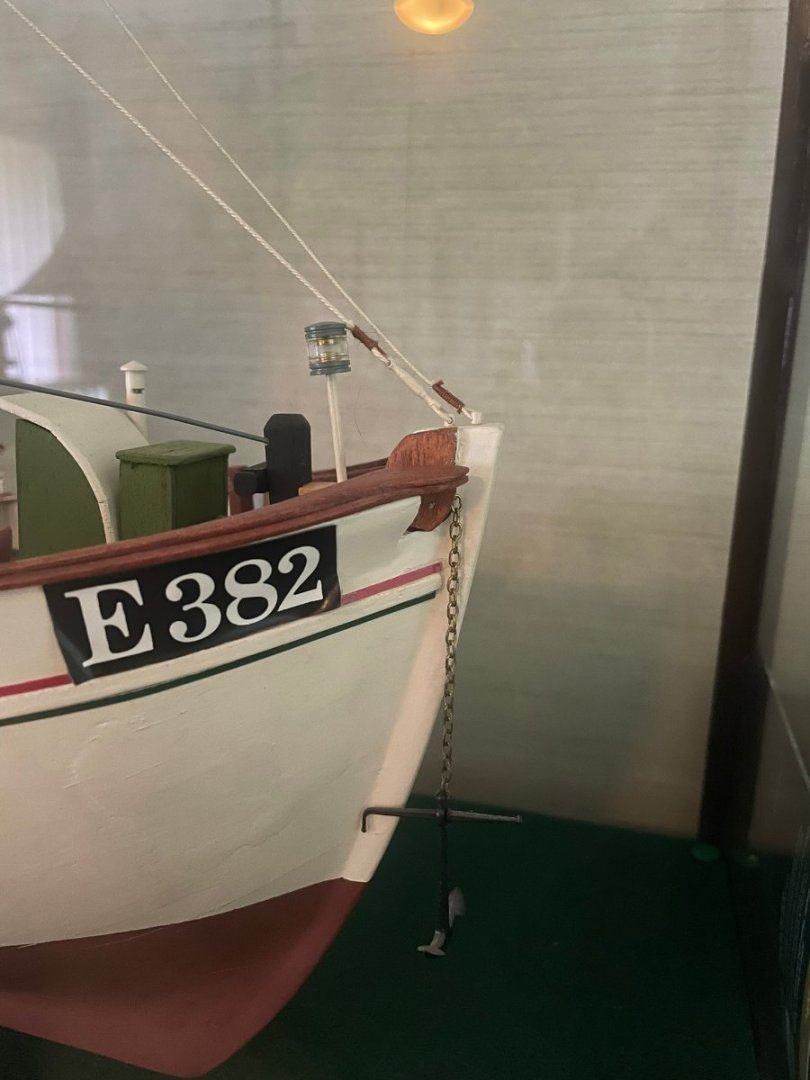
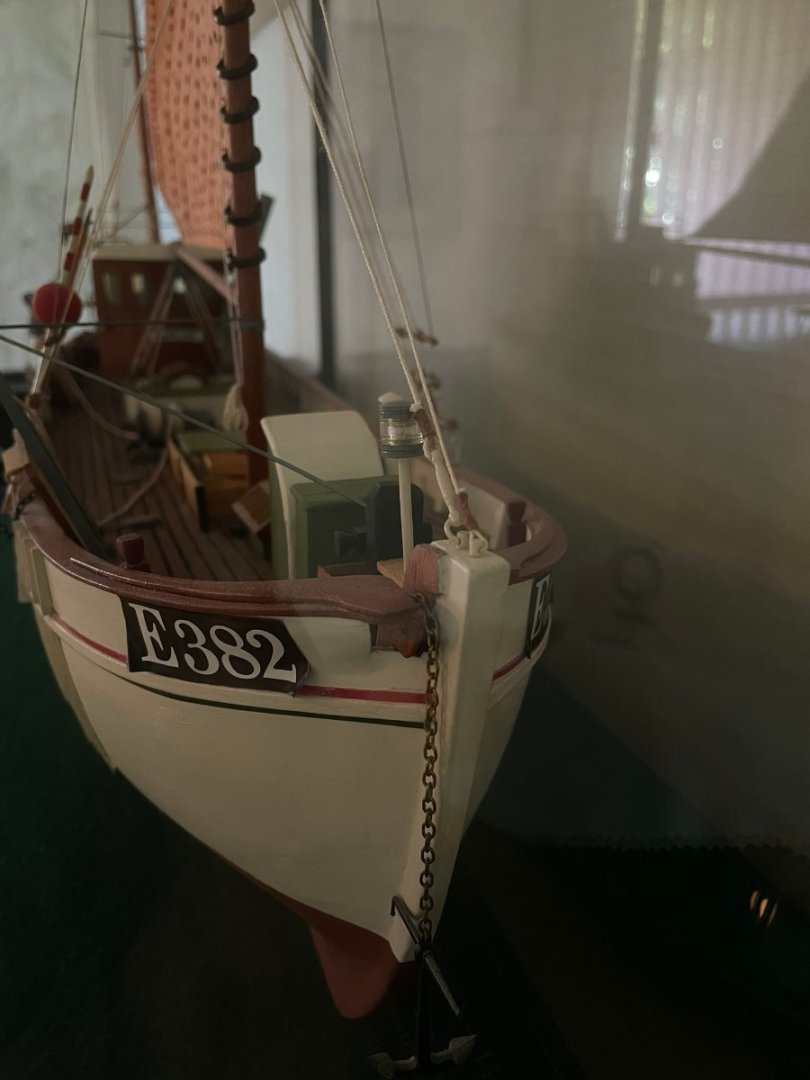
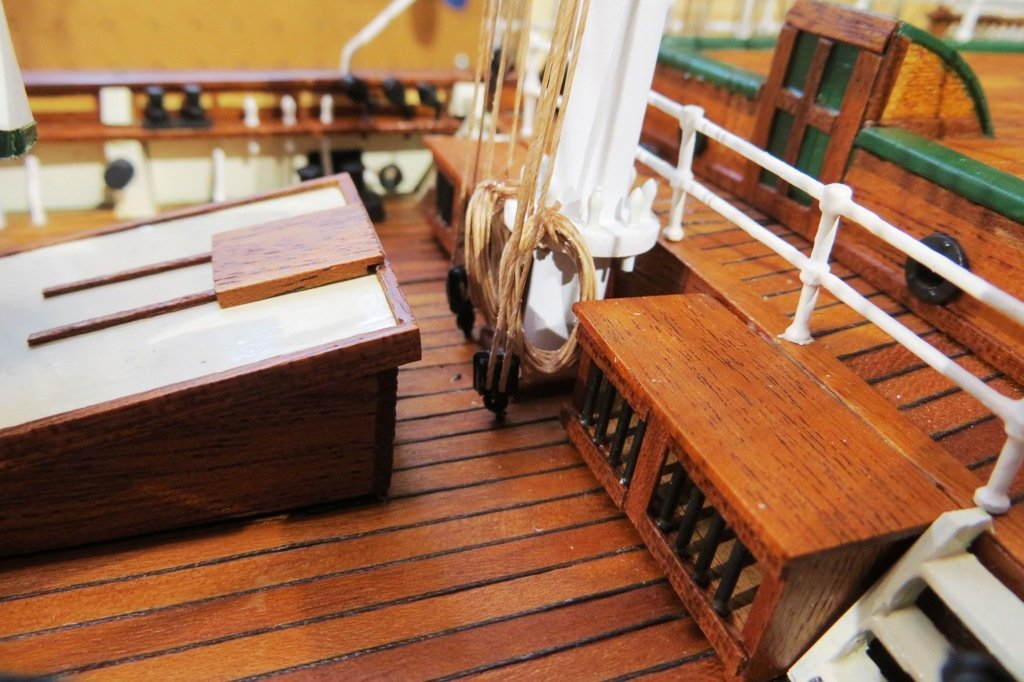
Hi Felix and welcome to MSW. I too started this hobby with a Billing kit, the Mary Ann and have been hooked ever since. There is another reason for the 6mm gap as you call it between the outer edge of the planking and the bulwark. It is called a waterway. It creates a shallow channel to carry water off the wood decking and allows the water to flow towards the scuppers. All the best with your new project. It looks like a great introduction to this fantastic hobby. Peter
- 9 replies
-
- 1
-
-
- Esperance
- Billing Boats
- (and 1 more)
-
Hi Ron. As for the yards, they are spray painted a Matt black. I think the flood lights I use and the iPhone camera may have played tricks with the photos. Although I am trying to replicate the rigging of the CS, I have taken a couple of minor shortcuts regarding some of the fittings. This in turn may affect the run of some of the lines controlling the sheets and clew lines. I’m simply unable to manufacture the actual fittings in this scale and so have adapted the fittings I have on hand and made due. So be warned, this aspect of the model is a reasonable facsimile but not 100% accurate. Happy modelling! Peter
-
Amazing detail work on your deck fixtures uscharin! Your talent at fabricating these tiny appliances is outstanding. All the best going forward with this project. I’ll be following along. Peter
-
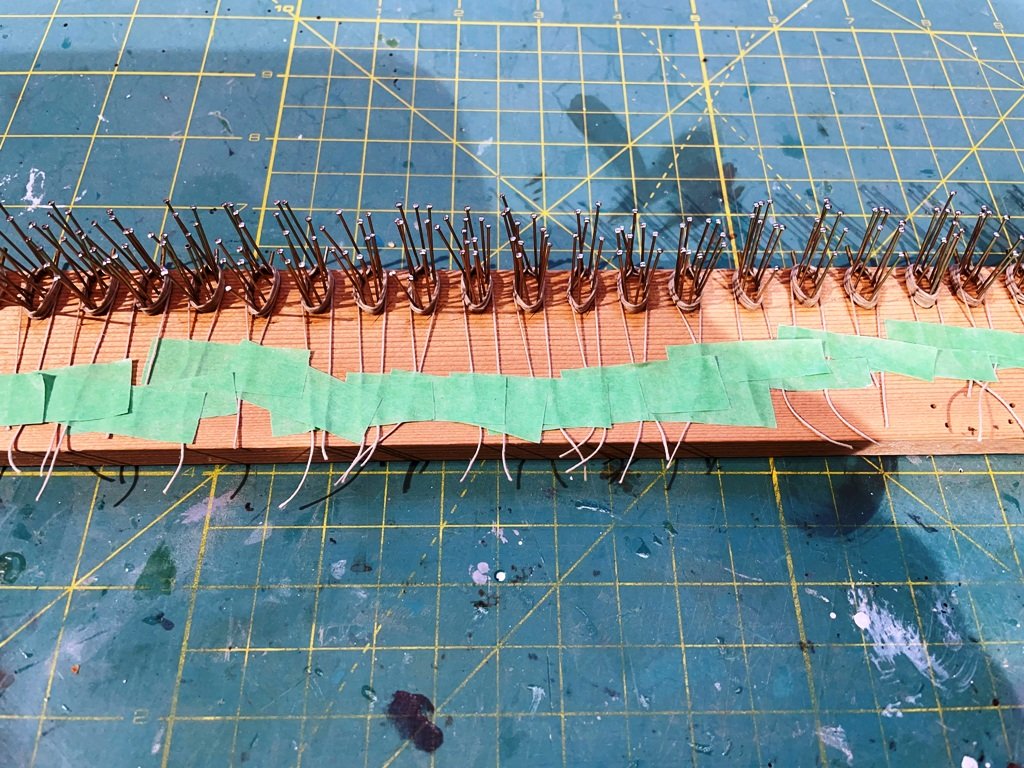
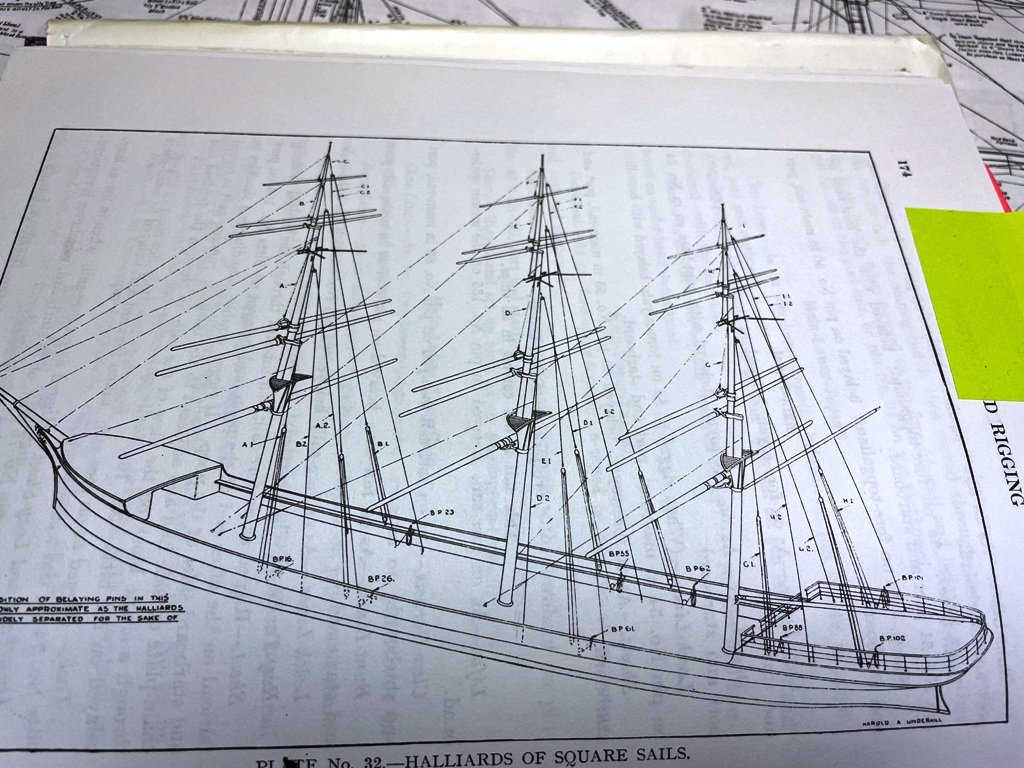
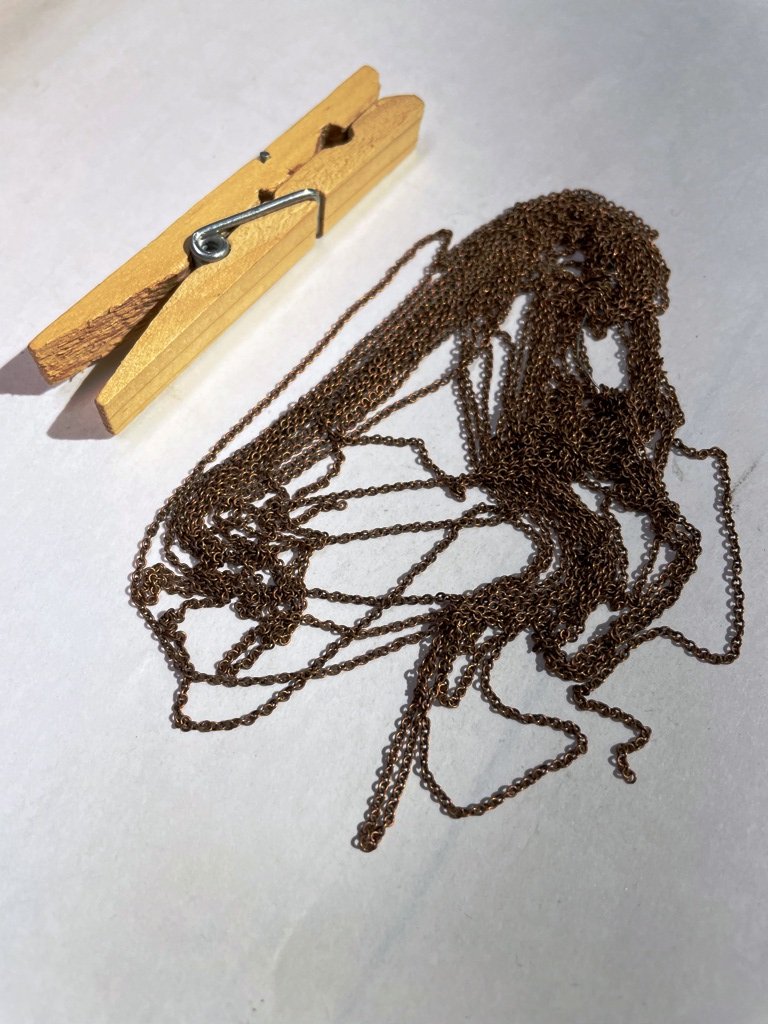
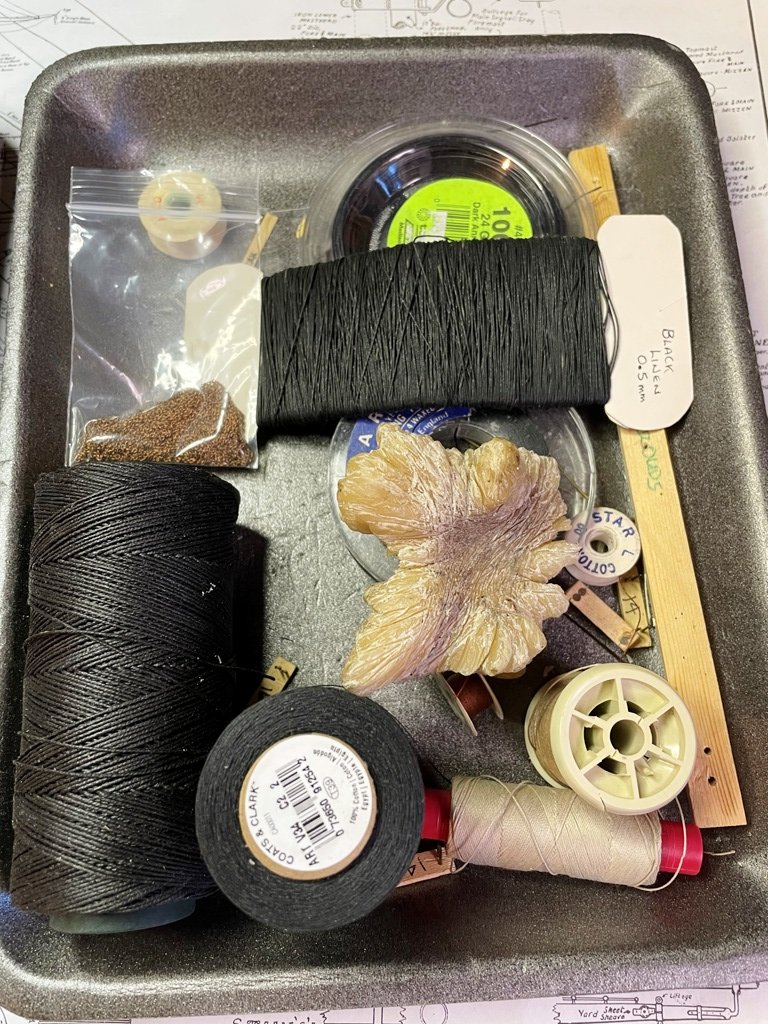
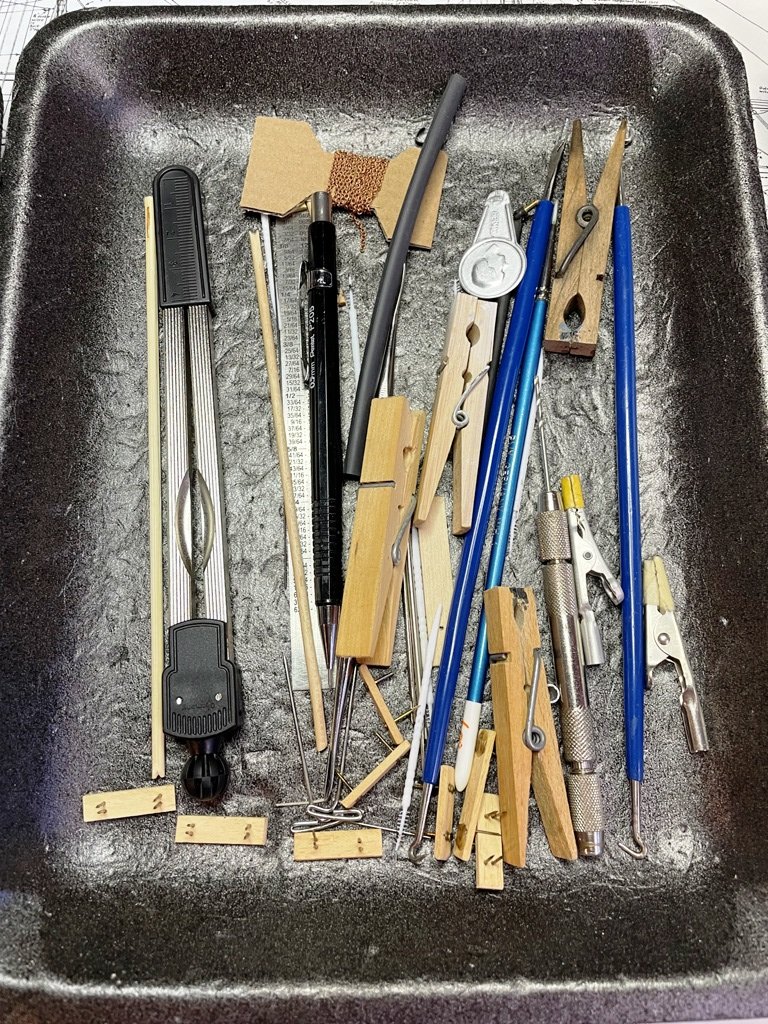
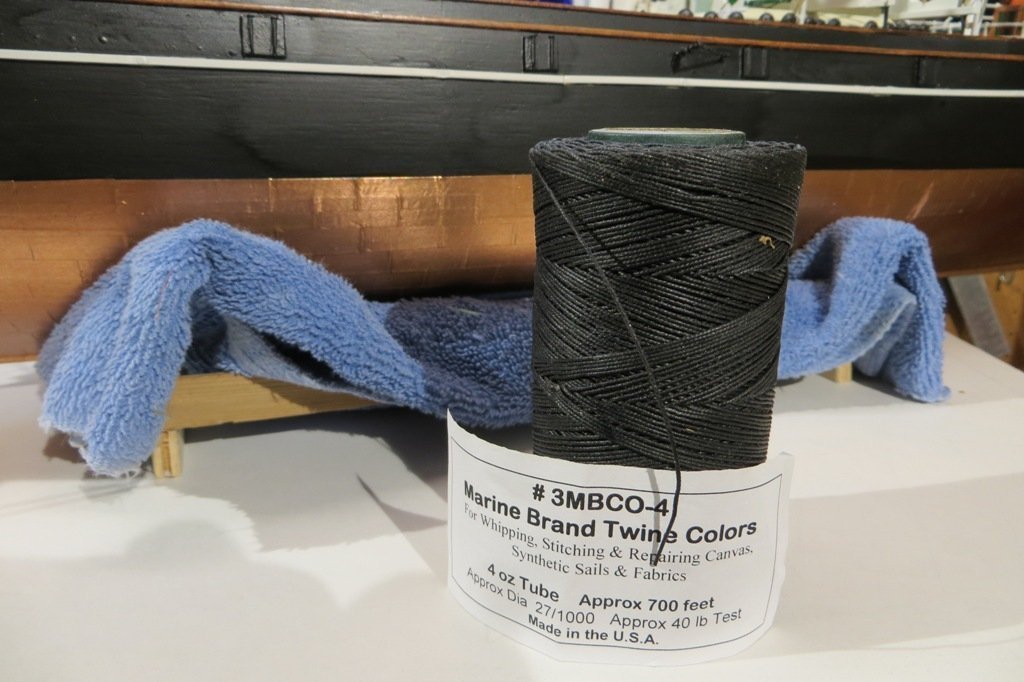
There are a fair number of tools and supplies necessary for rigging the model. Styrafoam trays are pretty handy in keeping sets of tools herded together and reduces the amount of time spent looking for the tool you need. My work bench is still a bit of a dog's breakfast at times but organizing it once in a while saves alot of foul language... I've also added a picture of the chain used on the model along with some reference material from Harold Underhill's book, Masting and Rigging the Clipper Ship and Ocean Carrier.

- 207 replies
-
- 5
-
-
- billing boats
- cutty sark
- (and 1 more)
-
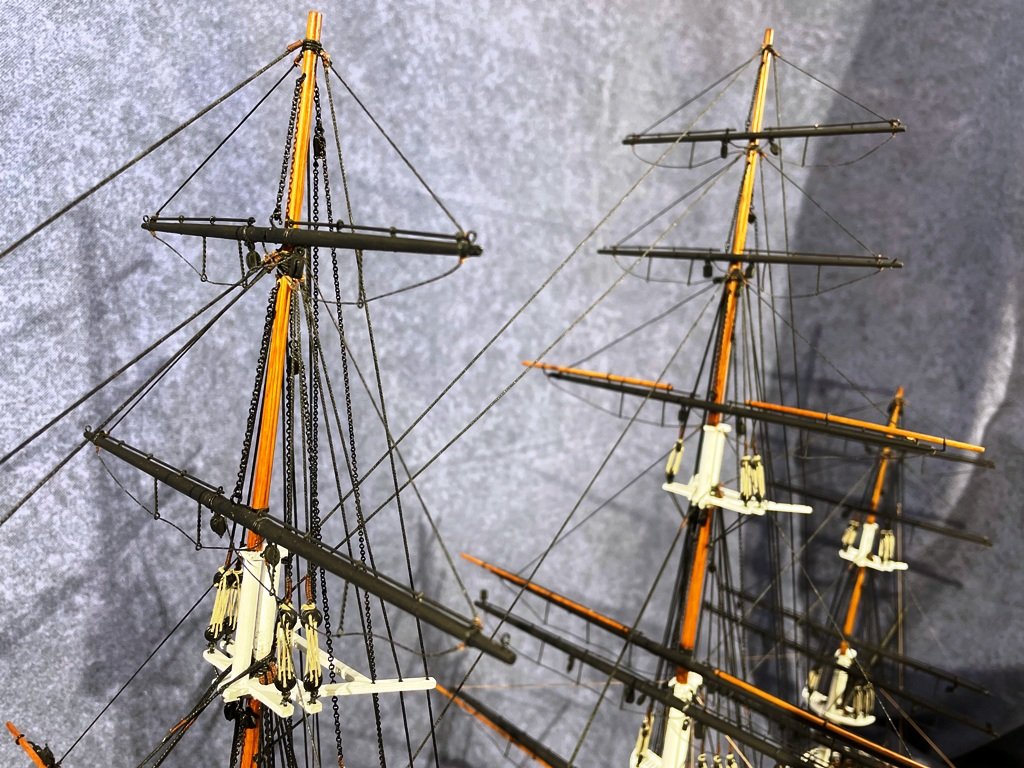
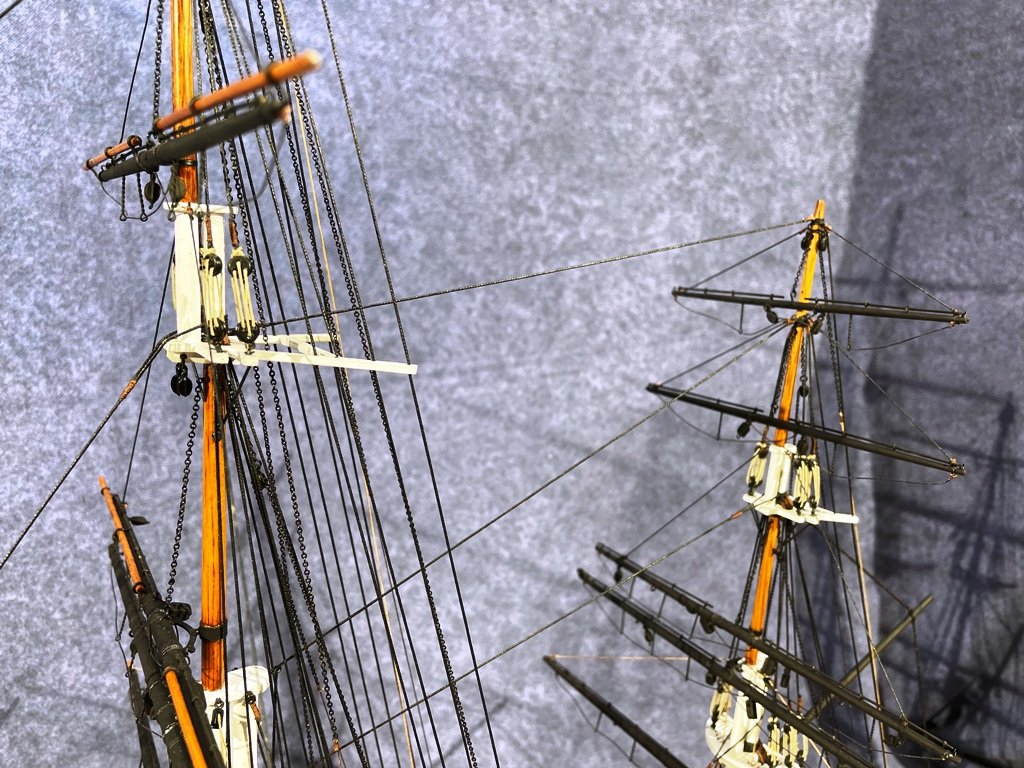
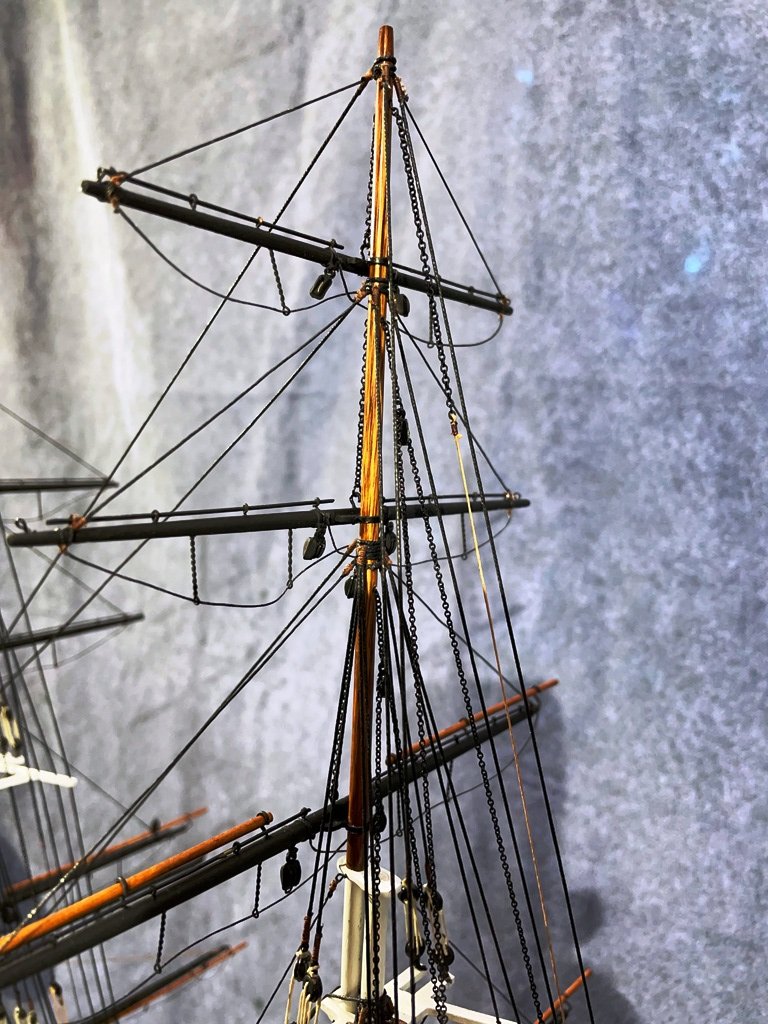
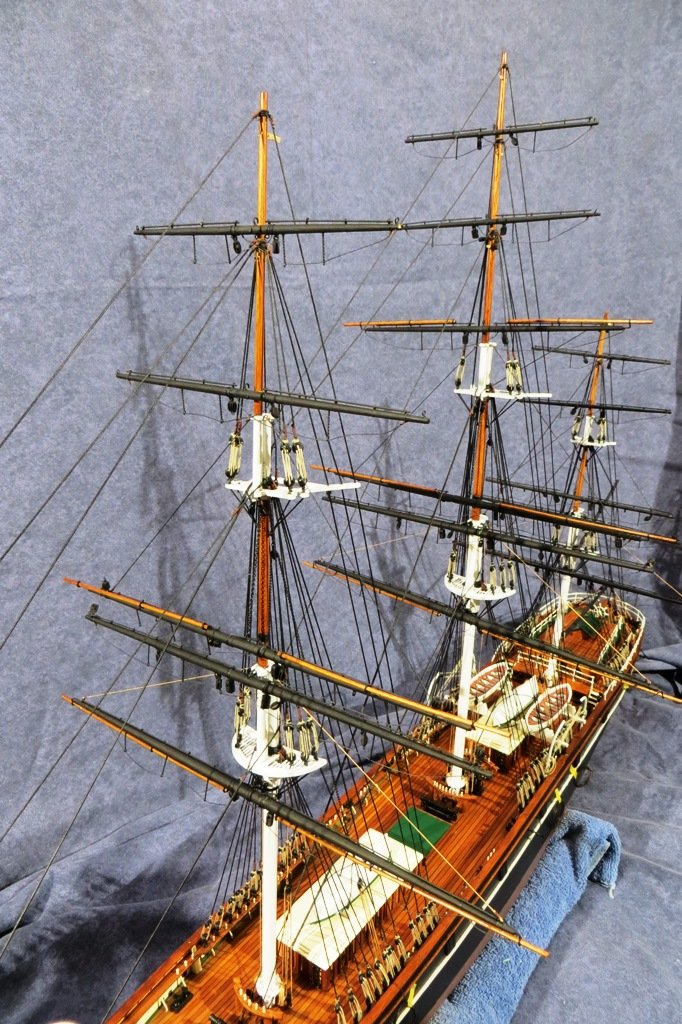
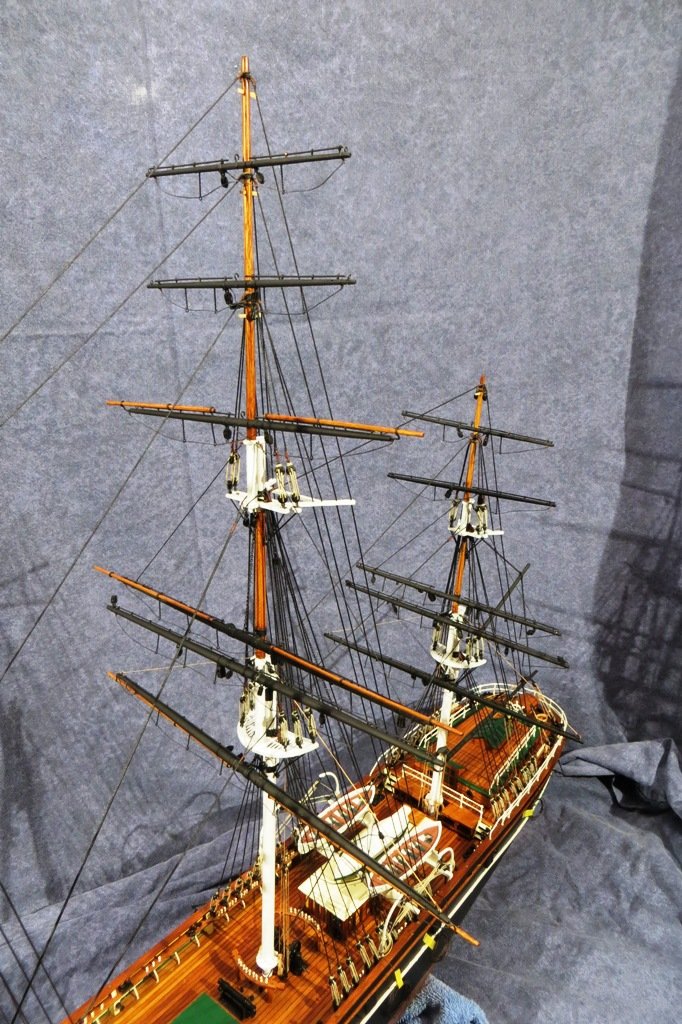
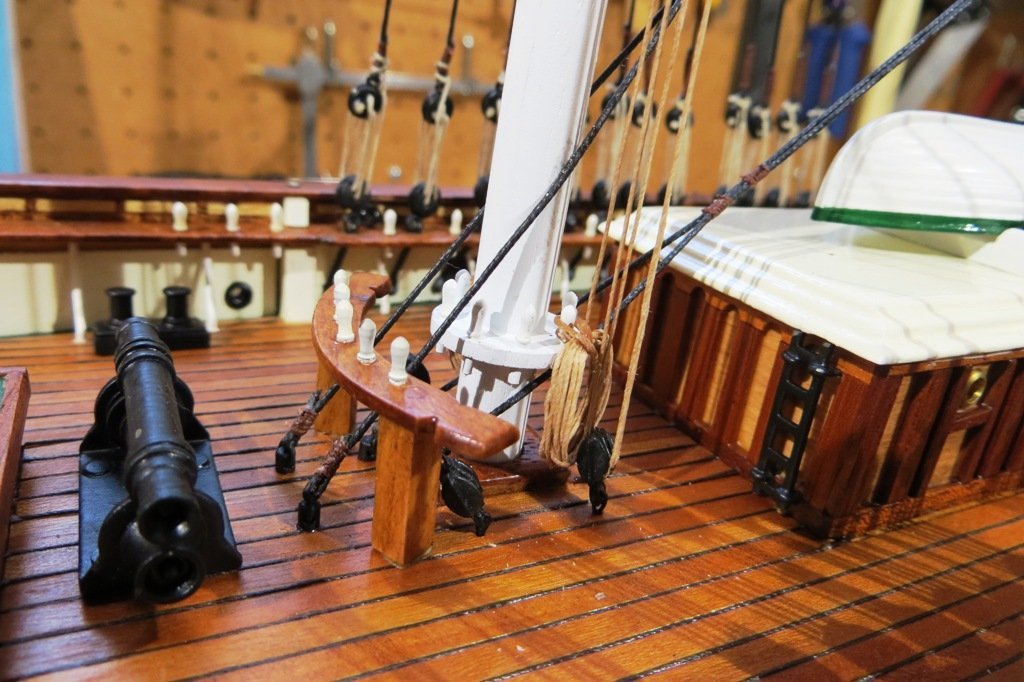
I've been a tad busier in my workshop of late which I'm pretty happy about. Since posting last time, all the yards above the upper topsail yards are hung and secured in place with tyes, halliards and lifts. I have used Longridge's and Underhill's books as references and the end result on my model is acceptable to my own satisfaction. The running rigging for the yards uses quite a bit of chain which is novel for me. I was able to source the chain needed at a local bead shop. It is some kind of brass alloy which I have painted black in situ after the yard is placed on the mast. I have found it easier to paint the chain on the model as the chain is taut and easy to access from each side. The next set of rigging to install will be the sheets, tacks and clew lines. I am trying to work from the centerline to the rails in order to have easier access to the belaying points. Therefore the ratlines will probably be the last bit of rigging to complete.

- 207 replies
-
- 2
-
-
- billing boats
- cutty sark
- (and 1 more)
-
Hi Julian. Congrats on your fine model. She turned out really nice. I like building this size model between bigger builds like your Friesland. It makes for a nice break of intricate, complicated repetitive steps. All the best with your next project! Merry Christmas! Peter
-
Greetings from a clueless Patrick O'Brian fan
petervisser replied to Galkar's topic in New member Introductions
Hi Galkar and welcome to MSW. Like you I am also an avid fan of Patrick O’Brian and his incredible body of work. I too have read the series several times and will likely read them again. As for the Sophie in Master and Commander, she is a fictional brig based on Cochrane’s Speedy and therefore has little resemblance to the actual brig. But like you, I also have a keen desire to build her. Therefore I have purchased Model Shipways Fair American which I believe to be a reasonable facsimile of the Sophie in M&C. They both have raised poop decks, and with a few tweaks, the Fair American can be made to resemble the brig depicted on the cover as painted by Geoff Hunt. All the best with your enjoyment of this amazing hobby. Cheers, Peter -
After another lengthy hiatus, work has resumed on my Cutty Sark. I left off work last spring after discovering I had made a somewhat serious error on some of the rigging of the masts. It has taken several months to reconcile these errors, and deciding whether to undo a substantial amount of standing rigging or leave well enough alone and charge on. I opted for Option B as the mistakes can only be noticed by me and an astute number of serious clipper ship aficonadoes on this website. 😉 I have fitted a number of the lower yards with ties and halliards and have now dry fitted the upeer yards on all three masts. I spent the last couple of days manufacturing collars for the trusses. Now I can continue rigging the yards with ties, lifts and halliards. Here are some pics showing all the yards in place , the upper ones being dry fitted.
- 207 replies
-
- 8
-
-
- billing boats
- cutty sark
- (and 1 more)
-
How to make signs to identify models on display?
petervisser replied to Dan Poirier's topic in Wood ship model kits
I'm with Glenn and bartley. I have acquired my nameplate from a trophy shop for a reasonable price. It is also a great way of including some pertinent info you might want to include with the name. Here is a sample...
-
Congratulations Ed on your very fine build of the NL. She is a real beauty. And no less so without the masting and rigging. Something I will be considering when I build this model one day. Cheers, Peter
- 48 replies
-
- 1
-
-
- norske love
- billing boats
- (and 1 more)
-
Hi Hostez, Wow, such a beautifully planked hull. Seems a shame to hide it under paint and copper tiles. That said, a black and copper hull look fantastic! All the best going forward! Peter
- 44 replies
-
- 1
-
-
- Cutty Sark
- Sergal
- (and 1 more)
-
A thing of beauty! Congratulations on your very fine model. Peter
- 95 replies
-
- 1
-

-
- flirt
- vanguard models
- (and 1 more)
-
Congratulations on a very fine model. She looks great! Peter
- 64 replies
-
- 1
-
-
- St. Roch
- Billing Boats
- (and 1 more)
-
Congratulations on a the completion of your beautiful model. Well done! Peter
-
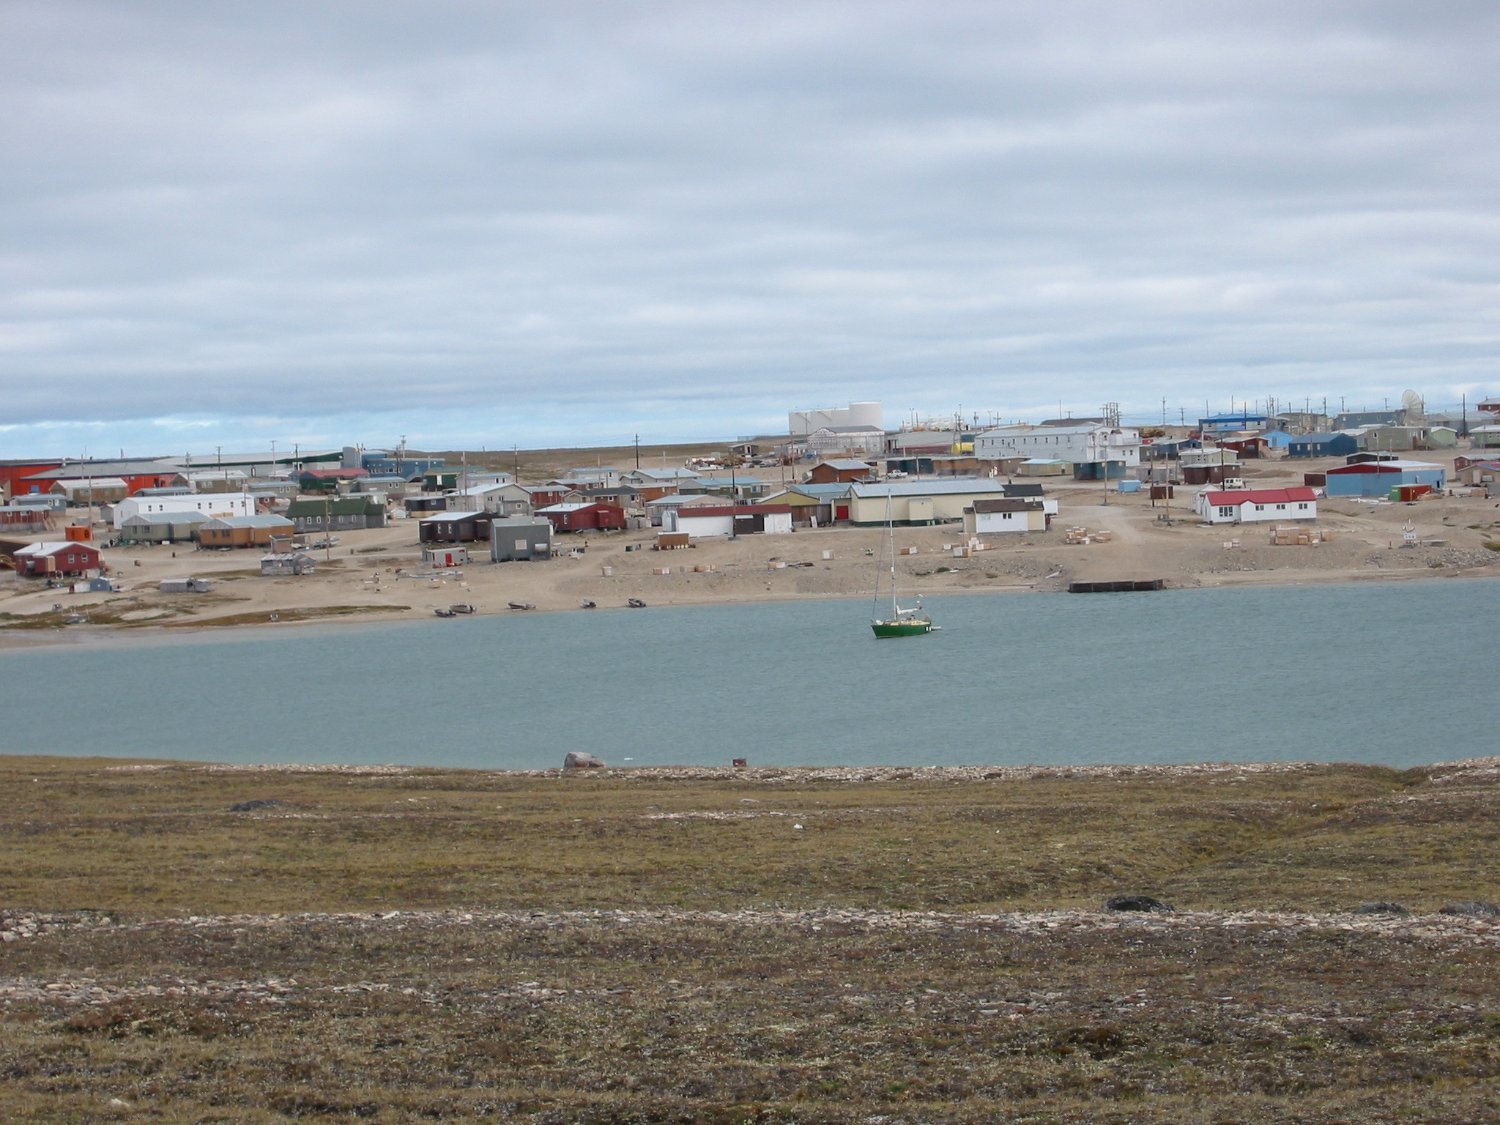
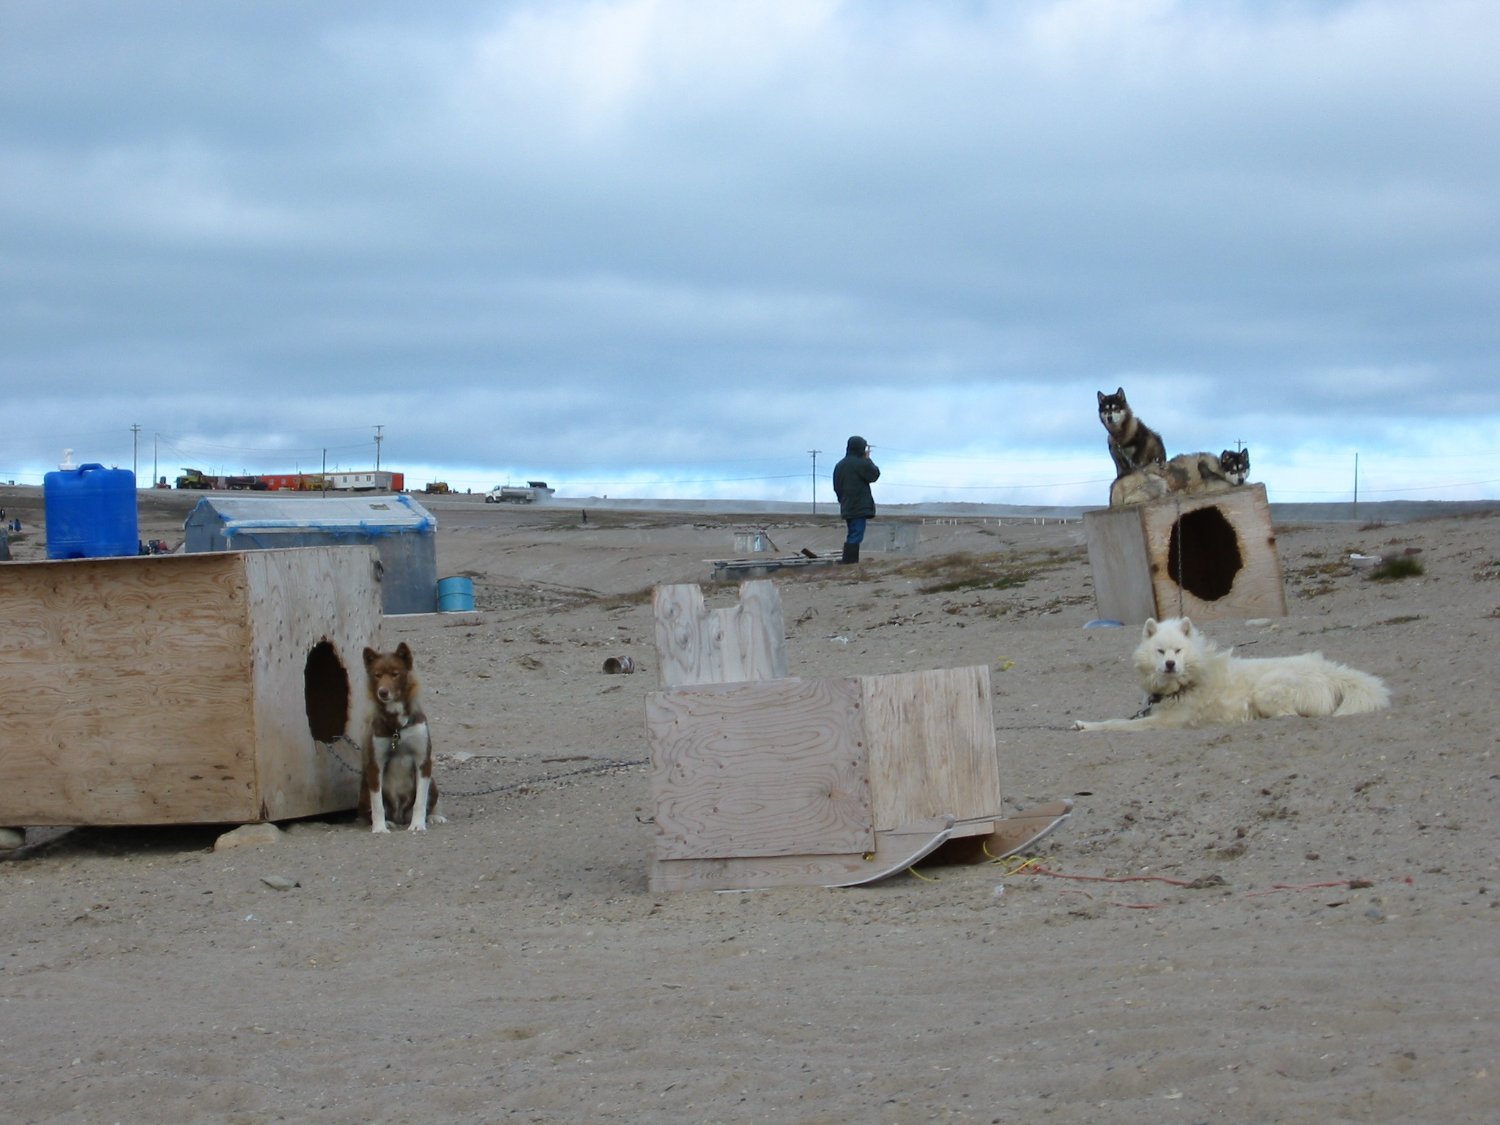
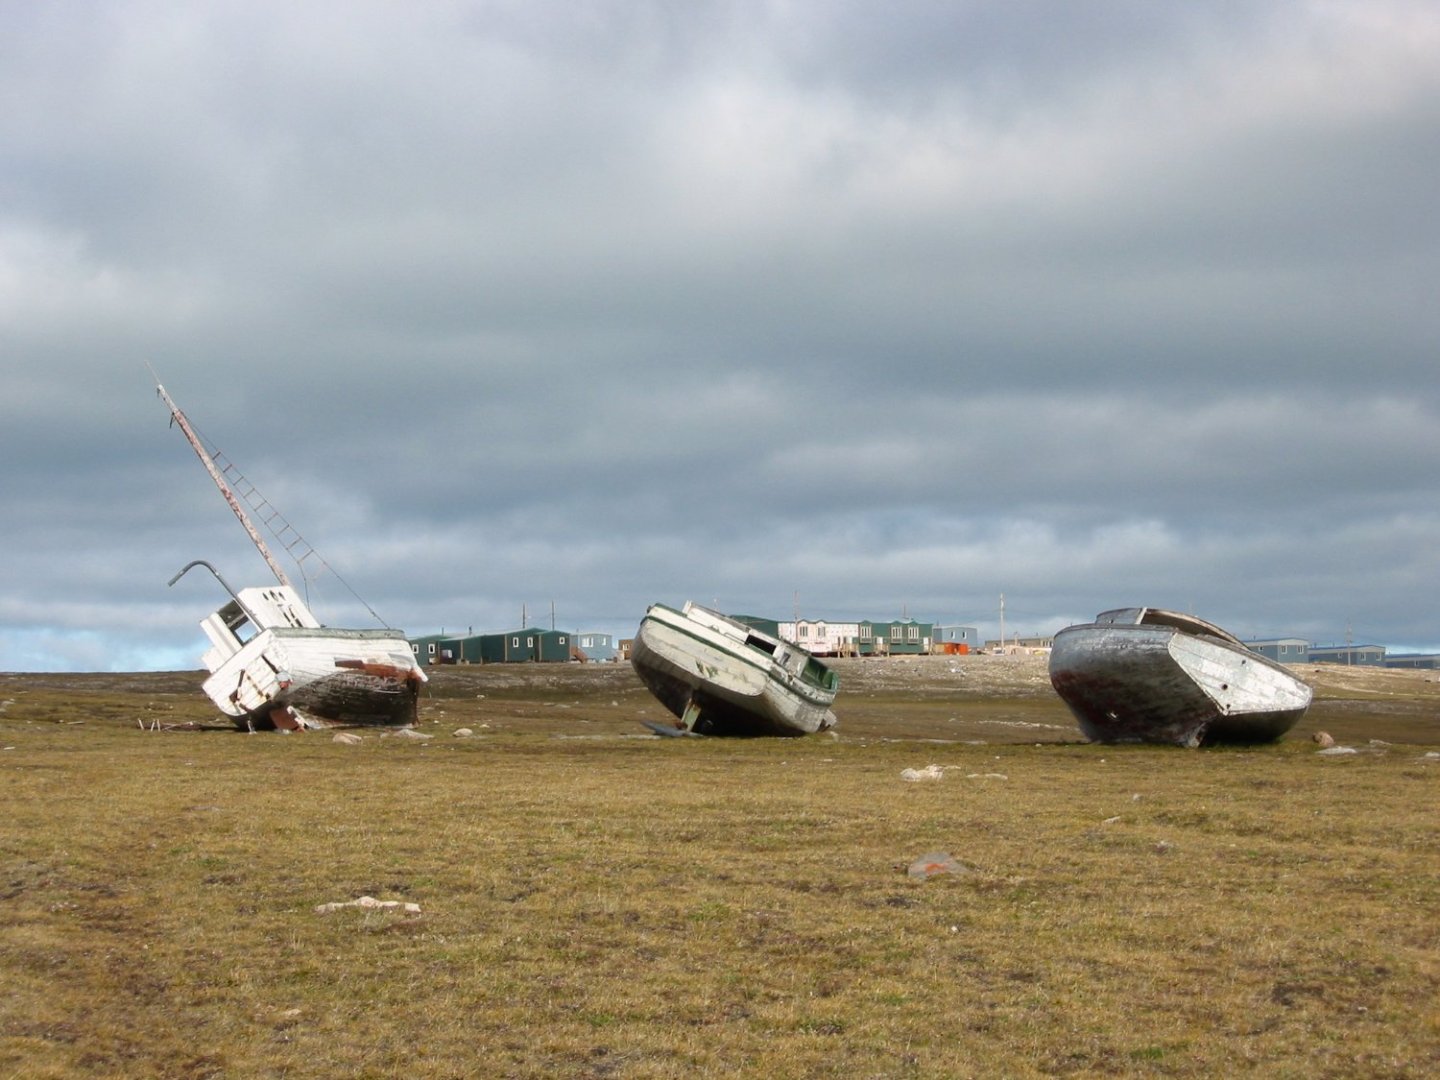
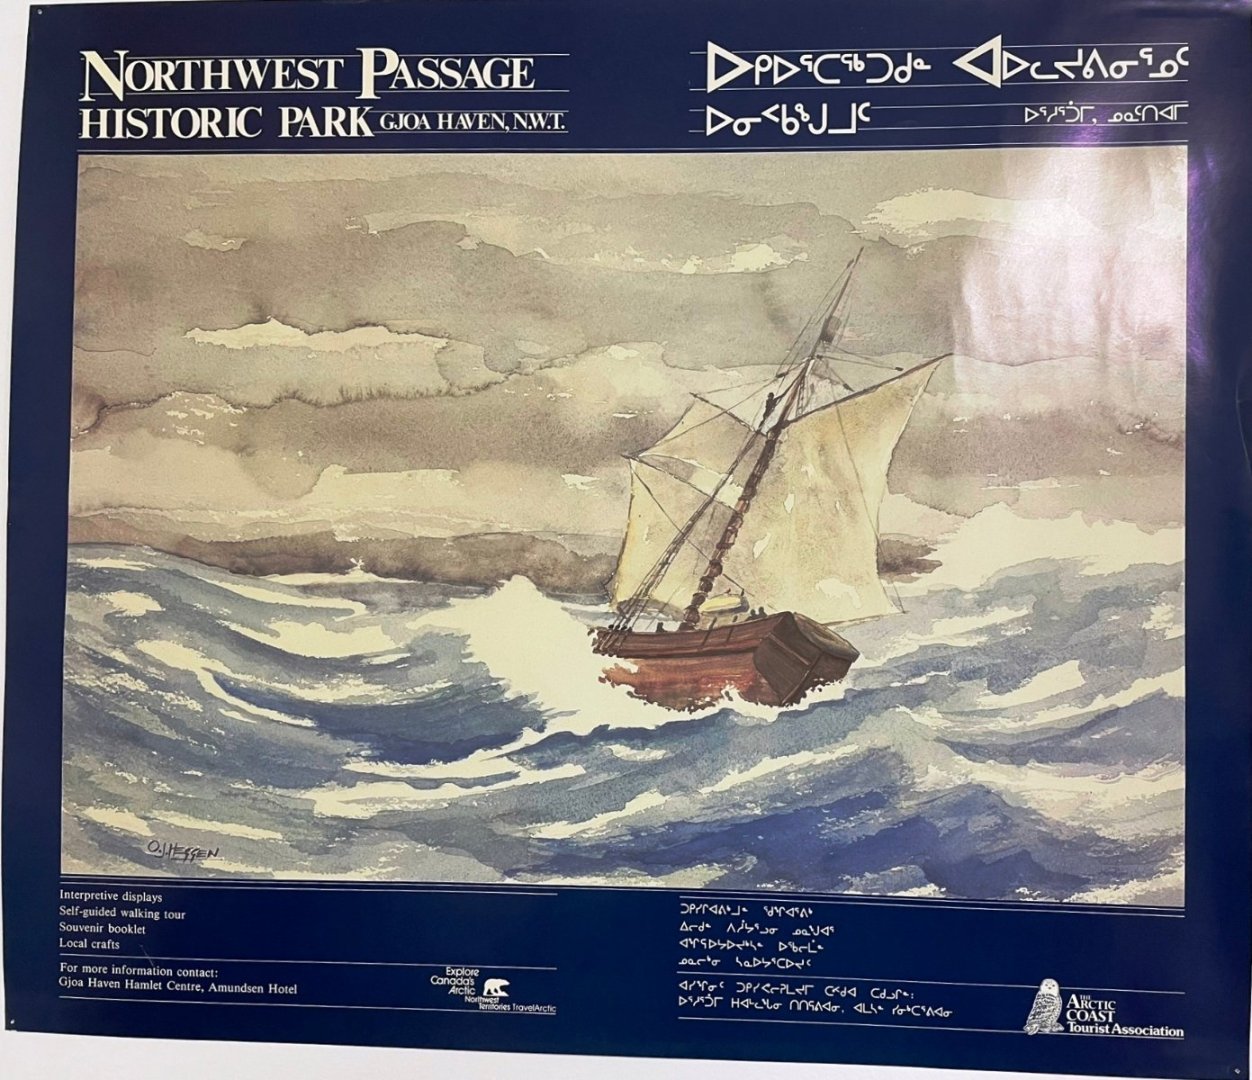
Hi Papa, Just discovered your build log of the Gjoa. What a great model you have on the go. The reason I am writing is the fact that I visited Gjoa Haven (Uqsuqtuuk) back in 2003 when I sailed aboard the CCGS Sir Wilfrid Laurier. Your model brought back some memories of the time I visited there and I thought you might be interested in seeing a few photos I took while I was ashore. I have also added a photo of a promotional poster the territorial government issued to entice some tourism. Amundsen must have been a pretty guttsy guy to take on the Northwest Passage in such a vessel as the Gjoa. All the best going forward with your model. Cheers, Peter


- 27 replies
-
- 2
-
-
- Gjoa
- Model Shipways
- (and 1 more)
-
Hi Lars Peter, Boy, this model sure brings back some memories for me. It is the first wood model I built waaaay back when. I'm glad I ran across your build log. I took some pictures of my model where you have some concern and I hope that it helps some. As you can seem my model has a little wear and tear after 40+ years. But I still have it proudly displayed in my home. All the best with your Mary Ann and I will follow along. Cheers, Peter
-
Stepping masts on Revell Cutty Sark 1:96
petervisser replied to Lost and Confused's topic in Masting, rigging and sails
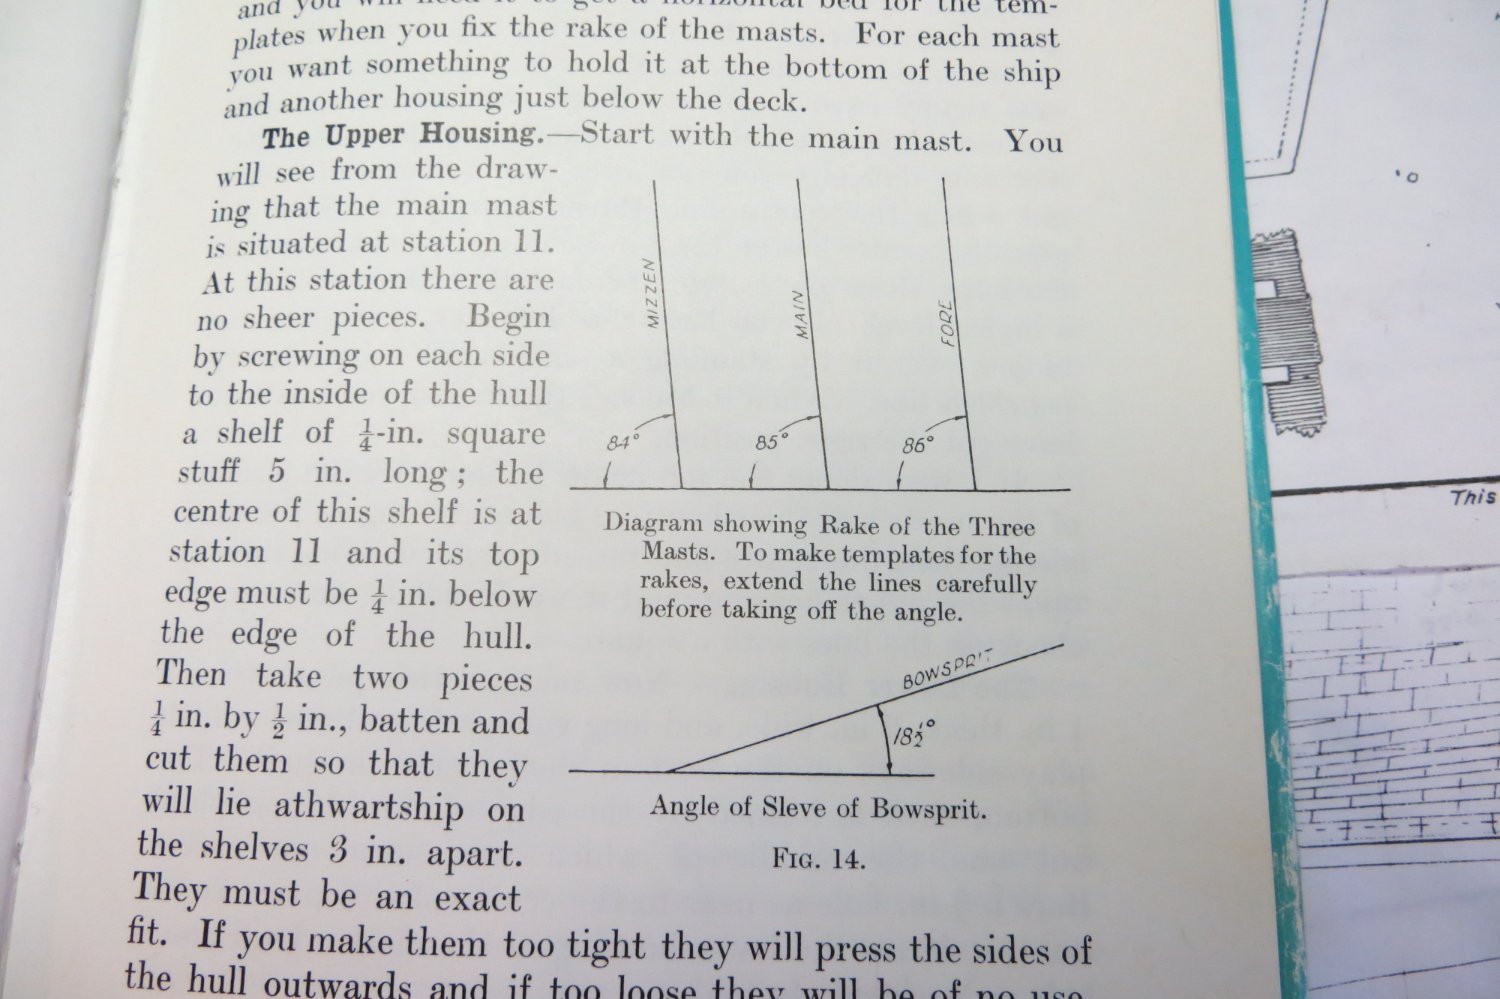
Hi Lost, According to Mr. Longridge's Cutty Sark book, the masts all have a slightly different rake. Here is what his book shows... Cheers, Peter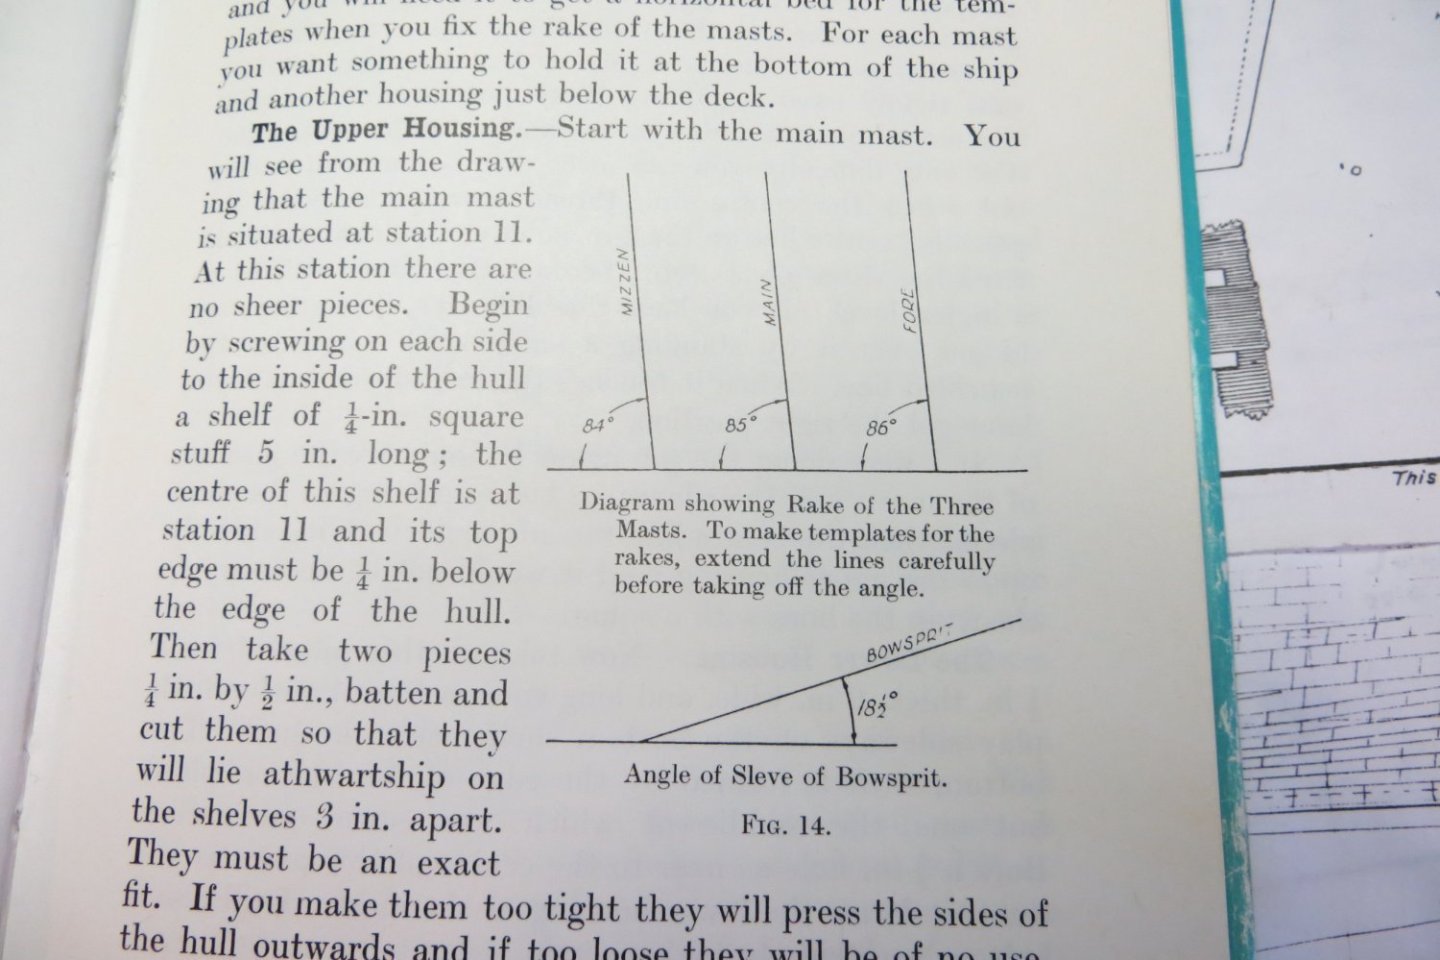
-
Very nice work on your Sperwer Julian! Working with older Billing kits certainly has its challenges but you seem to be dealing with them handily. Those planking curves at the bow and stern certainly sure look daunting! I have the Mamoli Catalina coming up next in my build sequence so I will be dealing with a very similar hull. I have also built the Billing Zeeschouw but it had very easy hull planking and it had laser cut parts so it was a pretty easy kit compared to your model. Keep up the great work and I'll continue to follow along. Cheers, Peter
-
What stunning models! All the best with your transition to tall ship building. If it's anything like your current work, it will be epic! Cheers, Peter
-
Welcome aboard Mark! Glad you made it over and look forward to seeing your modelling endeavours! Cheers, Peter
-
Hi Darren. Have you considered seine twine? I have used this on my last few models with good effect. It come in many diameters and is pre-waxed. So much so that I run a strand through a paper towel to remove the excess. I'm fortunate to have a marine chandler in town which usually has a good supply. I'm not sure if it's available online as I haven't looked. Good luck in your quest. Cheers, Peter
-
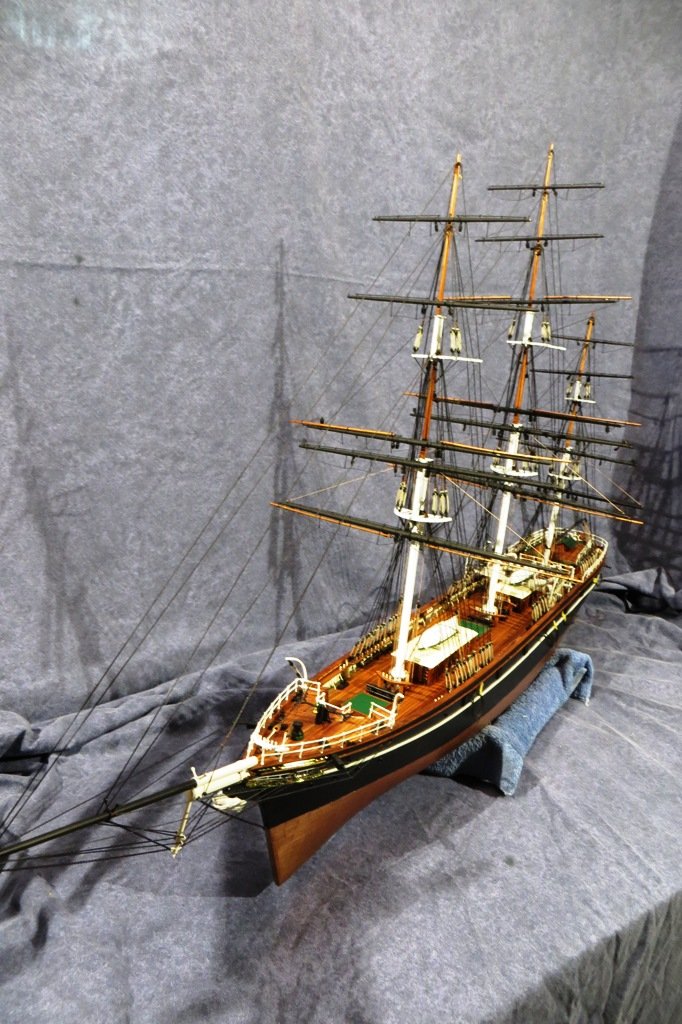
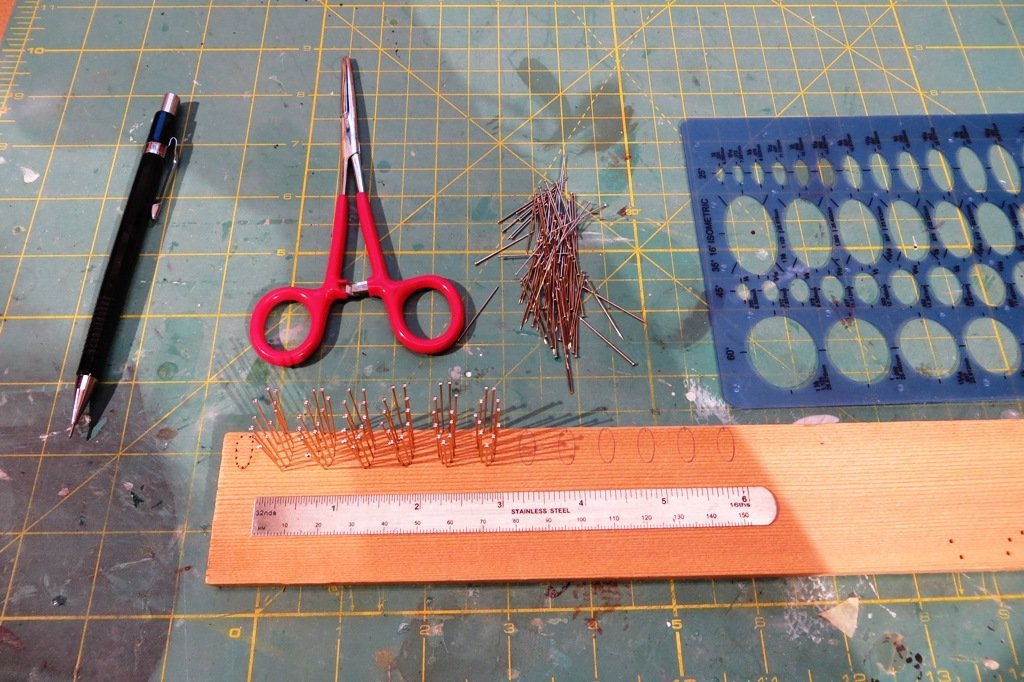
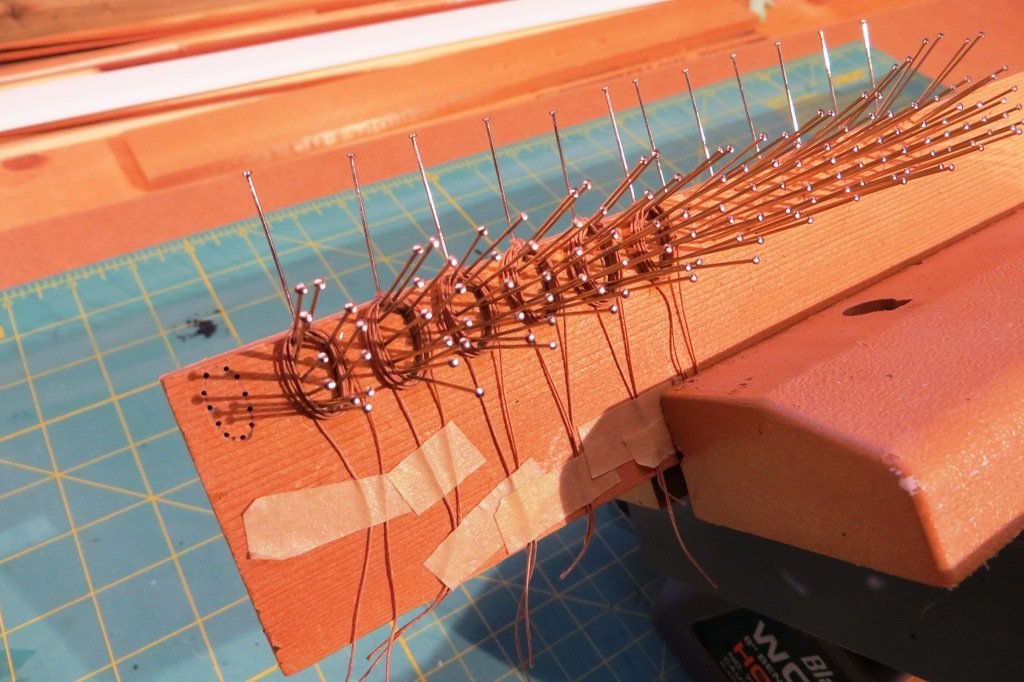
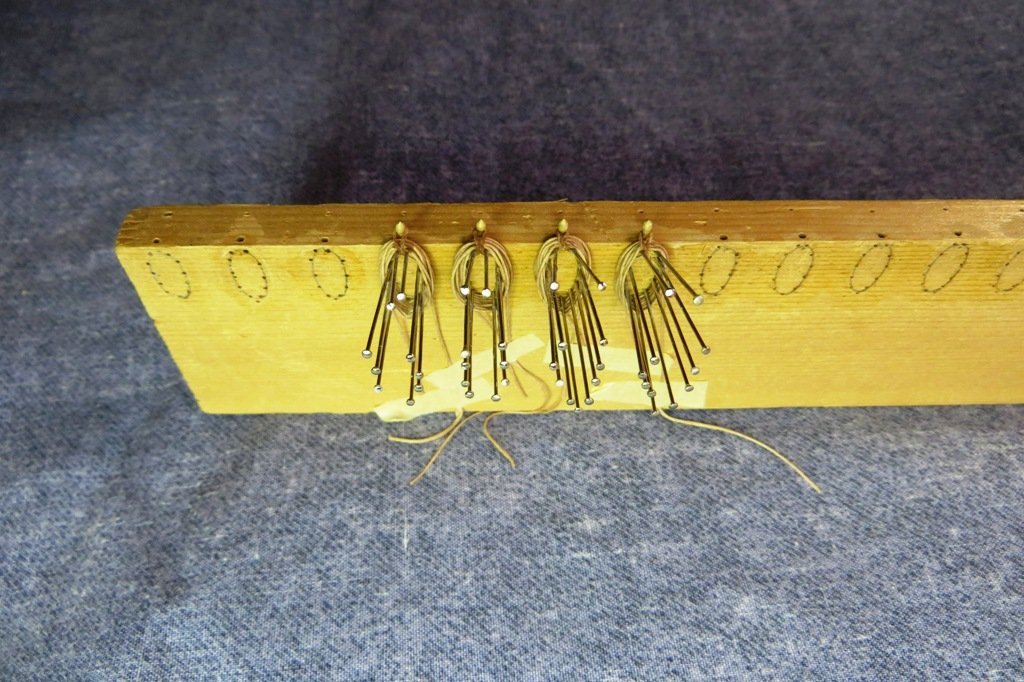
Hi Guys, I have commenced the running rigging at last, starting with the three sets of lifts for the 3 yards mounted on the lower masts. Baby steps... And what with runing the rigging to the spider bands at the bases of the masts, meant coiling down the ends of those lines. In the past, I used to leave enough thread after running the line through its various blocks and tackles and coiling the surplus several times around the belaying pin. However, with greater efficiency and less toil in mind I decided to put Tom Lauria's method into practice. He coils the lines off the model and places the coils on the pins. It is a more accurate depiction of how lines are coiled onto pins at the expense of having two lines make up each individual rope. Here's a link to his video: I did make a couple of modifications to his technique so as the loop around the pin didn't come undone and used diluted white glue to set the coils up permanently. Here are a few pic's of my efforts: Here I used a scrap piece of cedar strip as the pins were more easily pushed into it. Here are the coils around the pins with an additional pin set back from the top edge of the cedar strip. This allowed for a bigger bight to pull under and into the coil of rope. Here I used actual belaying pins to thread the bight as it made it easier to place the coils onto the model. As mentioned I used diluted white glue to set up the coils and allowed for longer tails so the bight did not become unstuck. And here are the results of the lifts' rigging onto their respective belaying points. It took a bit of trial and error to come up with a successful method but I am hoping it will alleviate some of the hassle in this repetitive task. Cheers
- 207 replies
-
- 5
-
-
- billing boats
- cutty sark
- (and 1 more)