


petervisser
-
Posts
578 -
Joined
-
Last visited
Content Type
Profiles
Forums
Gallery
Events
Everything posted by petervisser
-
Welcome aboard Mark! Glad you made it over and look forward to seeing your modelling endeavours! Cheers, Peter
-
Hi Darren. Have you considered seine twine? I have used this on my last few models with good effect. It come in many diameters and is pre-waxed. So much so that I run a strand through a paper towel to remove the excess. I'm fortunate to have a marine chandler in town which usually has a good supply. I'm not sure if it's available online as I haven't looked. Good luck in your quest. Cheers, Peter
-
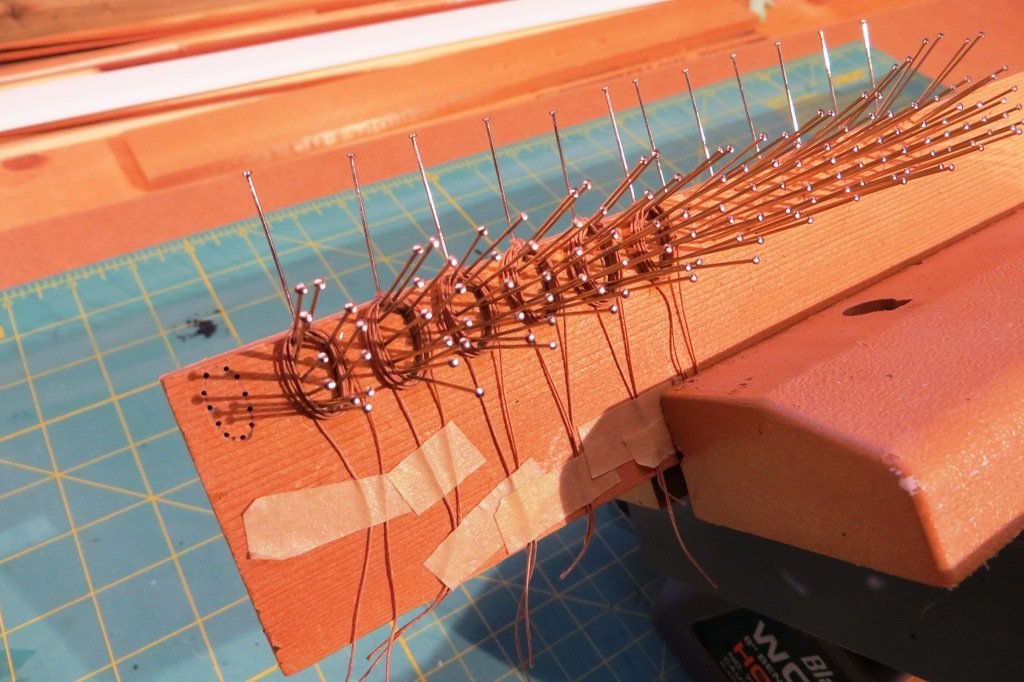
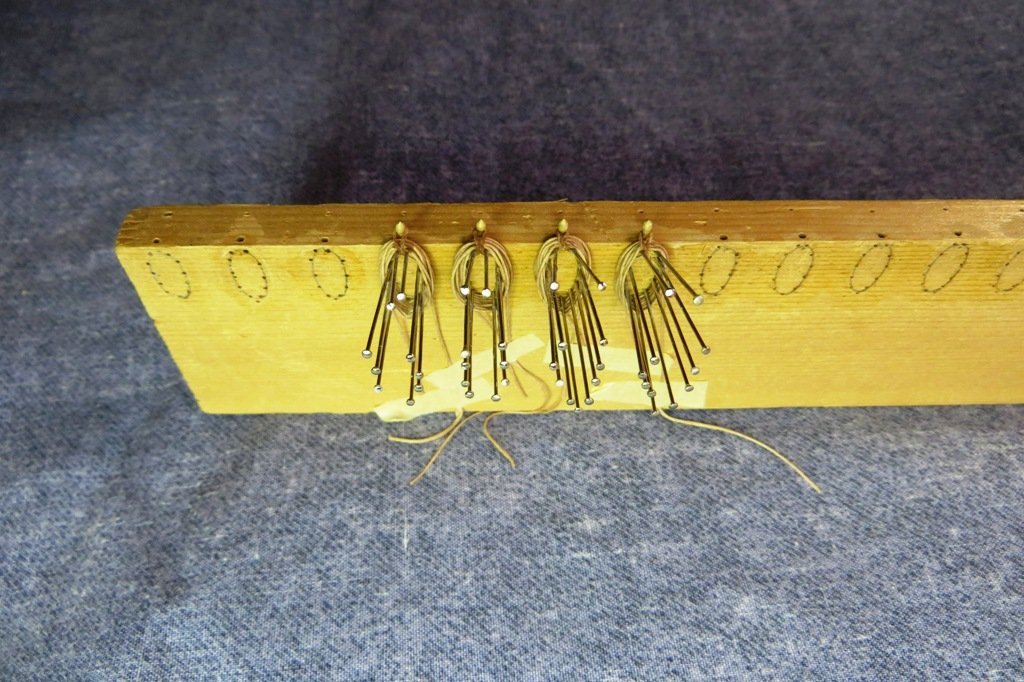
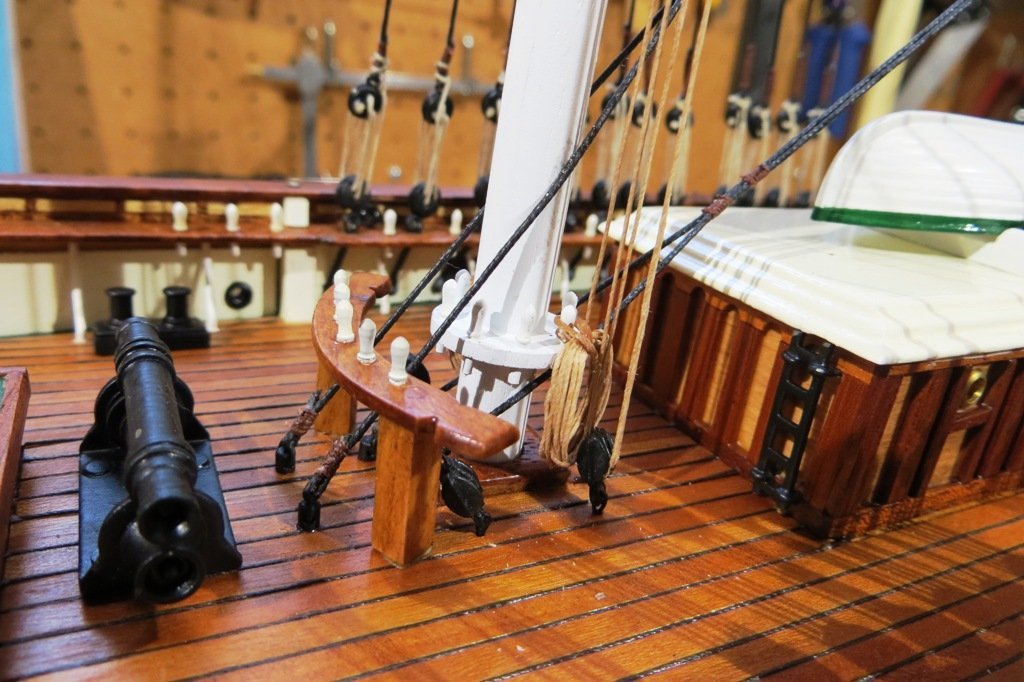
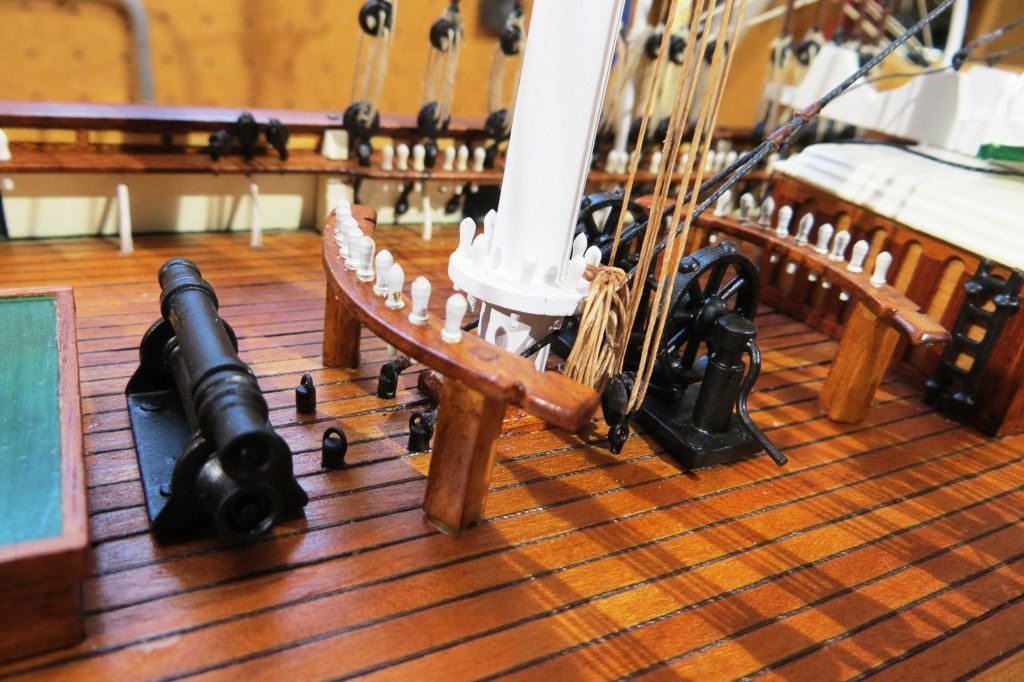
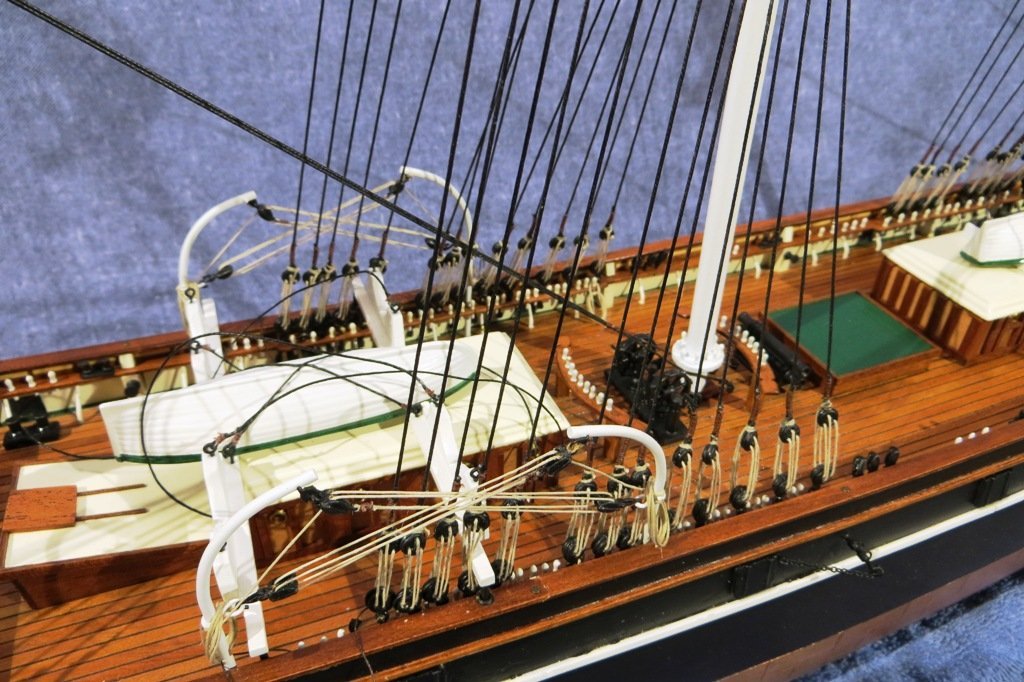
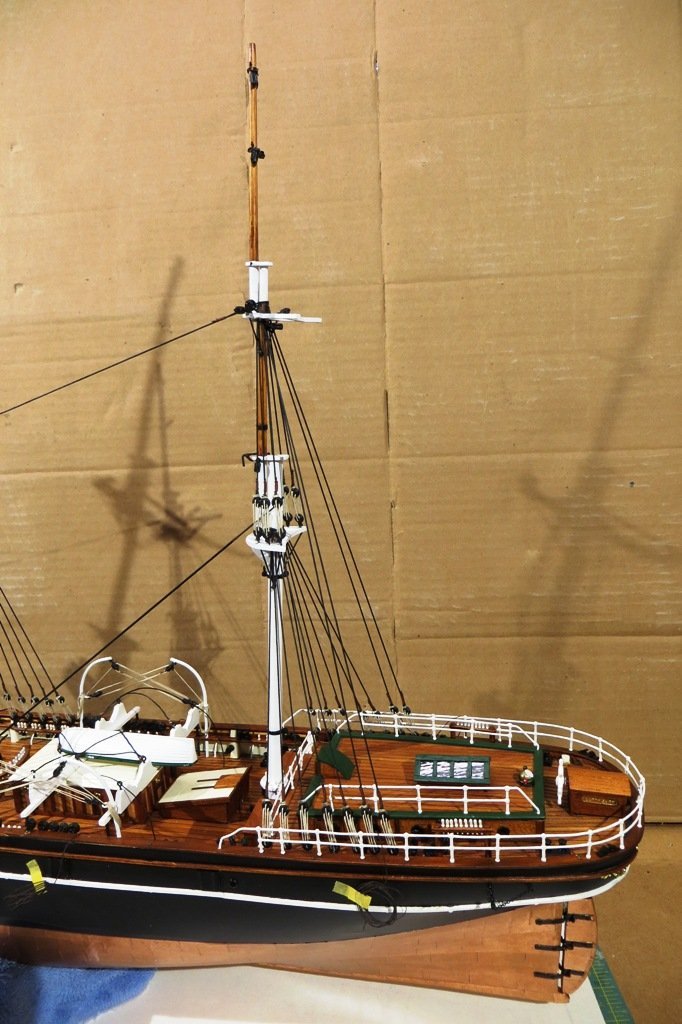
 Hi Guys, I have commenced the running rigging at last, starting with the three sets of lifts for the 3 yards mounted on the lower masts. Baby steps... And what with runing the rigging to the spider bands at the bases of the masts, meant coiling down the ends of those lines. In the past, I used to leave enough thread after running the line through its various blocks and tackles and coiling the surplus several times around the belaying pin. However, with greater efficiency and less toil in mind I decided to put Tom Lauria's method into practice. He coils the lines off the model and places the coils on the pins. It is a more accurate depiction of how lines are coiled onto pins at the expense of having two lines make up each individual rope. Here's a link to his video: I did make a couple of modifications to his technique so as the loop around the pin didn't come undone and used diluted white glue to set the coils up permanently. Here are a few pic's of my efforts: Here I used a scrap piece of cedar strip as the pins were more easily pushed into it. Here are the coils around the pins with an additional pin set back from the top edge of the cedar strip. This allowed for a bigger bight to pull under and into the coil of rope. Here I used actual belaying pins to thread the bight as it made it easier to place the coils onto the model. As mentioned I used diluted white glue to set up the coils and allowed for longer tails so the bight did not become unstuck. And here are the results of the lifts' rigging onto their respective belaying points. It took a bit of trial and error to come up with a successful method but I am hoping it will alleviate some of the hassle in this repetitive task. Cheers
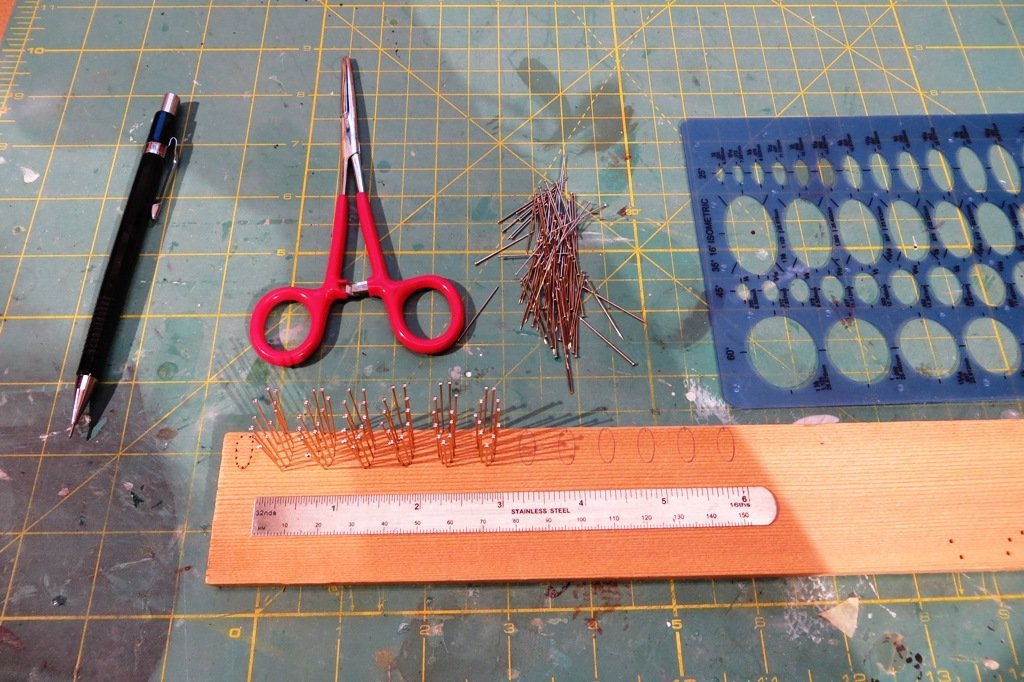
- 207 replies
-
- 5
-

-
- billing boats
- cutty sark
- (and 1 more)
-
She's a beauty! Looking back on some of the posts of your build log I saw some discussion about a display case. I have built display cases for all my models and it's not as difficult as it might seem at first. Take it from somebody who is not particularly talented with adult tools as opposed to modelling tools. (Me) I have discovered a site of building a display case whilst seaching for an improved method over mine and found it on modelshipcases.com by Wes Marden. It's a detailed build log of building a display case and except for a table saw, all the other tools used in its construction are pretty basic. It costs just $12US to download the instructions and I plan on using his method in building my next case. For me, it's cringeworthy that a piece of finely constructed ship model be subjected to the elements such as years of dust accumulation and cats.... Especially cats. Peter
-
First rate job on the planking Ed. She looks like a handful, size-wise. Looking forward to more entries in your excellet build log. Happy New Year! Peter p.s. Is that a Polar 8 model in the background? I sailed with a Chief Engineer who was part of the design team a long while back.
-
A superb model George. Congratulations! She looks right at home in her display case! Time to splice the main brace! Cheers, Peter
- 602 replies
-
- 1
-
-
- Flying Fish
- Model Shipways
- (and 2 more)
-
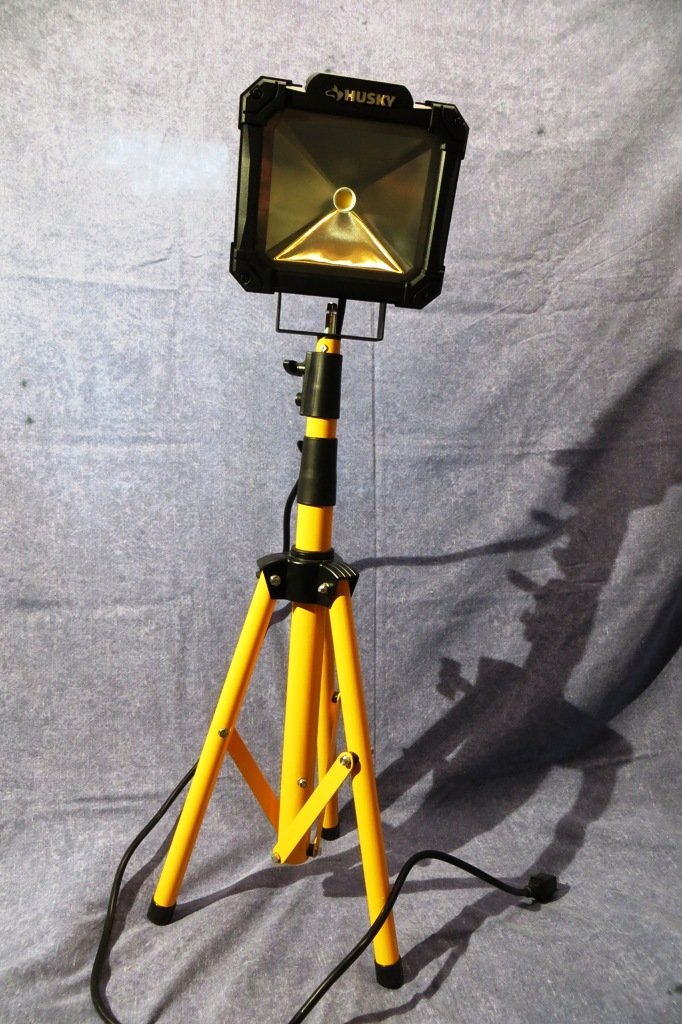
Just thought some of you might find this light assembly useful. Even though I have a double flourescent light above my work bench, I was still finding too many shadows obscuring my work. Therefore I bought a pair of light stands and LED portable work lights. I have set up the lights on either side of me and above the work area. The stands are telescopic and swivel so I can adjust the aim. The light is 3500 lumens, so now I see EVERYTHING! Cheers, Peter
- 207 replies
-
- 2
-
-

-
- billing boats
- cutty sark
- (and 1 more)
-
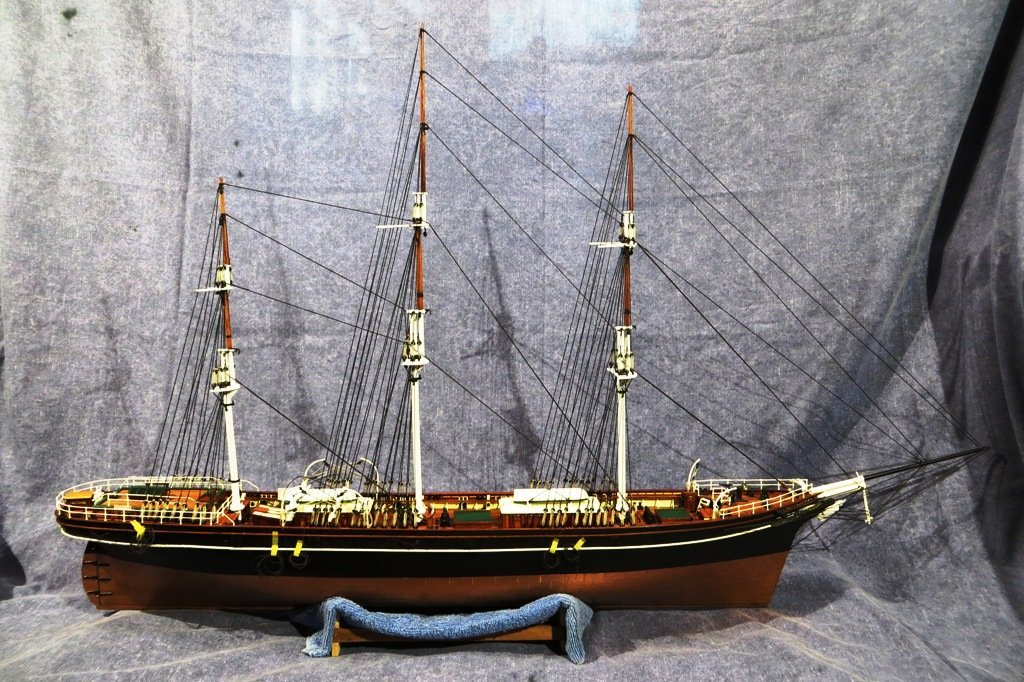
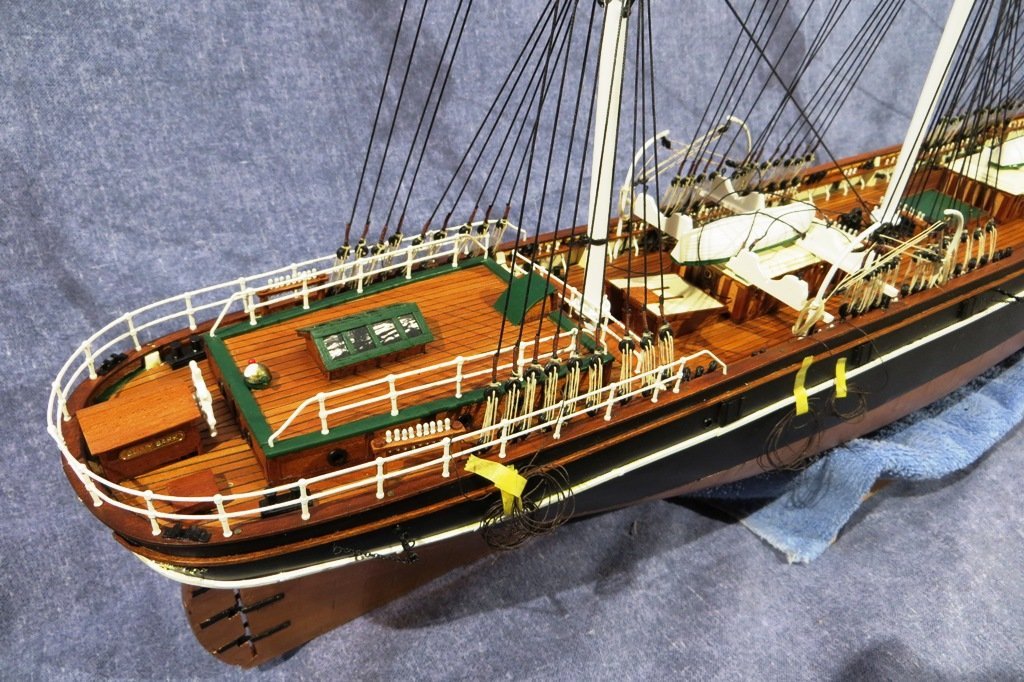
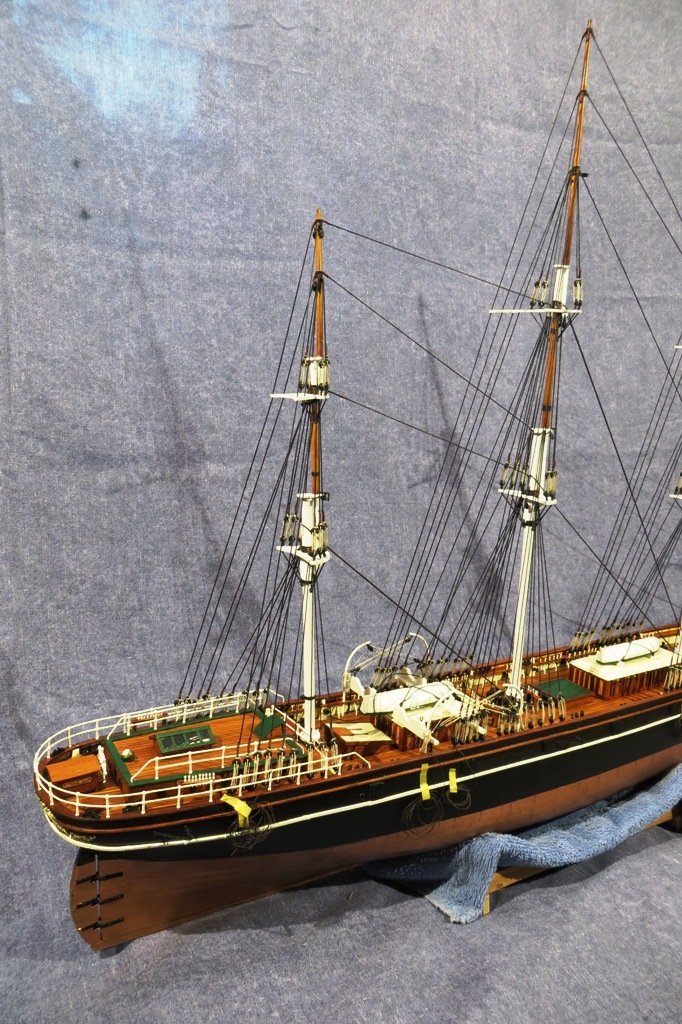
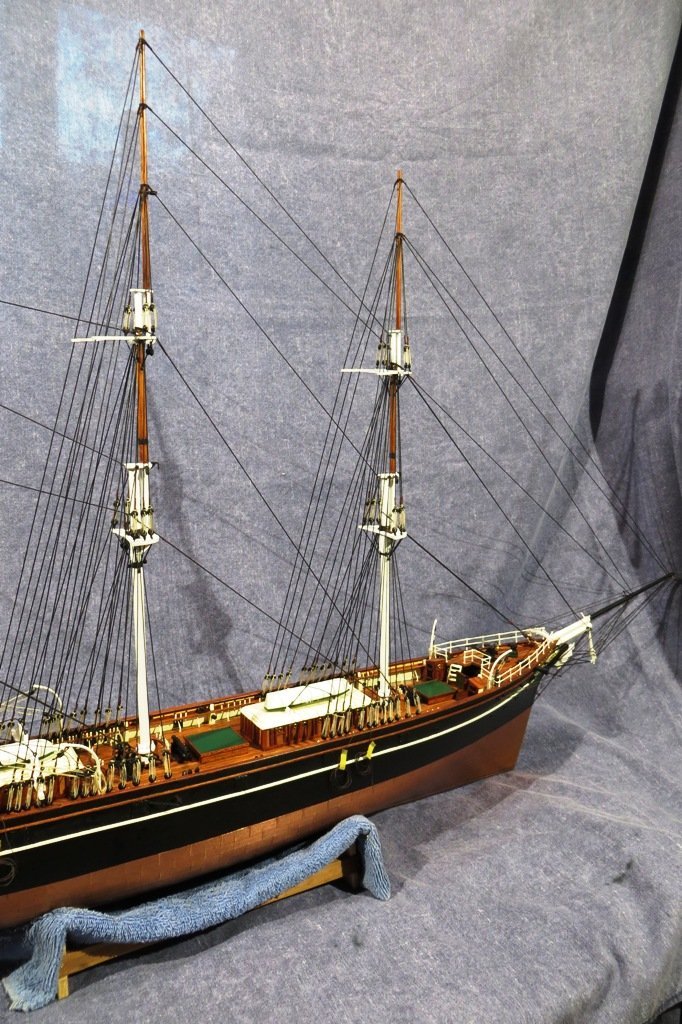
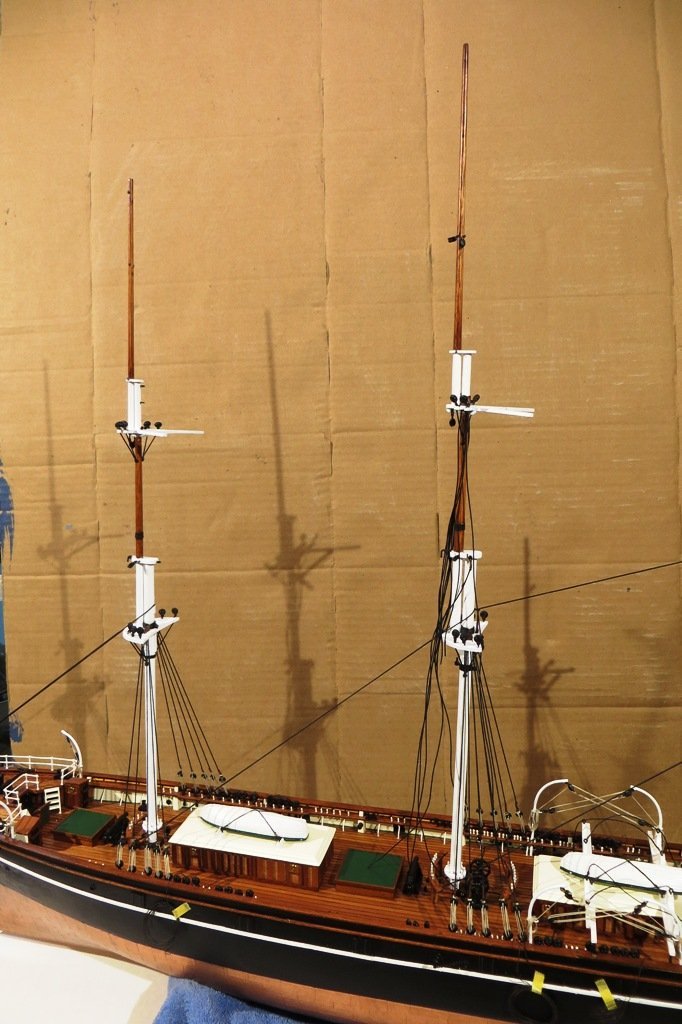
Merry Christmas everyone! I have reached a major milestone with this model just today. All the standing rigging is now in place. Phew... I counted 125 individual lines that make up the standing rigging. Happy with the results and I'm now looking forward to the next phase of the project, the running rigging. I have opted to leave the ratlines until the last. Not because I dislike tying off what seems like hundreds of pieces of rigging, but because I hope it makes the running rigging easier to access. It is for this reason that the lifeboats are yet to be secured. All the yards are prepped and ready to install. I now have to decide on the order in which to place them all. Here are some pics of the completed standing rigging.
- 207 replies
-
- 6
-
-
-
- billing boats
- cutty sark
- (and 1 more)
-
Congratulations on the completion of your lovely model! She's a beauty! When people on this forum ask, what their first model should be I'm always tempted to say a Billing model. They are well designed and interesting and relatively easy to build. They also teach the first time builder alot of the basic skills needed for more comlex projects. All the best going forward with your next project! Peter
-
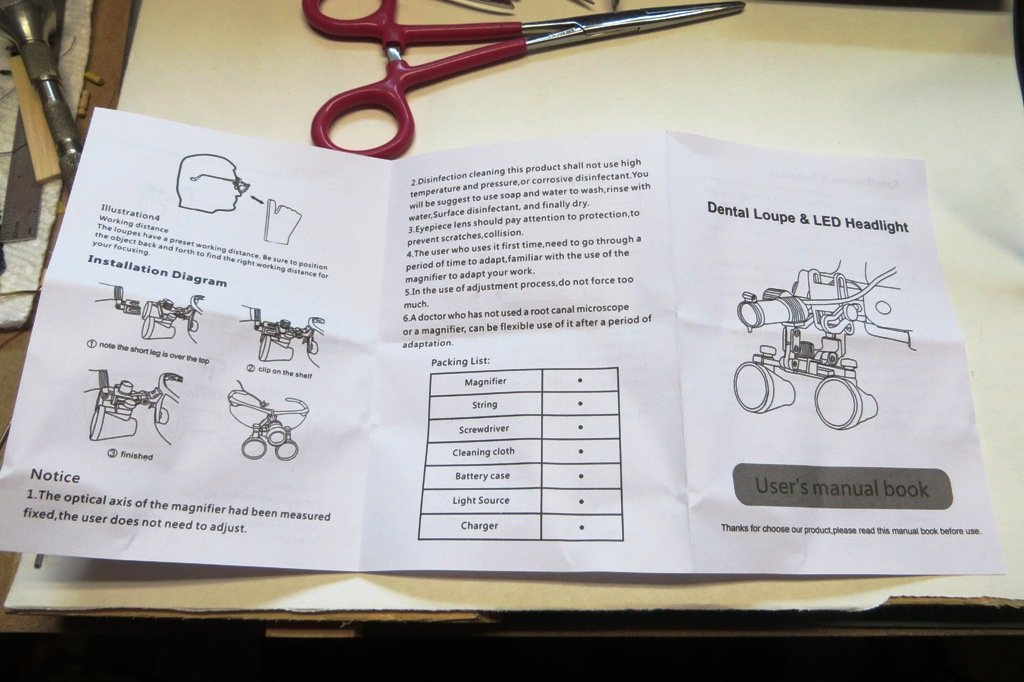
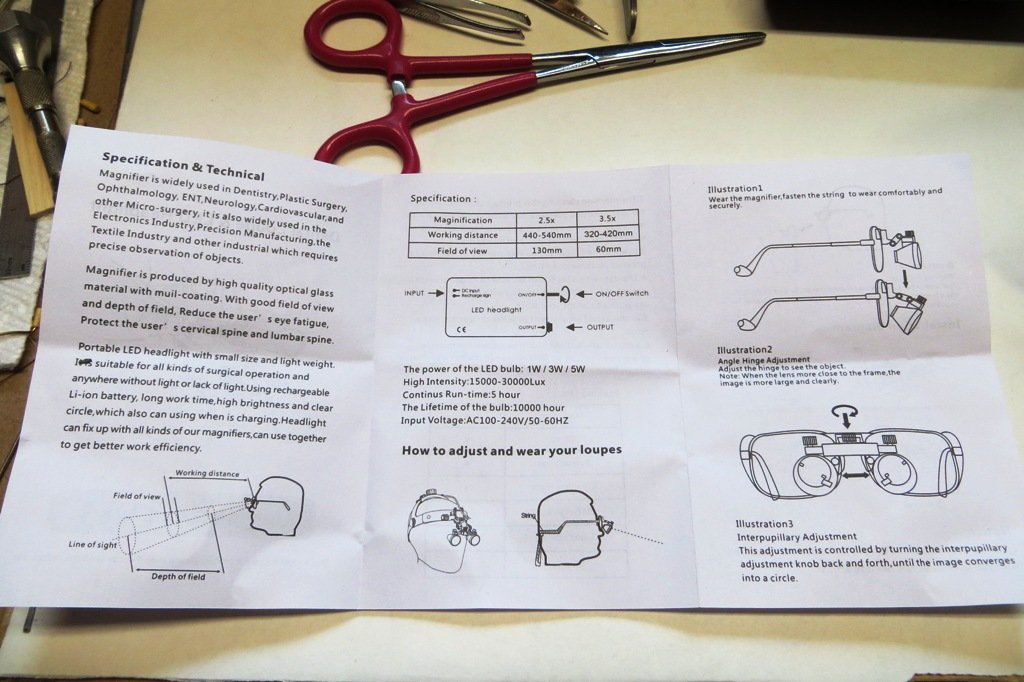
Thanks for looking in and the kind words. As for the dental loupe, I am still impressed by its capabilities. I don't use it all the time as I use an Opti-Visor for 99% of the time. The peepers aren't what they used to be... But the dental loupe really comes into its own when I'm trying to access tying a knot in a hard to reach place where my hands get in the way of the lighting in my shop. The loupe has its own head lamp which I find to be brilliant. The focal length is between 14" and 16", so a handy distance I find. With this vision aid I do find I have more tunnel vision than the Opti-Visor, so it requires more care in what movements I make with my hands. Hope this was a help. Cheers, Peter
- 207 replies
-
- 1
-

-
- billing boats
- cutty sark
- (and 1 more)
-
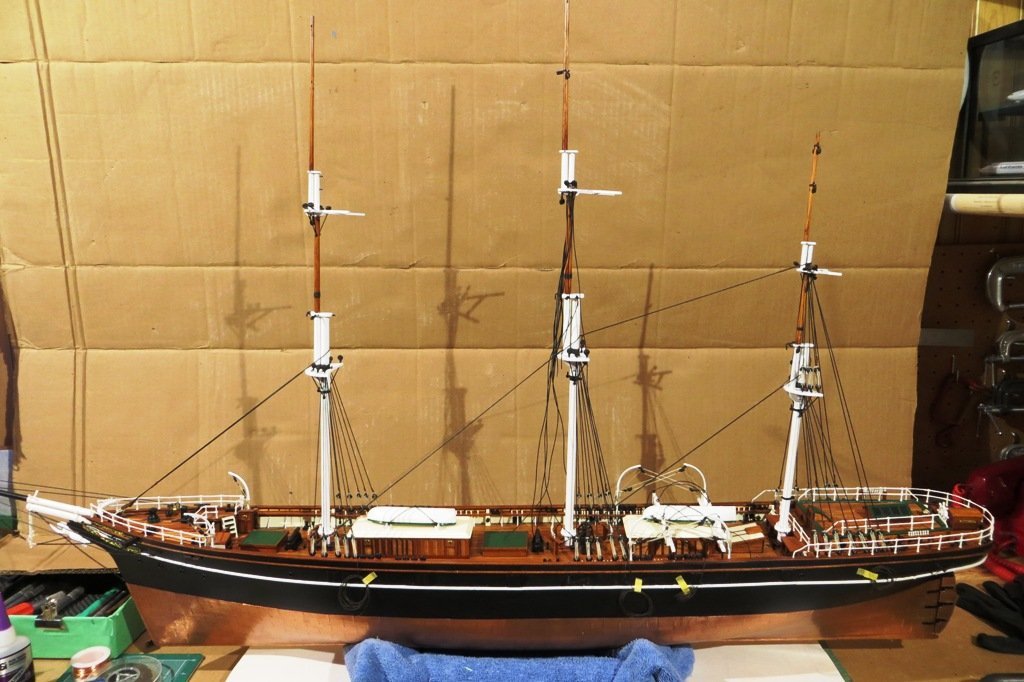
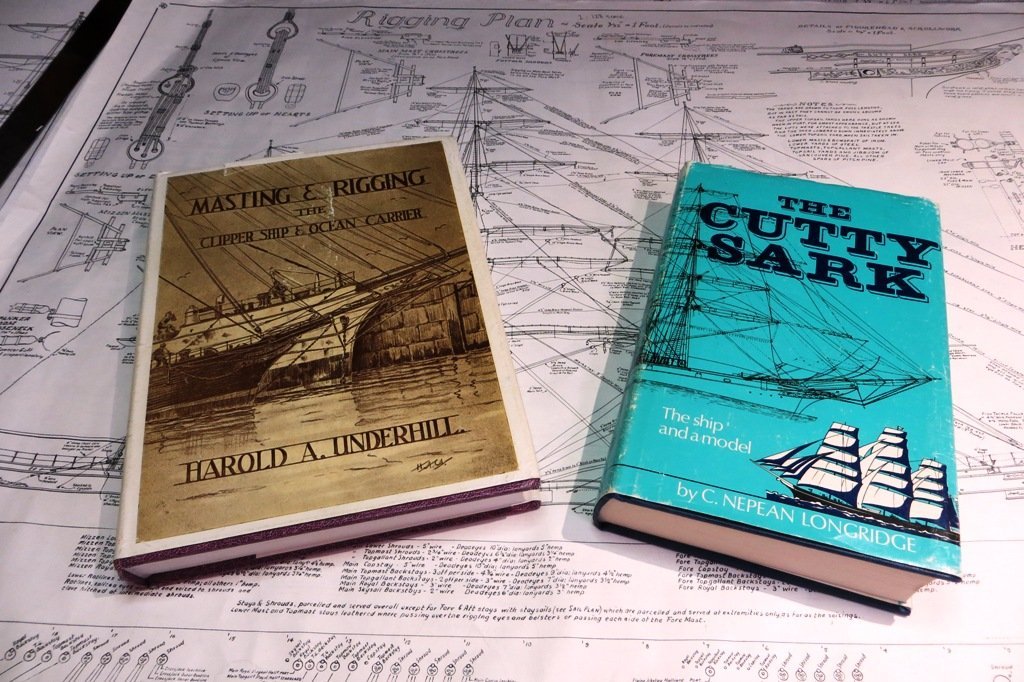
Hi All, Well, with the fall weather and rain arriving (yay...) it's high time to get back to model building! It's been March since I last posted any progress and to be honest, not much has happened. But with more free time and crappy weather I am really looking forward to getting all the standing rigging set up. I am using a combination of Nepean's book and Underhill's excellent text regarding the rigging of ocean clippers as well as Campbell's plans. Together they have helped immensely. I had started with the lower mast stays and lower shrouds on each mast as they held the masts to the desired rakes. A short blurb in Nepean's book which I thought makes sense is to set up the shrouds and backstays first before tying off the stays. This is due to the fact that the former are set at smaller angles relative to the mast and therefore have less tendency to pull the mast out of the desired plumb. So I shifted gears and have therefore continued with the mizzen standing rigging (shrouds, backstays and stays) for the lower mast first, then the topmast (shrouds, backstay, stay), and will continue that process for the main mast and foremast. Of course creating a "cage" of standing rigging will make the running rigging more interesting and challenging. Here are a few pic's of the progress...
- 207 replies
-
- 6
-
-
- billing boats
- cutty sark
- (and 1 more)
-
Welcome Marco! That is quite the impressive fleet you have! Coincidently, I was a passenger aboard the Stephan Batory in the early 80's sailing from Montreal to Rotterdam and back. You are probably already aware she was the former Maasdam. Anyhoo, glad to have you with us! Cheers, Peter
-
Spectacular Keith! A colossus of a model. All the best with the rigging. Cheers, Peter
-
Hi Keith. Sorry to hear that you're disappointed about the lack of responses to your very excellent build log. You have put in an incredible amount of work into your model and it really shows off your skills. On top of that you have put in a goodly amount of work into your build log. This is not only an inspiration to other ship modellers but also a valuable information source on the techniques and methods you have used in assembling this beast of a model. I for one will miss watching and learning from your log as I have this model waiting to be built. As a fellow build log contributor, I am also guilty of watching for the responses after I post my latest entry. Like you I don't often see many comments. But I always appreciate the "likes" I get from the members who are thoughtful enough to provide them. I have come to realize that although there might be a lack of tangible evidence, our work is appreciated. I believe that the site is a positive space in which to show off our efforts and we have to be satisfied knowing that somewhere, somehow we are enriching MSW and its members. I for one would really like to more of your Royal William. Cheers, Peter
-
Great work on your Cutty Sark so far. It's always fun to see others working on the same ship (different kits) to see the difference in fittings and materials. I managed to get the bow and stern decoration from AL for my model after having seen it on another model in the Build forum. Keep up the great work!
- 47 replies
-
- 1
-
-
- Cutty Sark
- Artesania Latina
- (and 1 more)
-
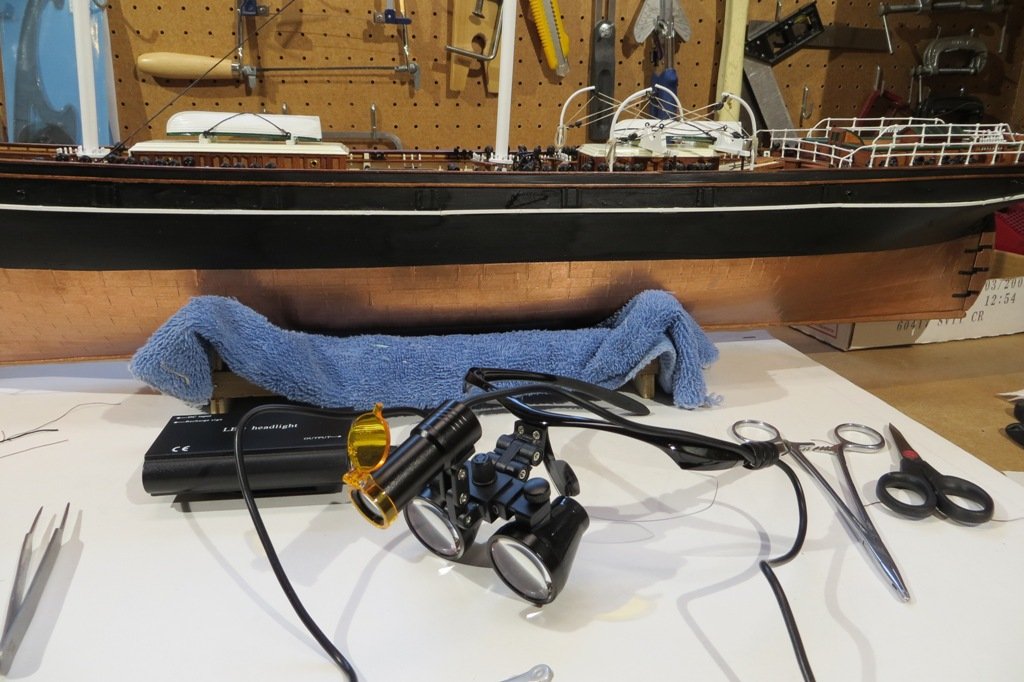
Hi Guys, I just got some new eyes! After a recent dental appointment, I was intrigued by the eye glasses my dentist was using. I asked about them and was told that professional dental loupes are in the range of $3K-5K. But she told me that they are also available on line for much less than that. So after a brief amount of searching I found these on Amazon. Where else... These are the BoNew 3.5X binoculsar loupes with a 5W headlamp. I was doing some intricate rigging using my usual magnifiers when I thought maybe the loupes would be more suitable. Were they ever! The work was made much easier with them as the headlamp really comes into its own. So if you have $100 CAD kicking around I would definately consider them. They do have a finite range of vision, but I find it an optimal distance. Here's some pic's...
- 207 replies
-
- 4
-
-
-
- billing boats
- cutty sark
- (and 1 more)
-
Hi Steve. What a great looking model. You have really done it justice. As for the masting and rigging, be prepared. It's been my experience that this aspect of the model marks the half way point in the project. Working on my current model, it has taken a TON of prep work getting the masts, yards and gear ready before a single line is rigged. Patience is the key, but judging by your work so far, you've got that covered. All the best going forward and I hope to see more of your work. Cheers, Peter
-
Hi Leo, I just found this on YouTube. Quality isn't the best but hey, it's free! Cheers, Peter
- 207 replies
-
- 1
-
-
- billing boats
- cutty sark
- (and 1 more)
-
Hello Cad. You are starting a project that is exactly where I started with my CS kit a few years back. It is a great kit, and I've enjoyed mine very much. Good luck with your project and if you have any questions, just ask. Cheers, Peter
-
Hi Patrick. I just ran across your completed Pelican. An outstanding accomplishment and a beautiful model. Congratulations! Cheers, Peter
- 756 replies
-
- 2
-
-
-
- galleon
- golden hind
- (and 2 more)
-
For those of you who still have cable TV and are fans of the Cutty Sark (who isn't?) there is a program on Knowledge Network in my neck of the woods titled World's Greatest Ships - Cutty Sark : 150 Years of War and Speed. Not sure how the "war" aspect is going to get tied in, but the description promises drunken captains and murderous crew. Yikes! Might have to add some blood spatters to my model. We'll see.... Anyhoo, I'm looking forward to some footage of the ship at her current home in Greenich. Full review later. Cheers, Peter
- 207 replies
-
- 1
-
-
- billing boats
- cutty sark
- (and 1 more)
-
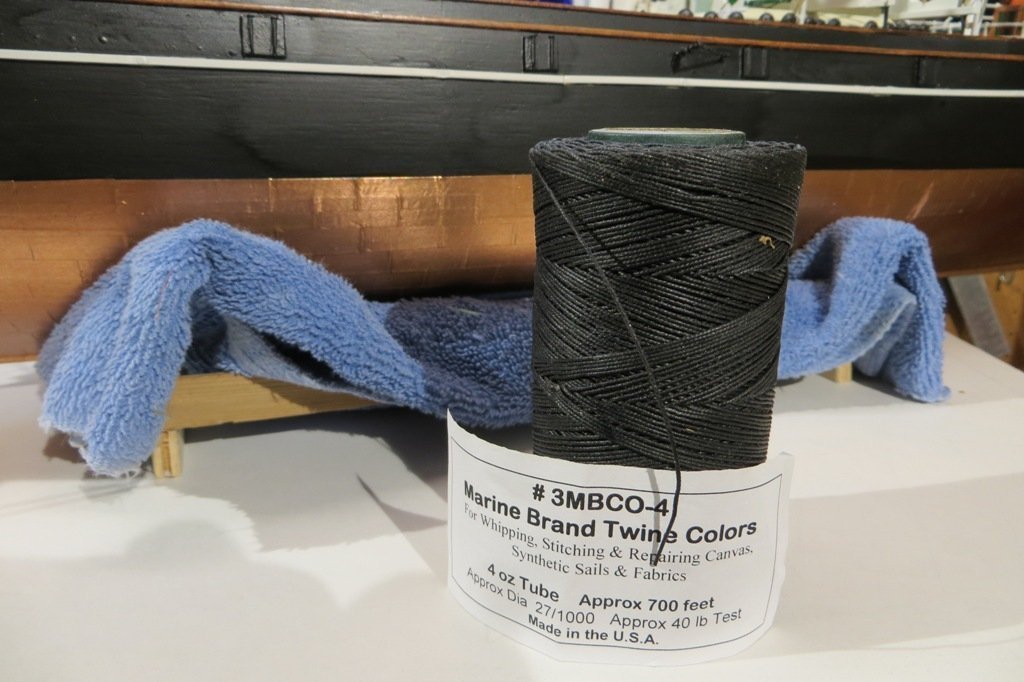
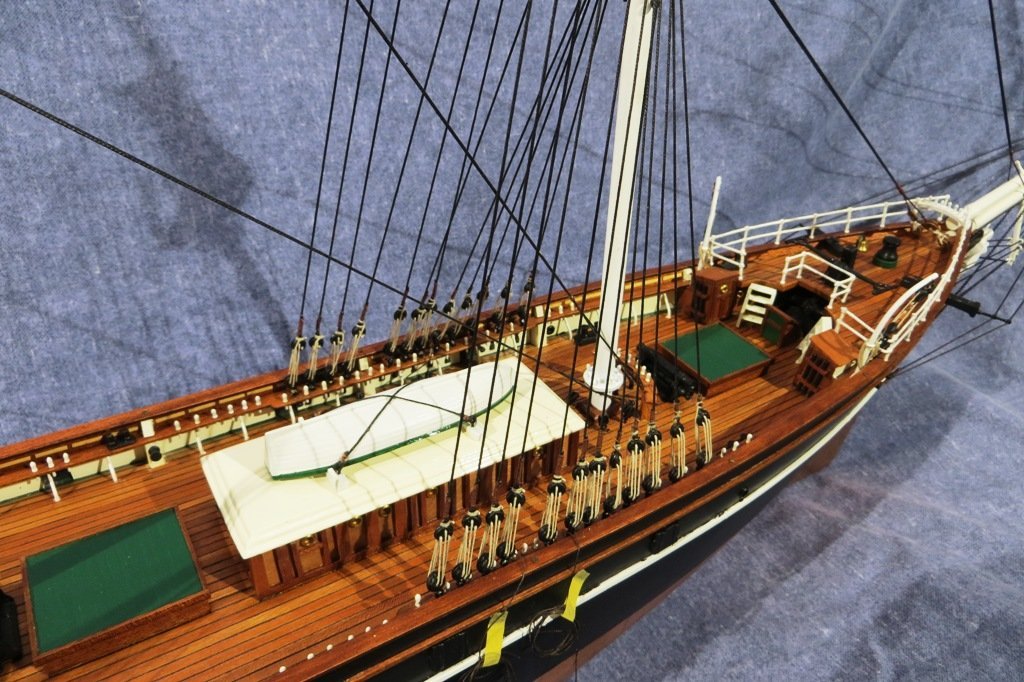
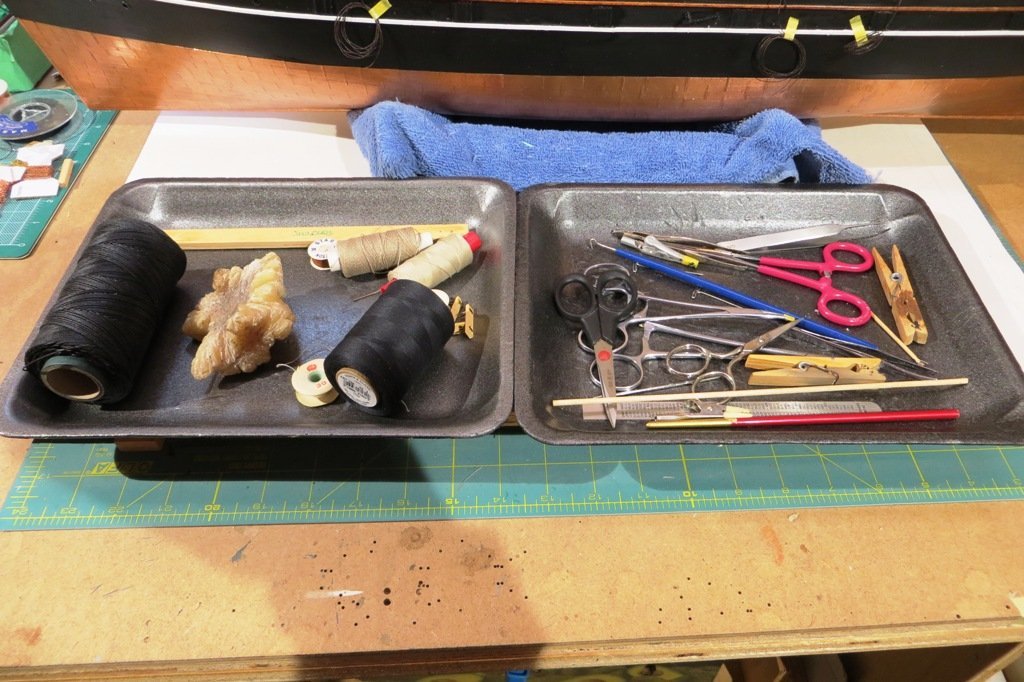
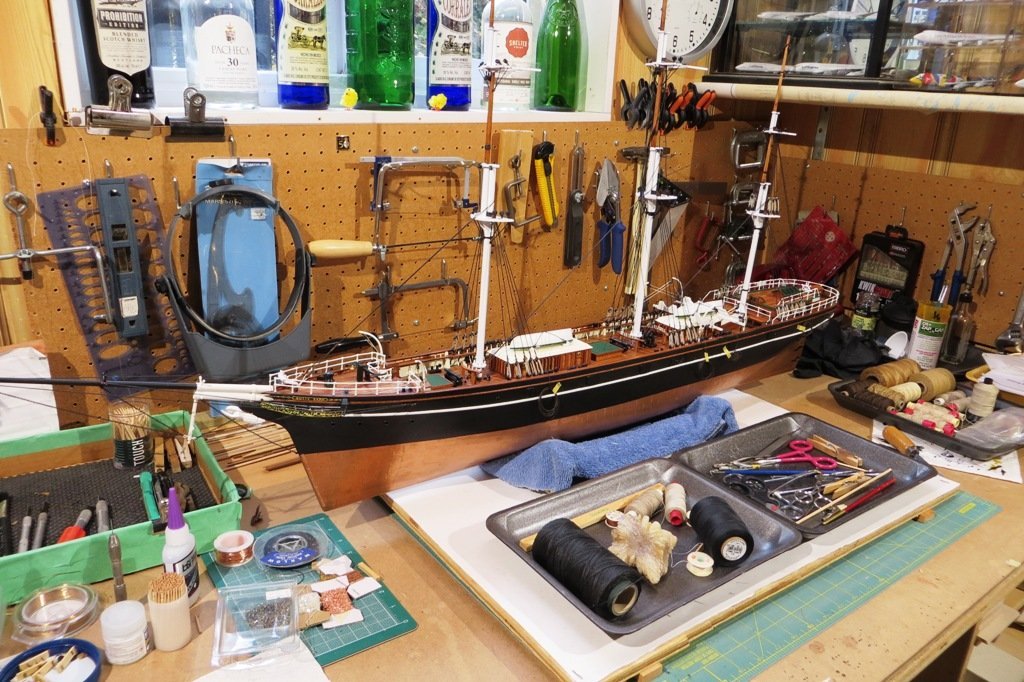
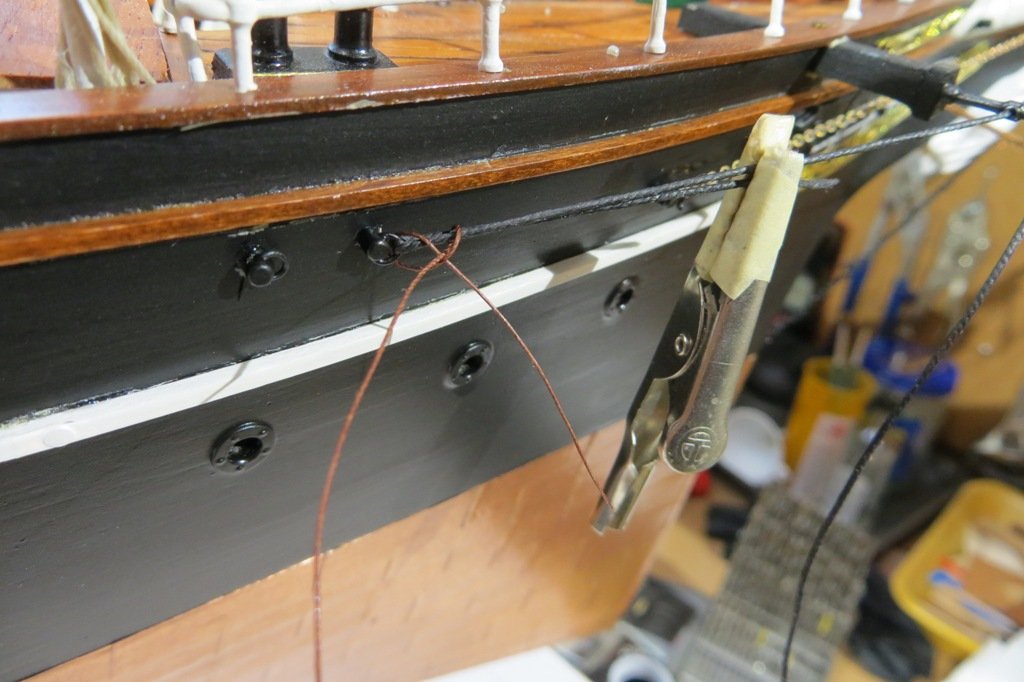
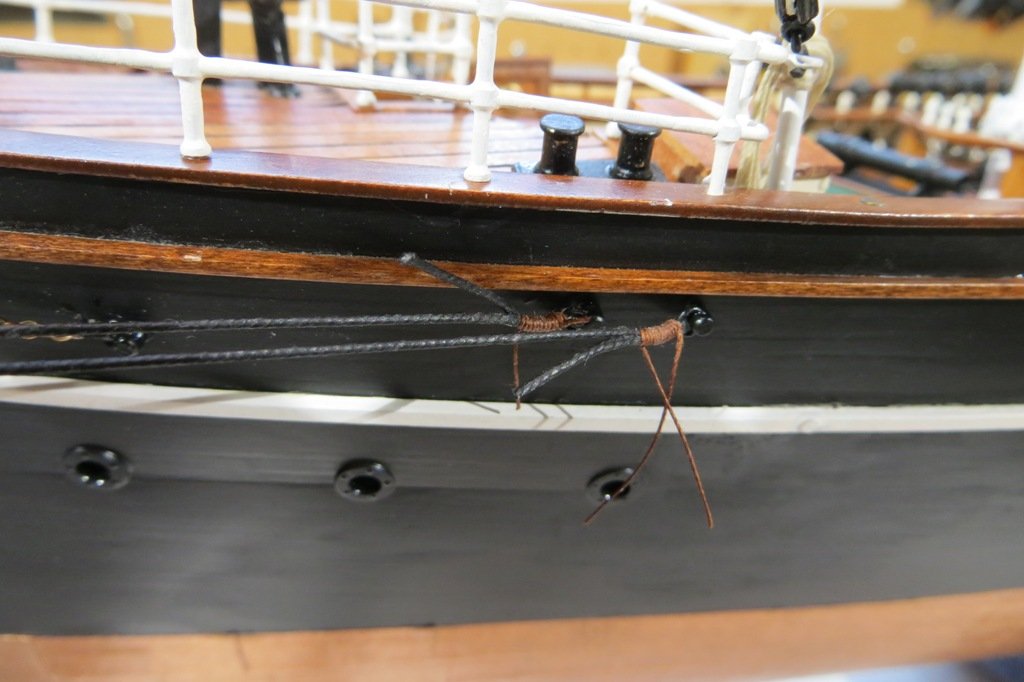
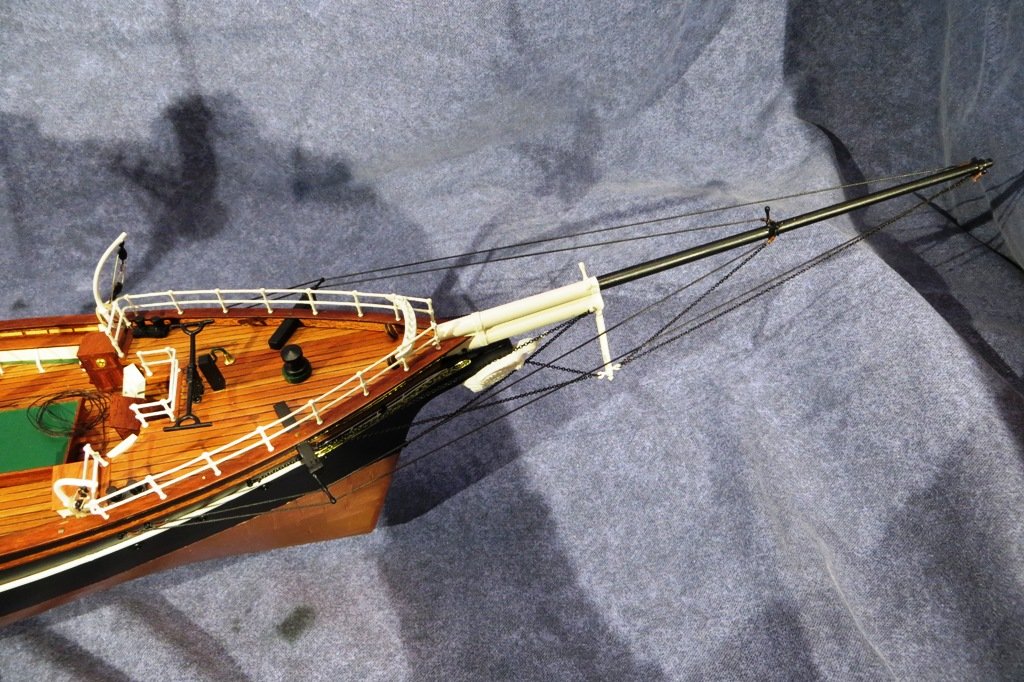
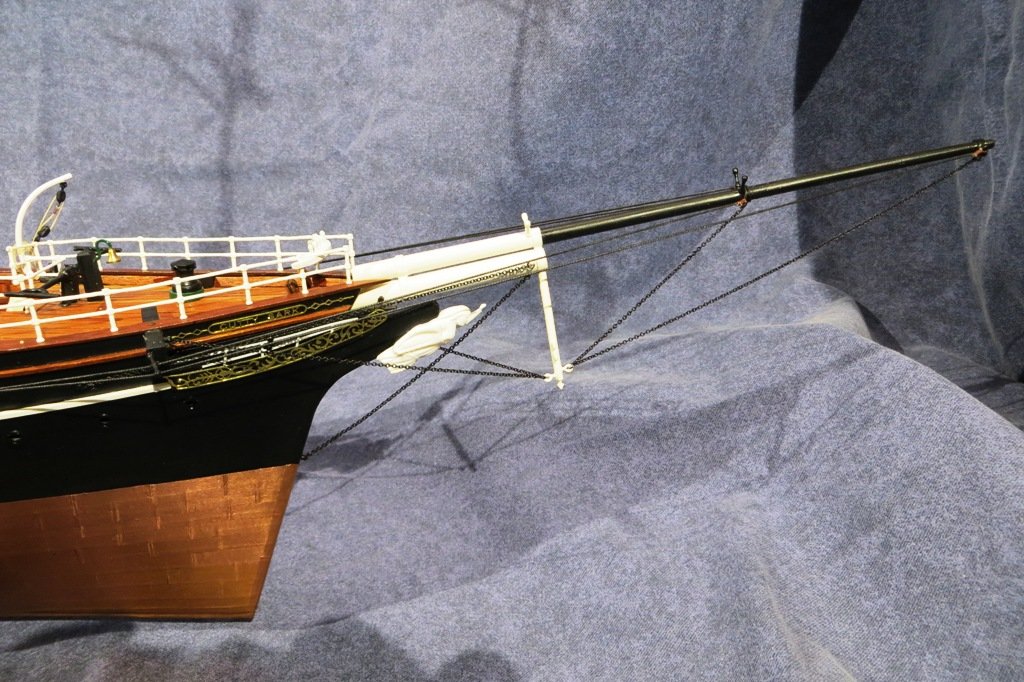
Work has finally commenced with the standing rigging after what seemed, many weeks of rigging gear to modify and prep. Today the standing rigging on the bowsprit and jibbom was added. This included the guys (rigging thread) and stays which are chain. I am using chain from the local bead shops and seine twine which I get from a ship chandler in town. The twine is already heavily waxed and the rigging thread I wax myself. This makes wraps SO easy because it doesn't tend to unwind when you're making the wraps. The seizing is started with a clove hitch and ends in a half hitch. Then a little matte lacquer is applied to permanently set it in place. Some of the blocks ready for a couple coats of paint. Lots of rigging supplies needed. Bowsprit firmly in place. This ship has alot of chain running and standing rigging. This is just some of the sail twine I have on hand. Finished seizings. A clove hitch starts the seizing here.


- 207 replies
-
- 5
-
-
- billing boats
- cutty sark
- (and 1 more)
-
Hi Guys and thanks for your suggestions. I am still having difficulty inserting the caption below the photo but have found a suitable solution. I move the photo to the left margin and insert the caption midway down, beside the photo. I'm not sure why the previous method no longer works, but hey, this works just as well. Cheers, Peter
-
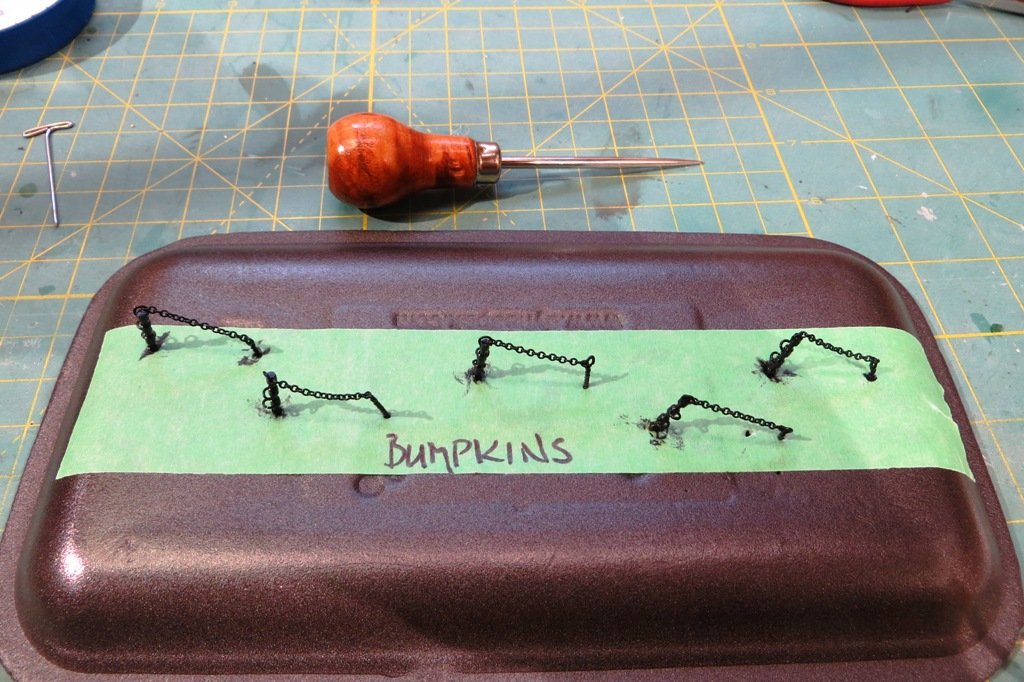
This morning the bumpkins were taken on. These are made with some stantions and split rings, some chain and manufactured eyebolts as well. Bumpkins are used for the braces on the fore and mainmast sails, including the courses and upper and lower topsails. They're well illustrated in Longridges book of the CS, which I'm relying on more and more.

- 207 replies
-
- 3
-
-
- billing boats
- cutty sark
- (and 1 more)
-
I have recently had issues adding text below a photo. After inserting the photo into the post, I then move the prompt below the picture in order to add a caption. However, the prompt immediately moves to left hand side of the picture at the middle of the picture. I have never had this issue before and hope that you can suggest a workaround. Cheers, Peter