HOLIDAY DONATION DRIVE - SUPPORT MSW - DO YOUR PART TO KEEP THIS GREAT FORUM GOING! (Only 24 donations so far out of 49,000 members - C'mon guys!)
×


petervisser
-
Posts
574 -
Joined
-
Last visited
Content Type
Profiles
Forums
Gallery
Events
Everything posted by petervisser
-
 Great job on your project Keith. They look fantastic together. Peter
- 732 replies
-
- 5
-

-

-
- Lula
- sternwheeler
- (and 1 more)
-
Hi Harvey. I just ran across your excellent build log of the Gjoa. Thought you might be interested in the actual village where Roald spent some time in Canada's Arctic. I was last there in 2003 aboard the Canadian icebreaker, Sir Wilfrid Laurier and went ashore with my watch partner Ed. We had a wonderful time walking the tundra and exploring the derelict boats nearby the village. Here's some pic's of what it's like in the high Arctic.
.JPG.00a17d70924ae2e8b0d47bd5ce036e4e.JPG)
.JPG.c9a414694dc12feef6771929b8e99c20.JPG)
.JPG.55687d86c91b1aa84162ef84ae611194.JPG)
.JPG.a22c0cf52252e12d833ab52f4ce23e5b.JPG)
-
That is really coming along Julian. Really nice colouring on the stern. What paint did you use on the ornamentation? I could use that on one of my later builds. Cheers, Peter
-
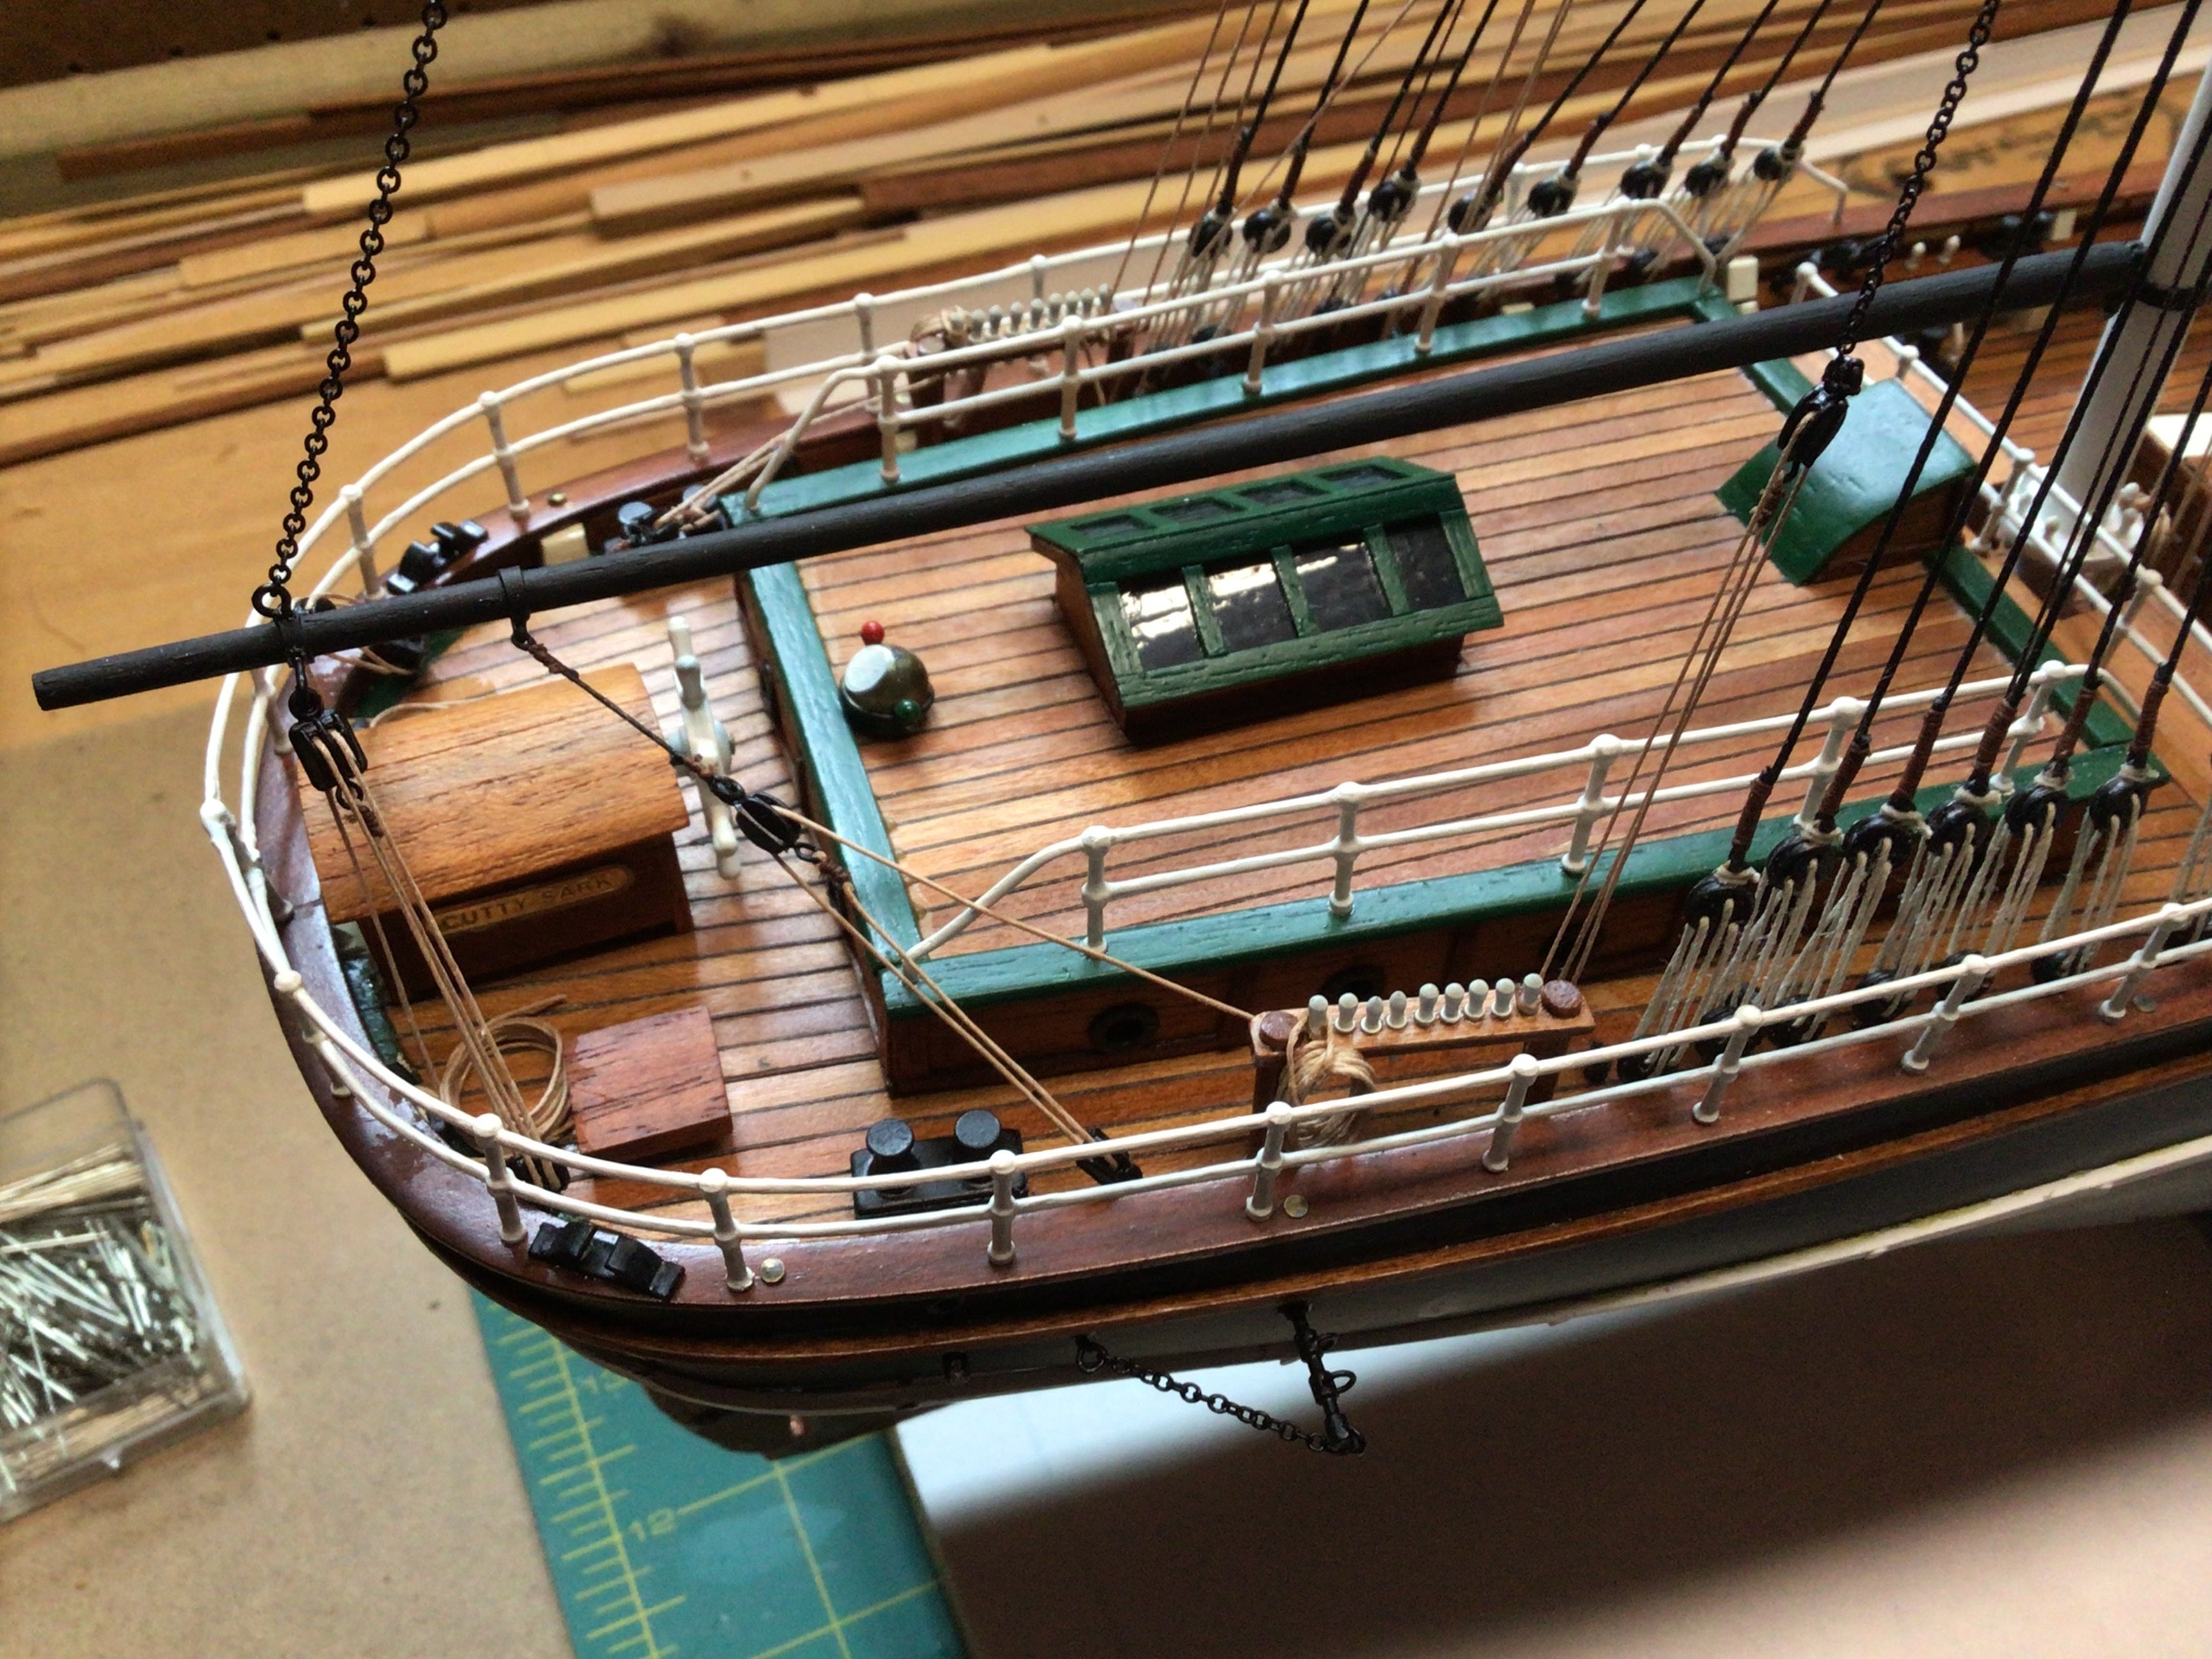
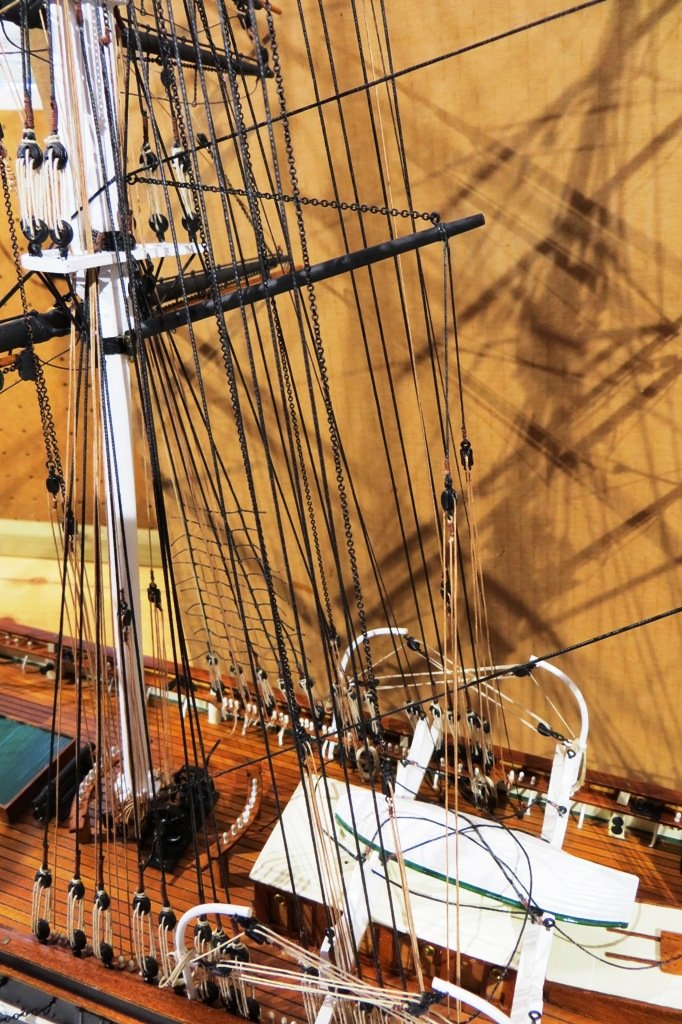
Wow, good to see that you are still working on your Cutty Sark. She is looking very familiar to me and we are both at the same stage roughly speaking. I was struck by how much chain is used in the rigging but it sure adds some lovely detail to the masts and yards. You have done amazing work with all the fittings you have manufactured. All the best on the last leg of your project! Peter
- 188 replies
-
- 1
-
-
- cutty sark
- billing boats
- (and 1 more)
-
The all natural wood finish looks amazing on the hull and decks. A very clean build harlequin. Well done! Peter
-
The Spencer Gaff is something that caught my attention late in the masting and rigging of the model. It is refernced in Longridge's "The Cutty Sark" so I have included it on my model. Campbell's plans also show it but without any associated rigging. Therefore it is now installed on my model with the vangs and chain sling, but without the lift. I had to re-rig the spanker gaff once the spencer gaff was installed as the former did not have the correct angle to the mast. The spanker gaff has a more accute angle. Here is a photo of the result.
- 207 replies
-
- 8
-
-

-
- billing boats
- cutty sark
- (and 1 more)
-
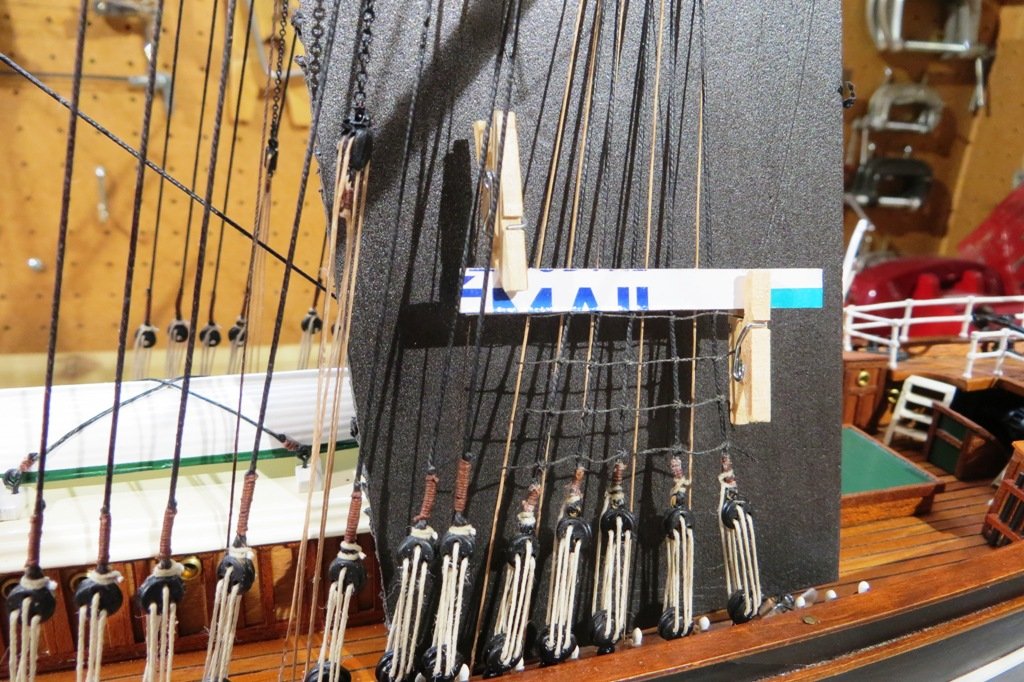
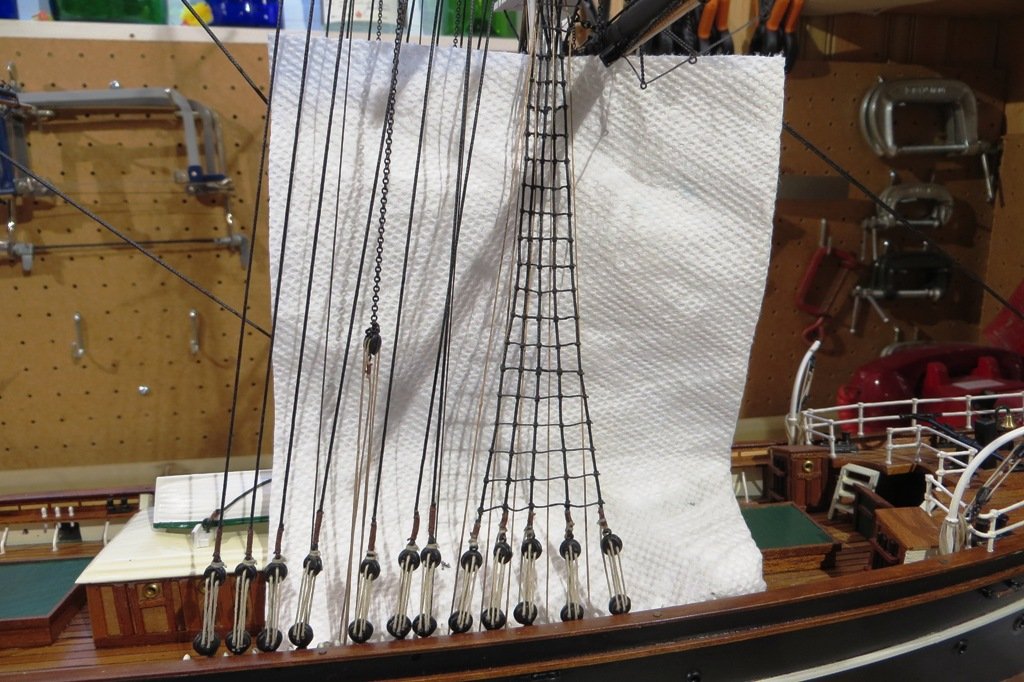
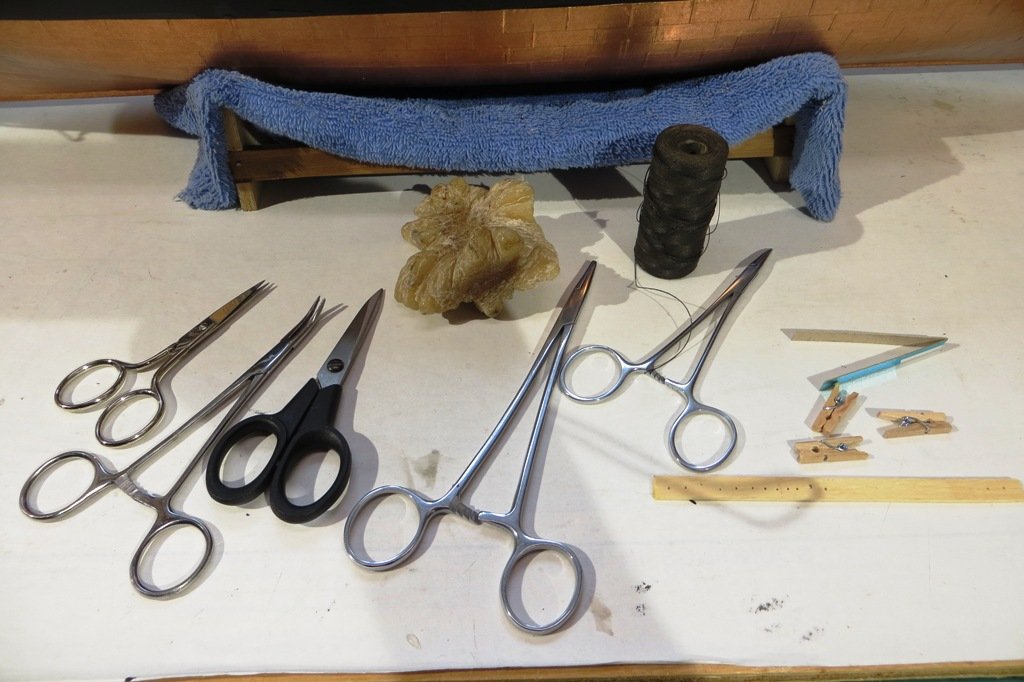
Hi Serpe. I recently posted this on my build log of the Cutty Sark and later saw your question regarding ratline templates. So I thought you might be interested in another method of tying these lines to your shrouds. Ratlines are pretty straightforward but I decided to make a post on a nifty way to get the spacing uniform. I cut a small piece of toothpaste box packaging to the correct width, folded it in half and then clipped it to the outermost shrouds that take the ratlines. The tiny clothespins were purchased at Michaels, a craft store chain. With the "jig" in place, the ratlines are added to the shrouds at the top edge of the paper. I'm not sure if this has been tried before, so apologies to the originator. Once the ratlines have been added to the lower mast shrouds, the sheets, tacks and clew lines will be added to the courses on all three masts. Here is a picture of the "ratline tool" (patent pending) in place along with a pic of the tools in use for this rivetting aspect of model ship building. The foam panel behind the shrouds isn't necessary and is there simply to make the ratlines show up better in the photo. All the best with you model!

-
Whats the best book on rigging for a beginner?
petervisser replied to Stuka's topic in Masting, rigging and sails
Yet another suggestion to add to your library is "Seamanship in the Age of Sail" by John Harland and illustrated by Mark Myers. Not only devoted to masts, rigging and sails but also shiphandling and a host of other topics. This book has hundreds of beautifully rendered drawings and lovely artwork. A masterpiece of a book! Cheers, Peter -
Twenty one ratlines later and this is the result. I'm a bit rusty at tying these but the process will become faster and more uniform with practice. I use bee's wax and a little dulcotte laquer to finish the ratlines which also keeps the knots knotted. Only 17 sets to go!
- 207 replies
-
- 4
-
-
- billing boats
- cutty sark
- (and 1 more)
-
All the best with your project. Feel free to ask any question you have and I will try to answer them. Cheers, Peter
- 207 replies
-
- 1
-
-
- billing boats
- cutty sark
- (and 1 more)
-
Whats the best book on rigging for a beginner?
petervisser replied to Stuka's topic in Masting, rigging and sails
Another book you may consider is "The Riggers Apprentice" by Brion Toss. I see it's on Abe Books for less than $20 US. Lots of really good information, great for beginners and wonderfully illustrated. It's gold! Peter -
It's ratline time! Since last posting, the sheets and clewlines have been rigged for all three masts from the topsails up. These lines have been belayed to the main pin racks behind the shrouds which will have these pesky little lines attached. I wanted as much access as possible to ensure there would be fewer obstacles in tying off the sheets and clew lines. Ratlines are pretty straightforward but I decided to make a post on a nifty way to get the spacing uniform. I cut a small piece of toothpaste box packaging to the correct width, folded it in half and then clipped it to the outermost shrouds the take the ratlines. The tiny clothespins were purchased at Michaels, a craft store chain. With the "jig" in place, the ratlines are added to the shrouds at the top edge of the paper. I'm not sure if this has been tried before, so apologies to the originator. Once the ratlines have been added to the lower mast shrouds, the sheets, tacks and clew lines will be added to the courses on all three masts. Here is a picture of the "ratline tool" (patent pending) in place along with a pic of the tools in use for this rivetting aspect of model ship building.😉

- 207 replies
-
- 5
-
-
- billing boats
- cutty sark
- (and 1 more)
-
I’m with the previous posters and think your model is outstanding. Beautiful work and she’s already stunning. Look forward to more of your work. Peter
-
Welcome to the site Doug. That is a neat and tidy Bluenose you have on the go. All the more so as the workspace on a live aboard is probably a bit less than vast. I’m in Victoria so that makes us neighbours I guess. All the best finishing your model and good luck with your next project. Peter
-
Just stumbled onto your build log of the NL. It is quite extensive with a lot of detailed info. I have this kit in the wings and you have got me inspired to build this model sooner than later. Mine is a newer version with laser cut parts which will make it so much easier. I have however built some of Billing’s earlier offerings and so I’m aware of the challenges you have faced. But your Norske Love is shaping up really well. All the best going forward and I’ll follow along. Cheers, Peter
-
Just ran across your Endeavour and glad I did. Very neat work indeed. And it was fun to see your Bellona in the background as I was really impressed by your work on that model. Couldn't help noticing the Unicorn as well. It appears you're a Corel man through and through. 😉 Cheers, Peter
-
Thanks Fritz. I was thinking about my Cutty Sark when I wrote the post. It is now corrected to reflect your observation.
Cheers, Peter
-
Rigging Mast Deadeyes Order
petervisser replied to acaron41120's topic in Masting, rigging and sails
Hi Allen. I am currently working on the rigging of my own model at the moment and have dealt with the standing rigging not that long ago. Myself, this is how I would tackle it. Start with the shrouds on the lower mizzen mast. This will in effect set this mast as the anchor of the forward masts. Then add the lower stay from the mizzen mast to the deck or base of main mast as it will put some strain on your mizzen mast shrouds and is easier to attach without the lower main mast shrouds in the way. Attach the lower main mast shrouds and follow that up with the lower main mast stays. Then the lower foremast shrouds and fore stay. Finish off the lower level of standing rigging by attaching the bob stays of the bowsprit. After that go up a level and start back at the mizzen mast topmast shrouds, backstays and topmast stays. By now you are probably seeing a pattern to this method. I always think of it as trying to maintain a rake of the masts so that they have a slight bias of leaning aft. As for the shroud attachment, I attach them to the base of the mast and then pass them down the lubber hole or cap. Of course there are others who may have an easier or more convenient order of rigging. This is just my take. Incidently, I am rigging the ratlines last. This will allow me to reach inside the standing rigging to attach the running rigging. Working inside to out so to speak. Good luck with this next stage of your model. Cheers, Peter -
I'm with Keith and think the fighting black hull is the way to go. Far more dramatic. I am really enjoying your build log and am glad you have resurrected your unique model. Cheers, Peter
-
Quite the process Julian, but the results look great. I really like the black acetate you used to replicate the window panes. All the best going forward. Peter
-
Splice that main brace Kevin! You have built a very fine model and she looks amazing. I can’t believe how quickly you have completed your build. It takes me that long to complete the hull…. Congratulations!🫡 Peter
- 62 replies
-
- 3
-
-

-
- belle poule
- OcCre
- (and 1 more)
-
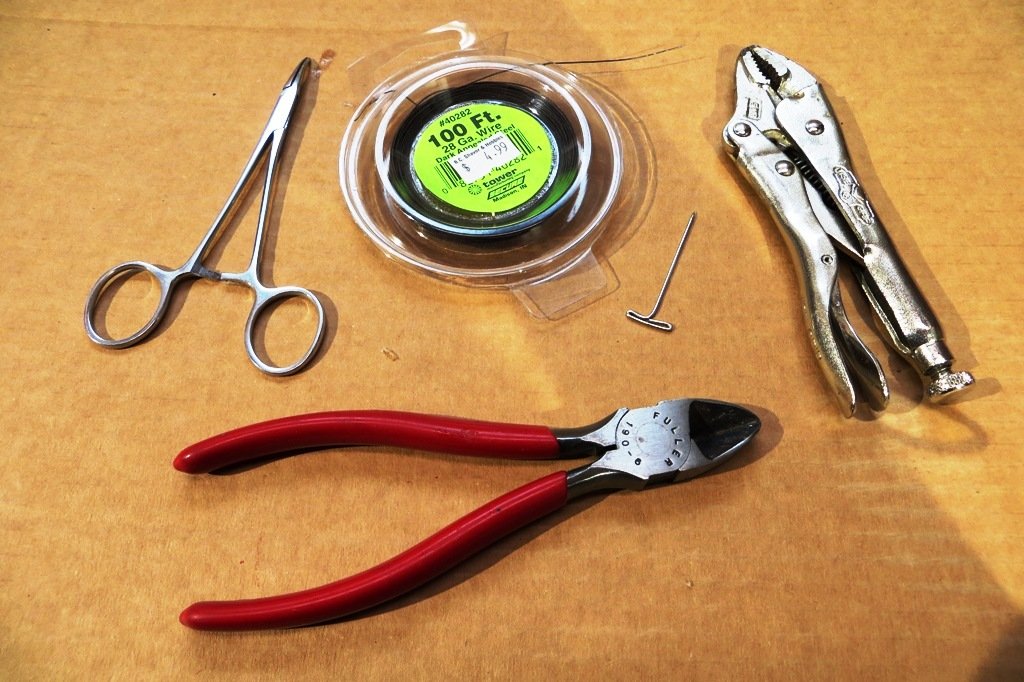
Hi Frank. I bought the wire at a hobby store a long while ago. My source for wire are bead stores or craft shops. They have they a wide variety of gauges I use. We have Michael’s here in Canada. Their wire is normally copper or a matte silver but some black paint can be used. Hardware stores might be another place for purchasing the wire you’re after. Cheers.
-
Hi Julian. Your model is really coming along and the decks look really good. Perfect shade for the wood I think. As for your stern windows, have you ever thought of using the storage filament found inside floppy disks? Remember those? I first learned of this technique on the old Drydock Models website a long while back. He used that technique on his Bellona model and I was really impressed. Otherwise a blue filament might work too. Just a suggestion. I’m curious what you choose going forward. All the best. Peter

-
A really interesting subject Keith and at such a small scale. You're a braver man than I. It sure is starting to come to life! Peter
- 732 replies
-
- 3
-
-
-
- Lula
- sternwheeler
- (and 1 more)
-
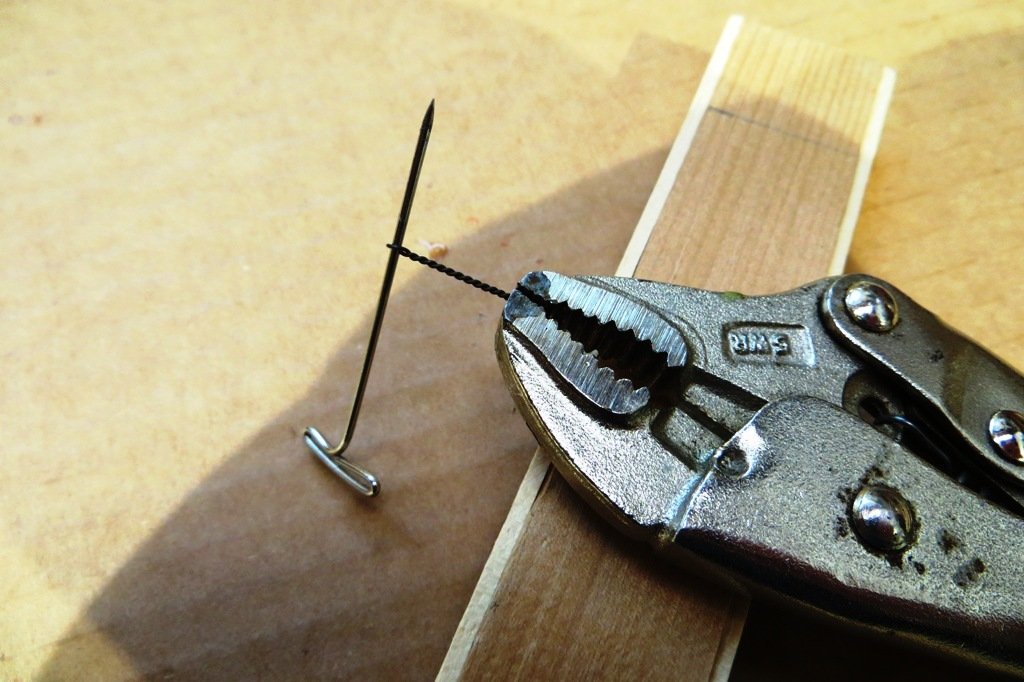
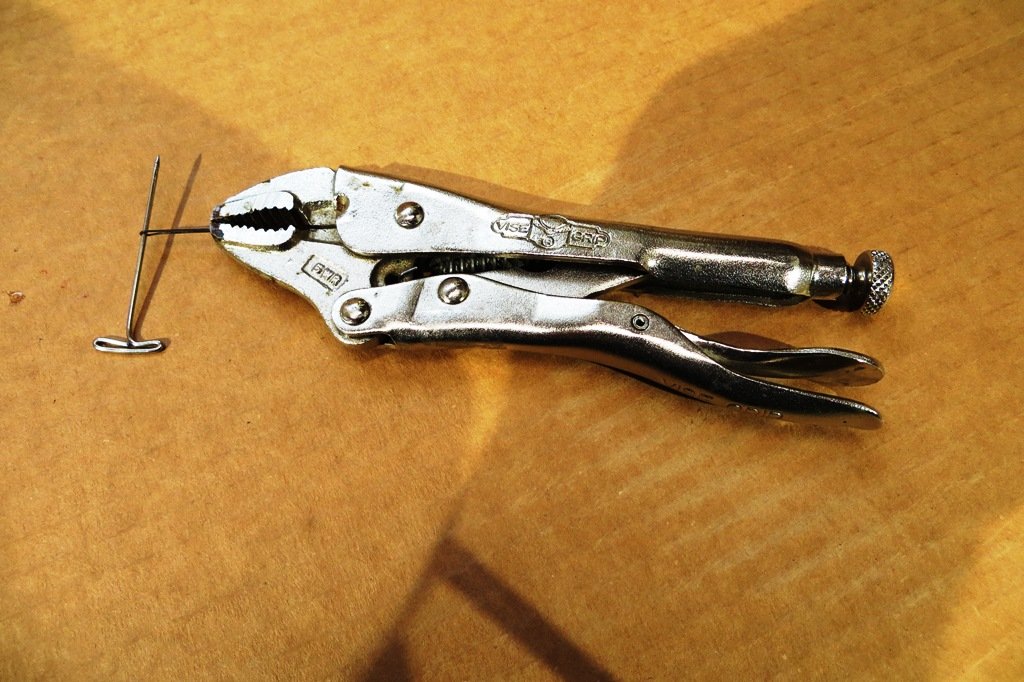
Hi G. I went through this dilemma a while back and tried to source the self same eyebolts. Like you, none were small enough so I tried fabicating my own. The results were less than ideal as each one was slightly different than the one before. And the length of time to produce a single eyebolt seemed quite time consuming. Not sure where or how I came up with this method but it has been a game changer for me. Below are the steps taken to manufacture these little fittings consistently and quickly. The size of the eye will vary with the size of the needle and gauge of the wire. Just experiment to get the size down to your satisfaction. Cheers, Peter