


petervisser
-
Posts
557 -
Joined
-
Last visited
Content Type
Profiles
Forums
Gallery
Events
Posts posted by petervisser
-
-
Hi HOF. Just saw your latest post and see that you're rigging anchors. You might want to take a look at Prince de Neufchatel by Coyote_6 – Constructo – 1/58 scale - American privateer. I ran across his build log and he has rigged his just recently. I will be following his procedure which appears to me as being the most accurate method.
Cheers,
Peter
-
-
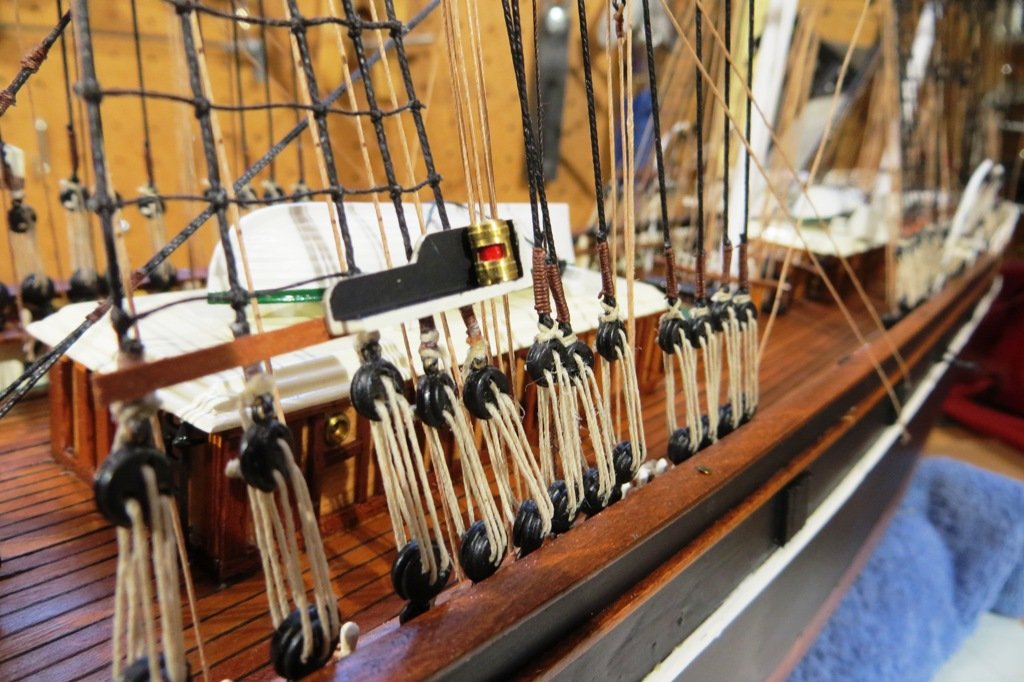
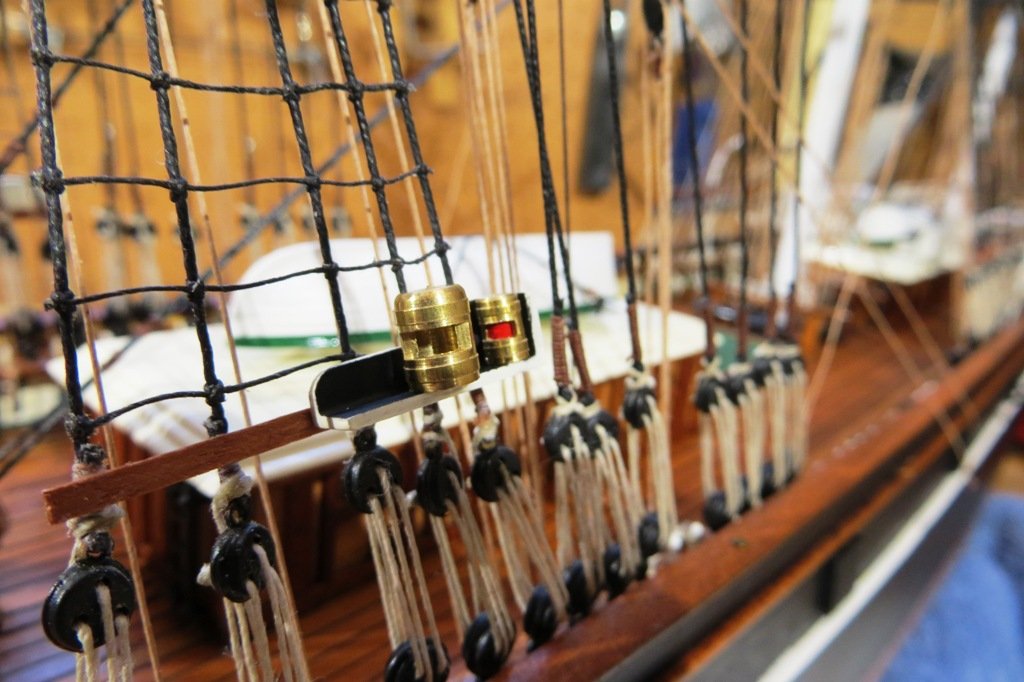
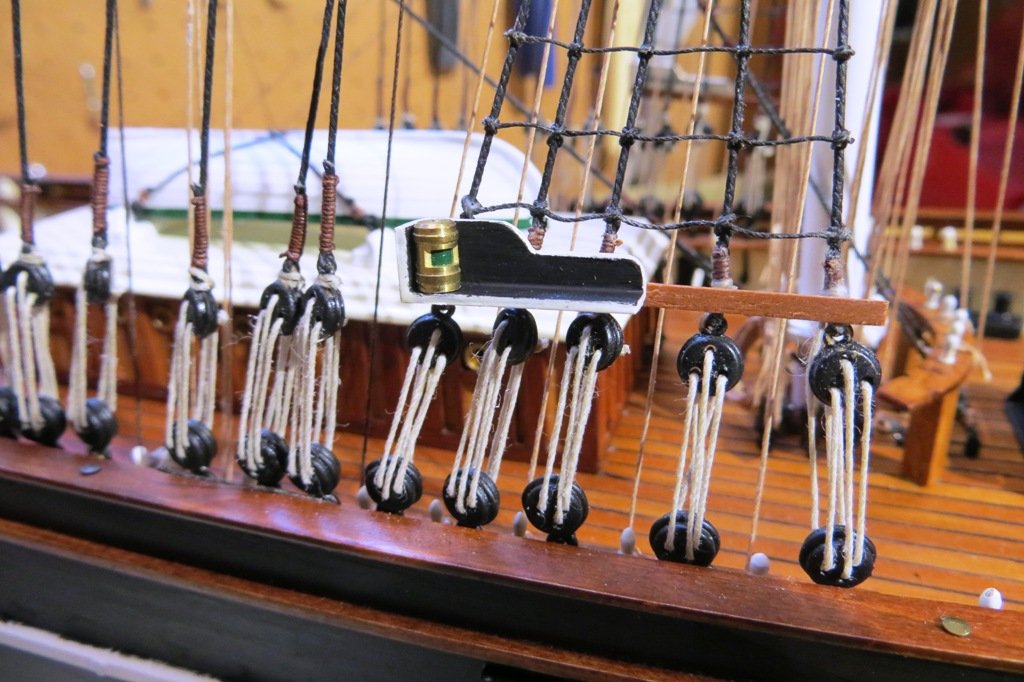
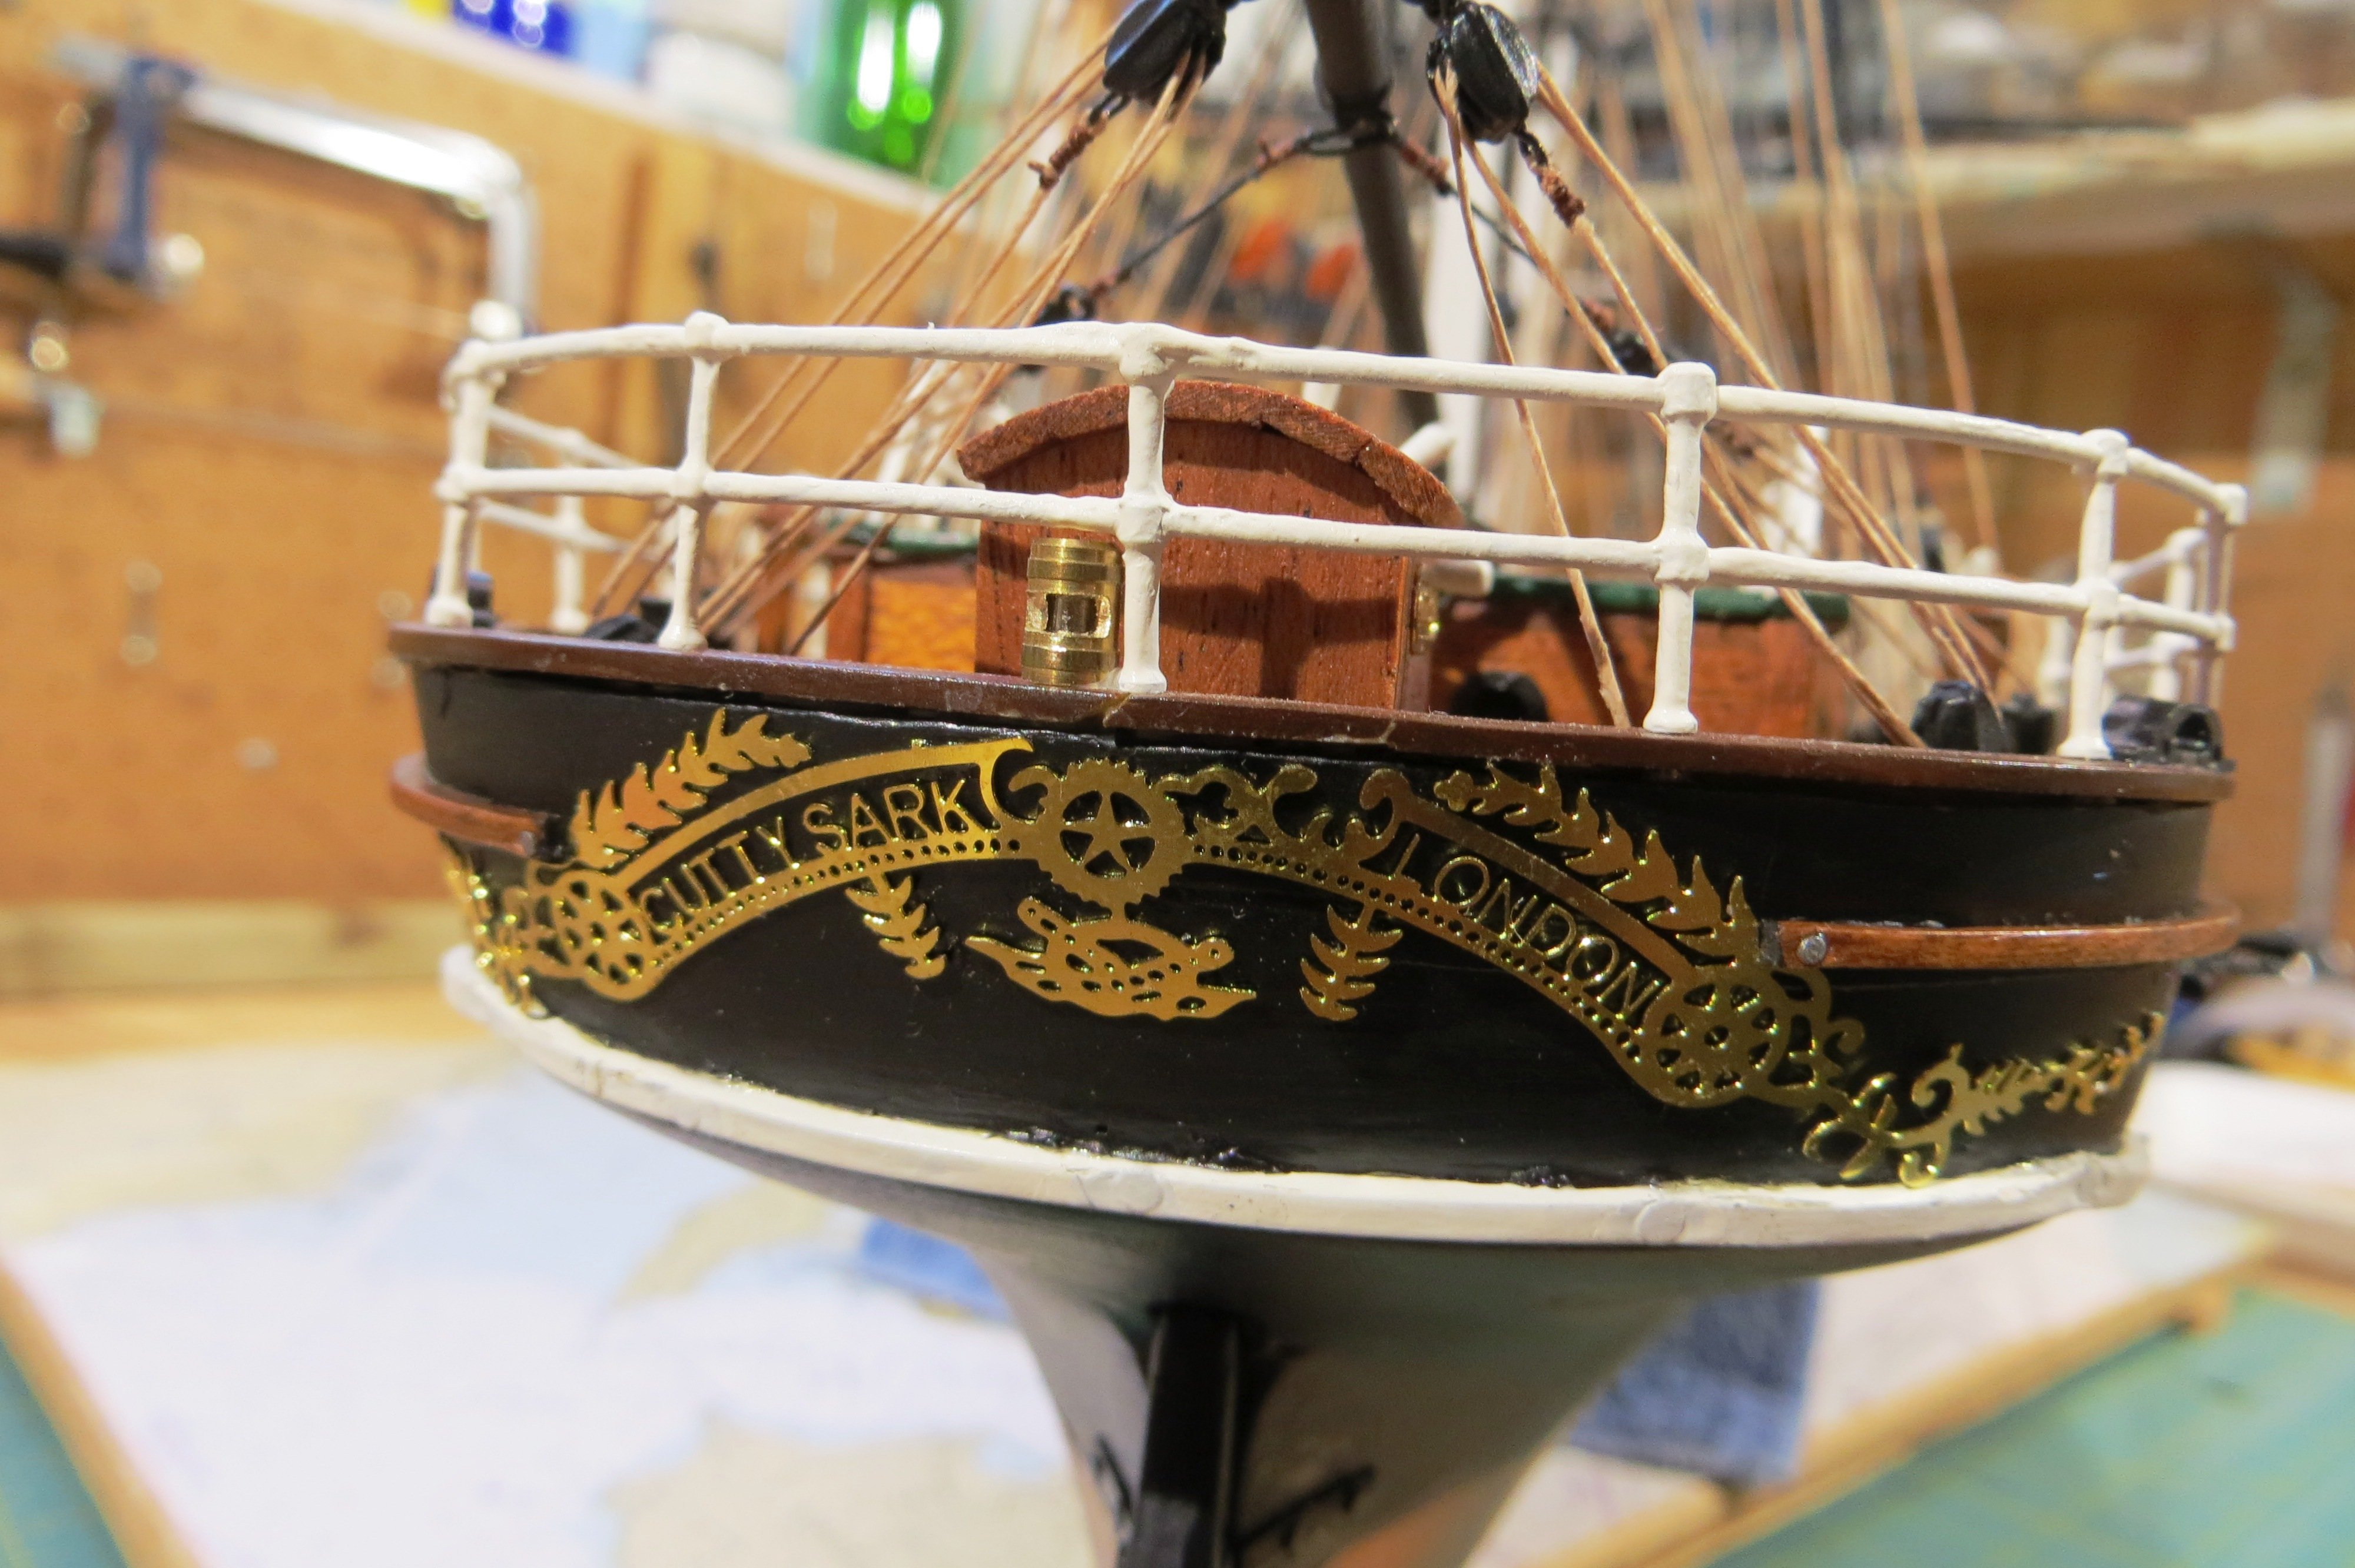
Work continues albeit at a slower pace now that spring has arrived. Between the installation of the running rigging, I have added the running lights which the Cutty Sark would have shown in her early days. The kit did provide 2 lanterns and sidelight screens, but they were not of the correct scale. This became evident when dry fitted onto the shrouds. Thankfully, I had some brass lanterns which were scavenged at some point and they seemed to be the perfect size. The screens were therefore modified and reduced in size accordingly. The kit did not provide a sternlight which to me seems a major oversight. Here are some photos of the results.

-
I was surprised to find this publication in a local bookstore in Sidney, B.C. What a treat as I wasn't willing to pay the delivery cost. Needless to say it is now in my workshop where it will be put to good use. Thanks to all the contributors for this collection of "how-to's". Very much appreciated!
Peter
- thibaultron, Keith Black, robert952 and 3 others
-
 6
6
-
A stunning piece of work Patrick. Well done!
Peter
- Old Collingwood and Baker
-
1
-
 1
1
-
-
For a deep clean of your paint brushes, you might want to try TSP which you can purchase at Canadian Tire, seeing as you're in Canada. Give give the paint brushes a soak overnight using the recommendations on the container and rinse with water. I hope this is a help.
Cheers, Peter
- druxey, thibaultron, MBerg and 1 other
-
4
-
Great model so far HOF. As Ian mentioned in an earlier post, Underhill’s masting and rigging book may be a really good investment at this point in your project. I have been using it with my own model and it has really helped. I see it listed on Abe Books for less than $20US. With your model at the very early stages of rigging, it will make your life much easier and you can rig it with greater accuracy and confidence. All the best going forward!
Peter
-
Hi Joe. I also have the Billing Norske Love which is in the wings waiting to be built myself. A fantastic model that should keep your dad out of trouble for quite some time. I have also built a number of Billing kits so I am familiar with their numbering of parts. "F" refers to a fitting. All the bits and pieces that are not wood parts. 164, is the fitting number and in this case refers to the gun carriages. The number "6" is meant to denote the colour the carriages are meant to be painted. In this case a dark red. I'm not sure where you see the "L" when you say it is on the board. "L" normally refers to the standing rigging or the rigging controlling the yards. I hope this is a help.
Cheers, Peter
-
Congratulations on your very fine model. A real achievment. Mr. Occre would be proud!
Peter
-
Great job on your project Keith. They look fantastic together.
Peter
- Canute, Keith Black, FriedClams and 2 others
-
4
-
1
-
Hi Harvey. I just ran across your excellent build log of the Gjoa. Thought you might be interested in the actual village where Roald spent some time in Canada's Arctic. I was last there in 2003 aboard the Canadian icebreaker, Sir Wilfrid Laurier and went ashore with my watch partner Ed. We had a wonderful time walking the tundra and exploring the derelict boats nearby the village. Here's some pic's of what it's like in the high Arctic.
.JPG.00a17d70924ae2e8b0d47bd5ce036e4e.JPG)
.JPG.c9a414694dc12feef6771929b8e99c20.JPG)
.JPG.55687d86c91b1aa84162ef84ae611194.JPG)
.JPG.a22c0cf52252e12d833ab52f4ce23e5b.JPG)
-
That is really coming along Julian. Really nice colouring on the stern. What paint did you use on the ornamentation? I could use that on one of my later builds.
Cheers,
Peter
-
Wow, good to see that you are still working on your Cutty Sark. She is looking very familiar to me and we are both at the same stage roughly speaking. I was struck by how much chain is used in the rigging but it sure adds some lovely detail to the masts and yards. You have done amazing work with all the fittings you have manufactured. All the best on the last leg of your project!
Peter
-
-
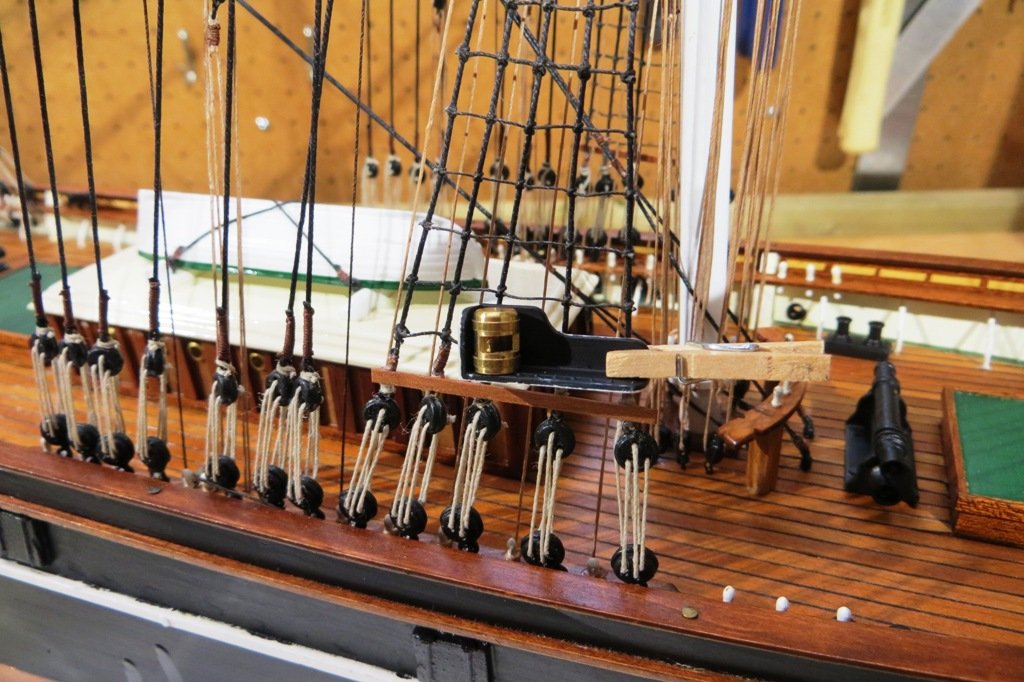
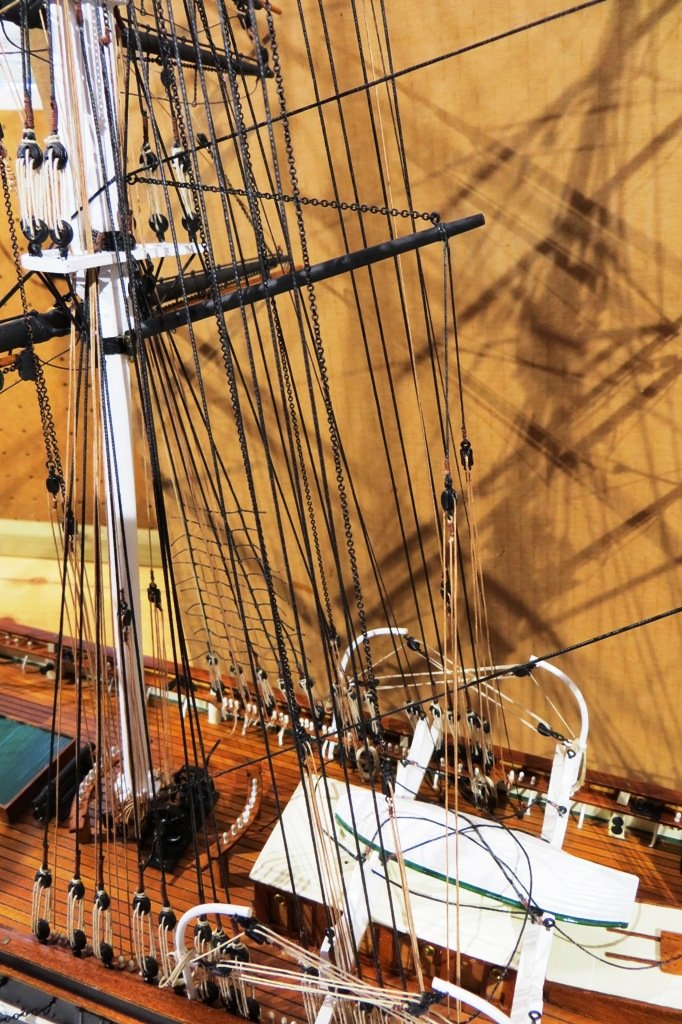
The Spencer Gaff is something that caught my attention late in the masting and rigging of the model. It is refernced in Longridge's "The Cutty Sark" so I have included it on my model. Campbell's plans also show it but without any associated rigging. Therefore it is now installed on my model with the vangs and chain sling, but without the lift. I had to re-rig the spanker gaff once the spencer gaff was installed as the former did not have the correct angle to the mast. The spanker gaff has a more accute angle. Here is a photo of the result.
-
Hi Serpe. I recently posted this on my build log of the Cutty Sark and later saw your question regarding ratline templates. So I thought you might be interested in another method of tying these lines to your shrouds.
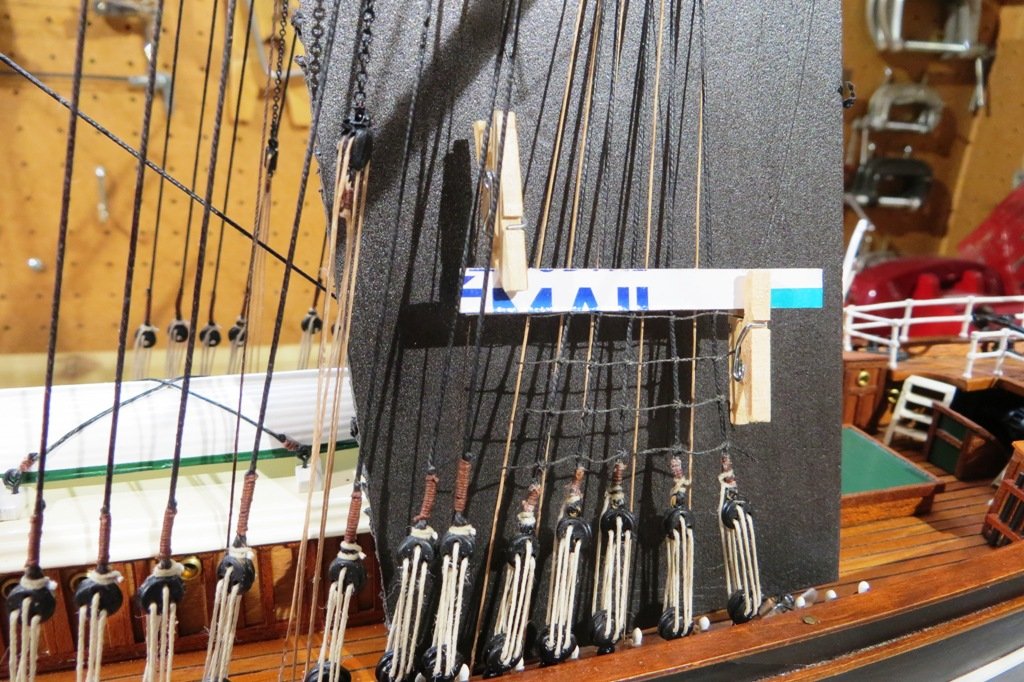
Ratlines are pretty straightforward but I decided to make a post on a nifty way to get the spacing uniform. I cut a small piece of toothpaste box packaging to the correct width, folded it in half and then clipped it to the outermost shrouds that take the ratlines. The tiny clothespins were purchased at Michaels, a craft store chain. With the "jig" in place, the ratlines are added to the shrouds at the top edge of the paper. I'm not sure if this has been tried before, so apologies to the originator. Once the ratlines have been added to the lower mast shrouds, the sheets, tacks and clew lines will be added to the courses on all three masts.
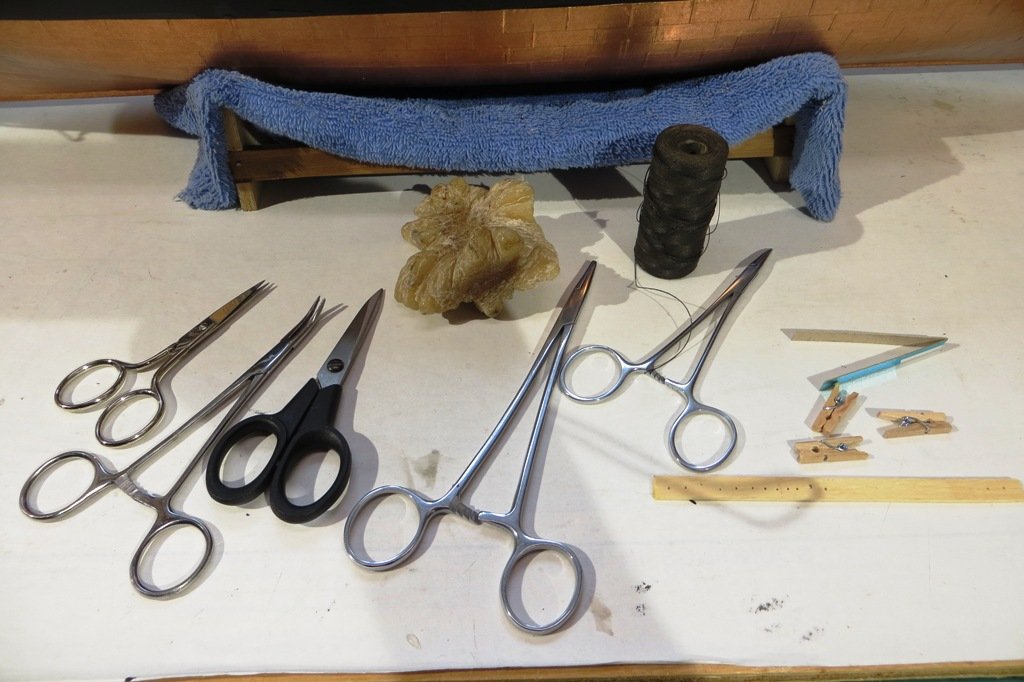
Here is a picture of the "ratline tool" (patent pending) in place along with a pic of the tools in use for this rivetting aspect of model ship building. The foam panel behind the shrouds isn't necessary and is there simply to make the ratlines show up better in the photo. All the best with you model!

- serpe and Knocklouder
-
2
-
Yet another suggestion to add to your library is "Seamanship in the Age of Sail" by John Harland and illustrated by Mark Myers. Not only devoted to masts, rigging and sails but also shiphandling and a host of other topics. This book has hundreds of beautifully rendered drawings and lovely artwork. A masterpiece of a book!
Cheers,
Peter
-
Twenty one ratlines later and this is the result. I'm a bit rusty at tying these but the process will become faster and more uniform with practice. I use bee's wax and a little dulcotte laquer to finish the ratlines which also keeps the knots knotted. Only 17 sets to go!
- berhard, eatcrow2, MisterMeester and 1 other
-
4
-
All the best with your project. Feel free to ask any question you have and I will try to answer them.
Cheers,
Peter
-
-
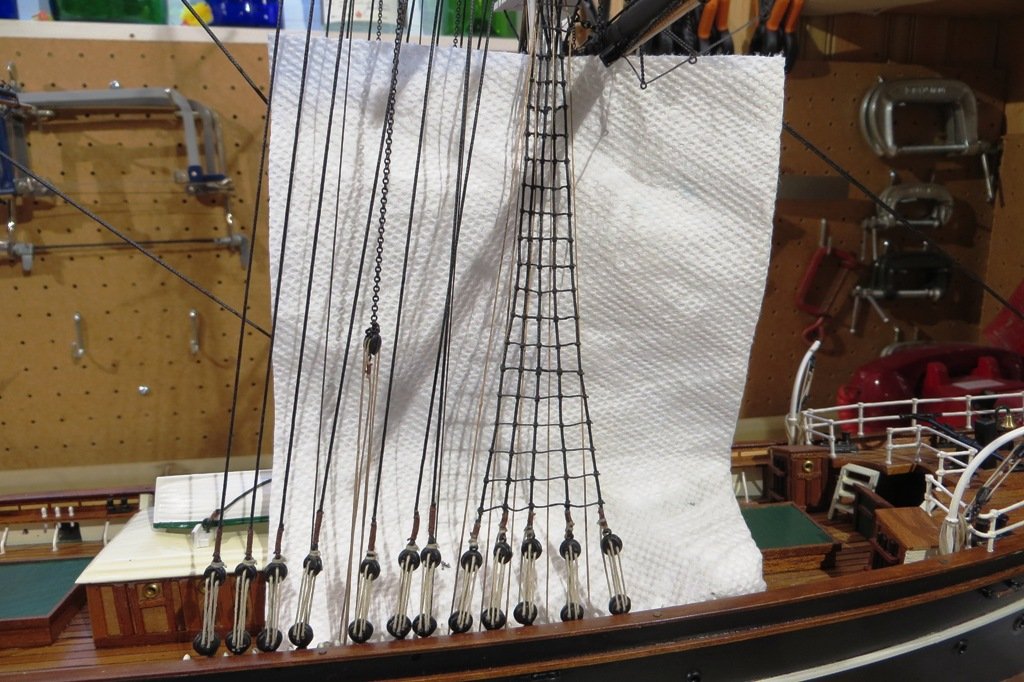
It's ratline time! Since last posting, the sheets and clewlines have been rigged for all three masts from the topsails up. These lines have been belayed to the main pin racks behind the shrouds which will have these pesky little lines attached. I wanted as much access as possible to ensure there would be fewer obstacles in tying off the sheets and clew lines. Ratlines are pretty straightforward but I decided to make a post on a nifty way to get the spacing uniform. I cut a small piece of toothpaste box packaging to the correct width, folded it in half and then clipped it to the outermost shrouds the take the ratlines. The tiny clothespins were purchased at Michaels, a craft store chain. With the "jig" in place, the ratlines are added to the shrouds at the top edge of the paper. I'm not sure if this has been tried before, so apologies to the originator. Once the ratlines have been added to the lower mast shrouds, the sheets, tacks and clew lines will be added to the courses on all three masts.
Here is a picture of the "ratline tool" (patent pending) in place along with a pic of the tools in use for this rivetting aspect of model ship building.😉

- berhard, Knocklouder, Keith Black and 2 others
-
5
-
-
Welcome to the site Doug. That is a neat and tidy Bluenose you have on the go. All the more so as the workspace on a live aboard is probably a bit less than vast. I’m in Victoria so that makes us neighbours I guess. All the best finishing your model and good luck with your next project.
Peter- Keith Black and Doug Smith
-
2

Flying Fish by Jared - Model Shipways - 1:96
in - Kit build logs for subjects built from 1851 - 1900
Posted
Looking really good! I think the chain really adds some character to the rigging. Are you adding sails to your model? I'm guessing not, as the yards are attached to the masts already.
All the best going forward.
Peter