


petervisser
-
Posts
506 -
Joined
-
Last visited
Content Type
Profiles
Forums
Gallery
Events
Posts posted by petervisser
-
-
I just ran across your build log for the first time. Having built the Unicorn a few years ago, it brought back some fond memories. As you say, not the most accurate model of an authentic British frigate, but an attractive model in the end. I modified mine in a few areas, using John Mckay's AOTS book, Pandora and Petersson's rigging book.
All the best going forward. You're certainly doing the model justice.
Peter
-
Thanks for the pic's Pete. I have put in a request to AL for the parts comprising the bow and stern decoration. Fingers crossed that they get back to me...
Cheers,
Peter
-
Hi Blunty. Your model looks great! Lots of very nice detailing. As for the rake of the masts they do vary a little. I have Longridge's book and he states that the foremast is raked at 86*, the main mast 85*and the mizzen mast 84*. The angle is measured from the horizontal to the after side of each mast. Therefore they are angled aft, for clarification,
By the way, I wondered if you could send me a photo of the bow and stern decoration that's included in your kit. The ones from Billing that I have are not ideal, especially, the stern. I am thinking of applying to AL to see if I could purchase a set of theirs.
Anyhoo, great work so far. Good luck with the masting and rigging!
Peter
-
Hi Ed,
I just ran across your log and will be following along. I have this kit on my shelf as well, and it's one I've always wanted to build. Handy that you've started yours so I have an idea what's involved. And I have the self same "deck plank clamps" that you have so I'm set in that department!
Good luck with your build. You have made an excellent start!
Cheers,
Peter
-
-
Hi Dave,
Have you thought about using bee's wax on your rigging? I use it all the time for most of the rigging I do. it adds a bit of stiffness to the thread you're working with and it does away with the "fuzziness" of the thread as well. Try drawing the thread through the wax a couple of times. It also adds a little tackiness to the thread which helps hold it in place to certain contact points and holds knots a bit better.
The only places to put glue on rigging is on the knots to make them permanent. However, I prefer dulcotte laquer on my knots, using a paint brush.
Hope this is a help.
Cheers,
Peter
-
Wow! Just a beautiful model you are building. Really one of a kind!
Peter
- BobG, Ekis and popeye the sailor
-
 2
2
-
 1
1
-
Fantastic work Mark. You are giving this model the treatment it deserves. Thanks for all the great photos too!
Peter
-
Thanks, but keep in mind that they are dry fitted for now. I simply wanted to get the various spars together to show some progress on the masts. I have Longridge's book which stipulates the rake of the masts. Thanks for looking in.
Peter
-
A thing of beauty BE. Having started with Billing Boat myself years ago, I have often wanted to build this kit myself. I now have the modern version of the model in my stockpile of models yet to be built. The fittings have changed somewhat and the blocks and deadeys are now wood. But the plastic lion hasn't changed one bit! Seeing the photos of your Norske Love has definately given me some inspiration to start mine. Thanks for showing them off!
Peter
-
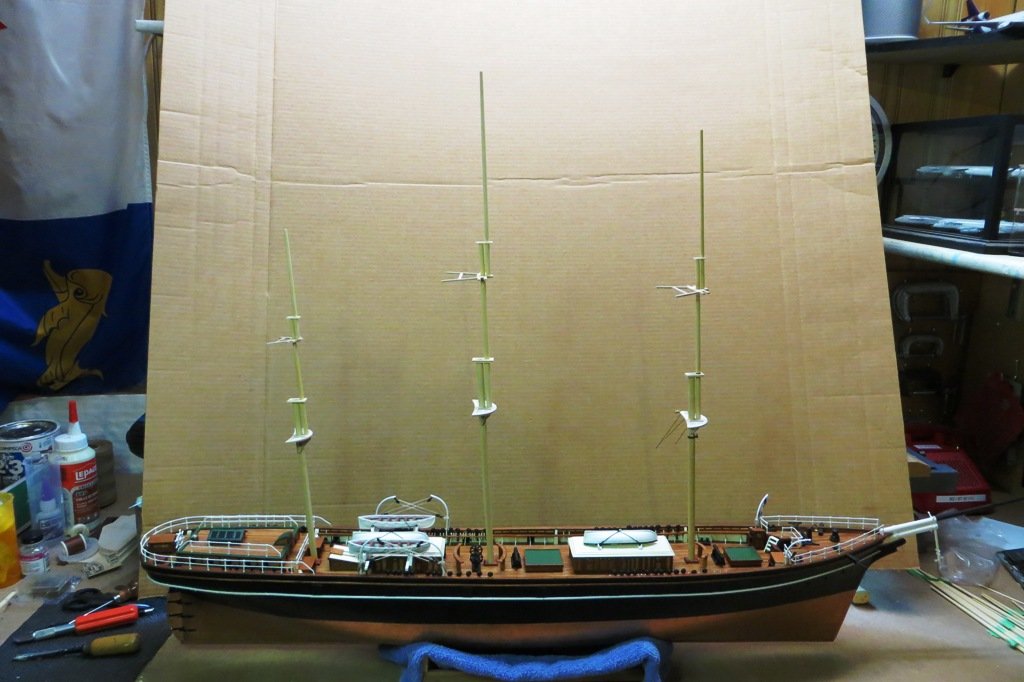
I have finally started work on the masting. Boy, there sure are alot of spars compared to my last model. The foremast went together with lots of trial and error. Mostly error. But once I established a system, the other two masts went together rather easily. All the masting is currently dry fitted so that they can be worked on. There is a ton of fittings that will be glued on piece by piece and careful planning is called for before the spars are stained and painted. I'm pretty excited about getting to this stage. Rigging is one of my favourite phases of the build. Once the spars are fitted, rapid progress can be made with the rigging. Here's a photo of the masts in place...
-
Hi Alan,
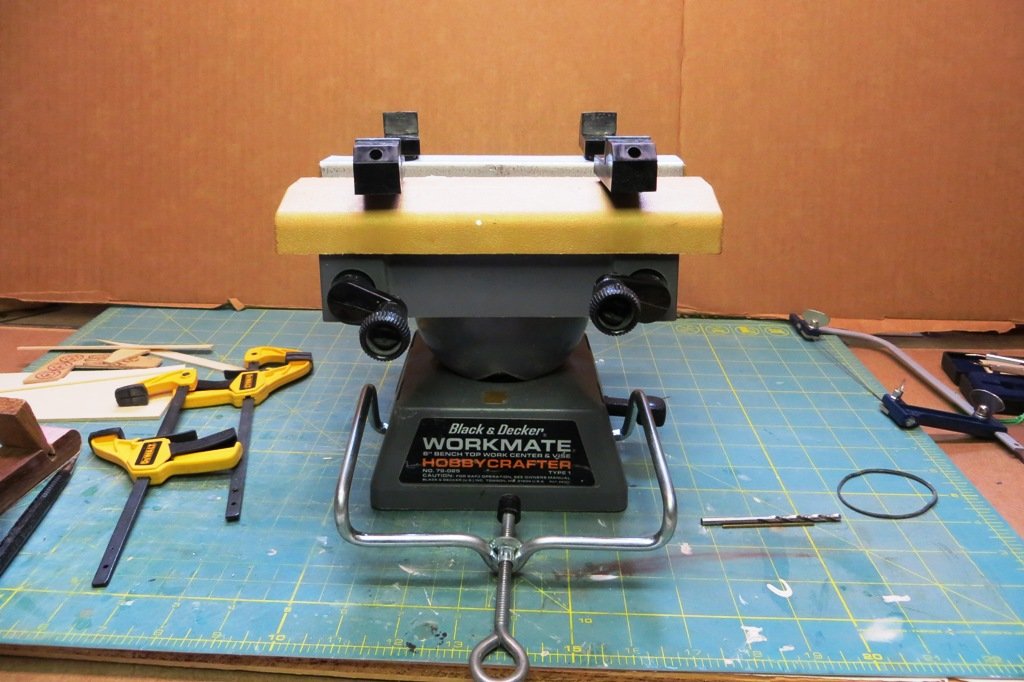
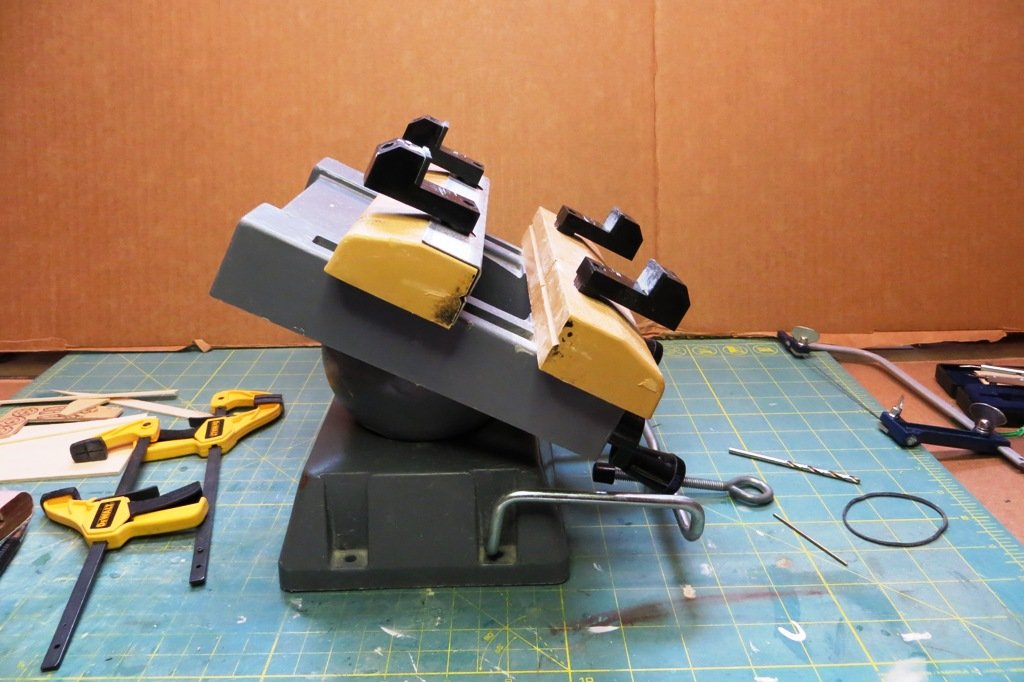
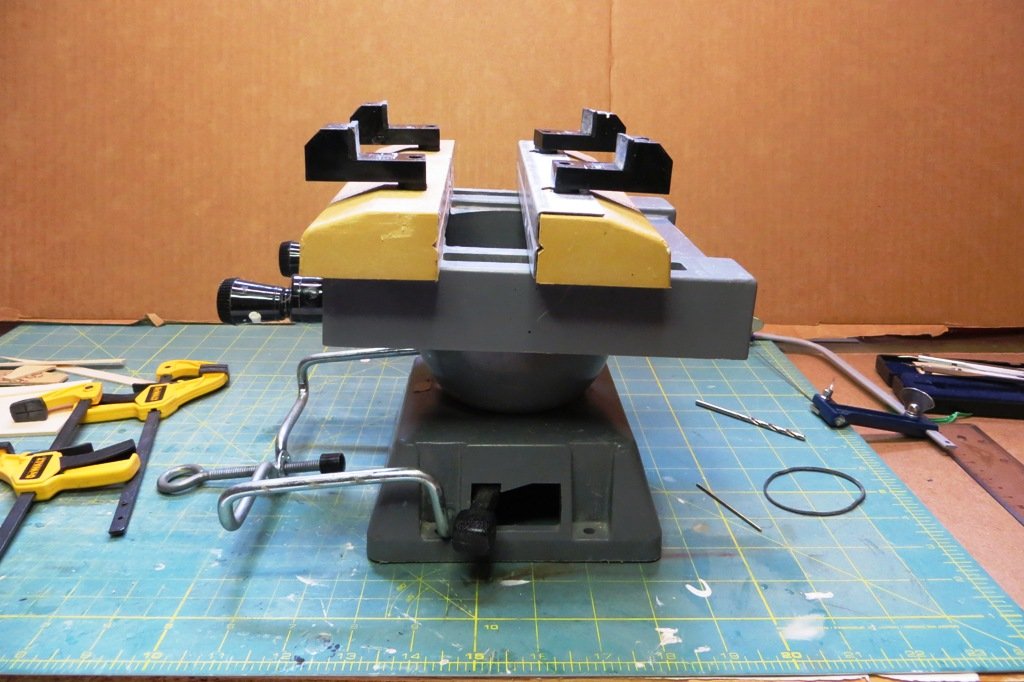
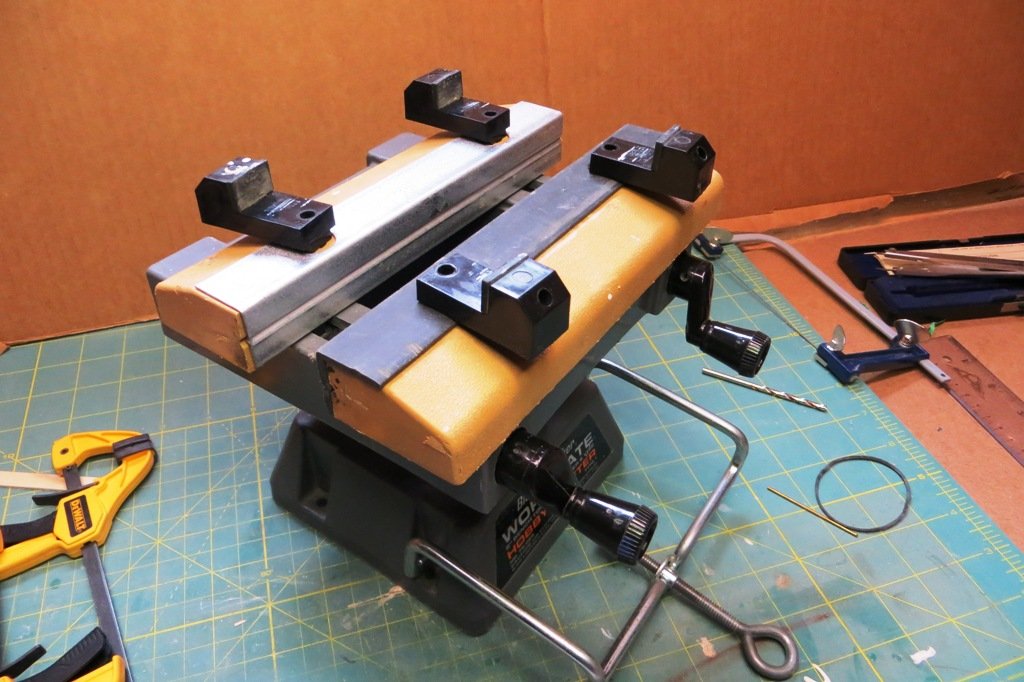
Thanks for looking in. As for the Workmate, here are some pic's of this handy-dandy unit. I am sorry to tell you that it is no longer made. I remember buying this in Duluth, Minnesota in the early 80's. I was sailing on the lakes at the time and the 3rd engineer and I went to a model shop in town. He was into scale railroading and I went to have a browse. The Workmate was on the shelf for sale and I snapped it up on the spot. It has served me well for many years and is very versitile. It clamps to the workbench (or not) and tilts and turns as necessary. It also came with rubber and metal inserts for the jaws to accommodate different materials. Seeing that it is no longer available, I will be taking much better care of it...
Cheers,
Peter
-
Hi Burma. Thanks for looking in and pointing out the top and cross-tree holes for the shrouds. I have partially drilled out the holes in the cross-trees but have yet to do the same for the tops. But worry not because they will be modified. Lots of work yet to be done before they are installed.
Cheers,
Peter
- Bruma and popeye the sailor
-
2
-
Hi JR,
As a fellow Cutty Sark builder, I will definately follow along with great interest. Although our kits differ, the ship is the same and it will be of interest to me how AL have designed their kit. I am envious of their hull decoration, which I believe is much better than Billing.
From the pictures of your shop you appear to be very organized and I'm sure you will do the model justice. I also noticed that you have some liquid inspiration on your shelves. Don't forget to refer to the artwork on the bottles as well as the books to gain insight on the construction of the ship. 😉
All the best with your build!
Peter
- Vladimir_Wairoa and Flypast
-
2
-
After a long hiatus from Cutty Sark, I have finally started on the masting and rigging. This is just a short update as to where I'm at with the project.
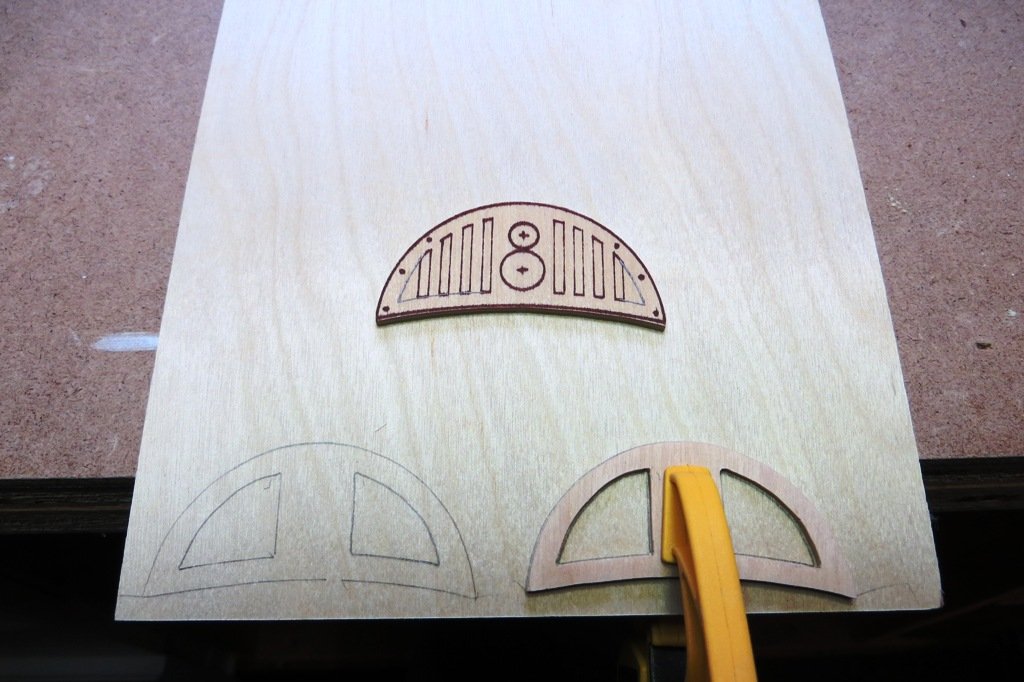
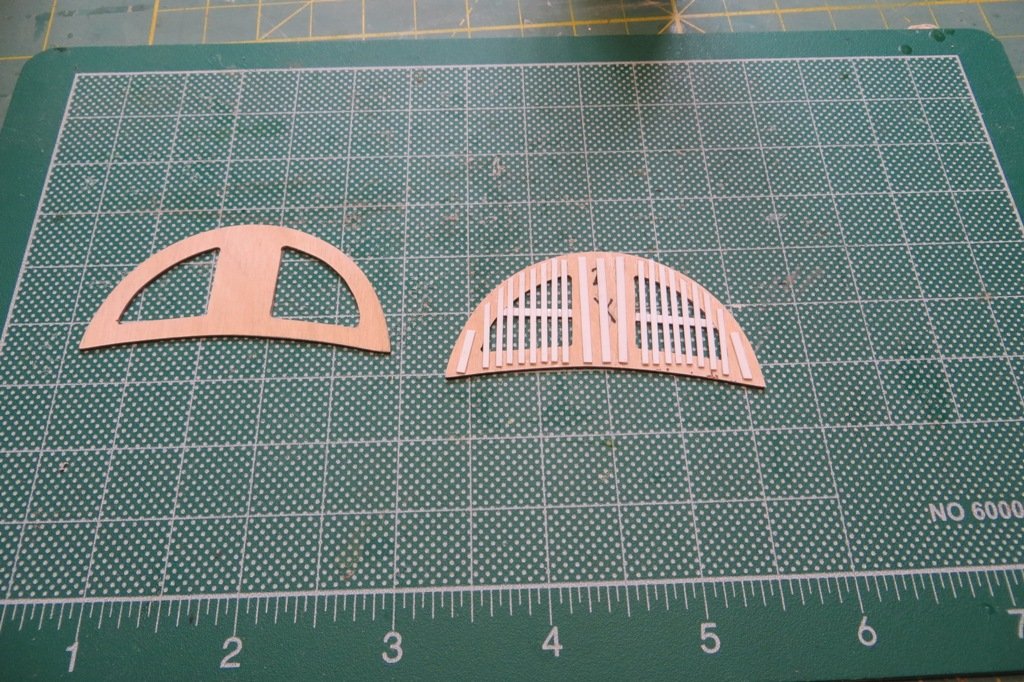
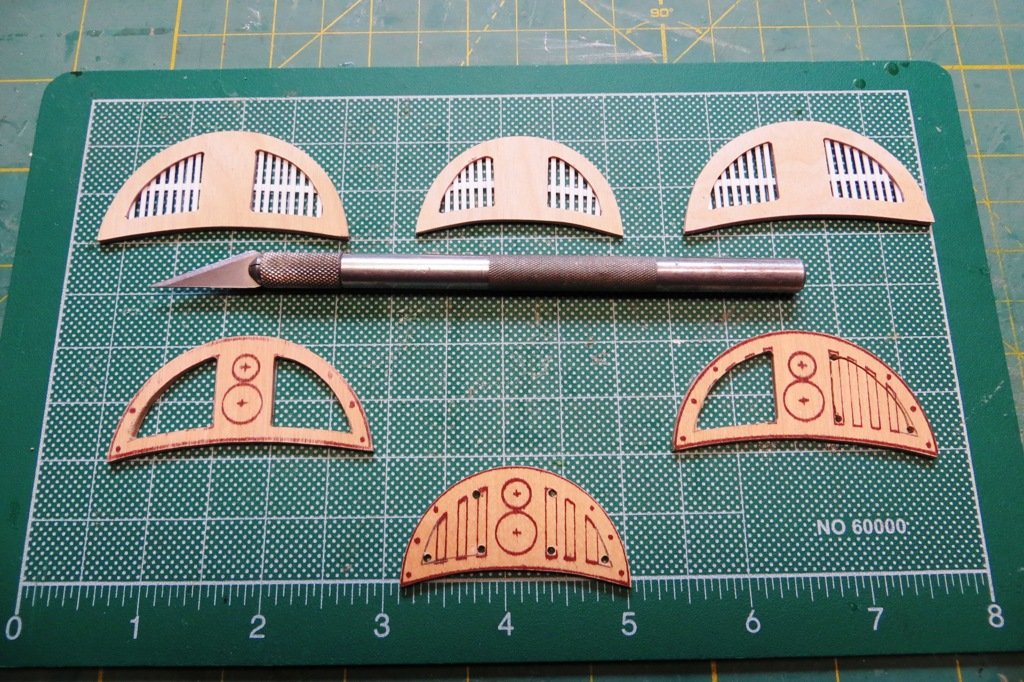
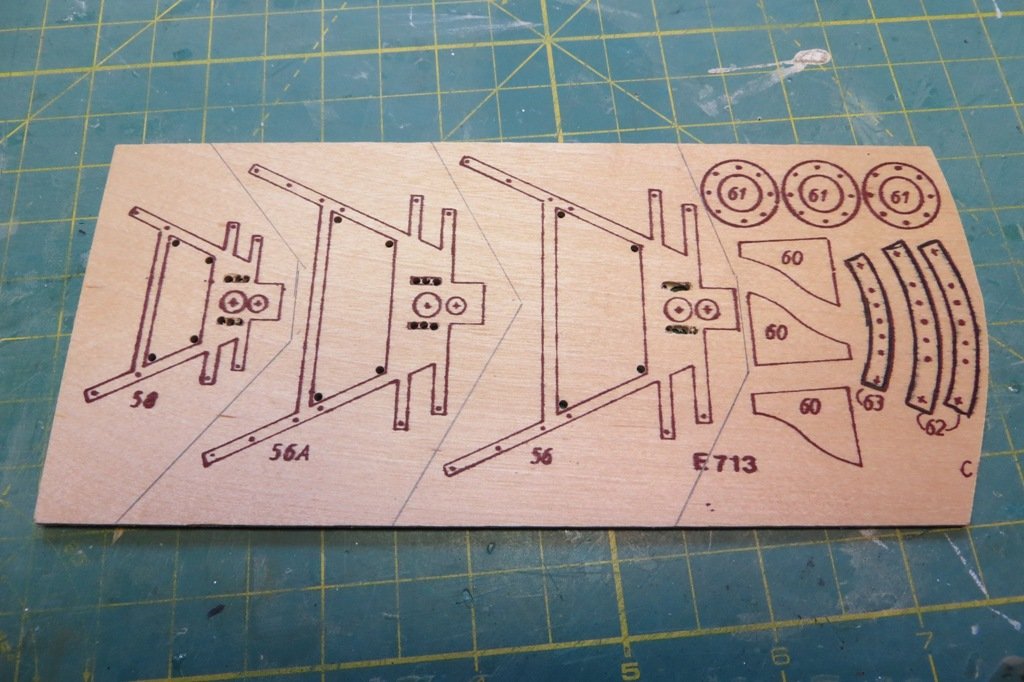
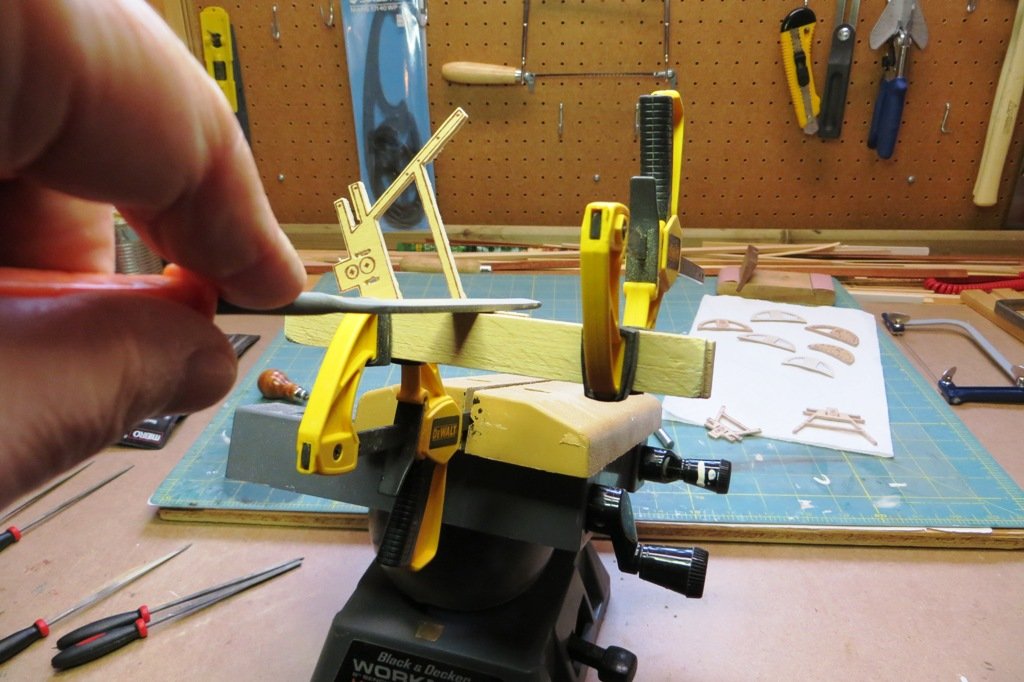
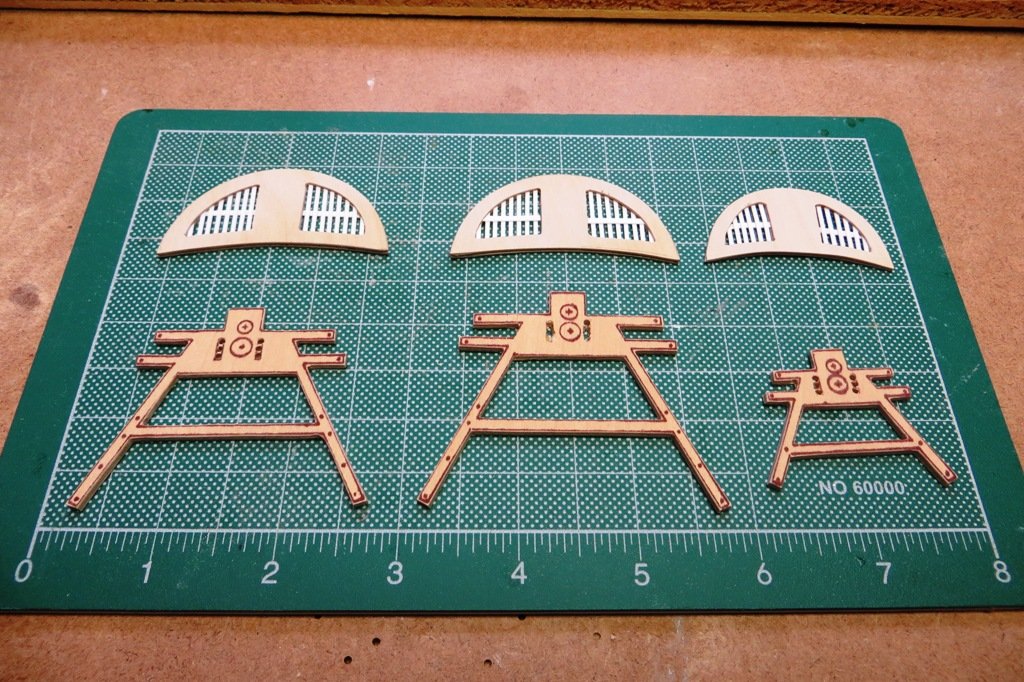
The first step in this long and involved process is to fabricate the parts that hold the masts together, they being the tops and cross-trees. My old kit had these pieces marked out on sheets of ply which had to be cut out with a scroll saw and fret saw. I cut the pieces out with the scroll saw and then filed and sanded out the pieces to size.
Due to the fact that the tops are less than detailed as marked out on the plywood, I opted to use them as templates. The templates were then used to trace the shapes on thinner sheets so that I could sandwich the gratings in between. I decided to use styrene for the grating as they are a uniform thickness and width and there is no sanding involved for such small and delicate strips. All will be painted white so there won't be an issue with the different materials.
Here are some pics of the initial construction.

- gak1965, Rudolf, marktiedens and 3 others
-
6
-
Fantastic! What a great subject for a model boat. I really like the fact that Billing come up with designs for models that are different than the more conventional and have more relevance to the European model builders. All the best with your project. I will be following along!
Peter
- popeye the sailor, Ekis, ccoyle and 3 others
-
6
-
Wonderful work Mark! It's going to be stunning when she's complete. Enjoy the journey.
Peter
-
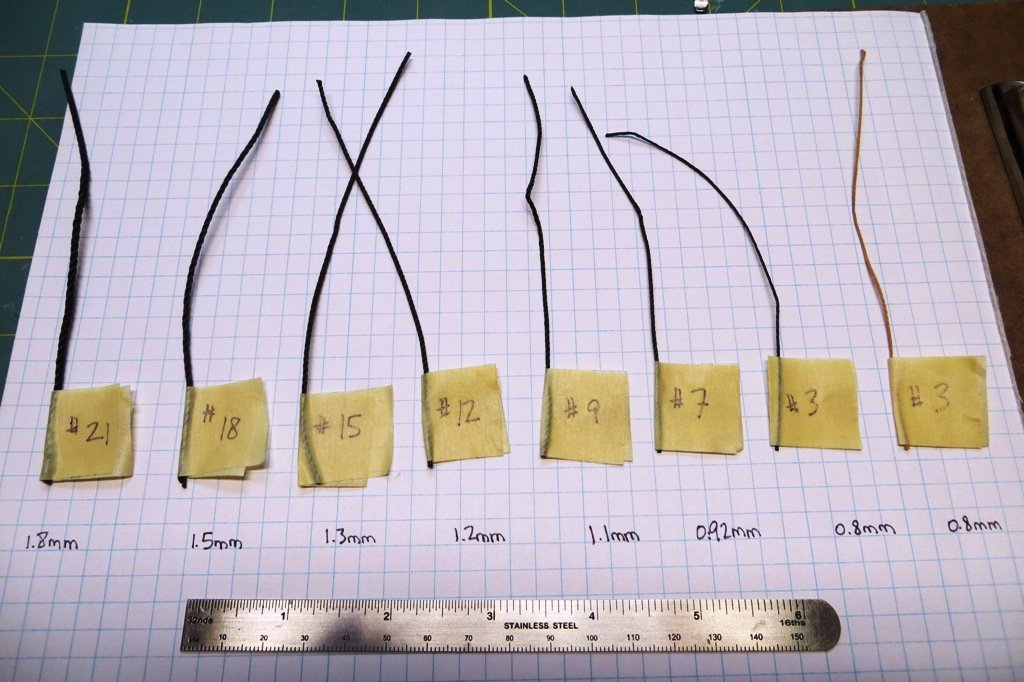
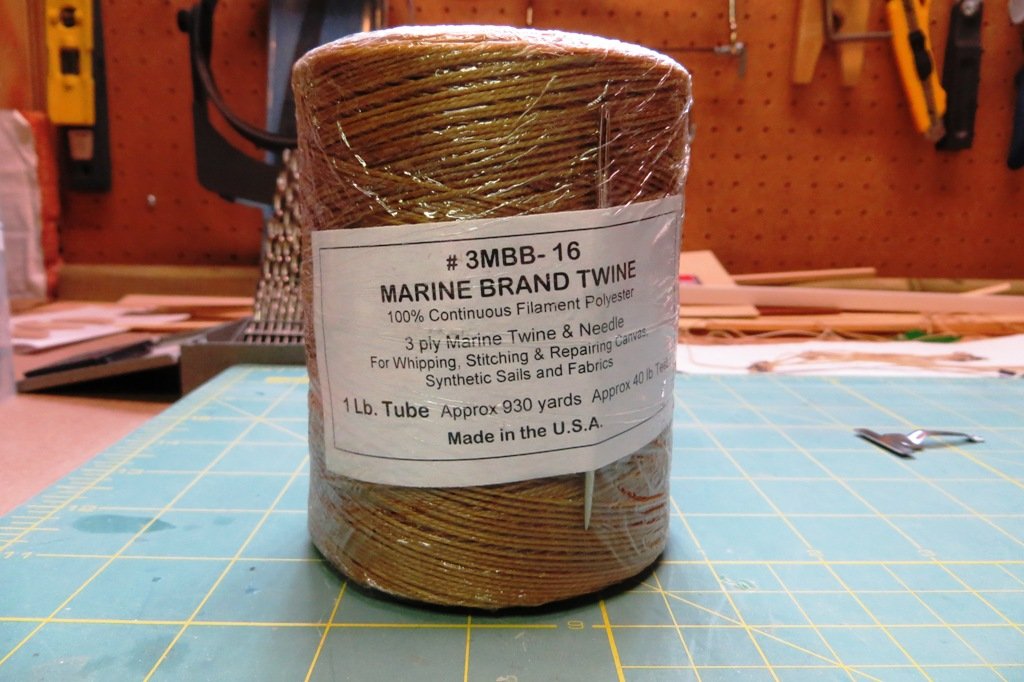
Bruce has asked about the diameters of the seine twine, so this morning I dusted off the digital calipers and took some measurements. Her's a pic with the results...
Thanks for the tip about the nylon coating Bruce. I'm repairing a model of a West Coast seiner and will keep the stainless colour so I'm not sure if I'll need to remove it. I'll do a little experimentation.
Cheers,
Peter
-
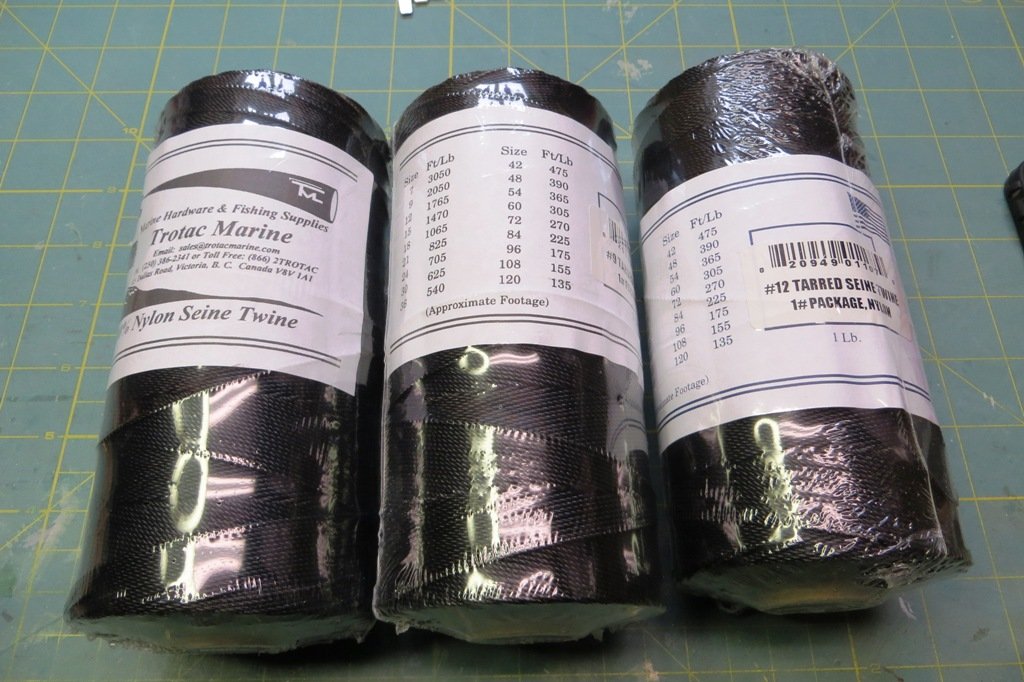
Up until now I have used the rigging supplies provided with the kits I have built with a few exceptions. But I have discovered a couple of other kinds of suppliers that others may have access to in their neck of the woods.
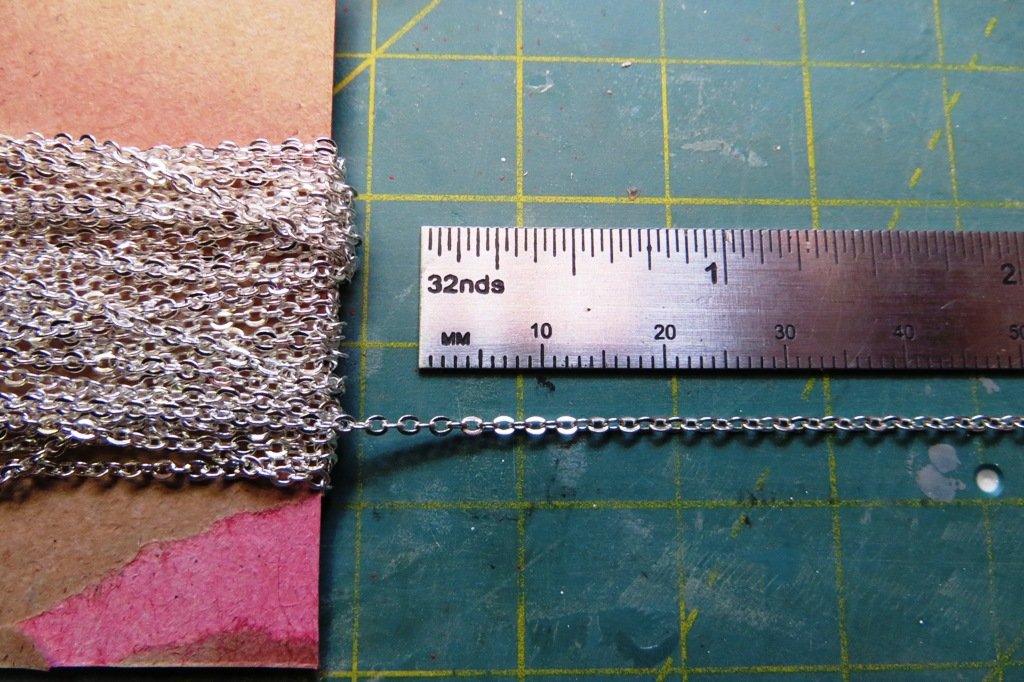
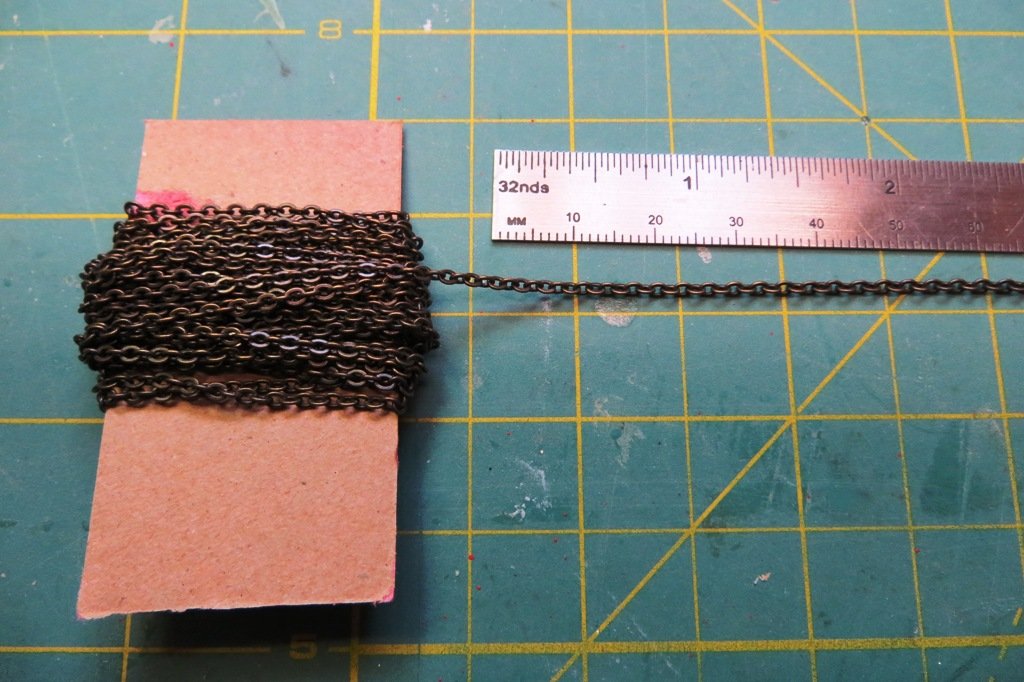
As for rigging thread I like using seine twine which I have sourced from a local chandlers here in Victoria. The black seine twine comes in a variety of diameters which I generally use for the standing rigging. It's actually tarred nylon and so it doesn't have the "fuzzieness" of rigging thread that comes with most kits. The tan line comes in only one diameter so I am carefull where it's used to try and keep it to scale.
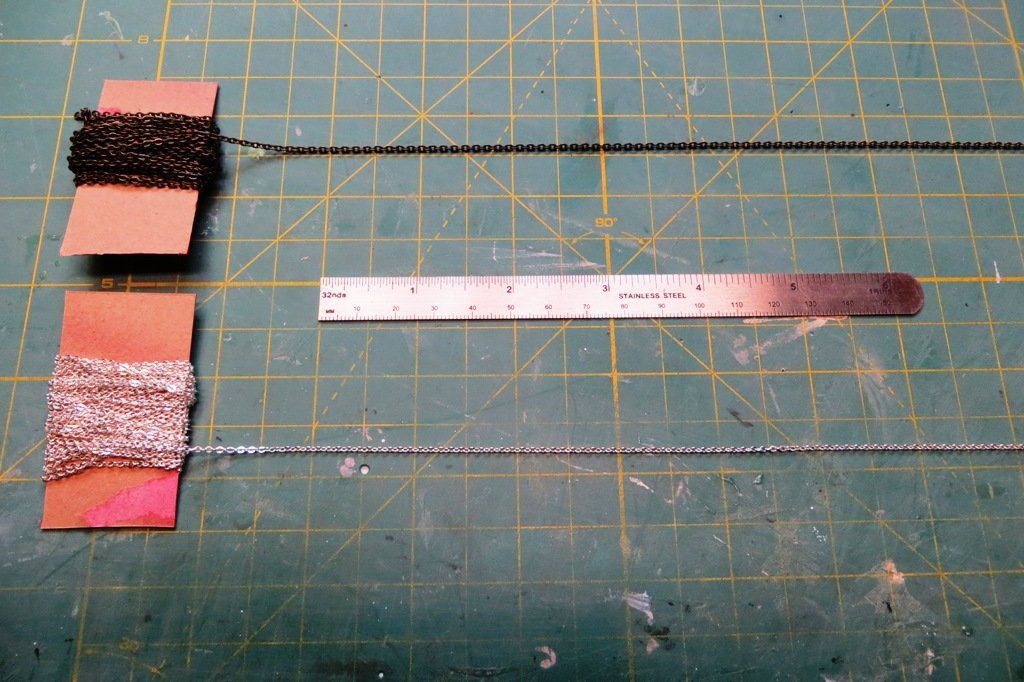
I have also sourced some wire rope at the chandler's but have also found some at the local bead shop. I went there to see what kind of chain I could purchase in preparation for rigging the Cutty Sark which I'm building. Lo and behold, they also had small gauge wire which would be suitable for my current project. Here is a photo of the wire rope I bought at the chandler. They also need wire sleeves so as to crimp them. Splicing would require teeny tiny hands...

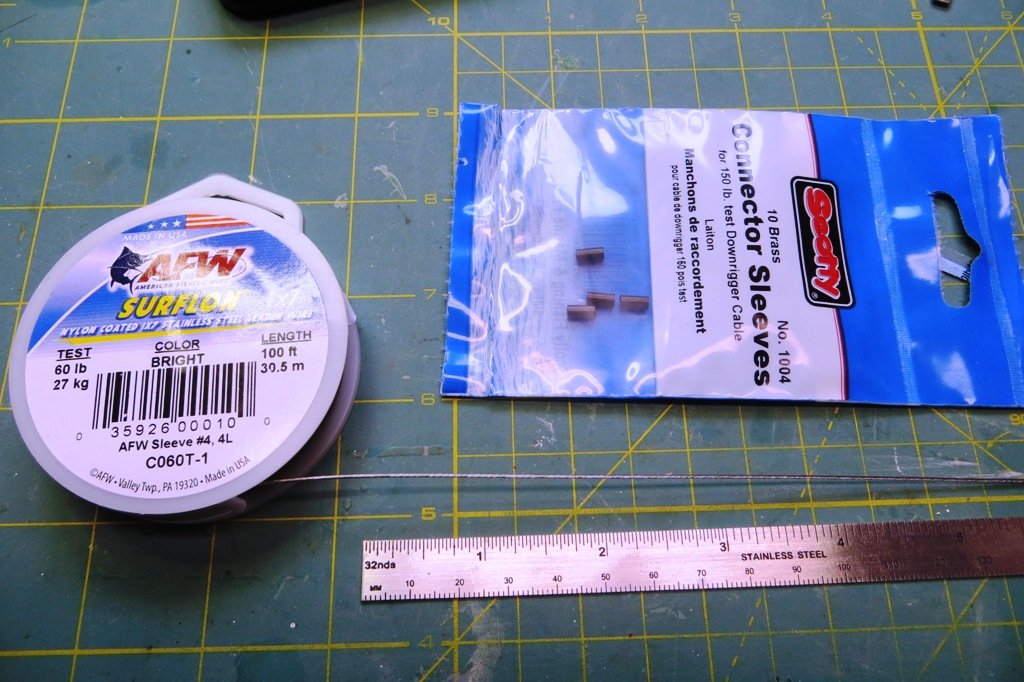
I was pleased to find some small gauge chain which I will need to rig the Cutty Sark. This I found at the bead shop and they has several sizes for various purposes. Of course they will have to be painted before they go on the model.
I'm sure that some of you will be familiar with these sources for rigging supplies. But for those of you looking for chain, wire and rigging thread, these are great options which are likely cheaper than model kit suppliers.
Cheers,
Peter
- marktiedens and mtaylor
-
2
-
Hi Colin and welcome to the site. I just did a quick search and both Ages of Sail and Cornwall Model Boats have Cutty Sark fitting kits for sale and in stock. I would buy the kits complete as this option is cheaper and quicker in acquiring the parts you need. The list is pretty long...
Good luck!
Peter
-
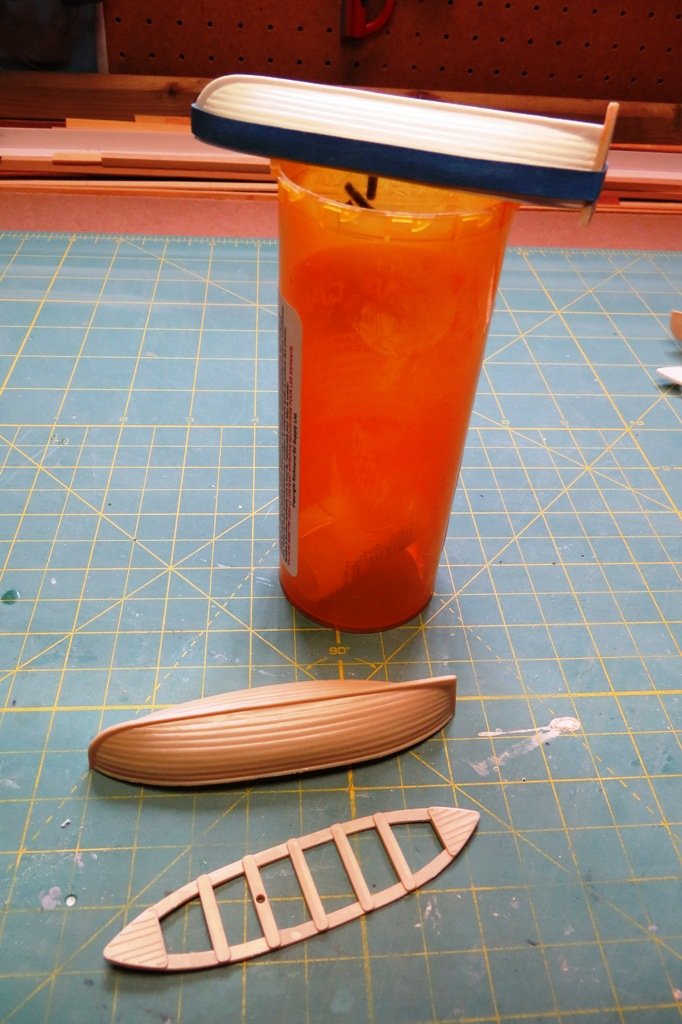
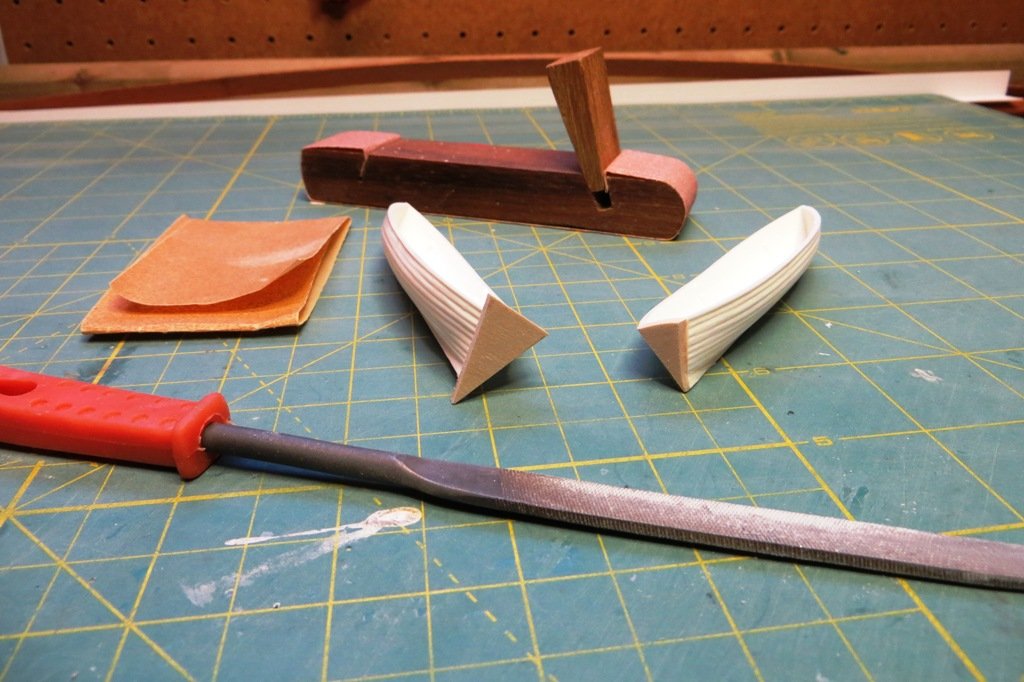
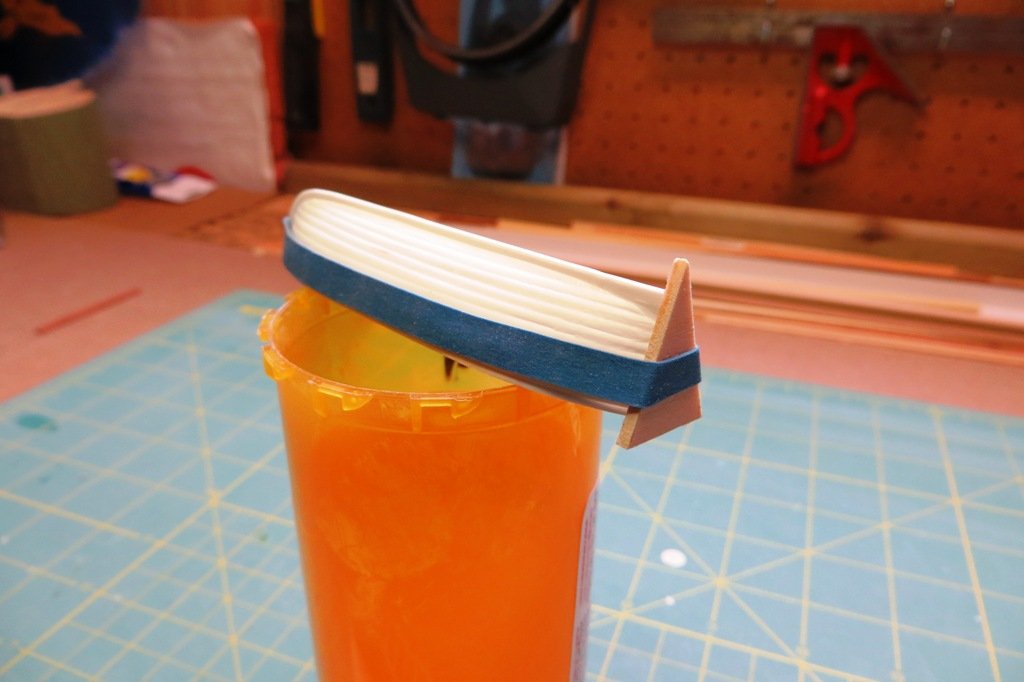
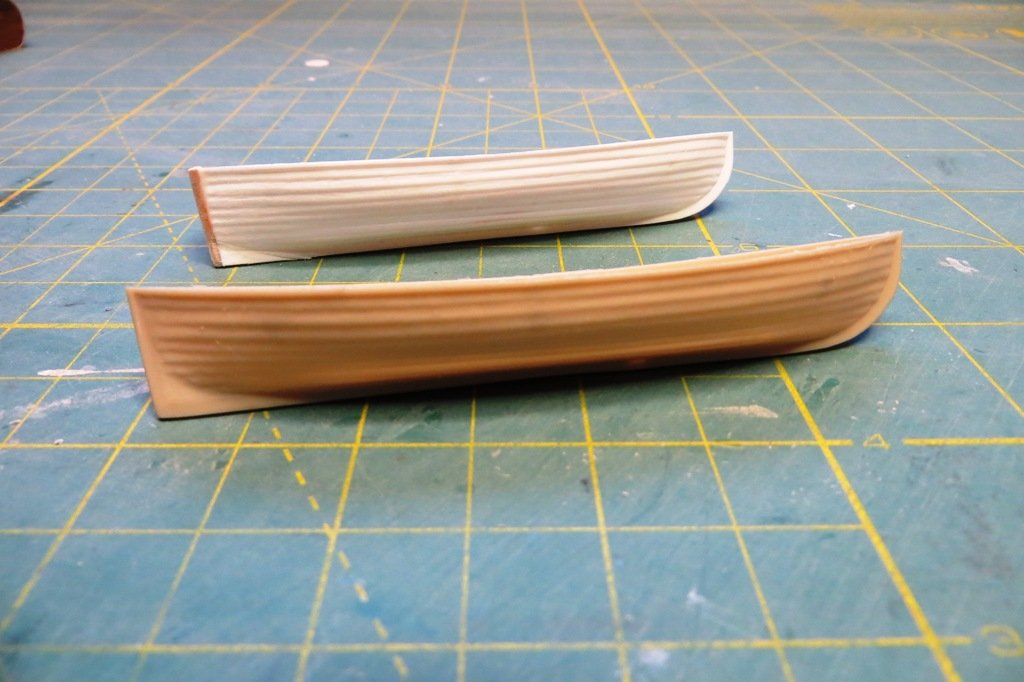
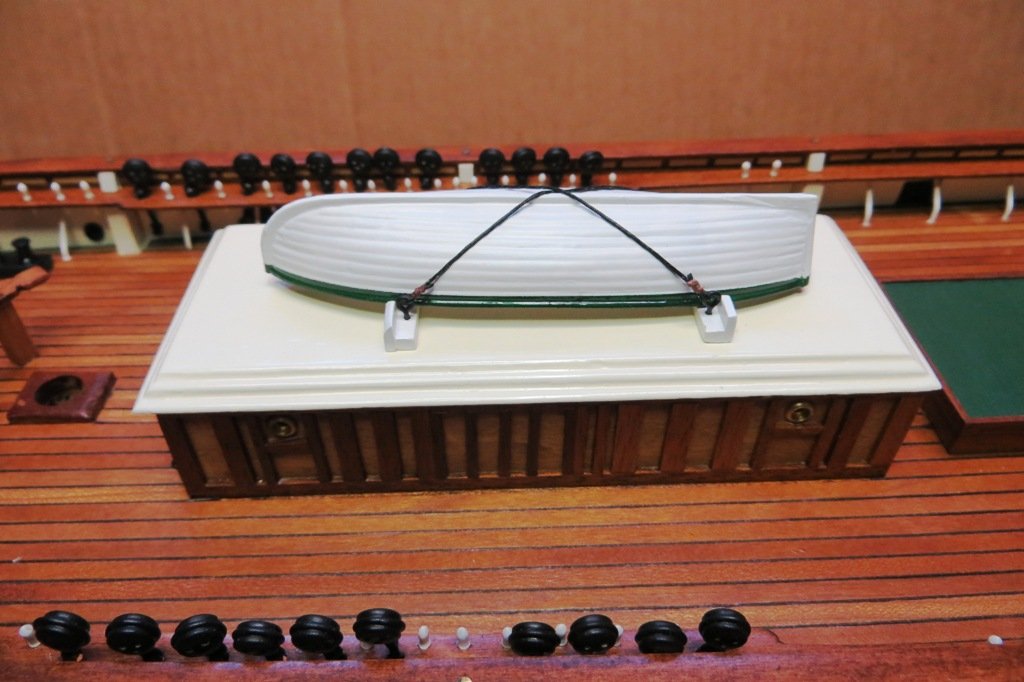
Thanks for the likes gentlemen. I forgot to post a few pic's of the boat conversions. I basically chopped of a portion of the stern to two of the Biliing F167 life boats and then glued on a transom converting a double ender to a squared transom boat. This to me was the easiest solution and now all the boats are to a more correct scale and configured correctly.
Here are some photos of the conversion...
-
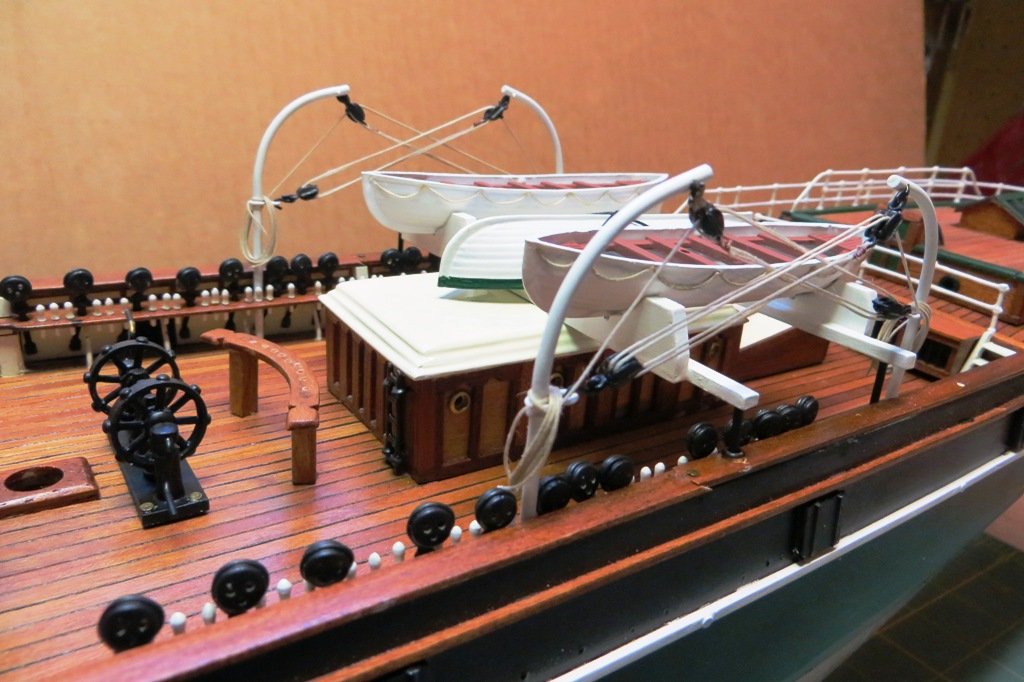
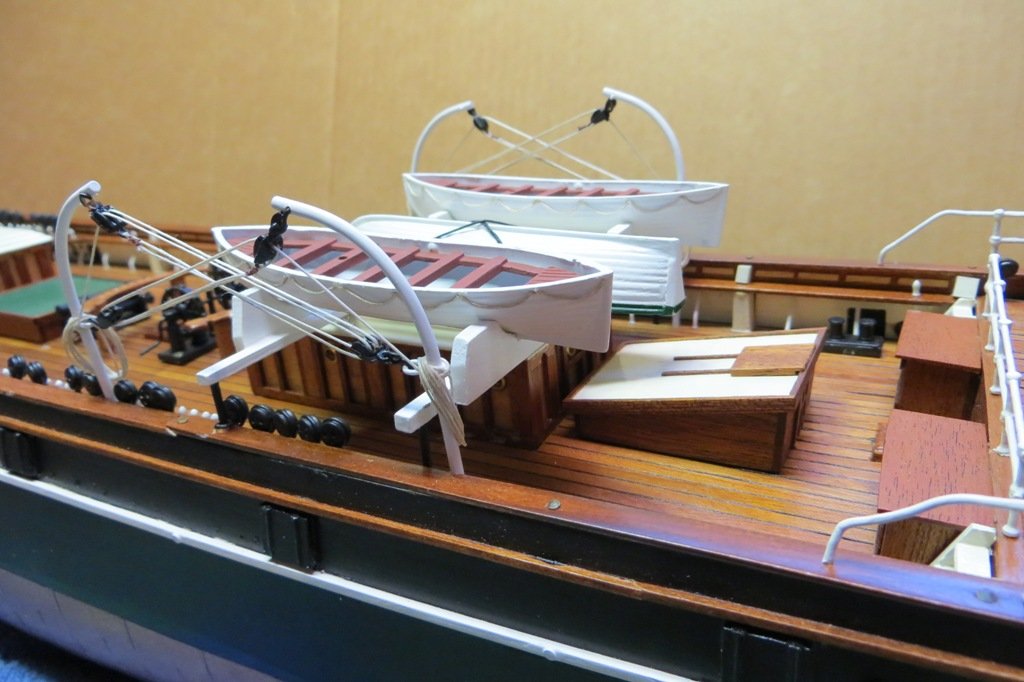
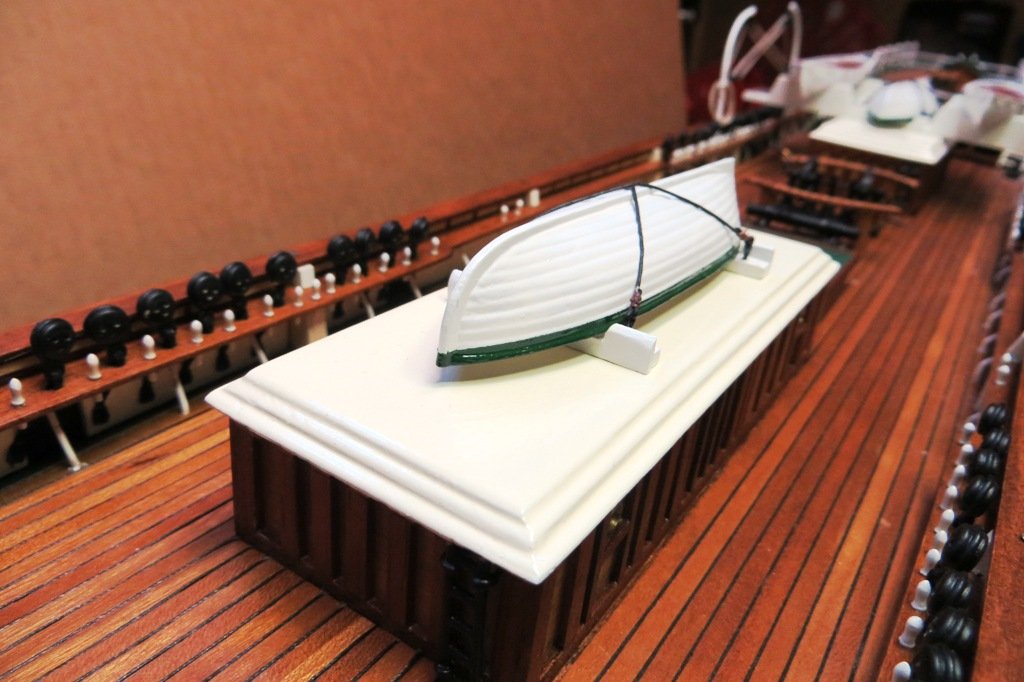
Hi All. Well, it's been a while since any serious work has taken place on my model ship bench. I am happy to be back and have resumed work on my CS.
I have finally dealt with the boats that are aboard the Cutty Sark. Two lifeboats and the gig and jolly boat. The kit came with three plastic boats and I realize that they are a serious no-no to some builders. I am not one of those however, and with a coat or two of paint they look way better than anything I could cobble together.
The kit came with 3 boats all described as lifeboats. They were F167 (good) and F405 (not good) it being way to big for the scale of model. I decided to get two more of the F167's and modify them by altering their transoms. That would convert them into a jolly boat and a gig. I added some lifelines to the gunwales of the lifeboats to make them more authentic.
I lashed down the jolly boat and gig but have not done so yet for the lifeboats. They would be in the way when it comes time to set up the shrouds and the rest of the rigging going to the belaying pins. I'll have to tie them down after the rigging is complete.
So here are the results...
-
Hi Martin. Welcome to the site! Billing is not known for their detailed instructions. They do provide decent full size drawings which you could use to come up with a build strategy. This site has a bunch of tutorials dealing with planking and so forth. There are a number of build logs on the site which you can study which are as good or better than instructions which come with most kits. I have one on the go. And feel free to ask the builders with build logs questions on issues you may be dealing with. Good luck with your Cutty Sark. Or Shark in your case...😀
-
What a beautiful model Alan! Thanks for posting those great shots. Very inspirational!
Peter
Cutty Sark by petervisser - Billing Boats - Scale 1:75
in - Kit build logs for subjects built from 1851 - 1900
Posted
Hi All,
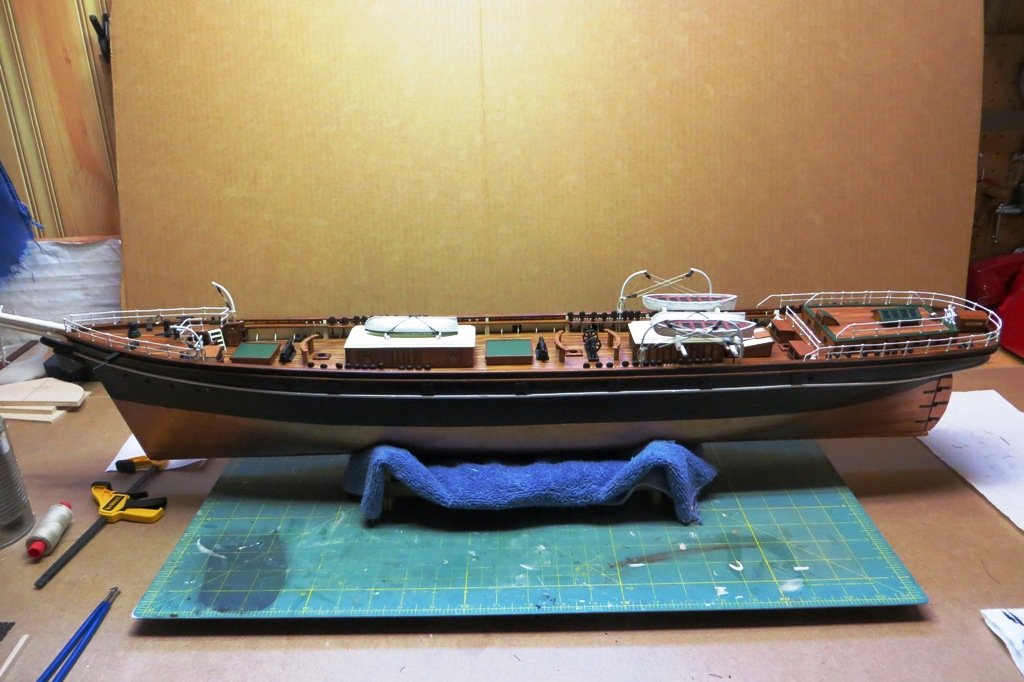
Just popping my head up after a long while with Cutty Sark. I have been in the shop from time to time, but that was for other projects. I have been working lately on CS's yards and they are now done except for the paint. I am now poring over the Campbell's rigging drawings, Longridges chapters on rigging as well as Underhill's book covering the same topic. All three are invaluable. Less so the drawing that accompanies the kit. That said, not everyone is a rigger and the drawings are adequate for a completed model.
Here are some pic's of the yards in place. They are dry fitted for the moment, so not all are level.