


petervisser
-
Posts
505 -
Joined
-
Last visited
Content Type
Profiles
Forums
Gallery
Events
Posts posted by petervisser
-
-
Hi Mark,
Would you point me to Chuck's method of bending planks. I did not see it in the planking tutorials.
Cheers,
Peter
-
Great build log Vane! Lots of good photos and explanations. I'm getting some great ideas. Thanks!
Peter
-
Outstanding so far Mark. It's a pleasure to follow along on your build log. Lots of great hints and tips!
Peter
-
Great looking Cutty Sark David. Congratulations on a very fine model. She's a beaut. Time to celebrrate with a liquid Cutty Sark!
Peter
-
Hi Rick,
Yes, I have that book as well. And it was a great read. Modern day editors would have a field day though, cleaning up his very dated references to people of colour.... That said he is a great writer who captures the times of sailormen and their ships. I have a number of his books including the Nitrate Clippers, the China Clippers and both volumes of The Last of the Windjammers. They were recently for sale at an antique/book shop in my area. I have been enjoying them ever since.
Peter
-
Thanks for the kind word guys.
Yes Chris, I like the old Billing kits. I have two other ancient editions people have given to me that I would like to "bring to life". It seems a bit tragic that they waste away in their beat up boxes.
And yes Nenad, I will keep going! Now that the winter season has arrived, I can spend more time in the shop guilt free. Thanks for the prodding!
Ricky, the idea of the garbage can was a fluke. The second prototype was cambered in place on the model by simply having the false deck jammed in place. It was awkward fitting the planks on the false deck so I decided another method must be better. The can was sitting in the storage room where I work, and the magnets were something I used in the past. They just went hand in hand and a cambered deck was born!
Lots more prep work to do before the decks and hull are painted and varathaned, but I'll get there...
Peter
-
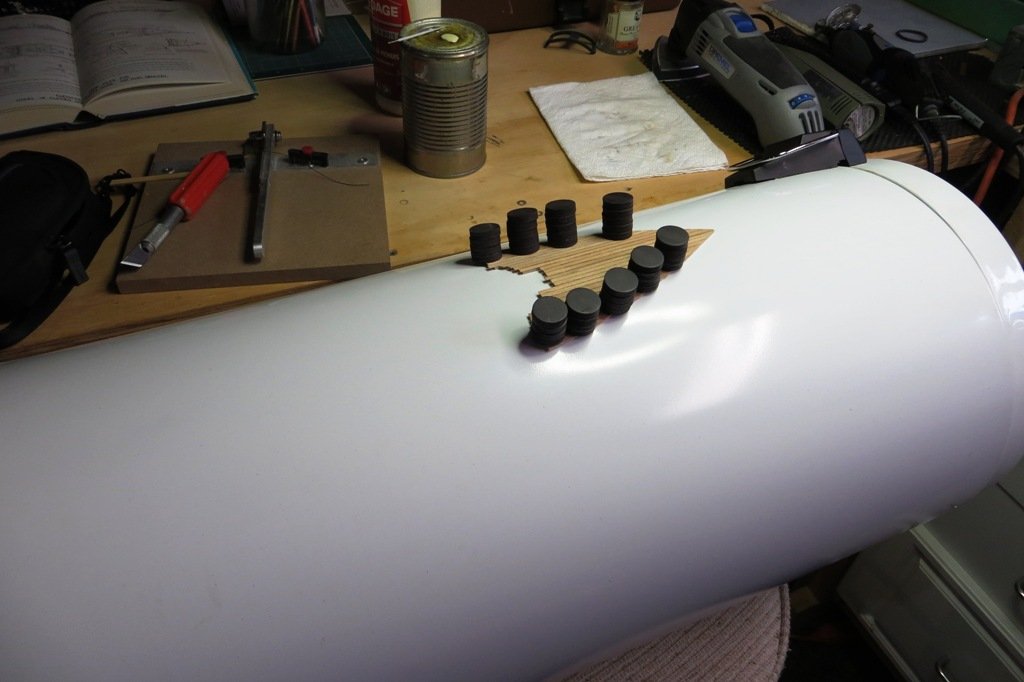
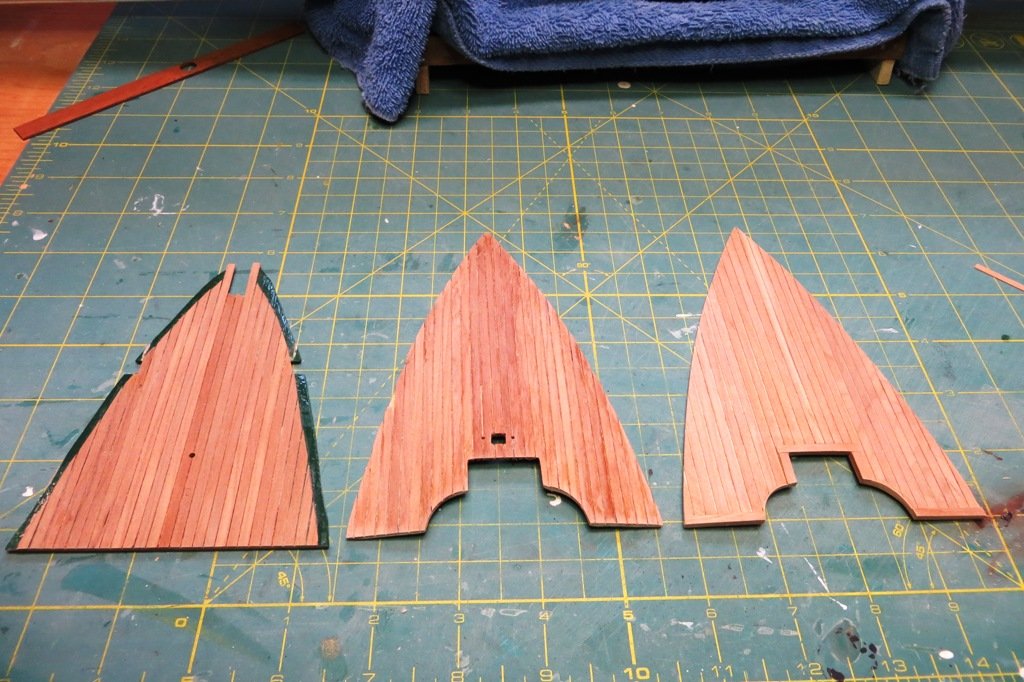
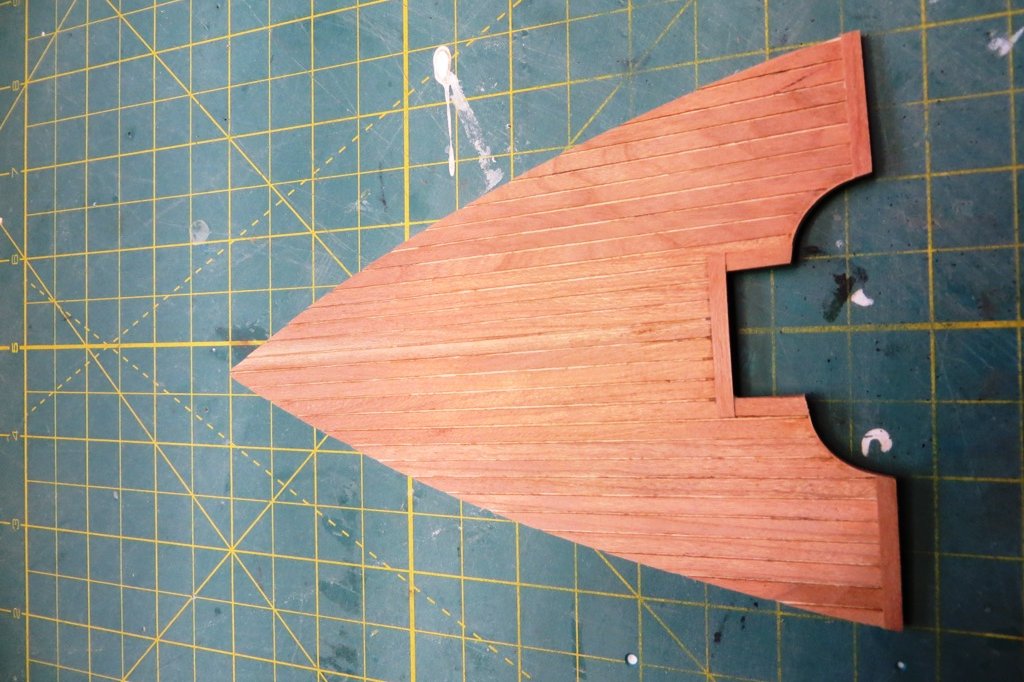
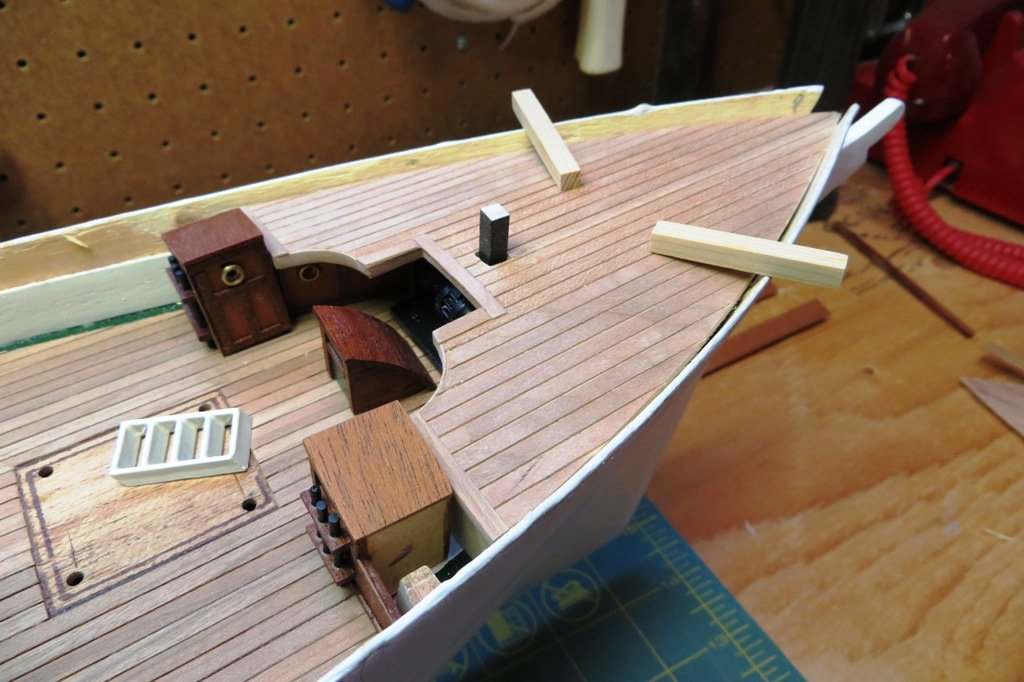
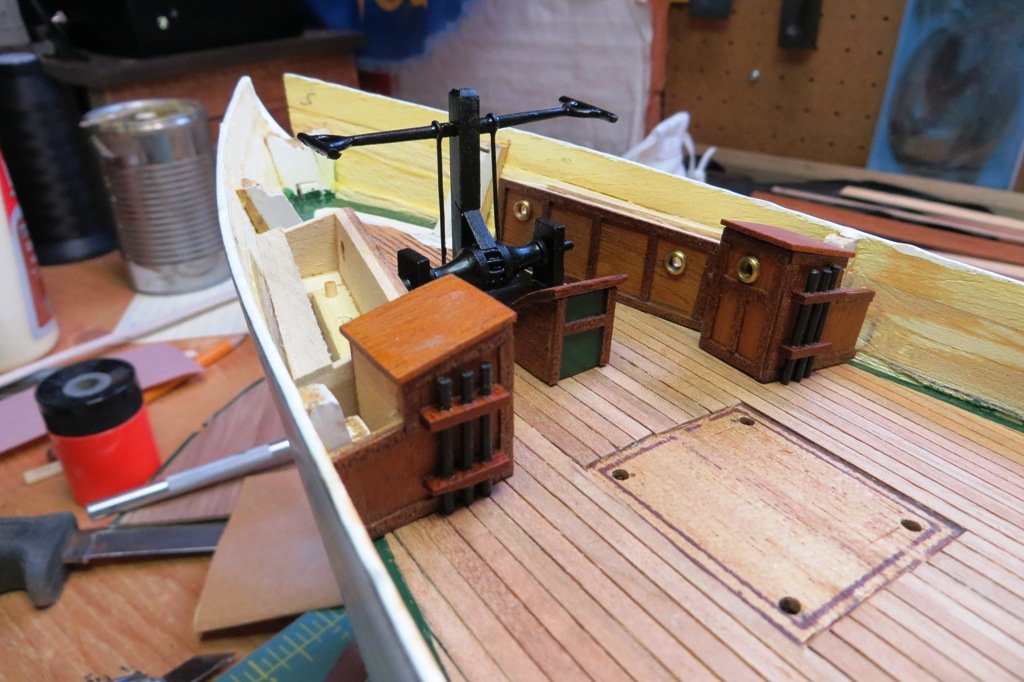
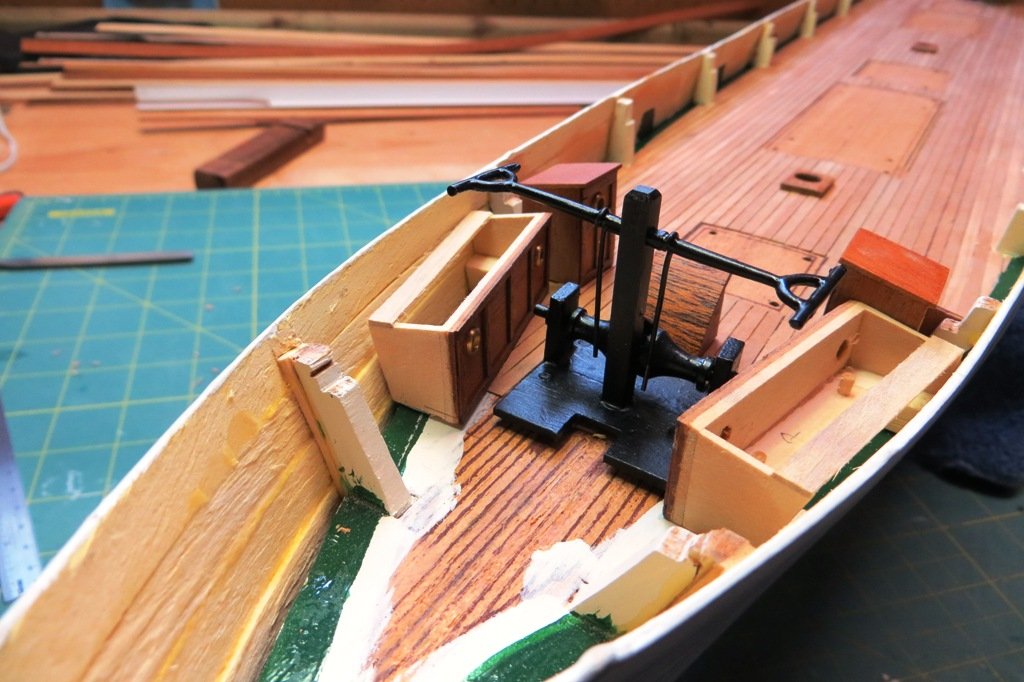
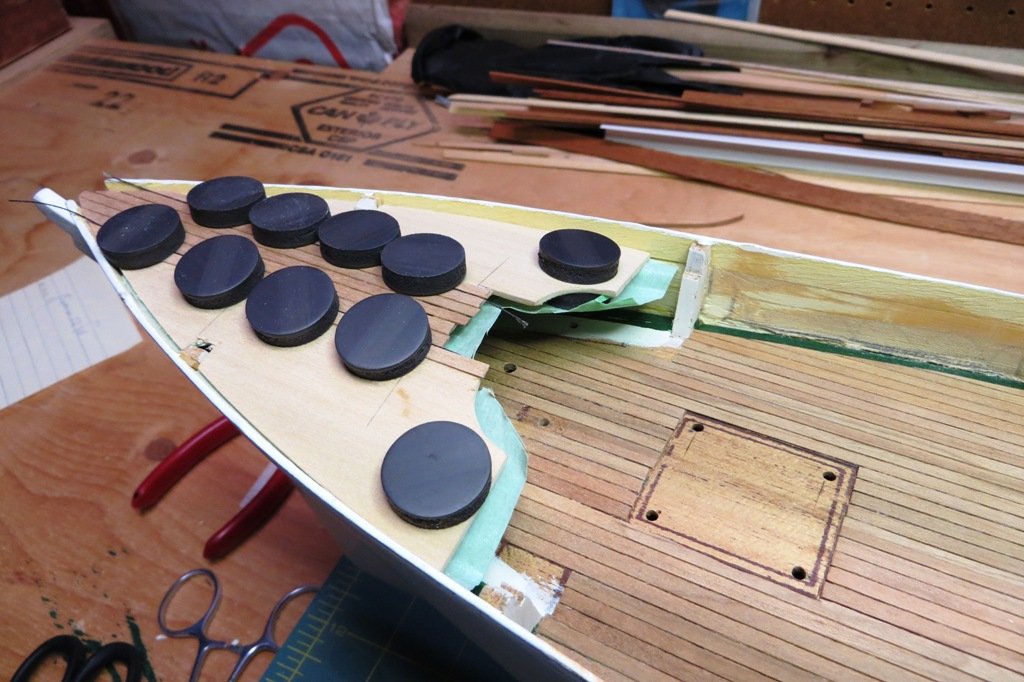
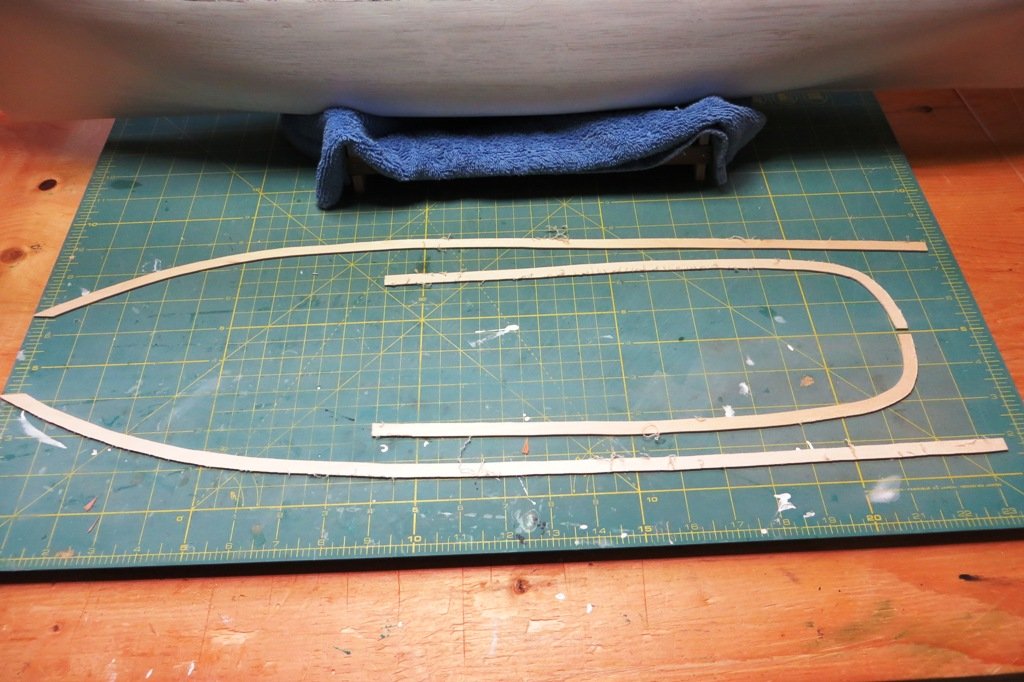
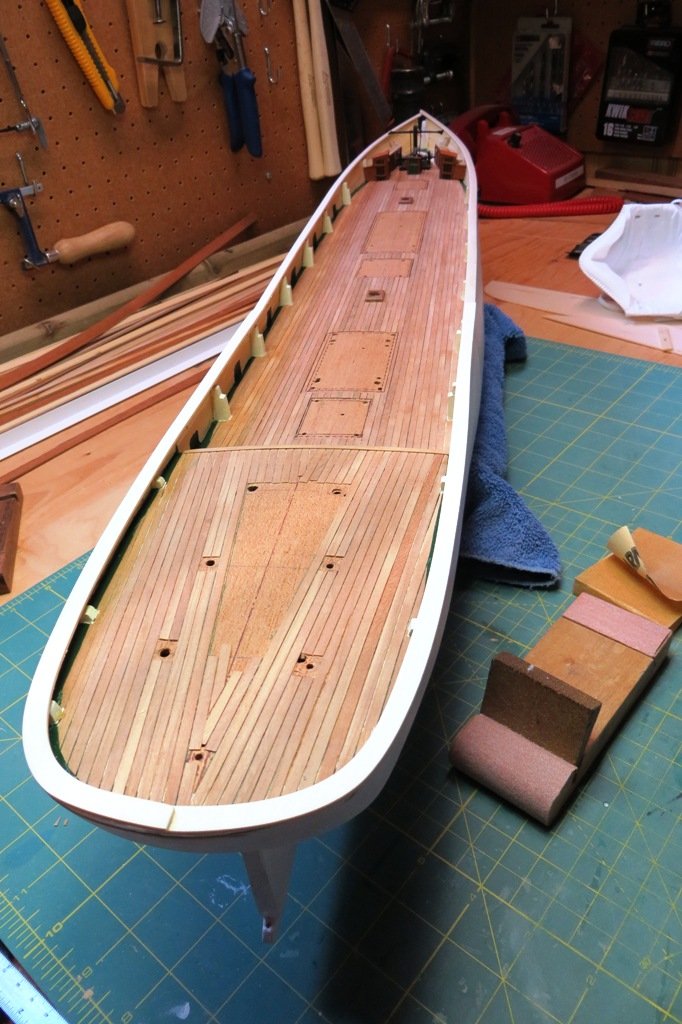
My third attempt at building the foc'sle is a keeper I think. The first attempt used the false deck cut out by the original builder. The second atempt although good, was messed up a little when I varathaned the deck too early. Now the third one is built and dry fitted and I will add the detailing once the fittings have been added. Here are some pics...
I used a garbage can and magnets when applying the planks to the false deck so that a camber could be introduced to the foc'sle.


- marktiedens, ccoyle, JayCub and 5 others
-
 8
8
-
Hi Tom,
Your model looks terrific. It's nice to see different subjects that modellers like yourself bring to MSW. Brilliant work!
Peter
- usedtosail, popeye the sailor and J11
-
3
-
Yes Kip, the bulwarks were iron plate on the actual ship. Mine are fashioned from wood as it is easier to work with and my metal work needs "work".
Yeah Ricky, I'm not sure if that is Nannie or not. She has her left arm outstretched and ideally holds something in her left hand representing Maggie's tail.
Cheers,
Peter
-
Actually a cutty sark is the short night dress that Nannie wore when Tam O'Shanter went for his ride home after a night out. Not knowing her name he called out "Weel done, cutty-sark", as she danced, referring to Nannie by what she was wearing.
Cheers,
Peter
- RickyGene and drobinson02199
-
2
-
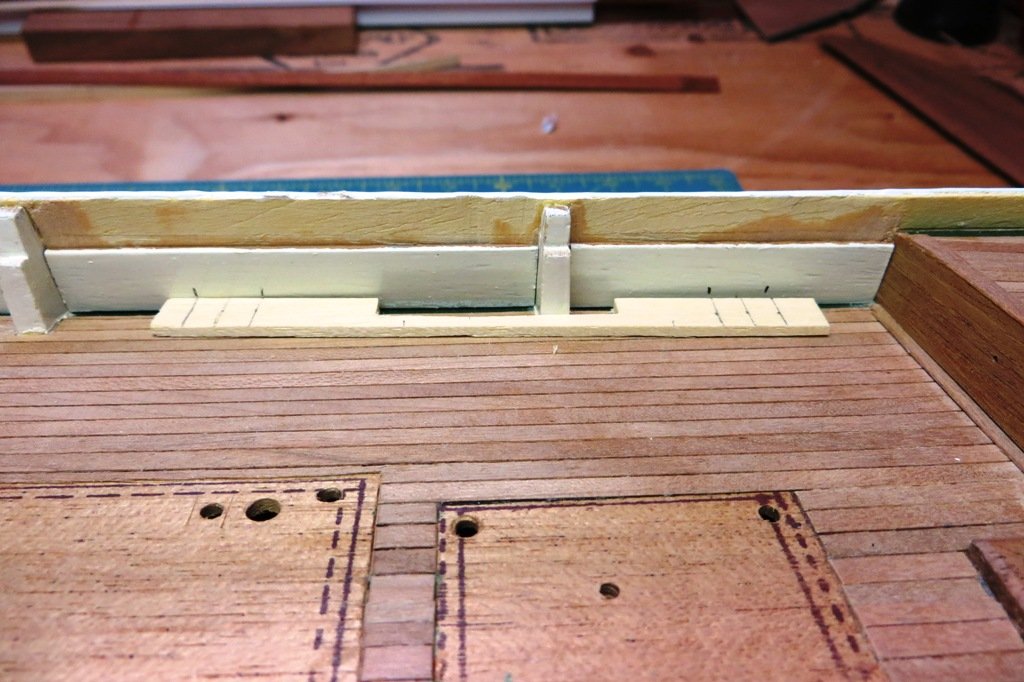
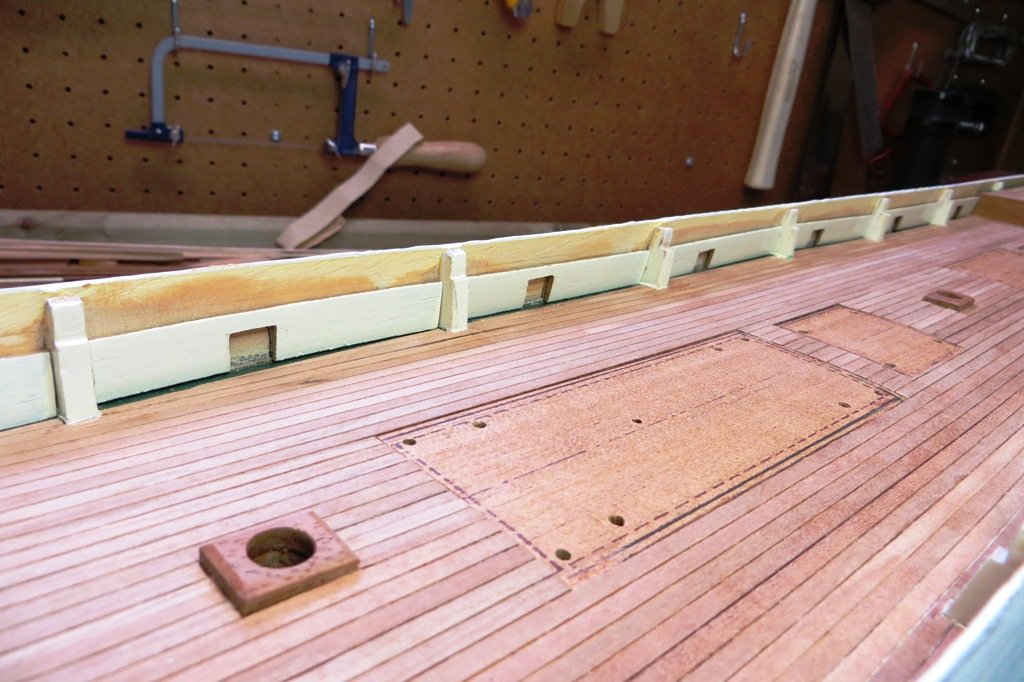
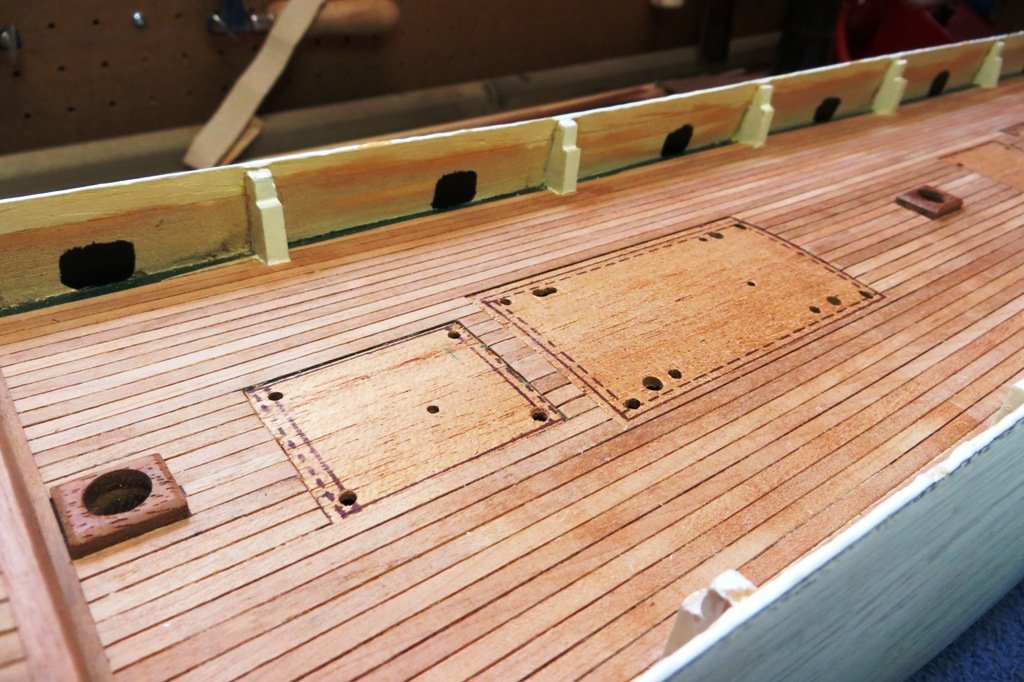
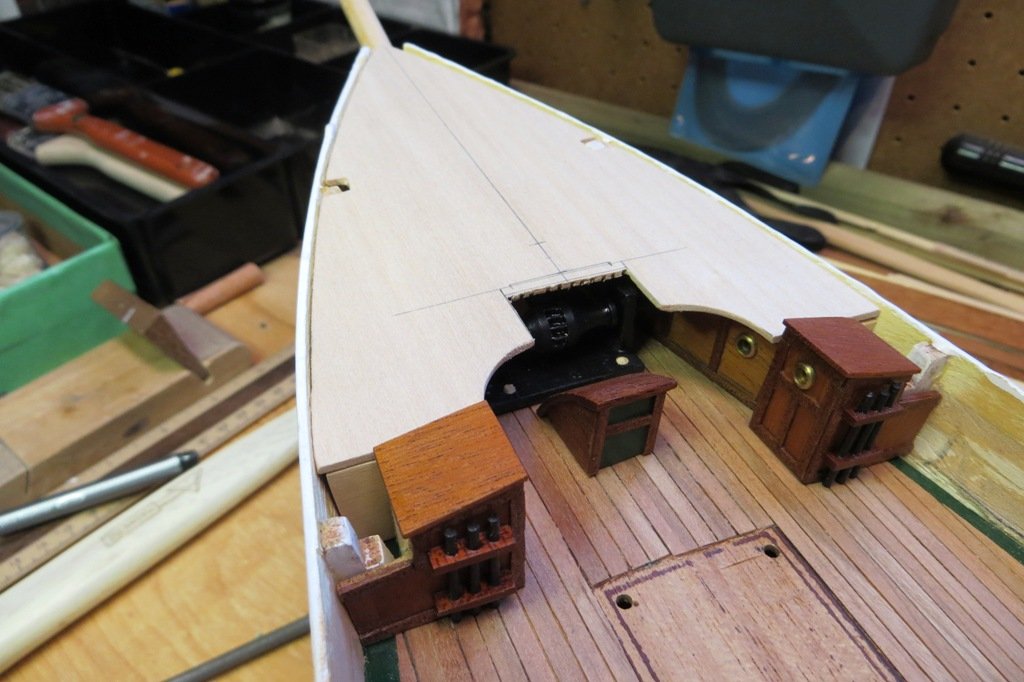
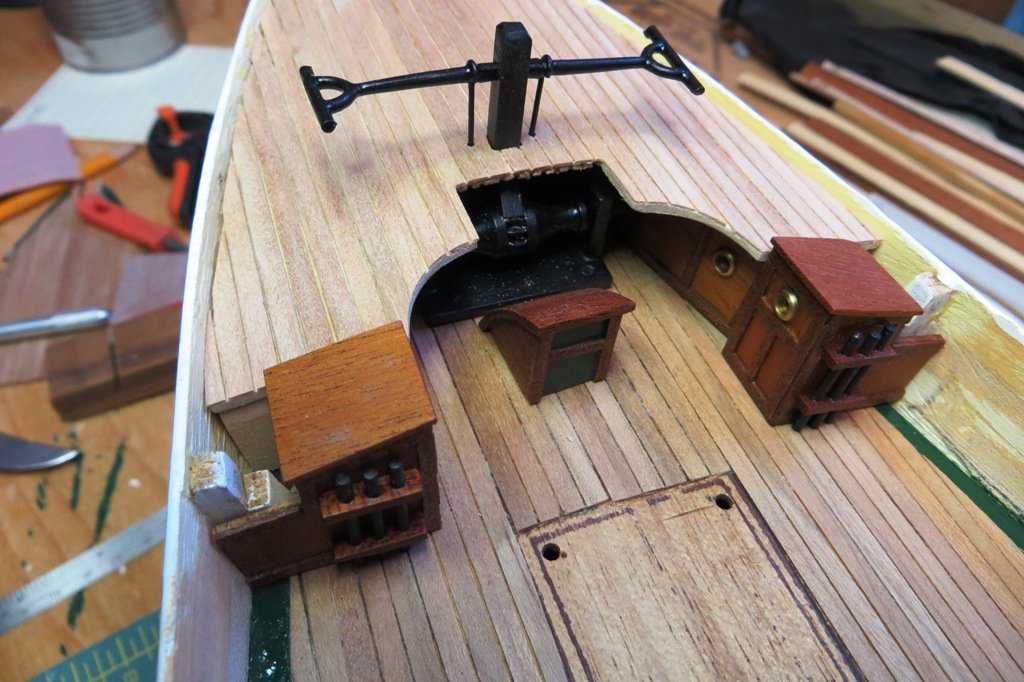
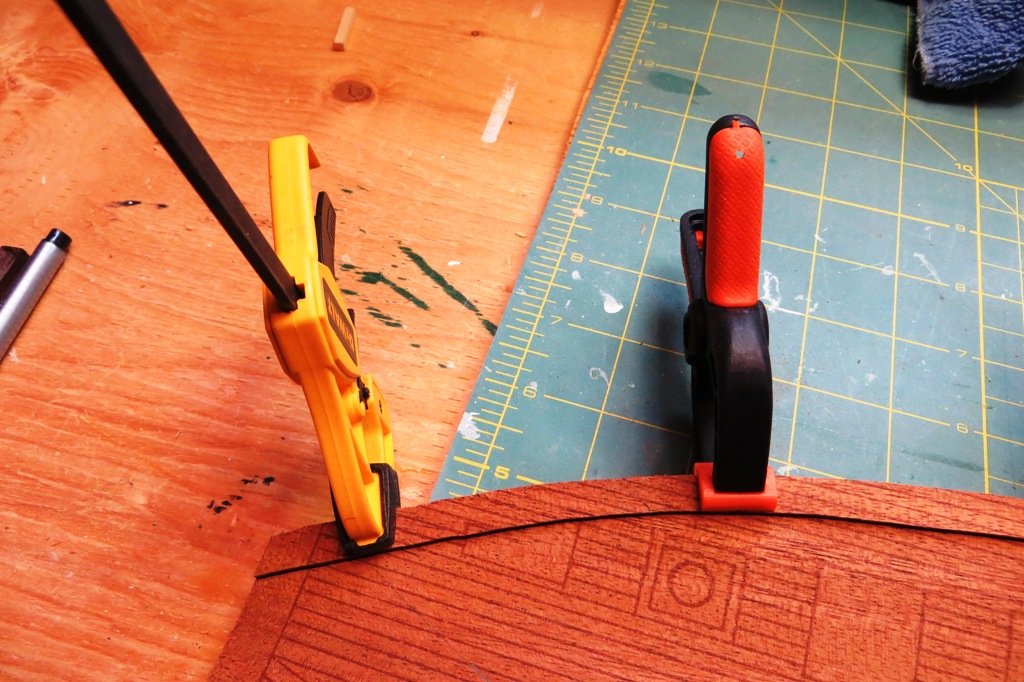
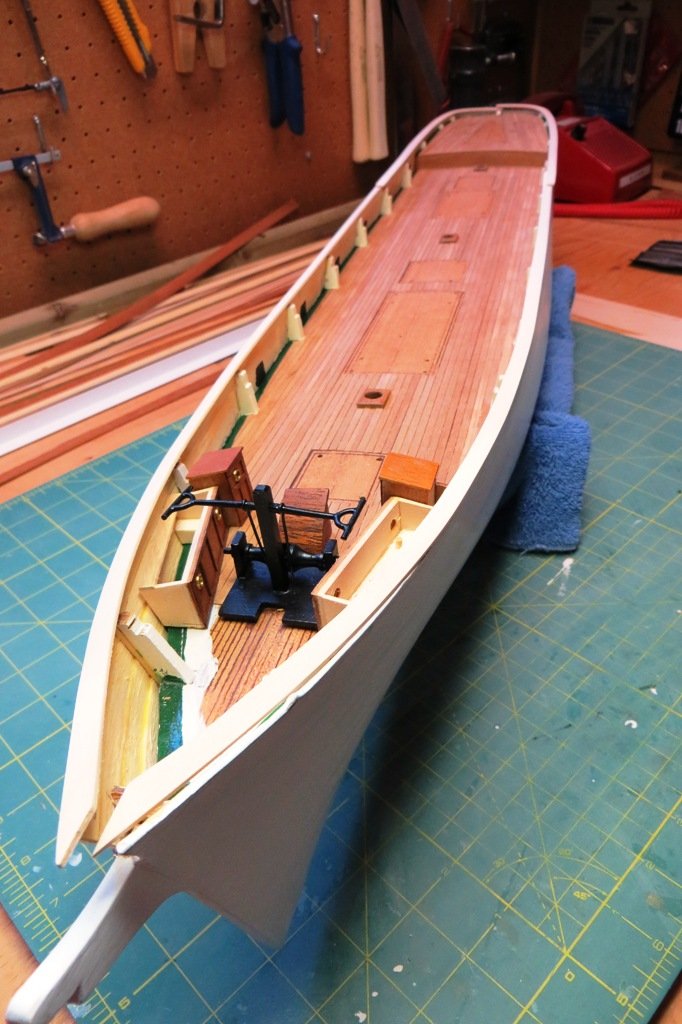
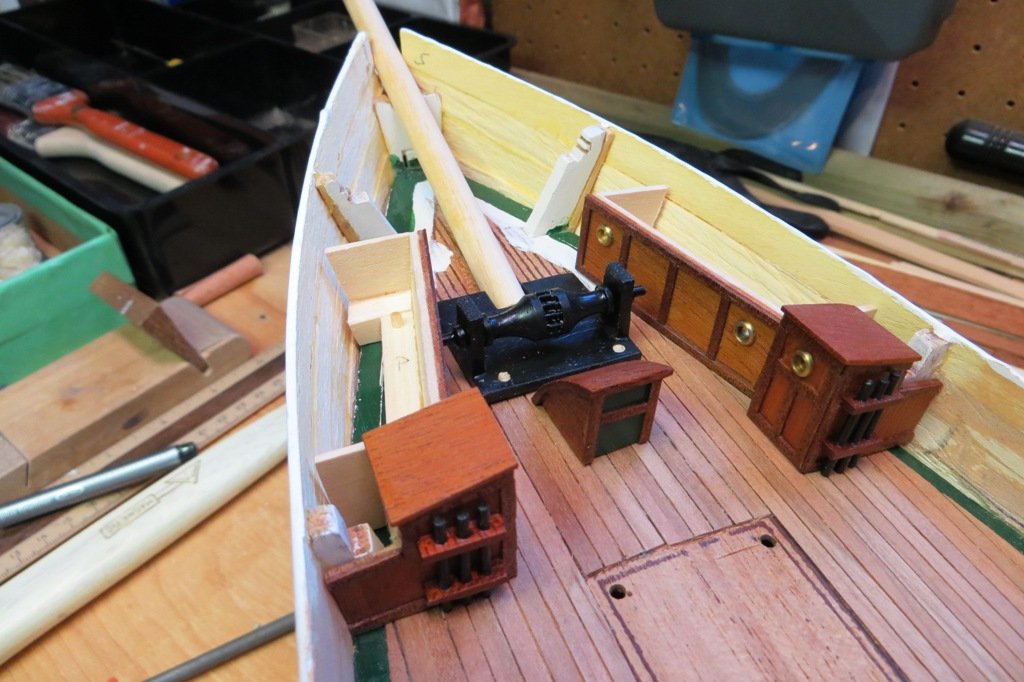
The inner bulwarks did not finish off pretty so I decided to add some linings to them. This also helped me with the freeing port problem I was having. By cutting ot the openings in the liners, I won't have to cut though the hull. I will simply affix some dummy freeing port doors to the outer side of the hull when that time comes. The liners also helped witht he tricky painting that needed doing at the waterways. There is the problem of attaching the stanchions and the deadeye straps that they will alleviate, but I have yet to figure that out altogether...
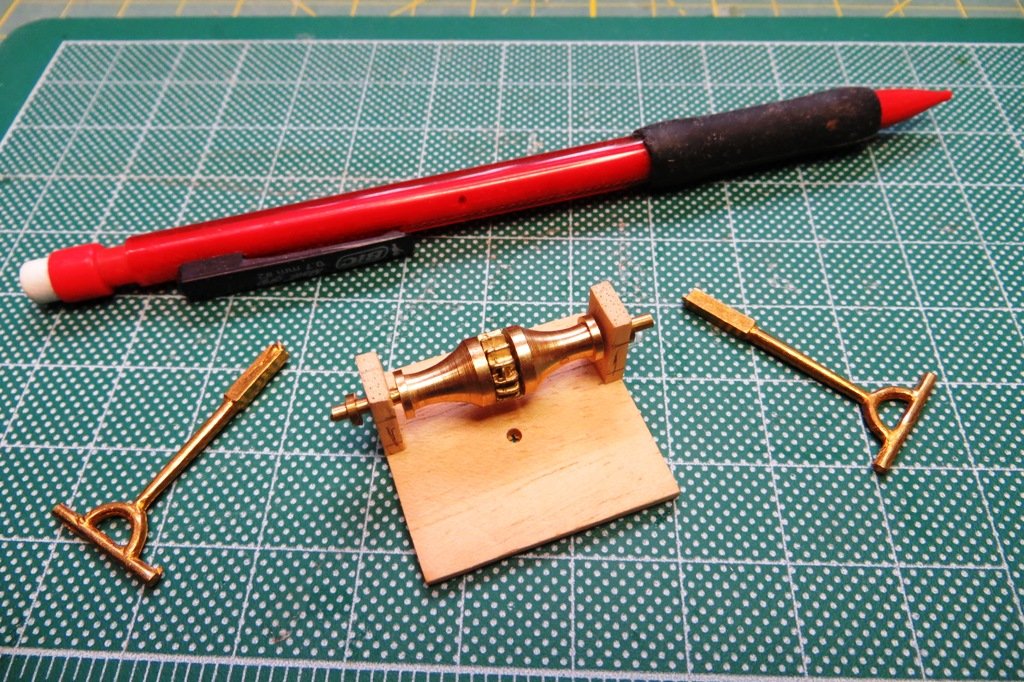
-
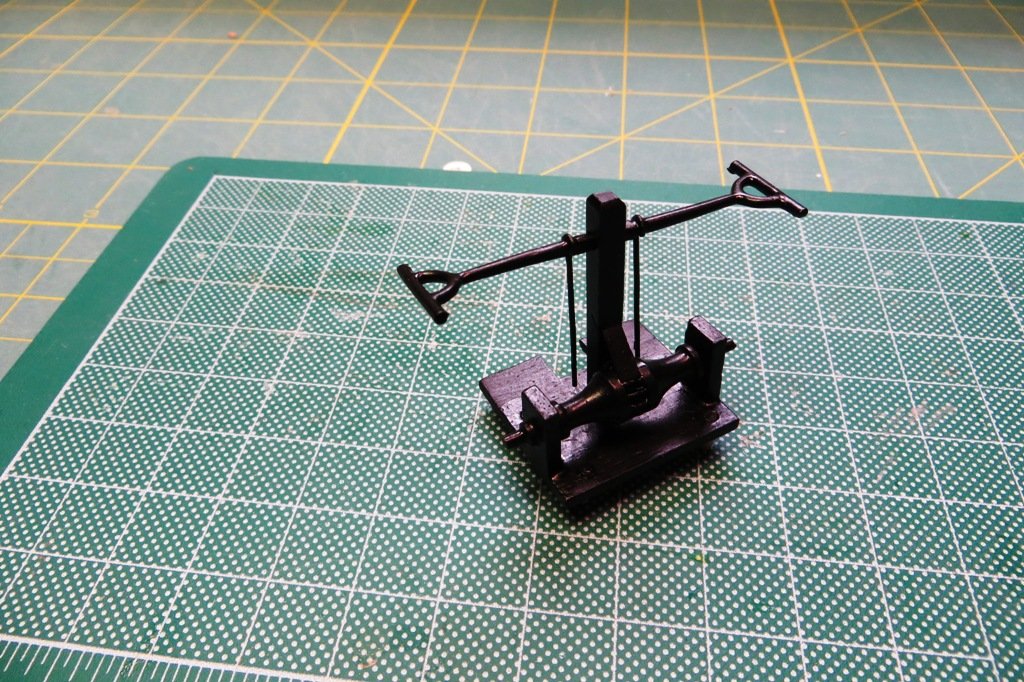
The windlass also needed some work so the purchase rods and crosshead handles were added.


- marktiedens, JayCub, NenadM and 2 others
-
5
-
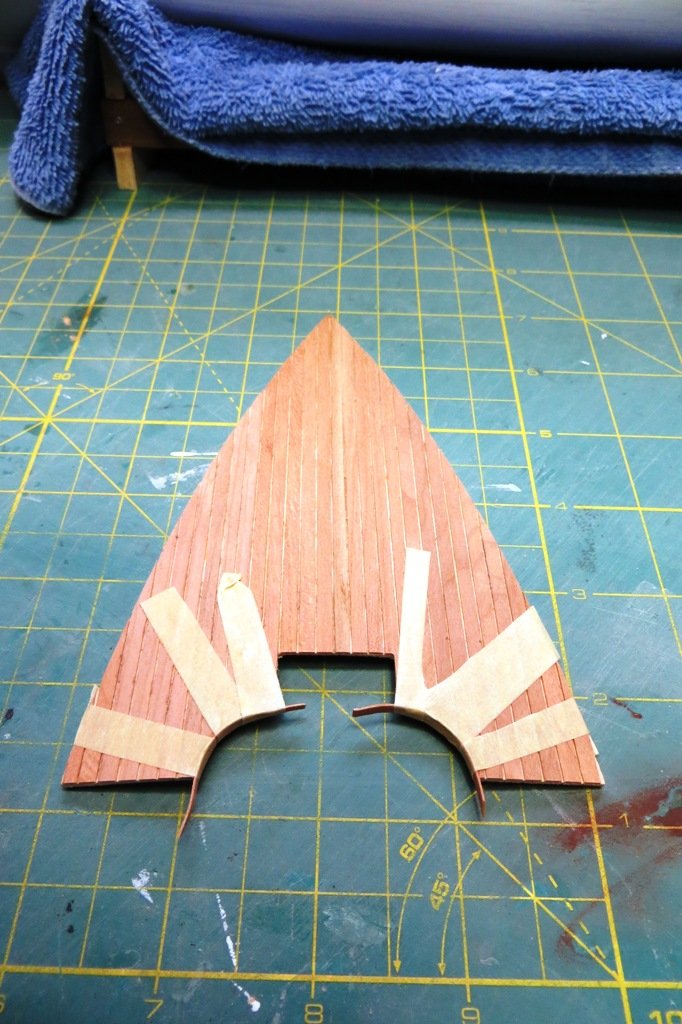
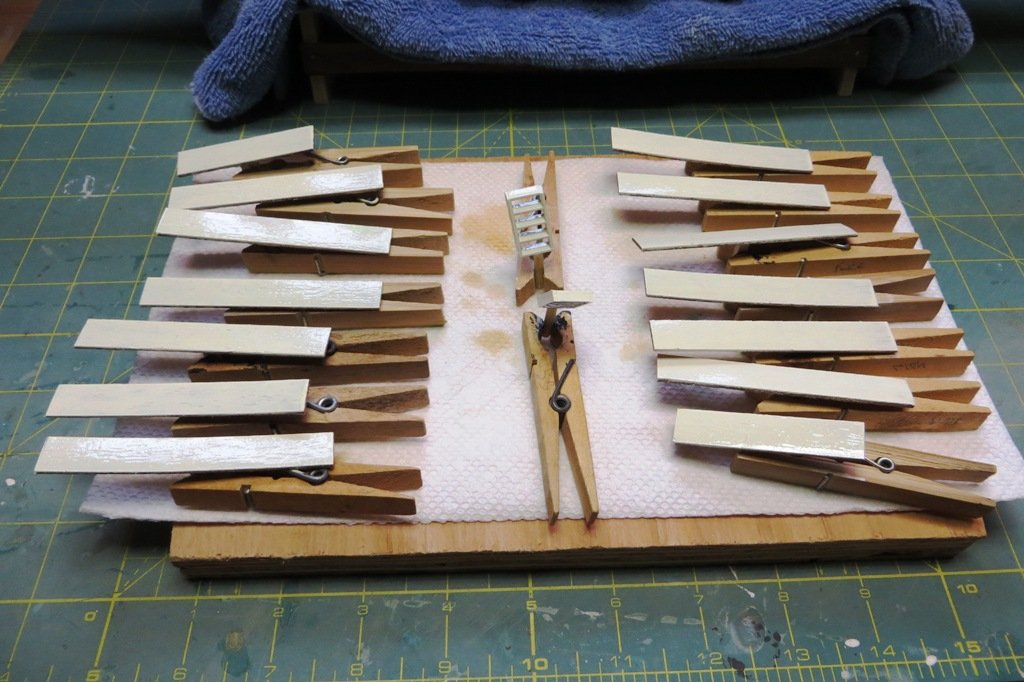
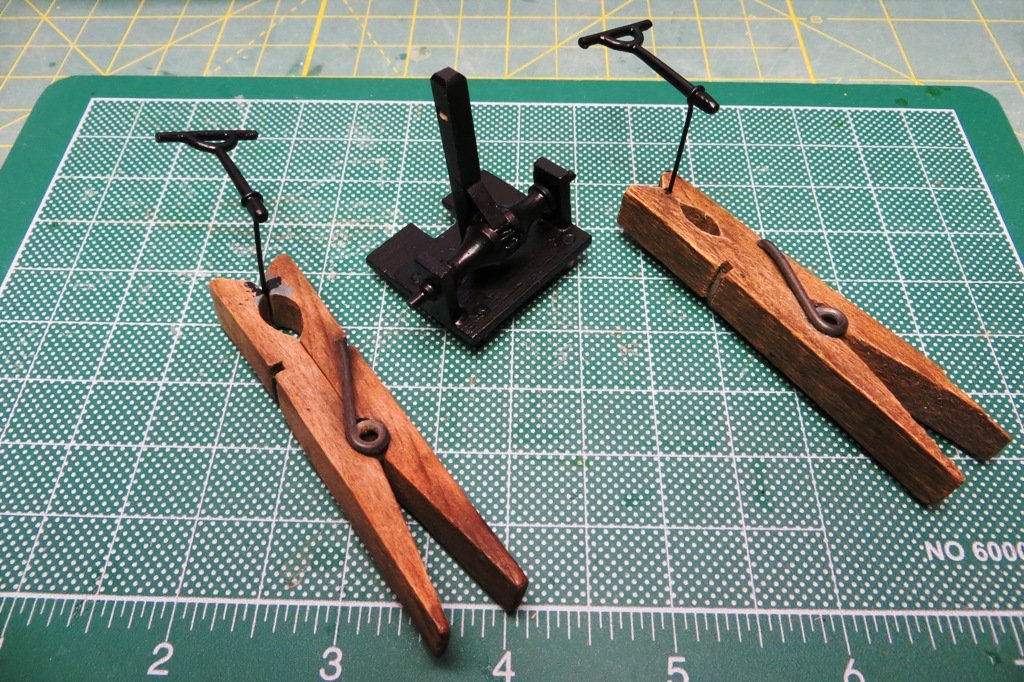
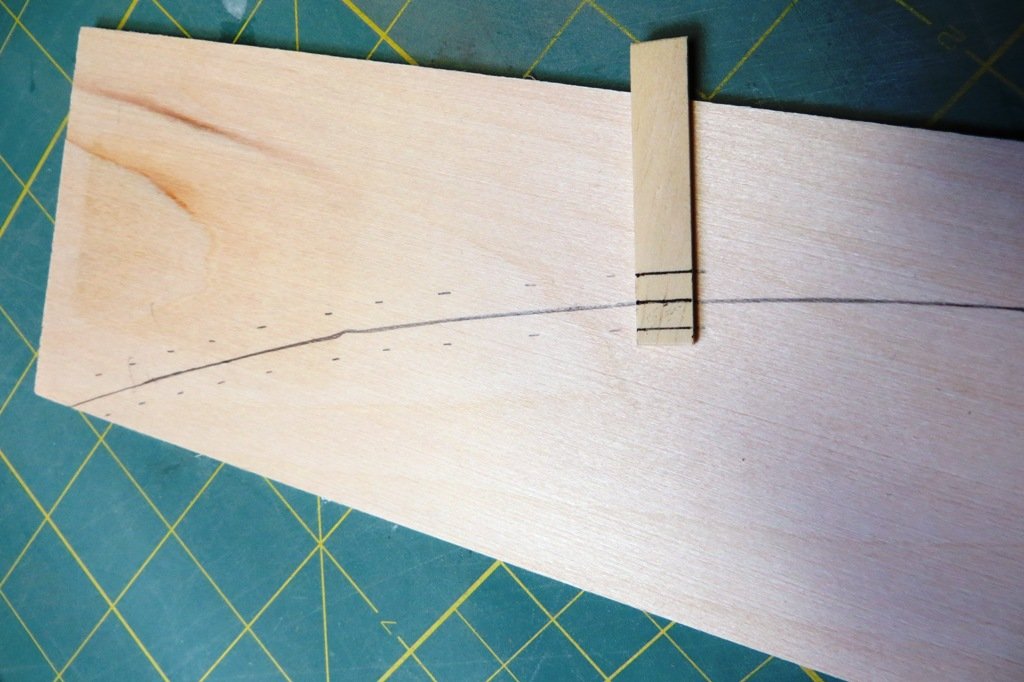
I also worked on the foc'sle. My initial attempt did not work out so well as I was using the deck the previous owner had cut out. It proved to be too small and there were large gaps between it and the hull planking. Unfortunately I had already planked it so that proved to be a waste of effort, and wood...
Again, I traced the outer contour of the hull in that area and got the shape of the foc'sle deck. I applied the planking while the false deck was in place because I wanted the camber. To do this and hold the planks in place while the glue was setting I could not use any type of clamping. So I devised a new method of holding them in place with magnets. I taped the magnets to the underside of the deck and placed the other magnets atop the glued on deck planks.
Here are a couple of pictures to show what I mean.
- GrandpaPhil, etubino, JayCub and 3 others
-
6
-
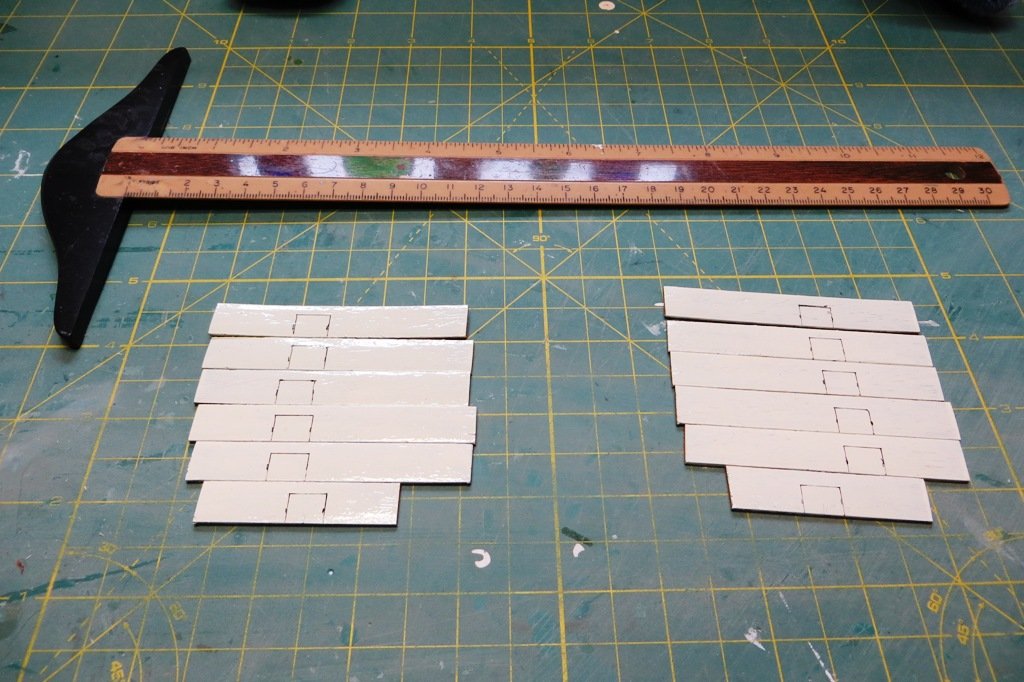
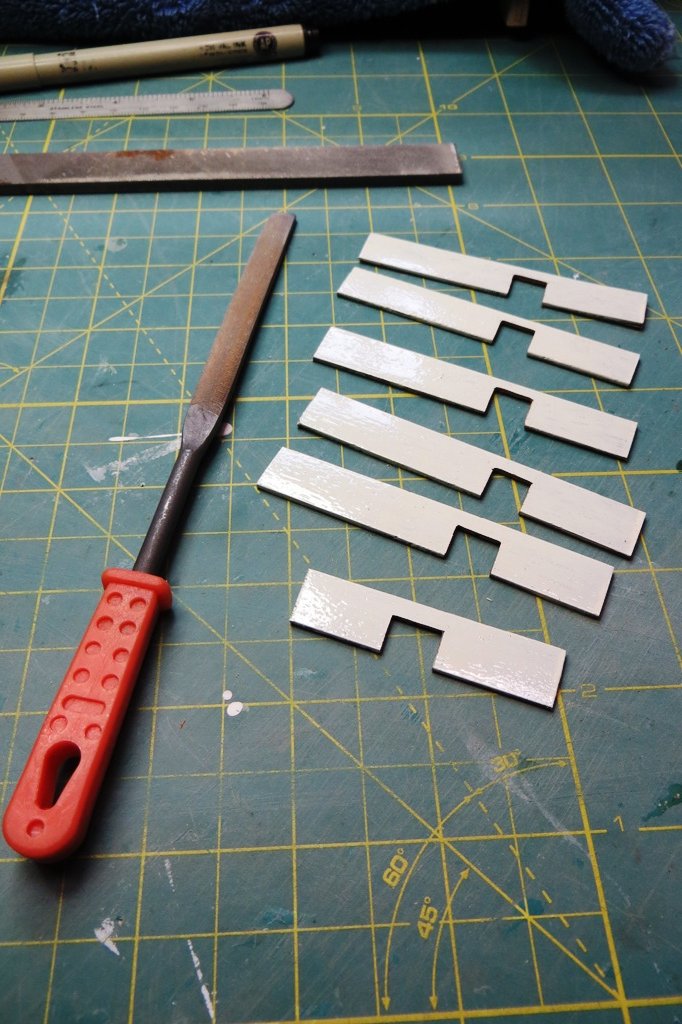
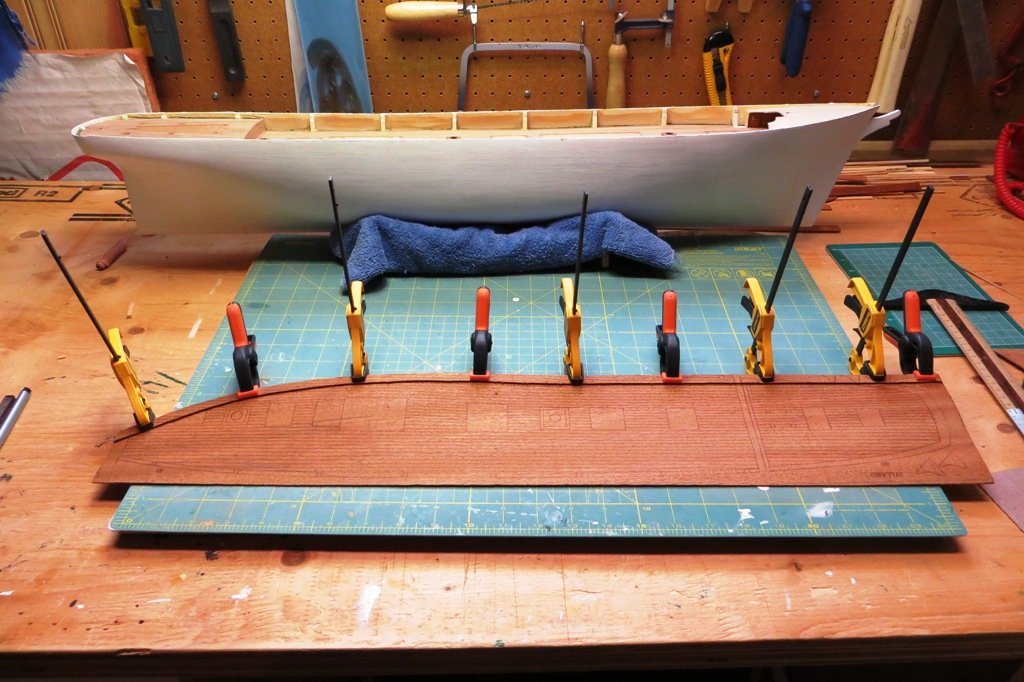
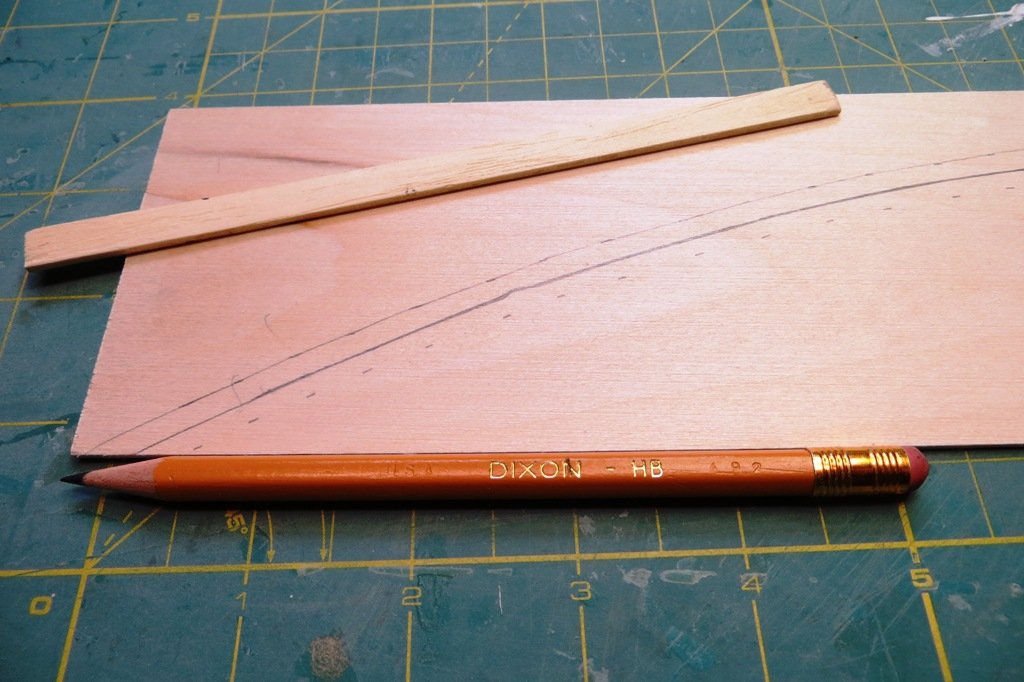
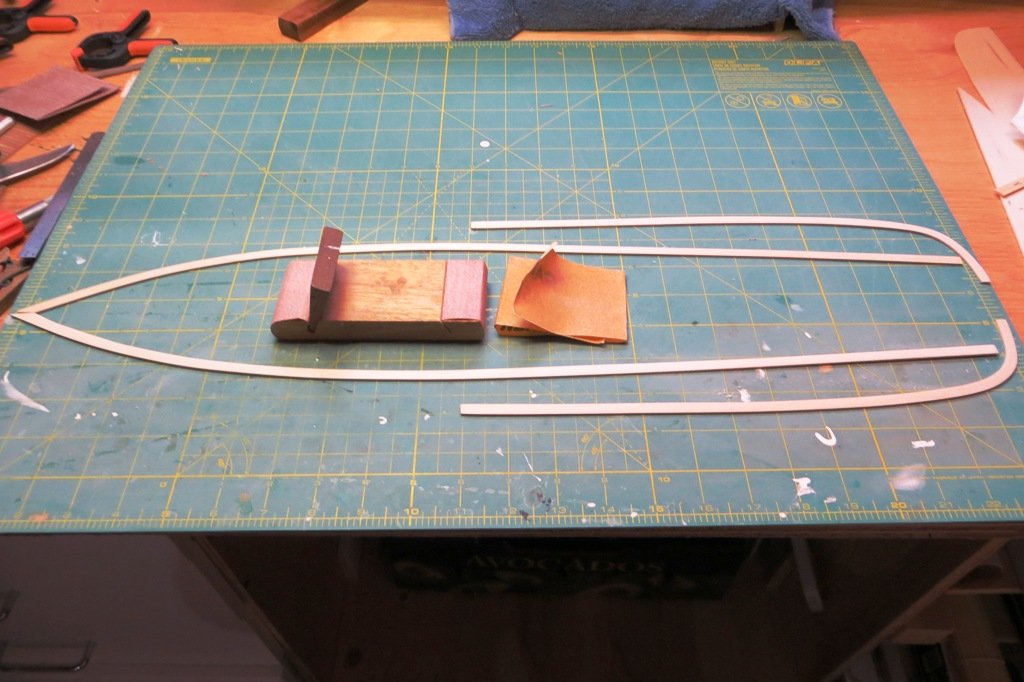
Time to catch up on the ole build log before it gets ahead of me. I have been doing work in a few areas before finishing off the hull. One of those areas is the caps for the bulwarks. Ideally I wanted to apply them as soon as the hull painting is done. Initially I wanted to use the "mahogeny" that I had on hand from an old kit I had been given a while back. That that proved impracticle because I could not saw it without it splitting/breaking when I sawed across the grain. I also had sheets of basswood on hand which I ended up using as they did not break. It's not my favourite wood to use but it is available at my hobby store here in town and I can stain it to suit.
I start by tracing the outer shape of the hull at the bulwarks to have a baseline from which I can measure to get the width of the railing cap. Here are some photos of the process. The initial pics show the wood I initially started with.
- GrandpaPhil, JayCub, marktiedens and 1 other
-
4
-
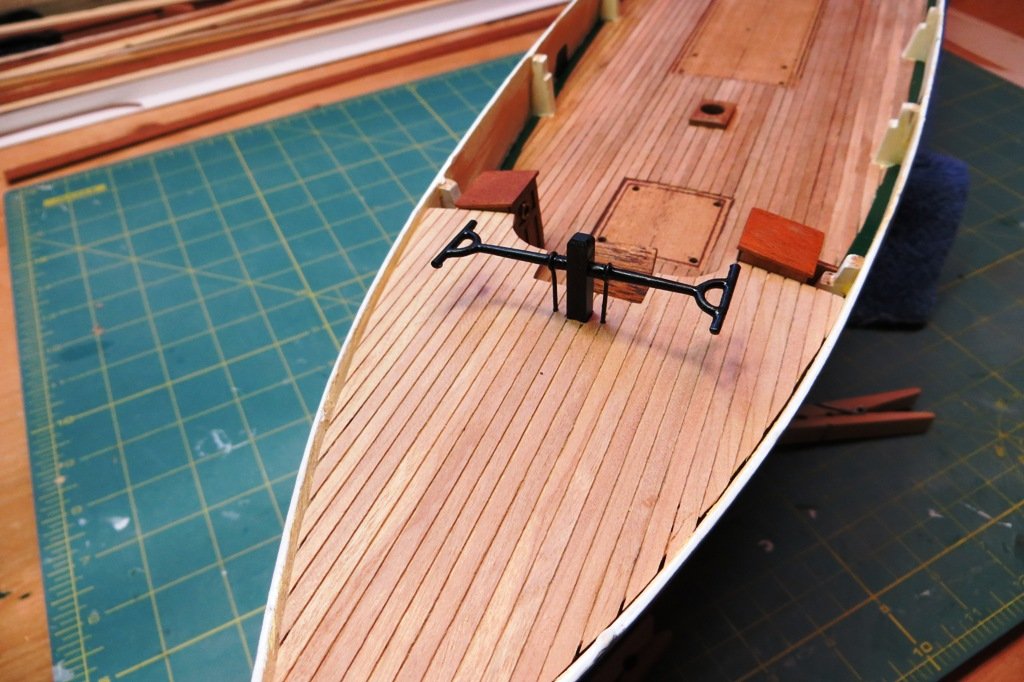
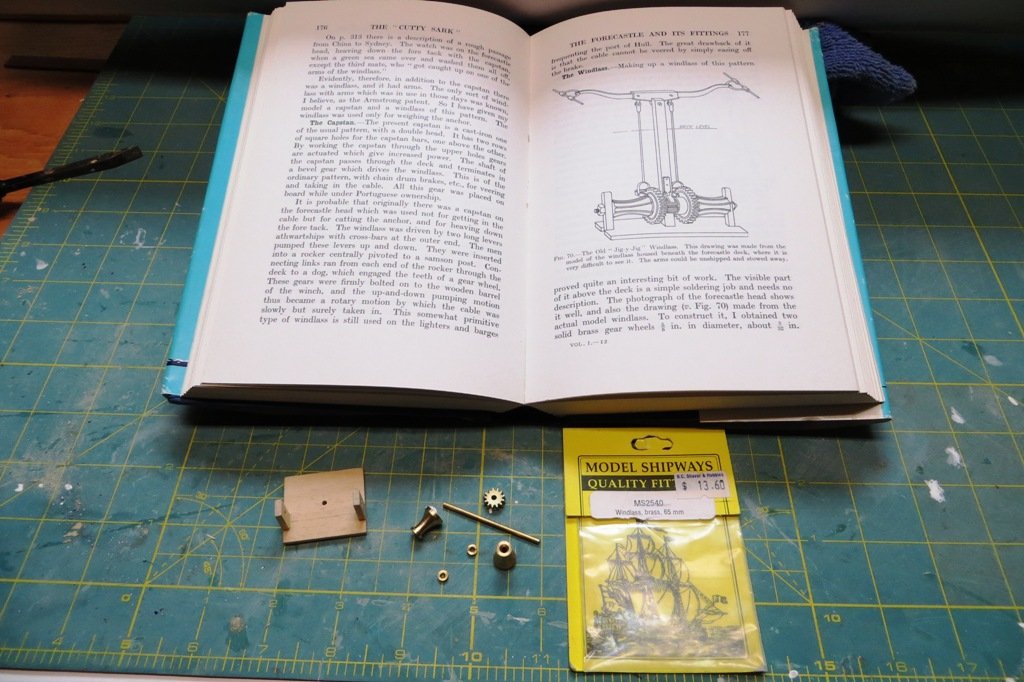
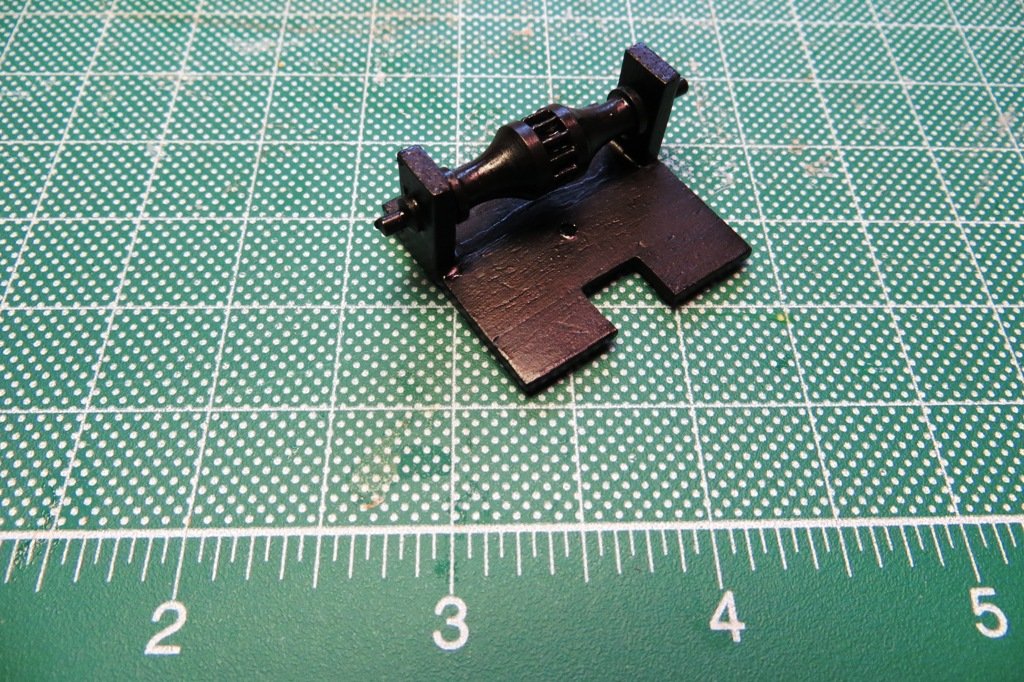
After having a little debate with myself about adding a windlass, I happened to be at my local hobby store and they had a Model Shipways version for sale. Well, that meant I had to add it to my model...
I wasn't sure if it would be worth the effort because it is under the foc'sle but with the cutaway, it is definately visible. Using Longridge's book I had a good idea what it's supposed to look like. I didn't use all the bits and pieces, just enough to make it look somewhat authentic. After the assembly, I used some Humbrol satin black paint and voila!, a windlass was born.


-
Hi kp. Were it me, I would cut the frames off altogether flush to the keel and then cut out the notches in the keel again. Then I would fashion out some new bulkheads and start again. Hopefully you have the full size drawings to do that.
All the best with your Cutty Sark.
Peter
-
Mark. You're a machine! Back in the saddle so soon. Well, good on ya. Doing something you're passionate about and obviously something you are very gifted at. Enjoy your new project and I will sign up for more updates. I love this kit and know you'll do it justice.
Cheers,
Peter
-
Beautiful work Mark. A wonderful addition to your fleet. It's mainbrace splicing time!
Peter
-
-
Hi David,
She looks fantastic! The black hull and copper bottom are real eye catchers! The white strakes are a very nice touch too.
Peter
-
Hi Allan,
Wow, what a great model so far! She looks super. I have a very old Danmark kit which I have just started. However, the instructions are so old and basic that I have contacted Billing to get some full size drawings.
I will be checking in on your build log from time to time and get some hints and tips. You have put the bar pretty high...
Peter
-
-
Hi Robin,
After seeing the enlarged picture I recognized her as the sail training ship Cuauhtemoc, from Mexico. I was aboard her when she visited Victoria several years ago. I remember how immaculate she was when I visited her. Built in Spain in 1982. A lovely ship (barque really).
Cheers,
Peter
-
HMS Vanguard by marktiedens - Model Shipways - scale 1:72
in - Kit build logs for subjects built from 1751 - 1800
Posted
Brilliant! Thanks for the great explanation and thanks to Chuck for the idea! I will try this on my next build as I find the "clinking" affect kinda troublesome. Too much sanding, if you know what I mean.
Cheers,
Peter