RussR
-
Posts
232 -
Joined
-
Last visited
Content Type
Profiles
Forums
Gallery
Events
Everything posted by RussR
-
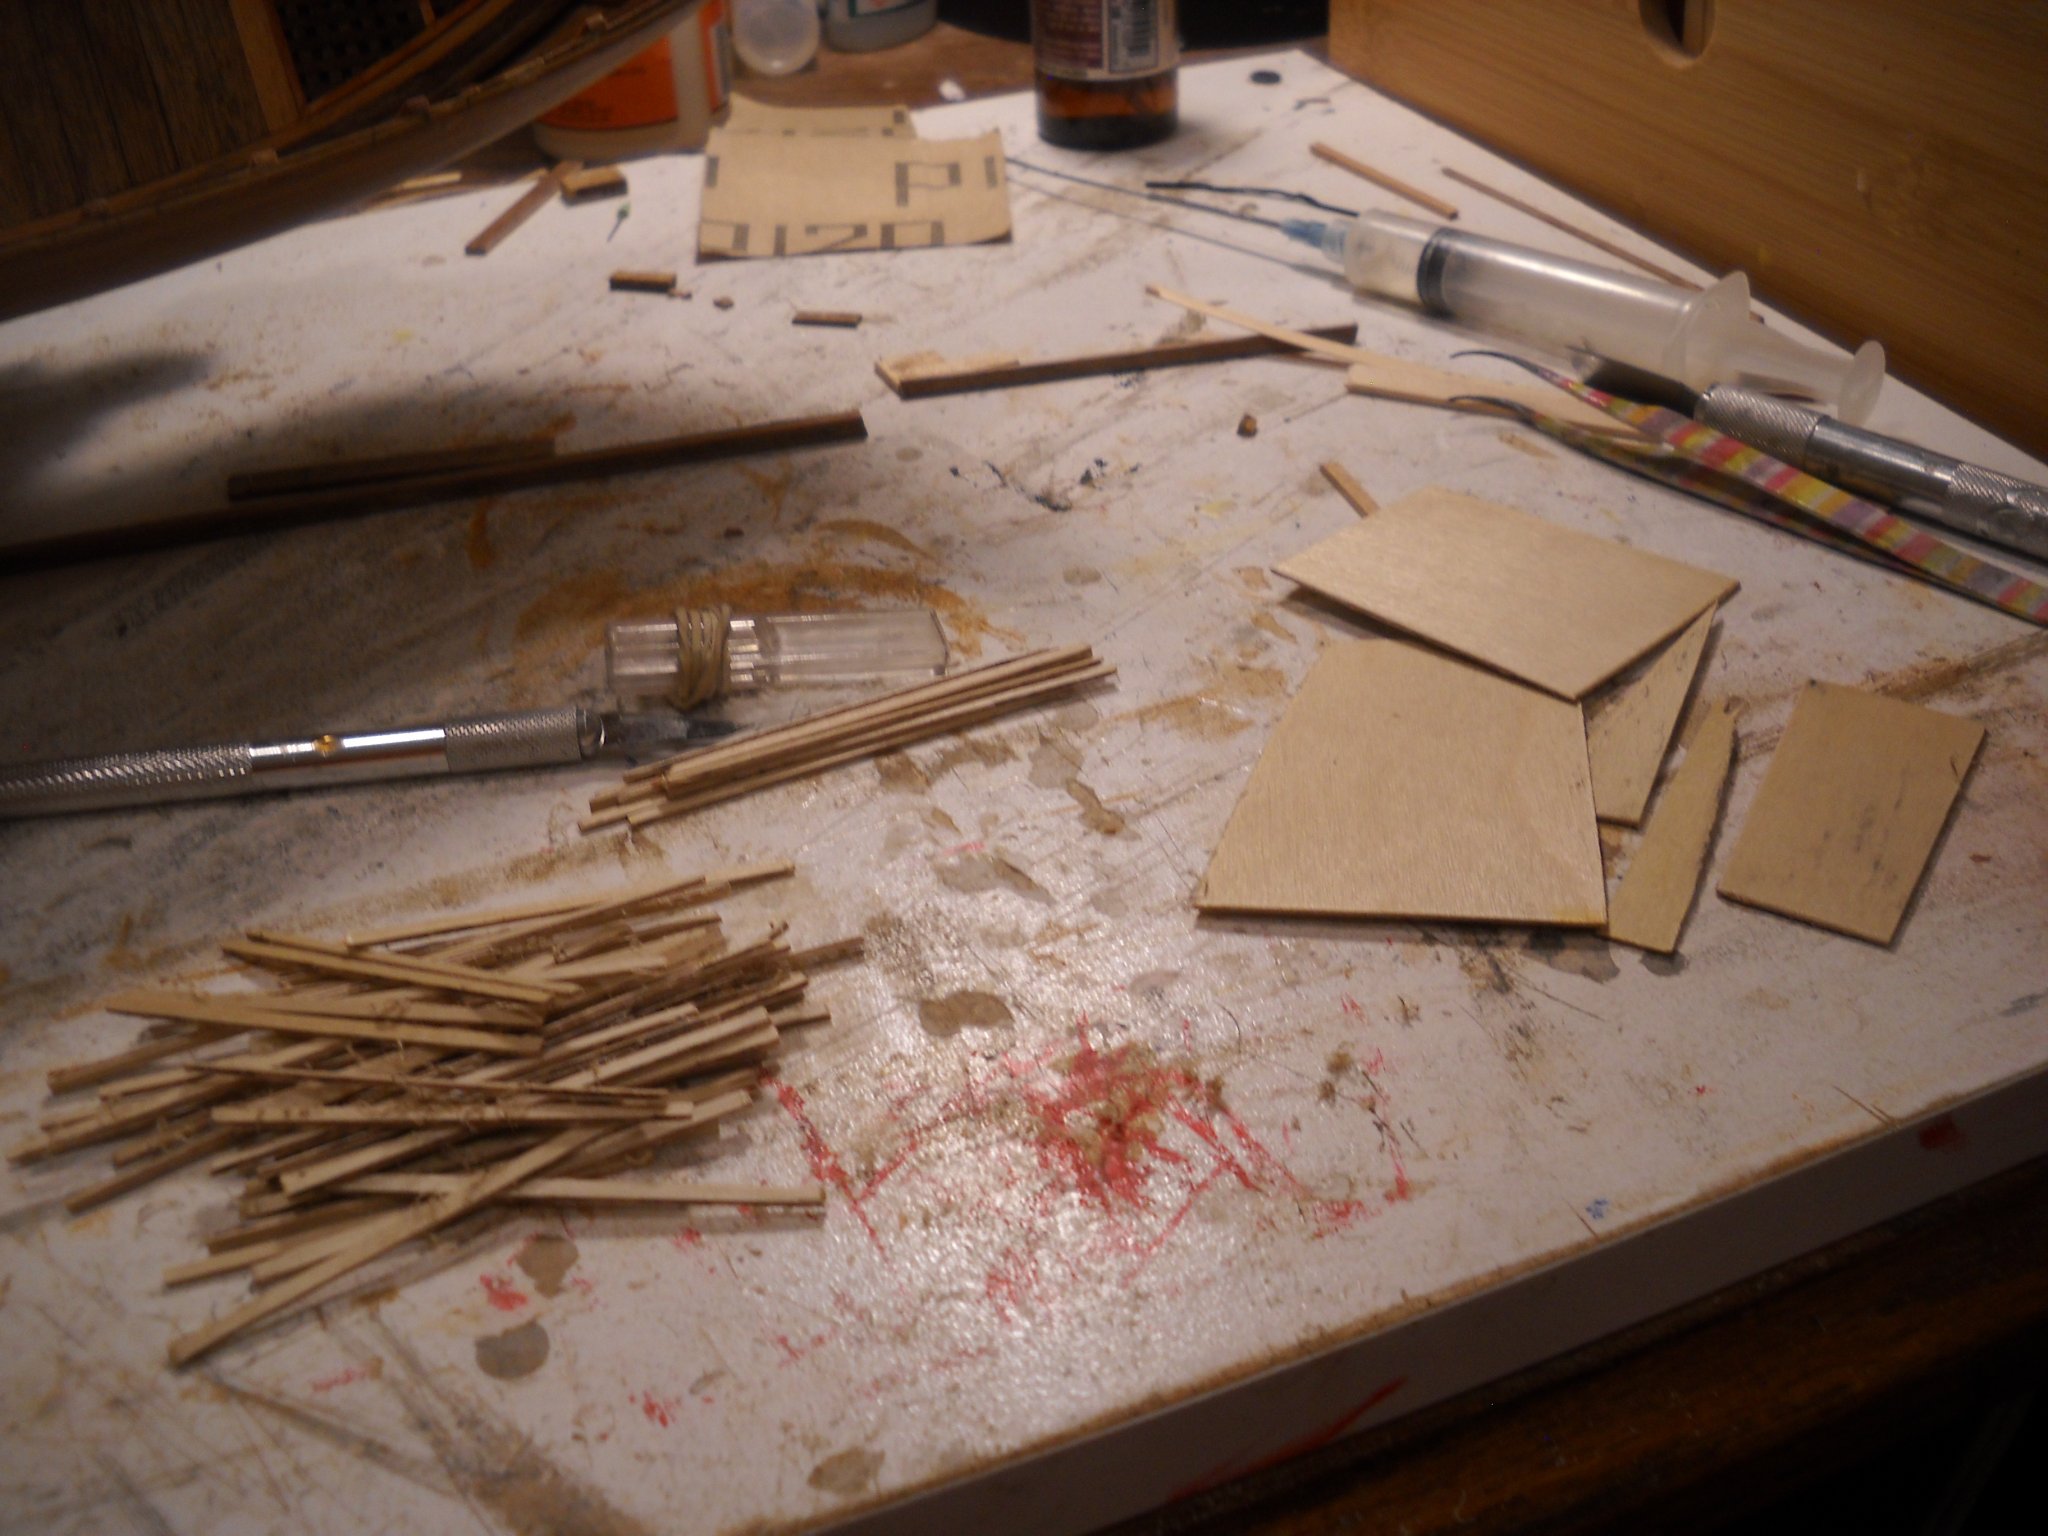
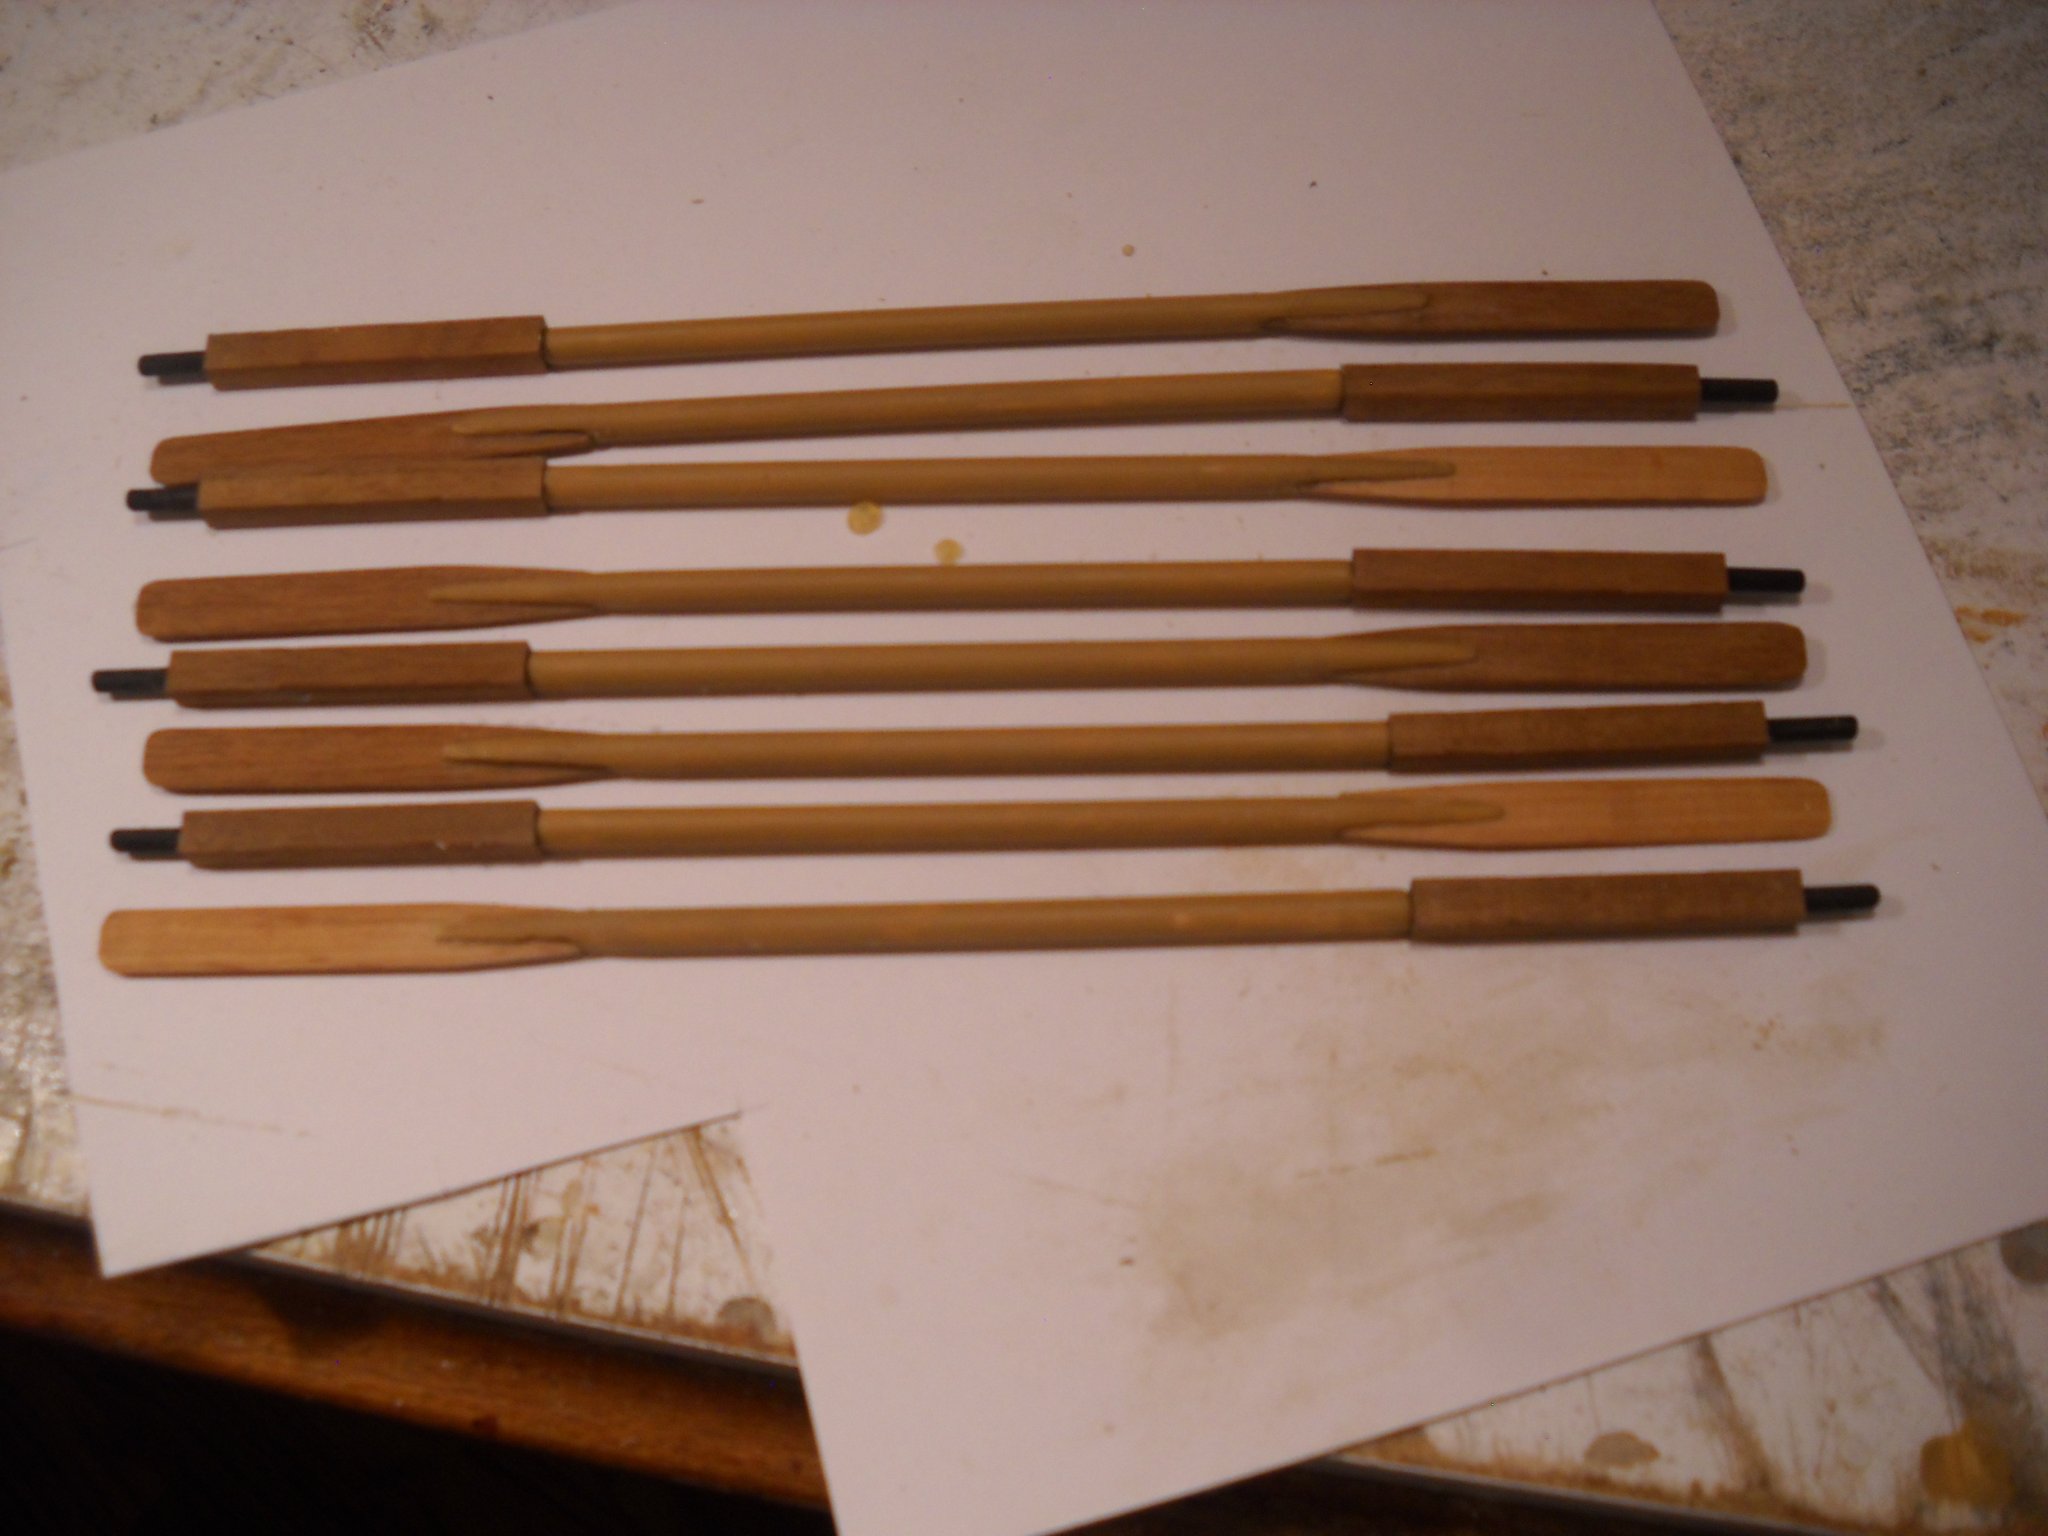
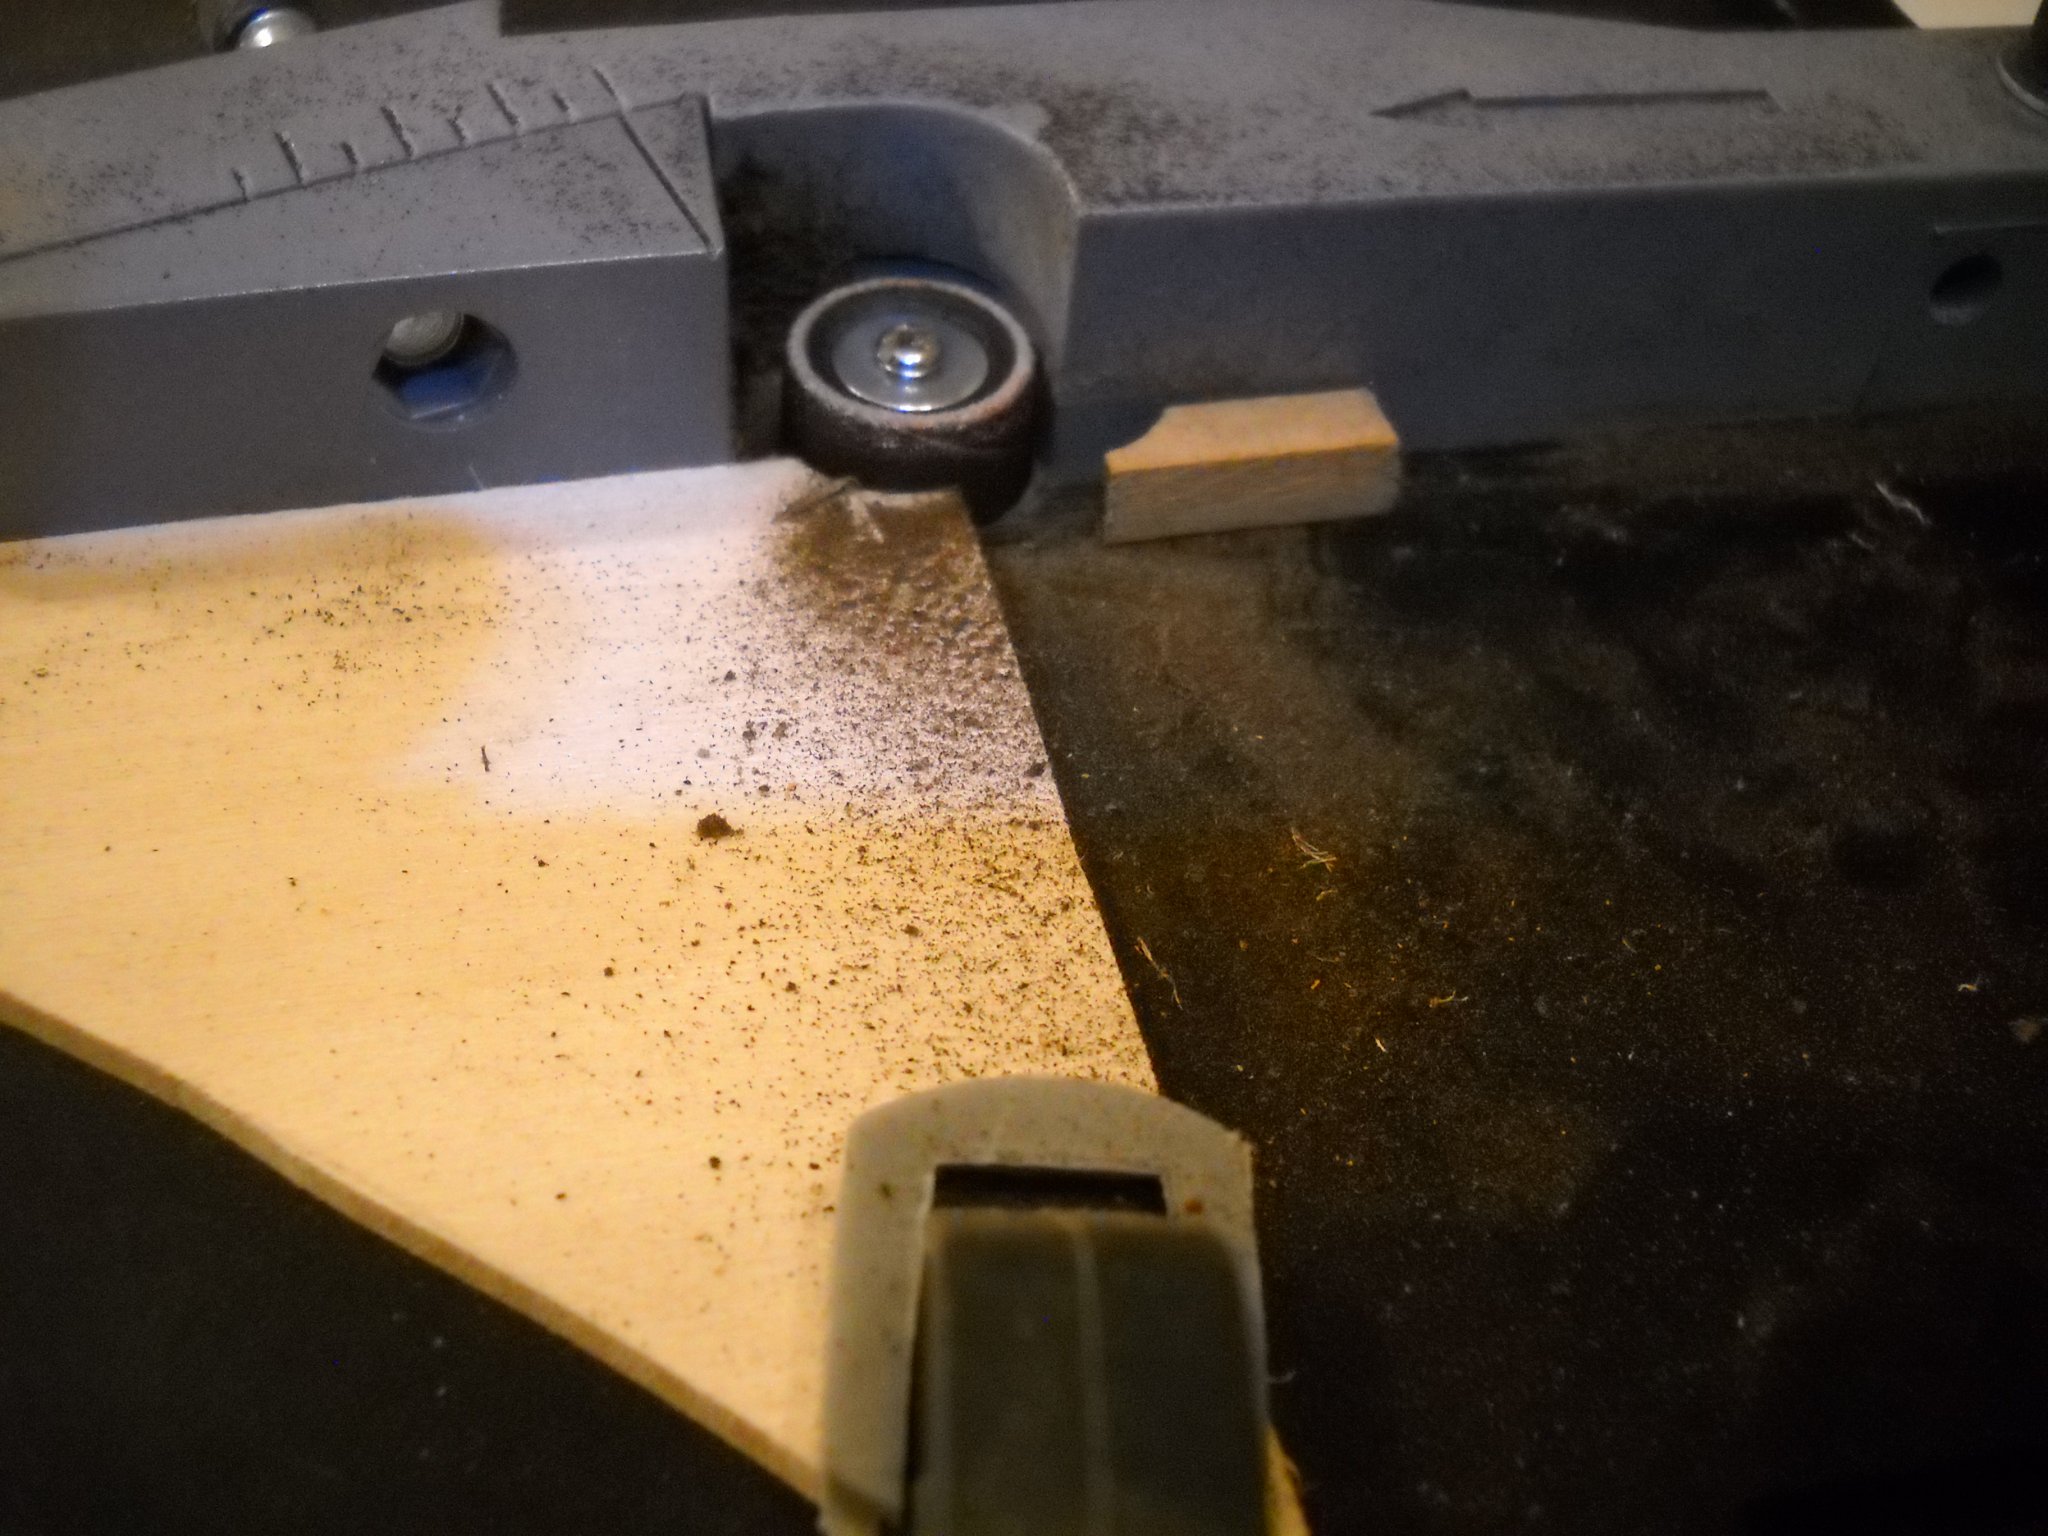
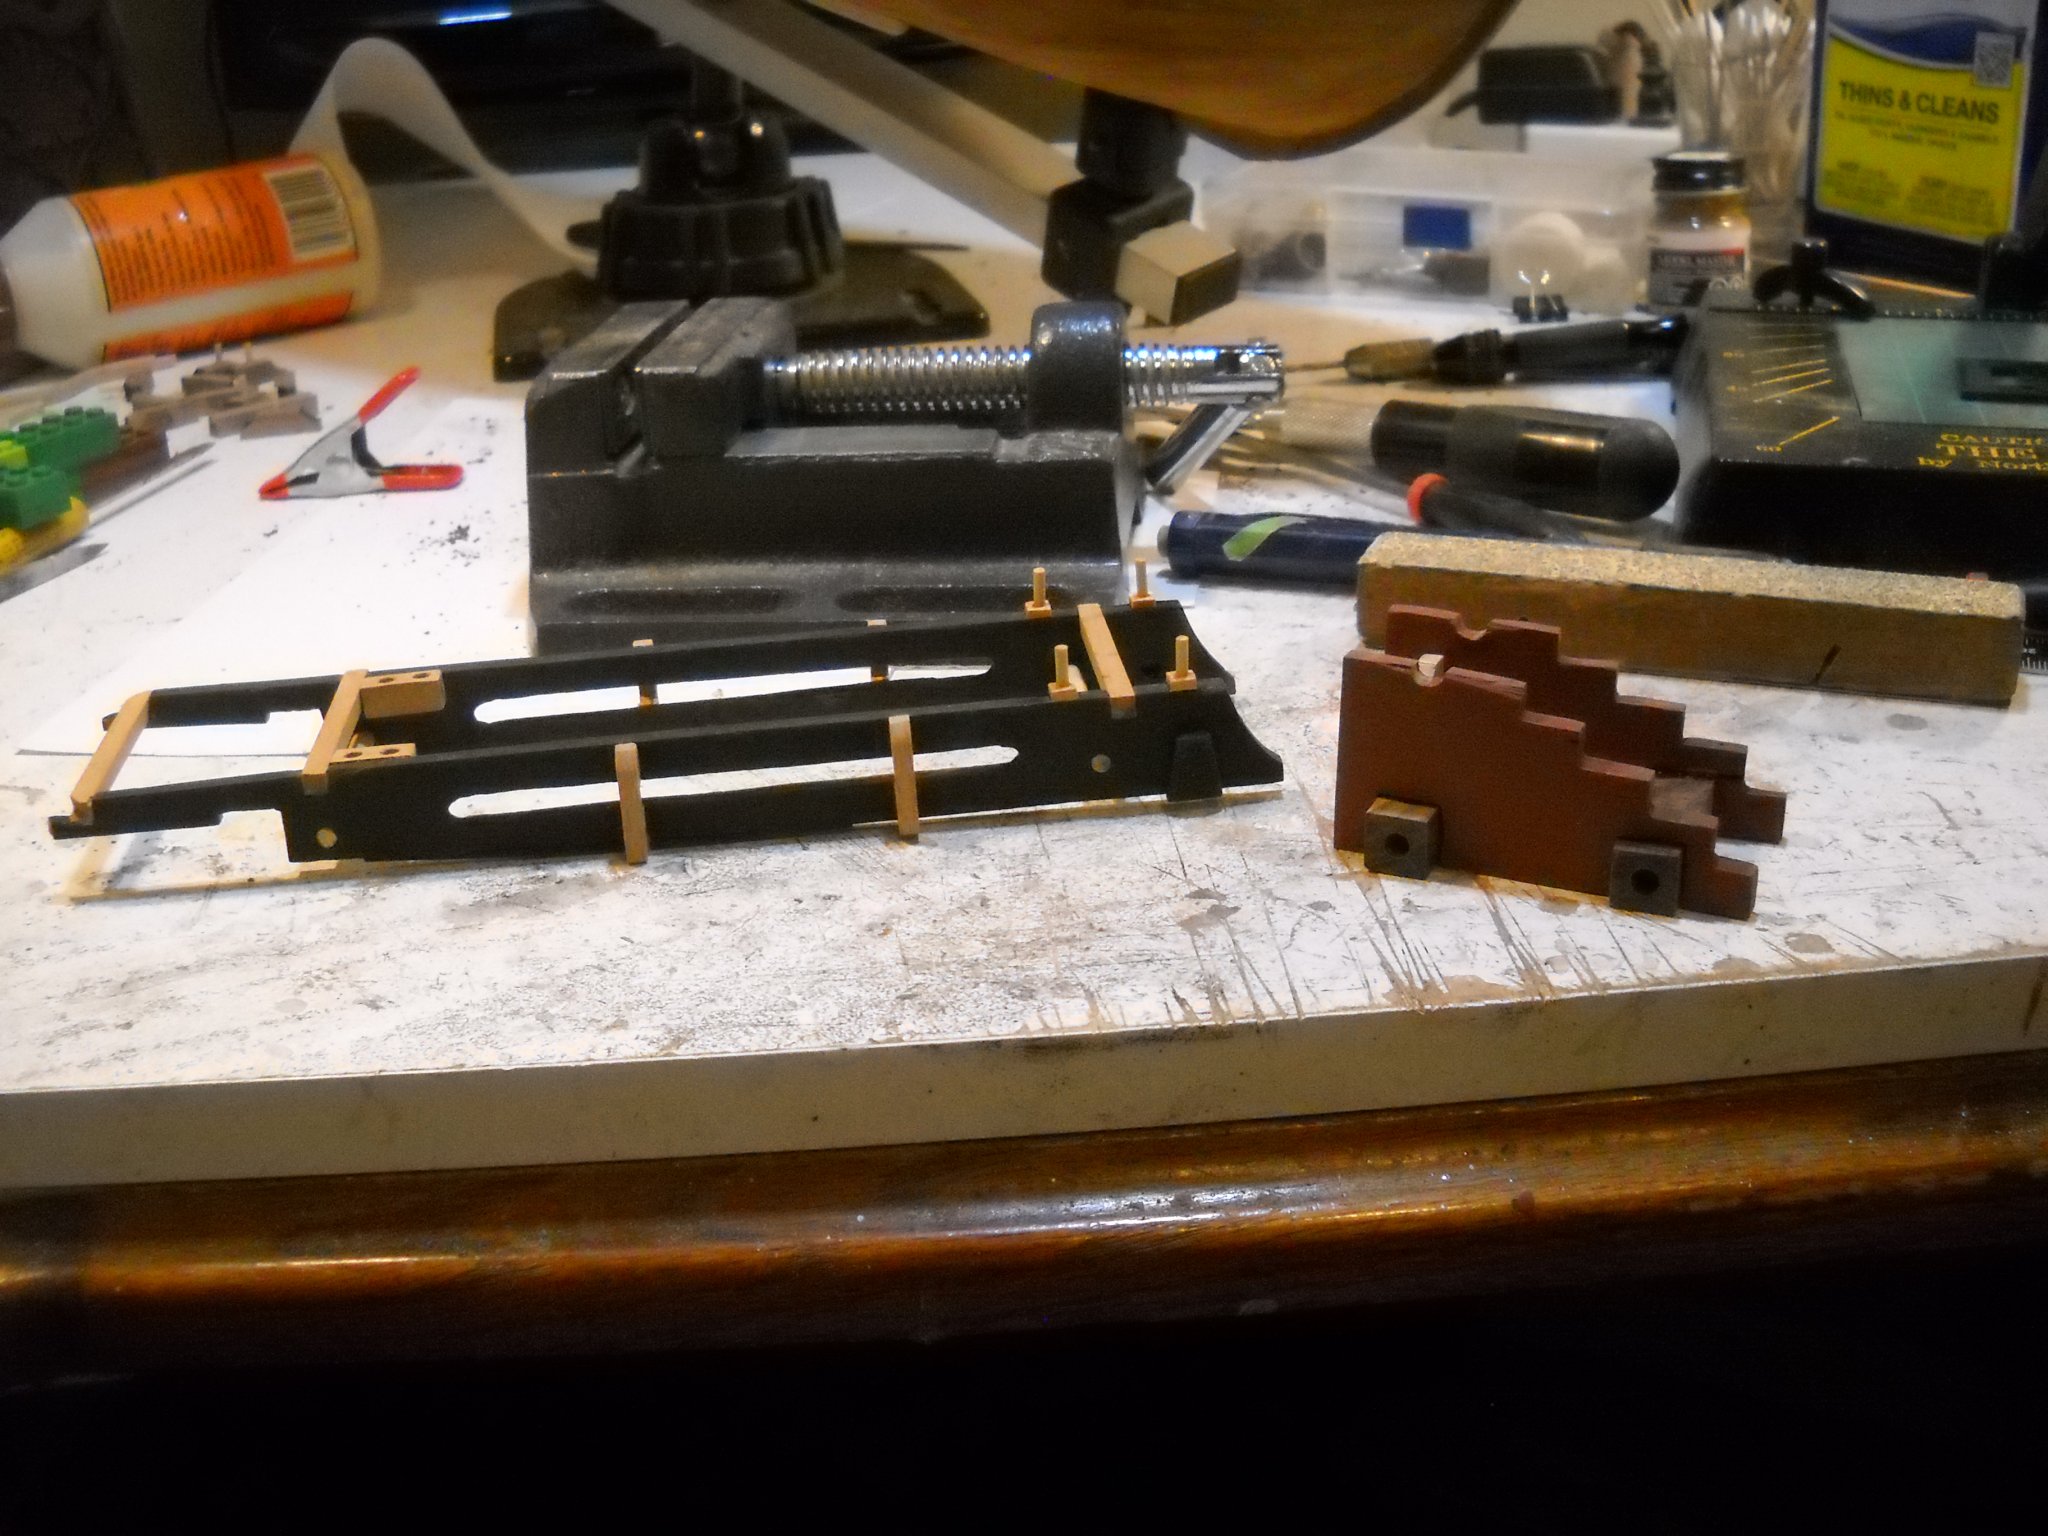
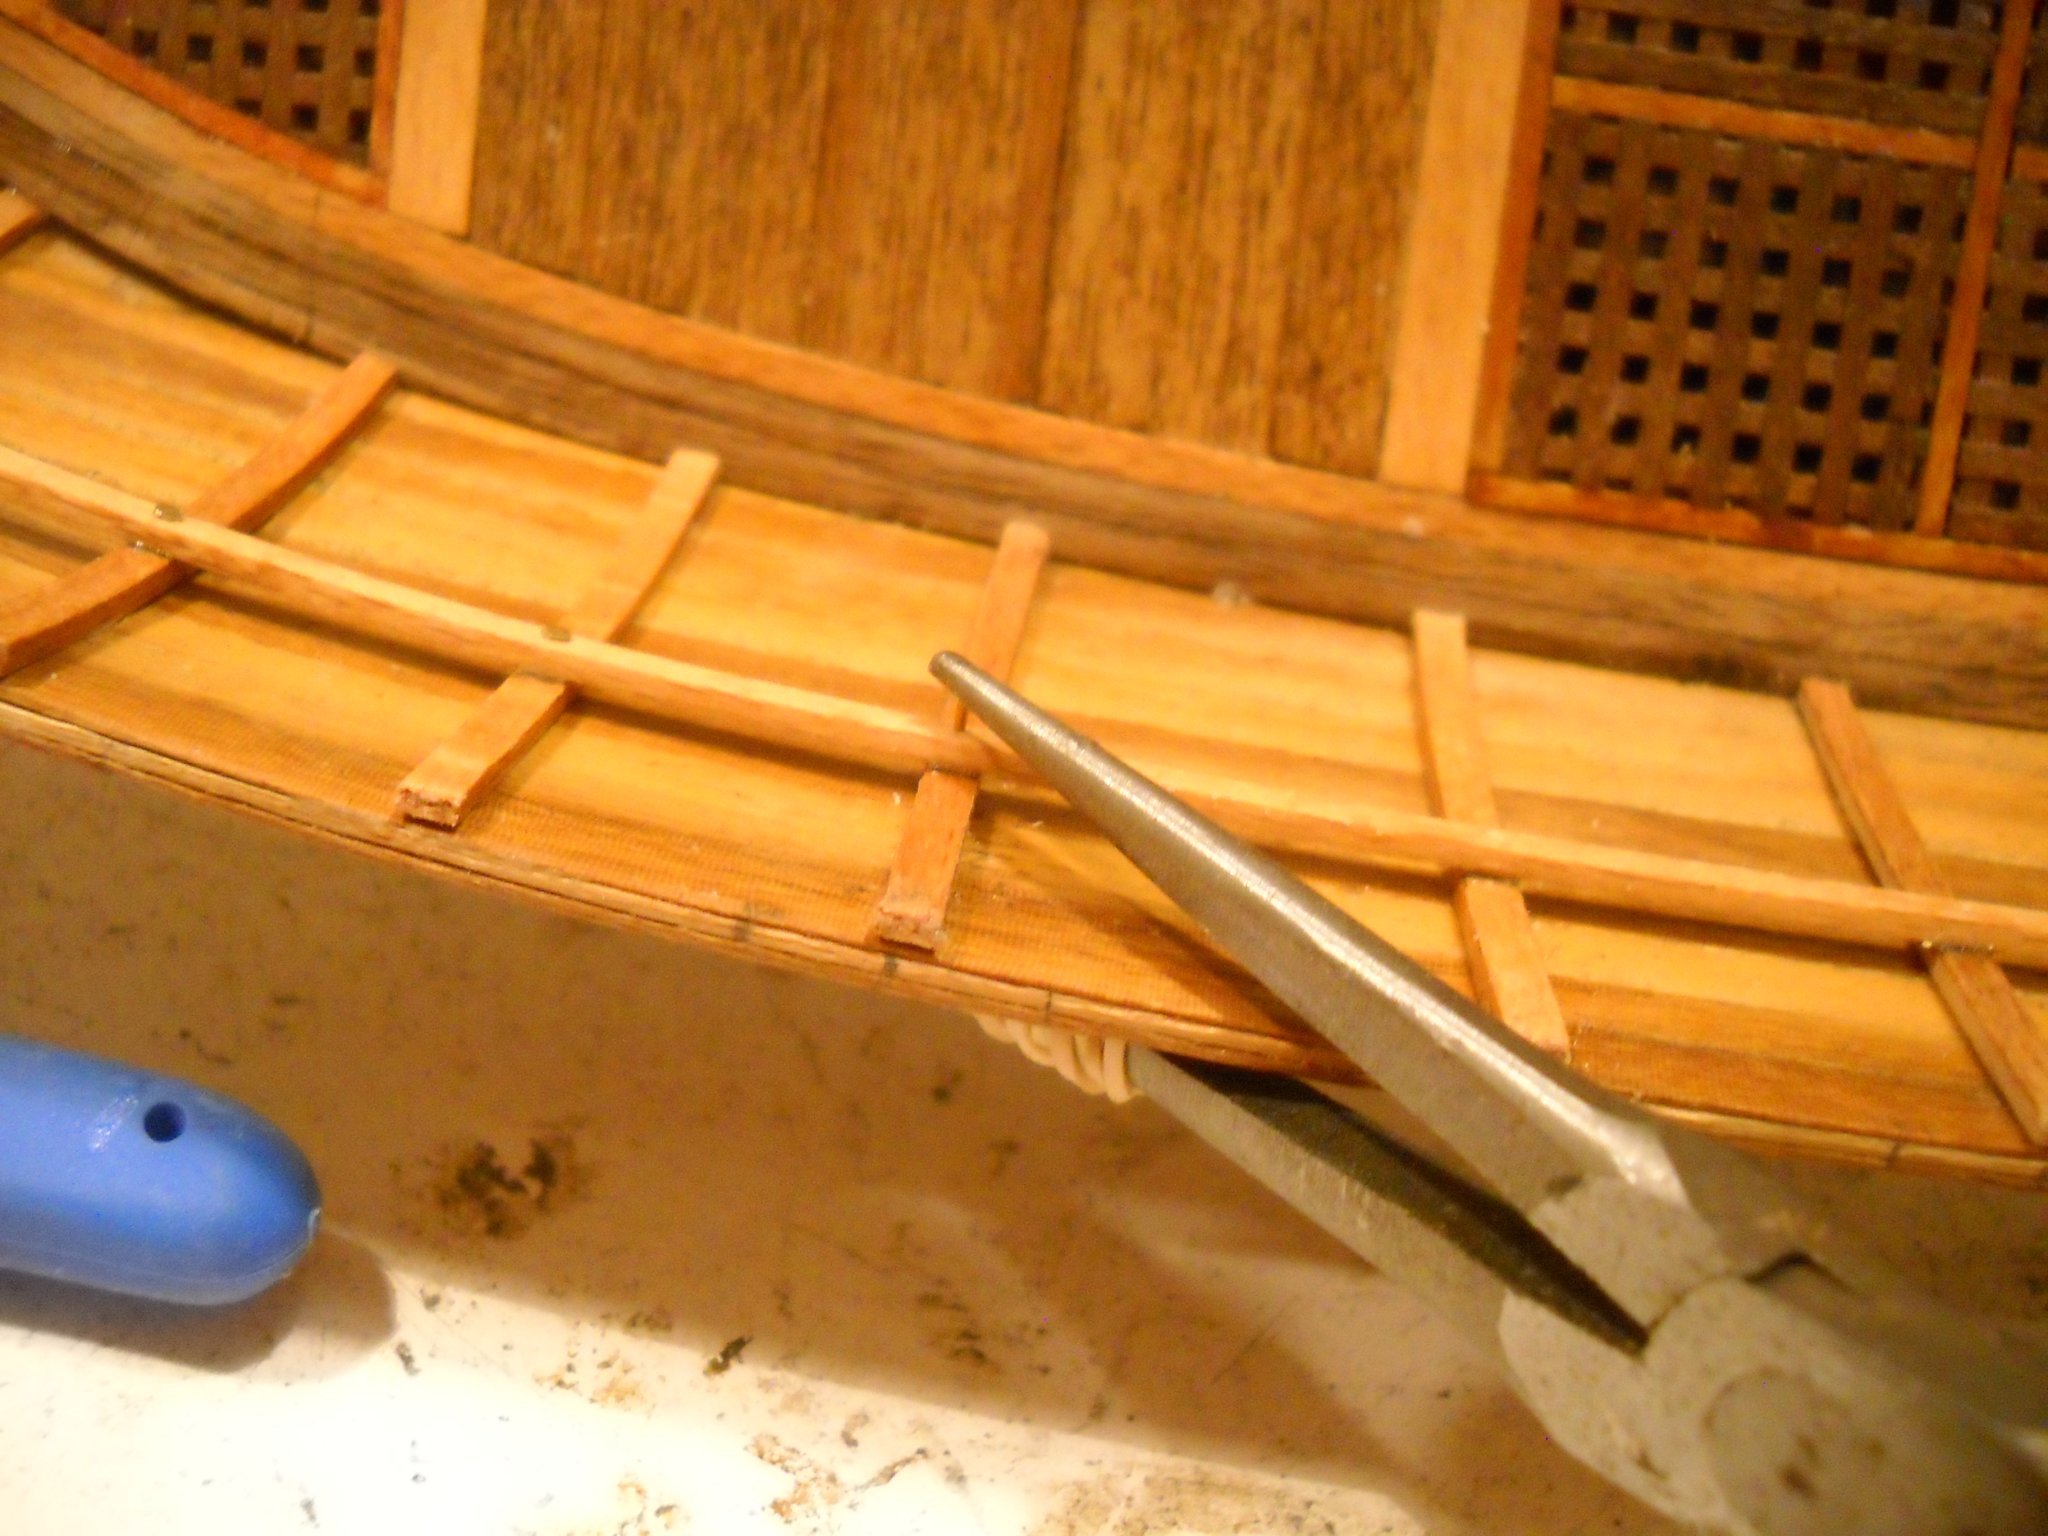
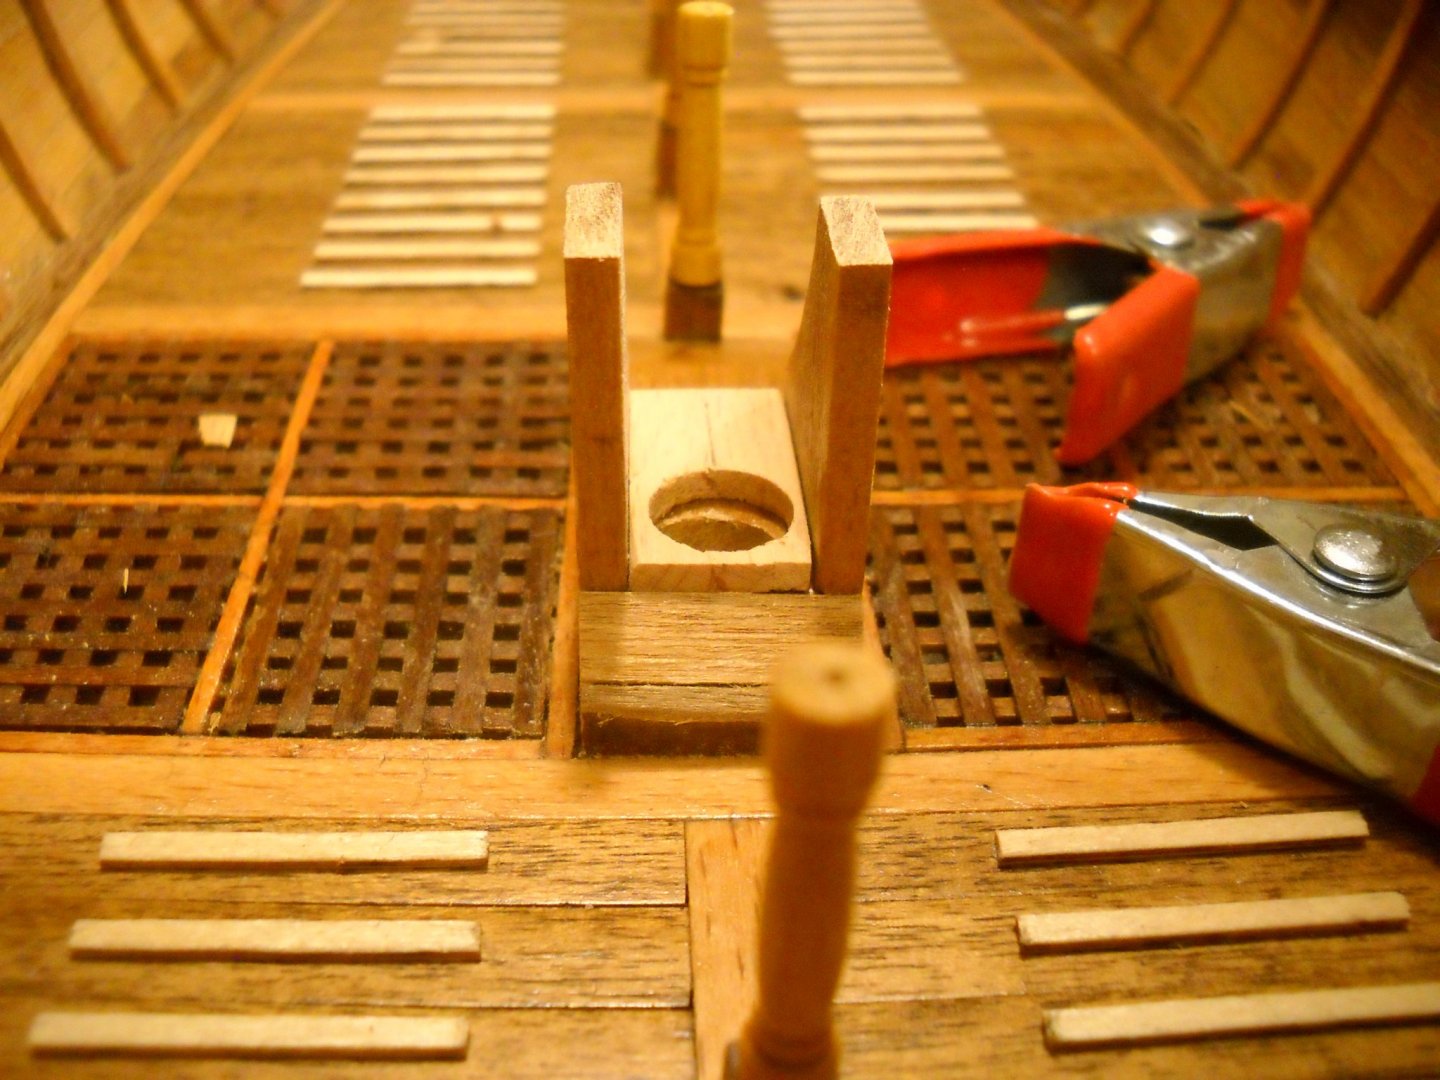
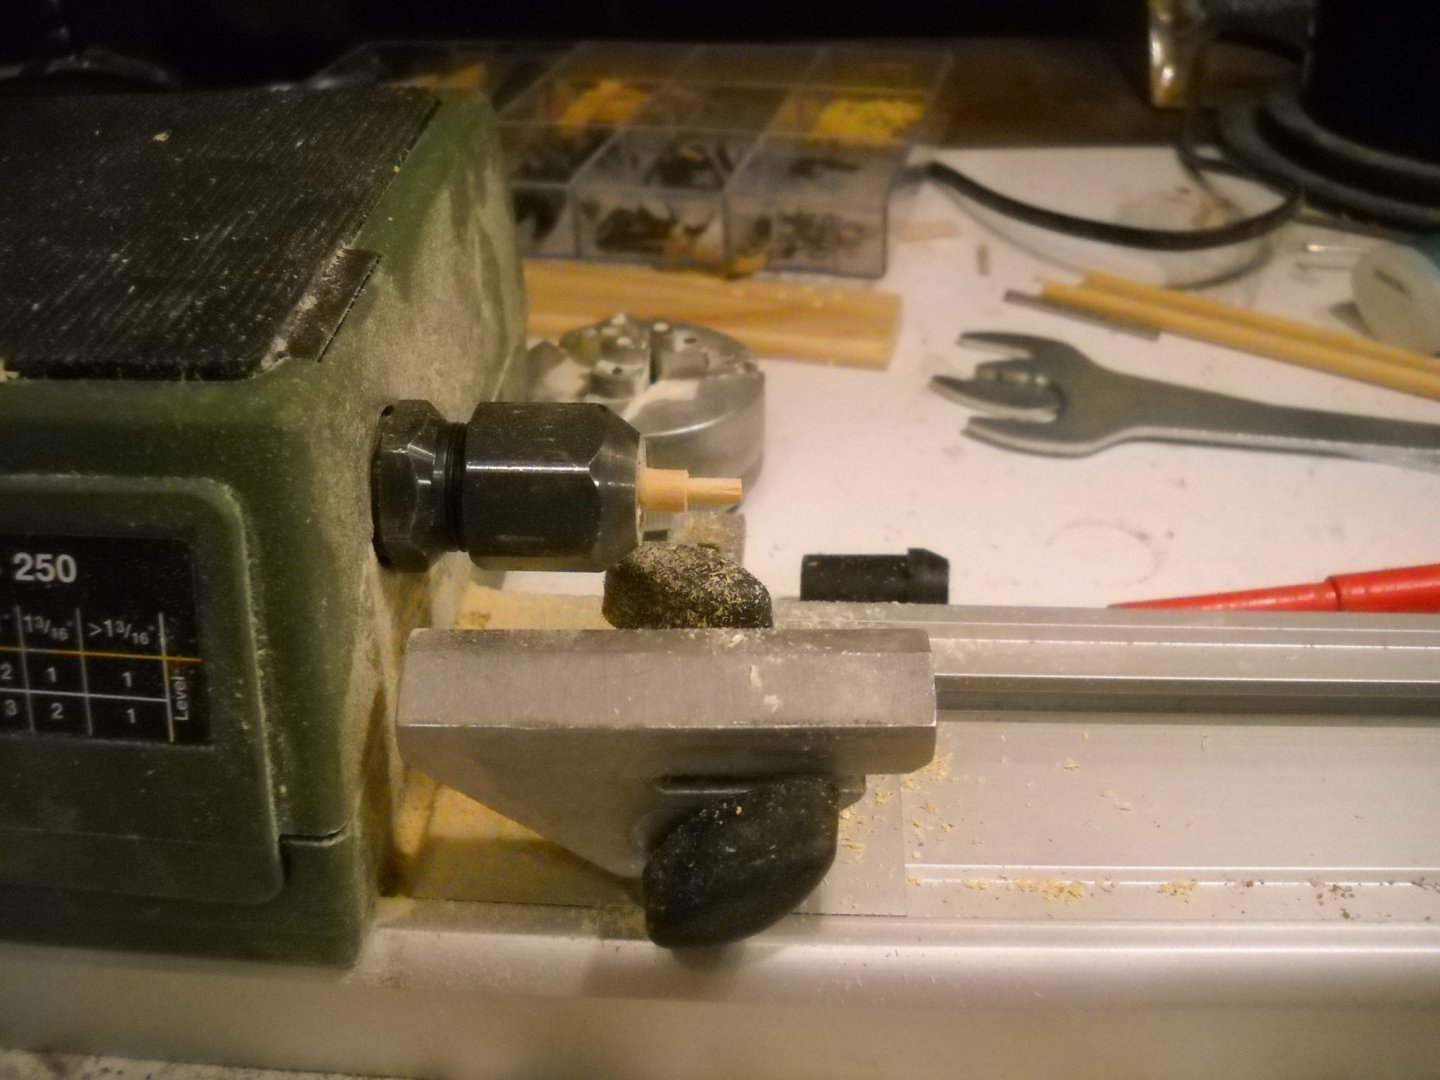
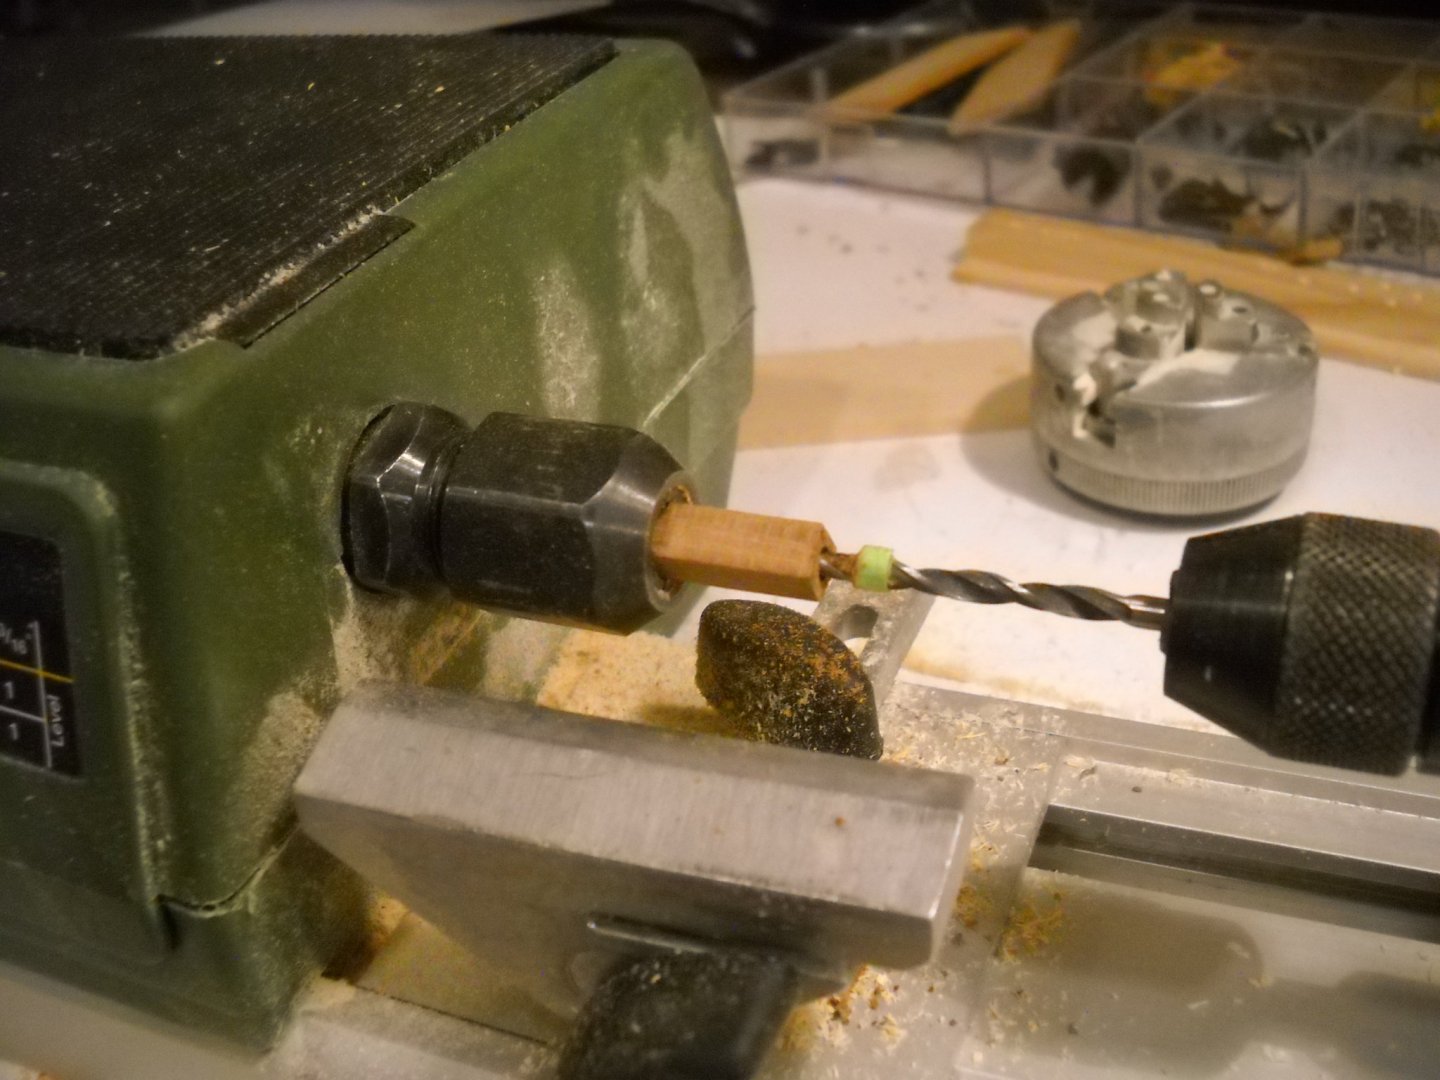
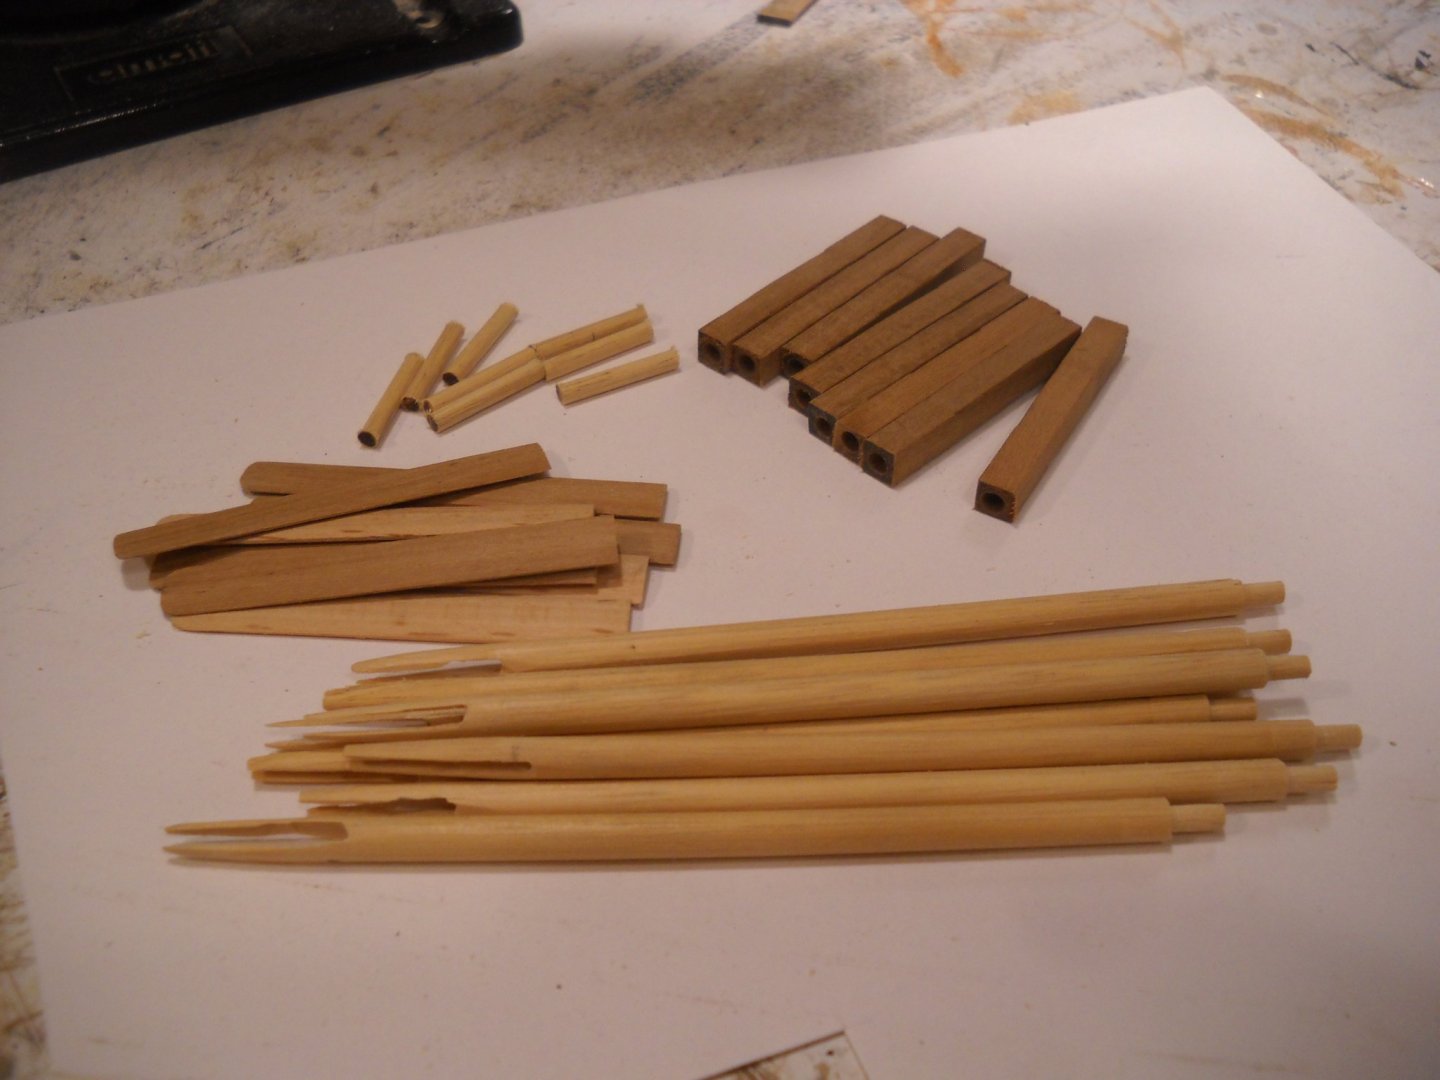
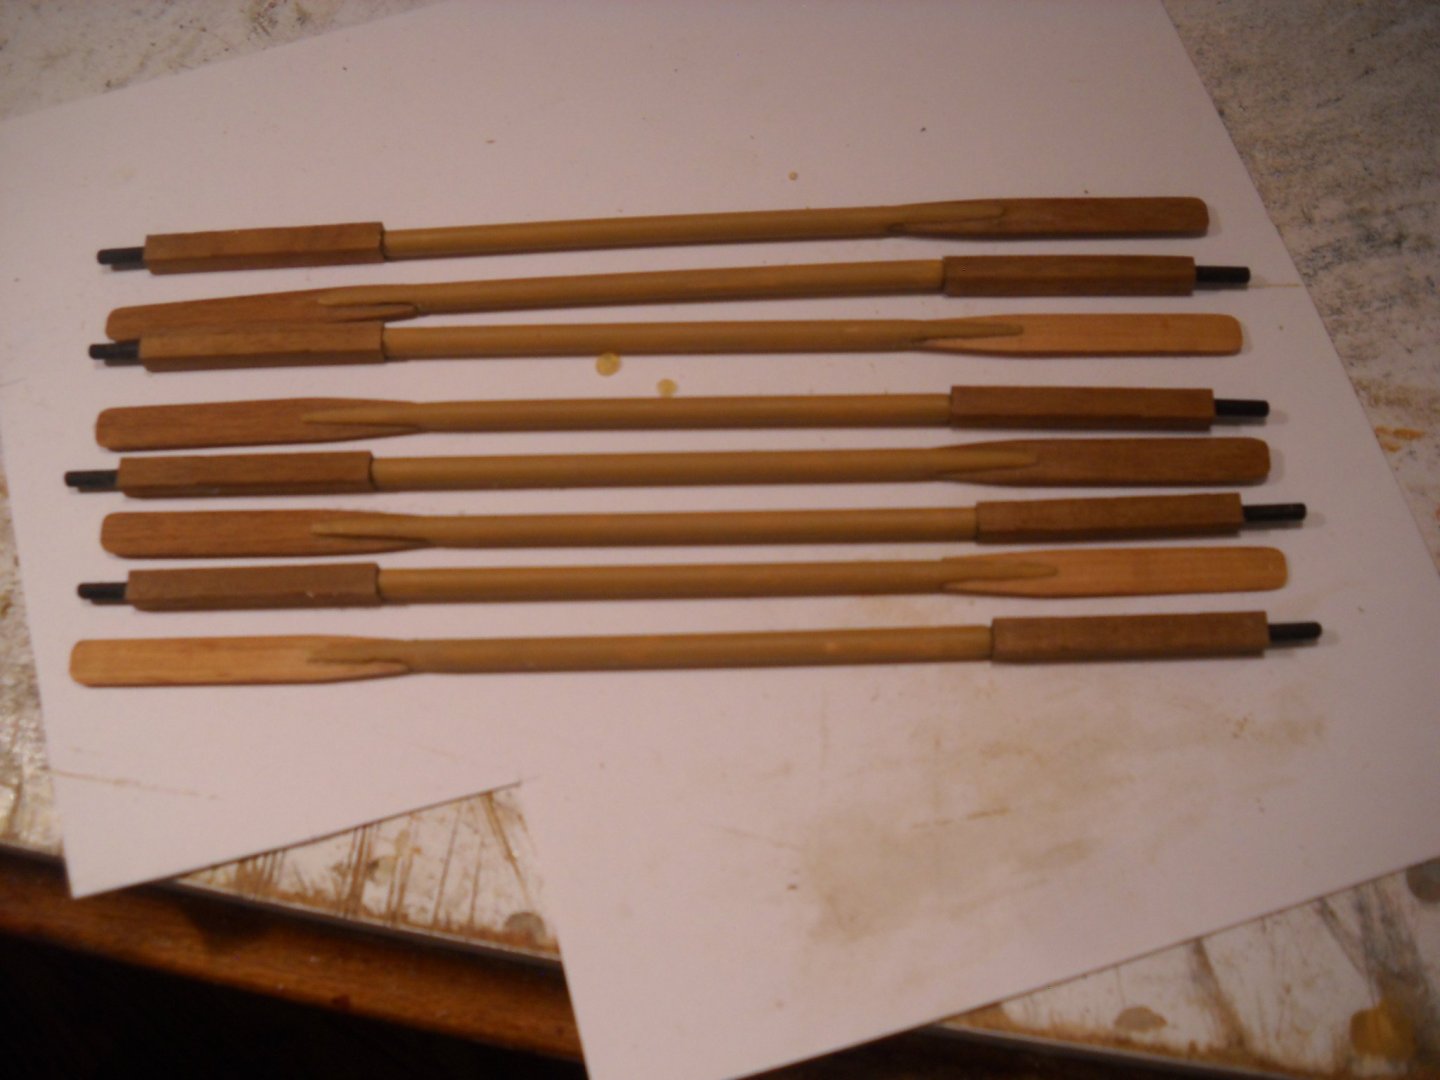
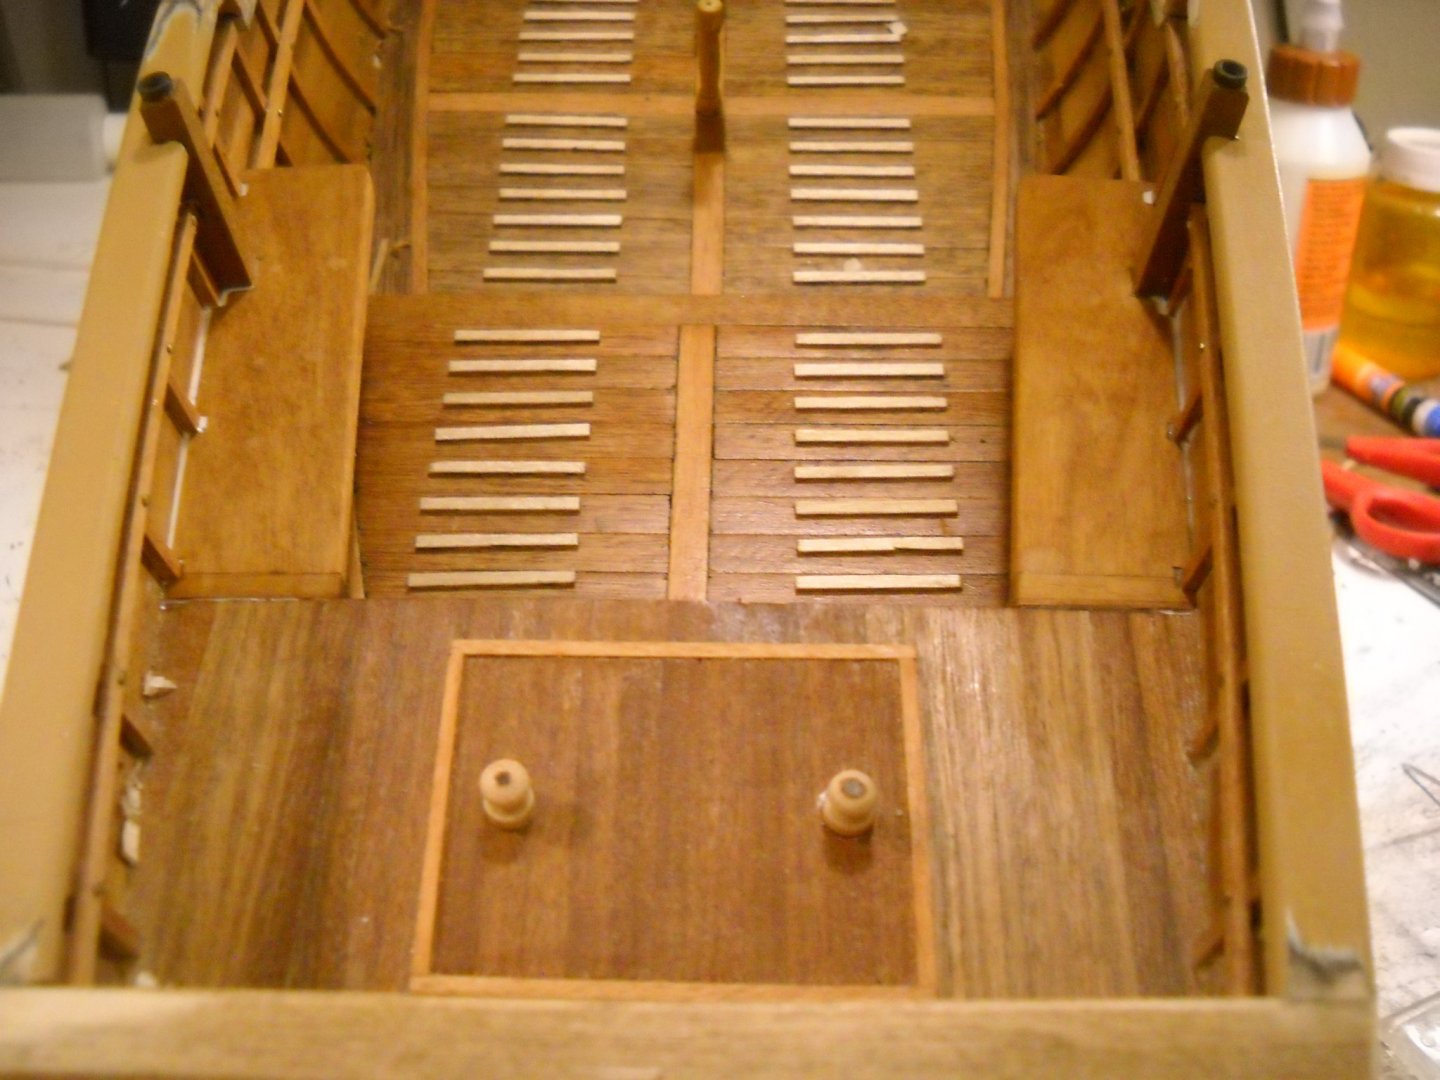
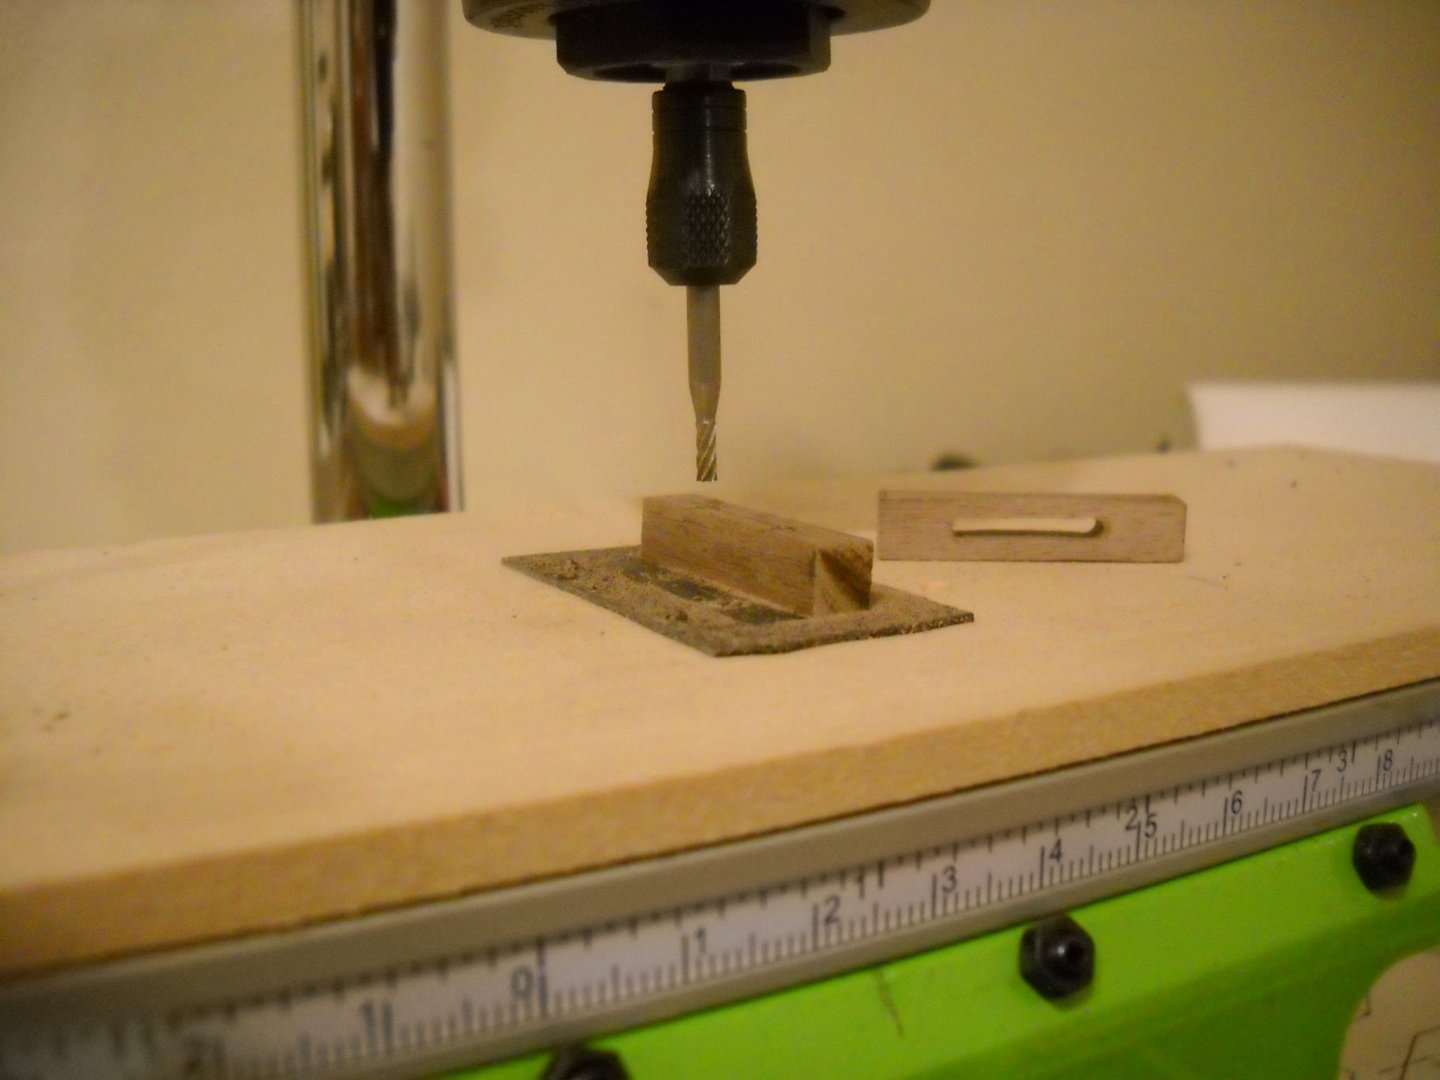
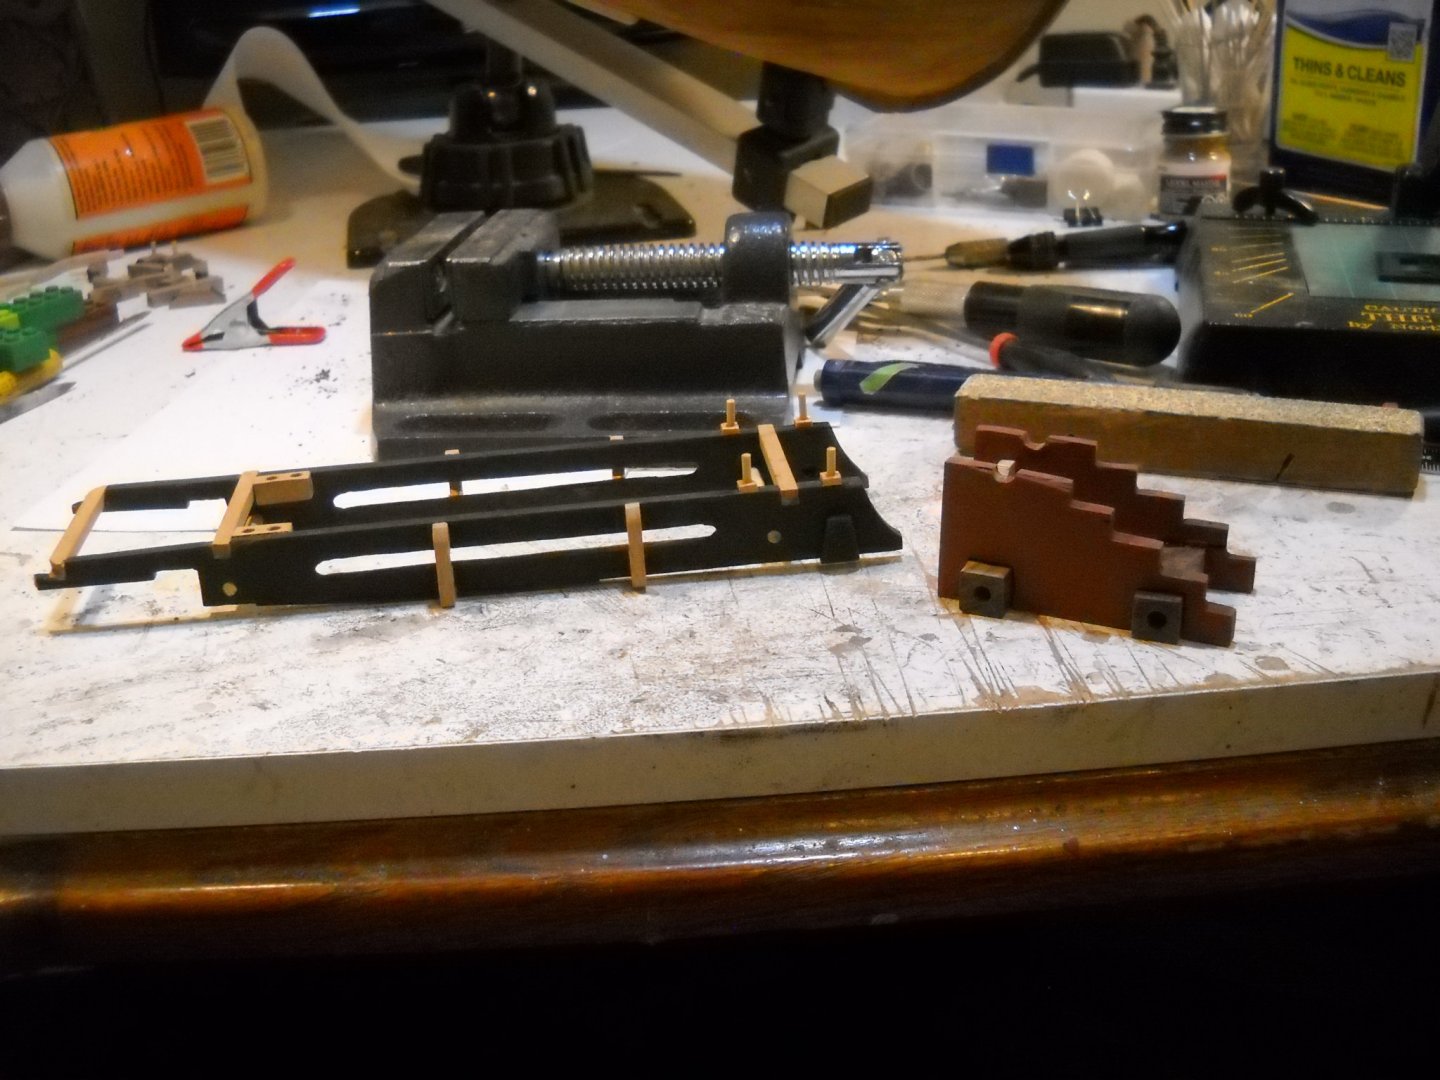
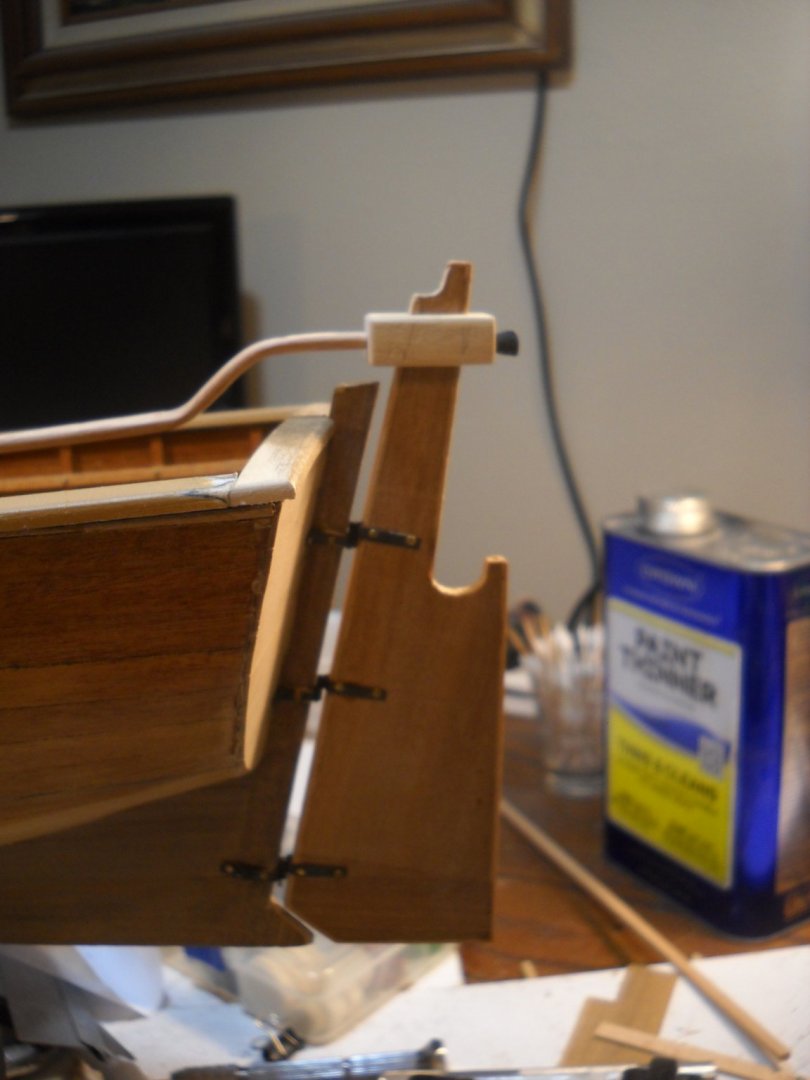
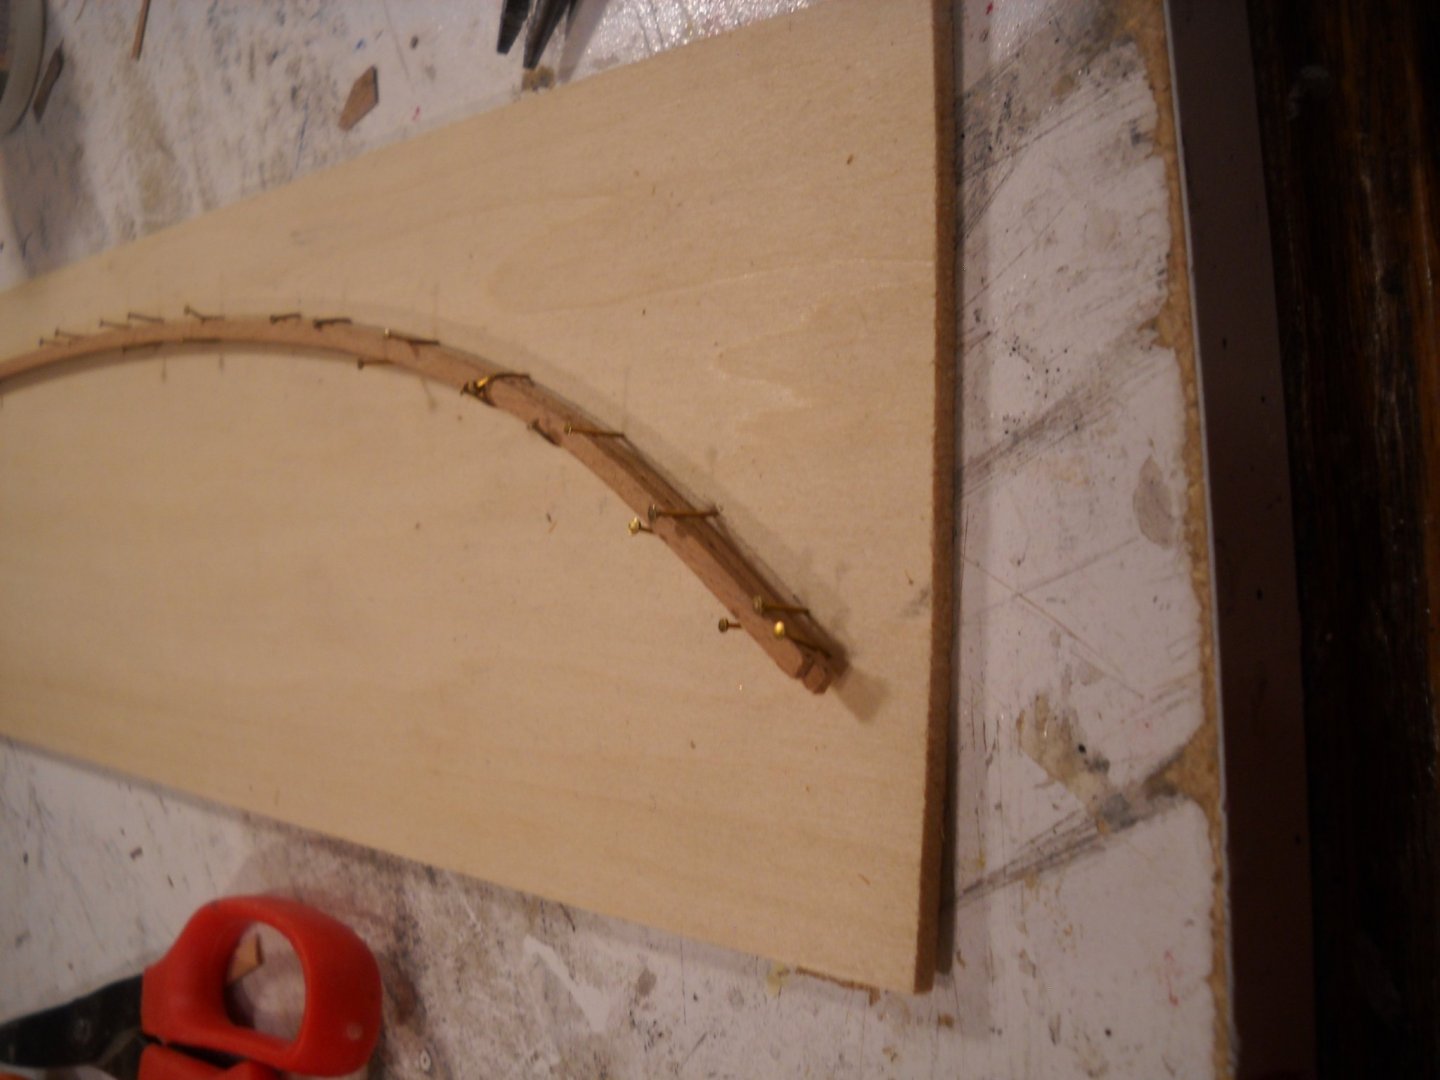
 I am sorry I didn't make last weeks update. But I have made up for it this week. The plans called for 2X2 strips for the tread but I though it look to tall for tread. So I cut some 1X2 strips from some scrap and used that instead. This is some shots of the results. When I tried to drill out for the mast, it chipped out. This is a shot of my feeble attempt to mitigate the damage. This is shots of fabricating the oars. They are not perfect but they will do. You would think you could drill dead center on a lathe. Not so with this Proxxon DB 250. There is so much slop in the tail stock. One couldn't expect to make watch parts with it but it will work for model building once I understand the limitations. The lathe was used and also came with a brand new three jaw chuck (still in the package). It was packing some kind of grease that had hardened so it was lock up and wouldn't move. I managed to force it free and clean the the old grease out. Then when I tried to thread it onto the spindle, I couldn't get but about 2 or three threads. Once I knew that I wasn't damaging the threads I literally had to force it on. Now it spins like the button on an outhouse door. 😀 This is a shot the component parts for the oars. And the assembled oars. This is a photo the a couple of knobs that I turned no my lathe. It sure a lot easier than doing it with a drill and a file and sand paper. This is a shot shaping some oar locks, also used it to shape a lot of the knees on a Dremel router attachment. It sure made a lot of smoke. Smelled like I was grilling steaks. Here I am milling the fair leads with a Dremel Work Station and an X-Y table. It isn't an ideal method but got the job done. Check out the fancy hold down method (double stick tape). But neither is a high dollar milling machine that would collect dust over 95% of the time ideal. This is what I worked on all day today. The gun carriage is almost finished. I also finished the rudder and tiller assembly. Bending 3X5 stock wasn't easy but I think I did okay. The part that the tiller goes into (don't know what it is called) is made out of basswood so I just drilled it out and finished it with an exacto knife and files. My small end mill couldn't go deep enough to do the job. That's it for now. I have got to clean this place up. My plan for next week is to complete every thing below the cap rails and paint. Depending on how far I get along I'll start the mast, yards, sail and rigging. Will just have to wait and see how it goes. RussR


- 14 replies
-
- 2
-

-
- panart
- armed launch
- (and 2 more)
-
John's YouTube Channel is like a complete video tutorial on model building. He is currently building the Occre Montanes
-
USS Constitution Best historical wooden kit available?
RussR replied to J11's topic in Wood ship model kits
I was just on Model Space's web site USA and it appears that they are out of stock on most of there ship models. And after reading one of our members (RickyGene) experiences receiving his subs I think I would want the whole kit before I started a build. -
These sails are typical of the kit supplied sails. Compare these to the panel sails that Cathead makes for his models described here: Or the paper sails made by rwiederrich in this thread: You have done a great job and spent a lot of time on your model, don't short change it with these crappy kit supplied sails. Of course the choice is yours. RussR
- 11 replies
-
- 3
-
-
- golden hind
- mamoli
- (and 1 more)
-
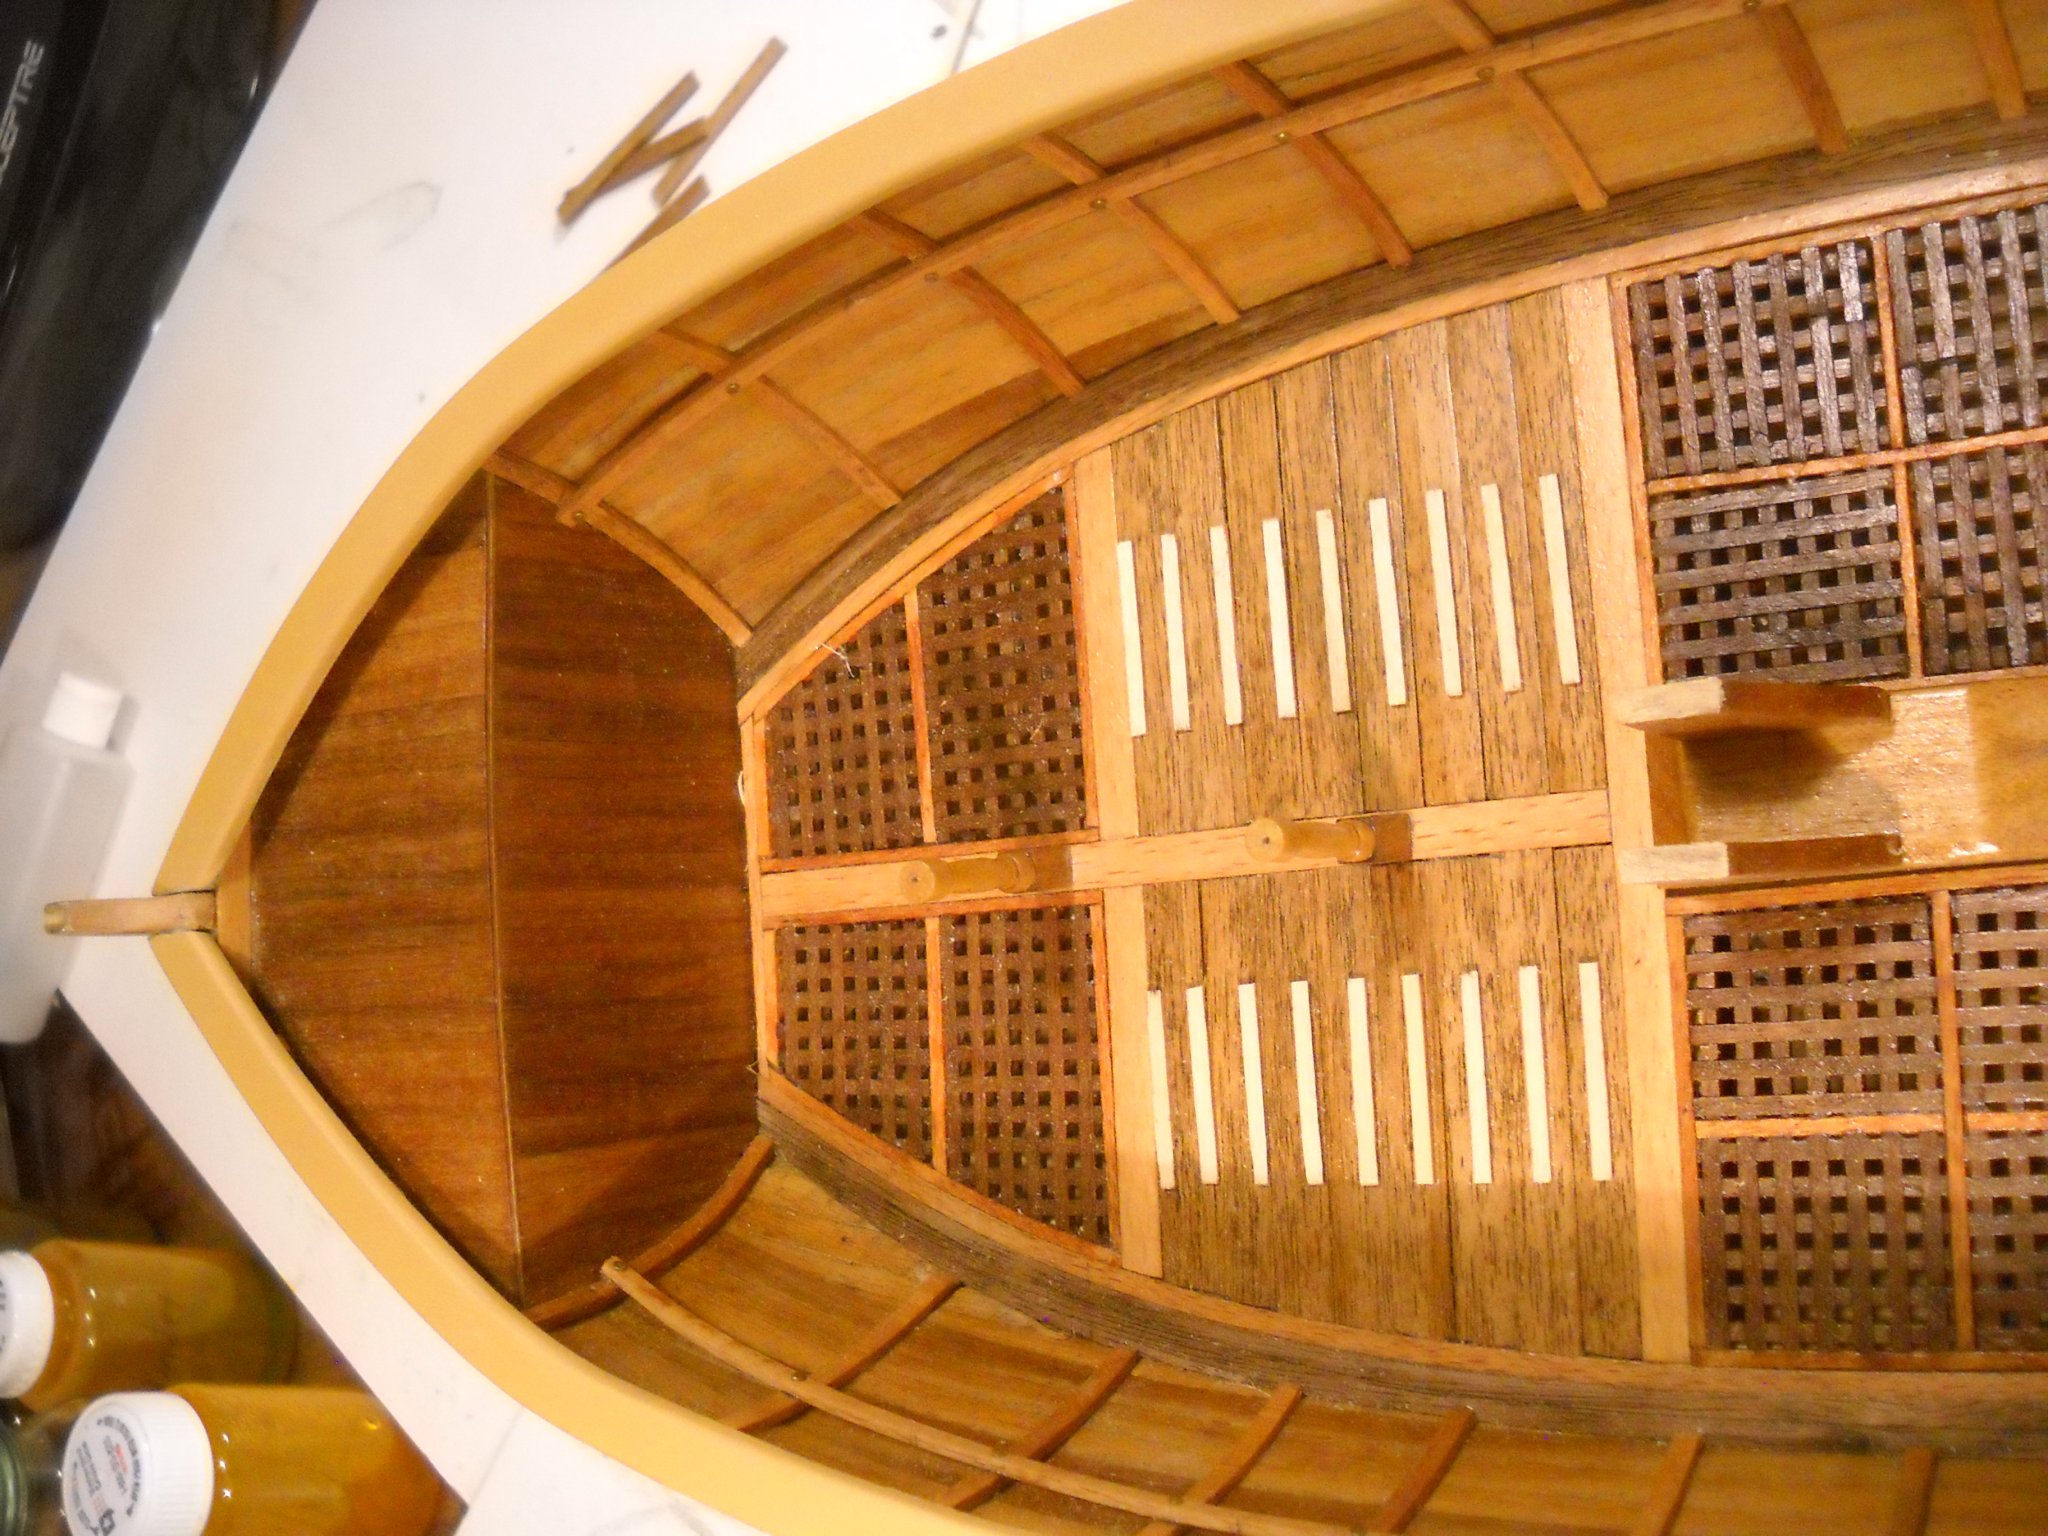
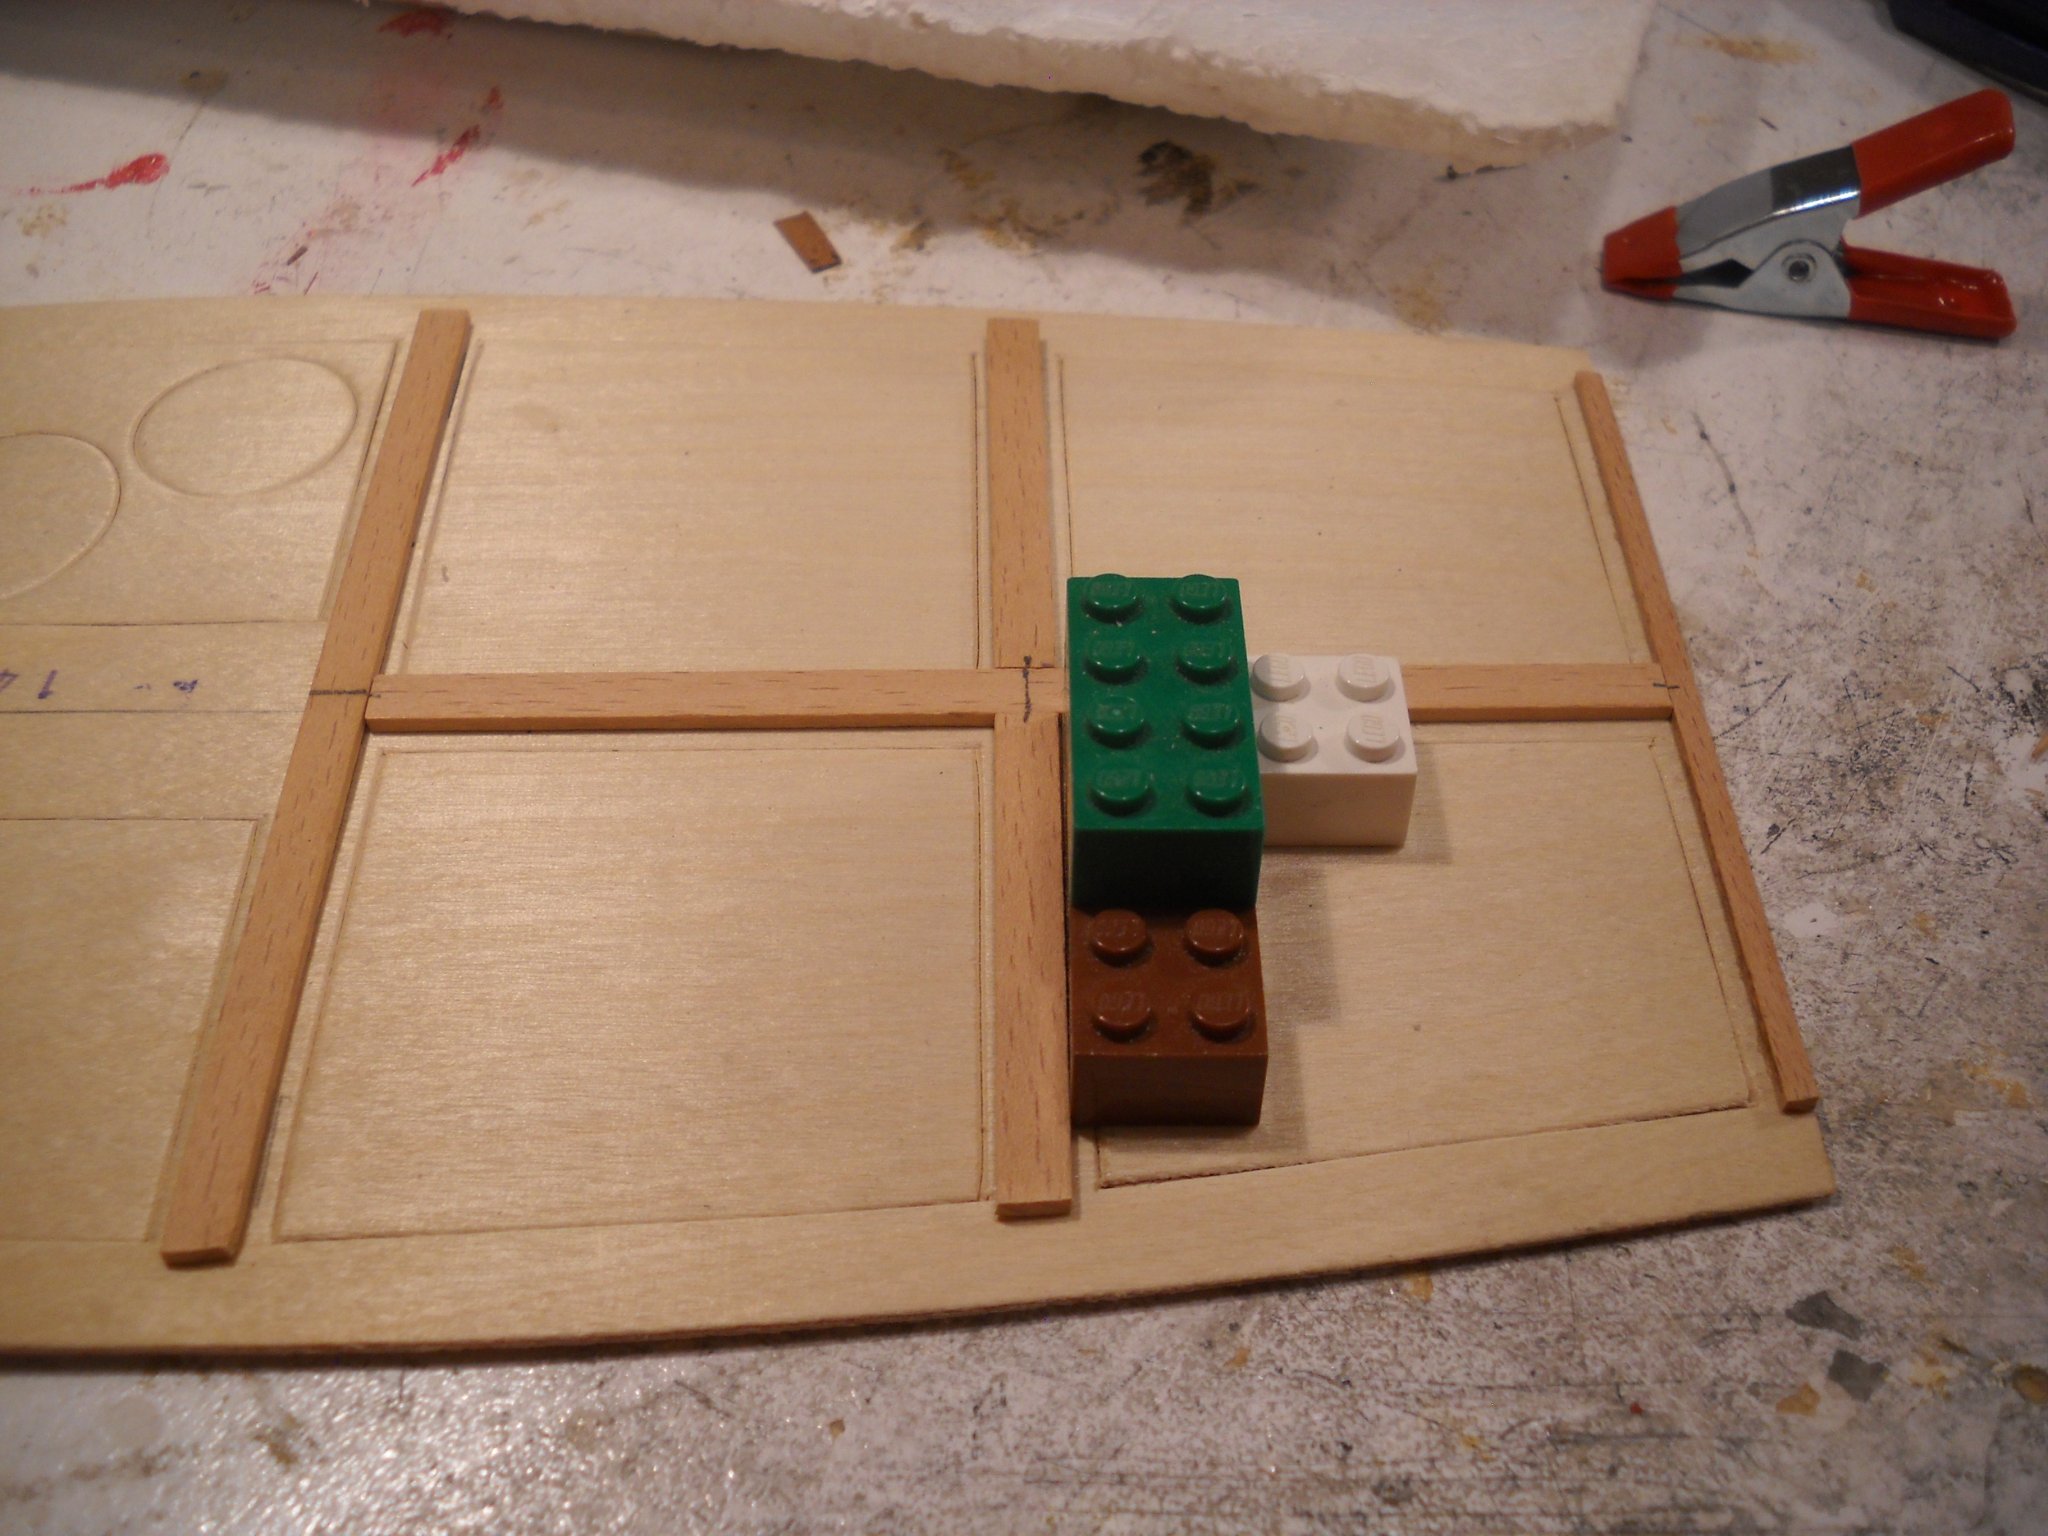
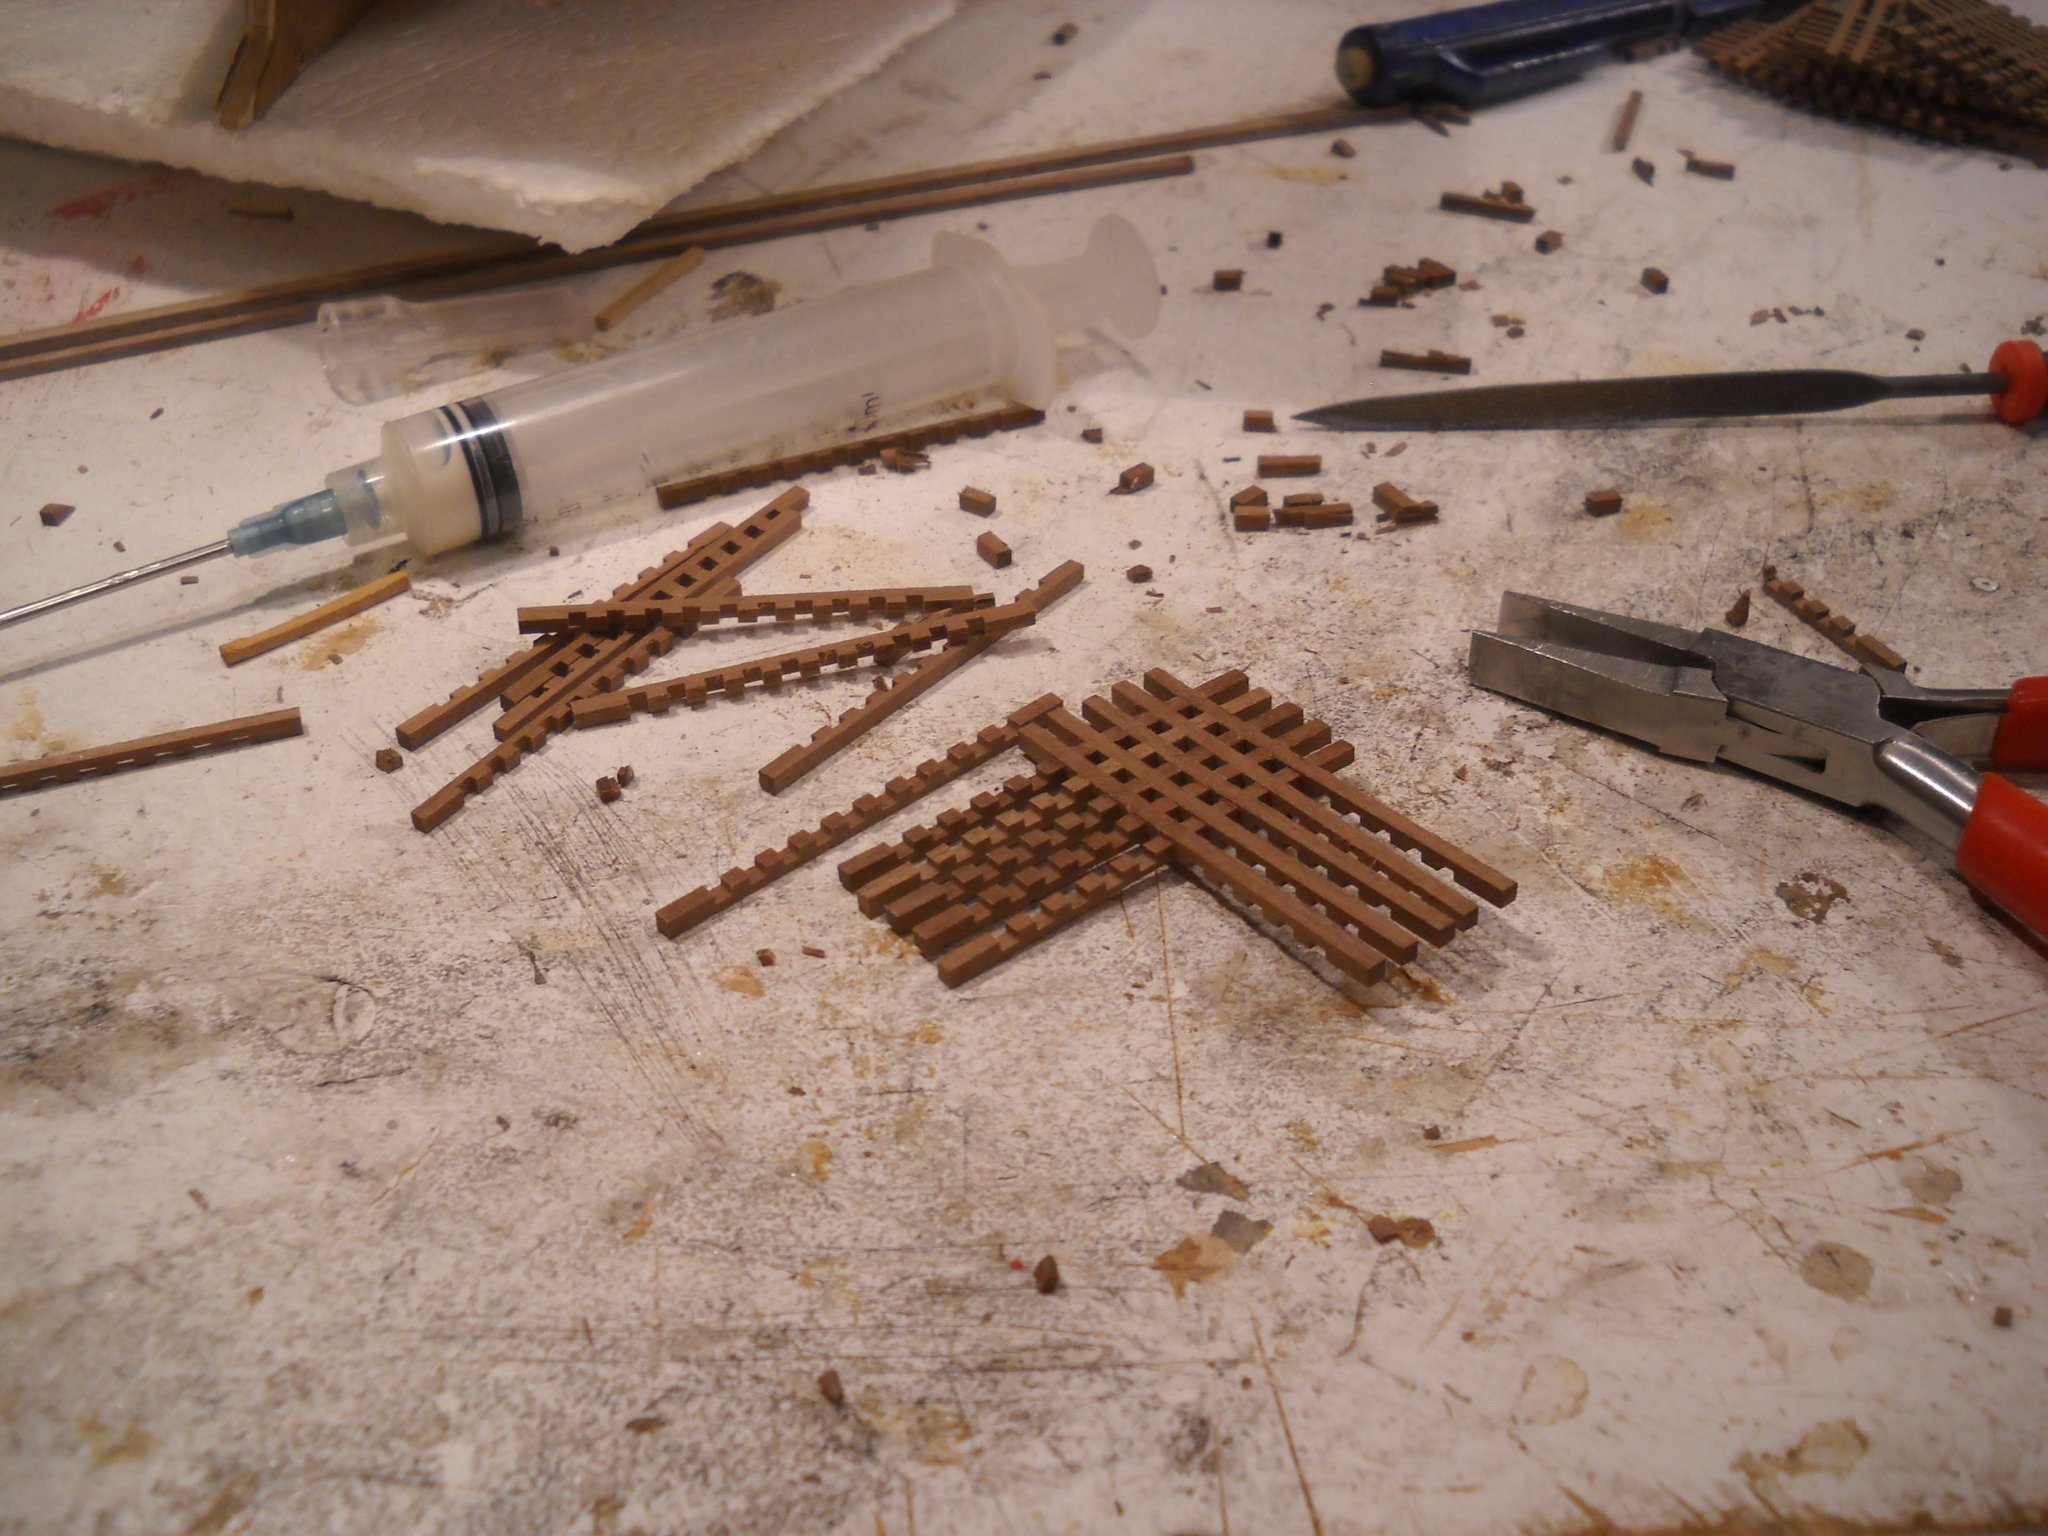
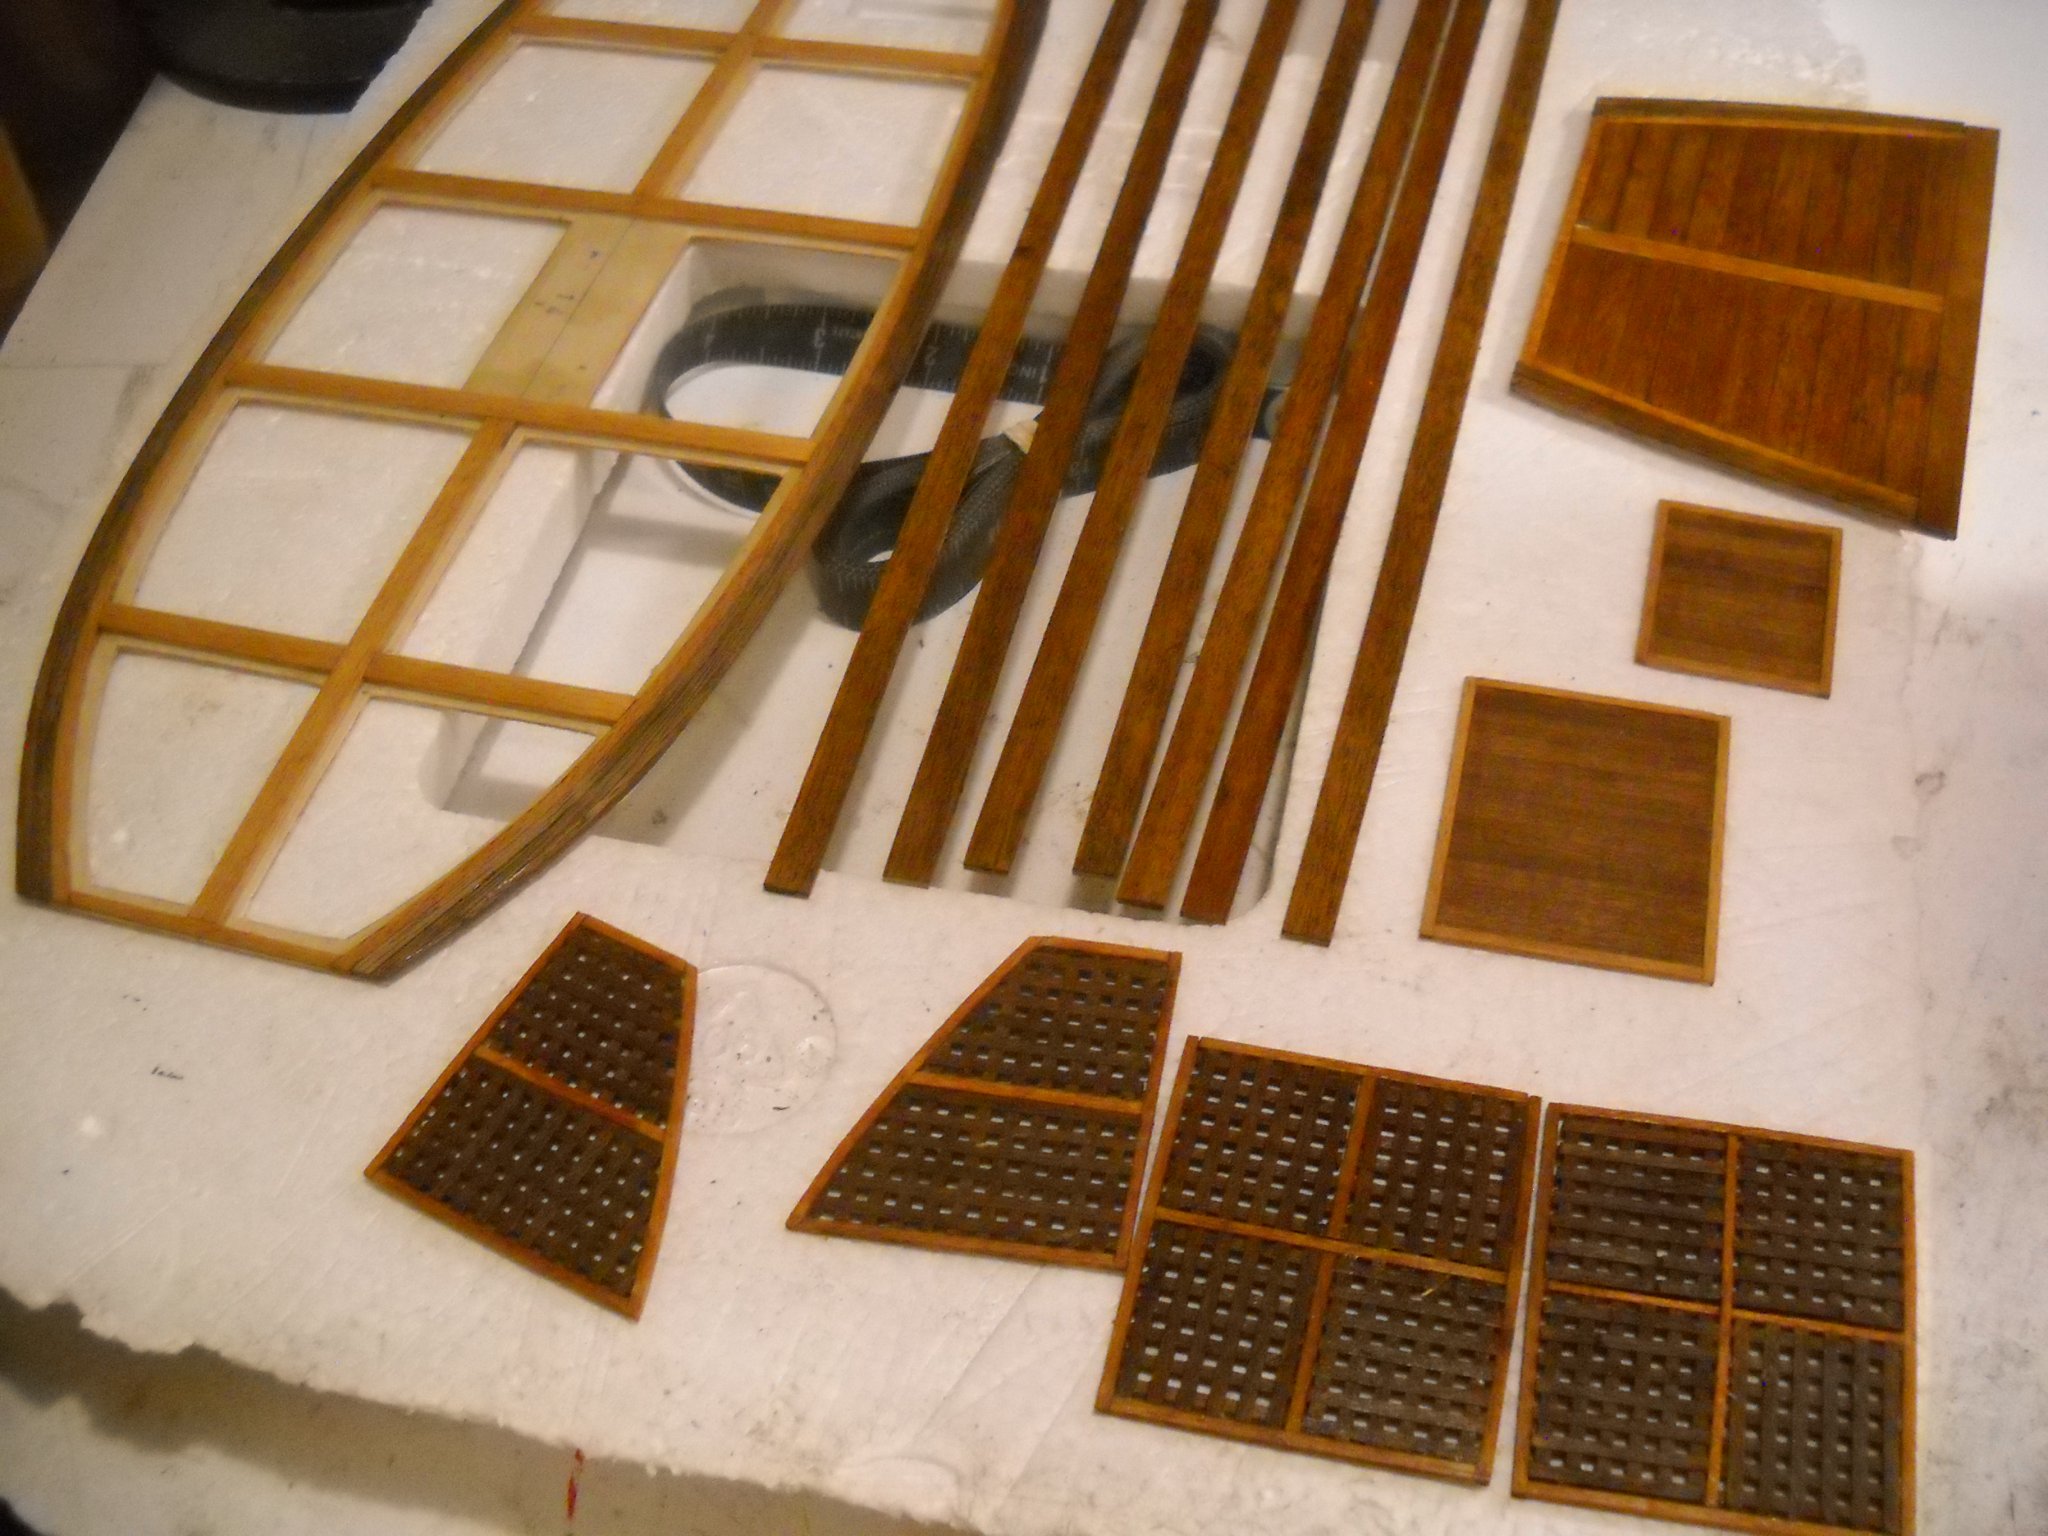
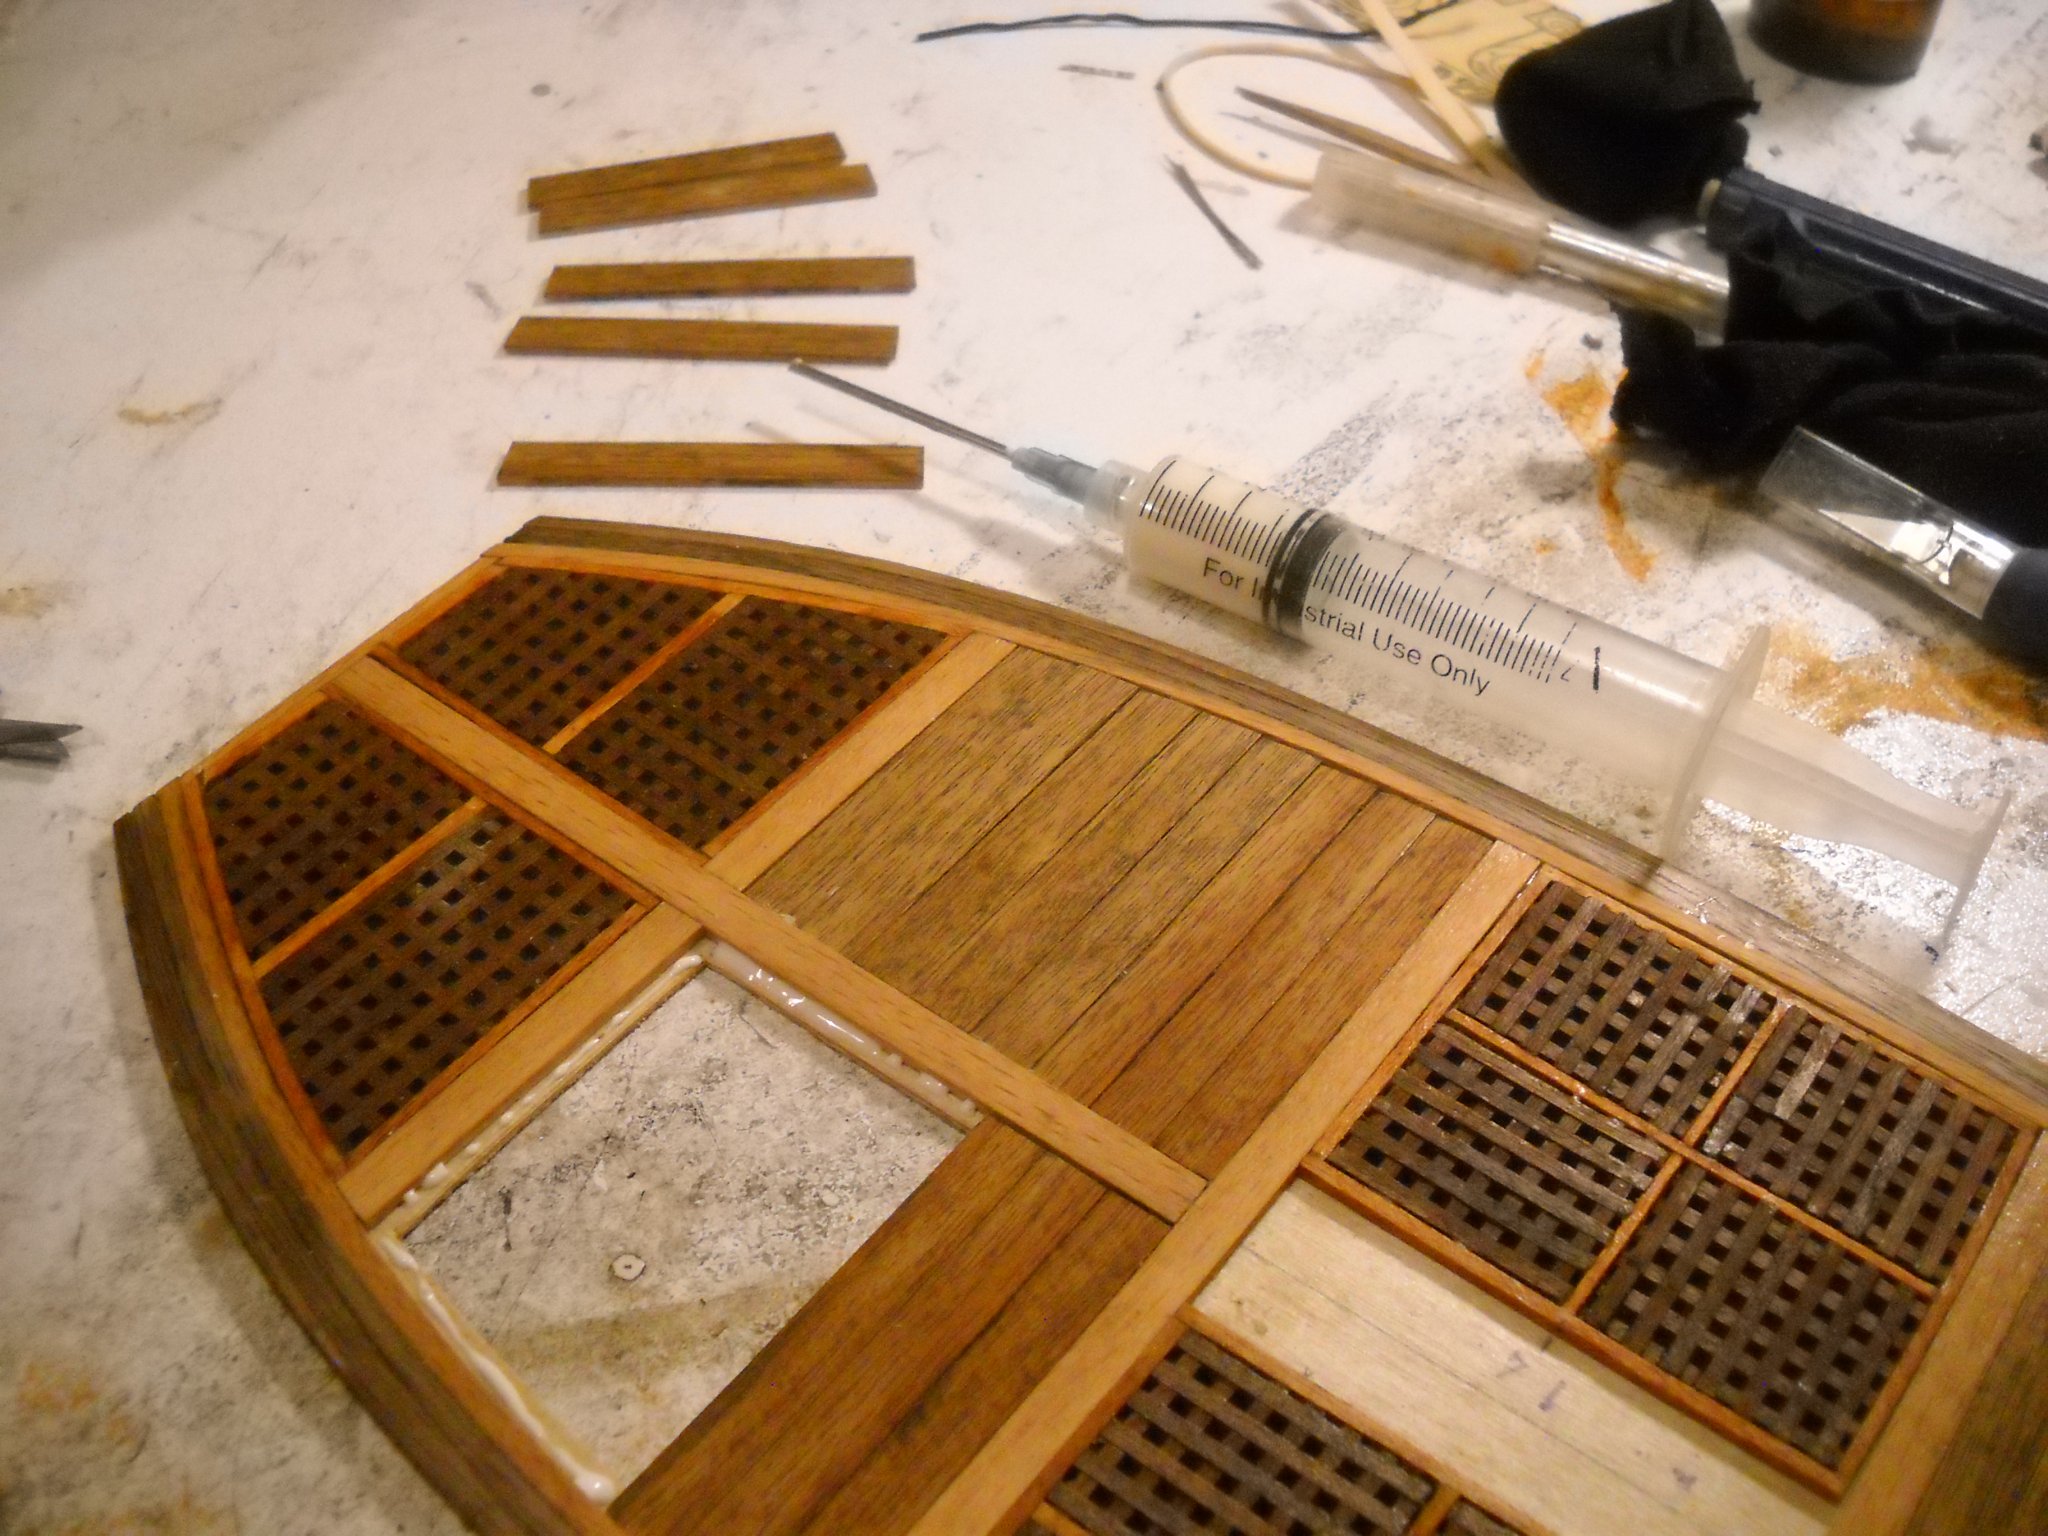
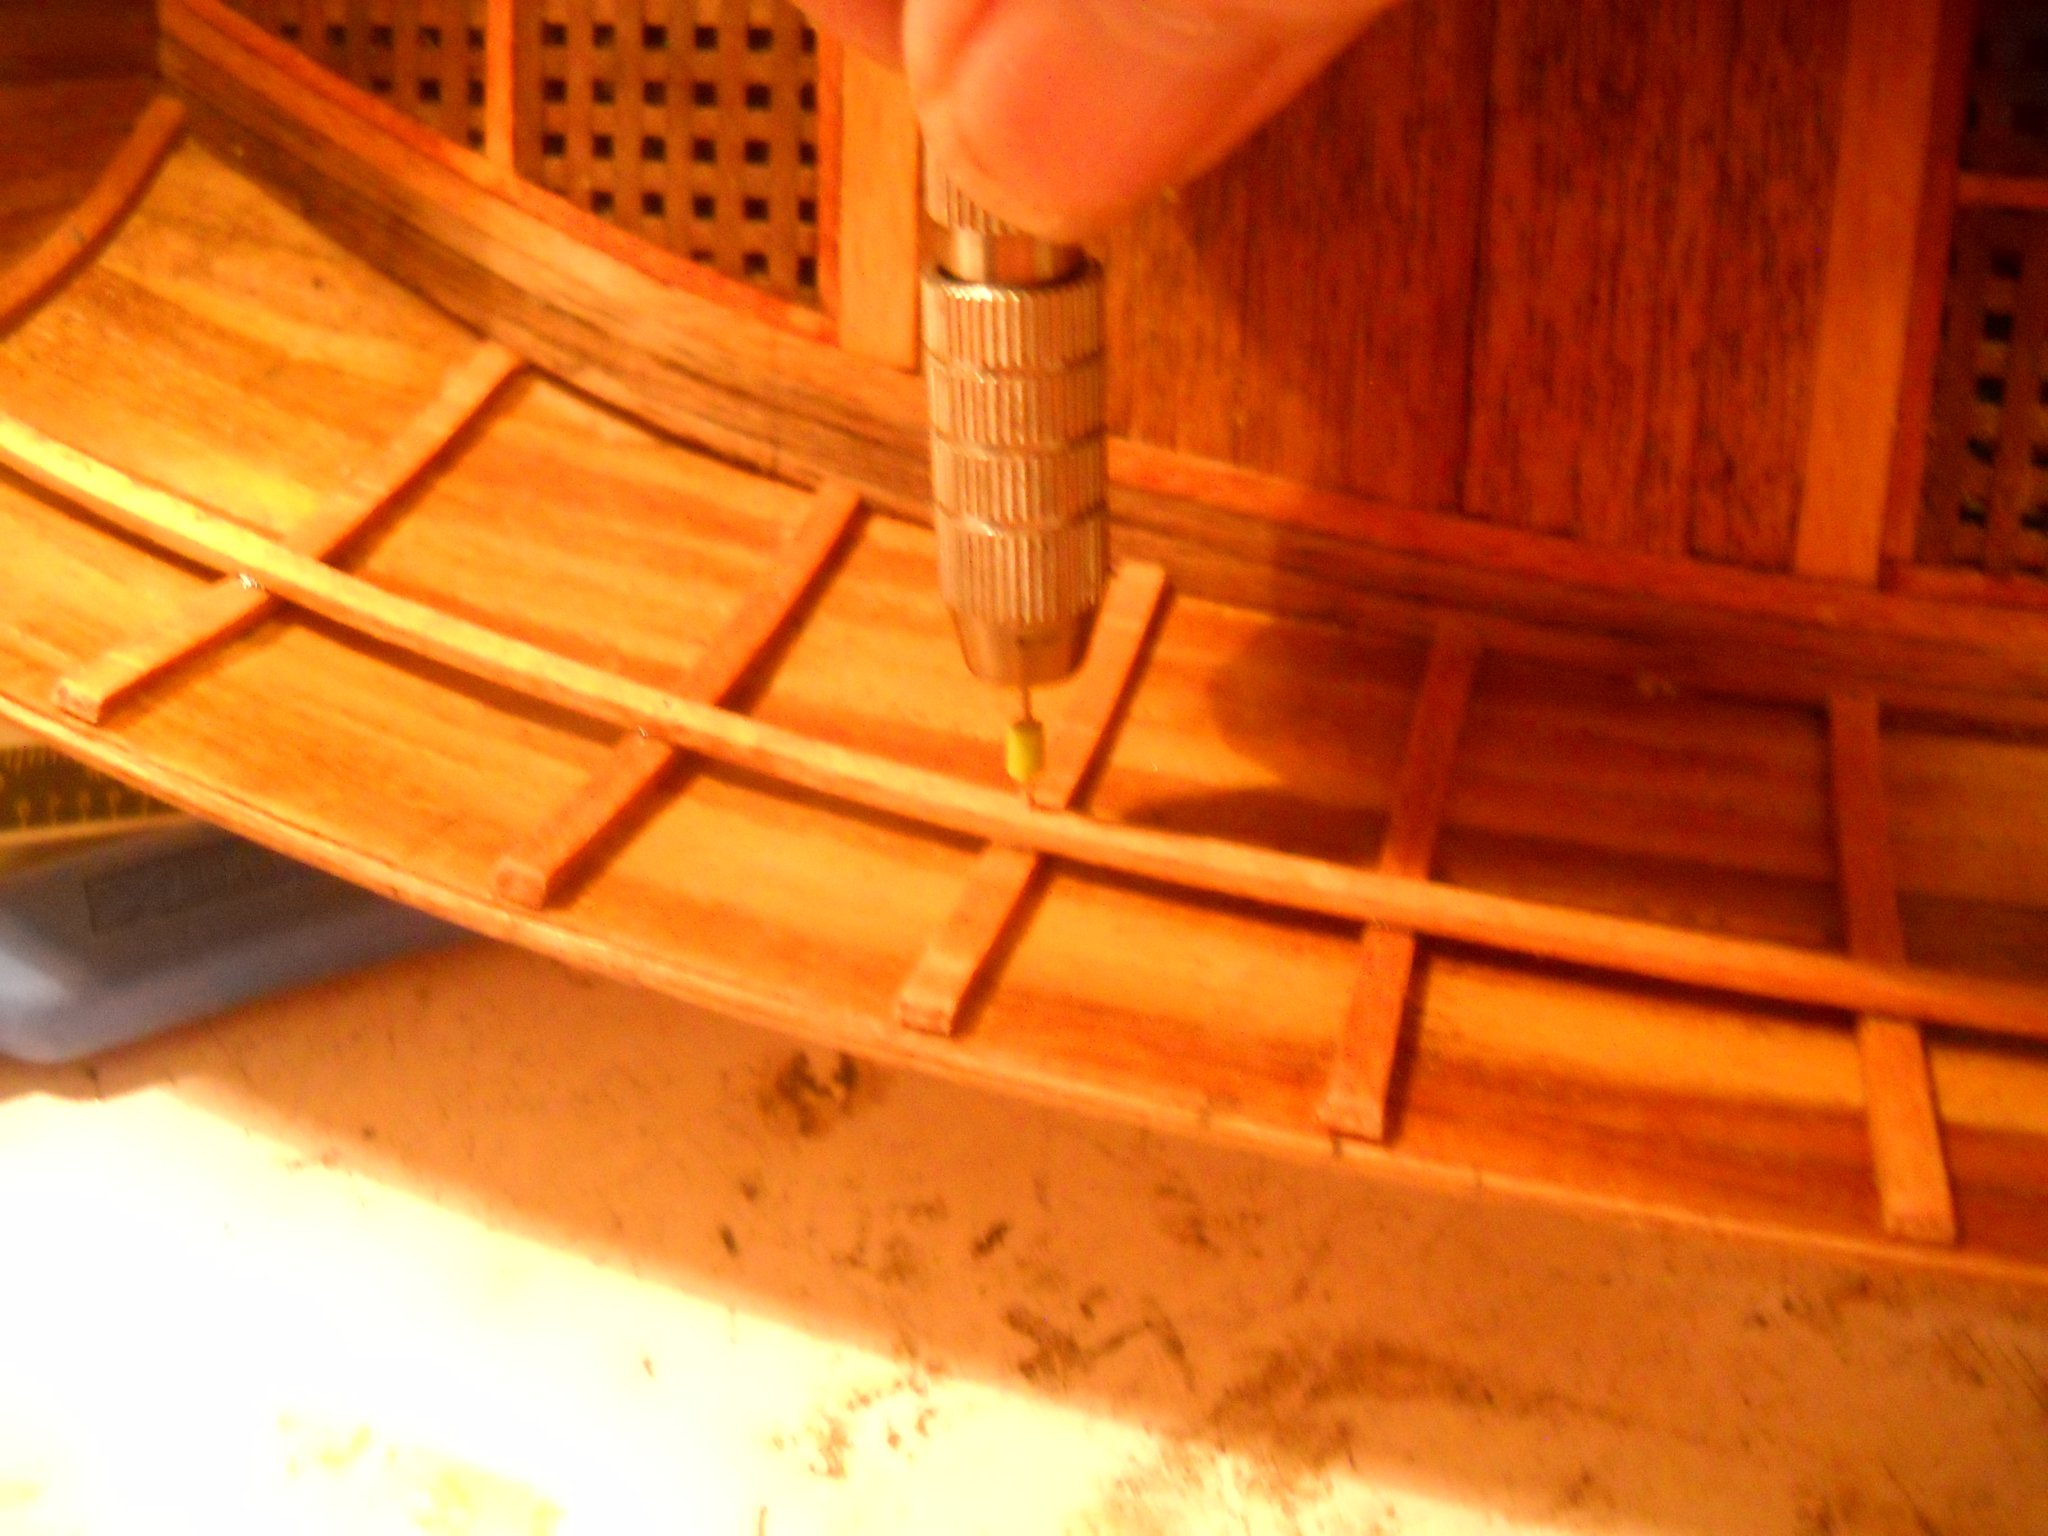
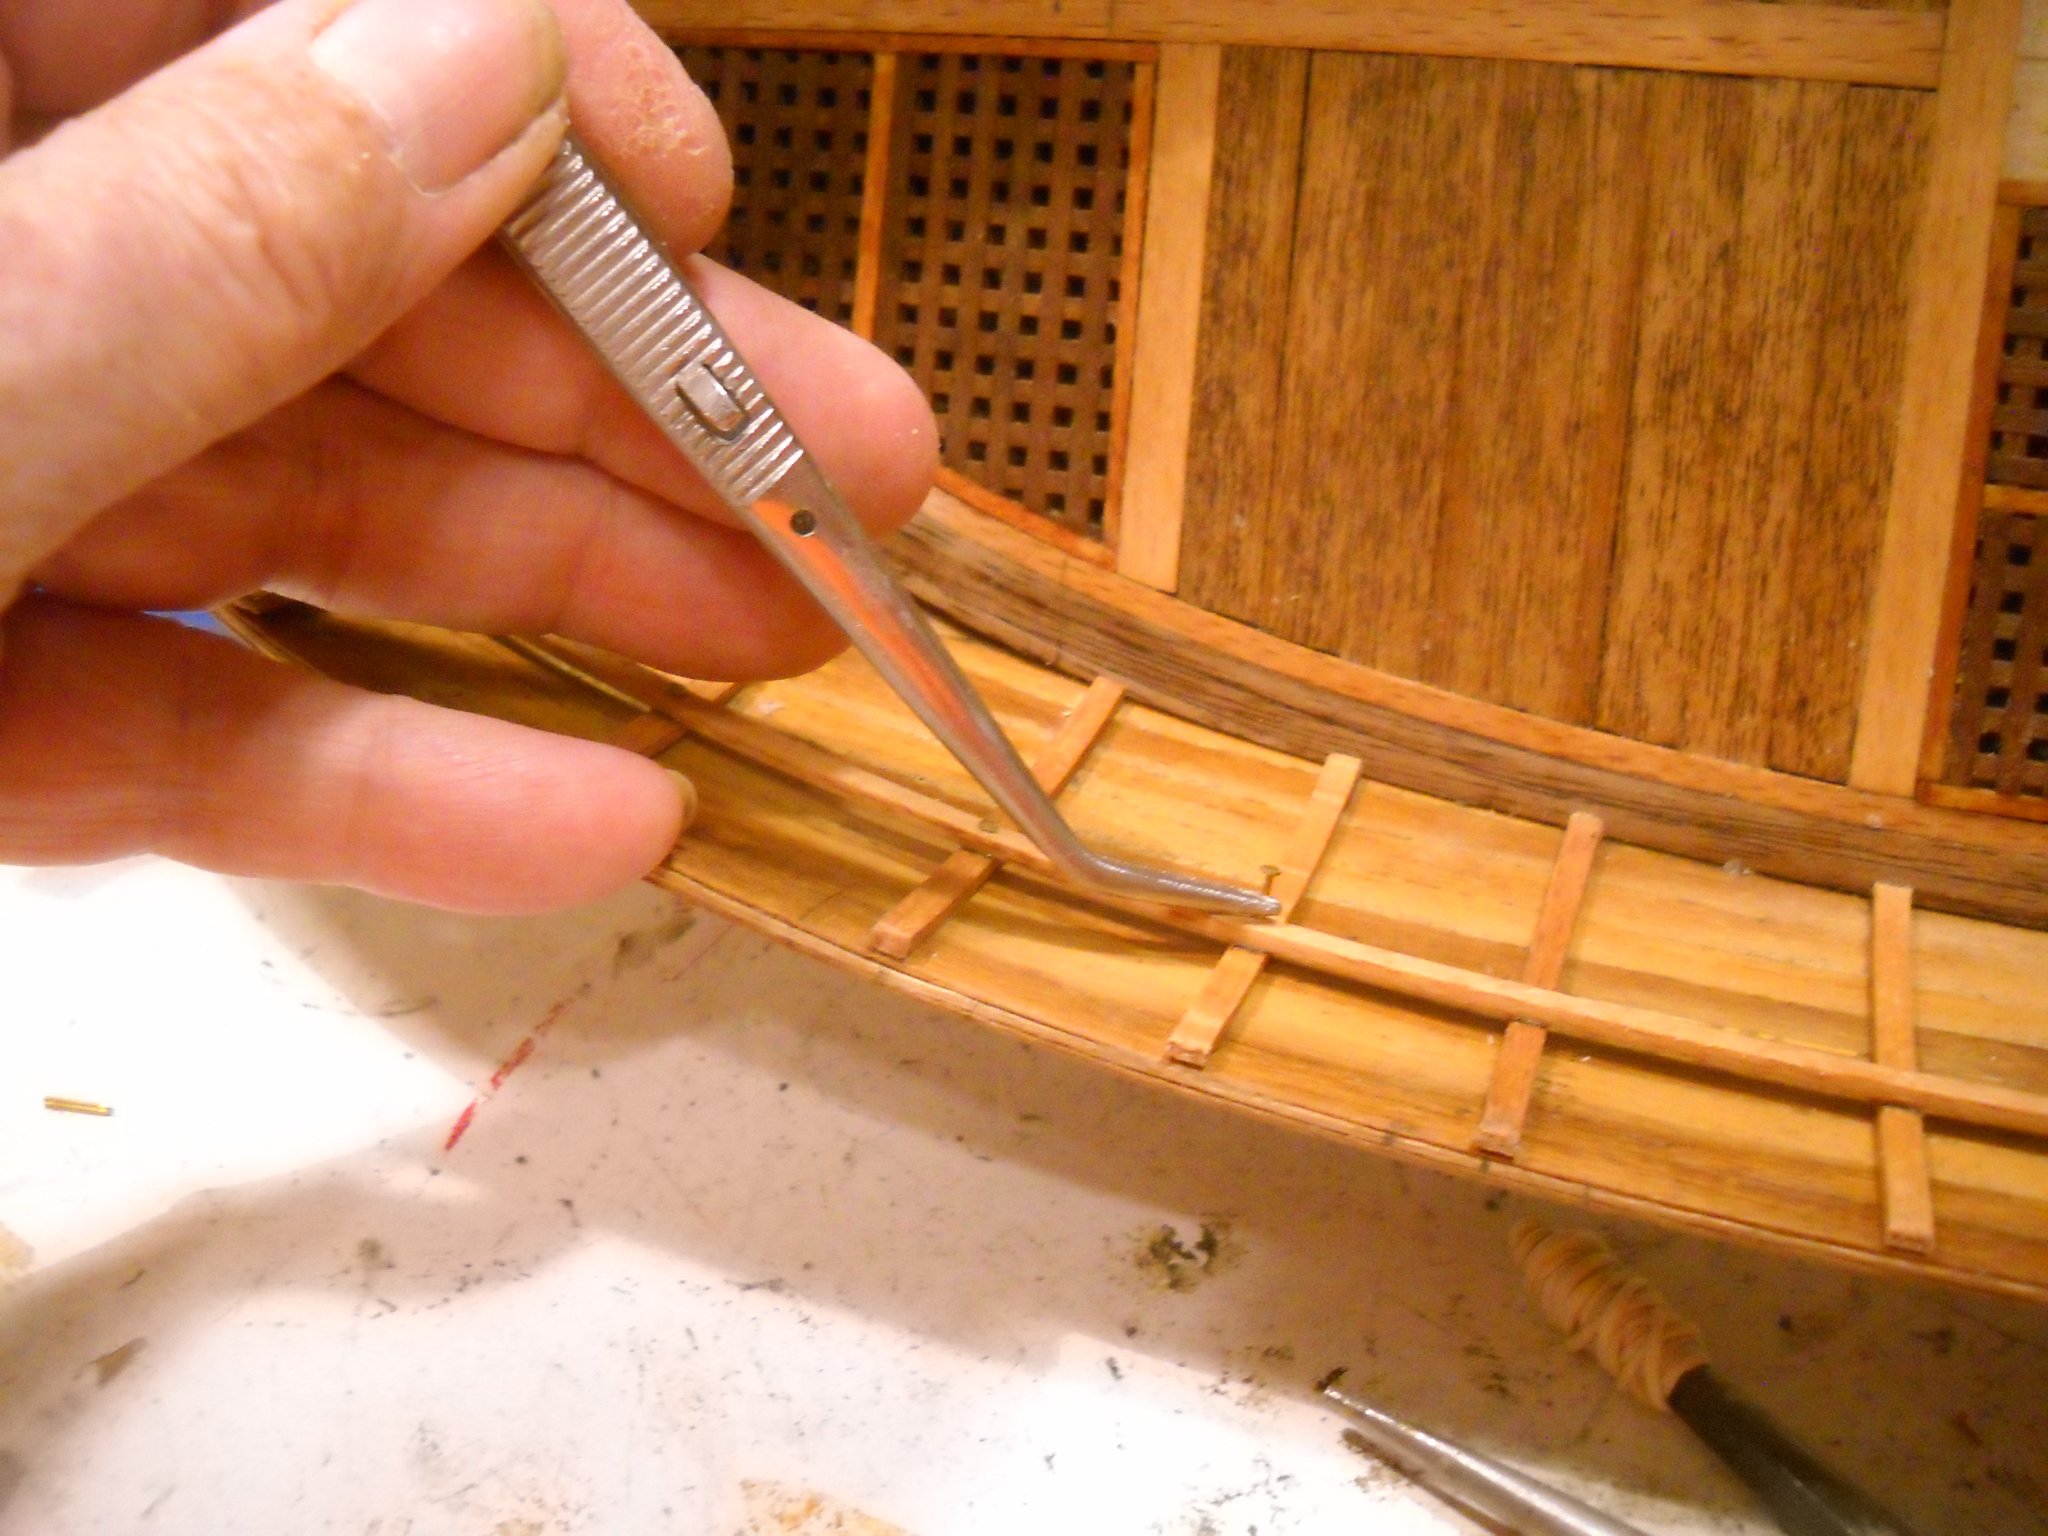
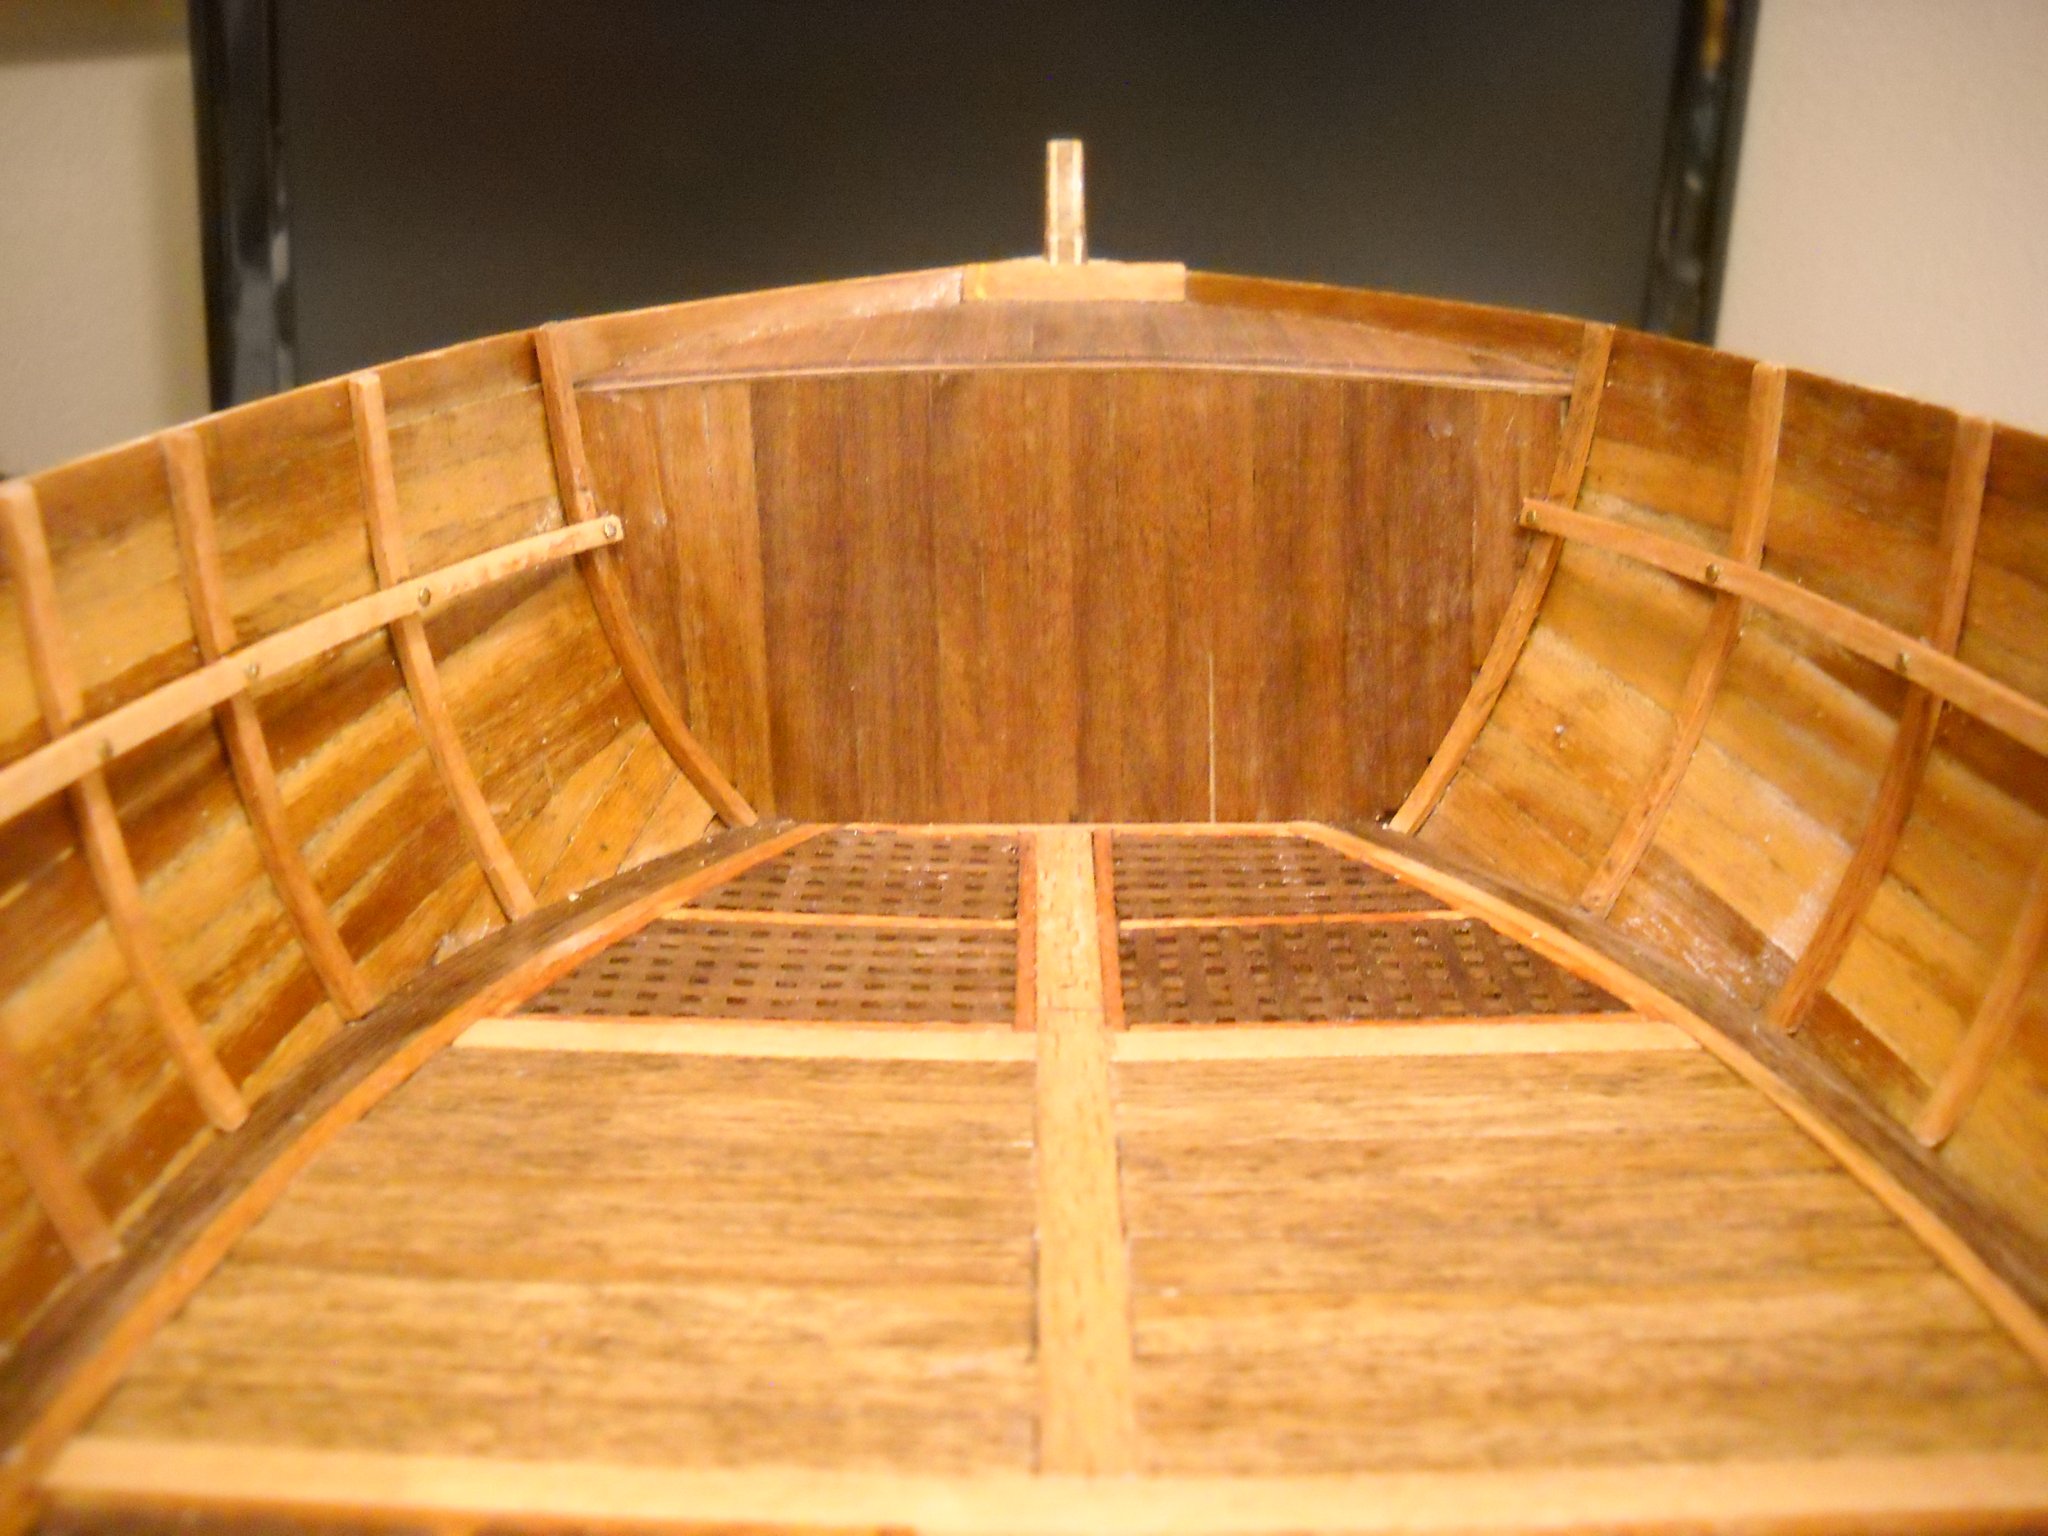
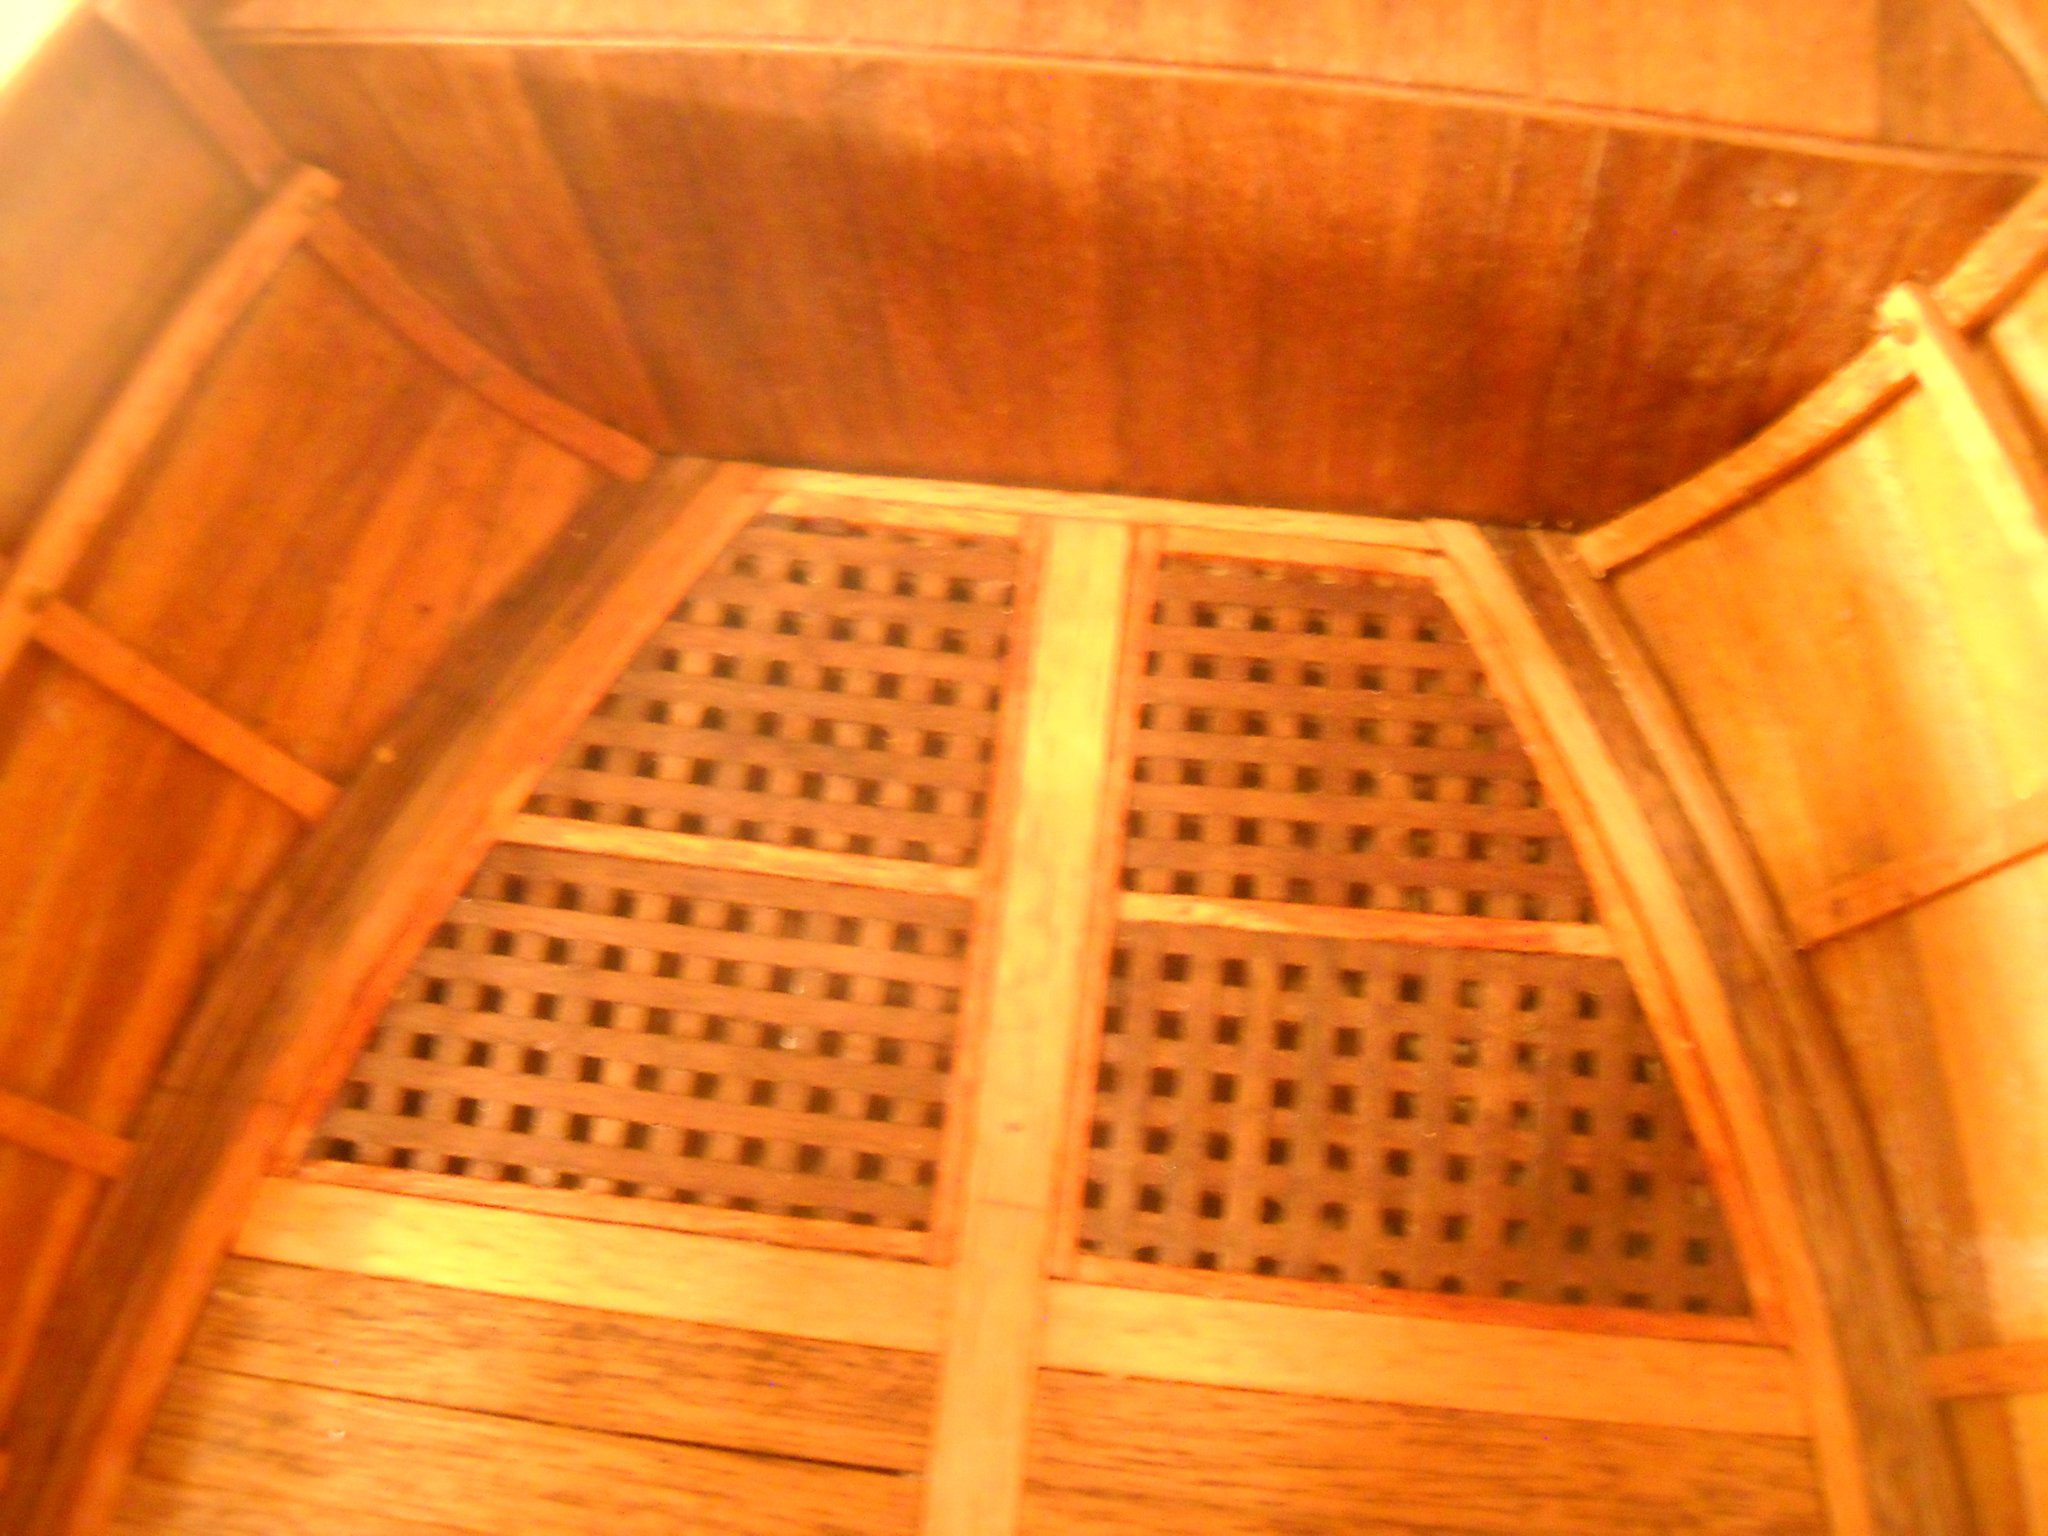
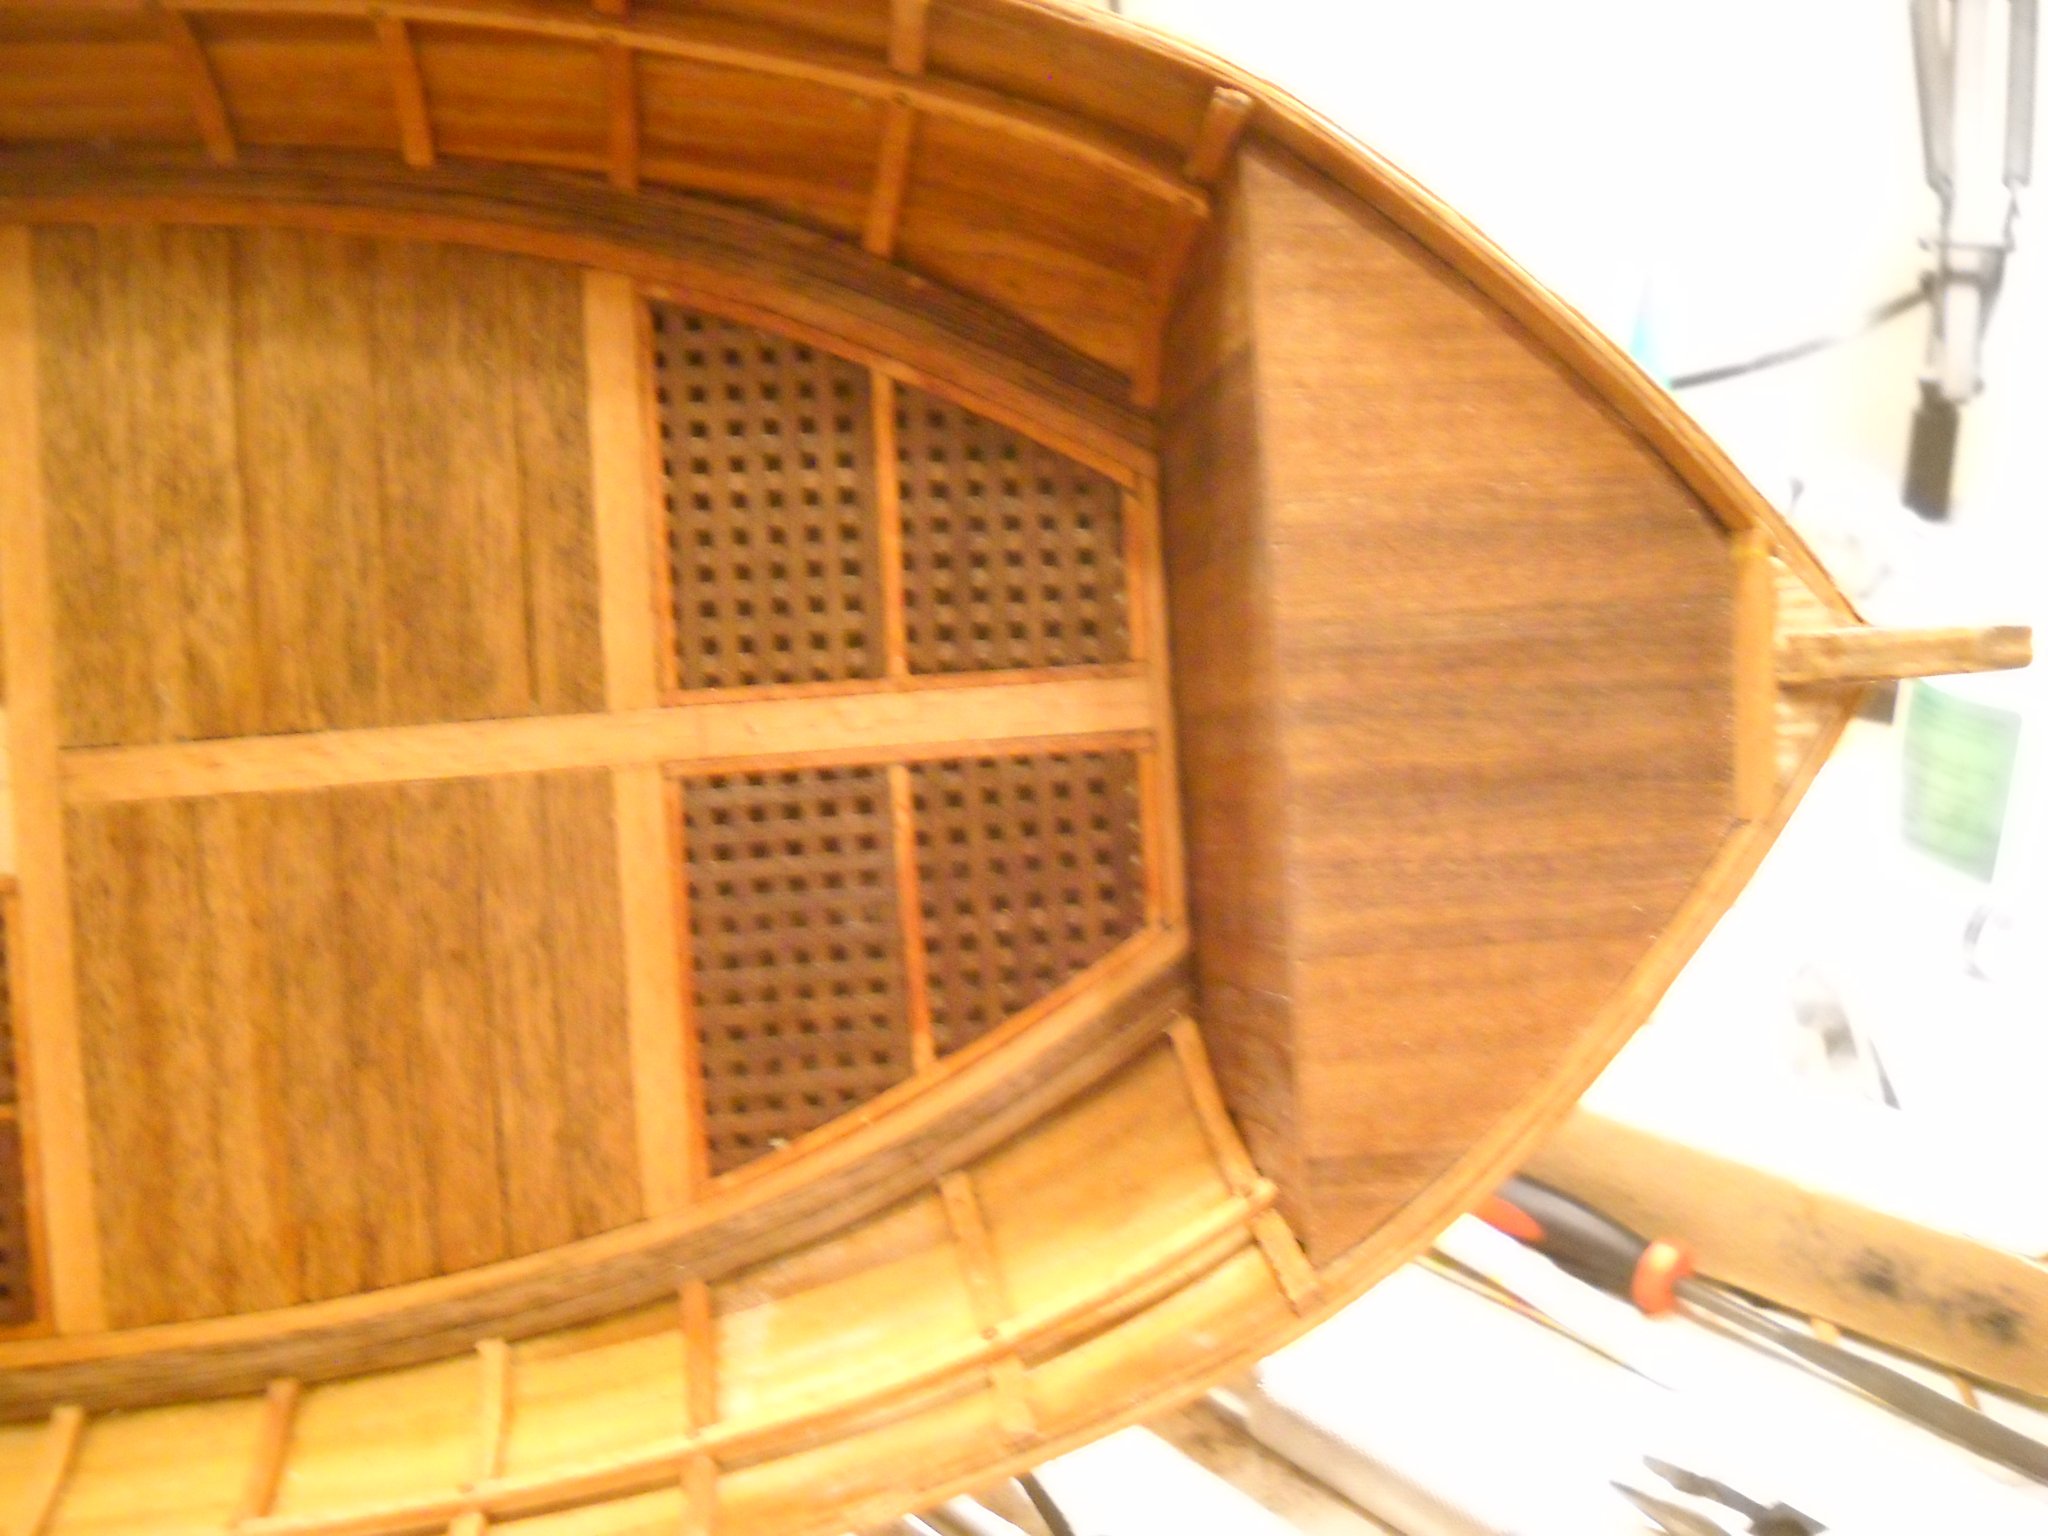
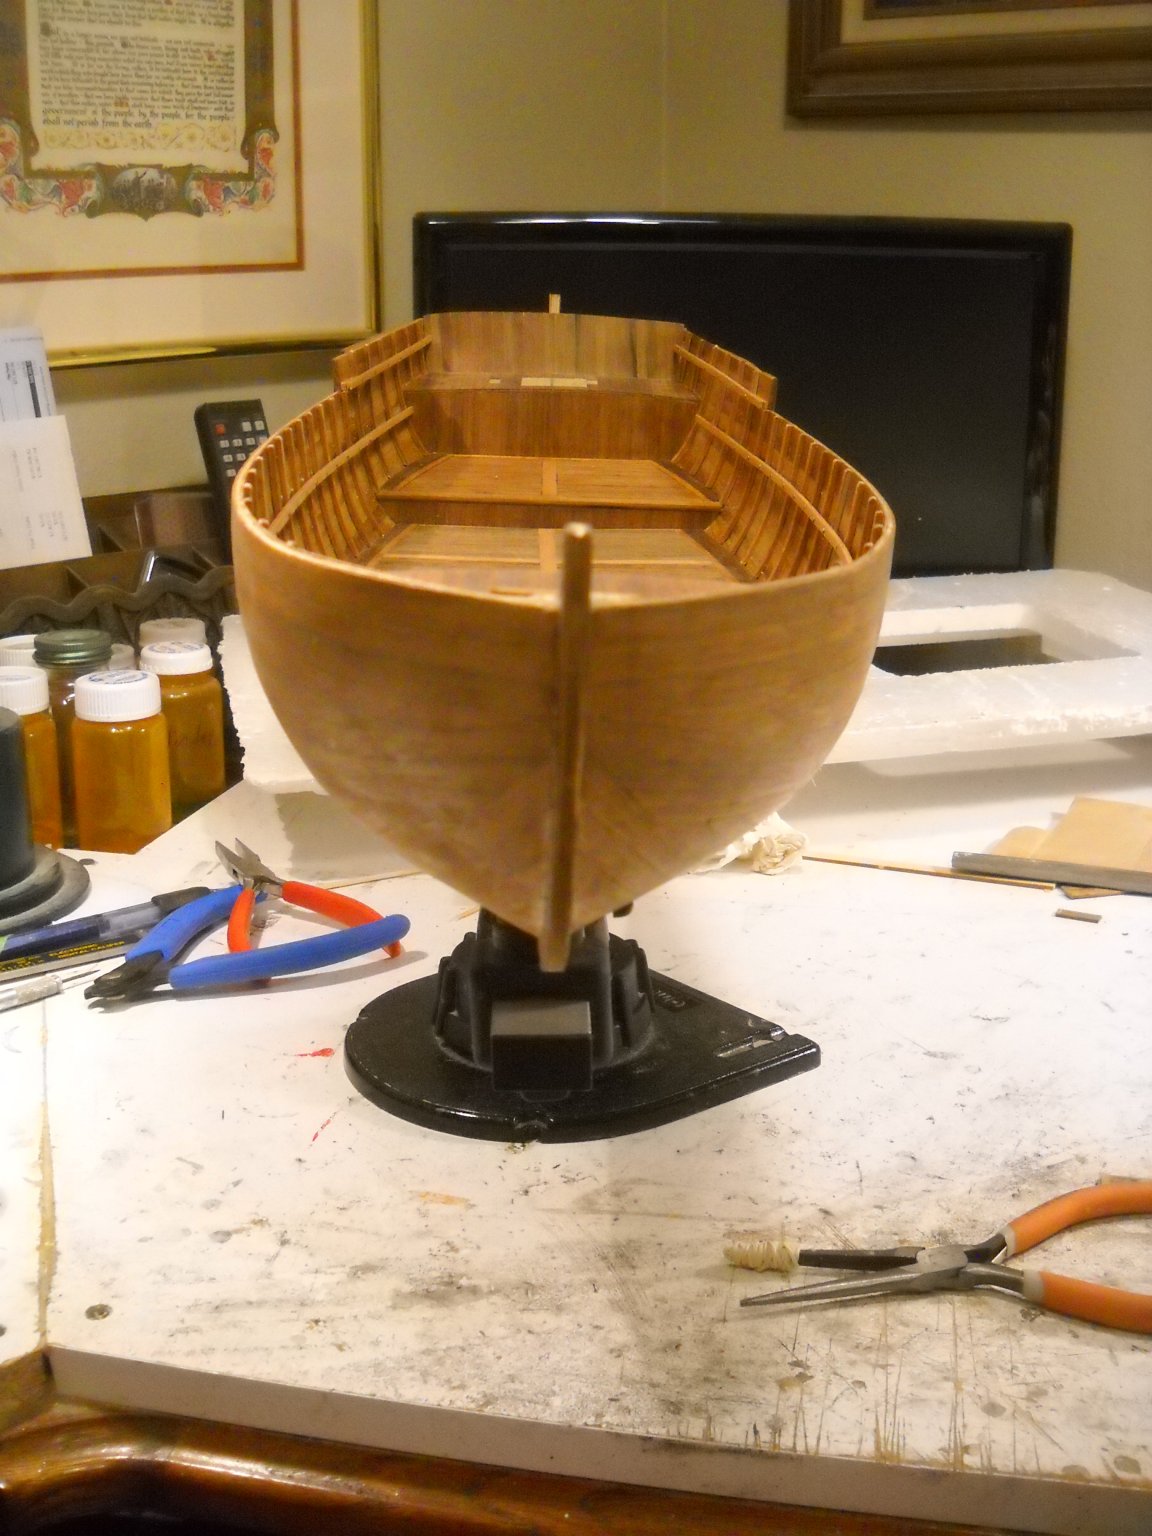
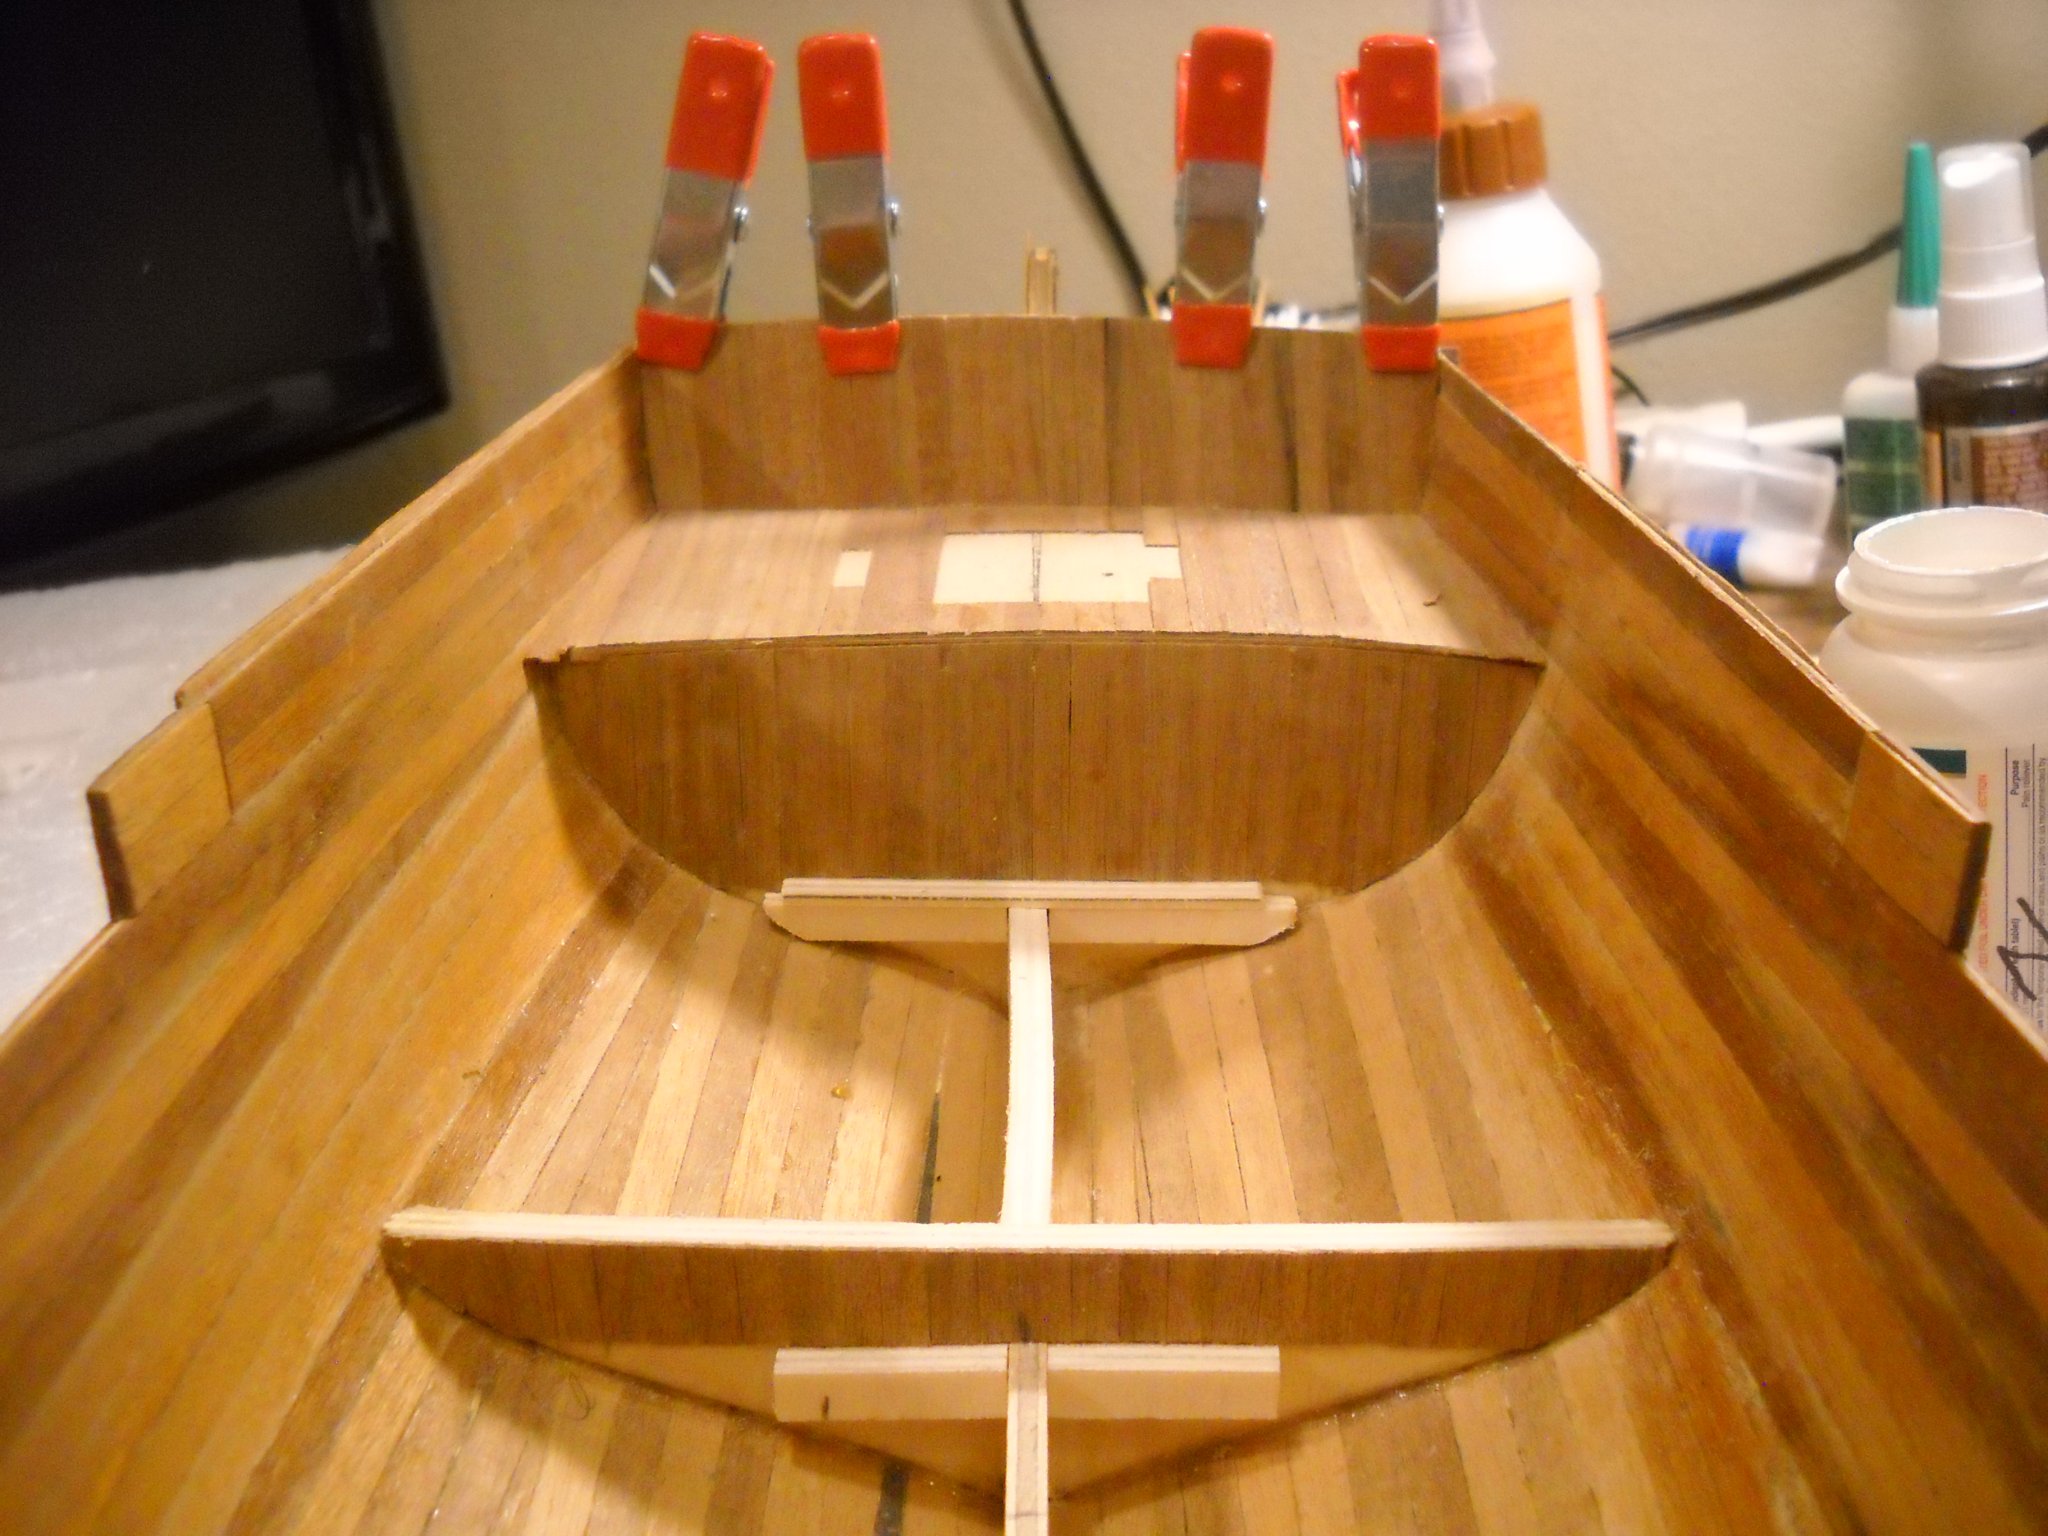
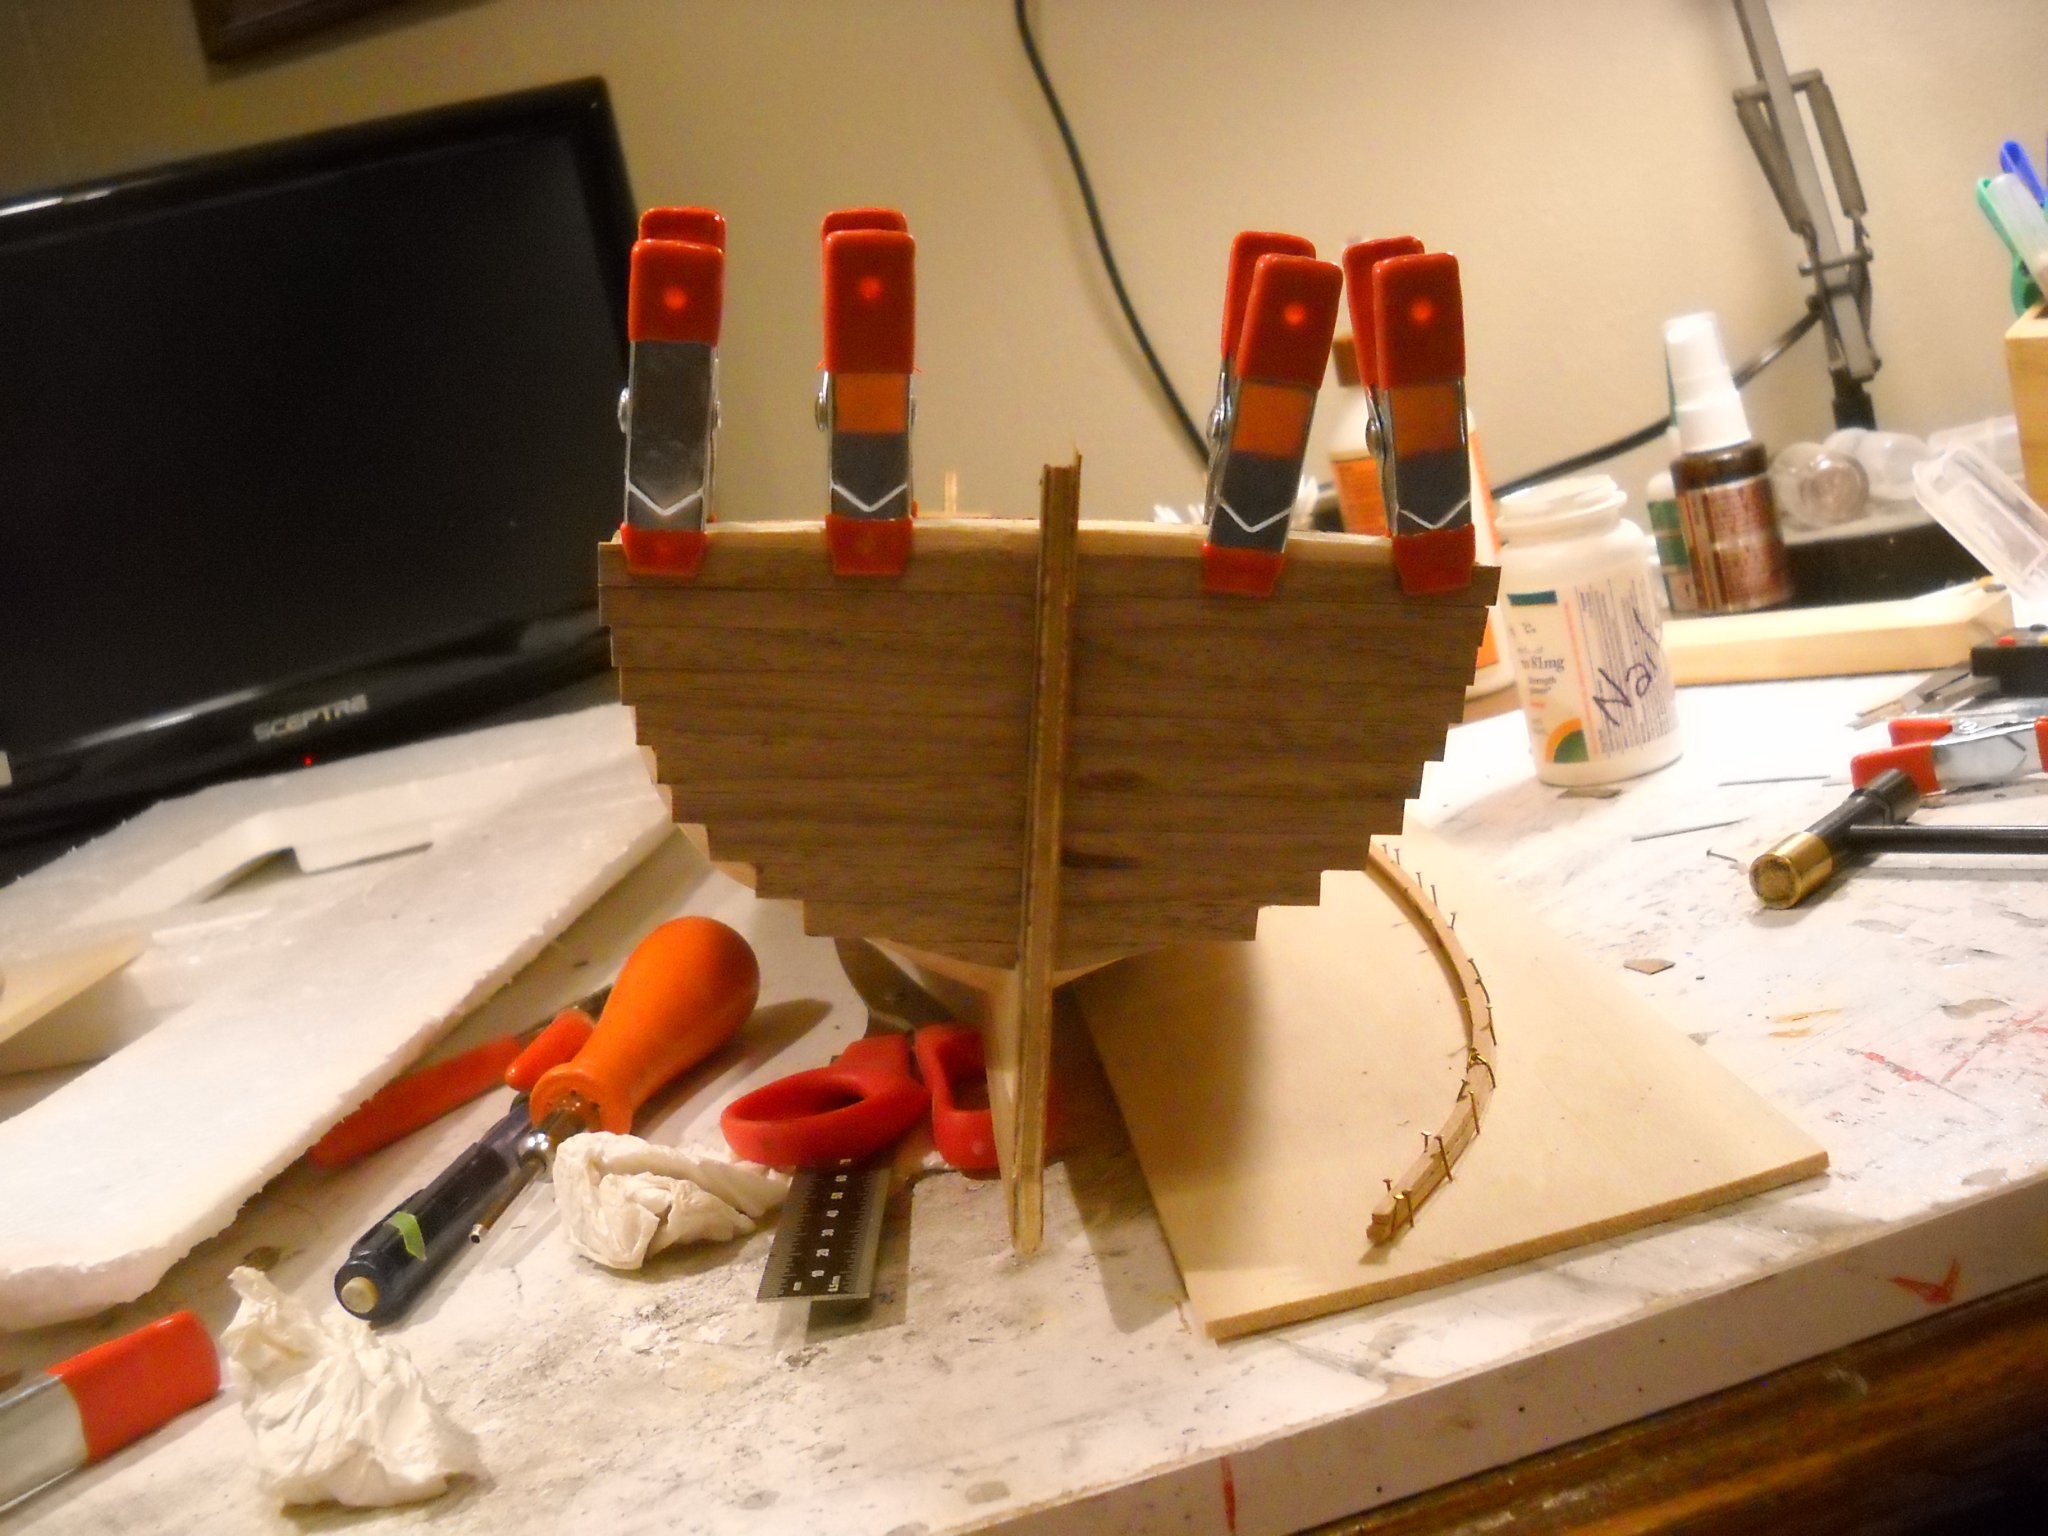
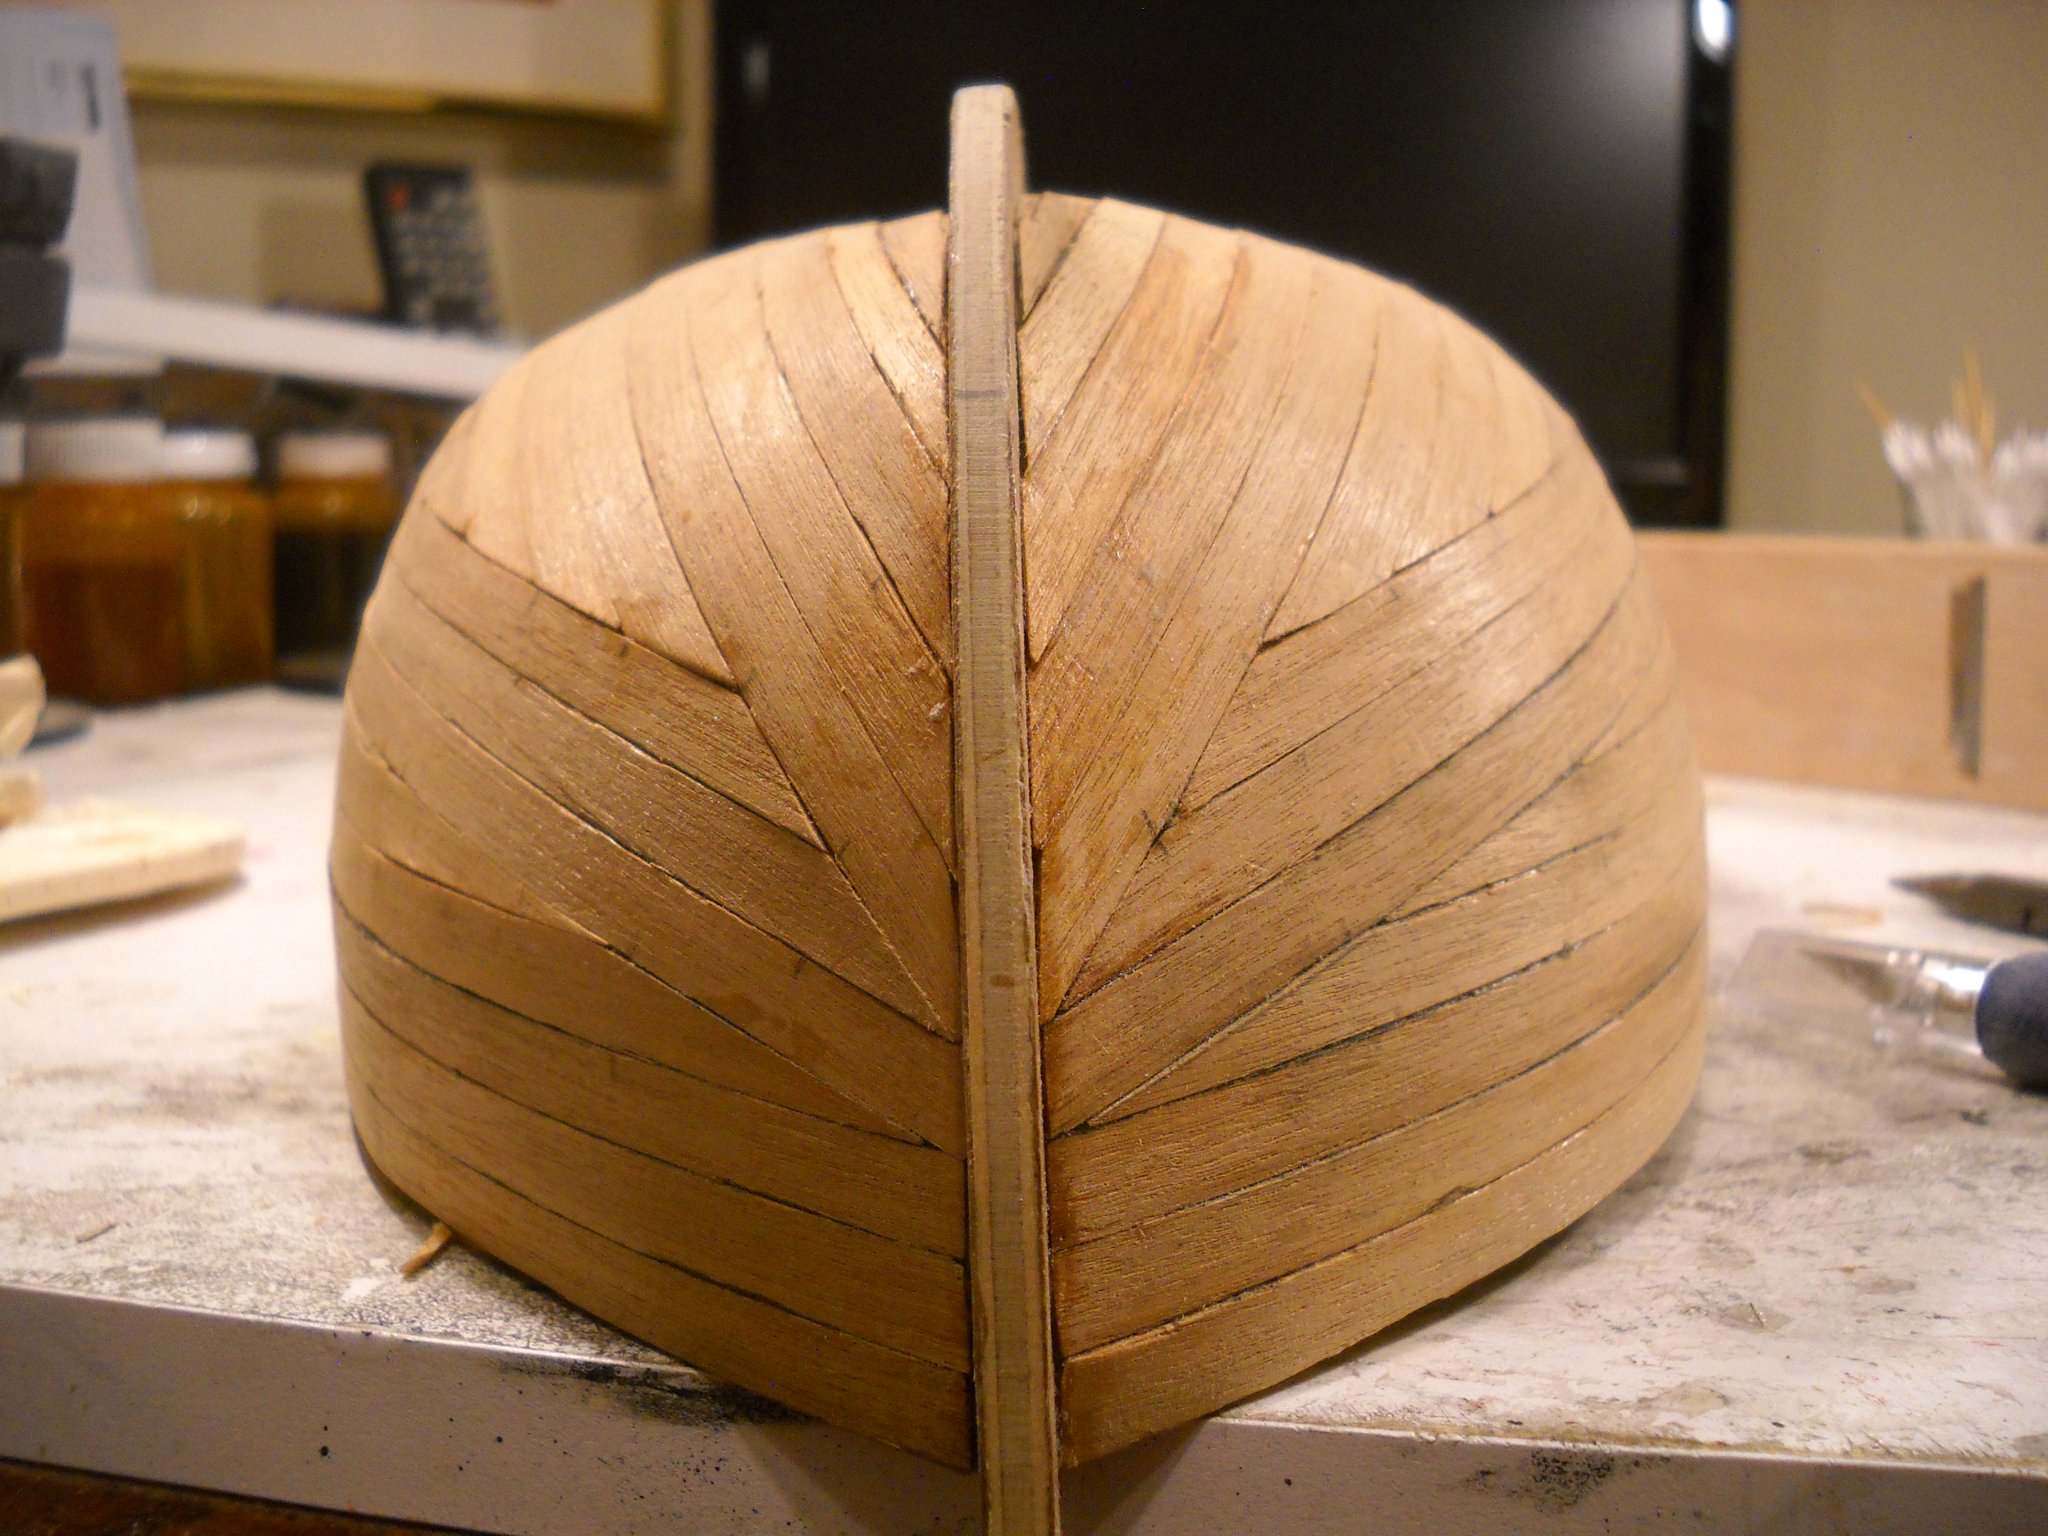
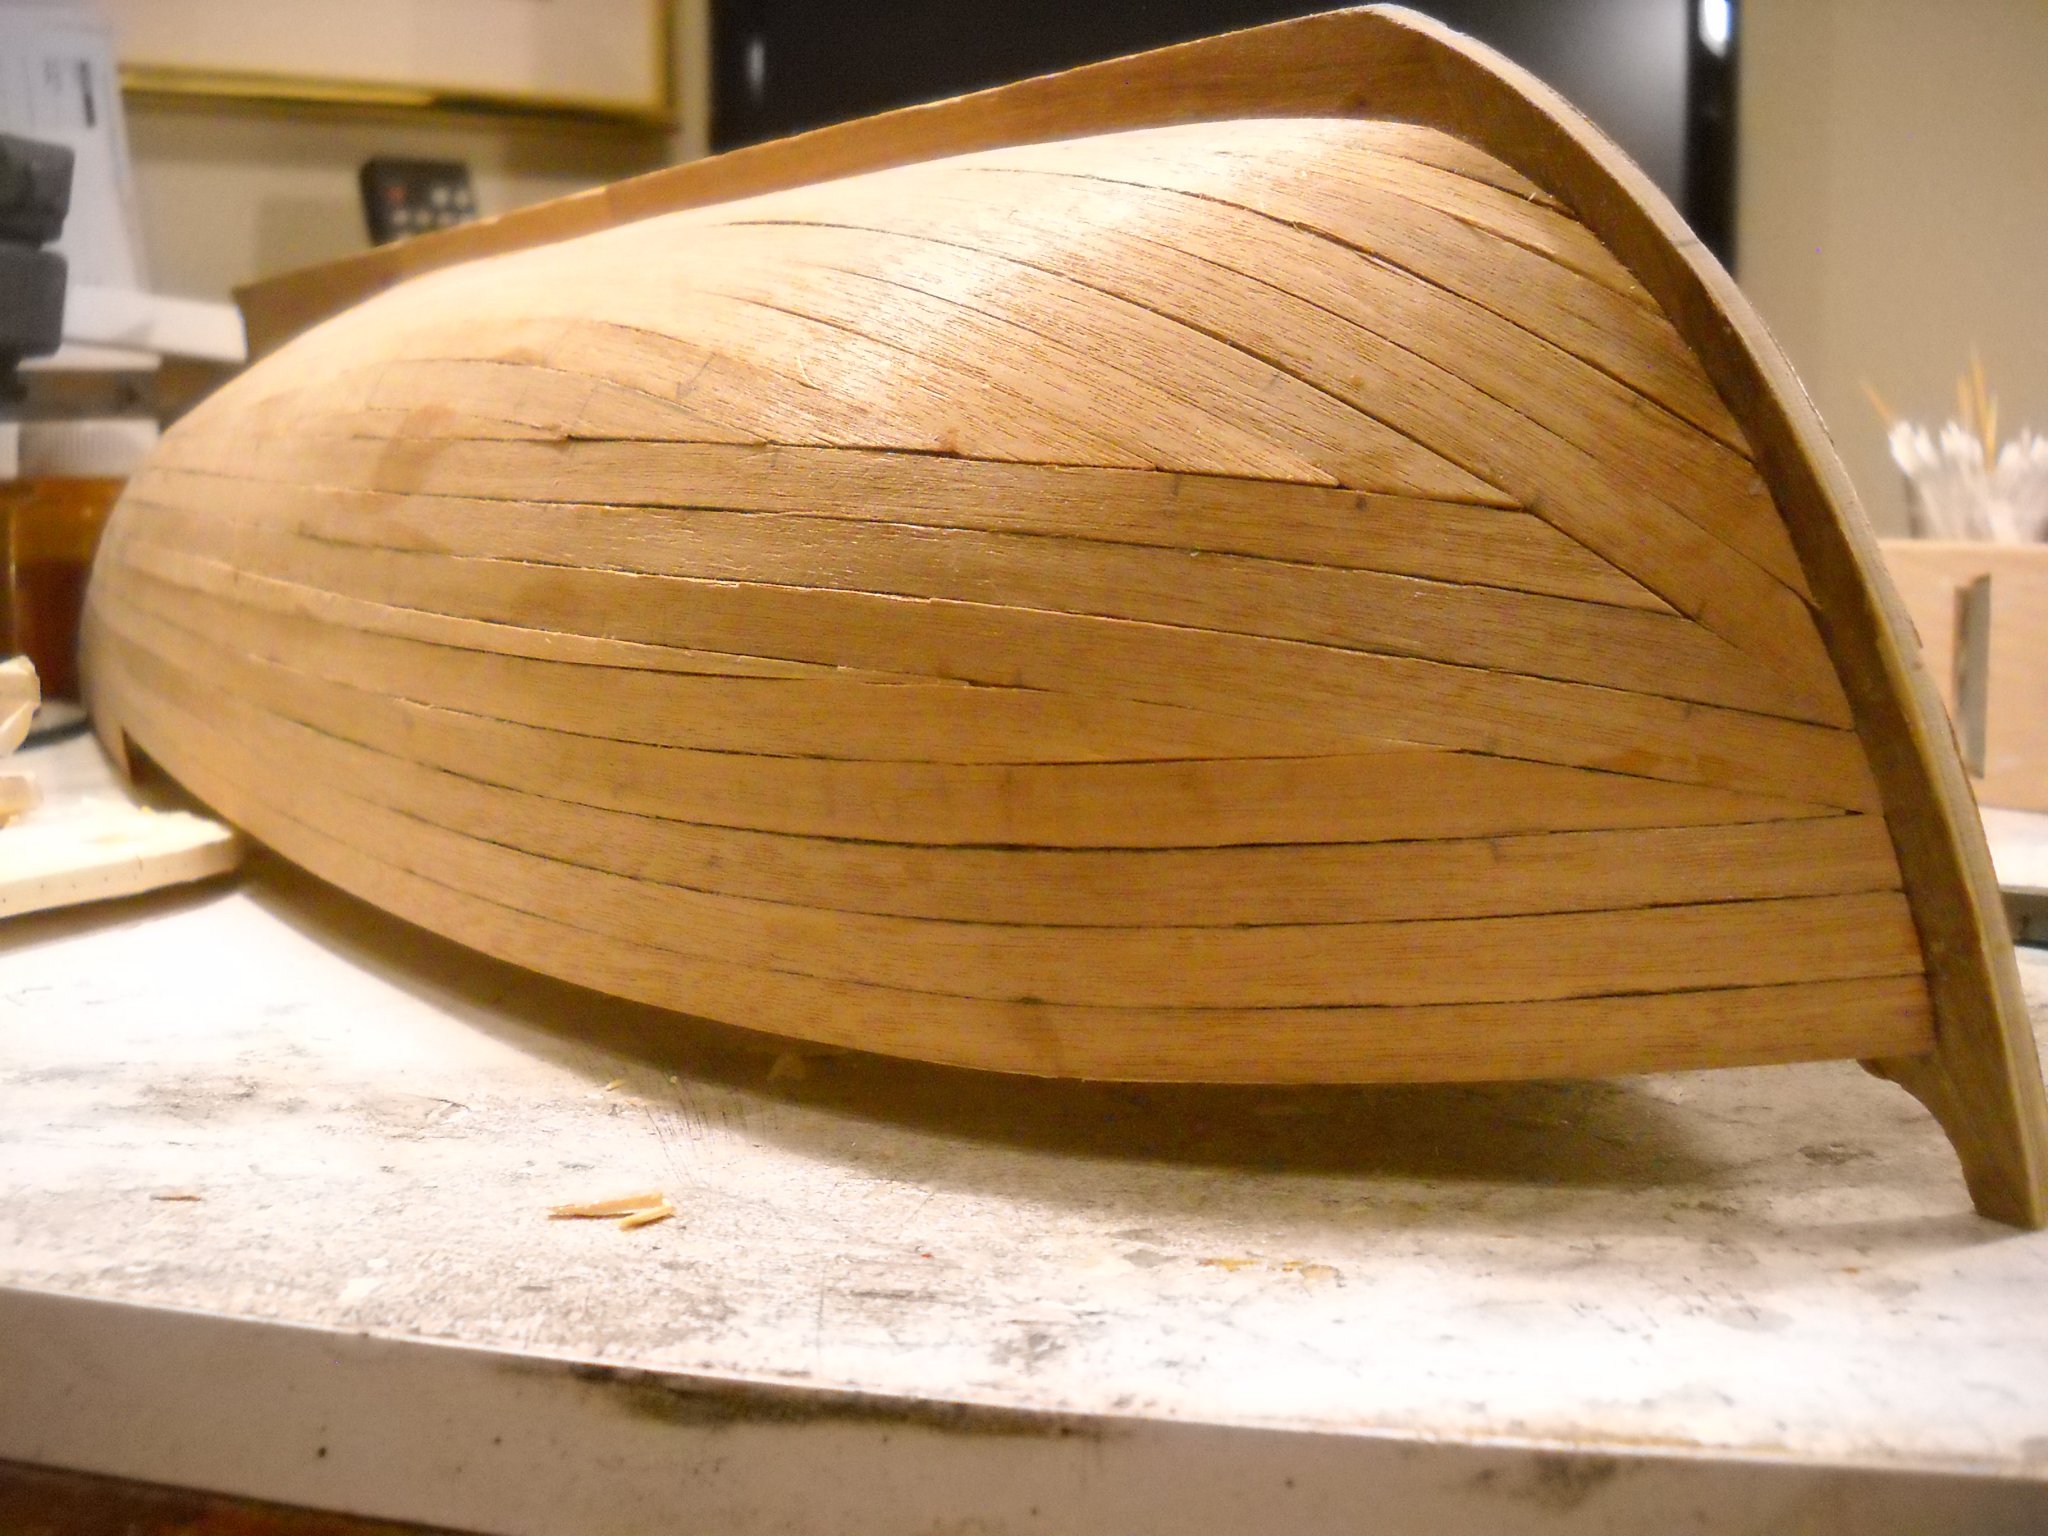
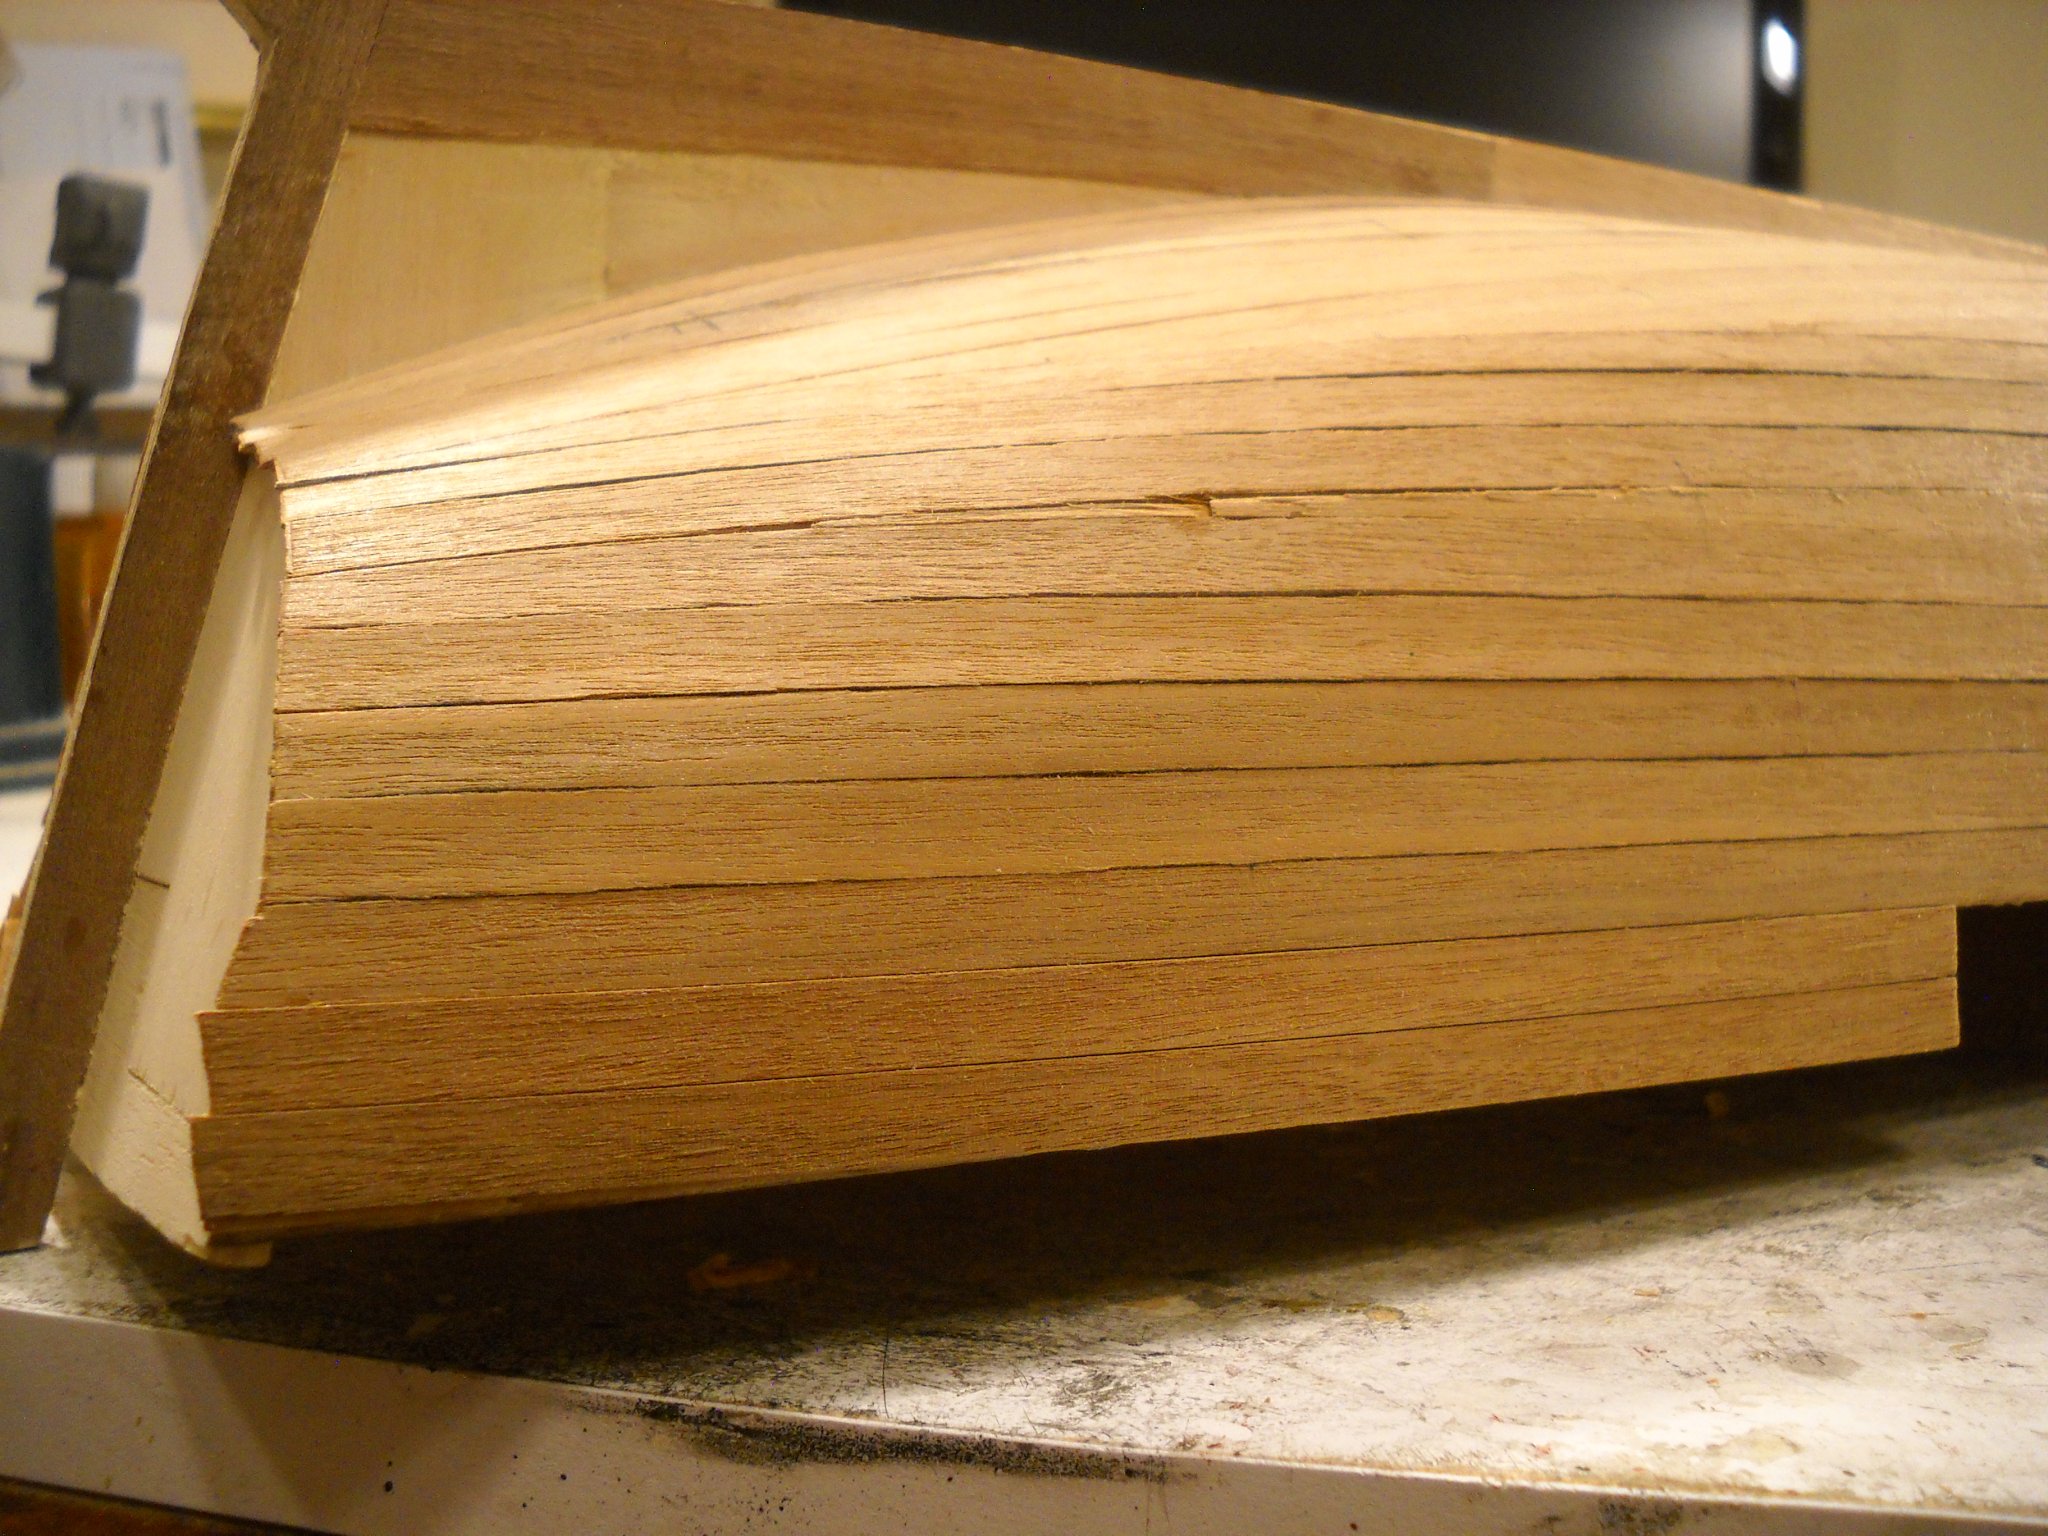
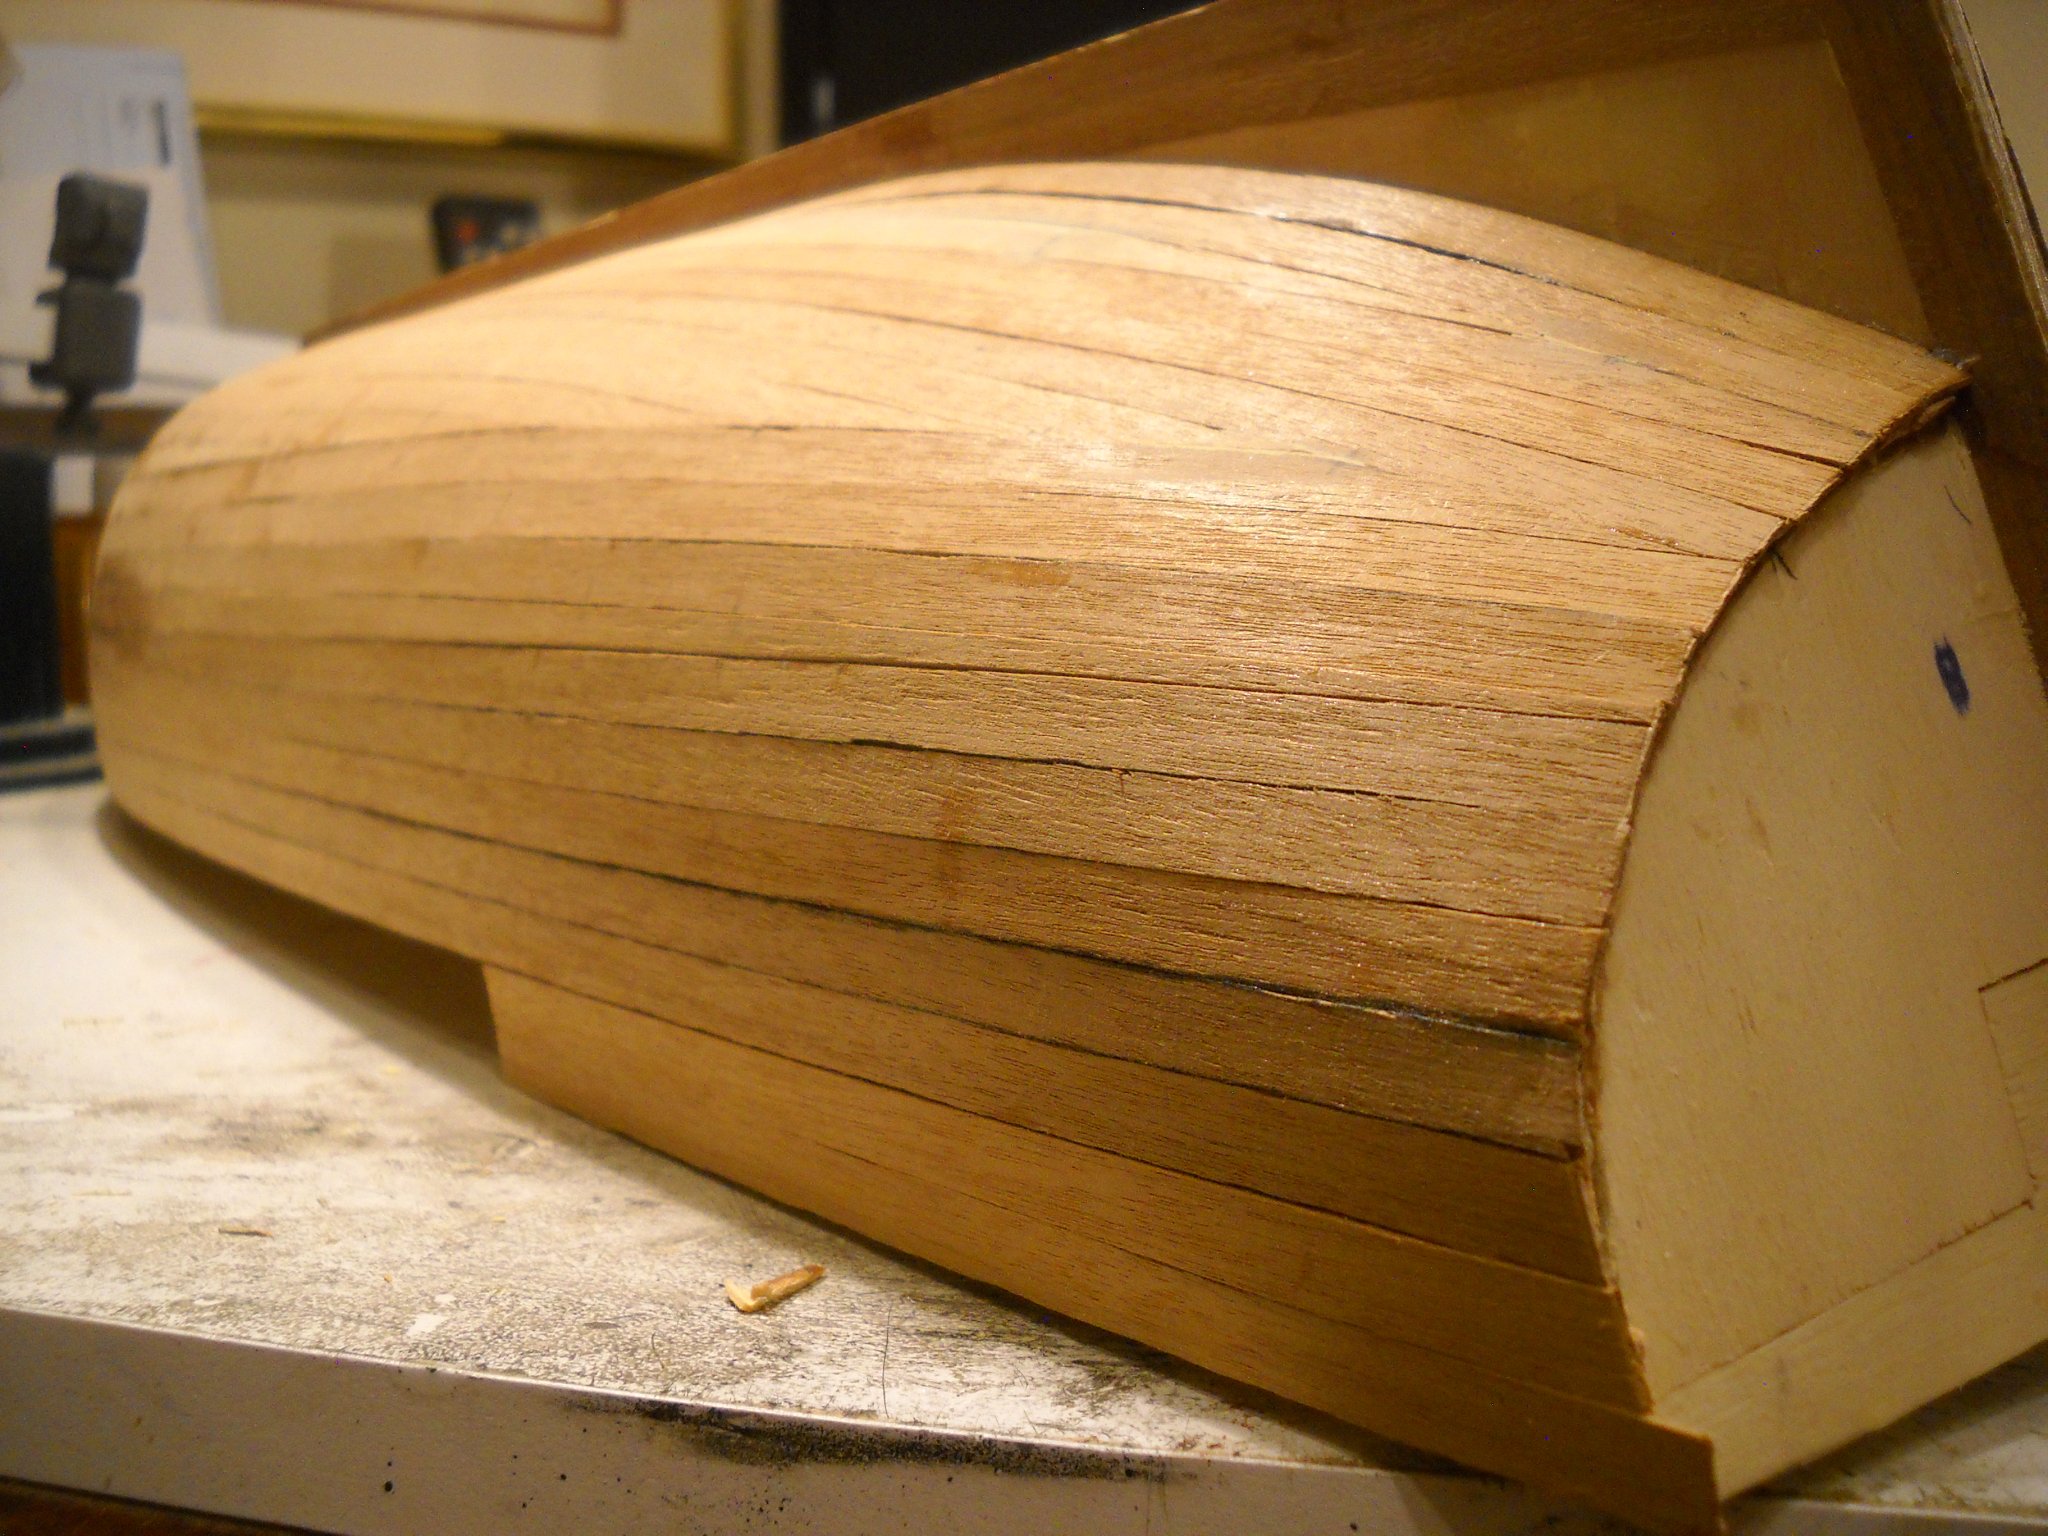
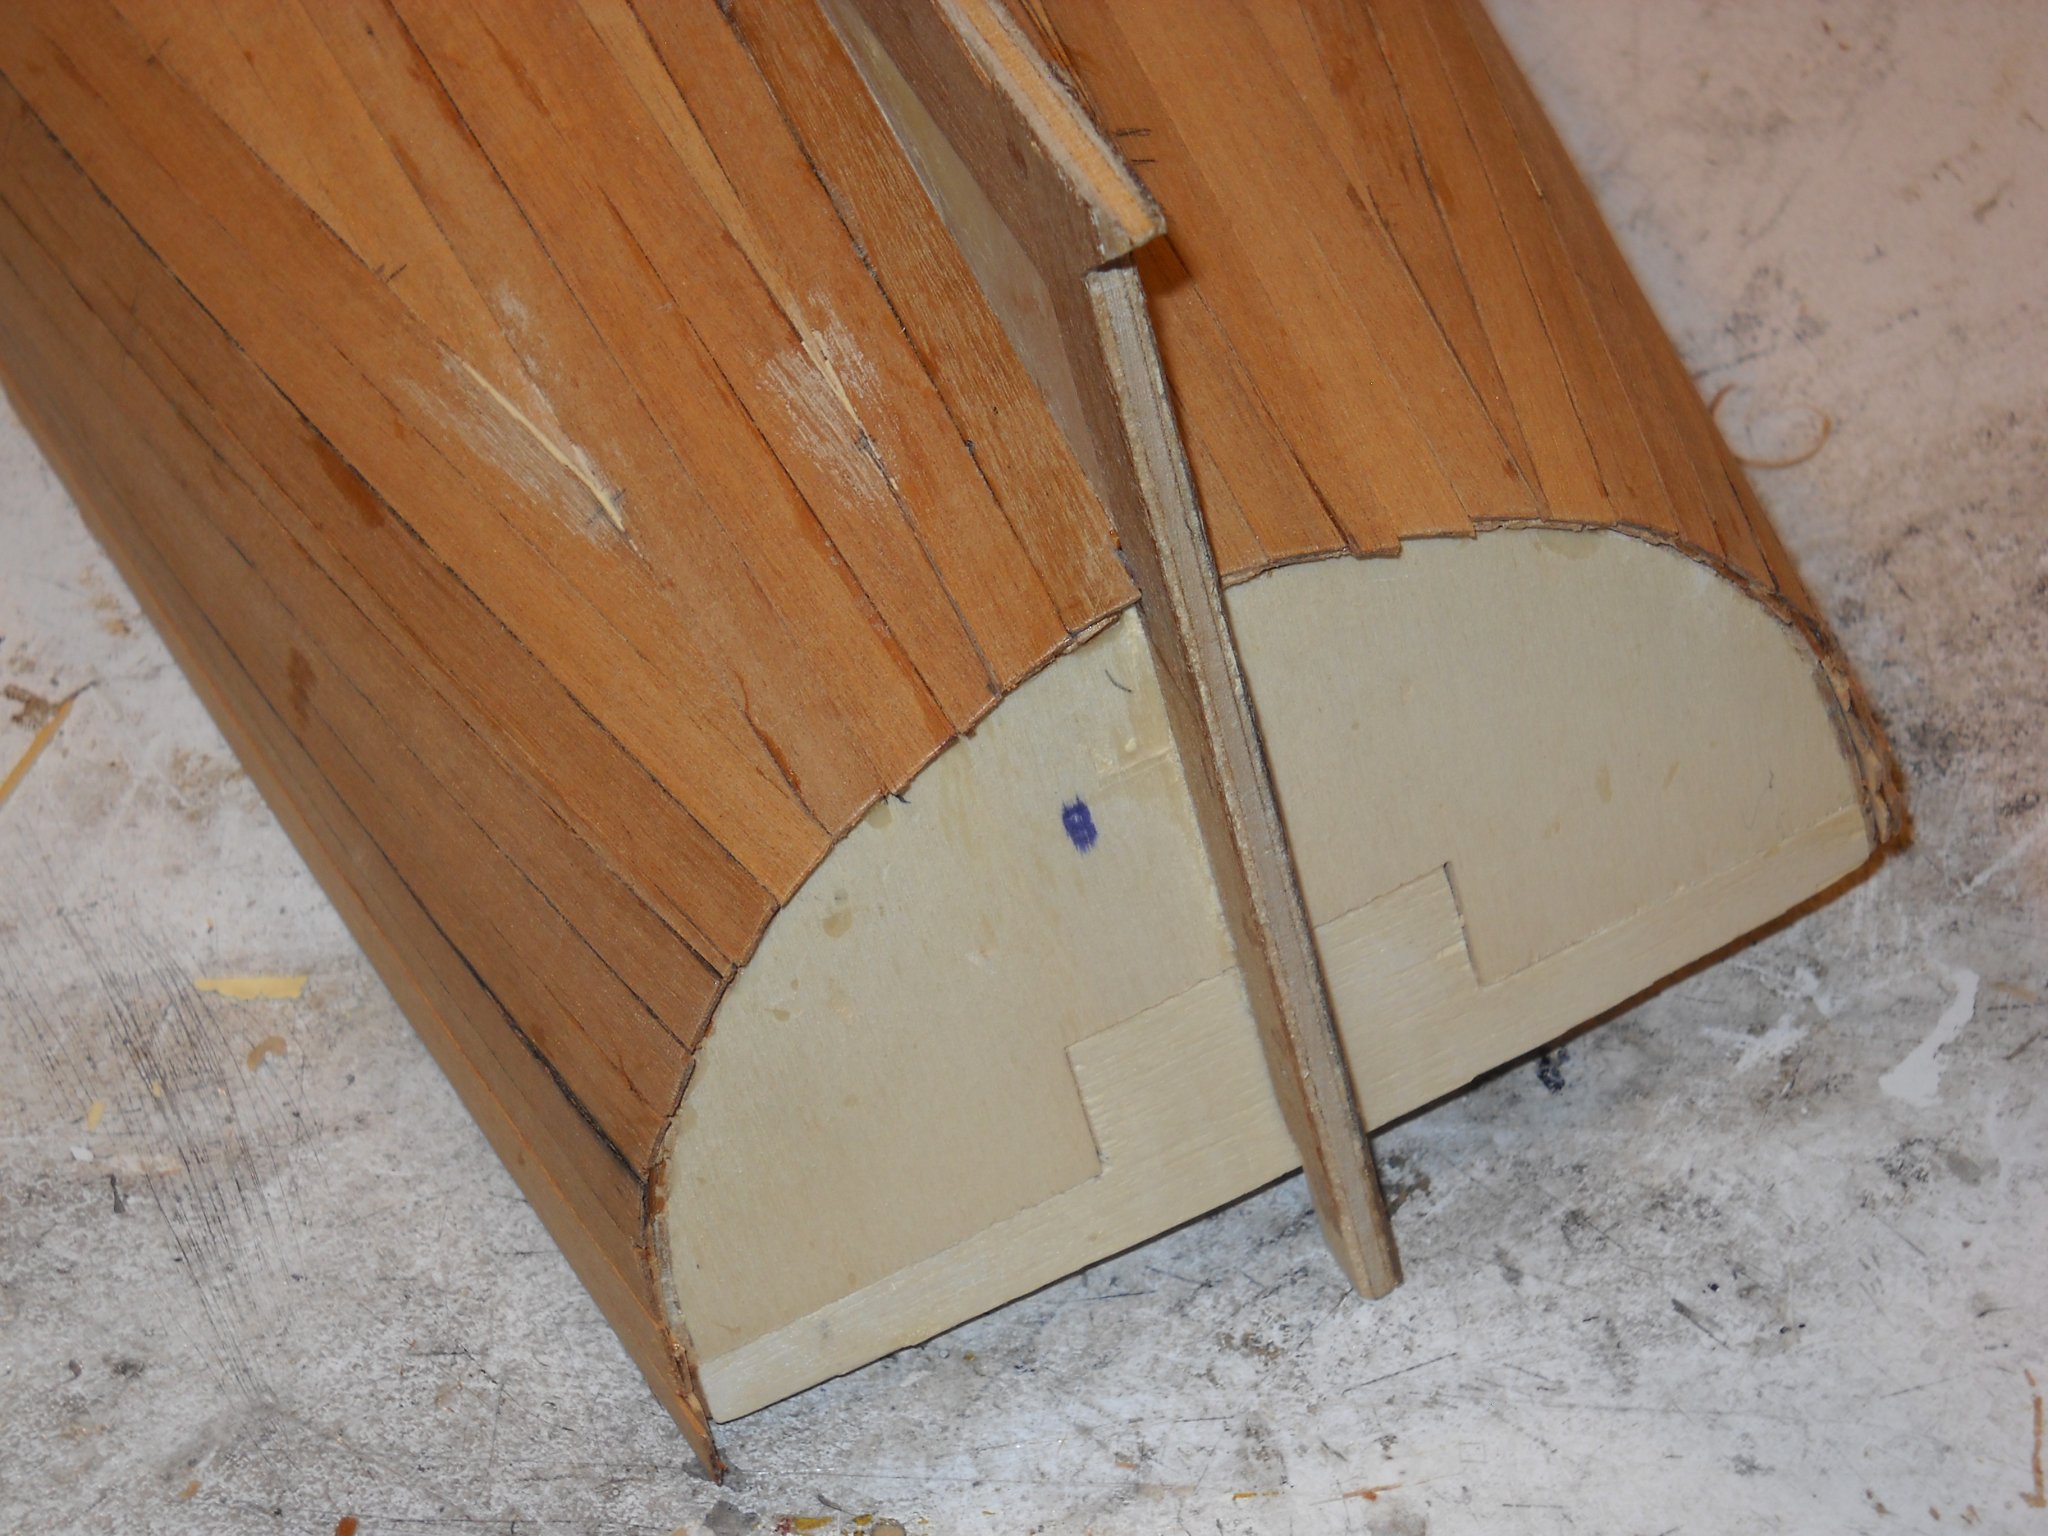
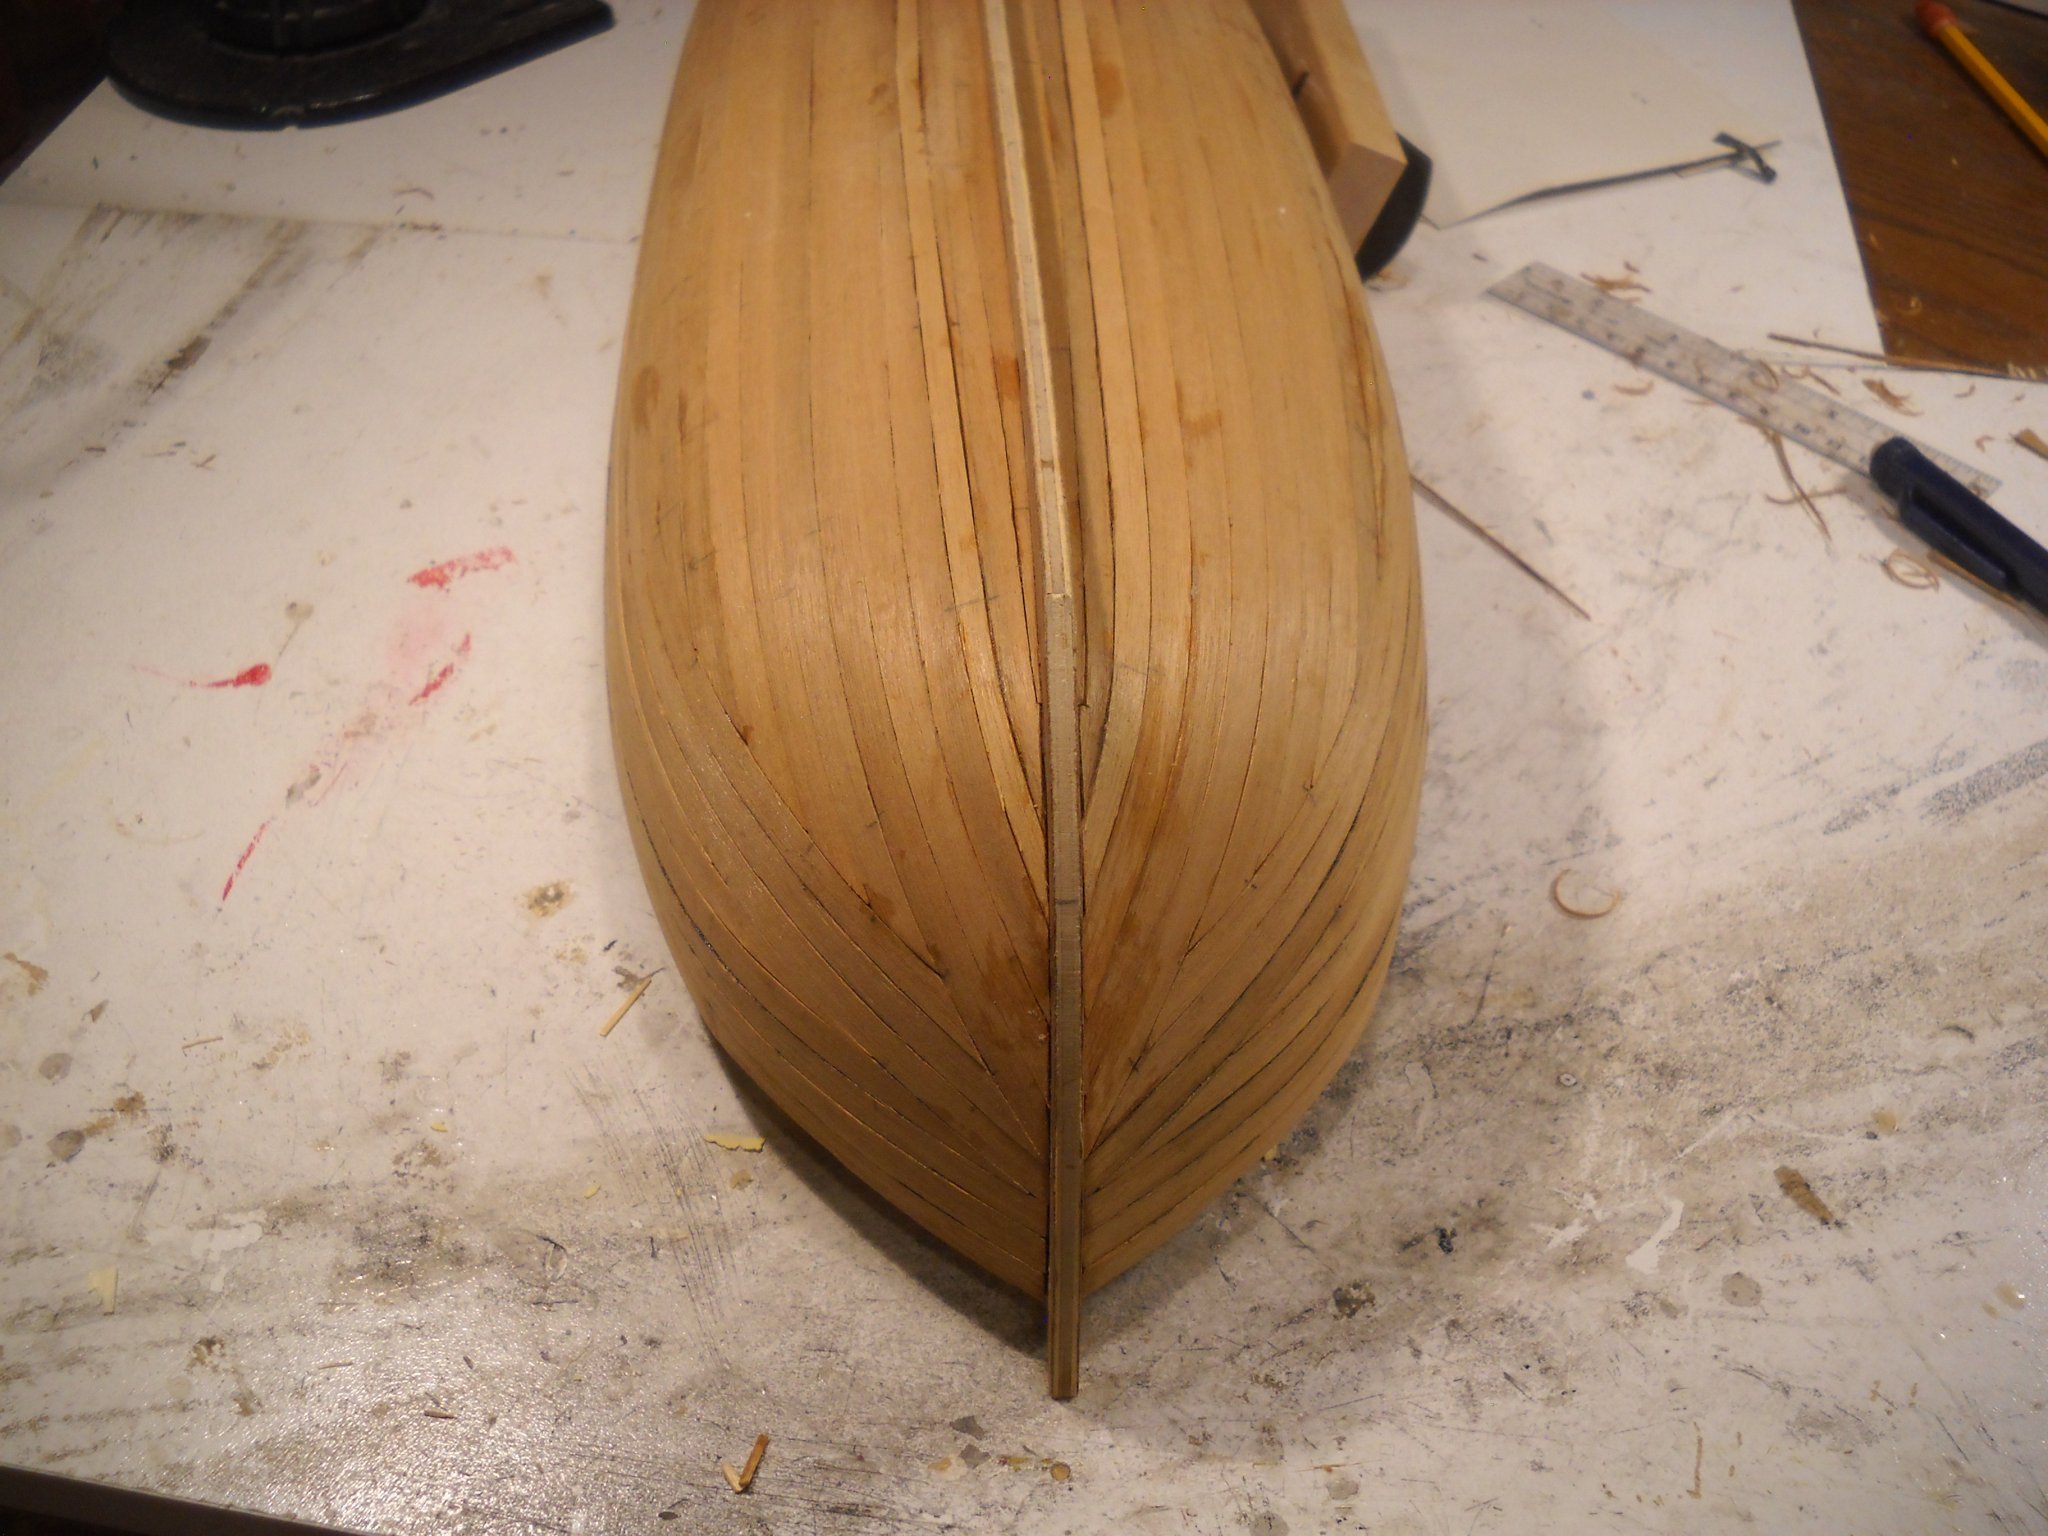
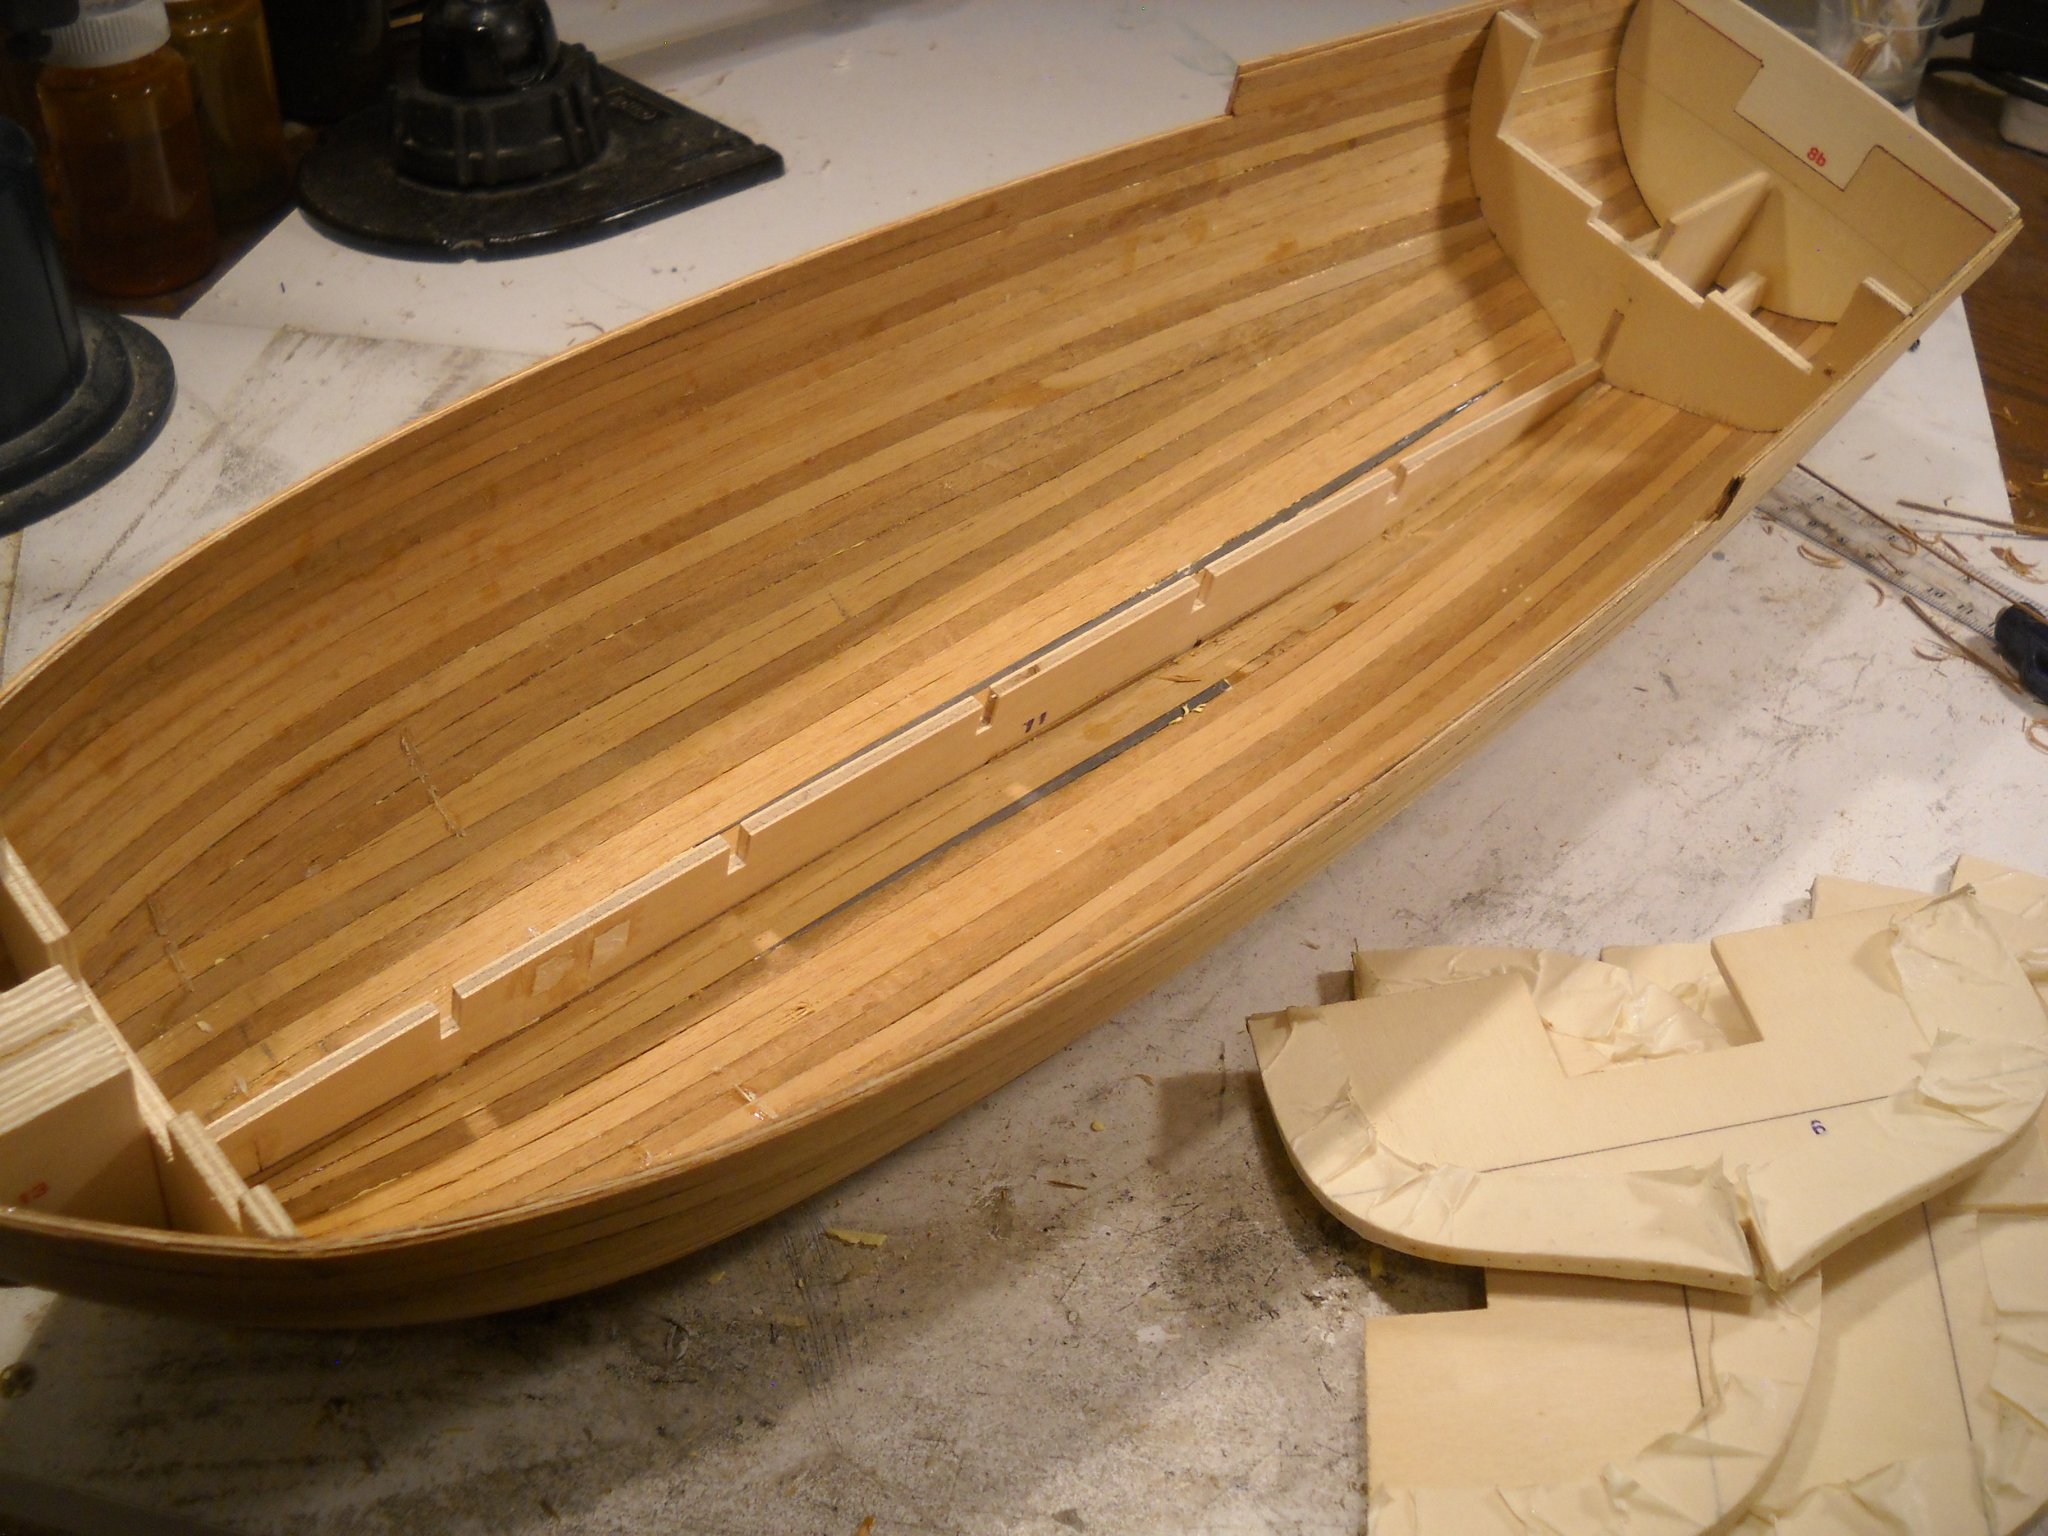
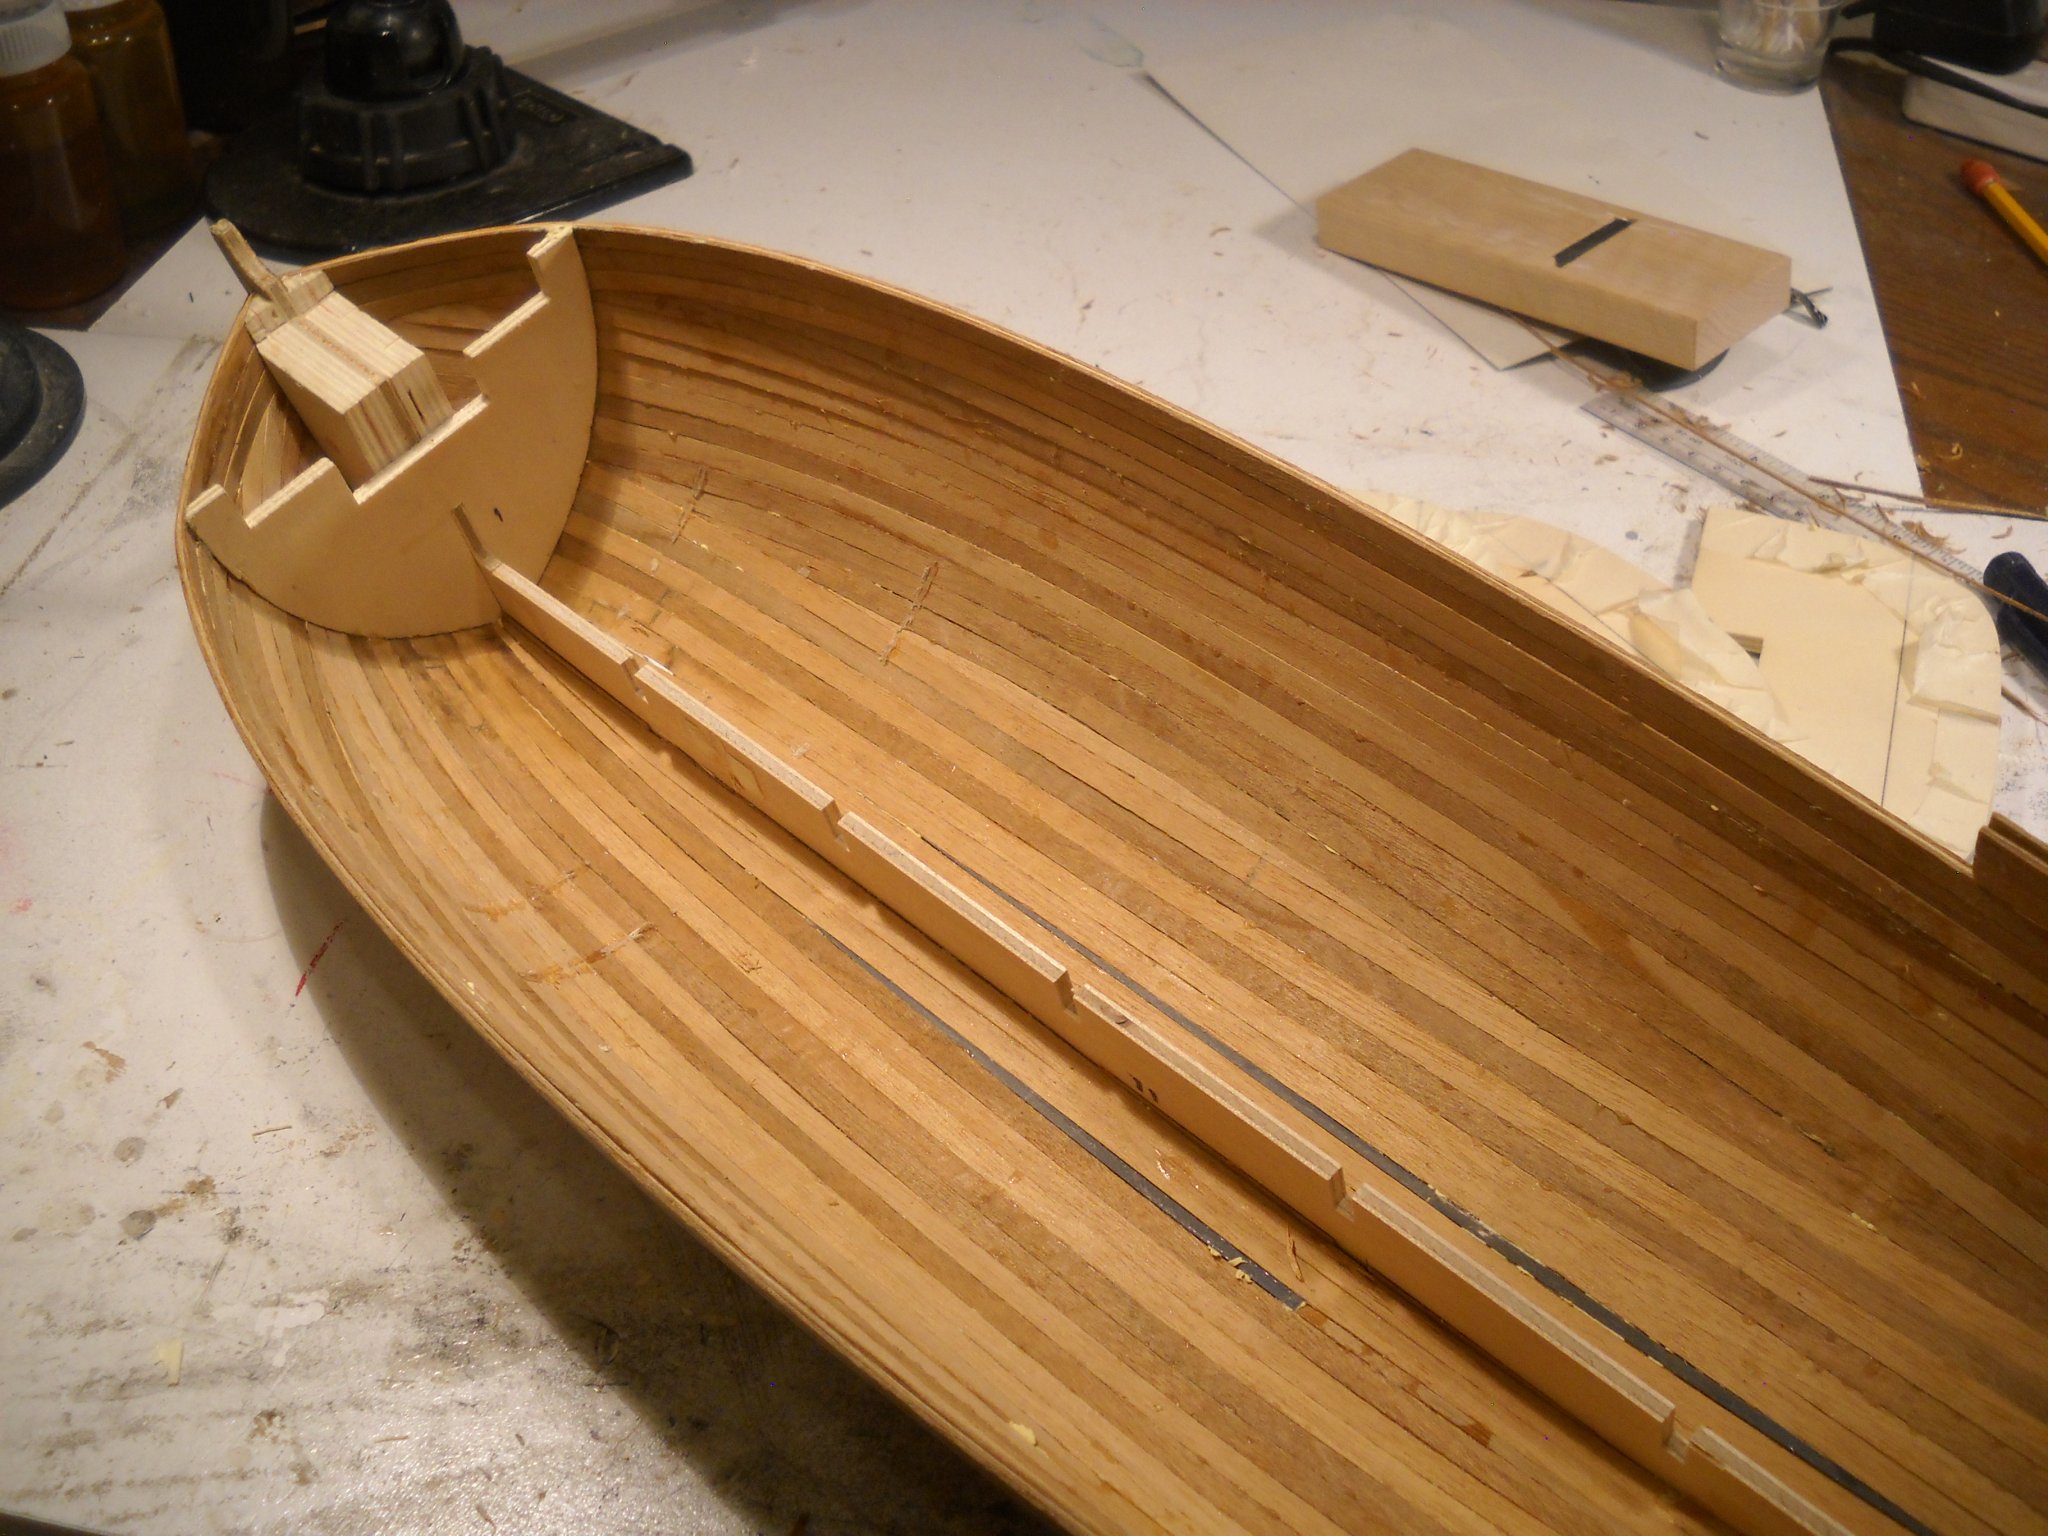
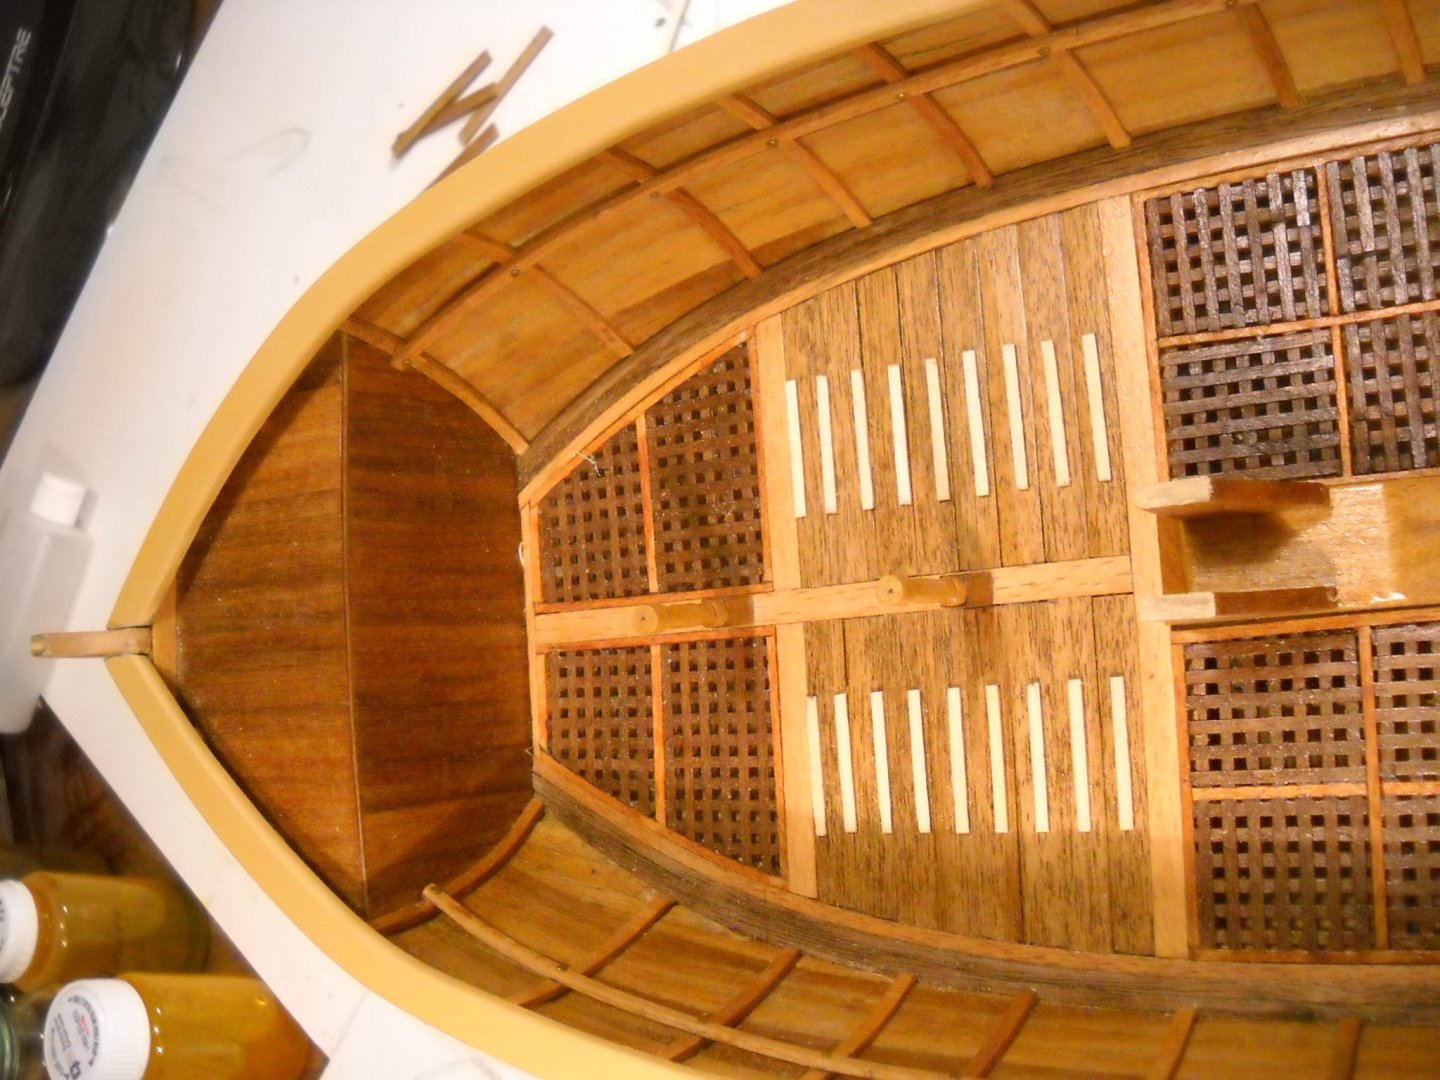
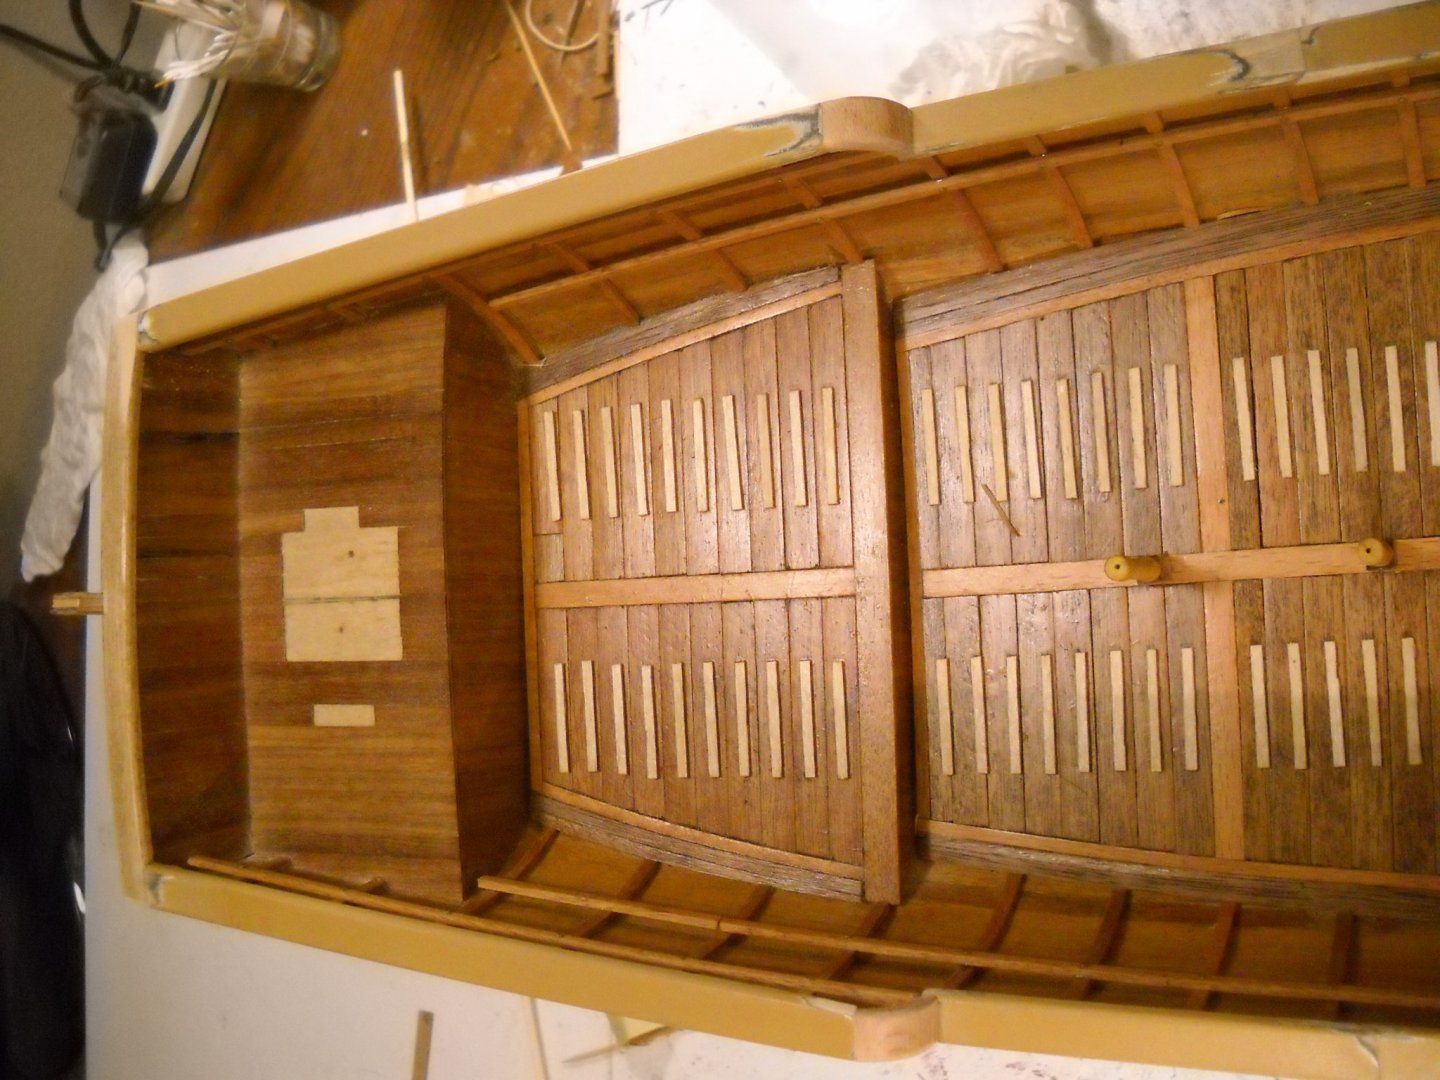
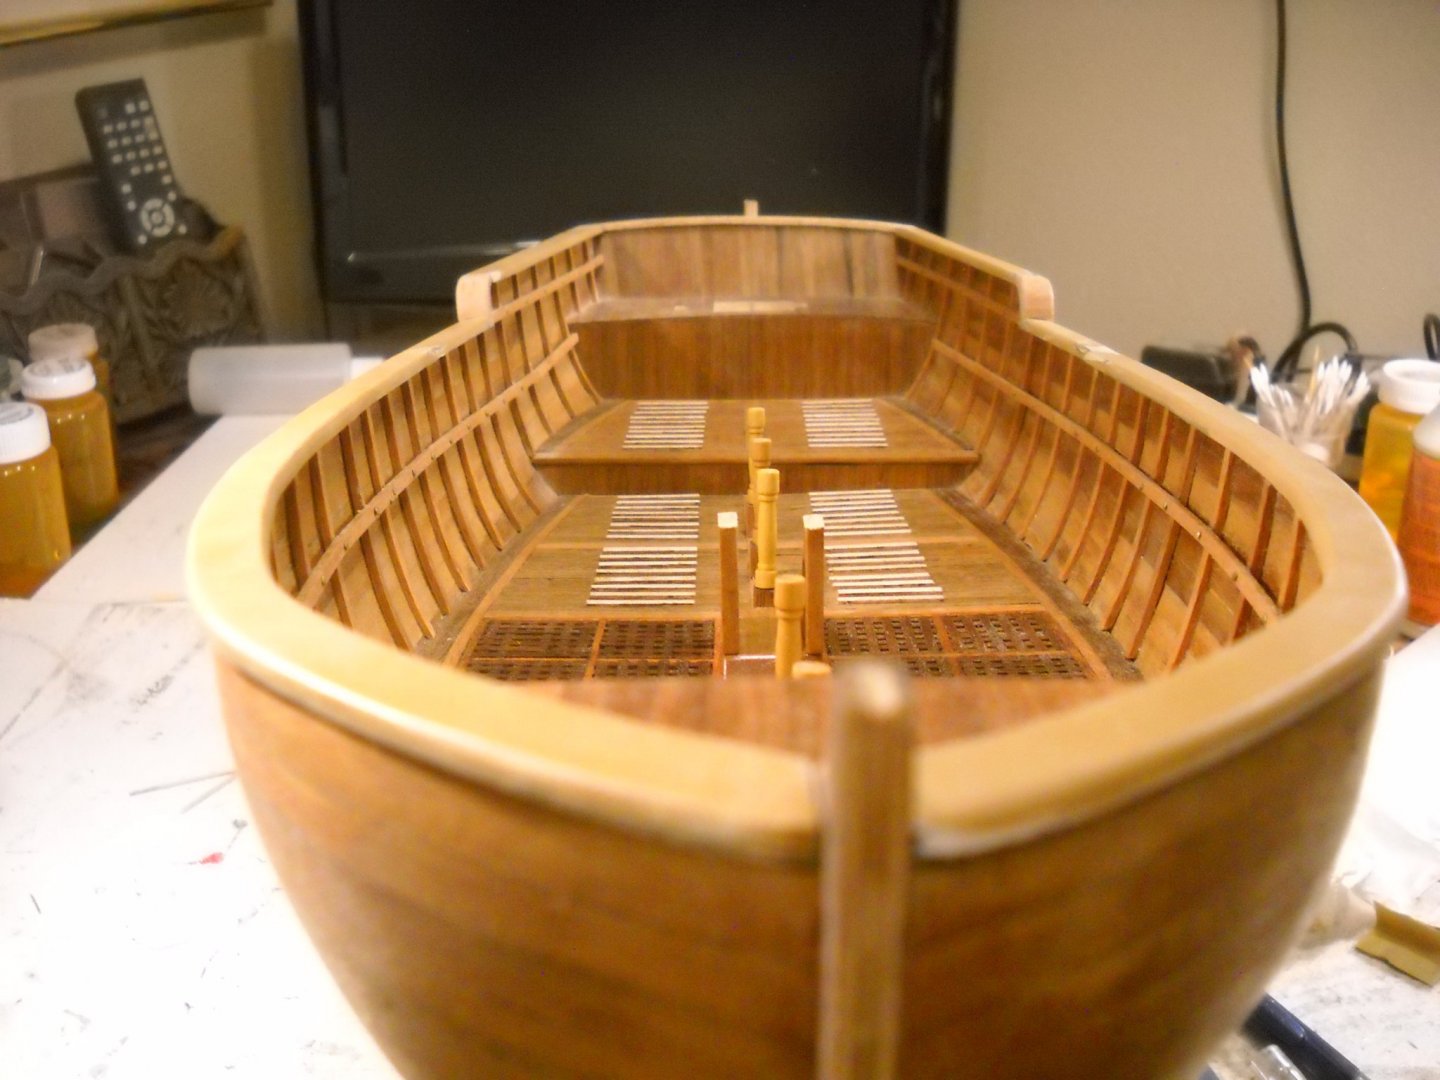
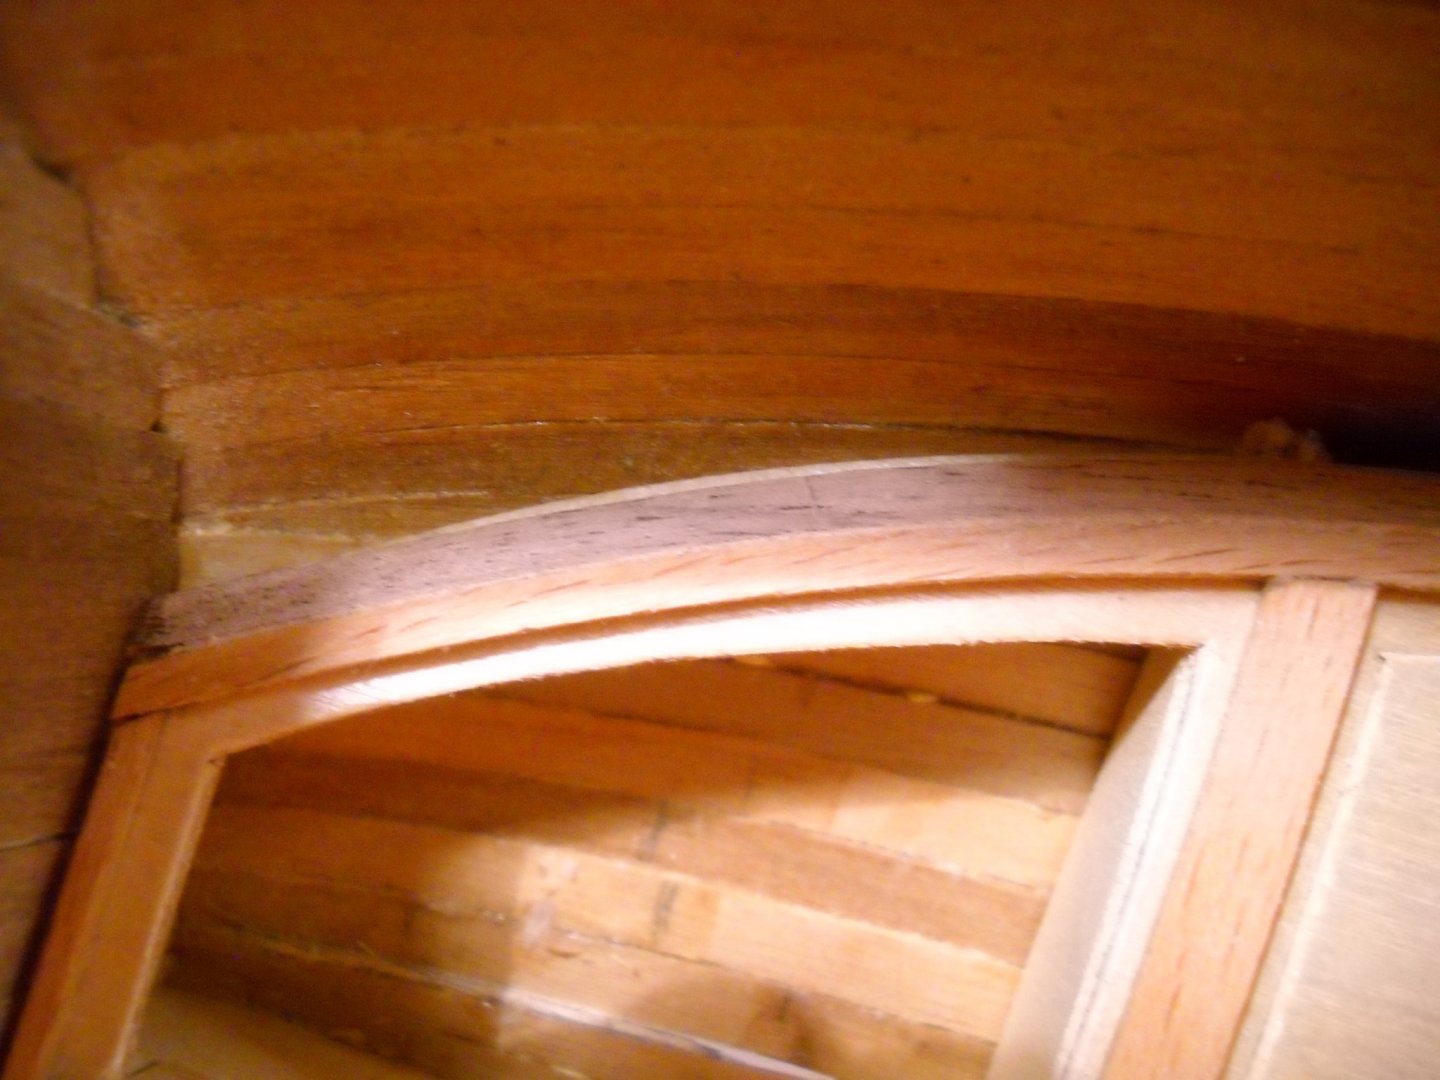
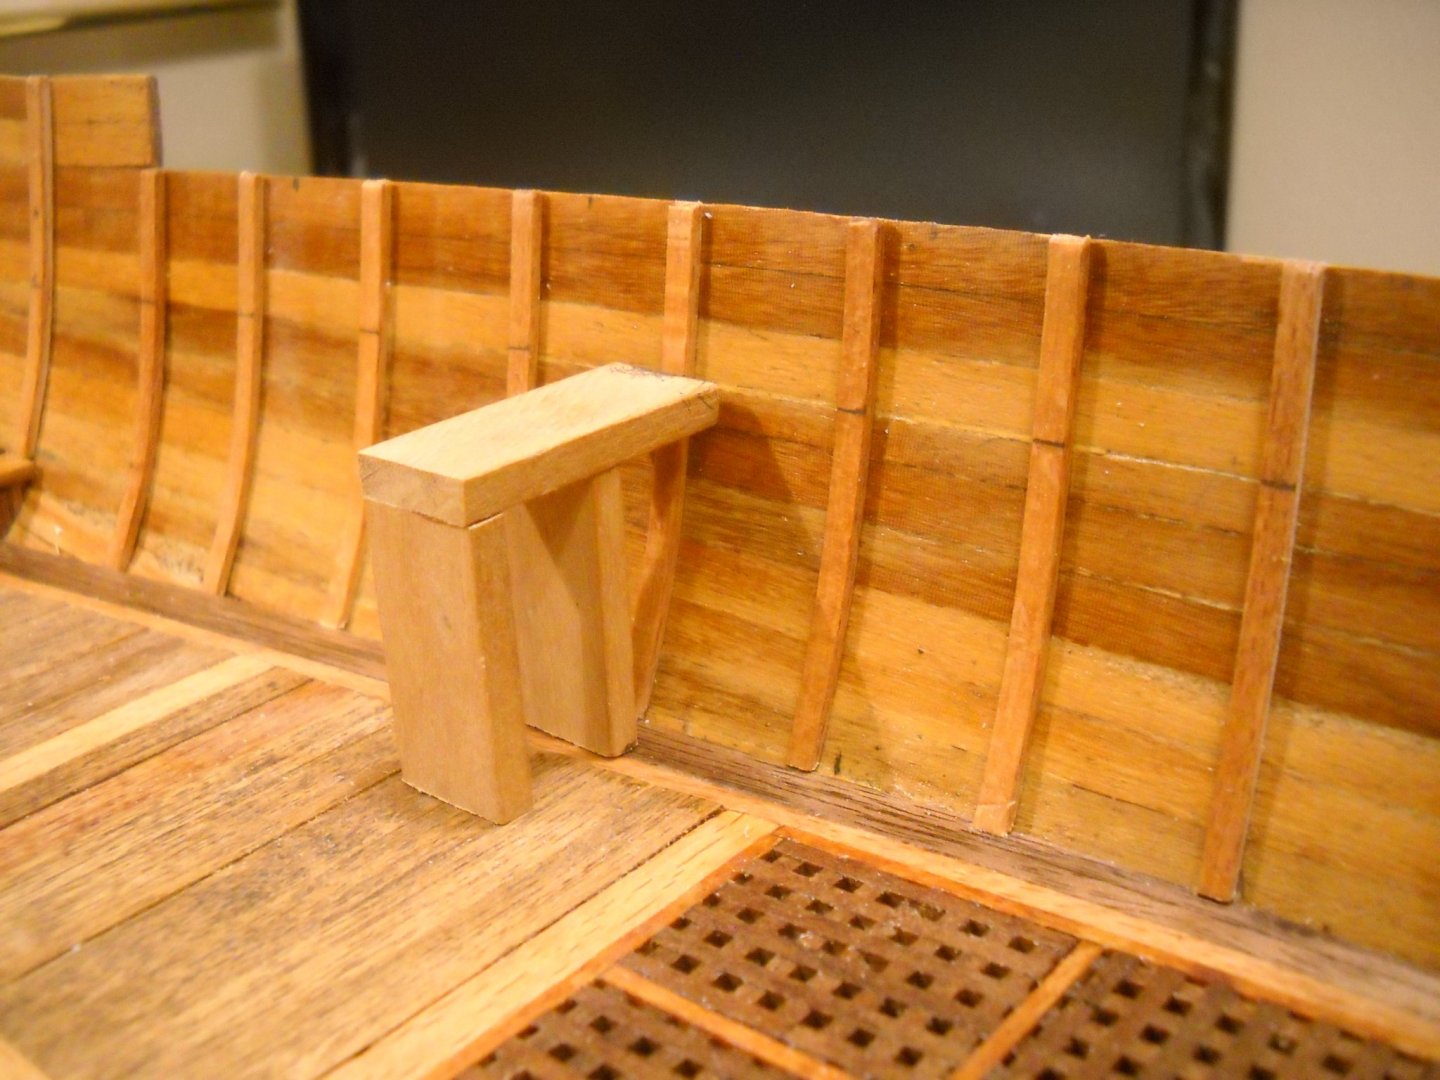
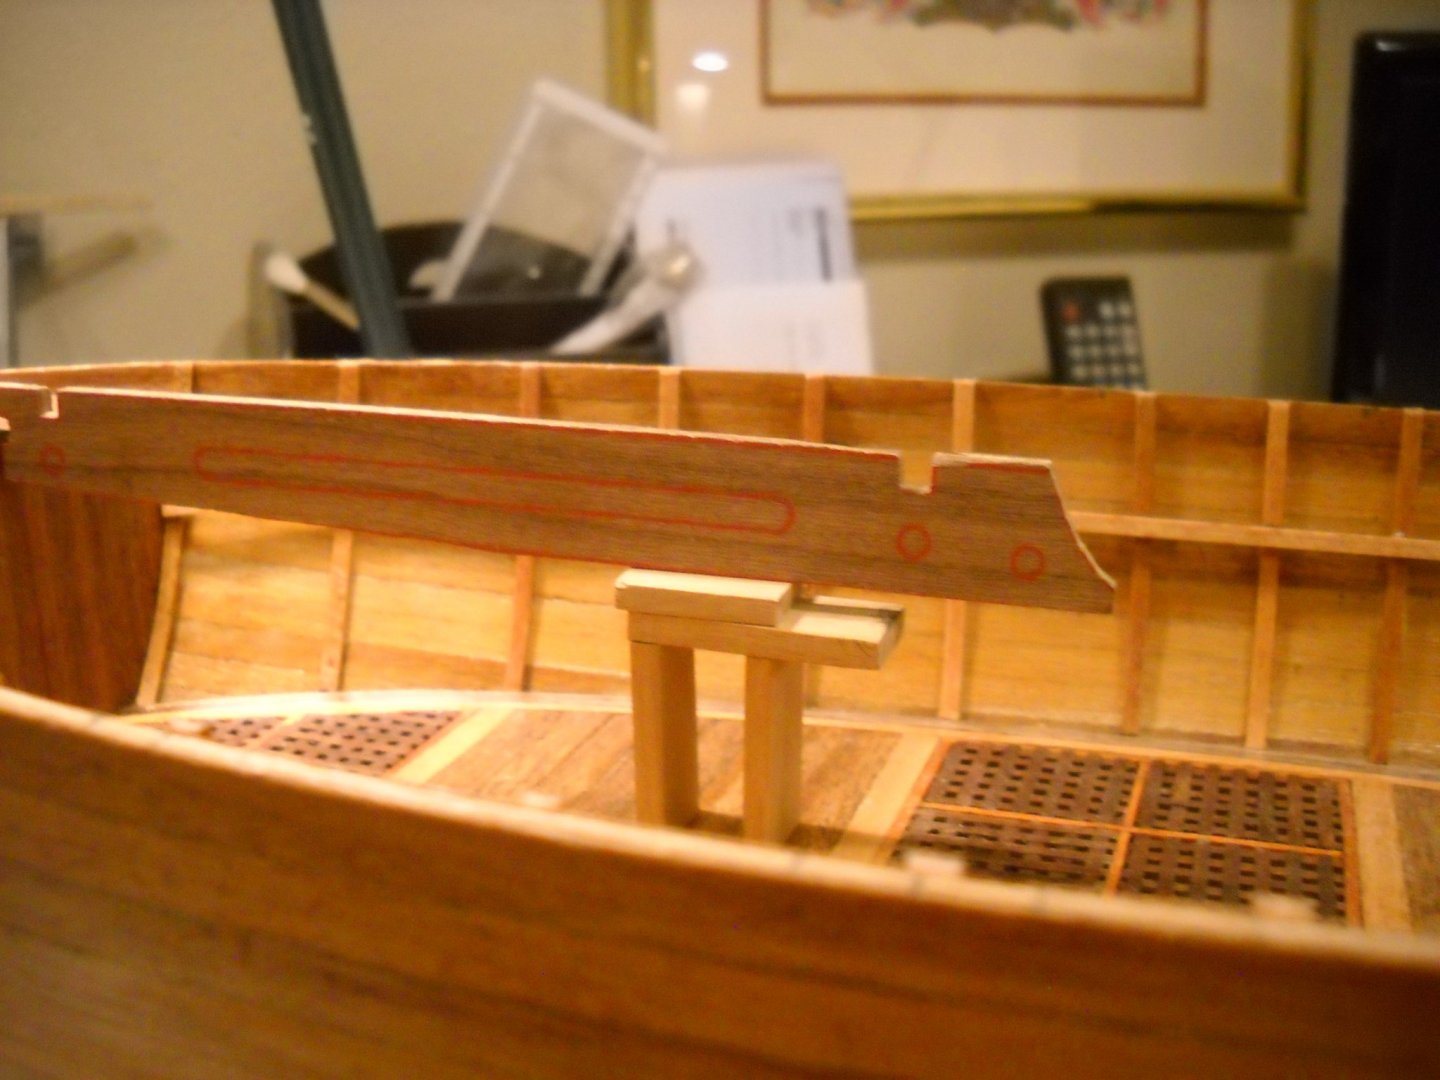
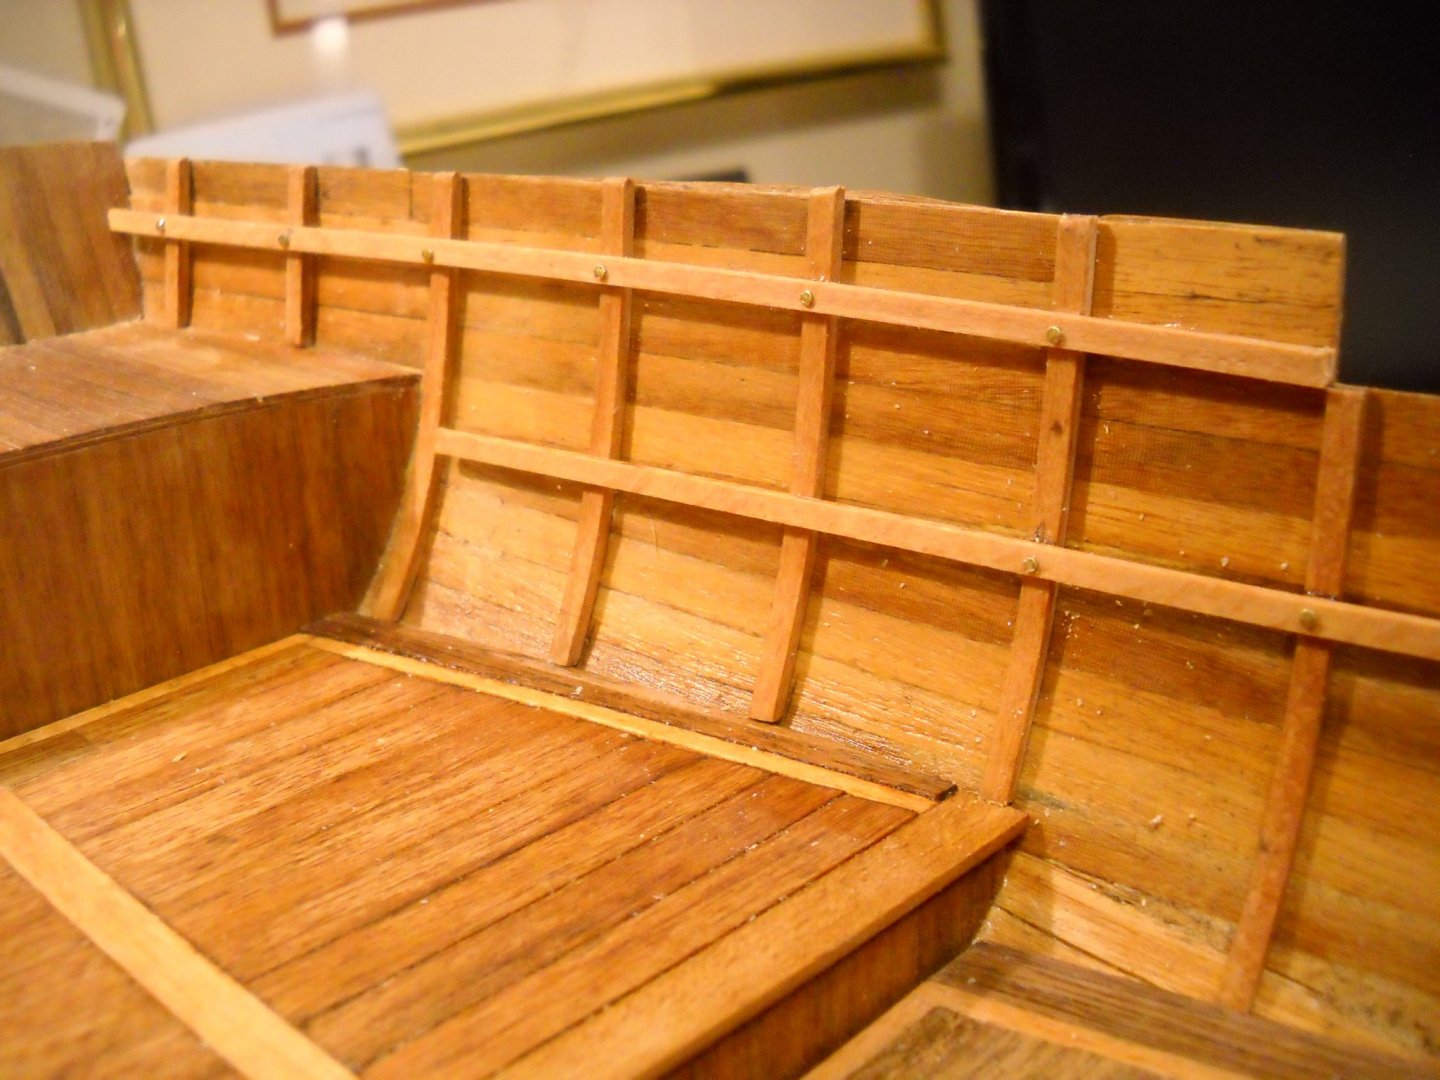
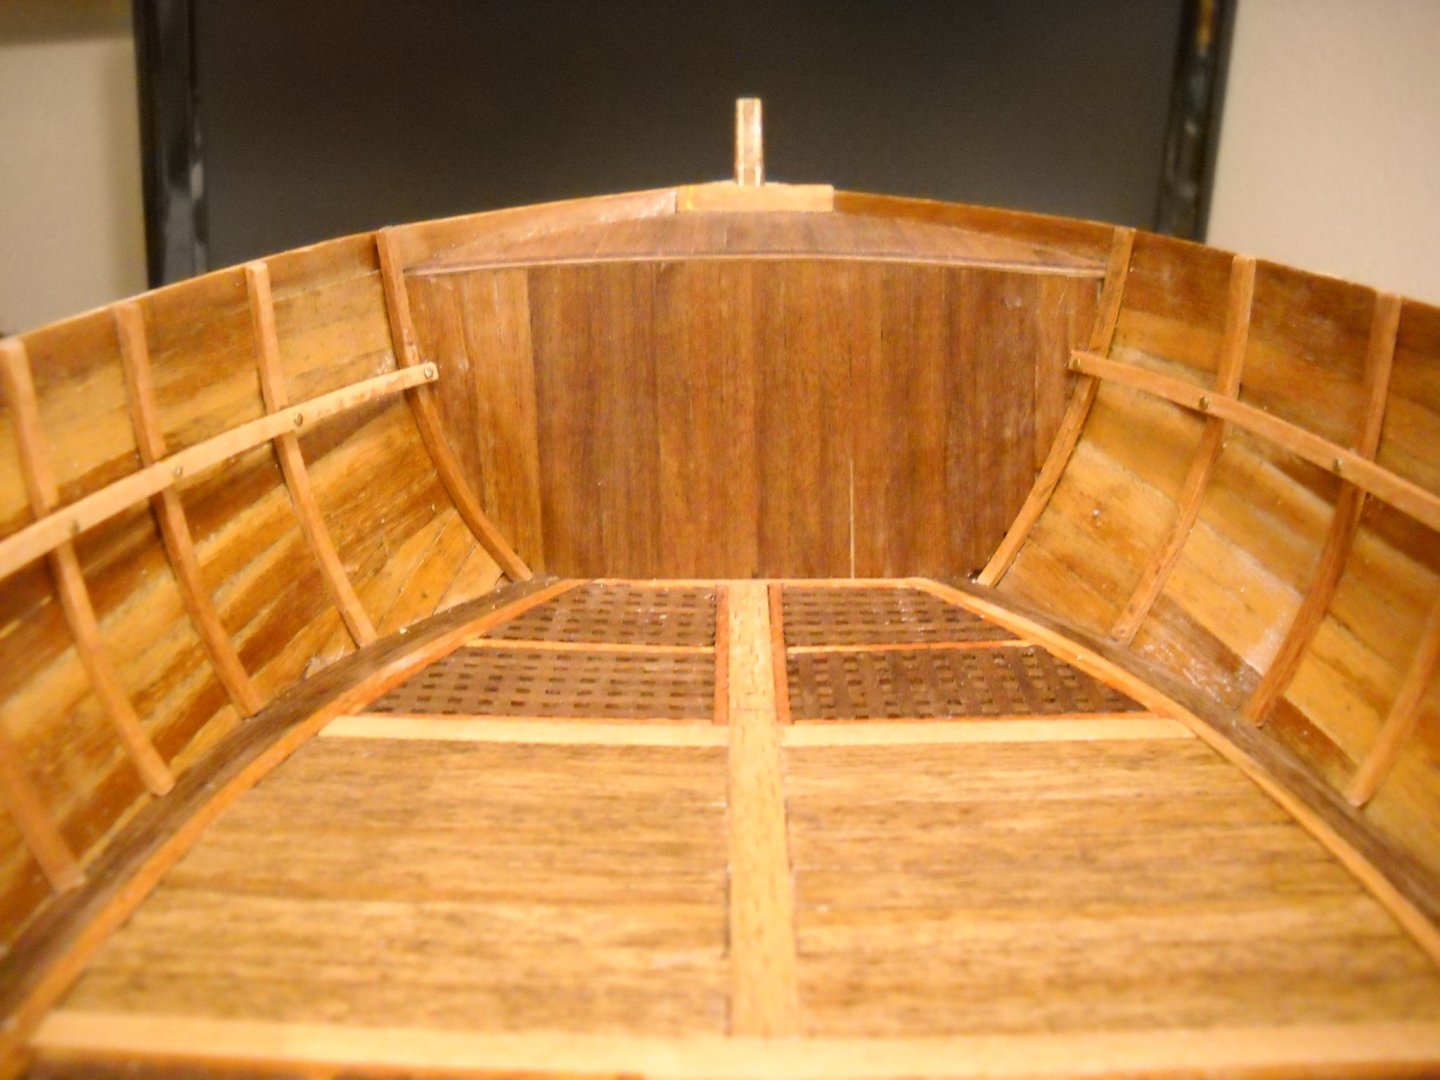
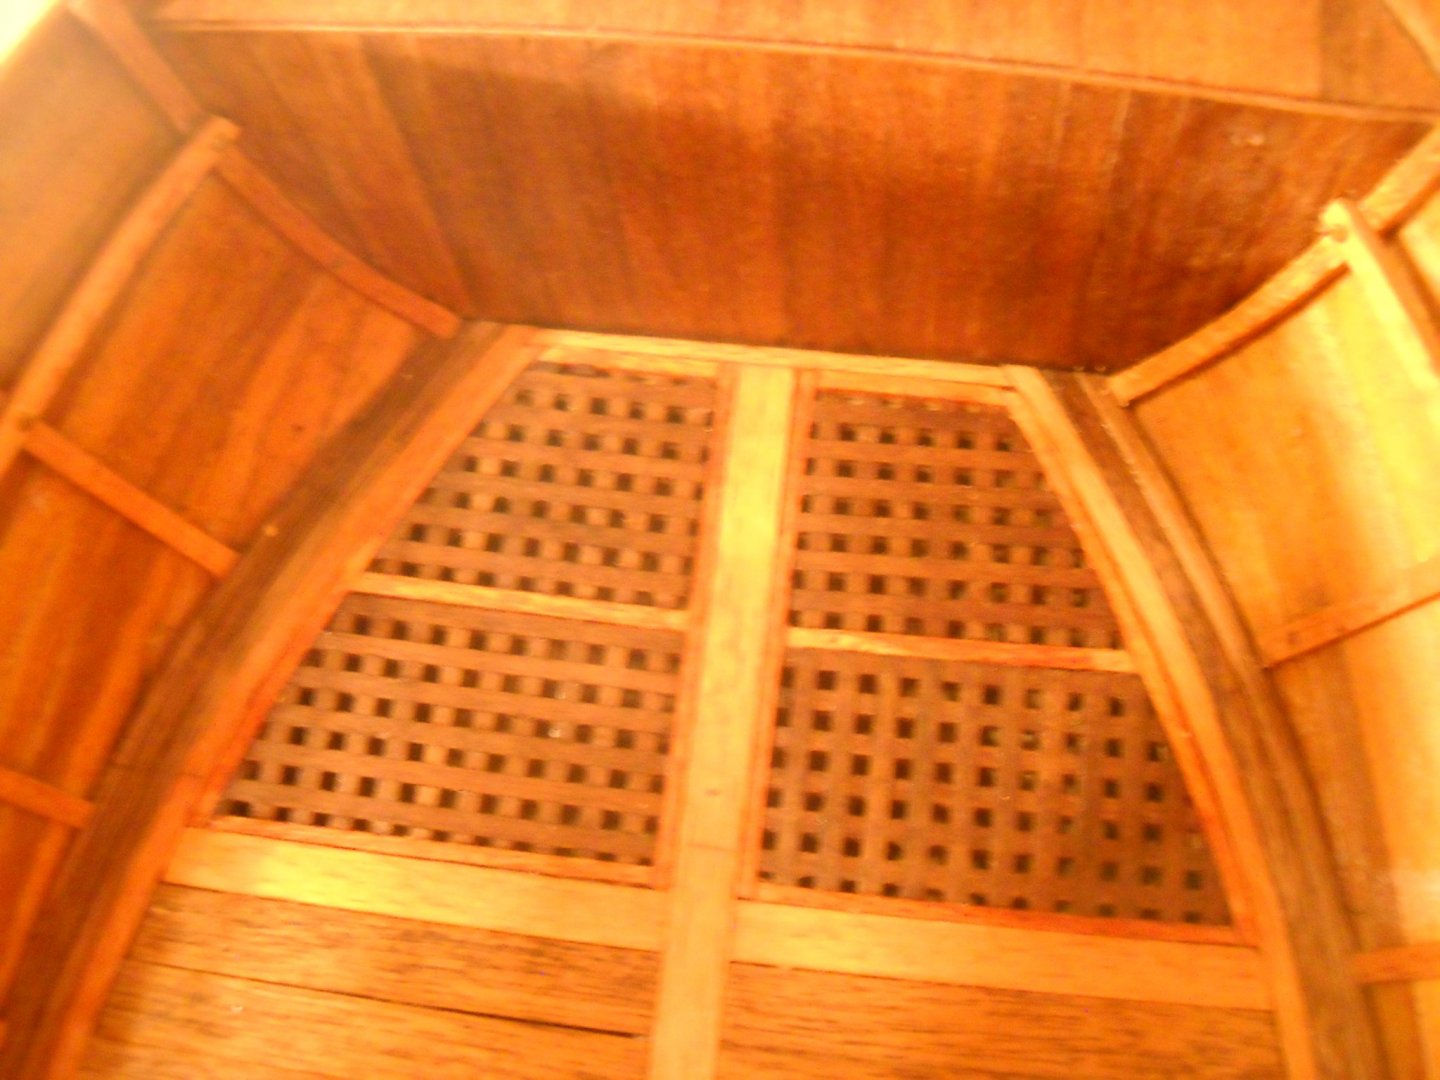
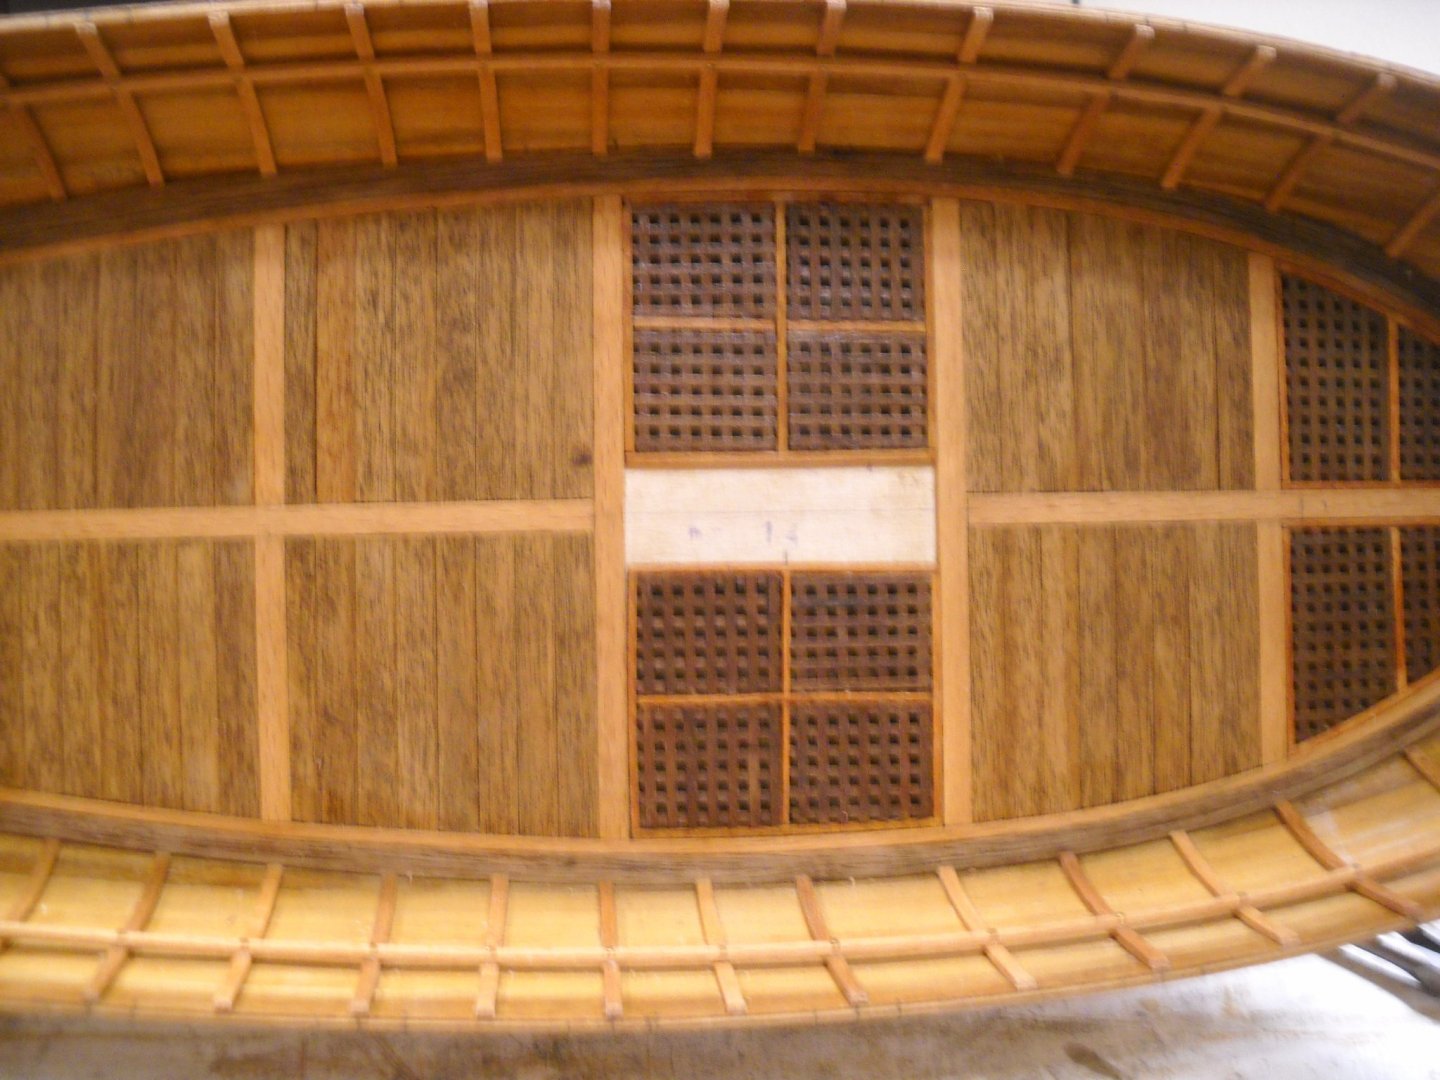
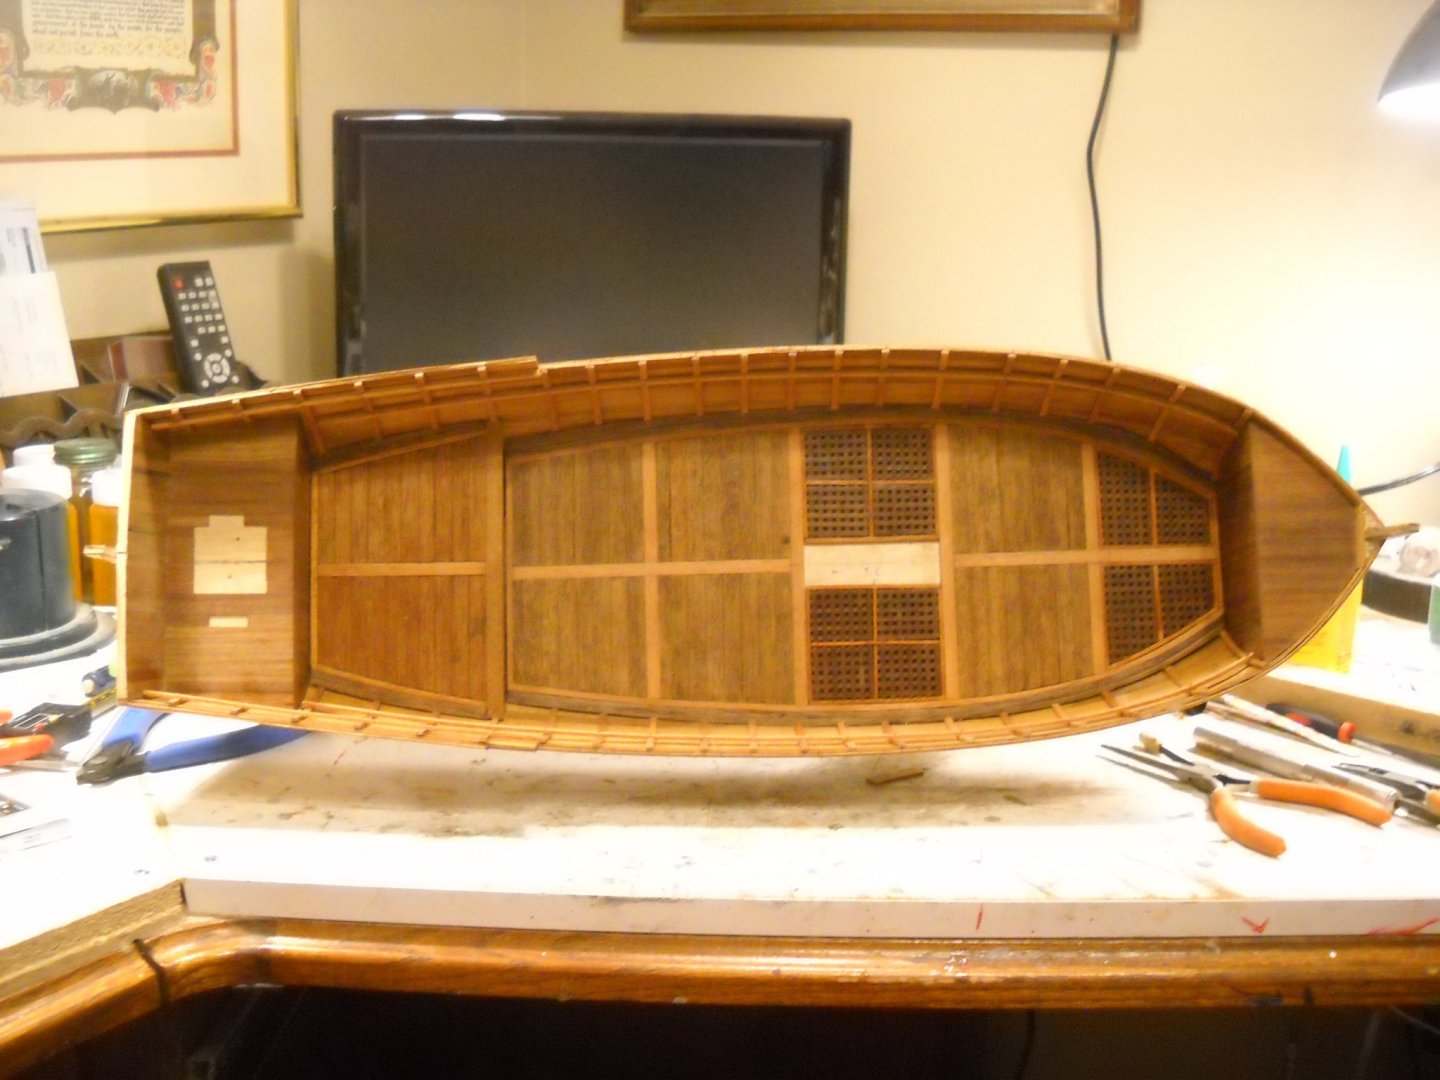
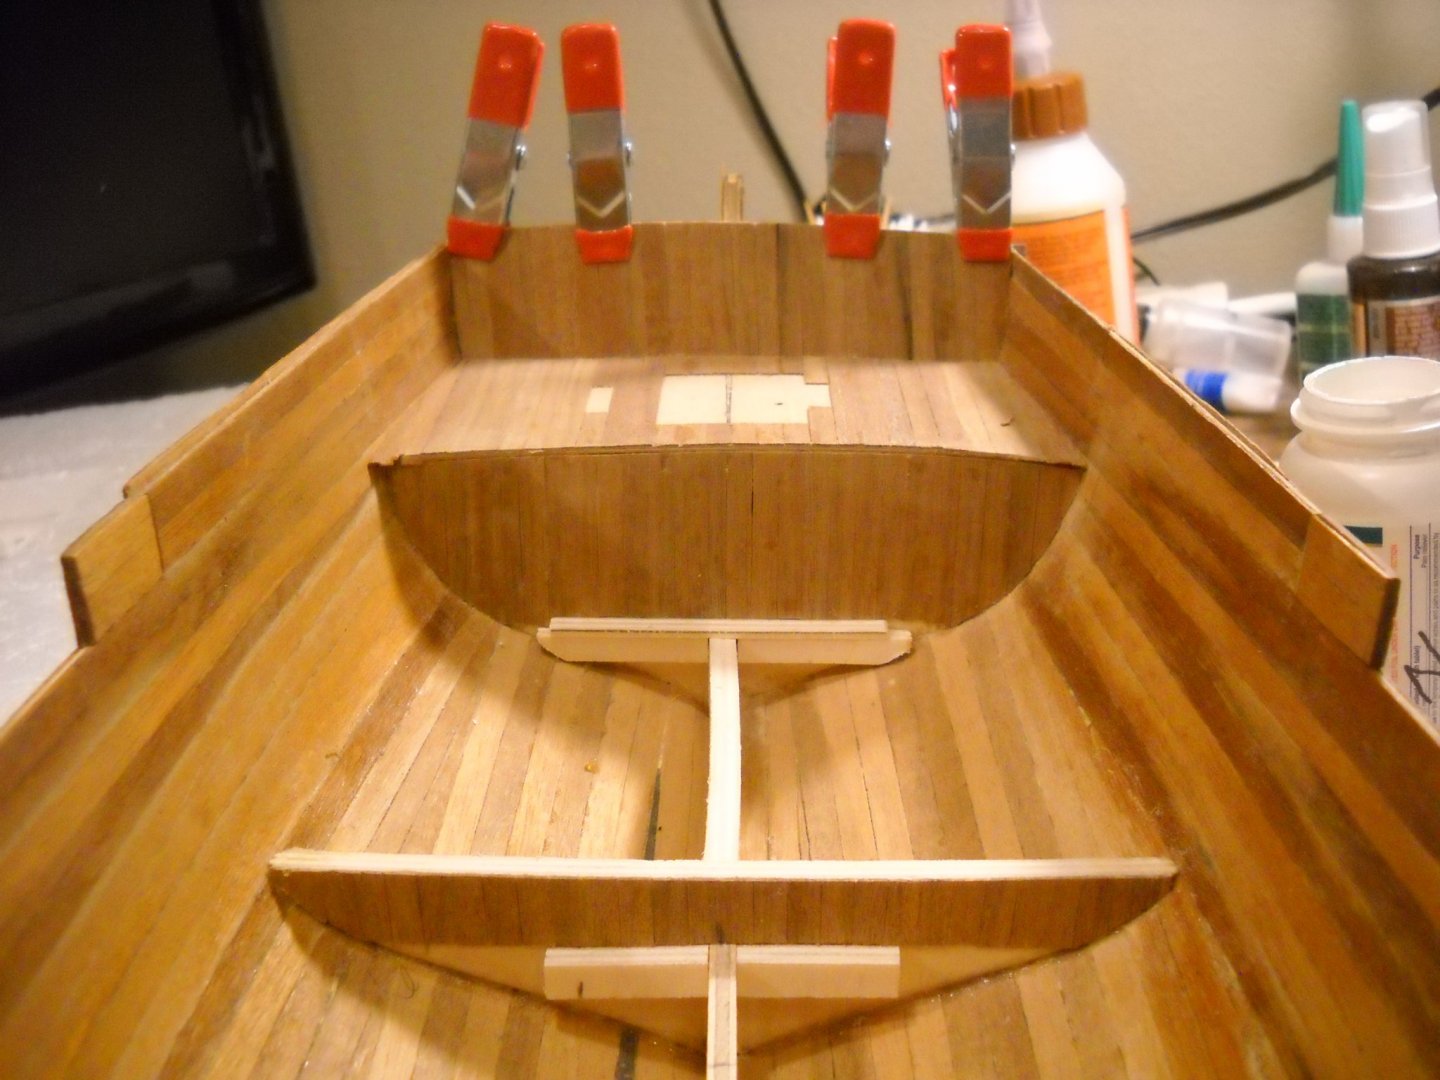
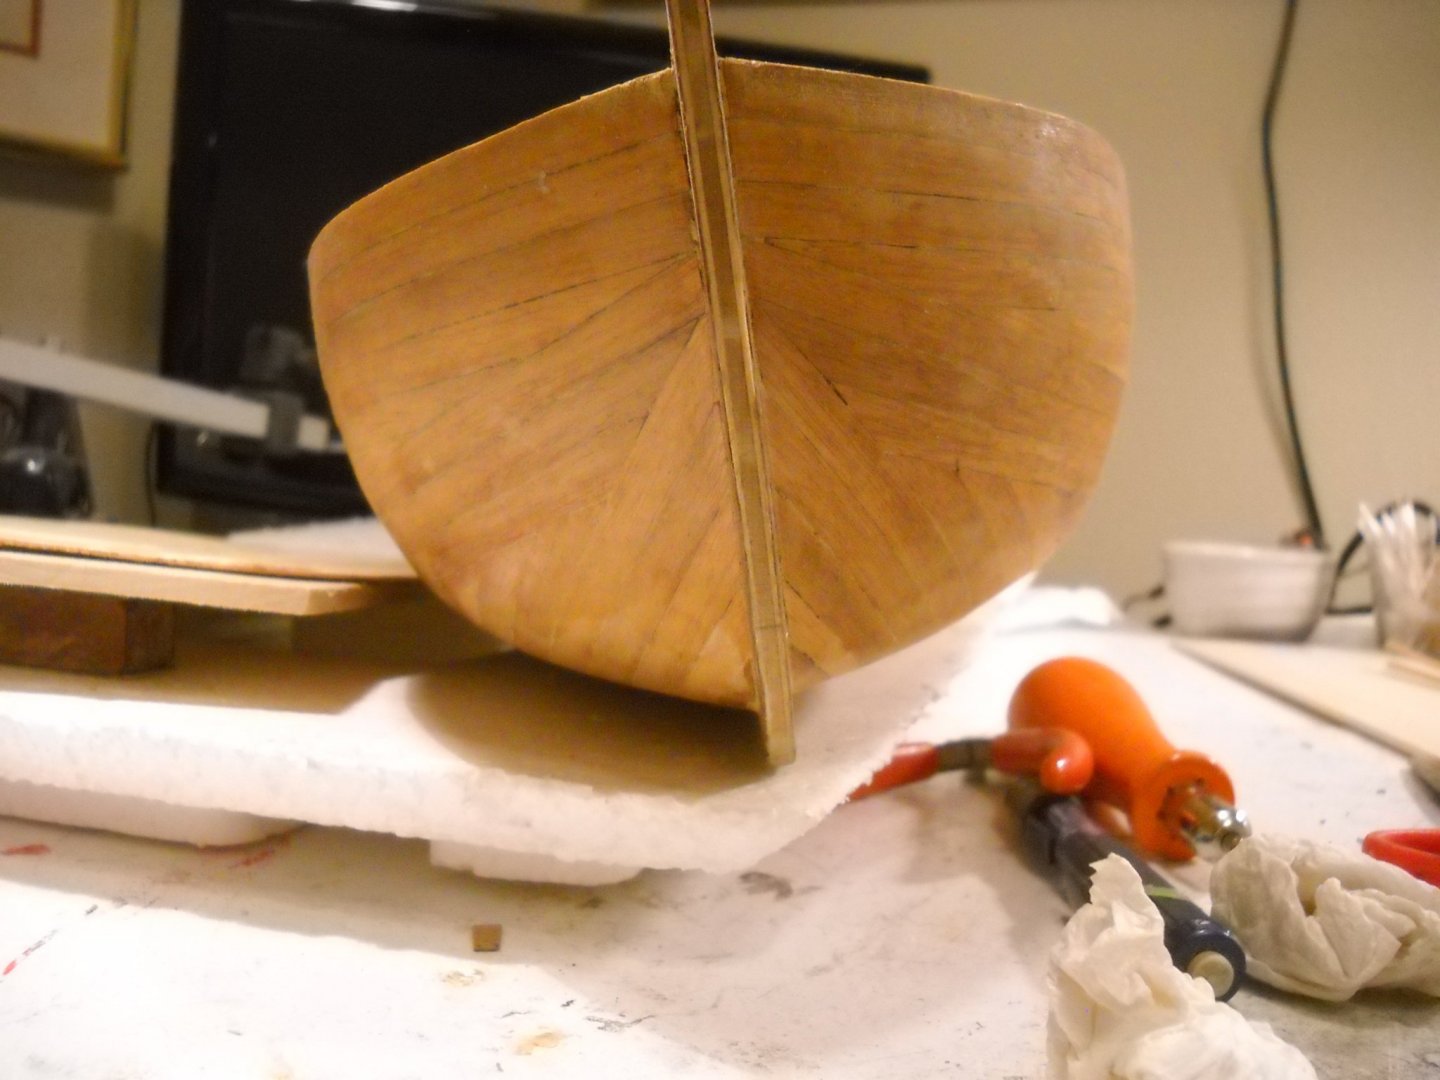
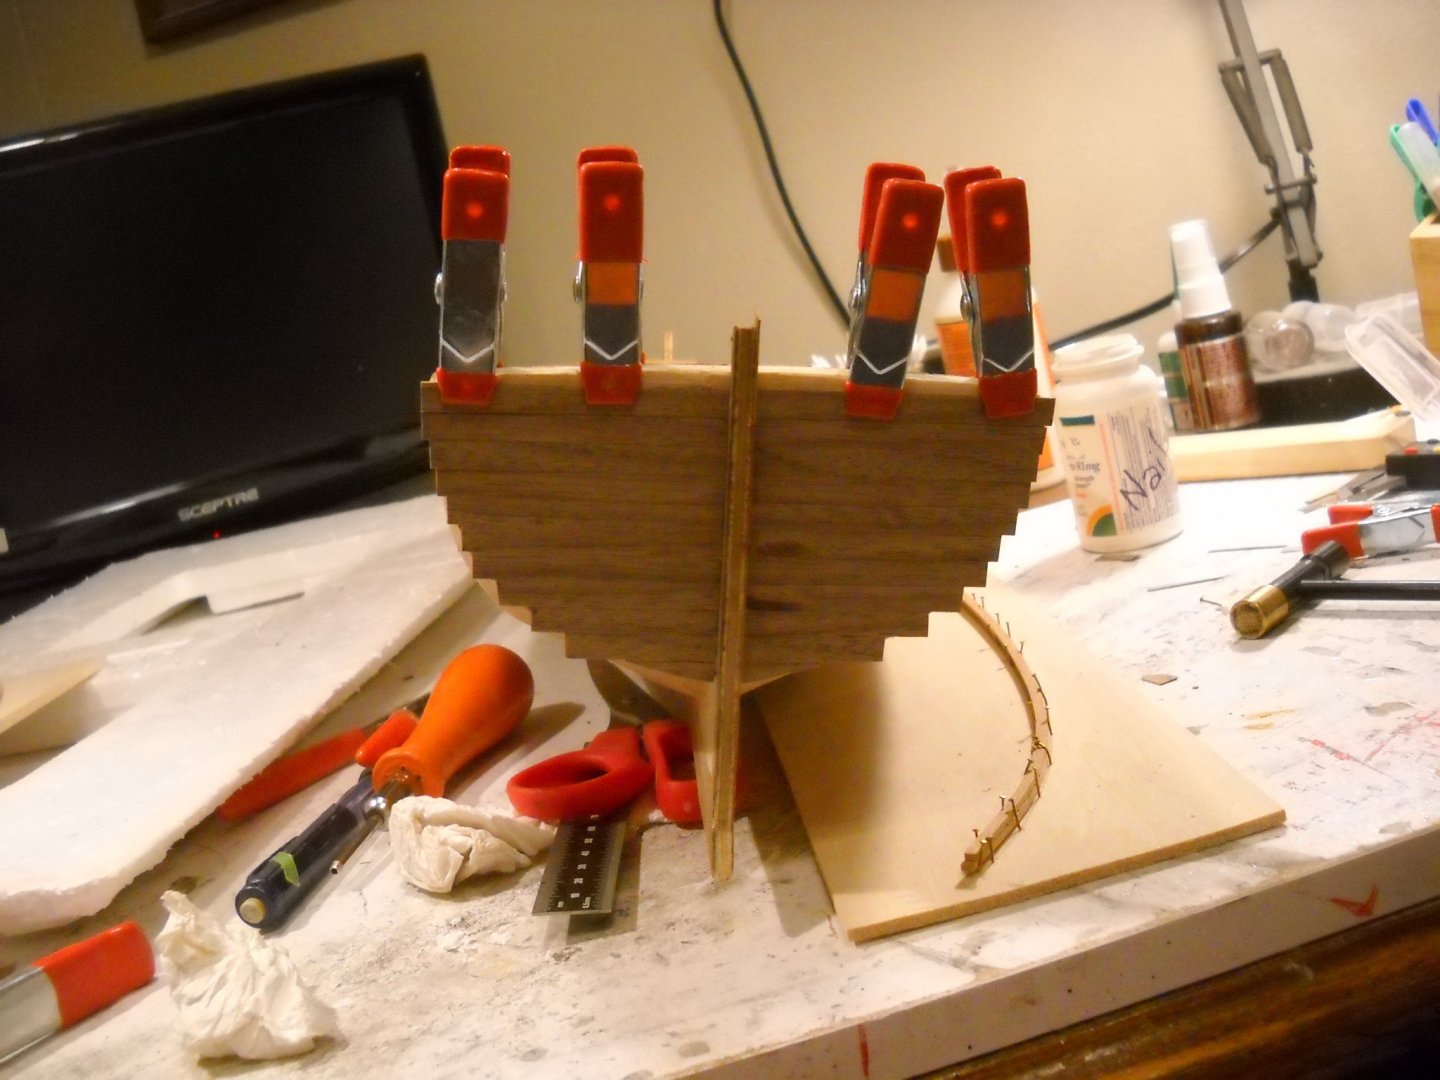
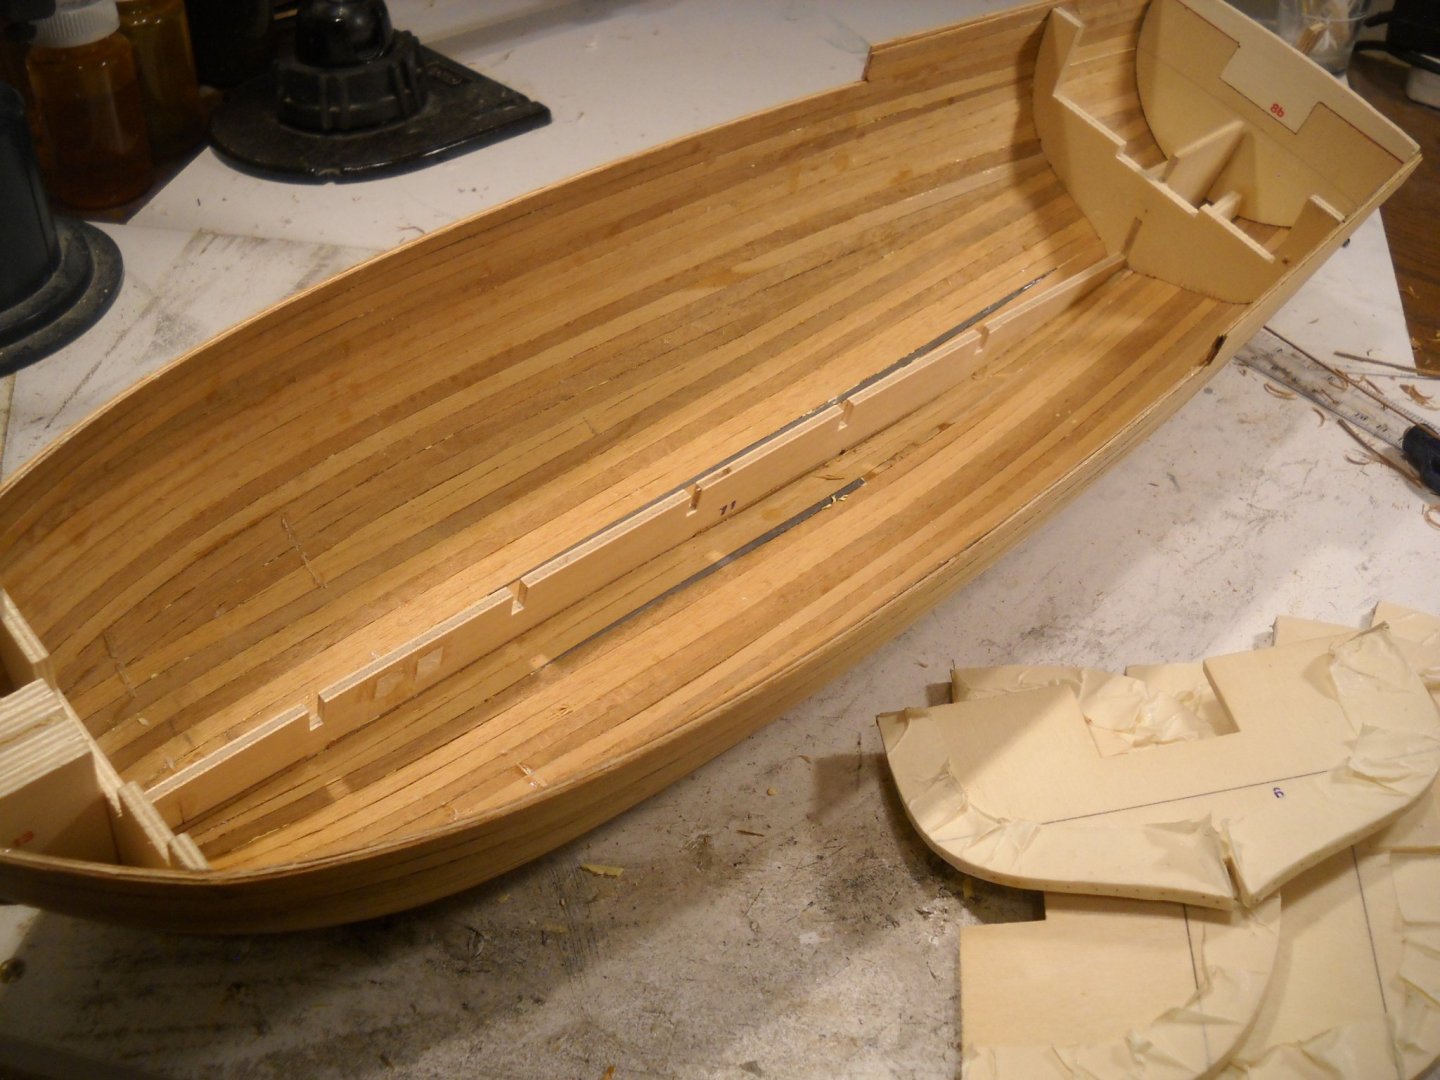
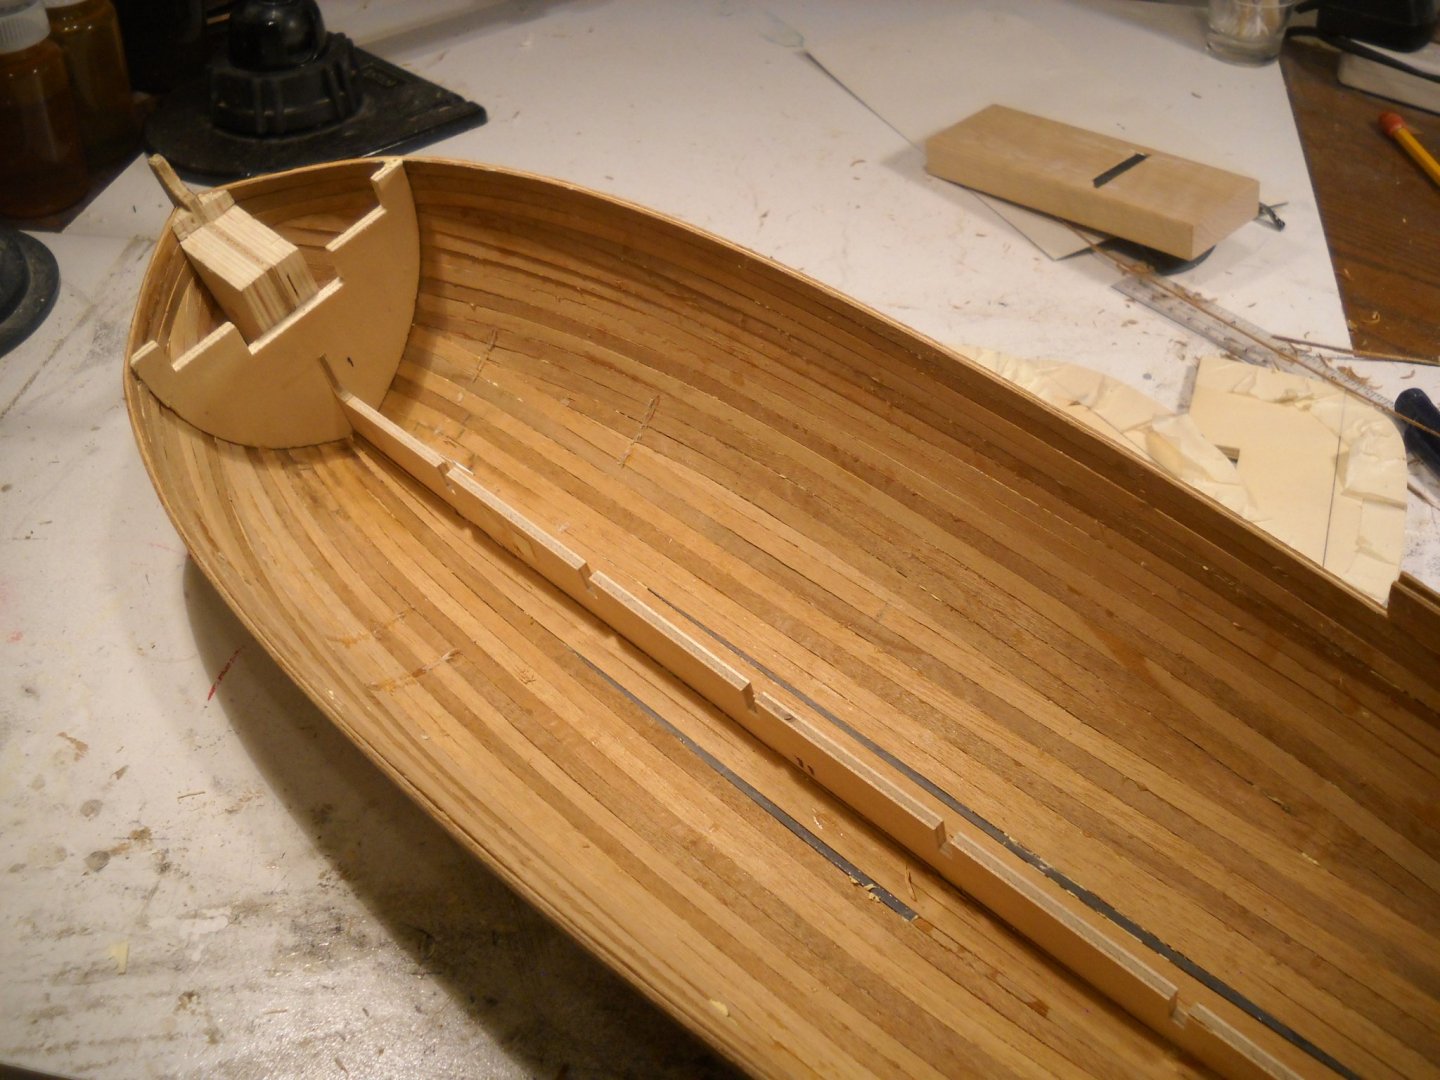
Here is the update that I promised. In this shot I am framing the deck. Lego blocks help keep things square. Adding some more framing. And preparing to build the deck grating and install the deck planking. Here I added some wood to fill in some of the gaps between the deck and hull. This shot only shows one of the spots filled. Putting together some of the deck grating. There wasn't enough but I managed to piece the scrapes to make do. The instructions have you to cut the 10mm X 3mm material in sections to make the cap rail. As other builder of this model I traced the outline of the hull on some basswood sheet and cut it out on my Dremel Scroll saw will I was waiting on some glue to set. I'll coat the basswood with sanding sealer and stain it. If I am not happy with the result I will have to paint it. This is the deck framing, deck grating, deck planking and the two doors the plans call for. Putting the different deck parts together. Here I made a gauge to get the stringers location. Used the same gauge with a piece of the thwart material to check the gun carriage placement. Drilling the ribs and stringers with a 0.6mm drill for the brass nail placement. I had to cut the nails to less than 4mm to prevent them coming through the hull. I used these tweezers that has a locking mechanism because I kept dropping them. I pushed the shortened nails in with some long nosed pliers with a couple of rubber bands rapped around one side to protect the side of the hull. Next is some random shots of where I am in the build. That is it for this week. I'll do another update next friday. Until then don't let the Covid Monster get you. RussR


- 14 replies
-
- 2
-
-
- panart
- armed launch
- (and 2 more)
-
Thanks, I'll have to check them out. RussR
-
That would be great but: my Proxxon has a 10mm arbor. The Byrens adaptor is 0.625" to 1" (15.875mm to 25.4mm). Thanks for the suggestion. RussR
-
I have a Proxxon FKS/E saw (with 10mm arbor) with several carbide tipped blades like the third one pictured. The problem with these blades is if you are cutting 1.5mm planks, over half of your material is going to end up in your vacuum cleaner. What blade does everyone recommend for cutting planks? RussR
-
How to narrow planks?
RussR replied to Brewerpaul's topic in Building, Framing, Planking and plating a ships hull and deck
What has already been said. Plus you can clamp a straight edge down on top of the plank so it won't move. Then cut along the edge. RussR -
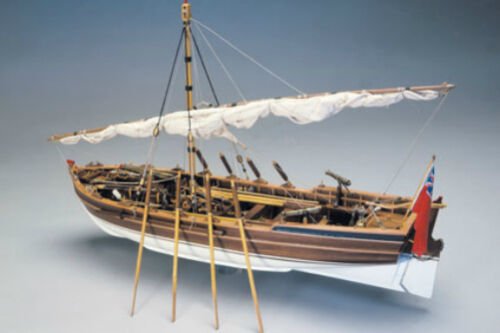
I have looked online for a historical reference for this boat and I have found nothing. Is there a publication, a link or anything? RussR My plan is to provide an update to my log every Friday until complete.
-
I have something similar and never use it. Because of space limitation I thing you would be better off getting something like this https://www.amazon.com/Proxxon-37006-115-Bench-Circular/dp/B0017TO806 . Living in the UK you may need the KS 230. One operates on 115volts and the other on 230volts. But if you don't have space for a Byrnes or a Proxxon FET the KS 115 is a good choice. I have a Proxxon FKS/E and a Proxxon KS 115 and I still use the KS 115 because it is so handy. The Proxxon FKS/E takes up more room. RussR
-
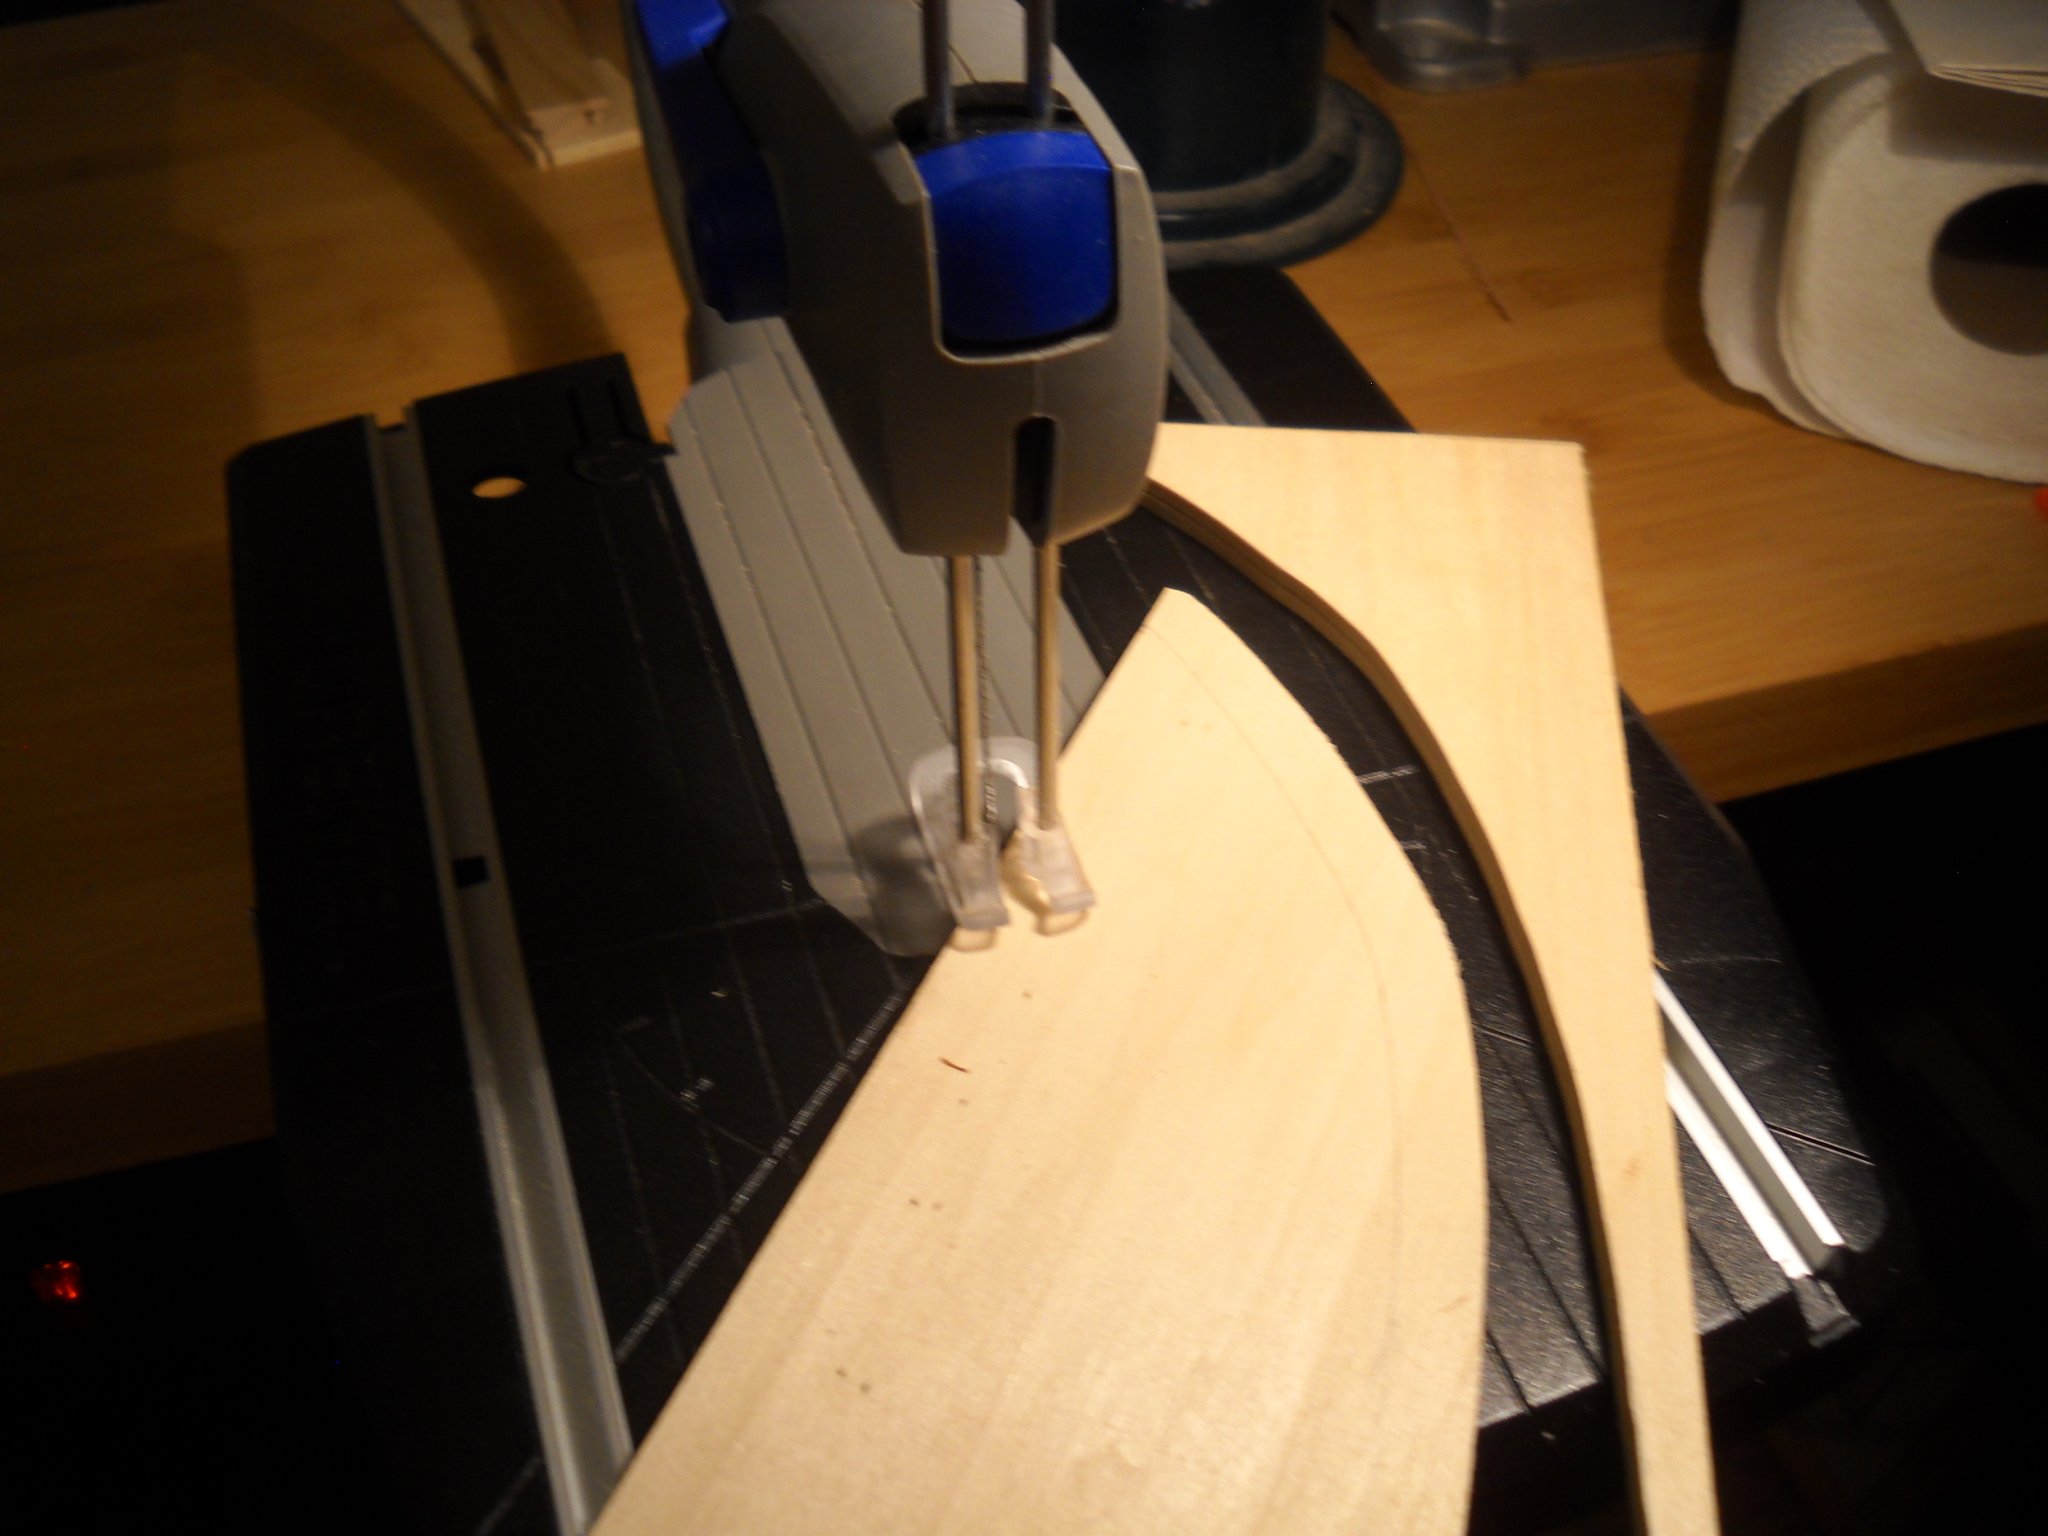
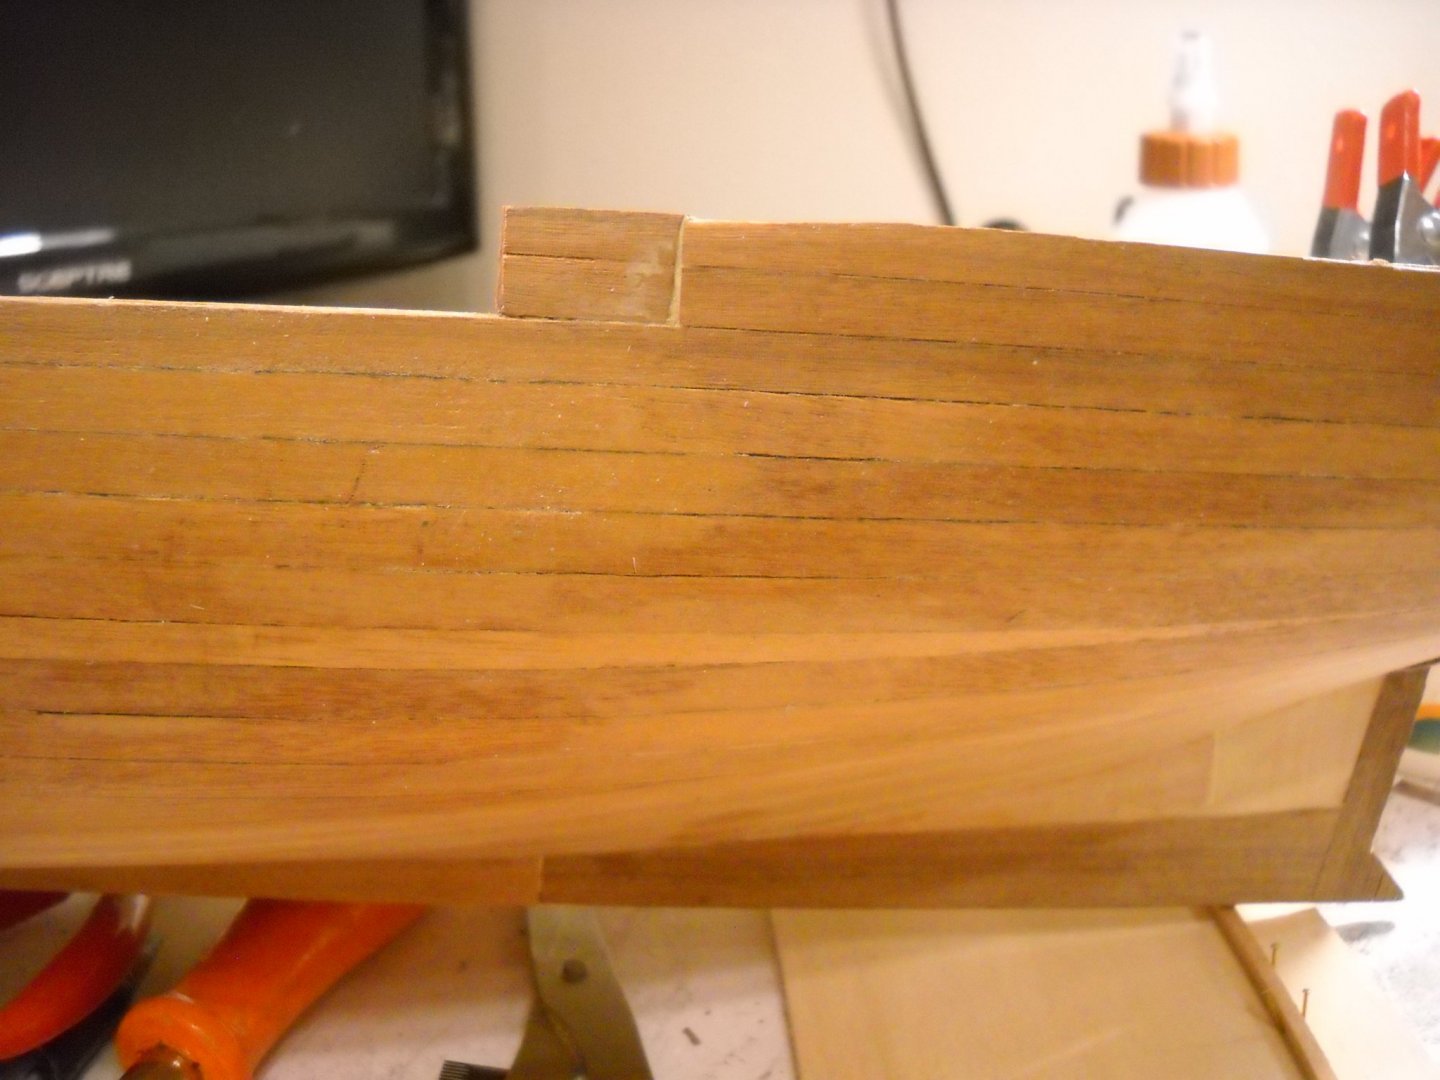
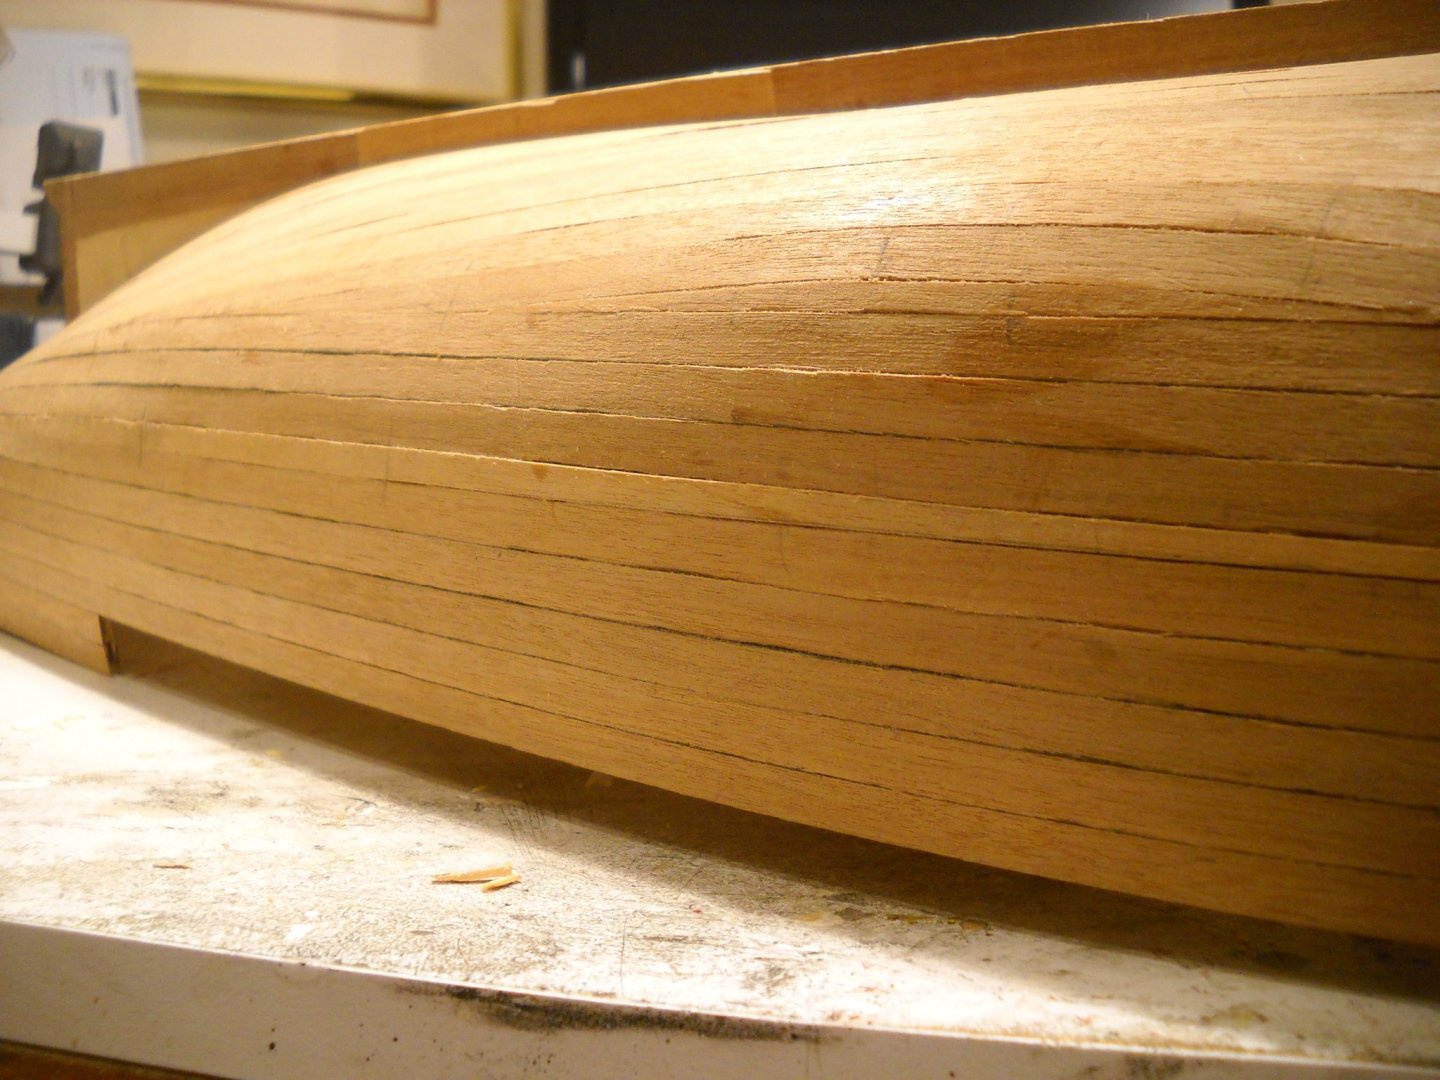
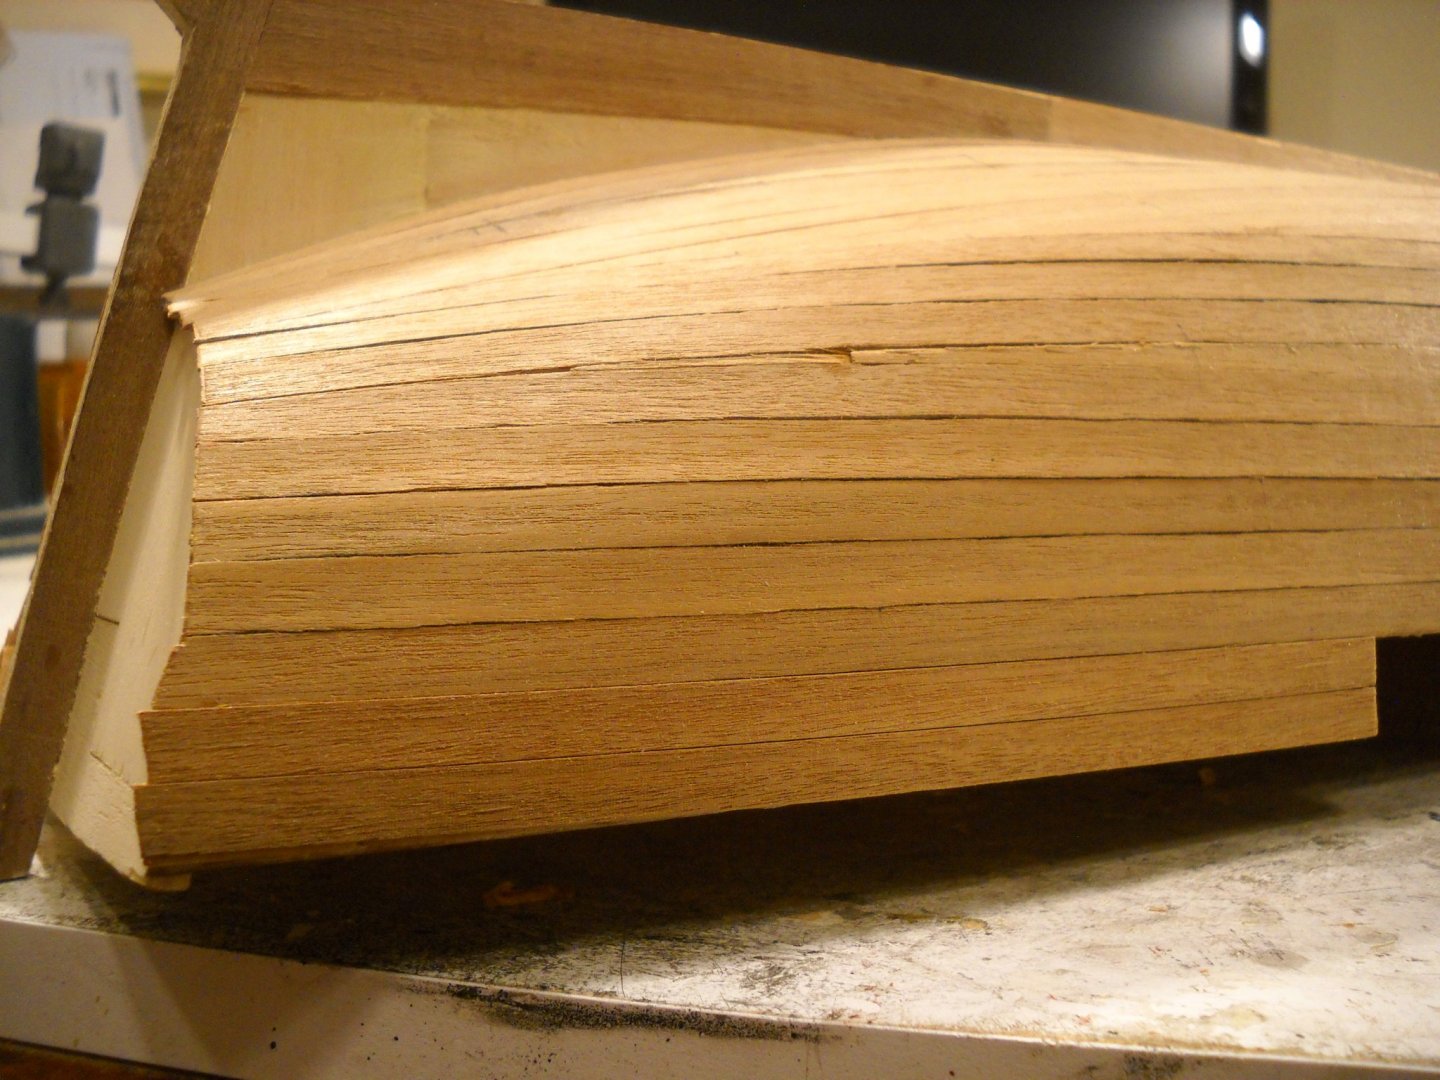
My plan is to attempt to duplicate the paint scheme on the box. I have put a couple of coats of Minwax Prestain and a couple of coats of Natural Wood Stain and a coat of Wipe On Polly on the exposed wood to view. To my dismay I find that the instructions doesn't spell out where part of the planking extends. (see photo) I think I can cover this with the painted strip and a rib on the inside. I could have just replace the 12 planks (the hull is triple planked). I may still do that. Also I had to improvise to make the 5mm X 0.5mm planking cover the after deck. Bow shot after staining. I had to cut some 0.5mm walnut planking with my newly bought Proxxon Saw. (I need more practice cutting planks) But I got enough cut to do the job. With a little sanding I think it will be alright. This is some 2mm X 3mm walnut that had to be bent for part of the deck. I drew the shape that I need on some wood and nailed on the edges then soaked the wood in water. Then I used a 25watt sodering iron via lamp dimmer to control the temp. If you don't control the temp. you will scorch the wood. That's it for this time. RussR

- 14 replies
-
- 3
-
-
- panart
- armed launch
- (and 2 more)
-
Bring it on. I am sure most of us would like to see it. Any subject nautical is welcome here. RussR
-
Proxxon DB250 mini wood lathe has arrived...
RussR replied to Jorge Hedges's topic in Modeling tools and Workshop Equipment
I just recently bought a Proxxon DB250 and can see the issue with the short tool rest. Nor do I see a simple fix. But for the price I think I can work around it. I could probably solve this problem by buying a Sherline for over a $1000.00 dollars. I'll keep cost benefit in mind. Enjoy your new lathe, I am sure I will enjoy mine. RussR -
Richard, I have looked at your build. It is very nice. I think yours and two others has completed this model on MSW that I have drawn inspiration from. RussR
-
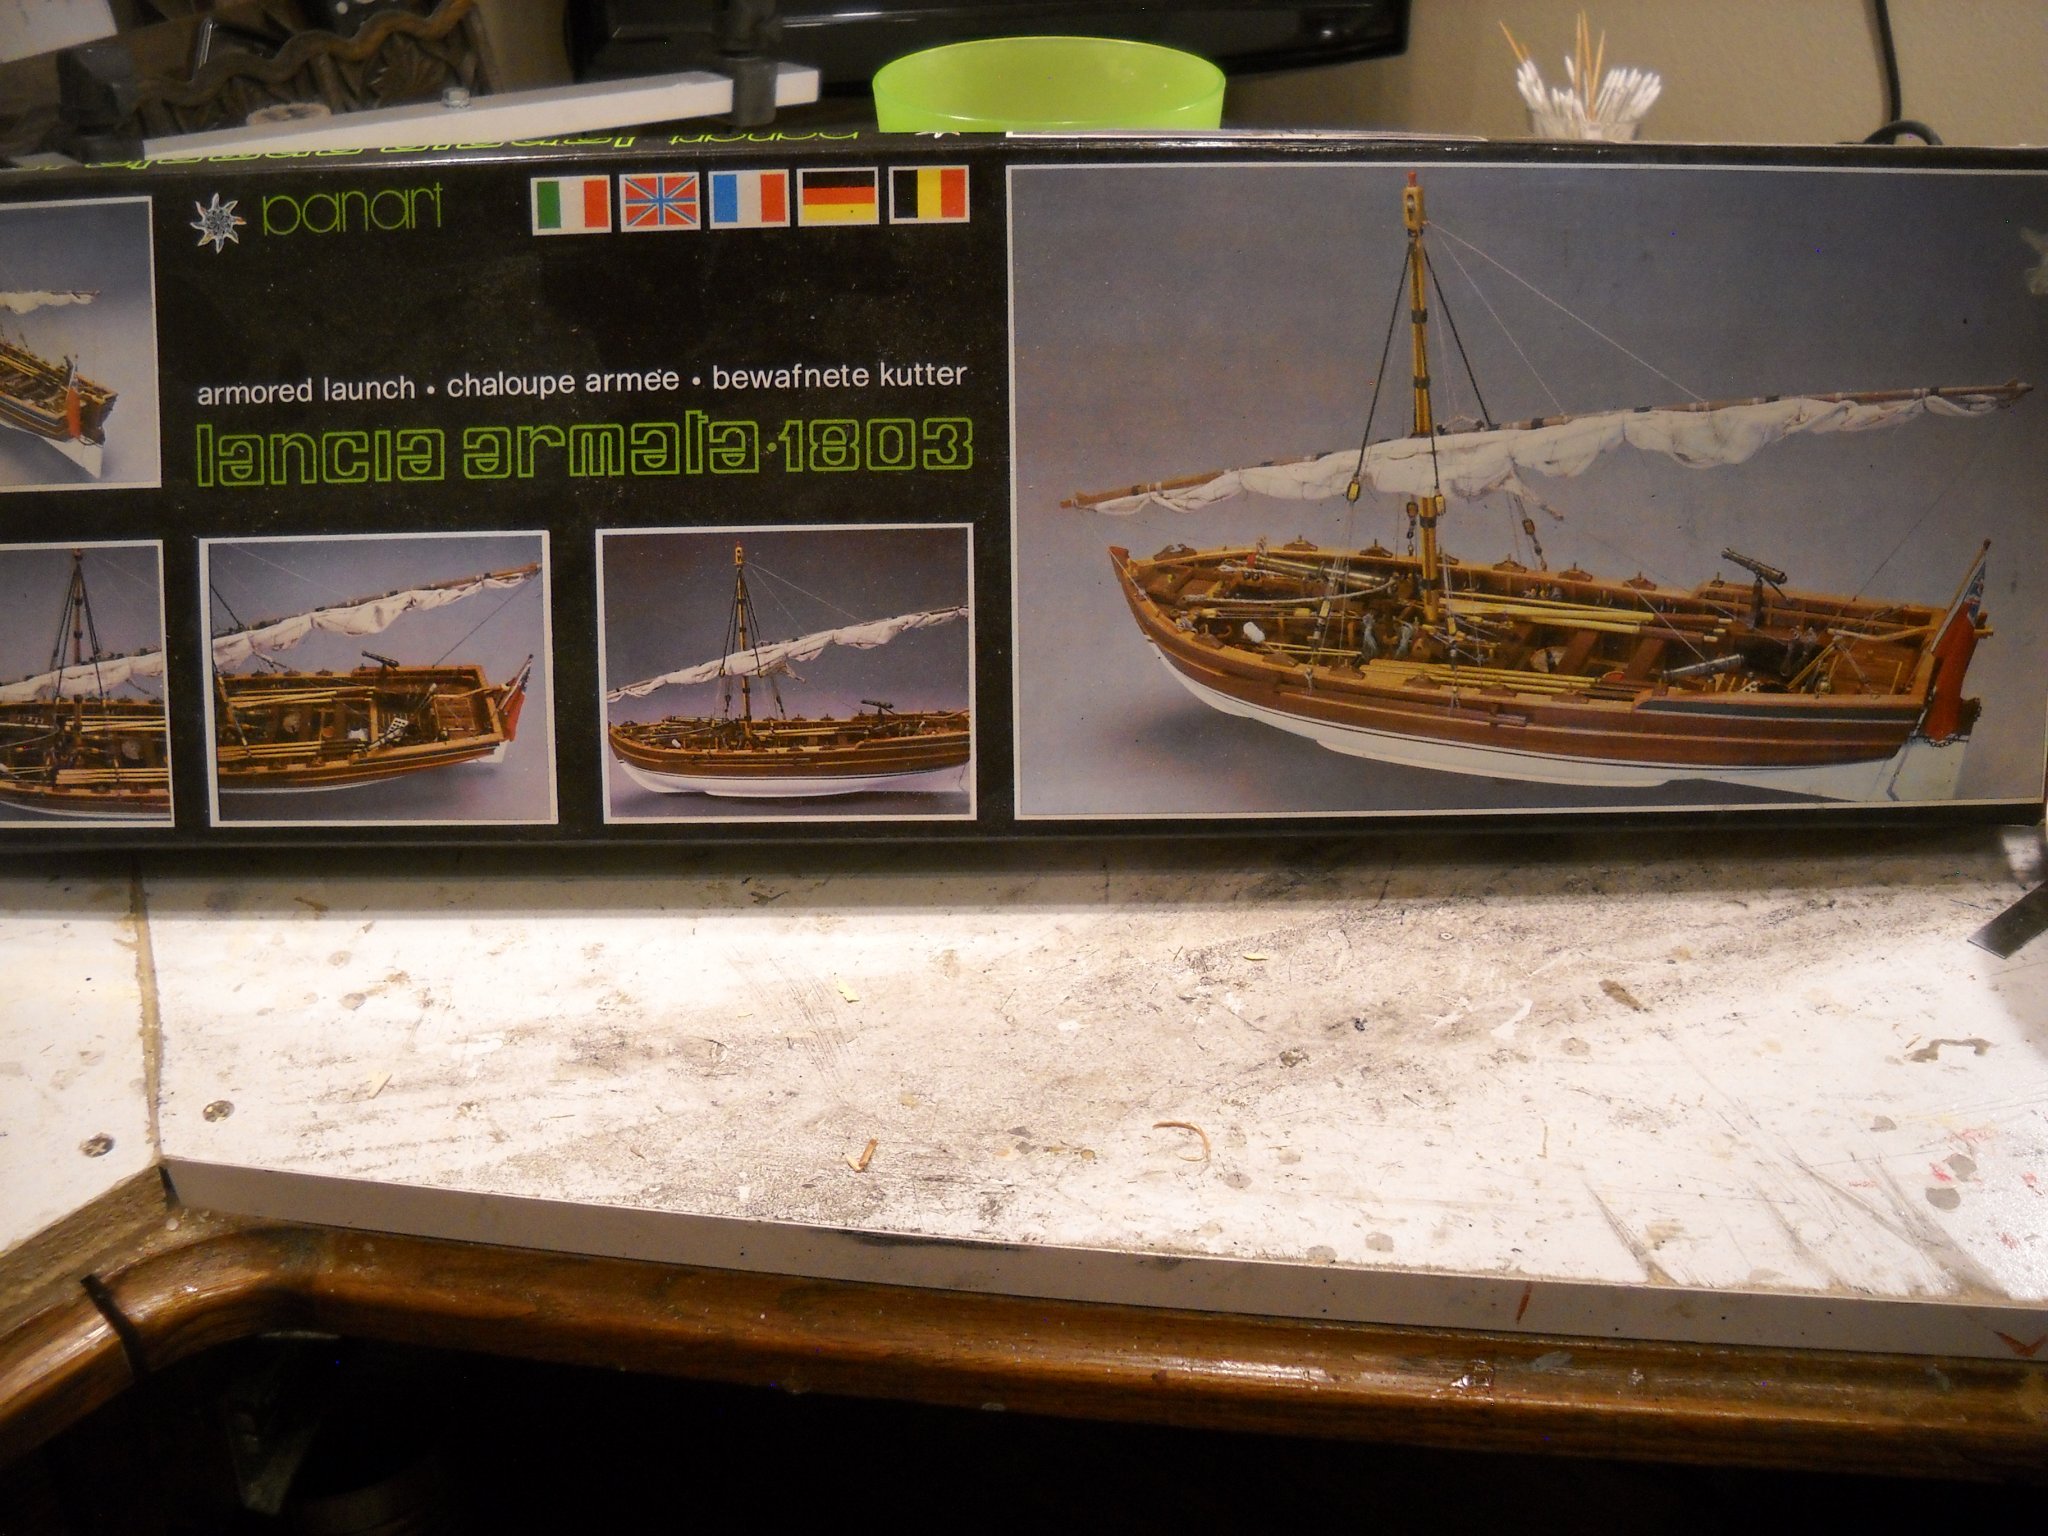
I bought this new on Ebay a couple of weeks ago for a very good price. This is my 5th model. 1. Model Expo 18 Century Long Boat, 2. AL 1805 Swift Boat (that I completely screwed up), 3. AL Hermione, 4. Model Expo Chaperon. It is always disappointing to see a new log that gets abandoned. I hope this doesn't happen here. Since I have finished five models before, I don't think this will happen. Also, I would like to keep the log clean meaning not a lot of "back patting". I don't need the gratification. A simple "Like" is good enough. If you have helpful suggestions or constructive criticism, I want to hear it. Box that it came in. I finished the final layer of planks and I lay bare my planking sins at the altar of Model Ship World. ☺️ Before sanding and filling. I would've liked to not have to paint it but I fear that I got sloppy with the CA. I can get a little bit of CA on my fingers and the next thing I know it is on the bare wood.☹️ That's it for now. RussR


- 14 replies
-
- 8
-
-
- panart
- armed launch
- (and 2 more)
-
If you ask a dozen people you will get a dozen different opinions. Build what interest you. If you live in the US you can't go wrong with one of the lower priced Model Expo Models. Because if you screw up a part or lose something it is easy to get replacements. Ask me how I know (I've done it). RussR
-
Some lucky buyer got a hell of a deal. The shipping alone would cost at least half of the sale price of $29.95.
- 1 reply
-
- 1
-
-
I just had an offer from a seller on eBay for a new Model Shipways Schooner Sultana for $29.95 including shipping. I am reasonably sure if you contacted the seller you could get the same deal. I would buy it if I didn't have more that I could build in my life time. Link: https://www.ebay.com/itm/Model-Shipways-1-64-1767-Colonial-Schooner-SULTANA-Wooden-Model-Ship-Kit-1988/124223232064?ssPageName=STRK%3AMEBIDX%3AIT&_trksid=p2060353.m1438.l2649 RussR
- 1 reply
-
- 2
-
-
As Kurt said in a post above. All I did was glue the decks together with pva and after it dried I filled it with Minwax filler. Then etch the lines back with a scribe and a straight edge. I figured that after I got the rest of the structure in, one wouldn't be able to see any flaws if any (which there wasn't). Also I didn't spend a lot of time on stuff that wasn't very visible like the boiler and pilot house interior. RussR Brian, outstanding build by the way. 👍
- 23 replies
-
- 3
-
-
- model shipways
- chaperon
- (and 1 more)
-
Ship Kit Database
RussR replied to vmwilson1's topic in Using the MSW forum - **NO MODELING CONTENT IN THIS SUB-FORUM**
On the right above USA Air Brush Supply and below Sherline Products. There is a link that says "Ship Kit DataBase". I am using Google Chrome and the link just runs and never opens. I am good with it. Kevin sent me a link that provided me with what I was looking for. Kevin also sent me this link to the original MSW thread. It doesn't look like it is available anymore. RussR
-
Ship Kit Database
RussR replied to vmwilson1's topic in Using the MSW forum - **NO MODELING CONTENT IN THIS SUB-FORUM**
I am using Google Chrome. The Database link on the right side of the Homepage is dead. The link that Kevin found for me on the net works fine. Just use this link instead. https://suburbanshipmodeler.com/model-ship-kit-database/ All is good now. -
Ship Kit Database
RussR replied to vmwilson1's topic in Using the MSW forum - **NO MODELING CONTENT IN THIS SUB-FORUM**
Thanks for your effort. The link that you provided is a help. https://suburbanshipmodeler.com/model-ship-kit-database/ -
Ship Kit Database
RussR replied to vmwilson1's topic in Using the MSW forum - **NO MODELING CONTENT IN THIS SUB-FORUM**
I have found the log listings but at one time there was a database for kit manufactures that had the scale, period, length height width and so forth. I guess it is gone now. It is the link on the right side of the homepage. And I haven't found it in the "Articles Database" as Mark suggest. If it is gone it's gone. But that was as handy as a "shirt on a pocket". 😀 -
Ship Kit Database
RussR replied to vmwilson1's topic in Using the MSW forum - **NO MODELING CONTENT IN THIS SUB-FORUM**
Does anyone know if the Ship Kit Database will be back, or is it gone for good. I haven't been able to find it in the "Articles Database"? And the link on the right side of the homepage appears to be a dead link. RussR