RussR
-
Posts
232 -
Joined
-
Last visited
Content Type
Profiles
Forums
Gallery
Events
Everything posted by RussR
-
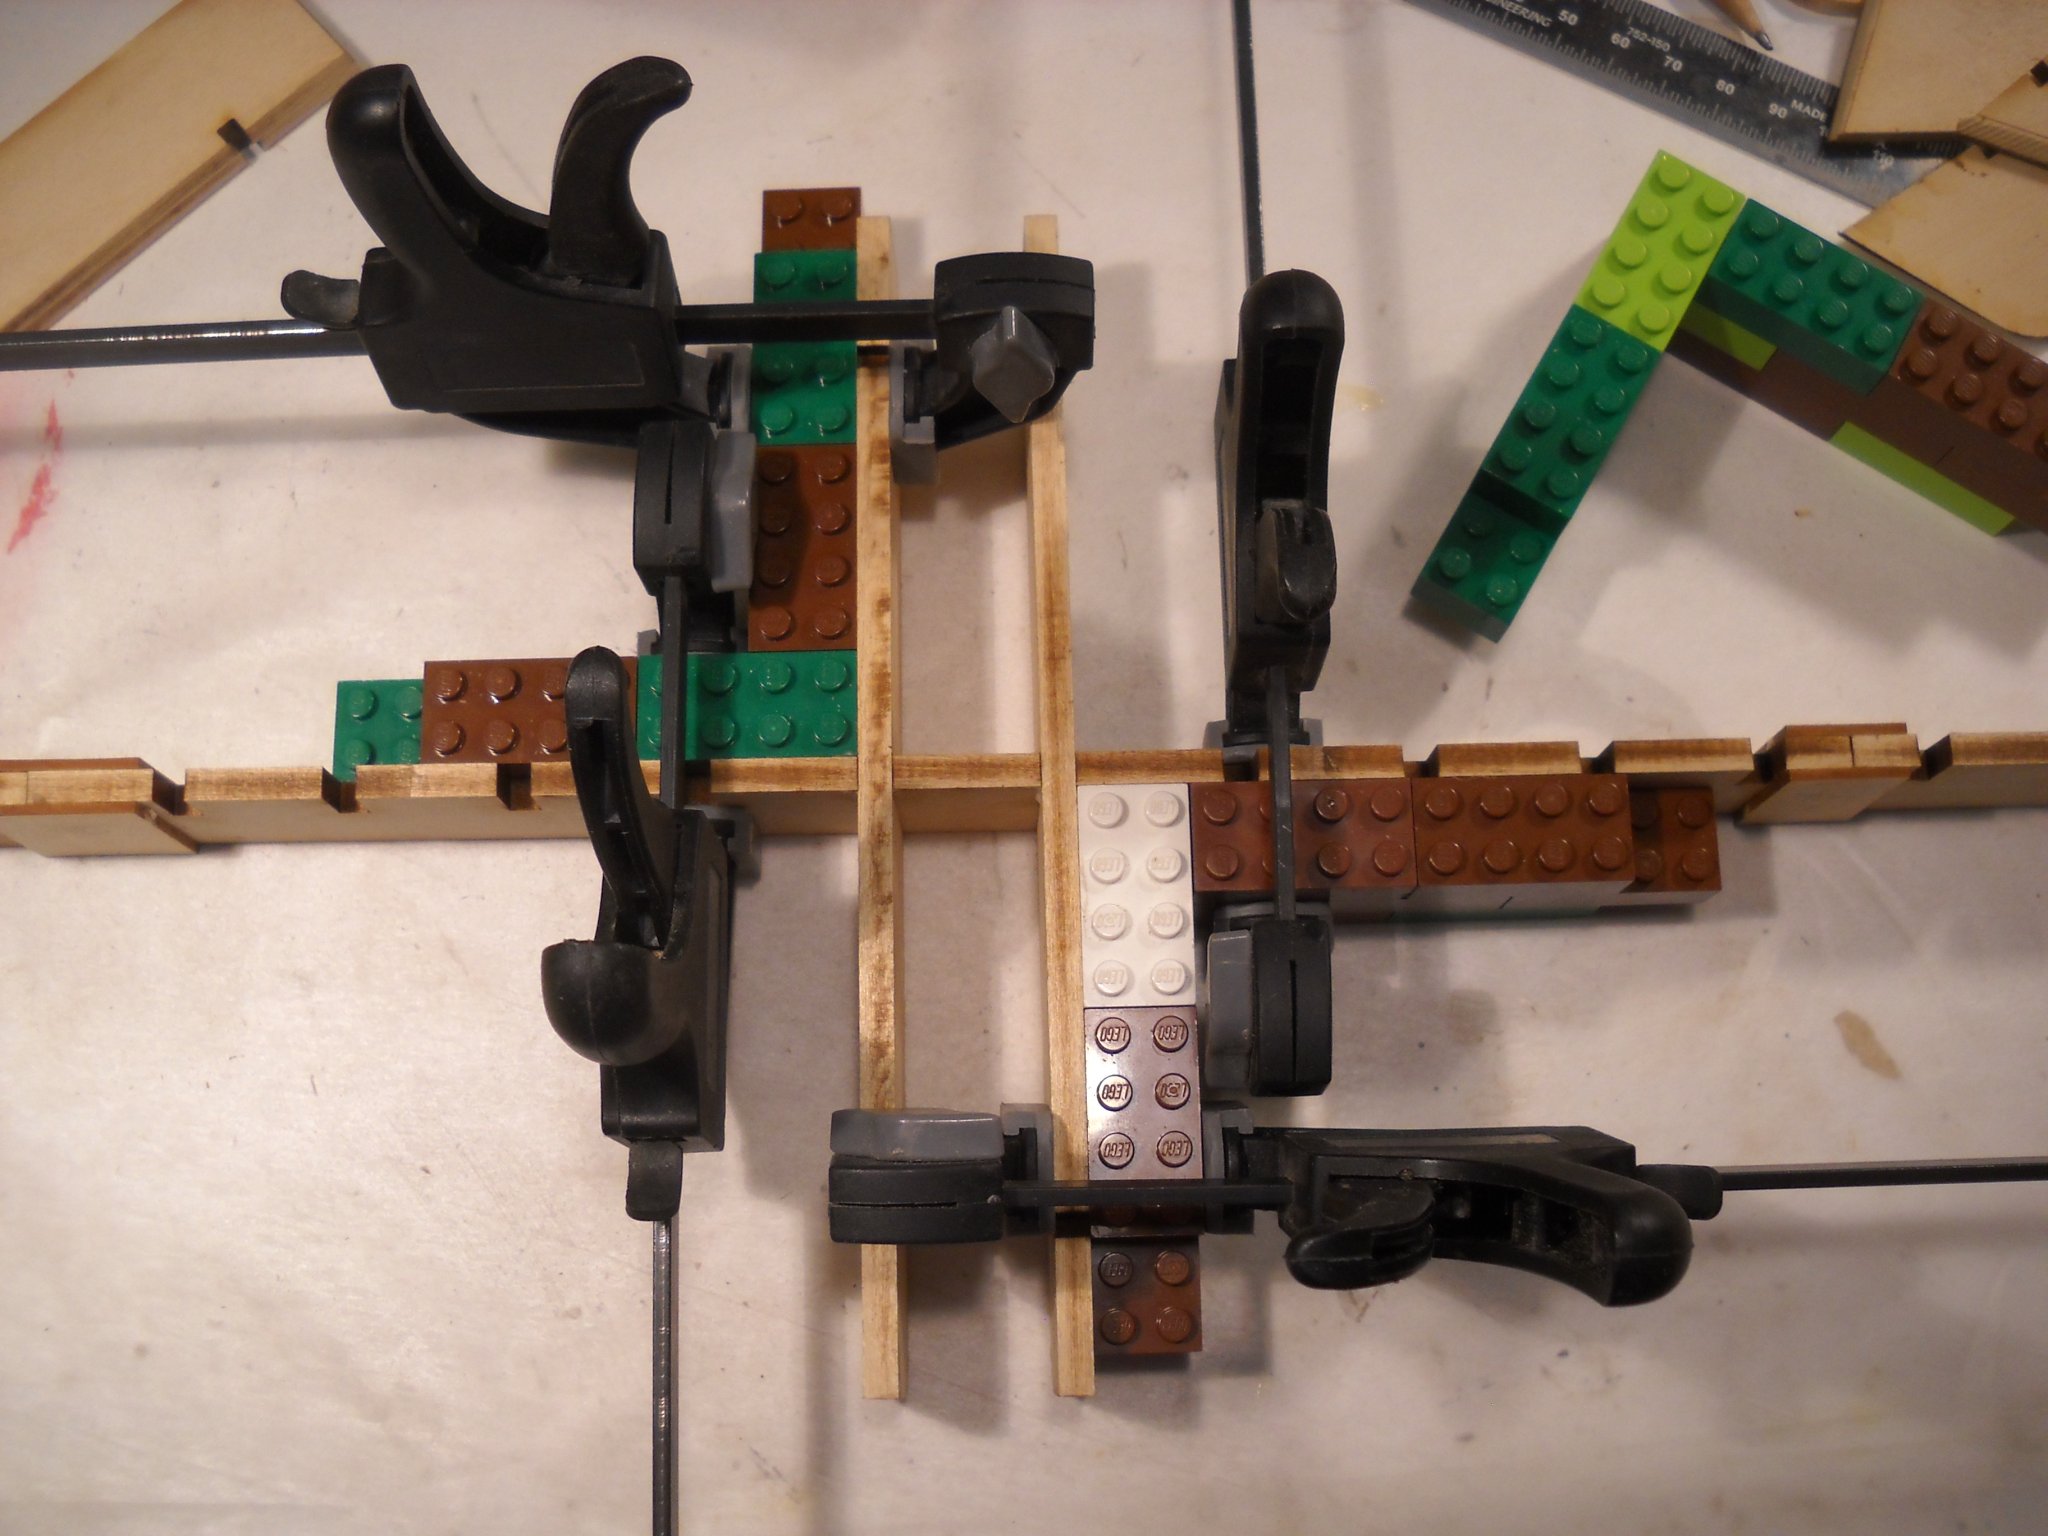
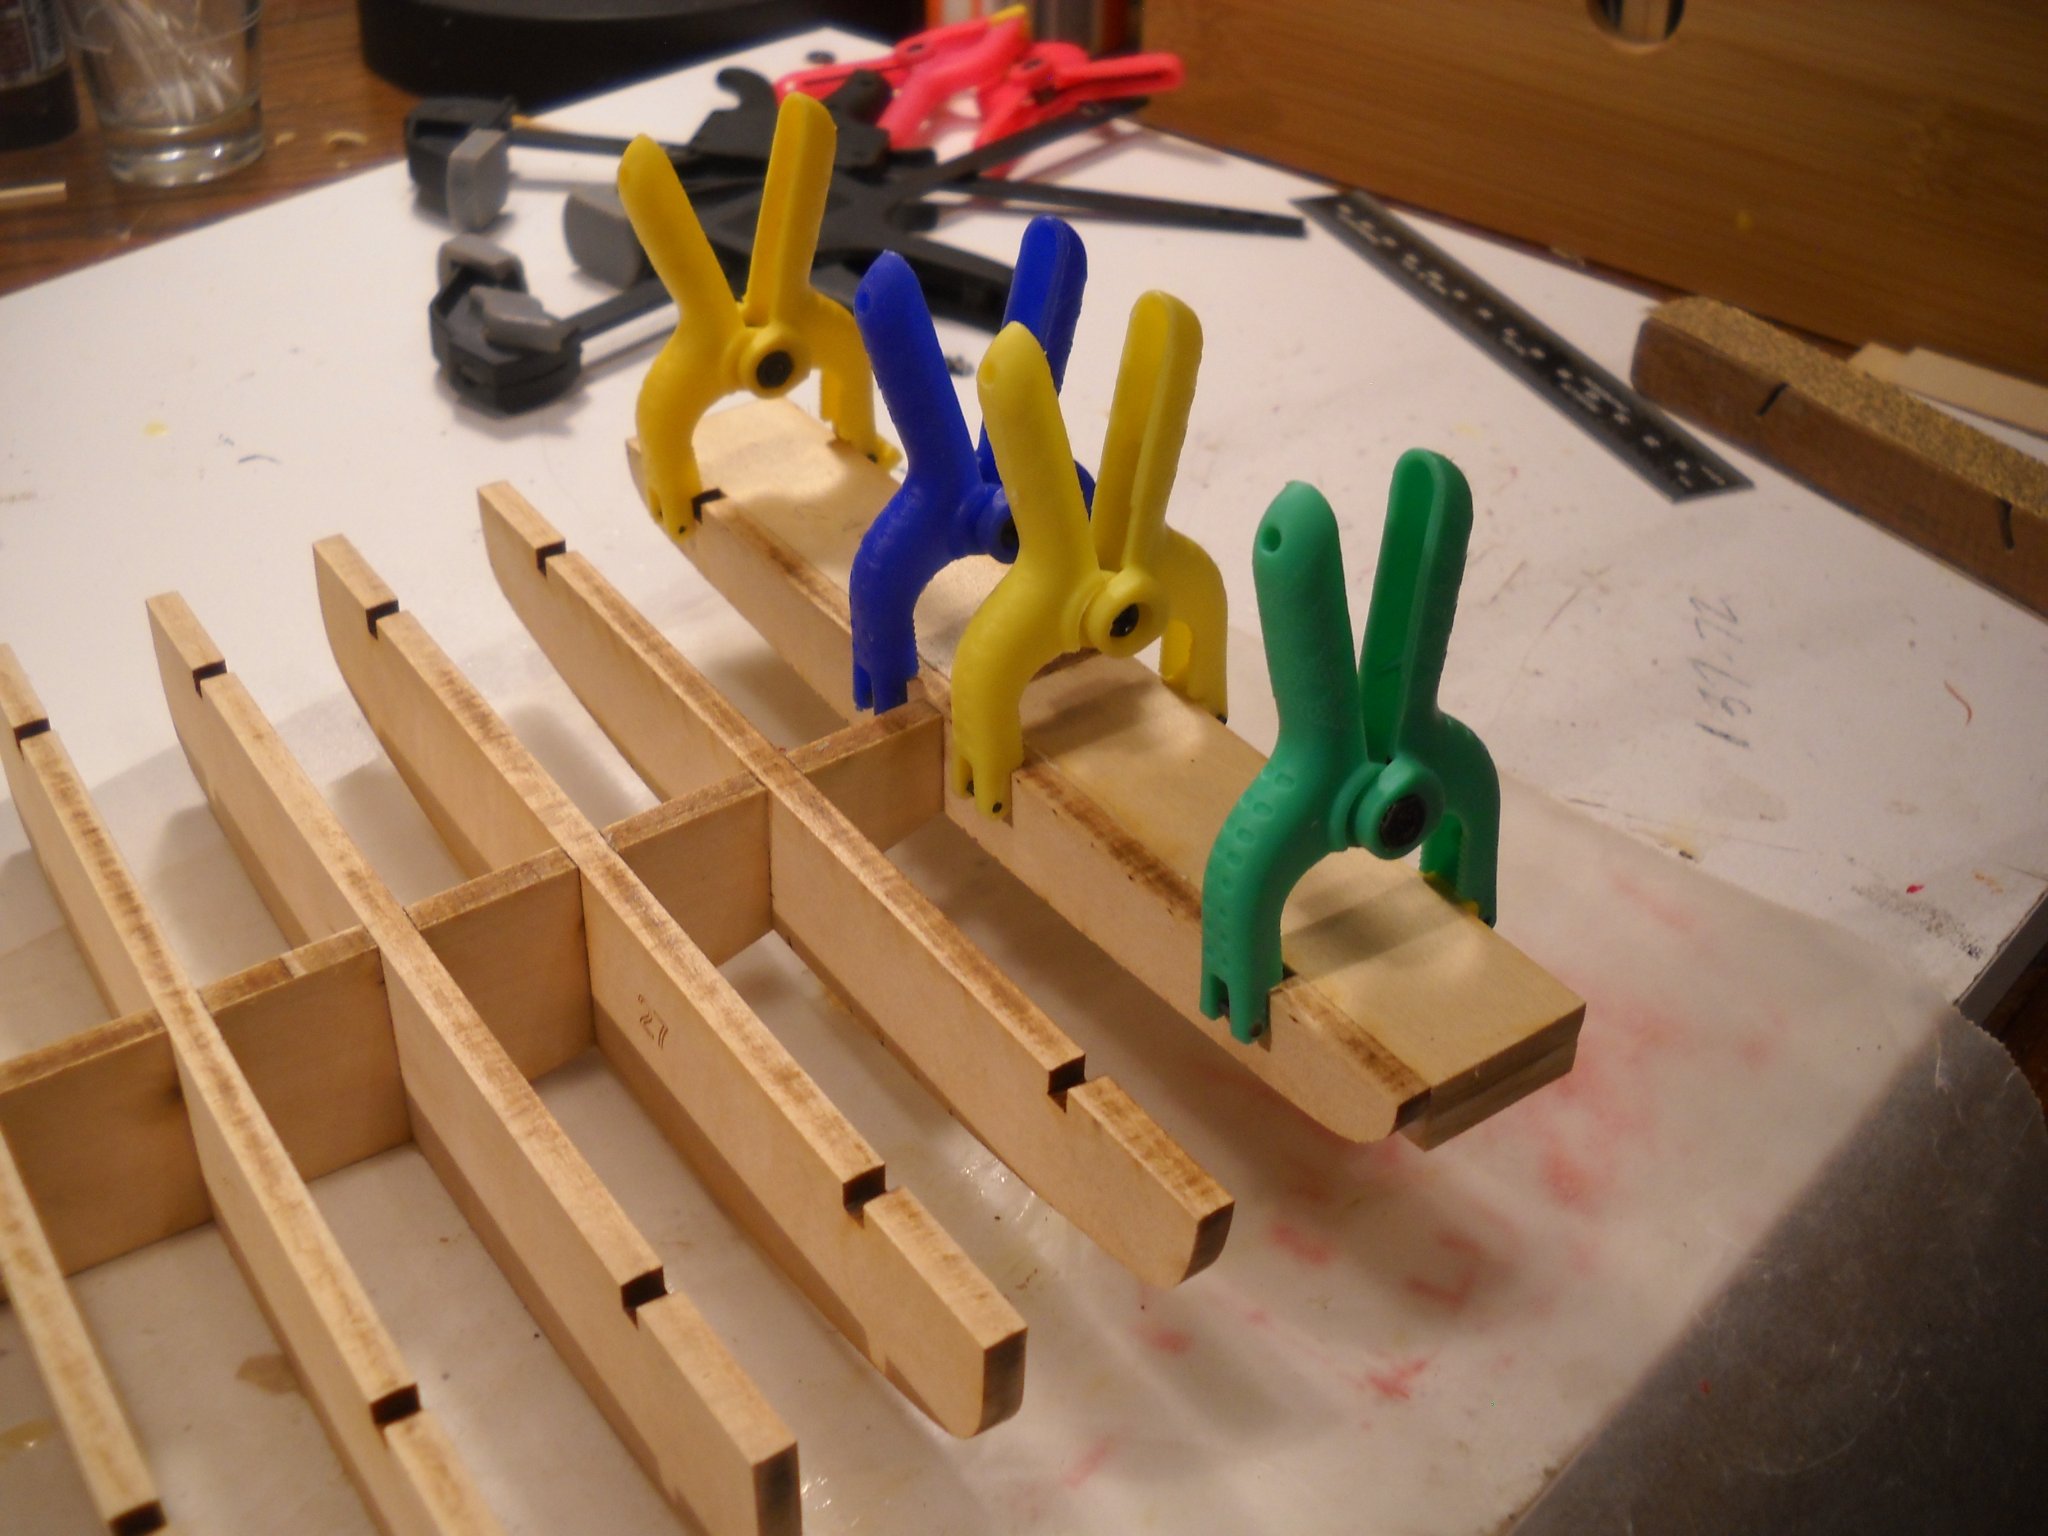
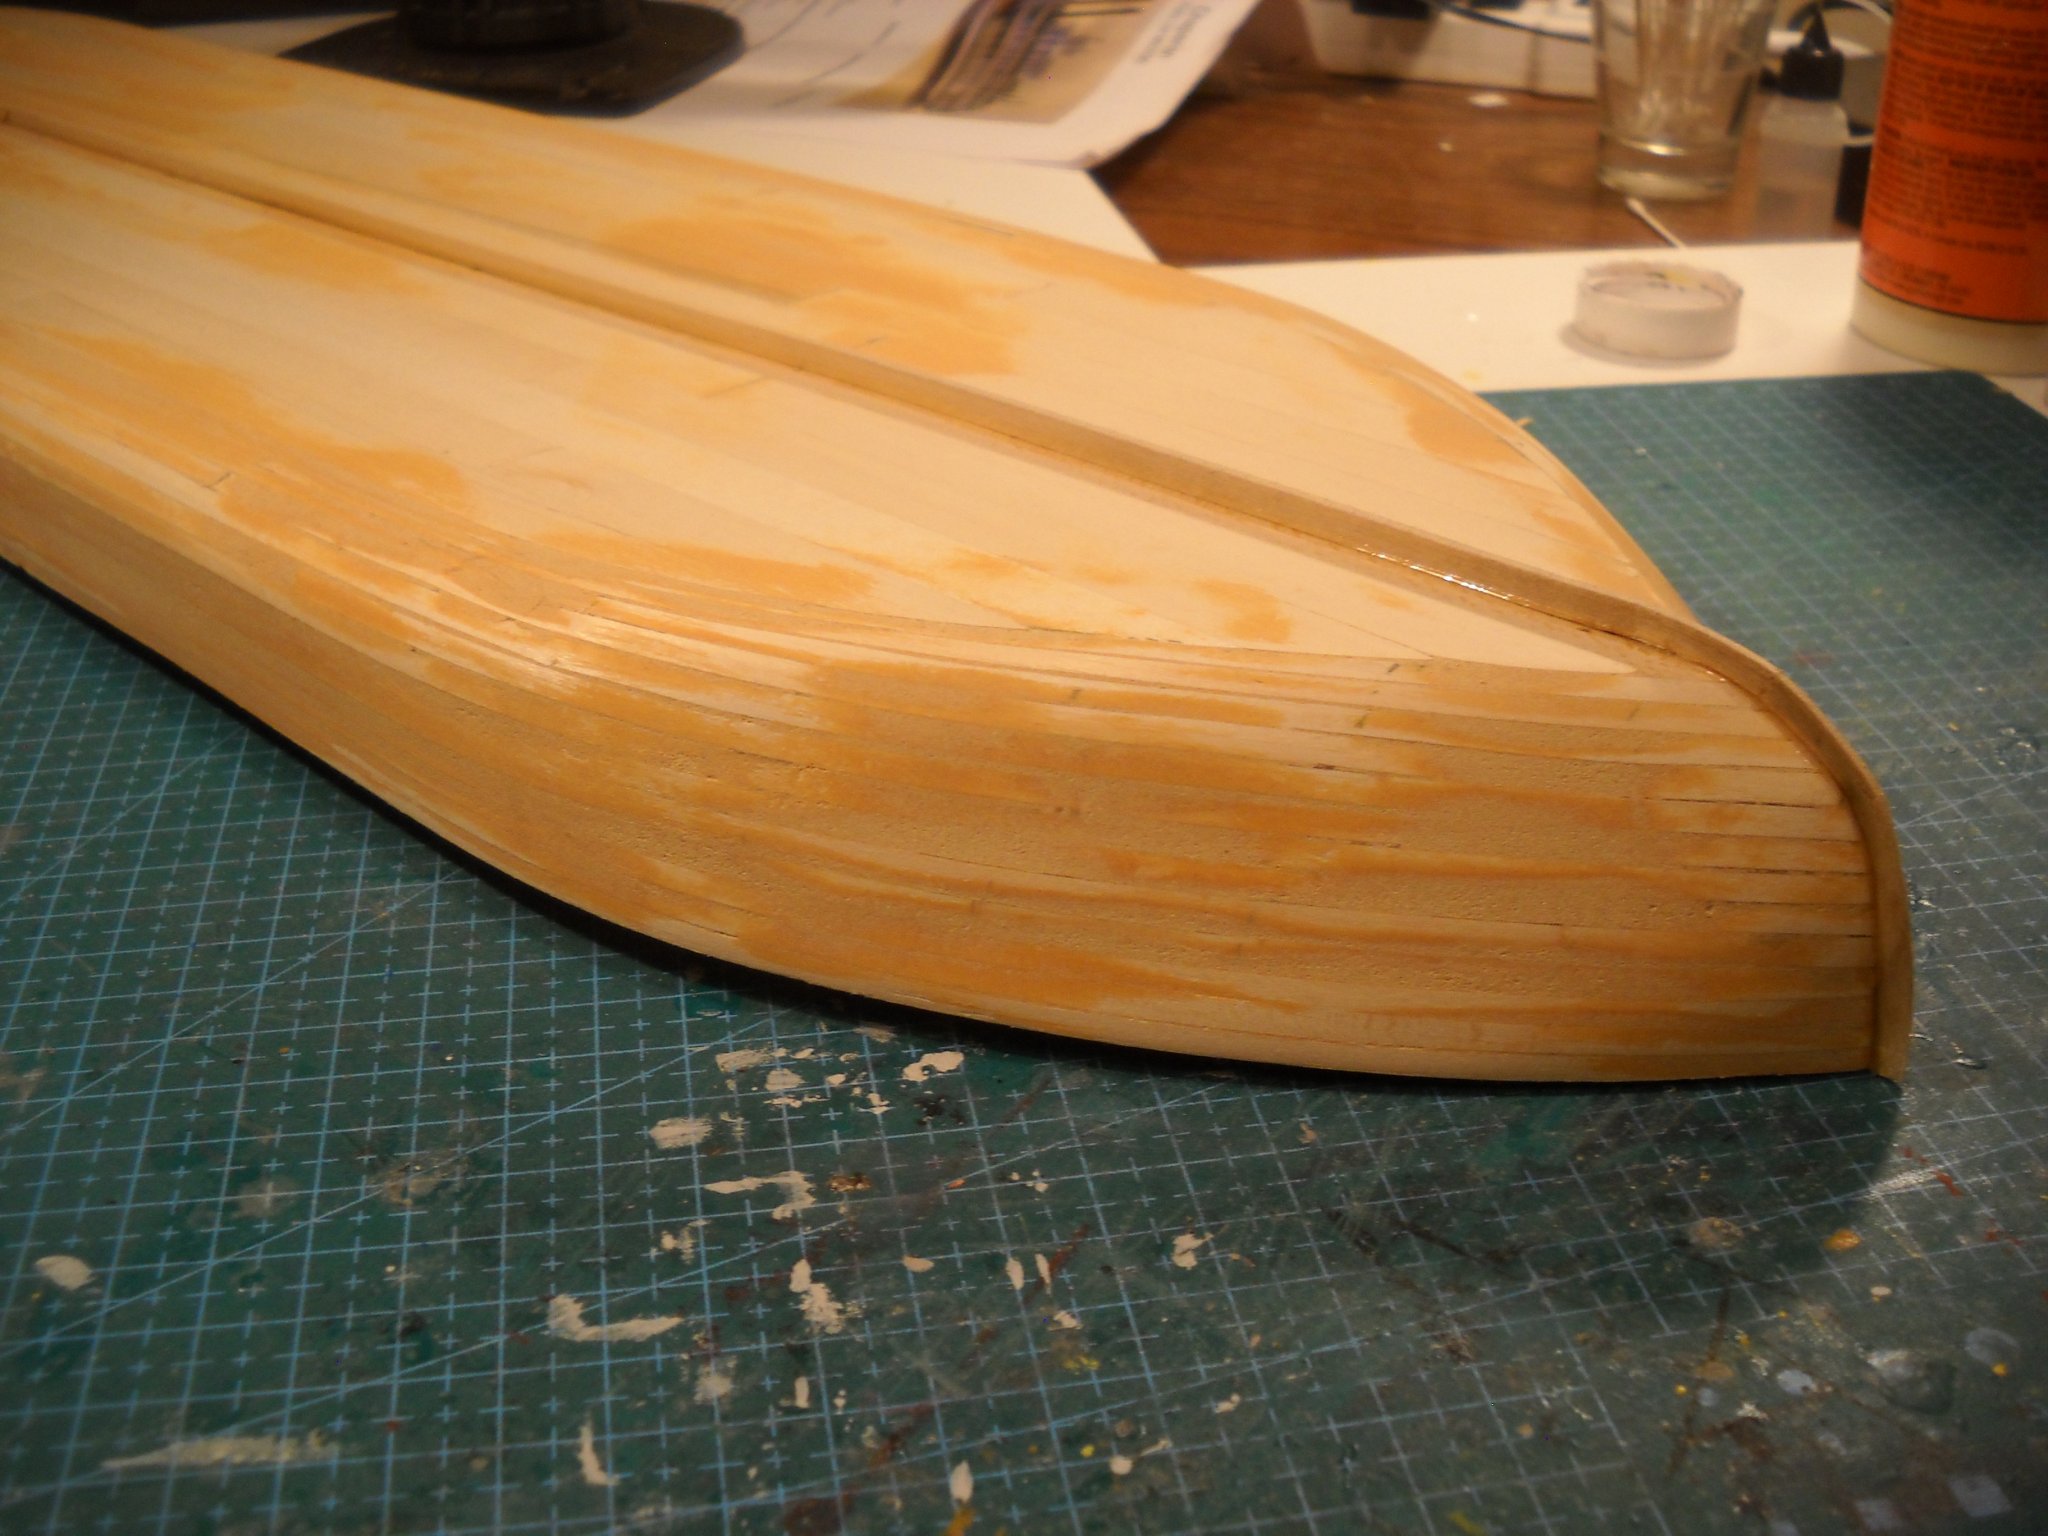
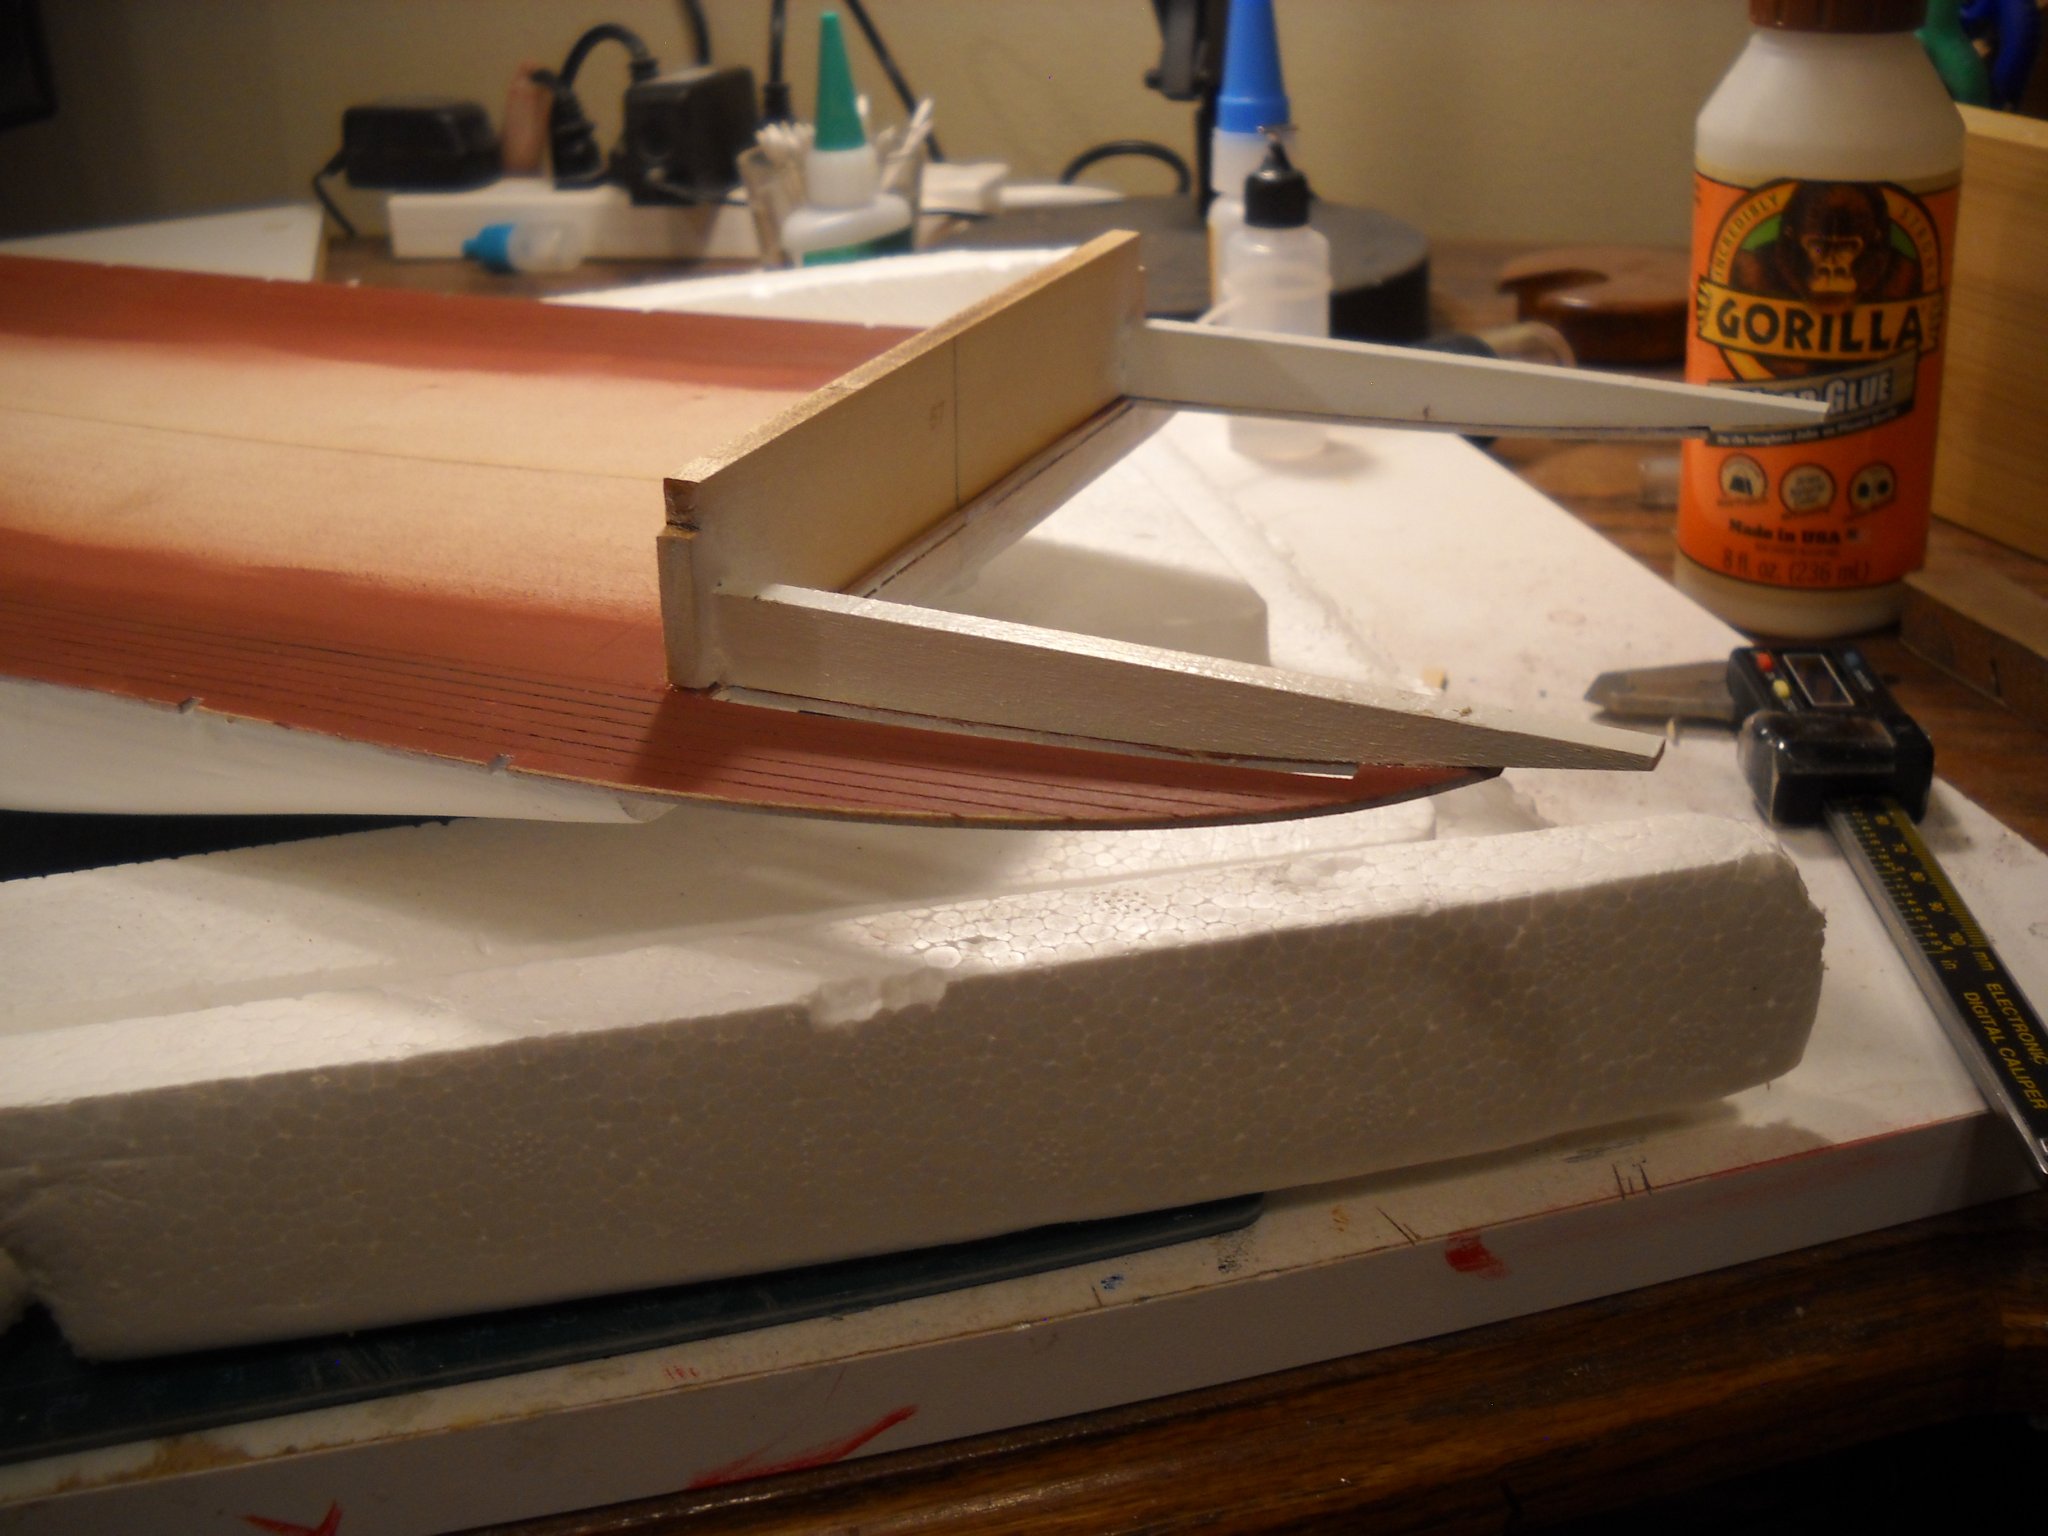
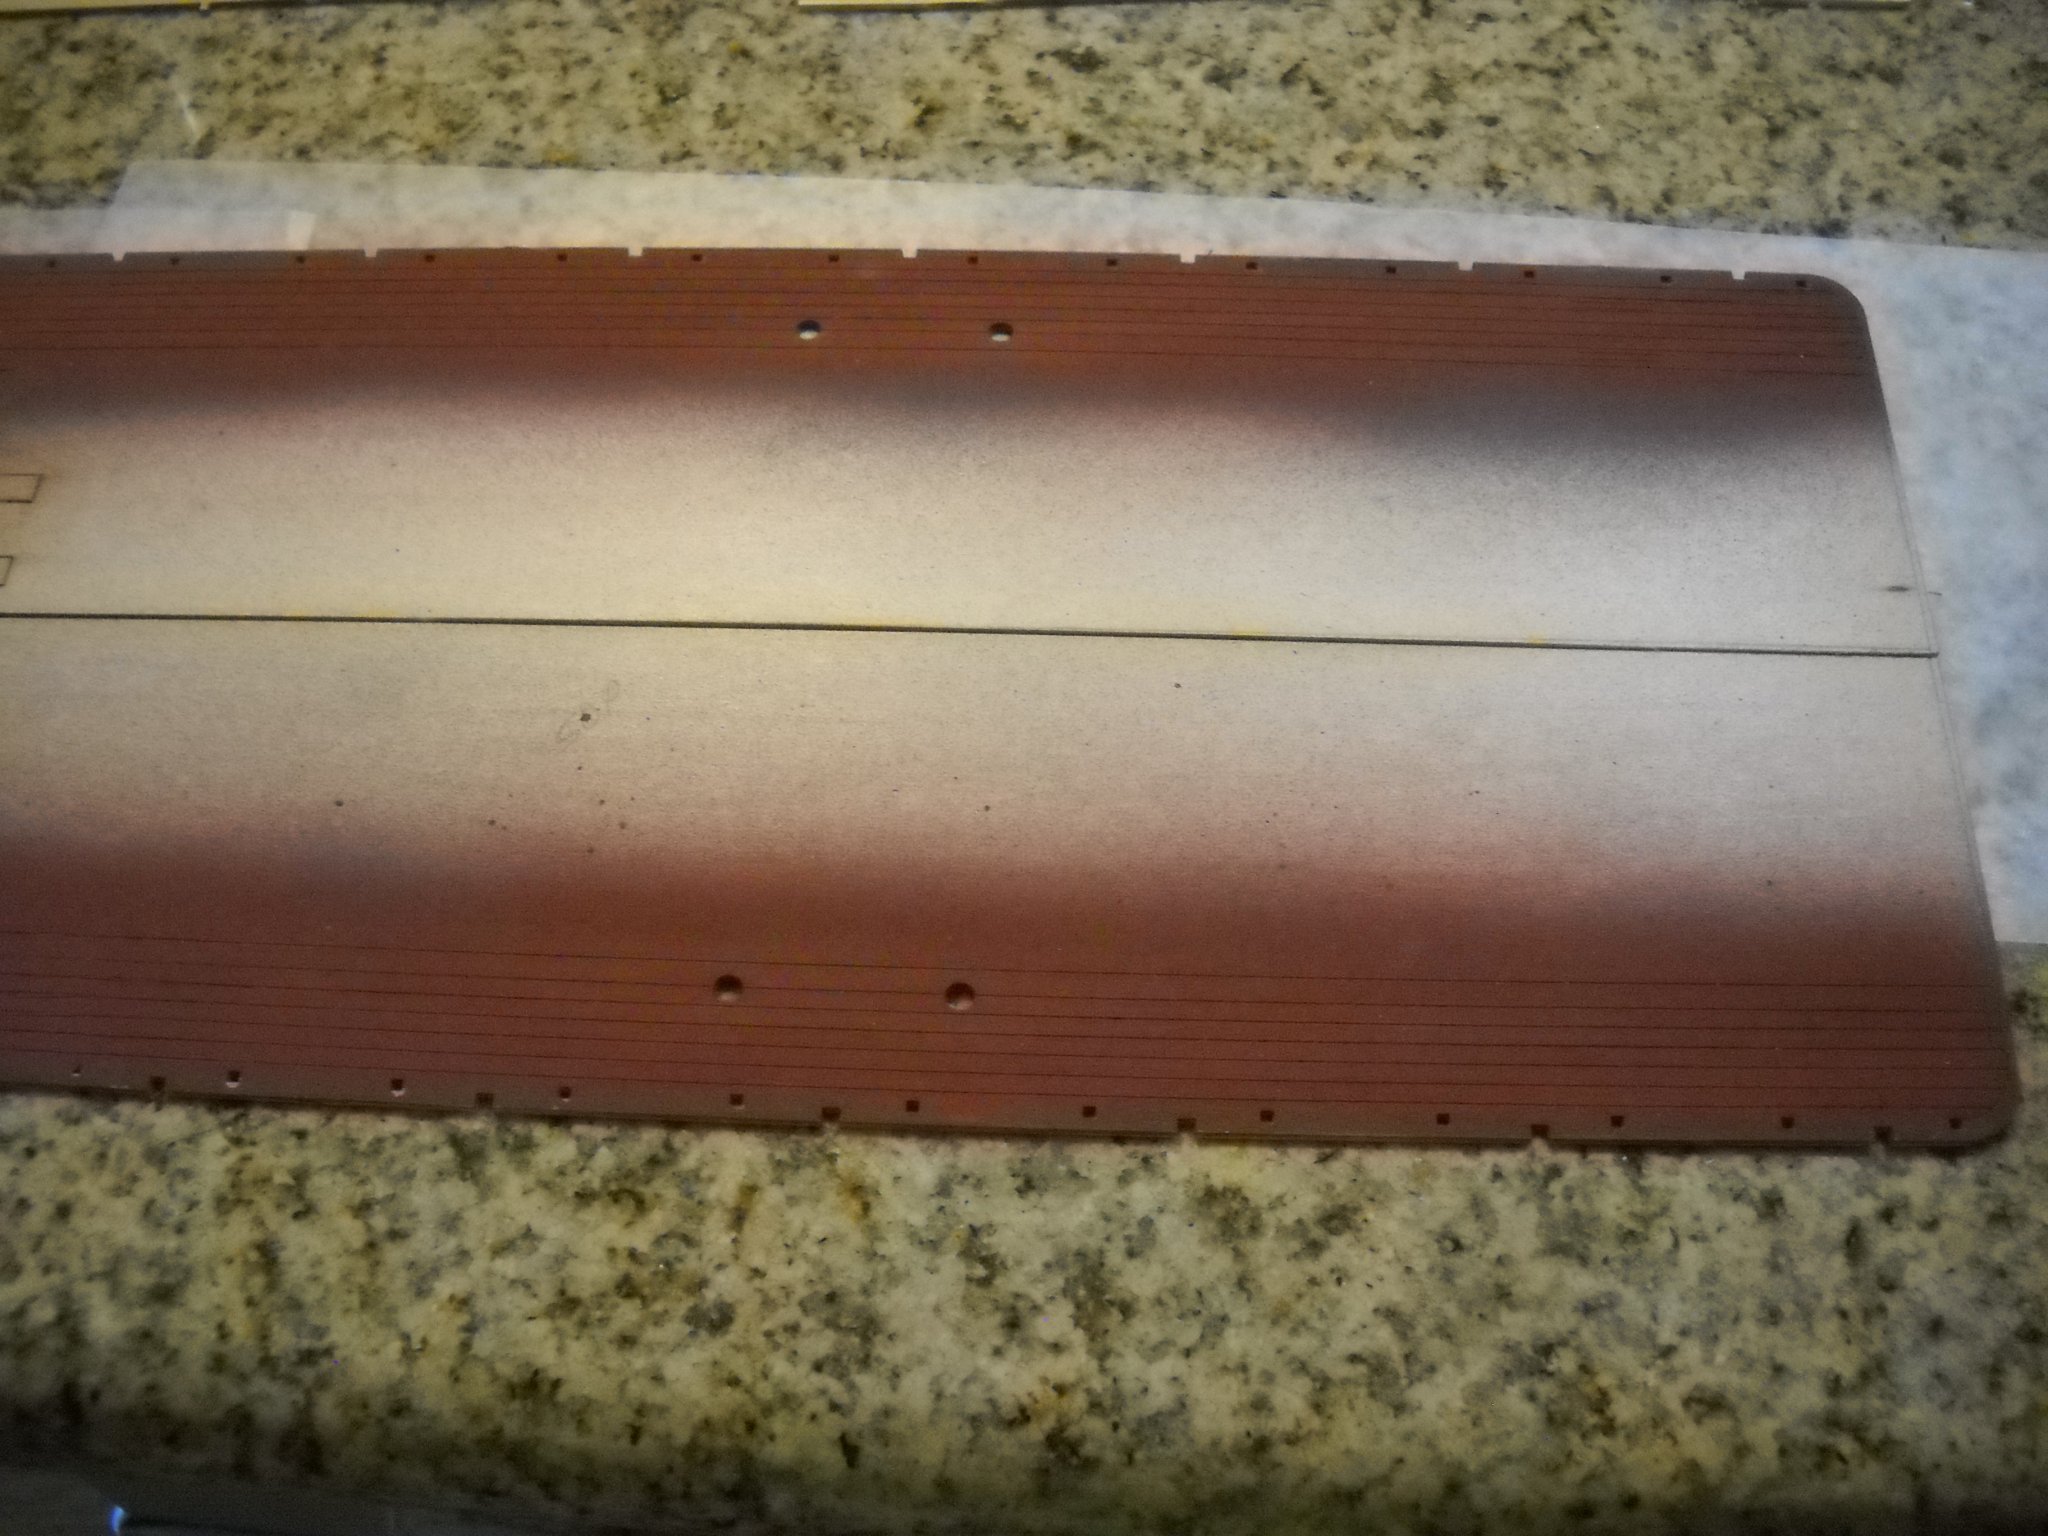
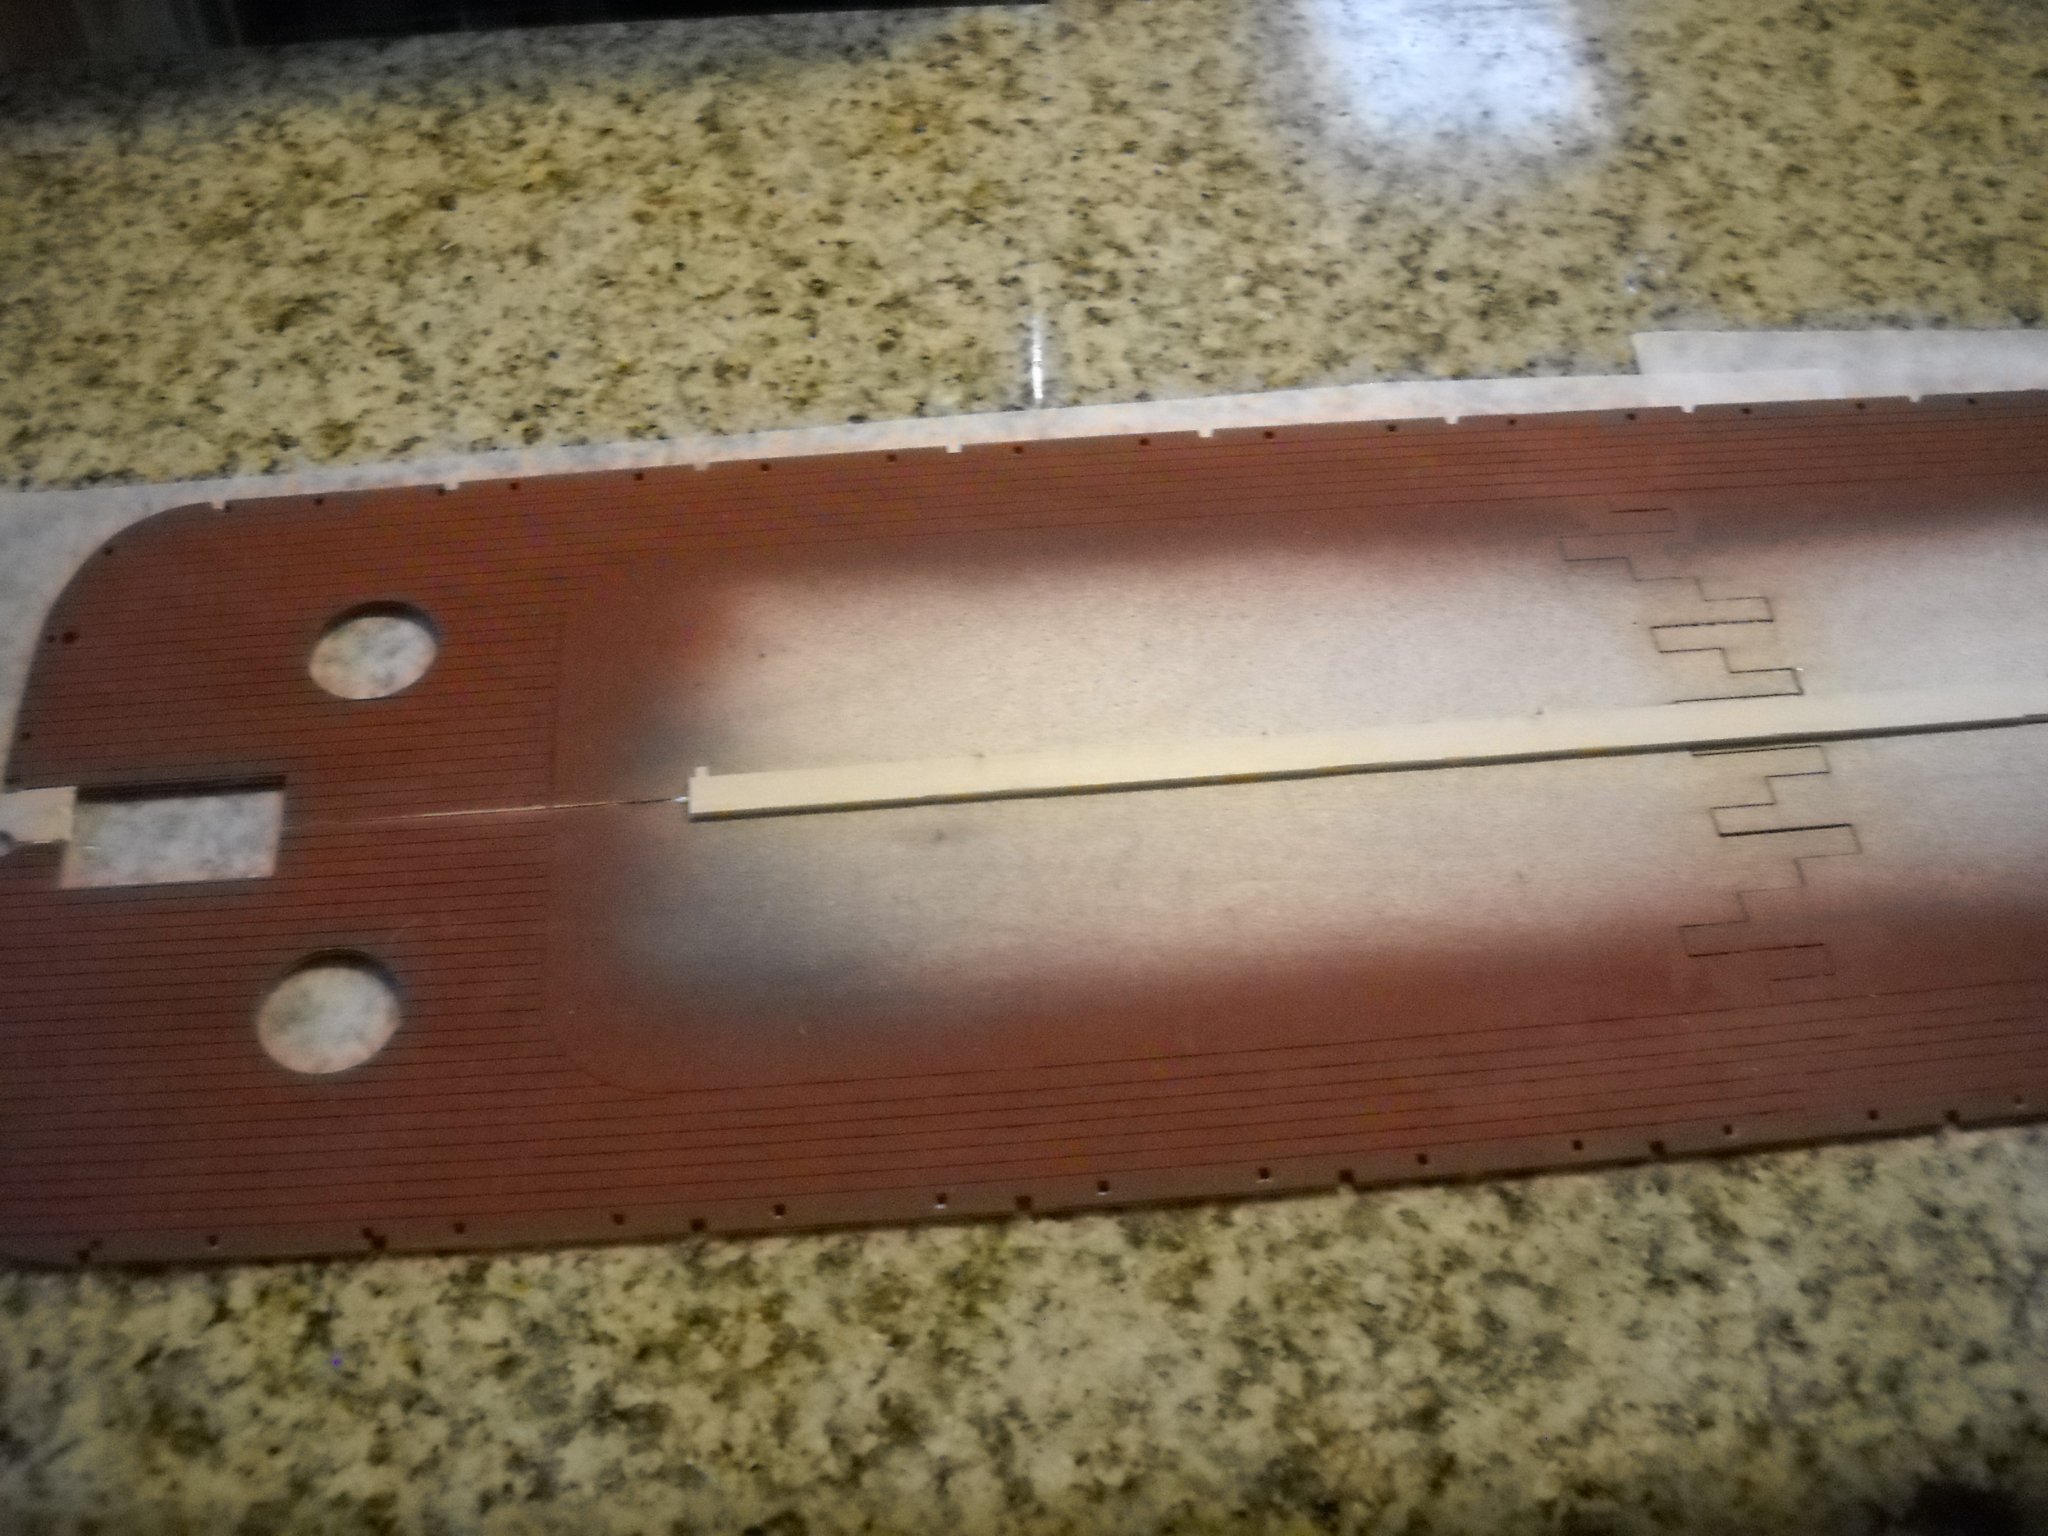
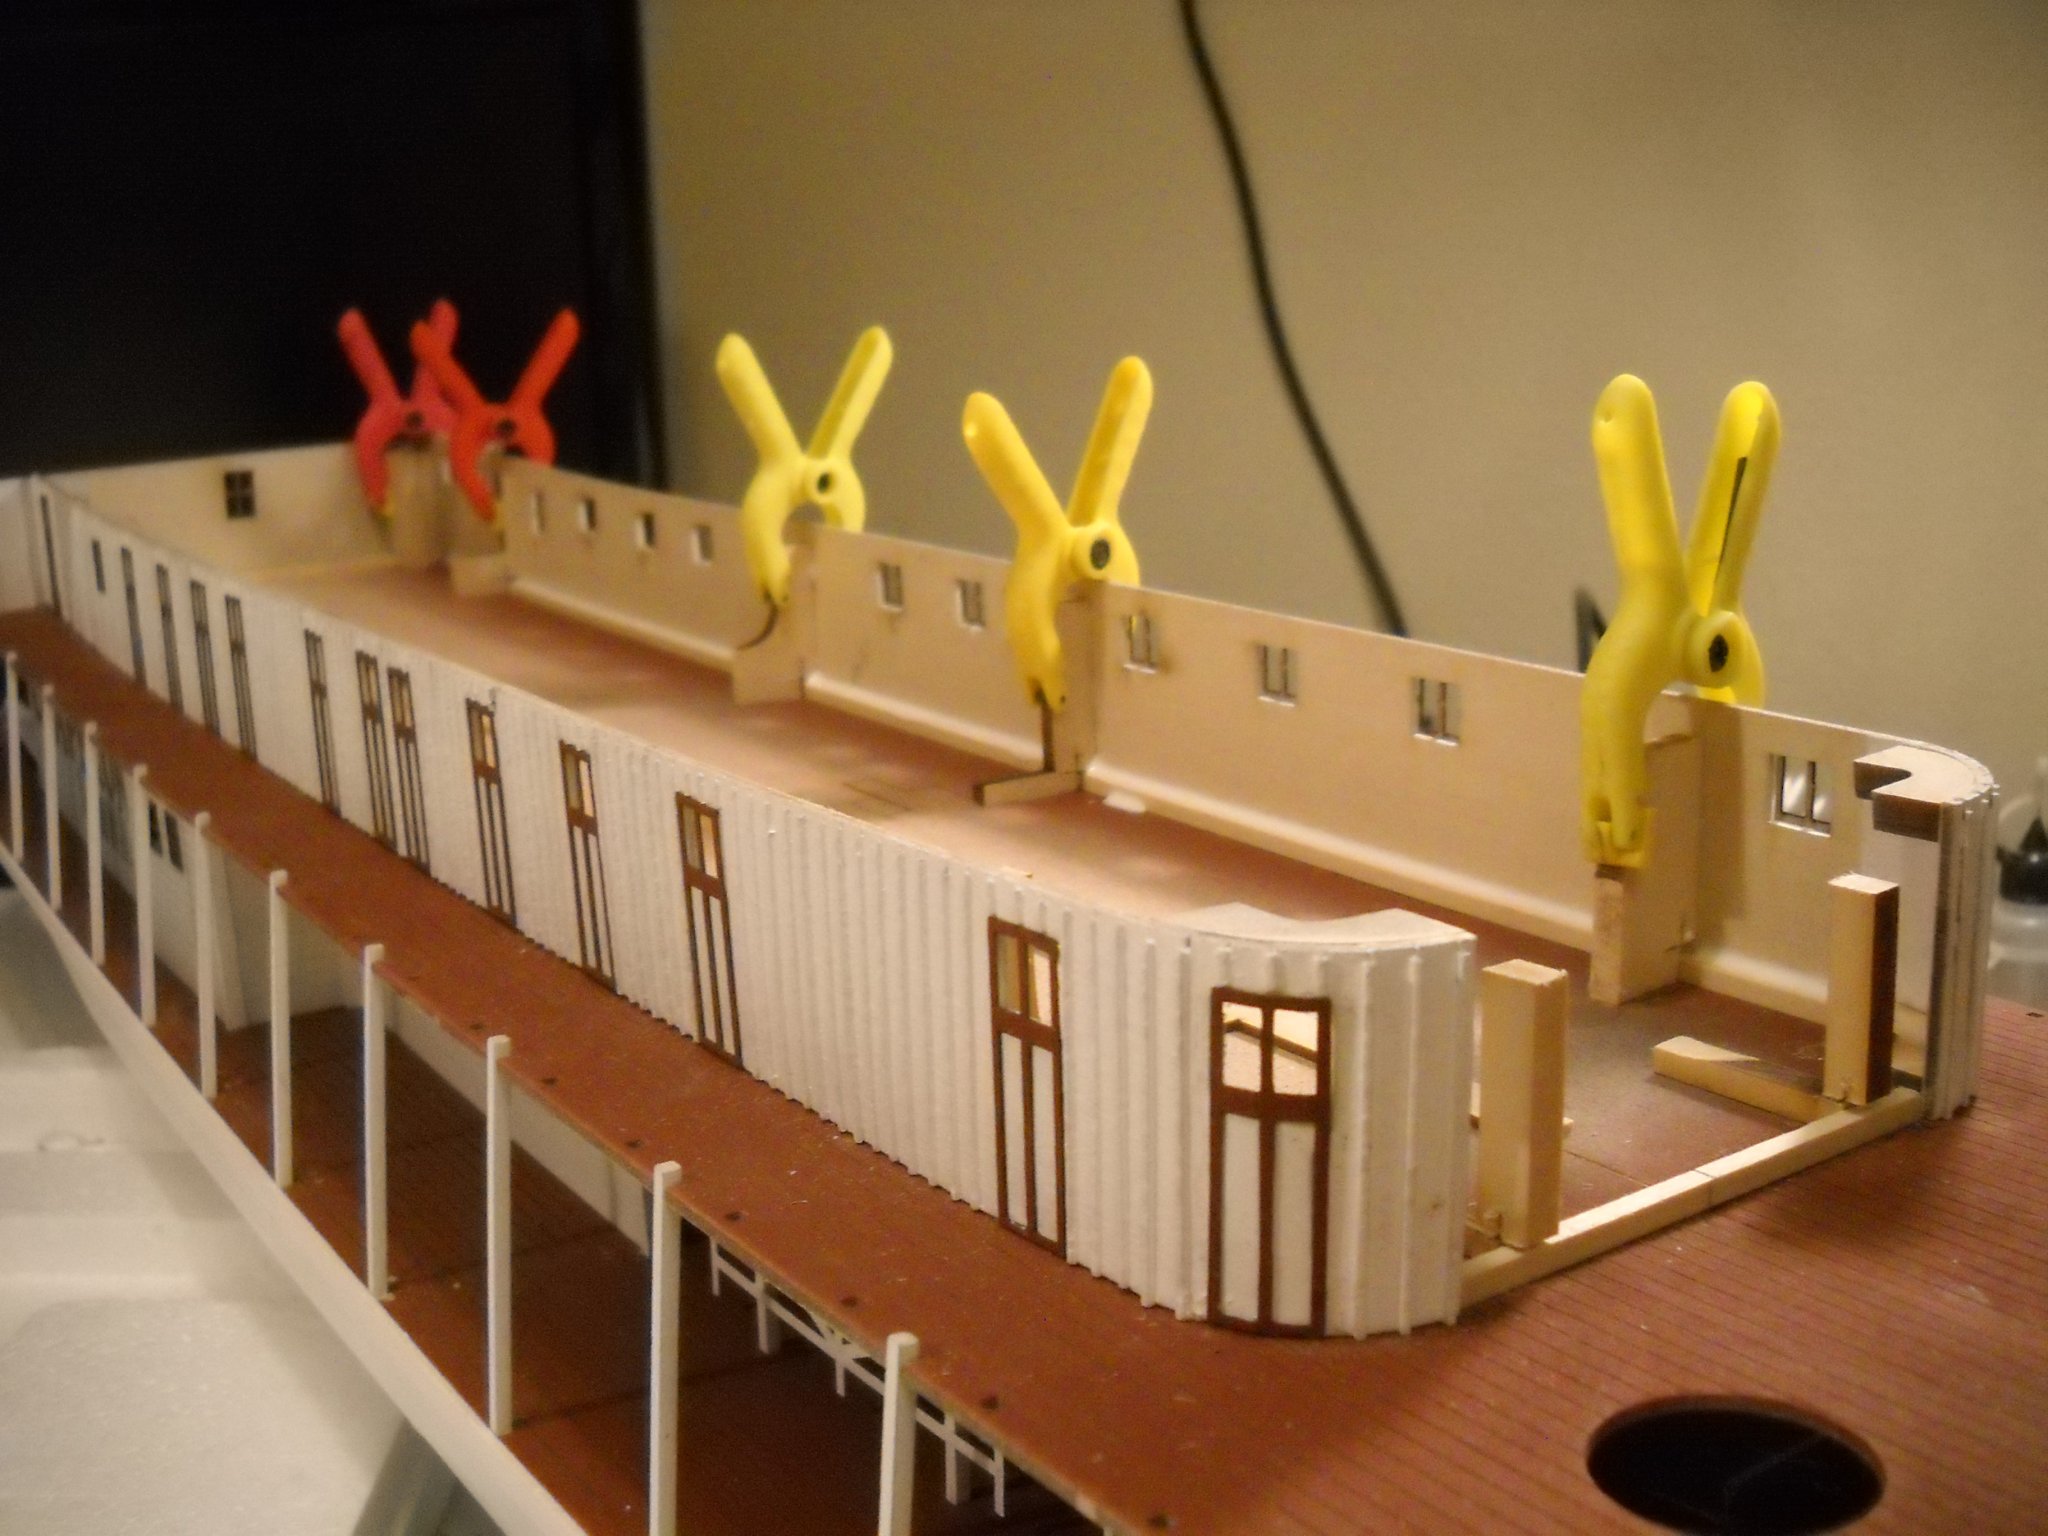
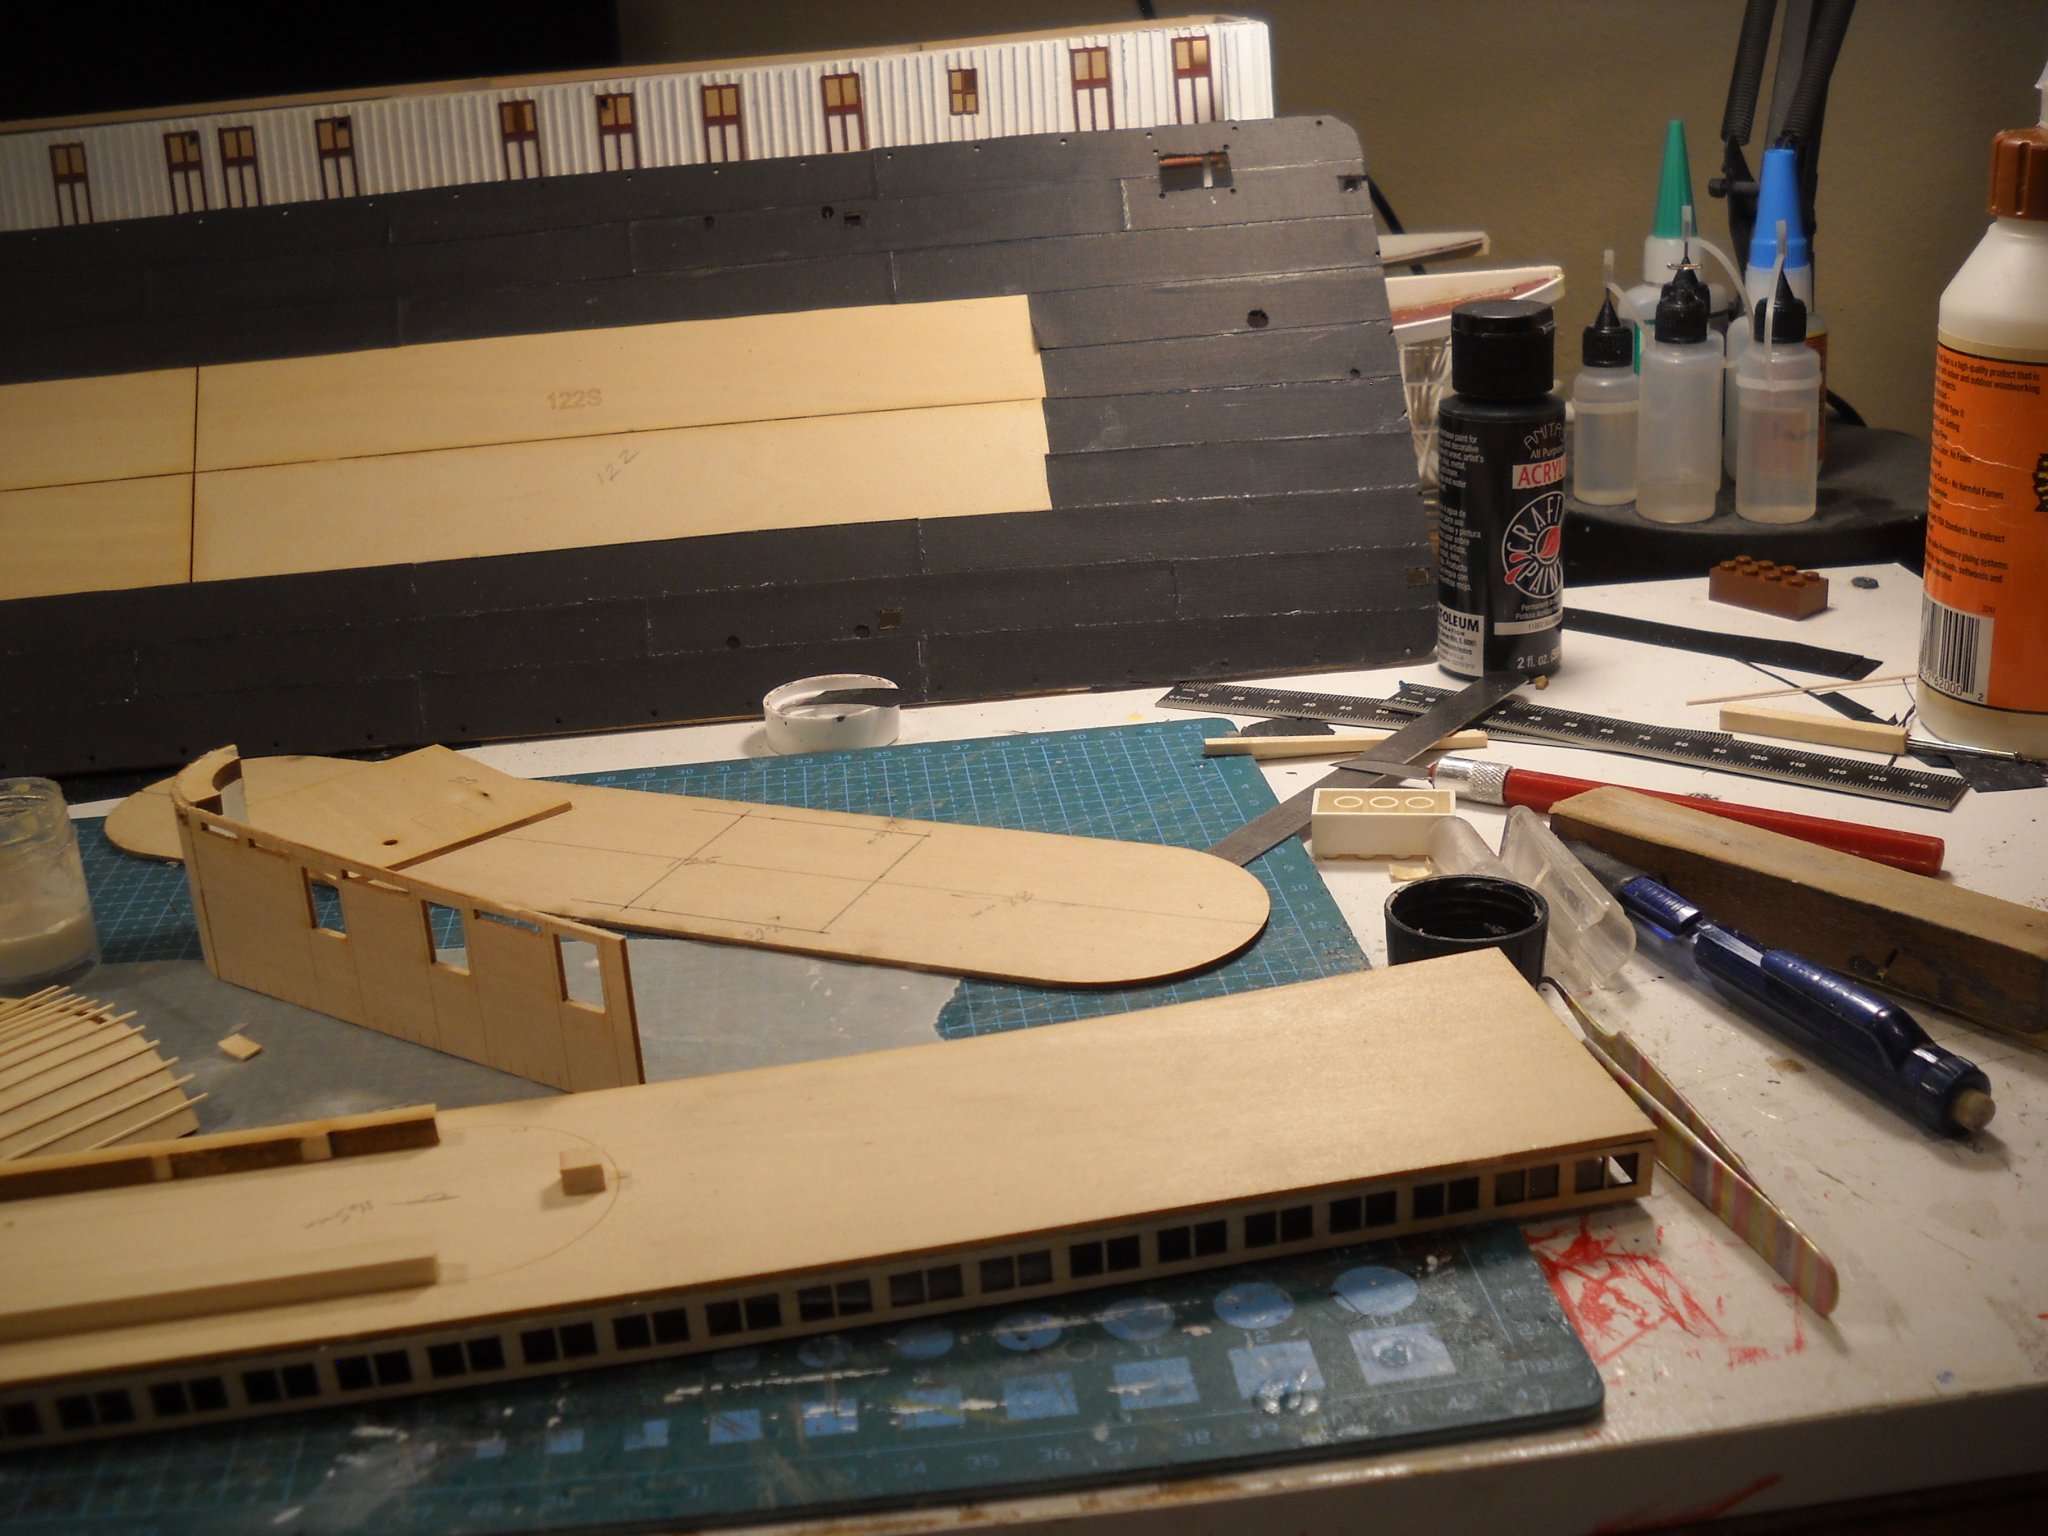
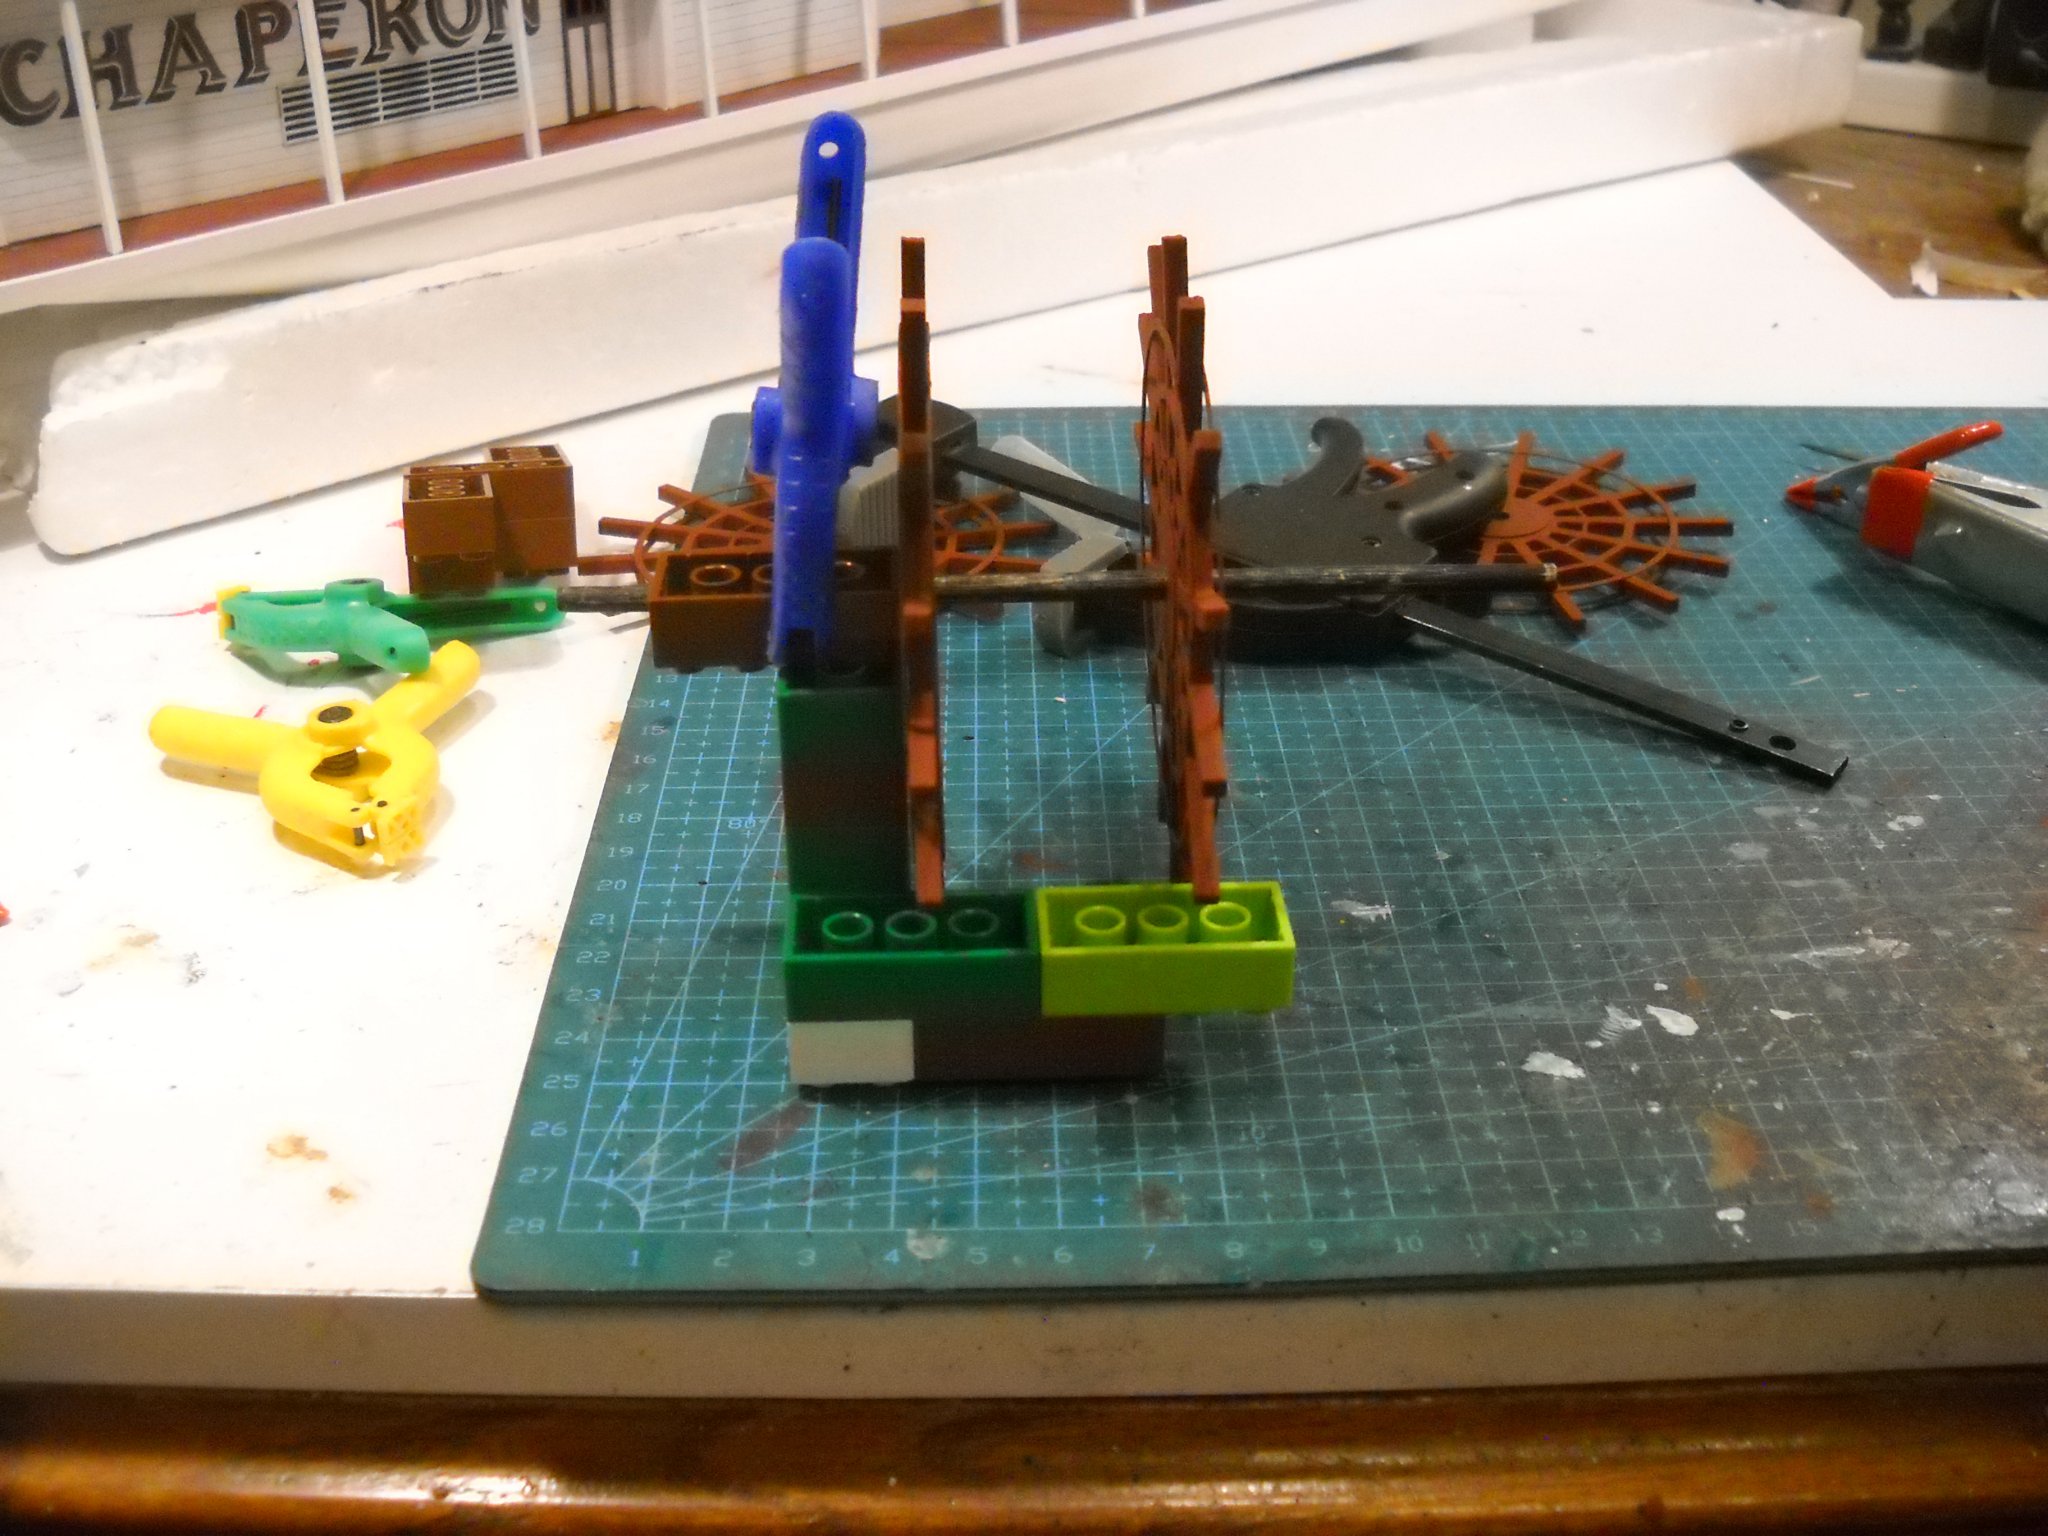
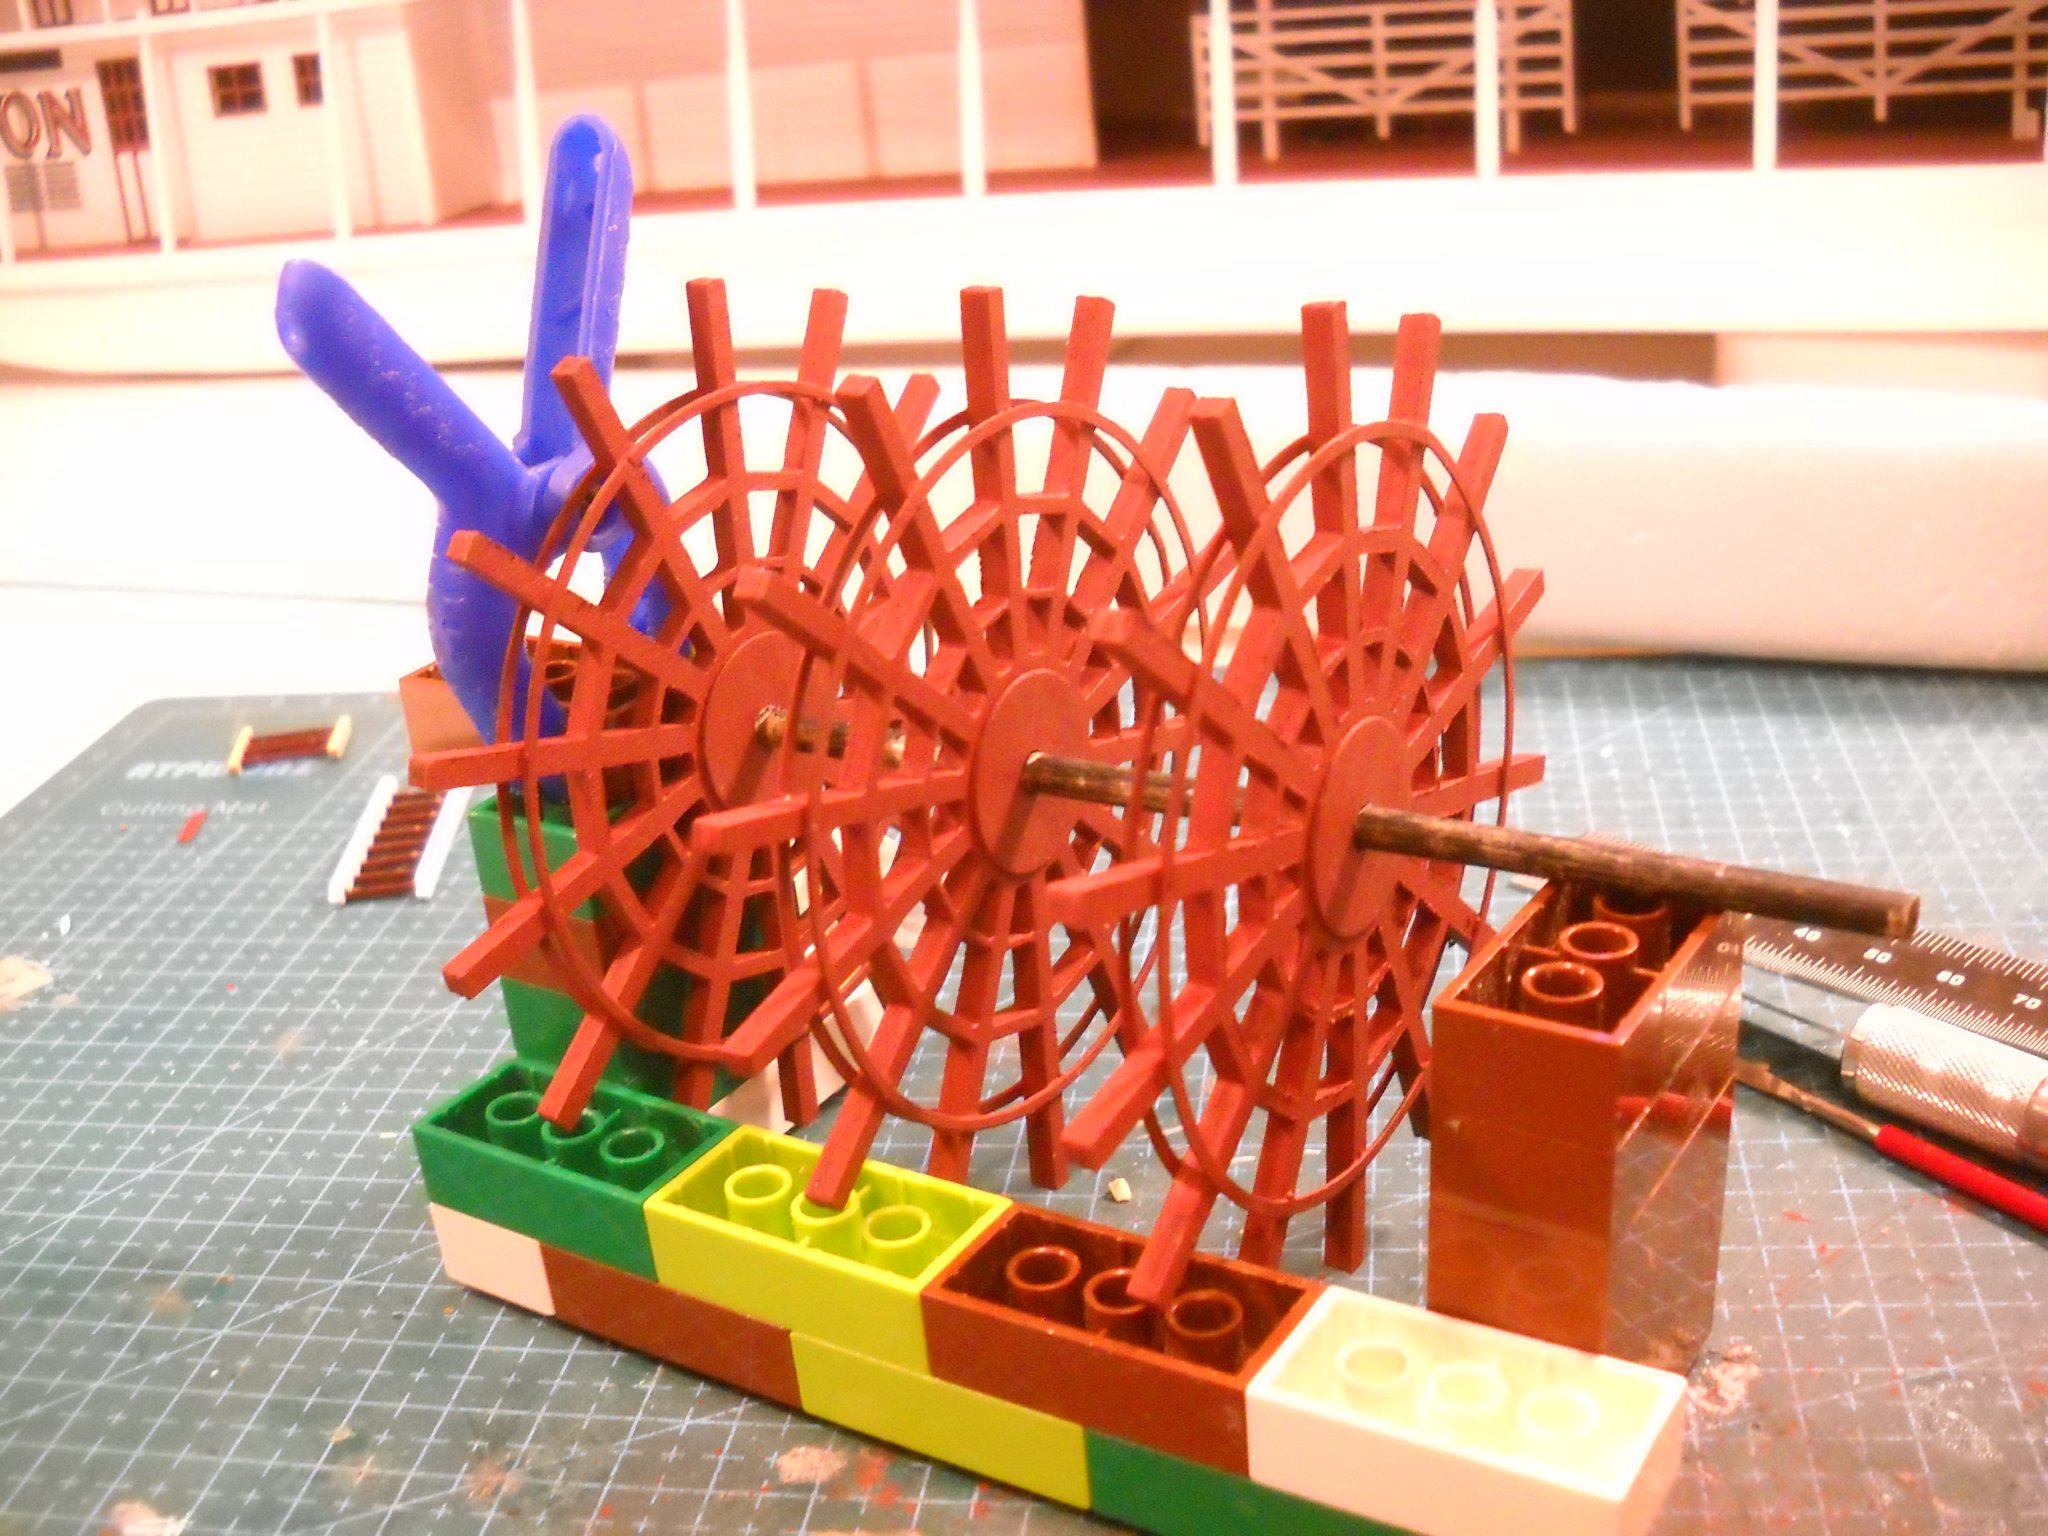
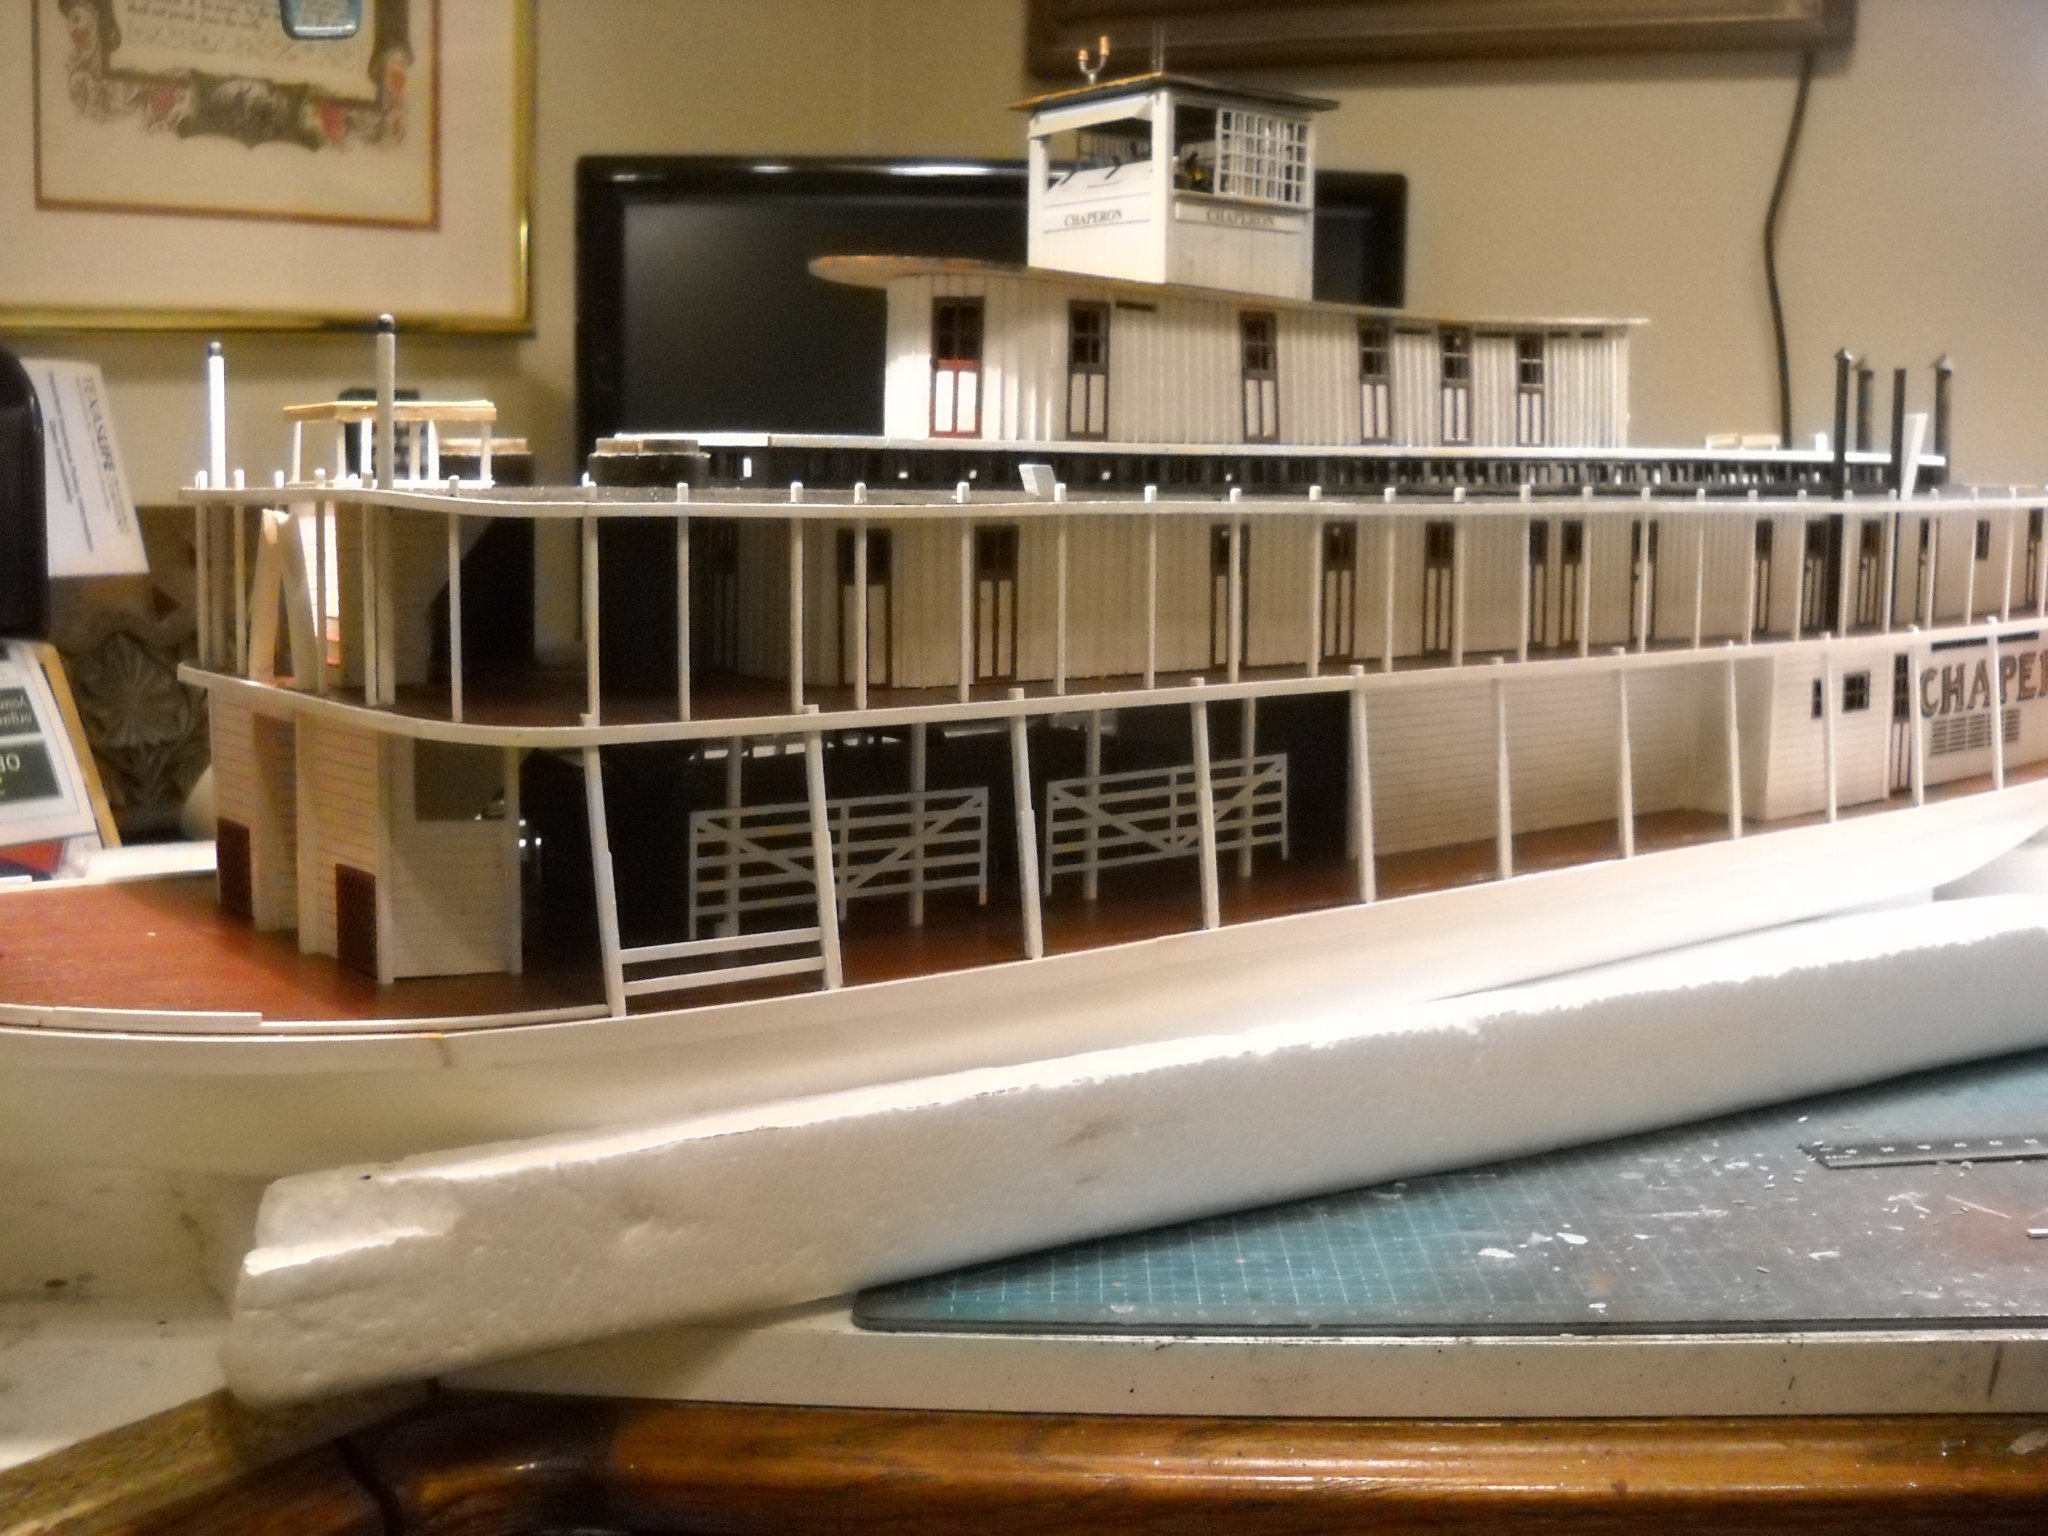
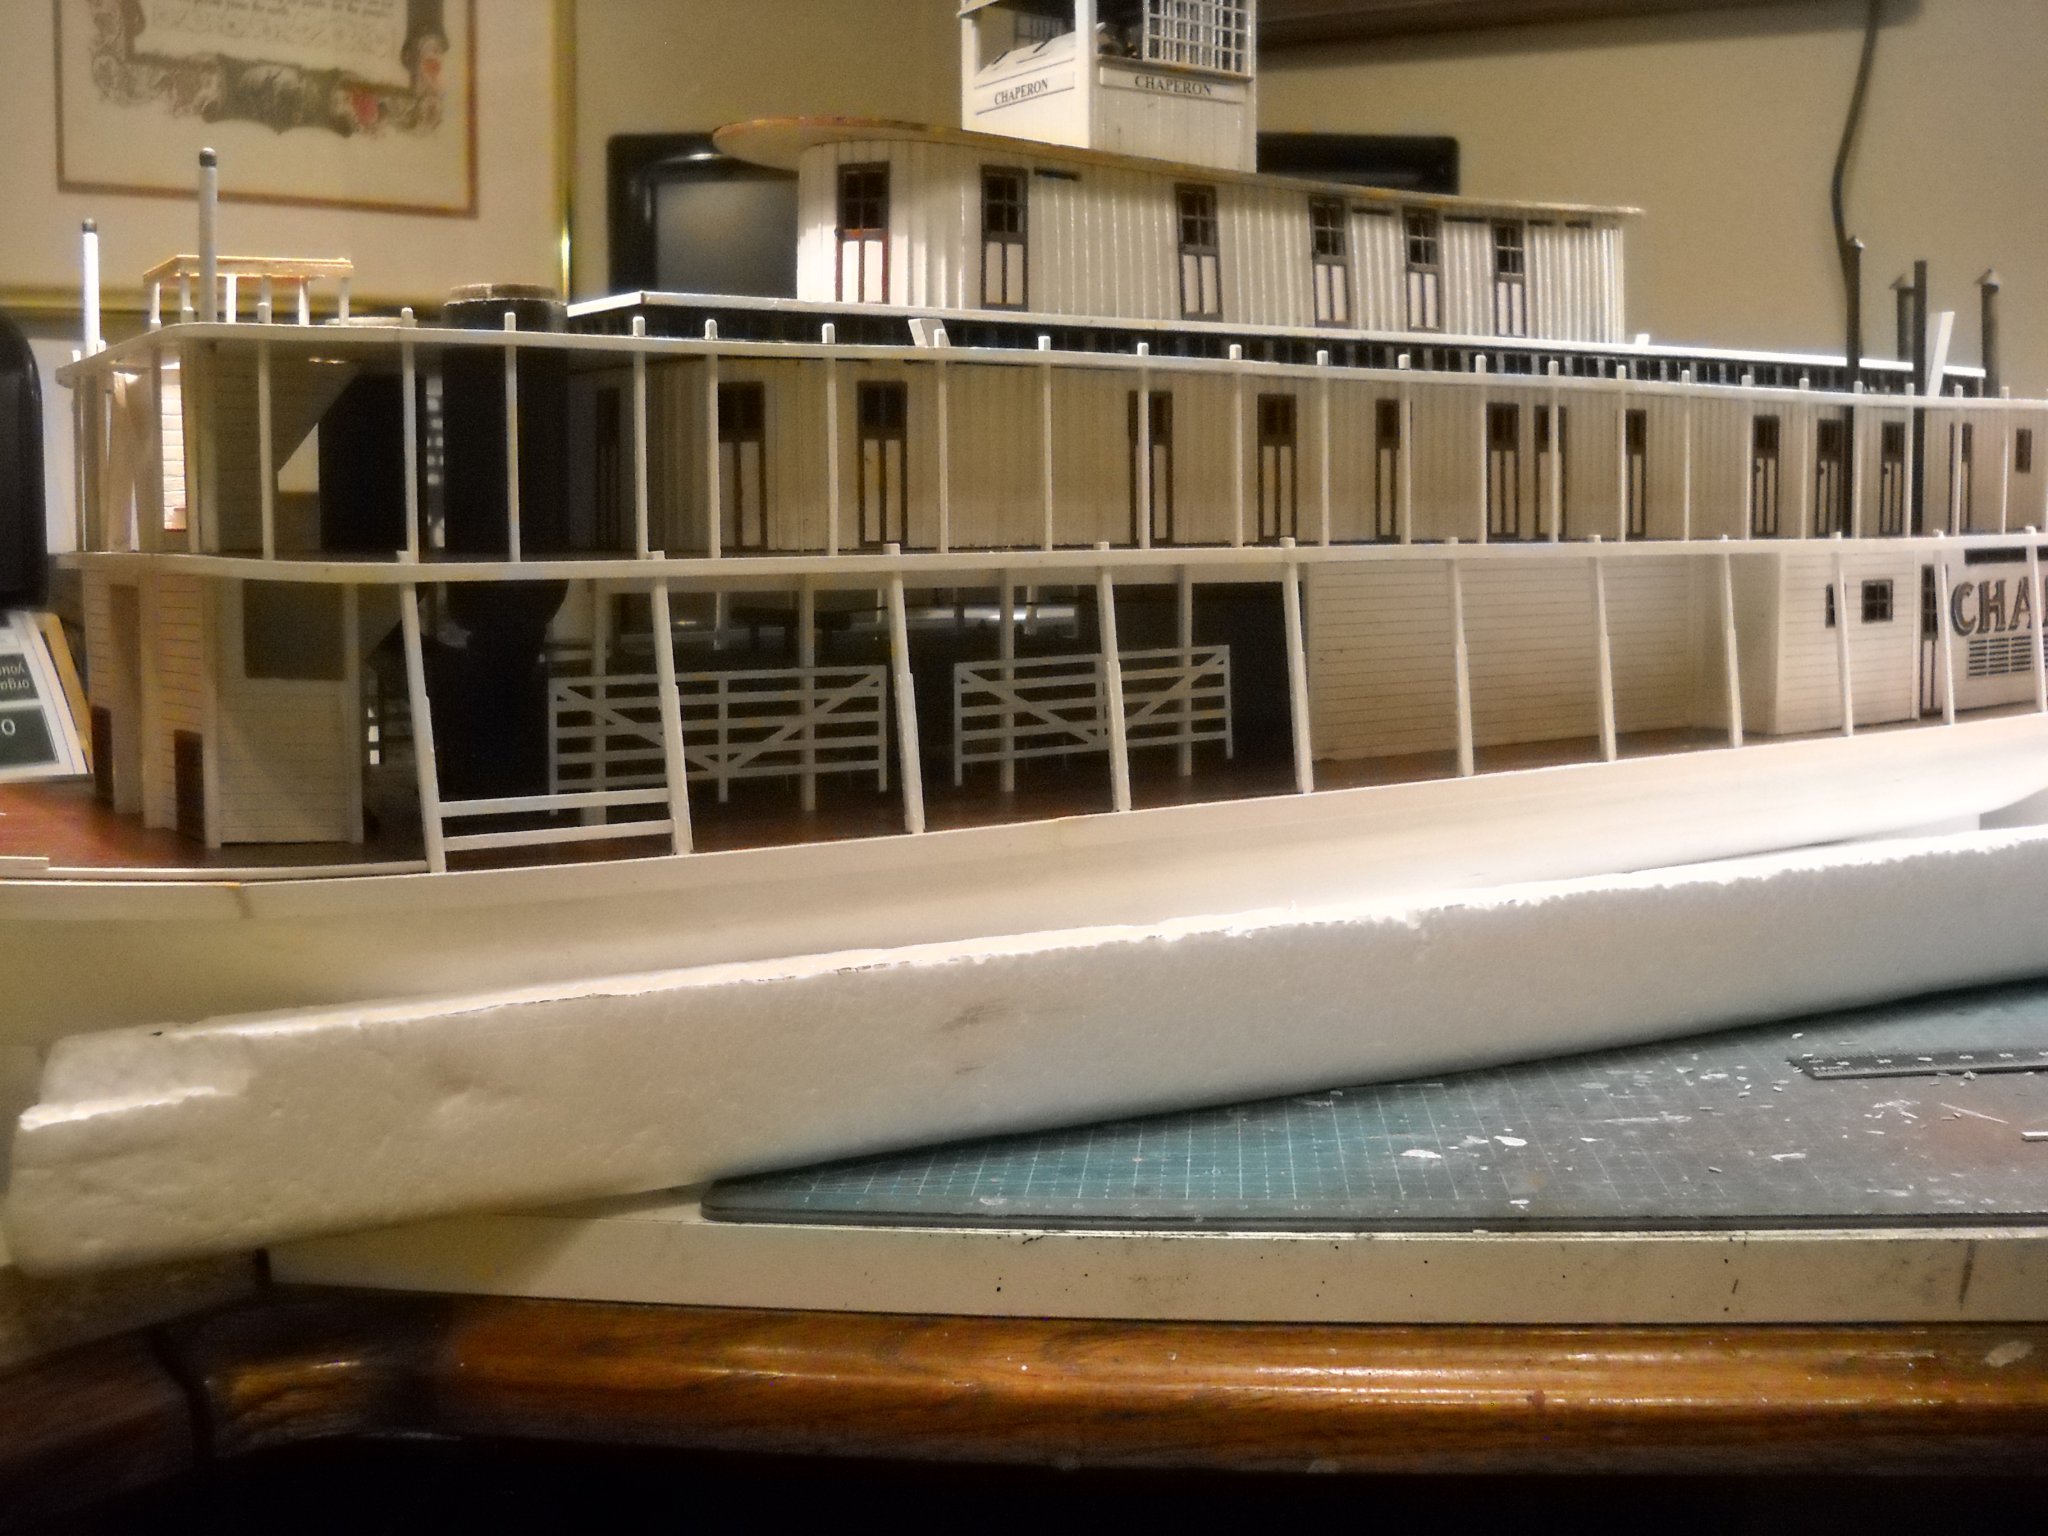
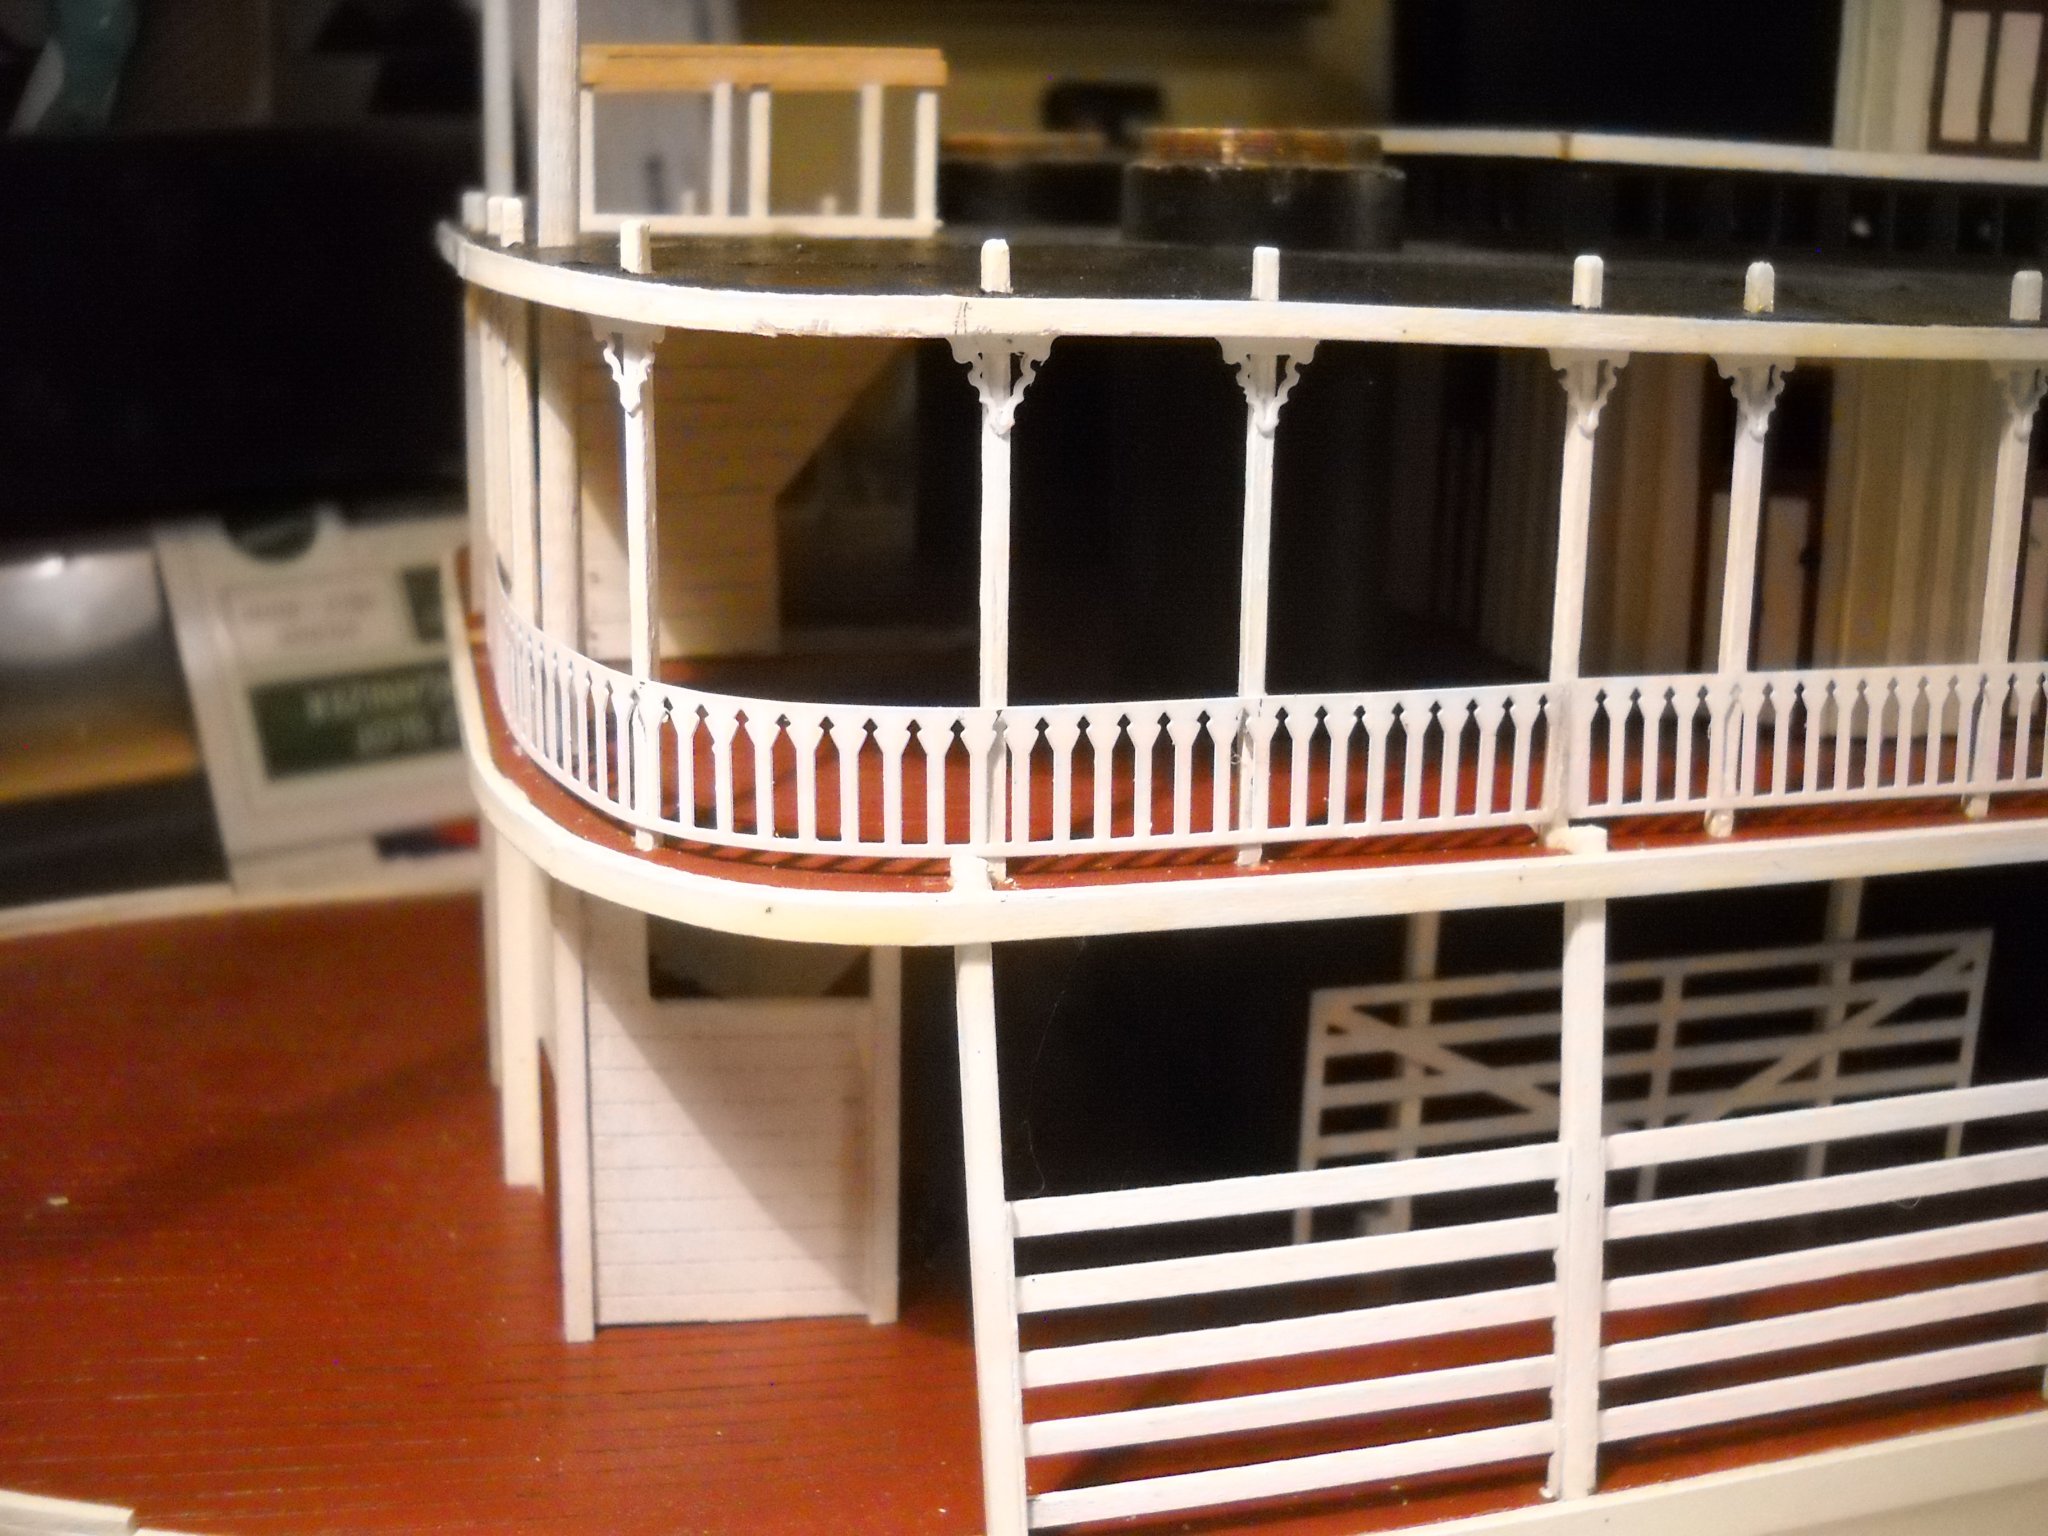
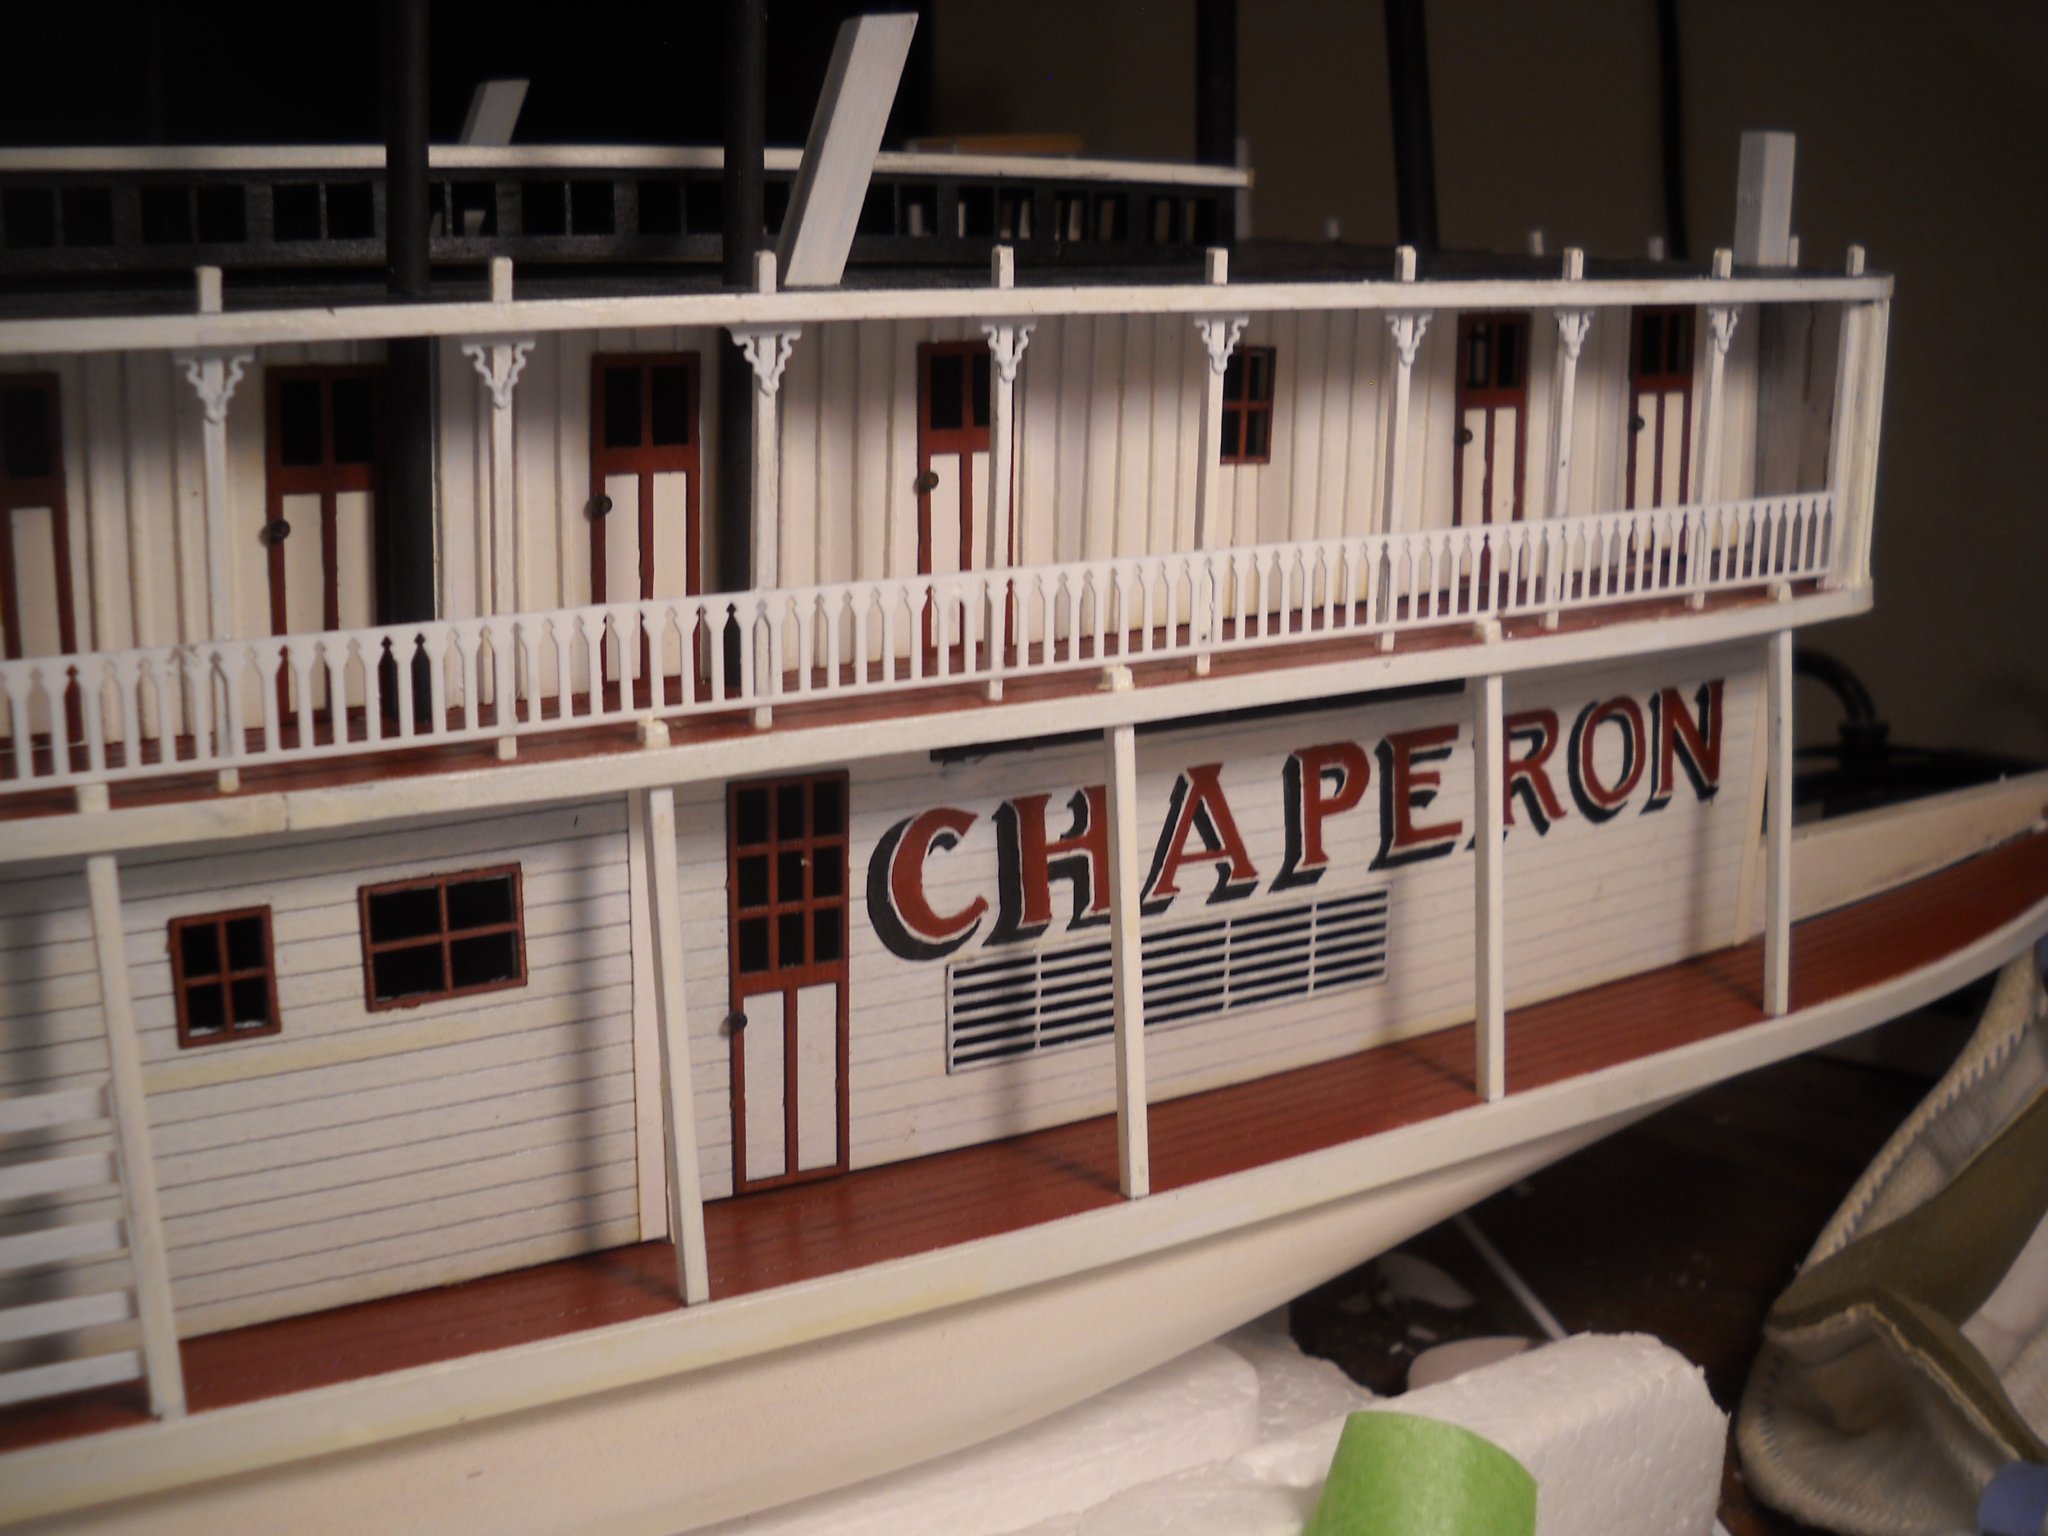
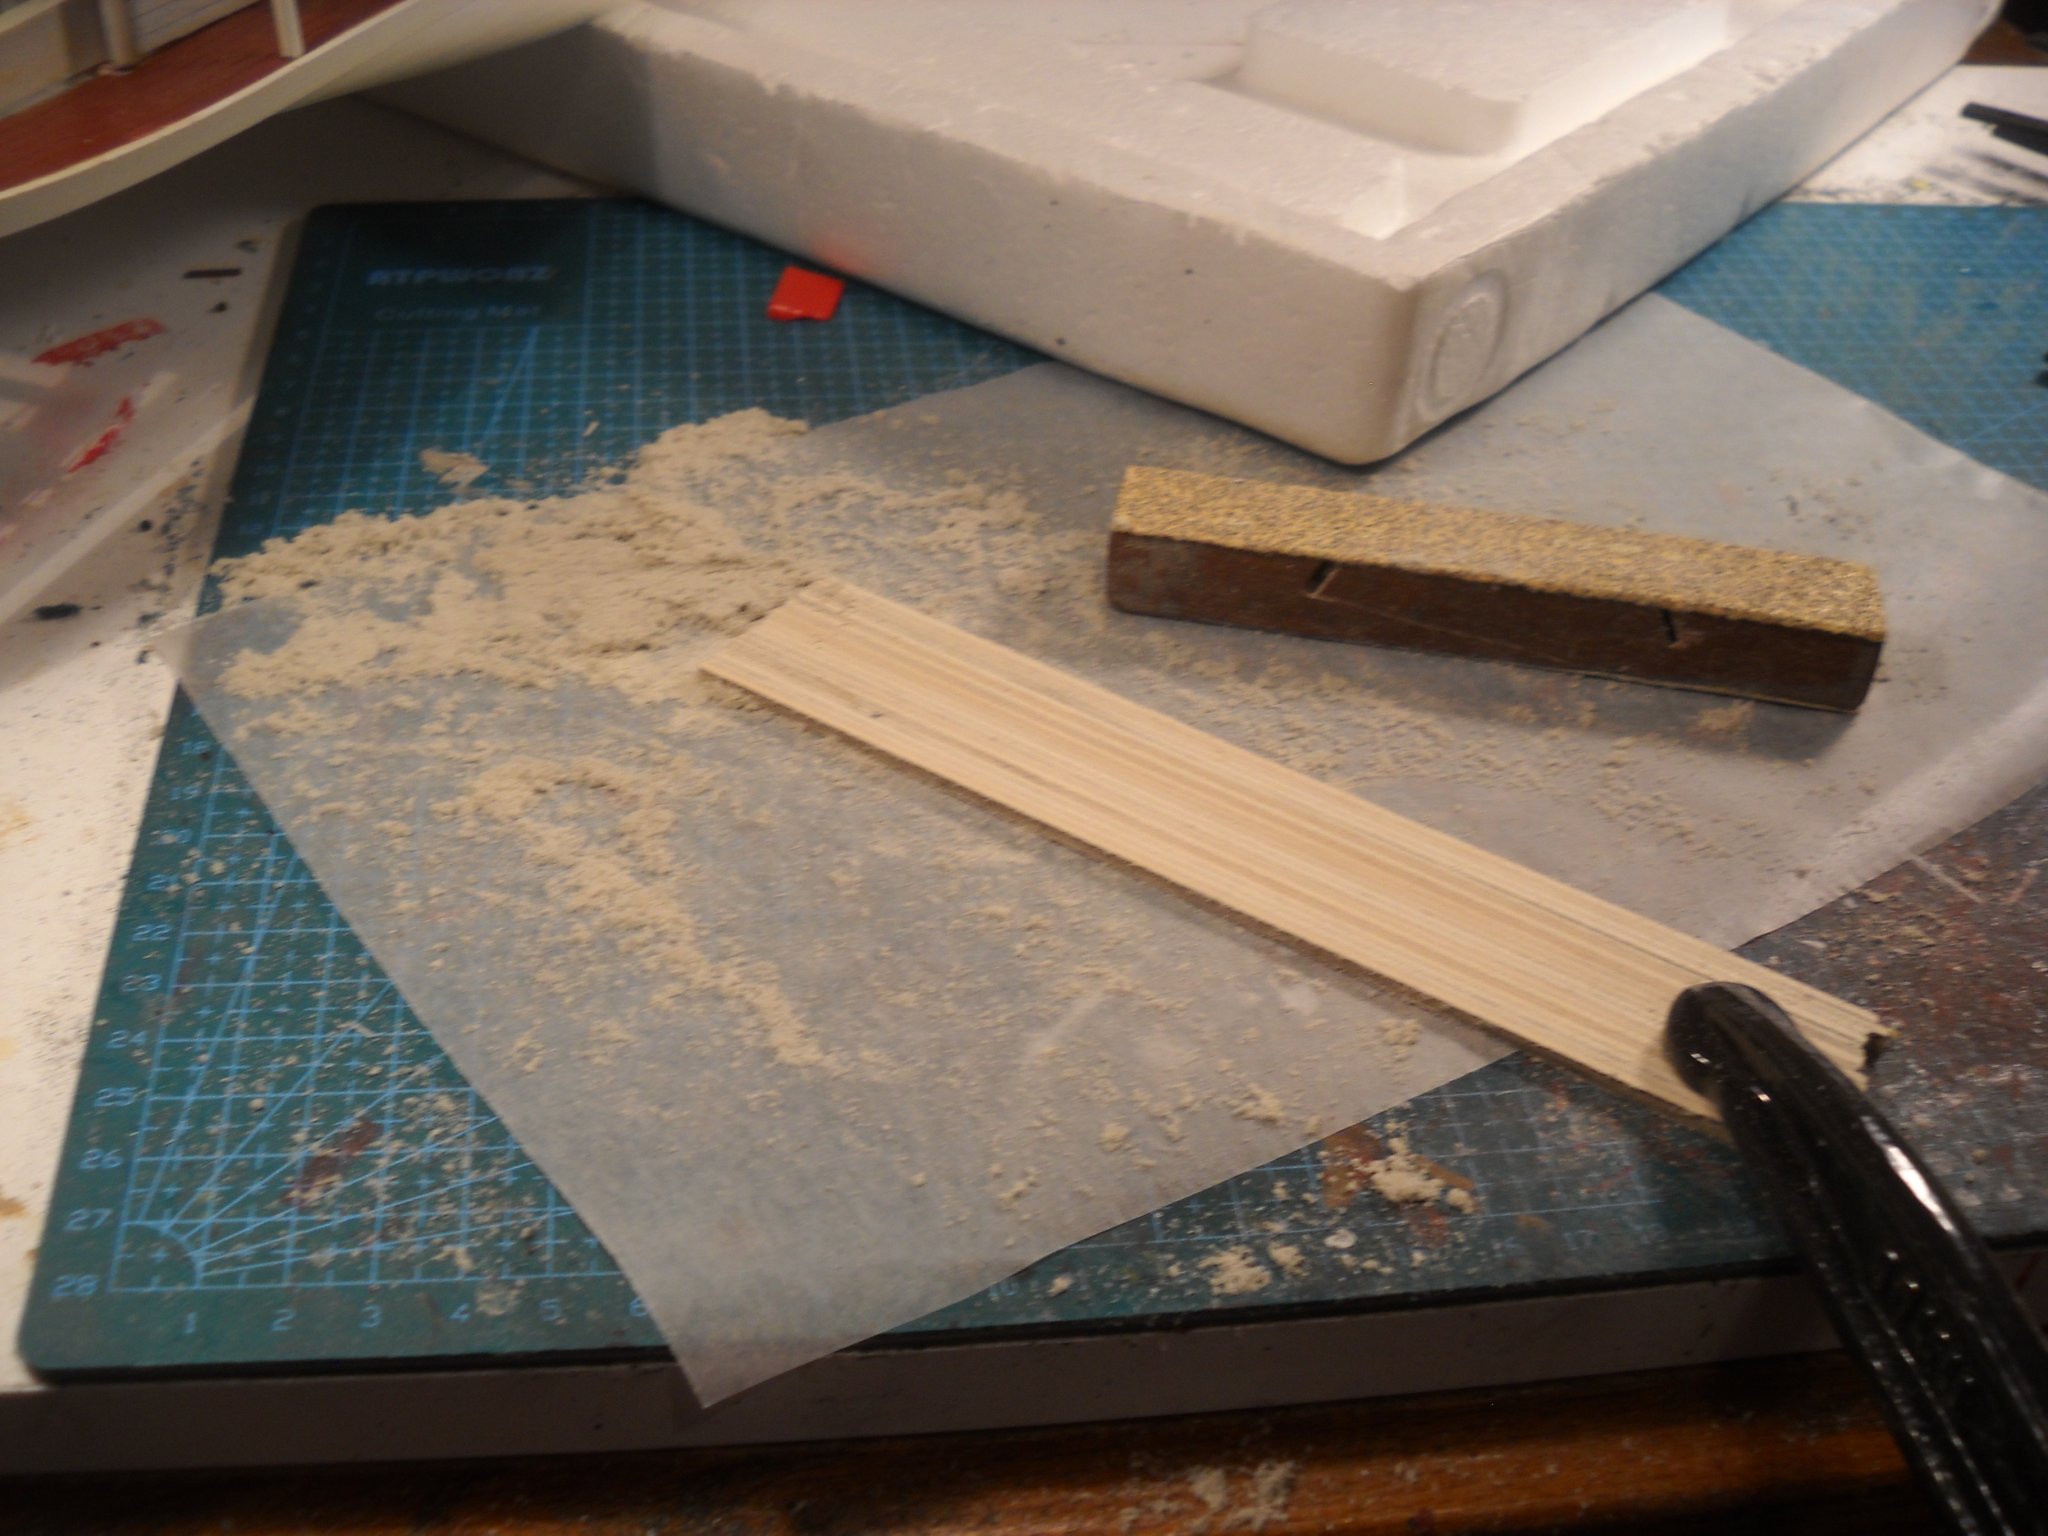
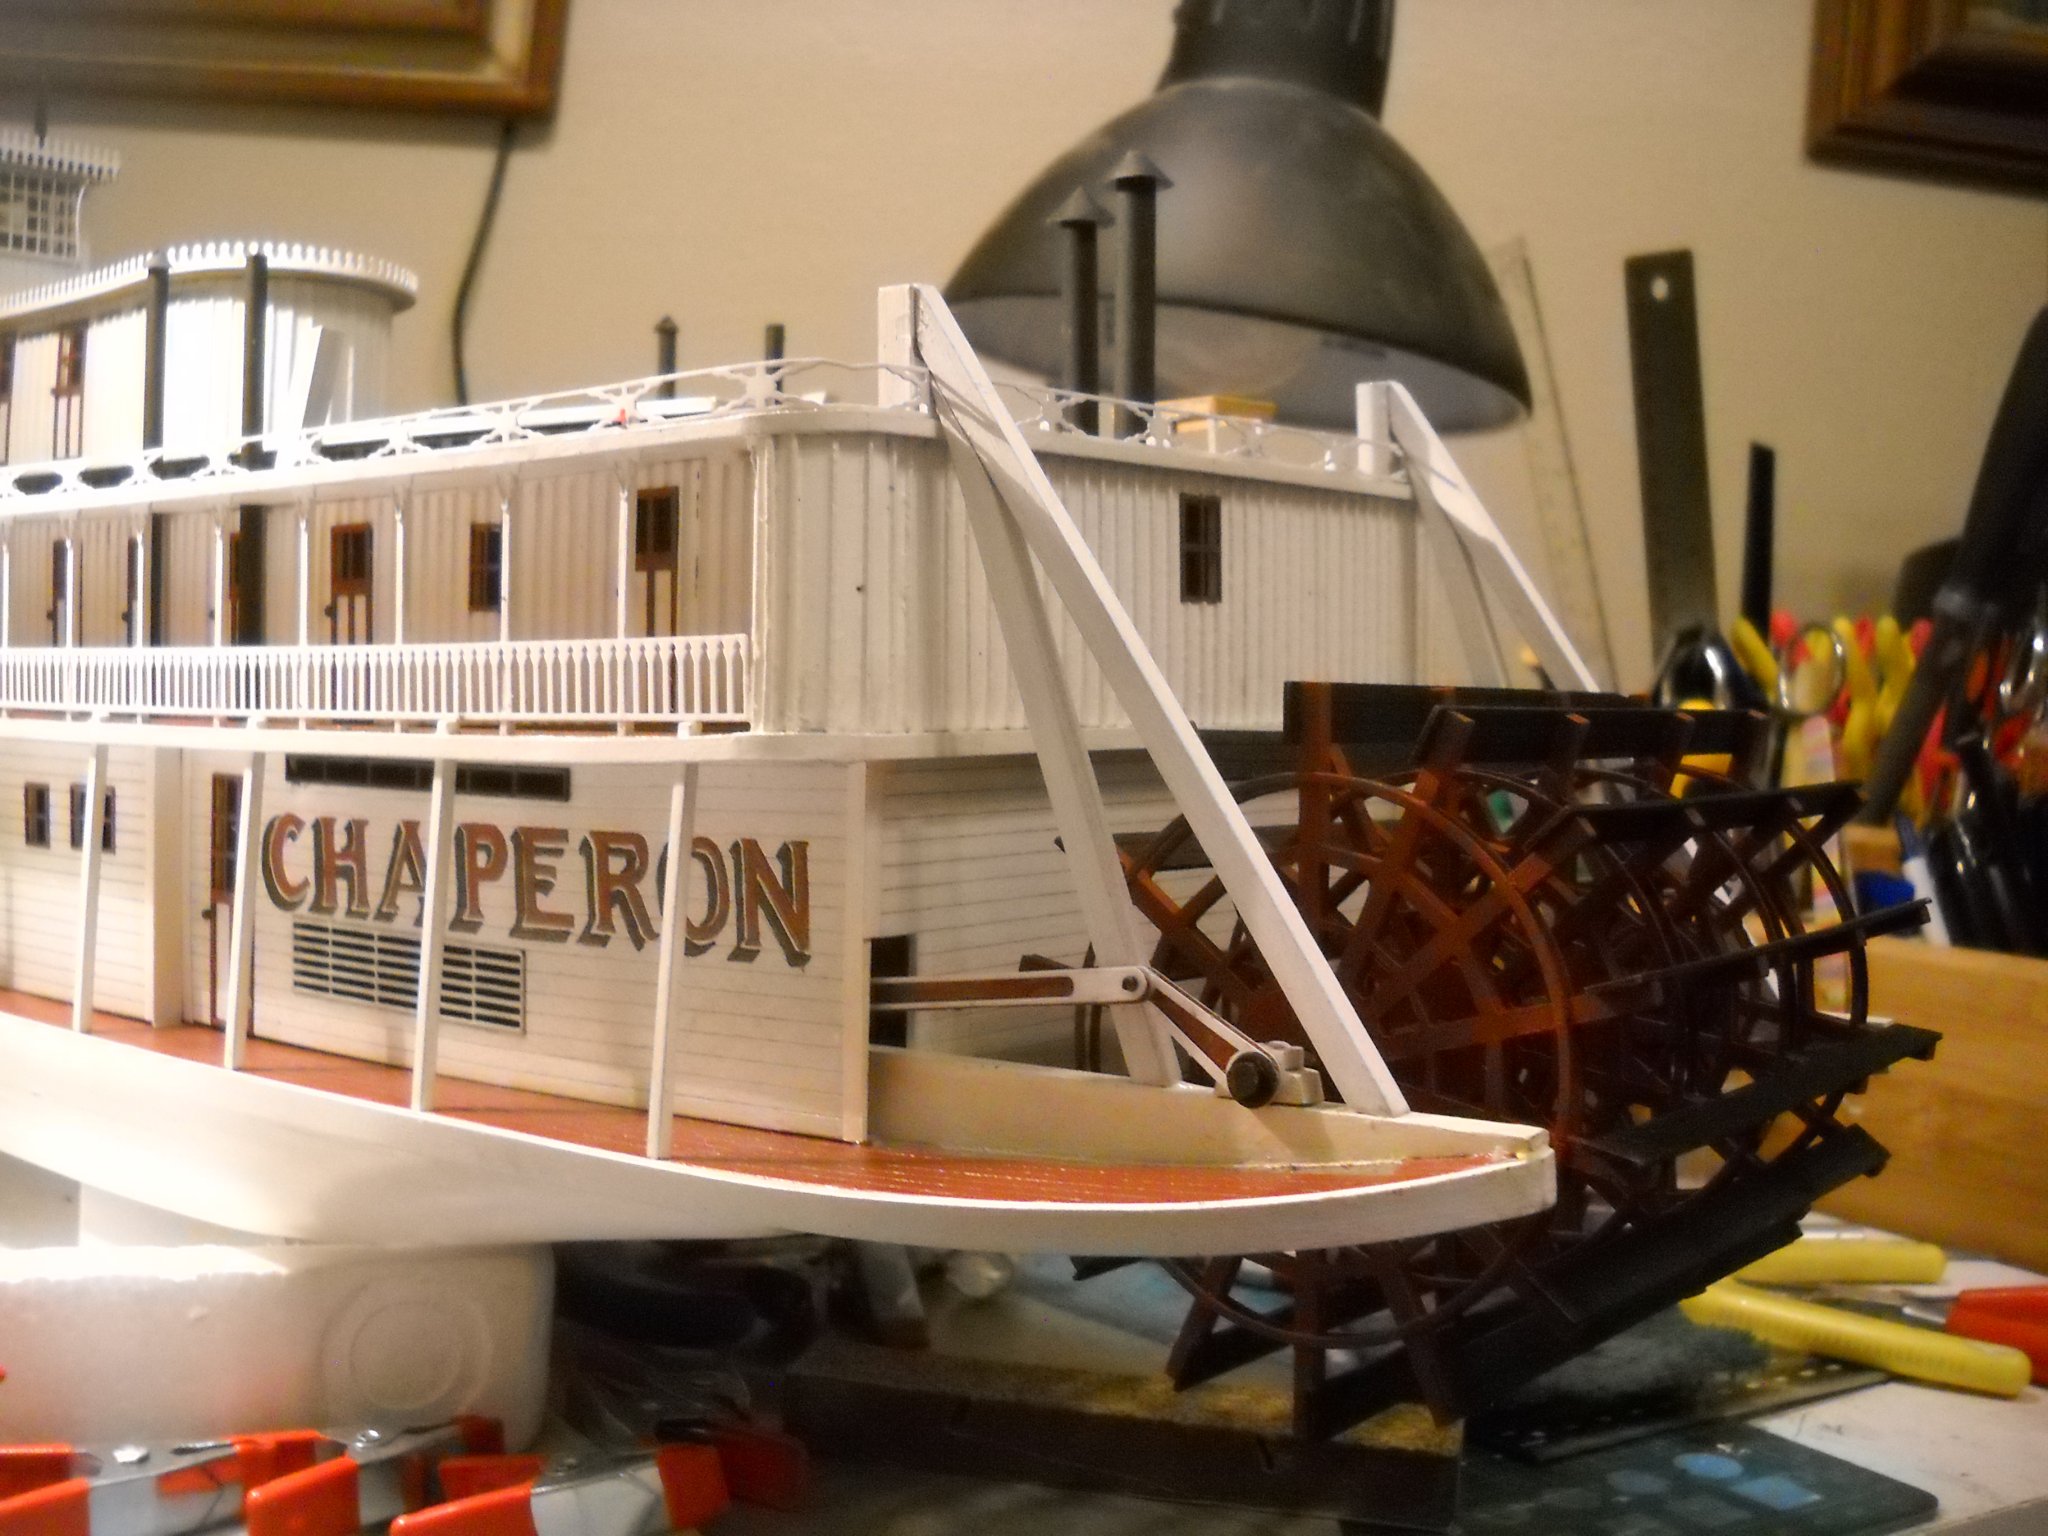
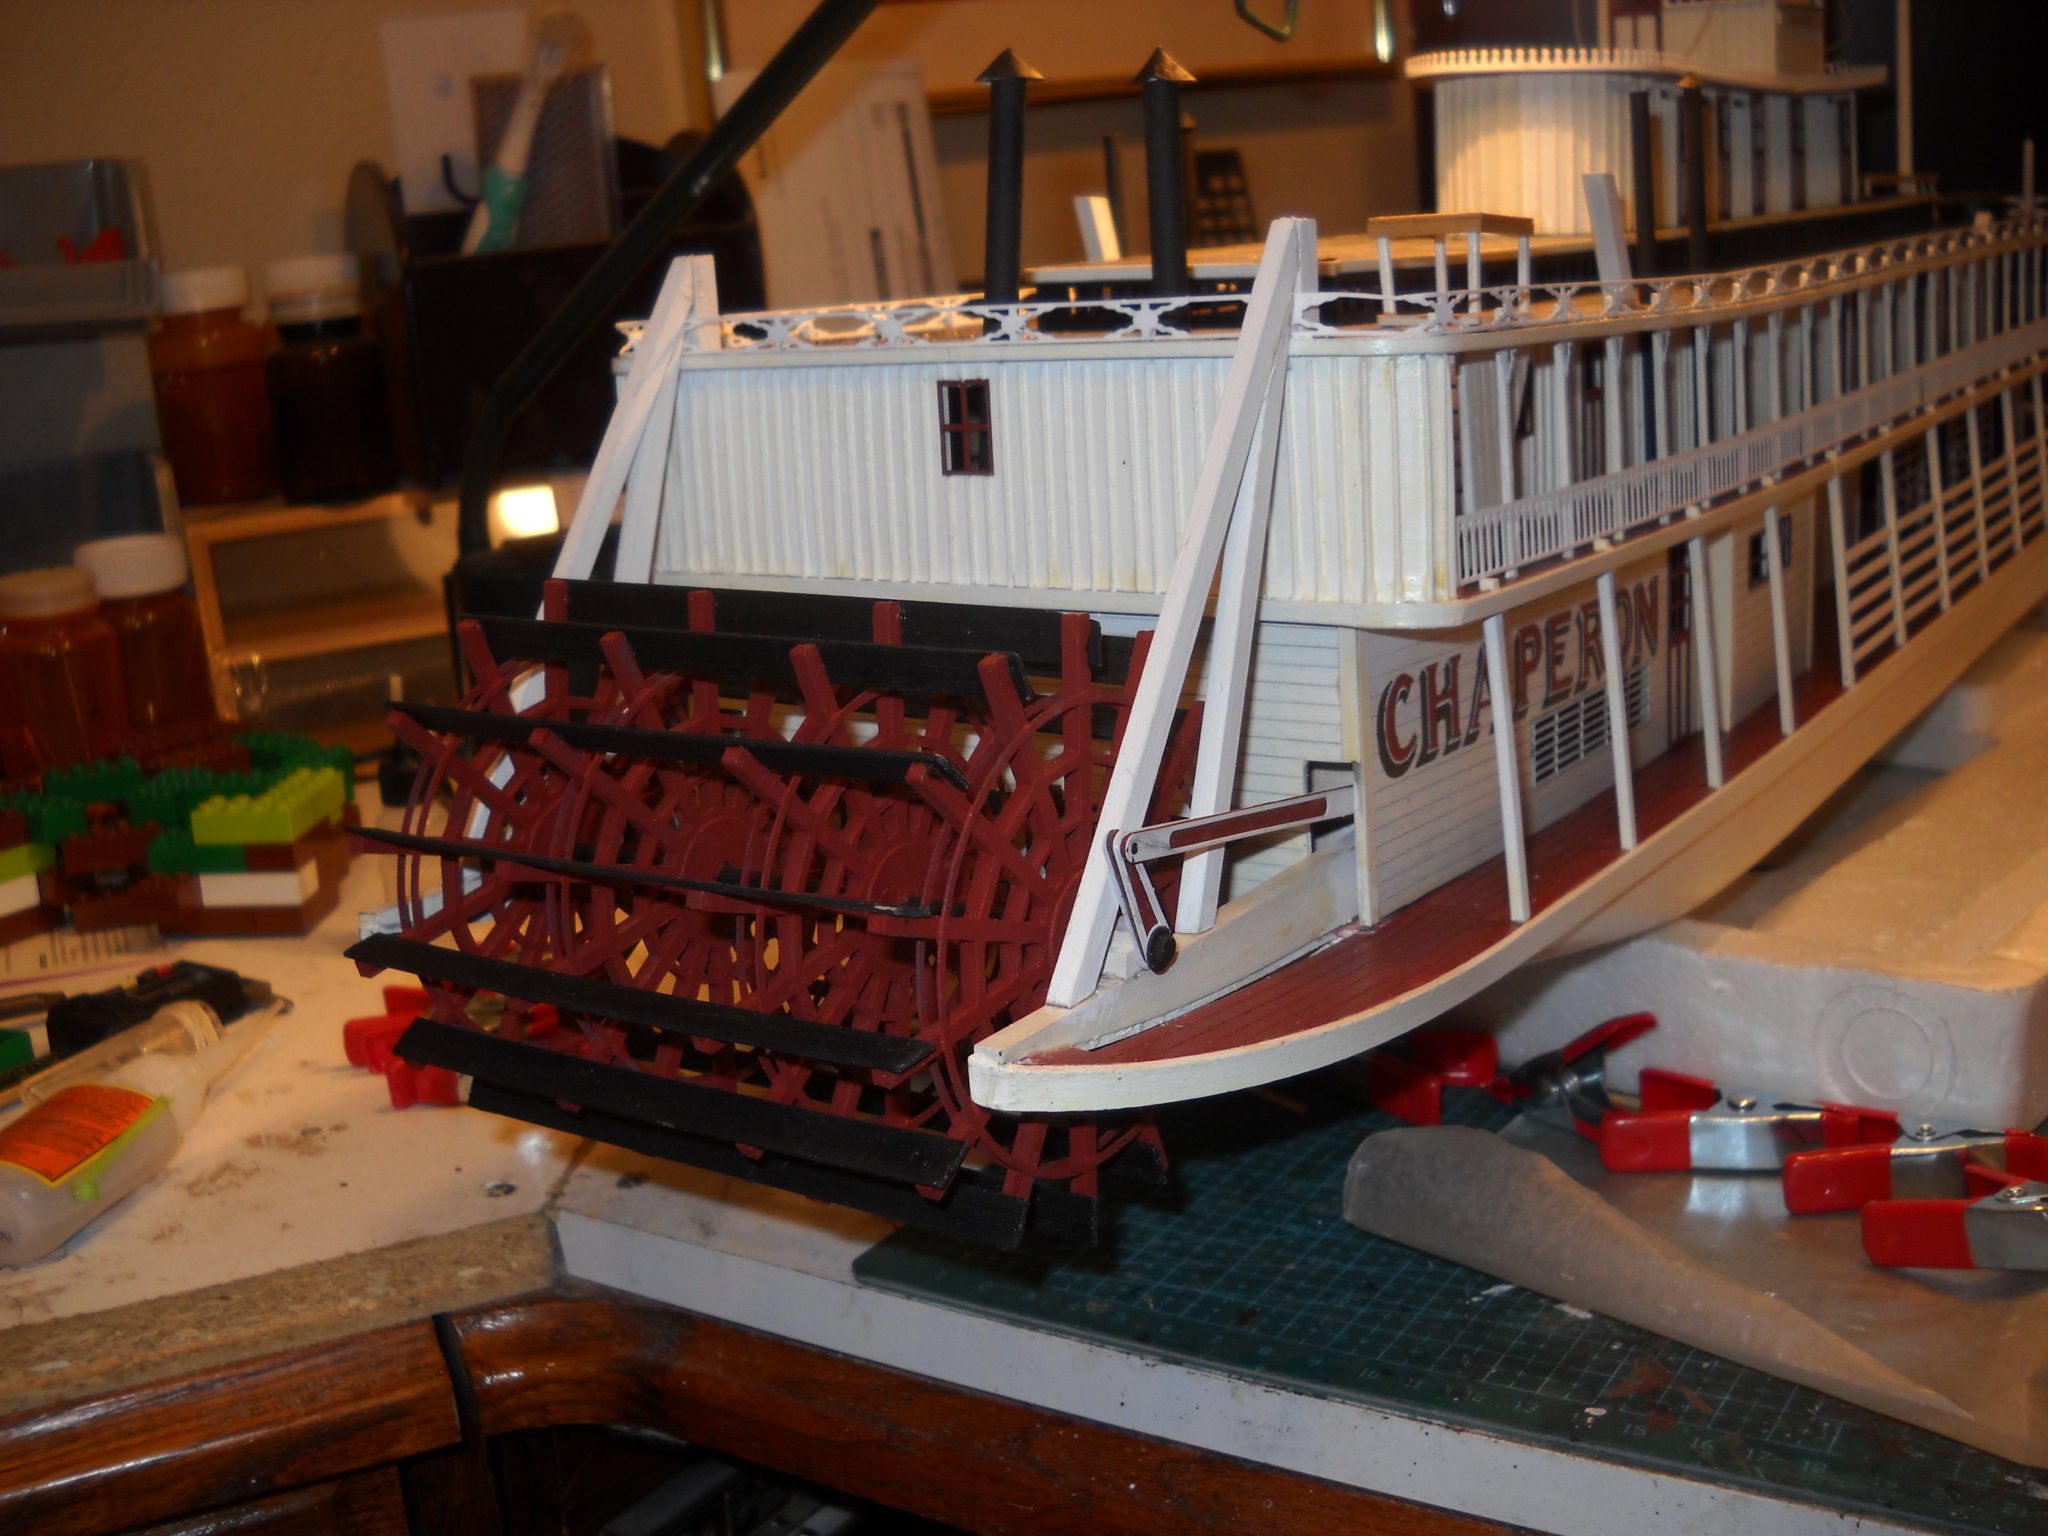
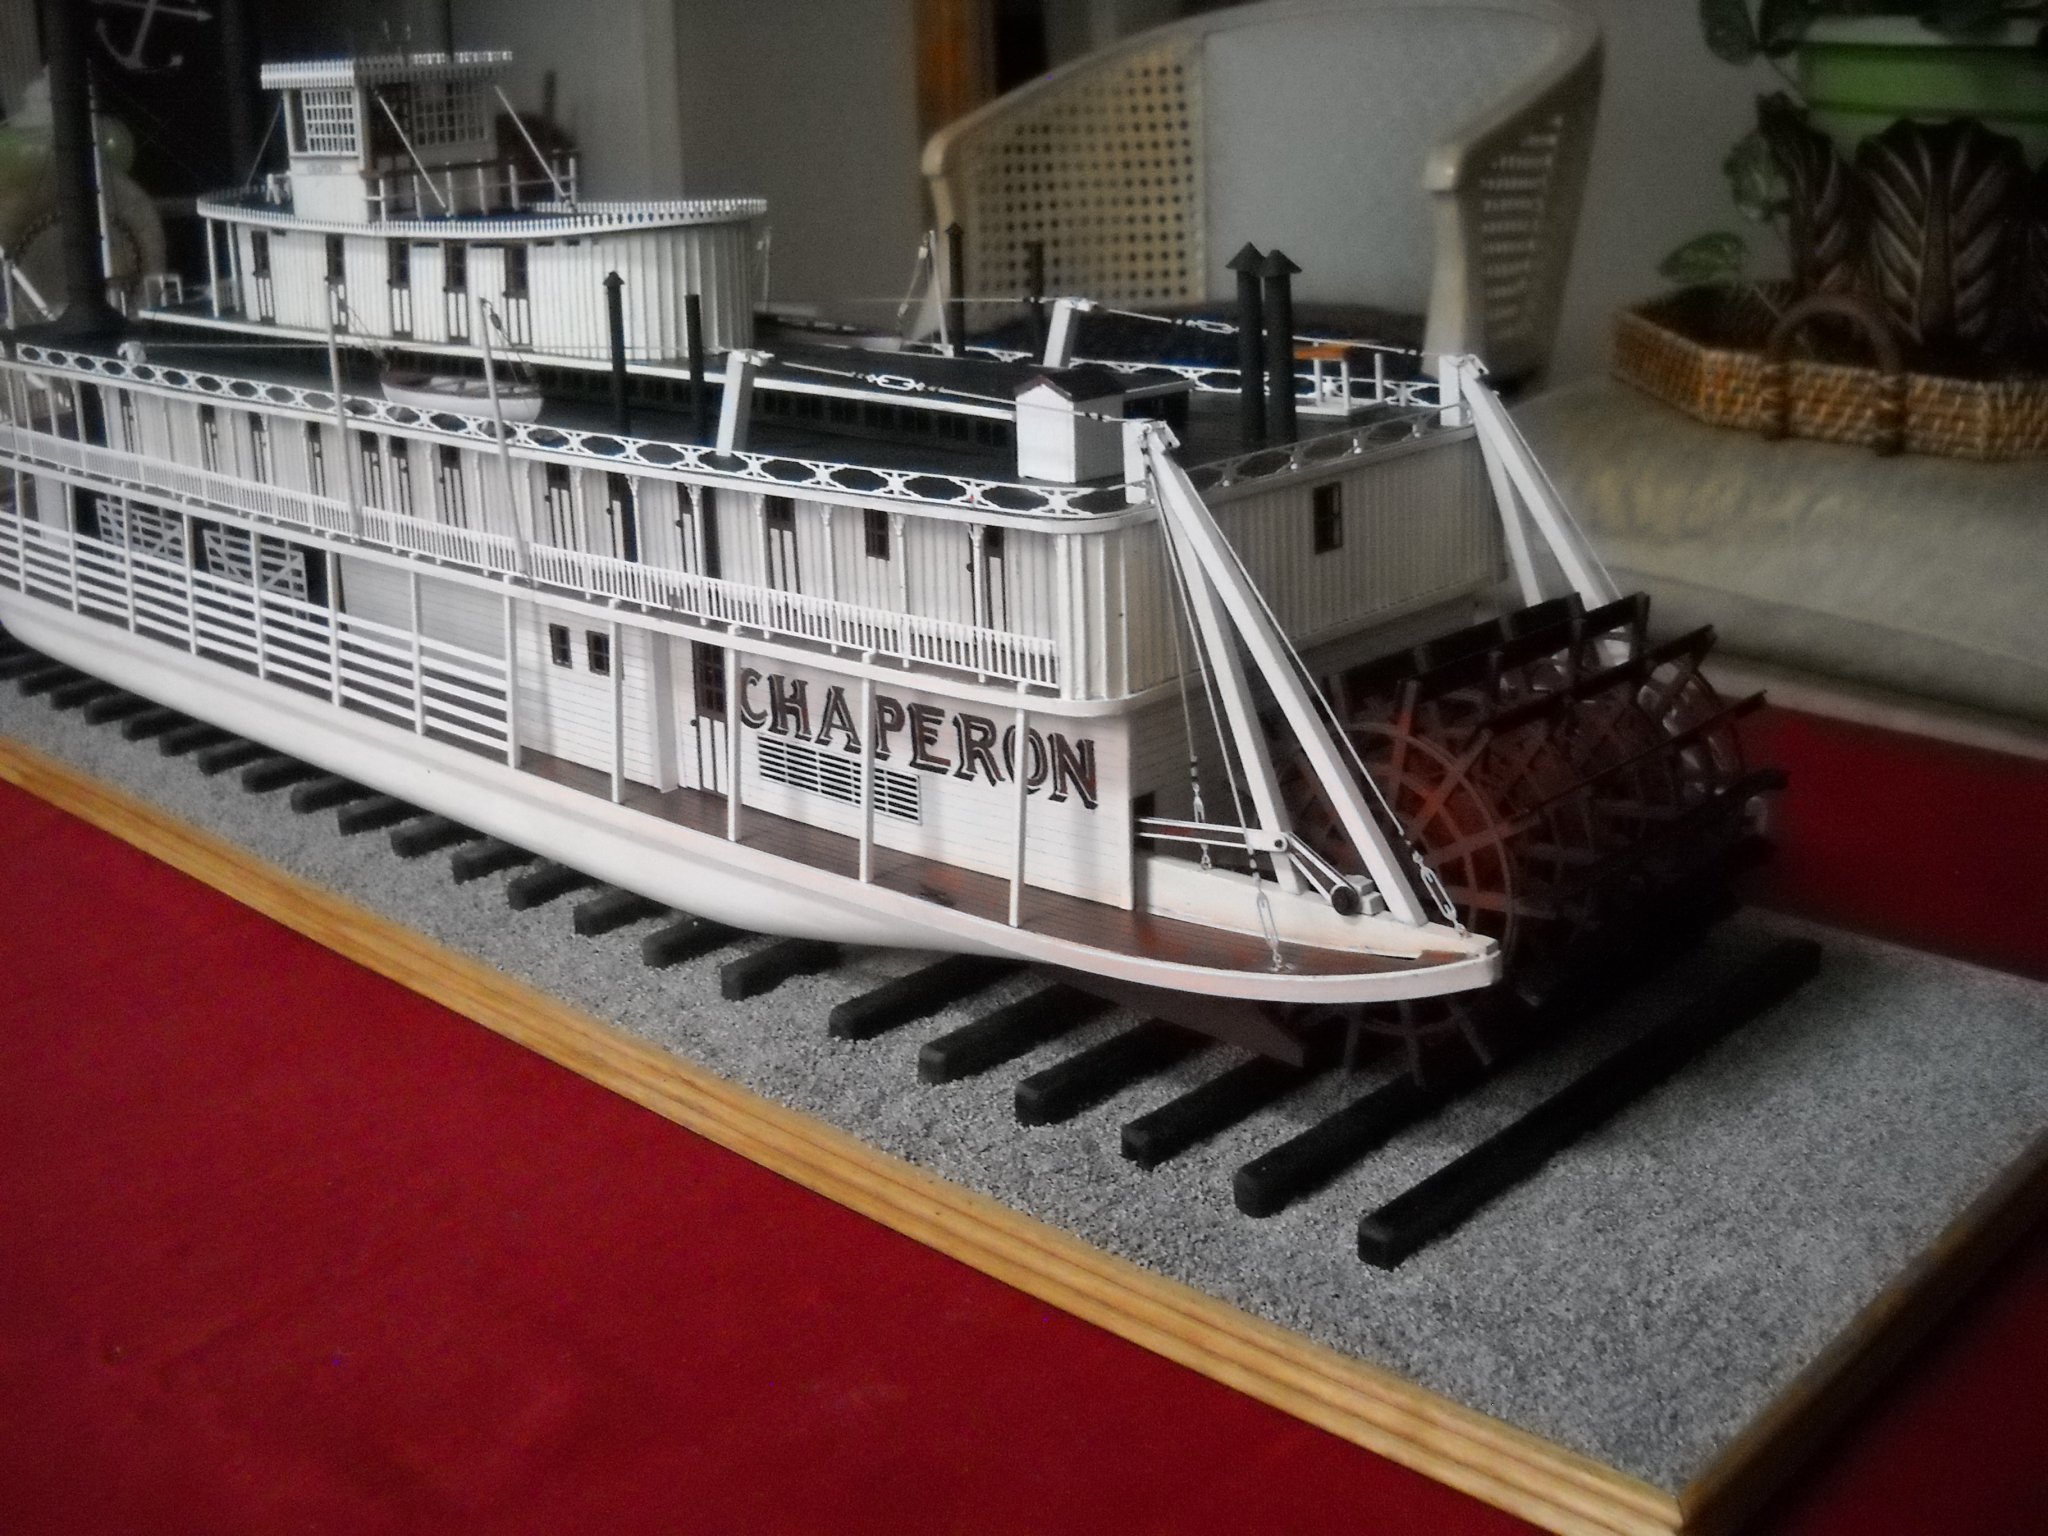
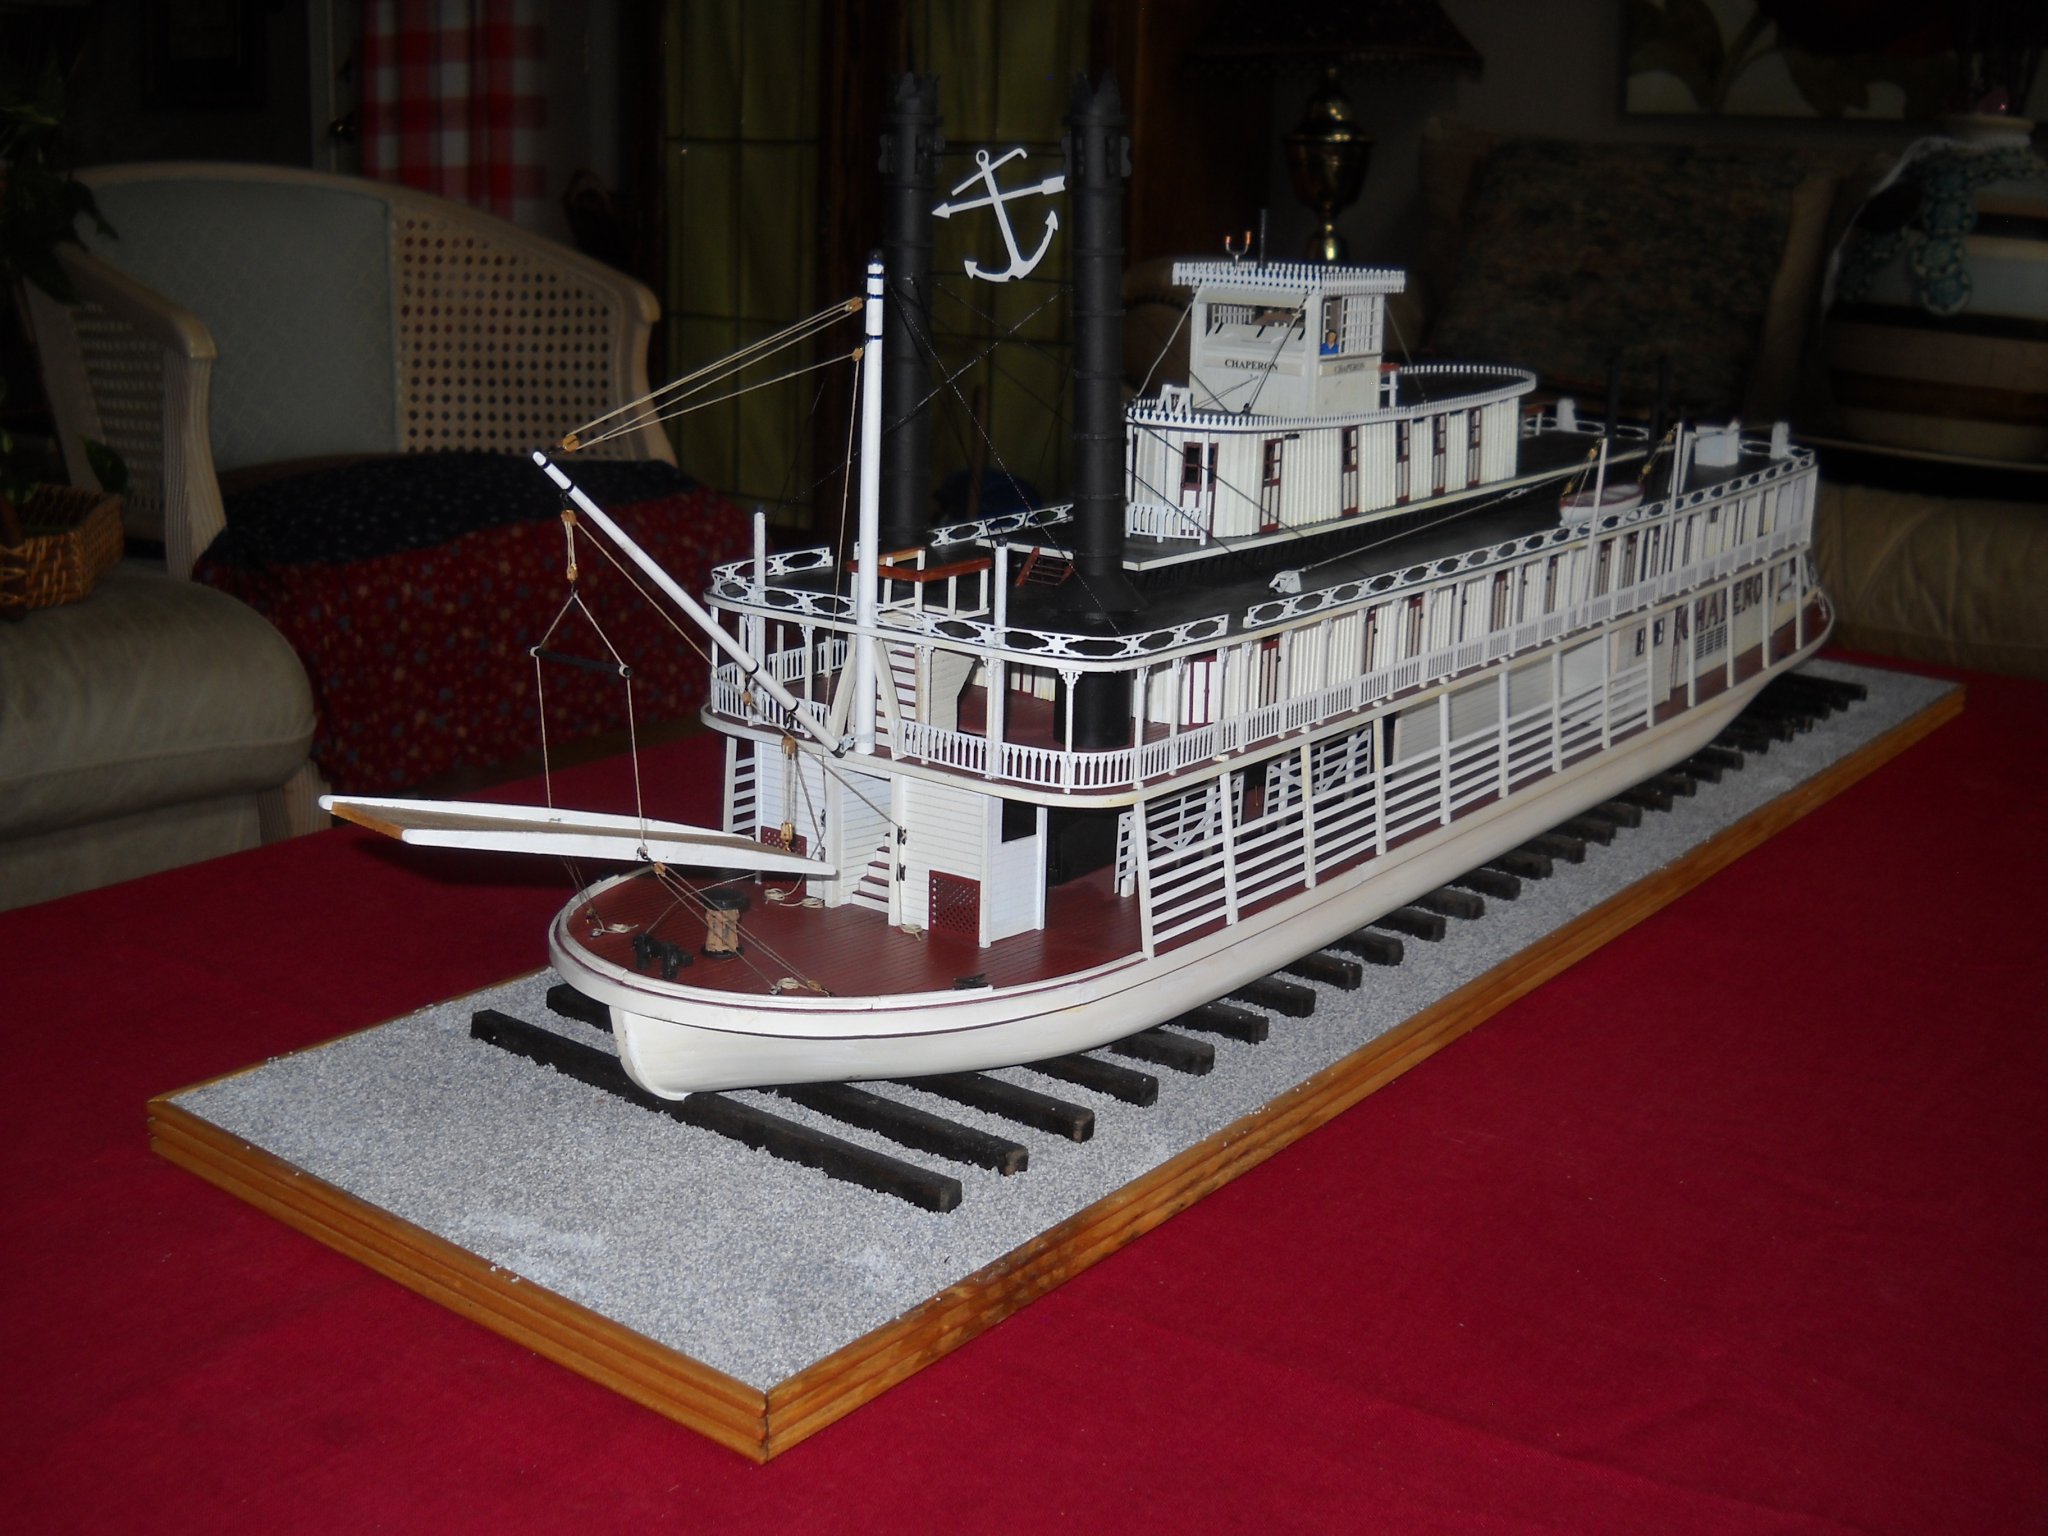
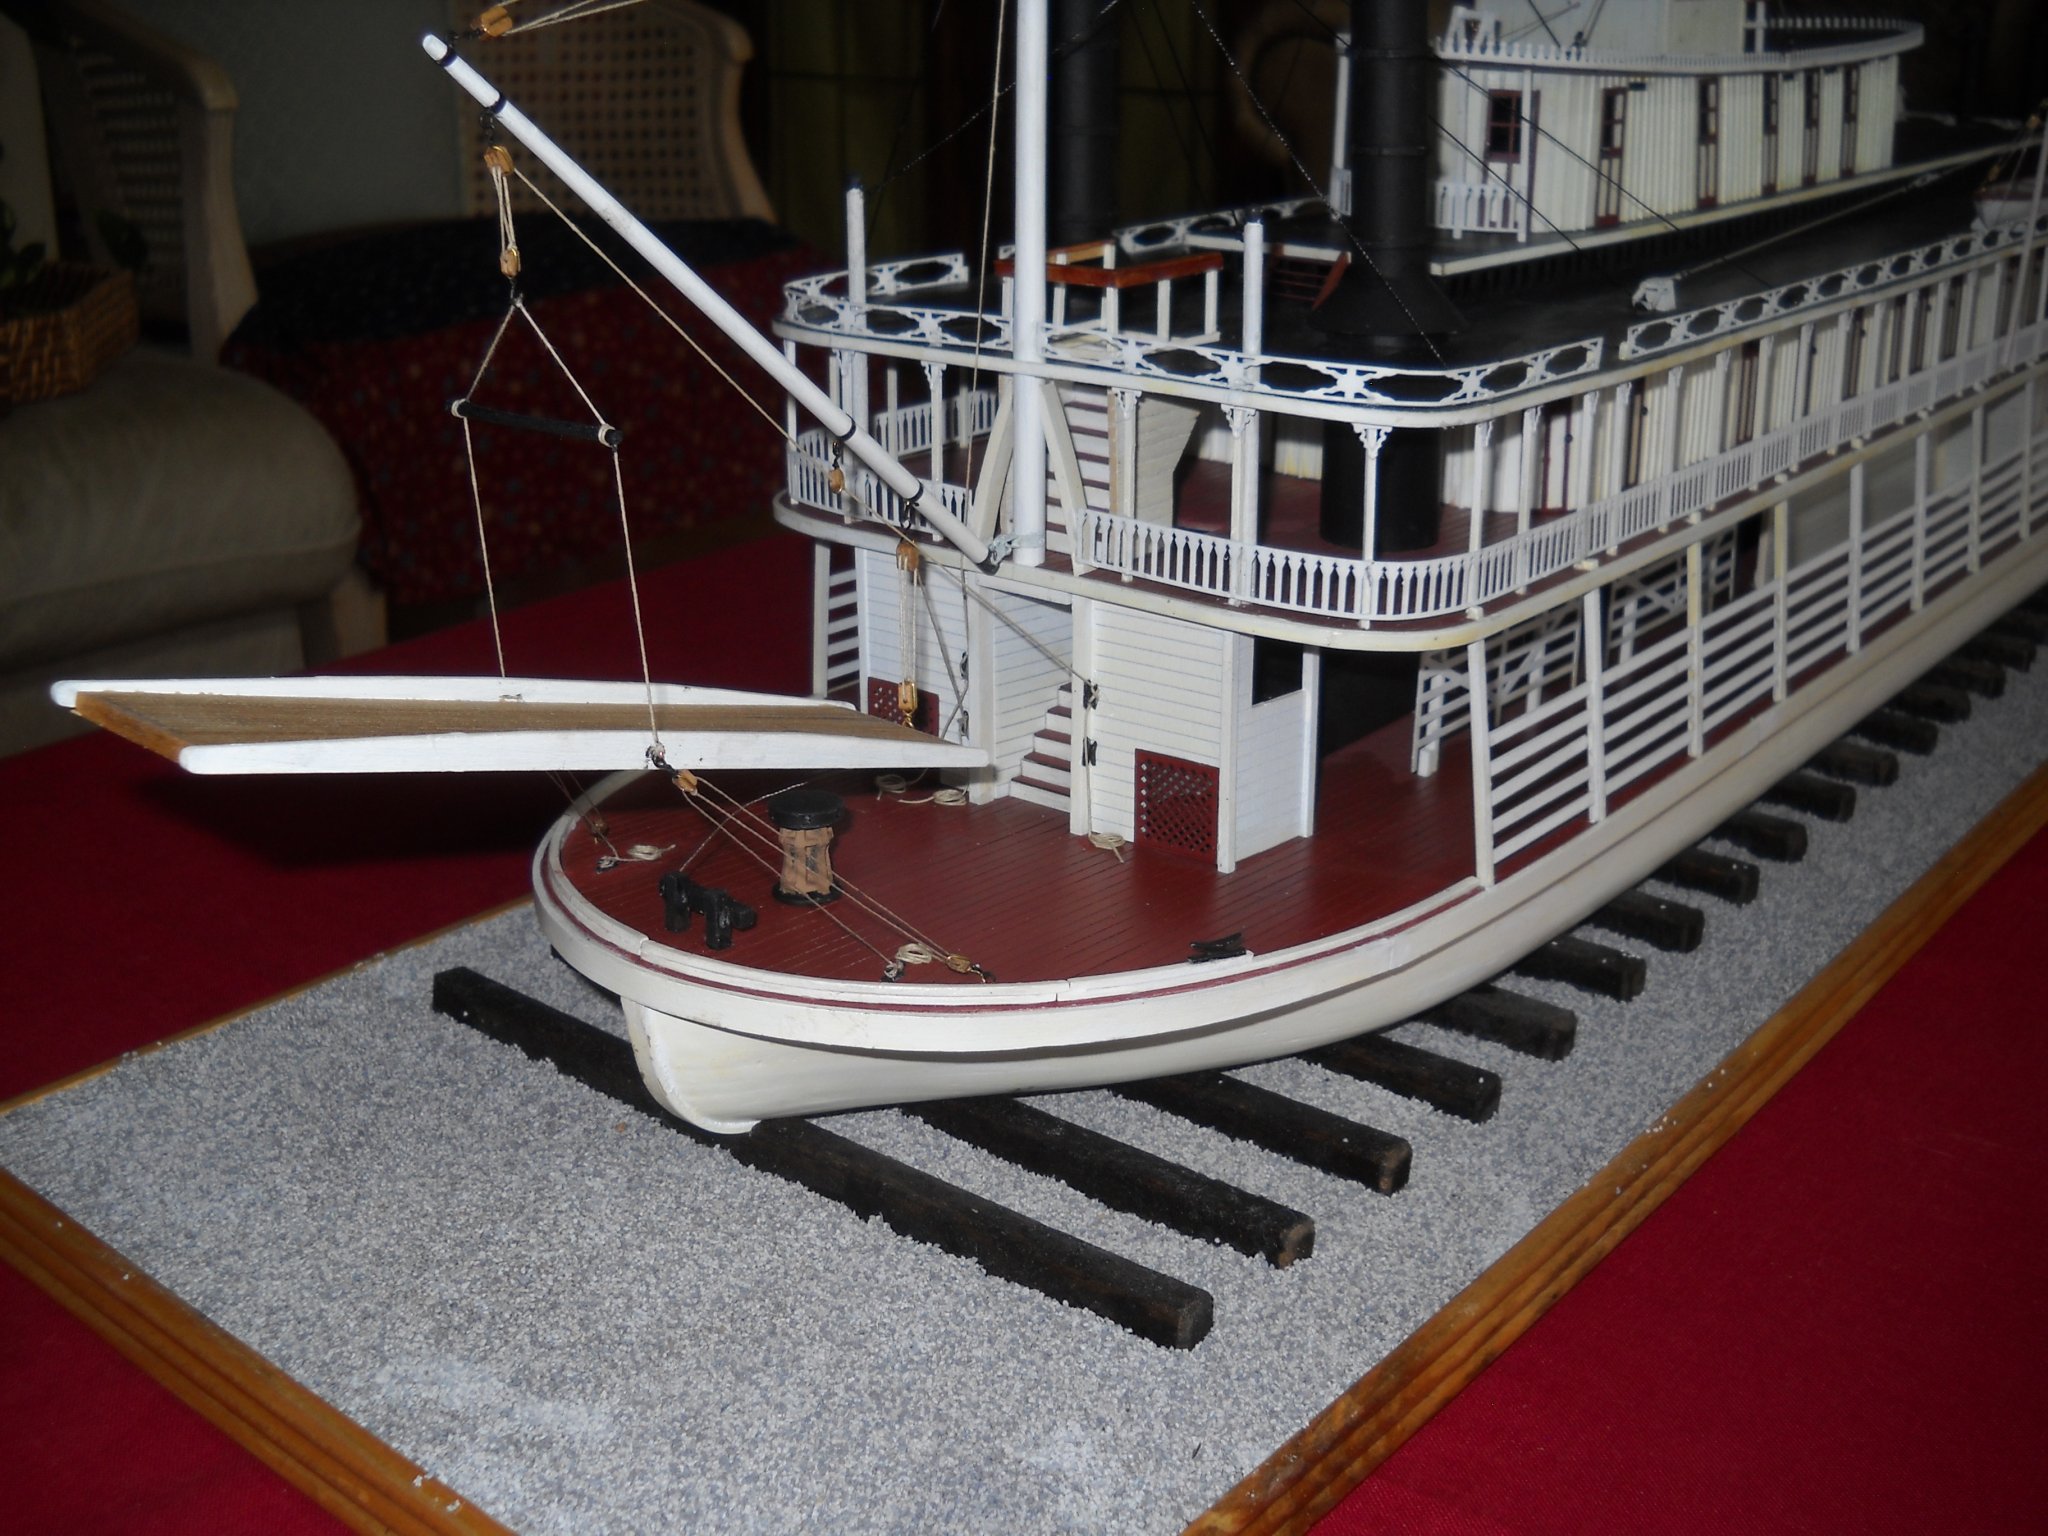
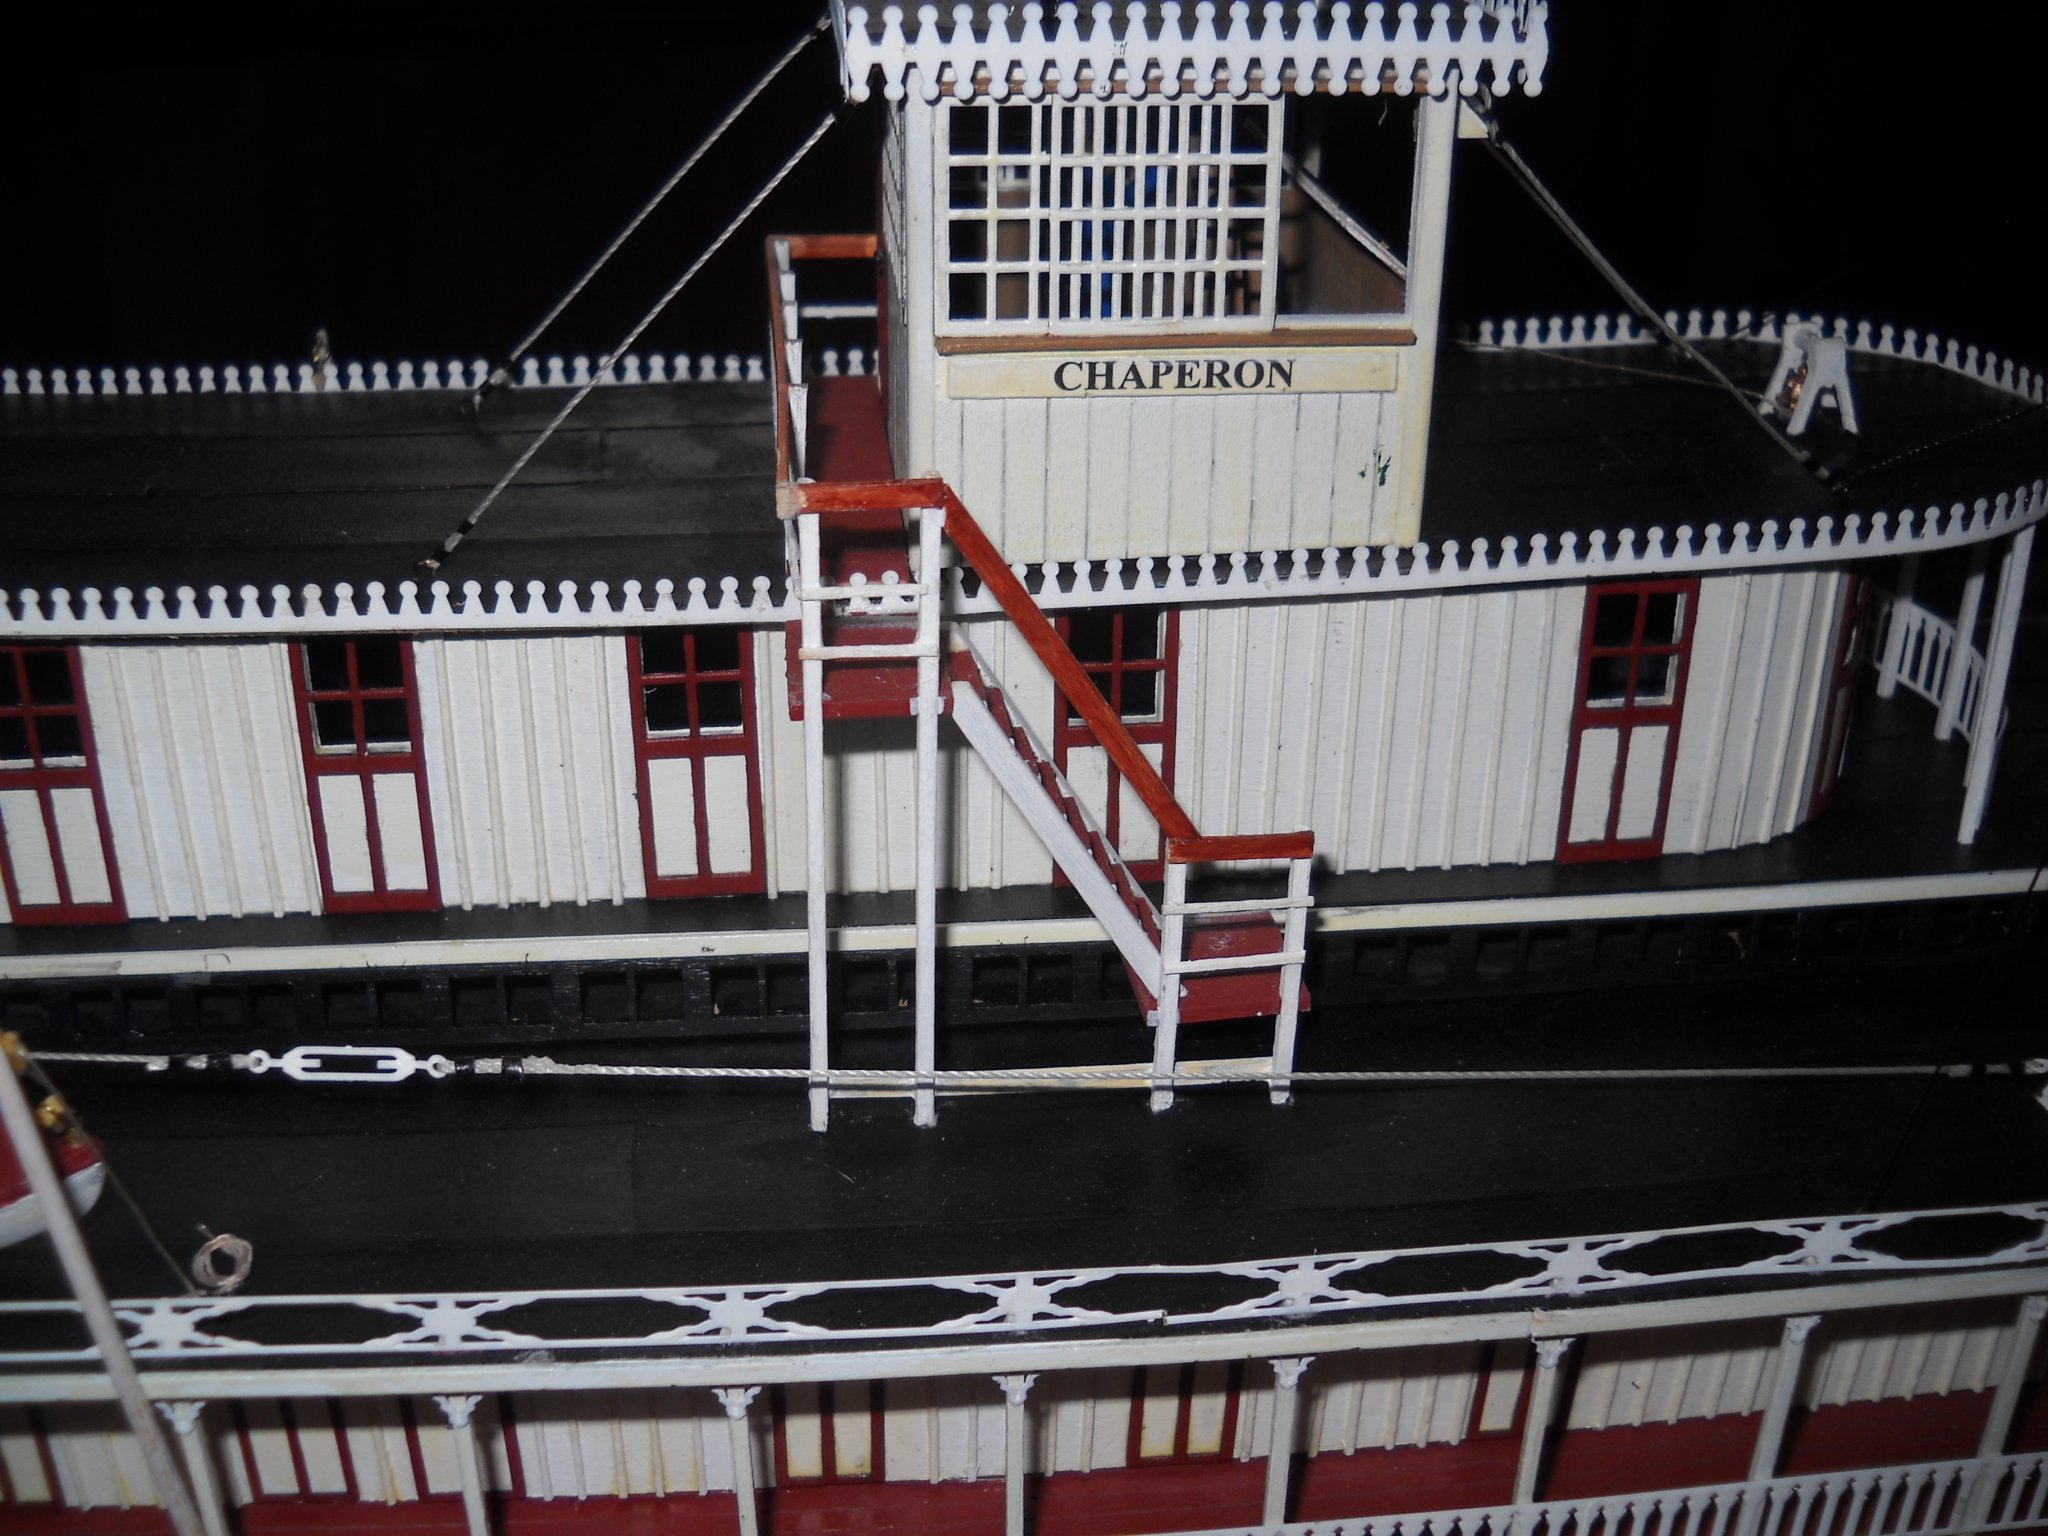
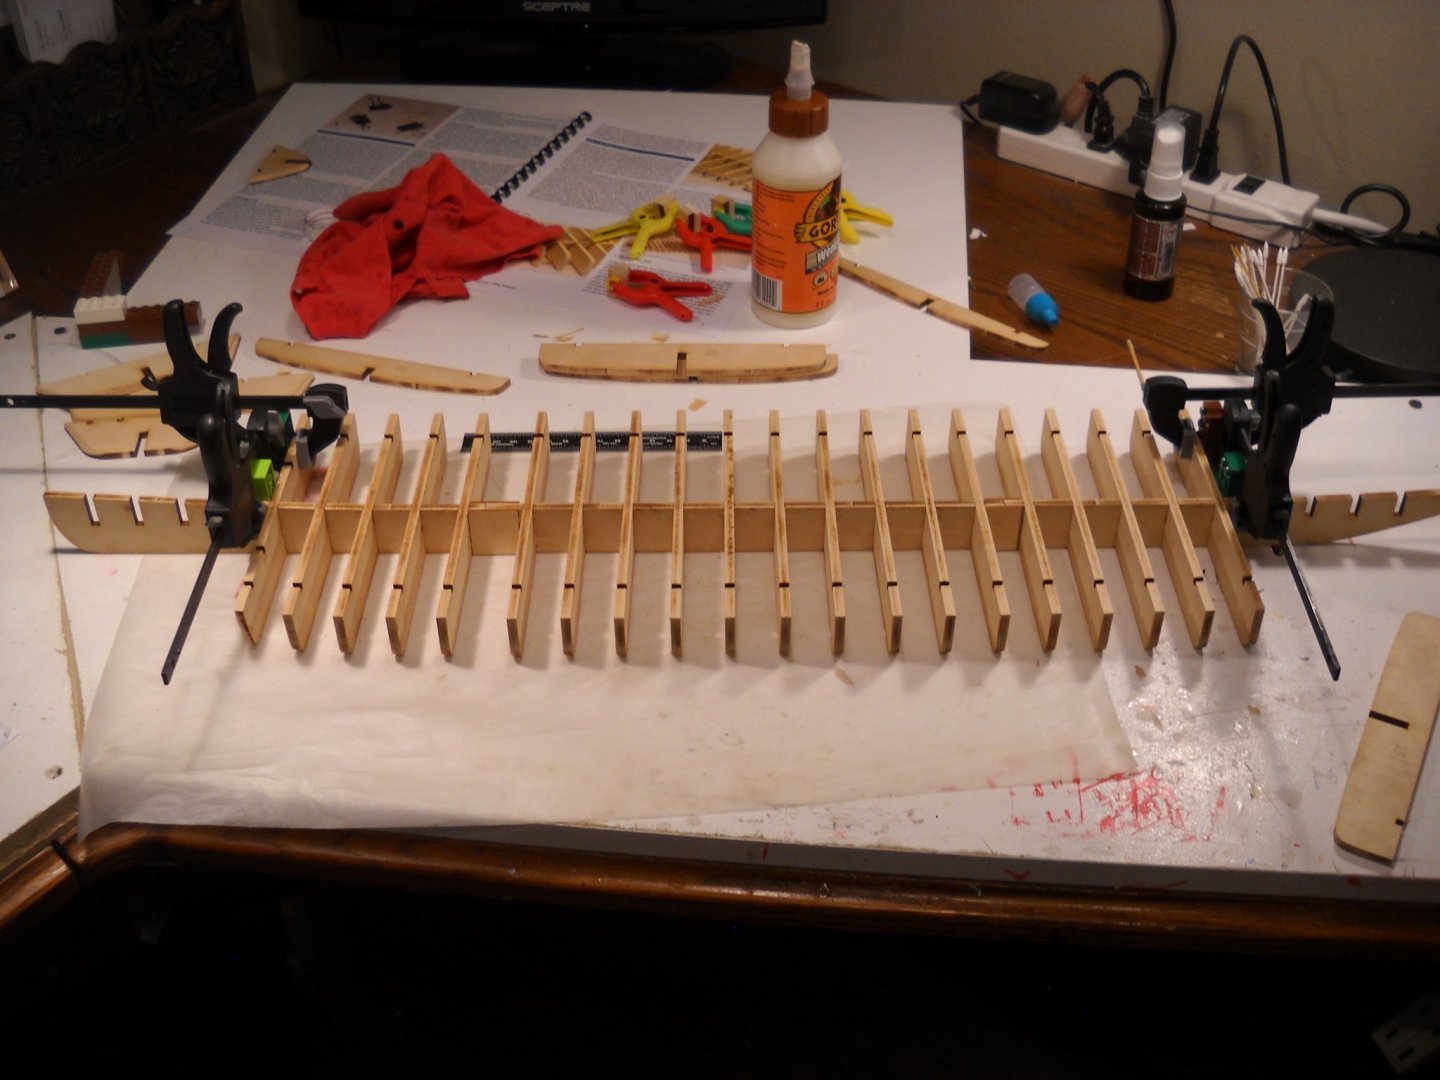
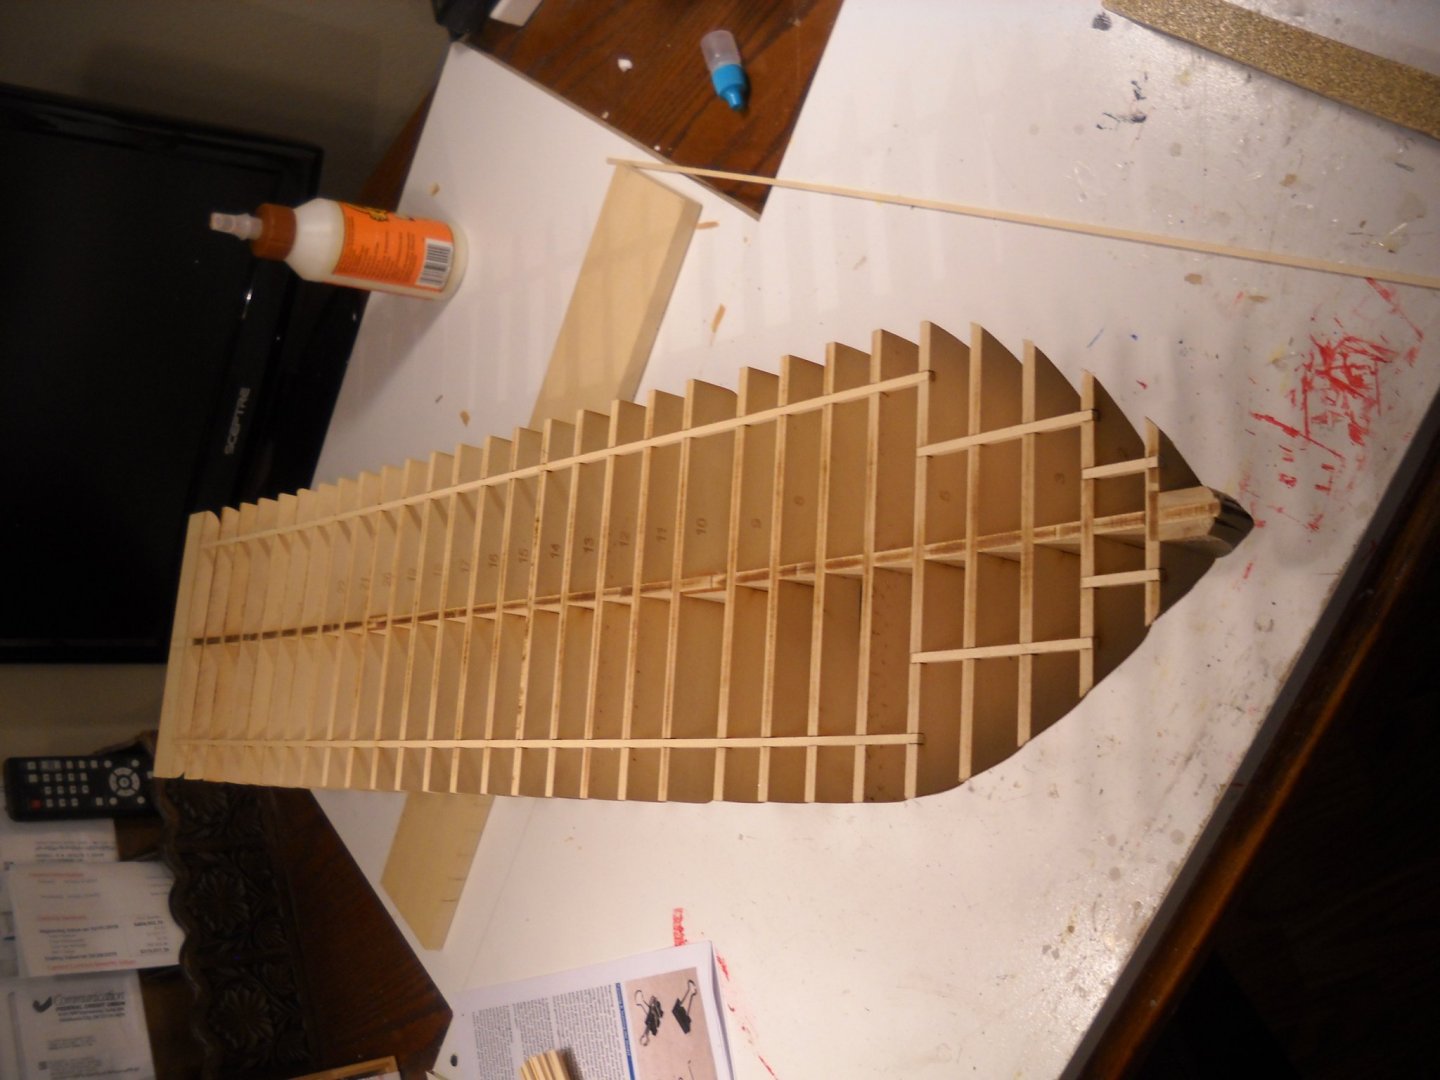
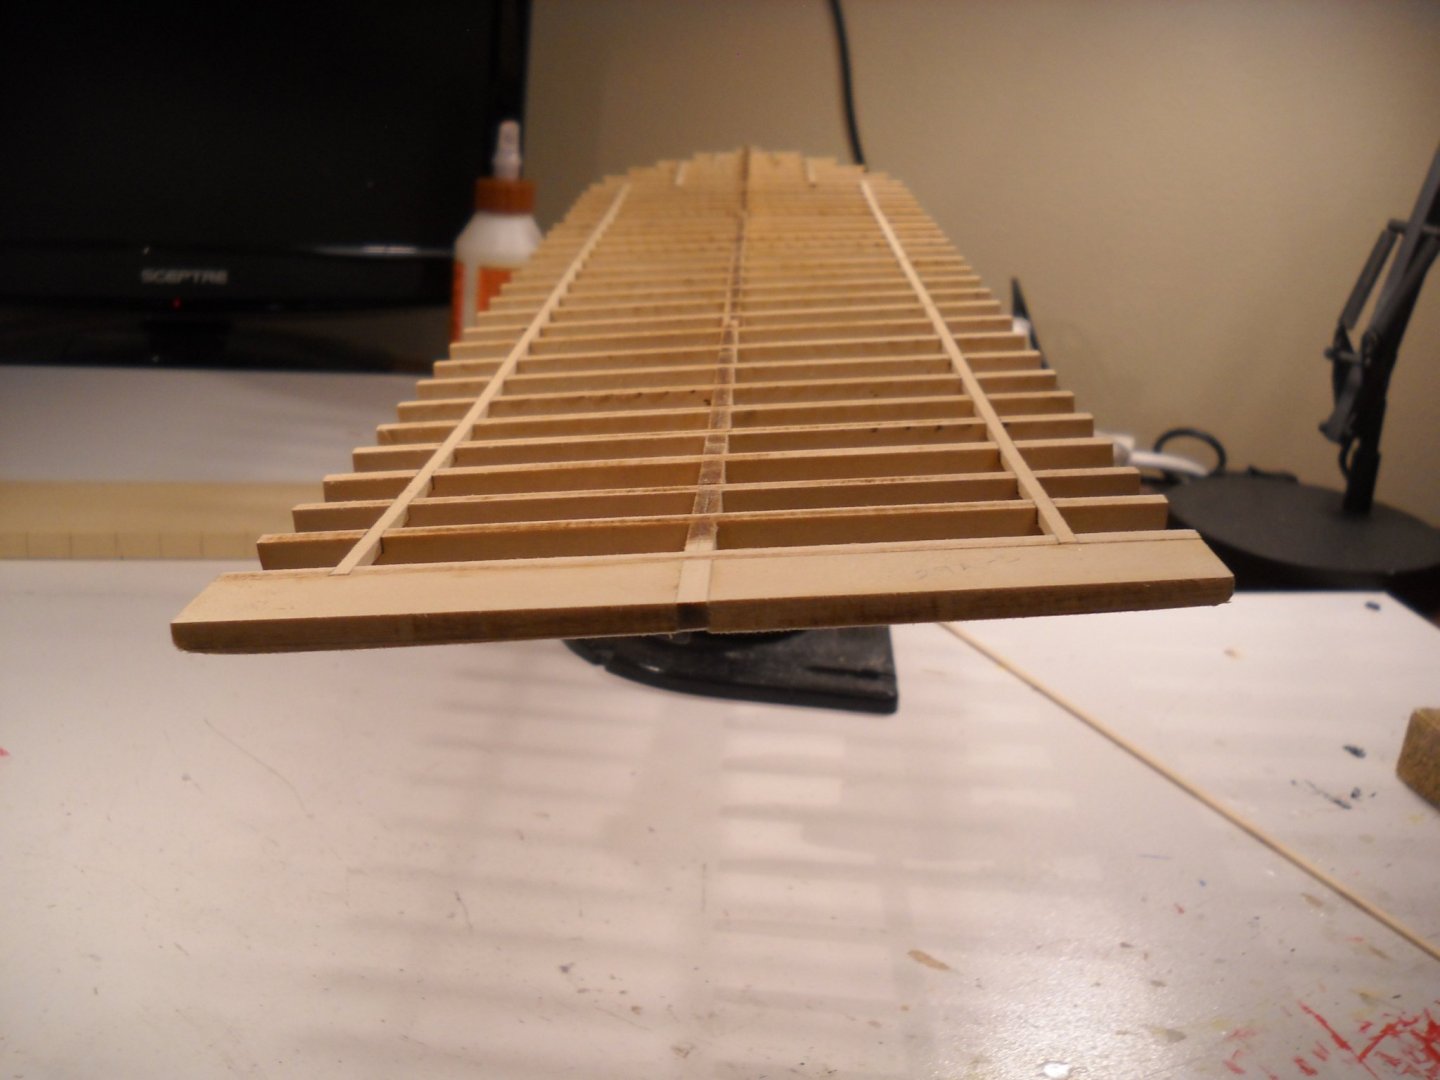
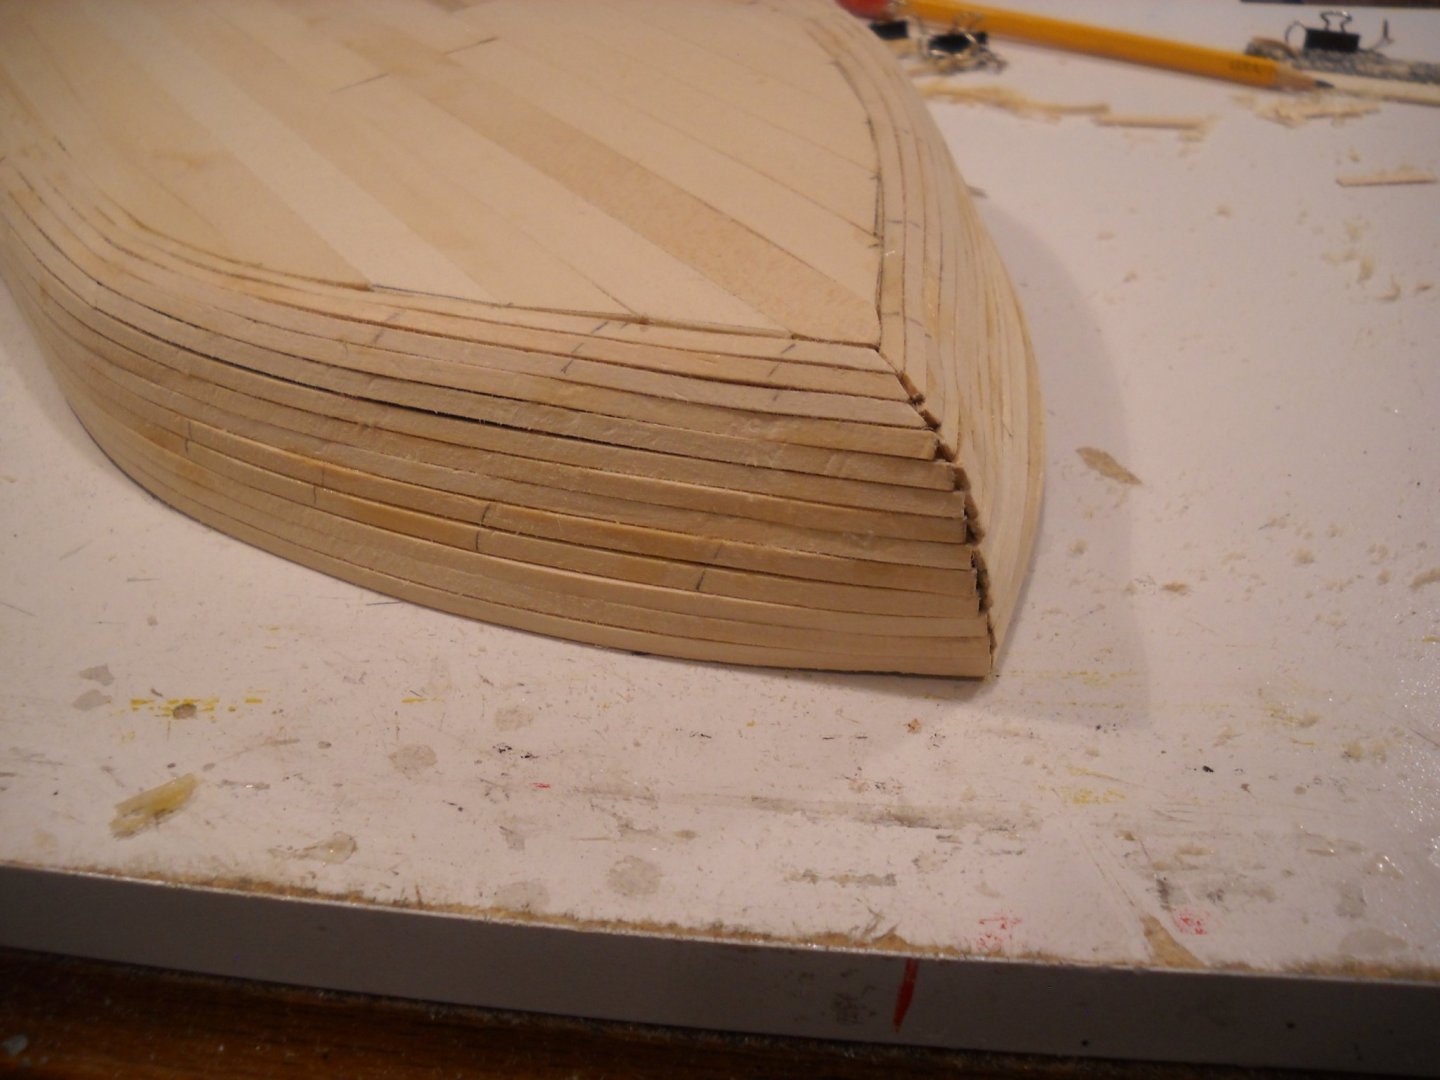
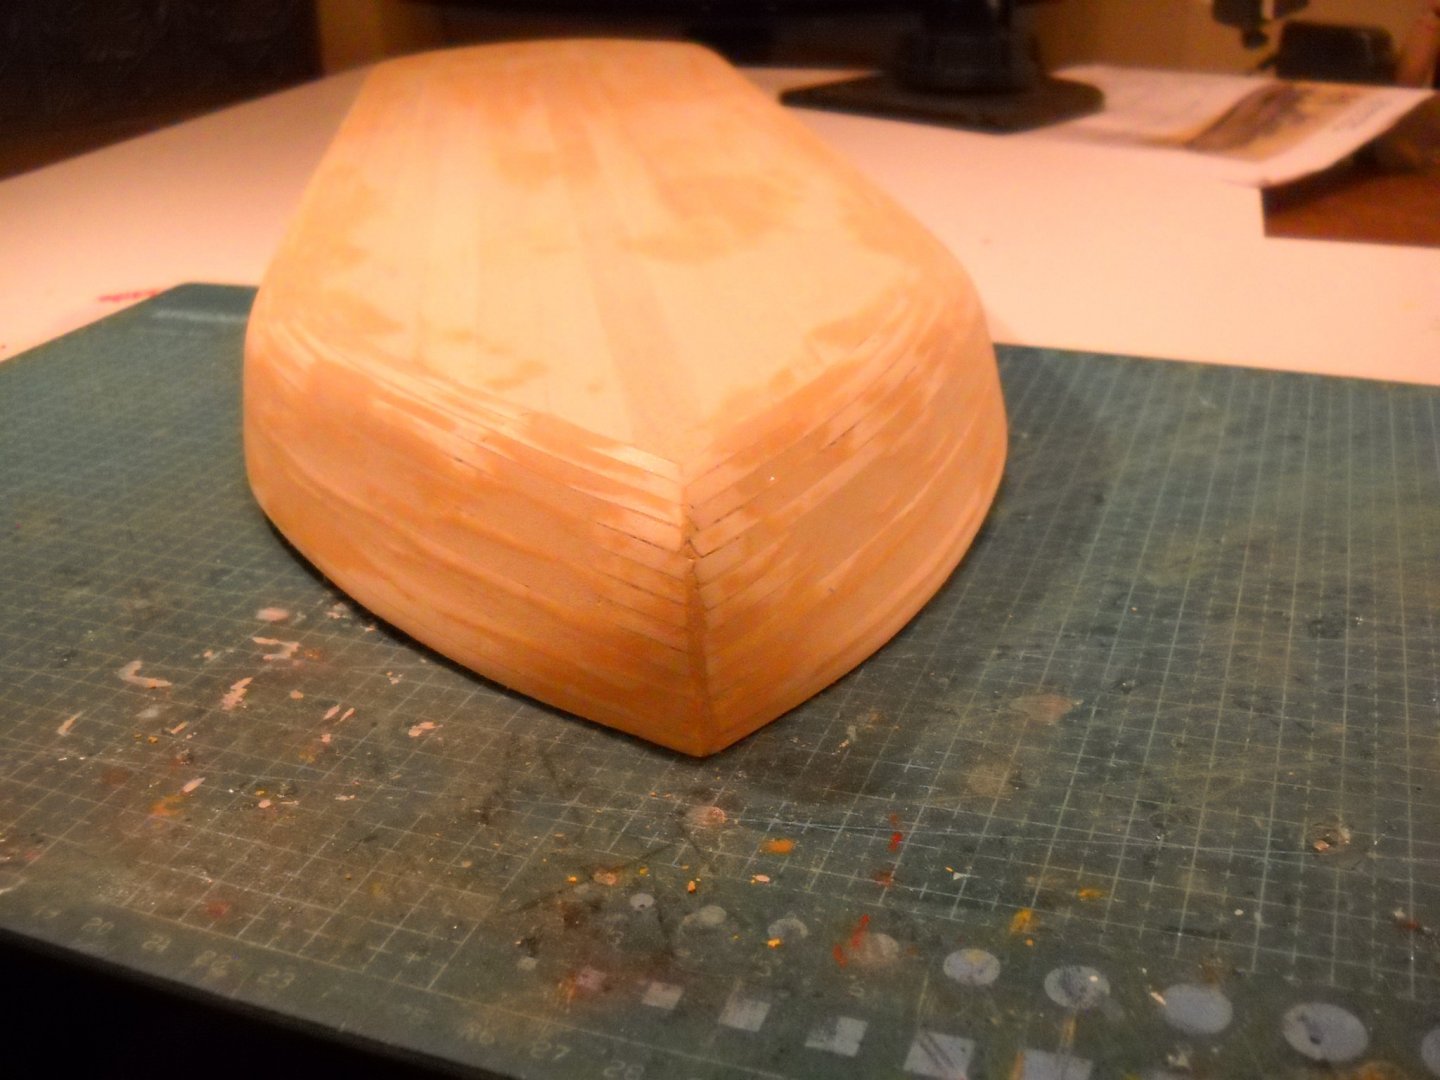
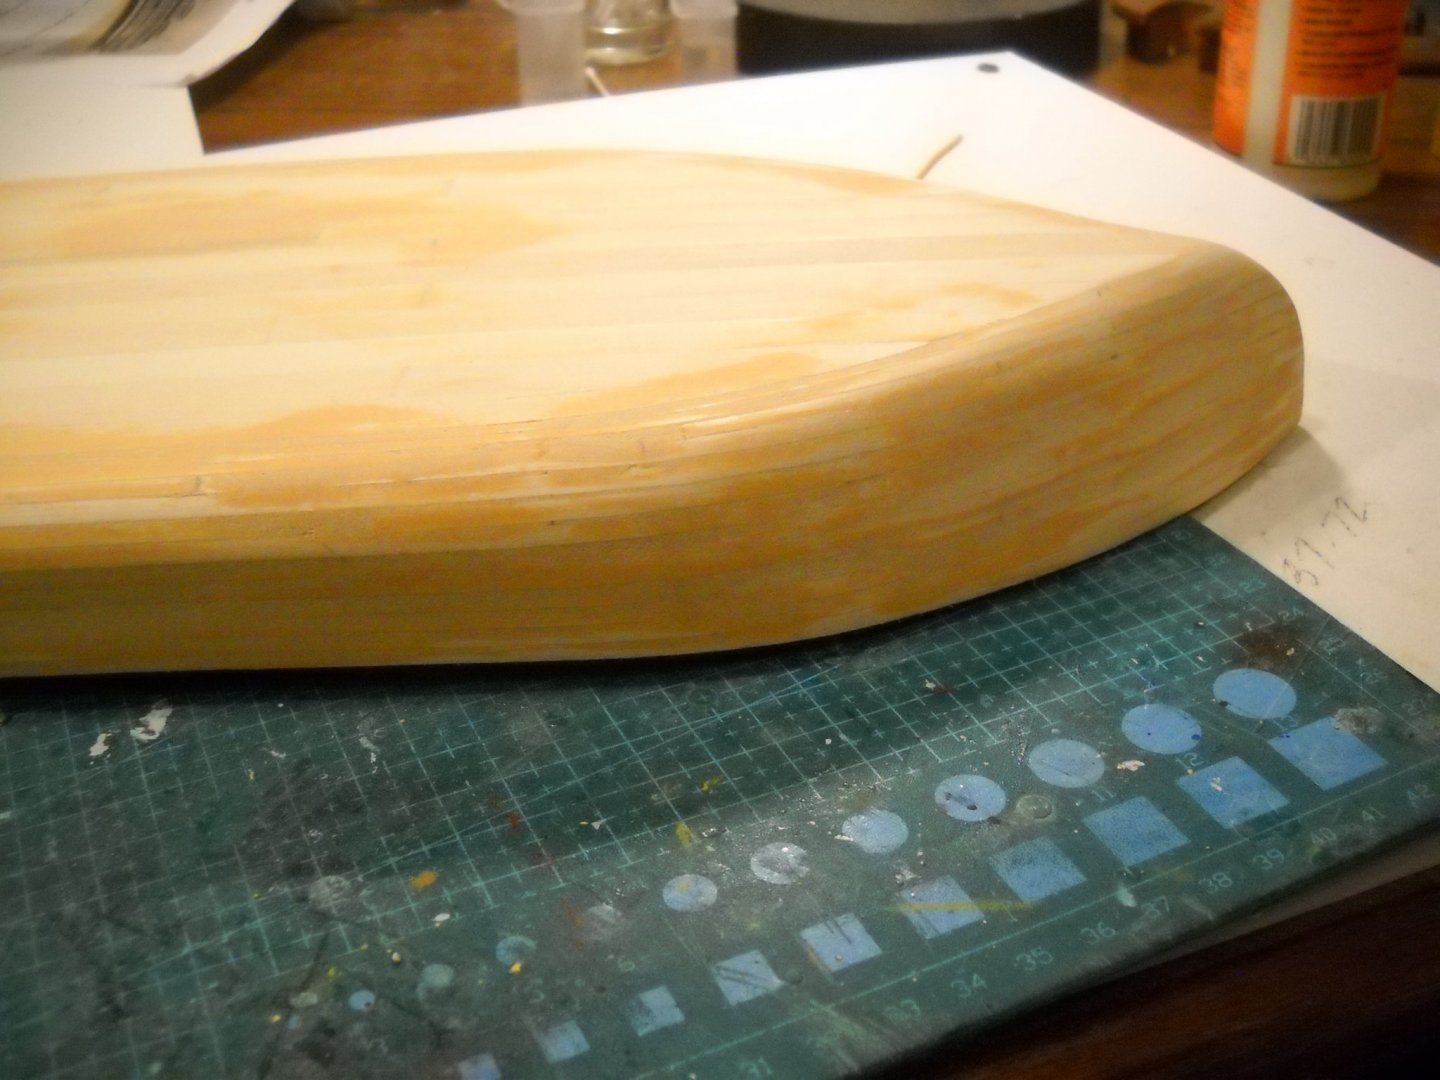
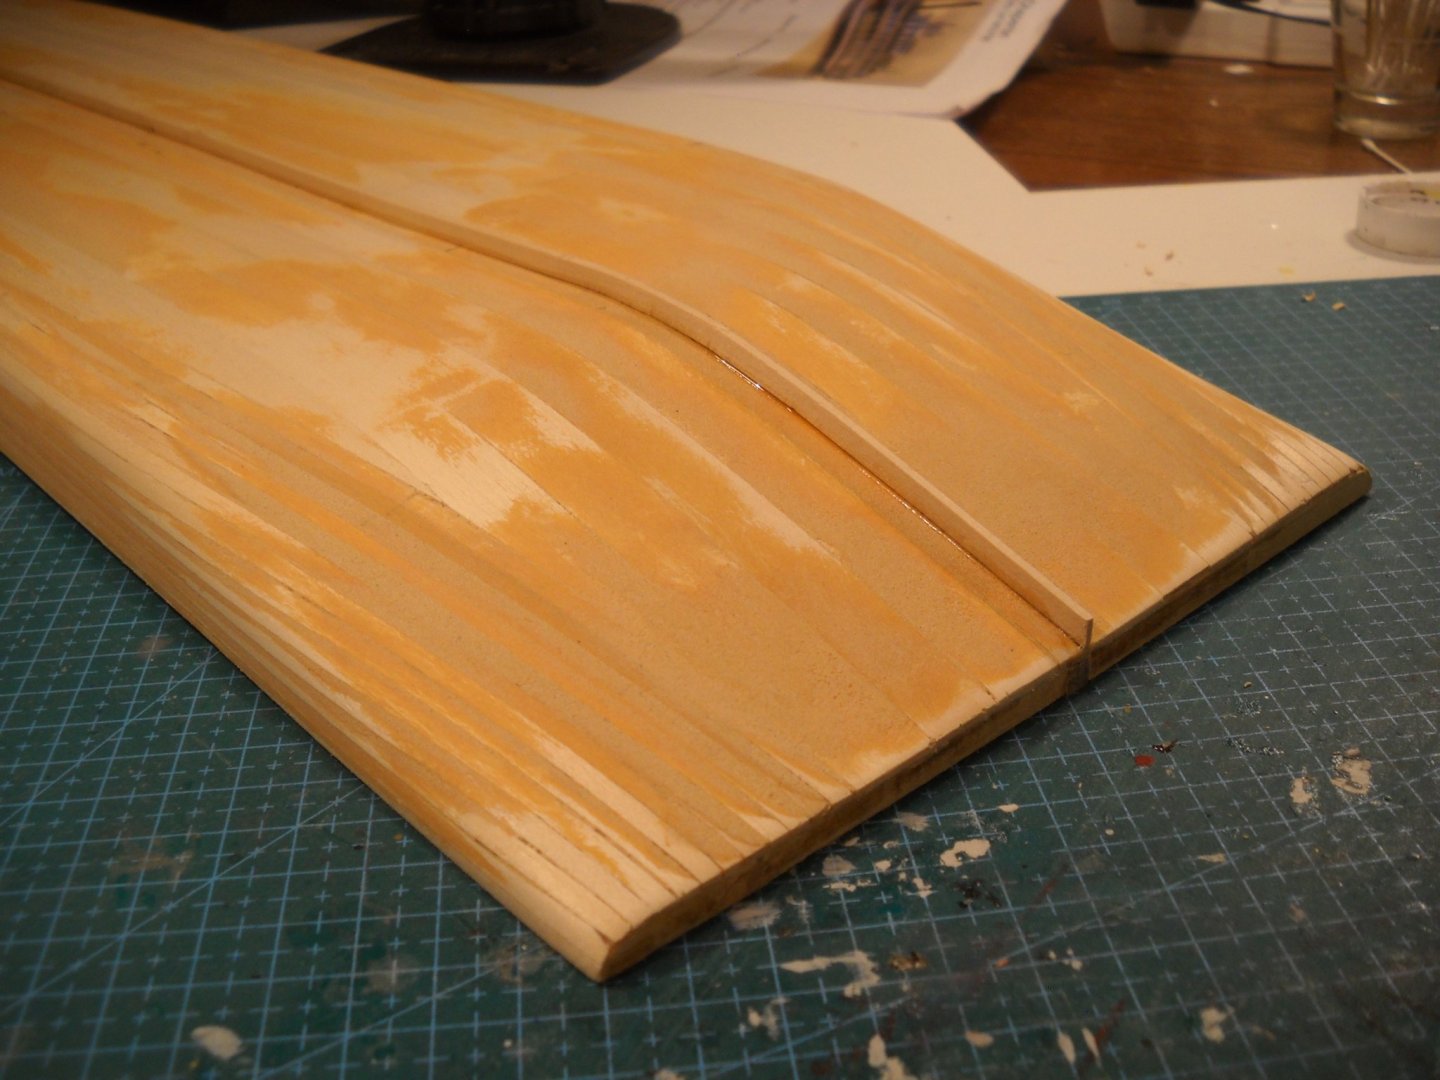
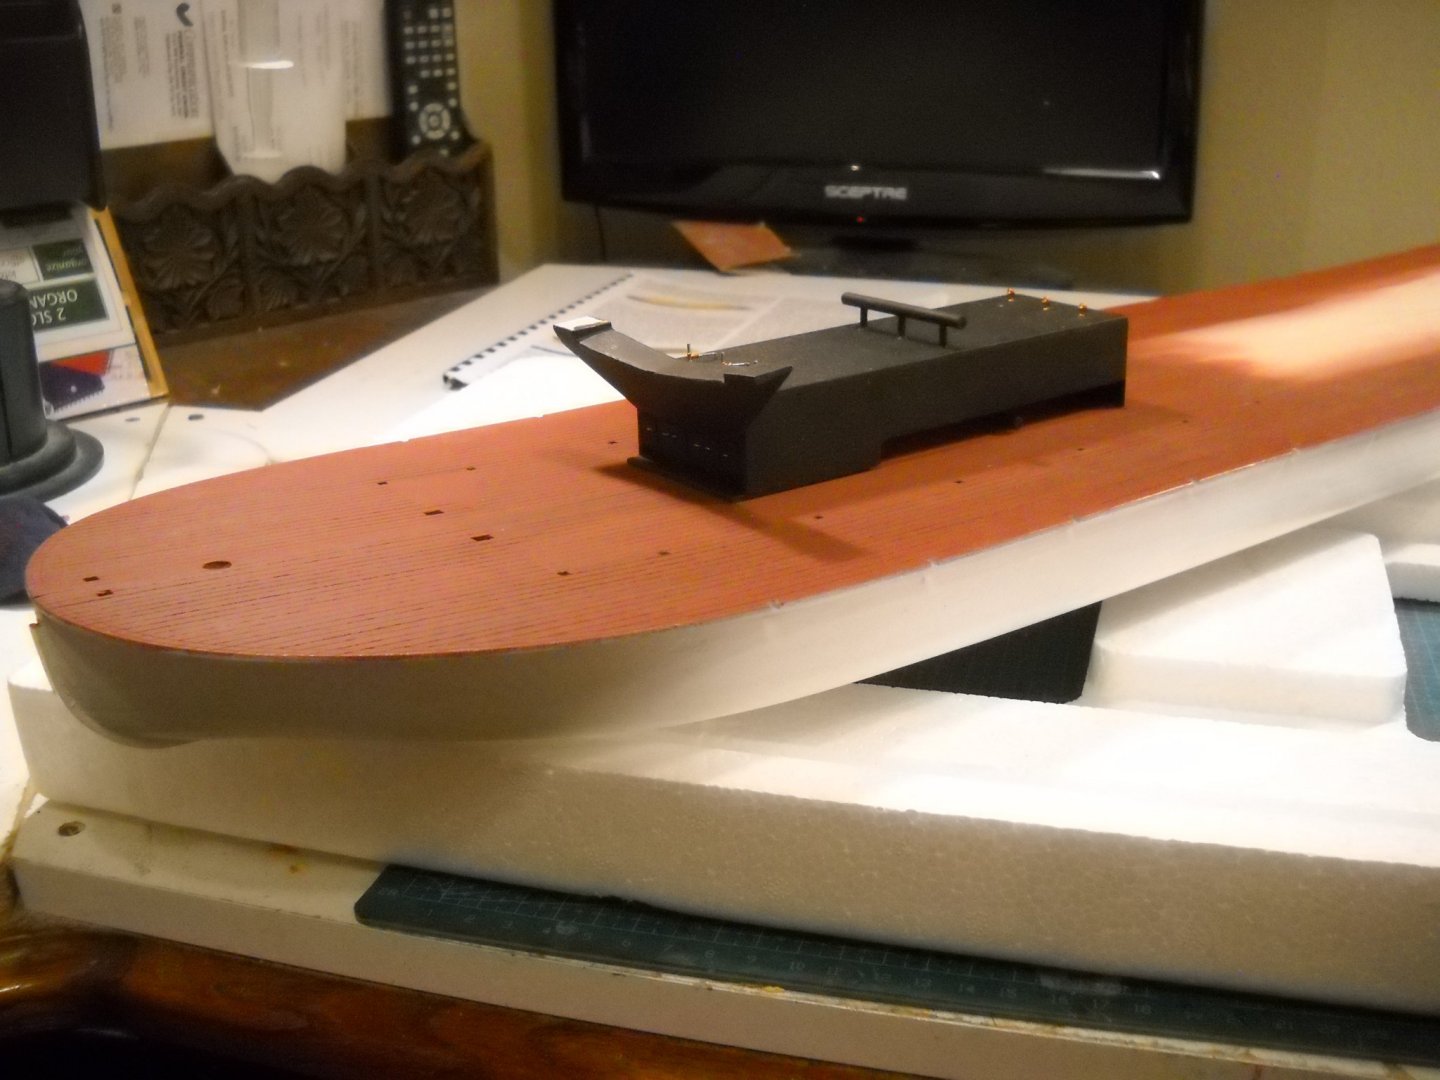
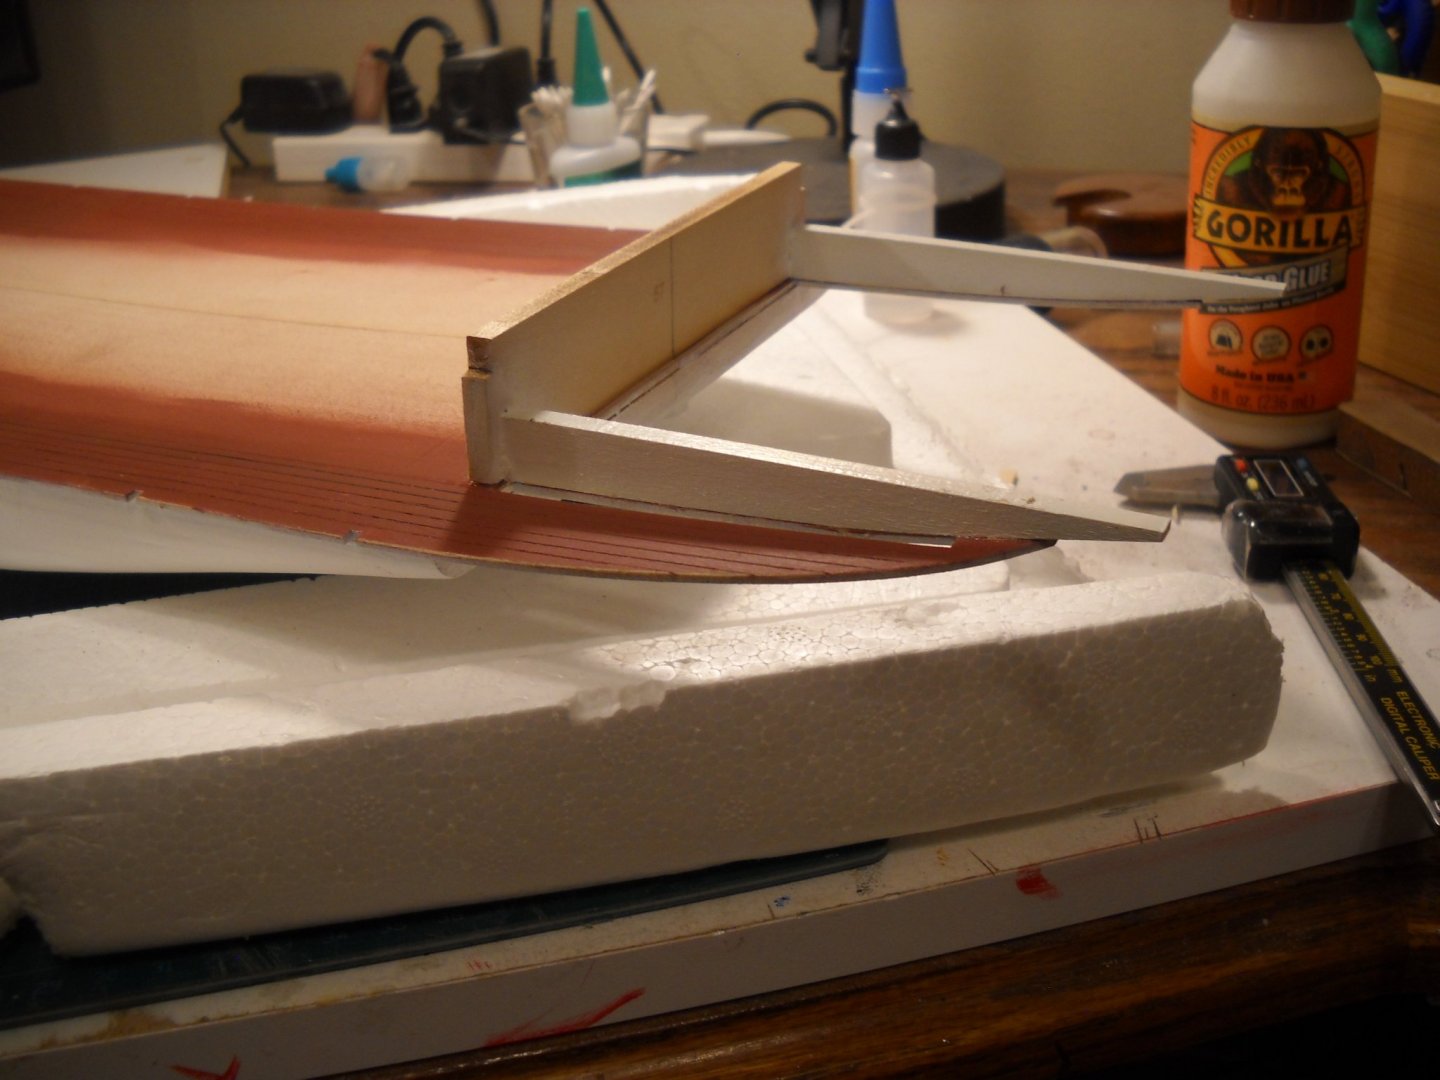
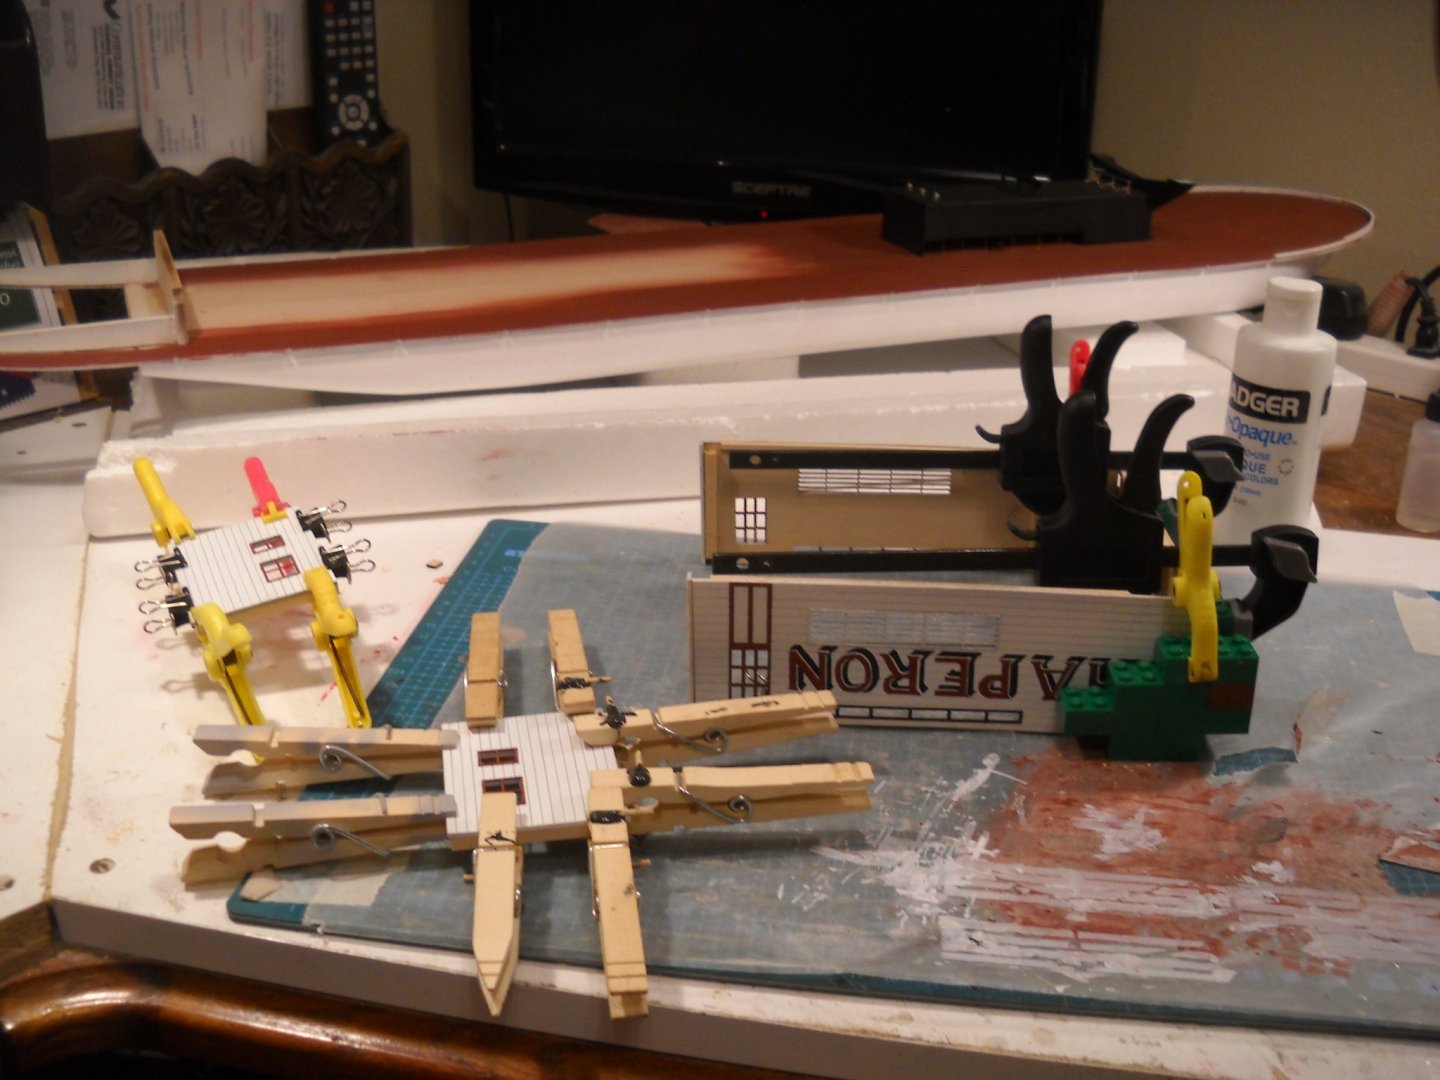
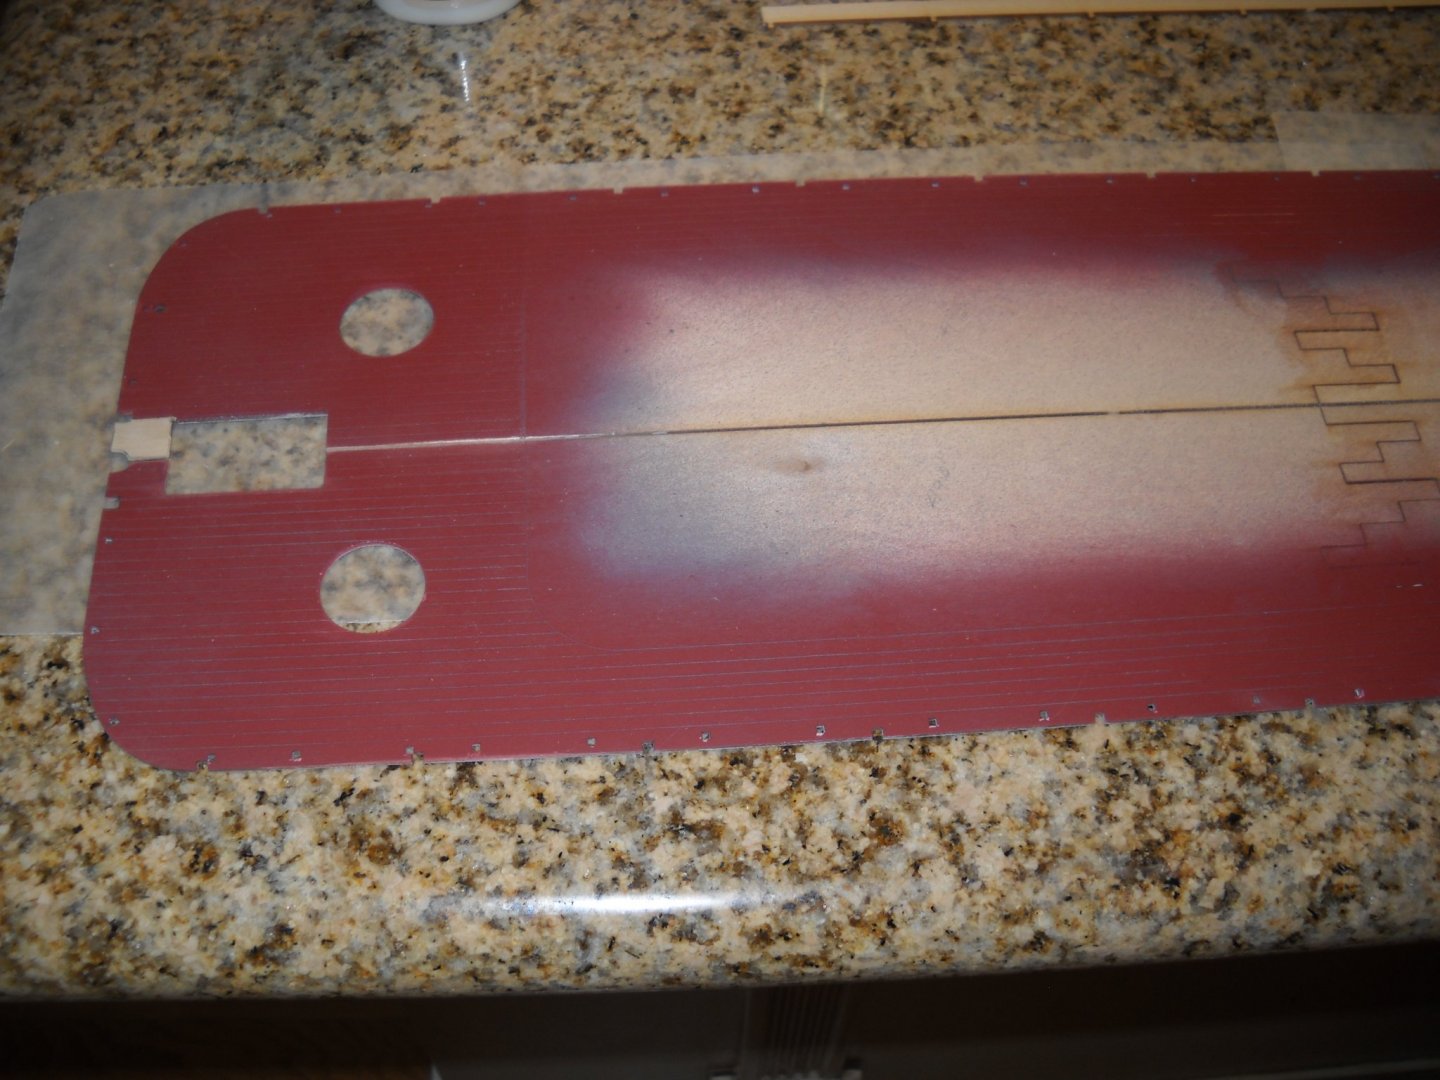
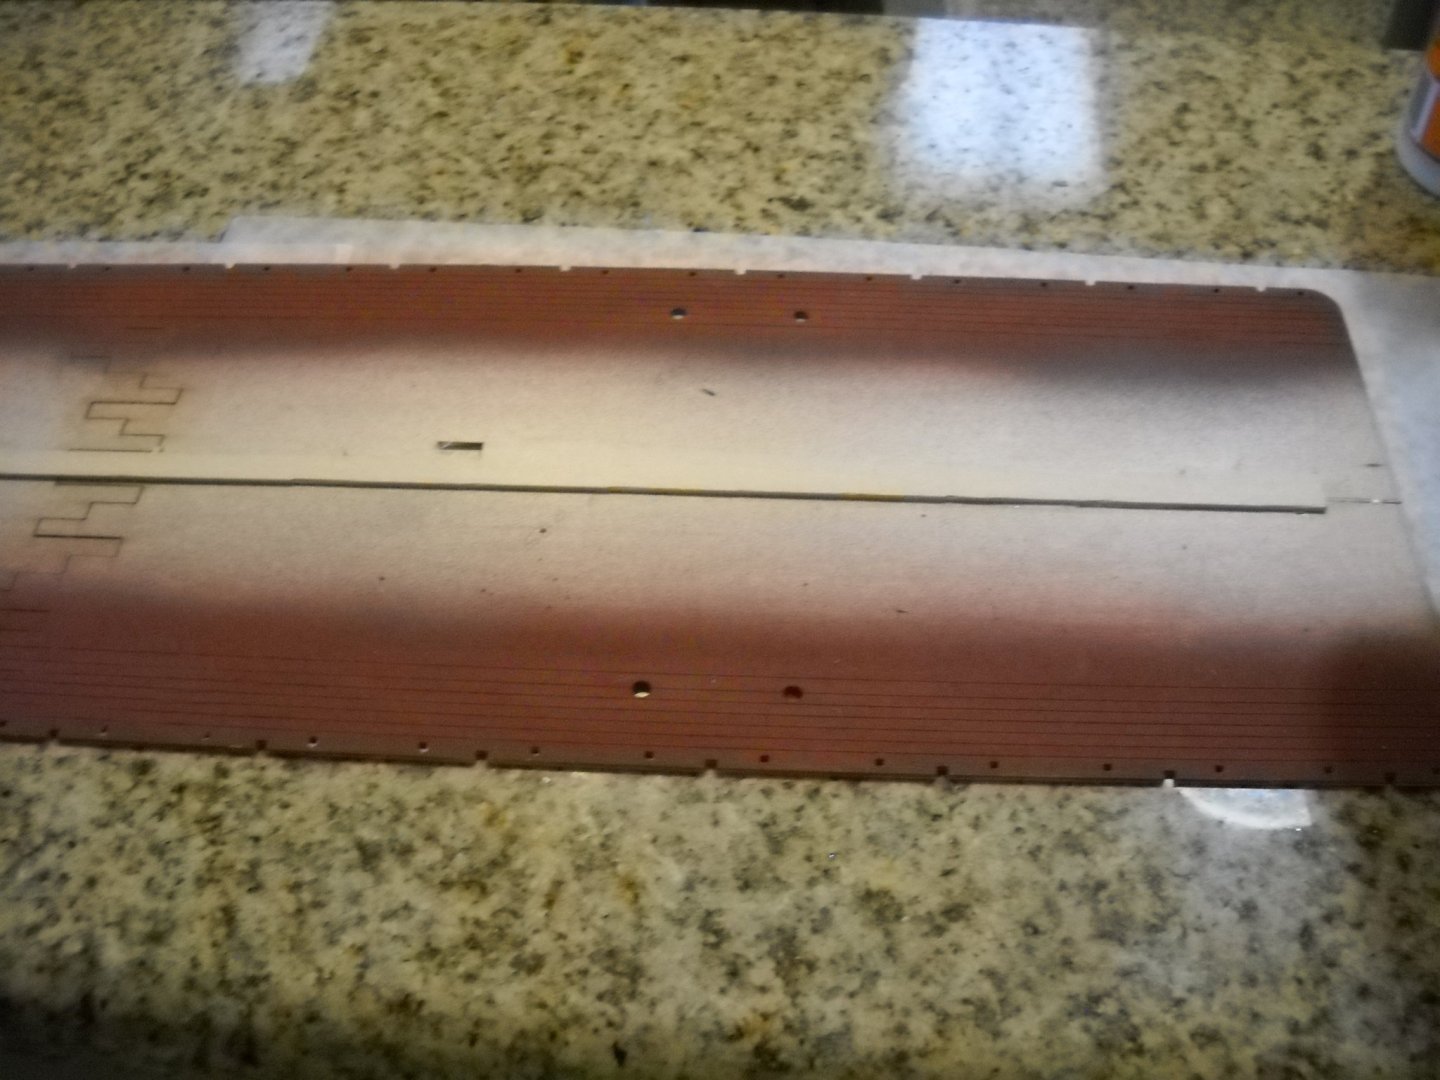
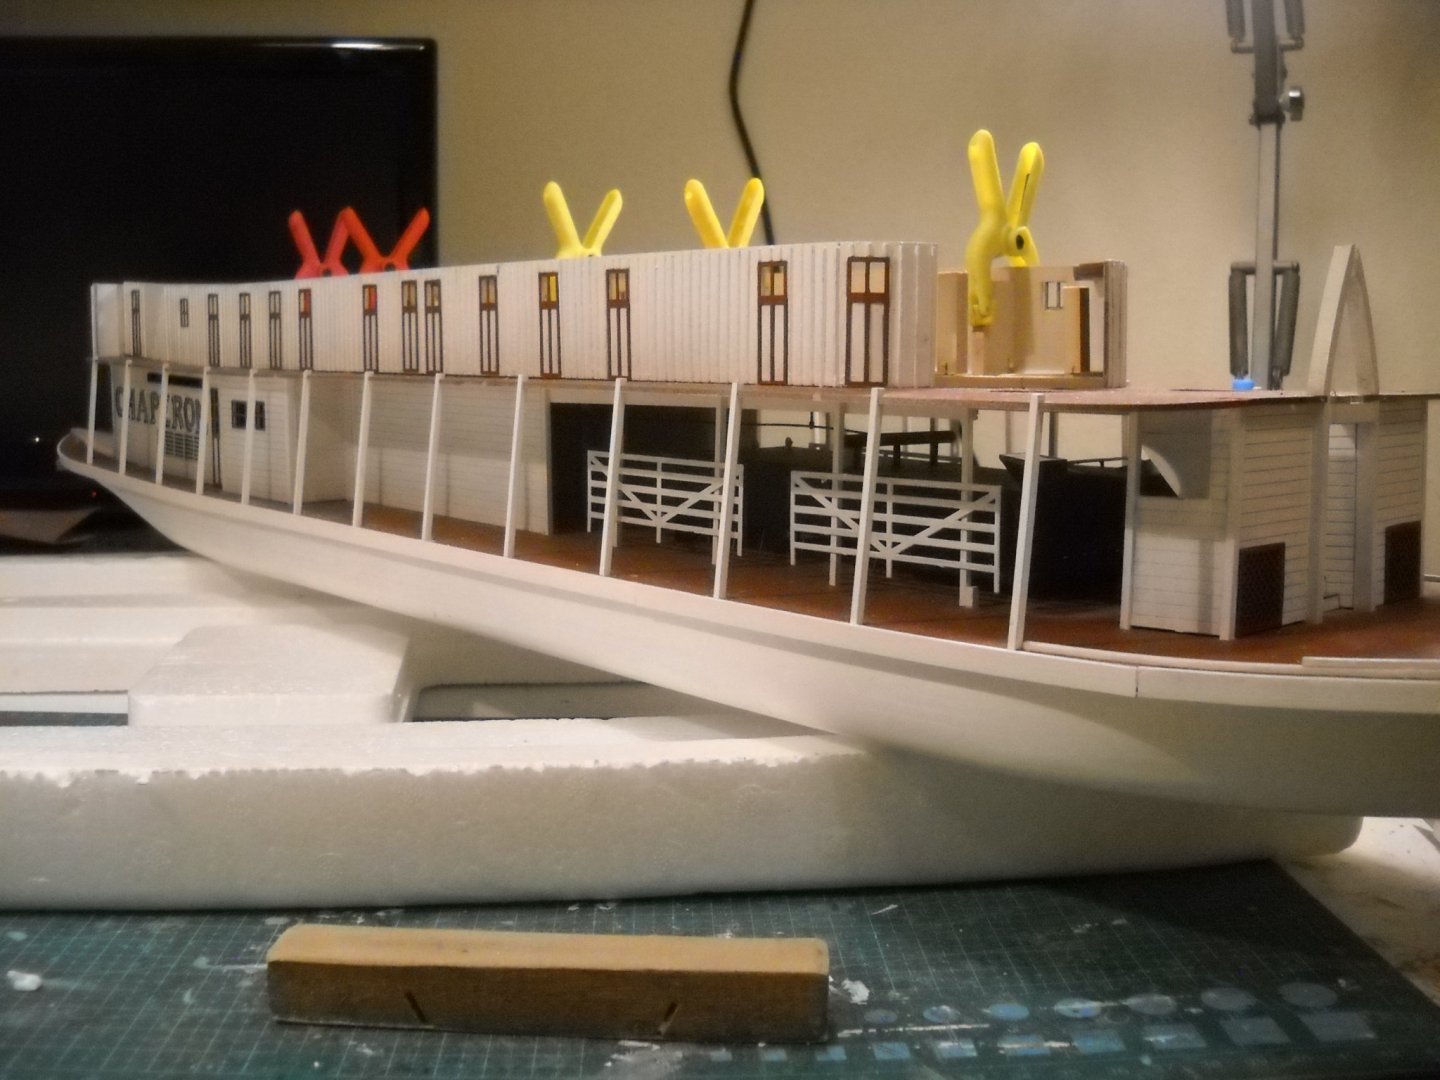
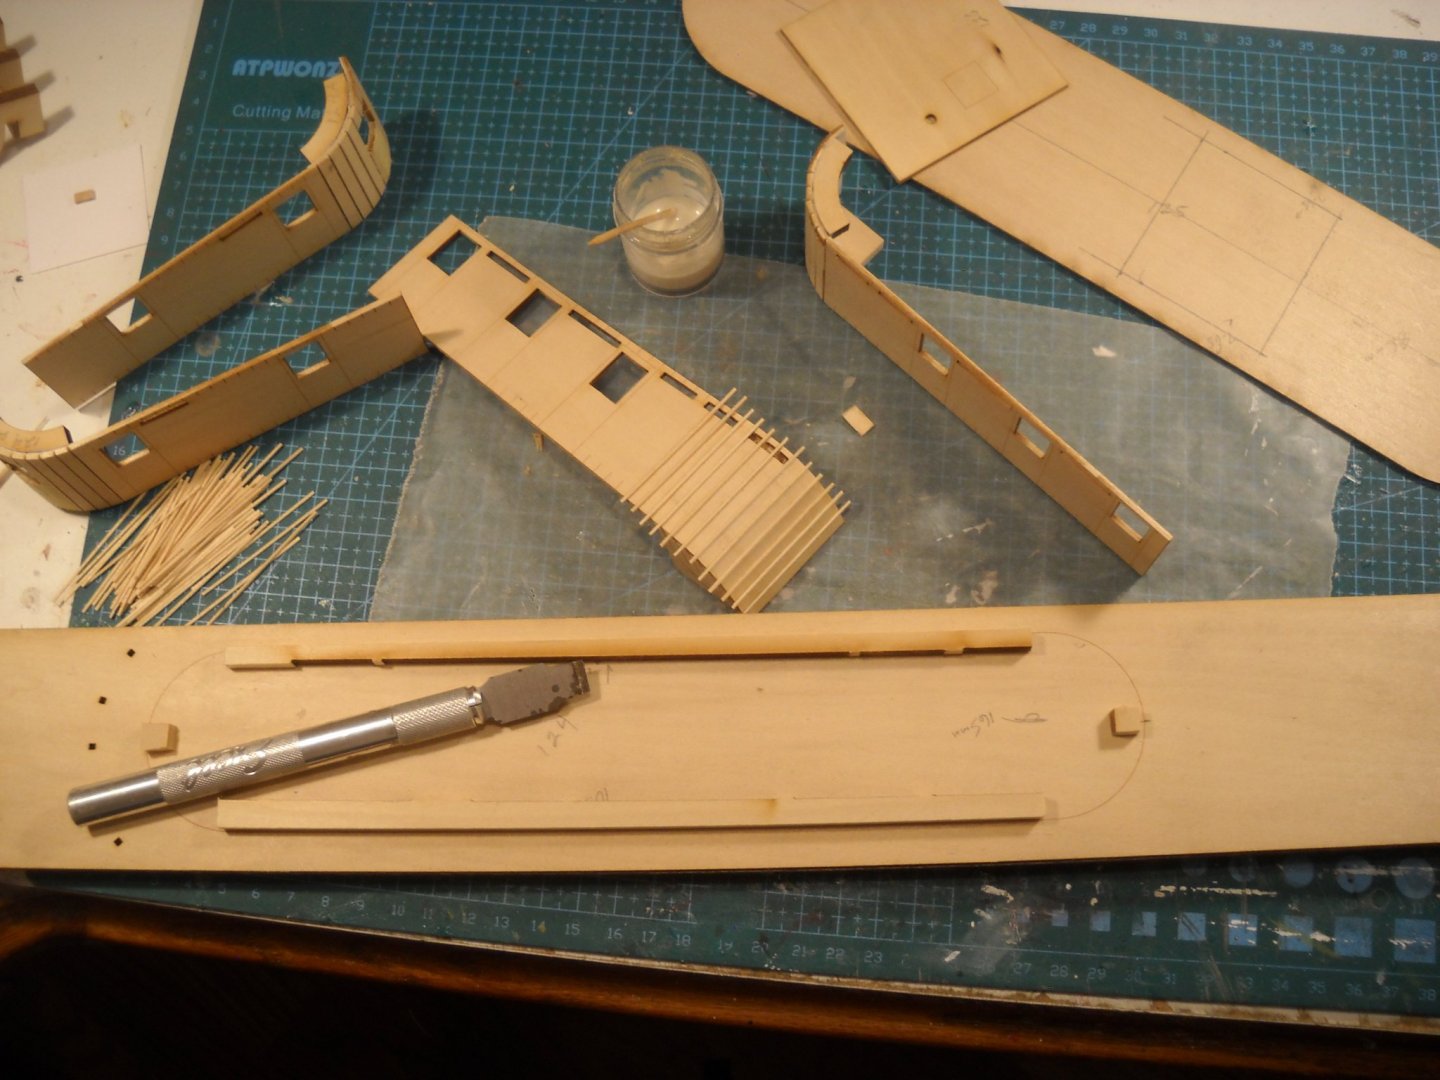
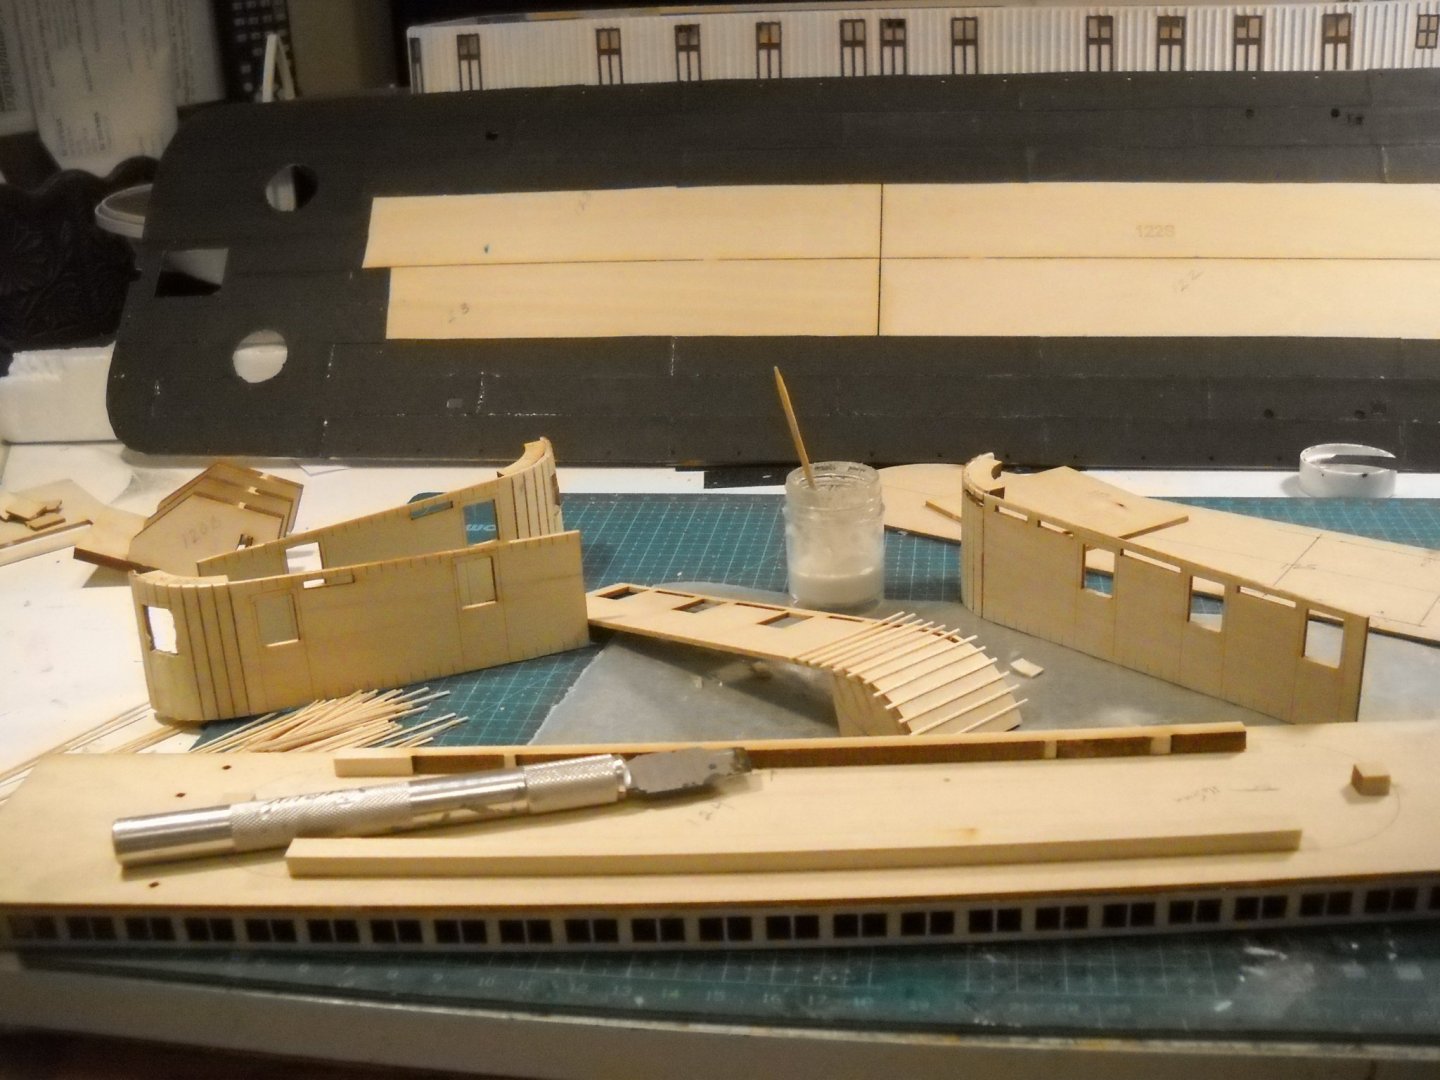
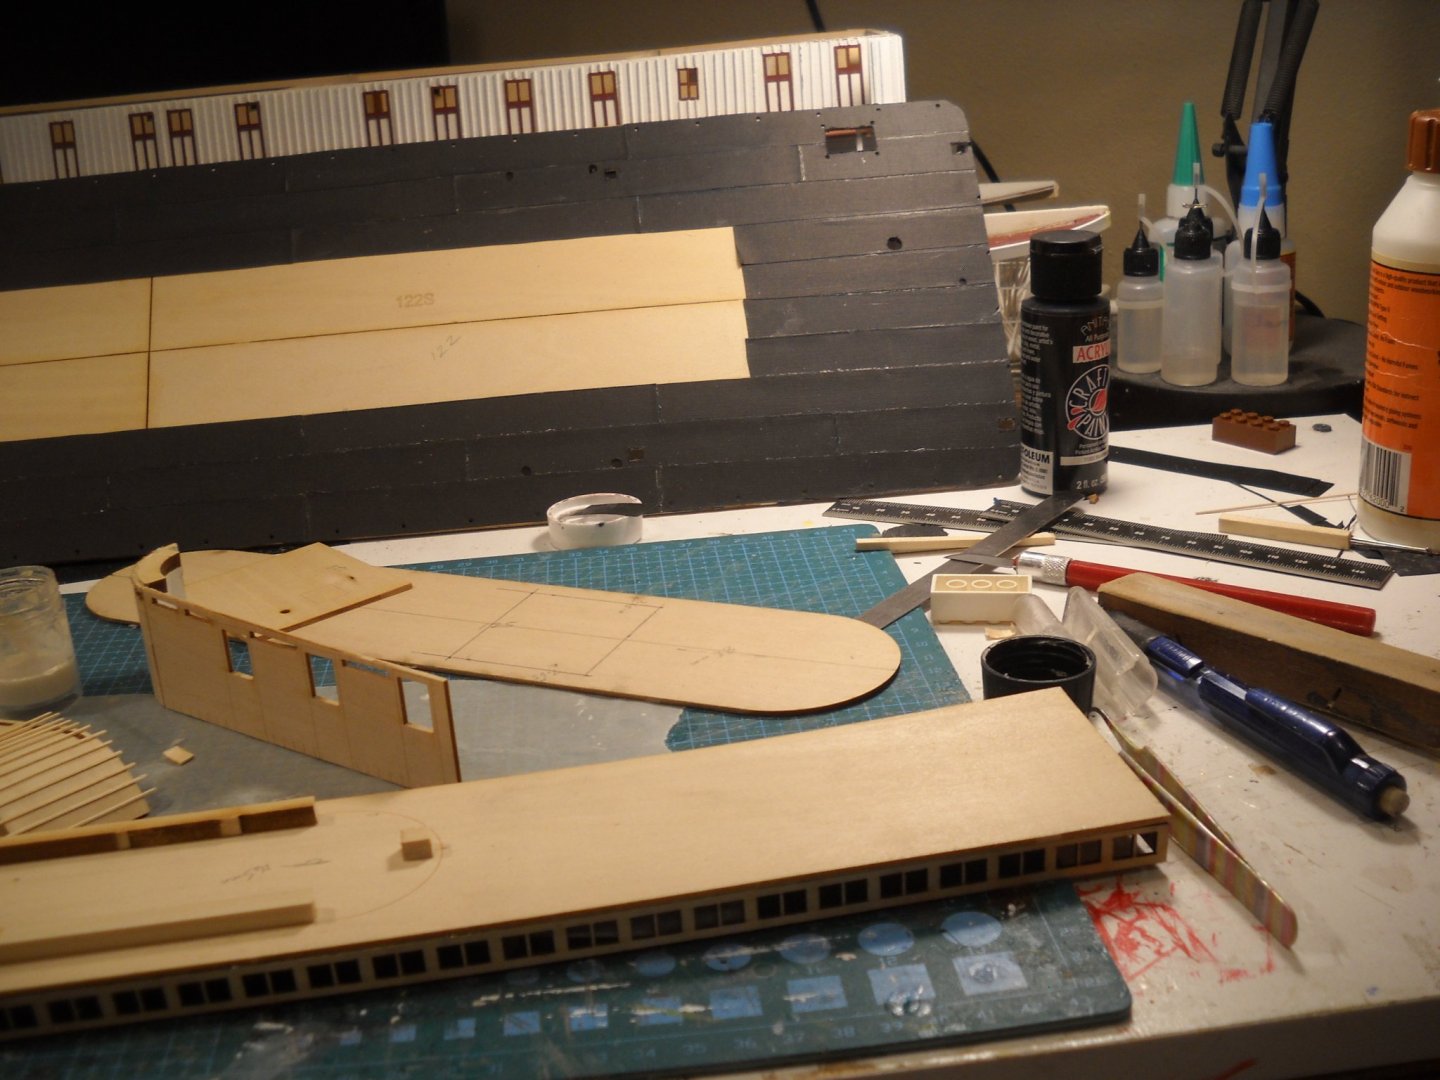
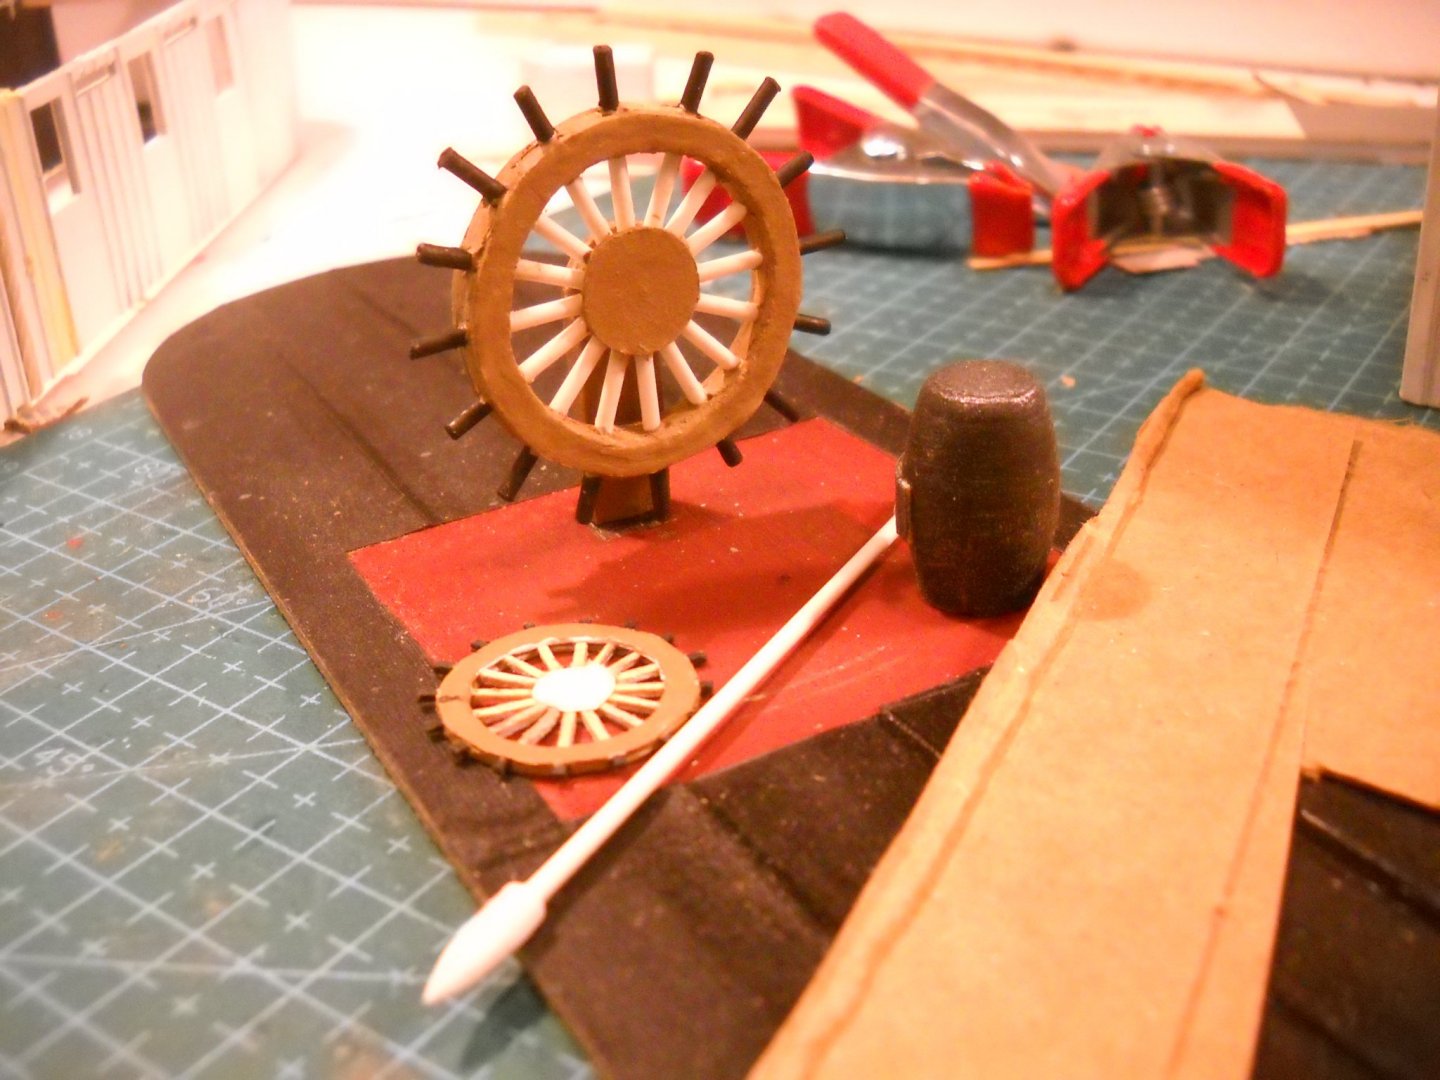
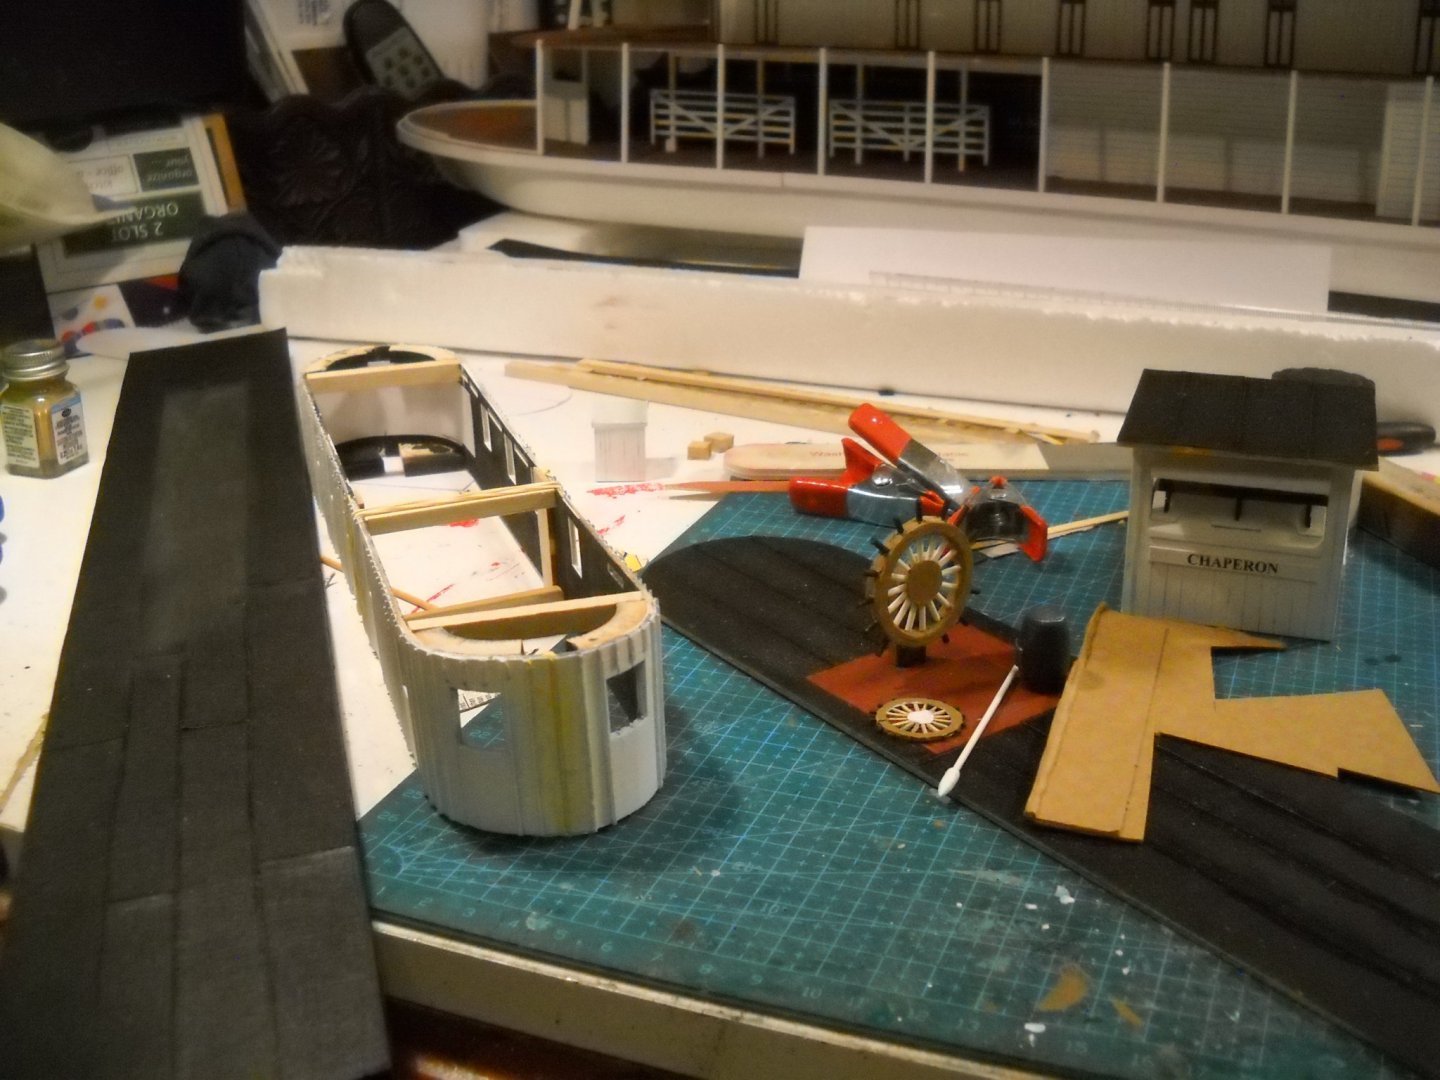
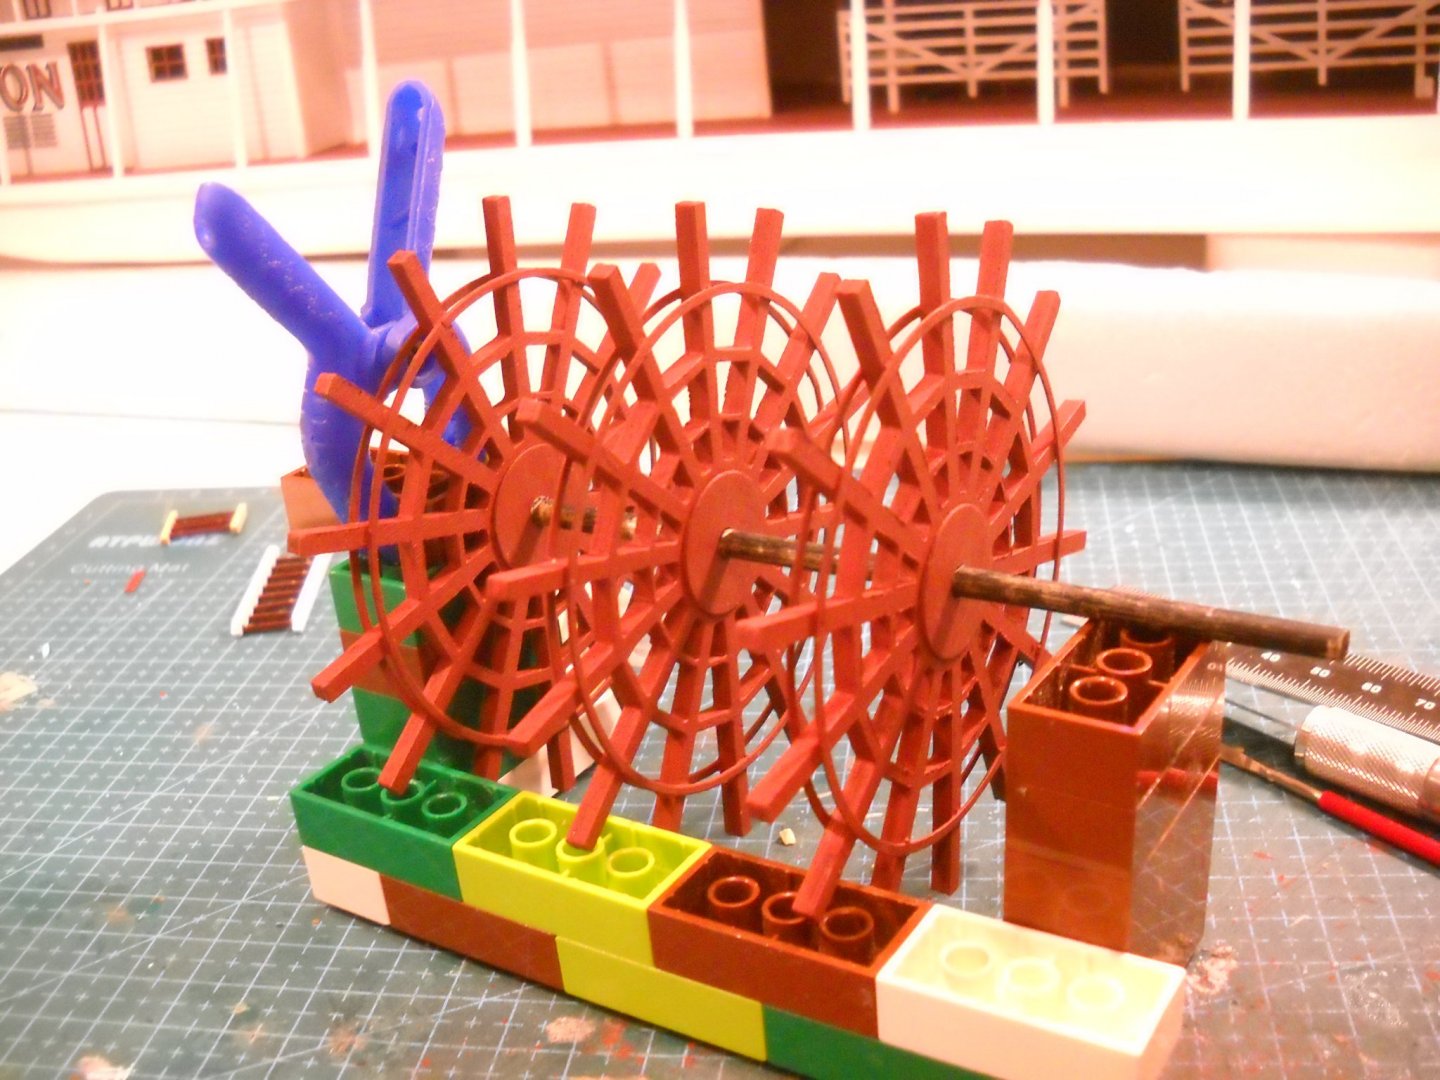
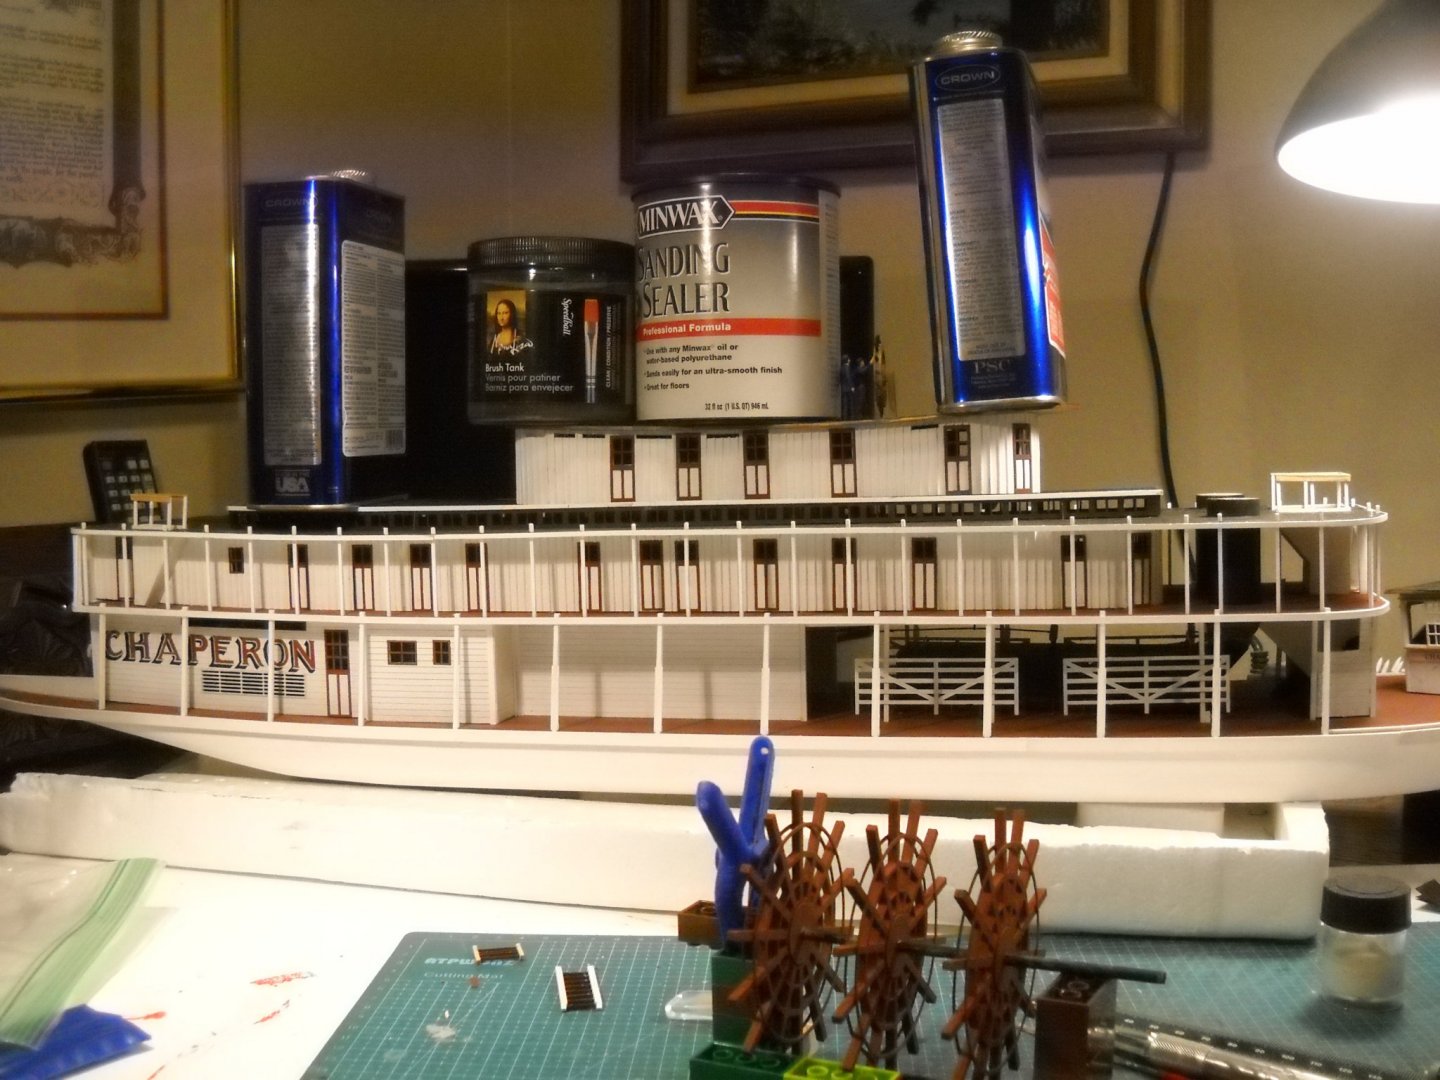
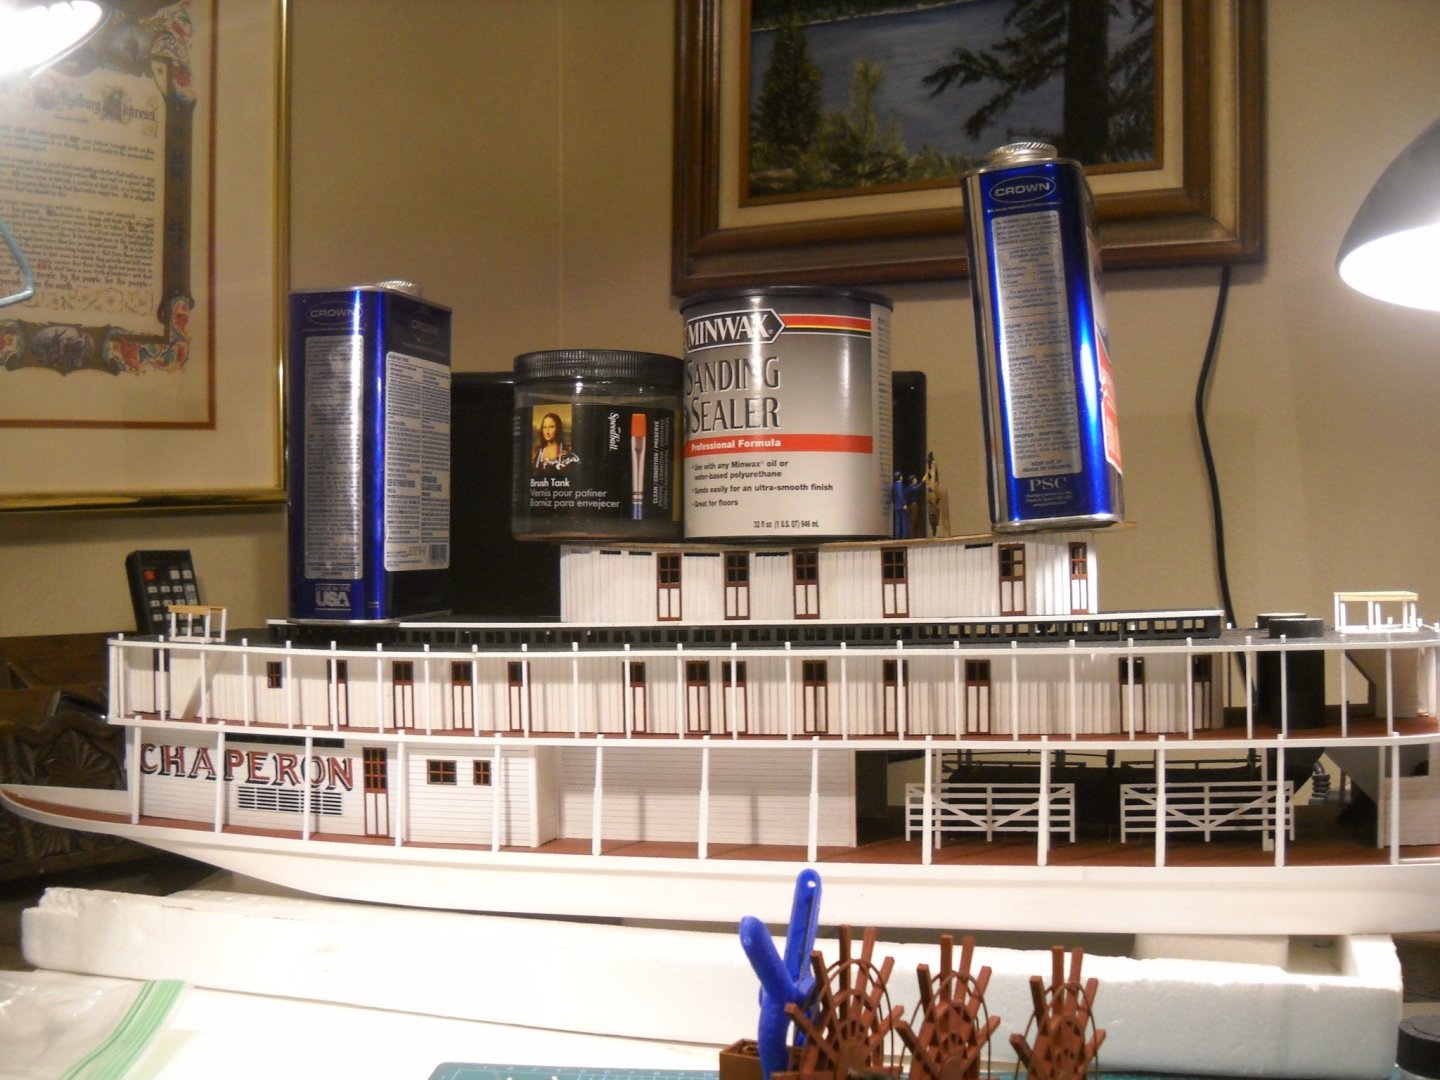
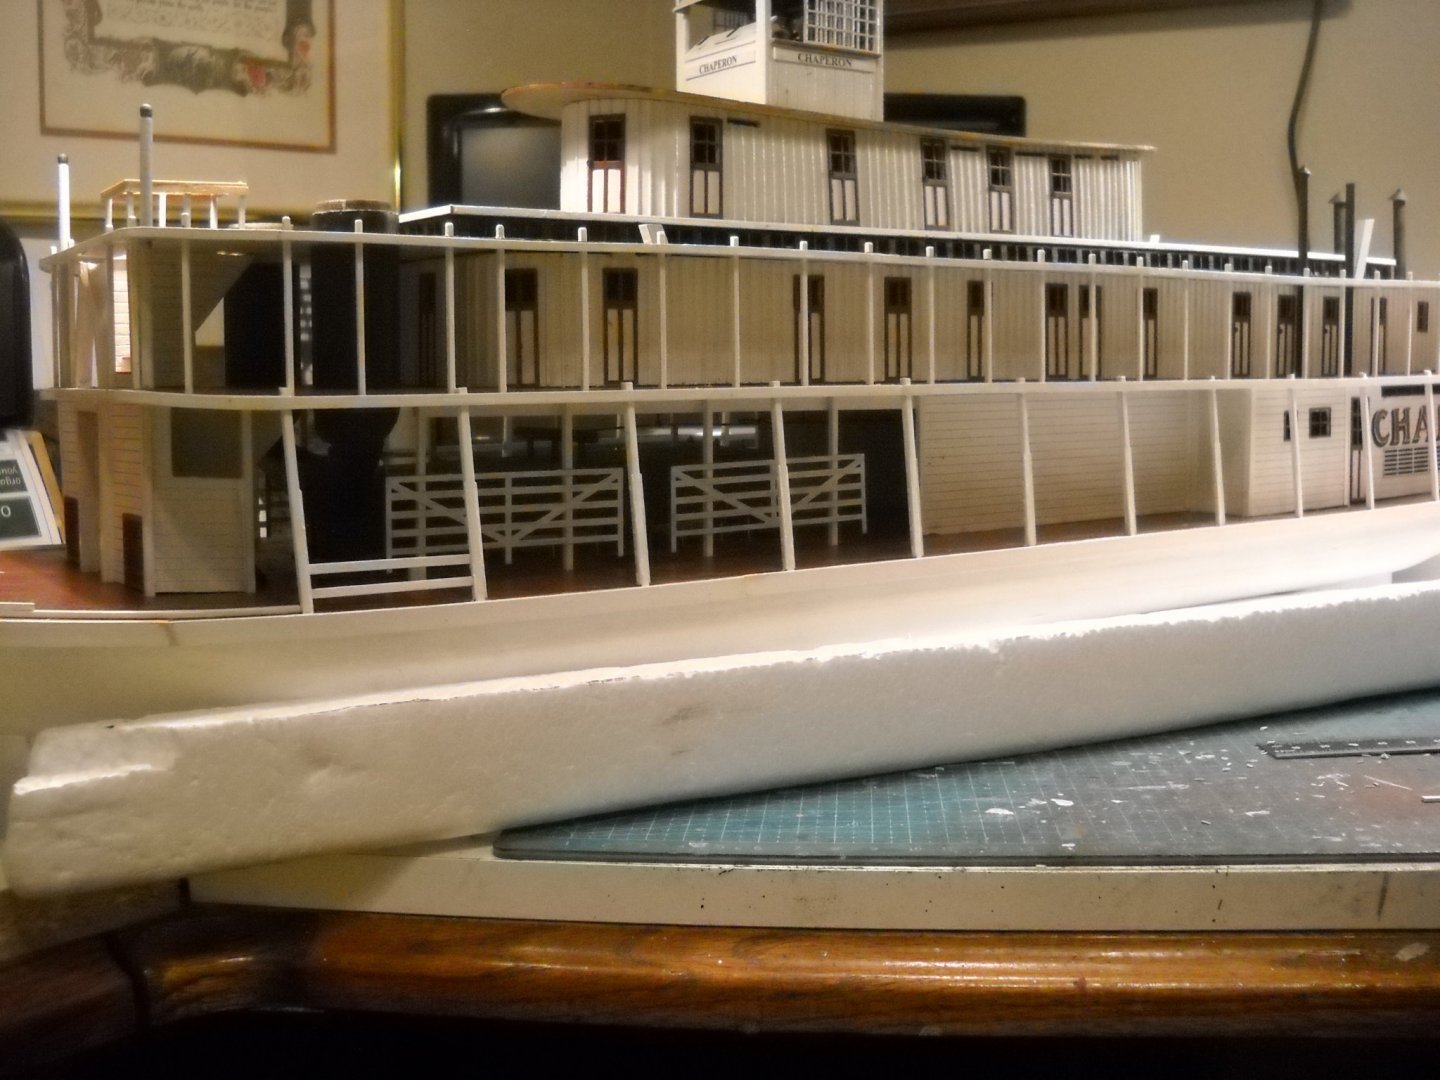
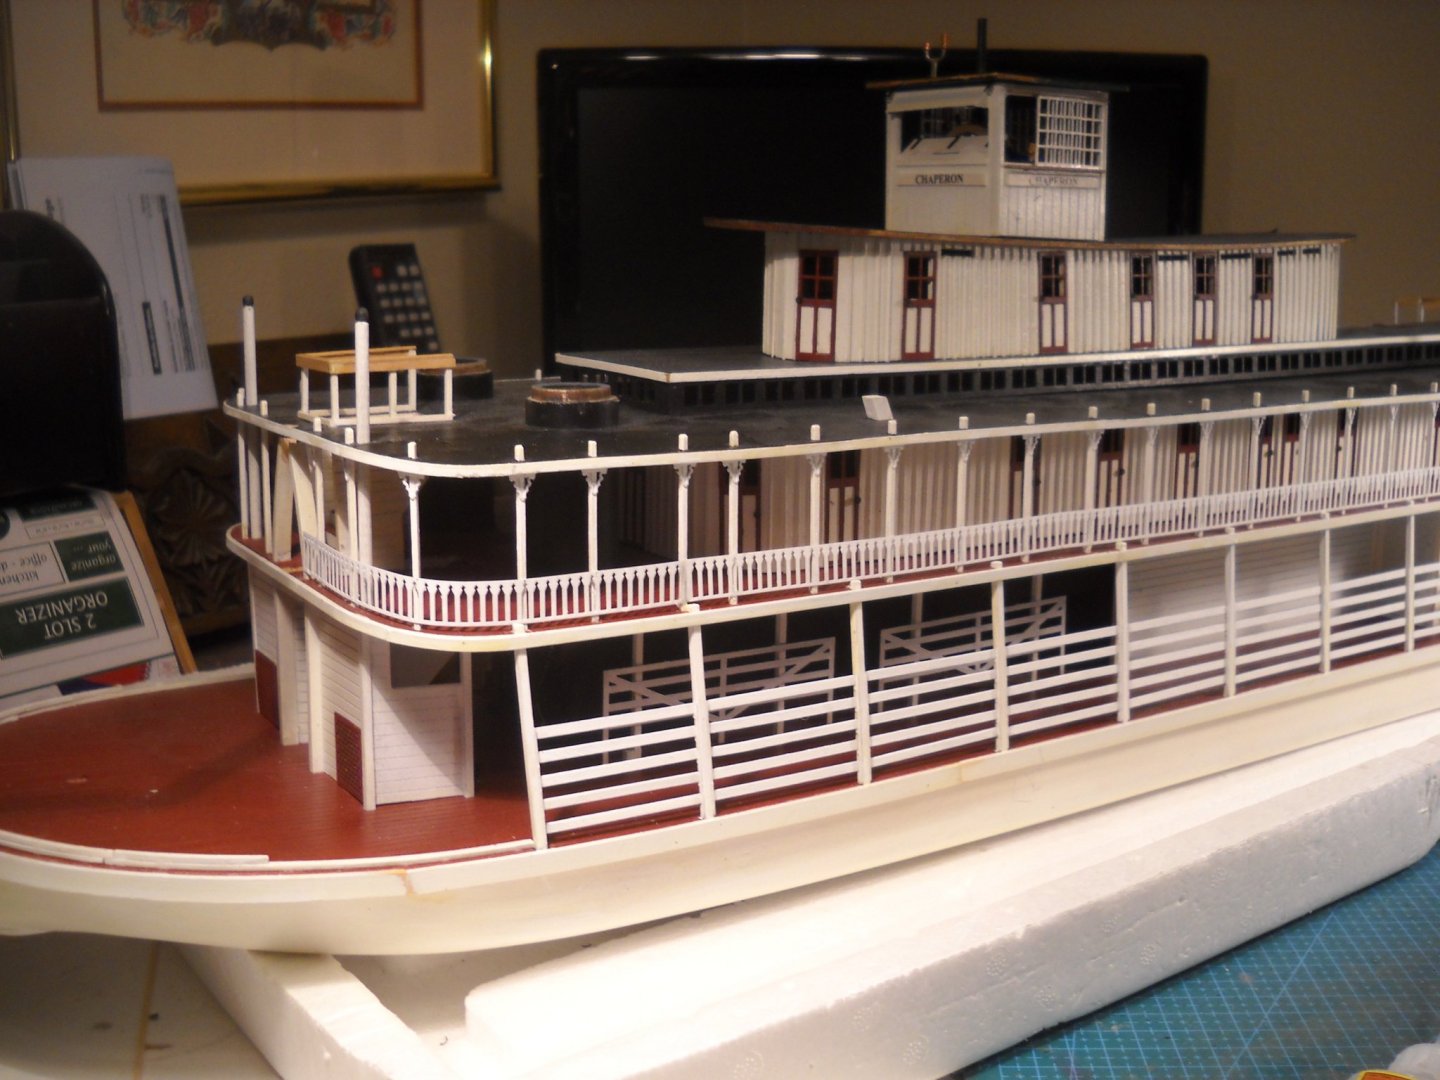
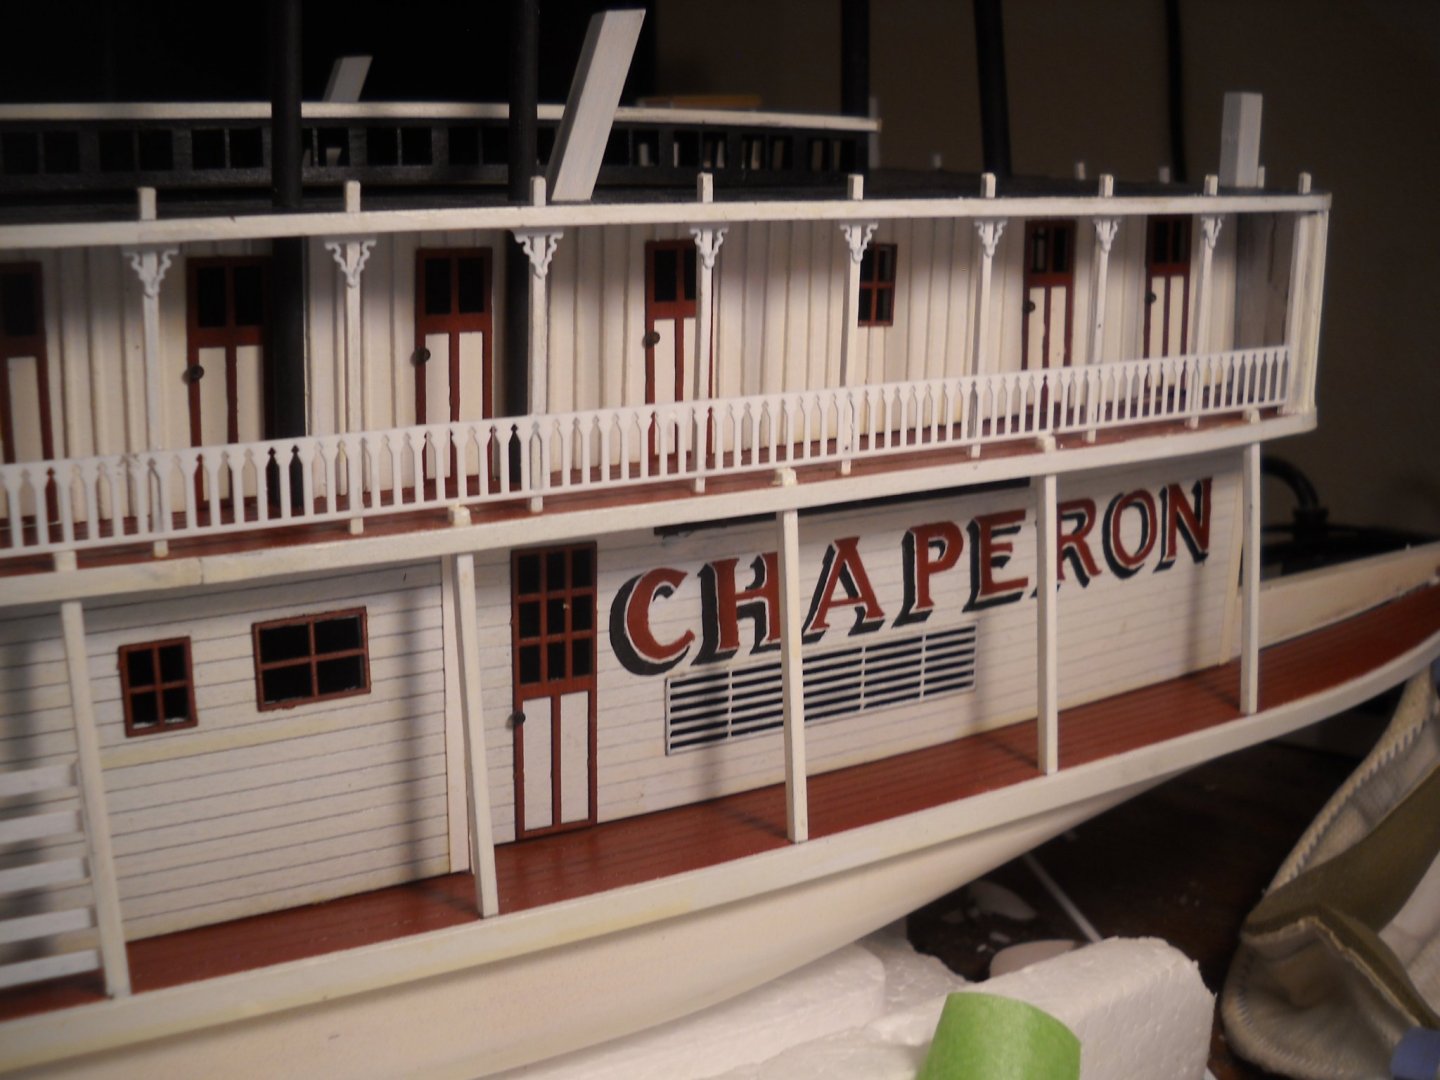
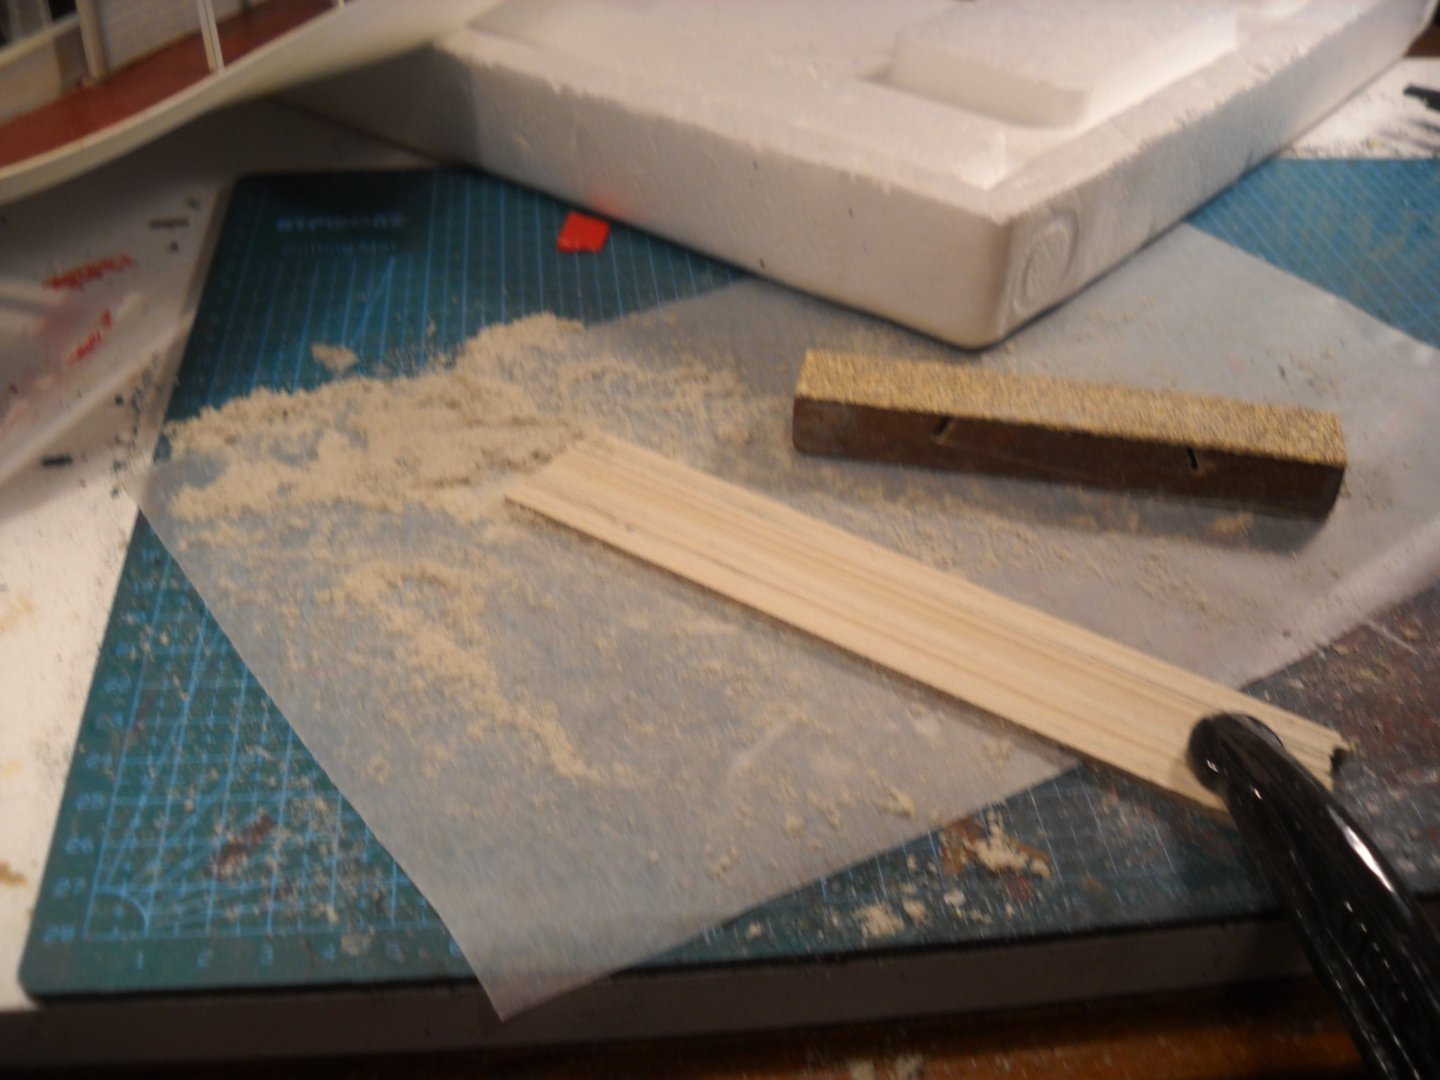
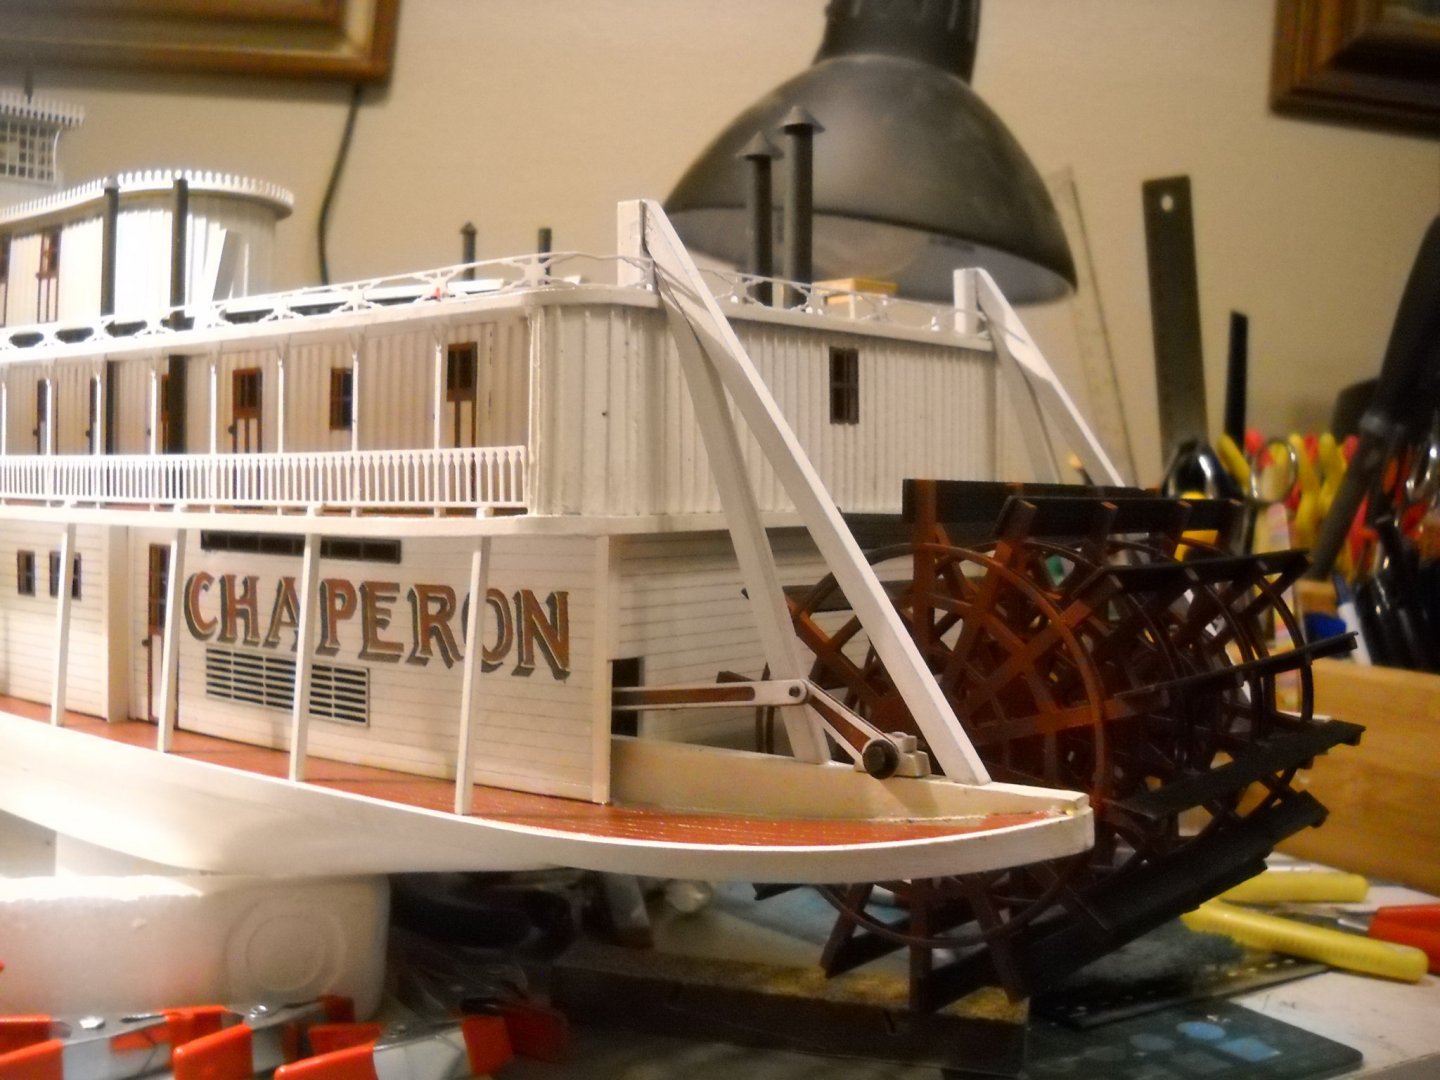
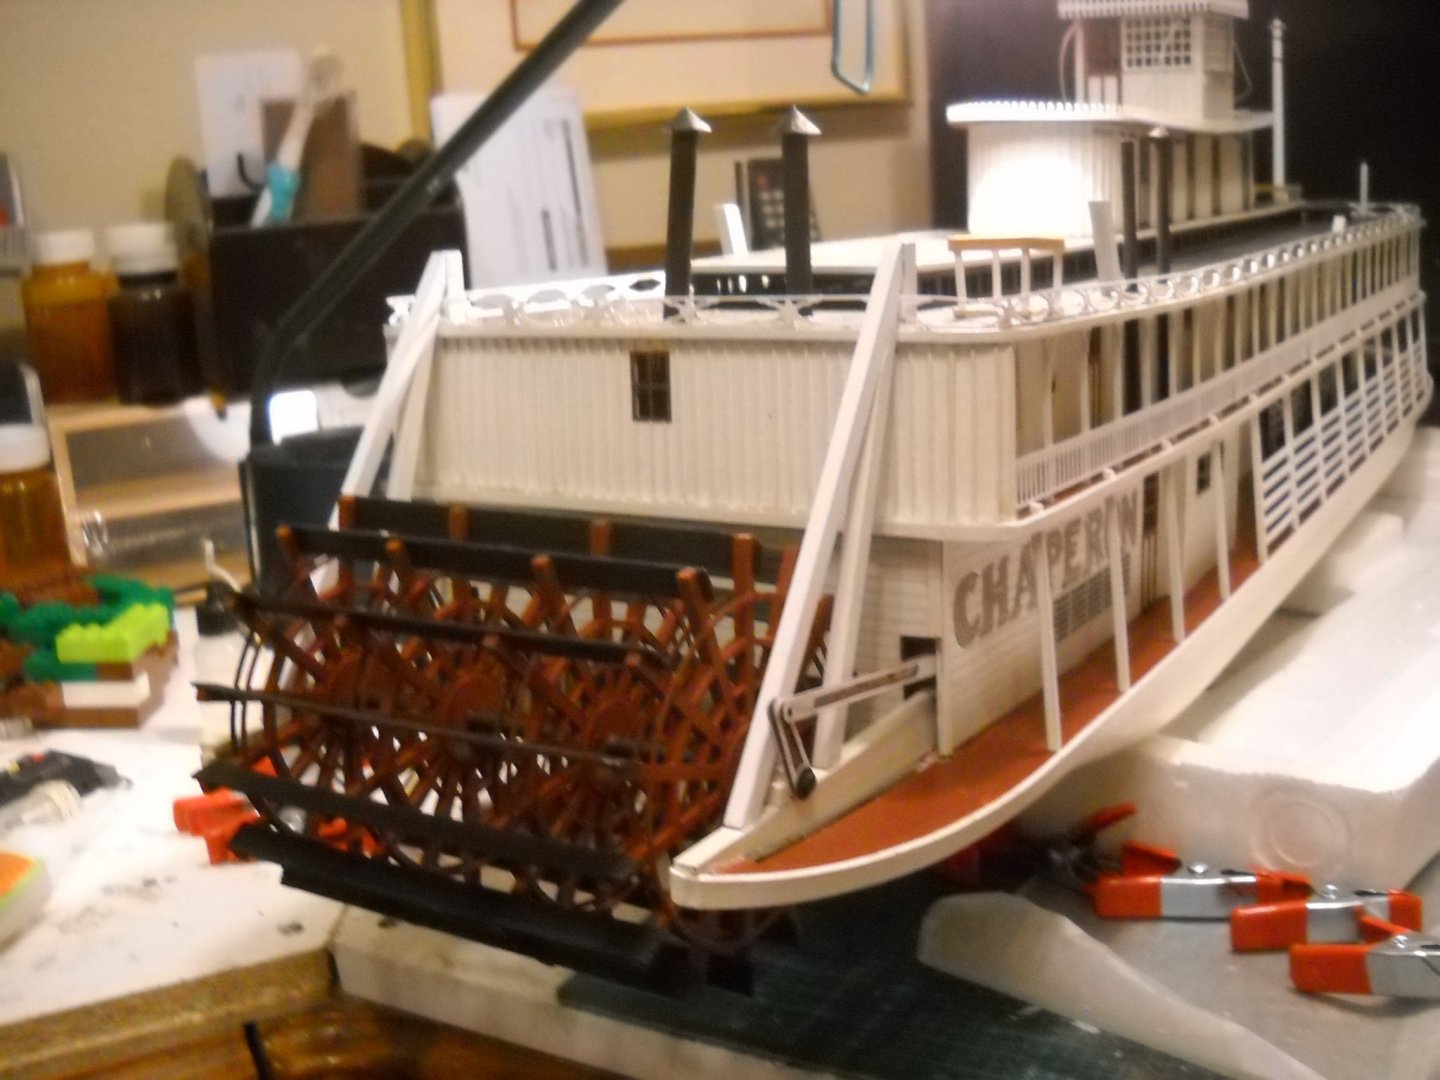
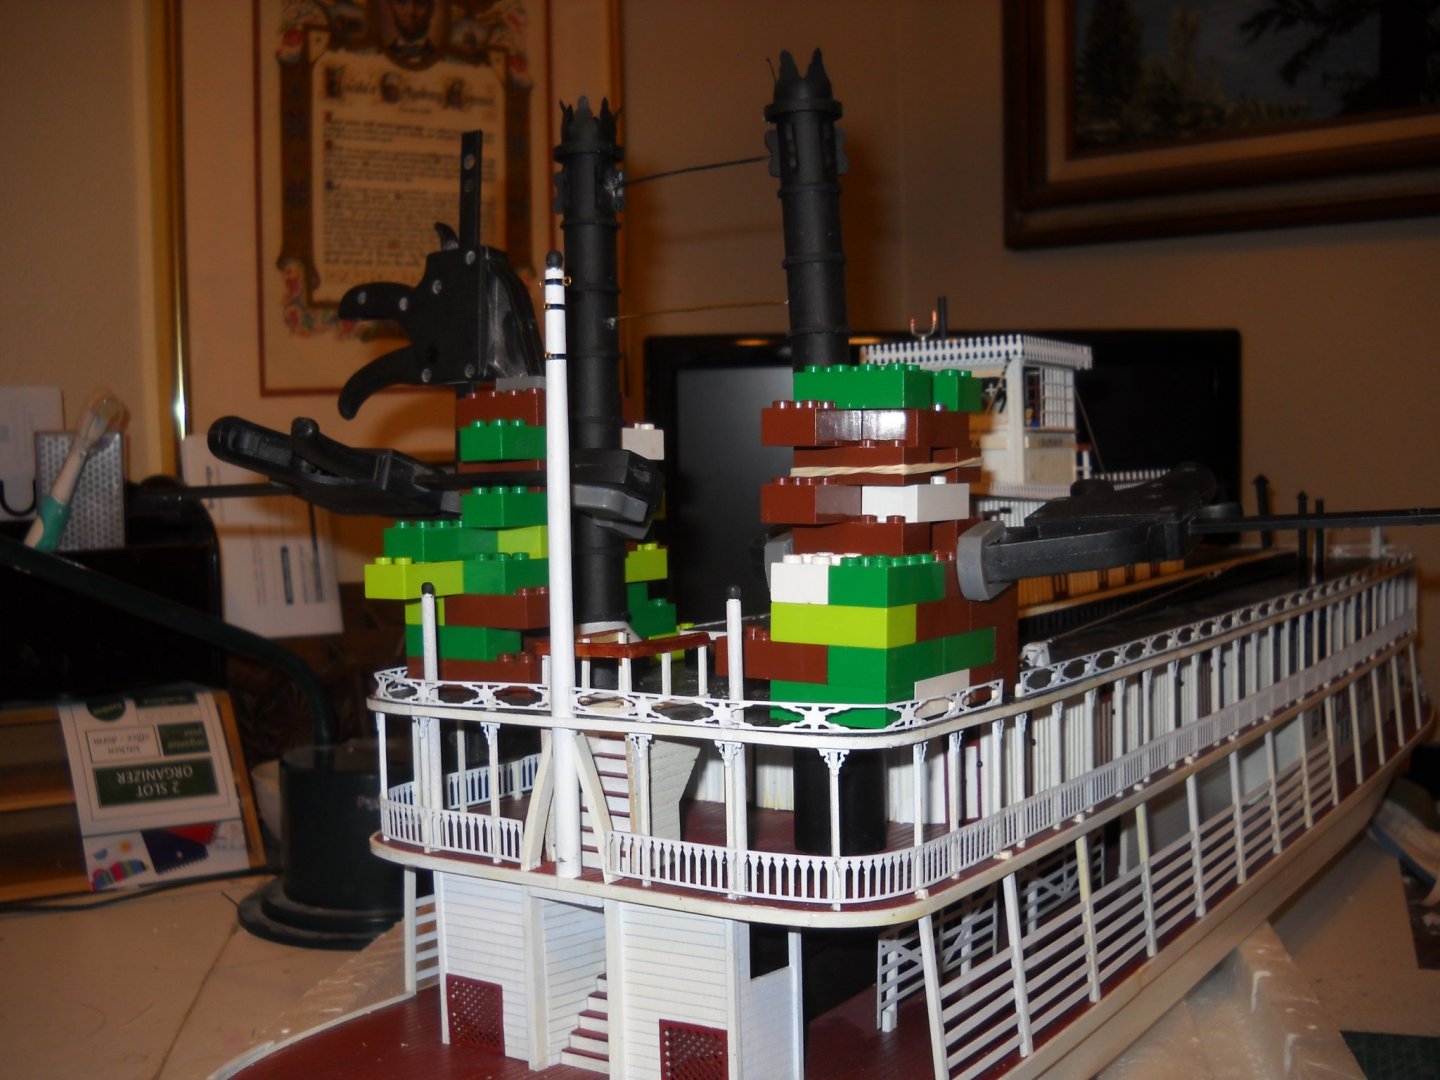
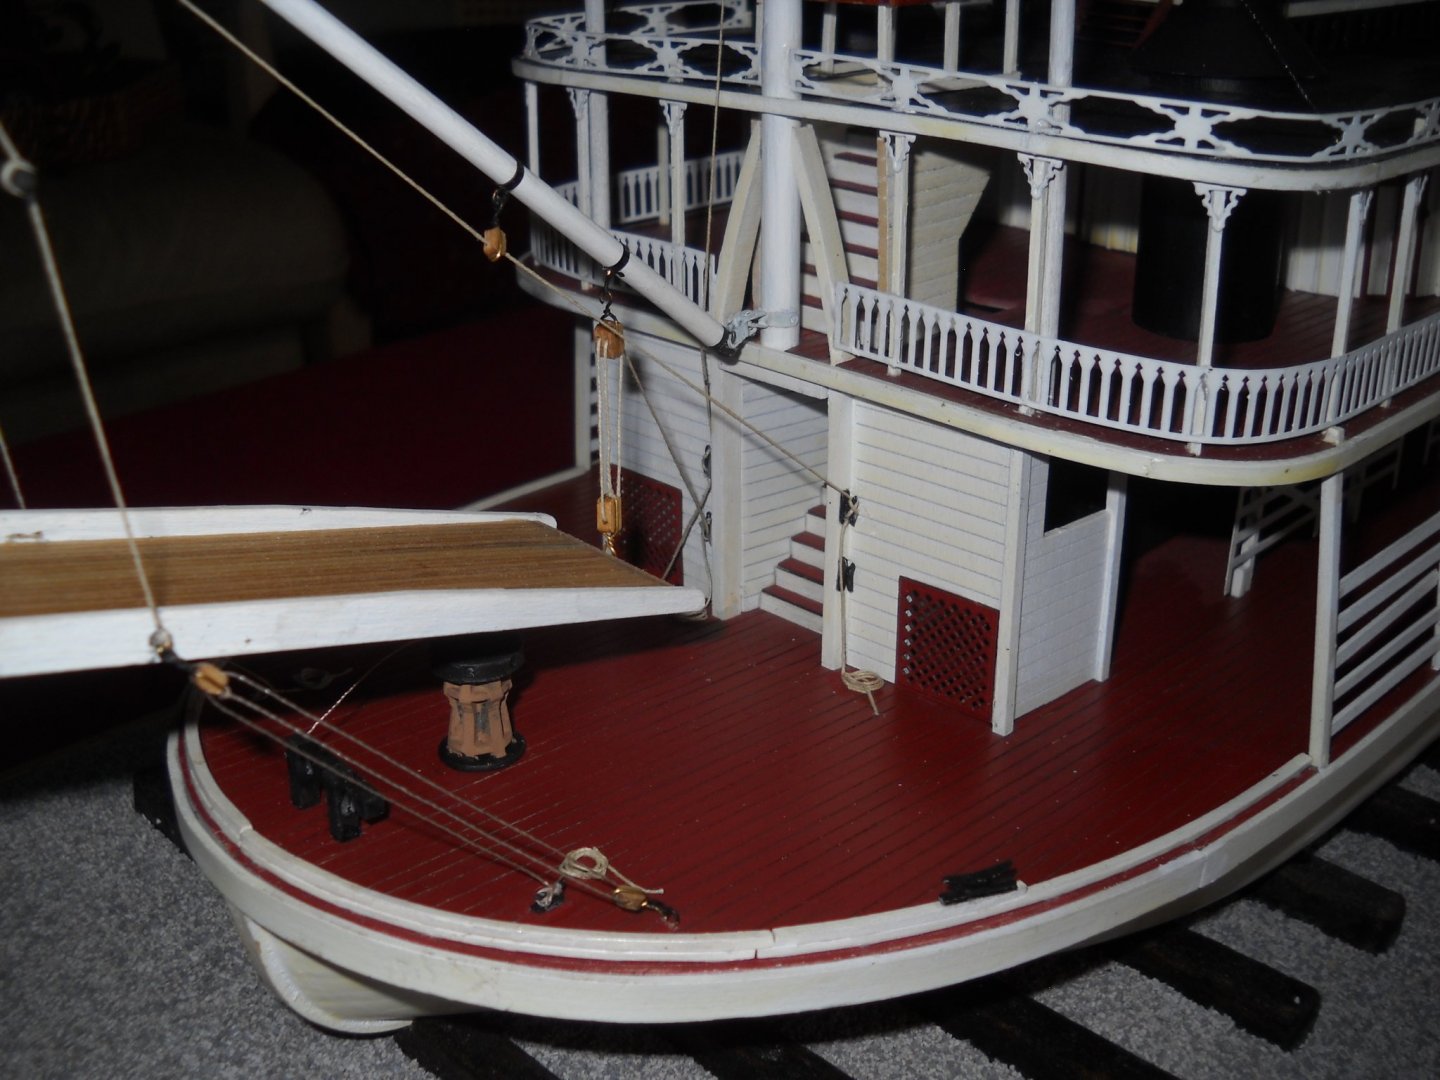
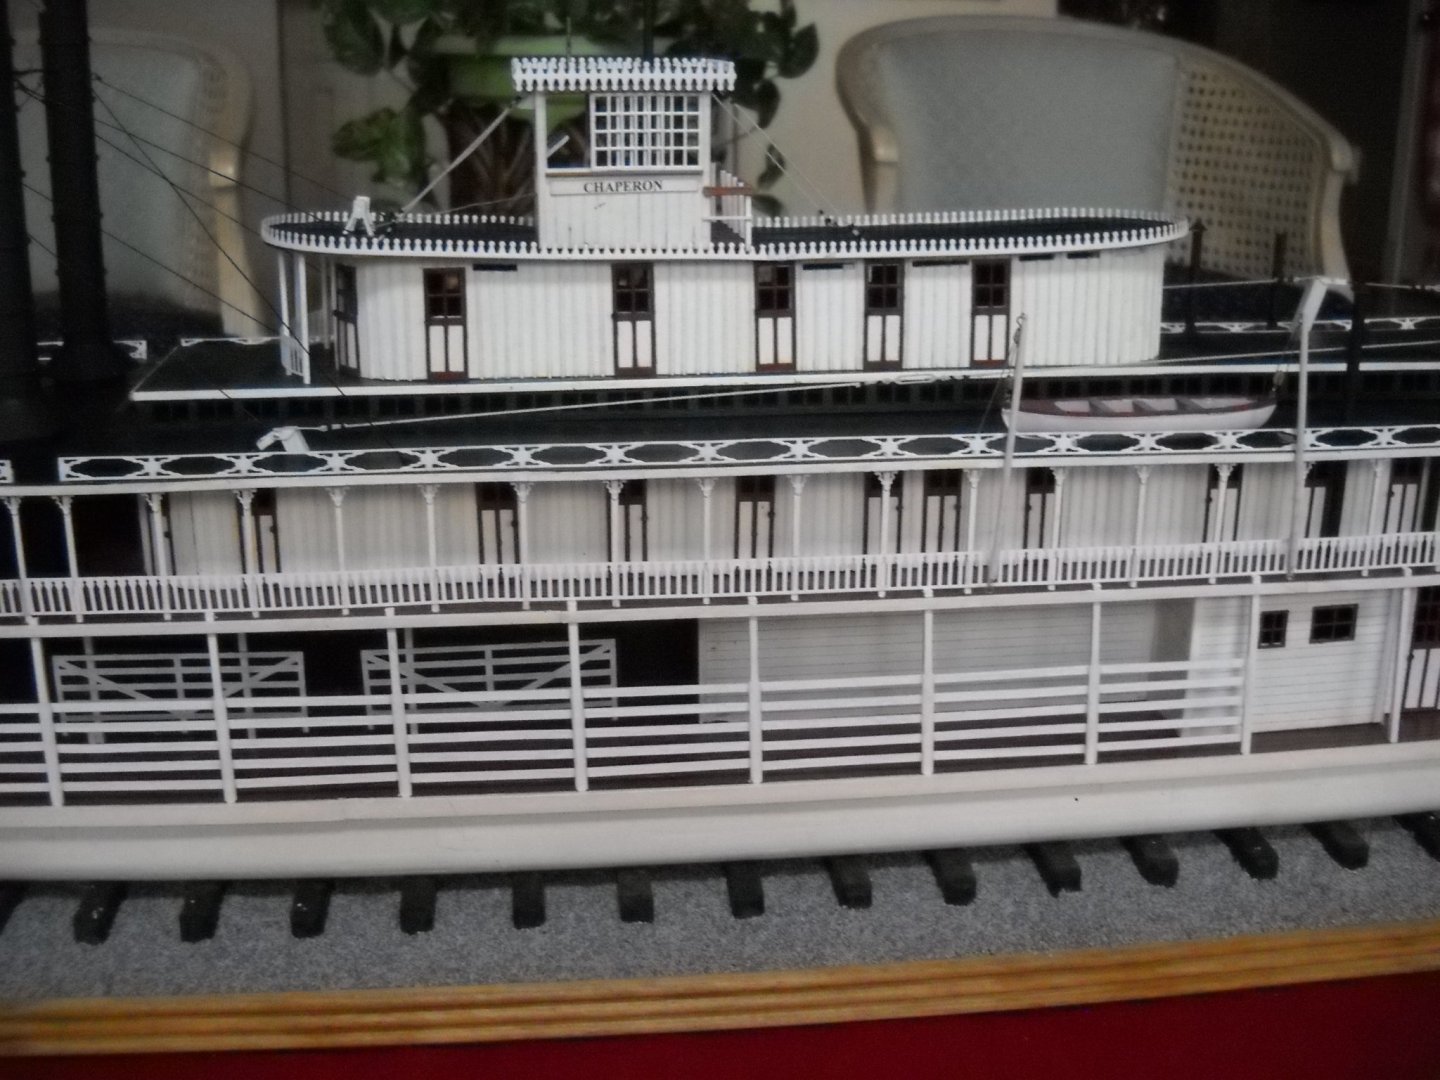
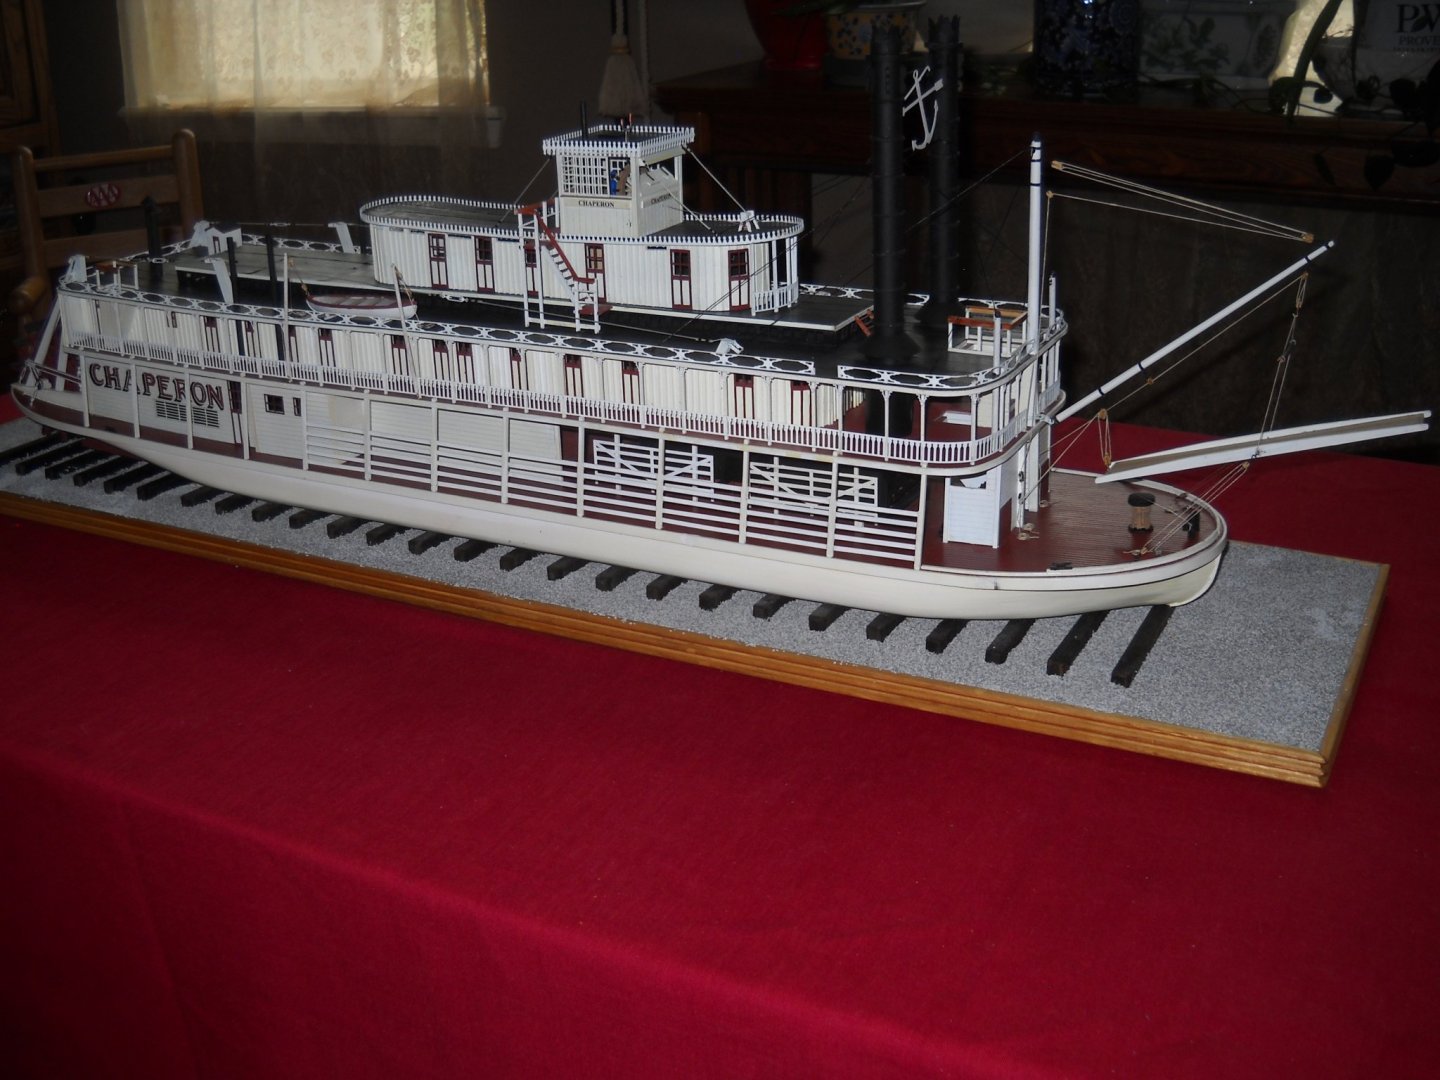
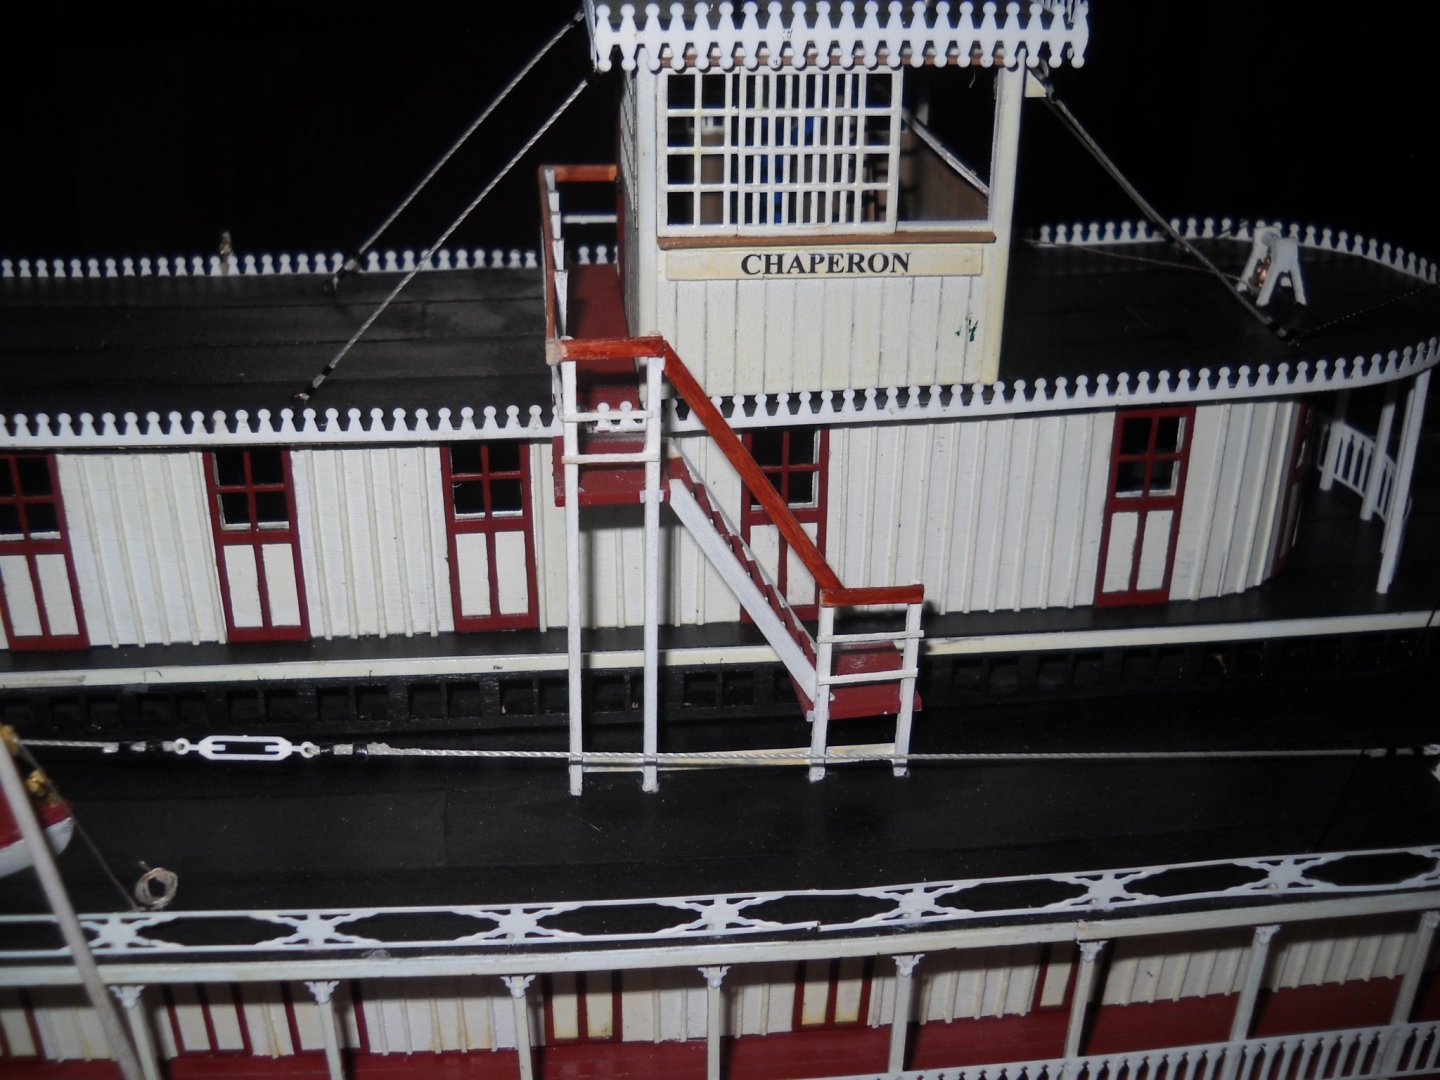
 I am sorry looks like my photo got all jumbled up My Chaperon is finished. The following is the photos that I took along the way. I will try not to post any duplicates. 1st a few of the typical boring stuff. Later I had to remove the keel and redo it because I bent it edge wise instead of the proper way. Since I didn't add lights I didn't detail the boiler as some have done. The infamous finger joint. I just filled it and re-etched it in. The paint was Anita's All Purpose Acrylic....Red Rust that I bought at Hobby Lobby. Nothing innovative in the next photo...I just followed the instructions. The boiler deck was uneventful. I added some scrape wood along the scribed lines to line everything up. And also added 90 deg. blocks to keep the walls plumb. Another shot of the same A shot of the barely visible boiler Shot of the Sky Light an gluing battons on the Texas. Made a ships wheel out of cotton bud sticks and cardboard. 1st one was to small and the 2nd one was to large. Now I wish that I hadn't spent the time doing it because one can't even see it in the Pilot House. Also made a stove from a barrel left over from something else. In the end it isn't visible anyway. Leggo blocks was used to keep the paddle wheel lined up. Another shot of the paddle wheel assembly. Later I found out that the shaft was to short. So I had to pin a short piece on both ends to make it work. Here shows the bull rails installed. Also like to mention the neat CA Glue Applicator. It is the best I have used. I have even forgot and it set overnight and it still wasn't clogged the next day. If it dose clog up all you have to do is just clip a piece of the end and your good as new. Then when it gets to short, pull it off and stick on another one. Another good thing about it is you can control where the glue goes. And you don't get glue all over the place. Also you don't waste glue.😀 Another shot of the bull rails. Also some of the railings and decorations. Here I am fabricating the Stag per the plans, no problems. Paddle Wheel and Supports. Also some more Railings and Decorations installed. Wow! What a mess. ..I used Lego Blocks to keep the stacks plumb until the glue set. From here on is the finished model on a 1 by with some molding around the edges. I used some 3/8" square basswood. Then I beat'm up with a meat tenderizer to rough them up And stained with diluted india ink. Then I knocked off the sharp corners with a course rasp then stained the whole thing with Golden Oak (I think). Then a coat of wipe on polly. The surface was covered with Medium Ballast That's All Folks Now on to the next project, what ever that is. My goal is to finish what ever I start. I have studied many many logs which are a great help. I bought Kurtvd19's CD which helped a lot Thanks to all. RussS I sorry, looks like my photos got all jumbled up.


- 23 replies
-
- 11
-

-
- model shipways
- chaperon
- (and 1 more)
-
I wish that I knew about this website before I started my Chaperon build. https://www.jensmittelbach.de/steamboats/chaperon/resources.html RussR
-
You are a fine example, one doesn't have to have a lot of fancy tools to build an impressive model. One only needs a strong desire and determination to succeed. I look forward to witness your progress. Keep up the good work. RussR
-
Don't you think it boils down to whether or not a manufacture can recoup there developmental and production cost and still make profit? RussR
-
Some sellers I think, try to re-coop there eBay and PayPal fees. But there are deals to be had if you are willing to wait. I just bought a new Panart Lancia Armata 1803 Armored Launch 1/16 scale for a third of retail. I looked for a long time but wasn't going to pay full retail plus shipping. And about 18 months ago I bought a new Model Shipways Armed Virginia Sloop for a fraction of retail. But you have to be careful and read the description and look at all the photos very close you could get skinned. The problem for me is I will end up with more models than I could ever build. I hate ModelExp 😊, they run those 40% off sales. RussR
-
Is there an easy wooden tall ship out there to build?
RussR replied to thegrindre's topic in Wood ship model kits
I don't think so. This Covid 19 is playing havoc on everything. They manufacture most of there stuff. They are a USA company. The Chaperon was on back order and I got it right away when it was on sale. (My Chaperon is finished now except for the mounting and case). -
Is there an easy wooden tall ship out there to build?
RussR replied to thegrindre's topic in Wood ship model kits
I second that. This was my very 1st. Although I finished it. It was so small and fragile. And I didn't do a very good job. I didn't have the skills to do it properly. I have gotten a little better since (I hope). What ever you do dont't "bit off more than you can chew". A year or two is a long time to be saddled to one project. If you are like me, you will get bored and give up. RussR -
Is there an easy wooden tall ship out there to build?
RussR replied to thegrindre's topic in Wood ship model kits
I don't see how you could go wrong with ModelExpo (one of MSW (sponsors). If you mess up a part it is easy to get a replacement. I know from experience. I used some material that was suppose to be used for something else and they sent me some more and didn't even charge me for the shipping. 👍 I think you would be happy with there "MODEL SHIPWAYS WILLIE BENNETT SKIPJACK1:32 SCALE" for a 1st time. https://modelexpo-online.com/Model-Shipways-WILLIE-BENNETT-SKIPJACK132-SCALE_p_1015.html Or one of there many other fine model kits. RussR -
Mini Table Saw recommendations
RussR replied to captainscott's topic in Modeling tools and Workshop Equipment
When I first started this hobby, I started with basic tools. Not a single power tool. I wasn't sure that I would stay with this or not. My first power tool was a Dremel rotary tool, then a work stand with a flexible shaft. Then an x-y table. Then I up graded my miter box & hobby saw to a used Proxxon KS 115 Bench Circular Saw for $50.00 plus shipping. It wasn't a $500.00 saw but a real upgrade from what I had. (I would sell it for what I paid) Then recently I had the opportunity to buy a PROXXON FKS/E for a reasonable price. The Proxxon KS 115 served me well. If a used Byrnes saw comes up for sale for a reasonable price I'll up grade and make someone a good price on the FKS/E. If not I'll be happy with what I have. (by this time I hope my craftsmanship has improved). I wish everyone well. RussR -
If asking questions was against the rules, I would have been band a long time ago. 🙂
-
Kurt, What method do you use to anneal brass and not burn it up? Thanks, RussR
-
Mini Table Saw recommendations
RussR replied to captainscott's topic in Modeling tools and Workshop Equipment
If you are patient, hobby saws do come up for sale here on MSW and Ebay. I recently bought a saw from a MSW member. It has a fine adjustment fence that attaches on the front and back of the table. And it is variable speed with four carbide tipped blades. It may not be the Cadillac of the saws but I think it will do every thing I need. -
Since I bought a used Proxxon FKS/E saw recently from a MSW member. I located this video on YouTube. It may be of interest to someone else. It may apply to the FET as well. It is a little tricky getting apart and back together. It starts at 1:23 Warning: It is an hour long. Question: How do I post just the link and not the whole video? RussR
-
- 3
-
-
Todd, After going thru my left over parts I found what your looking for. If you PM me your address I think I can put it in a envlope and mail it to you. RussR
-
Todd, If you have some scrape 2mm dowl you could bend it cut it off. You could go so far as taking a deadeye and sand half off and drill a 2mm hole in the center to put the dowl in and paint it. Or don't worry with the bend in the dowl. Or the other opition is leave them off intirely. Unless someone else has a better solution. RussR
-
To add sails or not? What is your preference?
RussR replied to Bill97's topic in Masting, rigging and sails
Thank you Rob and Cathead, I like the idea using paper. Will have to study and try it out. Also the method in the PDF Mark posted above. RussR -
To add sails or not? What is your preference?
RussR replied to Bill97's topic in Masting, rigging and sails
Wow! If I didn't know better I would have though I was looking at the real thing. Great job Hubert. The sails is what draws your eyes in. Then one starts to notice the rest the the model. My last completed model was 1/89 scale which was almost acceptable. After that I decided I need to back up and do something more my level and resources. Nothing smaller than 1/50 scale and it must have a sail plan. In the que is MS Bounty Launch 1/16 scale to hone my skills in boat building before attempt to tackle anything more ambitious. I don't want just another model. However I am about to finish MS Steamboat Chaperon at 1/48 scale that doesn't have sails. It would be great if someone would produce a video series about sail building here on MSW like Chuck's planking videos. I haven't looked at PDF that Mark posted but plan to. Thanks Mark -
To add sails or not? What is your preference?
RussR replied to Bill97's topic in Masting, rigging and sails
Yes, good sails are difficult to make but that is what makes your model stand out among the rest. Instead of speeding though a build I try to get better even with my limited experiance and limited resources. I admire Rob and flyer efforts, that doesn't come easy. I may get there if I don't "kick off" first. -
To add sails or not? What is your preference?
RussR replied to Bill97's topic in Masting, rigging and sails
You sir are a master at your craft. I can only aspire to your level of artistic abilities. Model sail making is an art in its self. If anyone is interested here is a youtube demonstration on silkspan sail making. -
To add sails or not? What is your preference?
RussR replied to Bill97's topic in Masting, rigging and sails
In my opinion a sailing ship without sails is a raft. A sailing ship sould have sails (furled or unfurled). The model to me looks unfinished without sails. All of your rigging will be viewable from different angles anyway. If I am going take years to finish why stop at the sails? -
Connecting Pins - Need help on first build
RussR replied to Brianh526's topic in Metal Work, Soldering and Metal Fittings
I would like to know as well. Because I was trying to flat'n a brass nail in a hinge recently and when the nail turned slightly in the pliers and ended up crushing the hinge. I ended up not doing anything and let gravity do the work. -
Thanks, That makes sense, I just wasn't familiar with that term. RussR
-
Been reading Captain Cook Society web site. They says that the ship Resolution was "flat-floored, apple-cheeked hull" as opposed to what? Thanks, RussR
-
Wow! That was quick, you received it 20 days before you ordered it. ☺️ 😇
-
I had goofed up some material on my model build. So I contacted John Garcia at Model Expo to get some replacement material. I offered to pay for it and the shipping but he said it wasn't necessary nor did he ask for proof of purchase. Thanks John. Model Expo is the best in my book. Russ