


Blackreed
-
Posts
83 -
Joined
-
Last visited
Content Type
Profiles
Forums
Gallery
Events
Posts posted by Blackreed
-
-
-
Certainly is a beautiful model.
-
I’ve managed to get a bit done, I have sanded the hull, gotten the cockpit built, I then had to redo part of the hull to accommodate the fact that the boat was not scheduled to have a cockpit. I had a small issue with the clear coat I was using, I wanted a satin finish, I should have just used gloss, I’ve got it glued together and sanded enough for the gloss clear.
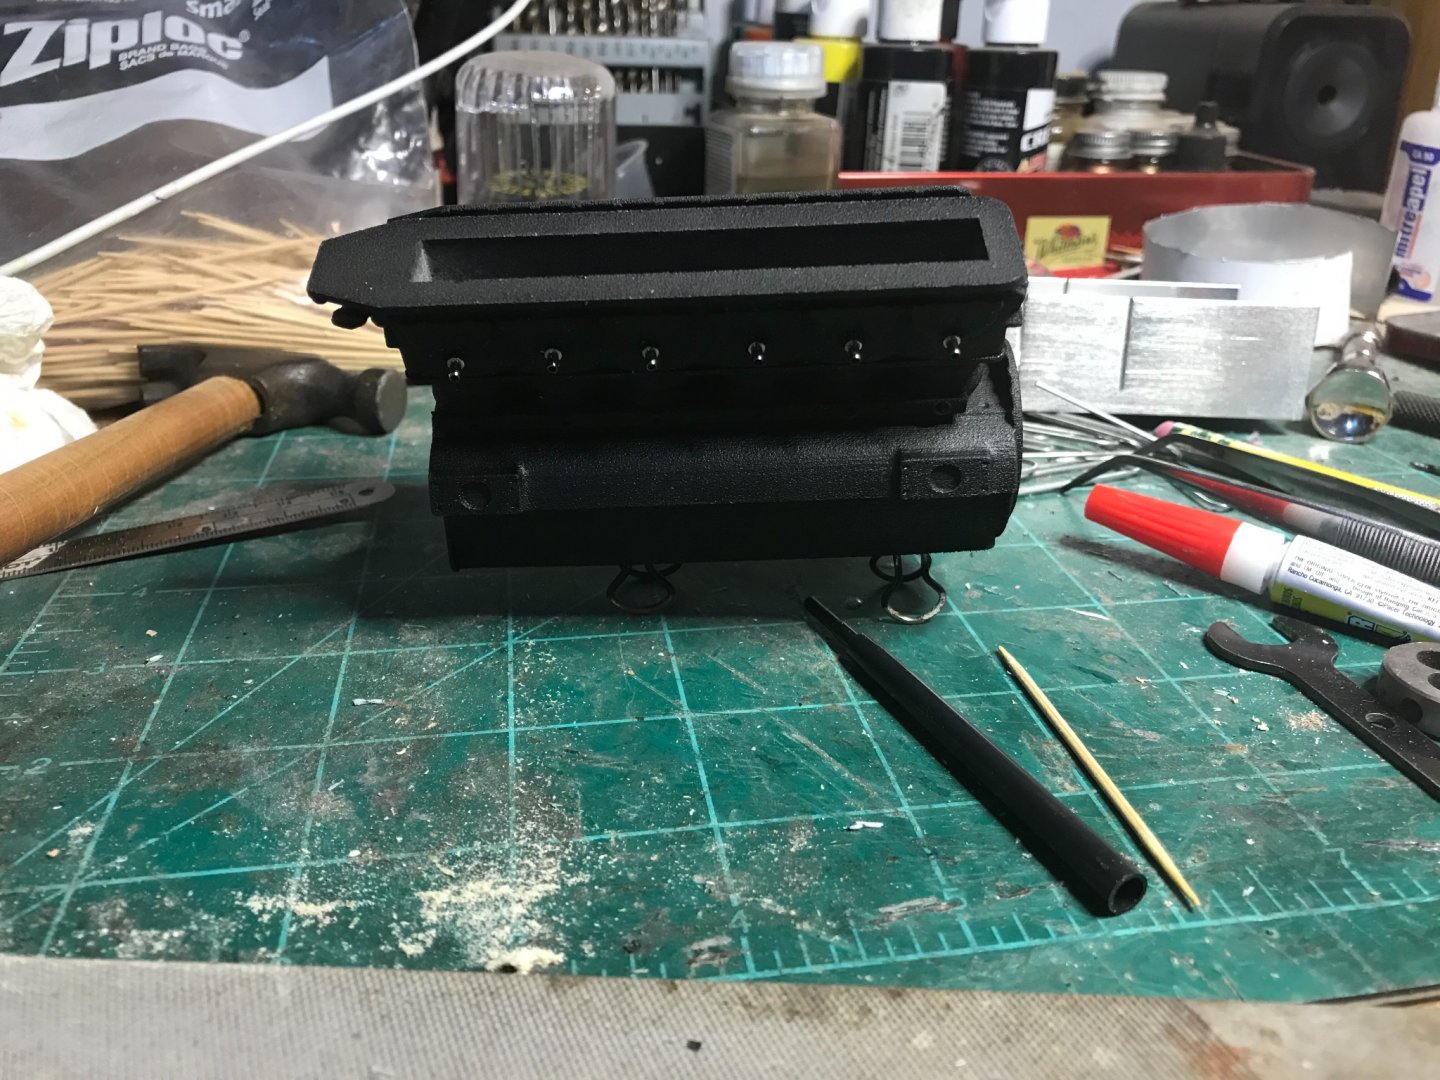
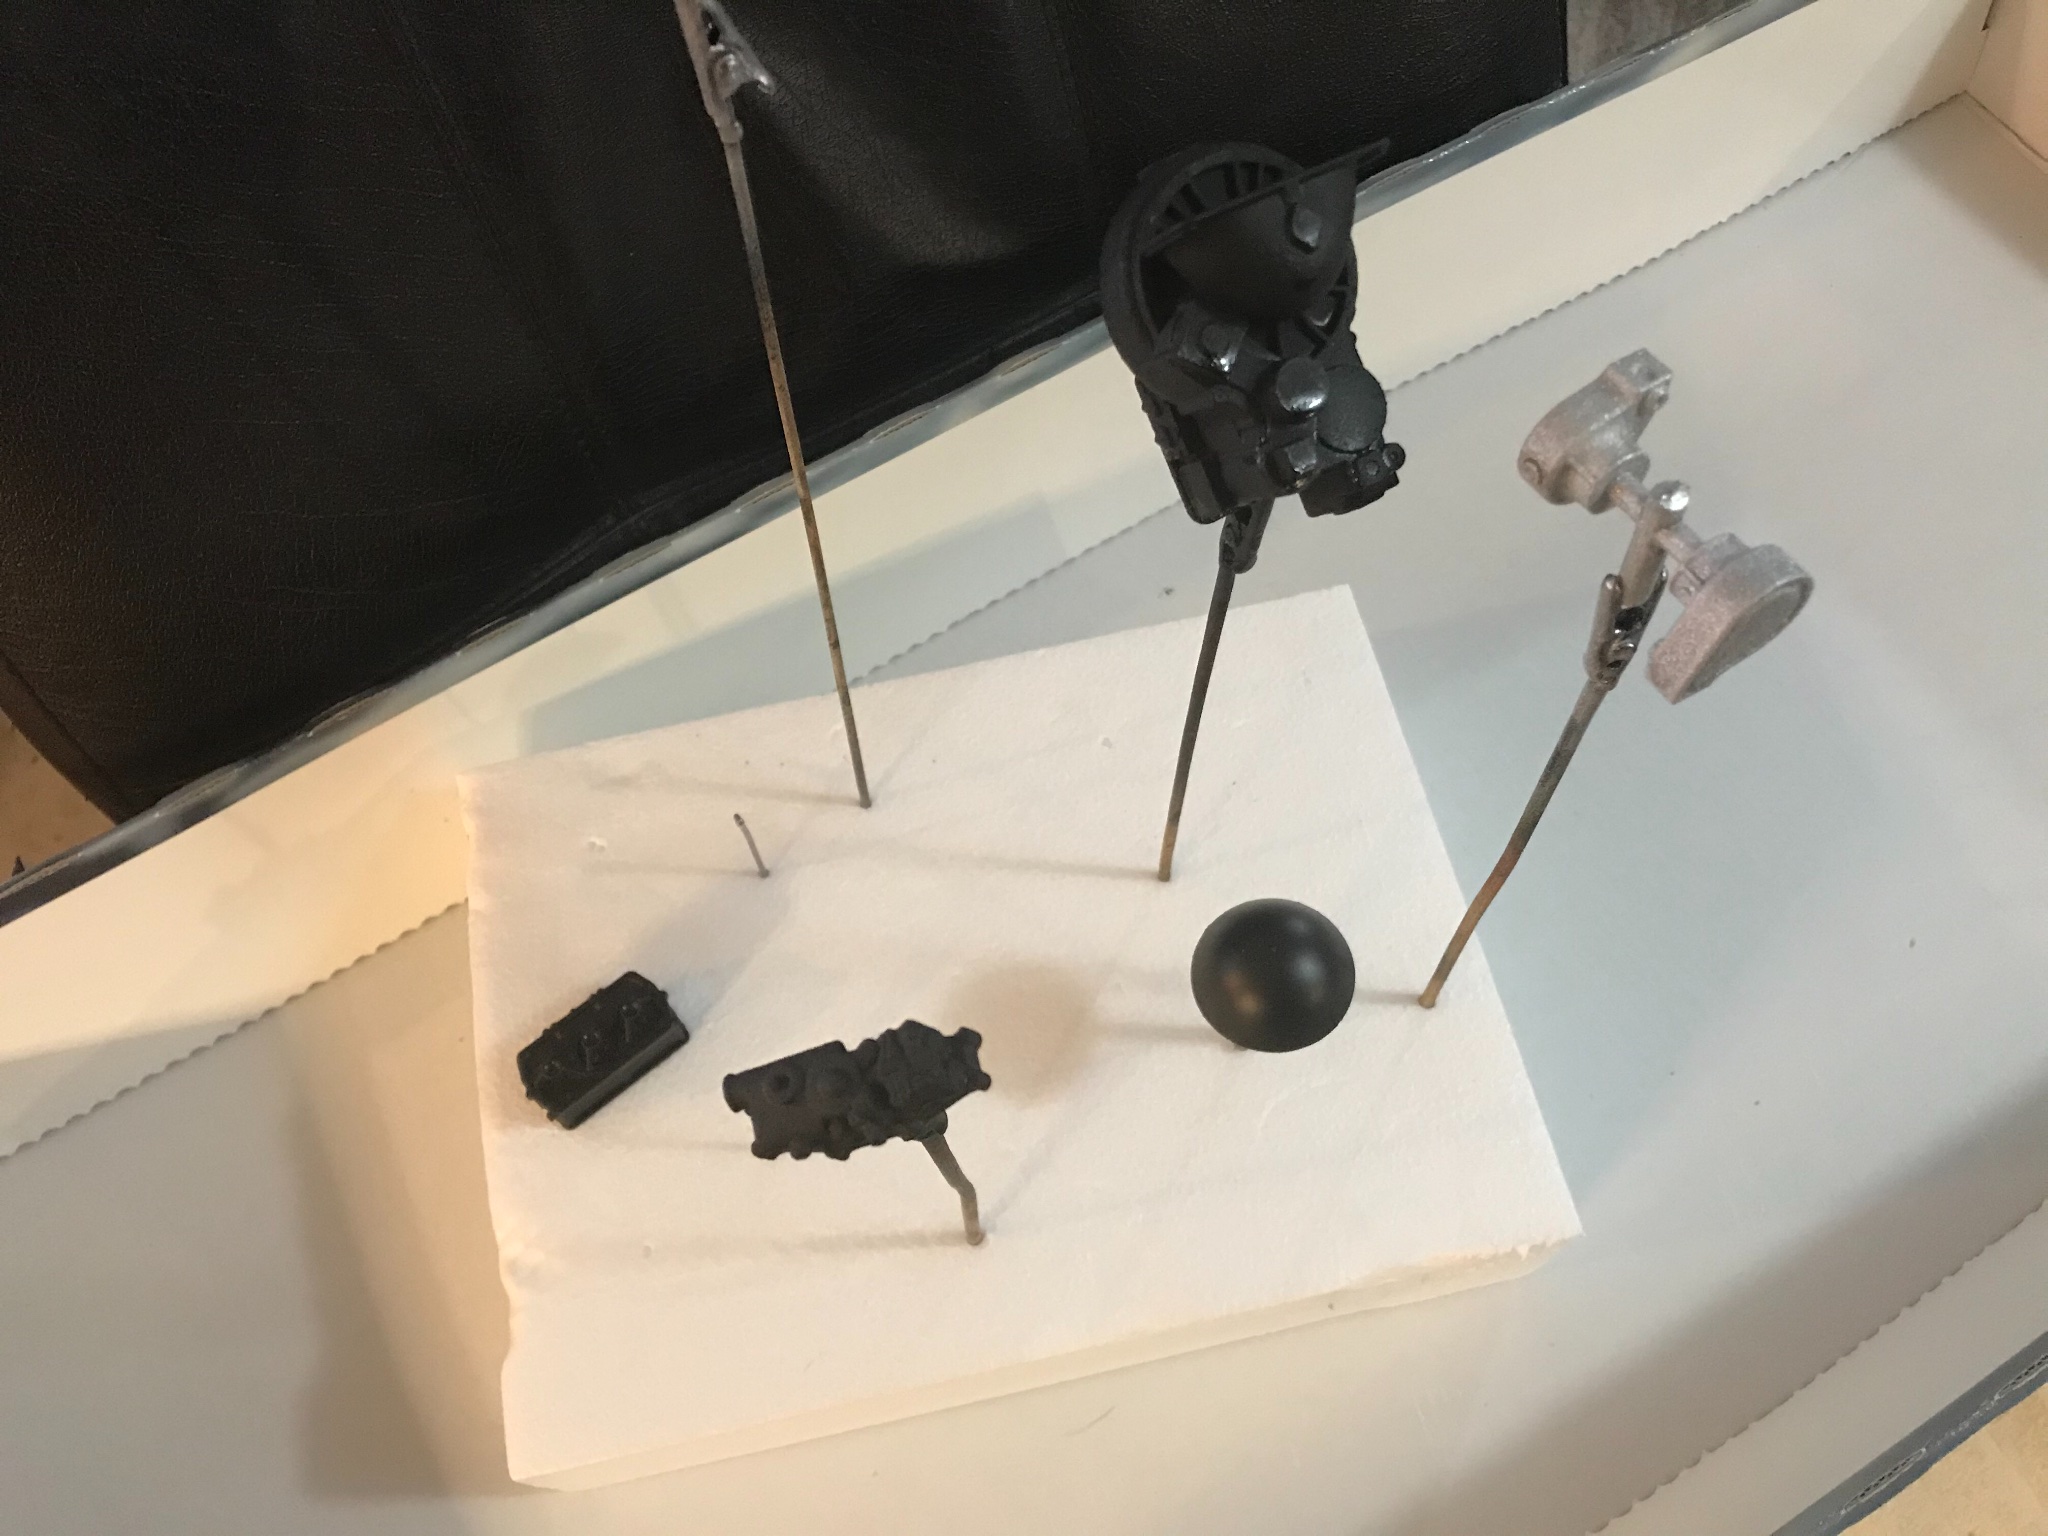
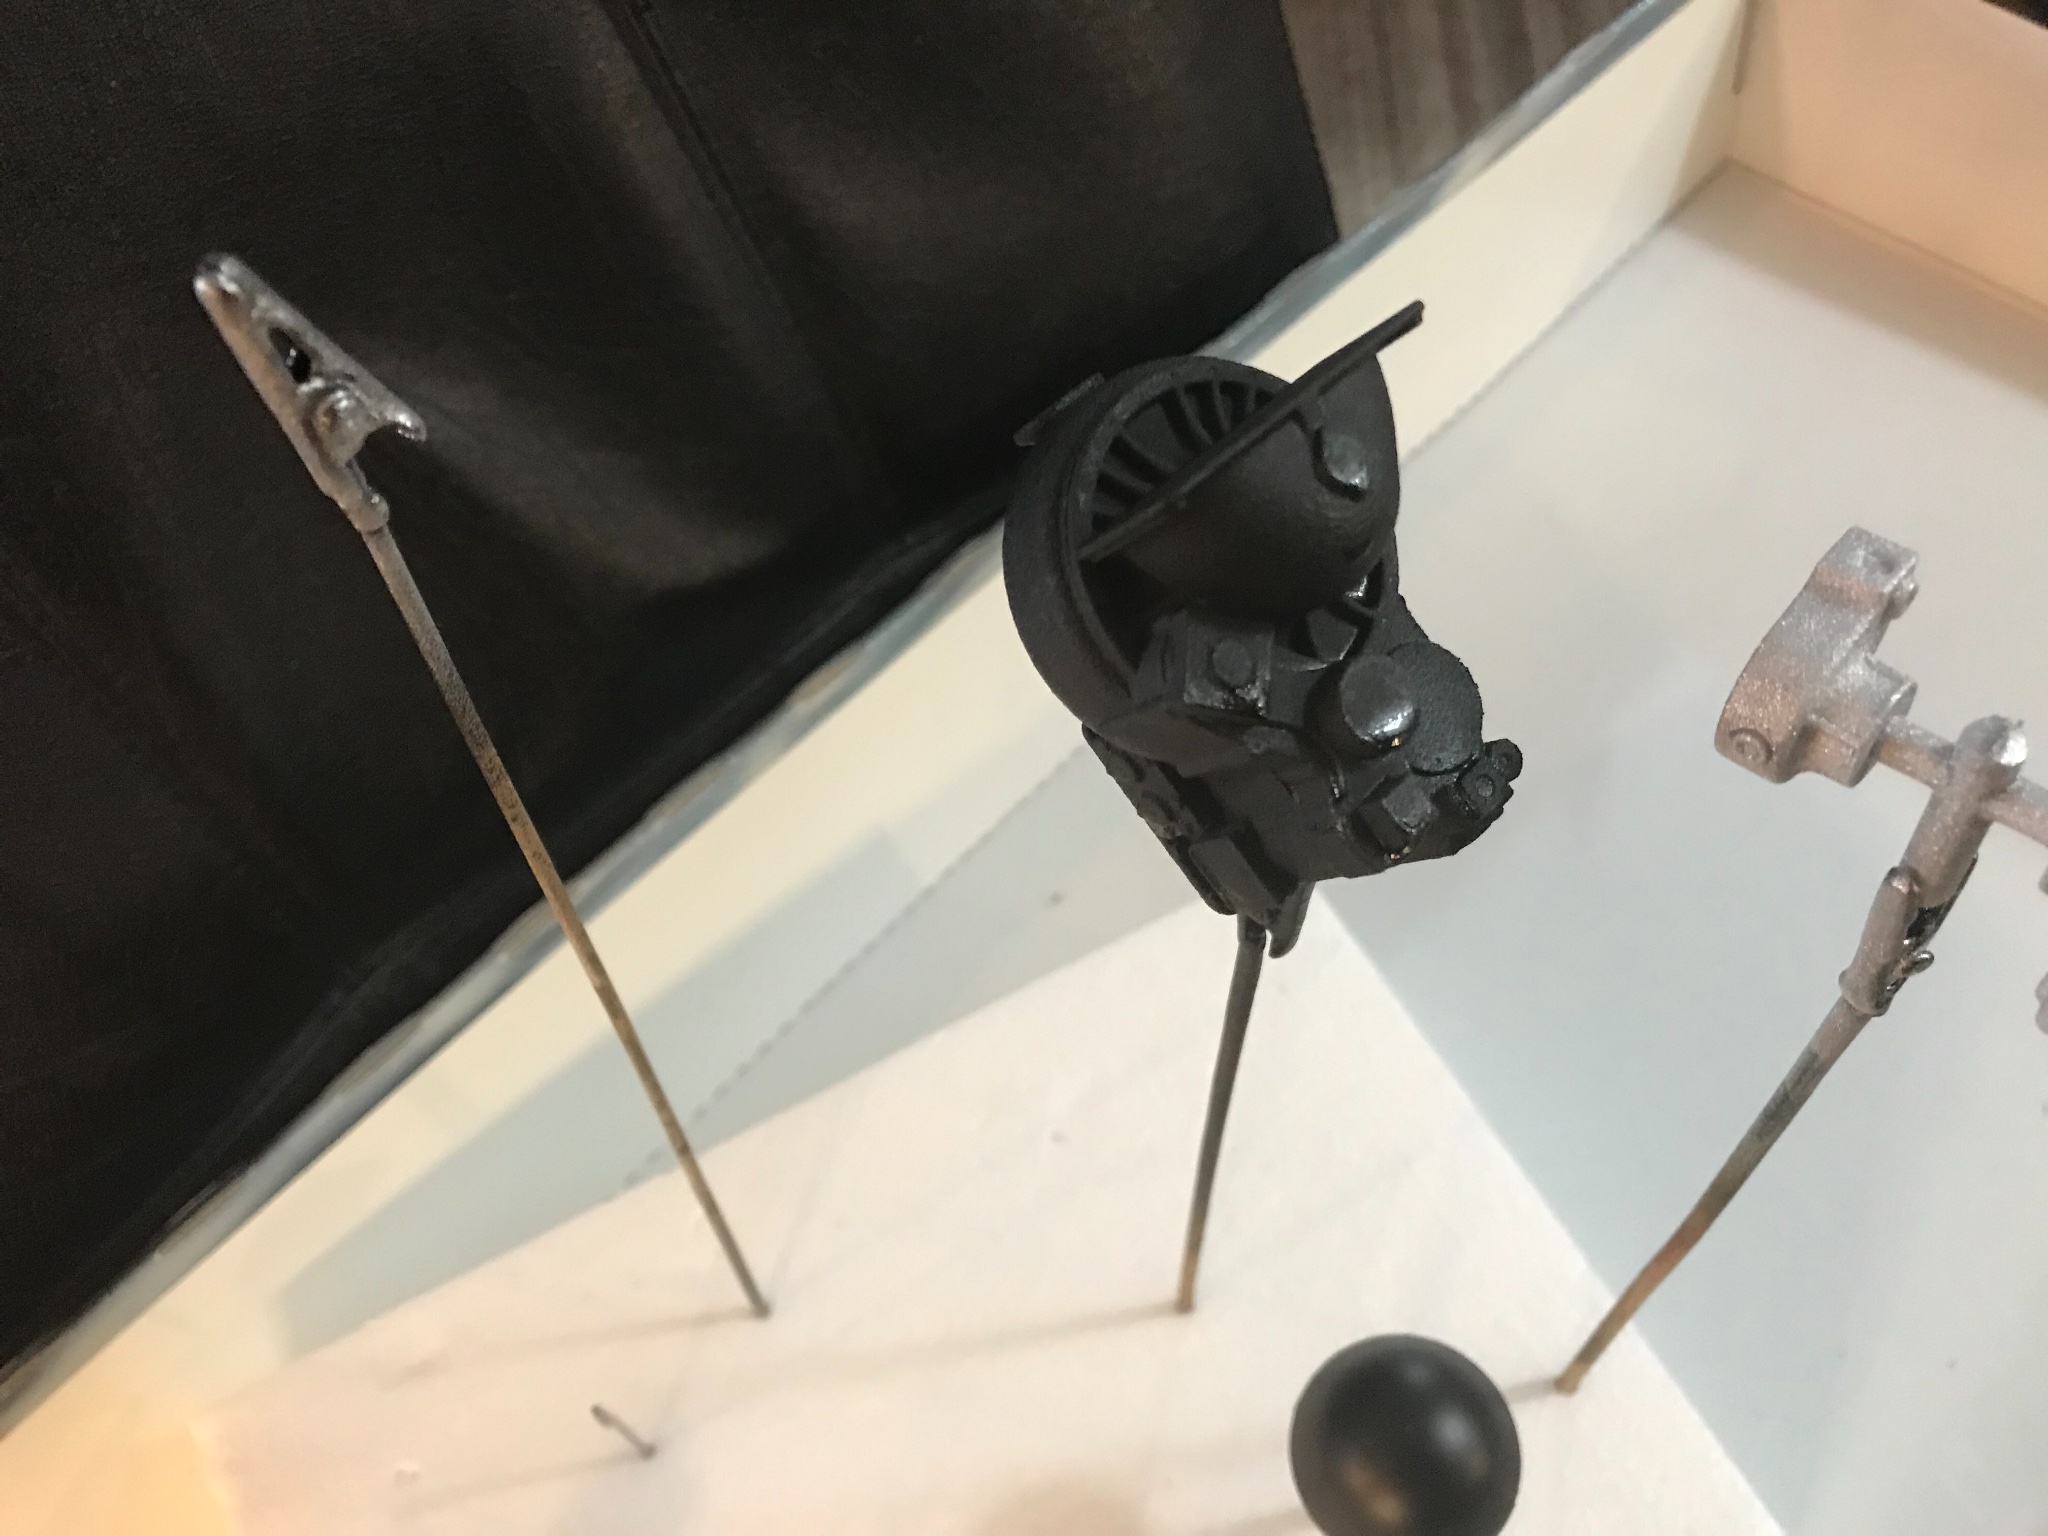
I worked on the front of the motor, I have the intake, super charger, carburetors, fuel pump and the distributors painted, I’ll leave them to dry over night and then prepare for attaching them, I should then have a good idea of the overall length of the engine.
I also have the transmission ready, I still need to make the output shaft, however I won’t know for sure what this will look like until the engine is mounted on the motor mounts.


-
-
This is my thoughts, I’m not sure what you are trying to make;
When wood gets to be thinner than 1/16 it moves to mils, you are talking about 10 mils or so,
when woods especially hardwoods get very thin they tend to warp, dry out and crack,
so I looked at “domestic veneer sample packs” from Rockler, now Amazon will have these as well, however if a specific wood is desired there are also options, these packs begin around $11 and go up to really expensive, ie 24 inch by 96/inch mahogany with paper backing is $69, and without the backer is $62.
I would caution you on such small pieces 3mm x 5mm because the wood will be so difficult to cut, it may be easier to sand those small pieces, and drilling, as veneer is very stable could possibly break due to the pressure from the drill and any clamping methods.
Thinking about this, if you are on Amazon, or really any one that sells hobby wood look into buying CA50 with the activator, this will laminate your wood and make it much easier to drill. As far as staining the CA50 would only work after staining, and as far as painting it would be the same as painting plastic.
Good luck with your project.
- thibaultron, grsjax, mtaylor and 1 other
-
 4
4
-
Beautiful job, what will you do with it now?
-
Great start. That’s awesome subject matter.
There was just an outboard motor on eBay, it came with a boat, but it was still cheap. I can’t remember the scale, I do remember it was relisted.
-
-
The bottom gets plywood, I’ve been working on that, that’s going pretty good. That will get mahogany as well.
The sides get veneer covered with veneer, I’m going to put on the aluminum upgrades that Slomo 4 had.
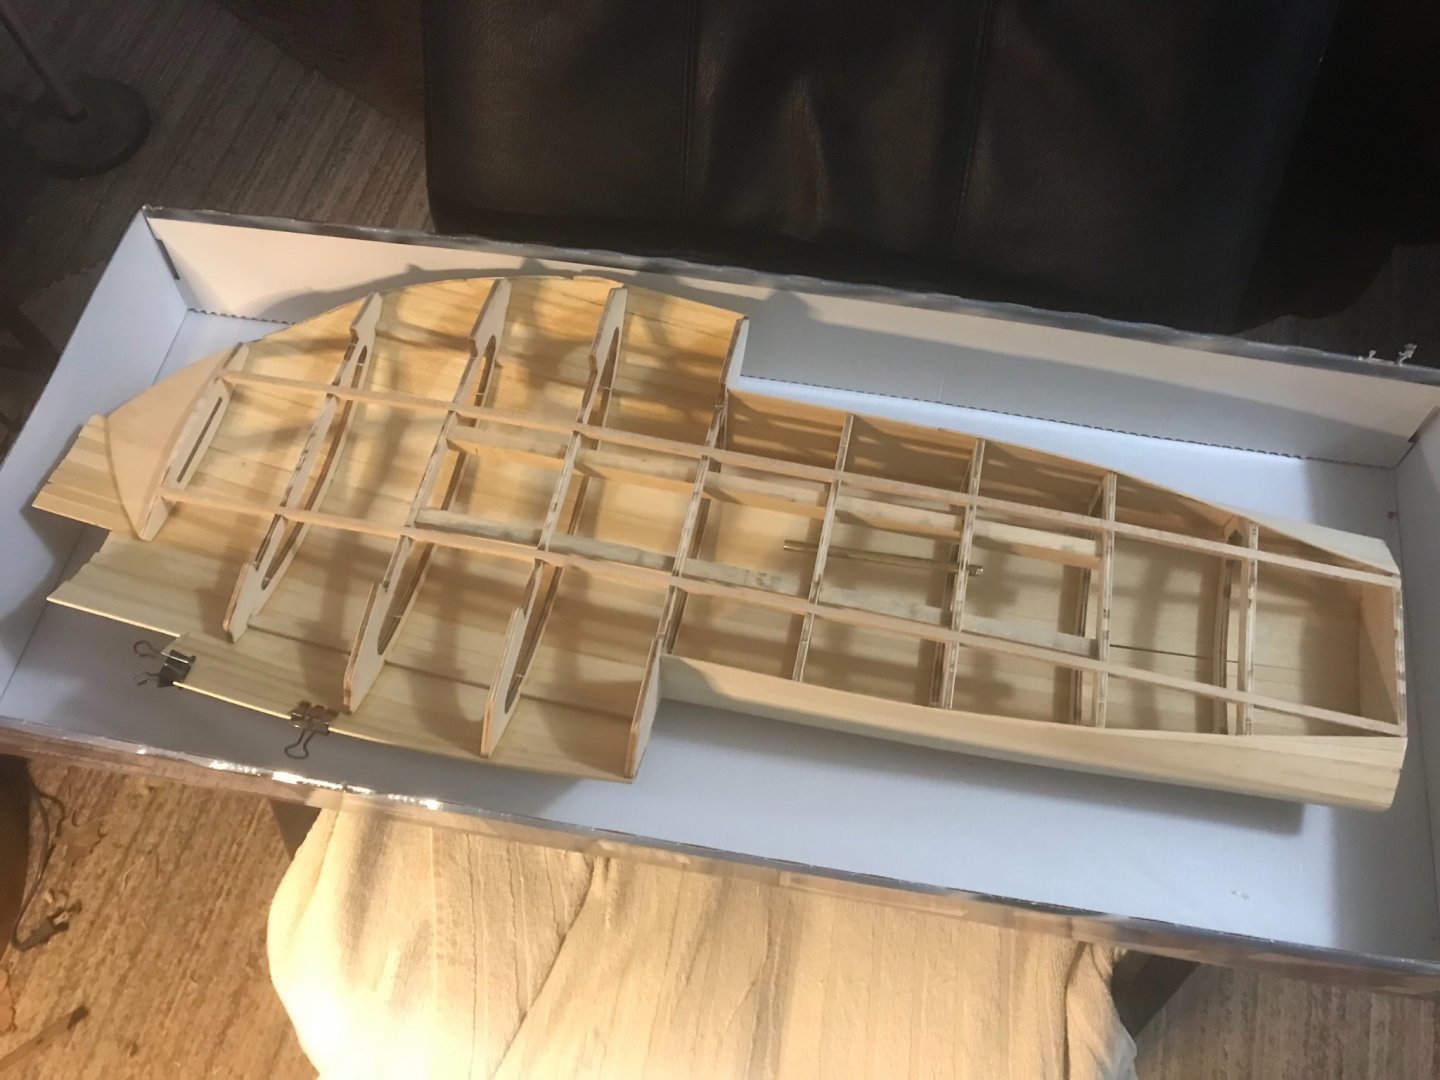
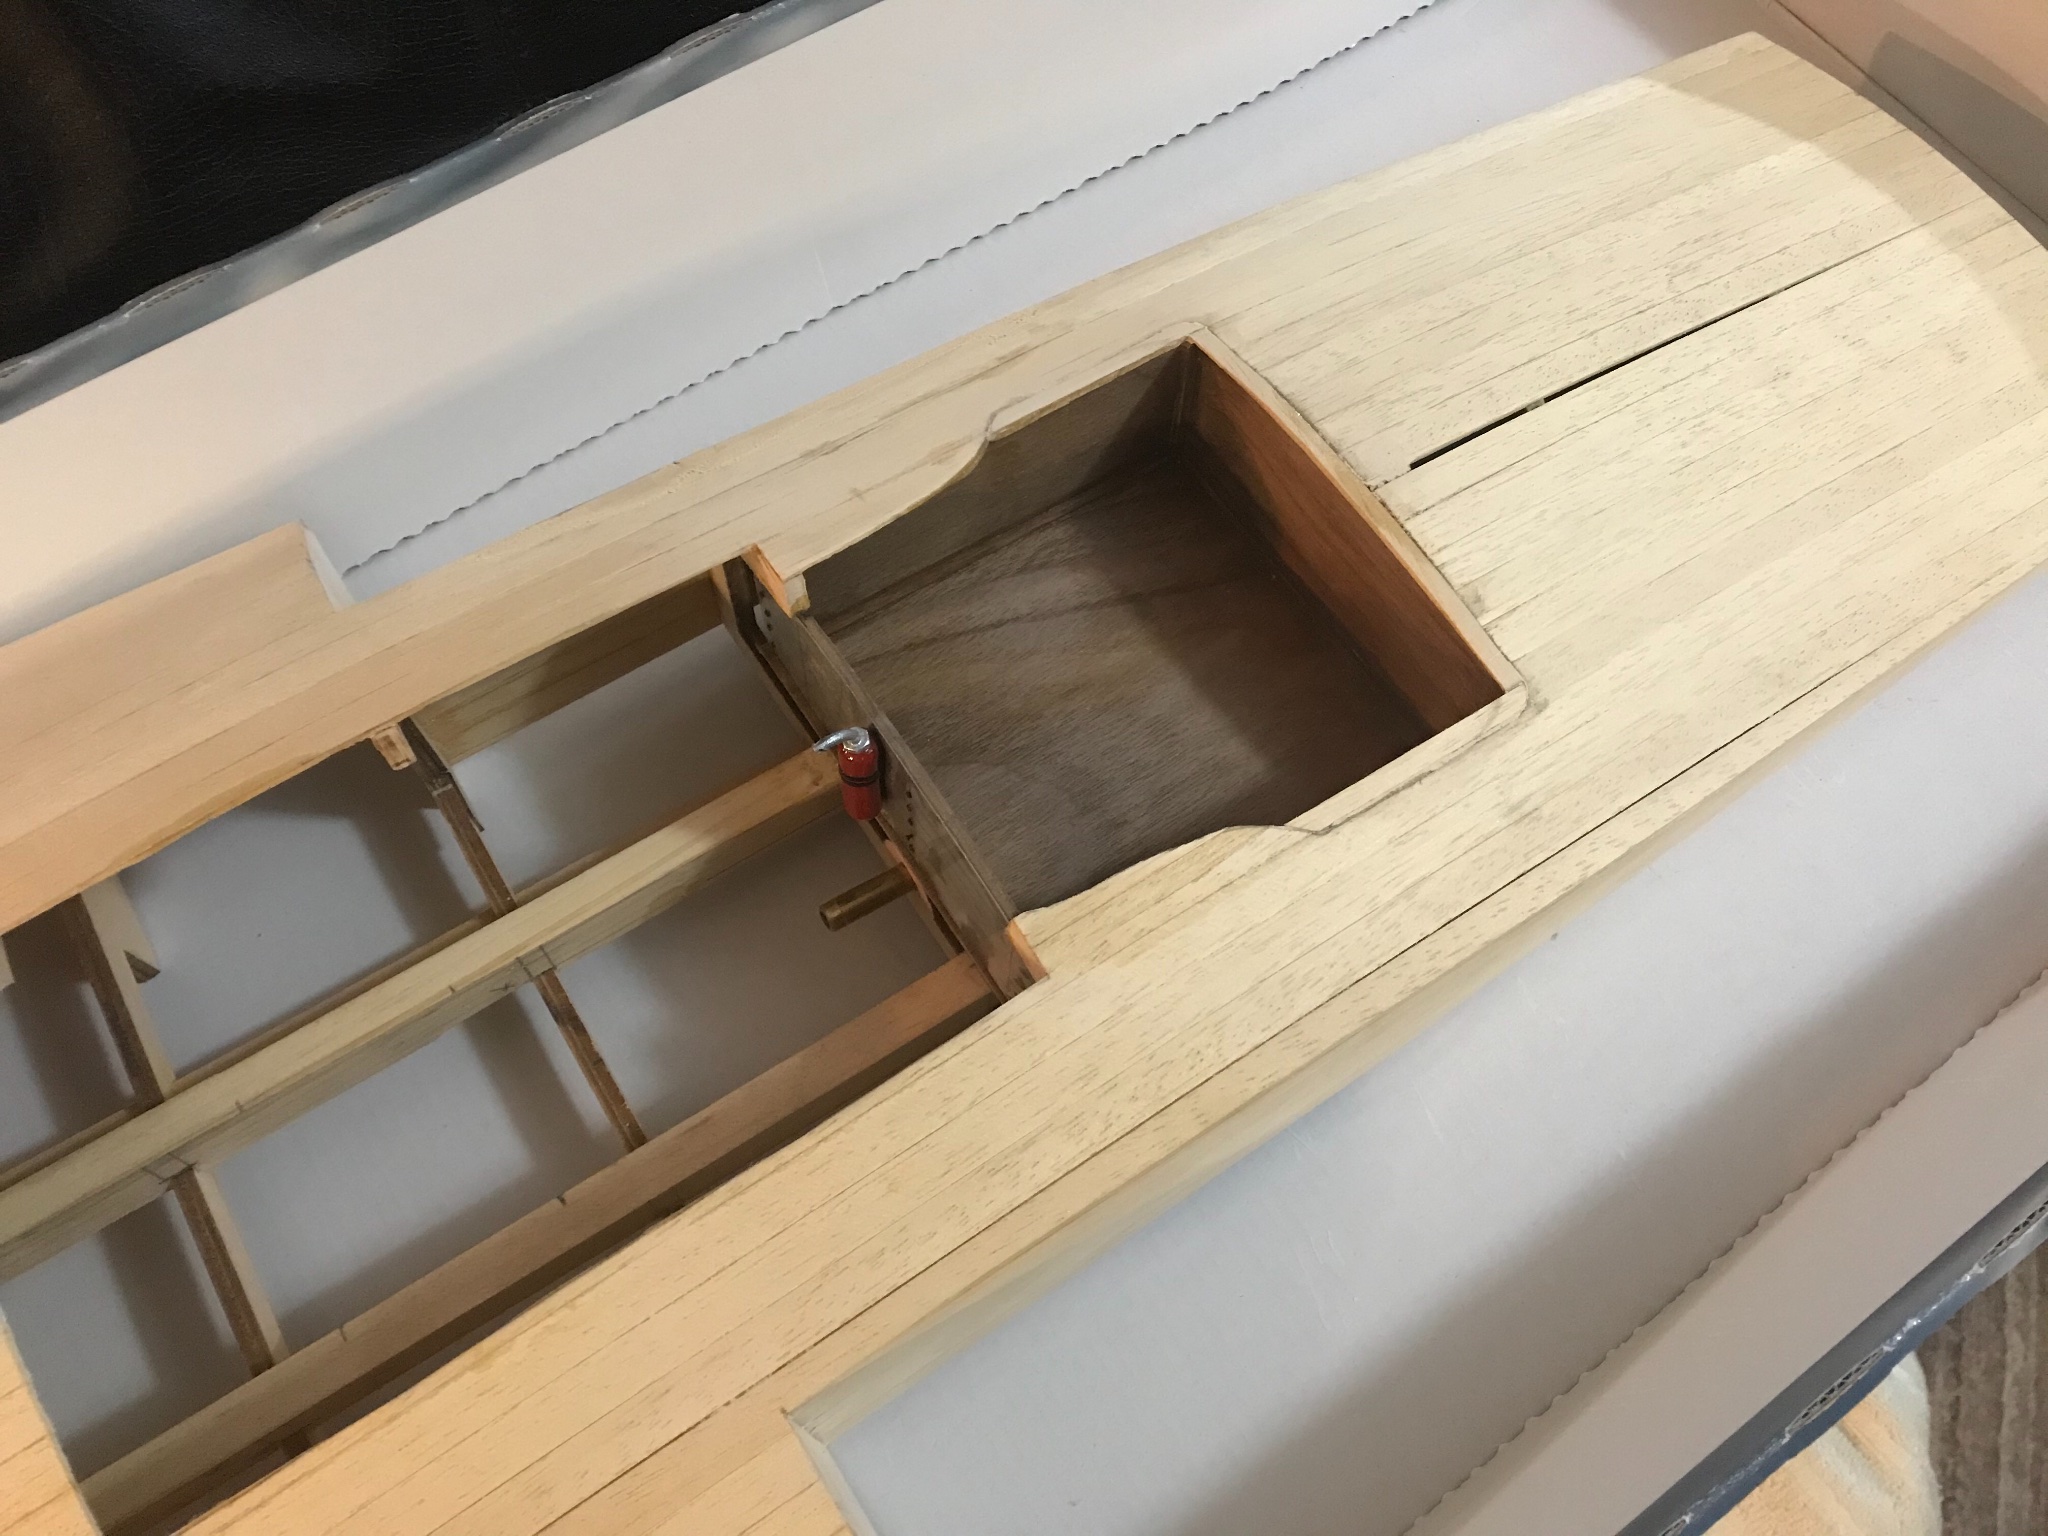
I cut the tabs and the spine so I could get inside to build the framing for the floor and engine.
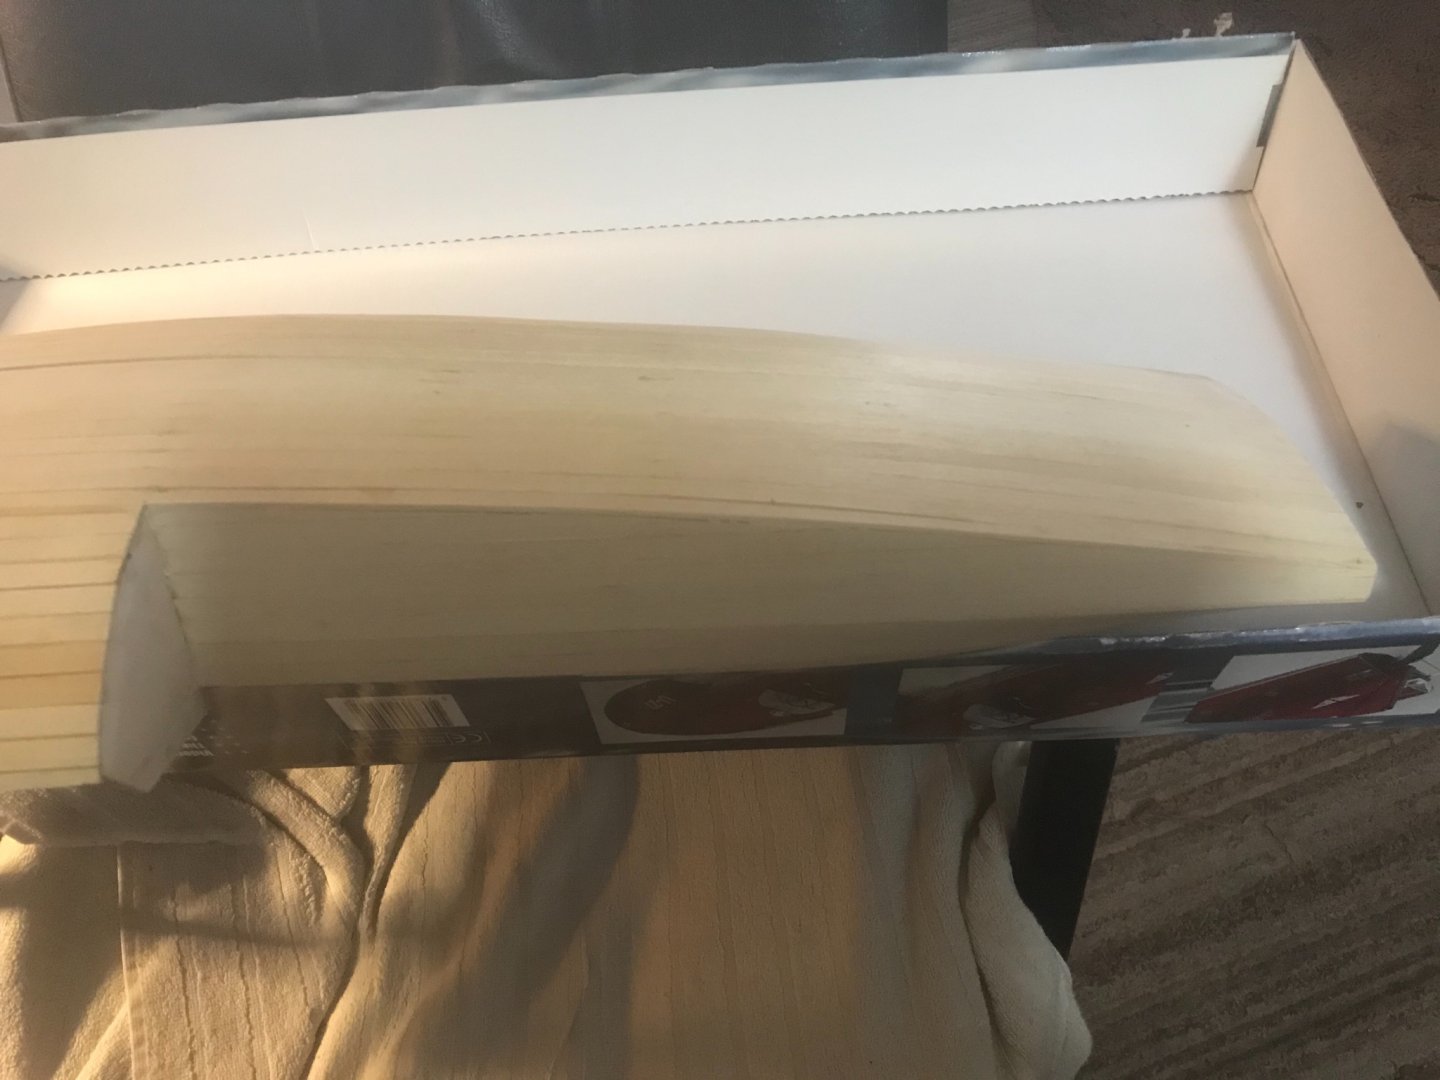
I did leave extra planking hanging out on the front as I wasn’t sure how the front closed if it came to a point, it looks like it does come to a point, and the shaping is done to the bottom.
I have to get the engine and the drivers compartment ready, the kit has a seat and that’s about all that’s in the compartment. I assume there’s a fuel shut off, and I have the gas pedal. I also picked up more gauges, I will look into making the glass for them and covering the dash with aluminum like the real boat.
Tomorrow is another day.
-
1/30th scale figures are somewhat common, they are also called 60mm, look up 1/30th scale navy and the figures will come right up.
1/35th scale is completely off the chart, that is 54mm, I think those figures would do you, but if you didn’t change out your guns the people would look like little kids.
Reminds me of a funny story, I once took a dog to a police station, the dogs handler looked like he was 12.
I’m surprised Dumas made that kit in 1/30th and not 1/35th, I guess it is actually a very popular kit.
I also noticed that at Shapeways there are a lot of parts in the 1/30th scale.
- lmagna, Egilman, popeye the sailor and 1 other
-
4
-
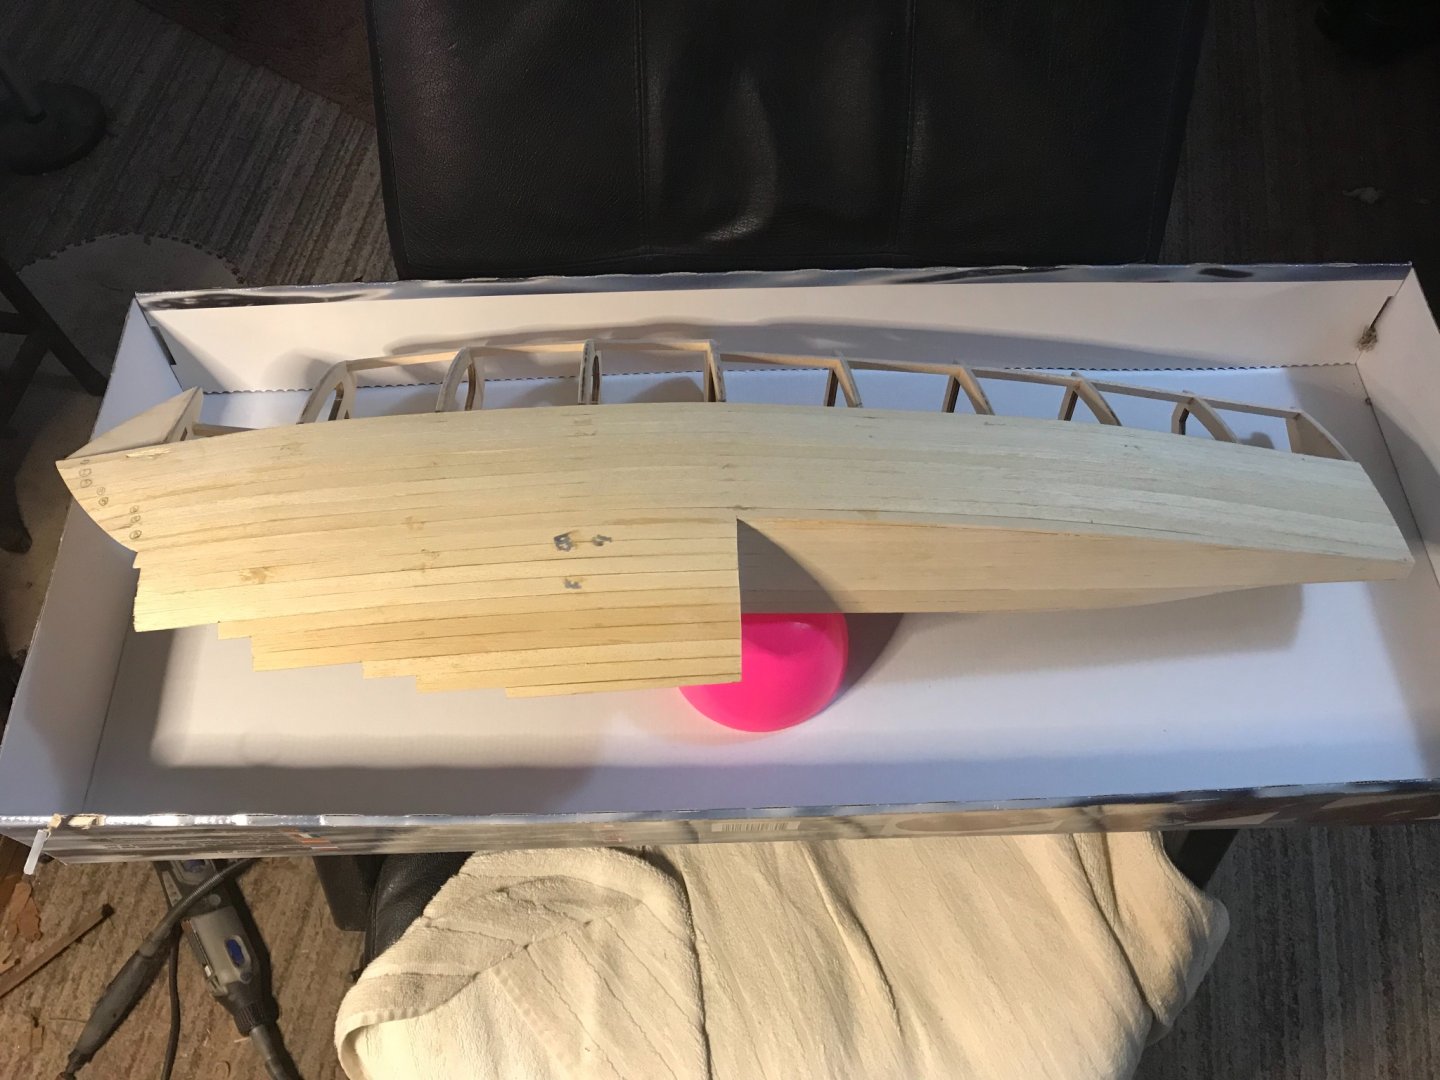
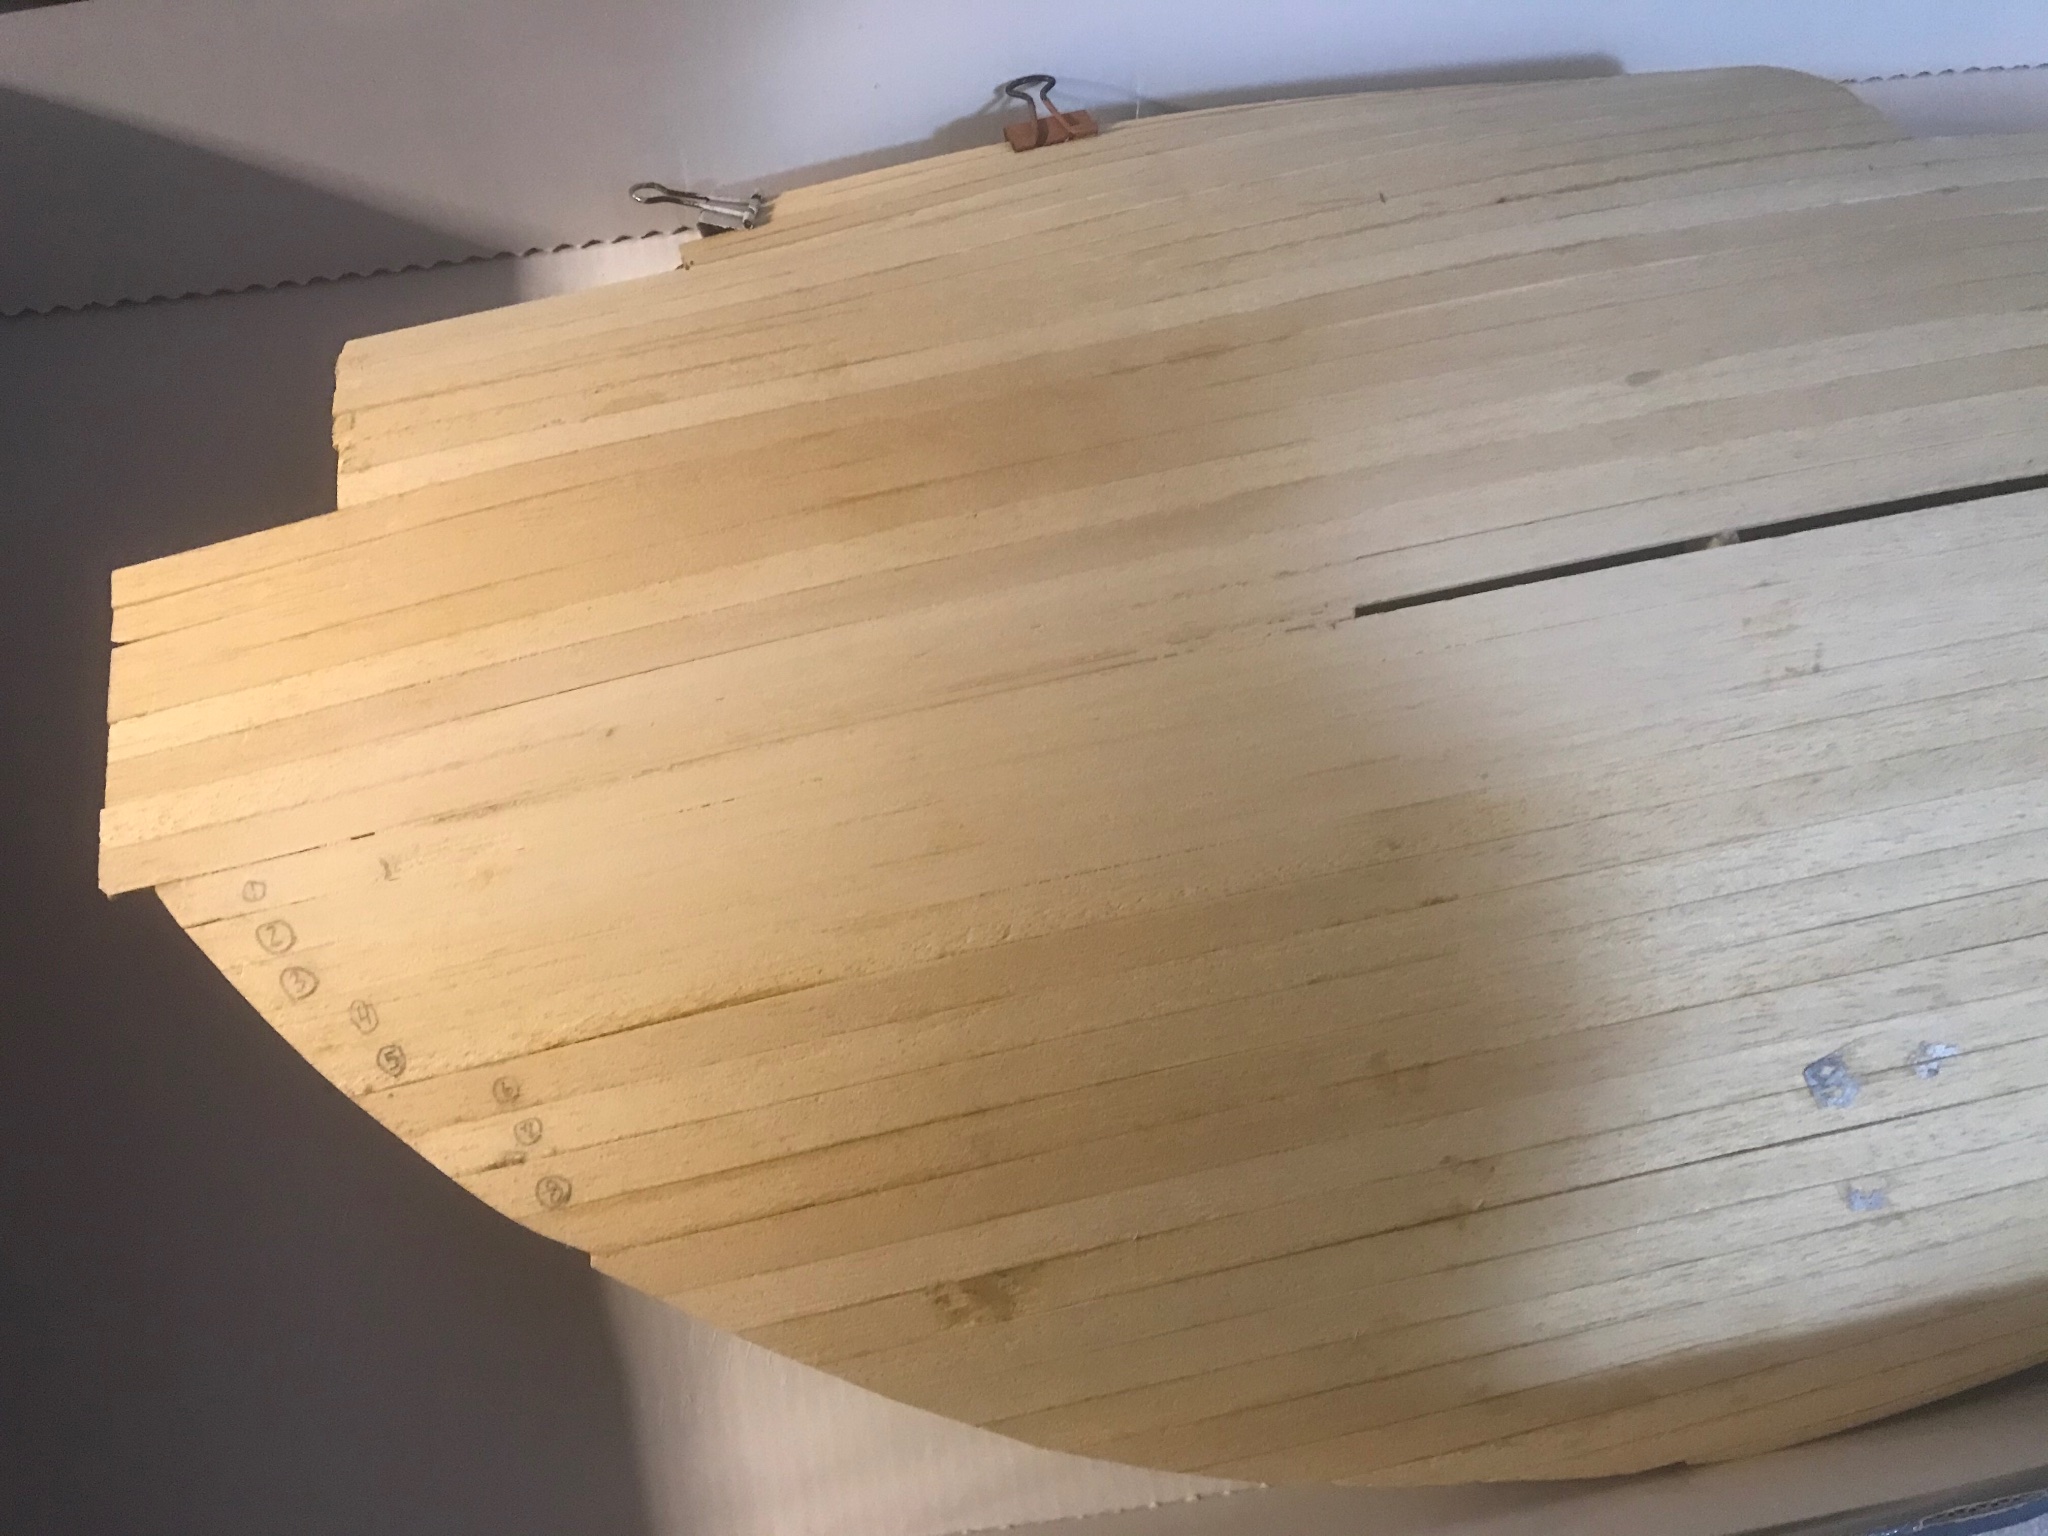
So through a long week, I managed 1 plank at a time till the planking was completed, wish now I had used wood glue.
The planking went well, I had to taper 1 piece on the second side, not sure really why, after that piece they all ran perfectly straight.
I have a section that will need filled between boards #6 & 7, I fixed the dip under them so the parts will run without any extra work, if I don’t fill this I’m afraid I’ll sand that section to thin.
Next I think I’m going to take the orbital sander to it to cut it down without to much effort, then the block sander to make sure the corners remain square.
So far the corners are square no issues there, and the opening along the center has been filled for all I need it to be, as the motor, cockpit and tail fin will cover the rest. This conveniently left all of my center marks perfectly visible.I haven’t been through the rest of the instructions thoroughly enough, but I am left at this point with enough planking to do at least another half of the boat, this is a great thing, and I can’t see any reason to really need the planking, we’ll see.


-
This boat is also of a great scale, lots of detail parts available.
I bet if you tried you could easily get Popeye himself as a pilot, maybe even Brutus and Olivoil for your gunners.
-
Your planking looks great.
-
-
I would love to build 10 of these, Miss Bergdoll, Miss Budweiser, Miss M&M, I would even love to modify it to the jet version, maybe even a Lamborghini, maybe in the future. For that matter all of the 1/8 scale Chris Crafts, even the PT boat with motors of course.
I have 2 spots where filler will be needed so far, and the other half is going great.
I get tired of the glue, I’ve managed to do almost all of my gluing from the inside.I do have some extra mahogany so my underneath will also be mahogany.
I love the Ferrari boat, that motor is expensive and very difficult to get. The F40 motor heavily modified could be adapted, would still look great, be Ferrari and only cost about $300.
I have 4 models that I want to build, I hope to post them all on this site.
Its great to get insight and advice, and of course reassurance for motivation and bigger and better ideas.
-
Your ship is a work of art, along with your tooling.
I checked out your stagecoach as well, I had already seen and liked that, it’s very beautiful.
- michael101 and EJ_L
-
2
-
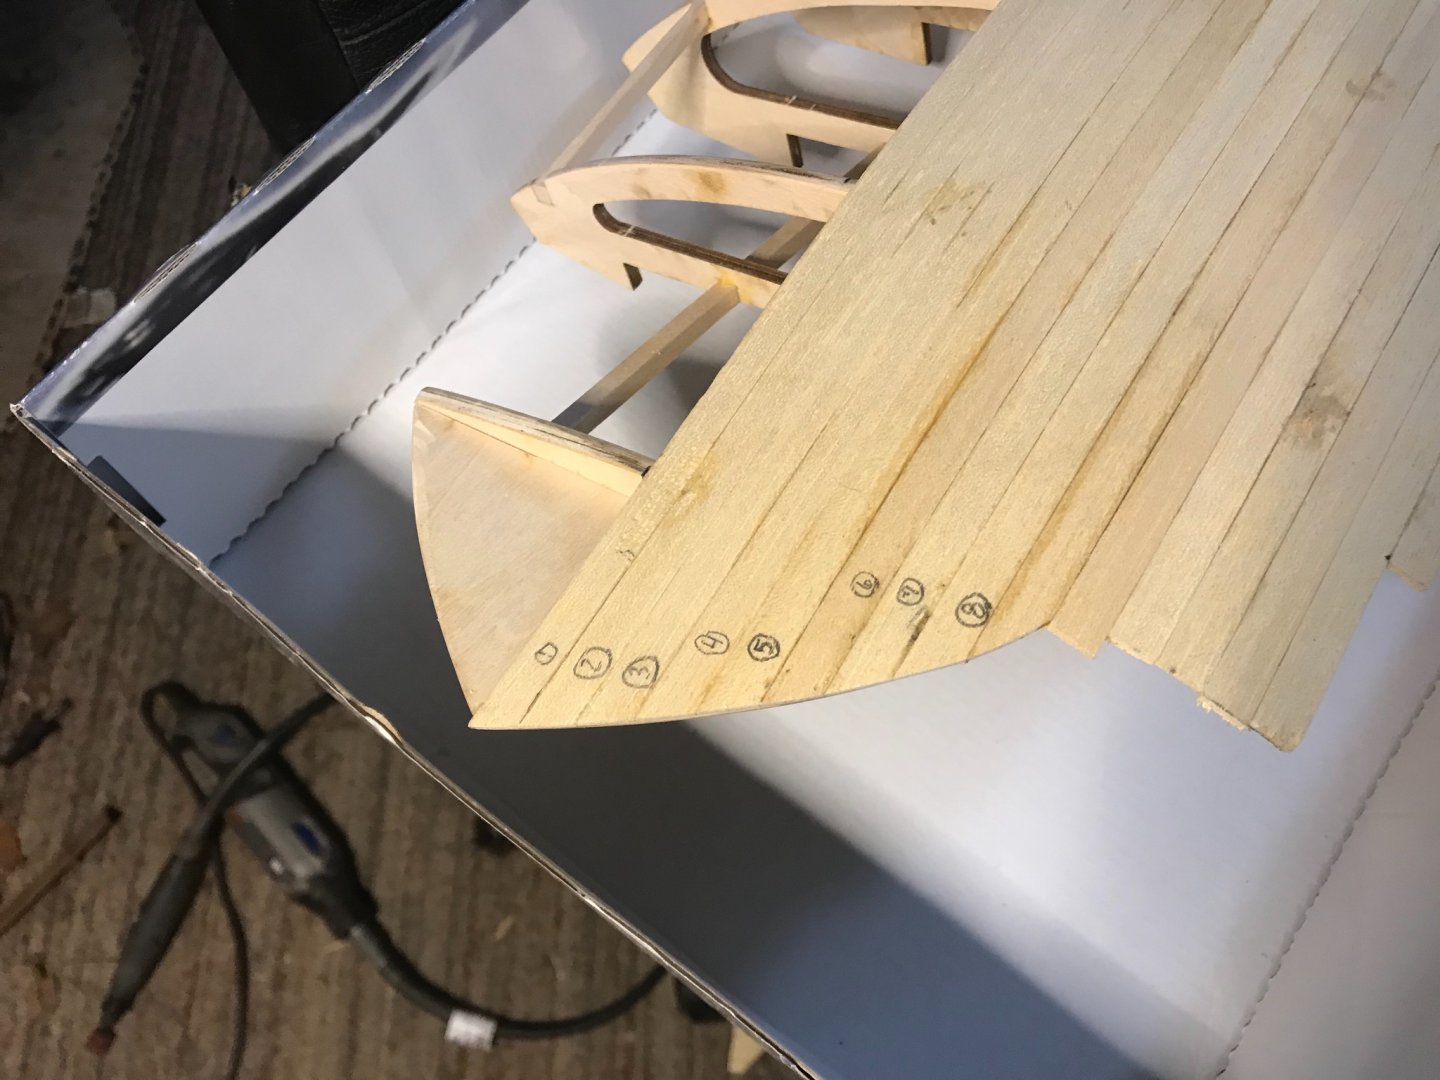
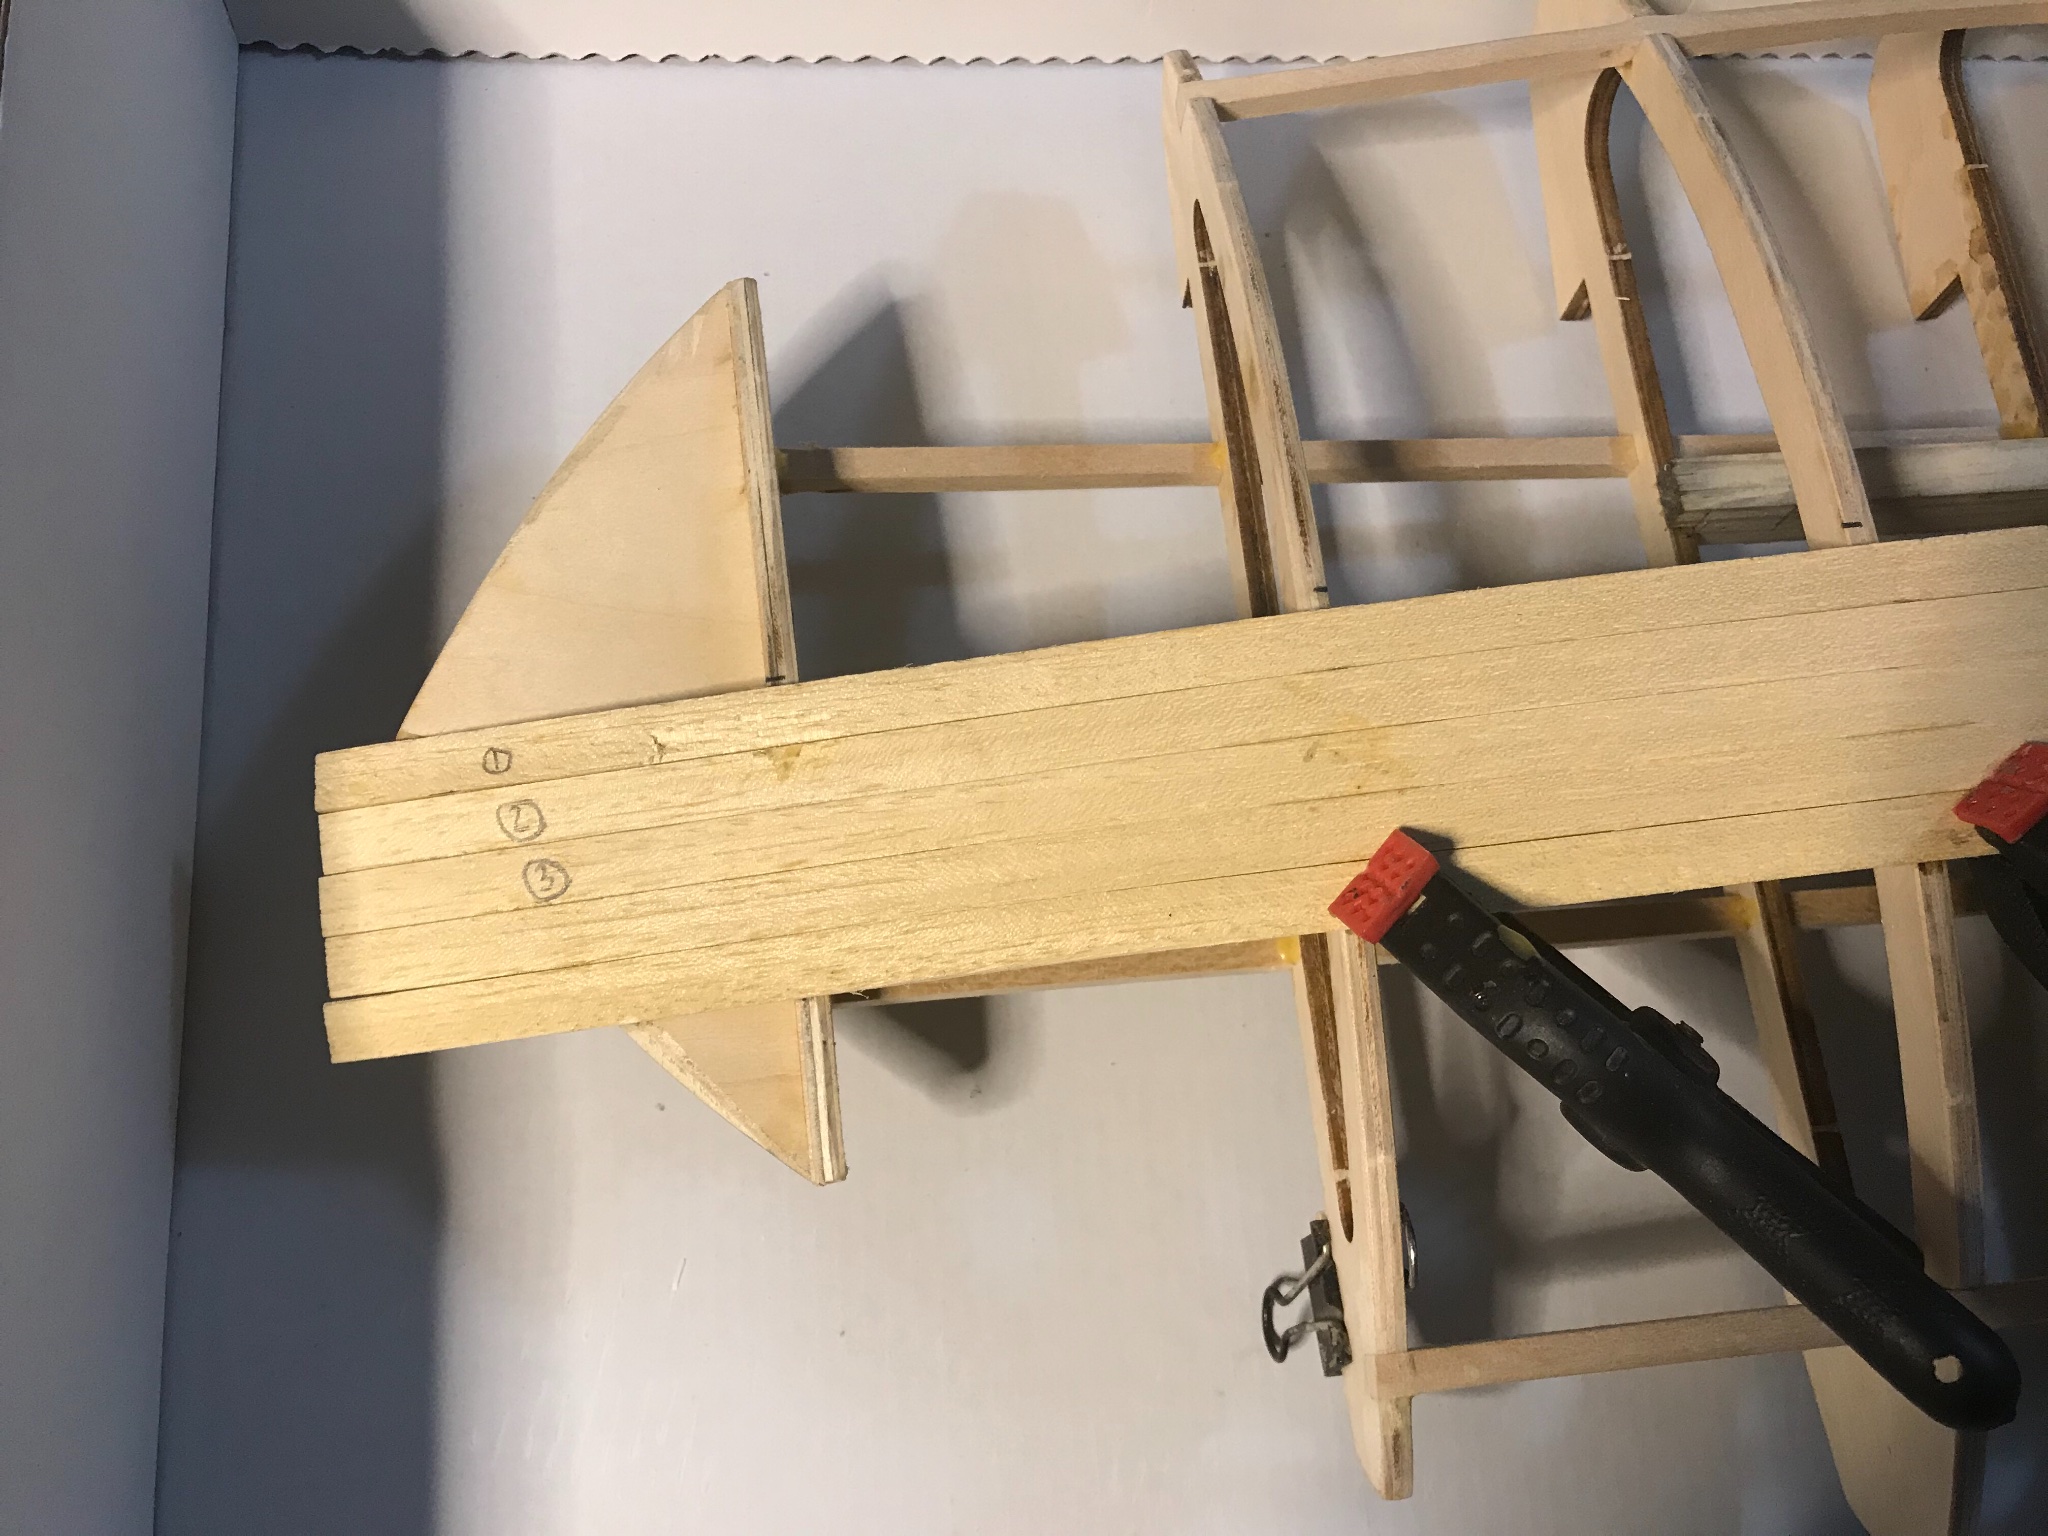
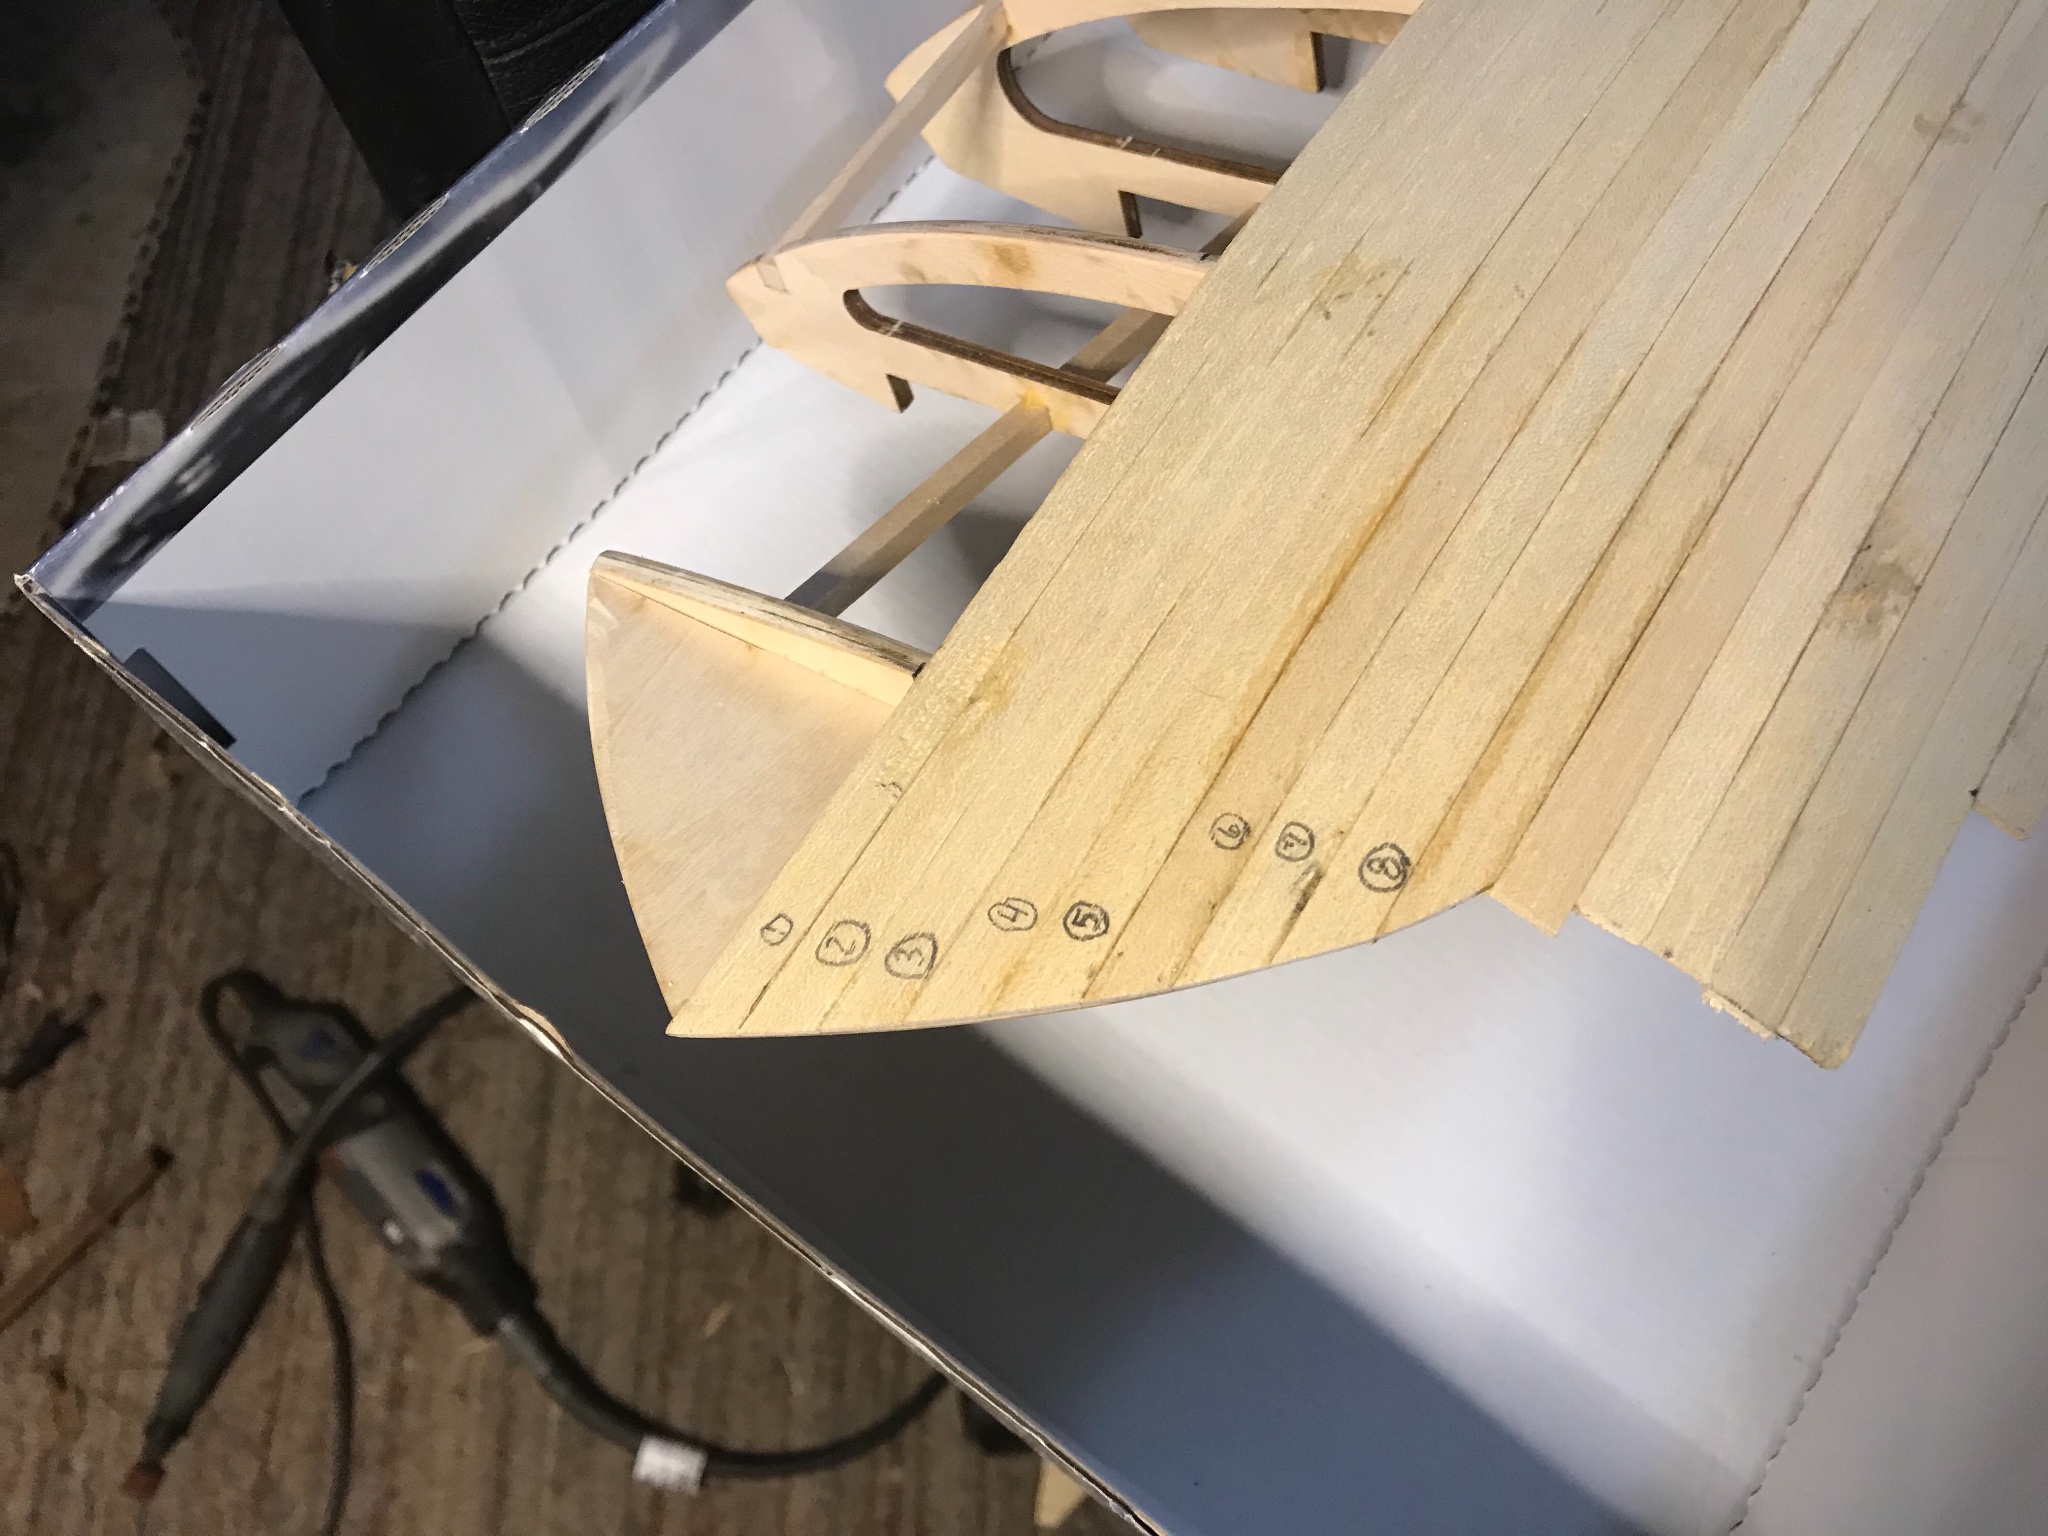
I began planking the boat, once I got to the 5th board I realized that I needed to sand the last frame piece before the nose, I got a little over zealous and got into the nose.
I then began studying the instructions because this is not noted and realized that carving the stress out of the planks was part of how the sides would take their shape. I thought about how to fix this, and in the instructions they ran 3 and then began cutting the planks back, I had already ran 5 with no stress, the planks laid perfectly? Hmmmm
I jumped ahead and grabbed the side pieces laid them in place and scribed the planks 1-8, and realized if I kept pulling them and gluing them to each other they would hold the shape.
So with half the planking done, I needed a break from the glue.

-
17 hours ago, popeye the sailor said:
I don't believe I've ever seen that kit by Billings before.....has to be an older kit, likely not laser cut. I've gotten two Nordkap kits in the past......the first one I've built, and the second one I'm building as the Progress, a spin off of the Nordkap and produced around the same time { actually, I think one was a bit older}. older Billings kits did not come with the fittings......they were purchased separately. but chances are, that someone started to build it and gave up........hence the other missing parts. if you have the instructions, I'm sure that there are pictures of the parts panels........you could blow them up and scratch produce your own parts. I do that with the spent parts panels ......I save them {try my damndest not to damage them}. this engine looks very interesting.......can't wait to see what it looks like
")
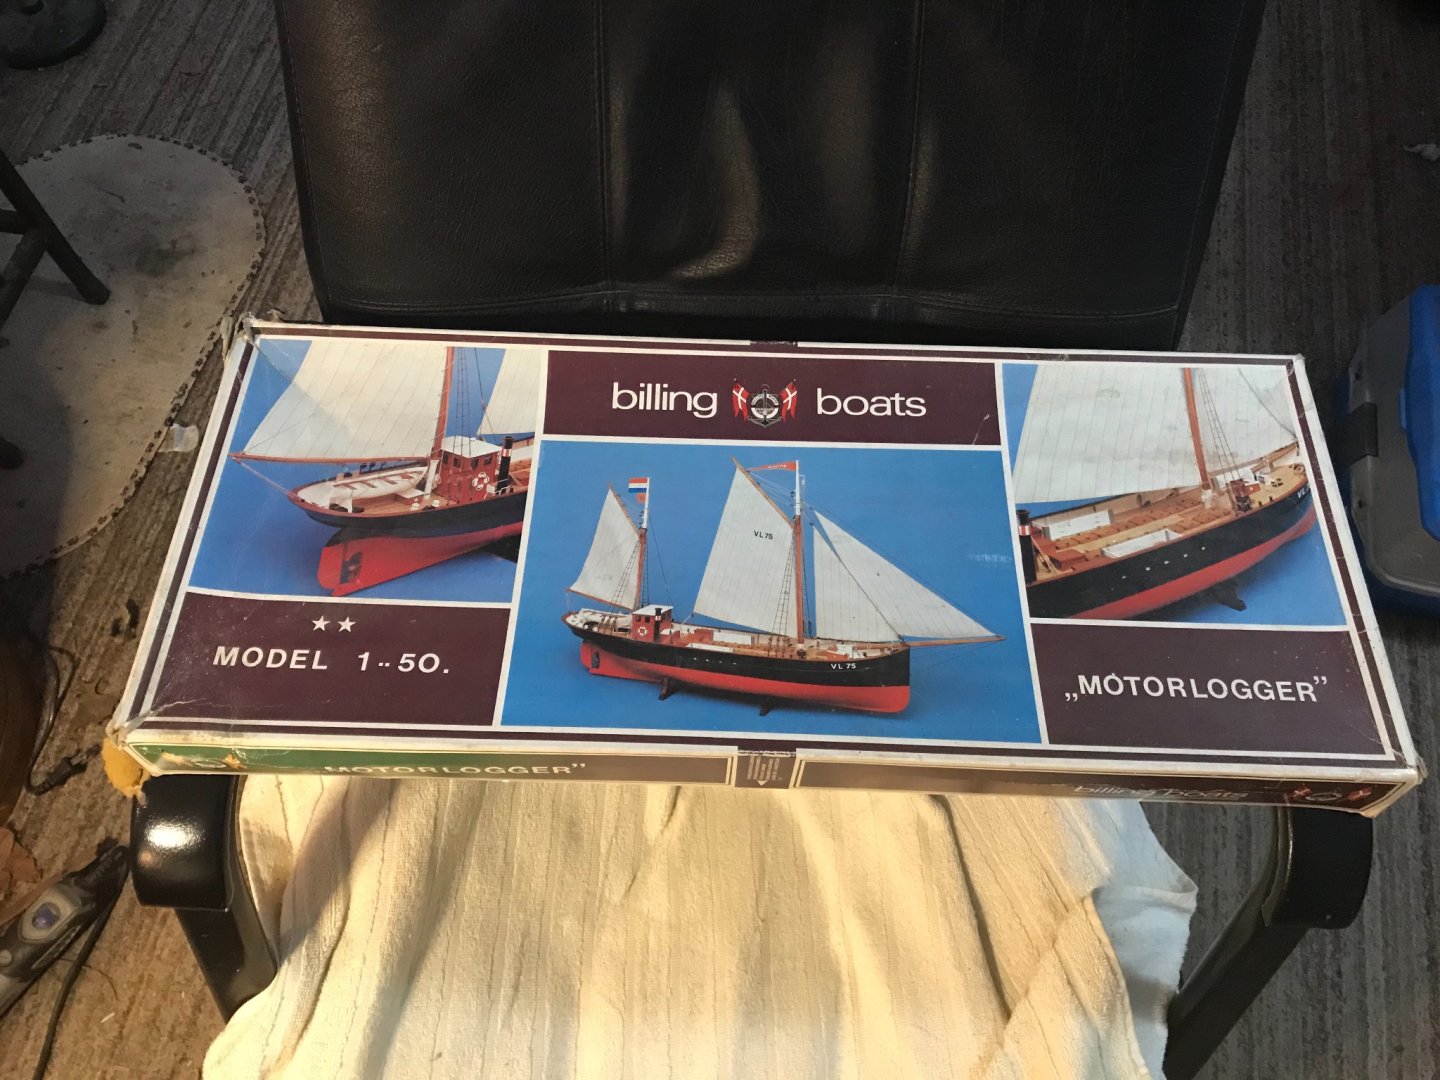
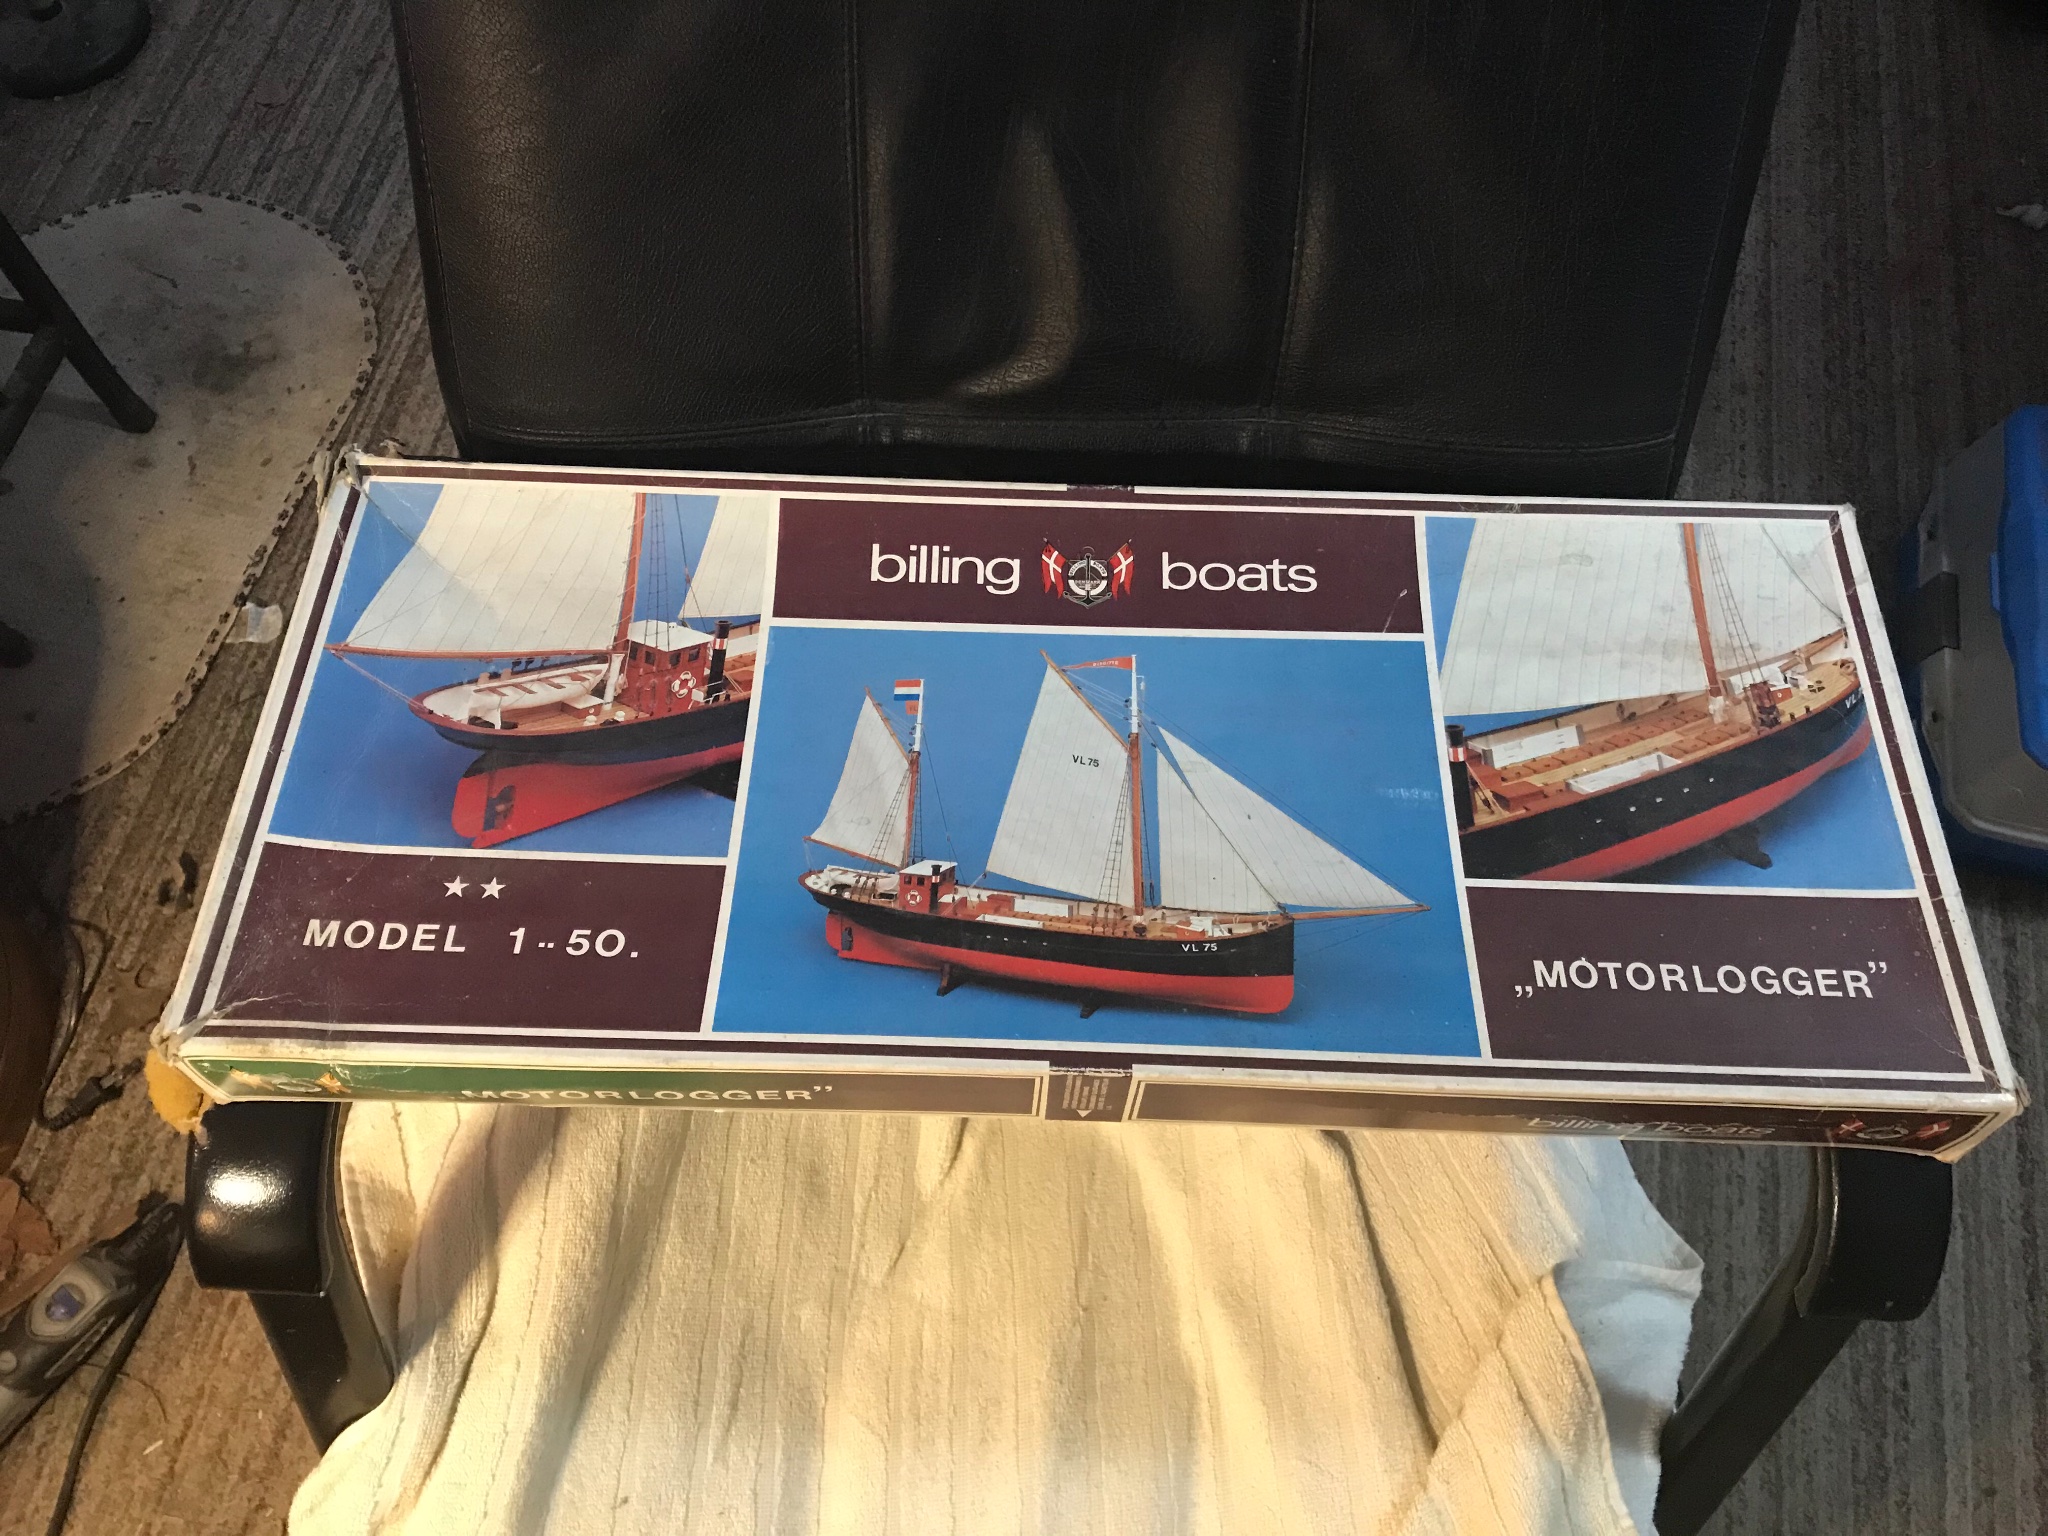
if you could post a picture of the lugger's box, that would be neat
")
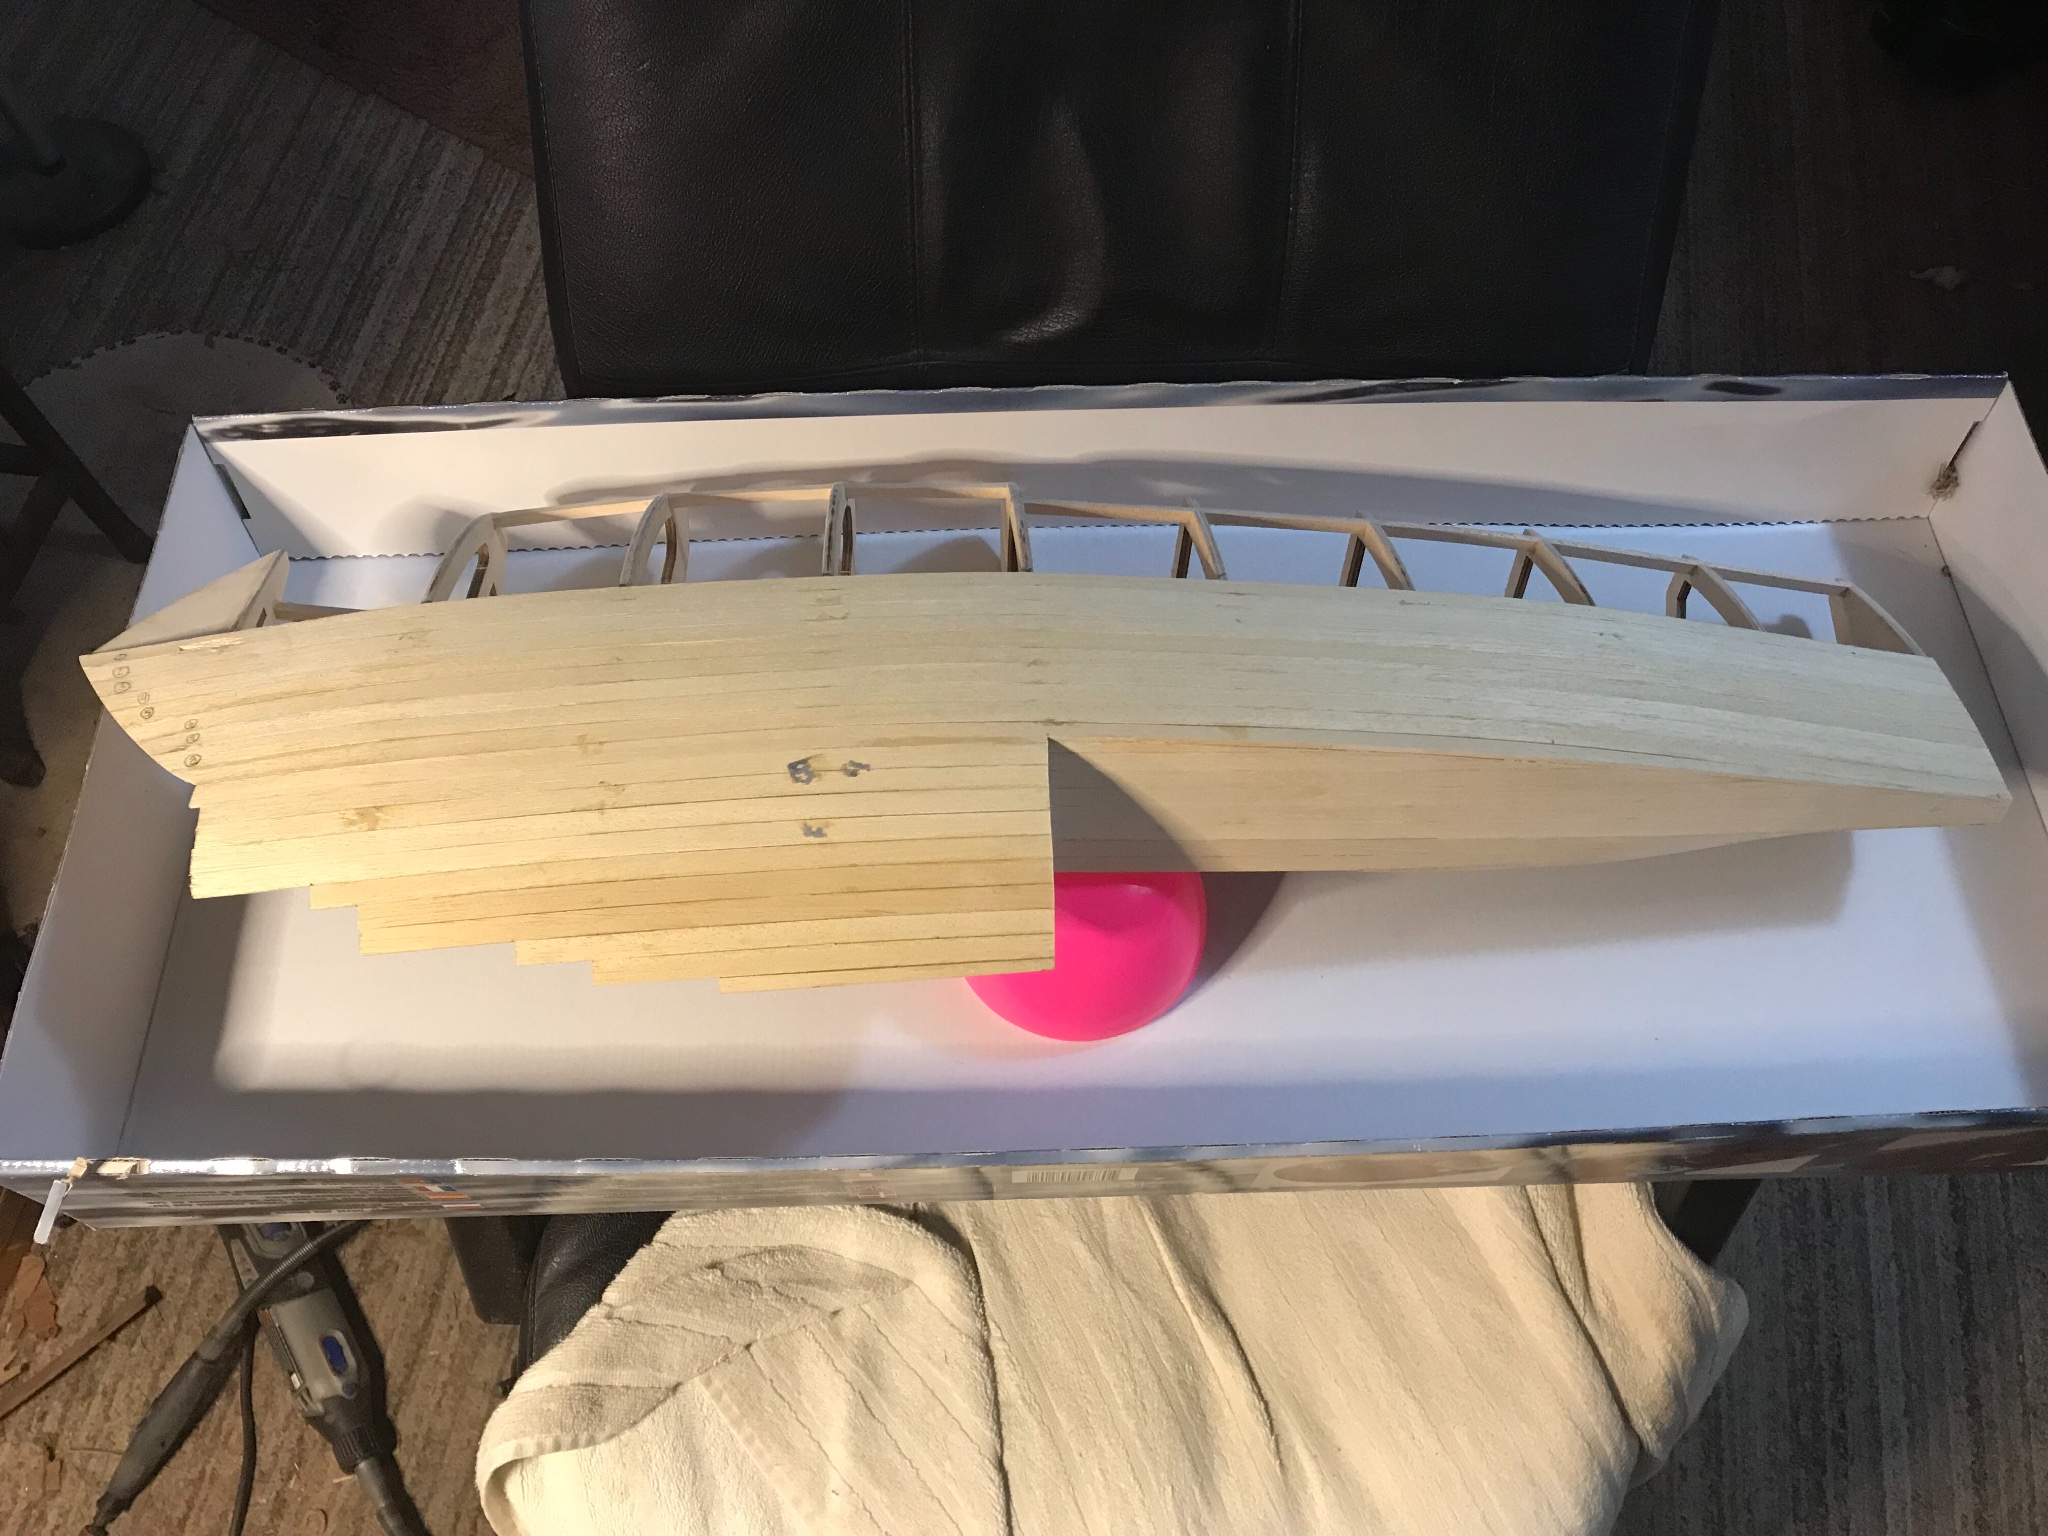
The boat is so old the parts look screen printed, and then require hand cutting out.
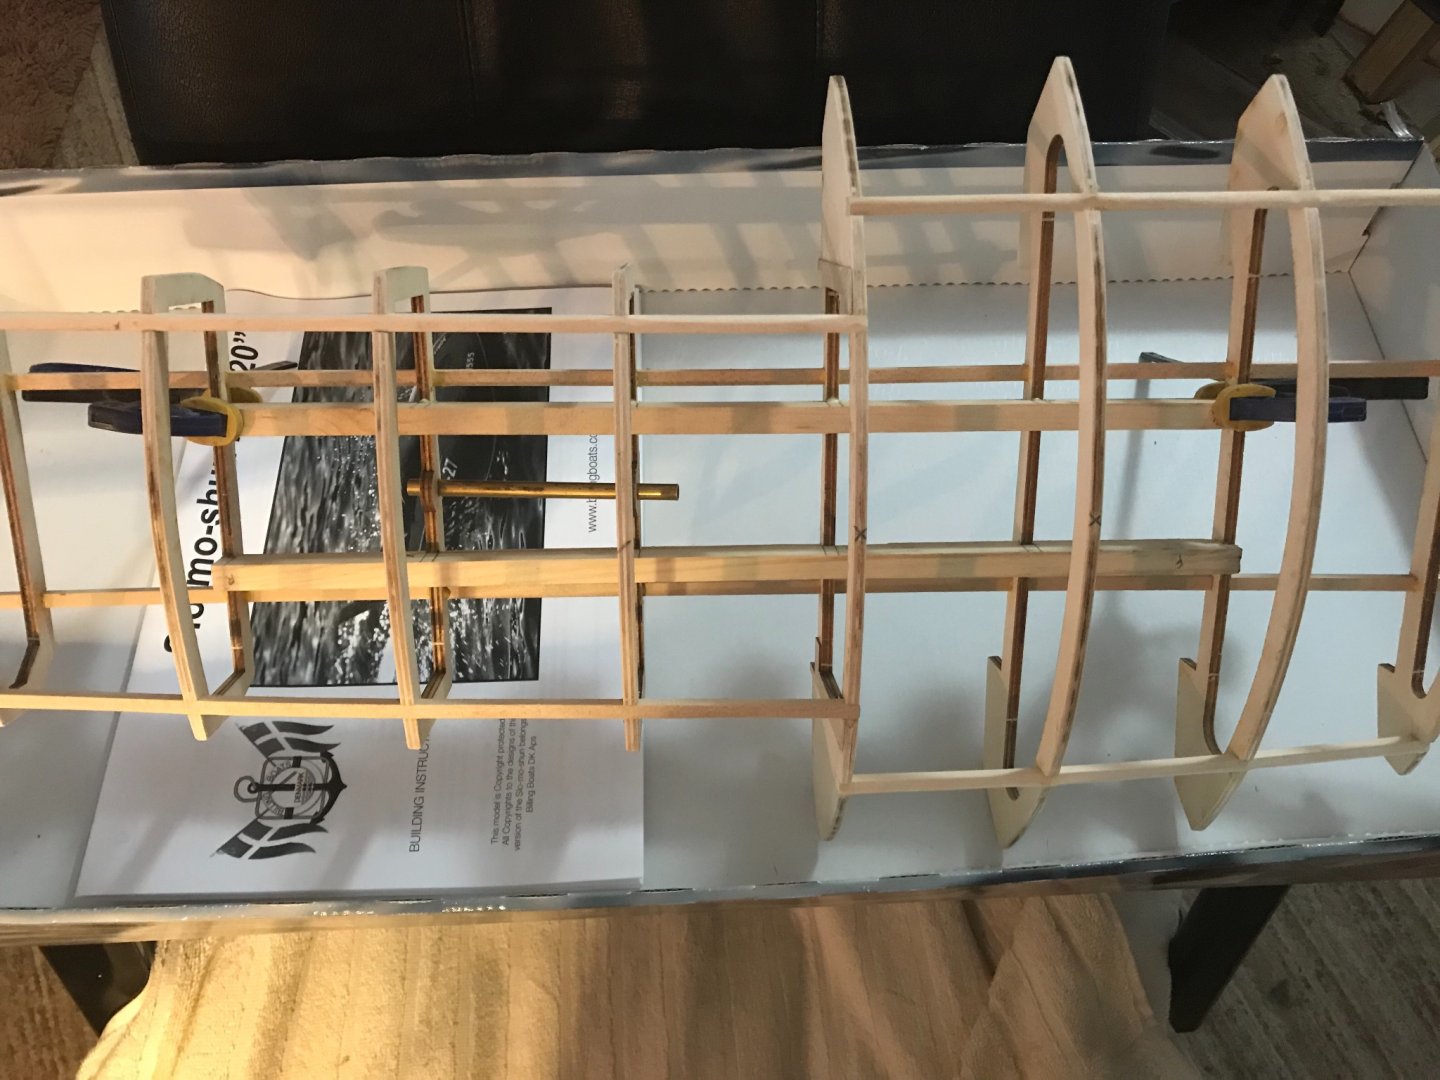
I was saddened that the plans do not include the parts, it does look like it could be figured out, there are two pieces of the framing, no keel, but the deck is the top which will show the width, and the 2 pieces still here may show the height.
-
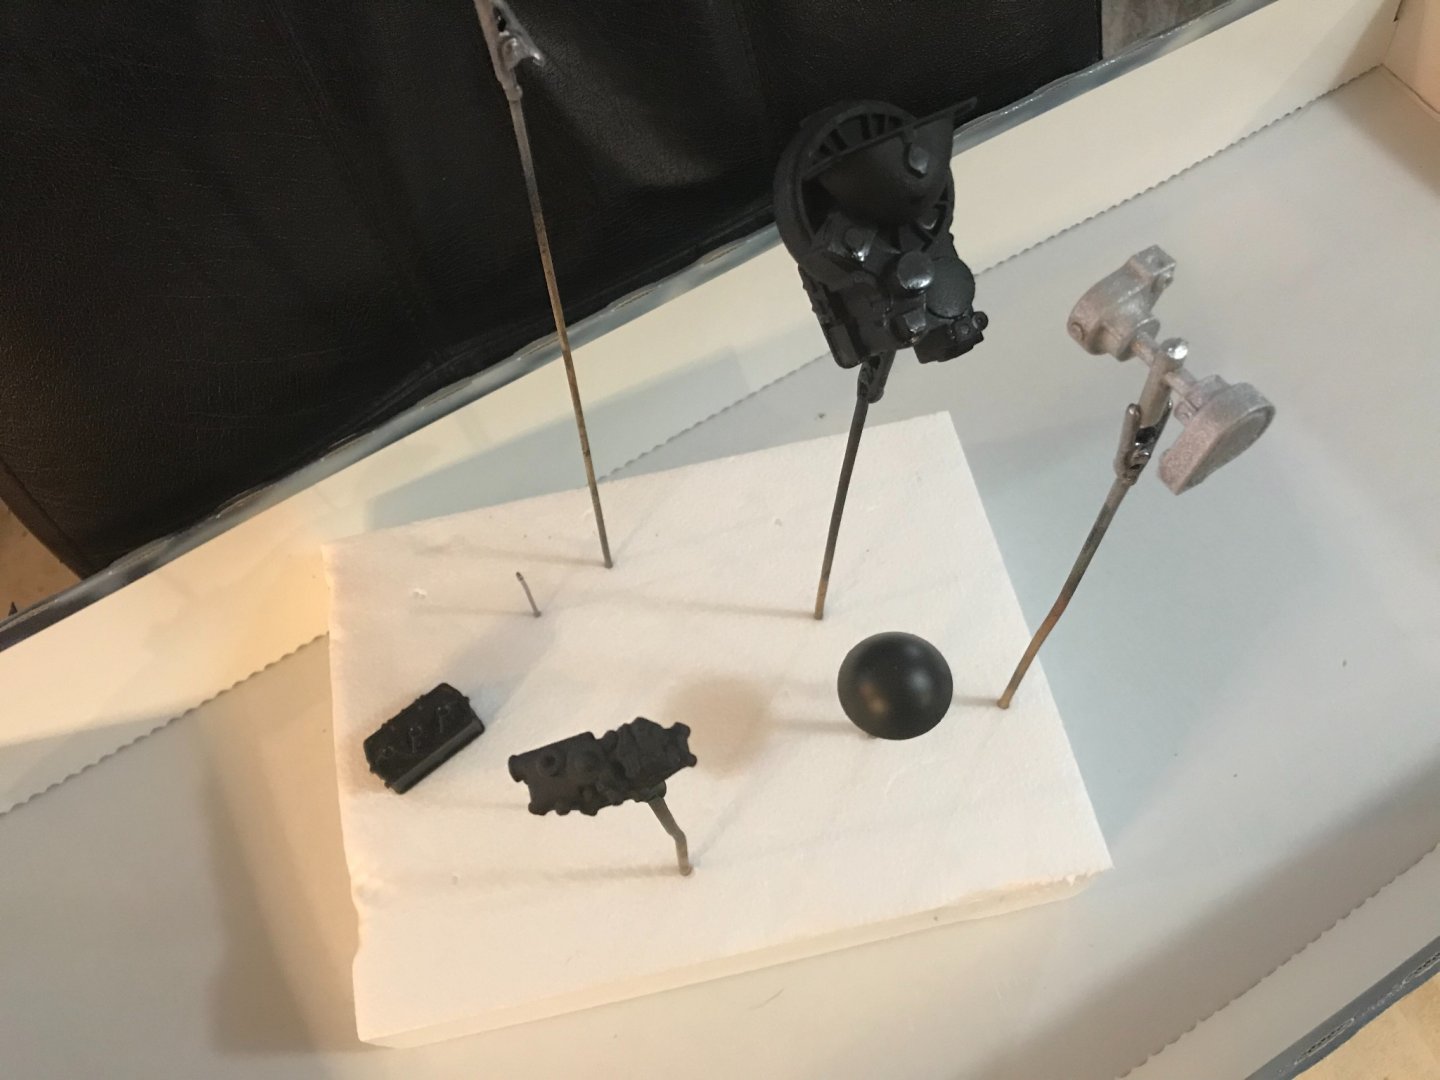
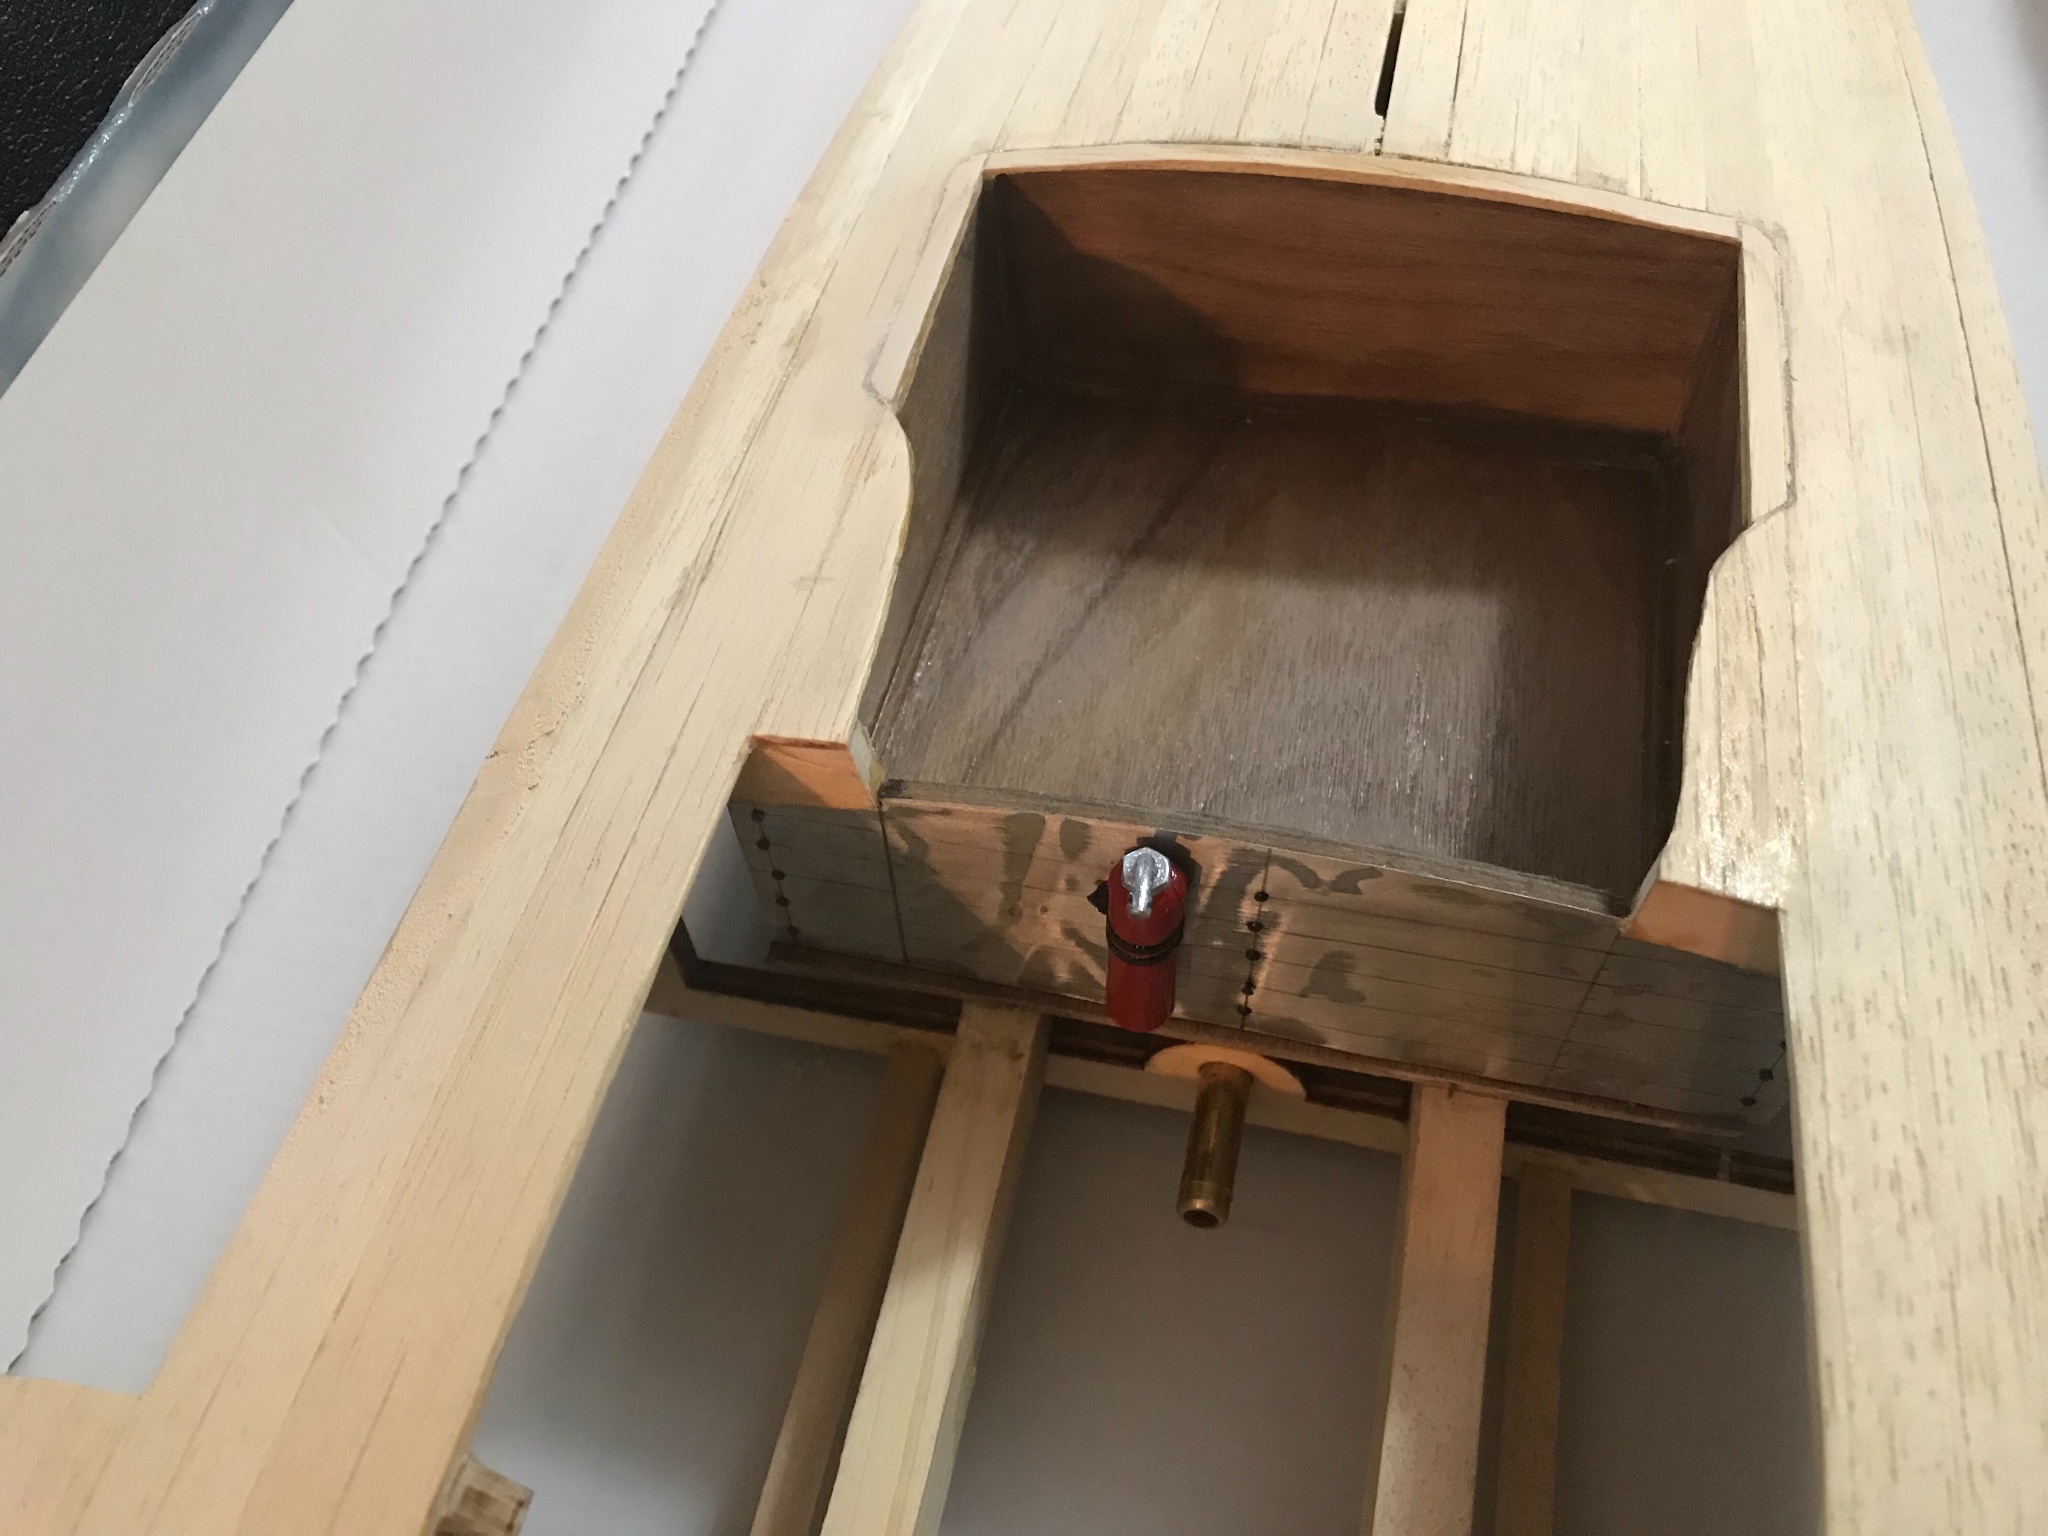
These are the main beams running through the boat, I plan to build the driver’s floor and the motor mounts off of these.
My next step is to find the angle to the motor mounts, and to build the transmission, for whatever reason they did not include the transmission, I have a plan for it.
The spark plugs pressed right in.
-
22 hours ago, Clark Griswold said:
Are you building this as a static model rather than R/C?
Static display.
-
There’s no doubt that the PBR1 came with the MK17 turret, however looking at it clearly shows it is an anti aircraft set up, not to mention the ballistic armor is to the sides. Most likely this would have been retrofitted, possibly before any Canadian variants of this hit Vietnam.
Those ballistic panels would have made an easy target for a sniper, not only would this have directed his fire right into the chest of the gunner it would have left the sniper to have simply stayed put, no one else on the boat would have had sight or line of fire on him.
The MK56 that you have pictured there is an anti personal configuration. Having the ballistic plate with the sight on it directly in front of the gunner would have protected him. This set up would have done heavy damage to not only the personal but also to any cover they may be using.
Another point here would be that to engage the gunner from an elevated position like a sniper would, would leave his round “driving” downward, ie when you shoot down the round drops, that’s why the armor was moved to the center.
The most critical point here would be the shock wave the M2 as well as all 50. Cals have. By separating the guns like this if the gunner had engaged personal with the sight the 2 rounds passing on either side would still have ripped the person apart, this is why the guns were separated.
One other thing I learned was that these boats are fiberglass. If this is true, the most important thing would have been the boats speed. My guess is that these “gun ships” would have made for excellent cover, as well as an effective delivery system for the Marines or special forces.
-
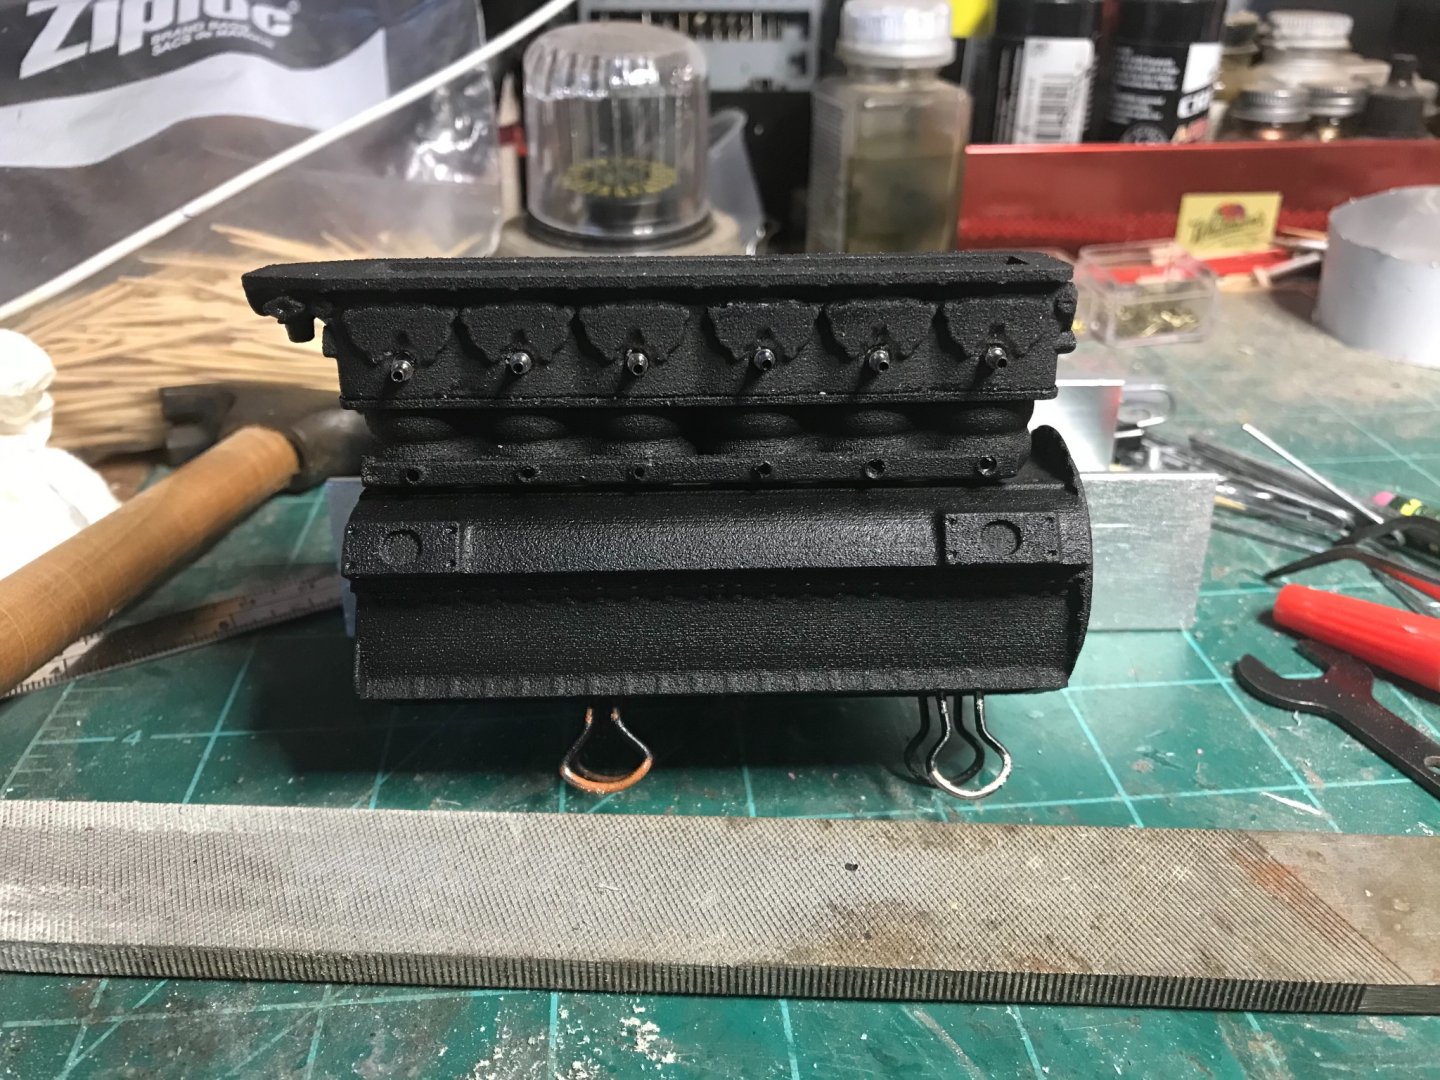
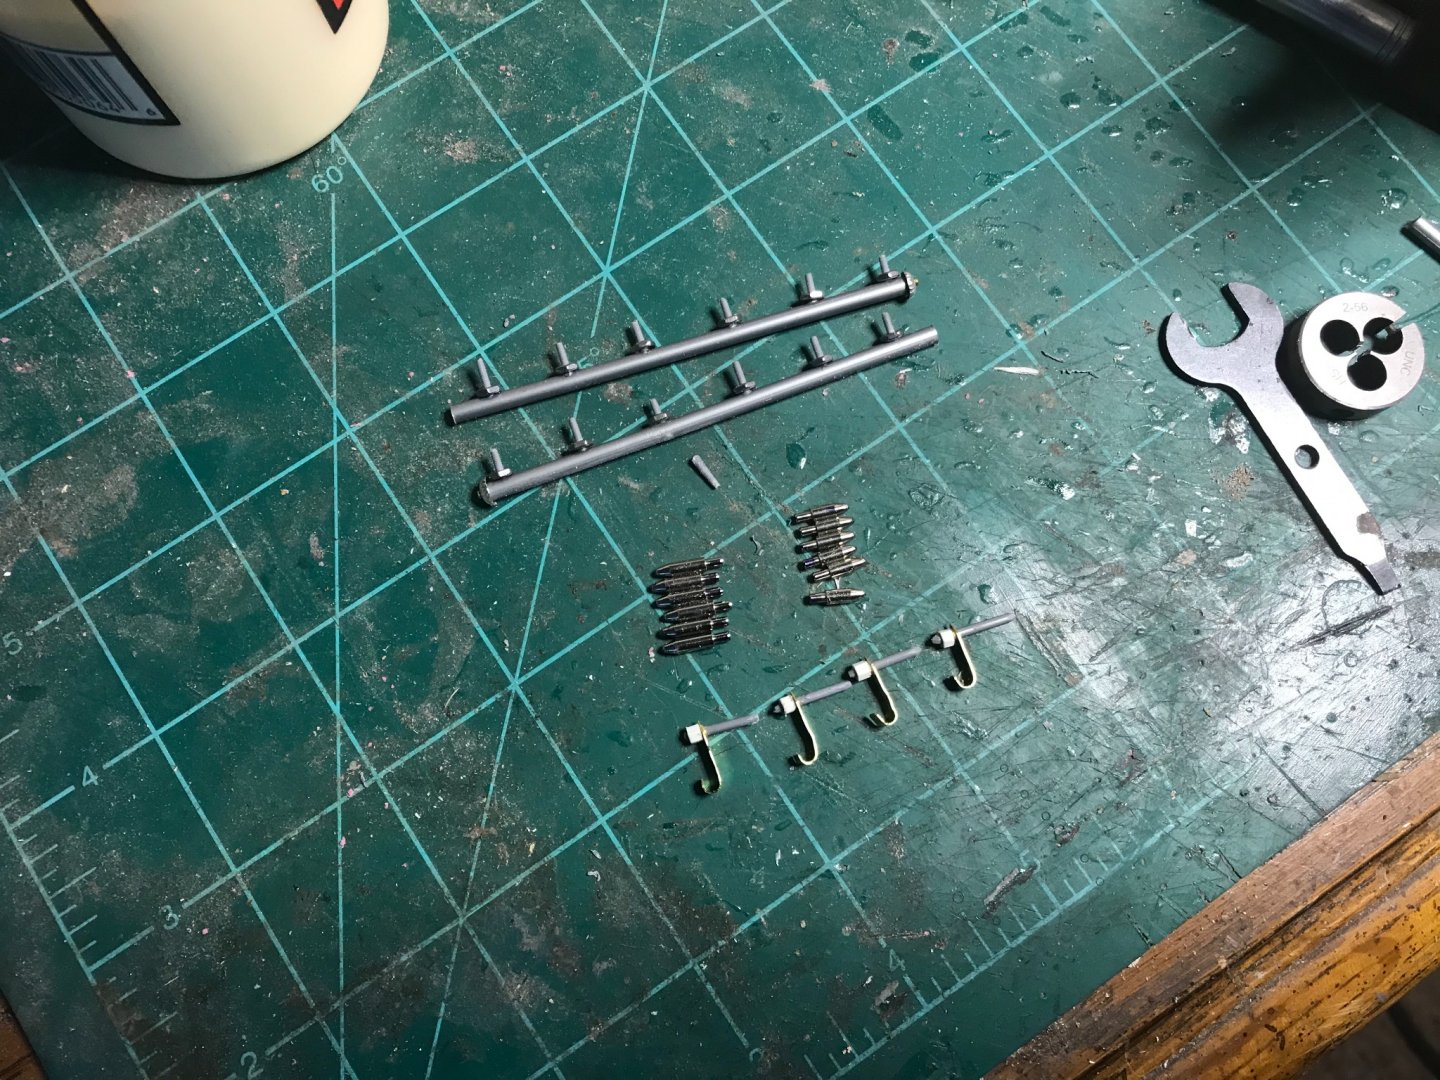
These long grey tubes will be the spark plug wire carriers, the 4 small hooks will hold the spark plug carriers onto the cooling jackets, and the 12 small chrome pieces are the spark plugs, it’s off to the paint shop for this.
-
Popeye
It does come with the mahogany strips, very nice, and plenty of it, Billings didn’t short that.
I don’t want to sound like a hater of Billings, I’m very mindful of every model, and I rate them by the parts, of which in this case I’ll be making the parts and then by the instructions.
I did receive another Billings Boat yesterday that I won on eBay, it’s called a Motorlogger, Birgitte no. 494, unfortunately it’s not complete, it has everything but the frame and metal hardware, what a shame. The instructions are very nice, very detailed. It even came with a color pamphlet showing all of their products. I can not find a date, it did come from Altech Marketing, Inc.
I could see in the pictures that the pieces were missing, I had hoped the plans and the wood I did get would be worth the $25, I enjoy collecting models as much as building them, and as much as I enjoy milling my own lumber, I’ve completely lost control of my wood collection.
I have another wagon in the slot behind SLO-Mo-Shun, it will be the Django dentist wagon, I was hoping this wood would work for that but looks a bit small, good for trimming.let me get some update on slo-mo, as I’ve had an unexpectedly busy week.
Dan
-
Beautiful job, more pictures please😁
- Egilman, Edwardkenway, mtaylor and 3 others
-
6


Slo-mo-shun IV by Blackreed - Billings Boats - 1/12 - hydroplane
in - Kit build logs for subjects built from 1901 - Present Day
Posted · Edited by Blackreed
My weekly update.
My past week has been a lot of work and not much accomplished.
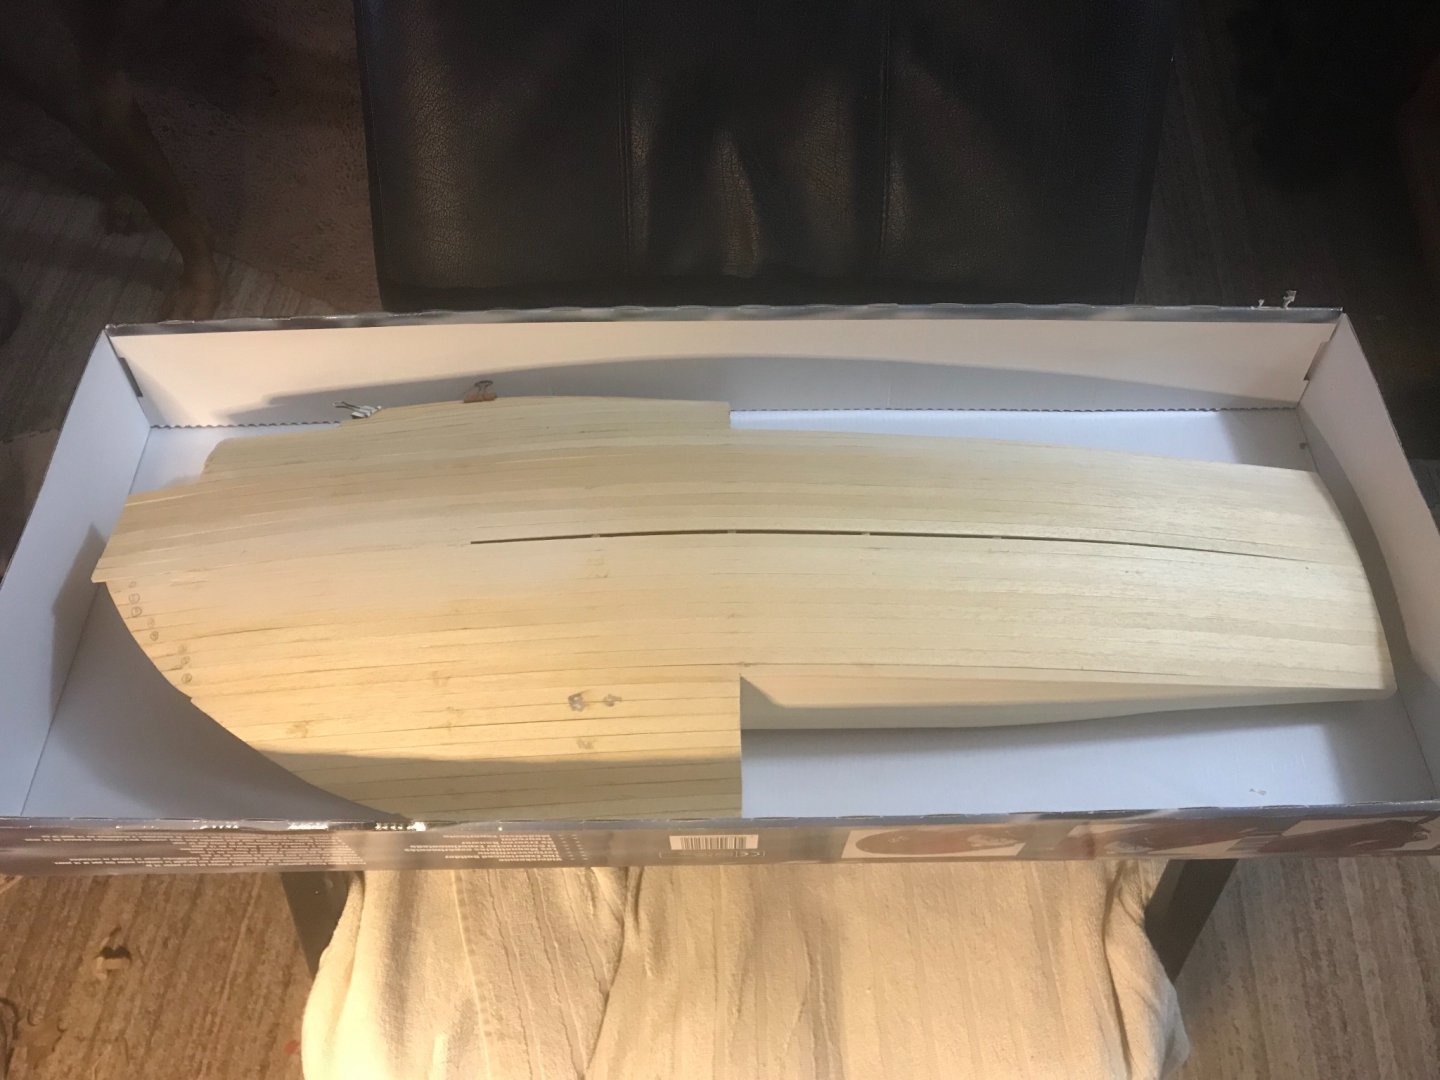
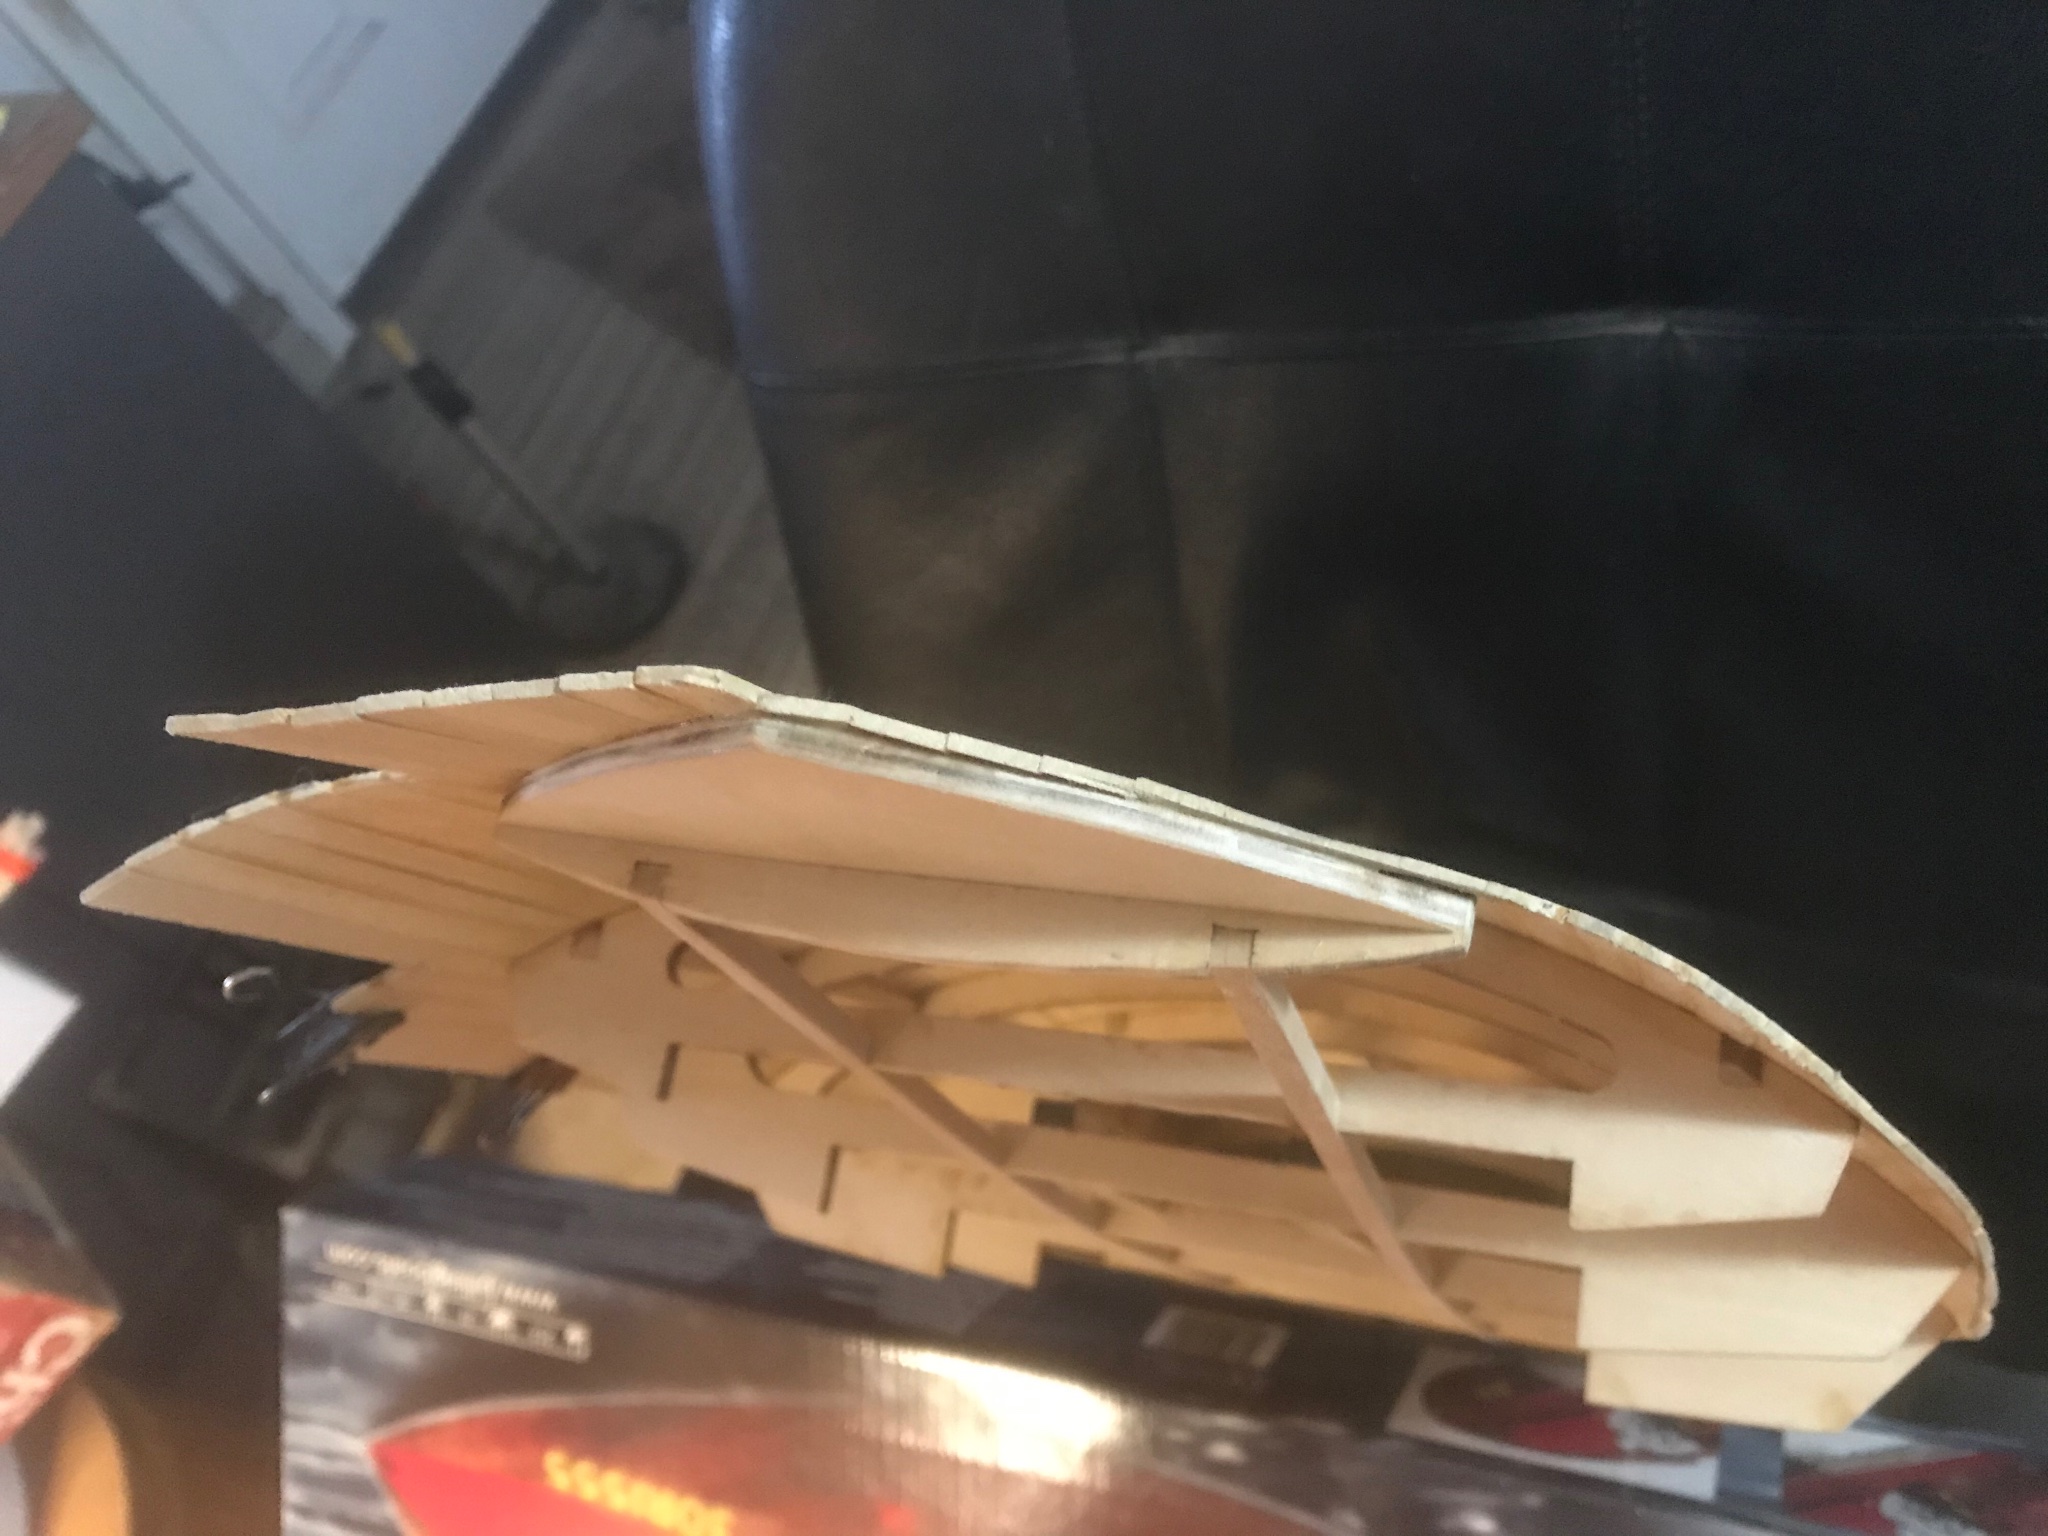
So this week I moved to the bottom of the boat, the first piece went well and gave me an idea of how correct the overall framing is.
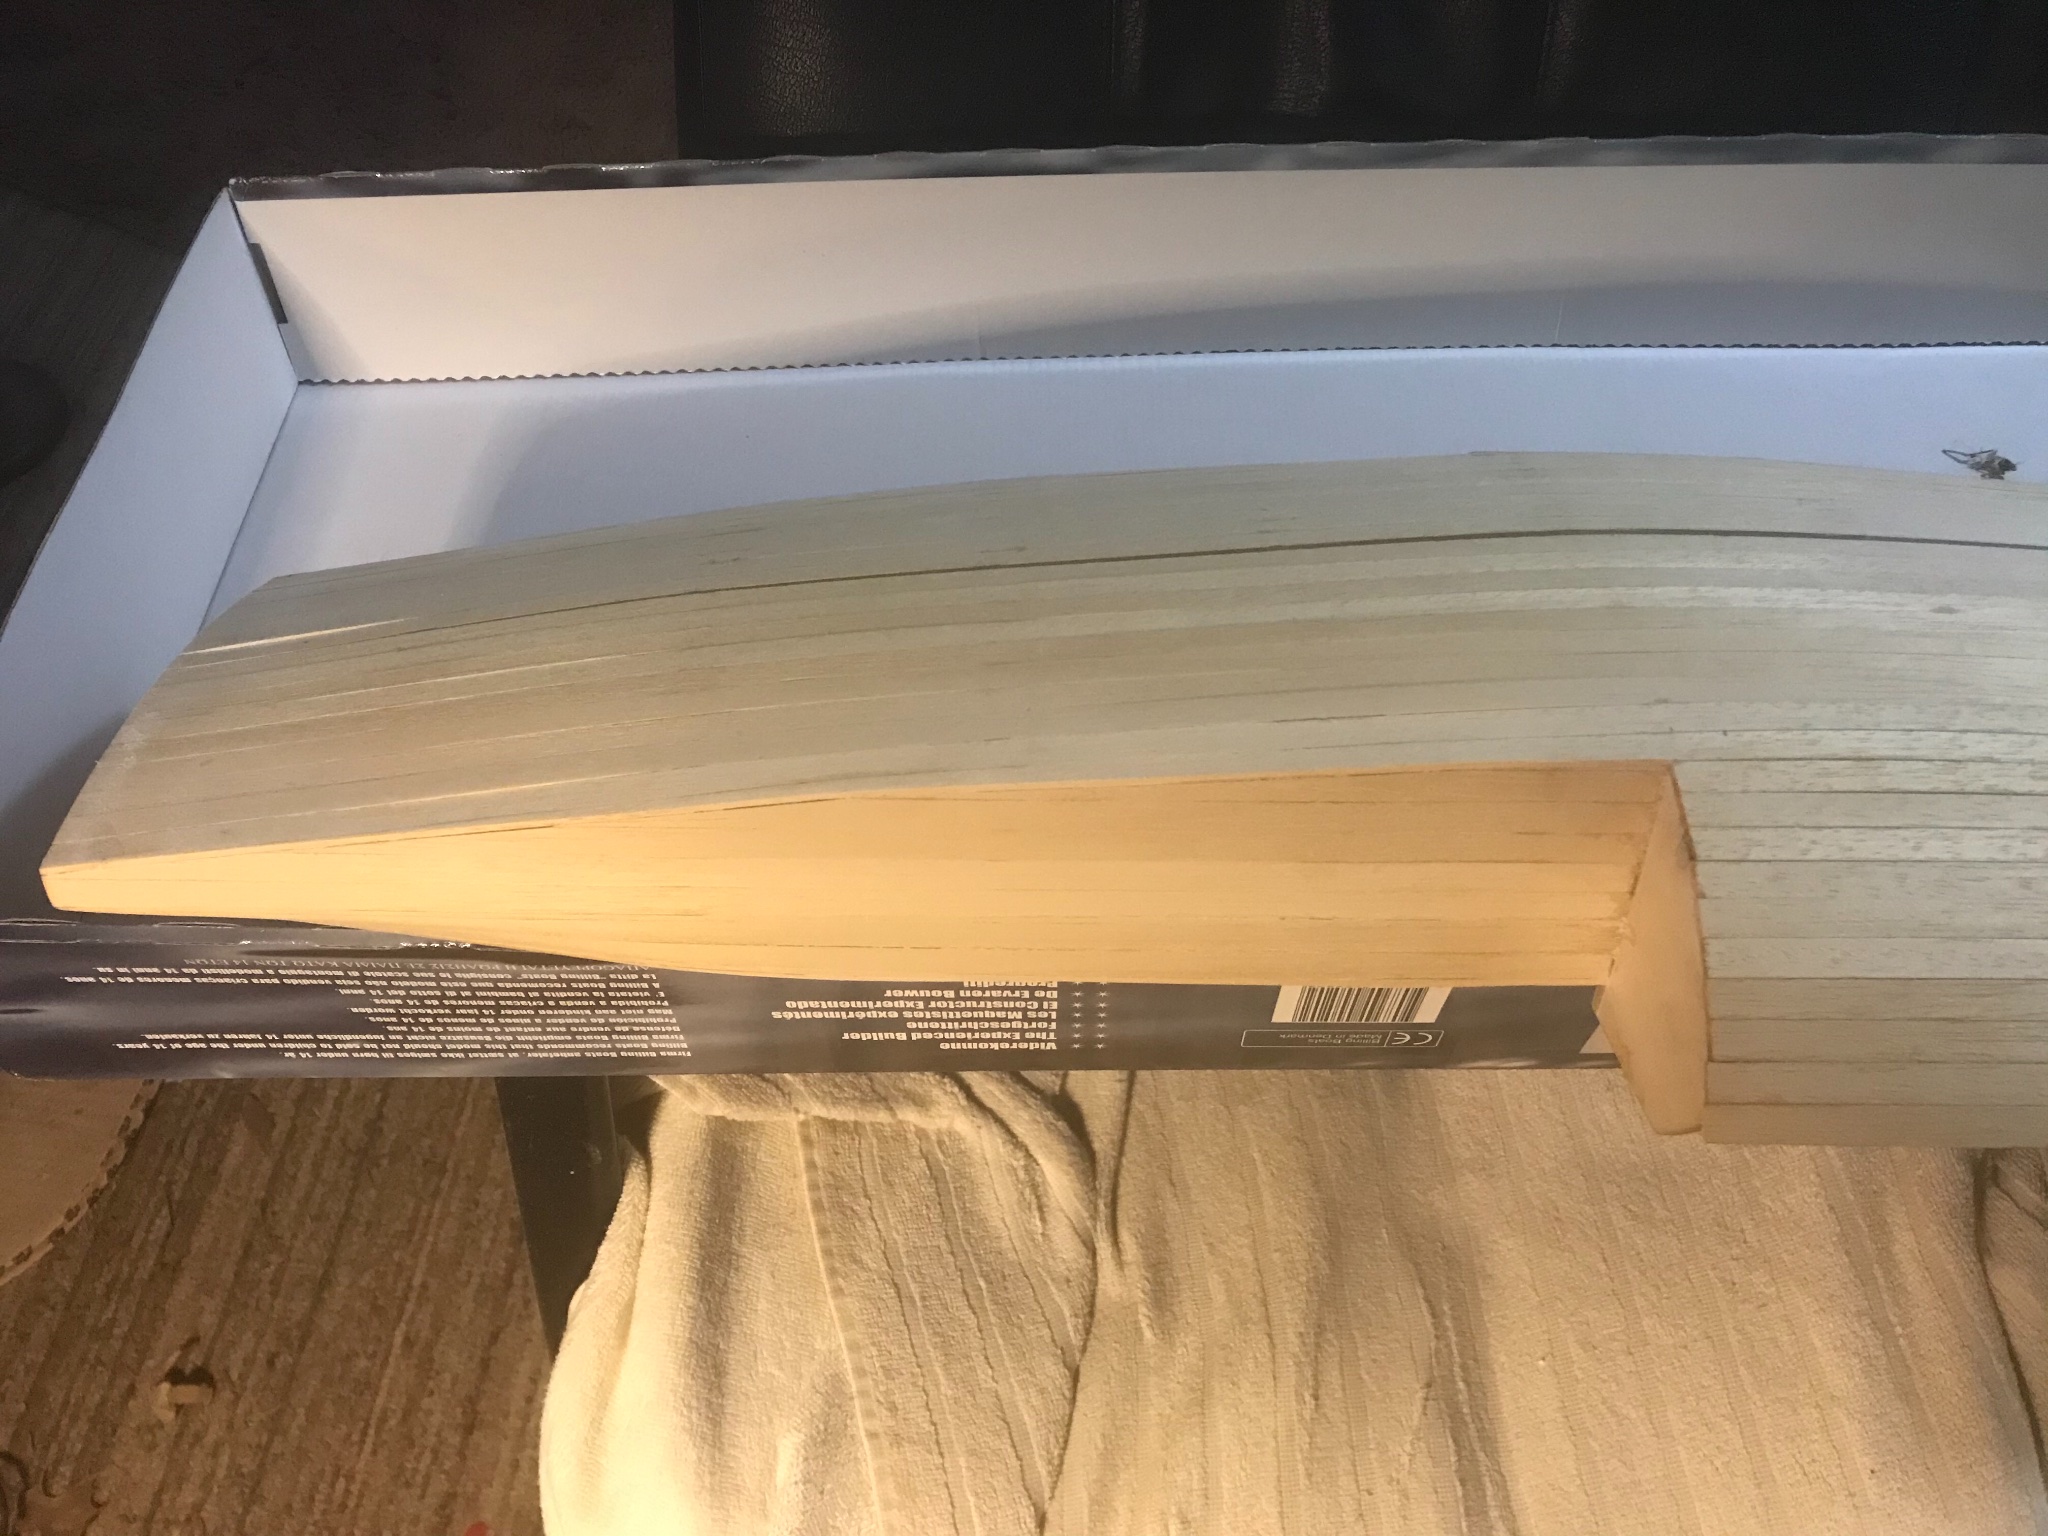
I then learned that I needed to sand the front🤔 Looking back over the instructions and the hull, I realized that in step 2, once part #11 is glued and sometime between cutting off the jig and planking the top, there must be a line drawn on part #11 across the front showing the half way point. This line then represents the sanding mark, the top has to be sanded down to that line then the boat gets flipped over and the bottom gets sanded up to the line creating a point.
The front of the boat will be a point in the end.
Because I did not do this and ended up sanding from the bottom up I have left the boat 1/4 inches longer than it’s intended to be.
So I had to modify the front supports, which is done here, then I will brace them in place.
also because of this lack of sanding part #19 doesn’t fit. I sanded it until it was flush with the frames, leaving a gap that is about 3/32 of an inch.
I sorted this by cutting some cardboard and sanding it into place and once I had my template I remade the parts using a sheet of balsa wood.
I should have a complete template of this boat not counting the frame made out of cardboard soon.