Hubac's Historian
-
Posts
3,314 -
Joined
-
Last visited
Content Type
Profiles
Forums
Gallery
Events
Everything posted by Hubac's Historian
-

MONTAÑES by Amalio
Hubac's Historian replied to Amalio's topic in - Build logs for subjects built 1751 - 1800
I could not agree more; a series of small triumphs add up to a beautiful model. The immediate satisfaction of seeing some small aspect of the ship take shape and then it’s place on the model is tremendously motivating; it motivates one to maintain a consistent and steady approach. But, if that isn’t the essence of patience, I’m not sure what is. The impatient modeler can, perhaps, see exactly what it is they hope to achieve, but they cut corners, they compromise, they leave a detail, as is, when it should really be re-worked - all in a rushed effort to see the whole thing come together more quickly. Anyway, my point is that you are doing a fabulous job, here, Amalio! It is so nice to see her clean, elegant lines in the broadside view. -
Hi Dan, and thank you. Yes, the reason that I have not done as you suggested is that while the Allumilite resin does a pretty nice job of making castings within these rubber moulds, I think the resolution degrades when you make a new mould from a previous casting. I haven't tried it yet to confirm, but I prefer the crispness of casting from the masters. By pairing like ornaments at each port, I will minimize any apparent differences, and whatever differences there are can be considered the charm of a mostly hand-made thing. In other words, I'm just being a little lazy, here
- 2,699 replies
-
- 3
-

-
- heller
- soleil royal
- (and 9 more)
-
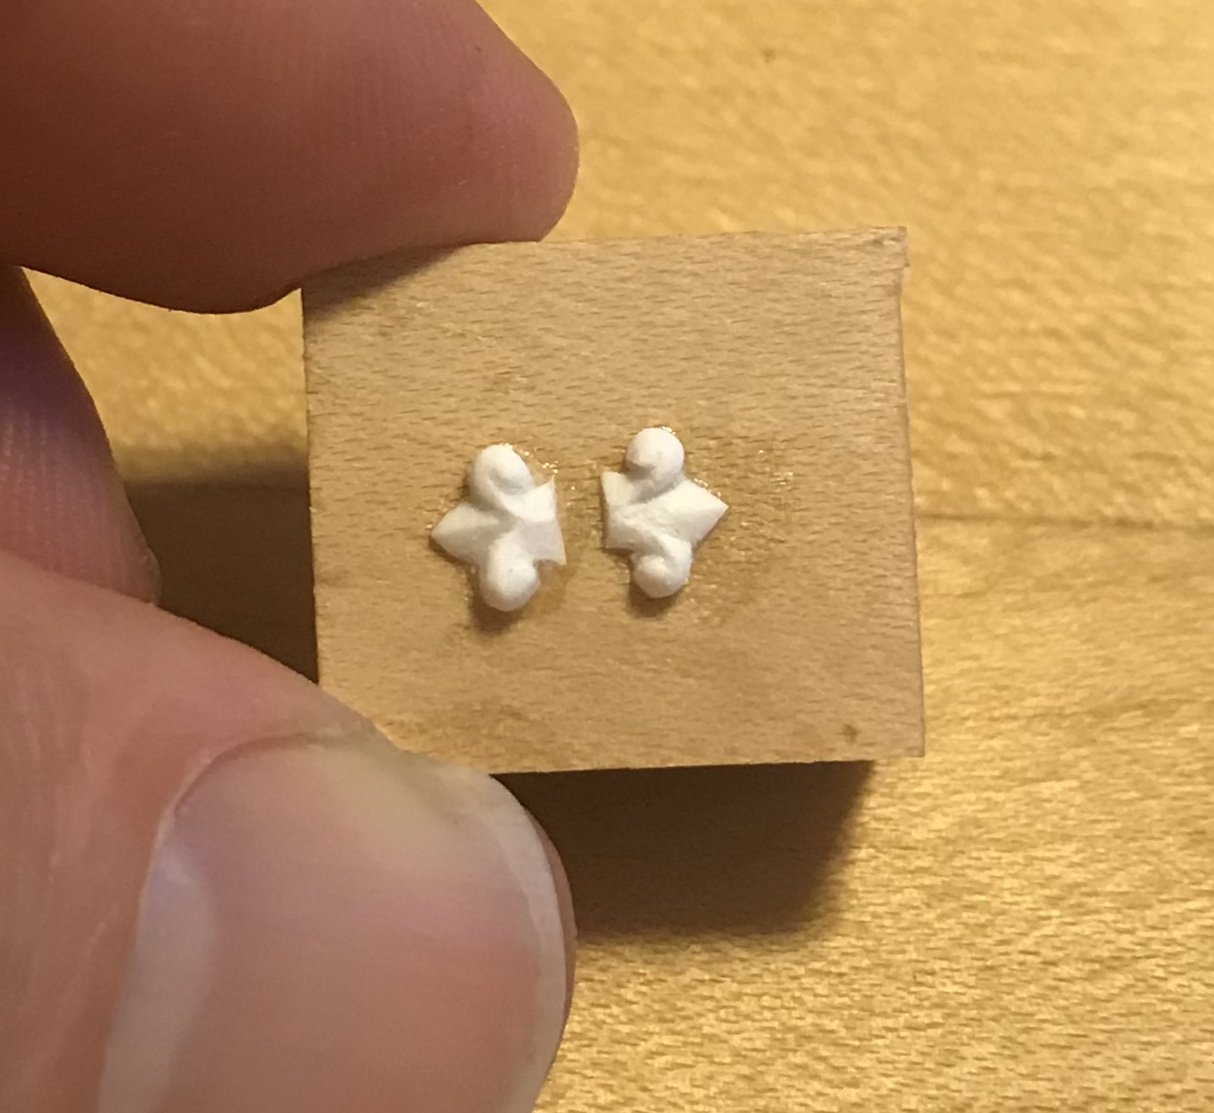
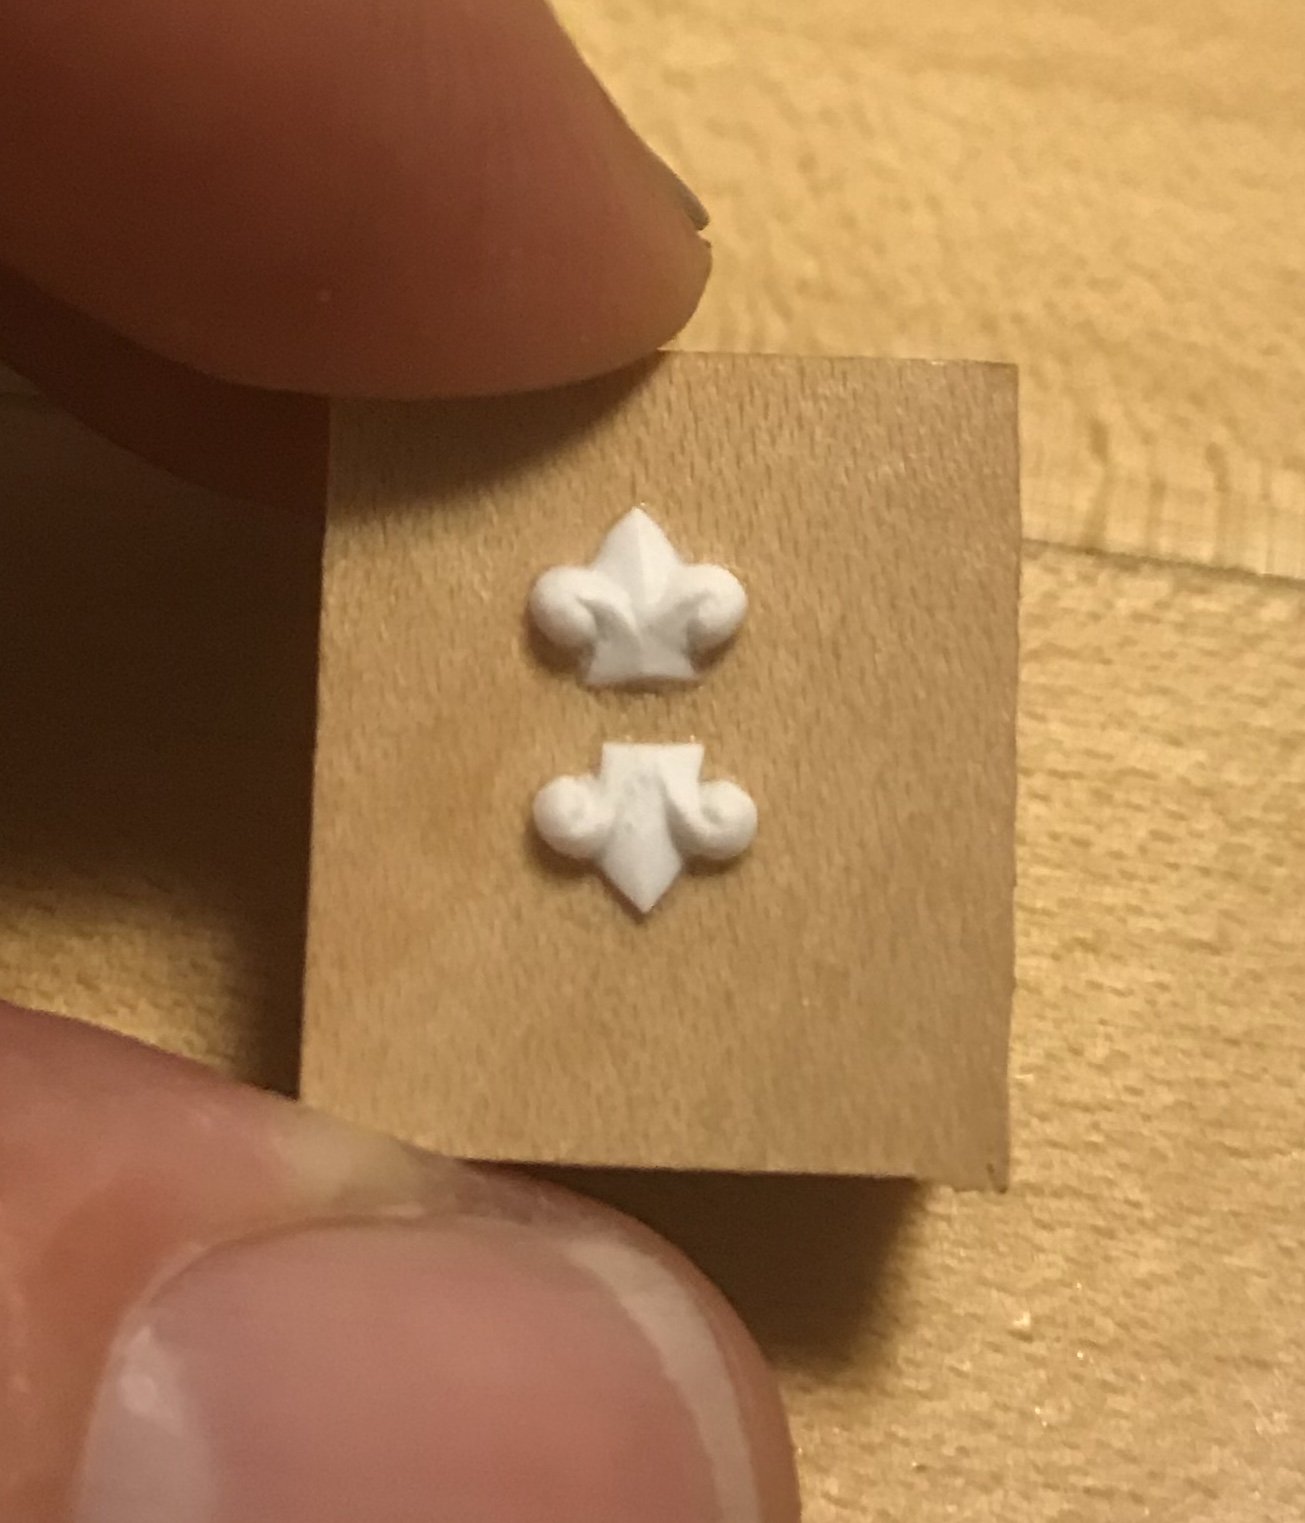
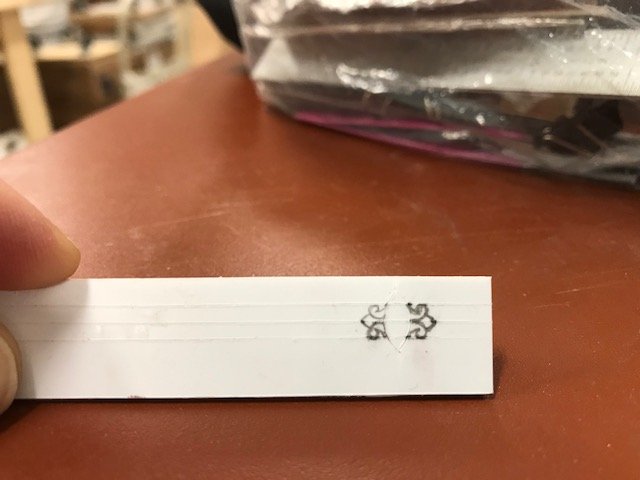
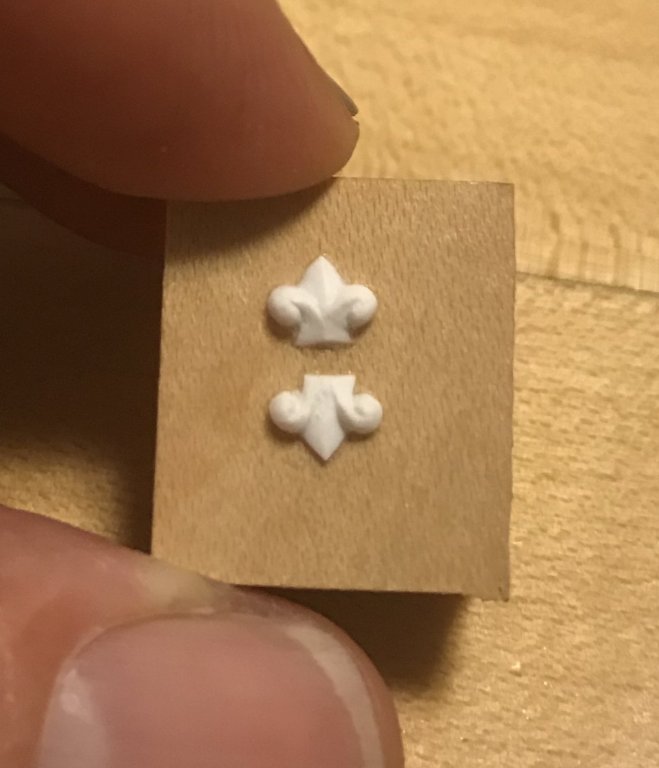
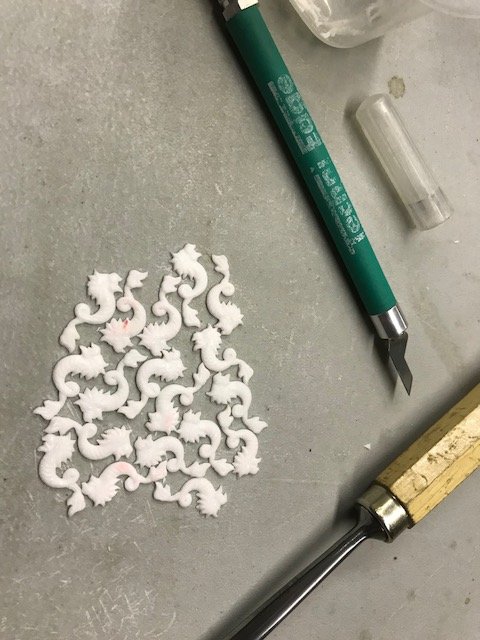
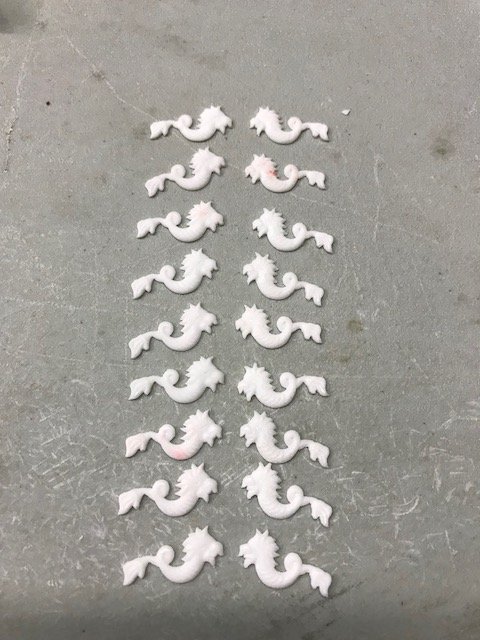
Work on the port poop-royal railing continues. I still have to clean up my dolphins. In the meantime, though, I have made masters for my round port enhancements. I laminated two pieces of .032" stock because I desired a somewhat more rounded relief. The following series of pics pretty much tells the story: These ornaments are so small that it is difficult to draw these little scrolls in a truly symmetrical fashion. When faced with this circumstance, I always figure that I can round out the shapes better with the tools as long as the drawing is close: Pretty good symmetry Not shaped, yet, but placed to get a sense for the ornament You can see that I was not able to carve both sides in exactly the same way. I happen to like one more than the other, but I like both them well enough to use them as masters. I will simply pair identical ornaments for each port, and alternate them from one port to the next. Here they are, in the vertical, so that you can see them in a different raking light. I may also shorten the "neck" that abuts the port frame, when I do the installation.


- 2,699 replies
-
- 12
-
-
- heller
- soleil royal
- (and 9 more)
-
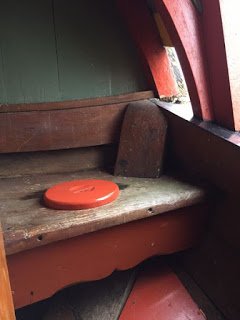
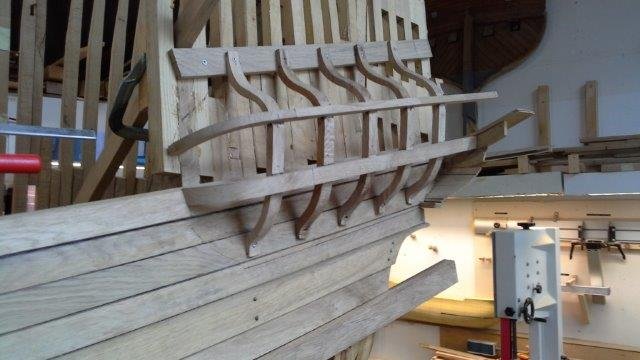
Following are a few shots from inside the Batavia replica's QG, and also a framing shot I found of the Batavia Werf's large scale model of the Provincien. The people at Batavia Werf are pretty much the authority on 17th Century Dutch practice, so I would say that these are solid guides for the sort of framing that make up your average QG.

- 2,699 replies
-
- 7
-
-
- heller
- soleil royal
- (and 9 more)
-
Far from Neanderthal, Vic, I think of your talents as those of an artistic savant. Your intuitive feel for proportion and the right amount of detail is a gift, and the way your RW sits on the water is about as close to any of us will ever get to seeing one of these great First Rates sail. Mostly, I am a compulsive personality and remain obsessed with the small details until I am satisfied with their execution. Nothing I do is ever "perfect," but I do strive to create something that can really be scrutinized very closely and still found to be consistently good. I appreciate the compliment, though. I agree with you, EJ, that I can only muster a hazy sense of the underlying framework of the QGs. My sense for them, though, is that the wales serve as supporting ledges for the structure. I suppose it helps that tumblehome generally gives an assist to resisting gravity, here. Now, whether the beam framing from the interior decks extends past the ship sides and becomes the floor for the QGs, on some ships, I cannot say. My recollection of the Batavia replica, though, was that the whole structure sort of grew from the support of the wales and was fastened to the sides of the ship. The structure was very light. Come to think of it, I believe that the Batavia Werf website features a partial model of the Provincien's stern, which may just show the framing of the QG on one side. Will check and get back to you.
- 2,699 replies
-
- 2
-
-
- heller
- soleil royal
- (and 9 more)
-
Doris and Tecko, I can certainly appreciate your POV, when it comes to replicating the tiny ideosyncracies between like carvings that are individually made, just as in full practice. This certainly adds to the charm of a handmade thing. The proof of your excellence is always right there, in the model. I am a little lazy, in this way, though. I probably wouldn't be, though, if I were building a different type of model. In any case, I would like some day to give your card method a try. For a subject, I think I would try something like a Dutch 17th C. "Spael Jacht"; beautiful lines, some ornamental work, and not too overwhelming of a project.
- 1,035 replies
-
- 6
-
-
- royal katherine
- ship of the line
- (and 1 more)
-
Thank you, Patrick! And thank you Vic and Dan for the tips on glues. I have limited experience with regular Gorilla Glue - which I'm not wild about because of the bubbly expansion. I also probably haven't used it properly, as I think mating surfaces are supposed to be slightly damp. But, presumably, Gorilla CA glue wouldn't behave that way, anyway. I will look into it and find something that works for me. Tonight, I glued in the dolphins on the starboard, aft bulwark and seeing the three of them neatly inlet into their places really completed, for me, the whole visual upgrade to the sheer railing. I'll post more pics after I have fit and glued-in the mating halves of the sheer dolphins, and after I have created the port poop royal railing. The next step, after that, will be to create the round-port enhancements. And following that, I will tackle the upper bulwark frieze, which is what really transforms this build into another model, altogether. After that, I think I can begin painting. Although, I am still not sure about what method I will use to build up the quarter galleries. At one of our Ship Craft Guild of New York meetings, Dan was unloading various odds and ends, and I picked up a few really nice sticks of very finely grained wood that might be lime, or holly. Something white, and with an extremely fine grain, yet not especially hard like boxwood. I am tempted to edge glue this stock and make blanks for both the lower finishing, up to the main deck level (that wraps to the stern), as well as a separate piece for the ammortisement. My reservation with doing so, is that I wonder how much seasonal movement I could expect from this solid wood glued to the plastic hull. Or, if it is glued only at the center, will it even matter at all? I could paint the hull and upper bulwarks such that, if there is some degree of expansion and contraction, then there is never an unpainted line of demarcation around the quarter gallery. The advantage of carving from the solid is that you can carve, directly, the convoluted undulations of the QG surfaces, as well as any frame and panel detailing. You could then apply any necessary profiled mouldings, as well as the carvings. Maybe, though, it would be more advisable to do an underlying bulkhead framework, as Doris has recently done on her Royal Katherine build - over which, I could skin a thin layer of card sheathing. The difficulty with this choice has to do with my interpretation of Berain's drawing; these French quarter galleries are not neatly compartmentalized into segmented panels, in the English style (where the panels, themselves, can be mostly flat), but have rather a more rounded and sculptural shaping of their surfaces. The QGs are, by far, the most complex part of this build and making a good model of this will mean really taking whatever time is necessary to figure it out and execute it. I will probably proceed with painting the lower hull and upper bulwarks, but leaving a large enough glue surface bare, that I am confident will be covered by the QGs, no matter whether they expand and contract. In all likelihood, I won't begin building up the QGs until after this thing has been assembled into a hull. That probably makes the most sense, anyway, as the ammortisement has to flow fairly into the lower QG.
- 2,699 replies
-
- 5
-
-
- heller
- soleil royal
- (and 9 more)
-
Thank you Vic and EJ for your gracious comments, and thank you to everyone else for checking in and for your likes! Vic, I'll have to give medium CA a try. As the build progresses, I will need to use it more and more, so something less noxious would be great. Well, EJ, the Heller kit's poop royal is layed out just as you have described. Because I have lowered the sheer, somewhat, this will necessitate re-positioning the poop royal deck, somewhat, and also shortening the deck a bit. The camber of this deck will also be a little more pronounced than on the poop or quarter decks, so as to provide better central headroom to the inhabitants of these quarters. Toward that end, also, my inclination is to set the deck just below the sheer of this poop royal rail, as seems to be the case in this other Puget drawing of the Royal Louis of 1668: You can clearly see that the figures standing upon the PR, are fully visible, which implies that the railing must be set very close to the deck, itself. As a practical vantage point for handling of the ship, I'm not sure how much value this deck really had, back in these days; I imagine most of the command took place upon the poop and quarter decks. If anything, the purpose of this deck would primarily be to make shelter for the lesser officers, who would have been assigned to one of a series of very small state rooms, housed beneath this deck. Michel Saunier's model is perfectly illustrative of the arrangement of these small state rooms. It is my observation of Michel's model that lead me to this conclusion, in the first place. It also makes sense for the chicken coops to reside here, on the PR deck (as Heller modeled it), as they would be out of the way. The final arrangement of my PR deck will be determined by the two small, octagonal ports or windows that I pierce through the upper bulwarks, in the area just forward of the top finishing of the Quarter Gallery. I suspect that the purpose of these ports wasn't primarily (or even at all) for extra guns, but to provide some light and ventilation to these living quarters.
- 2,699 replies
-
- 6
-
-
- heller
- soleil royal
- (and 9 more)
-
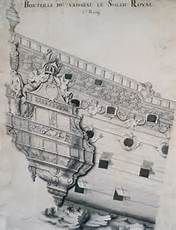
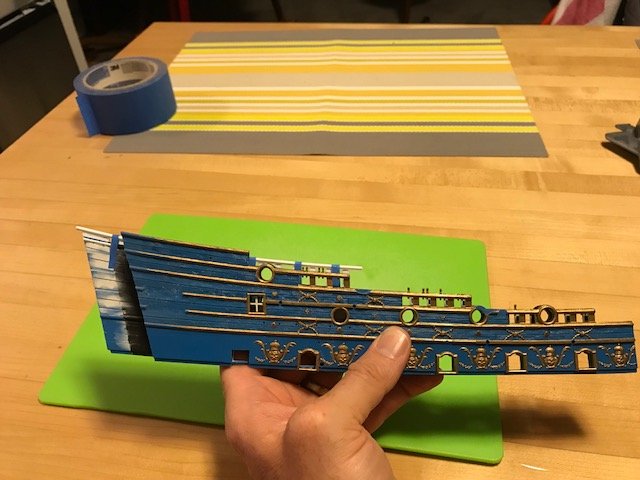
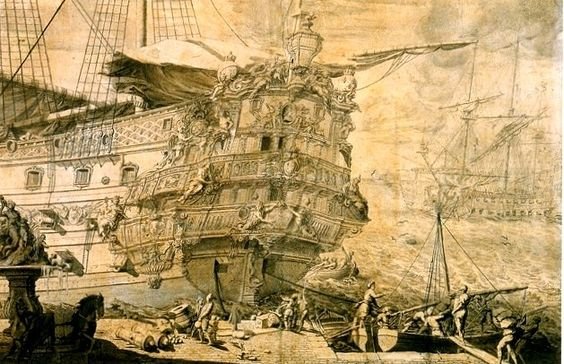
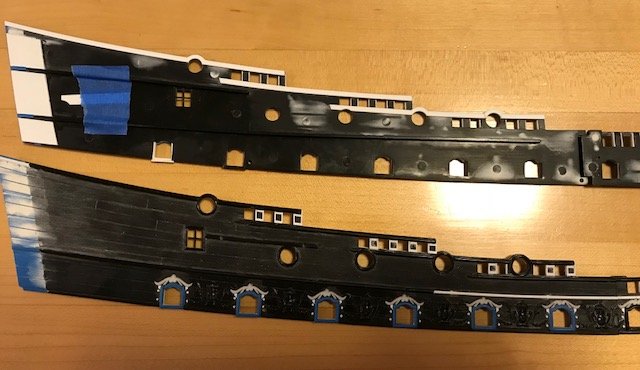
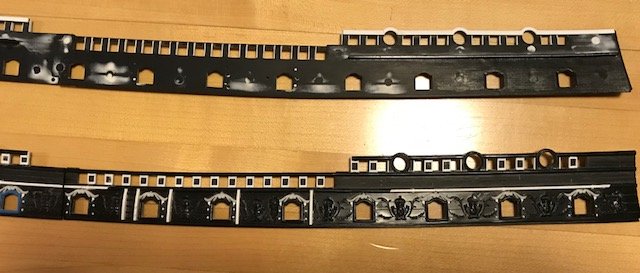
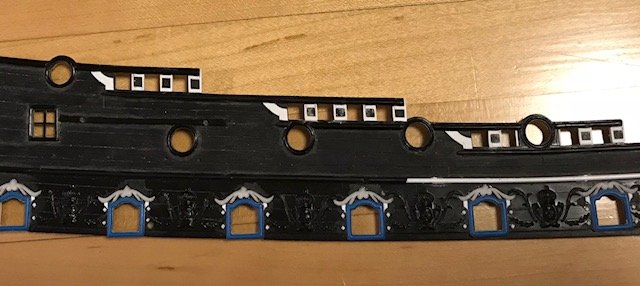
I am nearly done with the in-letting of the sheer rail dolphins. The Forecastle dolphins were particularly challenging because of the intersection of where they cross the waist rail. In order to inlet them, you must remove most of the waist rail, just up to where it joins the timberhead. On both sides, I broke away the waist rail, in short segments, and had to glue these pieces back in place, as I glued-in the outboard dolphin halves, at these locations. Because I am sensitized to it, I don't love cyano, but this is definitely the glue for this application. The area around the mouth of the dolphin is only a shallow ledge, so there isn't much support, there. I think I will probably drill for backing pins before I glue on the in-board profile, just to re-enforce the construction. As I will always try to do, I must note that the dolphin and the scalloped hancing piece below it are not in perfect, parallel agreement with each other, as drawn by Berain. This, for me, is a matter of comme-ci, comme-ca; I could create a parallel relationship, but I think that the hancing piece would suffer, disproportionately, and look completely wrong. As it is, each element only looks a little wrong to the very small segment of the world population that is paying attention to the fine details of this particular ship. I am fine with it. So, now, a montage of the poop royal sheer railing: In these next two pics, you can see the relative lowering of the sheer - even with the add-back of the poop-royal railing - as compared with the stock kit: And a few shots with the railing glued in place: I think it pretty well captures the feeling of the Puget drawing, below, of the Dauphin Royal of 1668:


- 2,699 replies
-
- 8
-
-
- heller
- soleil royal
- (and 9 more)
-
Hello Doris, So, as I look through your photo essay on the making of the square gunport wreaths, two things occur to me: For one, they are remarkably consistent. On the other hand, I wonder why you don't master a detail like this once, and duplicate it in resin castings. I have watched and am tremendously impressed by your video tutorials on how to do some of the larger figurative work, and it would be no stretch of the imagination that sculpting each element by hand is ultimately easier and a more efficient use of your time. I am just curious as to your perspective on that issue. Thank you, Marc
- 1,035 replies
-
- 4
-
-
- royal katherine
- ship of the line
- (and 1 more)
-
MONTAÑES by Amalio
Hubac's Historian replied to Amalio's topic in - Build logs for subjects built 1751 - 1800
I agree. This is one, where the build is so exemplary, that the pictures are worth a million words. In my opinion, the key ingredients to what Amalio is doing are research, patience and whatever time it takes to achieve his standard. He is undoubtedly, incredibly resourceful, and that is the magic of ship modeling. -
Thank you everyone for the likes and comments. I have been having a ton of trouble with my relatively (or at least to me) NEW iphone7, which among other things, will not lately allow me to log onto MSW. So, for the time being - while I go to war with Apple (who is apparently dodging their warranty obligation) - I make my posts from my home computer, where it is much less convenient, or timely. Sorry for the delayed response, here, and to all the other builds I follow. Frustratingly enough, I can view updates in email, on my phone, I just can't link directly to the sight, from email, to comment. Also, I lost all my phone contacts. GOOD TIMES. God!, what I would do for the artillery might of the actual SR, pointed in Apple's direction, right now I will say, though, that I have had much success in-letting dolphins into the upper bulwarks, and have almost finished that stage of the modifications. I have also installed the "poop royal" sheer railing, on the starboard side, and that looks very good, IMO. So things are moving along. Pics and a more developed post to follow. All the best, Marc
- 2,699 replies
-
- 2
-
-
- heller
- soleil royal
- (and 9 more)
-
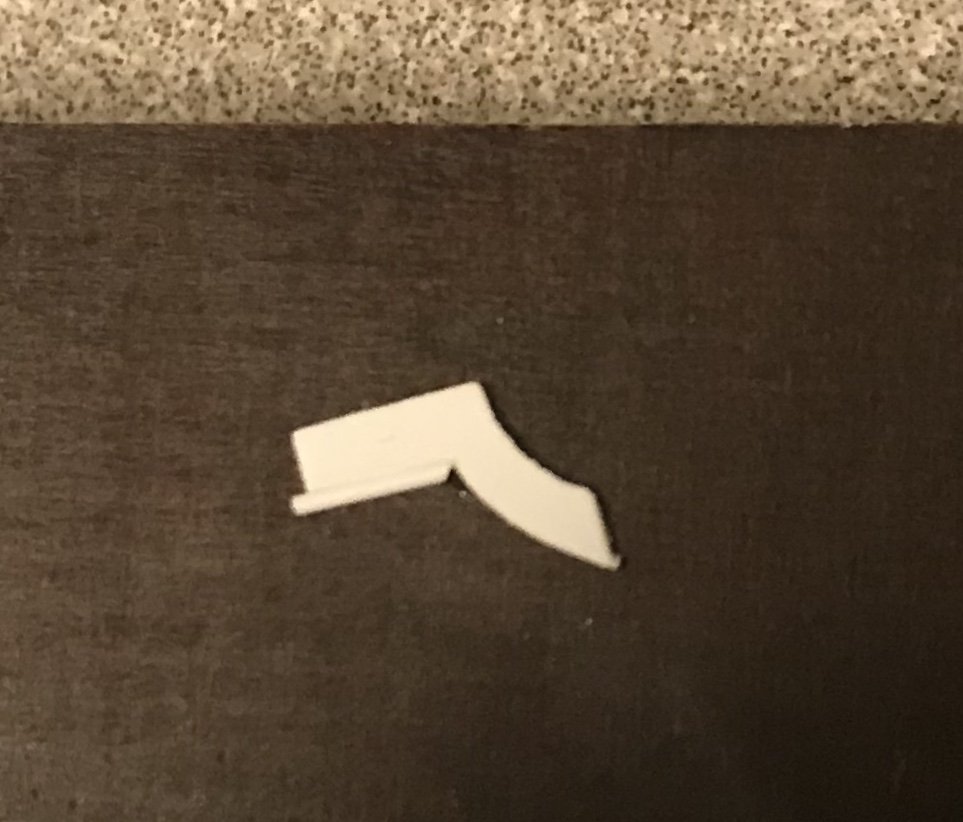
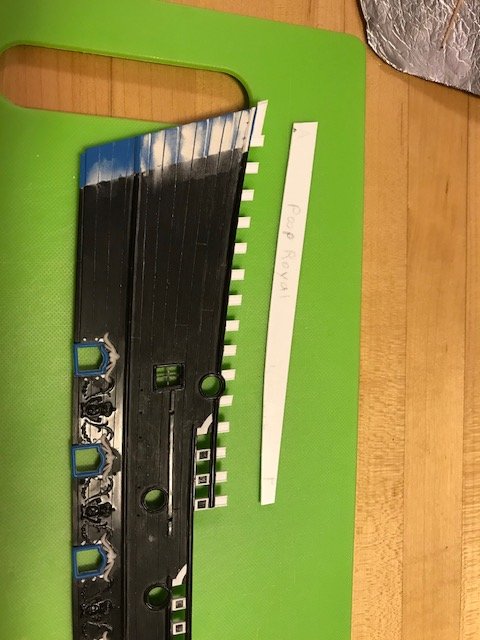
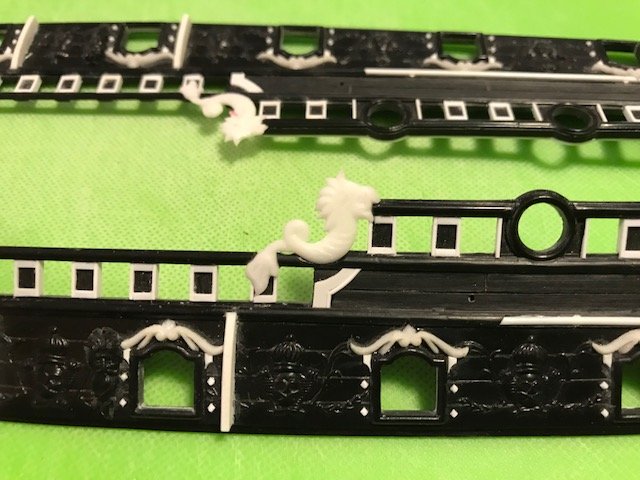
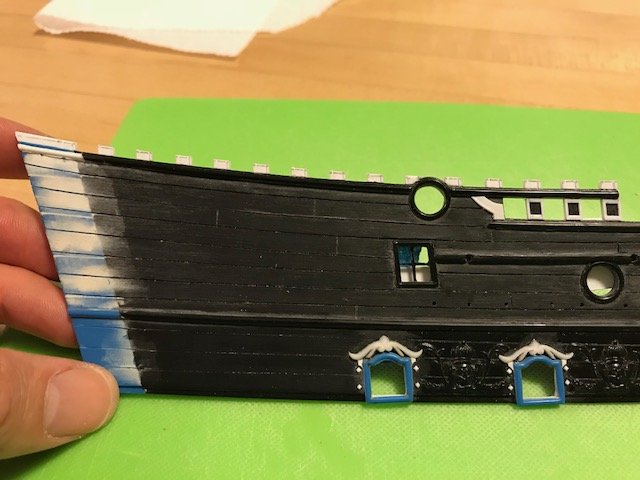
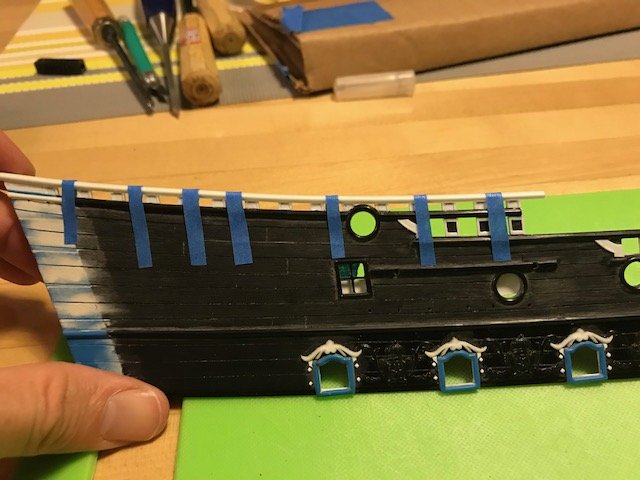
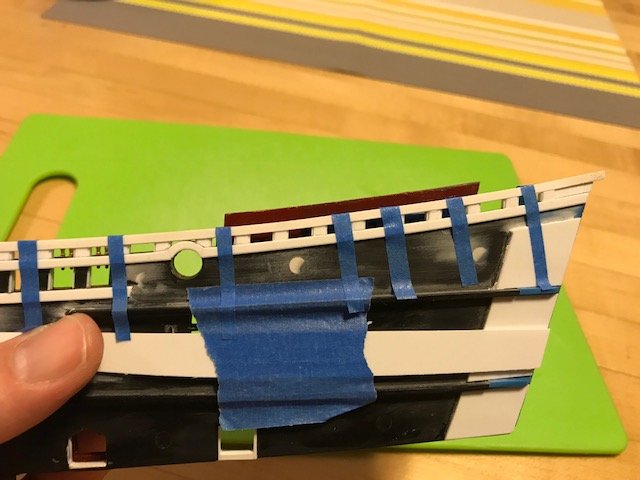
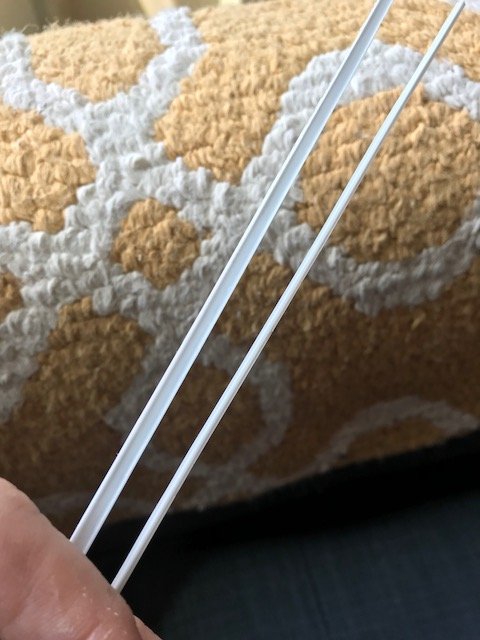
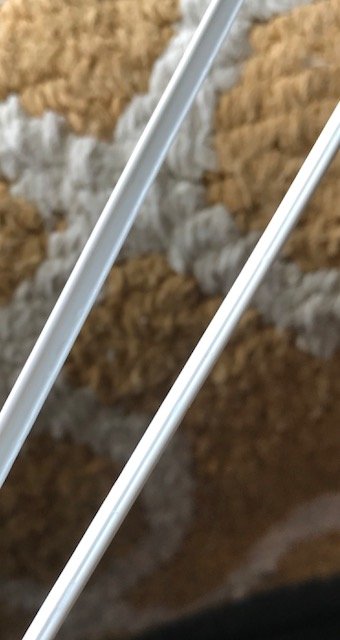
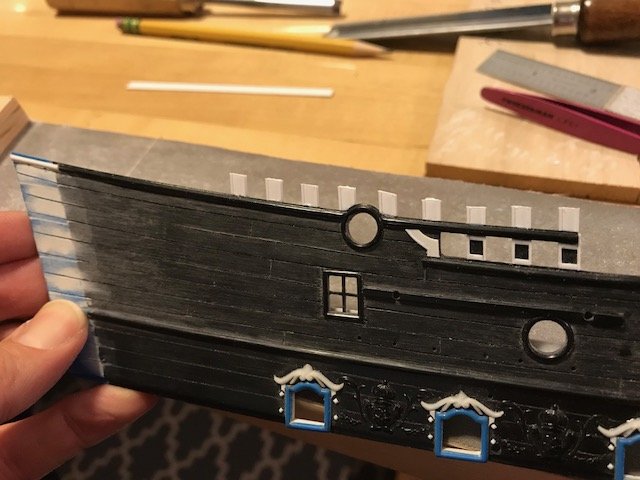
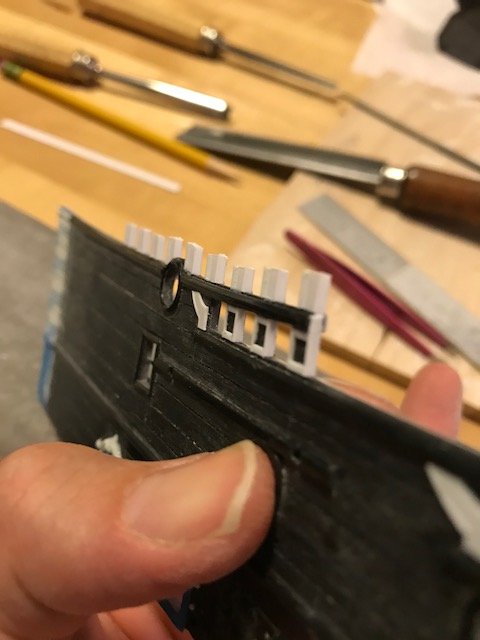
As I mentioned in the last post, I've been busy extending the sheer railing at the poop and poop royal level. This project necessitated creating a strip of stock that matches the profile of the exposed timberheads, as well as a strip that matches the sheer strake, itself. For the timberheads, I laminated two pieces of .032 strip that I cut to slightly over-wide strips. I then sanded the laminated piece until the edges were flush and I had matched the stock width of the exposed timberheads - just slightly wider than 1/8". Then, to match the vertical mouldings with which I had framed all of the timberheads, I edge-glued the same .020" x .060" strip stock that I had used before. The strip pictured, to the left, is my timberhead strip: The caprail strip is three pieces of .030 x .100 strip that I laminated together, in order to match the thickness of the stock caprail. To this, I then glued to the outside face a half-round moulding that was just thinner than the thickness of the caprail to leave a shallow flat to either side of the half-round. A slightly better picture of this stock can be seen here, to the right: So, next it was just a matter of adjusting an angled cut so that I could join over-long sections of timberhead from fore to aft, taking great care to match the rake of the timberheads relative to the rising sheer, as well as the spacing between timberheads: Before I started gluing these in place, I had made a styrene tracing template of this section of the sheer. Once I have all of the timberheads placed, I will use this template to trace a parallel line (to the original sheer strake), and thus trim these timberhead extensions down to about an 1/8", more or less. I will then be able to fix the new cap rail in place. Simultaneous to this project, I have been relieving my sheer cap dolphins from their backgrounds. I learned from my earlier port enhancements, and this time, I did not attempt to completely sand away the backing of the casting because I now knew that would result in dolphins that were precariously too think in the tail area, and that the general profile would not be terribly consistent. So, instead, I sanded away the background to within a heavy 1/64", and then used two of my gouges that neatly fit about 90% of the carving's curves to trim away the background. The area around the head was easily cleaned with an Exacto blade. I have been using Henry's spare bulwark pieces to figure out exactly how I was going to go about in-letting the dolphins into the sheer strakes. Several early attempts to hold the dolphin in place and trace where it crossed the sheer strakes with an Exacto knife were just too sloppy for good finish work. I realized, though, that by starting with the belly (the largest overlapping glue area), I could use the same gouge I used to design the carving to mark it onto the bulwark piece. Once I had notched in the belly, I had a better hold on keeping the dolphin in place while I pressed in the intersections of the tail and snout, using a much smaller sweep of gouge
- 2,699 replies
-
- 9
-
-
- heller
- soleil royal
- (and 9 more)
-
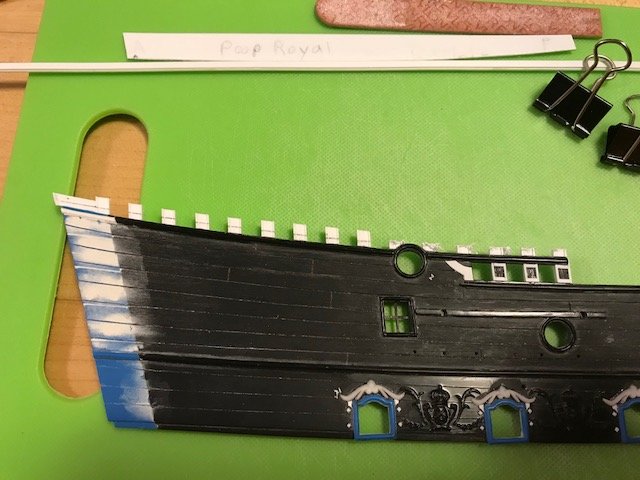
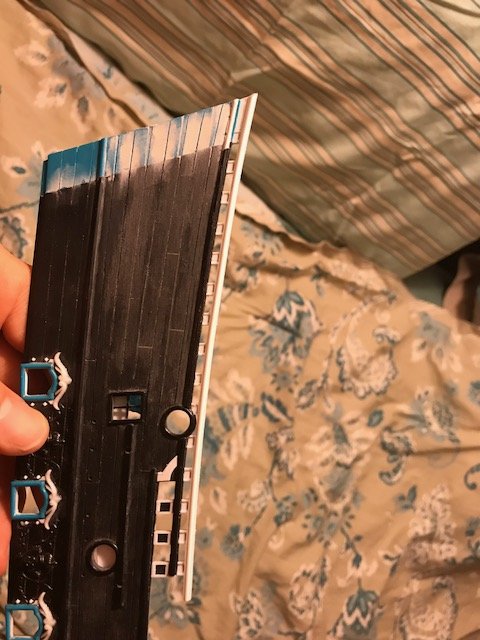
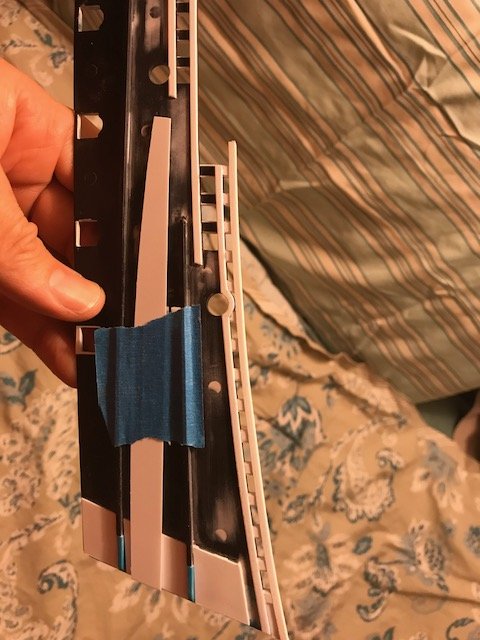
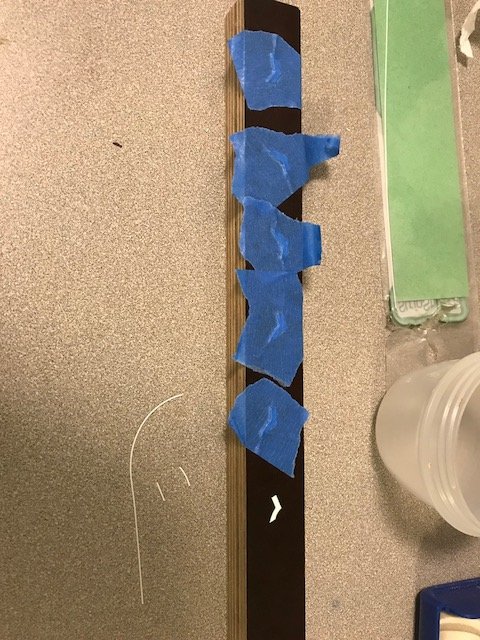
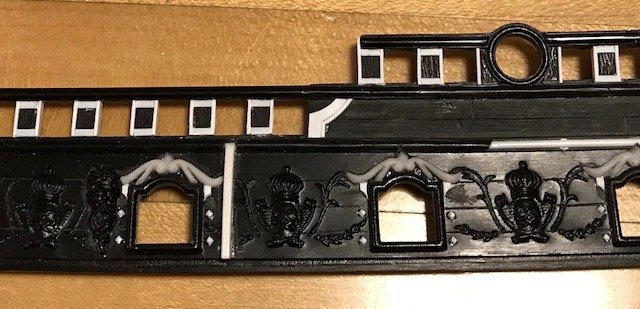
After much scraping and re-touching and glue clean-up, I have finished the panel framing of the timberheads: This was tedious, but well worth the effort, IMO. Next, I set about making these scalloped details that define the aft edges of each step in the sheer railing. I cut these from really thin sheet styrene - maybe .020". Not sure, exactly, but thin enough not to stand proud of the lowest moulded detail on the upper bulwark pieces. This same thickness of sheet styrene will also, eventually, be the base of the new frieze. I wanted there to be a bead moulding on the trailing edge of the piece, and considered engraving it into the plastic with a scratch-stock. Ultimately, I discovered a method of gluing styrene rod, that is about 1/32", to the edge of the part using phenolic plywood as a base, and blue tape as my clamp. Here are the scalloped pieces without their bead mouldings (except for the one wider one): Here is a piece with the straight (and mitered corner!) bead glued in place, before setting the curved bead: Here, I've set the beads tight to the scalloped pieces by burnishing blue painter's tape all around the perimeter: I had made a few extras, and not all of them had perfectly tight joints, but I was able to discard those and use the best. After lapping the backs on an emmory board, and scraping the faces and edges clean of glue, I trimmed them to size and glued them in place onto the bulwark pieces: Here you can better see the slight moulded detail of the applied bead: I am not yet sure whether I will actually carve out the scalloped area of the backing styrene - the bulwark, itself. My plan is to glue one of my discards to Henry's extra bulwark pieces and cut out the scallop to see what that looks like. Ultimately, I may simply blacken this small crescent with the same flat black that the backs of the timber heads will be painted, and let the yellow ocher of the timberhead framing, and scalloped pieces pop. Before getting into the installation of my sheer railing dolphins, I will next build up the low poop-royal railing, at the stern. Although, I did cut away the a-typical fourth sheer step, from the stern, I do still need some height back there, to accommodate the poop royal deck, itself, and to conform more closely to the Berain drawing, which shows a timberhead railing, continuously, right up to the stern lanterns.

- 2,699 replies
-
- 8
-
-
- heller
- soleil royal
- (and 9 more)
-
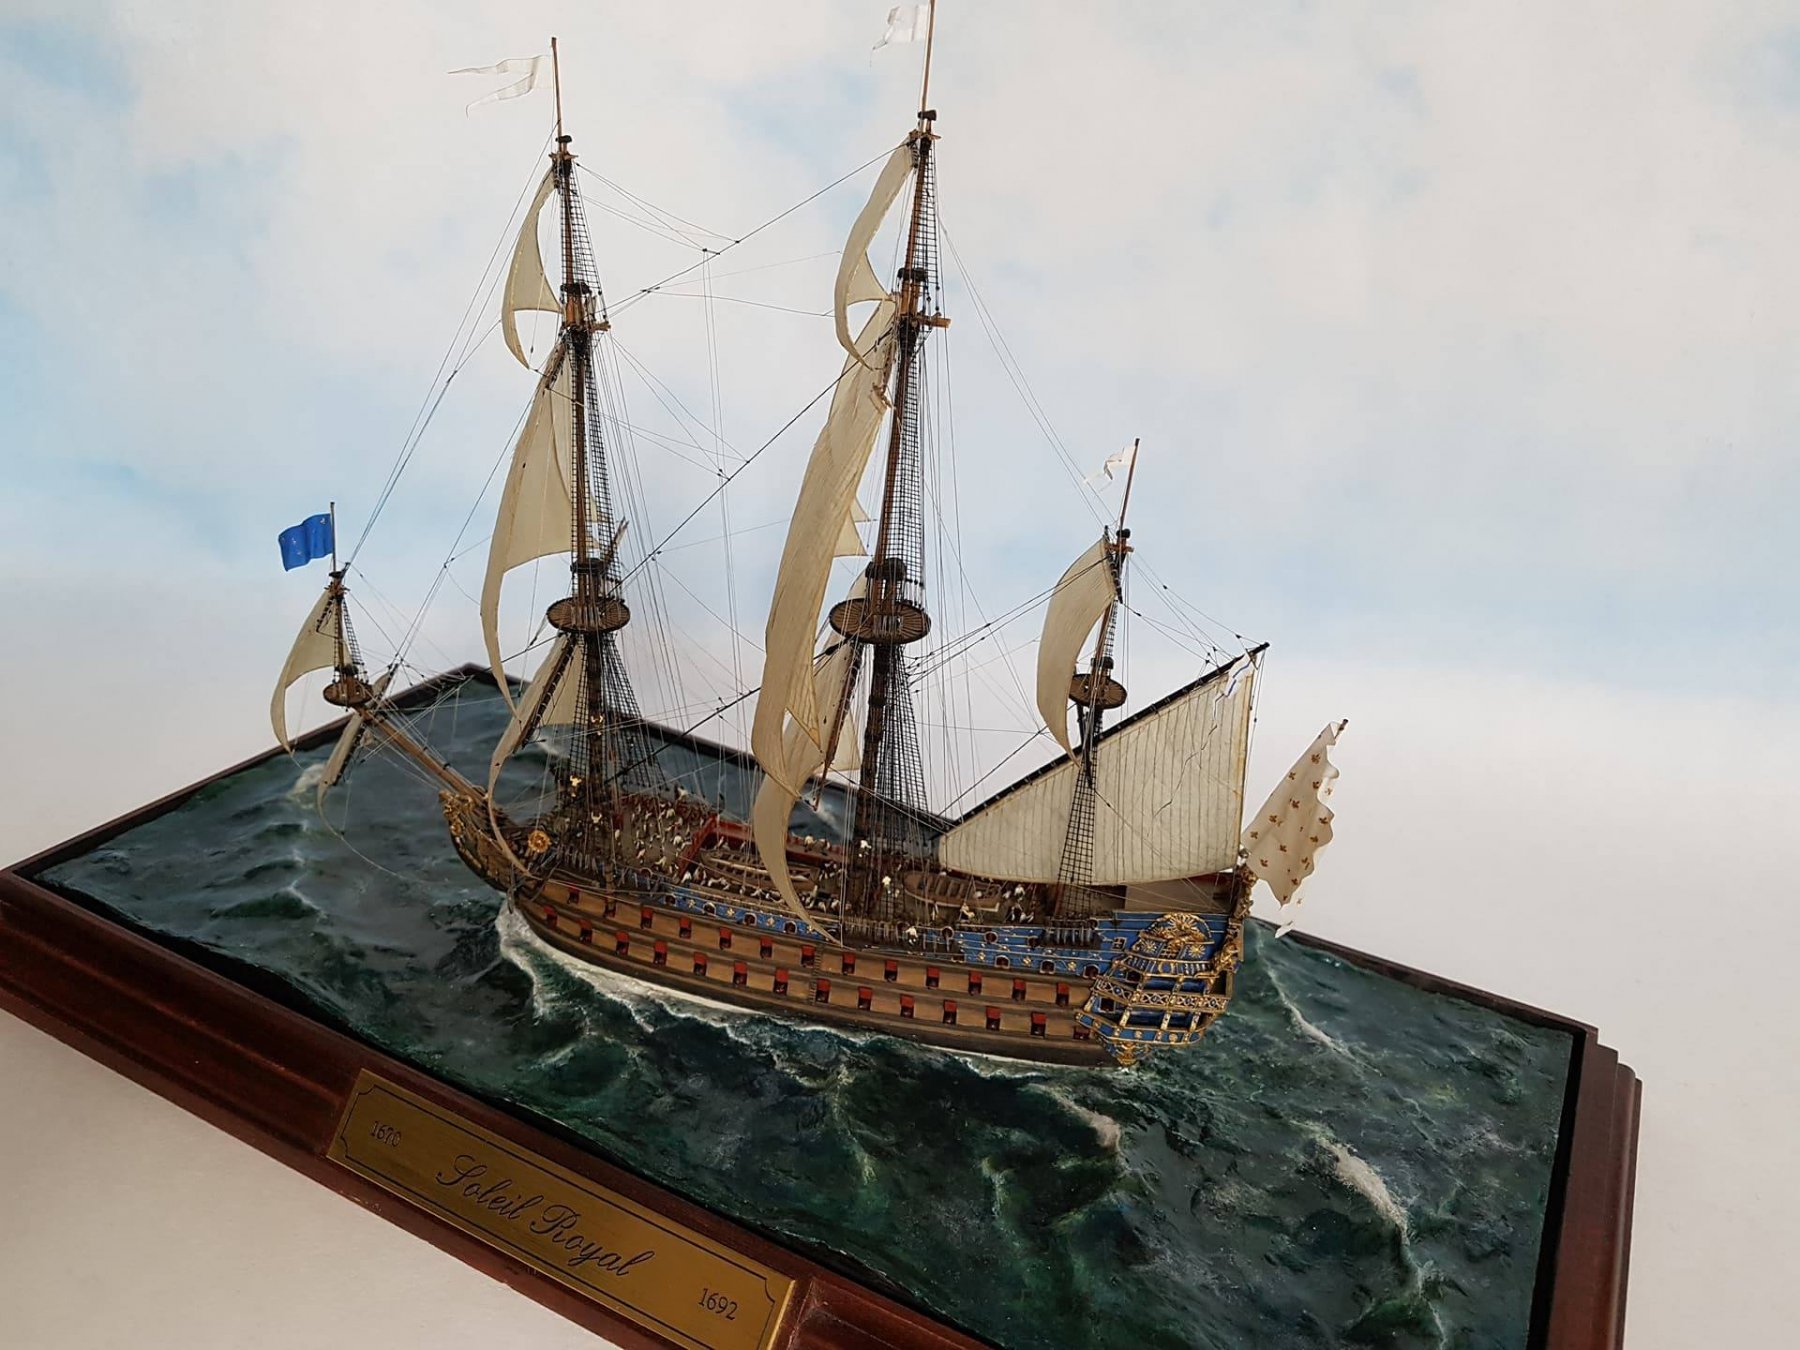
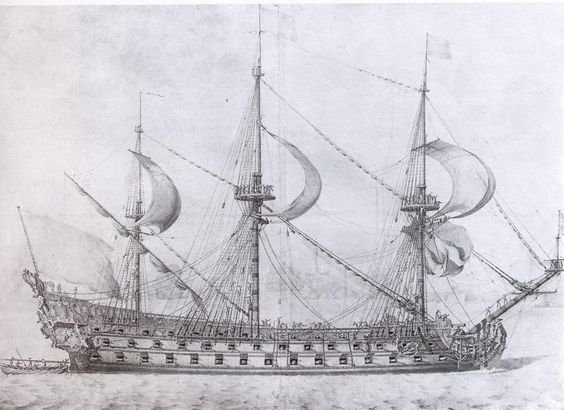
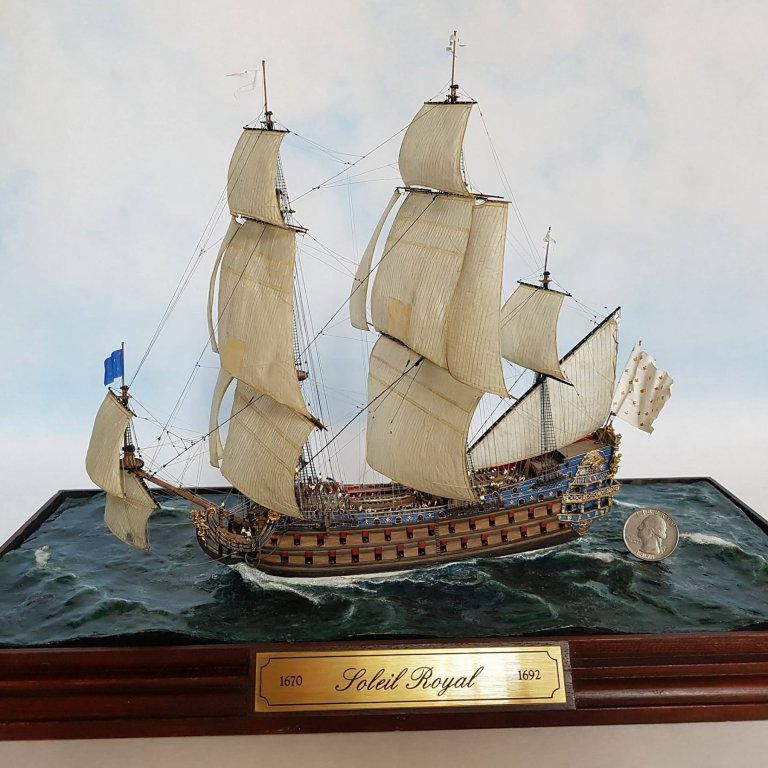
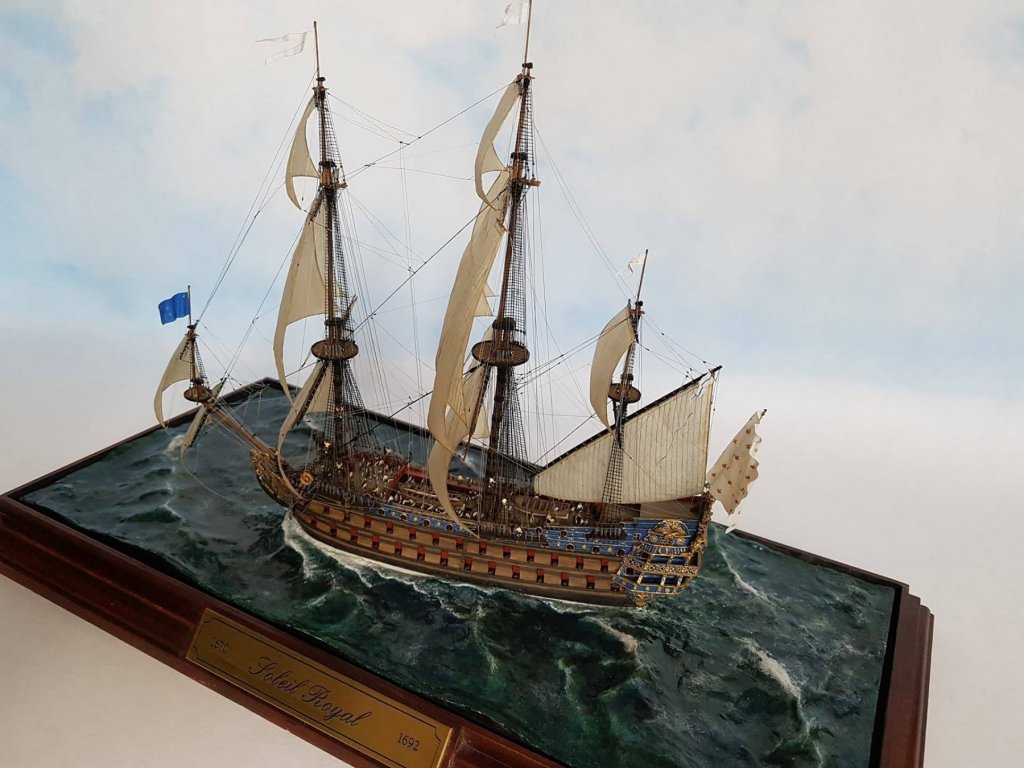
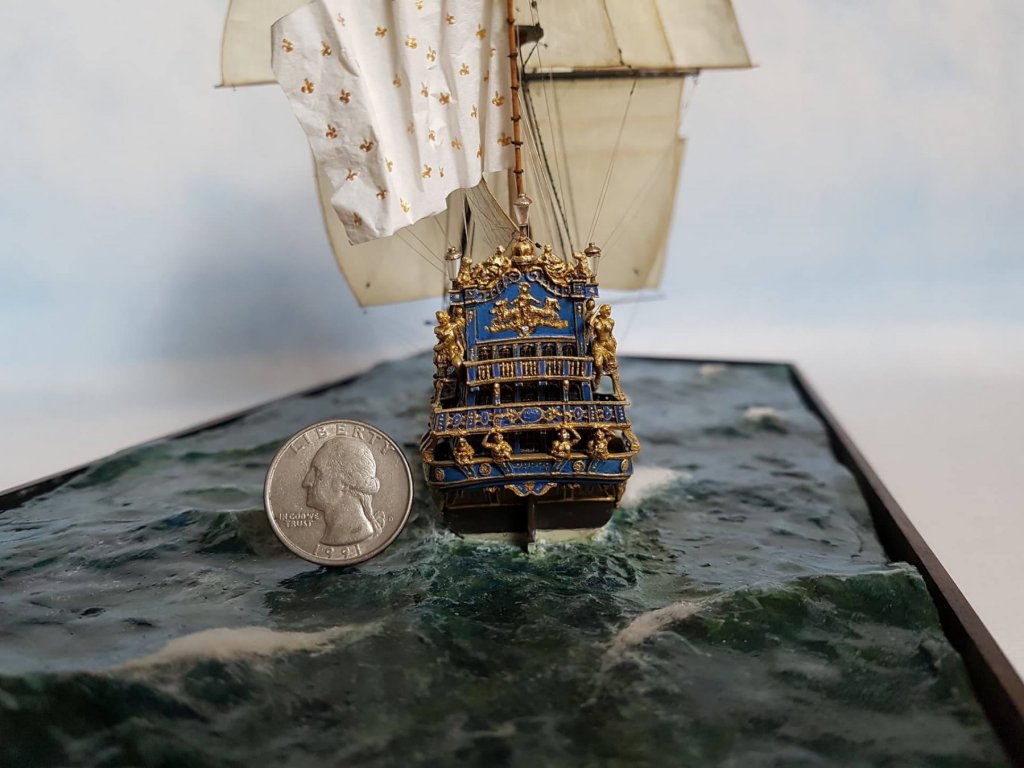
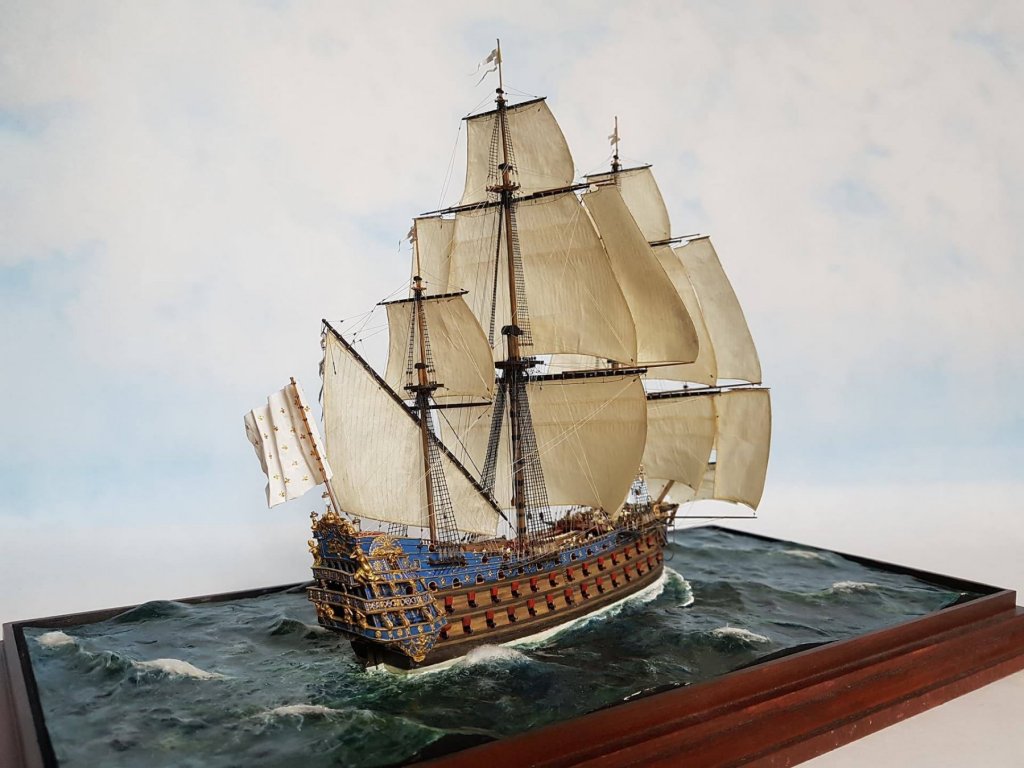
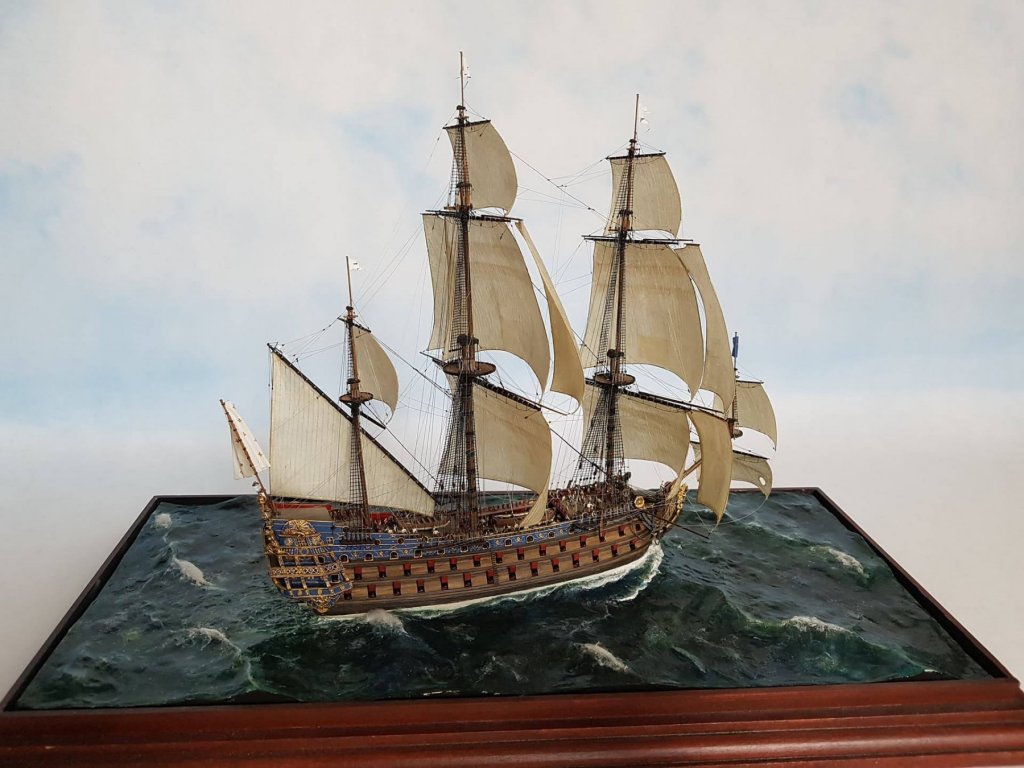
Work on the railing detail continues. Pics of that, soon to follow. In the meantime, I found a really excellent photo essay of a 1/350 Heller Soleil Royal, in a diorama setting. I do not know who made the model, but it is very well done. The sails, in particular, are really good. It is hard to achieve a good billowing effect in a larger scale, let alone this small. There's so much to like about this model, but one thing that jumps out at me is the effect of a slightly more pronounced rake of the main mast. The 1/100 Heller kit has the main mast nearly perpendicular to the waterline; the rake is very slight - maybe a few degrees. That also appears to be consistent with the Louis Quinze model in the Musee de la Marine. This model, however, appears to have doubled that, and the effect is more in keeping with what I have observed of other contemporary art work from this period.
- 2,699 replies
-
- 12
-
-
- heller
- soleil royal
- (and 9 more)
-
I love the progress on your beautiful model of the Provincien, YankeeD! I've been checking in from time to time, and not saying anything, but you are doing an excellent job!
-
Alex, this is all superbly well done, and I am happy to follow along. I am looking forward to seeing how this project shapes up.
-
Beautiful, clean build here Zappto. I really appreciate the quality of your efforts. This looks like an excellent kit that you are making into a beautiful model!
-
This, for me, is the key; 1/2 an hour doesn't seem like much time, but it sure makes a difference in the long-run! Incremental progress. You will get there. And this really is a superb execution of the Le Mirage kit. I will be following along with great interest. Also, with regard to your cyano bleeds; you should be able to simply sand your surface and apply finish. I use cyano to repair un-intended breaks when wood carving, and the glue line never shows through the surface finish.
-
Superb effort, Patrick! With the highest compliments - you are a master of tedium.
-
Yes, I can see that aspect of your dillema, now - the accumulation of color in corners and how that would be especially apparent around the rigols, for example. It seems to me that the antique wash coat will help a great deal with that issue, and I like that you will “dirty” her up a bit, as anything that goes into the sea does not remain pristine for long.
-
Whatever inconsistencies there may be in color tone, they don’t show in the photographs. Though these are diluted wash coats, I would think the color would even out after a certain number of applications. If not four wash coats, maybe 6? Perhaps, also, making up a large enough batch of diluted paint to do two to three wash coats from the same batch, might improve the consistency of the color.