Hubac's Historian
-
Posts
3,304 -
Joined
-
Last visited
Content Type
Profiles
Forums
Gallery
Events
Everything posted by Hubac's Historian
-
 Hi Kevin - Yes, I was following Bruma’s Cutty Sark, and I have commented on the excellence of his sails. They truly are great. My first inclination, though, is to try a technique with silk span that I first saw on a build by Blue Ensign - his Heller kitbash of La Superb. Silkspan seems to give the right scale impression for 1:96. If I’m being a little over-critical, I find that the material Bruma used felt a little heavy. His approach may ultimately be necessary, though, to achieve such a deep billowing effect. SR kit prices have been all over the place. If you have an early pressing, you are in luck, as the plastic remains excellent, so long as the kit has not been stored through temperature extremes. As you know, I have a deep respect for your computer modeling skills, and your hand-skills in bringing it all together. Your results are worth whatever wait is necessary. Although I have the Airfix Vasa and Prince in my stash, I am growing doubtful that I will ever get to building them, as I want to begin transitioning to wood on my next project. Why can’t this be my job?
- 2,699 replies
-
- 2
-

-
- heller
- soleil royal
- (and 9 more)
-
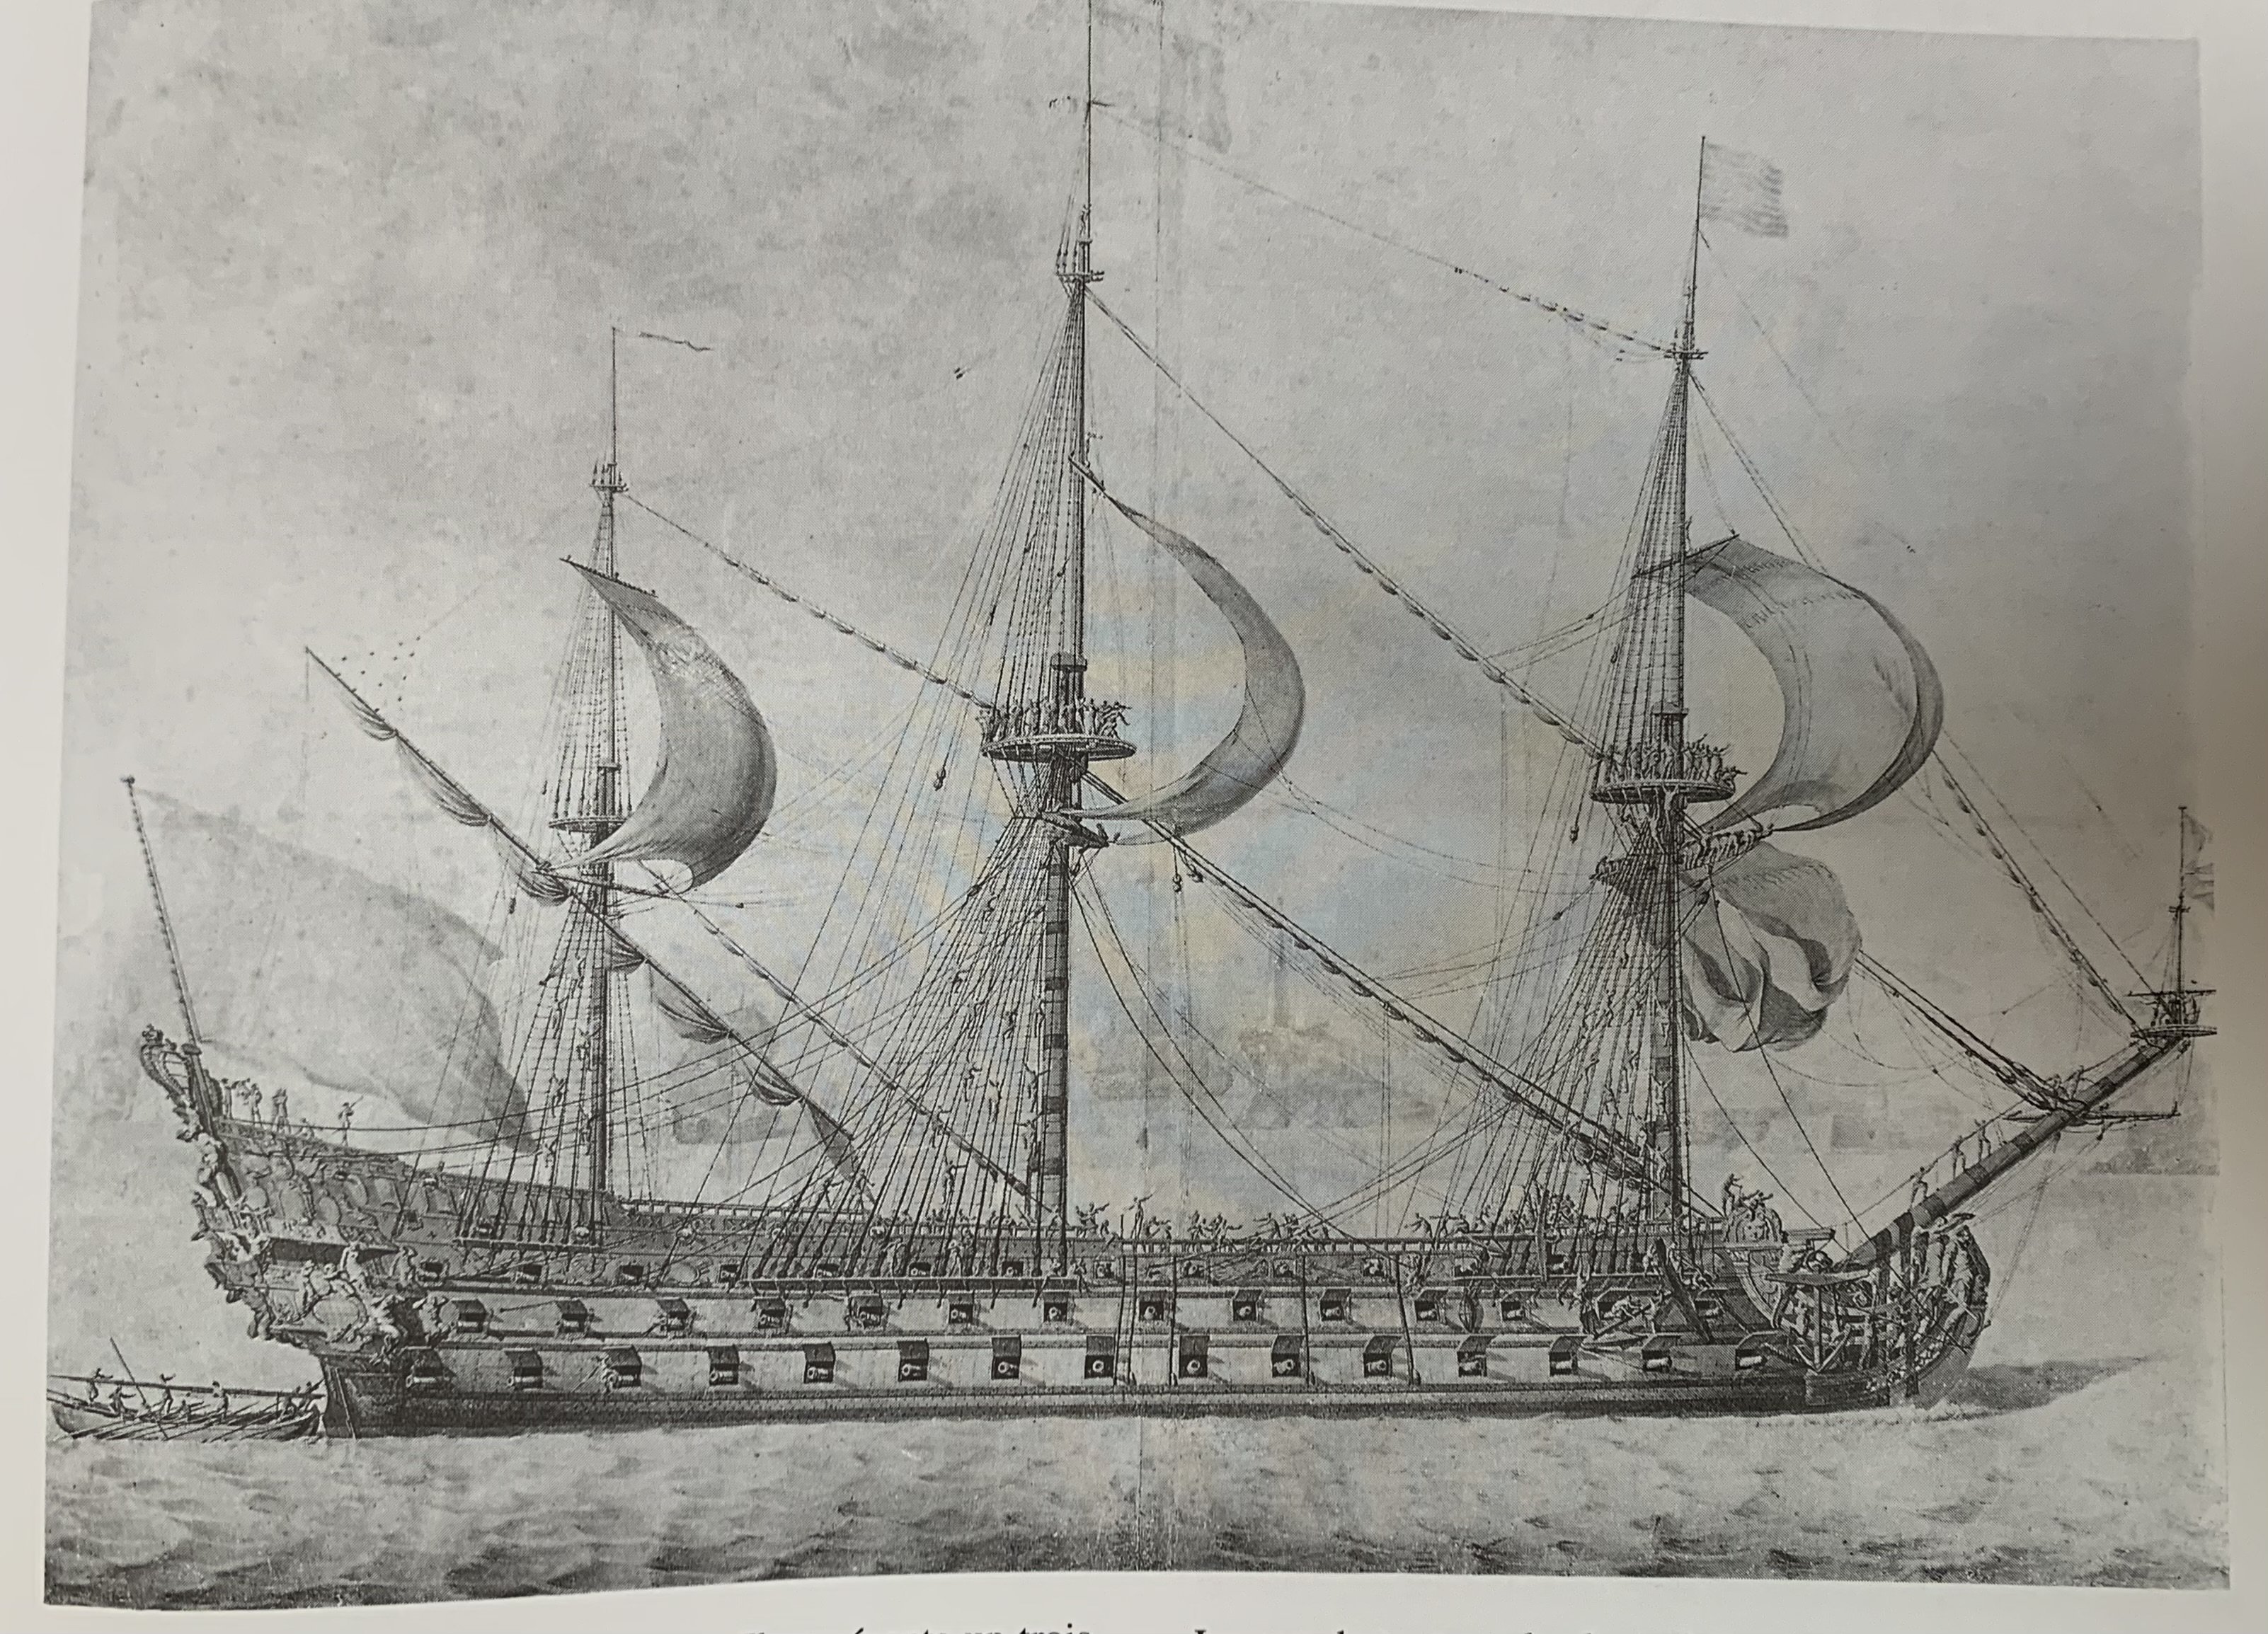
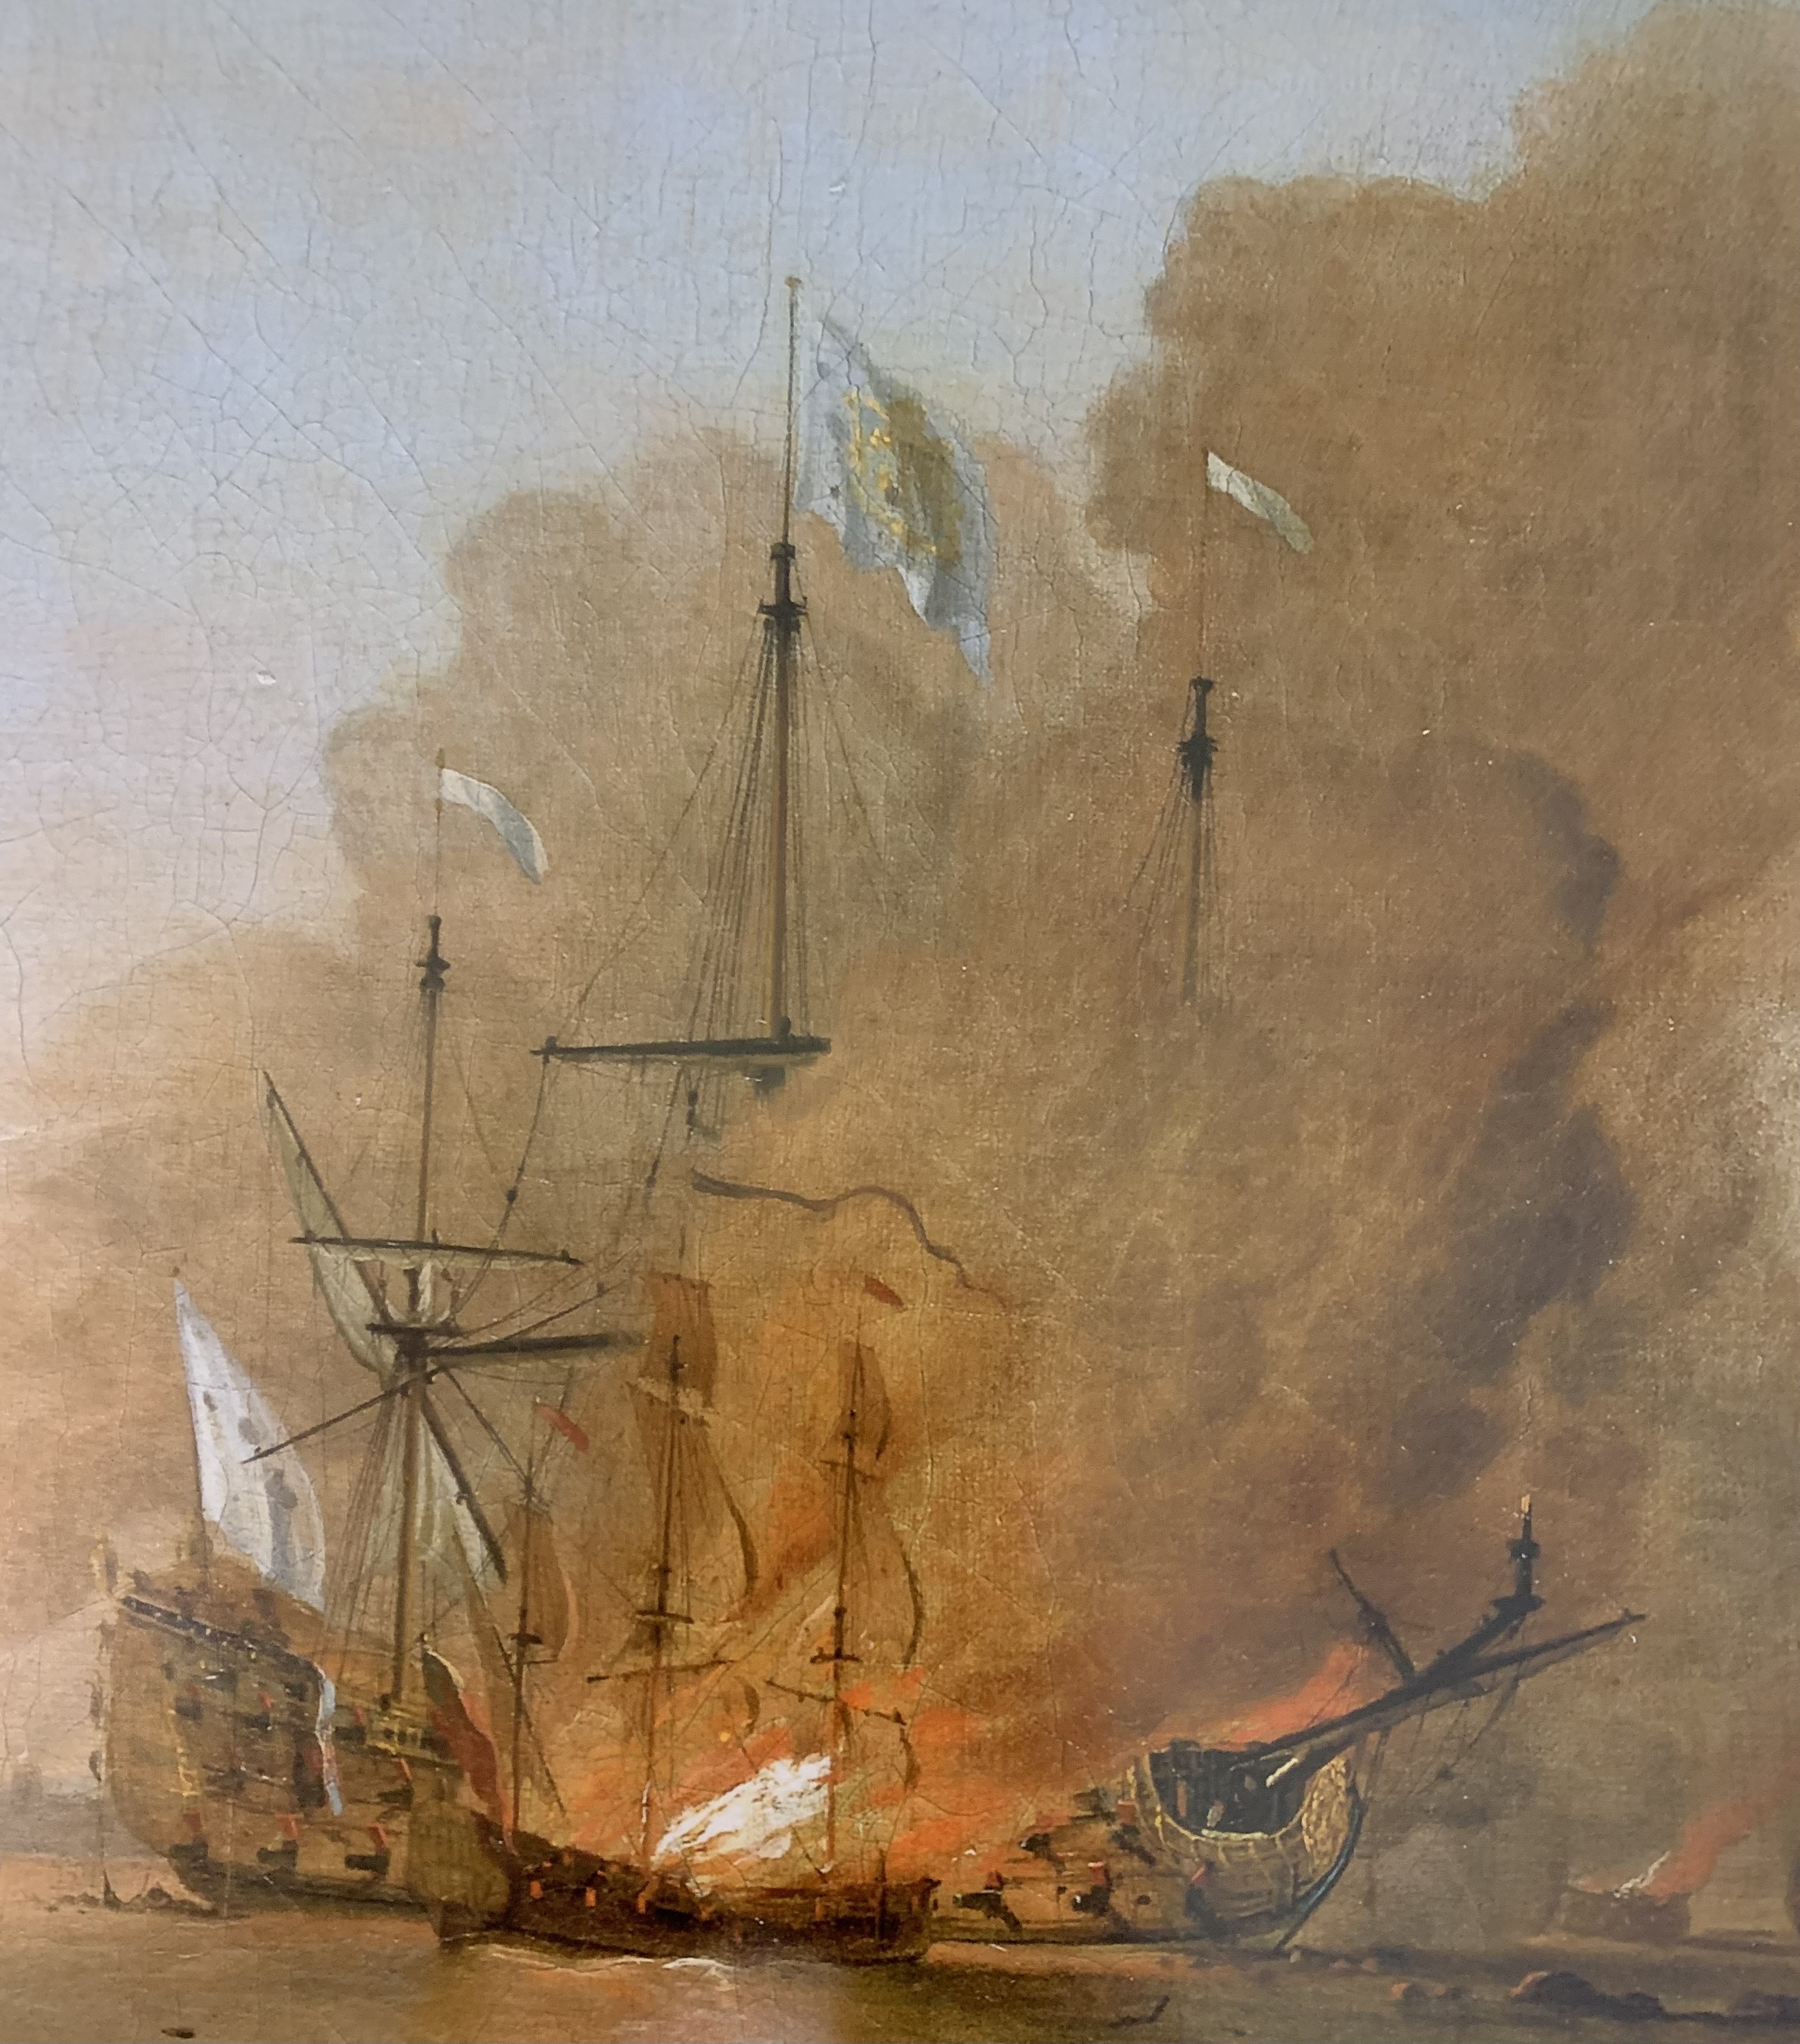
Well, Bill, I was thinking today about how much I enjoyed scratch-building the structural and ornamental aspects of the build. At this stage, though, the rigging looks like a steep, uphill climb. The trouble is that I’ve established a standard for the model, and I can’t just do what I’ve done on earlier builds for the rigging. I won’t be happy with that. In this scale, it is not really possible to construct ALL aspects of the rig to full scale practice, but I want it to look like that. Right now, I’m figuring out how best to strap single and double blocks with hooks for my carriage tackles. As you know, the available space to do so is impossibly small. I’m reading through Dafi’s Victory log because he has so many ingenious jigs and work-arounds for creating scale rigging effects. Because I’m so relatively un-skilled at this aspect of model-making, the going is very slow, and I really have to try not to get overwhelmed by the enormity of the task. I know, as with anything else, that I will acquire skill and confidence, and the process will pick up momentum. I find it somewhat helpful to think of each rigging element as a structure, in itself: what is its geometry? what are its component parts? what was it designed to do? On the other hand, if I spend too much time thinking about the finish line, I get an awfully strong desire to box the whole thing up and start a new project. I have too much time invested to not see it through, though. I keep the fire alive thinking about these fantastically billowing topsails that I will eventually try to re-create: This Puget portrait of the Royal Louis is the original inspiration for this diorama, and this version of the RL, circa 1692, is strongly analogous to what SR 1689 would have looked like. One foot in front of the other. Just keep on going, as I am telling my kids all of the time. As ever, I am grateful for the help and support of the community.

- 2,699 replies
-
- 10
-
-
- heller
- soleil royal
- (and 9 more)
-
I’ve invested my hopes and dreams in my best pair of tweezers. I’ll keep you posted!
- 2,699 replies
-
- 3
-
-
- heller
- soleil royal
- (and 9 more)
-
Firdajan - as need be, your process is highly organized and methodical. The artistic quality of your carved works is outstanding, and you have pulled-off the hardest trick of all with a build of the SOTS - the black, "negative" space behind the gilt work, balances the whole. 'Really great work!
-
That is very kind of you to say, Mark - much appreciated!
- 2,699 replies
-
- 2
-
-
- heller
- soleil royal
- (and 9 more)
-
Makes sense - the deadeye lashings enable you to tighten the shrouds, as needed.
- 324 replies
-
- 1
-
-
- Sovereign of the Seas
- Airfix
- (and 1 more)
-
Have you given thought to leaving shields off of one side of the model, so that those sniper cutouts are visible?
-
That is really interesting how they are rigged with deadeyes on one side - well done!
- 324 replies
-
- 1
-
-
- Sovereign of the Seas
- Airfix
- (and 1 more)
-
It wasn’t always clear to me, at all, how you were going to round this all into form, Patrick, but man-oh-man have you gotten there! Your process has been unconventional, yet instructive. Fantastic work!
-
Nice save, there, Bill!
-
I do have both of those books in my library, Bill, although Marquardt is on-loan from a friend. Excellent references, both.
- 2,699 replies
-
- 2
-
-
- heller
- soleil royal
- (and 9 more)
-
I think it was a good idea to pad up your sheer steps. I also think planking the inner bulwarks is a good idea, as your sanding away of detail appears to have made your bulwarks quite thin. The inner planking would provide an easy way to create the port lid rebates for those main and quarter deck square ports that are housed.
- 414 replies
-
- 1
-
-
- soleil royal
- Heller
- (and 1 more)
-
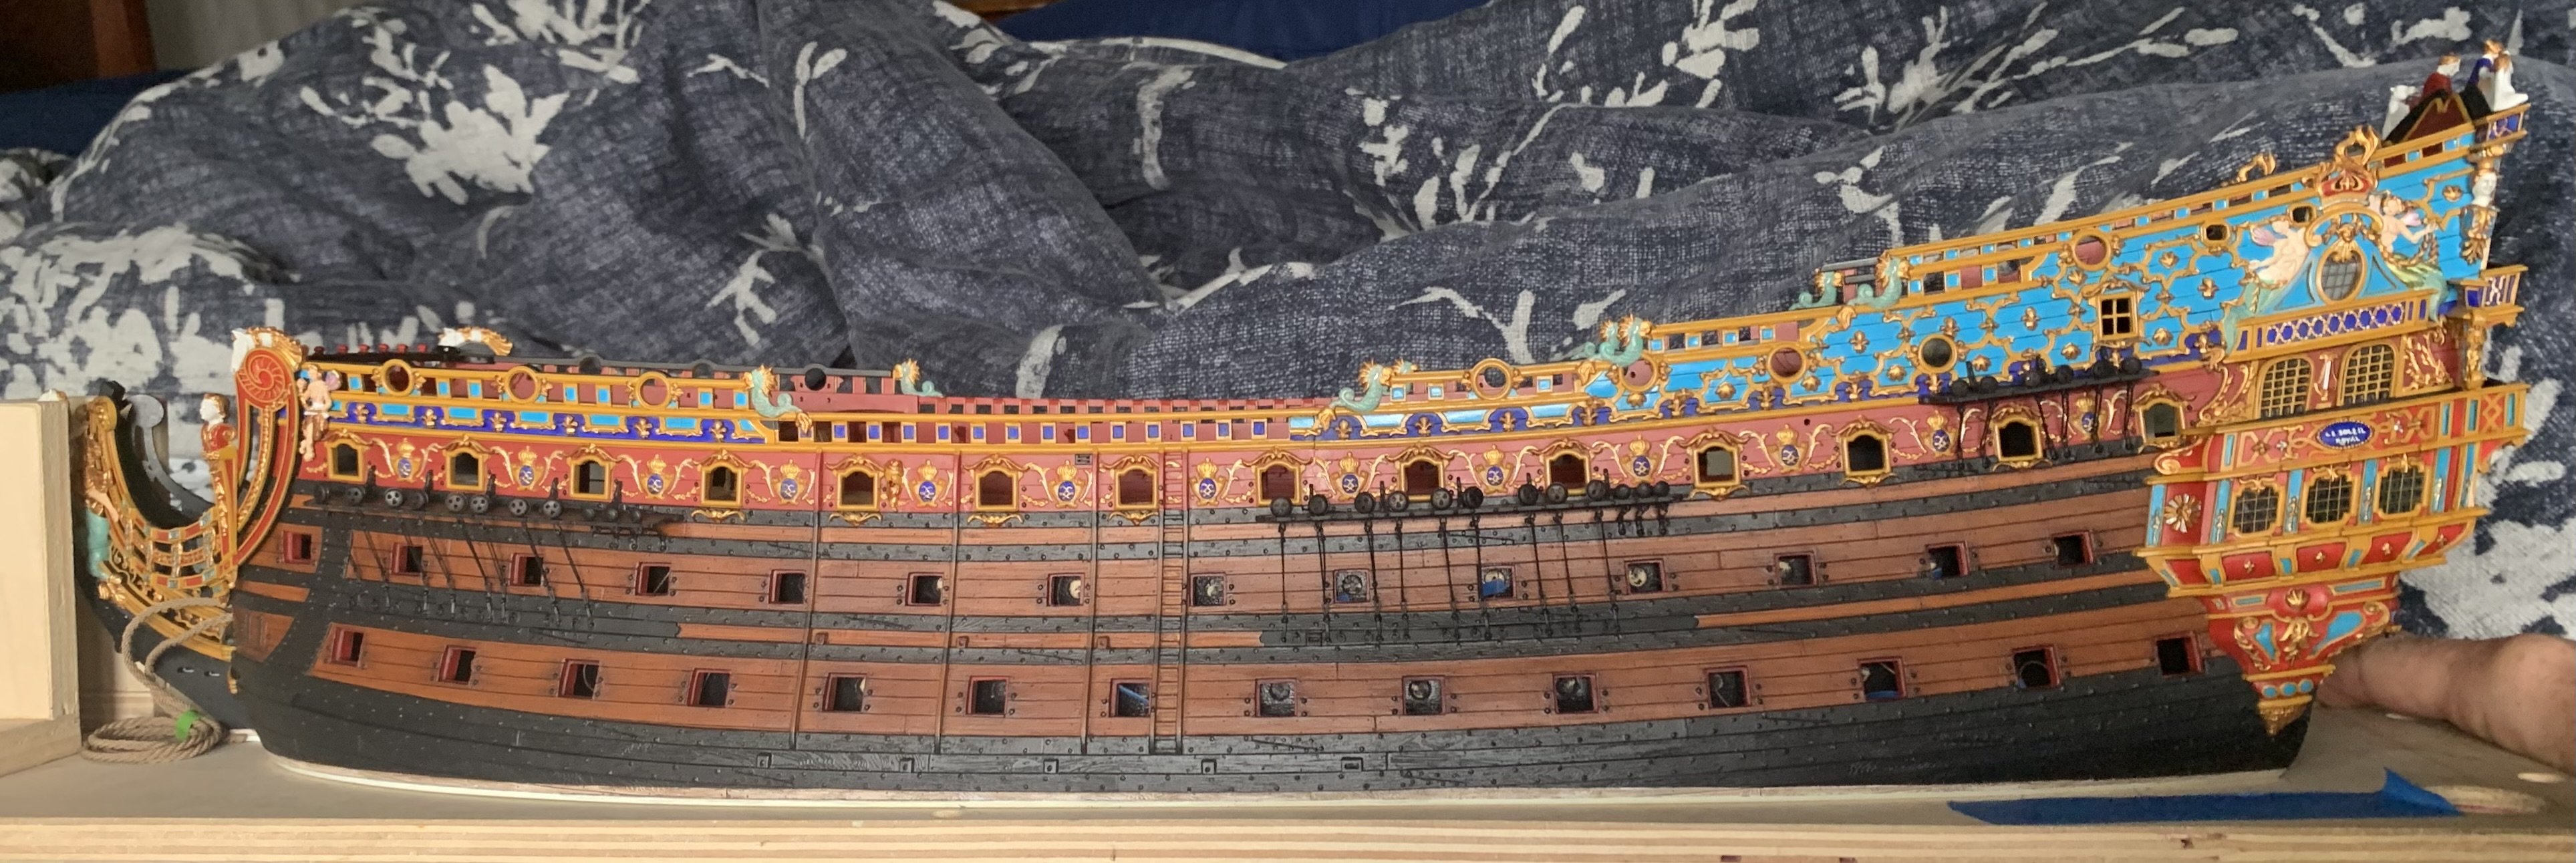
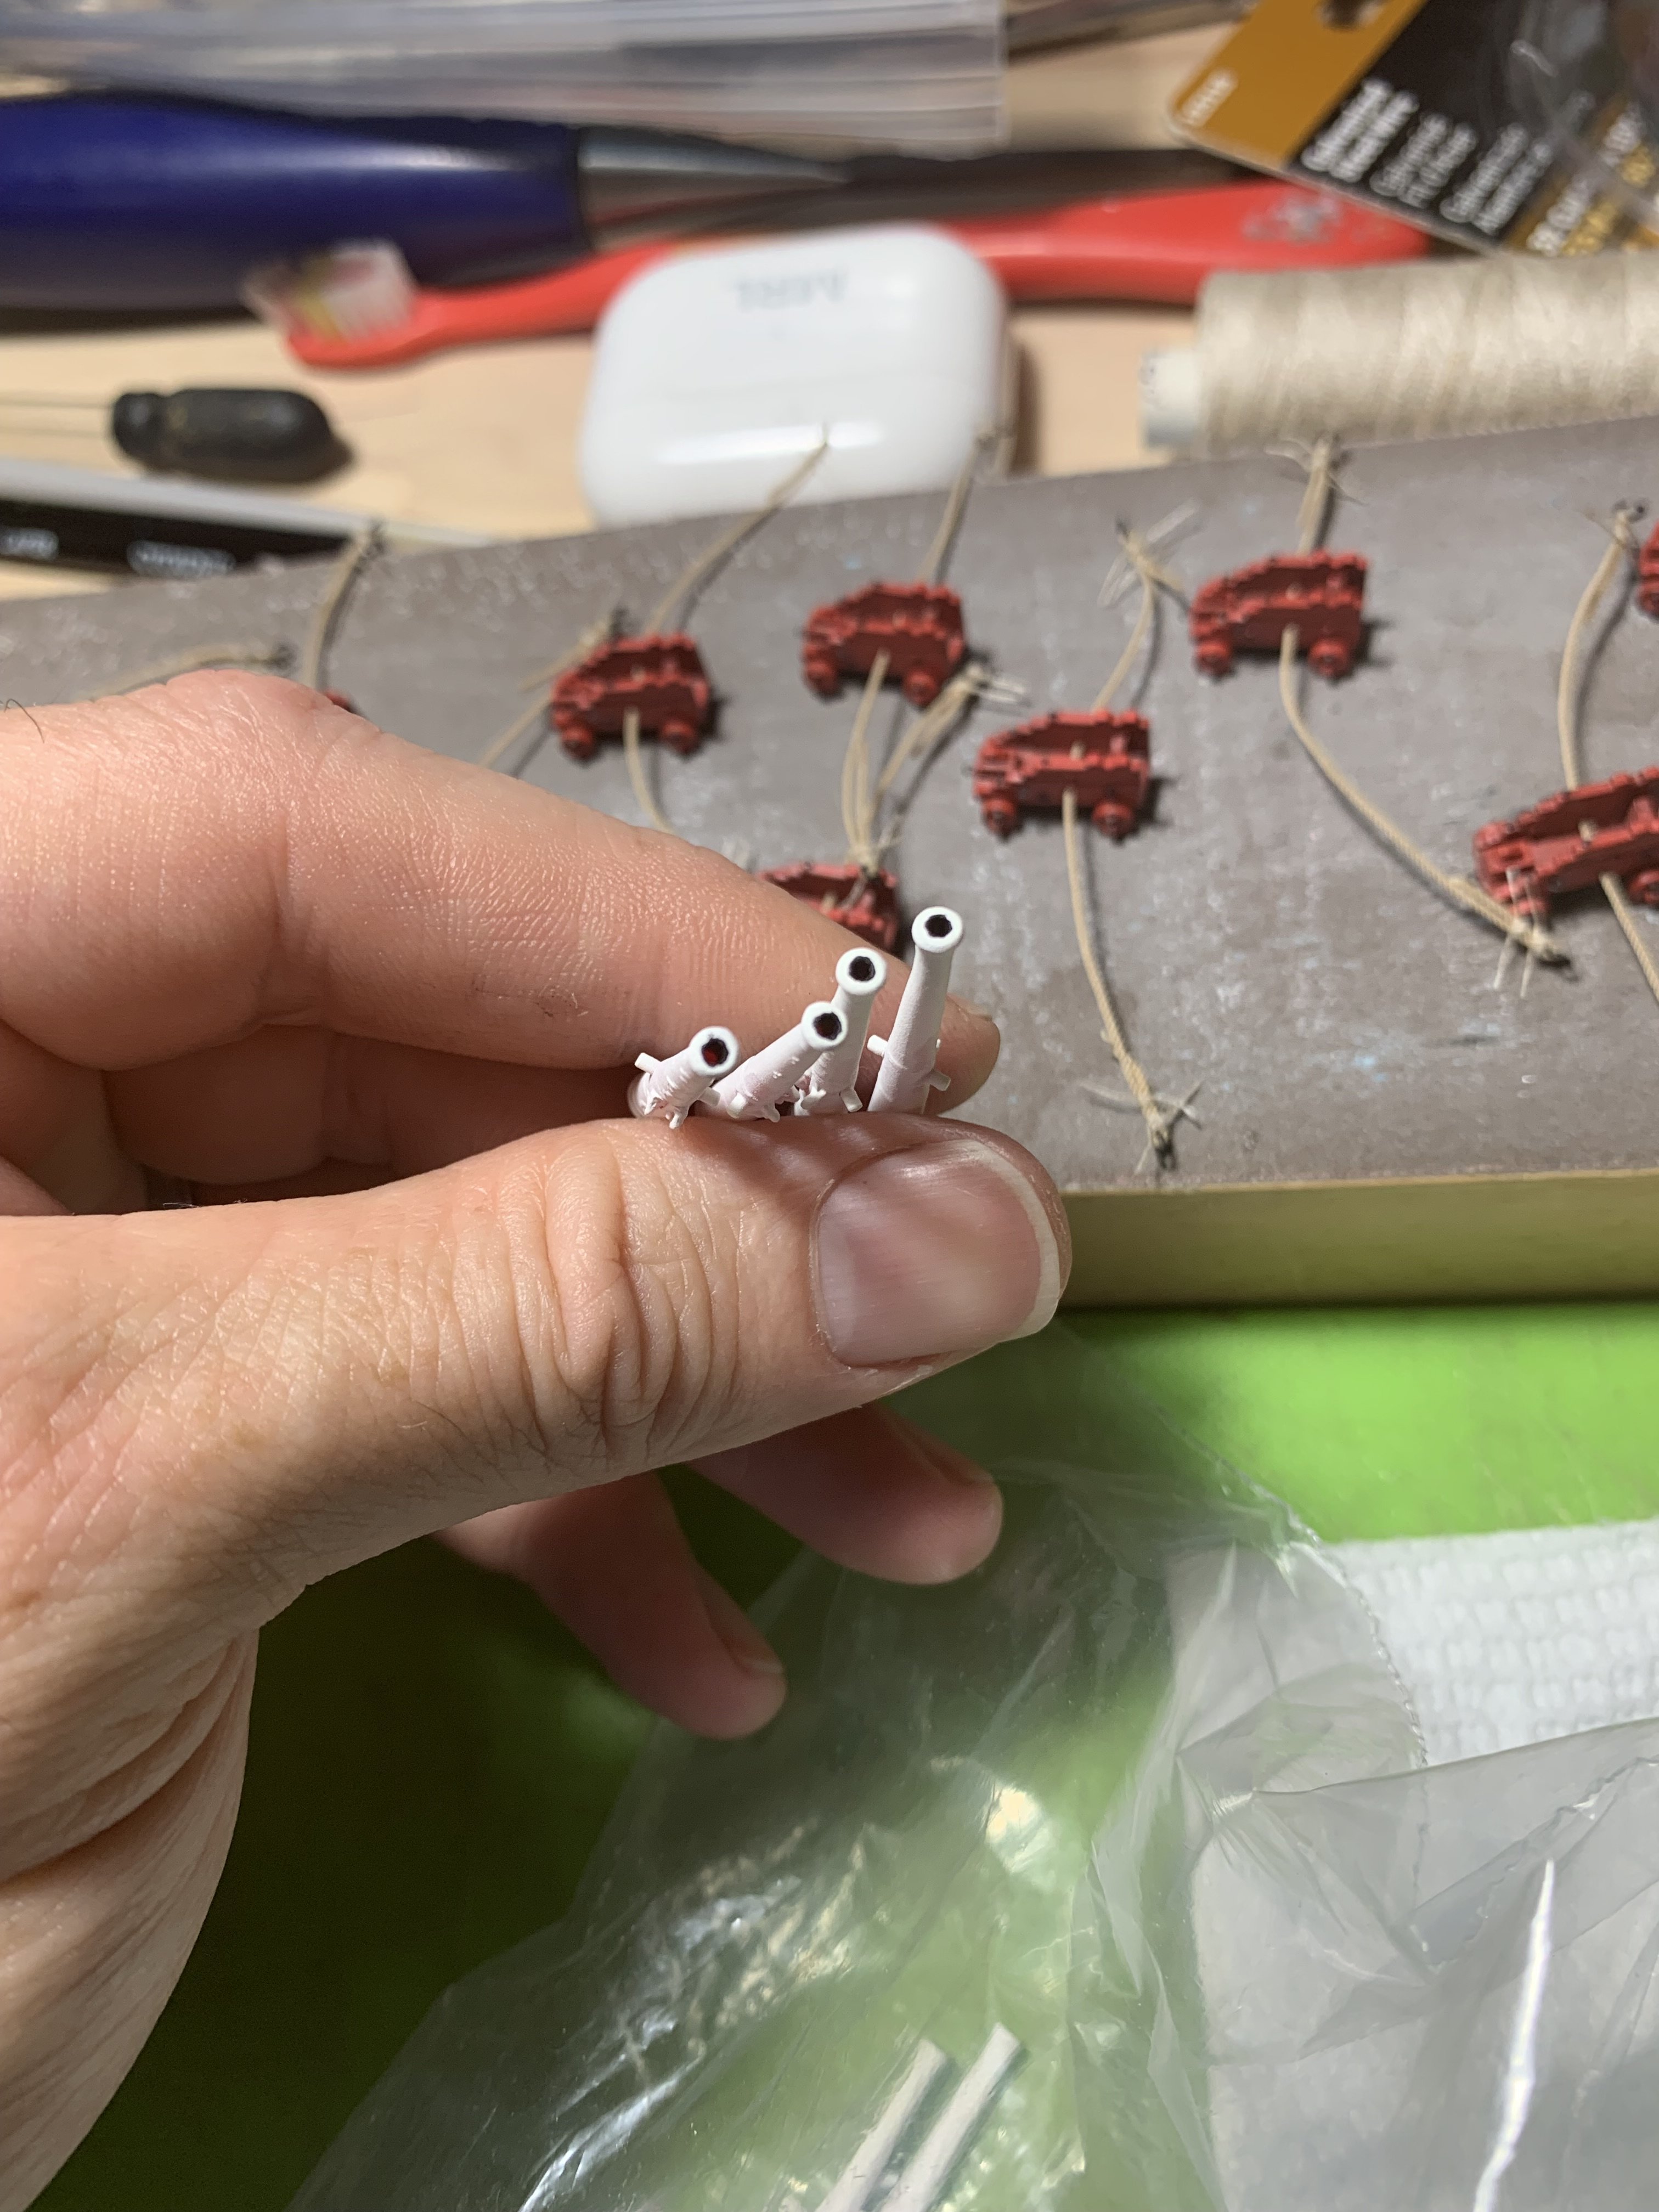
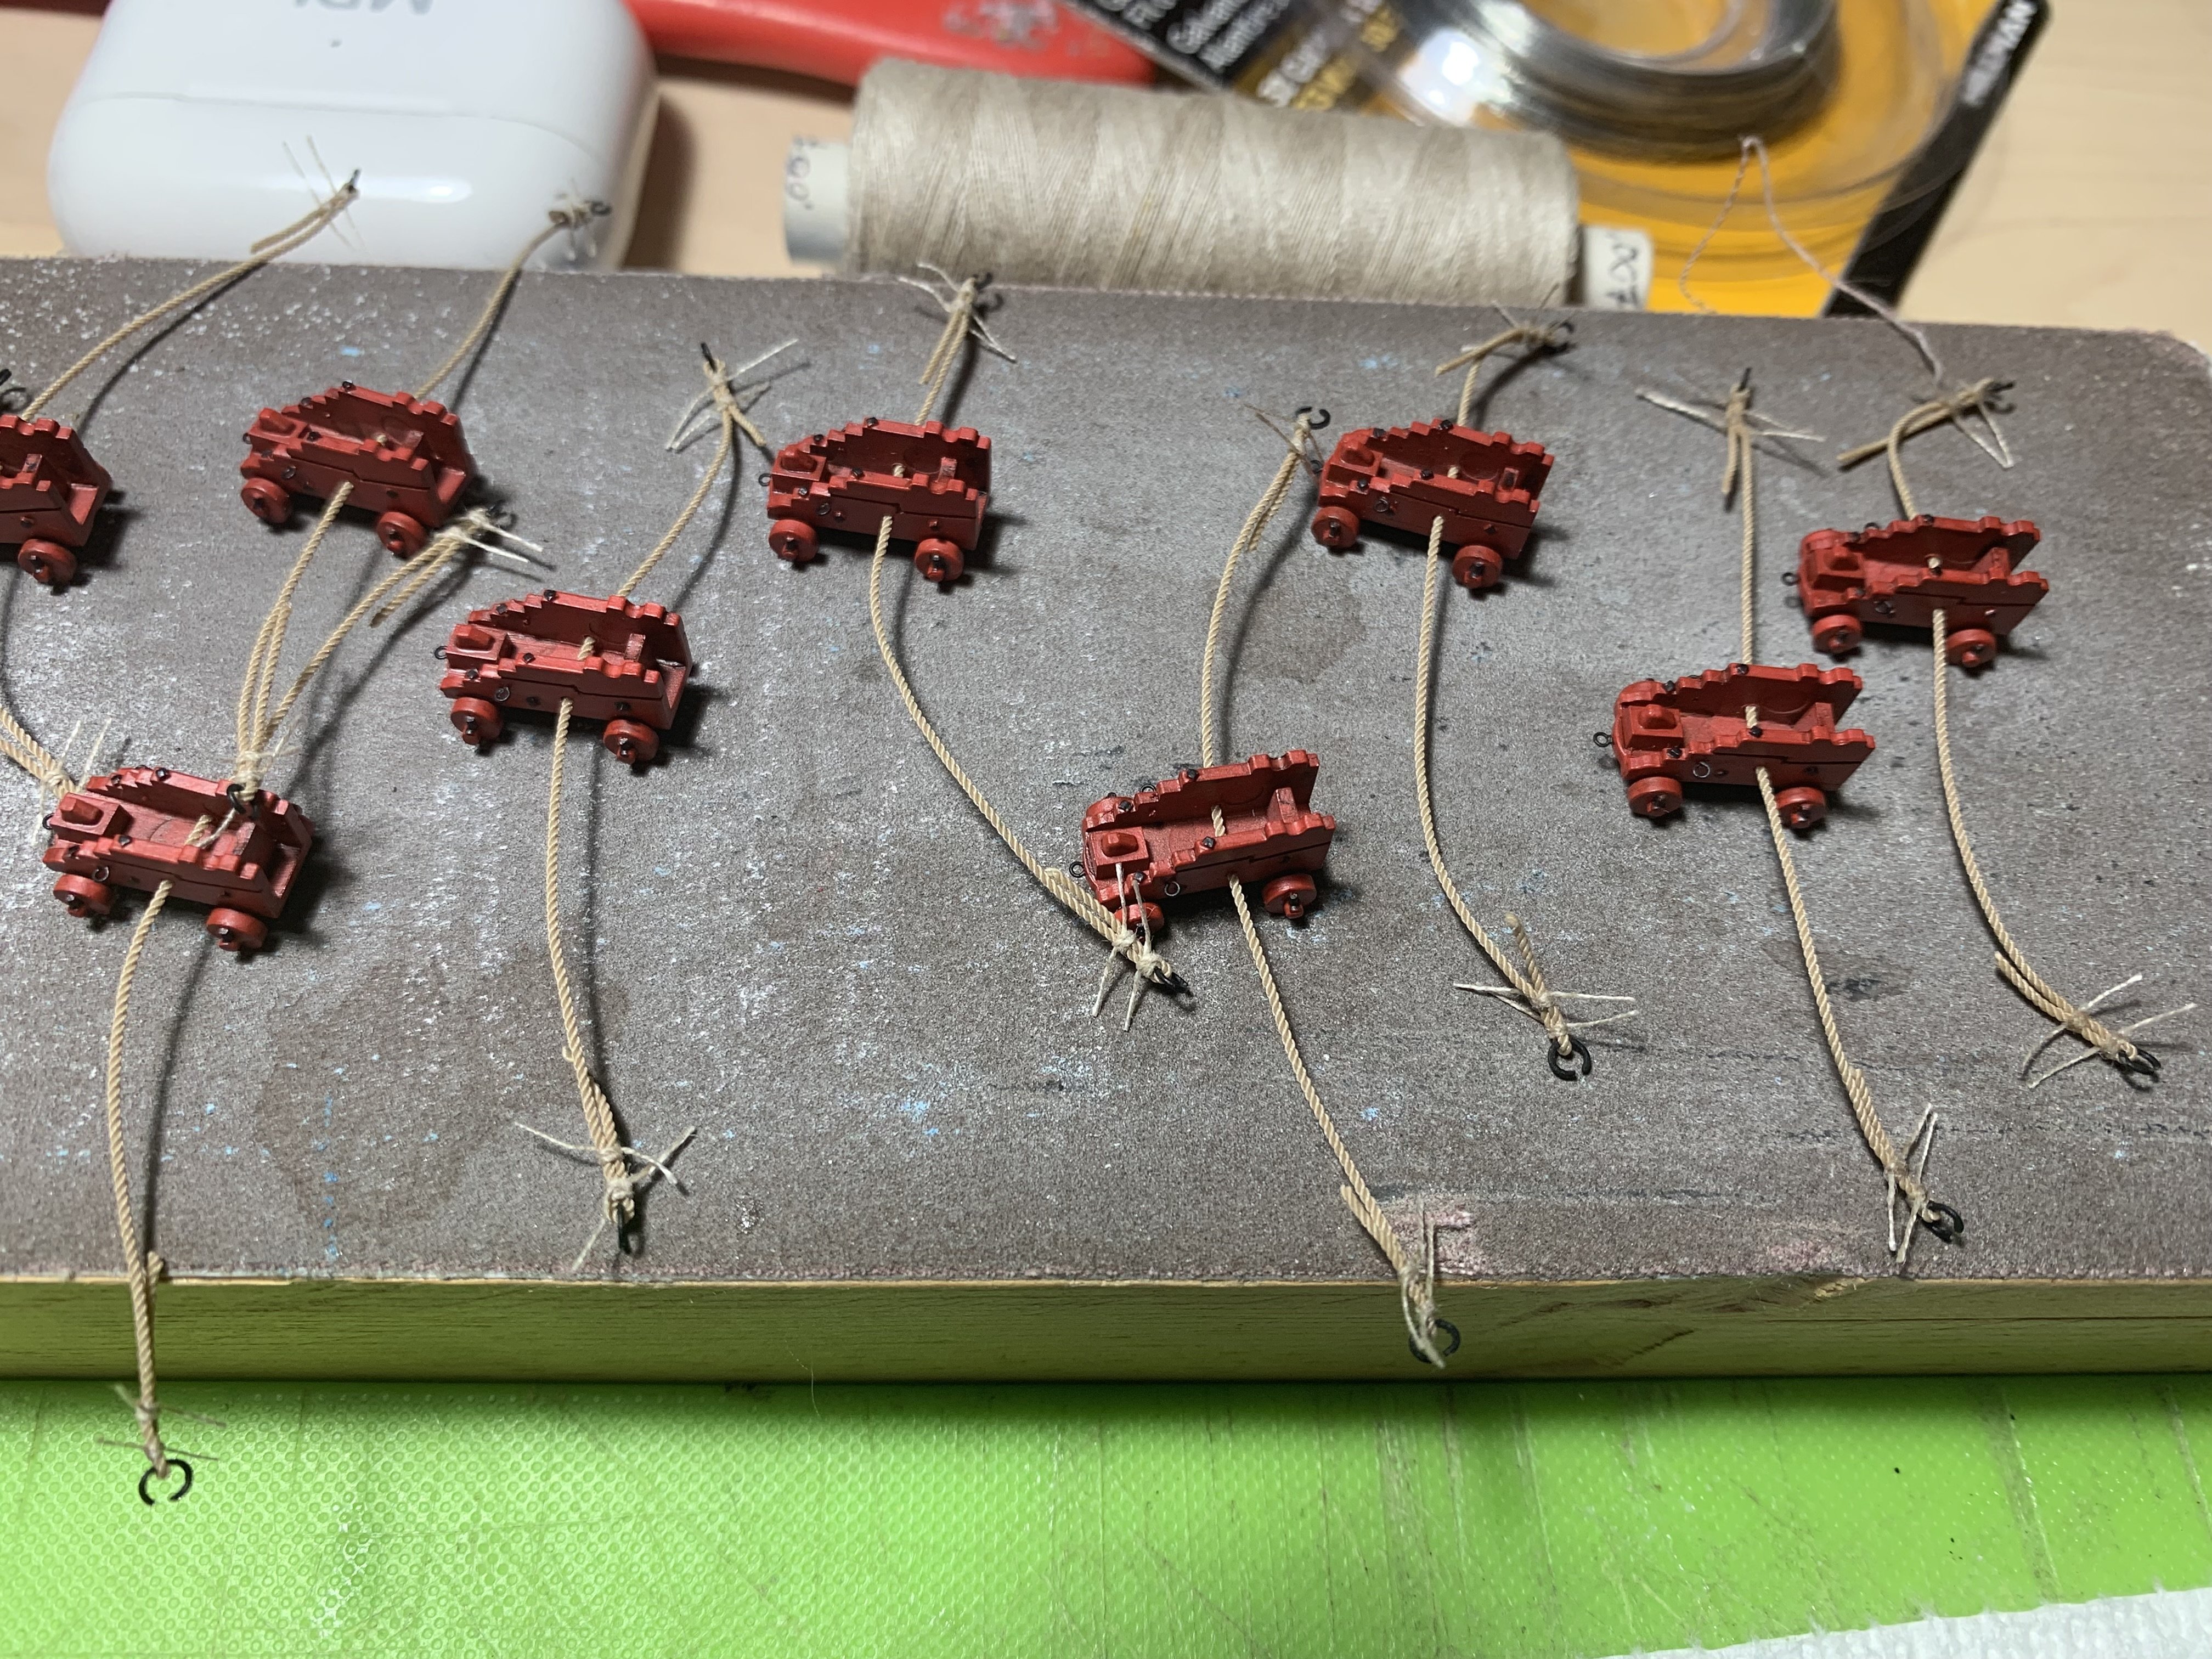
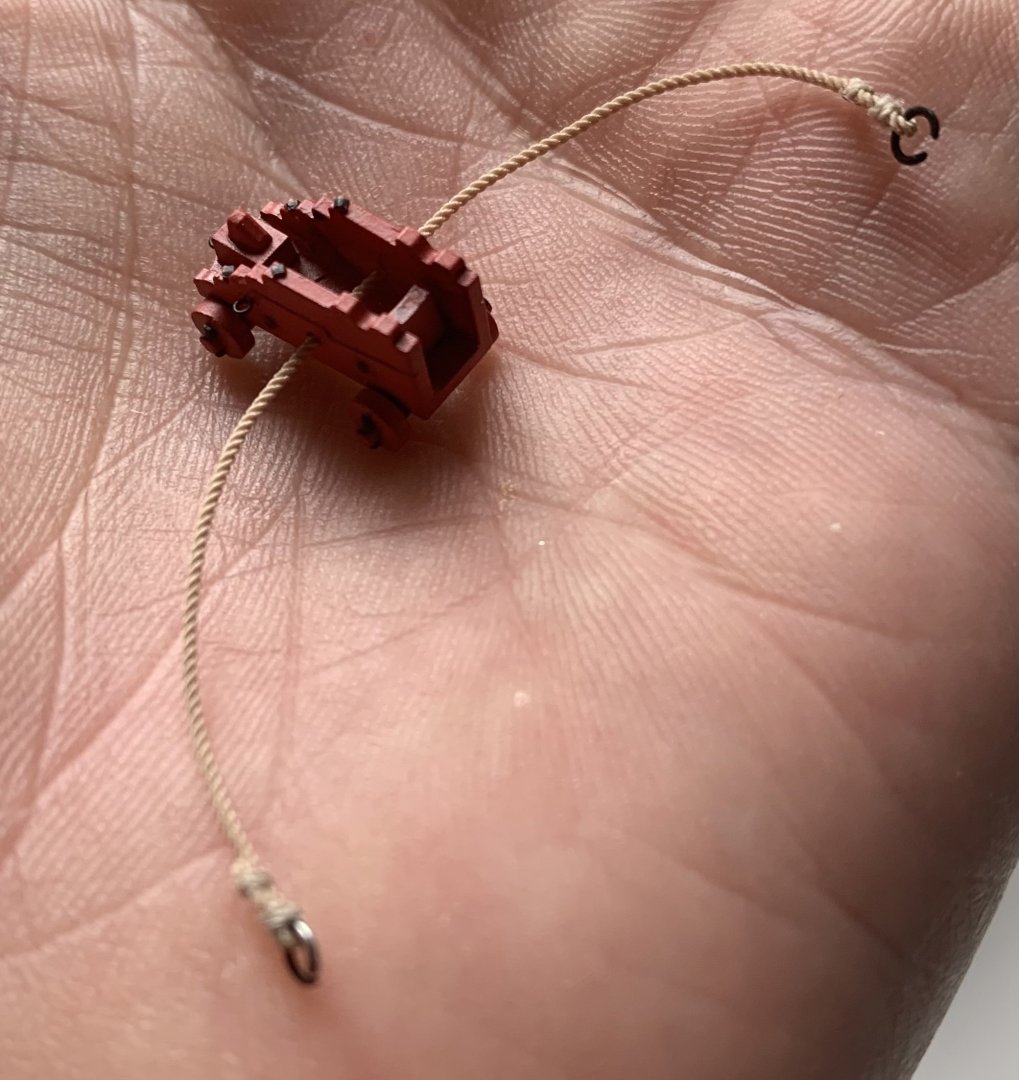
I have been absent for a good long time, but work does continue - albeit, at a snail’s pace. I have 99%, with the exception of the mizzen backstay stool that I have yet to make, completed the port side chains: With all the black touched up, and the thread links painted over with black acrylic, I am quite satisfied with the result: If you know to look for them, the knots on these long links can be found behind the deadeye strops, however, the theater convention of painting anything you don’t wish to draw attention to, flat-black, serves me well here. I could, perhaps, have extended the aft most backstay chain on the fore and main channels to the mid-way point of the adjacent gun port, but I am not going to change that now. The open port lid obscures these chains, anyway. A big thanks goes out to Eric Wiberg, who first sourced these plastic model-railroading round-headed bolts. They really worked perfectly in this application! Mizzen chains: I’ve begun the process of equipping the visible main deck carriages with their breaching ropes. I am using .6MM polyester line for these breaching ropes and .007 linen line for the seizings. I am aware that CA discolors polyester line, so I have secured the seizings with dilute Elmer’s white glue. I am taking a calculated risk that I can work around an earlier mistake without wasting all of the line and effort of making these seizings. Unfortunately, when I was detailing the inner bulwarks, I did not realize it was a mistake to glue-in the lower breaching rope eye-bolt. It is far easier to connect this eye bolt to your breaching rope split ring, off of the model, and then to glue the bolt to its bulwark location after the gun has been secured: So, the risk is that I can close these rings around the eye-bolts, often in tight spaces, without breaking anything or crushing the rings into an oval shape. This seemed to me a preferable approach to trying to break out the eye-bolts, which I recall being a snug fit: I will have to make a bunch of hooks and single/double block seizings for the haul-in tackles. I won’t, however, rig the haul-out tackles as I think they tend to make the decks look cluttered, and for the purposes of this diorama - SR making sail from Brest for Barfleur - I doubt these tackles would be rigged until just before engagement, as they present an encumbrance to sailors as they work the decks. I will soon paint the cannon barrels. Here, I’ve blacked-out the bores: I learned from the lower main deck guns not to paint the bronze and ver-de-gris wash until you are ready to mount in the carriages. The wash has an awful tendency to stick to itself. As always, thank you for your likes, comments and continued interest in this project. Little by little, we are getting there!


- 2,699 replies
-
- 23
-

-
-
- heller
- soleil royal
- (and 9 more)
-
Pure model-making magic, Gary! Brilliant stuff.
-
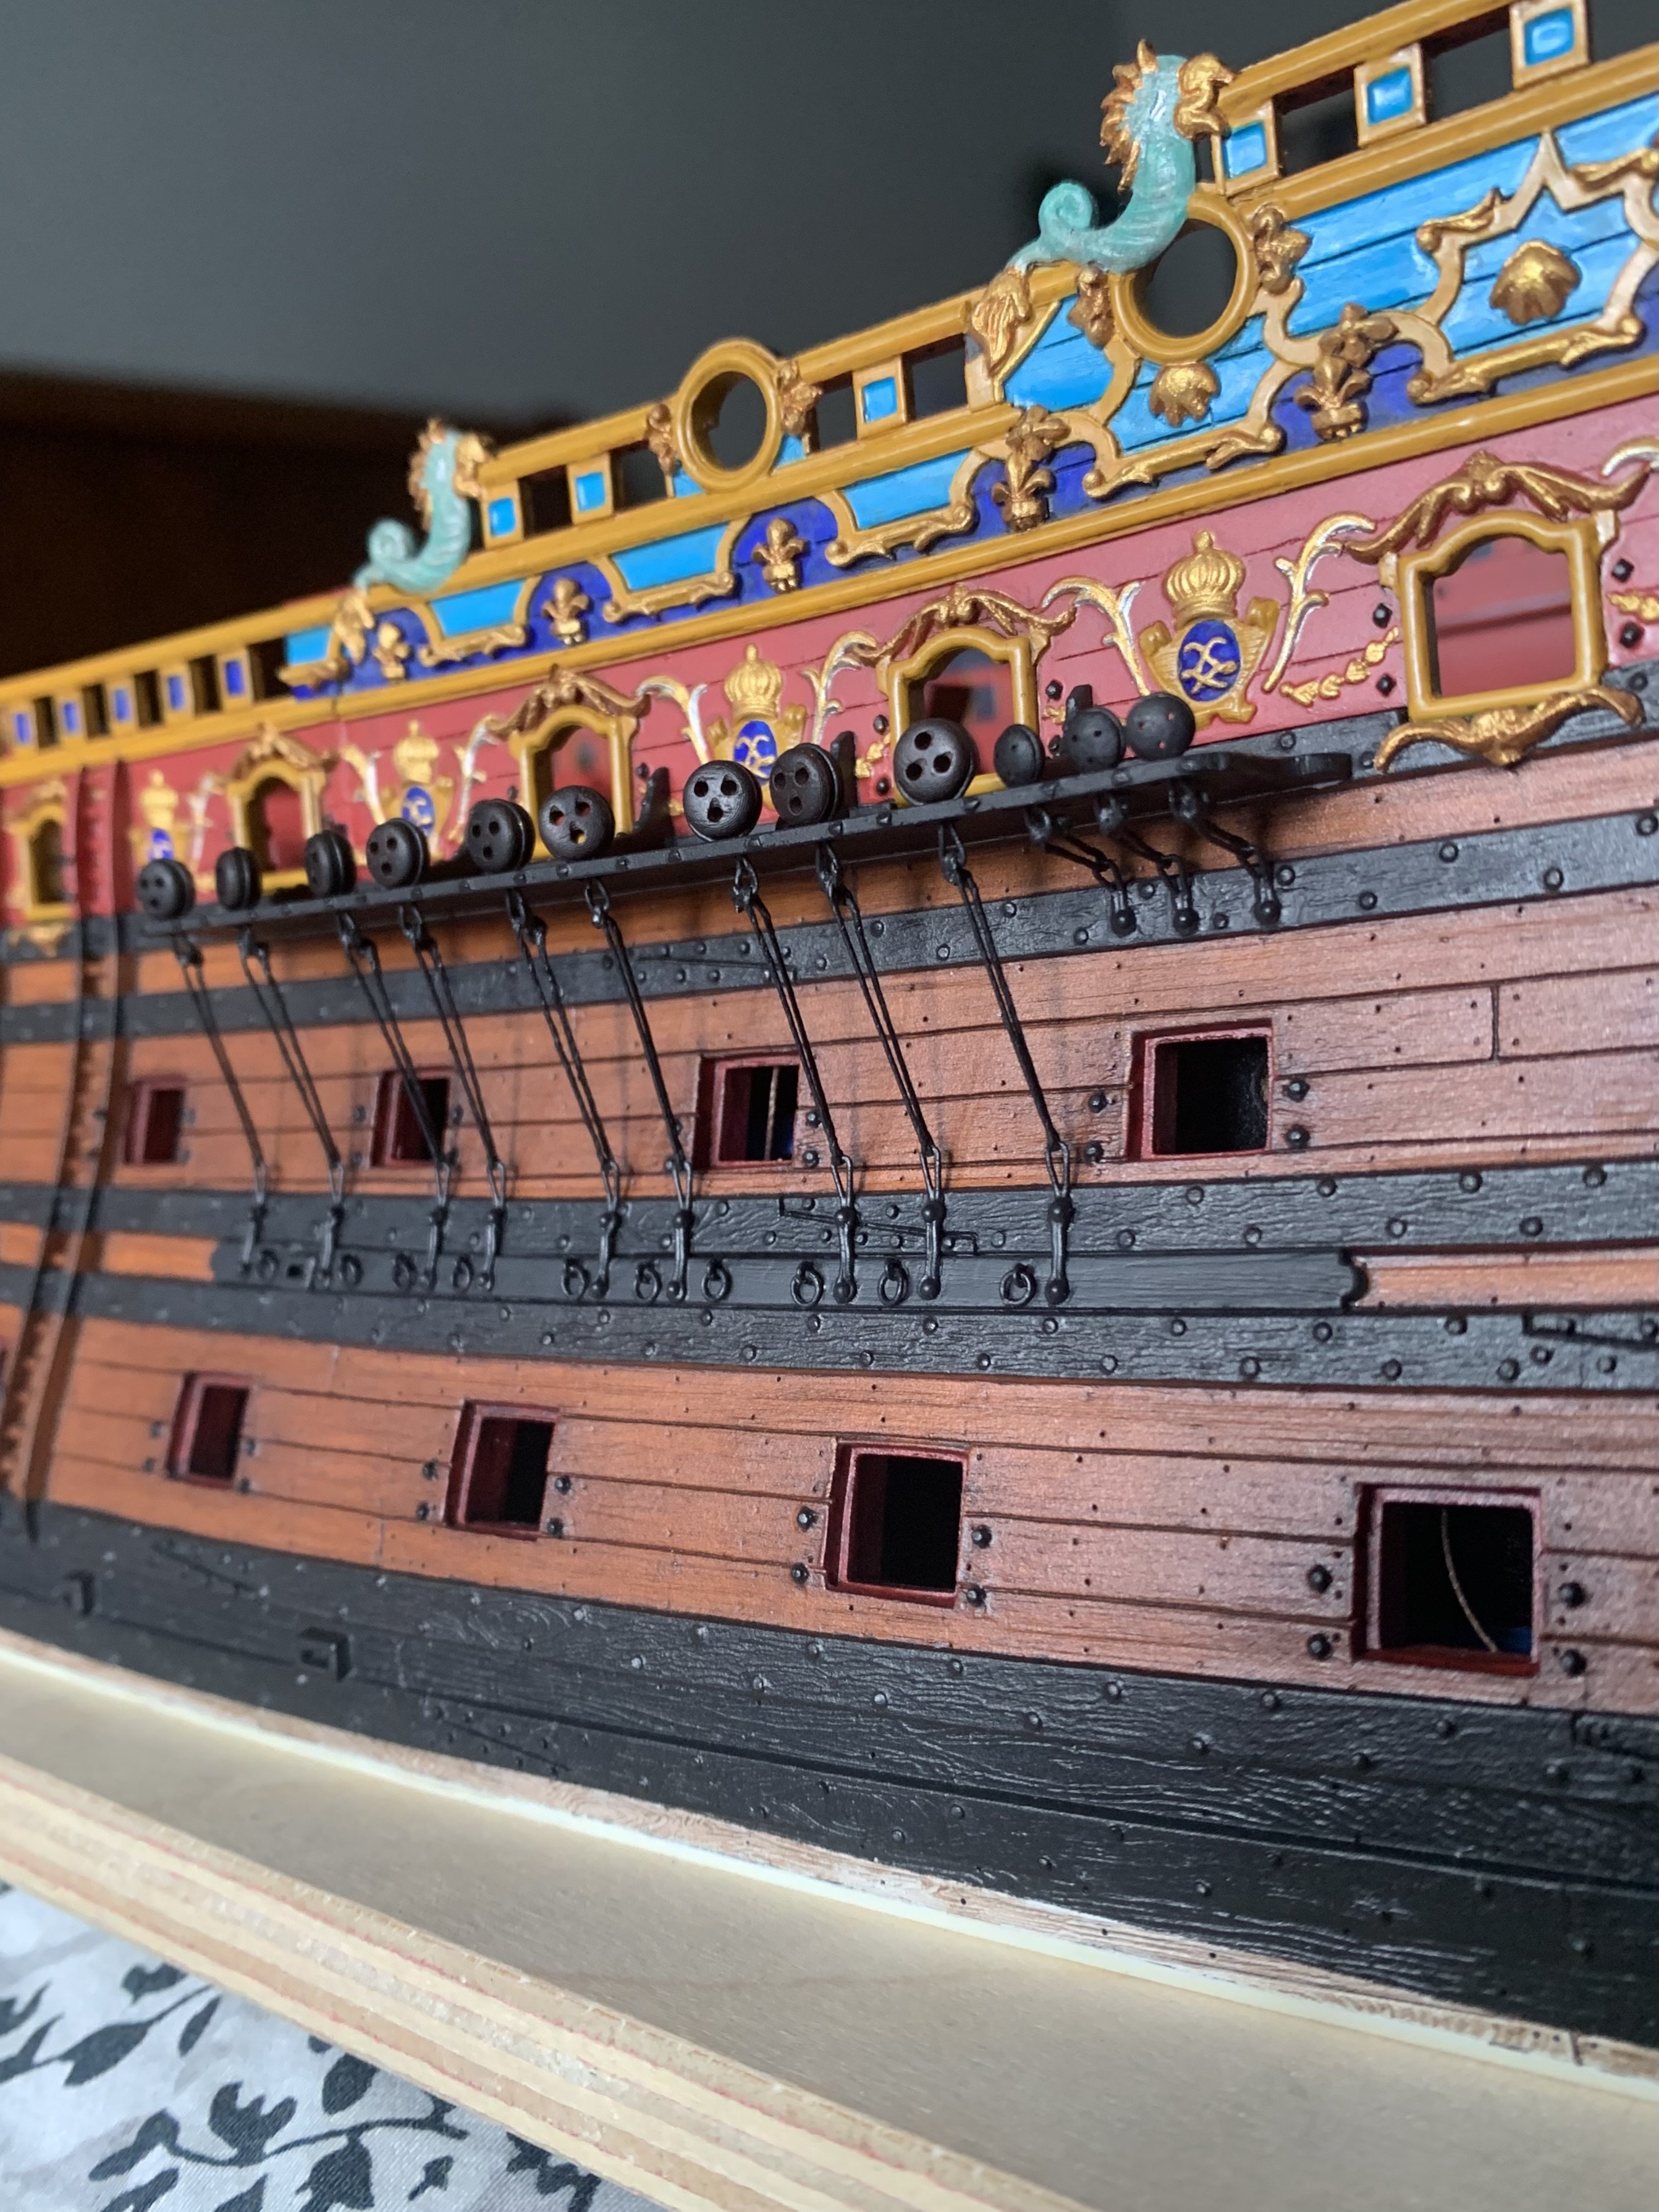
So, the best explanation I can offer as to why only some of the main and quarter deck ports have lids is that, during this early time period, the French used ports on guns that were fully housed by a deck above. So, the main deck guns beneath the f’ocsle and quarter decks would have lids. The guns in the waist were fully open to the elements, and watershed would happen through the scuppers. Likewise, the aft two QD guns are housed beneath the poop deck. What you are seeing along the top sheer rails is not a solid wooden frieze carving, but instead a series of “fighting cloths.” The poop, QD and f’ocsle rails, in preparation for battle, were blanketed in these cloths which helped give at least some cover to the seamen on deck, from the fusillade fire of opposing marines. On this Monamy painting of SR, you can see these cloths in royal blue. They are adorned with painted-on Fleur de Lis: Beneath these cloths are the conventional timber head railings you typically see. I have considered modeling these cloths on one side of my model, but I’m not sure I could do so convincingly well. Those four openings above the lowest tier of the quarter gallery would be the windows one typically finds in the upper tiers of the quarter gallery. In the absence of an elaborately architectural amortisement, it appears that La Reyne simply had these windows, framed in ornamental ginger-bread, set amidst a frieze of fleurs that decorated all of the upper bulwarks, above the main deck guns.

- 414 replies
-
- 2
-
-
- soleil royal
- Heller
- (and 1 more)
-
The minute scale of it all makes it super impressive.
- 324 replies
-
- 3
-
-
- Sovereign of the Seas
- Airfix
- (and 1 more)
-
I know Victor has “retired” from model-making, but I’ve a funny feeling he’ll find inspiration somewhere.
-
This is all master-class level work, Marsalv. I will try and remember to pick my jaw up from off the floor.
-
My thoughts, exactly.
-
I love your willingness to revisit and revise an earlier model, Schmidt. This is moving in a great new direction!
-
Really nice progress, Bill! I’ve had a lot to catch-up on. You were correct to paint the rubbing strakes black. This anchor lining would see plenty of hard use and was likely routinely re-painted. It is hard to tell from pictures, because the apparent sheen varies from one picture to the next, but I think a final coat of spray matte varnish would bring the sheen down in a pleasing way. That capstan makes little practical sense, where it is currently situated. What did they do on the replica?