Hubac's Historian
-
Posts
3,306 -
Joined
-
Last visited
Content Type
Profiles
Forums
Gallery
Events
Everything posted by Hubac's Historian
-
 Prieser makes figures in 1:100 scale, but they have to be heavily modified to look like 17th C. sailors. I thought the old Revell Spanish/English galleon kits came with figures in 1:96. Might be worth seeing if you can locate those on the market somewhere.
 -
For ease of consideration, Bill, consider the scale of SR to be 1:96, 1/8” to the foot. If the Hermione figures are 7/8”, or taller, they will not seem credible at all.
-
Yeah, I have to agree with Ian, here. Straight out of the box, the Heller Victory is a significant undertaking. I have a pressing from the mid-90’s. Plastic quality is high, and the hull does not seem to suffer from the same warping issues as with the Soleil Royal. There are a TON of parts to deal with, though. As others have said, the sky is the limit when it comes to modifying and adding to the kit. Doing a creditable job on this kit definitely requires some advanced skill and even more patience.
-
Just catching up, here - awesome work, as always. The stove looks really great! One question: after the flour/mortar application, is it even necessary to spray a final top-coat fixative, or will ambient humidity basically cement the flour in-place?
-
Excellent work all-around! That eagle carving is very nicely done and very small!
-
I agree you could go either way with this. Simpler may be better, though.
- 324 replies
-
- 2
-

-
- Sovereign of the Seas
- Airfix
- (and 1 more)
-
With your most recent comments in mind, Haiiaphnk, I do not think the French ever designed the ornamental programs of a pair or even a series of ships to follow a single conceptual idea. The ships were named individually, and their names reflected the multiple virtues of Louis XIV, while the capital ships like the Royal Louis and Soleil Royal were given ornamental programs that reflected the hegemony of Louis XIV’s reign. The common threads are virtue and dominance above all other nations. The ornamental programs of each vessel explored numerous stories from antiquity to express those ideas. As I have been reading more recently in Ms Pin’s dissertation, La Symbolique Sur le Vaisseau de Guerre Francaise, individual ornamental programs were not literal representations of the actual influence and might of the monarch, but rather projections of his own grandiose self-conception. Propaganda, in other words, with the intent of cowing the opposition.
-
Thank you Michael and Dan! I will continue to tinker with the chainplates. Eventually, I will arrive at something acceptable.
- 2,699 replies
-
- 2
-
-
- heller
- soleil royal
- (and 9 more)
-
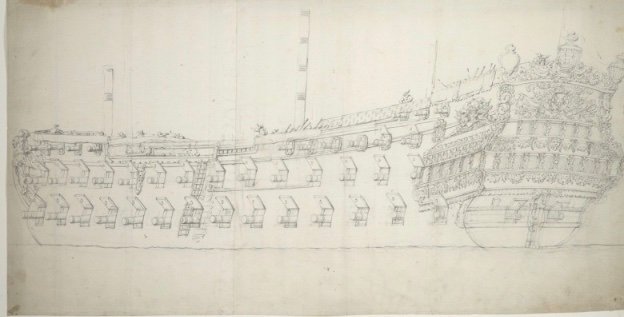
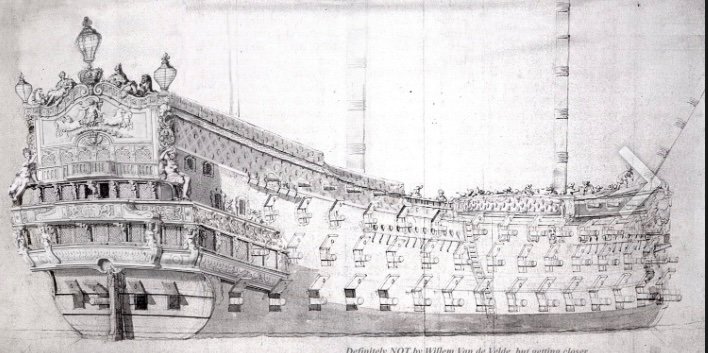
The one example of very close sister ships that comes to mind are La Superb, and L’Orgieullieux. The following is often captioned as La Superb, but it must actually be L’Orgieulliex because La Superb was not present in English waters in 1672 for the Van de Velde’s to draw her. It is said that these two ships were built to the same specs and that they were virtually identical, although the ornamental programs must have differed.
-
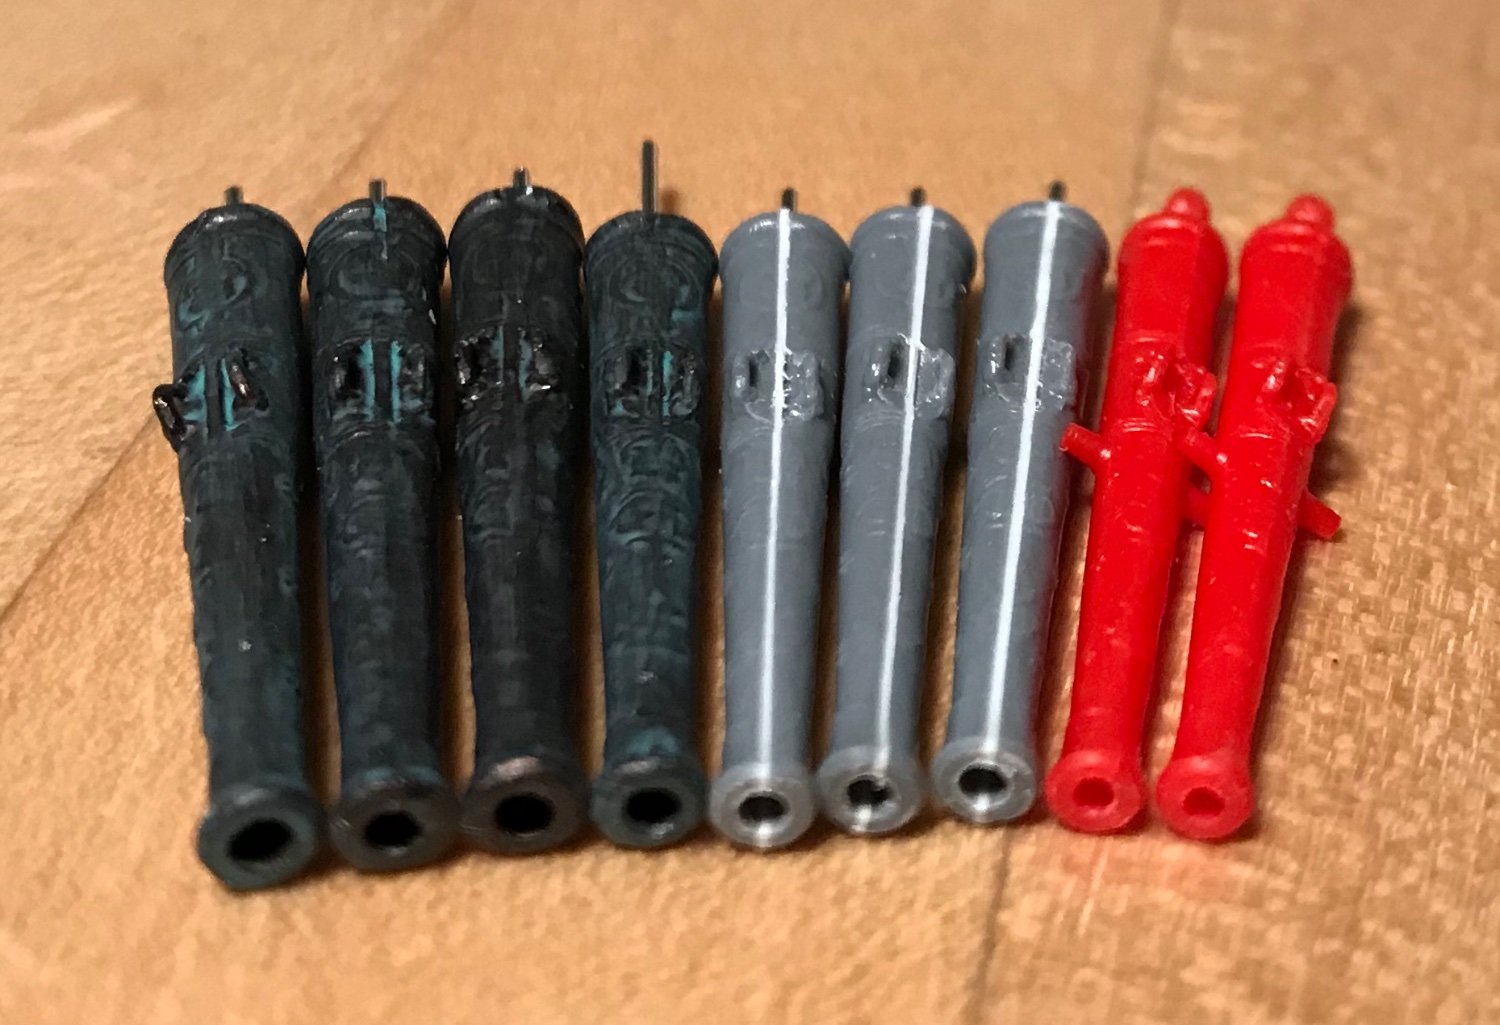
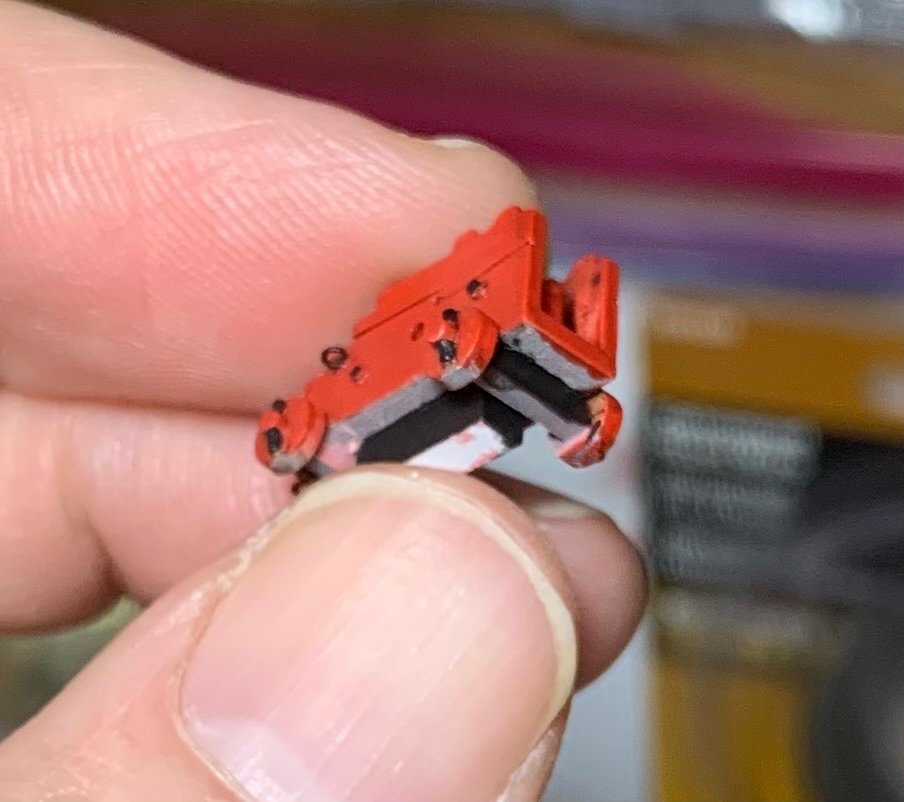
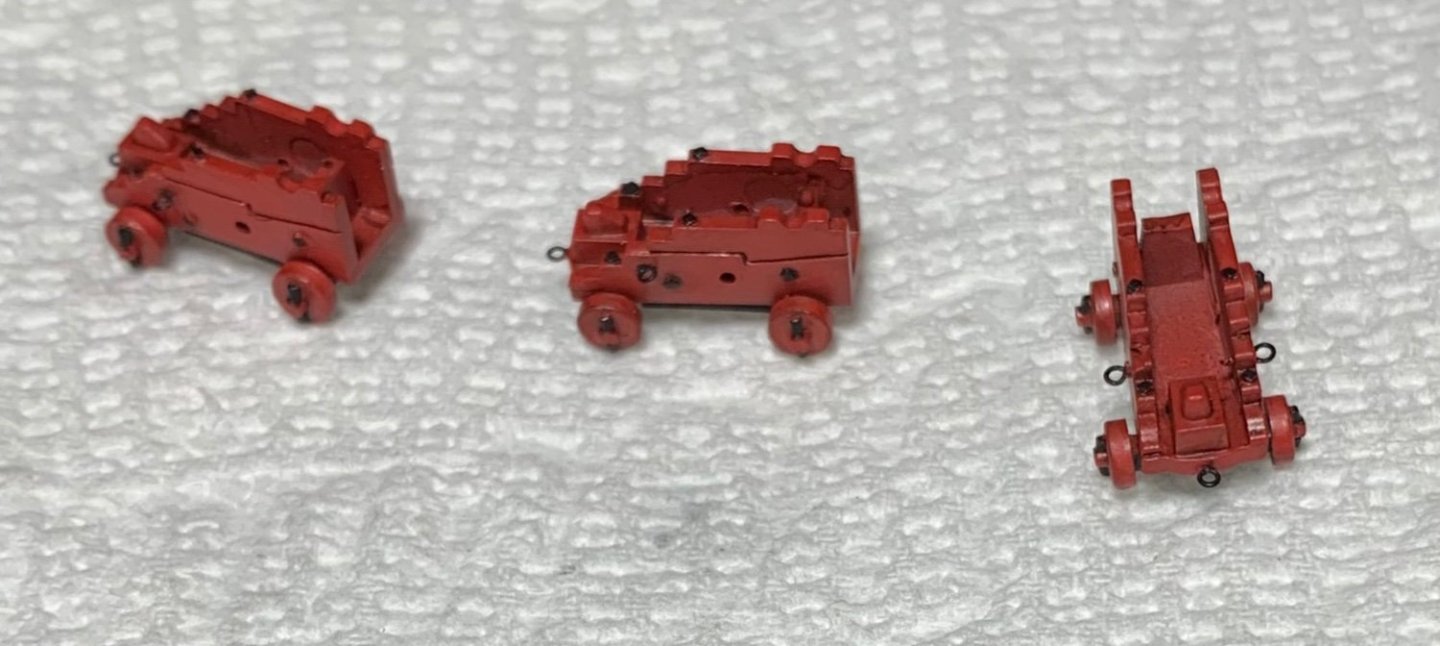
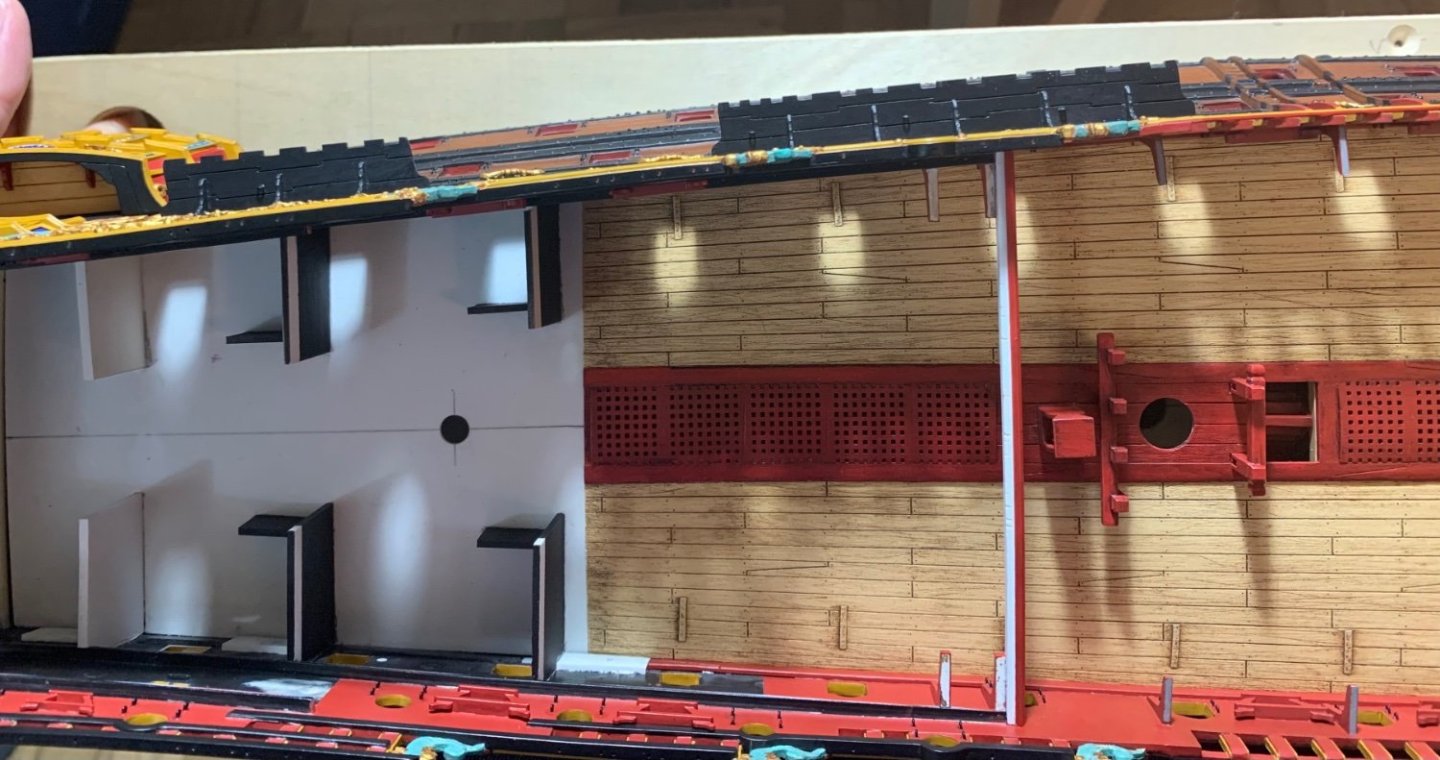
I’ve become somewhat stymied in my chain-making experiments, lately, as one of the tips of my Xuron PE snips snapped off, while cutting soft annealed wire (28 gauge). Maybe I’m using the wrong tool here, but should the tip really snap off after such relatively light use? Is there a better tool in the Xuron range for 1:96 chain making? Anyhow, that’s all on hold until I buy better/more appropriate tools. In the meantime, I just wanted to make some progress doing anything, so I finished detail painting the main deck gun carriages. I appreciate all reasonable advice to correct the implausible/impossible carriage trunnion mounts. After much hemming and hawing, during my phase of no progress, I have decided to let this one go in the interest of keeping things moving onward and upward. I am satisfied enough that I spread the trucks, and I will re-position the barrel trunnions themselves, so that the cascabels don’t overhang the back of the carriage to an unreasonable degree. Good enough for this go-around the May-Pole. I have blacked-out the truck axles and the glue blocks underneath all visible carriages. One other incorrect detail of my model that I would like to better understand the “why for,” is the rake of the channels. I have chosen to back-sweep the forward and aft edges of my channels: This just feels intuitively correct to me. To the contrary, though, all credible monographs show a slight forward-sweep to the fore and aft edges of the channels. What is the logic behind the design?
- 2,699 replies
-
- 19
-
-

-
- heller
- soleil royal
- (and 9 more)
-
You certainly have a loyal audience, but I feel like the broader MSW community is really missing out by not seeing the magical things that you do. You don’t strike me as one for self promotion, Michael, but MSW should have a featured builds page. I’m as guilty of it as anyone because I tend to stay within the late 16th into the 17th Century category, but I am frequently amazed at what I find when I do check-in on the 18th Century. Anyway, I love what you are doing here!
- 324 replies
-
- 4
-
-

-
- Sovereign of the Seas
- Airfix
- (and 1 more)
-
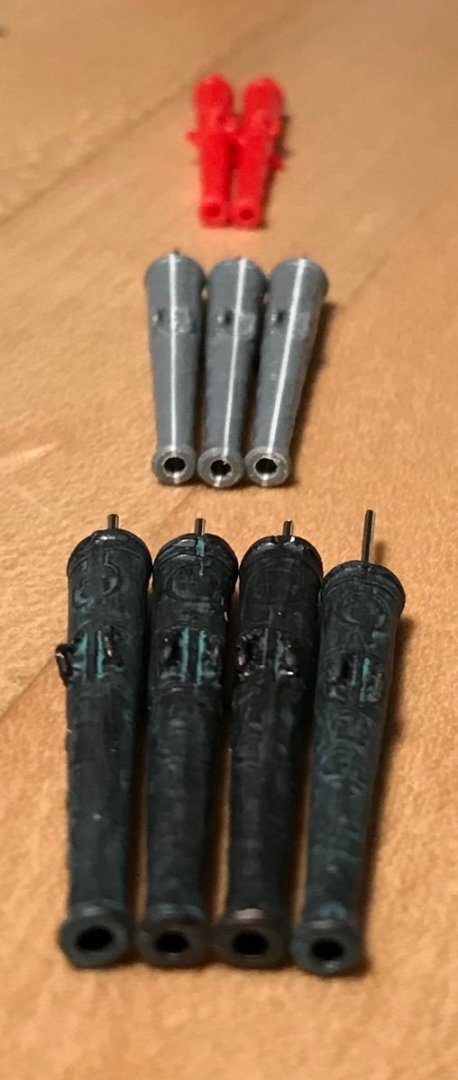
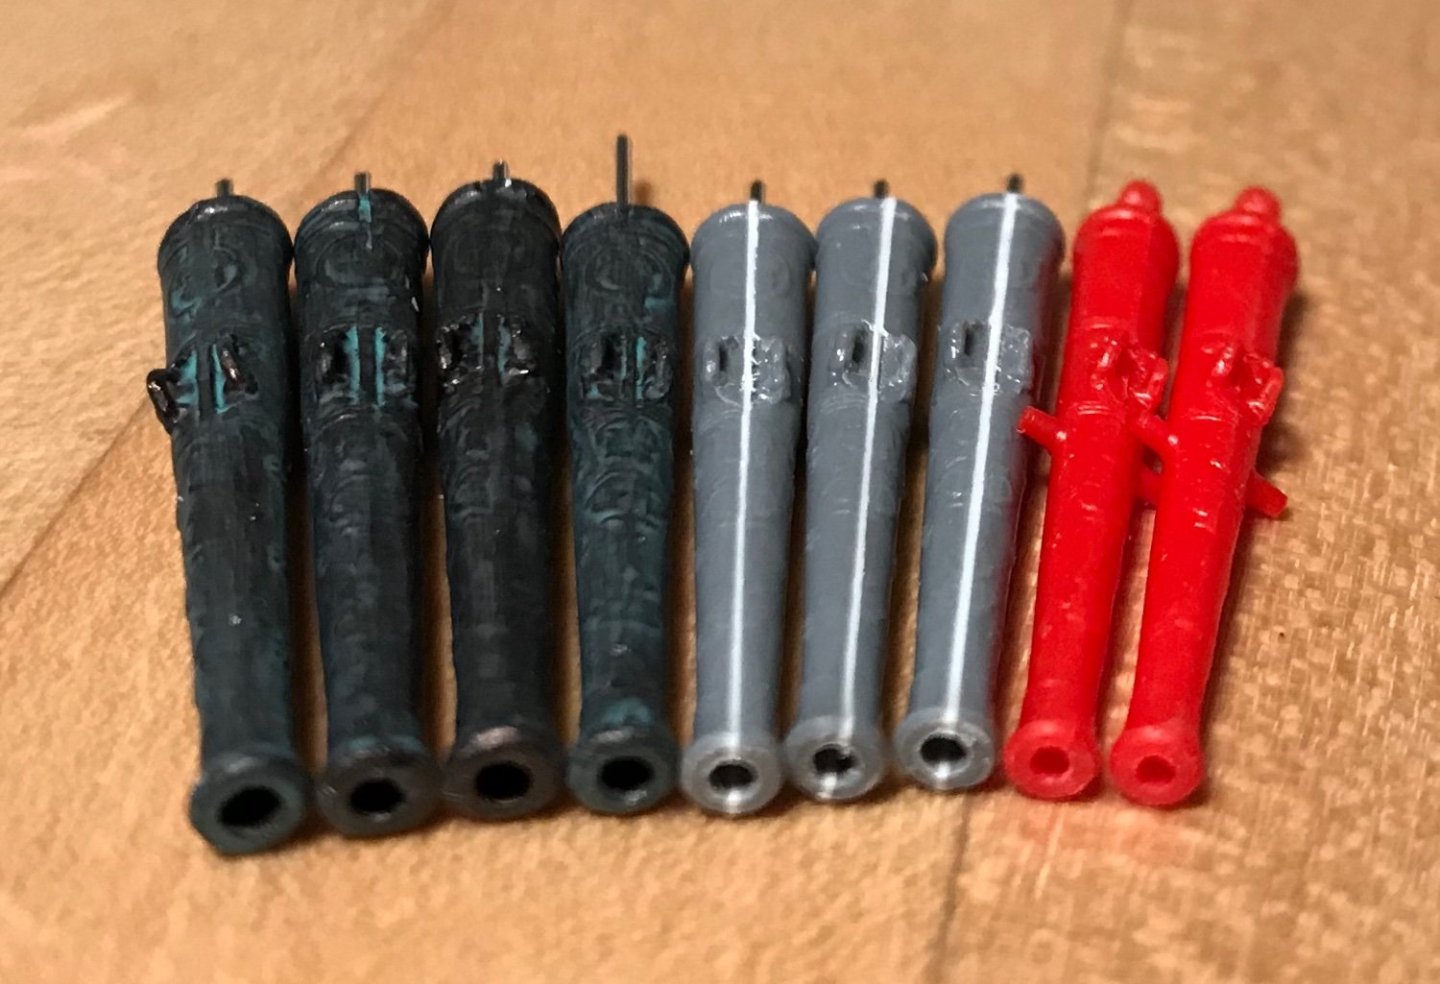
I will also mention that when I did my lower battery guns in a dark bronze with a ver-de-gris wash, those decorations pop very visibly: Looking through my file pics to find the guns, I saw John Ott’s brilliant Photoshop (or some similar program) adaptation of SR’s sister ship La Reyne into Soleil Royal. This makes me happy every time I see it.
- 419 replies
-
- 3
-
-
- soleil royal
- Heller
- (and 1 more)
-
Correct you are - breaching ropes through the carriages.
- 419 replies
-
- 2
-
-
- soleil royal
- Heller
- (and 1 more)
-
You might find that the stock lower battery 36-pounders look more to scale on the upper main deck battery, if you wish to take advantage of the nicely detailed Heller barrels.
- 419 replies
-
- 2
-
-
- soleil royal
- Heller
- (and 1 more)
-
I agree with what Ian is saying here. Generally, I find that it is better to go a little under scale than over scale - especially when it comes to hugely repetitive elements like the gunport lids and their hardware. It is useful to consider, not just how one lid looks in isolation, but how an entire broadside will look.
- 419 replies
-
- 1
-
-
- soleil royal
- Heller
- (and 1 more)
-
There is this related paper from 2015, from Ms Theron, which I suspect covers much of the same ground: https://www.academia.edu/41636304/La_bonne_fabrique_et_le_superbe_ornement_Pierre_Puget_s_ship_decoration
-
Aha - okay! I will also endeavor to track this down. This is something new. I thought, perhaps, that you were referencing the Portanier thesis, which had some good information in it, but which I did not find to be especially enlightening.
-
Hello Late to Soleil! Are you mapping out an SR conversion project of your own?
- 106 replies
-
- 1
-
-
- Soleil Royal
- Ship-of-the-line
- (and 2 more)
-
P.S. I have also found John Ott’s log to be a treasure-trove of accurate historic perspective, and modeling technique.
- 419 replies
-
- 1
-
-
- soleil royal
- Heller
- (and 1 more)
-
Thank you, Eric! As you are discovering now, much of plastic scratch-building is not as difficult as it may initially seem. When I started my project 7 years ago, I had done very little kit modification. Before I knew it, it had taken on a life all its own.
- 419 replies
-
- 1
-
-
- soleil royal
- Heller
- (and 1 more)
-
You’re not going to like what I’m about to say Bill, and of course this is a matter of opinion, but I think your model will be better served if you show your lower courses fully set. The topsails, t’gallants, etc all look very good, but the material you are using for the sails is too heavy, in my opinion, to show a sail in its middle stages of being either set or furled.
-
I just love a good reclamation project! Hi Eric, you are off to a great start here, and I love what you are doing with the upgrades and modifications. I do have to say that I tend to agree that the skids/fenders are a little too deep. Heller markets the kit as 1:100, but for my purposes I build to 1:96, as 1/8" to the foot is just an easy dimension to translate to scale. Personally, I would sand the skids a little closer to the hull tumblehome, and I would also round their bottom ends to a nice soft return on the lower main wale. I look forward to watching your progress. All the best, Marc
- 419 replies
-
- 2
-
-
- soleil royal
- Heller
- (and 1 more)
-
Can I ask you, Empathry, who the author of this thesis is?