Check out our new MSW Sponsor Innocraftsman
×


rwiederrich
-
Posts
5,504 -
Joined
-
Last visited
Content Type
Profiles
Forums
Gallery
Events
Everything posted by rwiederrich
-
Not sure if you discussed this earlier Nils..but if you are going to cast the boats..are you casting them hull and cover as one? A split mold? If so..I have lots of experience in this..being a certified dental laboratory tech(In my past life). Any questions just let me know...... Rob
- 2,625 replies
-
- 5
-

-
- kaiser wilhelm der grosse
- passenger steamer
- (and 1 more)
-
A man after my own heart. My very reason as well... I am captivated...and Bruce's Lightning is among the best representations I have the pleasure of enjoying. Rob
-
OH yes..you *clean as you go*. Your skill is second to none and the results have no equal. I may have missed this in an earlier post..but, how long have you been at this build? Rob
-
Albert..I see no mess...no shavings...no evidence of a model shipwright. How do you produce such impeccable results without the expected mess? Rob
-
MONTAÑES by Amalio
rwiederrich replied to Amalio's topic in - Build logs for subjects built 1751 - 1800
One rarely sees the level of precision that you have exhibited here in this build....very impressive. Rob -
Unfortunately I do not...but if you look at it this way.......once the tape tarp is made..you then glue small eyelets to each canvas strap...then use these to pass line through. At this scale..you could even simply glue the ropes to the end of the straps...paint the joint brown or black and then tie off the rope leads to the opposing rope lead. Not much tension is applied to the canvas strap because it is tape and simply laying the rope under the boat hull with mild tension works. The idea looks similar to your own example...but the ropes do not pass through the straps and the tarp looks and fits more like real tarps. Sorry about the lack of pictures, but I hope you see the process I'm trying to describe. Rob
- 2,625 replies
-
- 4
-
-
- kaiser wilhelm der grosse
- passenger steamer
- (and 1 more)
-
Nils...I pray my suggestion was not accepted as a criticism of your example. You are doing magnificent as usual. What I did on my version is to glue rope to the ends of each canvas reef point(Not run it through) then tie them off with the opposing line. One example was to glue wore loops to the canvas through which the line passed. Many ways to skin this cat...you'll find what works best for you. I just suggested the tape because of ease of use and its similar look as the real thing. Good luck. Rob
- 2,625 replies
-
- 4
-
-
- kaiser wilhelm der grosse
- passenger steamer
- (and 1 more)
-
Nils...good start...I like where you are going with this. However, I may suggest a thinner material as has been also suggested. Personally I used double wide regular tan masking tape. I would take the metal one you made and transfer it to the tape and cut one out and try that. It even has a texture that mimics canvas and when painted it is quite convincing.....big plus, it contours to the boat well......plus you can rub the edges that follow along the ribbed boat edge and it looks very good. If you can get a molding kit for cake making and fondant work..they work well as burnisher for this type of work. Good luck my friend. Rob
- 2,625 replies
-
- 3
-
-
- kaiser wilhelm der grosse
- passenger steamer
- (and 1 more)
-
Great work.....! It almost appears like you made 2 curved plate brackets..because the space required for the bend around the *A* frame and the location of the mounting holes does not appear to match from the original bracket you made and showed. The buff wheel brushed one doesn't appear to have long enough wings to wrap around the wood and then strap to the side based on the image of the finished un-mounted bracket. I could be wrong but it appears this way from your images. Regardless of my observations(Or what I think I observe)...your work is impeccable. Rob
-
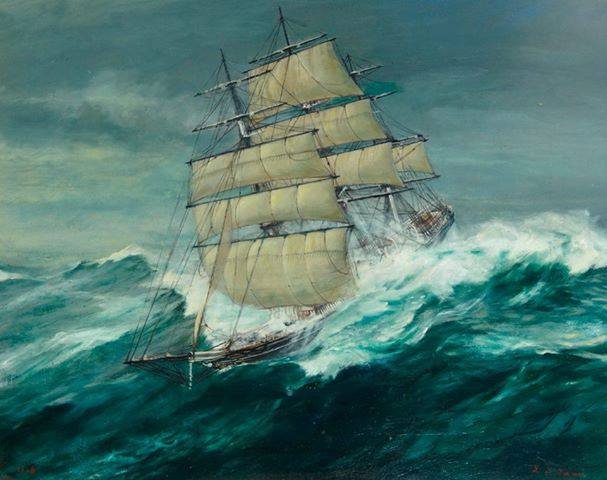
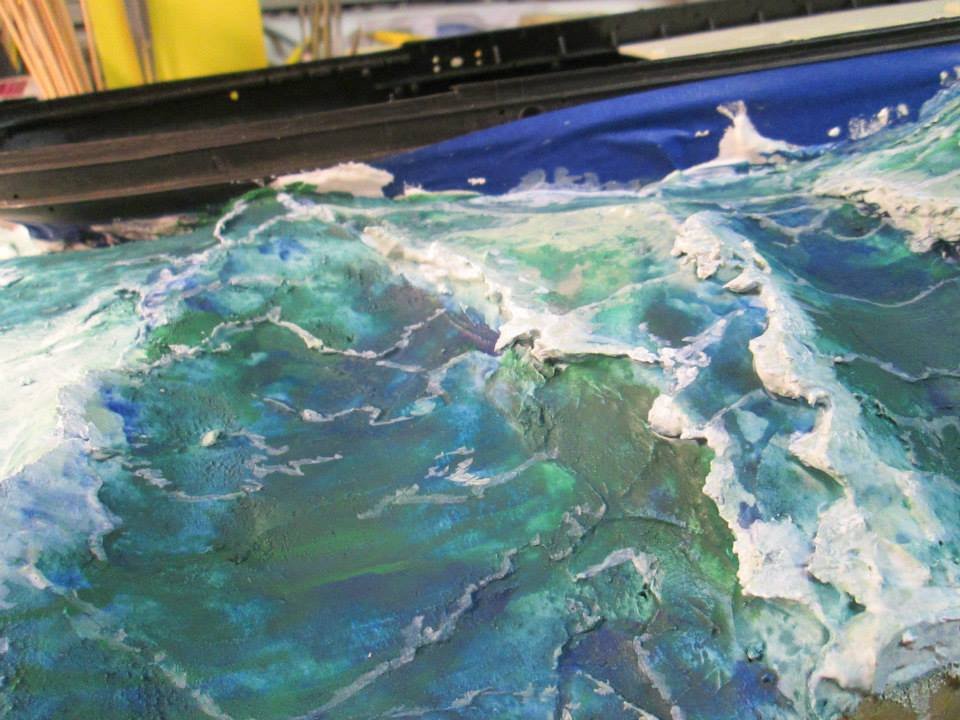
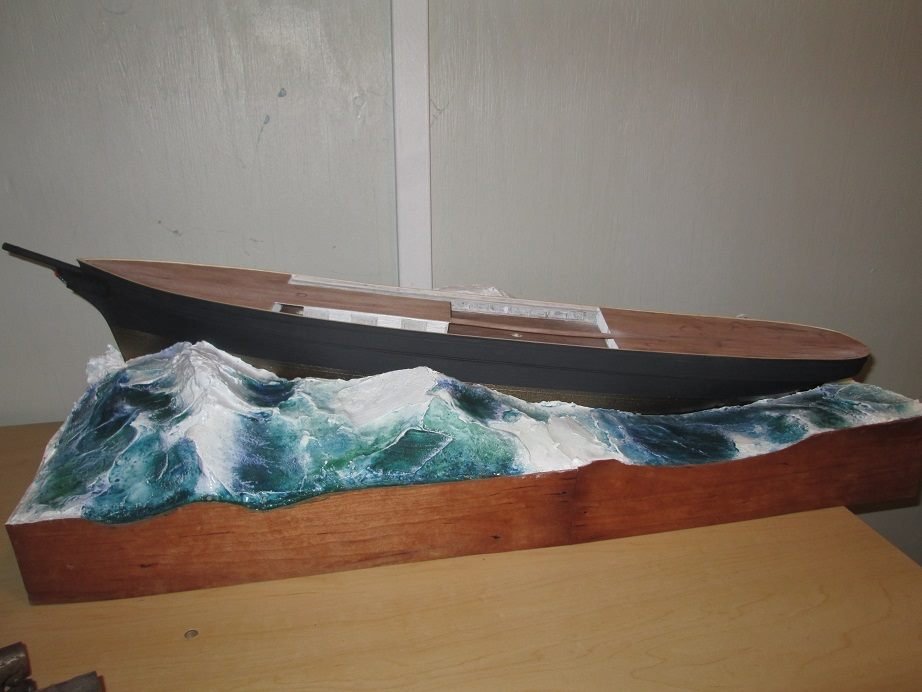
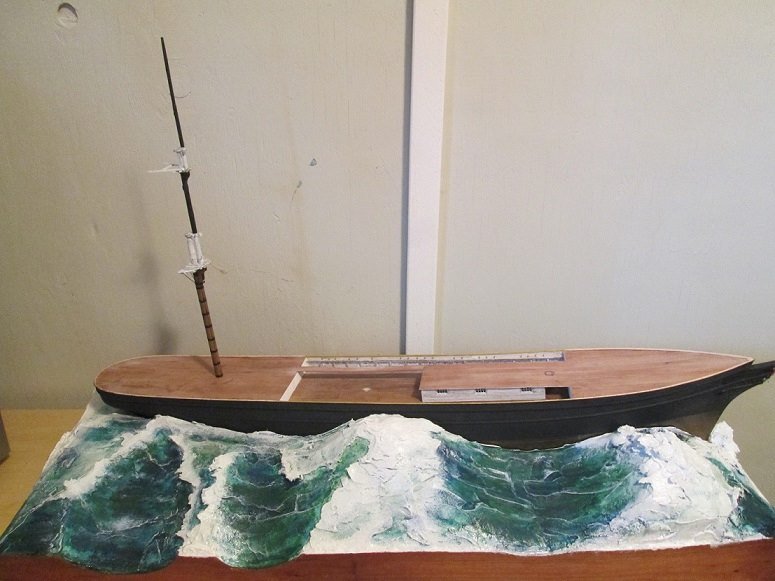
I think I posted this before, but, I wanted to put the Donald McKay in big water..but not so big she could not be displayed. I used this painting of the Cutty Sark as an example...and plenty of film of ships traversing big water. I simply placed the hull in a wooden box and filled it full of expanding foam. First I positioned it..then I cut the foam to suite the look and I then covered that with fast set dental plaster. I then carved the waves and created the final look. Then came the real trick...painting the waves to mimic the translucency of deep green water. I then capped off the white caps with extreme white. I detailed the waves with the tell tell signs of foam and exaggerations one would expect from active moving ocean water. Here are some images. The closeup was taken before the final white and gloss was added(Note the tape around the hull to prevent it from being captured by the plaster. Rob
-
Thanks Gentlemen. Since there are only a few clipper plans on the market and those are numerous and copiously built...I decided I wanted to build several Donald McKay clippers from scratch from the builders models and period photographic evidence. The open ocean diorama is the Donald McKay..coming out of the trough of a huge wave. I hope to get back to the Glory very soon....too many family issues as of late. Rob
-
Beautiful work.....everything looks very nice. Rob
- 1,348 replies
-
- 1
-
-
- constitution
- model shipways
- (and 1 more)
-
This is an example of smaller less detailed and slightly out of scale version(NOT Popeyes doing). The kits at this level tend to(in favor of simplicity in construction) be less concerned with accuracy and scale then larger more expensive versions. In light of the product and the hands it finds itself in...I think it is being built very well and is clean and exemplary. Popeye's doing a super job. Rob
- 453 replies
-
- 8
-
-
- thermopylae
- sergal
- (and 1 more)
-
It always amazes me that even these large modern(Kinda) ships still had flying bridges.....out in the weather. Rob
- 2,625 replies
-
- 5
-
-
- kaiser wilhelm der grosse
- passenger steamer
- (and 1 more)
-
Many times the lines passing through fairleads were running lines that controlled the sails..not the yards. Such as leach lines and bunt lines. These smaller numerous lines could number up to 20 per side per mast. That's a lotta belaying down on deck. Rob
-
Interesting......I would assume the shrouds/ratlines at the top mast and those at the topgallant were sufficient and the Jacob's ladder was above that. Not sure of the use of this rope ladder/ Hope you find out. Rob
-
I'm counting on the fact that you will be a solid Clipper lover when you get her finished Popeye. The *Greyhound* of the sea bug is infecting you and before you know it the magnificent short lived world of the Clipper will take you over. Everything about them was about speed......a uniquely American invention. Clippers put American sea commerce at its pinnacle. Great build...great fun. Rob(Seller of everything Clipper)
- 453 replies
-
- 5
-
-
- thermopylae
- sergal
- (and 1 more)
-
Wonderful...and I appreciate that you placed the crew in working positions...not just skylarking around..... Rob
- 2,625 replies
-
- 6
-
-
- kaiser wilhelm der grosse
- passenger steamer
- (and 1 more)
-
Keith..those goosenecks are fabulous...I had to make similar items for one of my telescopes...sweet work Love it, love it..... Rob
-
Jeff.....*A Mighty Fortress is our God, a bulwark never failing* A never ending help in time of need..... Trust in His strength.....sorry for your loss. Rob
-
Go get em...the more clippers the better. IMV Rob
- 2 replies
-
- 2
-
-
- flying fish
- model shipways
- (and 1 more)
-
WOW Popeye...you're *Clipping* along with this build. Nicely done and very clean..great job! I like how you tackled the chain plates and channels...nice. Rob
- 453 replies
-
- 5
-
-
- thermopylae
- sergal
- (and 1 more)