Check out our new MSW Sponsor Innocraftsman
×


rwiederrich
-
Posts
5,504 -
Joined
-
Last visited
Content Type
Profiles
Forums
Gallery
Events
Everything posted by rwiederrich
-
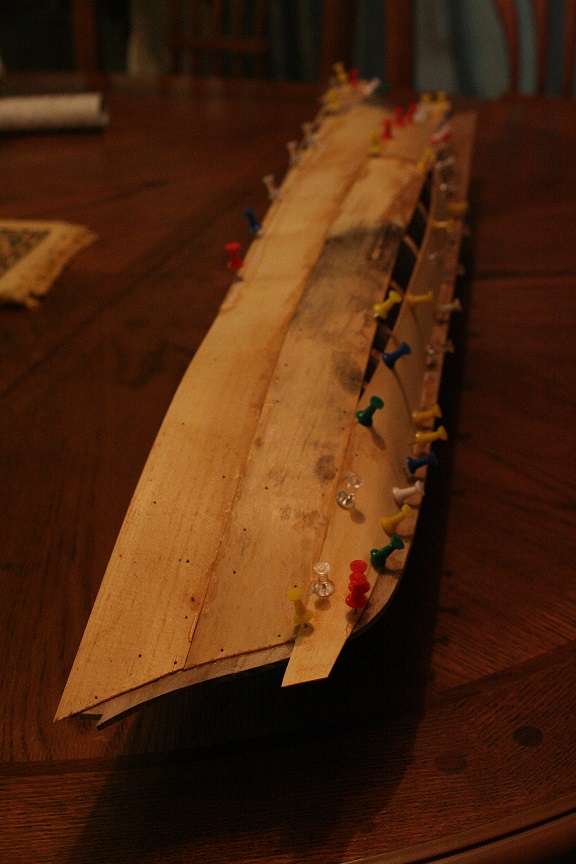
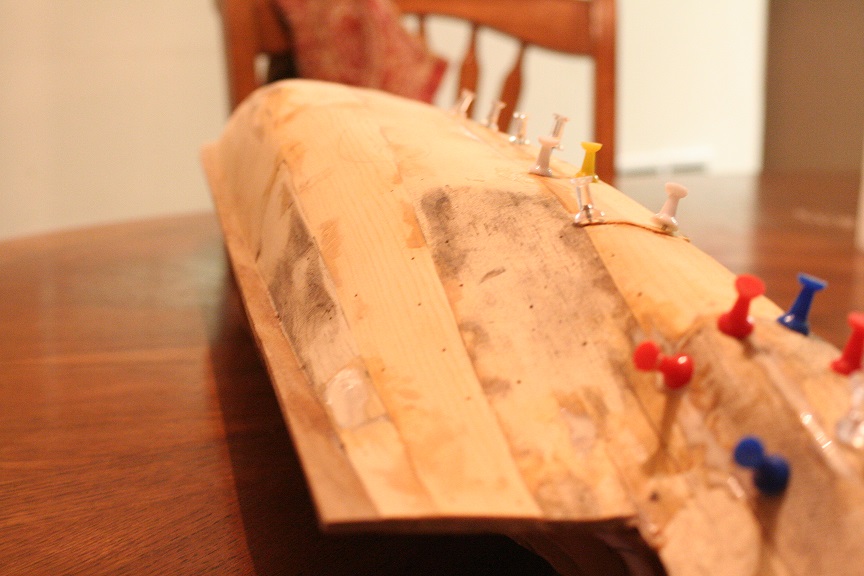
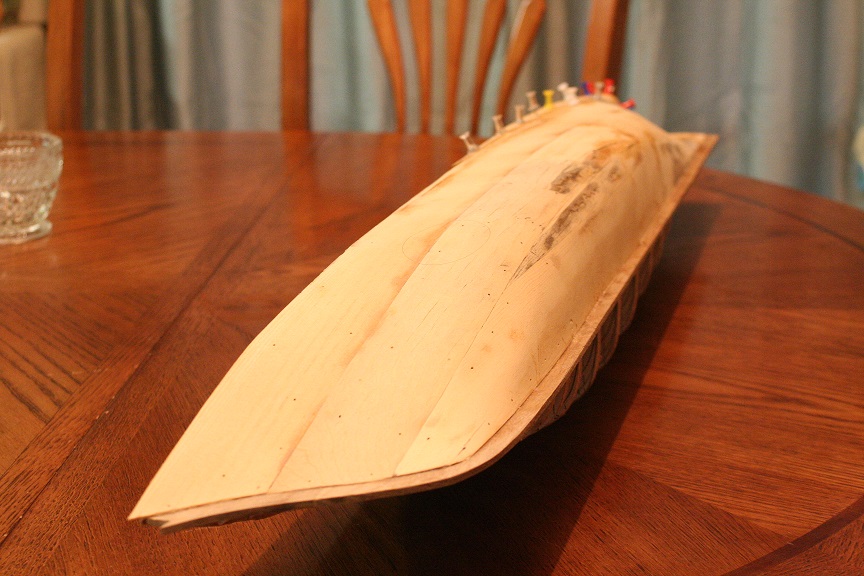
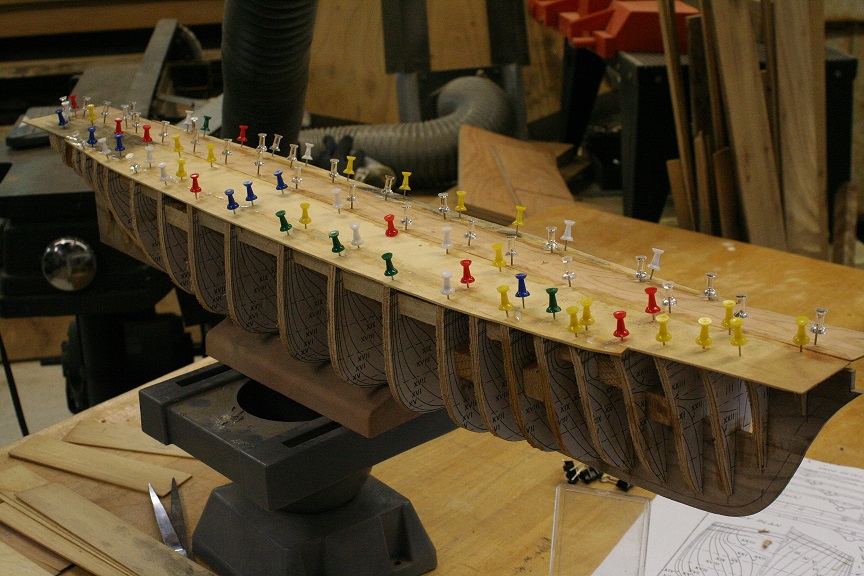
One on her side showing the smooth hull transitions. I should be done with this side by tomorrow and then onto the other. I'm *Clipping* along with 12 hours invested in this build currently. I hope I can keep up the pace. I tend to work in spurts..due to my work schedule. 2~3 hours on the hull planking this side...so I hope it pans out for the other side as well. Rob
- 1,208 replies
-
- 13
-

-
- great republic
- clipper
- (and 1 more)
-
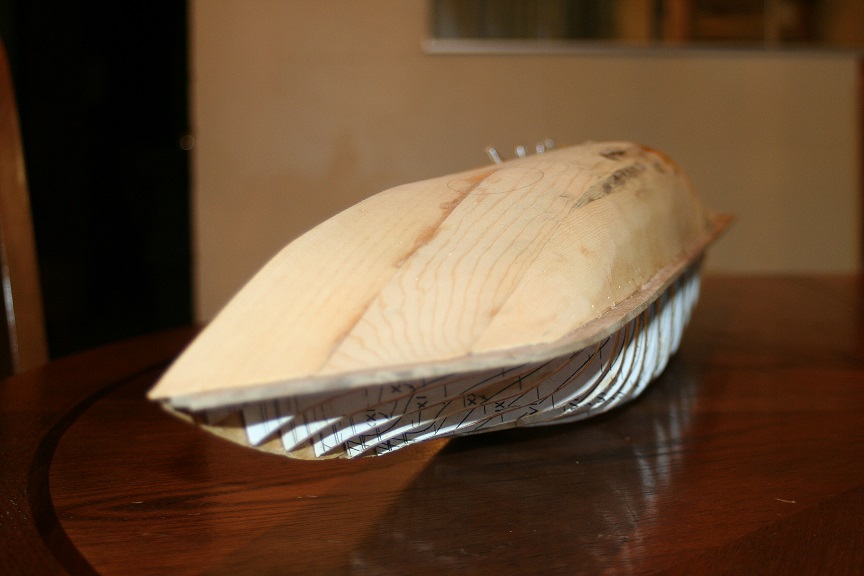
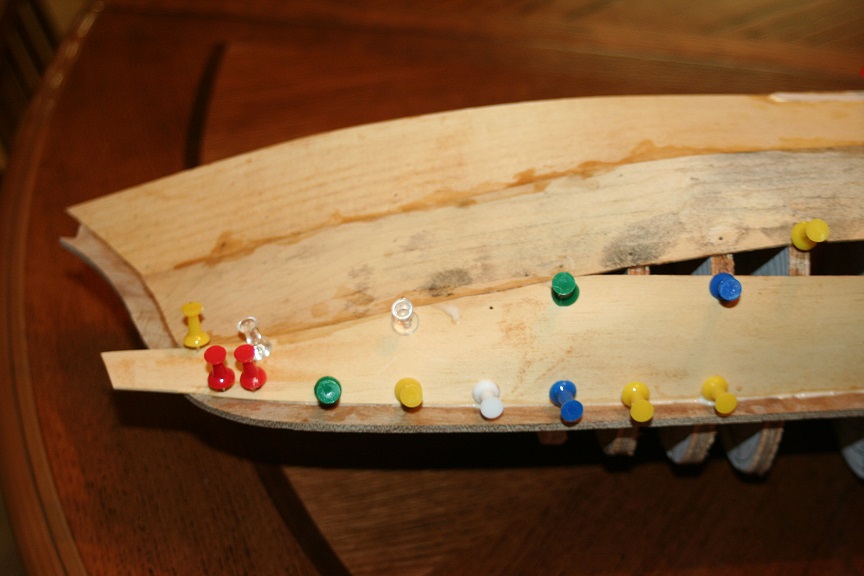
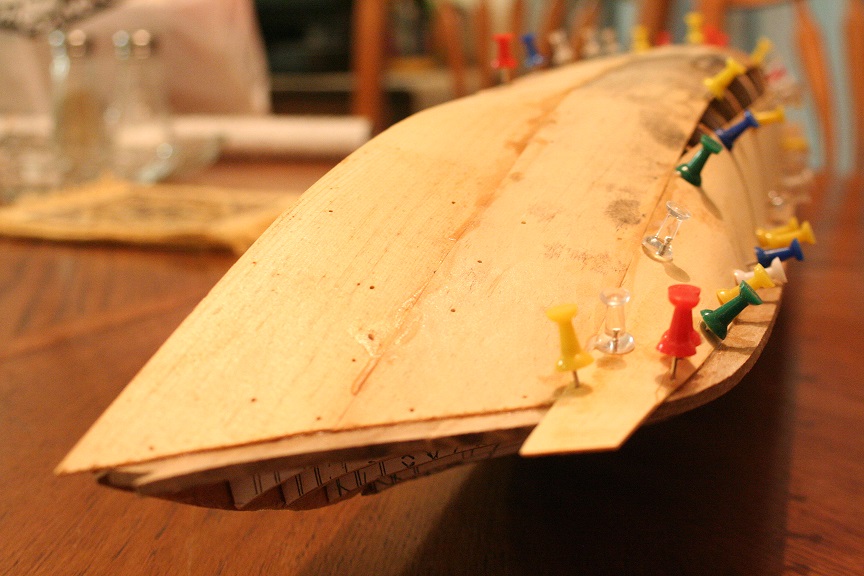
This image shows the contours of the aft exit. Pinning down the wood.
- 1,208 replies
-
- 7
-
-
- great republic
- clipper
- (and 1 more)
-
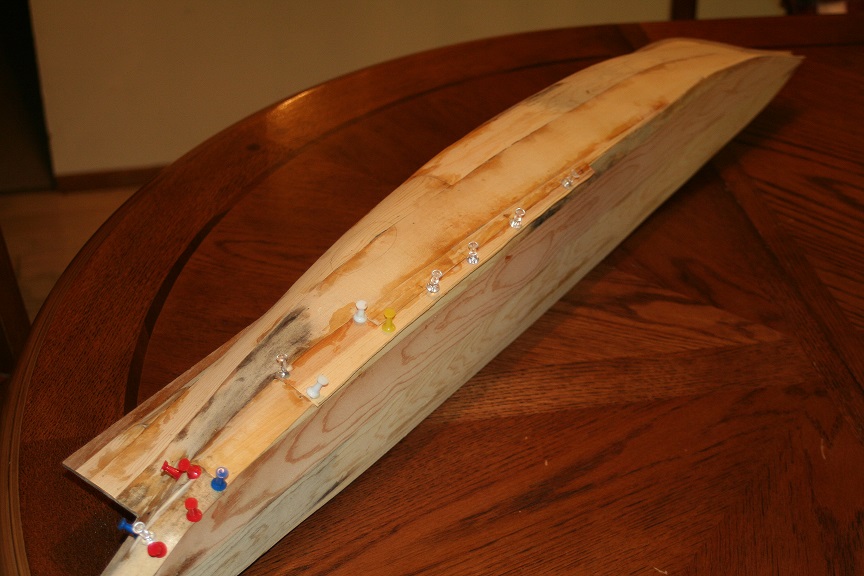
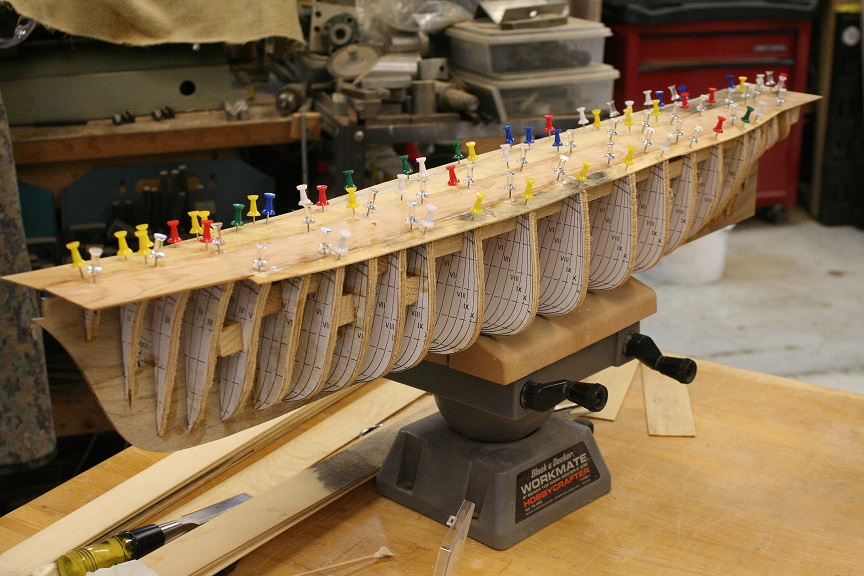
Well the Great Republic was a wood hulled vessel popeye.....I've yet to determine if I want to add a second layer of planking. This planking is 1/16"..amply strong for the build. Plus it will make the seams at the cutwater and exits appear bulky. On the other hand some builders apply a second layer of planks over a sublayer to create the final finished look...if they are using colored woods for detail and or paint simulation. My GR will be painted black. However..the main deck will be replanked to provide the individual planking for the spar deck. I did some pore planking. Note: the darker discolored areas are staining on the wood...I've had them for some time and they traveled from here to Europe and back. The hull is contouring very well. Rob
- 1,208 replies
-
- 8
-
-
- great republic
- clipper
- (and 1 more)
-
Back in the 80's I worked in a doll house factory in Oregon..so I have lots of great cut scale wood ..and boxes of oak and mahogany veneer. Plus I mill my own maple. I'm almost done with one side..pics tomorrow. Rob
- 1,208 replies
-
- 2
-
-
- great republic
- clipper
- (and 1 more)
-
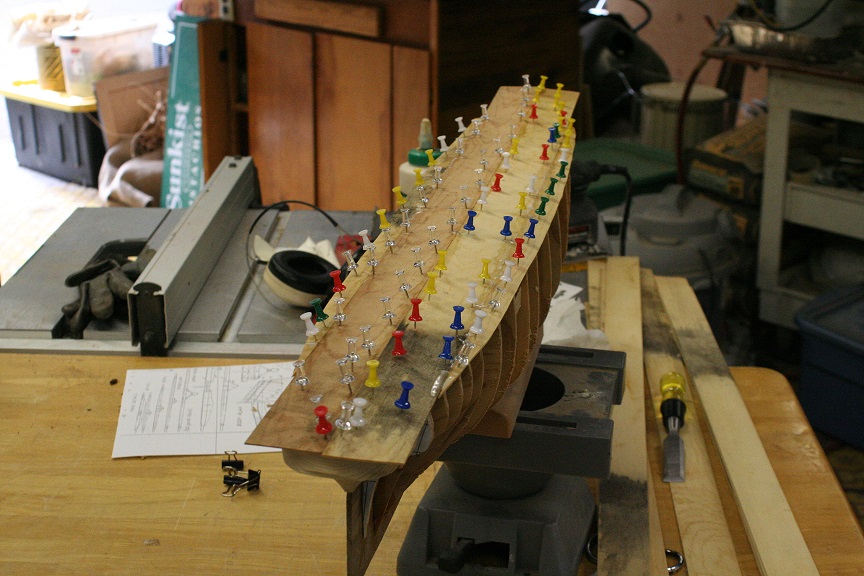
Today I'm spending time planking the hull. I',m using be milled clear white pine..that is nearly a veneer...at 1/16" . I can contour it very easily around the bulkheads to form nicely the hull. Here are a few images.

- 1,208 replies
-
- 10
-
-
- great republic
- clipper
- (and 1 more)
-
Yeah.....it looks that way..heehee All of that over hang will be removed. Rob
- 1,208 replies
-
- 2
-
-
- great republic
- clipper
- (and 1 more)
-
Well....I've cut the pre or false deck and glued the sections on. It may appear out of sorts but when dry I will trim the edges and ends and sand the curved deck smooth. I over extend the decking so I can trim it back nice and flush...controlling the contours This sub-deck is needed to give the deck a solid base to be built upon...similarly to the sub planking laid down before the final layer of finished planking is laid. I think I'm done for the day..I spent over 10 hours in the shop today...plus the deck needs to dry..... Thanks for looking in. Rob
- 1,208 replies
-
- 21
-
-
- great republic
- clipper
- (and 1 more)
-
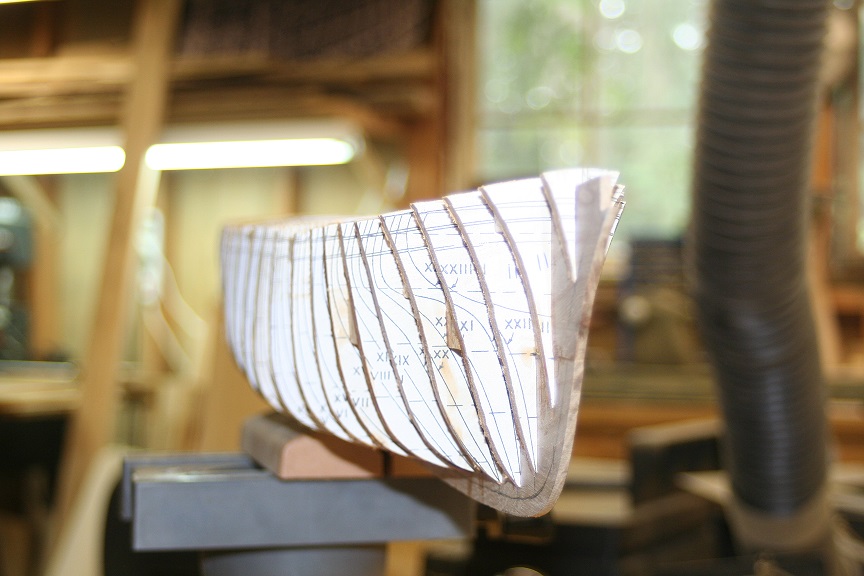
Indeed. Her sharp extreme clipper lines are very clear. One thing that is very nice about this ship(from a builders perspective) is there are no bulwarks. Crothers provides a nice depiction. Rob

- 1,208 replies
-
- 7
-
-
- great republic
- clipper
- (and 1 more)
-
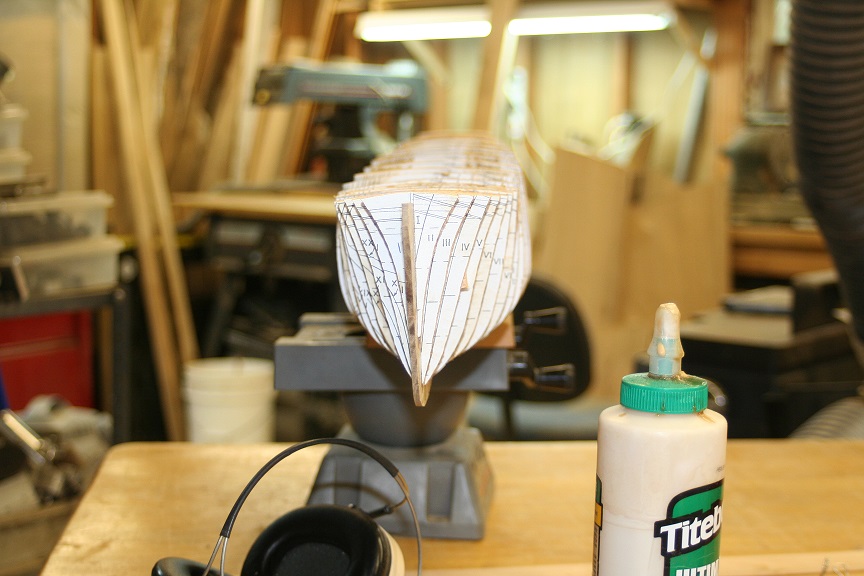
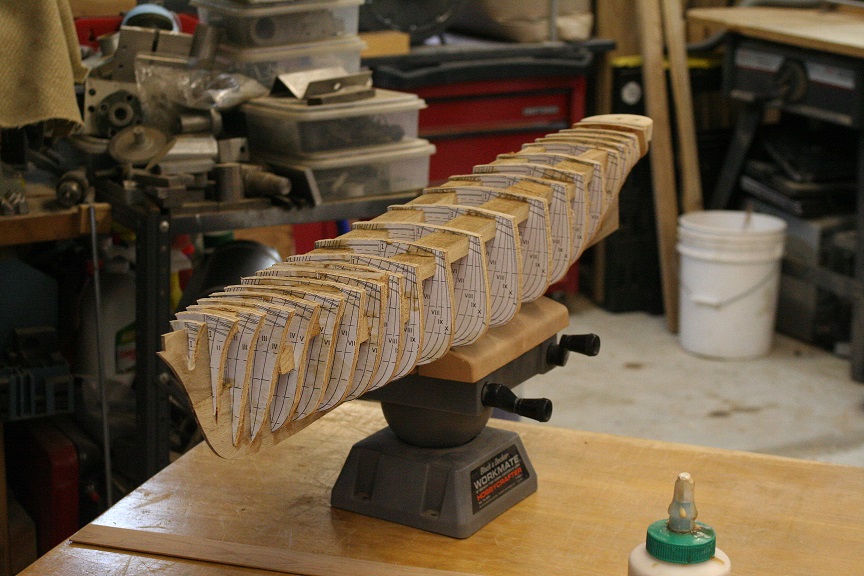
Well I finished all the frame work and the hard pine aft...now I'll let everything dry and then I'll begin sanding/chamfering the bulkheads..preparing them for planking. Rob

- 1,208 replies
-
- 14
-
-
- great republic
- clipper
- (and 1 more)
-
Done cutting all the rest of the major bulkheads...now I will glue them into place and then cut and install the bulkhead spacers that will give strength to the framing. No pics right now my battery is dead and is being charged........ Rob
-
Of course...I'll chamfer each bulkhead after they are all glued and set. Back to work. Rob
-
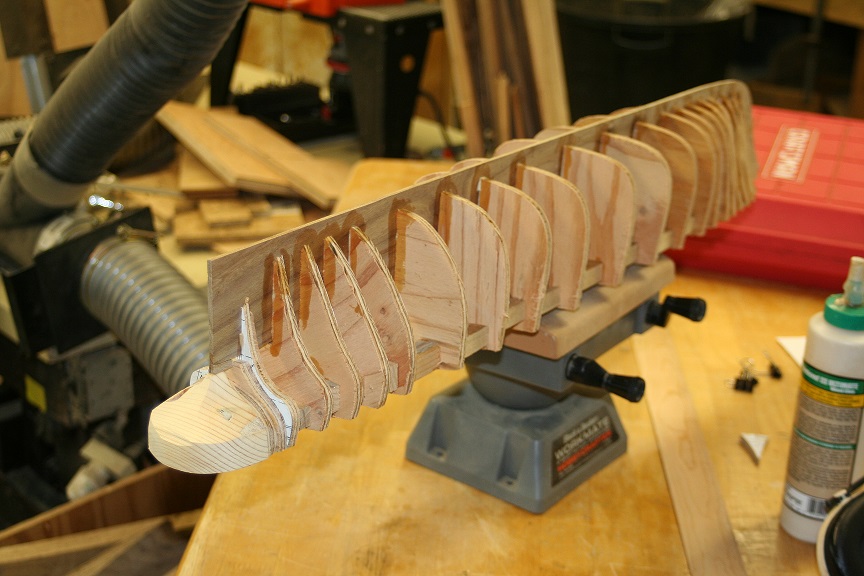
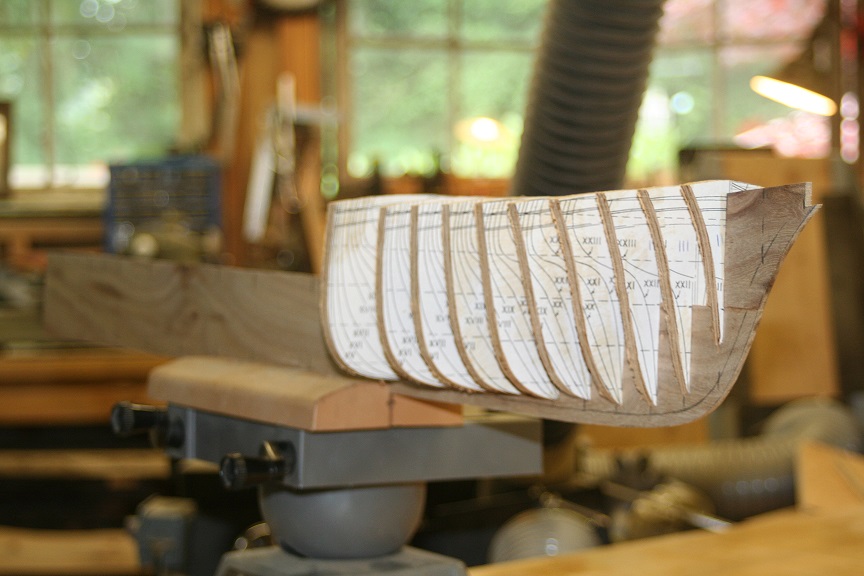
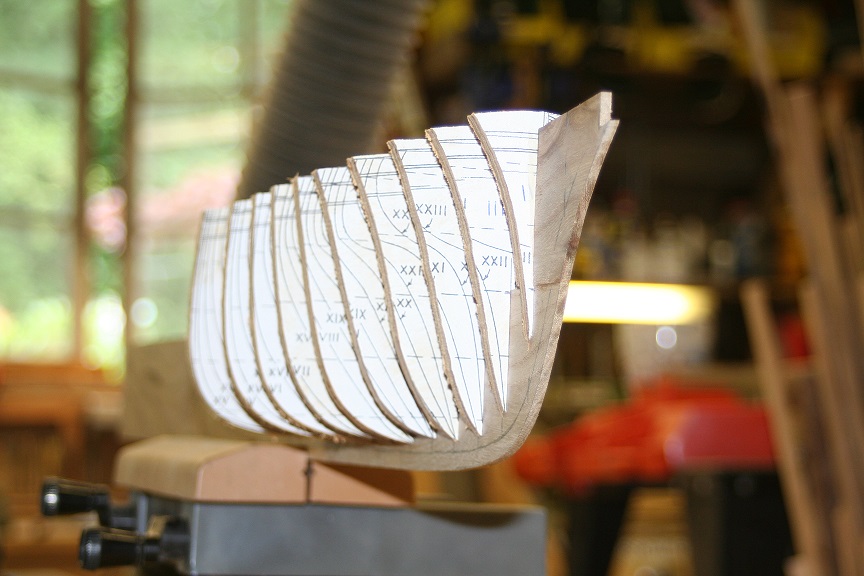
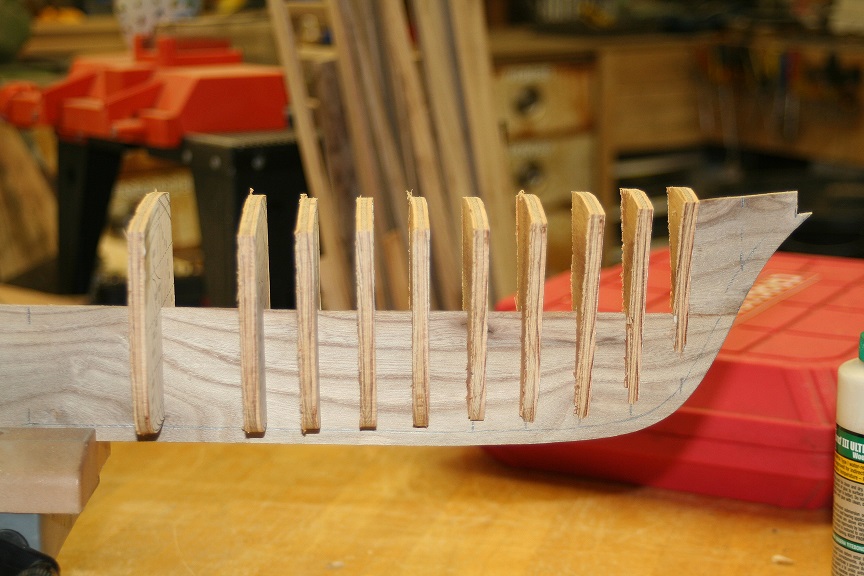
Thanks Ed. I changed my mind and decided to go with a firm keel..so I cut out some maple(from a tree I cut down in the yard) into full length..plained it to 1/8" and cut out the recess grooves for each bulkhead.... Here are some pics of the forward bulkheads mounted (test fit)

- 1,208 replies
-
- 12
-
-
- great republic
- clipper
- (and 1 more)
-
Bandsaw......much faster and with a steady hand//good results. Rob
-
Yeah.....cutting my own bulkheads..initially worried me...because I was relying heavily upon the drawings I collected(that's the thing about research). Kits these days provide you with such nicely laser-cut parts...projecting from the start a clean foundation from where one can either improve or detract from. I like scratch building because it provides ample levity to go in any direction that your building style or skill leads you. Rob(And we're off)
- 1,208 replies
-
- 2
-
-
- great republic
- clipper
- (and 1 more)
-
Just a construction note to inform my MSW friends. I tend to be less concerned about attention to detail..were that the detail is not going to be visibly accessible. I don't pay attention to the sanding of inside edges of bulkheads...or wiping away internal glue drips. I do pay attention to proper bulkhead dressing and beveling..so that the planking will not express errors initiated by them. If I were a purist at heart..these details, each in their turn would be a priority. My goal is a sound structure...with pleasant and correct lines...that I will paint. Please have patience as I bull my way through this initial construction process. Tomorrow is a new day and I hope to get the remaining bulkheads cut out and the blocking cut and the beginning (at least) of the framing assembly begun. When I work..I tend to move quickly...when I'm idle....the pond tends to freeze over. Rob
- 1,208 replies
-
- 3
-
-
- great republic
- clipper
- (and 1 more)
-
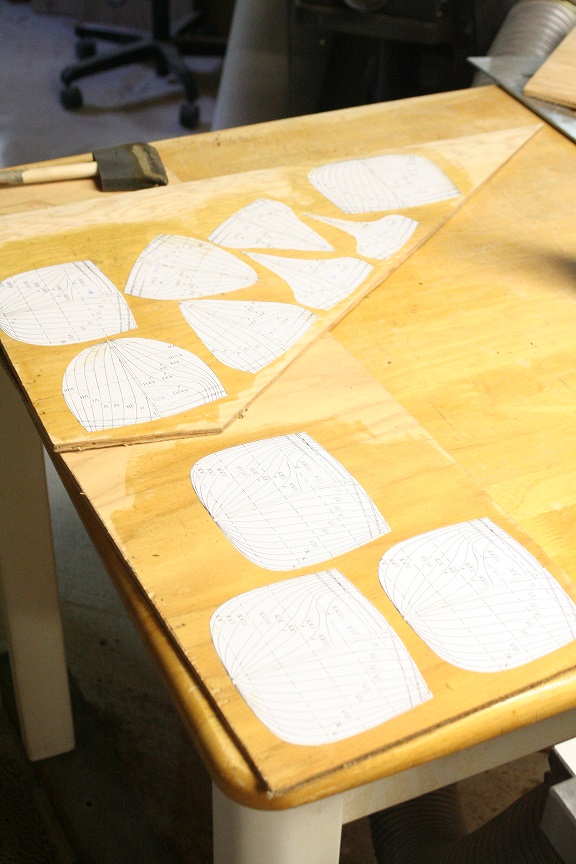
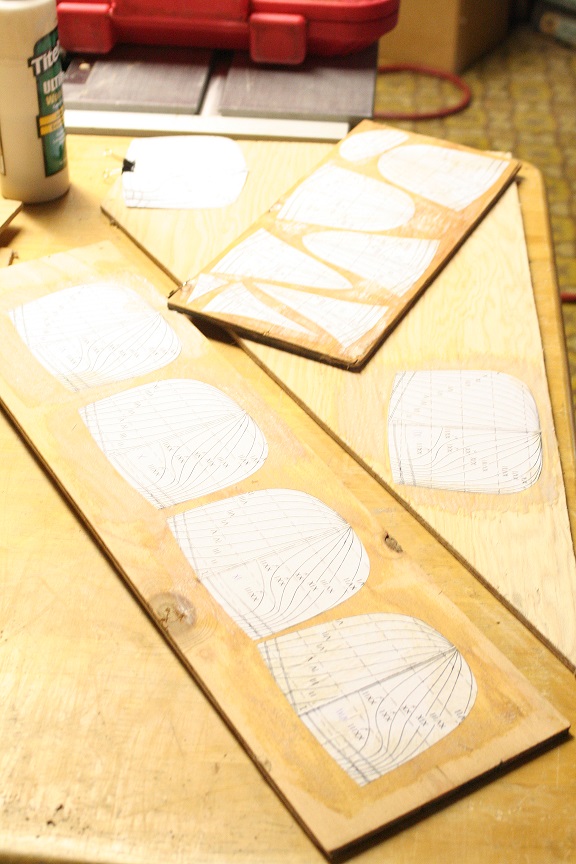
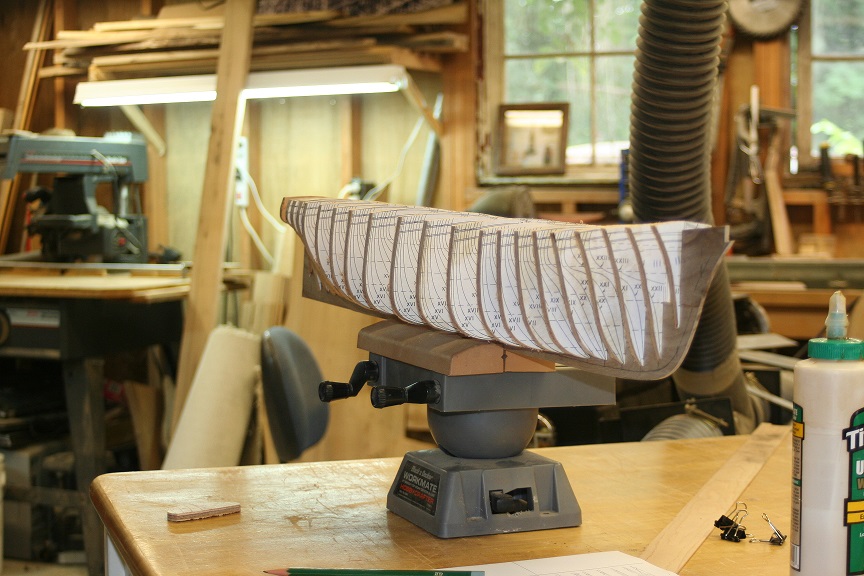
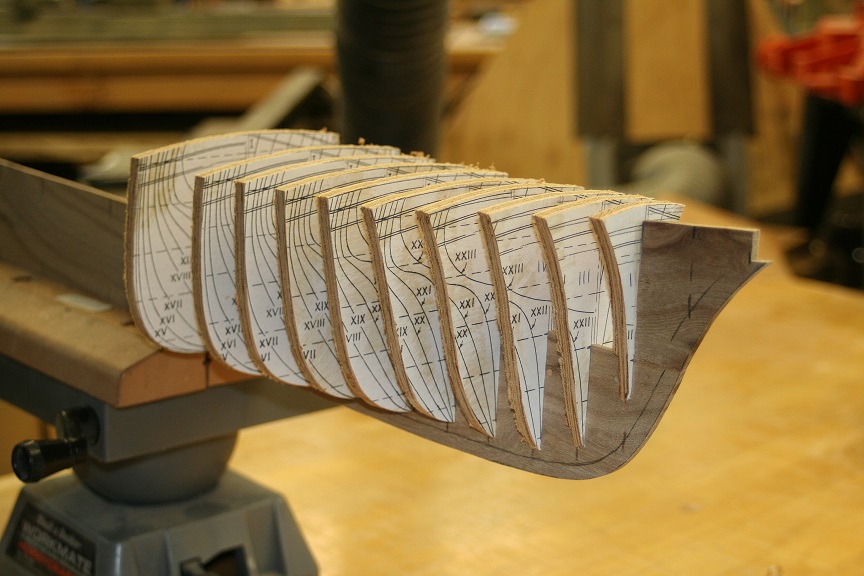
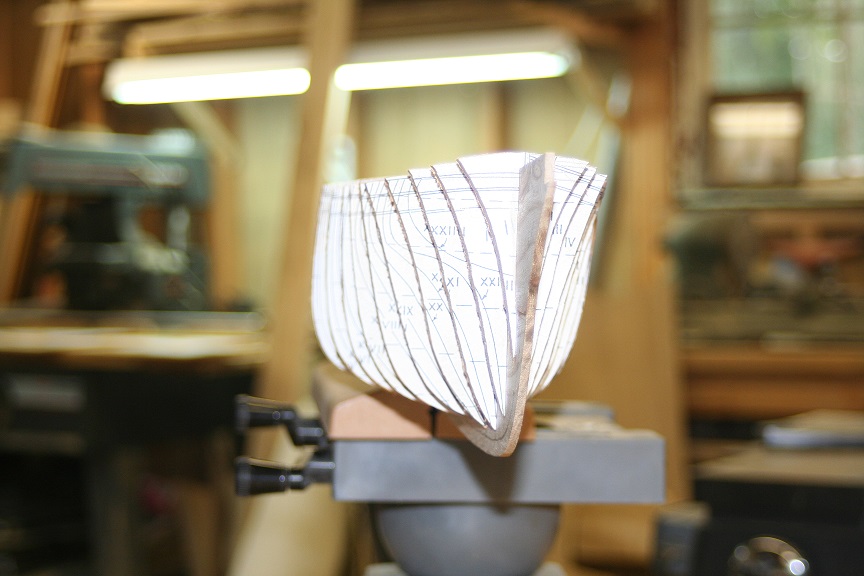
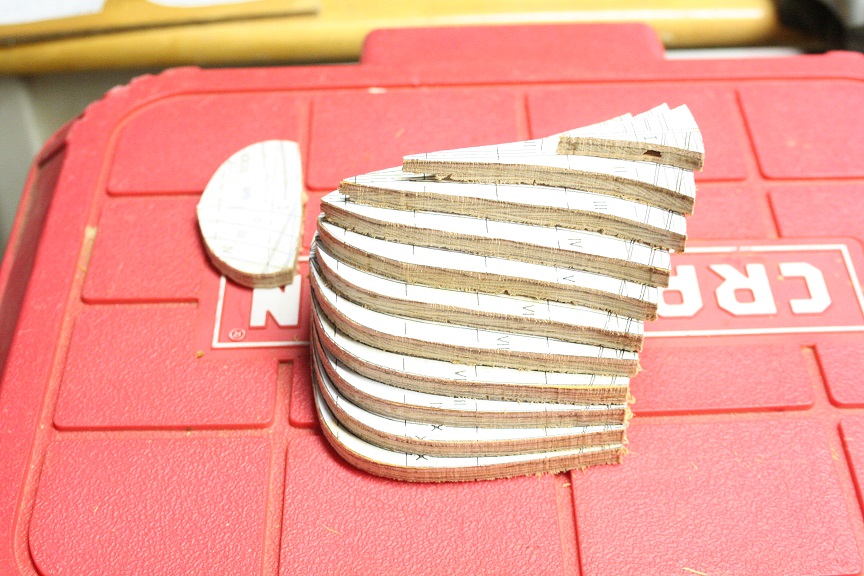
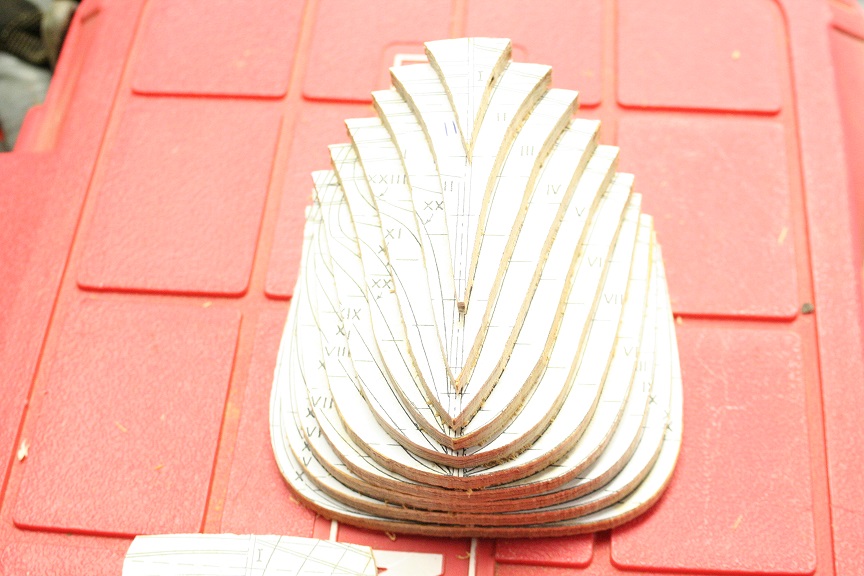
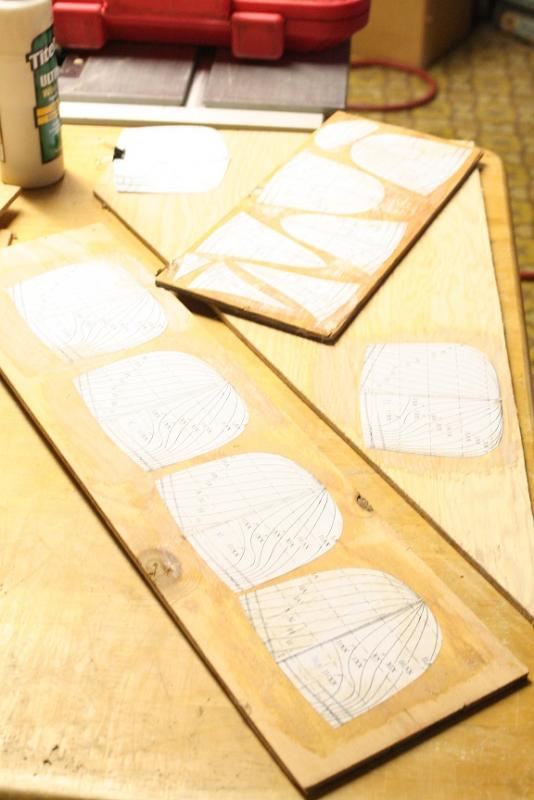
Today I glued the aft templates to plywood and cut the forward templet plywood bulkheads out. I'll return to the job tomorrow.


- 1,208 replies
-
- 10
-
-
- great republic
- clipper
- (and 1 more)
-
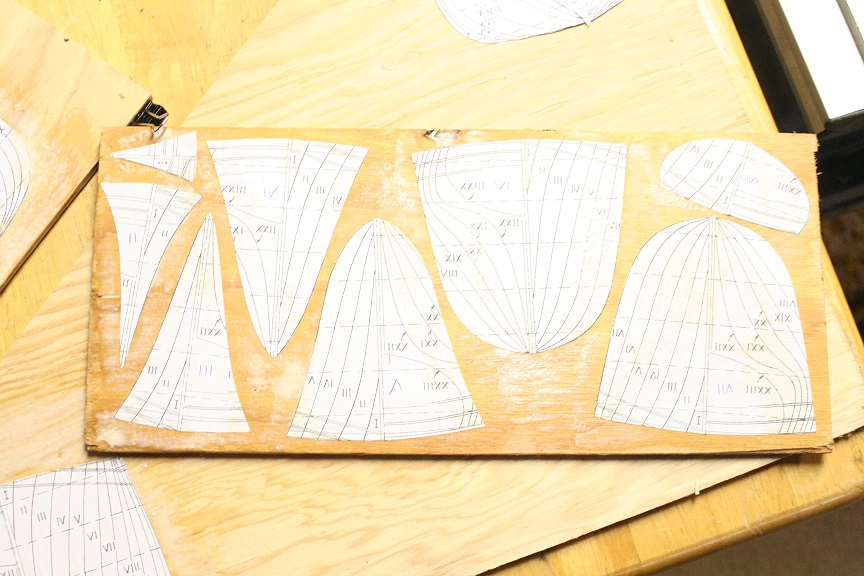
Thanks everyone...tomorrow(I'm at work)...I'll finish gluing the temples down and begin cutting out the dried ones. After much thought..I've decided to cut out bulkhead spacers to be placed between each bulkhead at the proper distance as identified on the scale drawings. these will provide ample strength and allow each bulkhead to be glued/nailed in proper position. Making the framing process go quite fast. I will then draw and cut out the keel and cutwater from the plans and add them to the framing. Not sure what will cut faster the band saw or the scroll saw..... Not your typical POB designed construction...but I shy away from typical. Rob
- 1,208 replies
-
- 3
-
-
- great republic
- clipper
- (and 1 more)
-
Glued the template down on the plywood..... Getting started. Half to go. Rob
- 1,208 replies
-
- 7
-
-
- great republic
- clipper
- (and 1 more)
-
Thanks Nils...I'm heading out to the garage to glue the templates to the plywood..getting ready to cut out bulkheads. Rob
- 1,208 replies
-
- 3
-
-
- great republic
- clipper
- (and 1 more)
-
For informational purposes it is worth repeating; A strong discrepancy was found on the McCann plan(And I've seen models built from this plan which first alerted me to this issue) The Doubling for each mast at the Fore/Main/Mizzen mast at the attachment to the Fore/Main/Mizzen topmast is backward. Placing the topmast to the rear of the doubling. The doubling on the GR was exceptionally lengthy, accommodating the Forbes topsail design which slid up and down its length. Study has revealed the doubling error was most likely not designed, since definitive evidence is clear from first hand account etchings. Secondly, study of other reputable builders models can be an aid....such as Greg McKay of New Mexico who's splendid example of the GR mimics the evidence I have uncovered. Second error found, absent on several noted models, along with respected author and historian Crothers have omitted the fifth deck house aft of the mizzen mast...which master model maker Donald McNarry included on his fabulous model of her. It is also mentioned in Richard McKay's book on the subject of McKay's clippers. From what I gather, there were five deck houses in addition to the helm house. Among the masting errors I have noticed....the original description of the GR as described by eye witnesses is that she had a flying jib boom accompanying her jib boom....much in the same manner as McKay built the Lightning. In short, it appears there is much to allow for ample artistic license as far as her sparing and rigging is concerned. This will permit me satisfaction when she is complete.....knowing that her original build will be less recognizable then the latter. Rob
- 1,208 replies
-
- 3
-
-
- great republic
- clipper
- (and 1 more)
-
Thanks guys. Nenad...I've been following your CS build and am pleased by your progress...I only wish I have as much drive. My Canadian friends are very much appreciated...your support is inspiring. Sailor....I still have plans for that extra CS hull, and again I thank you for your kindness in thinking of me. This new POB build will surely take me to new heights in construction. I've only built 2 other models using the POB method...and both of those were kit based. I'm going it alone...therefore I think the initial planking that will be used will be 2" X 1/16" X 30" material, of clear fine grain Fruitless Mulberry. Gaining the initial hull shape will happen rapidly..permitting me a fine base to apply the second layer of planking. I paint all my clippers...so grain and color imperfections in the wood are a moot issue. Thanks again. Rob
- 1,208 replies
-
- 3
-
-
- great republic
- clipper
- (and 1 more)
-
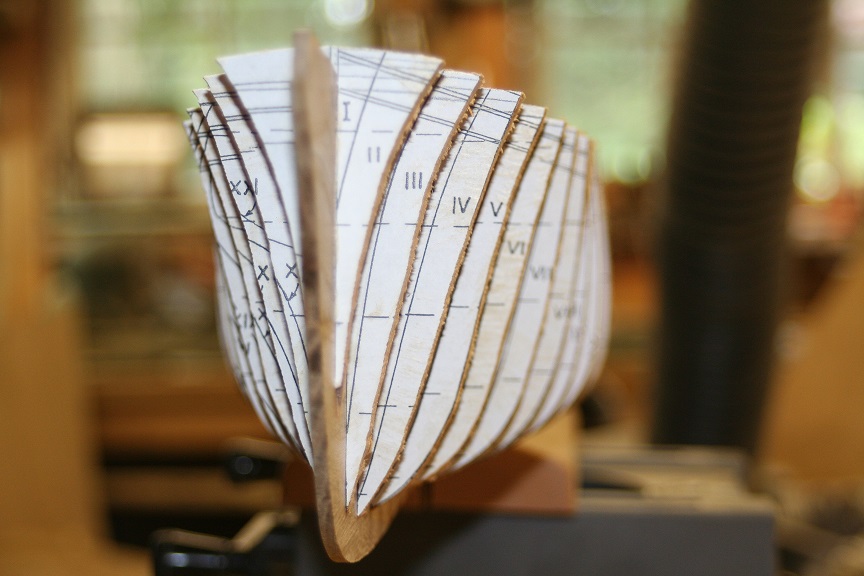
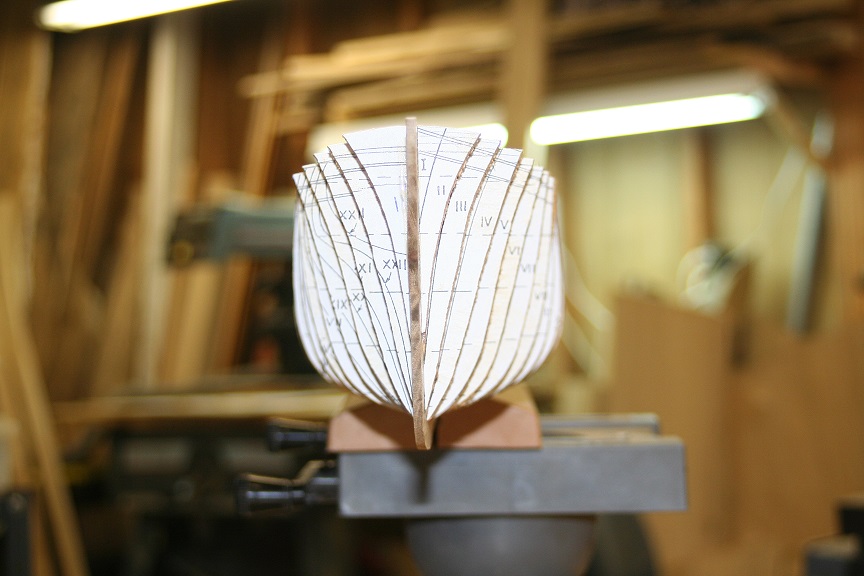
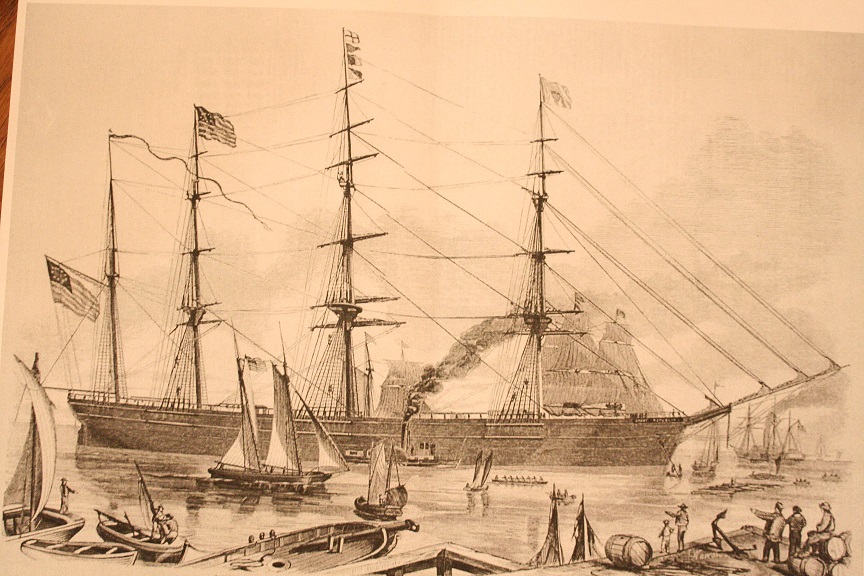
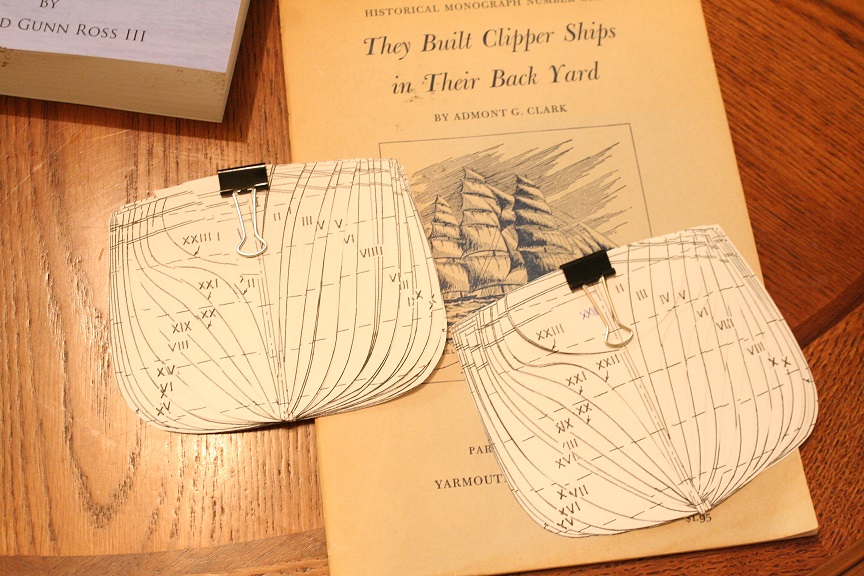
Well...I have been planning this build for over a year. Unlike my practice..I will not be modifying a Revell CS hull....but will be building a scratch POB model of the Great Republic from a couple of sources. Namely the McCann plan and those supplemented by the plans provided by Arthur H Clark, and drawings from Crothers, manuscripts and first hand wood etchings of the vessel. Unlike many contemporary replications...I will be following the descriptions of her rig by Duncan McLean and Richard McKay. Today I began by copying and cutting out the frame drawings and separating them into for and aft sections. I hope to get the plywood this weekend and then transfer the template to it and then cut out all the bulkheads. The model will be 3/32"=1' Here is an image of a engraving depicting the rig I will replicate. And an image of the cut templates. Rob
- 1,208 replies
-
- 15
-
-
- great republic
- clipper
- (and 1 more)
-
Thanks for responding Ed. I suspected such. My Glory was fitted with Howes as well...but the Great Republic which I am currently researching for a POB scratch model had Forbes rig. Can't wait till you return with lots of new pics of progress...... Rob
- 3,618 replies
-
- 2
-
-
- young america
- clipper
- (and 1 more)
-
I was thinking Ed...what design of double topsails did the YA have? Rob
- 3,618 replies
-
- 2
-
-
- young america
- clipper
- (and 1 more)
-
OH my word! Drooling through your build log pages....I can see how you create with such skill, this wonderful vessel. Along with your own hand/eye skills you have a nice machine shop to magnify those skills. A surgical light, and what appears to be a modified surgical/dental chair to hold and elevate your model...just at the right height and latitude. Excellent work...thanks for the fantastic tour. I'll follow your build with anticipation. Rob
- 728 replies
-
- 2
-
-
- le fleuron
- 64 gun
- (and 1 more)