


rwiederrich
-
Posts
5,502 -
Joined
-
Last visited
Content Type
Profiles
Forums
Gallery
Events
Posts posted by rwiederrich
-
-
2 hours ago, Rick310 said:
Rob,
Beautiful job on Glory!! I understand from Nic at Blue Jacket that you are also a DDS/DMD
Thanks Rick. Actually I’m retired ……but I was a DDN. A Denturist. Kinda like a prosthodontist, but my specialty was removable and maxiofacial prosthetics.
Now I’m just a humble procurer of clipper ship relics.
Rob
-
-
Sweet job Rob.....
Love a little lathe work thrown in there now and again.
Rob
- Keith Black and robdurant
-
 2
2
-
Interesting Rich......I never noticed this before, or if I did, I dismissed it....but I see some type of bracket beneath the lower channel, between the first and second, fourth and fifth and the tenth and eleventh chain plates? Interesting......Seams to be on all three masts plates.......
Can you confirm this on any other images of her?
Rob
-
-
22 hours ago, gak1965 said:
I've used thin, black wire from BlueJacket for the vertical footrope components. I found it was impossible to make thread hang right. Not that this is the consideration, but it is way easier to make the loop with wire than with any kind of thread.
I always install my foot ropes first...then install the stirrups. Never have a problem with string curling. since I hydrate the string forming it straight.
Bammmnnnn!
Rob
-
17 hours ago, Vladimir_Wairoa said:
I Guess when i start rigging Rob Will build Another clipper
 or two :D. V.
You humble me Vlad. If I was only that fast. Fortunately for me, I have an advantage over you in that, I have been rigging clipper ships for over 48 years and their rig is no surprise to me. You are doing it right...study, study, study. Familiarize yourself with the terms and the functions of each line and you will have good success, and your model will be an *accurate* scale model. When I get criticism from experts on any possible error I may have made, I can confidently claim the so called error was one of Artistic expression based upon a number of unsubstantiated possibilities, NOT on factual atypical practice I failed to replicate.
Keep educating yourself and you will do fine. you have thus far.
Rob.
-
37 minutes ago, My Fathers Son said:
Rob,
She has wonderful clean lines and it is so obvious without her masts at this stage.
I have been admiring your boat covers, (I have been admiring everything) but specifically, I have been looking at the boat covers as mine are rubbish in comparison. Are these silkspan?
Simon
No.....Actually it is another of my modeling hacks. First I used stainless steel wire(any good extremely stiff wire will do, and glued a length from stem to stern of the boat to create the peek for the cover. Typically this was a run of rope or a specifically made pole and the canvas was laid over that. (Creating a peek so rain water would roll off like a roof) I then ran masking tape right along the wire and formed one side of the canvas. Cleaning the edges and forming them correctly. Then I ran the other half of tape joining the other side at the centerline. Again pressing against the edge or gunnal of the boat to press the tape down snugly. Once finished and trimmed up nicely the canvas was painted grey. I used epoxy paint because it seals the tape down nicely. Any good paint will seal the tape down and to itself I'm sure. I used plain masking tape because it retains a nice micro dimpled appearance of real canvas.
Then I added the draw ties along the canvas edge and weathered the entire arrangement.
I've used this technique on nearly all my models for over 40 years and I have seen no failures of the tape method. Paint covers a multitude of sins.
Rob
- My Fathers Son, Keith Black and shipman
-
2
-
 1
1
-
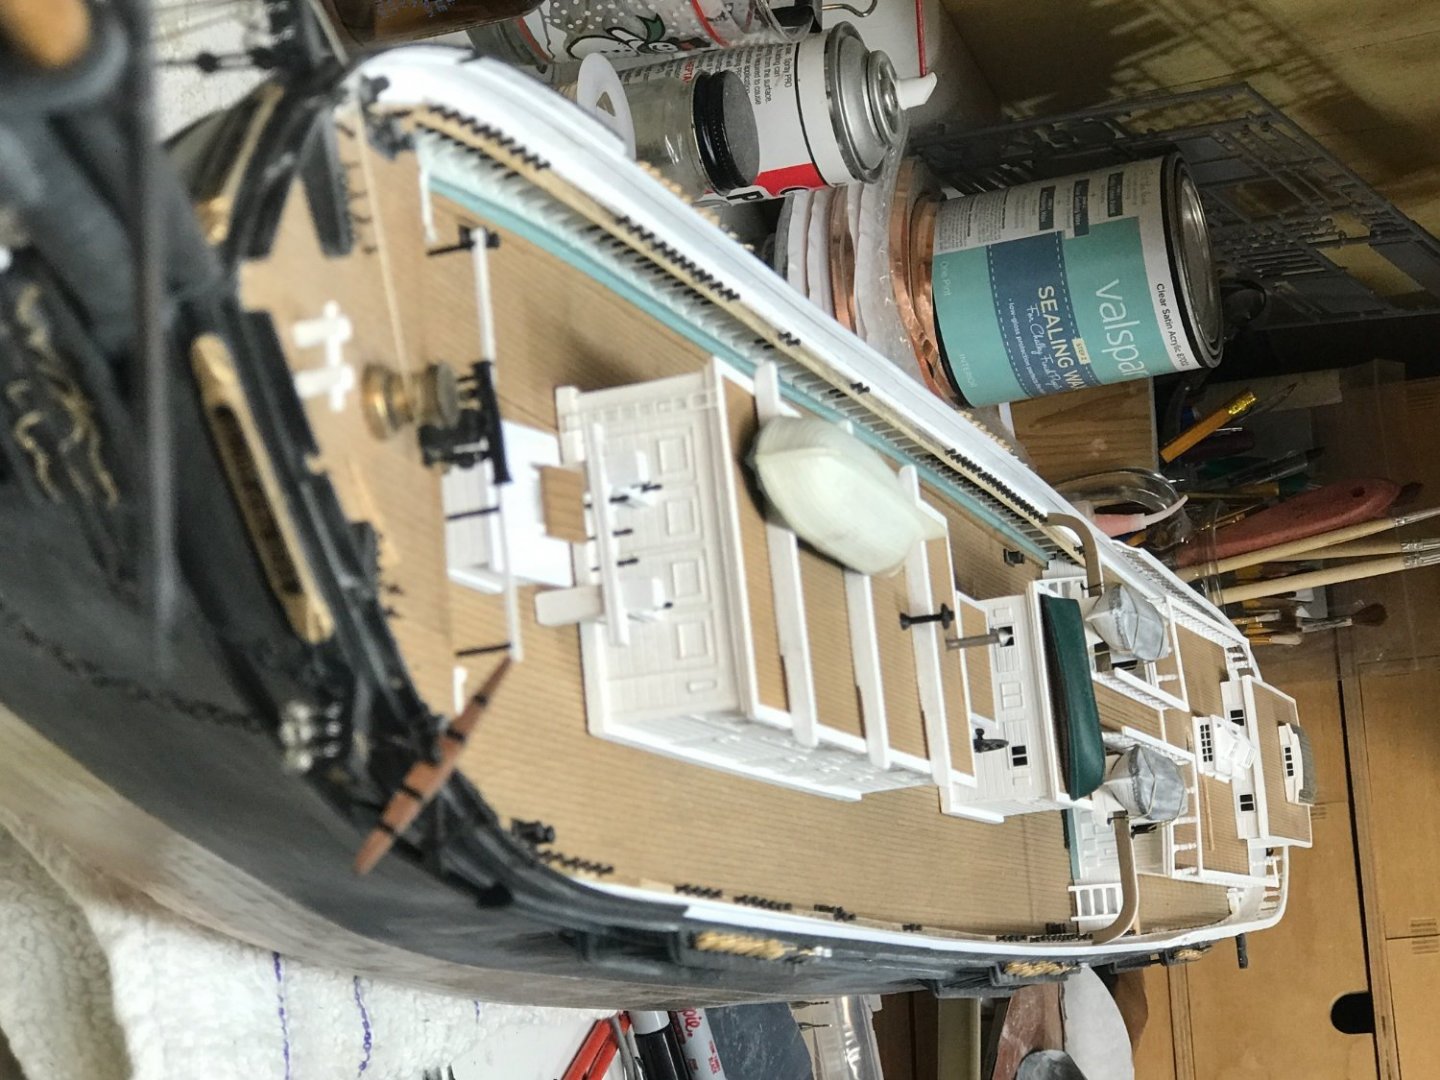
Some pics keep coming out sideways.
Grrrrrrrrrr
Let me try again.
😢 Sorry


- Keith Black, Glen McGuire, BANYAN and 3 others
-
6
-
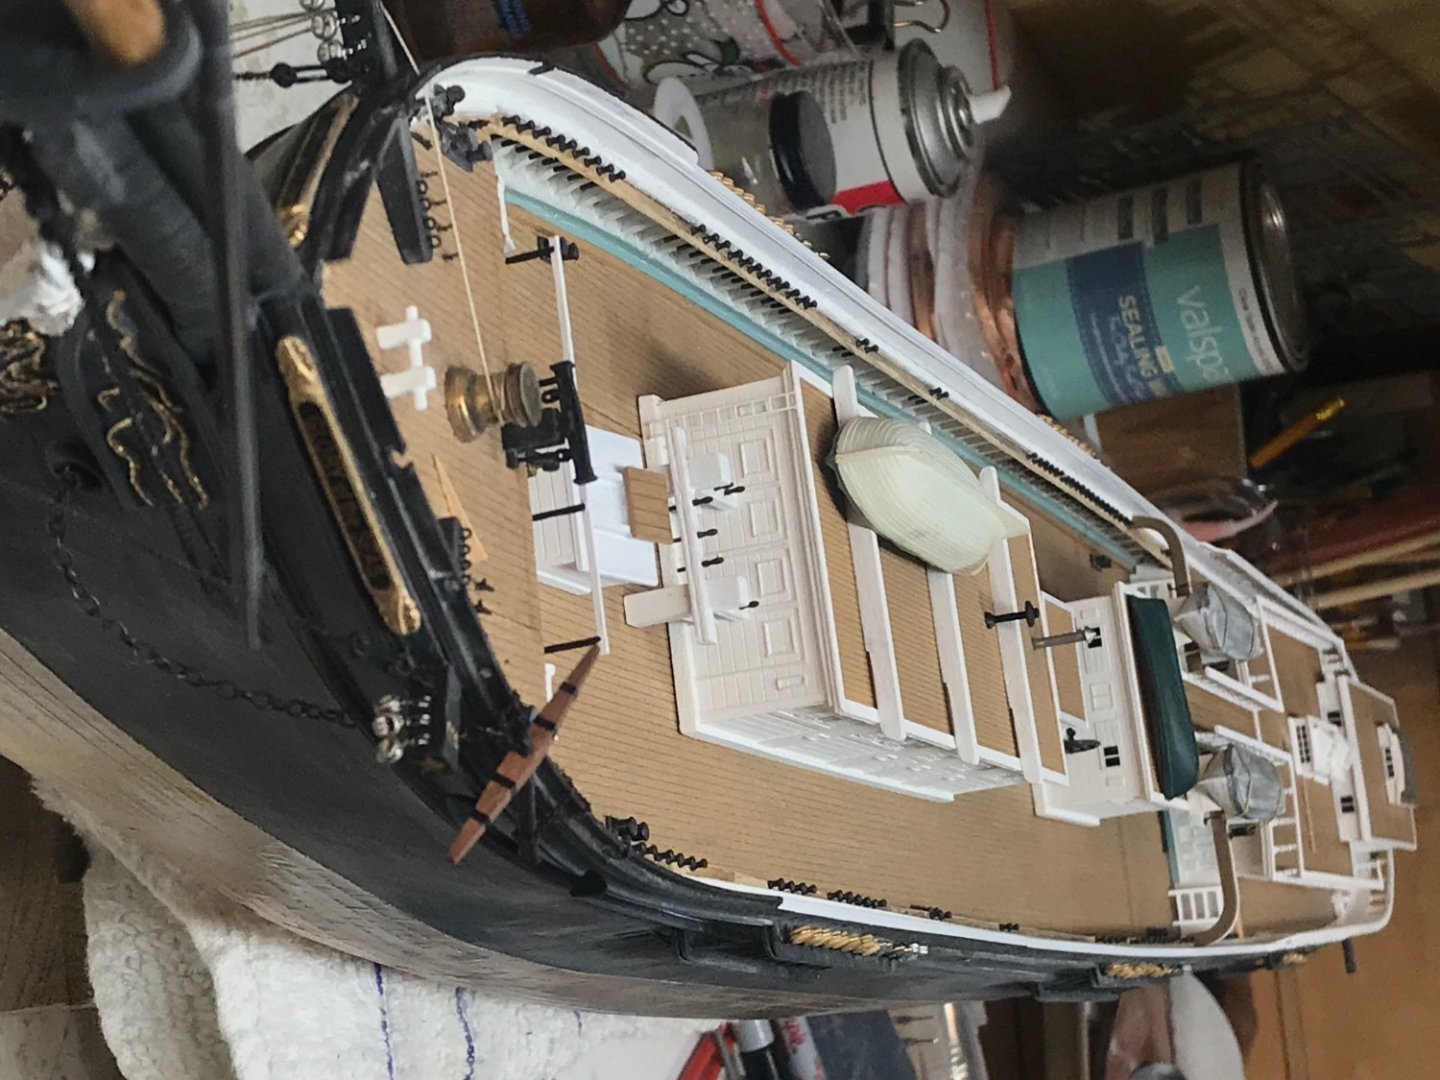
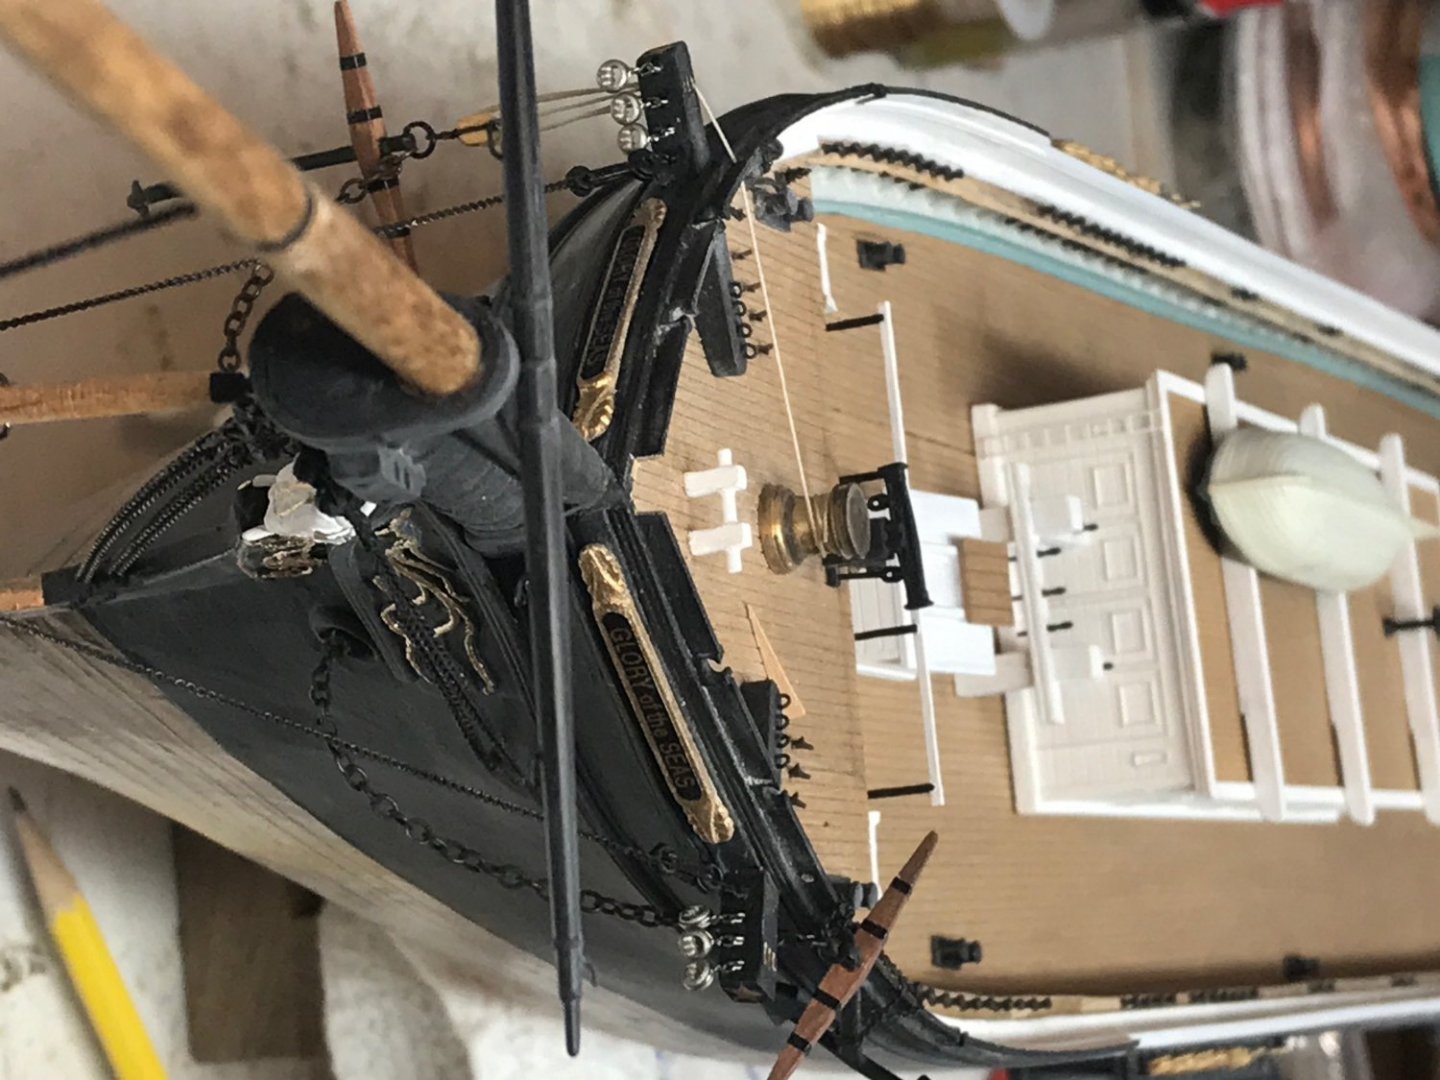
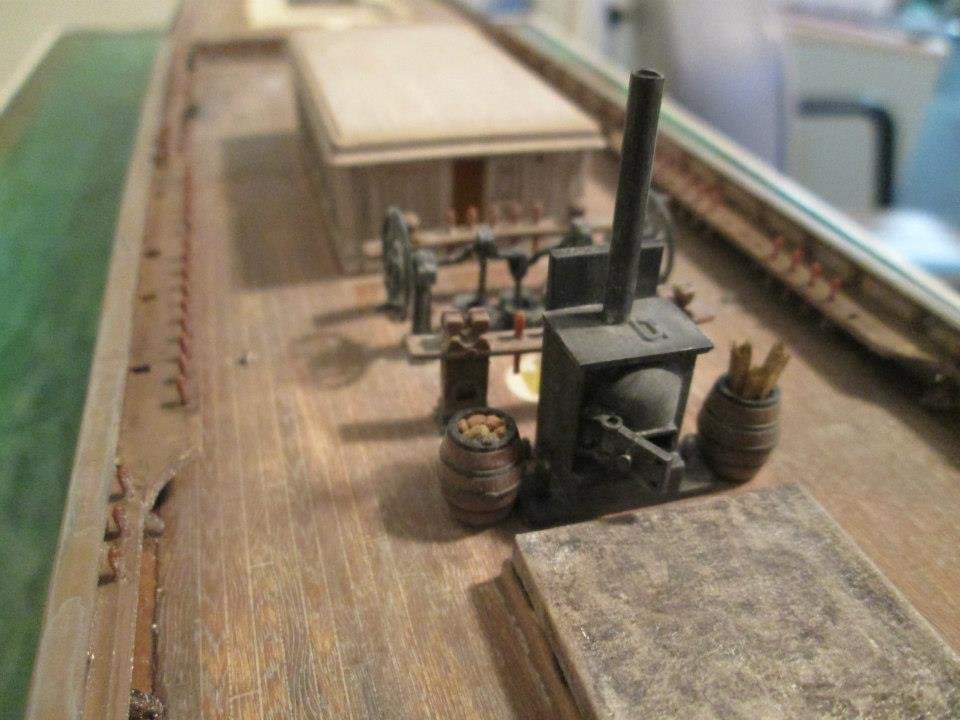
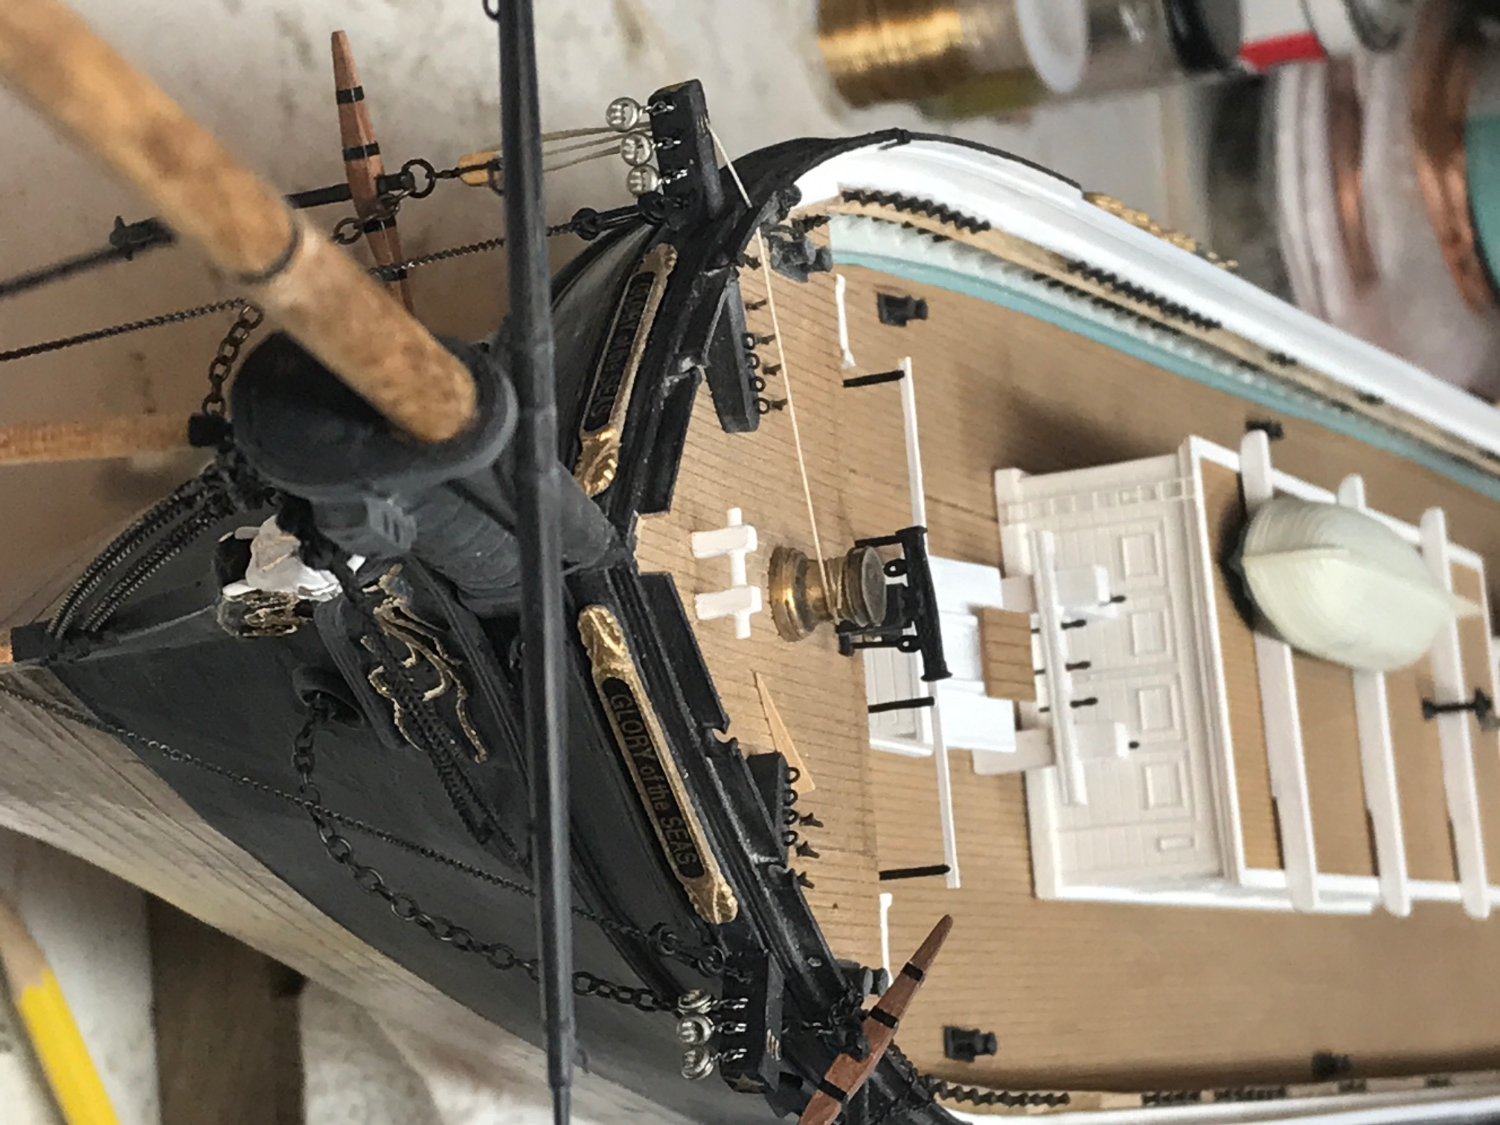
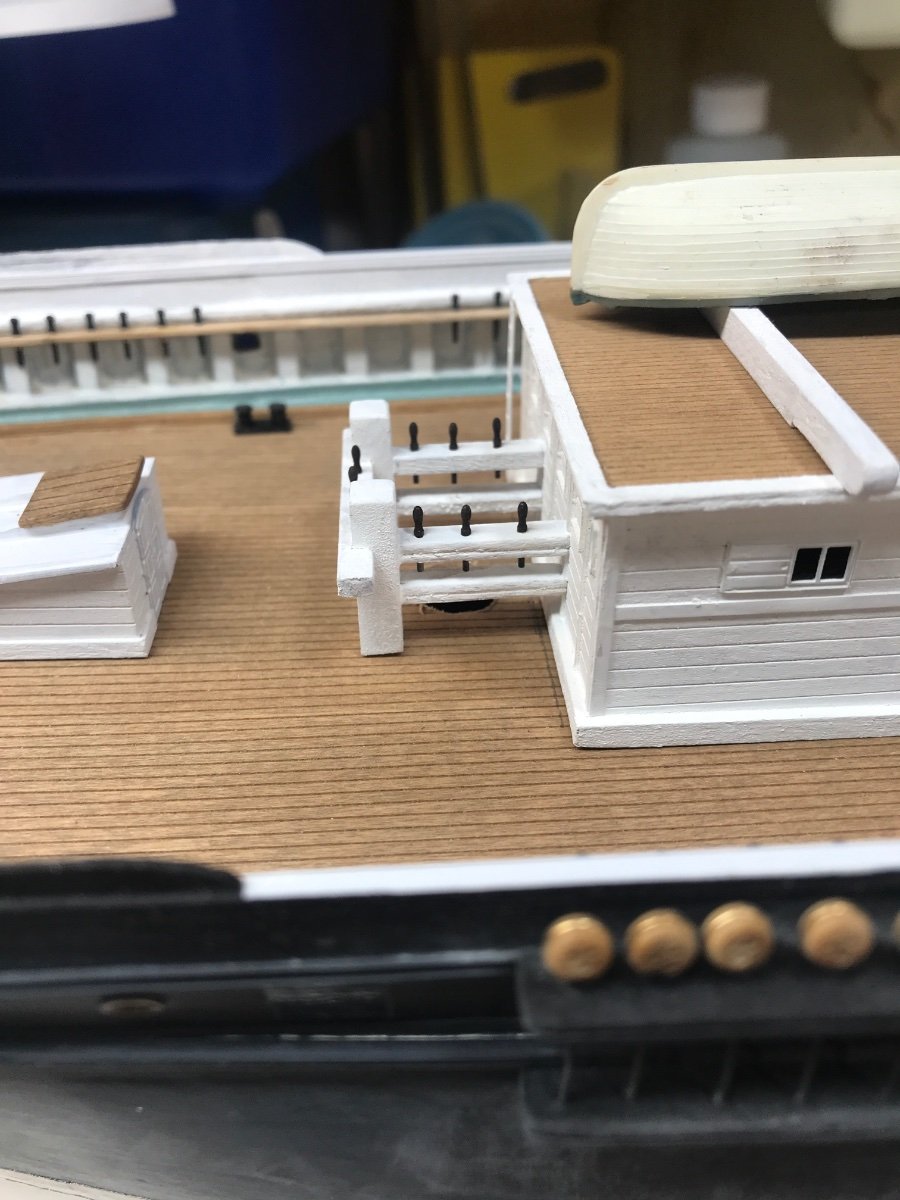
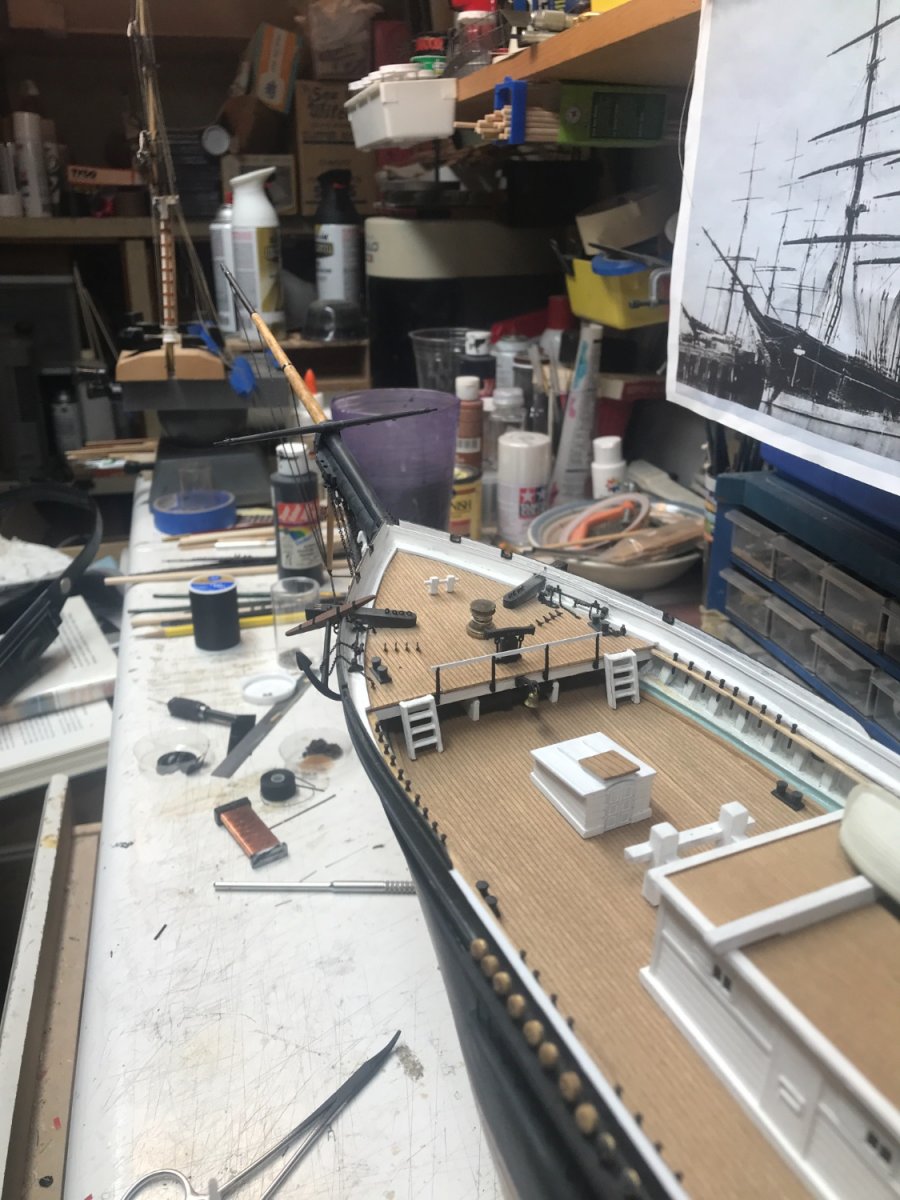
I had to finish up some left over minor work on Glory’s fore fife rail. I added the lower brace and the pins.
Here are some pics of the work and down the hull/deck
Rob

- Glen McGuire, shipman and Keith Black
-
3
-
5 hours ago, Bill97 said:
You guys are going to have to explain this ink process you are discussing. I really like the results but have absolutely no idea what you are doing with ink to create it.
I can’t speak for Kevin, but my process uses India ink diluted in 99%~100% isopropyl alcohol , then sprayed onto your deck/model. When the alcohol evaporates it leaves the dark diluted ink. Which finds the cracks and highlights detail. Weathering the surface. Then I highlight that with chalks
Other similar techniques vary.
Rob
-
4 hours ago, Dearborn said:
Perfect, I thought that was the deal there. (sometimes I feel dumb LOL) So a bit of research is in order while I wait for the copper tape (I bought 4 rolls)
and a punch wheel that comes with 4 different sized wheels. Then I will make my jig and I'll photograph the progress making my jig and applying them to the ship.
Thanks again!!
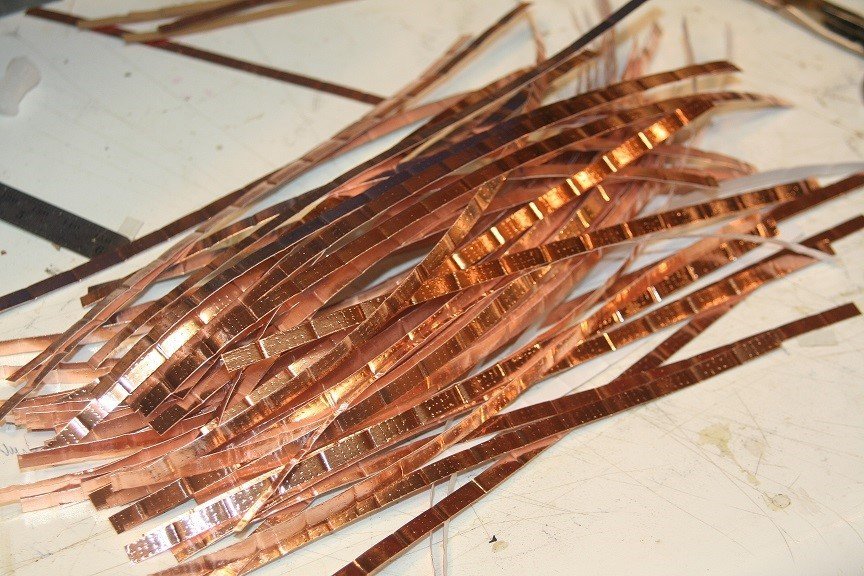
I hope the process works out swell for you. The smaller the scale, the less detail required. I used a ponce wheel when I was creating my plates back when I built the Great Republic.....but that method proved to be far too time consuming for me and for the time spent,...produced few plates for my labors.
So I opted for another method that I devised. I was going to emboss each 8" strip of copper tape with segment lines and nail impressions....all in the same pass through my repurposed clothes roller.
I could roll out hundreds of these pre-impressed tape tiles to cover the over 2500 plates I would need for the job.
I, again used this method, when I copper plated my current Glory of the Seas hull.
Now, since neither of these vessels was plated with copper...but with muntz metal...I opted to paint the entire coppered hull with a metalic paint that mimicked the color of oxidized muntz....NOT copper. I don't like shinny.
Here is a pic of the finished tape strips. and finished hull/model.
Good luck in your plating adventures.
.jpg.9cea46c0ac097f2f1674130194db7998.jpg)
- Dearborn, Keith Black and GrandpaPhil
-
3
-
5 hours ago, Vladimir_Wairoa said:
At some moments I miss or regret not having those elements authentically 3D outstepping of surface. but on the other side as you say its high tech against hand paint.
Vlad....if your build was mostly a product of 3D printed parts...I would agree with your opinion to remake them. But in this particular instance, the hand craftedness is harmoniously and attractively incorporated within the hand craftedness of the entire build. Plus as the model is passed from family or friend on down the line...it will retain its earthyness and attractiveness as a hand made model.
Go get-em.
Rob
-
23 minutes ago, Vladimir_Wairoa said:
somwhow and to get nameboard and hoods laser cut.
Why do that? You will remove a hand made element of your build.
My hoods scroll work is far from perfect...but it is hand made and hand painted. Its an imperfect aspect of my build, that makes my build more tangible and authentic. IMHV.
However, do what you think best.
Rob
-
1 hour ago, Kevin-the-lubber said:
are there any bits that might be missing second hand?
No...make sure you get the dust jacket with the book....they are usually provided...since the artwork is on it. Some later copies of Glory of the Seas may provide photographic corrections, but that is usually not noticed unless you have both older and newer copies. You shouldn't have any issues with this book...it is a great resource.
Good luck.
Rob
-
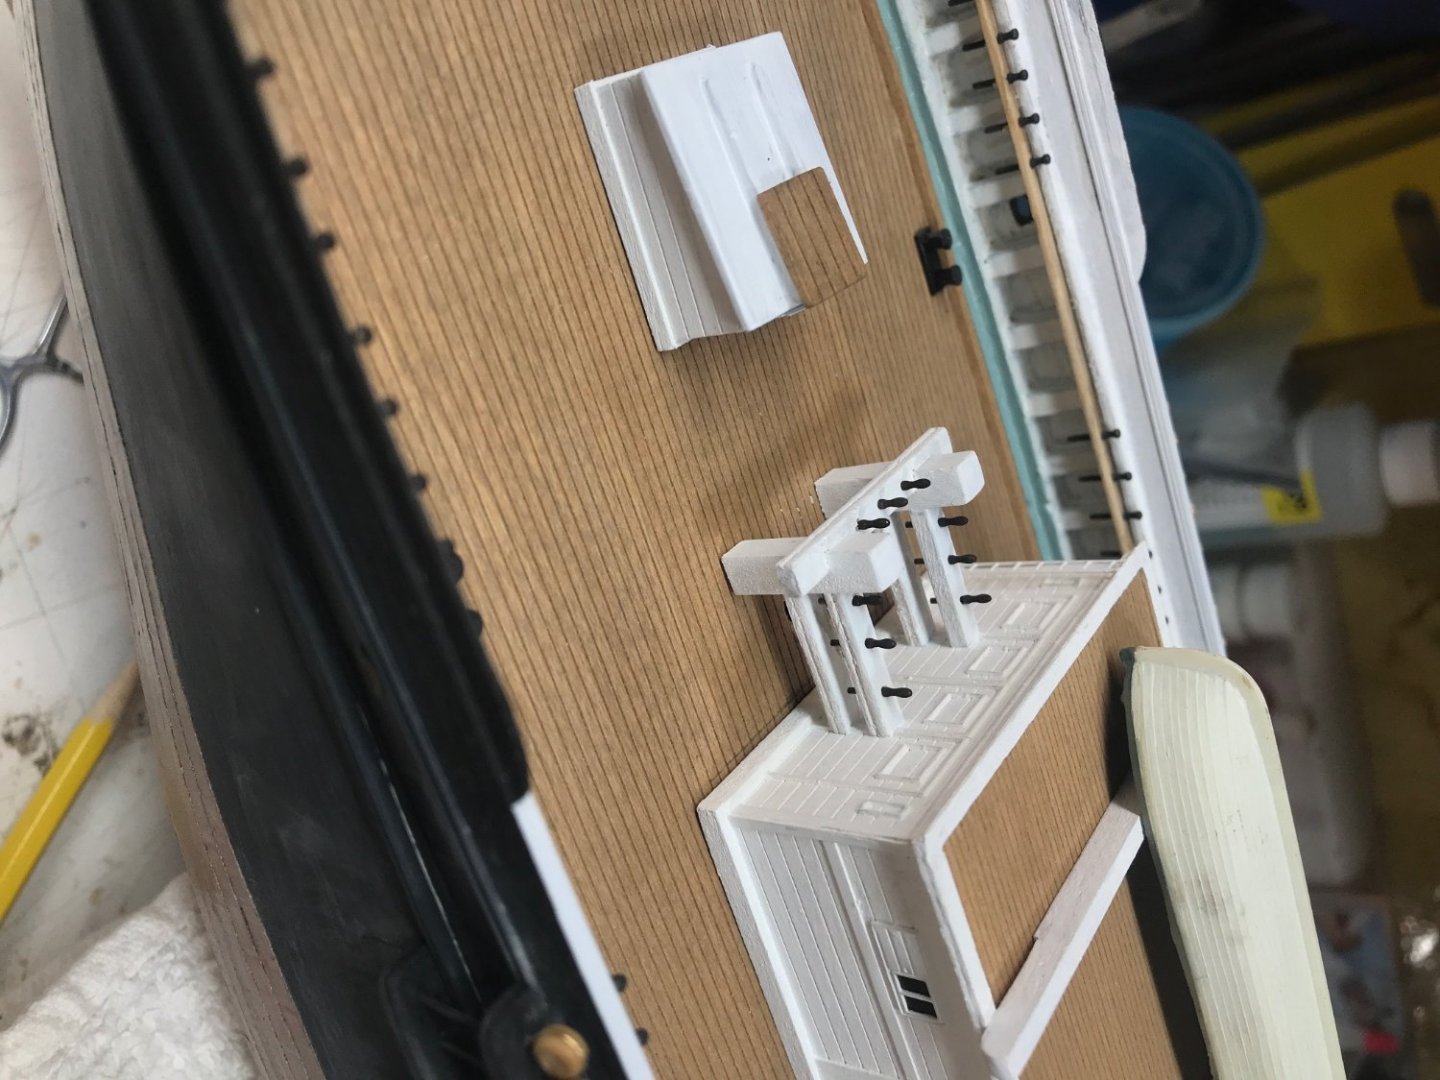
Great job on the skylight grating....
Rob
- robdurant and Keith Black
-
2
-
1 hour ago, Kevin-the-lubber said:
While you're here, I received my copy of Michael Mjelde's GoTS today but I don't see any plans within! Should there be any?
The plans are found in his second book, *Clipper ship Captain*.......Sorry.
Rob
-
1 hour ago, Kevin-the-lubber said:
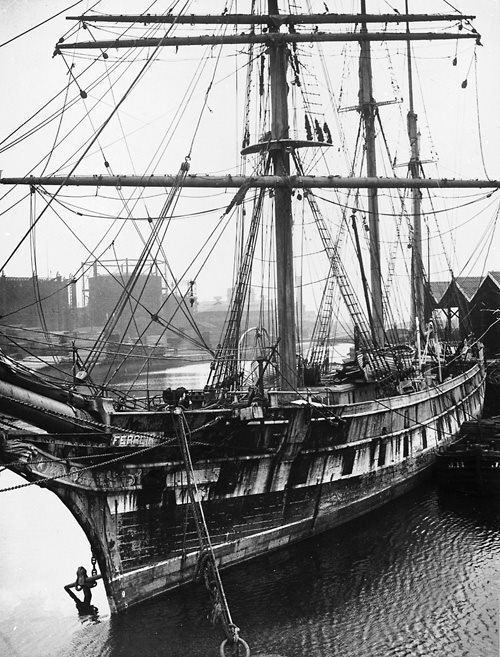
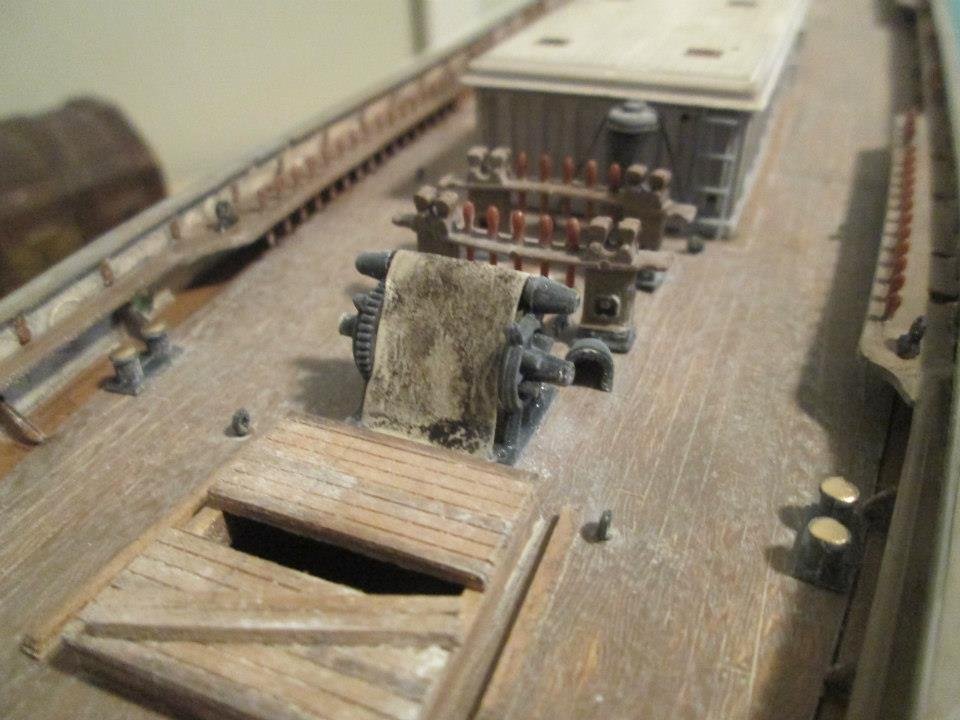
What is that 'fabric' on the winch, is it a leather cover?
It is a representation of a dirty tarpaulin, that was hastily placed over the winch. The idea was taken from photos of Ferriera when she was tied up at some backwater port.
-
5 hours ago, Kevin-the-lubber said:
In part because what I like about the ink is that, if you leave it alone, it creates it’s own, very attractive random pattern.
Indeed, that is why I like the ink in alcohol suspension. It's randomness is very natural....accounting for angle and shadow.
I used it heavily when I was building my Cutty Sark conversion into the Ferriara. Ferriera was extremely dirty and weathered and plus all the heavy additions and mods...it was an extremely fun build. Here are some images of the deck and its furniture after heavy weathering with inks and chalks.
Rob
-
-
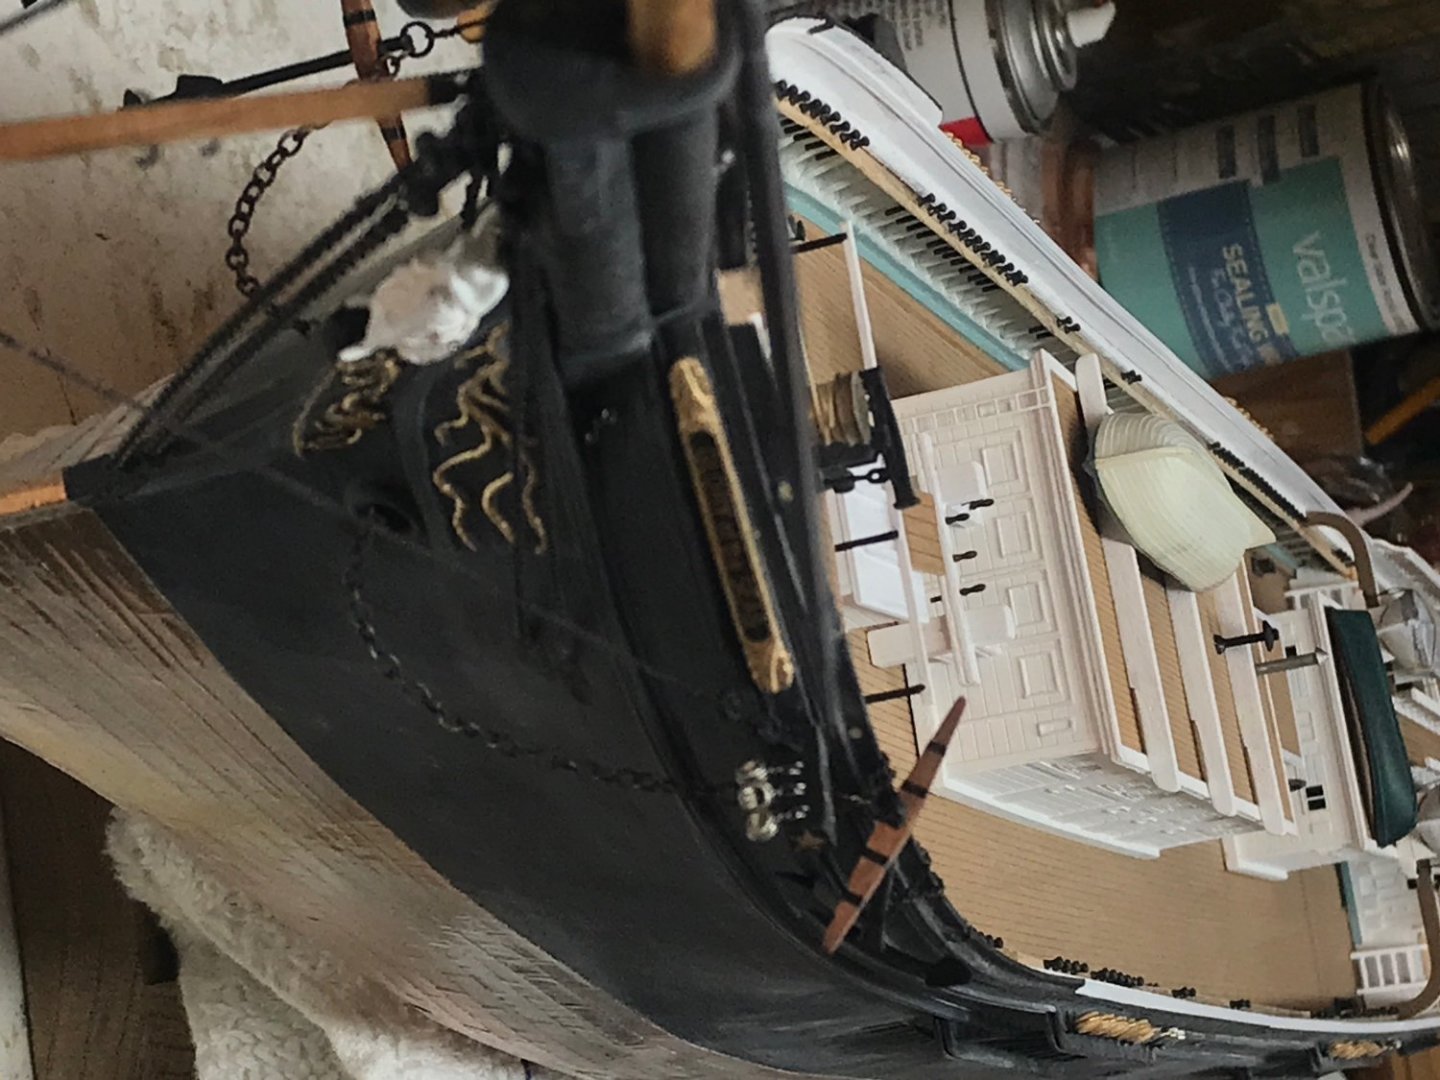
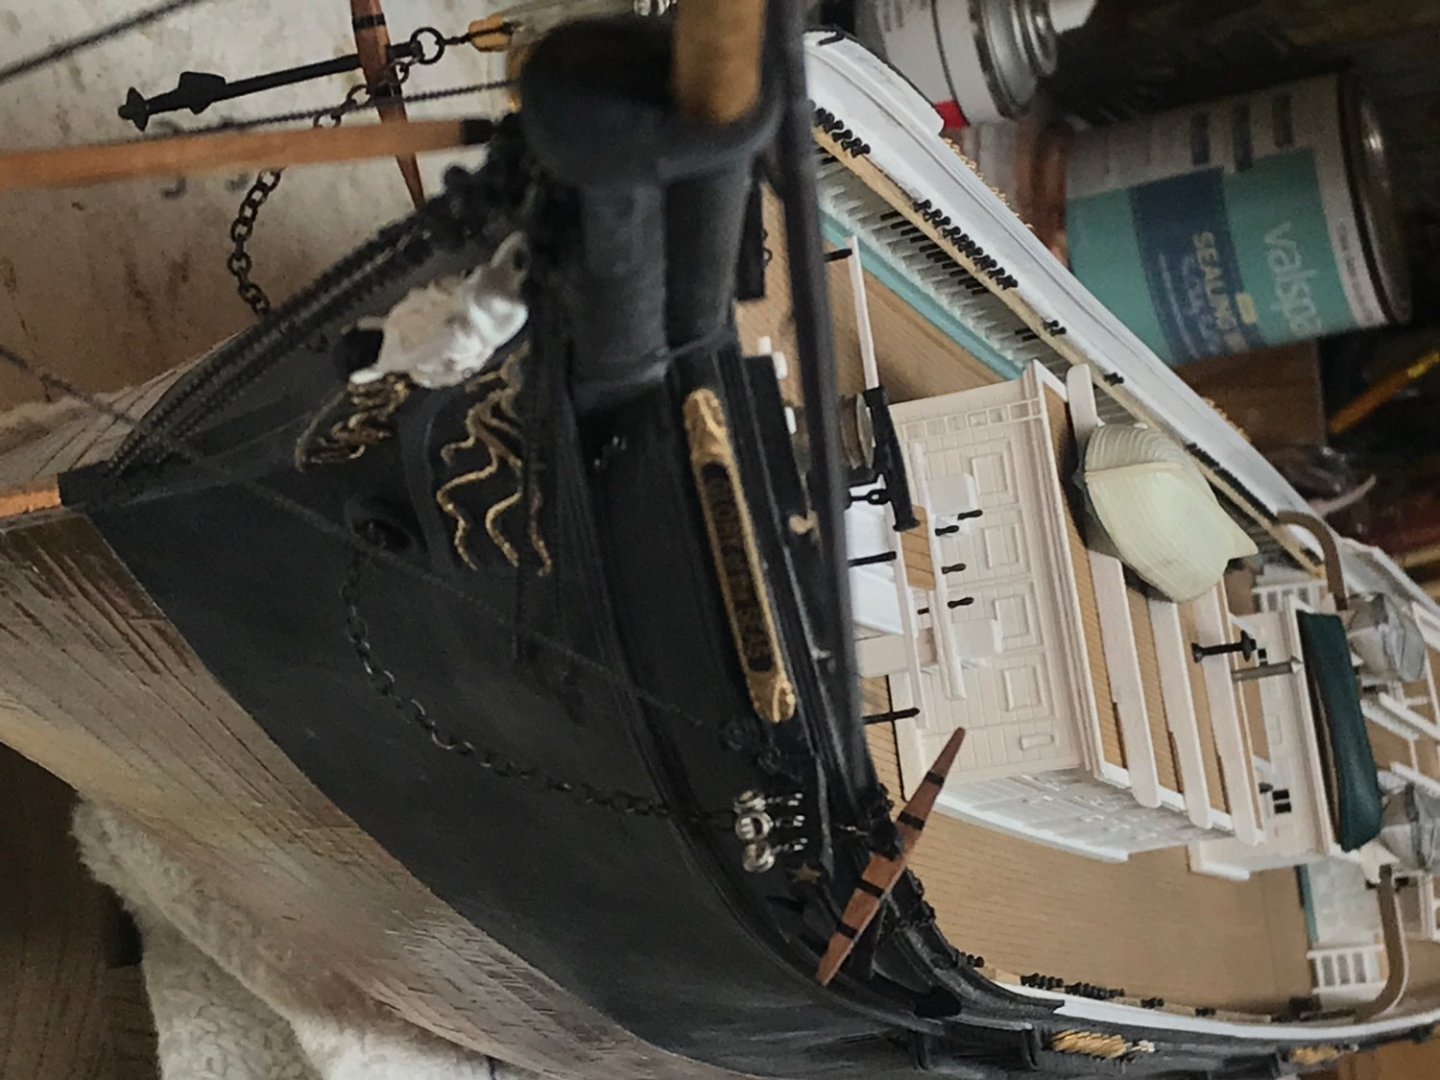
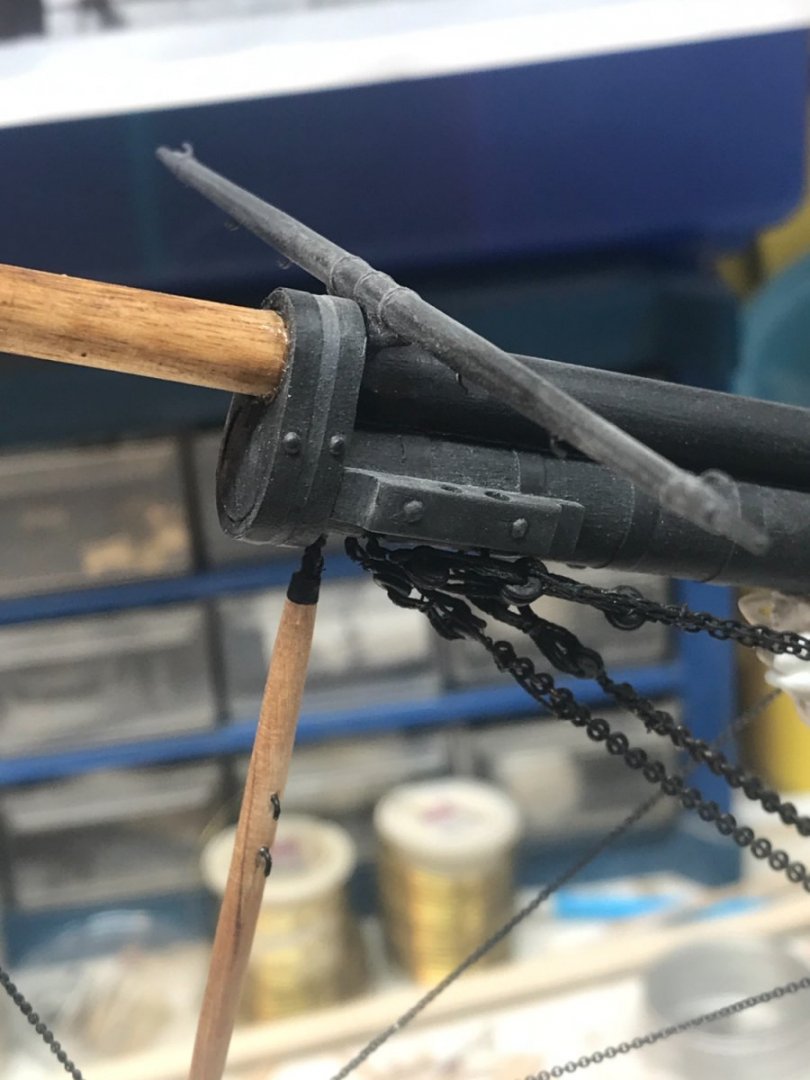
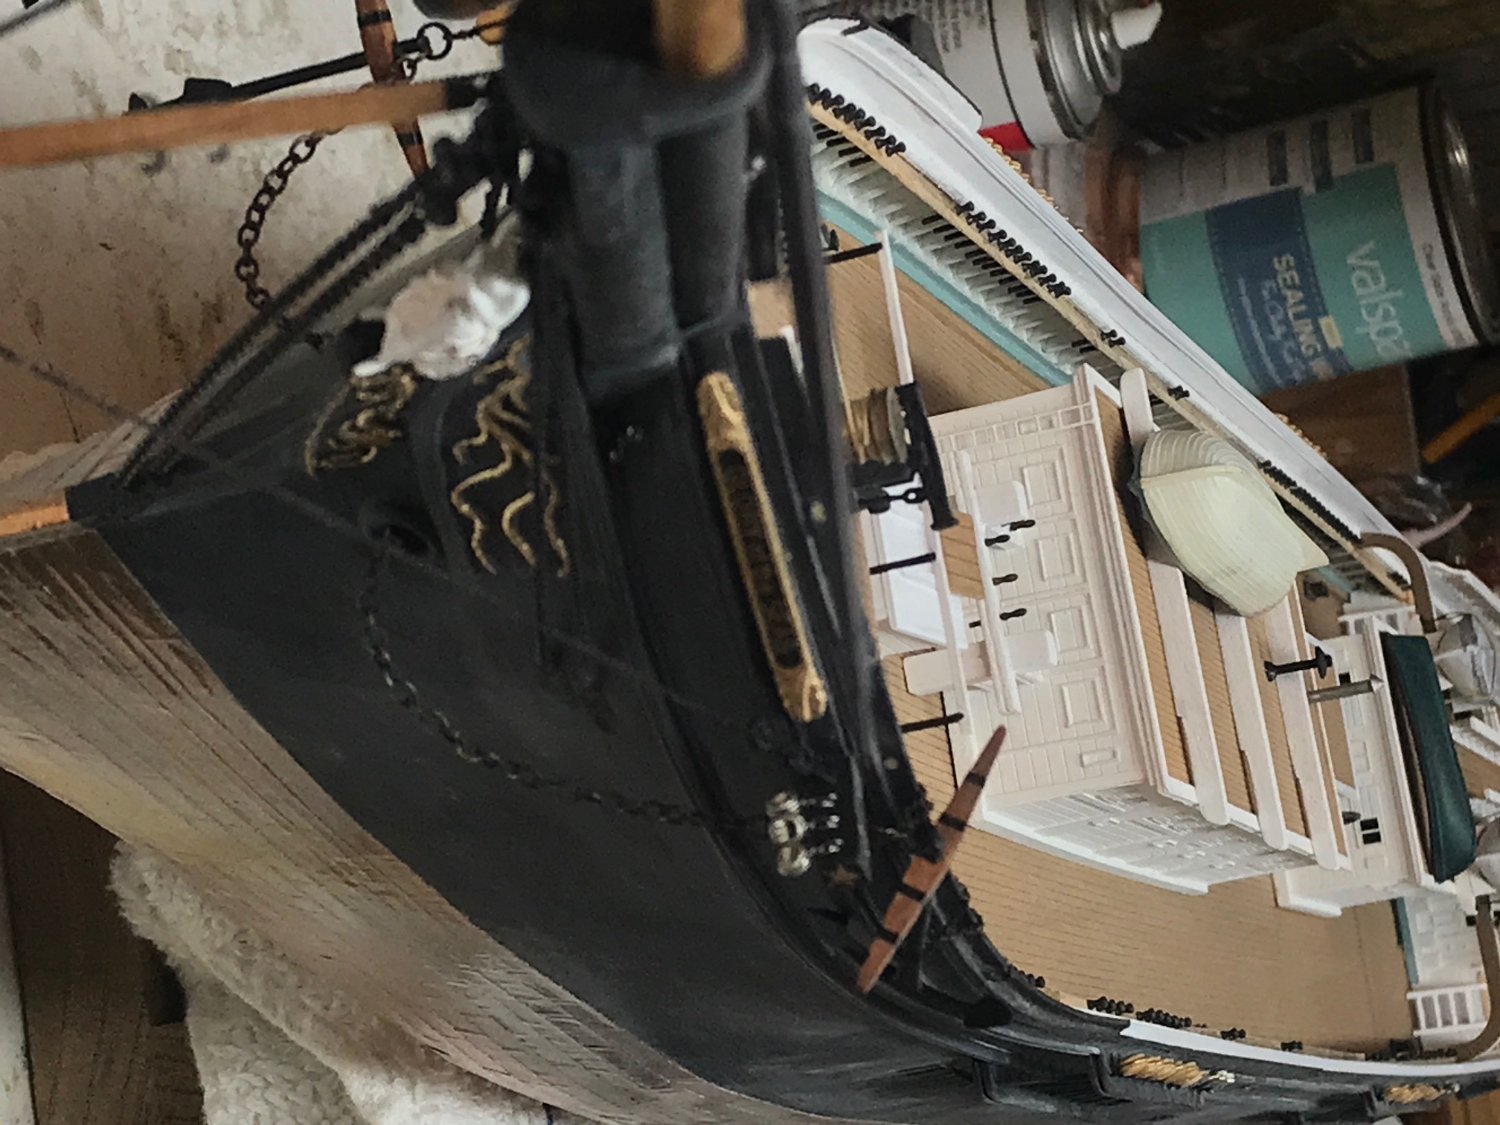
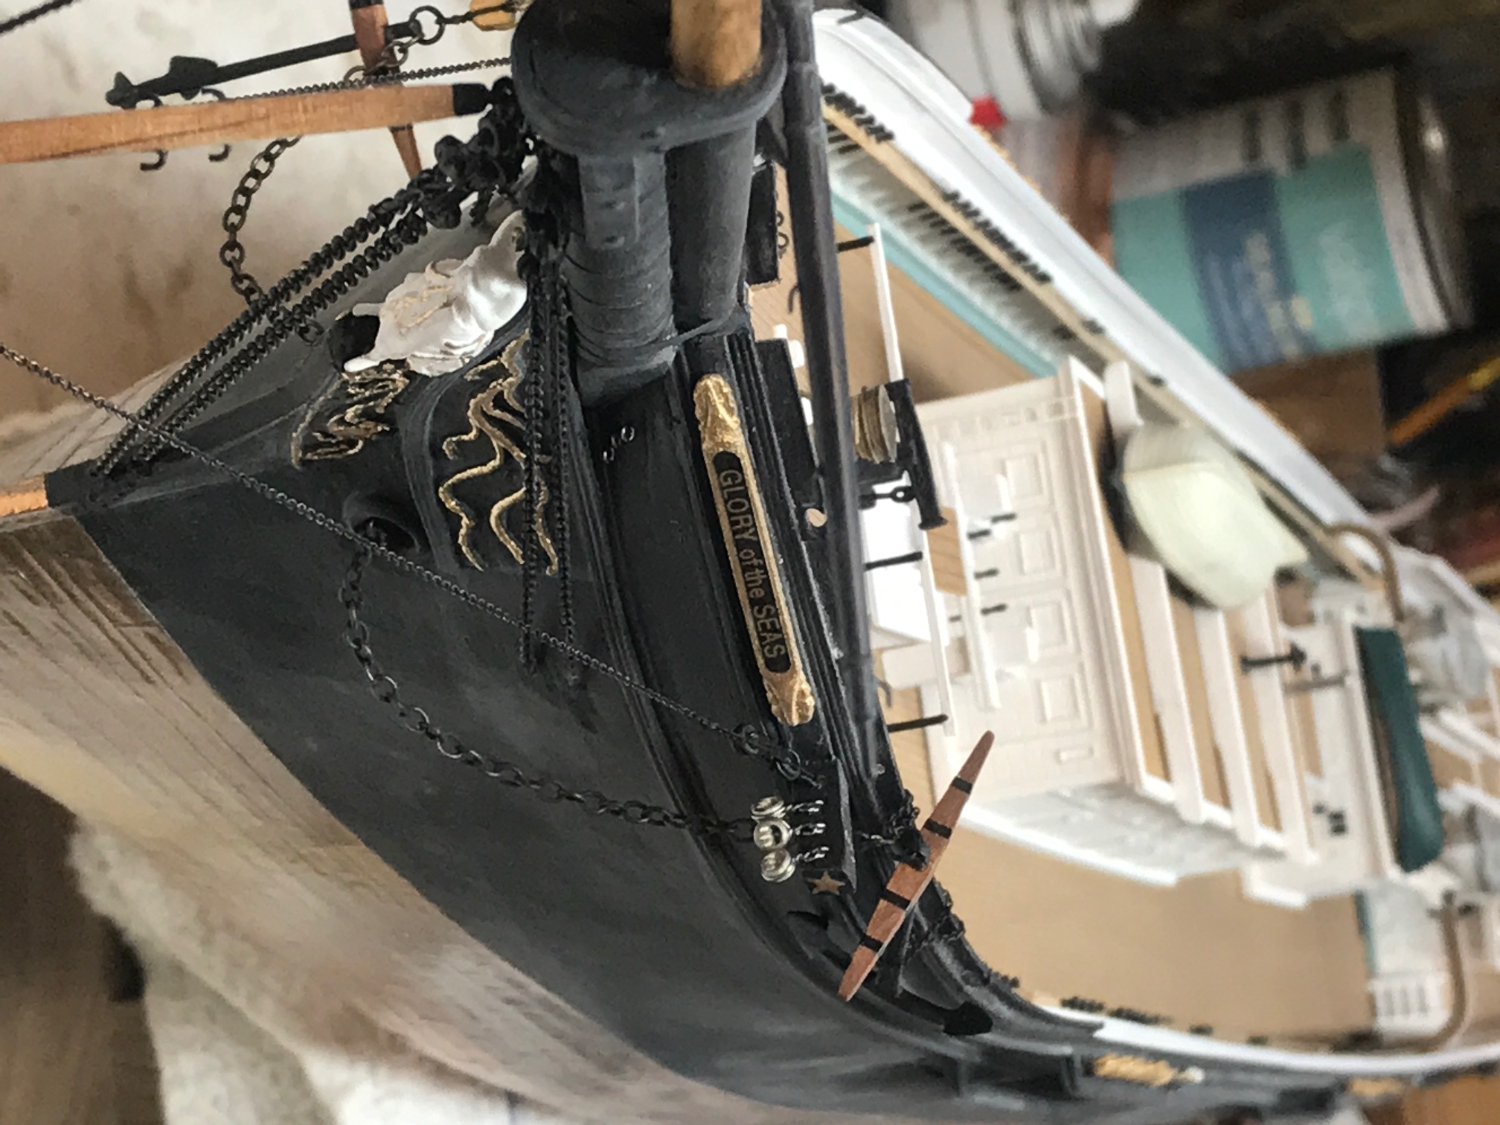
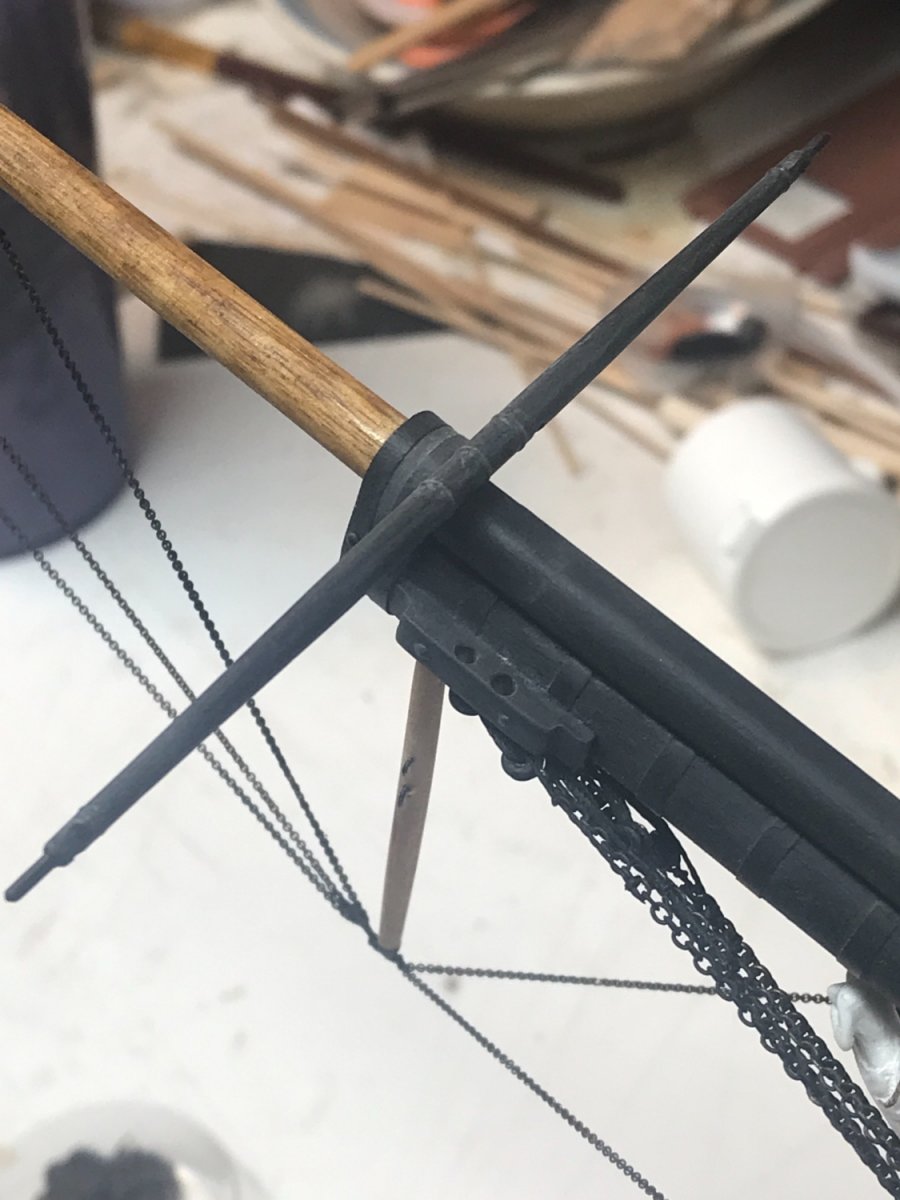
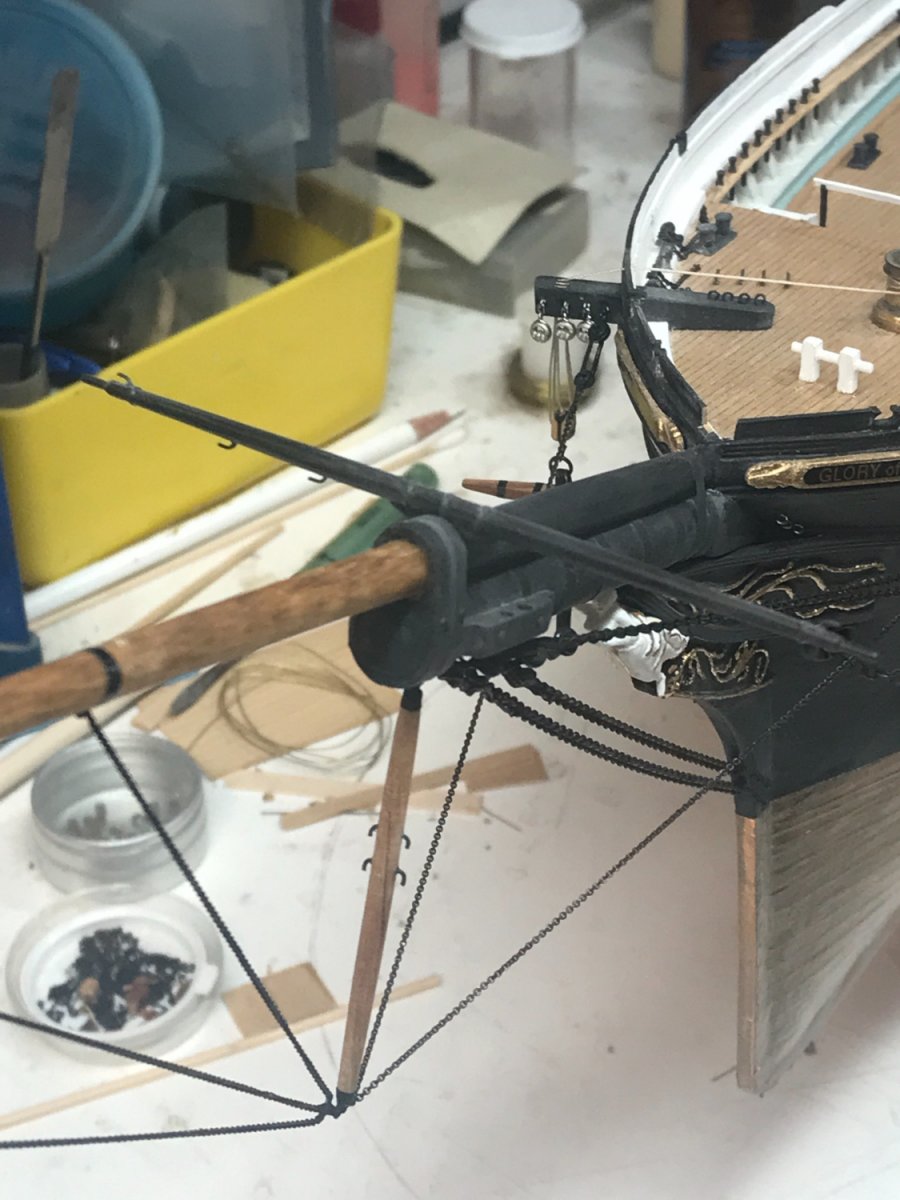
This image of her shows the bowsprit boom.
Zoom in and see
Rob

- KeithAug, Keith Black and BANYAN
-
3
-
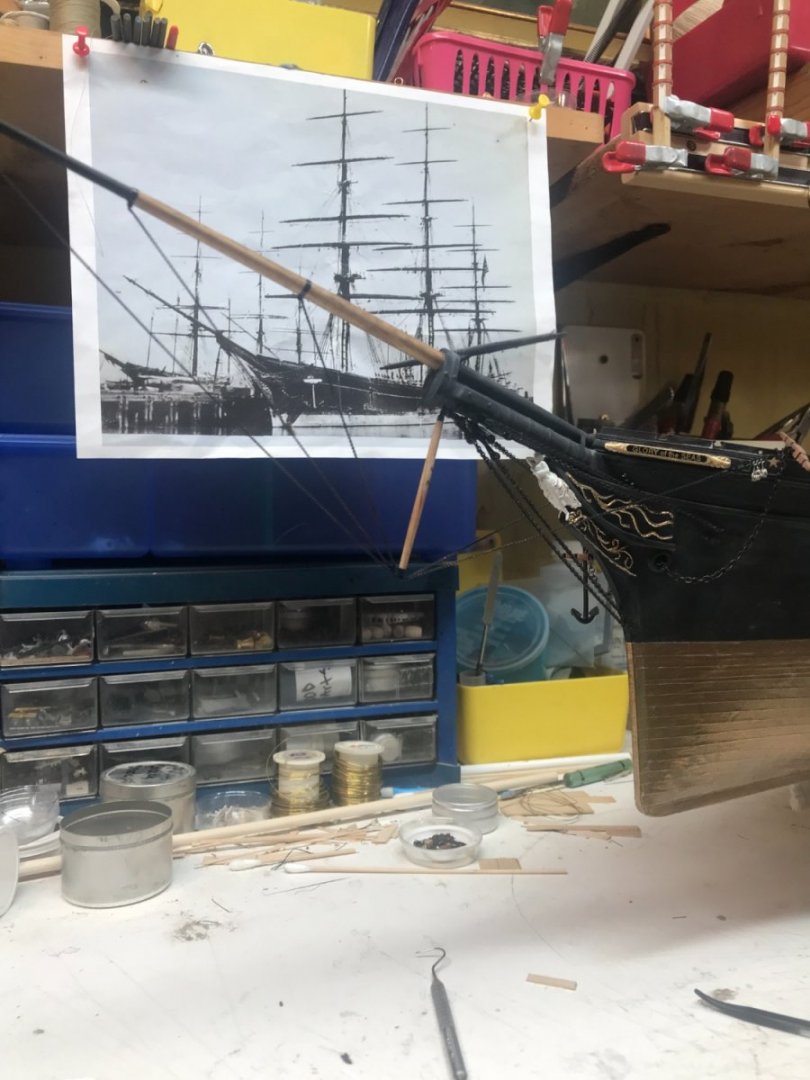
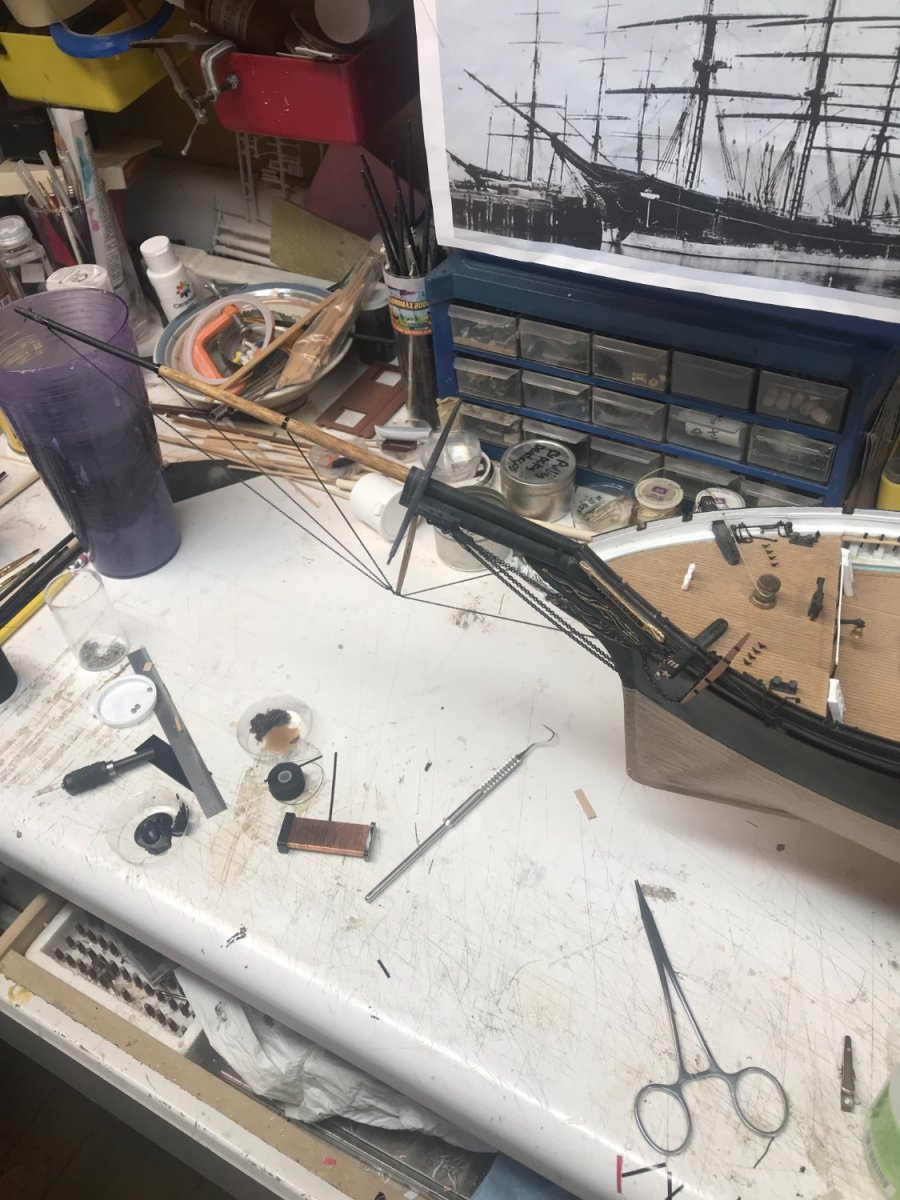
2 hours ago, michael mott said:
When I saw this picture It had not clearly registered how small all this stuff is.... then the picture looking down onto the bow and workbench it clicked. Wow that is some fine work there Rob!
Michael
Thanks Michael and Pat. I appreciate the compliment greatly. This scale allows me just enough size for ample detail but small enough to permit me freedom from the kind of details larger scales demand.
Thank so much.
Rob
-
Worked a bit on the bowsprit guy boom.
Rob


- michael mott, GrandpaPhil, BANYAN and 4 others
-
7
-
1 hour ago, michael mott said:
Rob superb work it just keeps getting better.
Michael
Oh man...that means something...Michael...coming from an extremely accuracy and detailed oriented modeler yourself. I'm humbled...really.
Rob


Glory of the Seas 1869 by rwiederrich - FINISHED - 1/96 - medium clipper
in - Build logs for subjects built 1851 - 1900
Posted
George, being the general modeling hack that I am, over the 40 years of my collecting kits , I have accumulated thousand of blocks from various models such as Cutty Sark, Connie, Alabama, Corsage,……you name it
I modify their blocks for my own purposes. Each one may get restropped, painted , bracketed and hooked or looped to make them suitable.
As is my habit, I will reuse any part or combinations of parts of previously engineered items for my purposes.
It is the end result that matters, NOT, how I got there.
Thanks for asking.
Rob