


Jim T
-
Posts
60 -
Joined
-
Last visited
Content Type
Profiles
Forums
Gallery
Events
Posts posted by Jim T
-
-
Your Sharpie is coming along great Dave. 👍
Remodeling..............you're on a slippery slope there! I started remodeling the kitchen in the house we lived in previous to the one we're in now. By the time I got done I'd remodeled the whole house. Beware of the terms: "While we're at it" or "We might as well"! 🙄
Jim
-
-
-
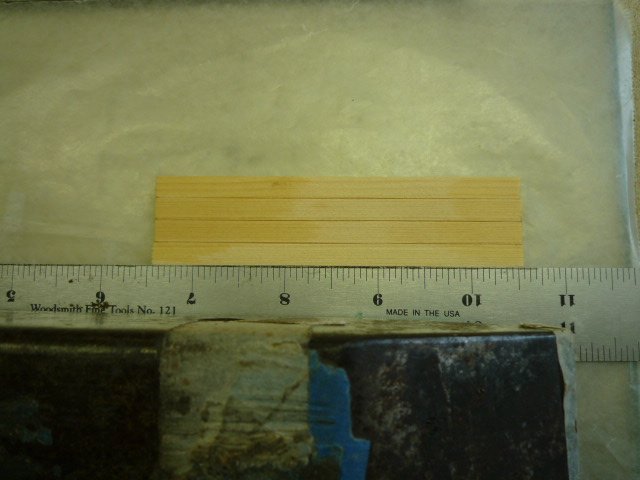
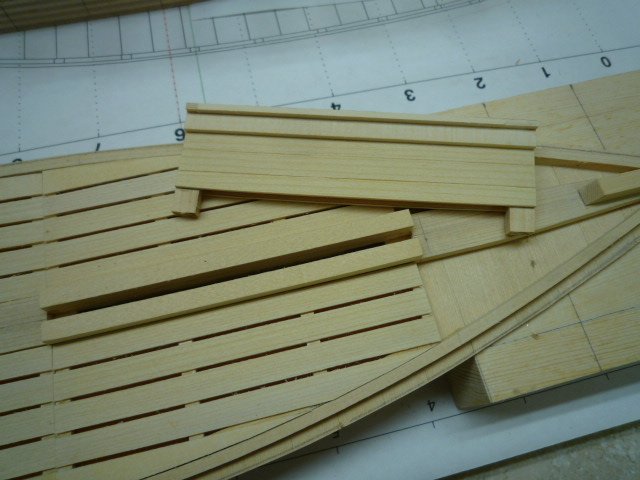
Got started on the Centerboard Case. The various views in the plans didn't always agree on the construction..... nor did the monograph. No big deal.........it is a "Generic Sharpie" after all, so I just built it the way it could of been built back in the day. 🙂
Set the end logs in place. I wanted to construct the C.B Case so it would be removable for now, so these weren't glued in.
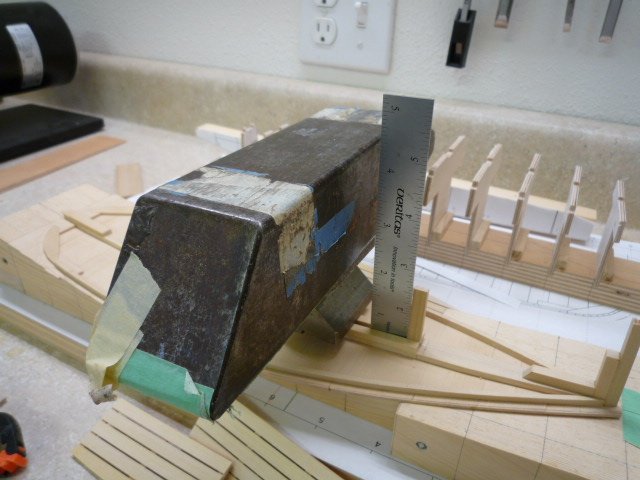
Then edge glued the sides and glued to the fore and aft CB Logs.
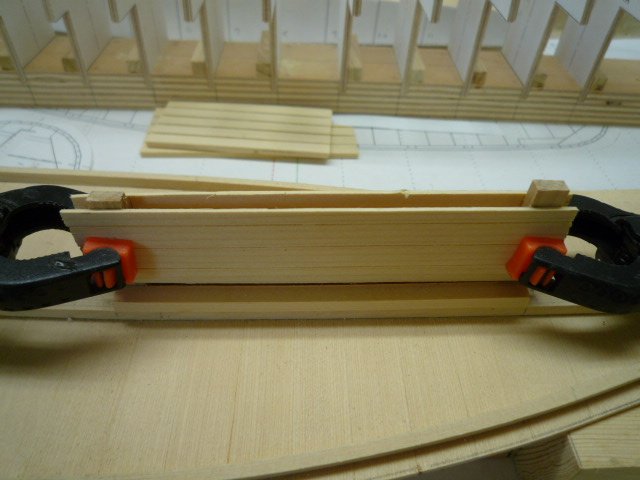
Added the Upper Case Support Logs.
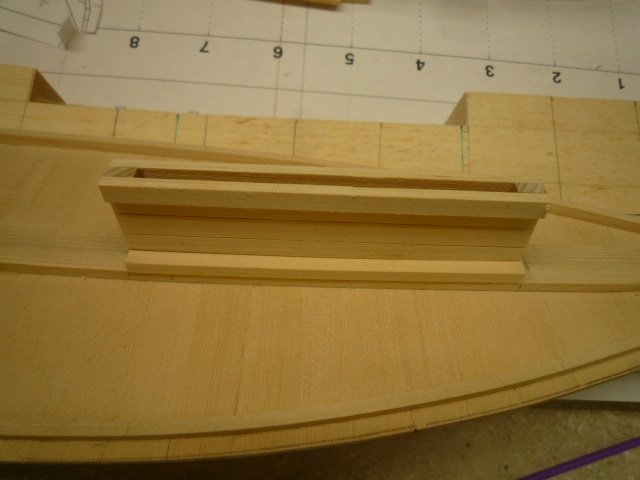
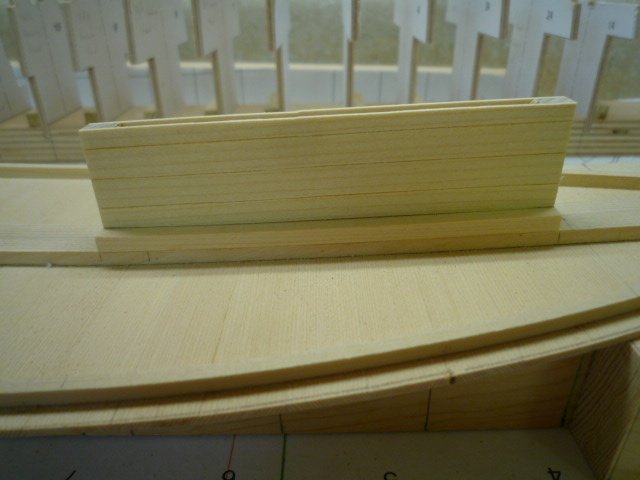
And finally the Open Cap Logs. Sorry about the weird color.
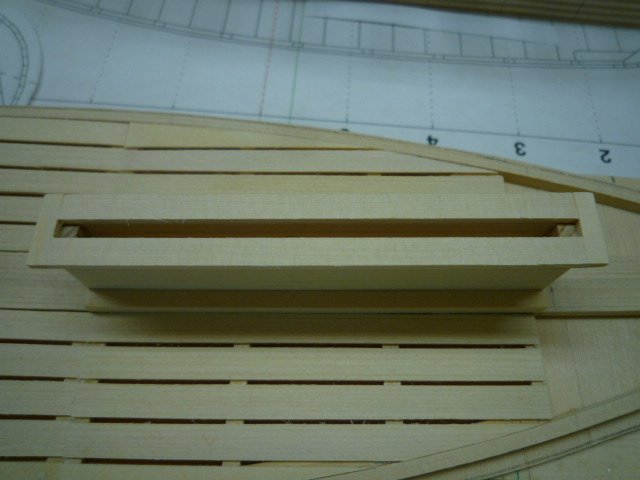
A little more work to do later. Removed for now.
Jim

- Jim Cricket, michael mott, G.L. and 1 other
-
 4
4
-
That's what I like about this scale (1:8)........a person can actually make fittings like these. 👍
Jim
-
-
As mentioned in the last post, I got started on the floor boards.

Once the floor boards were built I used a ships curve to mark the trim line and sanded to shape.
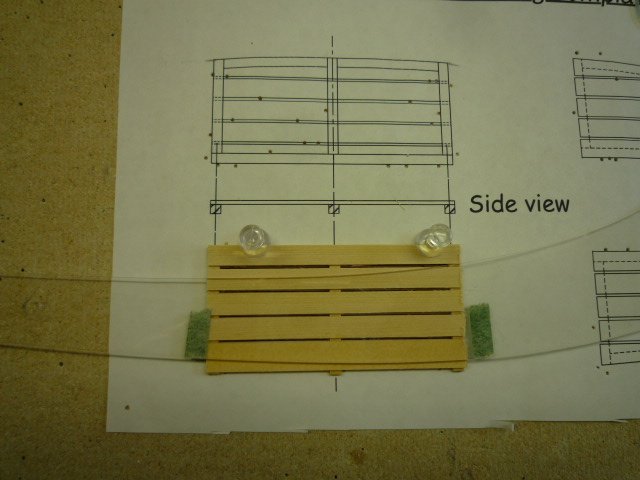
Finished.
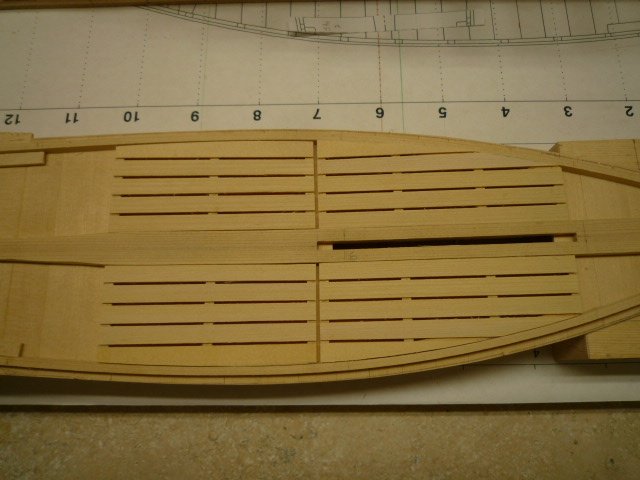
Next up is the Center Board Case.
Jim
- GrandpaPhil, davec, mtaylor and 4 others
-
7
-
On 5/28/2020 at 5:58 AM, davec said:
I'm using up the last of my Castillo boxwood supply on my current model, and looking to buy enough for my next project, which will likely be a fully framed Swan or Echo class ship in 1/48. I've been in touch with Gilmer Wood, who as usual, are being tremendously helpful. I mill my own wood, and have been happy with with what I have purchased from them in the past. The pictures they sent me of the billets look great. They also sent a description "perfectly flatsawn (quartersawn on the edge)." This isn't something I have considered before. Is flatsawn the best choice for milling scale lumber, or should I be requesting quartersawn? By the time I get the wood down to scale lumber sizes, does it even matter? The wood has been milled to 2x4" stock in 33" lengths.
thoughts?
thanks!
Dave
Castello's website shows numerous listings for boxwood. Which one are you looking at?
It's good to know about them. I have a well equipped wood shop, so could mill my own lumber, as you do. Plus, they're located only 60 mi. from me.
Jim
- mtaylor and thibaultron
-
2
-
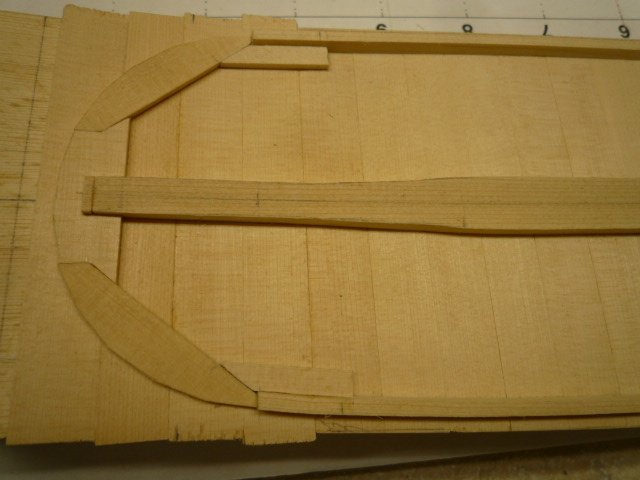
Got a little more done the last couple of days. Like most of us, I've got several projects going at once, plus the summer weather is getting here and the yard and garden is calling.
Got a couple more stern log parts added. I'm going to wait until I start the stern planking before I add the stern post.
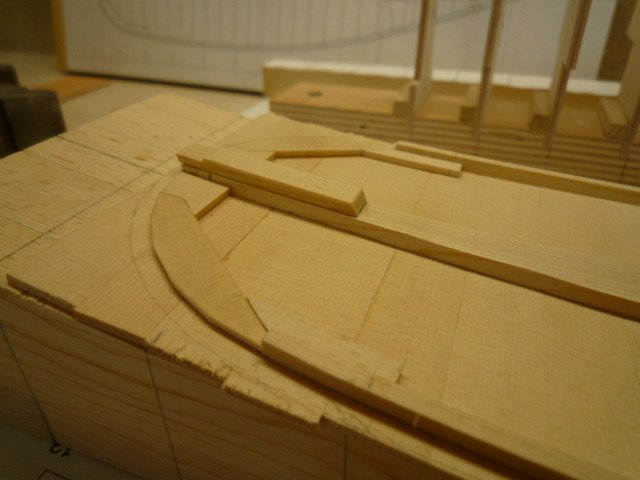
Also got a start on the floor boards.

Jim
- GrandpaPhil, davec, Jim Cricket and 2 others
-
5
-
-
Good save on the rub rail Andrew. I also like what you've done at the bow. The inwales add a lot...............I might look at doing that myself.
Jim
-
-
On 5/19/2020 at 8:50 AM, MrBlueJacket said:
Here's the bow and stern sheets installed. Now up to about 7 hours. Time to think about painting the exterior.
I'm at the point of needing to paint the hull (inside and outside) of my CLC Northeaster Dory, so will be watching your process closely.
Jim
-
51 minutes ago, Grisha said:
So, I get that a lot of my questions, for people who do more stuff like this than I do, sound like "I'm here to write a novel. How do I hold the pencil?" I have another of those. I put one coat of enamel ("Flat Depot Buff") on the inside of the hull and it looks...terrible. Rough textured, uneven thickness. What's the deal here? Do I need another coat, or did I do something really wrong, or do I need a specific size/kind of brush or?
(It doesn't look quiiiiite as bad as the picture but it's, you know, not what I was hoping for.)
Primer would of helped, but you would probably still need multiple coats. Also, probably thinned quite a bit. I'm going to paint the CLC dory I'm working on soon and am figuring on spraying one coat of primer and multiple coats of the final color. Someone may be along with more information.
Jim
-
My last post on this build was Nov. 14, 2018. The reason being.......I hadn't done squat on it since then! ☹️ Davec's thread rekindled my interest.........sort of. I got it back out and tried to figure out "where the heck was I"! I had a few pieces made for the stern, so thought I'd better at least get them glued on before I lost them.............which is what this post is about. Got that work done the last couple of days. Next up for me is to figure out the stern log construction. There's not a lot of information on the plans about that. However, the monograph seems to address that. Plus, when doing this type of boat construction, I think just doing what seems right will suffice. I have a hunch that that's what a lot of the original builders did. Lately I've been working on a CLC dory model project, so not sure how far I'll go at this time, but I am starting to feel the juices starting to flow a little bit.
Stay safe out there, Jim
- KeithAug, G.L., GrandpaPhil and 1 other
-
4
-
Looking good Andrew.
I'm about to the point of needing to spray some paint. I thought the rub rails looked a little clunky. so I tapered them a bit from inside to outside. I also cut them down a little so they won't stick out quite as far. I have the same sail plan as you, so your update really helps.
Jim
-
36 minutes ago, Jim Cricket said:
You're moving along, and problem solving as you go. That's what boat building is all about. For your next project, you might consider lofting yourself from plans. Besides being worthwhile, in and of itself, it tells you a lot about the boat, and if your lofting is fair, you know your molds and set up will be too.
Cheers
Lofting would make sense. Also taking the dimensions directly off of the plan drawings. When I set my molds up, I slotted my jig in the exact place called out in the plans. It just occurred to me that if the molds were moveable they could be adjusted to obtain a fair curve?
Jim
-
Looking good Andrew. I like your colors. I have some green left from a model engine machining project I'm working on that I might use. Probably light gray for the interior of the hull and varnished seats, etc. (unless I do a good enough job to varnish the whole interior..........not likely).
Pitfall #1: I stitched on the left #2 plank before I glued the frames to the bottom and I think that helped with frame alignment. Good call. 👍
Pitfall #2: I was watching for the gap between planks at the bow and can see how that could happen, but so far haven't had any problems with closing the gap between #1 and #2 planks. We'll see how the others go.
Next up planks #3 and #4.
Lead on! 🙂
Jim
-
Andrew,
When I first saw your project it really caught my eye. In fact, so much so, that I ordered the same kit..........which arrived today. I started building the NRJ "Generic Sharpie" over a year ago, but haven't done much on it since. I think this project will let me actually get something finished and get my head back in the model boat building game. I've already learned of a couple of pitfalls from your thread, which I'll watch out for.
Jim
- ccoyle and Duanelaker
-
2
-
Dave,
What you say makes sense. As far as the mold goes, I think working from patterns is what creates the situation you dealt with. In the full size world this hull would be lofted to create the molds. Hard to do at model size.
I notice the monograph seems to jump around some as far as the pictures go. Some of the steps seem to be written by coming back from the future.
No progress for me yet, but I did get my project out to try and figure out "now where the heck was I"?
Jim
-
Good headway Dave. I've been looking back at my build and at the monograph. According to it, the hull was built upright, so I'm a little confused when you refer to using the jig as a mold. But then I'm also confused how it can be planked without a mold. It also looks like I can do a lot of work before that first plank needs to go on. That is.......... if I actually get back to working on it! LOL
Jim
-
Have you seen this video?
There's a shot of the full size plans in the video and it looks like they show the correct location and orientation of the frames. Also there's a profile of the keel, stem and transom, so you can check the alignment of those.
Also you can use a right angle with a couple of shims added to space it away from where the glue joint is if you think there's going to be an issue during gluing.
This looks like a nice kit. I like these larger scale small boats.
Jim
-
Dave, I just checked into Model Ship World to see what's been going on and saw your post about starting on the Generic Sharpie. I have one of the build logs you've seen:
I didn't grind to a halt because of problems with the build, I just got sidetracked for other reasons. That said....... maybe I, unknowingly, got sidetracked just before I DID have problems! LOL
I was really enjoying my build, so maybe watching your thread will get me re-energized. At the least, I'll get my project set up again and try to figure out where I was and figure out what you're dealing with. This is my first scratch building project, so having someone to build along with that has some experience would be great.
Stay safe, Jim
- Ryland Craze and mtaylor
-
2
-
6 hours ago, Cricket said:
Quick question on the wipe on poly. Any difference between using oil or water based?
It's been my experience that oil based will give the wood a nice golden glow while water based won't change the tone much. I'd get some of each and give it a try. Oh.............then report back as I'm sure others have the same question.
Jim
East Coast Oyster Sharpie 1880-1900 by davec - FINISHED - 1/16 scale
in - Build logs for subjects built 1851 - 1900
Posted
Excellent progress Dave. 👍 Now that Fall is here, I hope to get back to work on mine, along with a few other projects. Your build log will be really useful.
Jim