clifforddward
-
Posts
112 -
Joined
-
Last visited
Content Type
Profiles
Forums
Gallery
Events
Everything posted by clifforddward
-
Welcome to model ship world...don’t be shy about asking if you get stuck...you’ll find many helpful people here in the forum.
-

Hello gentleman,,, I am a new member ,,
clifforddward replied to Jaan Ojala's topic in New member Introductions
Welcome!...you’ll find many helpful folks here. -
Enjoying following along on this Pinnace build... I had been thinking of picking up a Model Shipways longboat kit and pinnace kit just to use the drawings and then the kit laser wood as patterns. I’m going to use castello, buxus, holly and pear for my builds as much as possible. I moved away from basswood for model building a few years ago as I find it not strong enough for my tastes... Cherry and maple have been my garden railroading woods of choice, for shipbuilding these perhaps have too much grain for 1:48 or smaller scales.
- 90 replies
-
- 3
-

-
- english pinnace
- Finished
- (and 1 more)
-
Swan class 3D model in progress
clifforddward replied to dvm27's topic in CAD and 3D Modelling/Drafting Plans with Software
Thanks for posting this latest set of images Greg...Just last night I was studying the PE I recently received from you, checking the etch with the pages in TFFM...these images helped "close the gap" in my understanding of how the chain pump goes together...I can already see how these virtual images will be a great reference during the overall ship build!- 141 replies
-
- 3
-
-
- pof swan series
- swan
- (and 1 more)
-
Air Brush Paints
clifforddward replied to Worldway's topic in Painting, finishing and weathering products and techniques
Derek: You've asked a loaded question when you asked about airbrushes...I'm confident you'll receive many different answers. The correct choice of airbrush, of course, is the one that works for you....I'm not trying to be funny with that comment, it is just that I have observed over the past 4 decades that different airbrushes seem to work differently in each hand...and there are many trade offs. I am a Paasche snob...bought my first one in 1975 and am still using it along with a handful of other Paasche models, several in duplicate picked up along the way. My first one is sort of like the axe that has had a couple of head replacements and several new handles. Part of what I love about Paasche airbrushes is that parts obtained today can work in my first airbrush...that is huge as these are just tools and as such will need replacement parts over time. I use a nitrogen tank as air source...again the way I started and was taught back in my graphic arts days....absolutely zero humidity issues which can be a factor during our North Carolina summers. As for paint, I'm still a fan of solvent based paints...have a stash of Floquil paints I still use and am starting to roll over to Scalecoat as my colors run out. Someday I may master water based paints, but for the past 20 years I've tried I cannot achieve the same quality of finish. Since I use solvent based paints, I have a paint booth in my shop that exits to the outside after filtering. -
Hello Keith, and welcome to the forum!...you'll find lots of folks here ready to help answer any questions. I found this thread very useful when I joined the model shipbuilding community earlier this year...helped guide me with my personal path to getting started in the hobby:
-
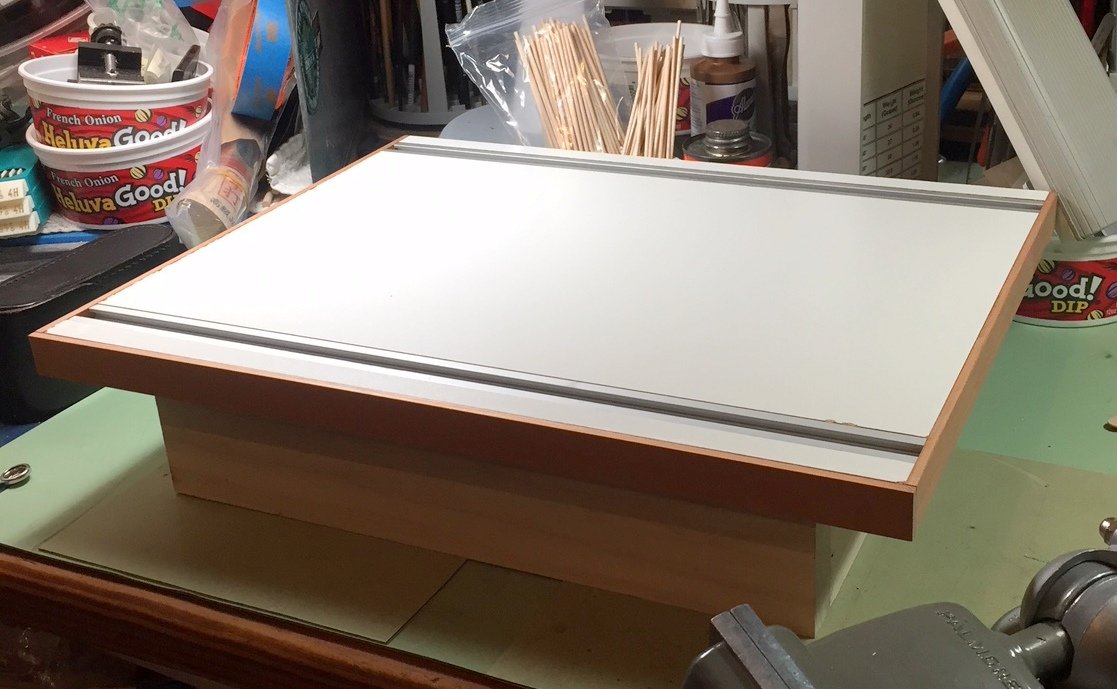
Took advantage of the Thanksgiving holiday weekend to make a building board for my Echo Cross Section build. Constructed along the lines of the building board in Ed Tosti's Niaid book. Probably overkill for this Echo cross section, but I wanted to use the opportunity to make several of the jigs to use with the track system that will be helpful as I move forward with a full Echo ship build in the future. This building board is approximately 12" x 15", and the tracks which were obtained from Lee Valley are spaced 10" on center. Should provide a stable platform for building my Echo Cross Section and allow plenty of places for use of the tracks as well as clamping around the edge. Oh and yes, I did just realize I need to open up slots in the end trim boards so I can slide the mounting bolts onto the tracks....Grrrr!

-
What brand of #11 blades do you use
clifforddward replied to bigcreekdad's topic in Modeling tools and Workshop Equipment
After decades of using various brands of #11 hobby blades, I finally tried surgical blades and discovered to my delight they are sharper, stronger and stay sharp longer...I've shifted to surgical #11 blades and holders for most of my hobby work now.- 26 replies
-
- 10
-
-
I'll take one set Greg....Direct email sent...
-
Dave, I think Greg hit the nail on the head...we can't think of the copper bolts in same way as a modern carriage bolt...these would have been made one by one, and fastening would probably have been more along the lines of clinching rather than a screwed on nut. As for our models, I suppose leaving a copper rod exposed in the raw would appear proper for an "as new" copper bolt...to represent an iron bolt using the liver of sulphur would color the "bolt head" a dark color. I bought some of the gel type liver of sulphur to try to see how it works...claims to last longer although I think the hard version has at least a year shelf life in the can. Certainly cheap enough to replace periodically.
-
Michael, if you have the space in your shop for the large bandsaw it will be ideal for resawing lumber even if you end up using a scroll saw for cutting frame and other parts. If I had the space for a large bandsaw I'd absolutely have one.
-
Dave...your note reminded me of the conversation at the recent Admiralty Models workshop about Liver of Sulphur....placed an order via Amazon this morning. David was right, this stuff is available from a number of sources. As I ramp up my Echo Cross Section build I'll be installing "bolts" in the keel scarf early in the build...need to get ready for that. Now just need to check my metal stock to see if I have the right sizes of copper wire already...
-
Druxey: Are you able to split the Bamboo thin enough to start drawing through holes such as in Jim Byrnes' drawplate, or do you start with a larger drawplate?
- 12 replies
-
- 3
-
-
- dowel plate
- splitter
- (and 2 more)
-
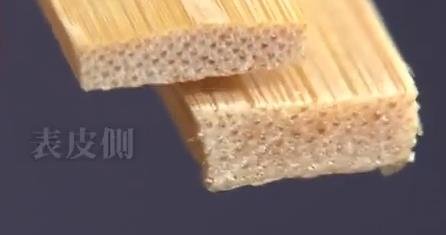
I asked my friend Yaeko (co-worker from my Japanese electronics company days) to help me translate and better understand several sections of the video...here are her comments: SURUGA bamboo lattice ware Question 1) ...they are soaking the bamboo at 6:55 mark....how long do they soak the bamboo and what is the purpose?....does the video say? →Soak one day (24hrs). It softens the bamboo and makes easier to make detail process Question #2) ...at 7:54 there appears to be a description of layers of bamboo, does it say to use the middle layer or just what? →The process is called へぐHEGU...Use only the outer/surface side. As you can see, the fiber is dense in the outer skin area. It’s stronger and supple. Question #3) ....at 8:02 she is sitting on the floor pulling the bamboo strips through a shaving tool....does the video say the name of this tool? I want to make something like this or search for it from Japan but I do not know what it is called, either Japanese or English name. →The tool is called Sendai せん台....to make the thickness even down to 1.5mm. I googled it in Japanese but I didn’t find it. https://translate.google.com/translate?hl=en&sl=ja&u=http://www.surugaya.com/sensuji/gihou/&prev=search The research continues...


- 12 replies
-
- 3
-
-
- dowel plate
- splitter
- (and 2 more)
-
I too was impressed by this video...I've actually reached out to a domestic bamboo rod culm supplier of Tonkin bamboo and have some pieces in route to me along with a Bamboo splitting knife. I also picked up several types of bamboo kitchen skewers from my local kitchen store...for testing against the Tonkin bamboo. There are a couple of things I need to work out in my mind, and a couple of tools to make....one tool to make is the "thinning plane" device, and one nagging issue to sort out is details surrounding the soaking of the bamboo culms at the beginning of the process. I used to work for a Japanese electronics firm, so I'll contact some of my old co-workers to get that part of the video translated. My guess is the soaking helps with the initial splitting and cutting process, but need to find out how long and any other pertinent details. In the end I hope to work out a superior means of creating high quality bamboo treenails.....maybe overkill, but we'll see... I'll report on my success (or failure) here on the forum.
- 12 replies
-
- 4
-
-
- dowel plate
- splitter
- (and 2 more)
-
I wish to provide a big “Thank You!” to both you and David for making these plans, your books, and the workshops available to the market…it was your collective offerings that provided the “hook” for me as I discovered the scratch model shipbuilding community 6 months ago…I’m looking forward to my growth in the hobby, first with your Echo Cross Section kit, and ultimately a full ship build down the road.
-
I'd second the decision for sewing machine oil....key properties that make it suitable for this application are: 1) Light in "weight" means it will penetrate bearings as needed. 2) Non drying formulas typically are used for sewing machine oils....this keeps them from "gumming up" mechanisms of sewing machines and also any other similar machine that does not see strong side loads (like a drill press). 3) Easy to obtain in small quantities. If you were asking about lubricating oil for the spindle of a milling machine then you'd need a different oil that provides ability to lubricate under presence of side load....so if you use your Proxxon drill press for milling operations then we'll need to discuss a different option...although in reality I'd suggest against using any drill press for milling as it will cause premature failure of the spindle bearings. This could be a really long discussion, but that's the crux of it....
-
Druxey Yep, probably a bit more resawn wood than I’ll need for the Echo fitting out kit😏 ...guess that means I’m need to plan a future build to use it on... LOL
- 19 replies
-
- 2
-
-
- milling wood
- echo cross section
- (and 1 more)
-
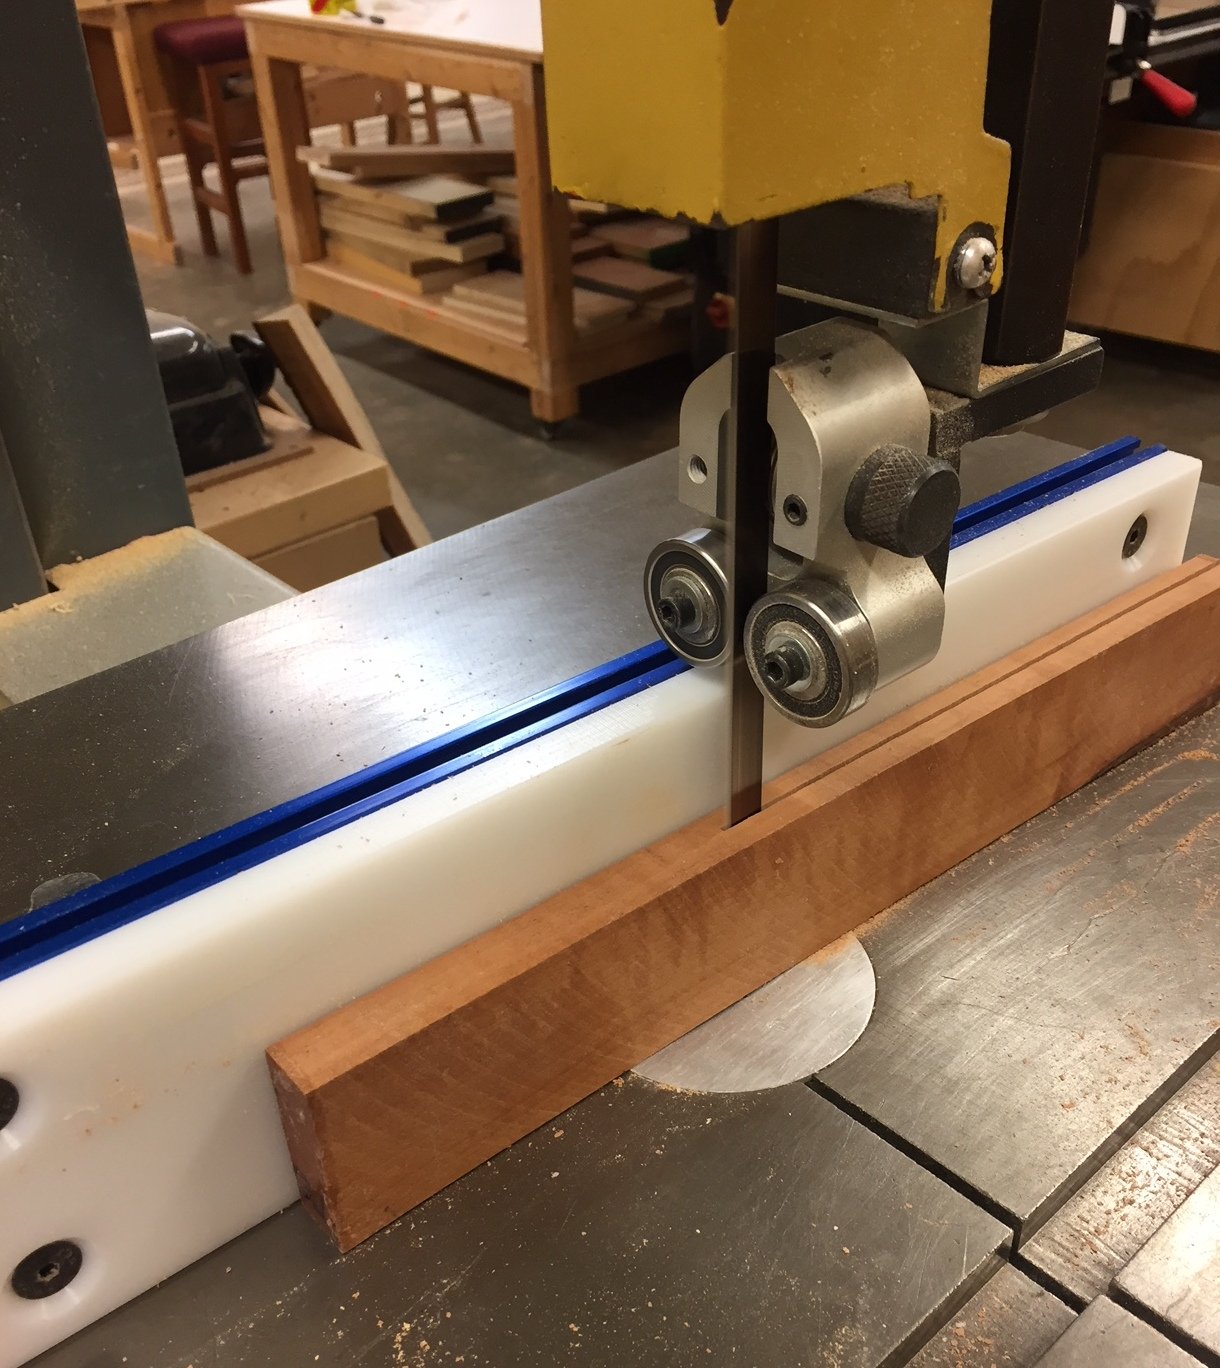
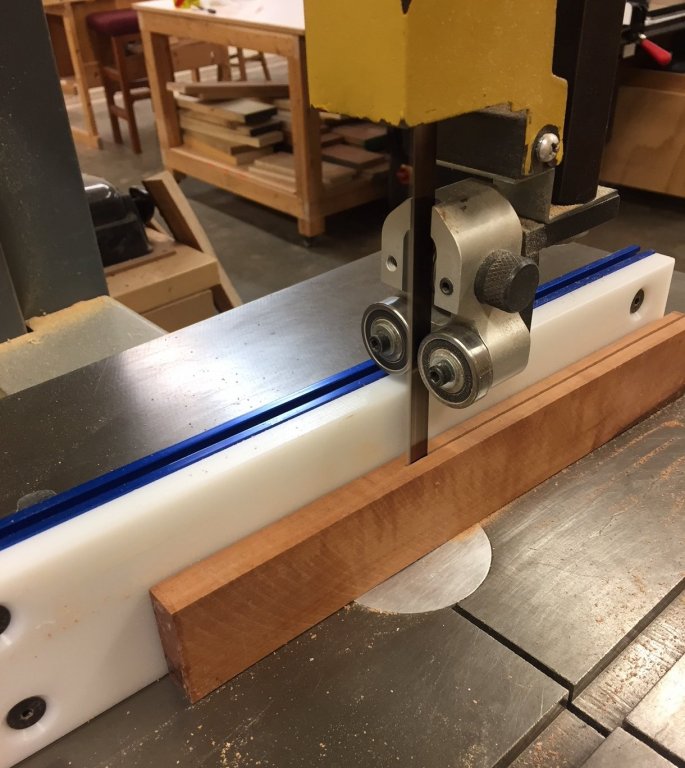
Hi Joe There are a couple of Bandsaws in the shop...this one is about a 16” model and has a rip type blade with about 5-6 teeth per inch with width being about 5/8”. The blade has a few flaws I could see that created irregularity in some pieces...I’m looking forward to seeing if the thickness sander cleans things up. I suspect the workshop would allow me to donate a new blade and I may consider that in the future... although I doubt they would allow a wider resaw blade as this bandsaw sees general use by many students and would not be dedicated to redrawing... such is the nature of shared shop equipment. So I am hoping the slabs I sawed will clean up OK on the thickness sander...if so this will turn out to be a satisfactory solution. The bandsaw had pretty good guides with fairly well adjusted roller bearings...a heavy commercial looking bandsaw.
- 19 replies
-
- 3
-
-
- milling wood
- echo cross section
- (and 1 more)
-
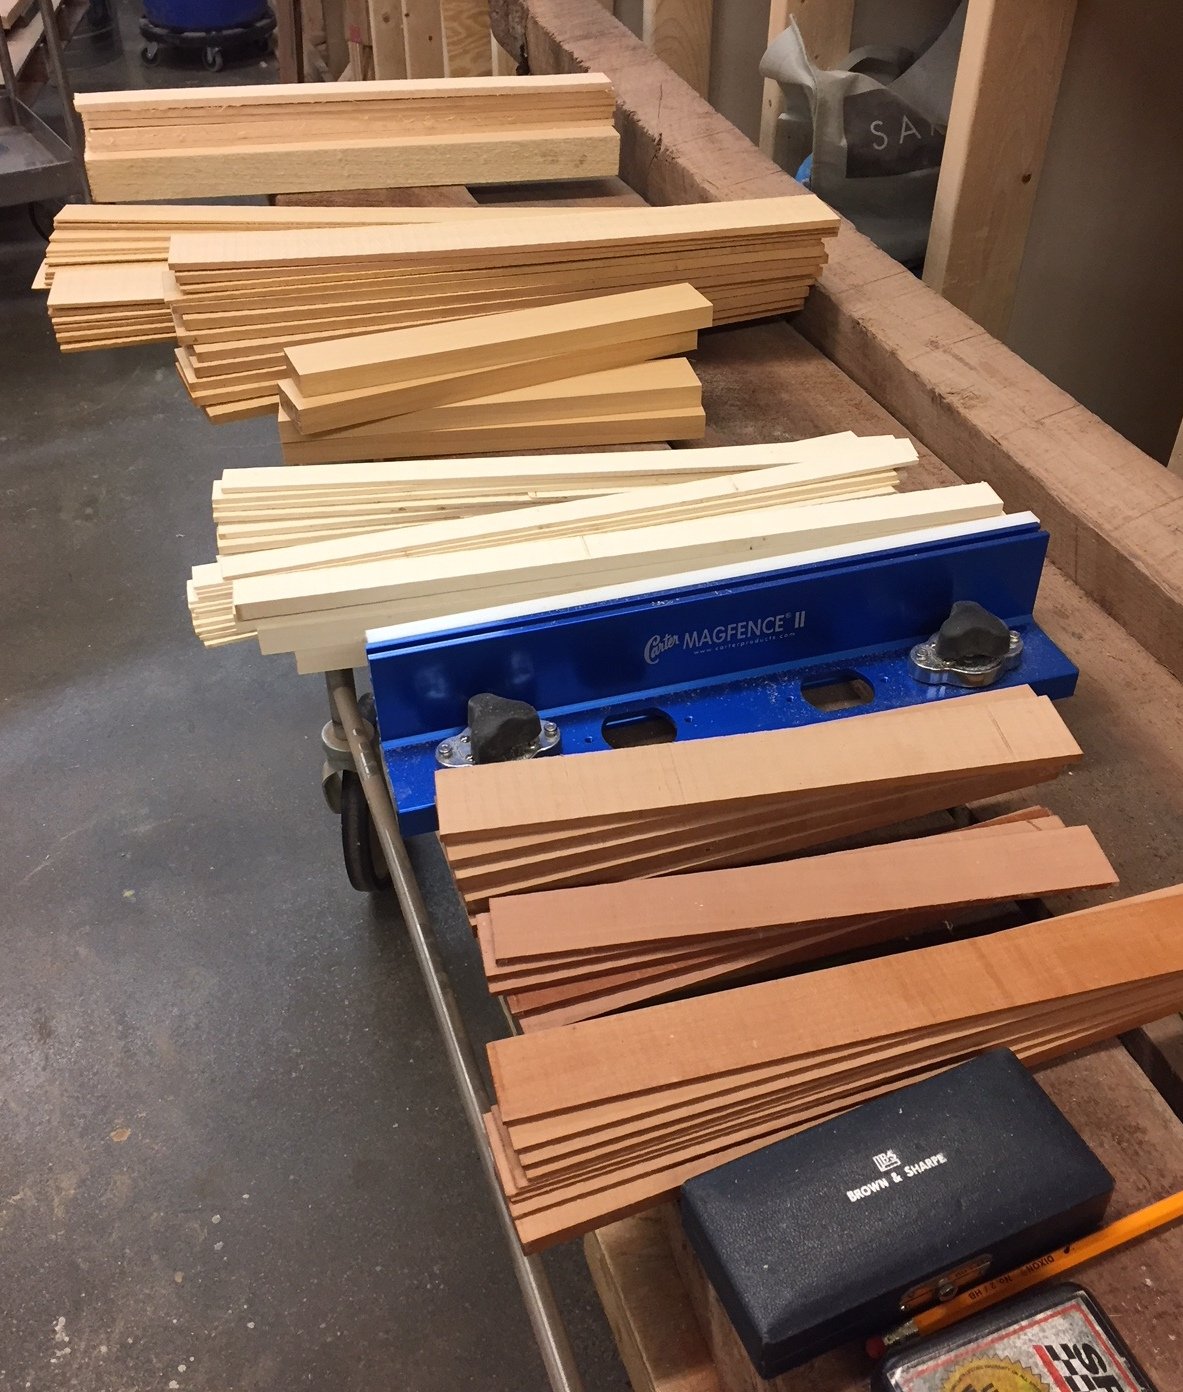
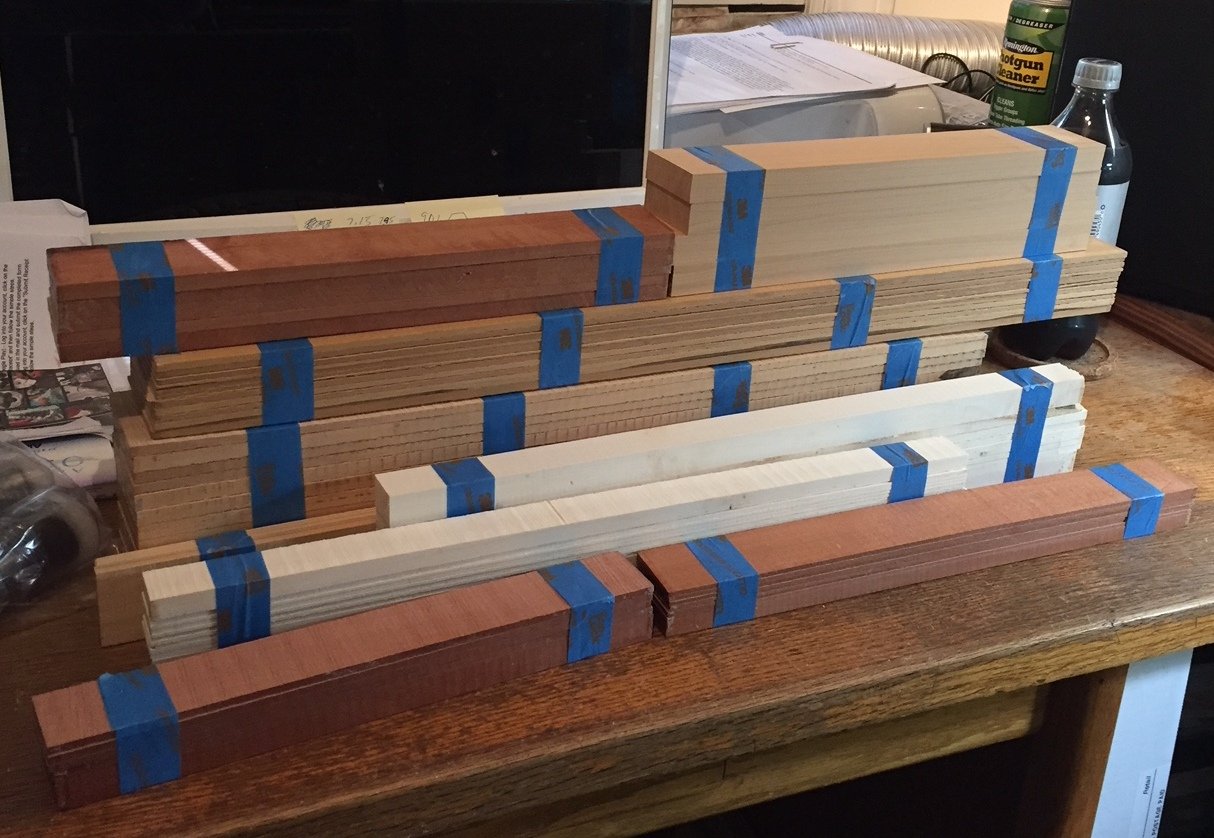
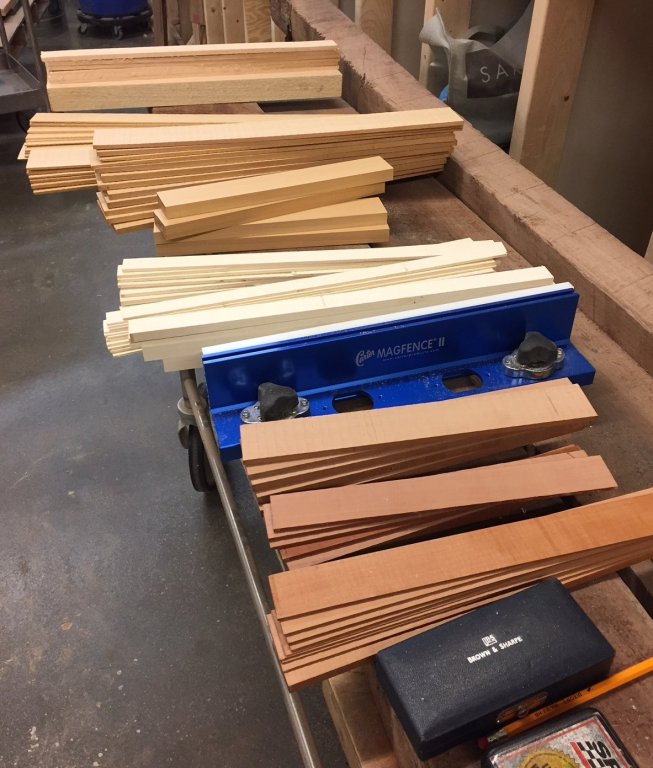
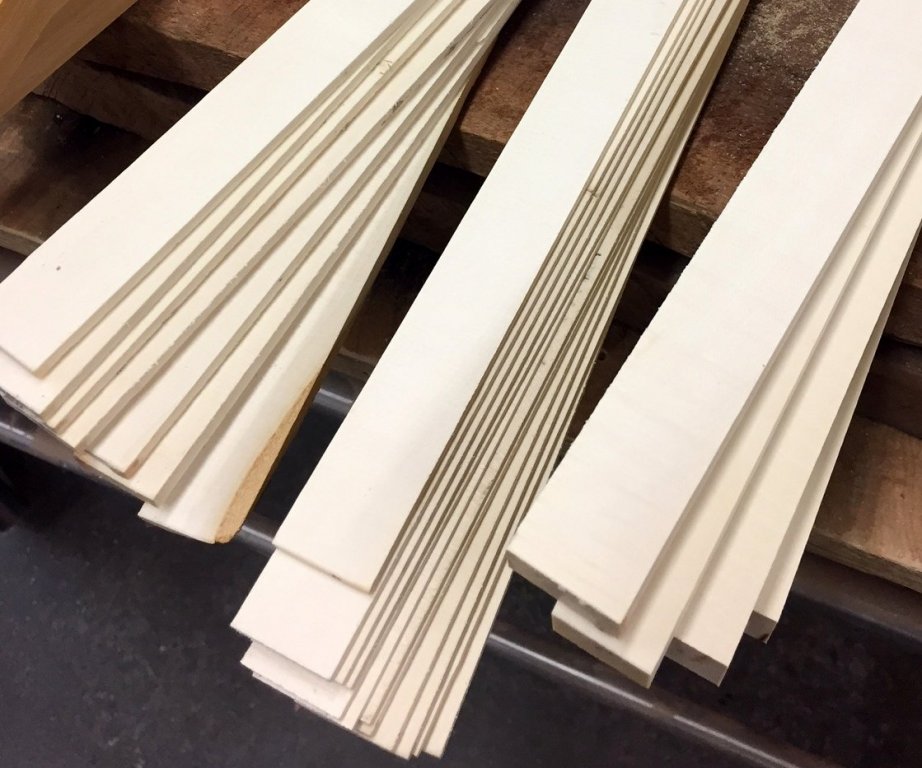
I don't have room for either a full size table saw or large bandsaw, so I took advantage of a program at our local university where alumni can pay a reasonable annual fee to gain access to the woodshop at the craft center on campus. This is a boon for my woodworking efforts as it is only a 20 minute drive from my home and while the equipment is not perfect it is fully workable for my needs. Last night I took a stab at first resawing efforts with some Castello, Holly, and Pear I had obtained to make lumber for my Echo Cross Section fitting out kit. All in all I was pretty pleased with the effort...the magnetic fence I picked up worked fine for resawing. I do think I'll add a couple more magnets to the fence...they are available separately from the manufacturer. In the photo grouping of resawn wood you'll notice a stack of basswood at the very back...I had picked up a piece of cheaper basswood for testing...this proved to be a wise move as I was able to develop my technique before cutting into the more expensive wood. I saved the holly to last as I wanted to make a number of thin strips for planking...this proved easy once the fence was properly set and technique was mastered. In the final photo I've taped bundles of the cut wood so it can acclimate to my home workshop before further processing....I'll be taking delivery of a thickness sander from Jim Byrnes during next week's NRG convention in Florida...I'll post further photos once I start thickness sanding of these pieces.

- 19 replies
-
- 16
-
-
- milling wood
- echo cross section
- (and 1 more)
-
One caution about Dan's recommendation regarding sourcing boxwood from older folding rules....Dan lives in Australia, so it may very well be that down his way old folding rules are made from Boxwood....but here in USA the leading historical manufacturer of folding rules was Lufkin Rule. I'm confident Lufkin started manufacturing in New England, but at some point they moved their folding rule plant to Apex, North Carolina just down the road from me. Back in the 1980's I sold instrumentation to Lufkin, so got a good opportunity to see the operations and equipment they had been using to make rules. For some decades prior to that point Lufkin sourced the wood for their folding rules from their company owned timber tracts in Maine...it was white pine, not boxwood. I do not know about earlier manufacturing, but suspect at least since WWII Lufkin used white pine for their folding rules. My Grandfather's old folding rule is a USA produced Stanley looks like white pine to me...wood appears too soft to be boxwood. Perhaps a UK manufactured folding rule would be boxwood...would be interesting to investigate as I believe they could be cost effectively sourced via eBay if not old enough to be a collectable.
-
Never mind the eating...pity the poor cooks! Having cooked using a gimbal stove on a 38 ft sailboat in moderately stormy seas I can attest to the difficult nature of keeping eggs in the pan and stew in the pot....and no, I wasn't interested in eating once the food was ready!
-
Now I get it Larry...funny how things look different sometimes in a photo. I applaud your efforts as it seems to me carving lettering must be among the most difficult tasks....any deviation in the font sticks out clearly...I look forward to seeing your future progress.
-
A question...I noticed the full size version of this has the letters gouged into the wood, while your prototype carving has the lettering raising above the surface in relief....seems it would be easier to use a miniature gouge to carve the lettering on your prototype piece into the wood...did you try any of that technique?
-
What grit for disc sander?
clifforddward replied to clifforddward's topic in Modeling tools and Workshop Equipment
Thanks Greg...180 grit is what I settled on from earlier respondents....actually ordered a disc sander from Jim Byrnes earlier today. My old Dremel disc/belt sander had served me well over the years but was always difficult to do fine work with so I finally passed it along and upgraded this important sanding tool on my workbench.