ESF
-
Posts
381 -
Joined
-
Last visited
Content Type
Profiles
Forums
Gallery
Events
Everything posted by ESF
-
 A terrific build, loaded with wonderful details and craftsmanship. Congratulations. Steve
- 227 replies
-
- 3
-

-
- BlueJacket Shipcrafters
- Stephen Hopkins
- (and 2 more)
-
To those who gave likes, thank you and thanks for stopping by. Carl, I grew up across the Hudson River from the entrance to the Erie Canal and spent many hours at riverside watching all manner of watercraft including boats, tugs, barges and the occasional larger vessel come and go. The 200th anniversary of the Canal opening is in 2025 and I was thinking about a packet (passenger) boat from the early period. I obtained two sheets of drawings of a packet boat at 3/8" to the foot scale from a regional museum which are currently being shrunk to 1/4" (1:48) scale at a local printer. I think the 3/8" scale would be an easier build but more parts and people are available at 1:48. Not a particularly graceful boat (hence my hesitation to commit) but an important one in our country's history (On the other hand the Vance was a bit of a tub too). My thought, if I do it, is to have one side partly open to show the living conditions within the boat, which often packed 100 passengers into a very small space on a boat about 70 feet long. It's all a bit of dreaming right now since it would be a full scratch build which I know next to nothing about, save for all the building design and drawing I did during architectural practice. Right now I'm doing a well needed shipyard clean and purge to get ready for whatever comes along. Steve
- 446 replies
-
- 4
-
-
- zebulon b vance
- deans marine
- (and 3 more)
-
To those who gave likes, thank you and thanks for stopping by. Denis and Jack, thanks for your kind comments. Steve Damage report. There was a comment earlier that all the added details might be a reason to refrain from sailing. The damage report from the first two outings was limited to two lifeboats knocked loose from their fastening point at the bottom of the davits. The davit rigging held them in place. The out of water damage was caused by inattention to the nearly invisible radio antenna strung between the masts. This resulted in a sideways jerk to the upper superstructure which knocked another lifeboat loose, with one of its davits popping off the deck; and one aft ladder separated from its mounting point. All damage has been repaired and was a small price to pay for the joy of sailing.
- 446 replies
-
- 4
-
-
- zebulon b vance
- deans marine
- (and 3 more)
-
Background music credit is Somewhere Over the Rainbow by Isreal Kamanawiwo'ole. Steve
- 446 replies
-
- 5
-
-
- zebulon b vance
- deans marine
- (and 3 more)
-
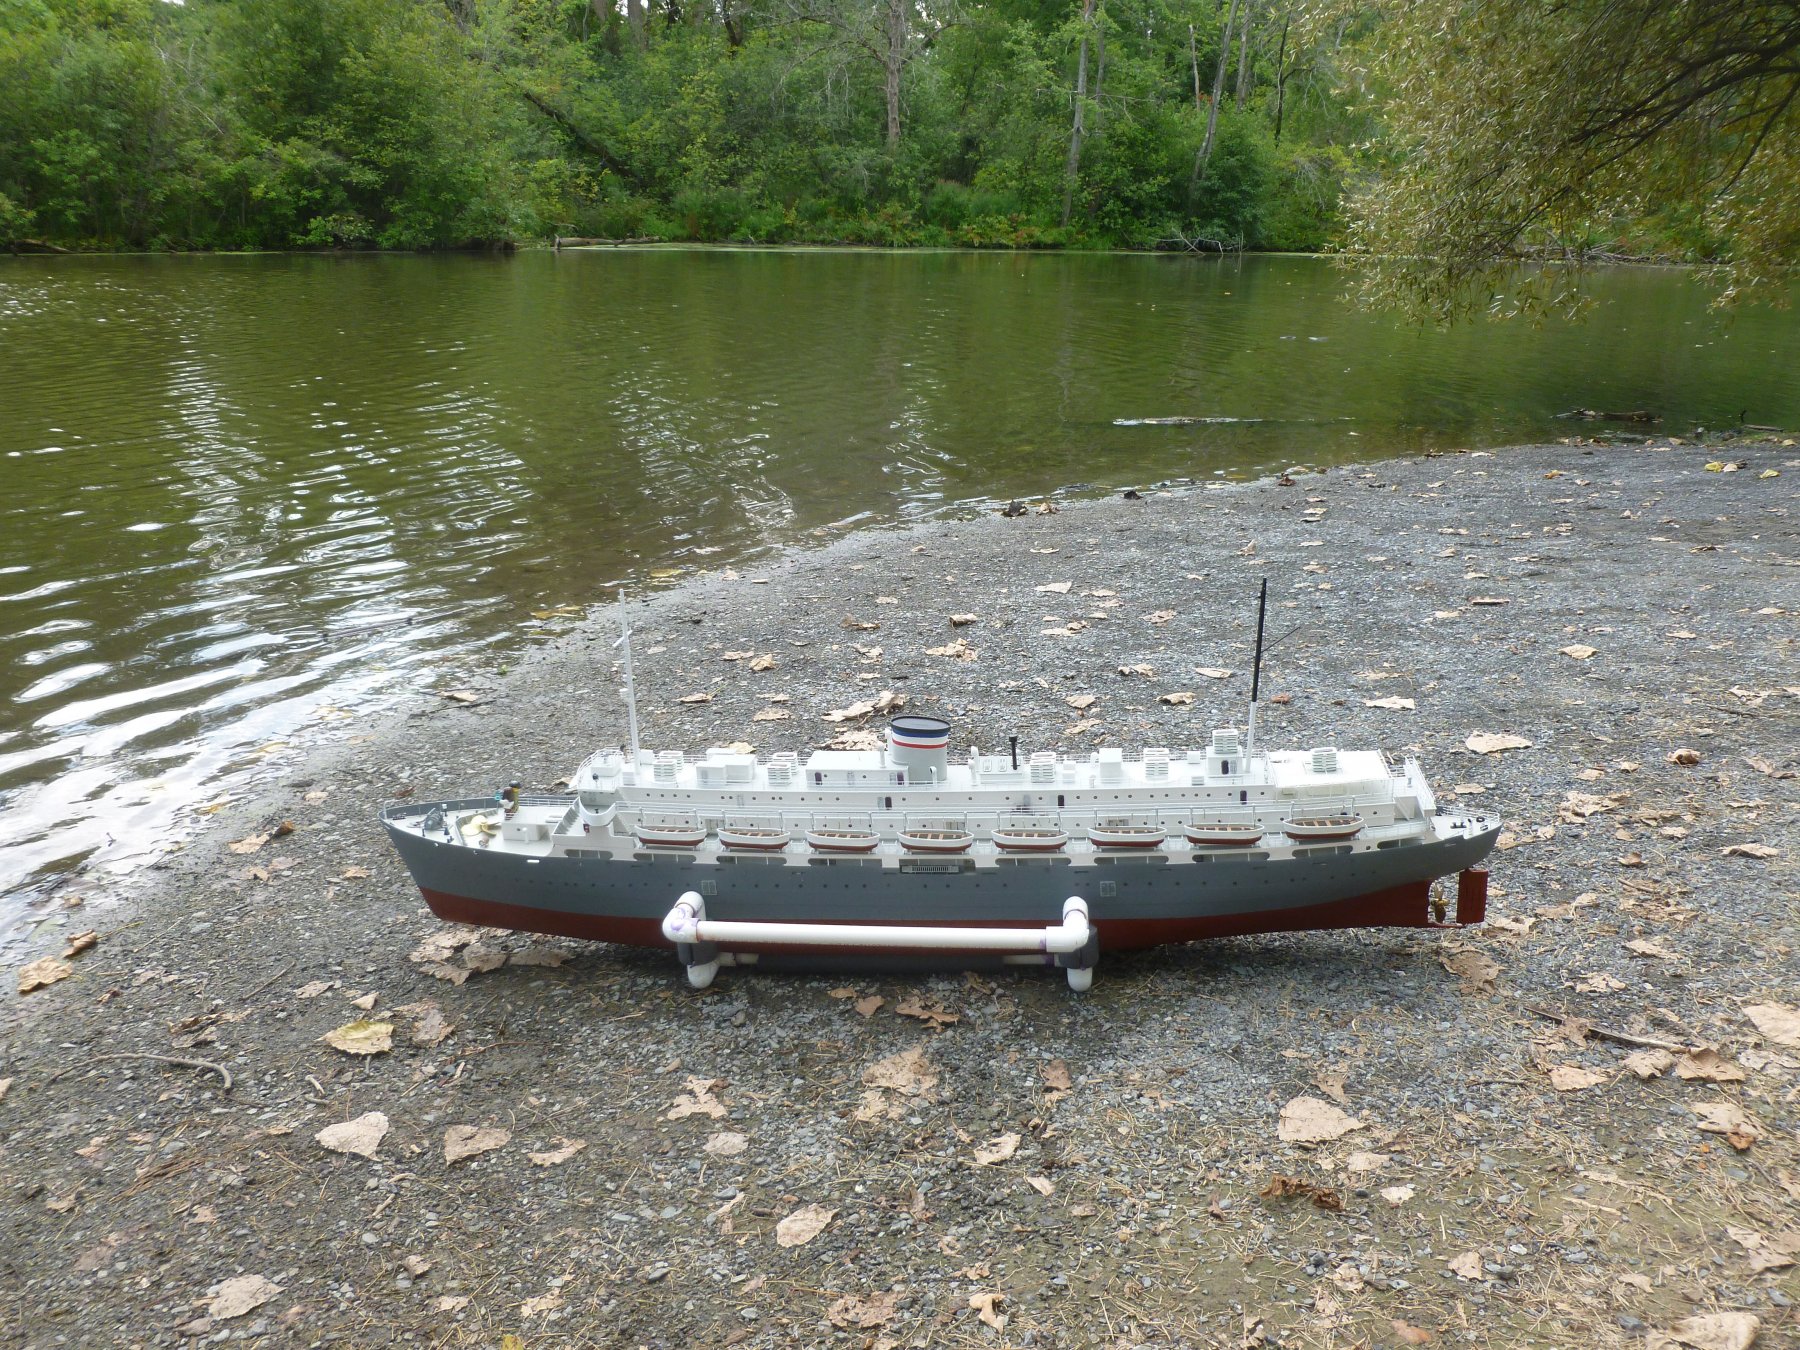
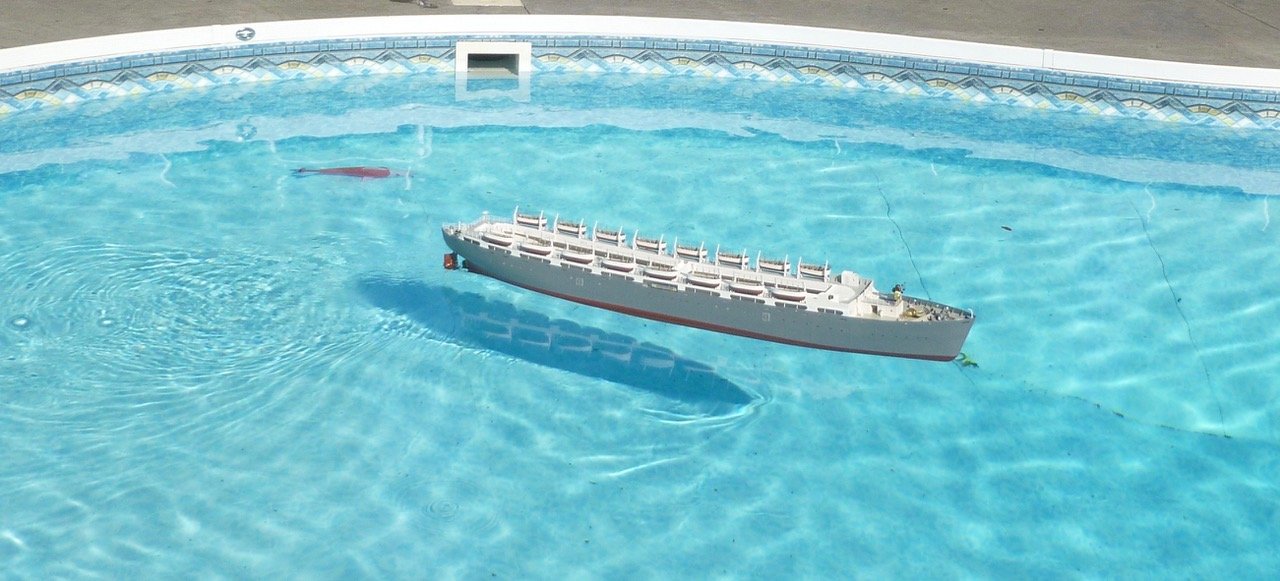
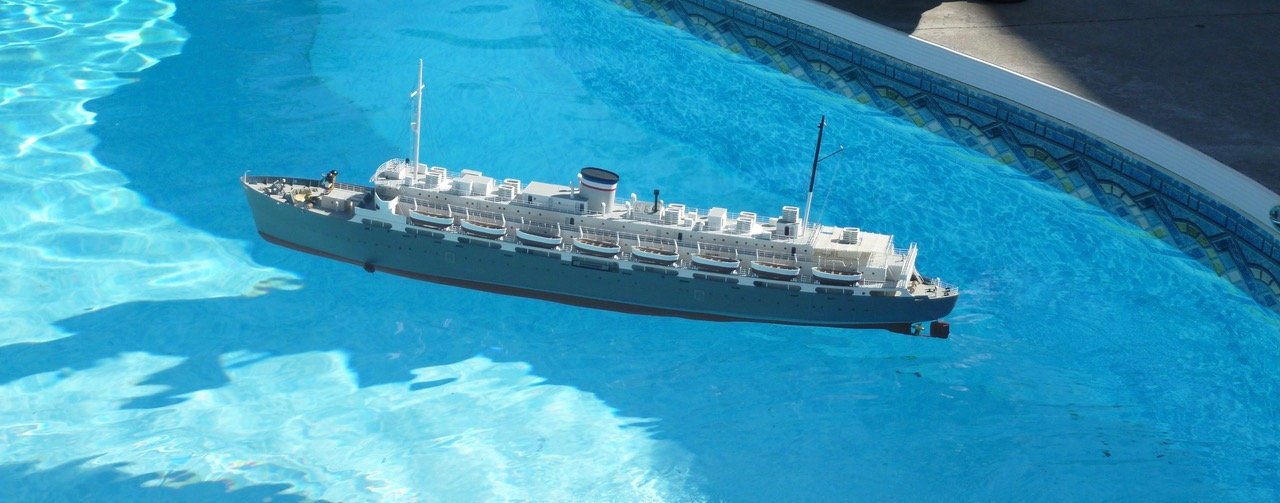
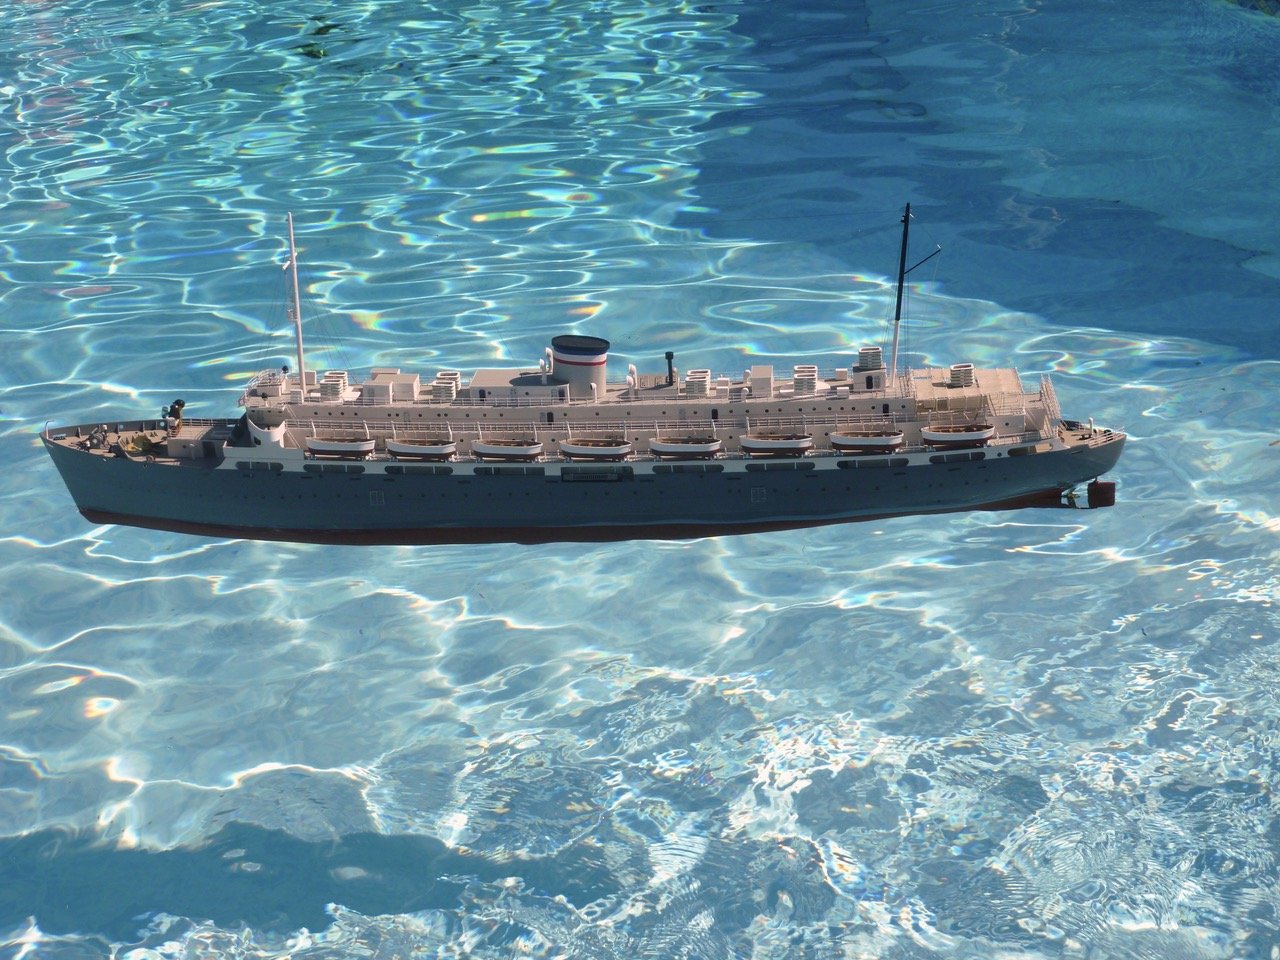
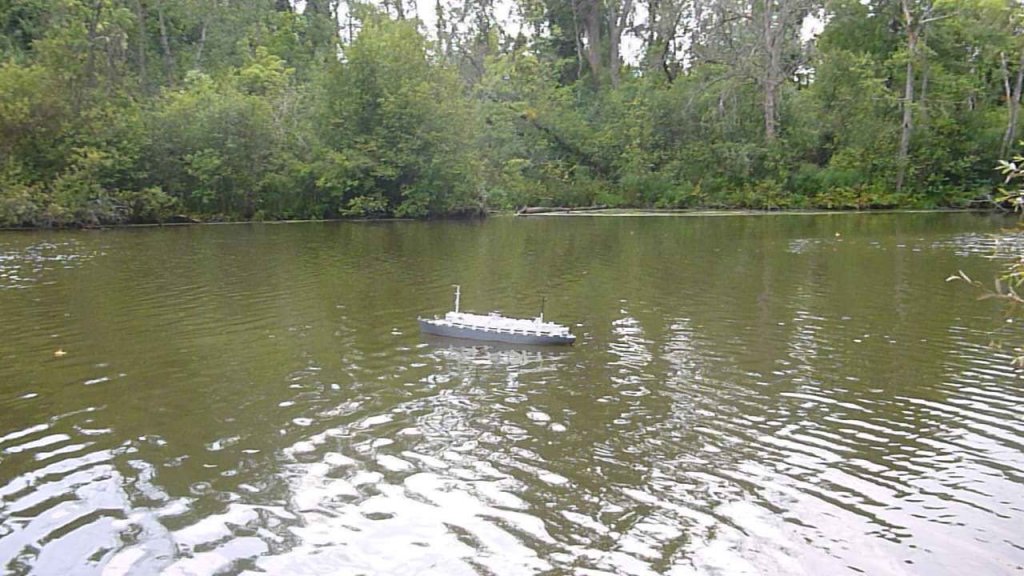
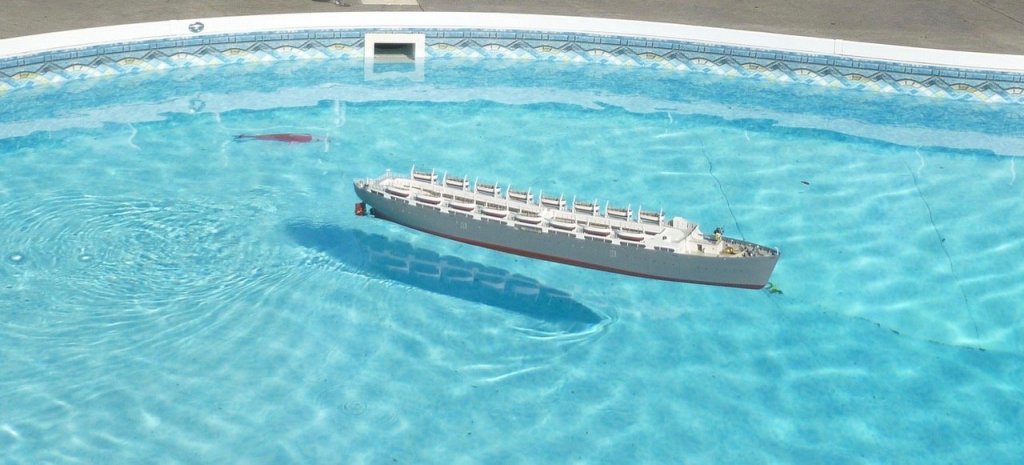
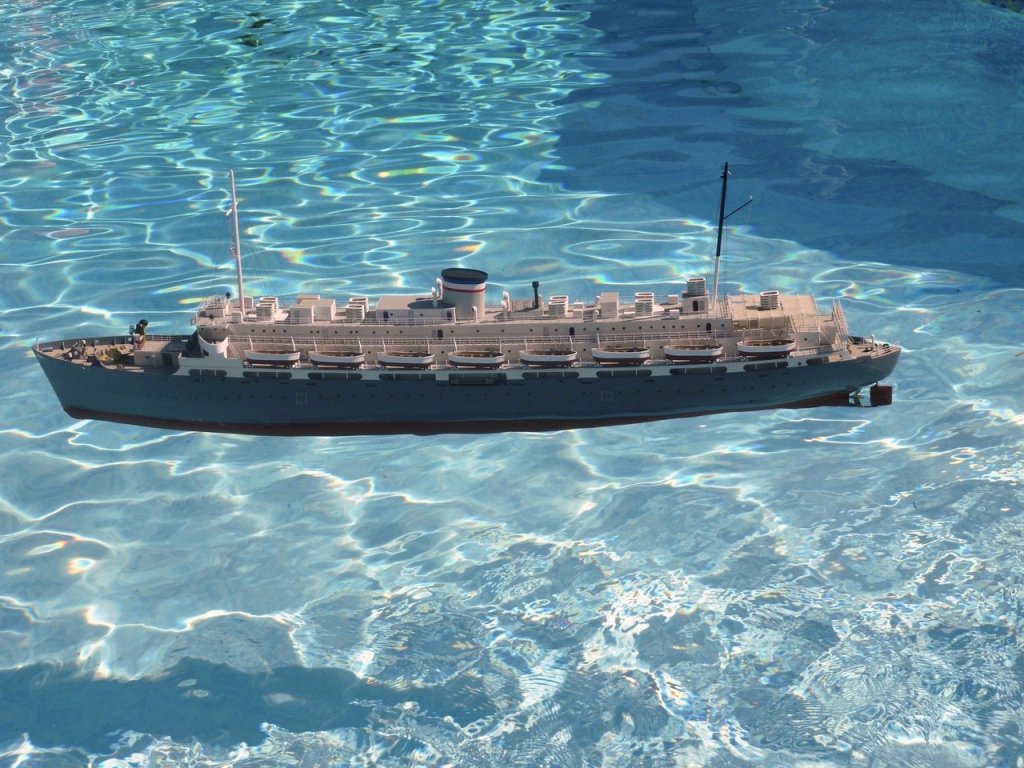
To those who gave likes, thank you and thanks for stopping by. Steve The pond. Not wanting to disappoint either myself or all you fellow members who have stuck with me for so long the admiral and I brought the Vance to the pond for a real sail. The ship sailed well but the pond aerators create enough current that discretion was needed to ensure she didn’t get caught up in it too much. Also a storm was coming and a little gust of wind broadside gave the Vance a good tilt and prompted a return to more sheltered seas. Below is a video. boat1 - Large.mov

- 446 replies
-
- 12
-
-
- zebulon b vance
- deans marine
- (and 3 more)
-
Denis, it's really coming together nicely. Great detail for something this small. For future reference regarding white "ghosts", and you may have already heard about the product, I mostly use a primer called B-I-N available at paint stores and big box. It comes in spray or brush, seals and covers dark colors well, and accepts both oil and latex top coats. I once put two coats over a very dark brown stain color on window trim with one coat of white gloss over it and had no bleed through. Steve
-
Now, back to the action. To all who gave likes, thank you and thanks for stopping by. Bill, thank you for your kind comments and your wonderful invitation. Unfortunately we'll be traveling with a carful of luggage at that time with no place to put the ship. Mark, thanks for the pop of bubbly and your kind feedback. Legodude thanks you and is anxious to get back down here to resume the skiff build. Lou, thanks also for your generous feedback. Legodude actually got in the pool but was quickly dissuaded from tsunami generation. Since the pool pump outlet was directly adjacent to the launch area and there was a bit of a breeze I learned the Vance's broad side makes it susceptible to sideslip while making headway if air is blowing on it, and a little throttle plus a little rudder allows the Vance to counteract a current and move ahead. Didn't try the 45 degree tilt. Carl, you've been with me since the Bowdoin days and I truly appreciate it. Denis, thanks for another visit and for your kind comments. The brass prop and 500 motor give very sufficient power. It was my first foray into an RC controller and some of the full power moments came when I mixed up rudder and throttle control. I learned that the ship has enough mass that a good distance is covered at larger throttle openings before direction can be reversed. Didn't hit the end of the pool but came close and brought new understanding to Titanic's Iceberg Dead Ahead!
- 446 replies
-
- 5
-
-
- zebulon b vance
- deans marine
- (and 3 more)
-
another tidbit - the hull length at the waterline is about 50 inches. The full hull width is 7.5 inches and the depth at the full width is 2.5 inches. The hull below waterline tapers in to almost nothing at each end and the depth at the tapered area is 2 inches. Calculate all that out and the volume is about 600 cubic inches which is 0.347 cubic feet x 62.5 lbs/cubic foot = 21.7 lbs displacement. So 23 lbs. actual all up weight is about right. Ta da!
- 446 replies
-
- 5
-
-
- zebulon b vance
- deans marine
- (and 3 more)
-
A quick tidbit - the all up weight was 23 pounds. A better response to all will come later. Thank you Steve
- 446 replies
-
- 4
-
-
- zebulon b vance
- deans marine
- (and 3 more)
-
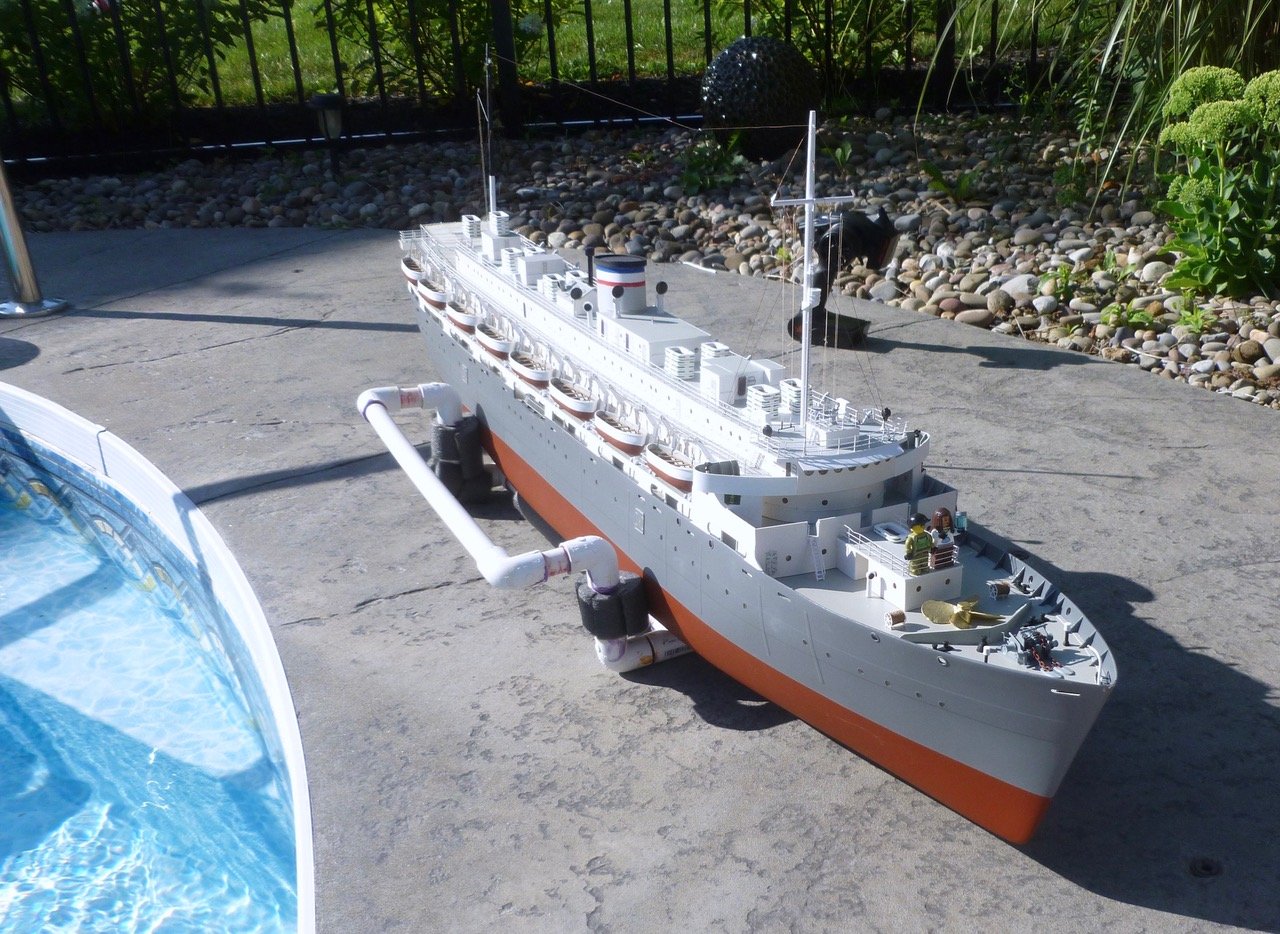
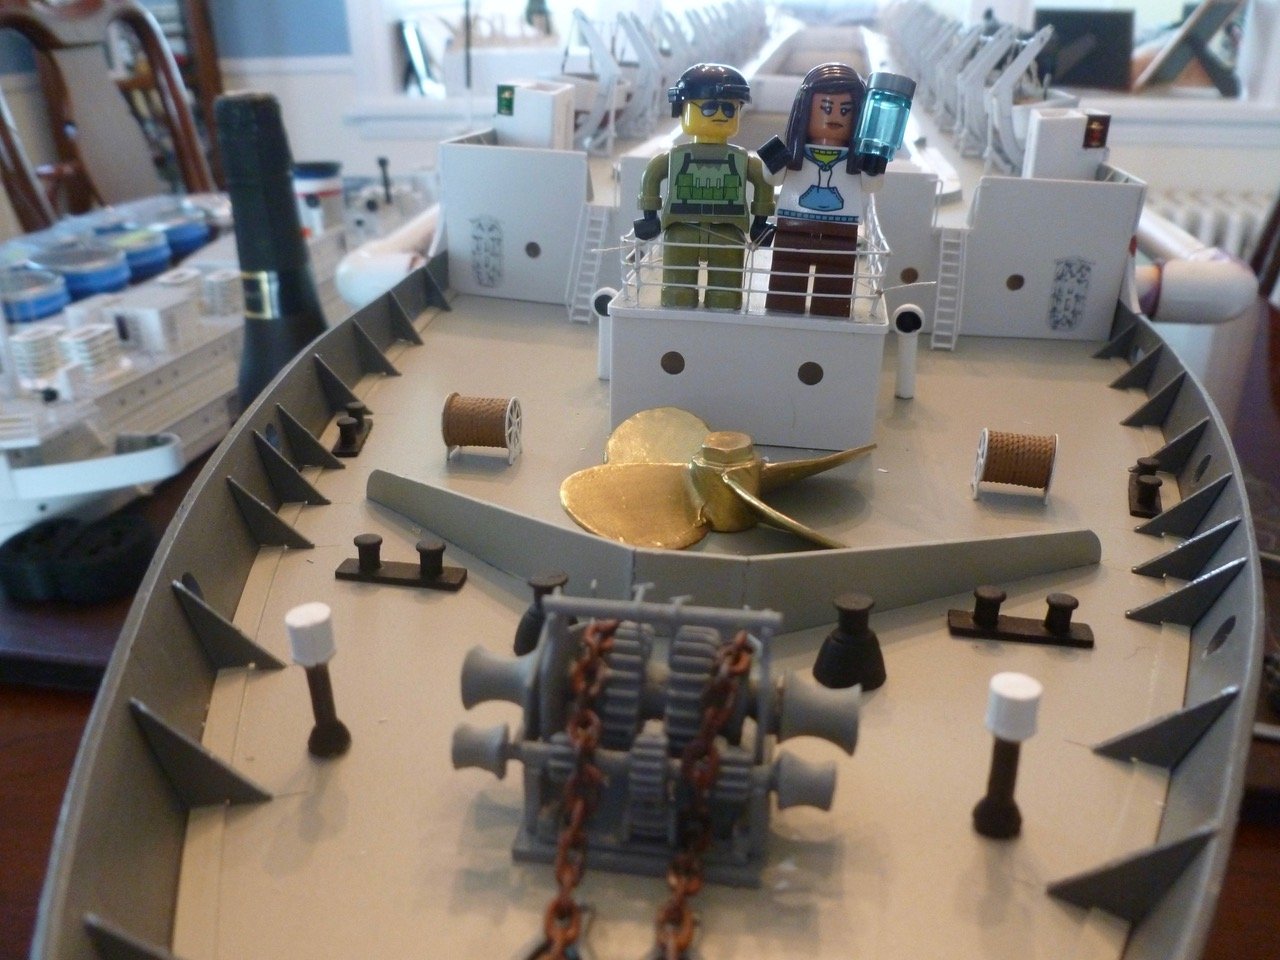
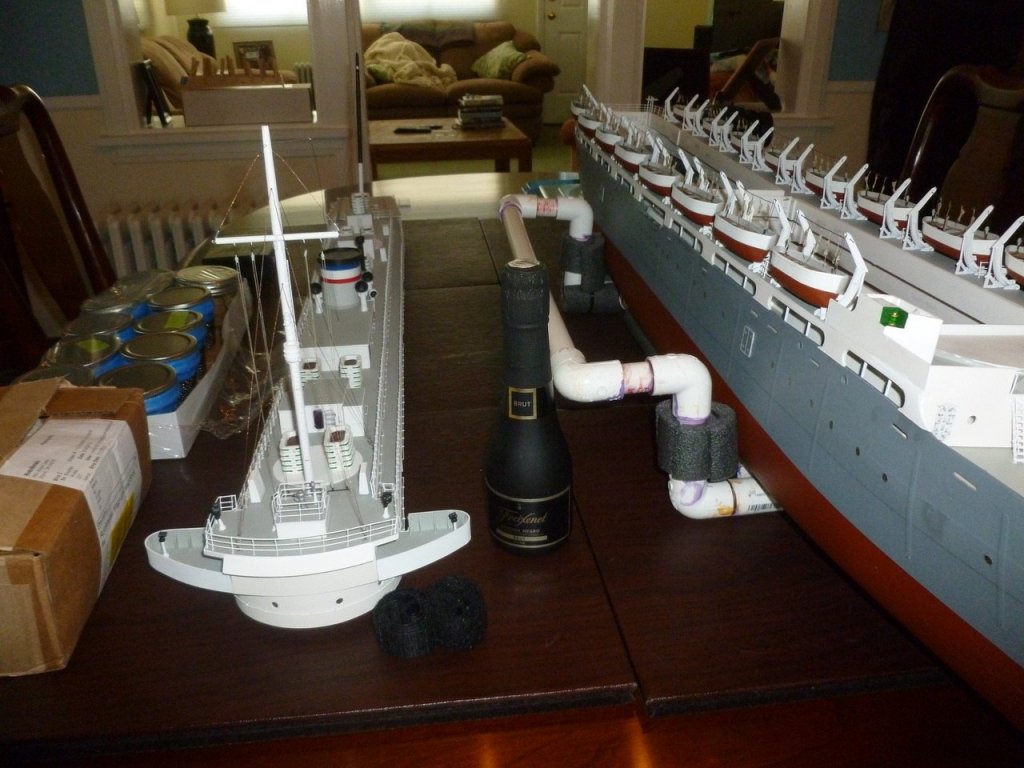
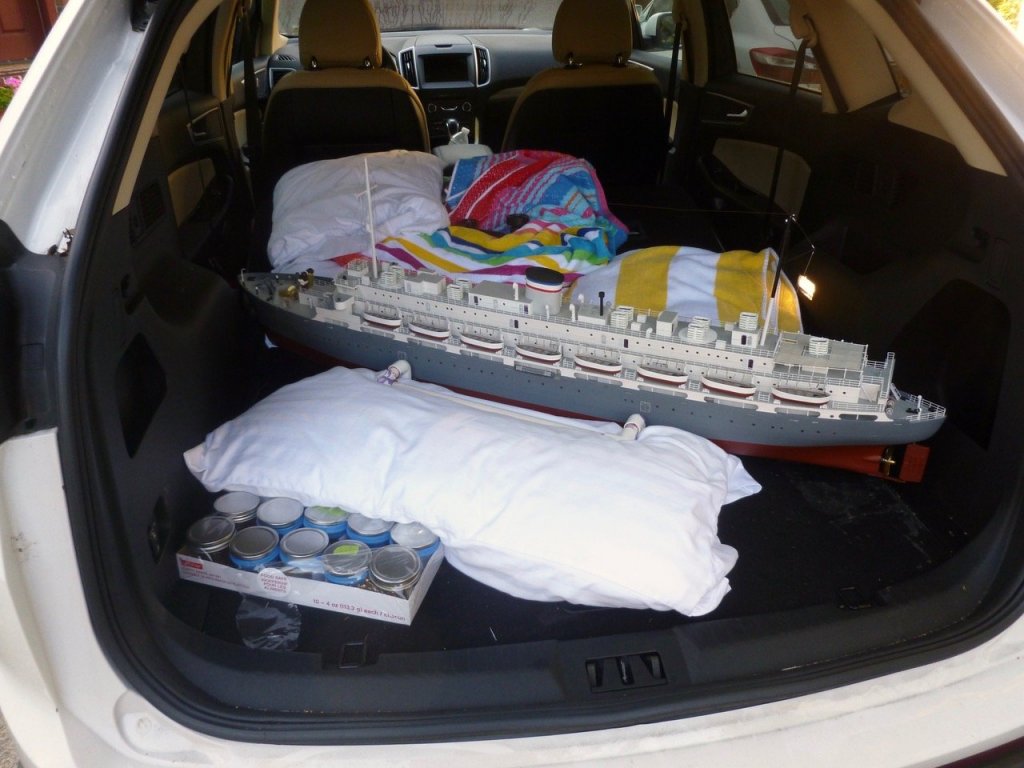
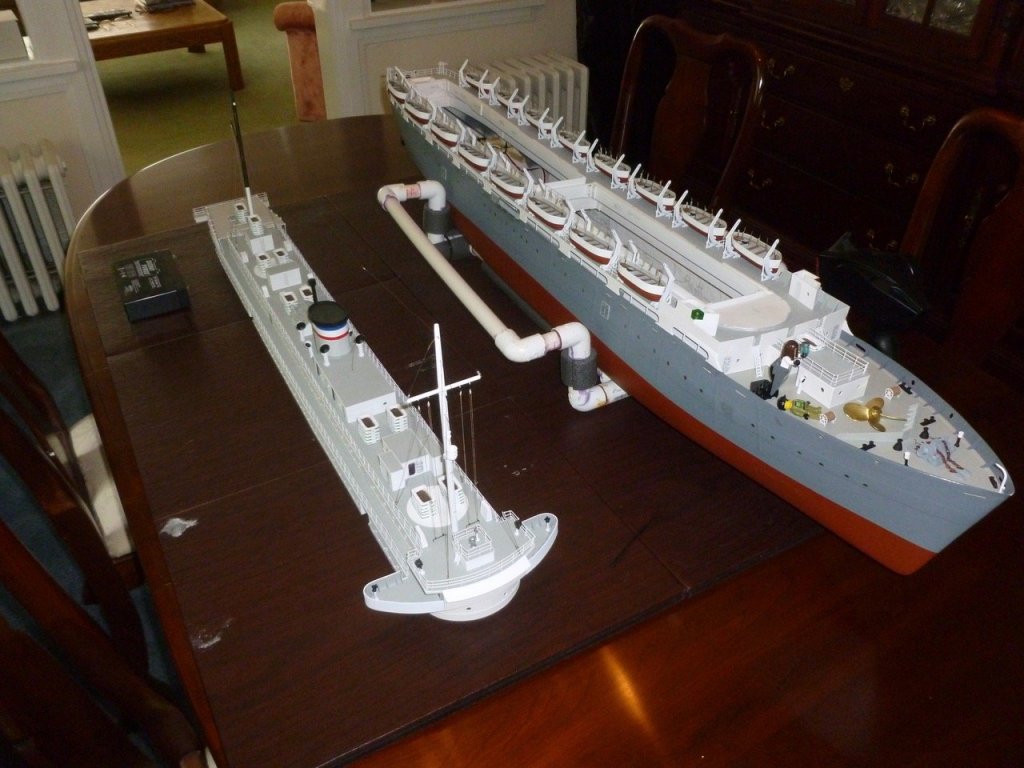
To those who gave likes, thank you and thanks for stopping by. Carl and Mark, thanks for your kind feedback. Bubbly follows. Steve The launch. The shipyard looks empty without the Vance which is on her way to test and launch. Not yet clean, but empty. I saw a PVC pipe carry rack in a Model Boats magazine article and thought that would be a good way to carry her while keeping away from the overhanging lifeboats. I learned that the two part welding adhesive works extremely fast, and makes CA look slo-mo by comparison. Not a very good pic of the smallest champagne bottle I could find. Lead pellet ballast is at the left in jars, and bags in a box. Grandson Legodude (see Skiff build) honored the upcoming voyage by creating great grandmother who took the Vance trip, and great grandfather who met her in New York City. The carry rack, which had foam pipe insulation for a snug fit, was invaluable for moving the ship around and giving it a stable platform in the car. With a few pillows and beach towels to eliminate sliding around the ship went to and from the launch site without incident. The ship saw a perfectly clear day as she prepared for launch. The first step was to remove the superstructure to tune the ballast. The initial set up was close to the calculated ballast weight. The ship settled well below the waterline. Ballast was removed and repositioned until the waterline had a close match to water level. The final ballast was a mere fraction of the original load which makes me wonder if the waterline dimension in the instructions might have been a bit low. After replacement of the superstructure and a christening by Legodude with a spritz of champagne the ship was launched. Dryland testing of the driveline showed a buzz, probably due to the rigid anchoring of the prop tube to the hull, and the hollow area within the plastic motor support. But underway the buzz disappeared and the only sound was a soft motor spin. A video is below and a second video is in the next update. IMG_0359.mp4 All in all a successful voyage. We looked at a nearby pond for a second voyage but it was weed infested right through the water surface, so it looks like one safe voyage may be it, which was the original goal. There’s a little fitting out remaining, including the anchors, hawse lips, ship’s name and re-gluing three lifeboats that were bumped loose during the launch; before finding a permanent home for the Zebulon B. Vance. Thanks again to everyone for your views, likes, comments and sticking with me for the build. Steve Stay tuned for the second video.


- 446 replies
-
- 10
-
-
- zebulon b vance
- deans marine
- (and 3 more)
-
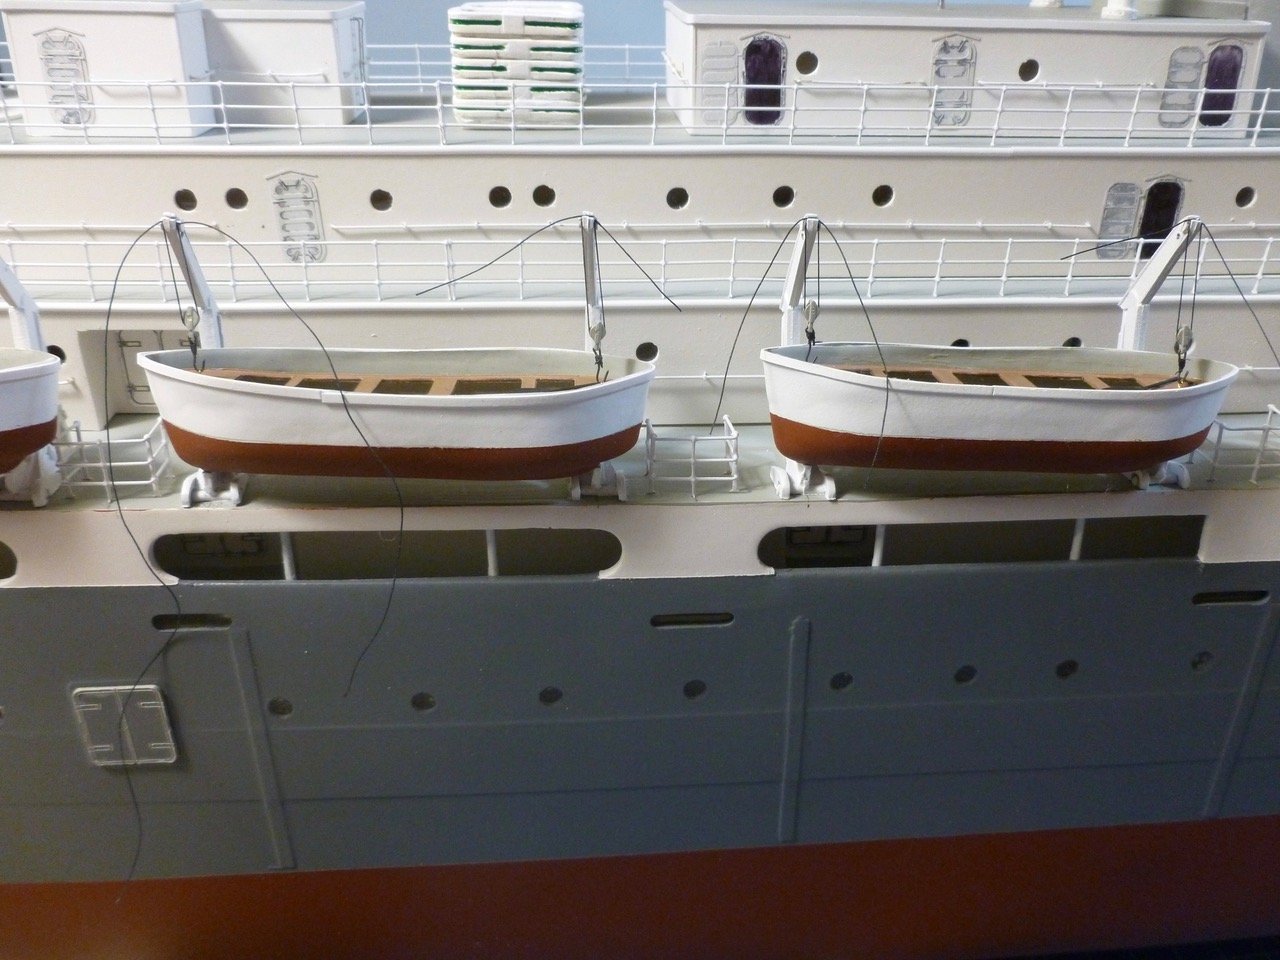
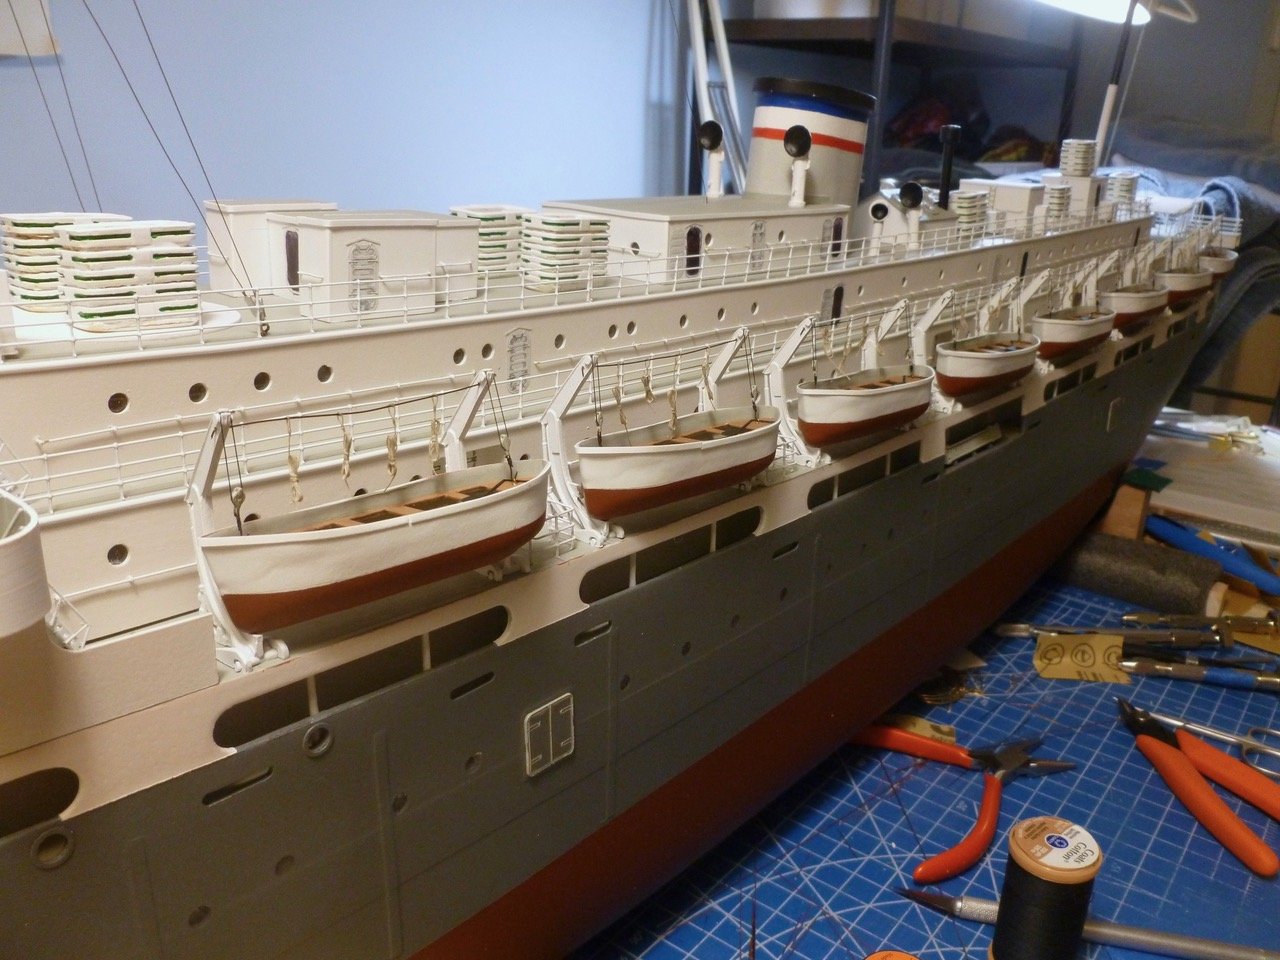
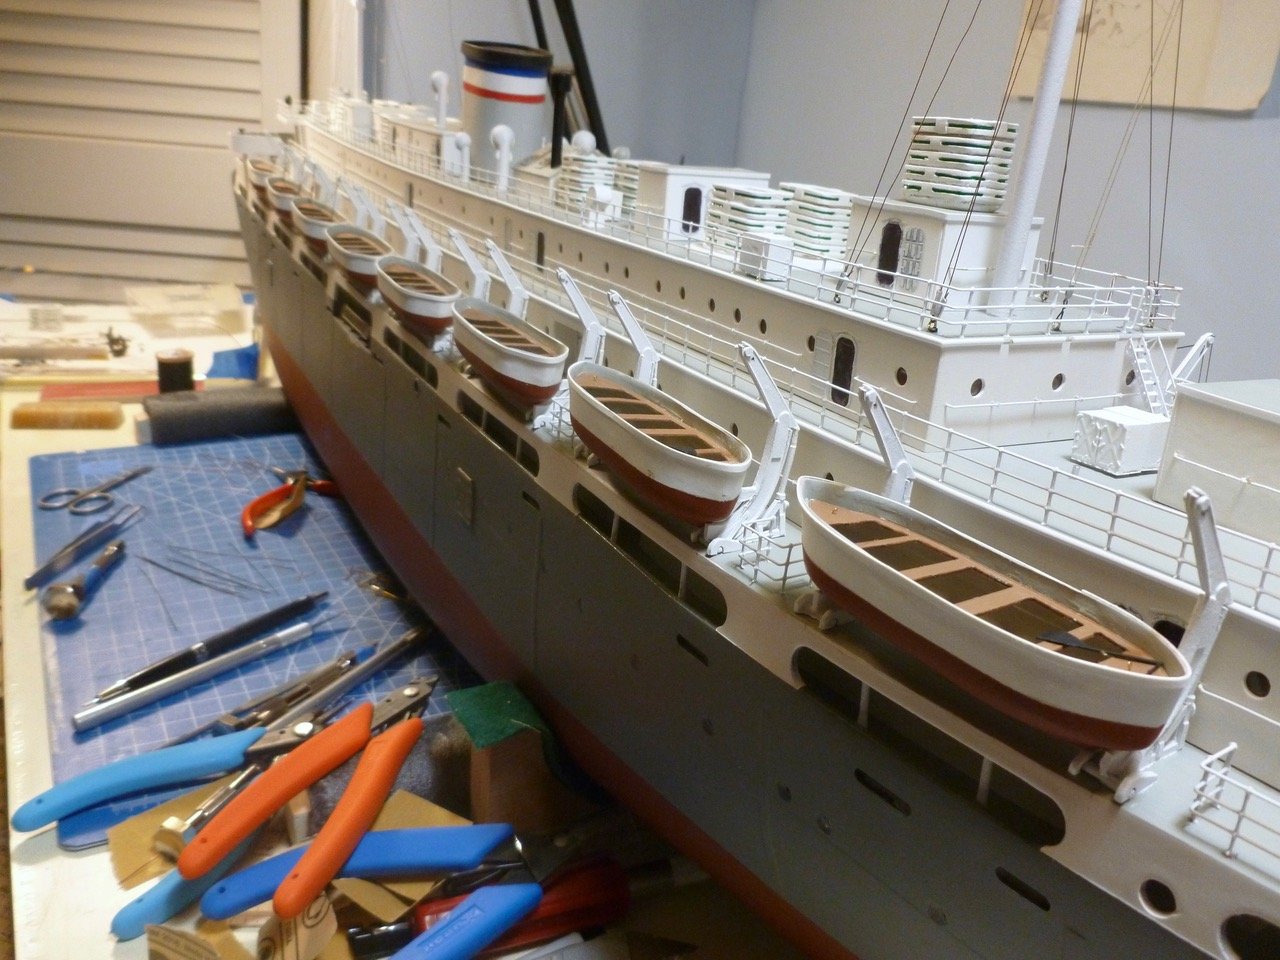
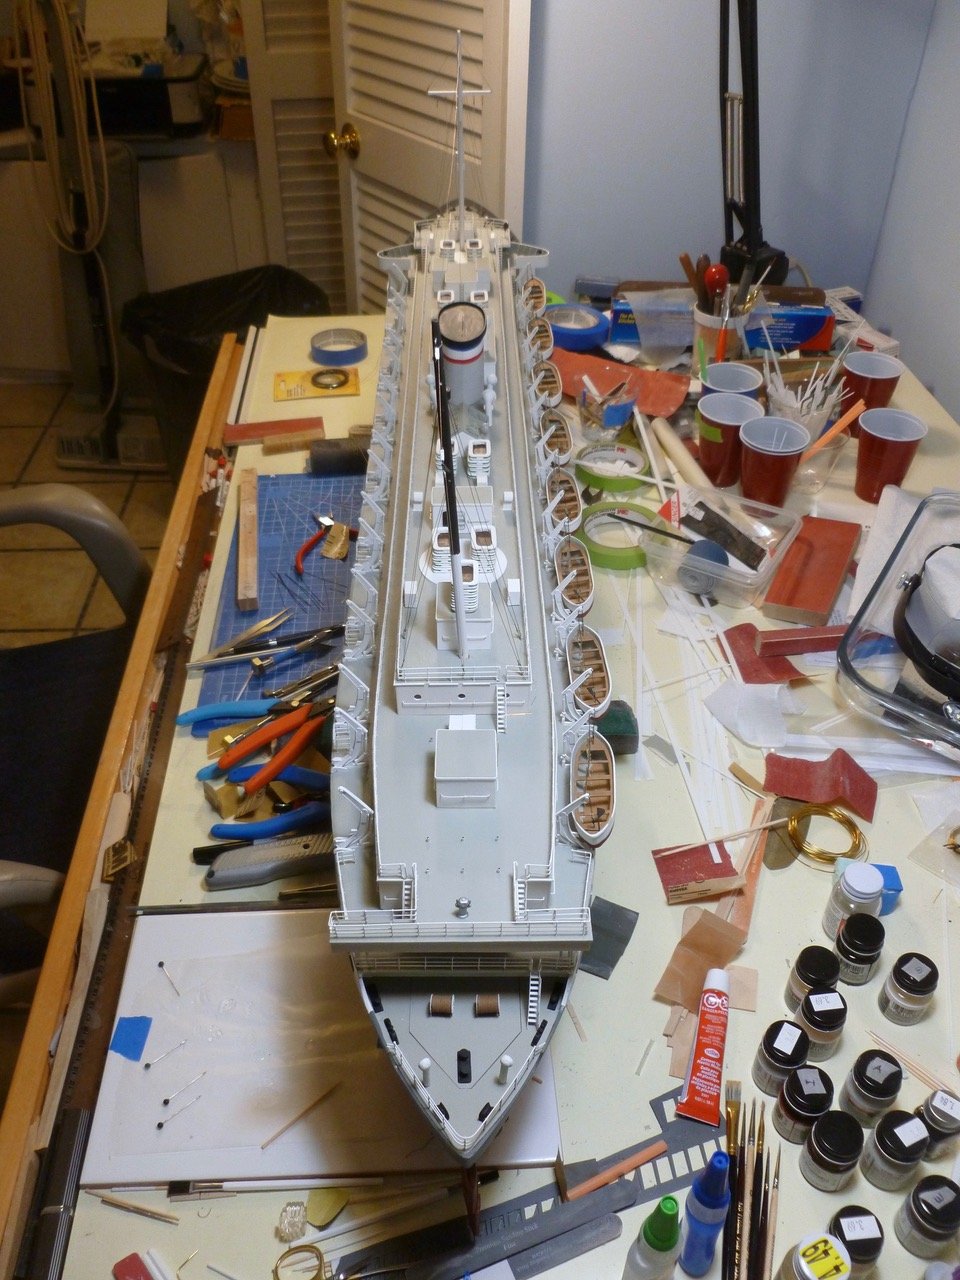
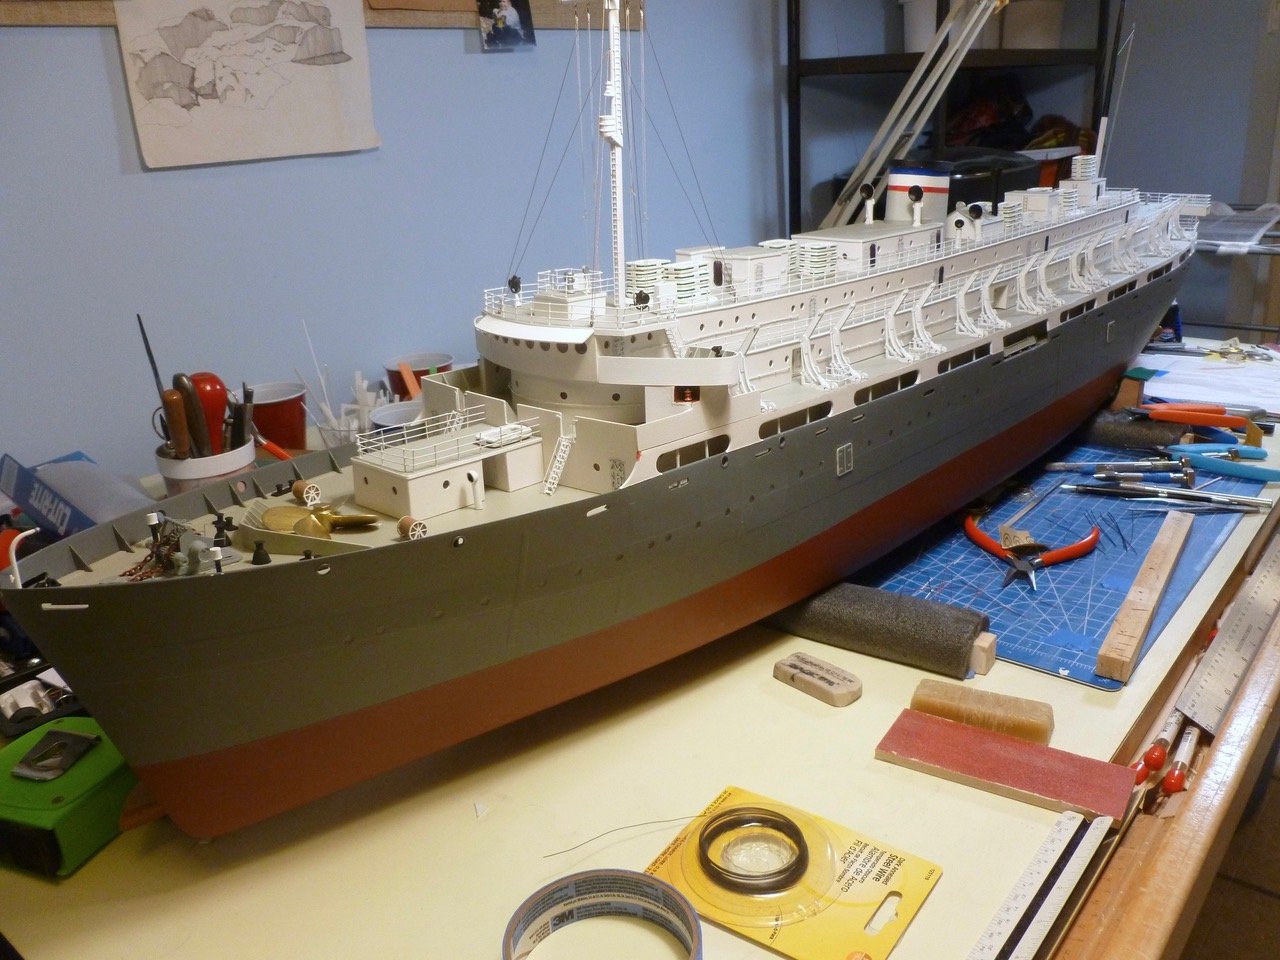
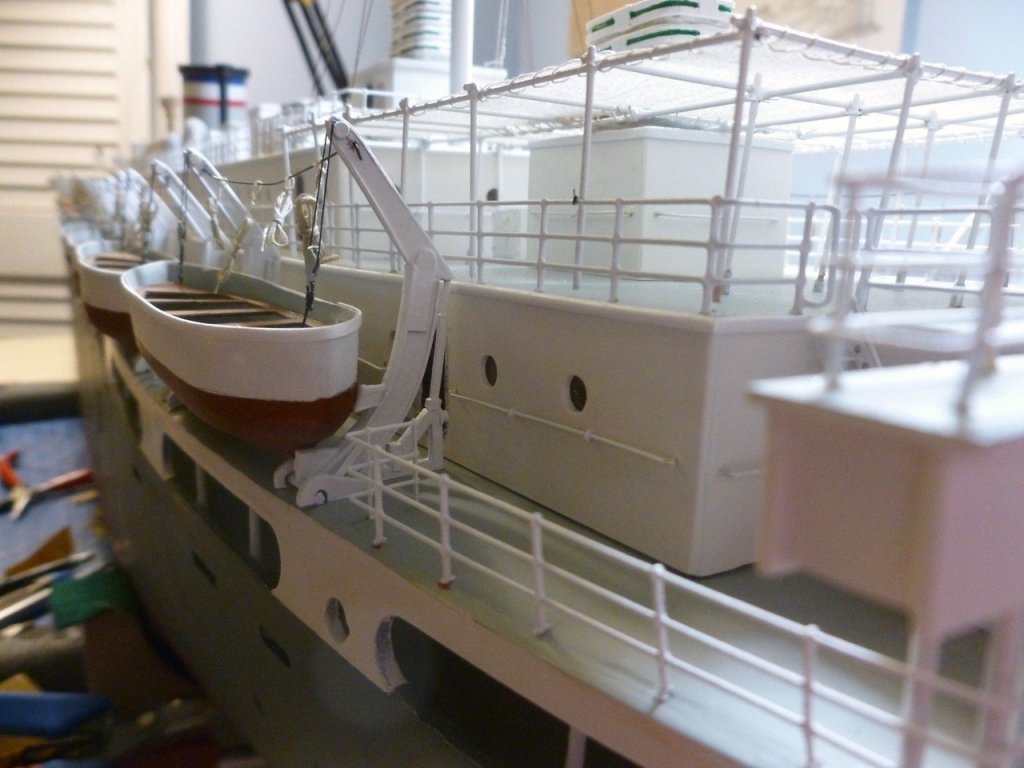
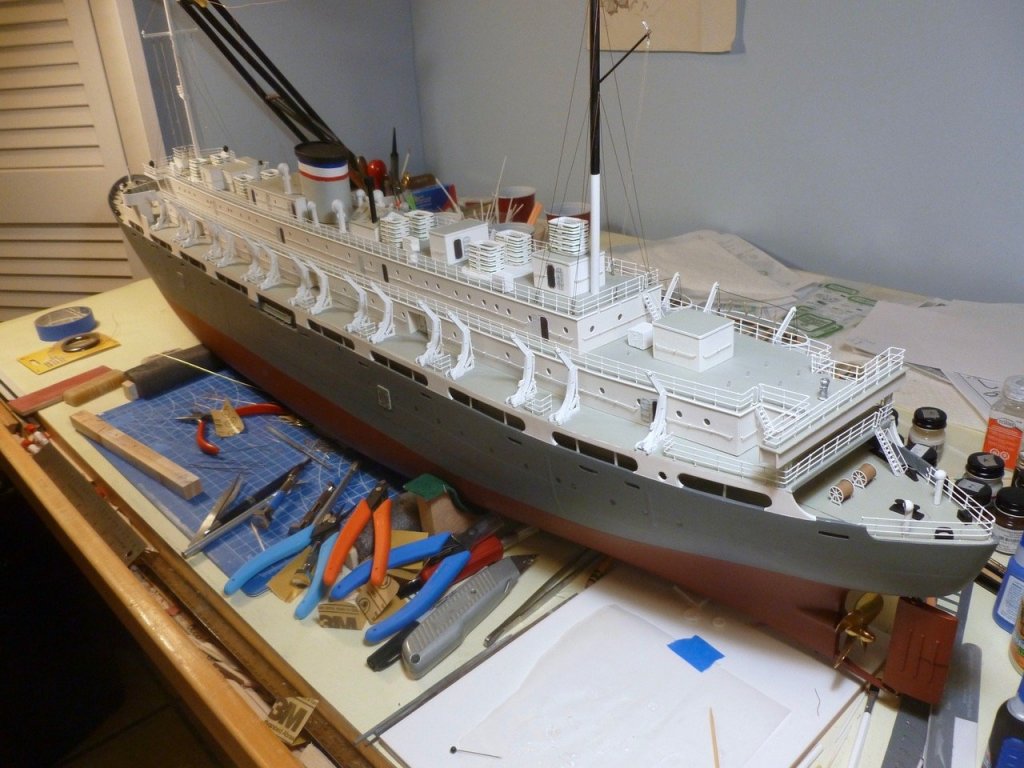
To those who gave likes, thank you and thanks for stopping by. Carl and Mark, thanks for your kind feedback. Steve Beneficial occupancy. The port lifeboats are attached to the davits. Port davit rigging started. As with the starboard side the boat rigging includes the cargo blocks and hooks, and four manropes on a cable hung between each pair of davits. All port boats are rigged. The awning is permanently set in its deck shoes. Lashing of the perimeter poles to the railings has started. The ship has reached beneficial occupancy, an architecture term that signifies the point in construction when the building is not quite finished but is ready for use. More pics below. I’ll get better ones after the shipyard gets a major cleaning. I’m turning my attention to the upcoming test sail.


- 446 replies
-
- 13
-
-
- zebulon b vance
- deans marine
- (and 3 more)
-
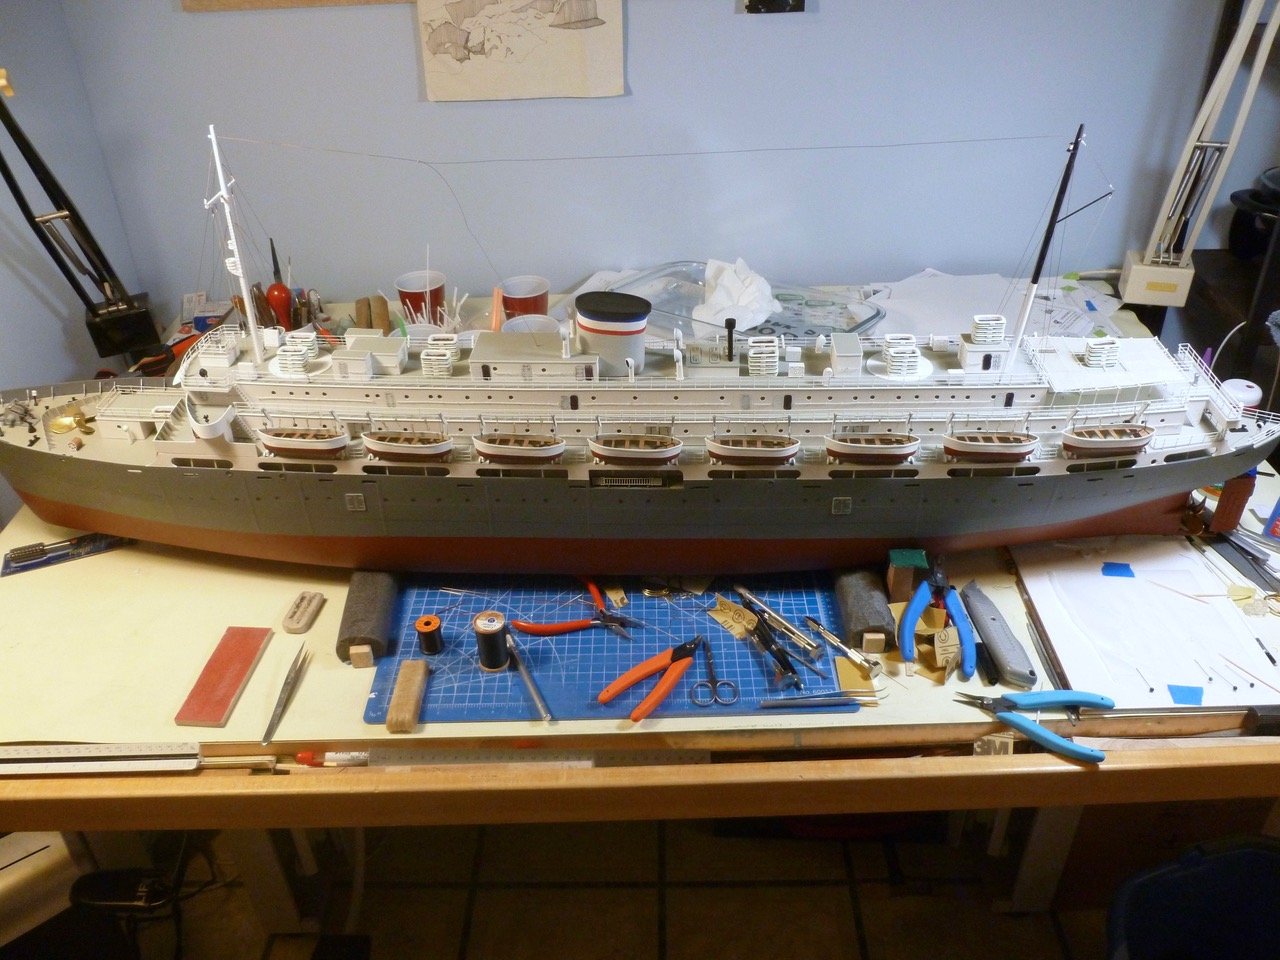
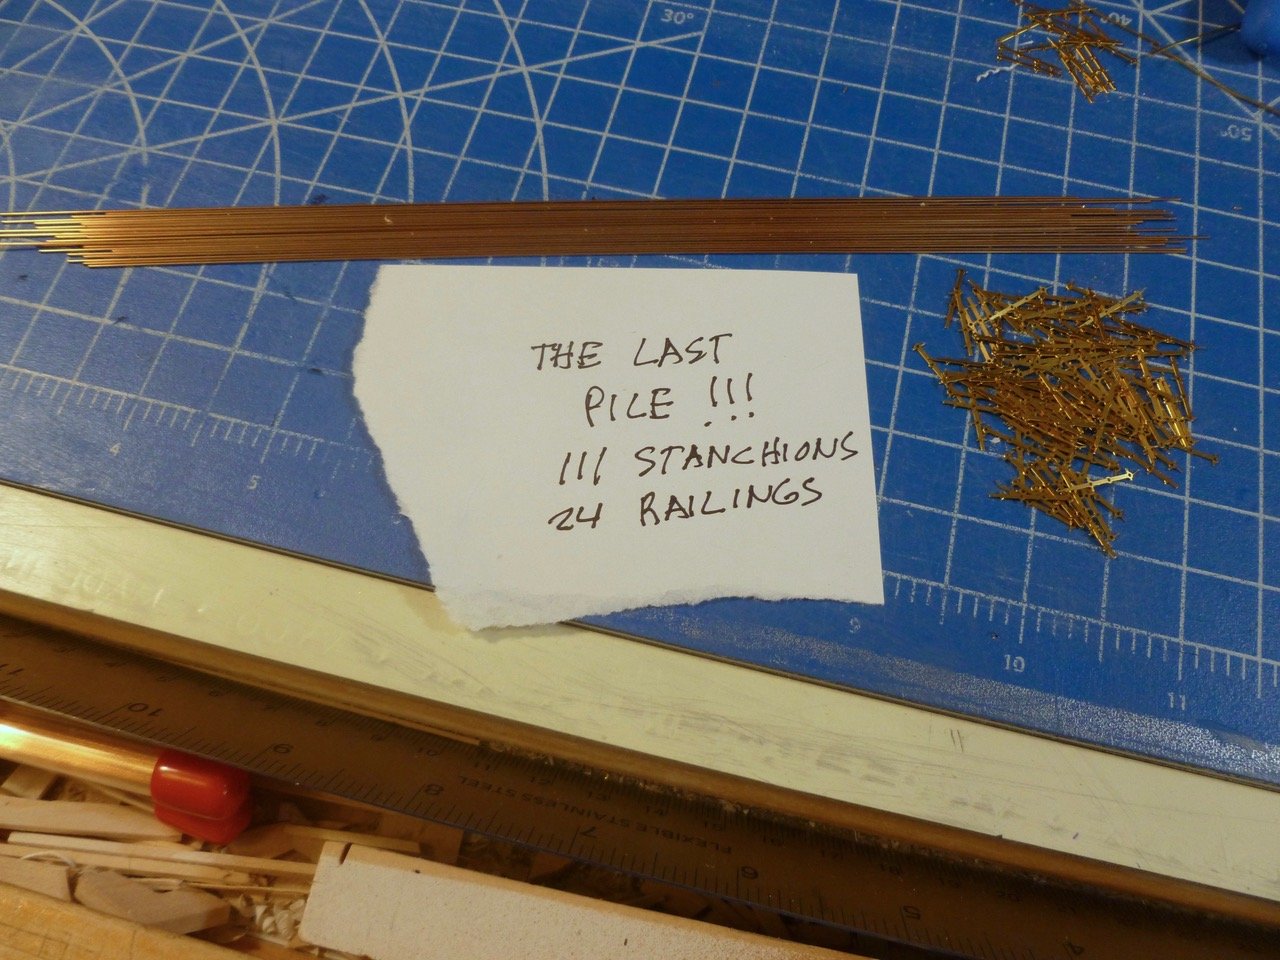
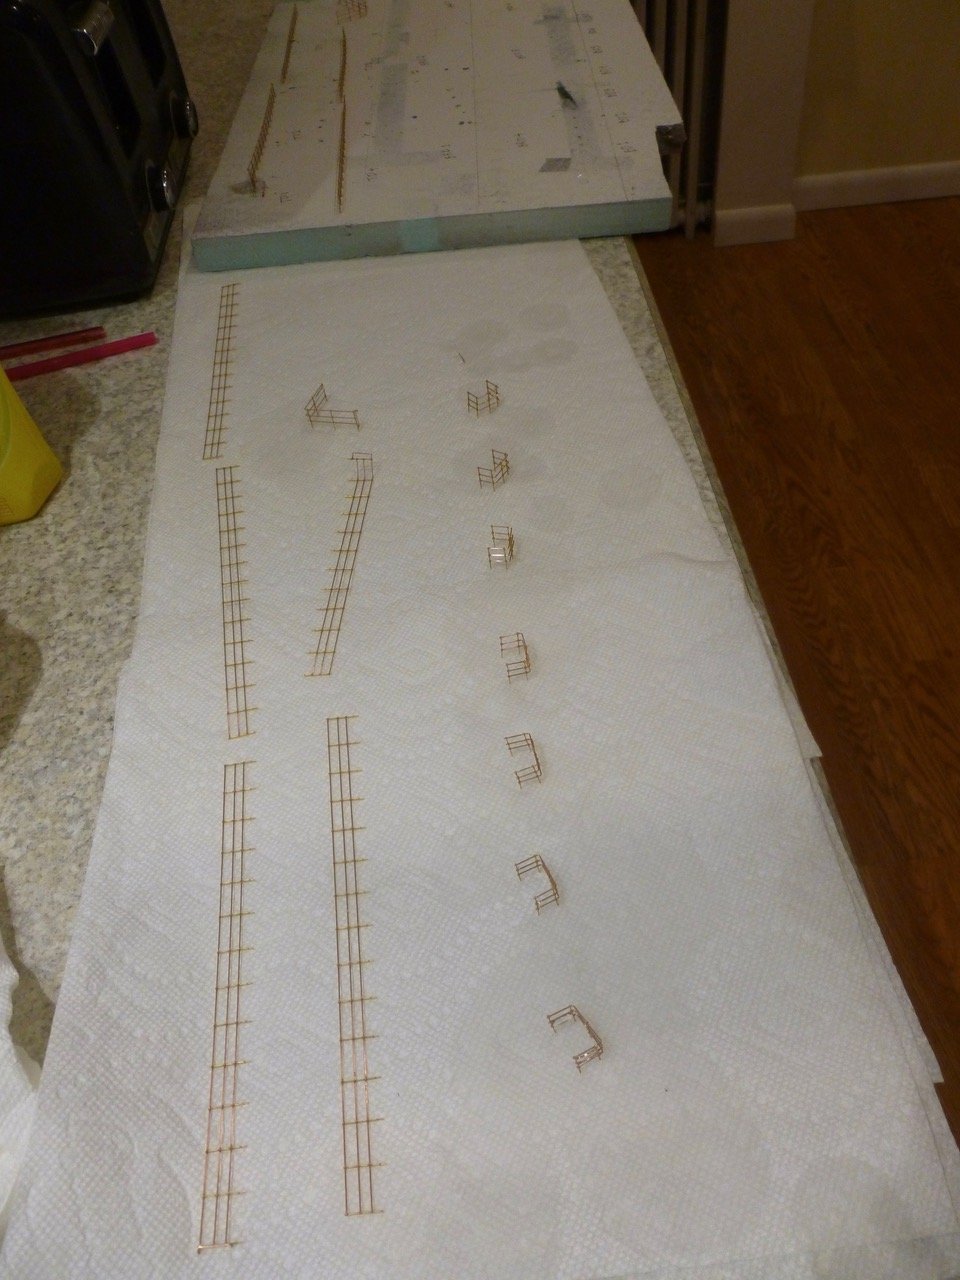
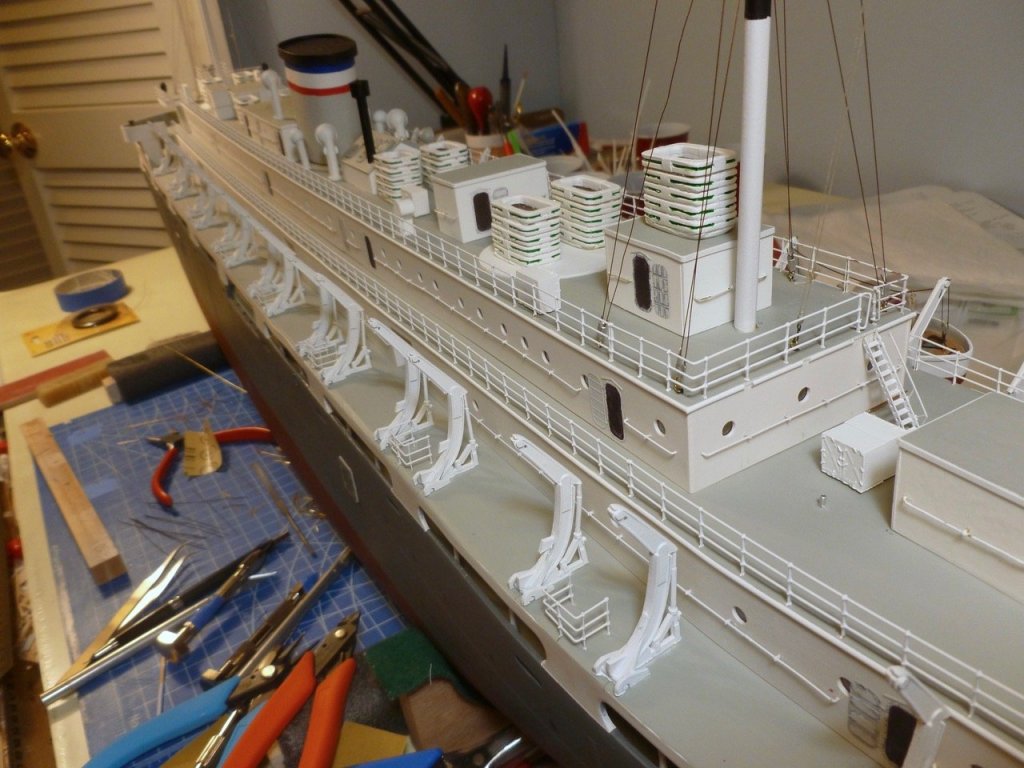
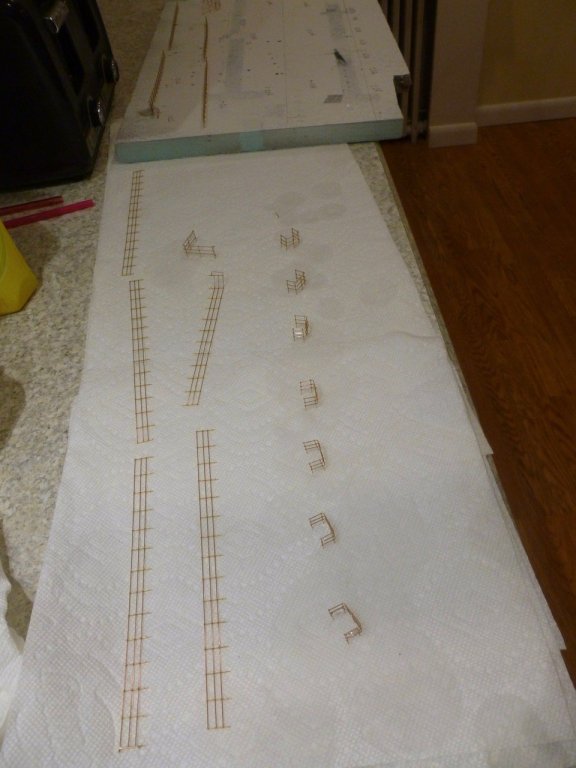
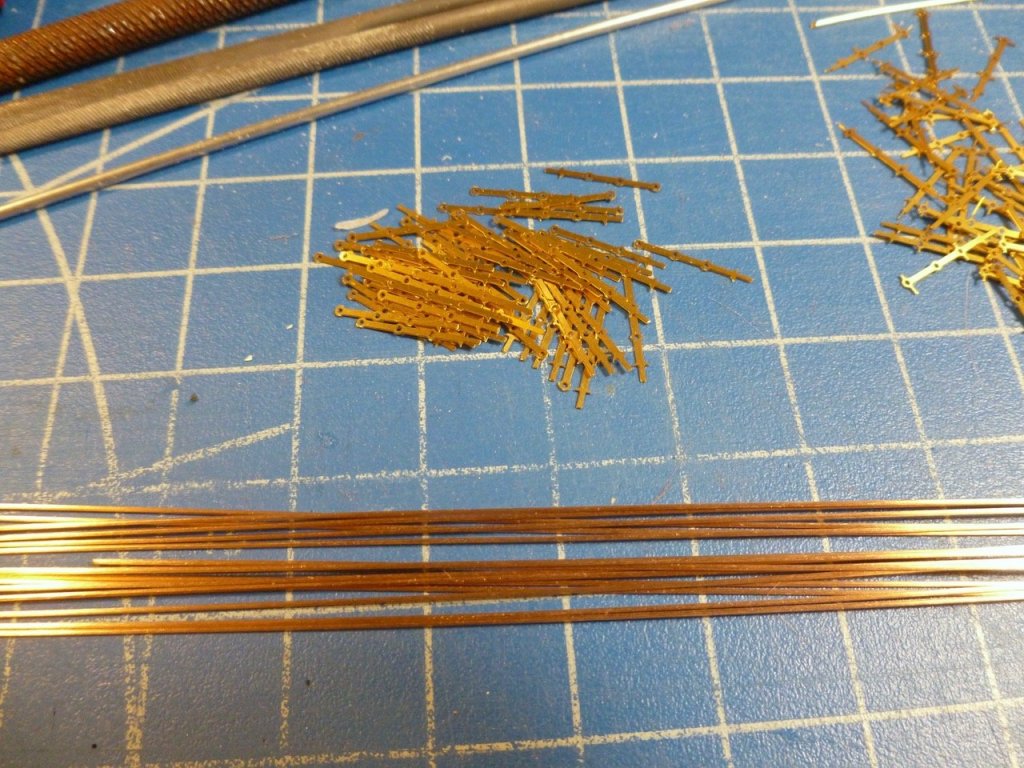
To those who gave likes, thank you and thanks for stopping by. Steve No more railings! The last pile of railing wire and stanchions was trimmed, sanded and fitted in place. After the sections were built up they were washed and air dried with help from the Admiral’s hair dryer. All port side railings and davits are installed. Celebratory photos are below. With the ship nearing completion I wish to thank all those who contributed so much during the 100 episodes to date. Without your support, guidance, helpful criticism, terrific ideas, gentle and not so gentle nudging the ship would not be what it is today. It could always be better but it is way more than I ever thought it would. Thank you, thank you, thank you.


- 446 replies
-
- 13
-
-
- zebulon b vance
- deans marine
- (and 3 more)
-
To those who gave likes, thank you and thanks for stopping by. Bill, thanks for the lead on figures. A very impressive website with many pages to ponder. The last railings have been fabricated (celebrate celebrate) and have received a primer and topcoat. Not much to see until they get installed. Then it's port side lifeboat/davit placement, set the awning permanently and have a test sail - or maybe vice versa for the awning. Anchors are awaiting some cast hawse lips after I gave up trying to make my own. I found a local vendor who said they can do white letters on clear self adhesive backing and am waiting to see how the order turns out. Steve
- 446 replies
-
- 3
-
-
- zebulon b vance
- deans marine
- (and 3 more)
-
To those who gave likes thank you and thanks for stopping by. Carl and Denis, I just realized that on page 1 of this blog is a crystal clear photo of the real deal hawse lips on the Zebulon B. Vance at its original launching. Why I didn't think to look at it before wasting time making bad ones is anybody's guess.😖 Do-over time. Steve
- 446 replies
-
- 4
-
-
- zebulon b vance
- deans marine
- (and 3 more)
-
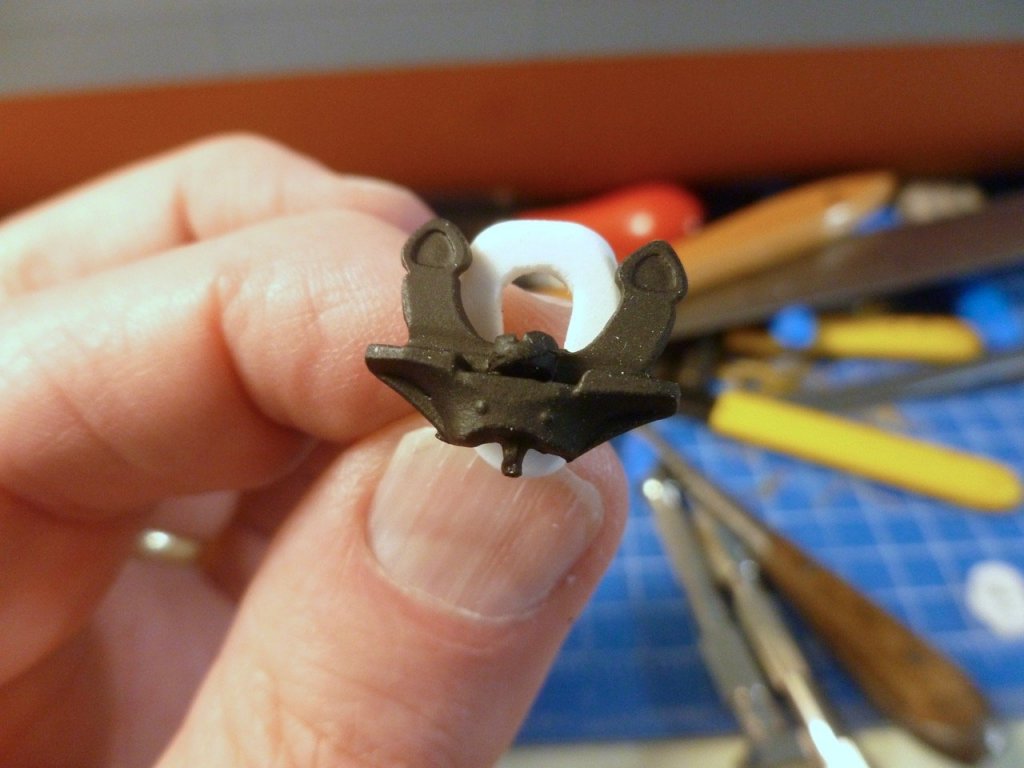
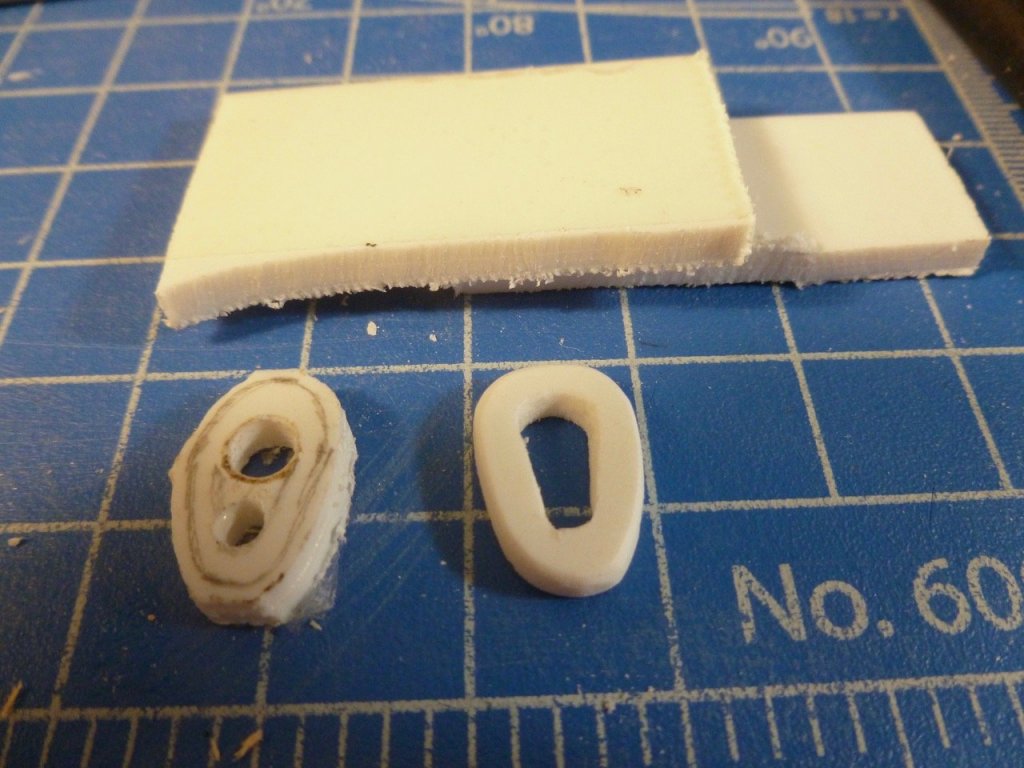
To those who gave likes, thank you and thanks for stopping by. Steve Kiss these lips? Hawse lip fabrication from two thicknesses of 1.5 mm styrene. Test appearance with anchor.
- 446 replies
-
- 10
-
-
- zebulon b vance
- deans marine
- (and 3 more)
-
To those who gave likes, thank you and thanks for stopping by. Carl, I can always count on you to bring me back to the obvious. With all the fiddling I did on the hawse pipe exits at deck level one would think I'd remember to use them as a pattern. My wife is doing well, thank you for asking. Kevin, I've thought about weathering. I've seen how good weathering takes a lot of practice and skill, and how bad weathering can look otherwise. I have had no practice so I'm limiting weathering to the door highlights. Besides, there are lots of areas on the ship with their share of scrapes, dings, mismatched color shades and other signs of less than perfect finish 😁
- 446 replies
-
- 3
-
-
- zebulon b vance
- deans marine
- (and 3 more)
-
By the way, the kit didn't come with any hawse lips for the anchors. Photos of liberty ship lips seem to scale about 6 ft tall (3/4 inch at 1:96). Does that sound right? Thanks Steve
- 446 replies
-
- 2
-
-
- zebulon b vance
- deans marine
- (and 3 more)
-
To those who gave likes, thank you and thanks for stopping by. Lou, thanks for the little ladies lead and for your kind remarks. The admiral says nothing less than a full bottle of bubbly will be acceptable on launch day. Denis, thanks for your ongoing interest and feedback. I have had plenty of railing practice on this one, and I'm really looking forward to it being over. The port side lifeboats and davits are ready and chomping at the bit to be installed but I need the railings first or the boats and davits get in the way. The marshaling area (acrylic serving dish) below also includes some surplus cowl vents.

- 446 replies
-
- 12
-
-
- zebulon b vance
- deans marine
- (and 3 more)
-
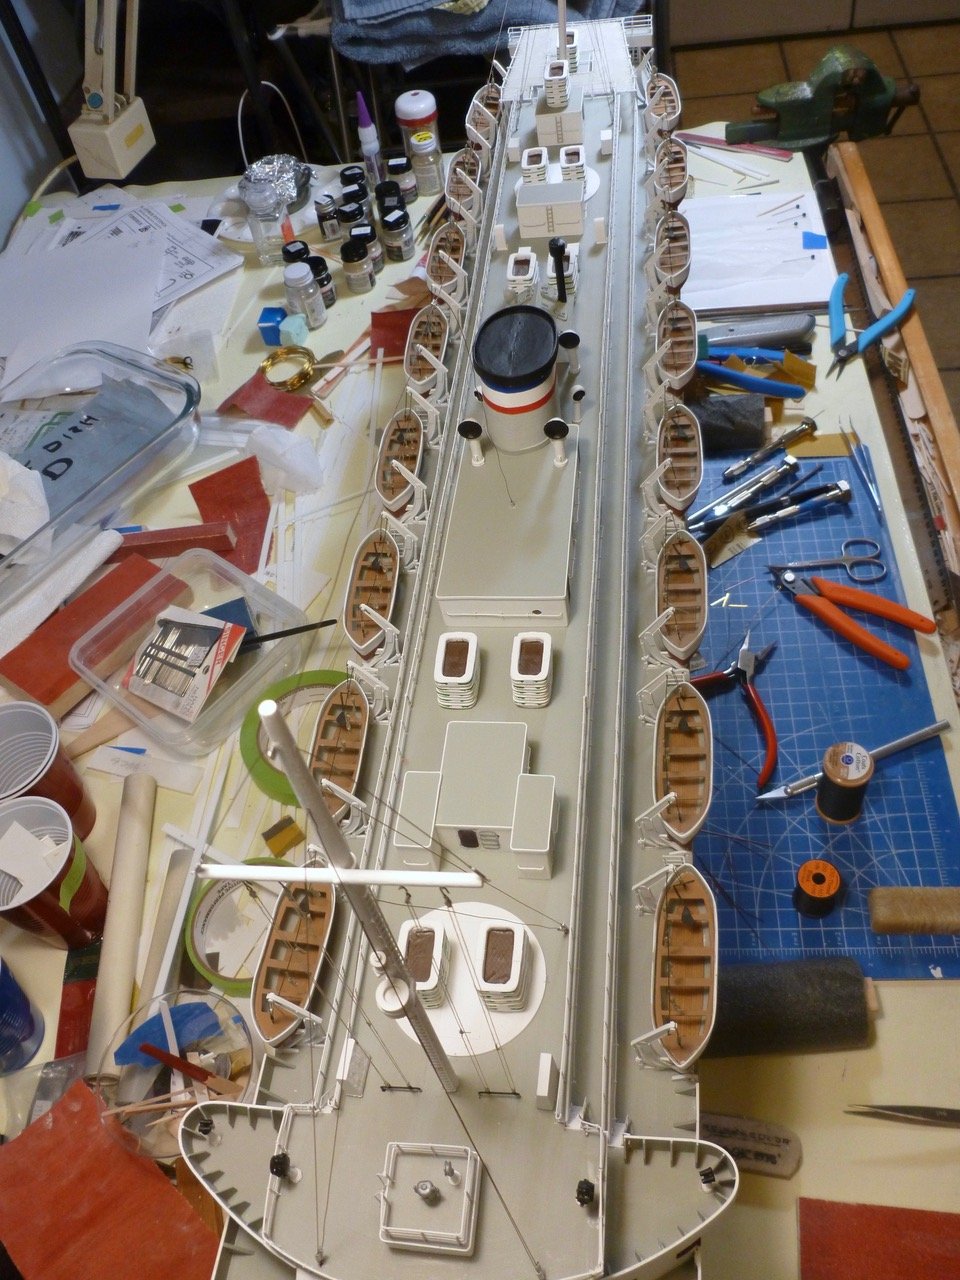
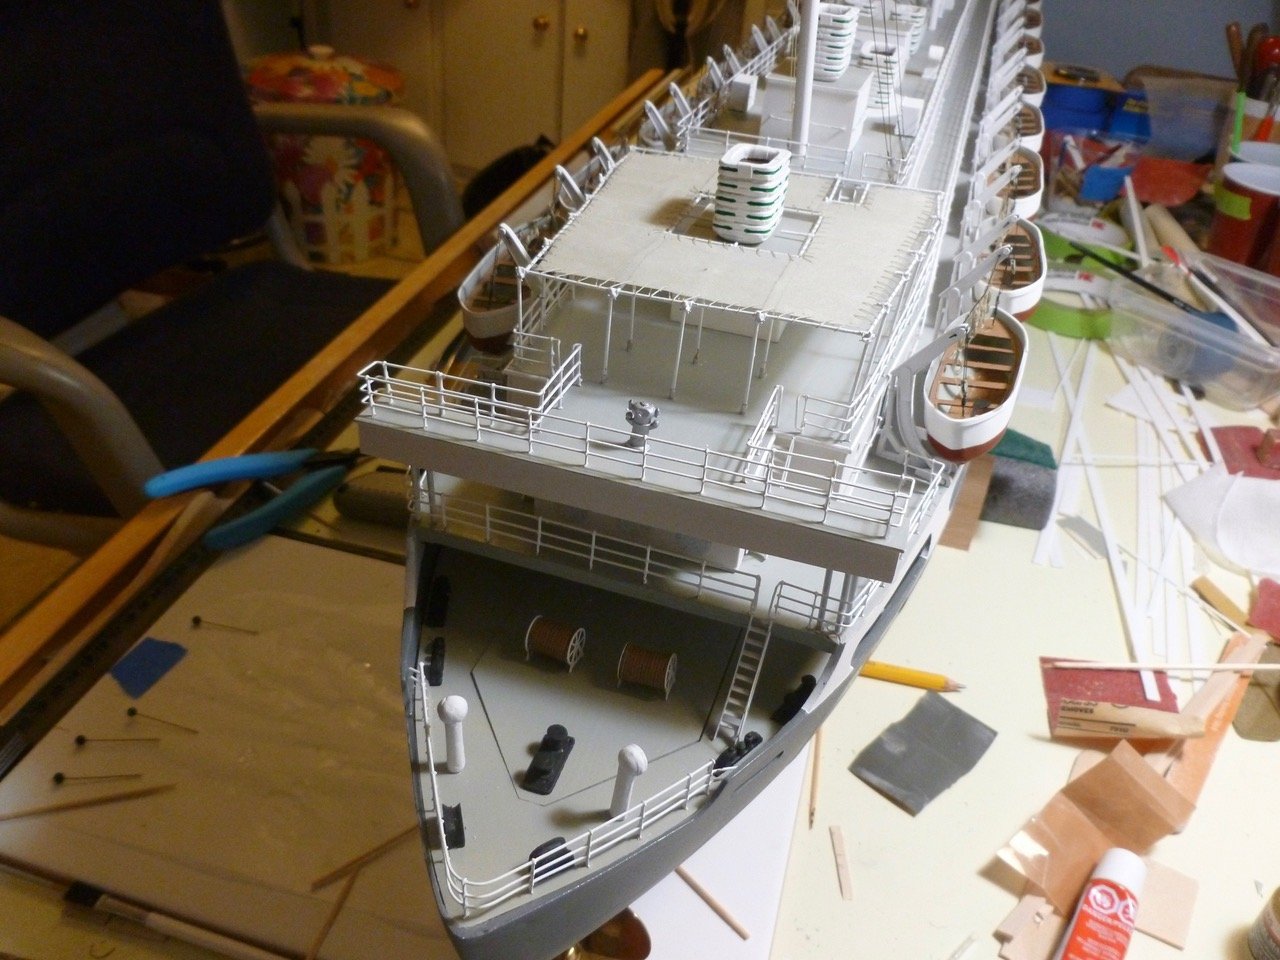
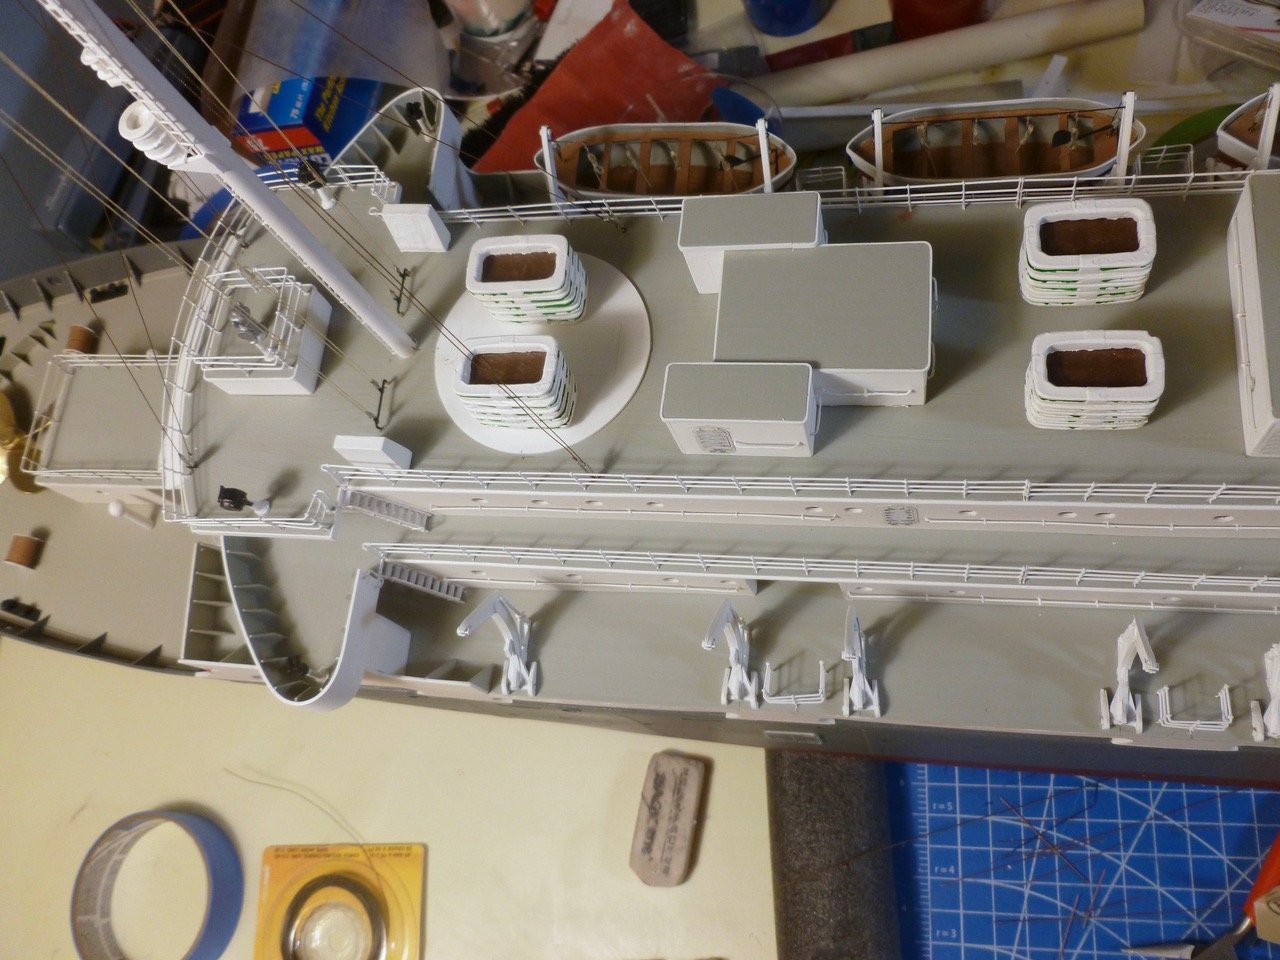
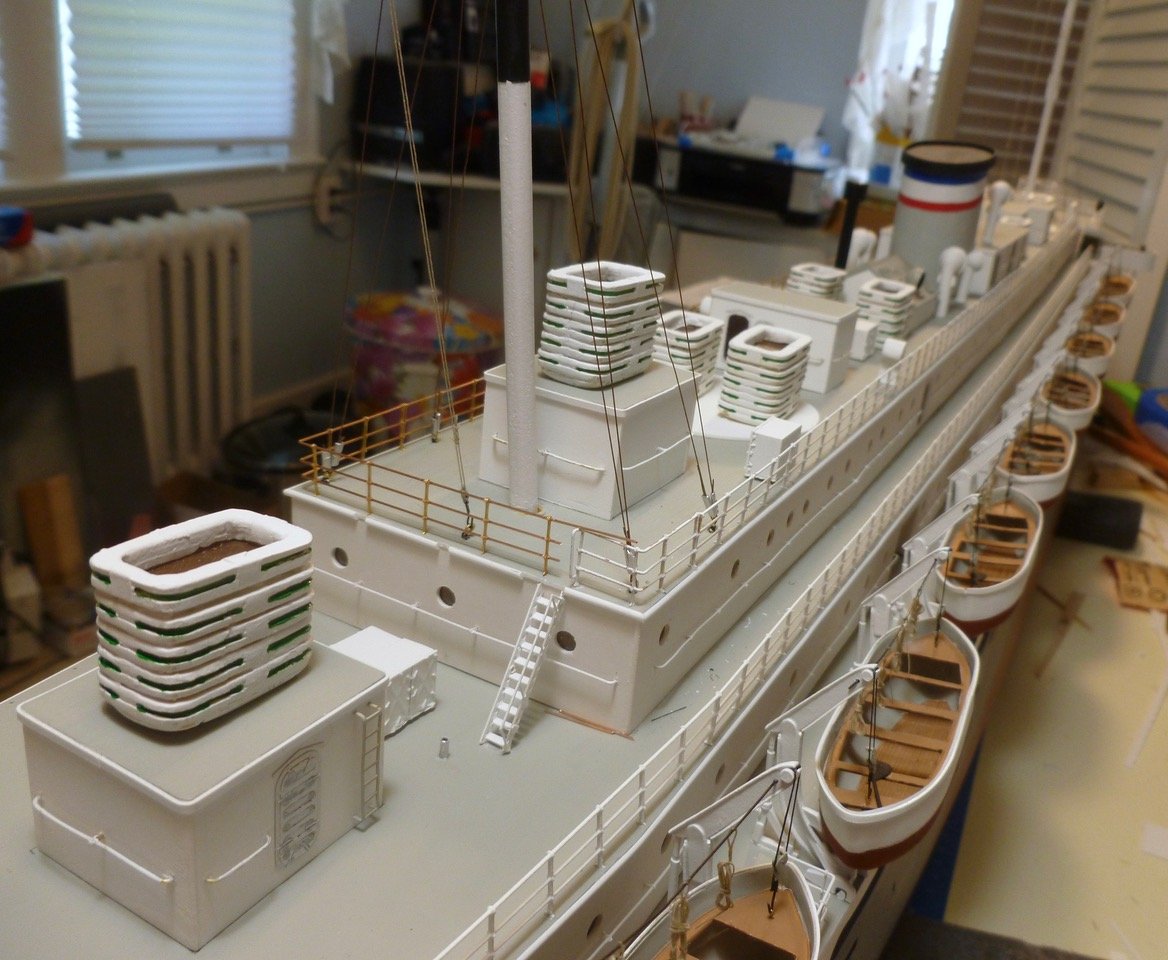
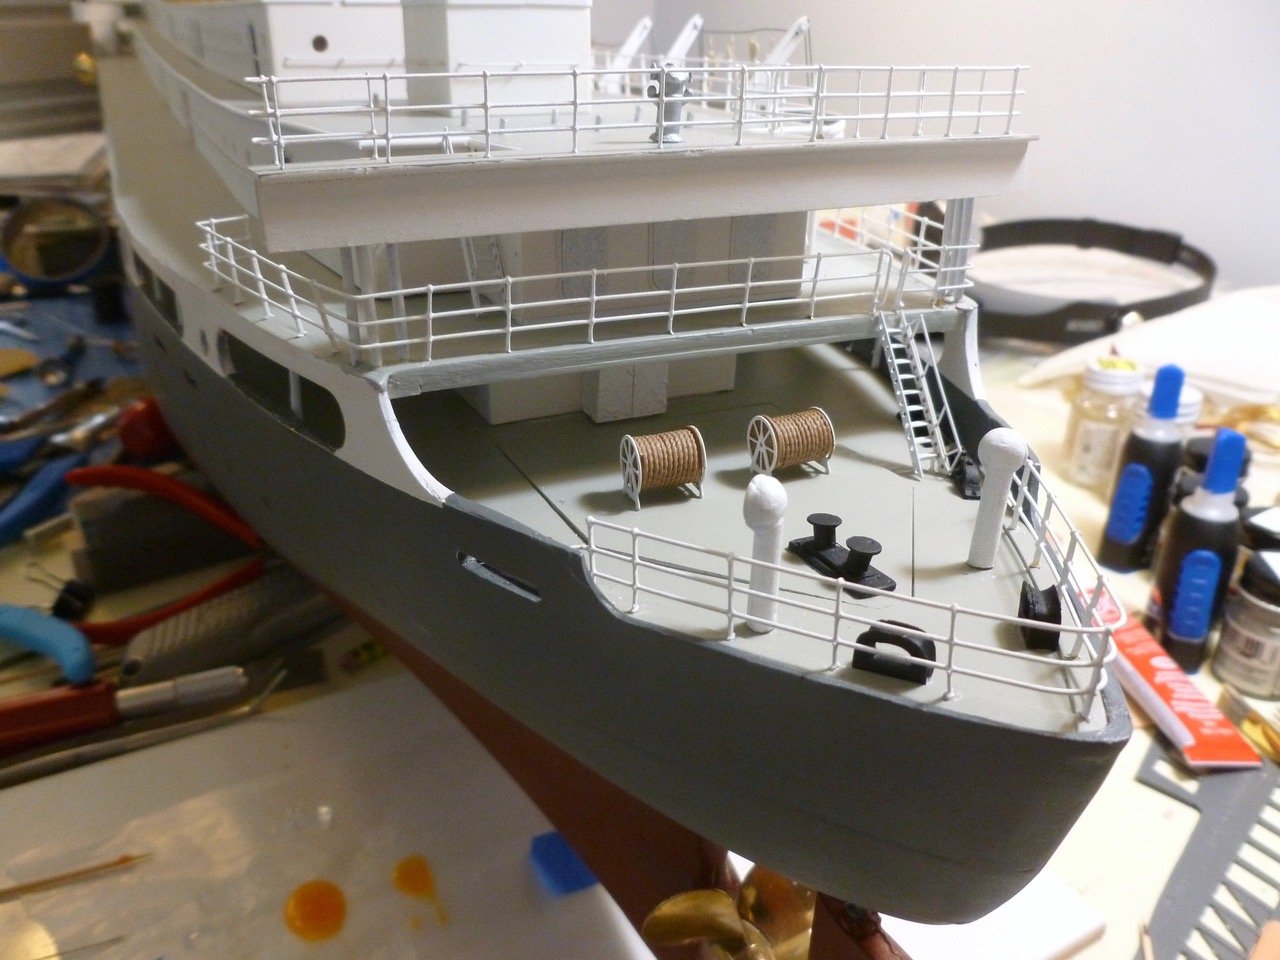
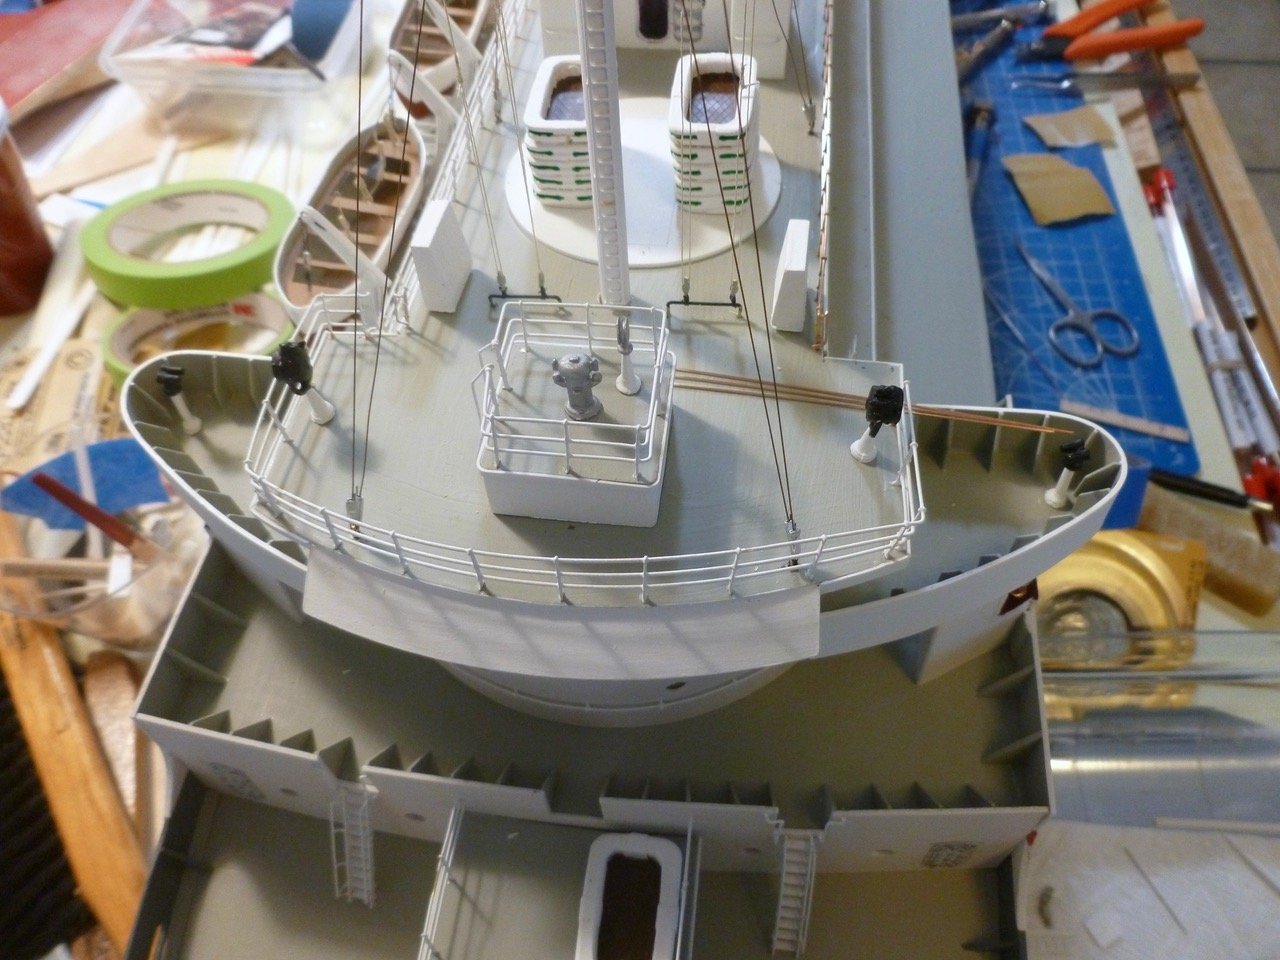
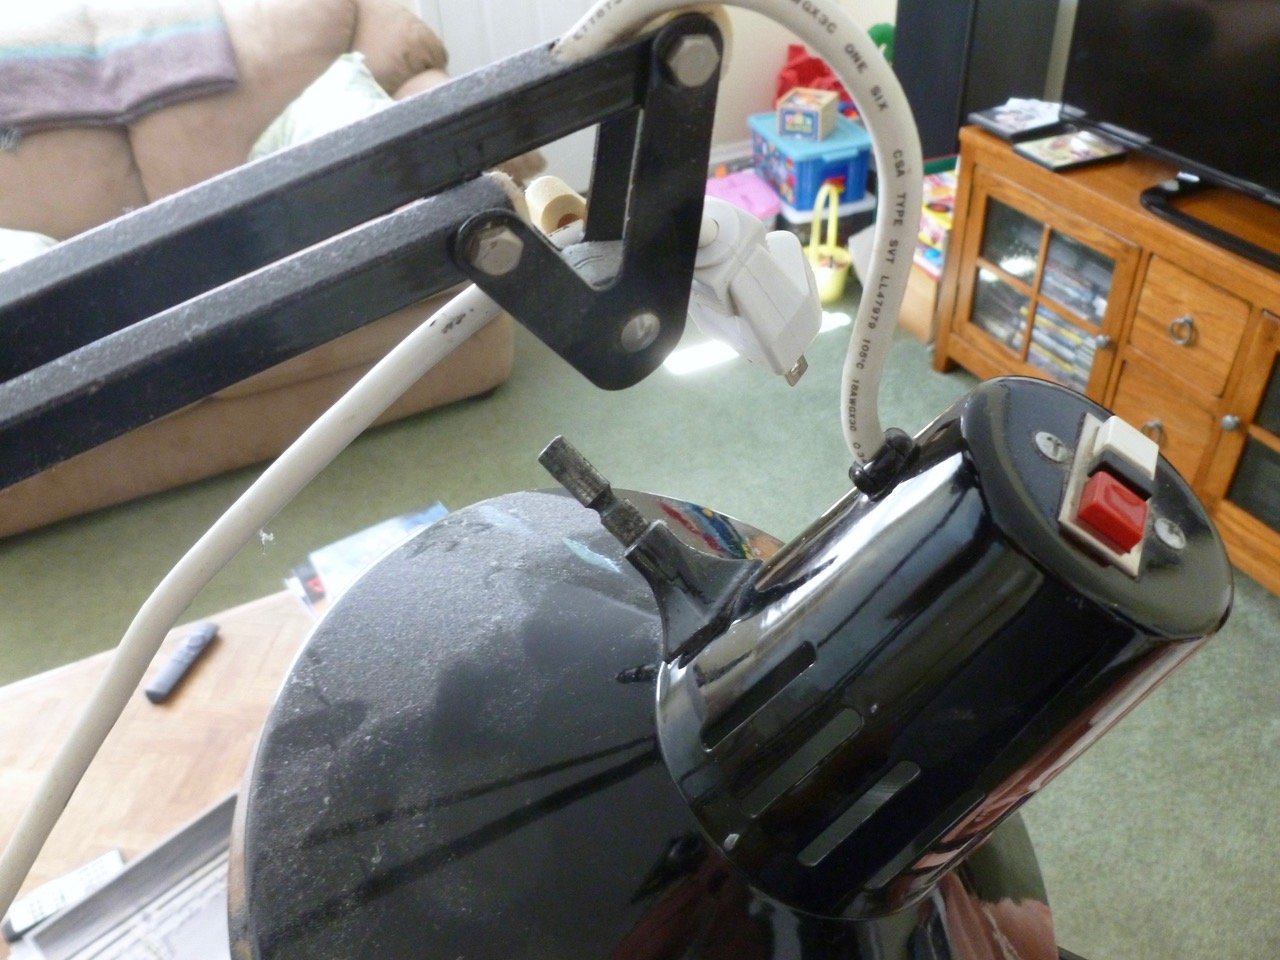
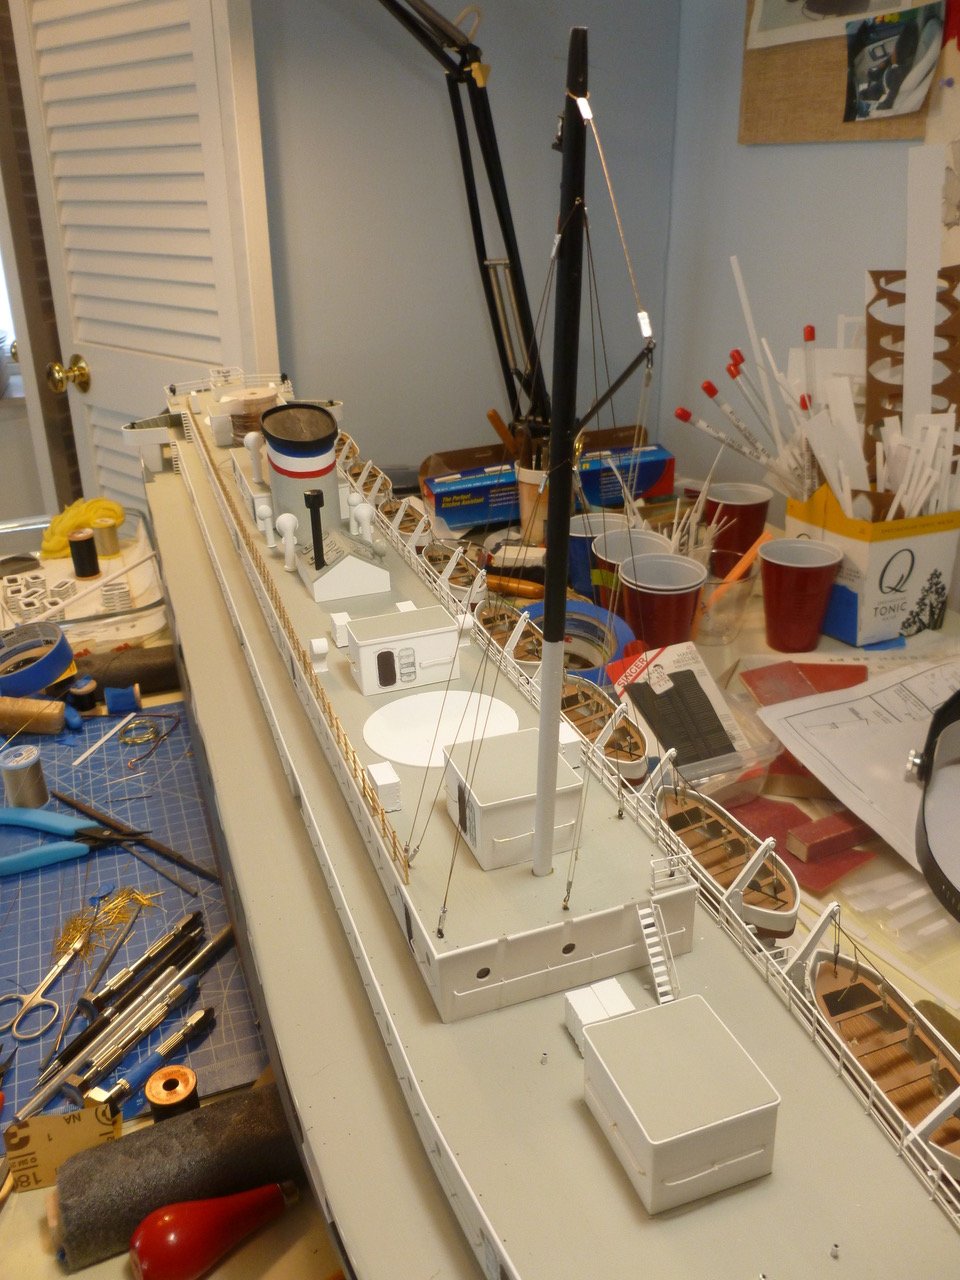
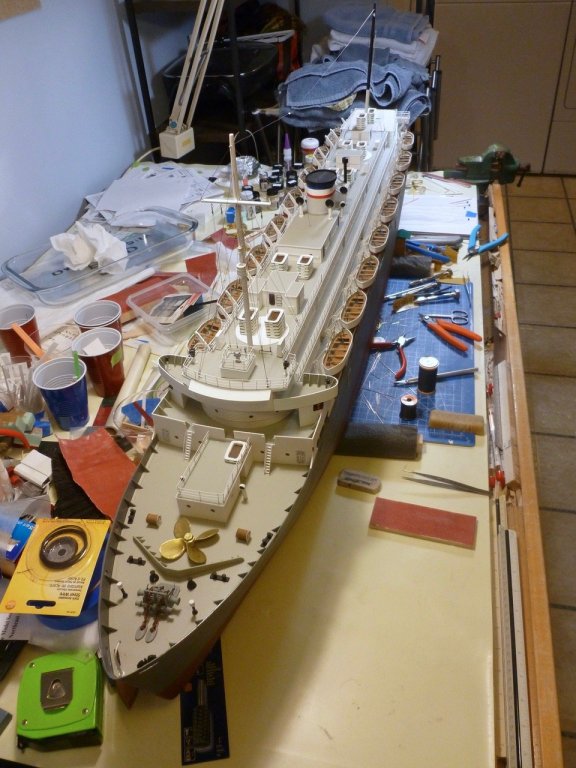
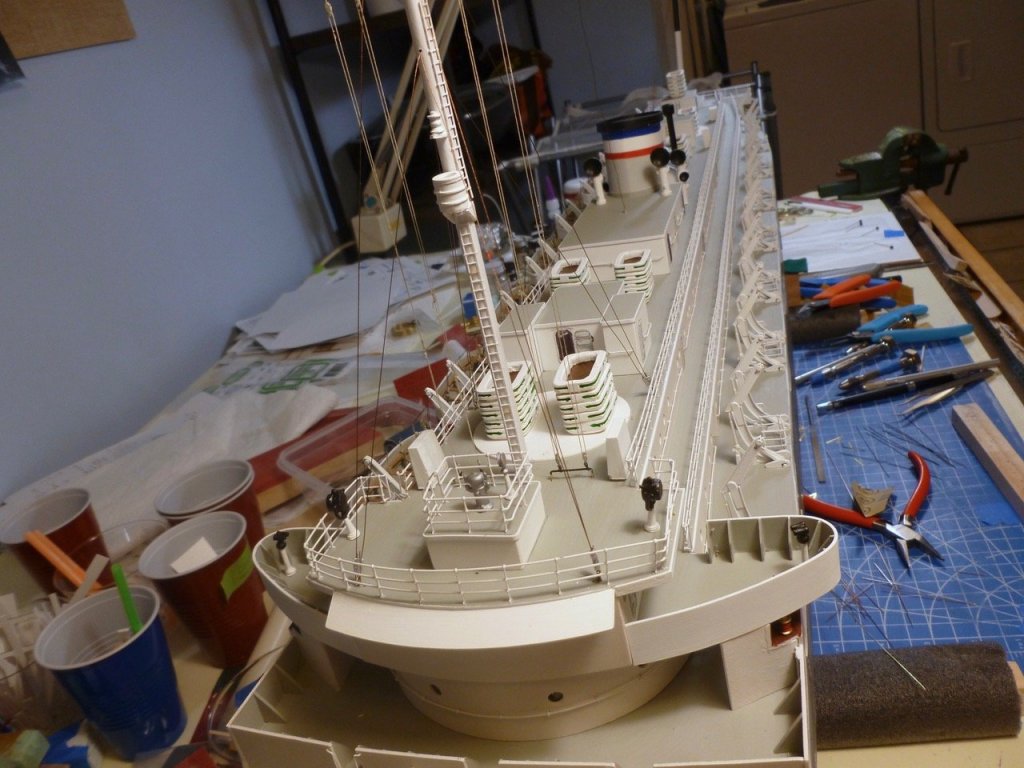
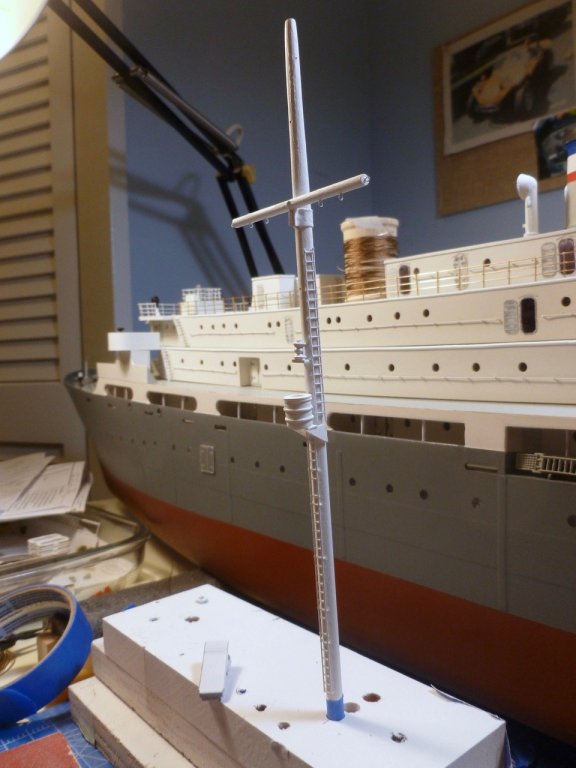
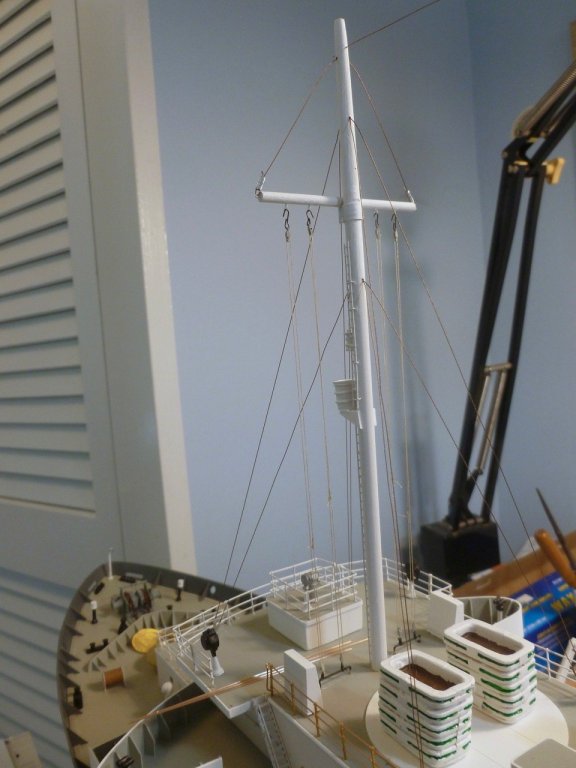
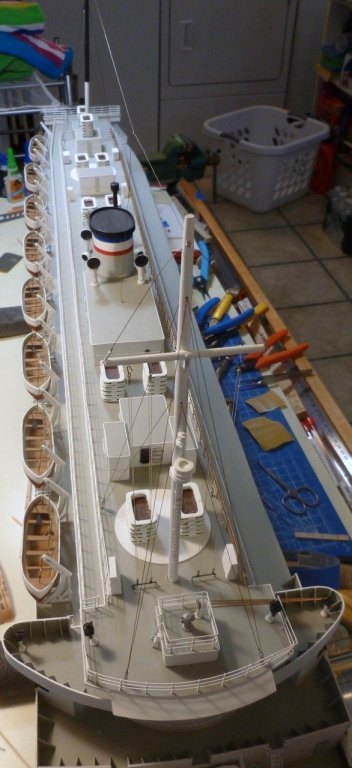
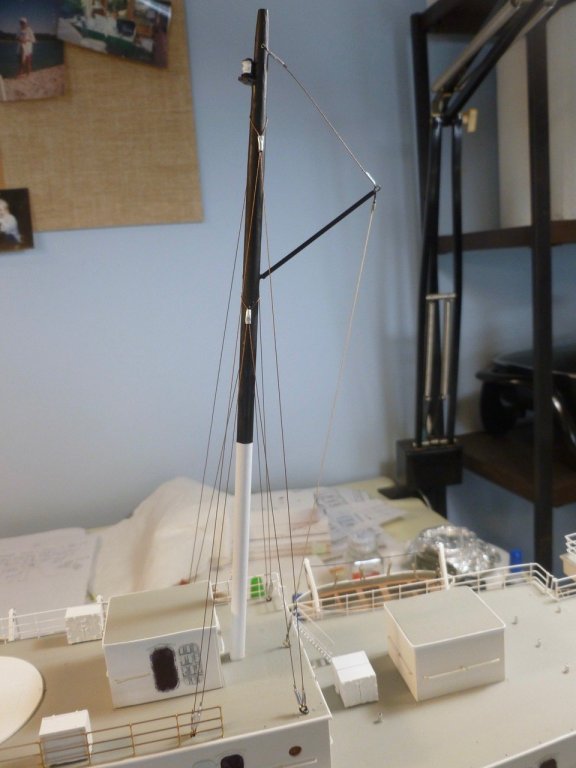
To those who gave likes, thank you and thanks for stopping by. Lou, I’m fortunate to have three lamps, two good and the injured one. I needed multiple lamps during my drafting days because the table is 3 ft x 5 ft and I always had a plan table nearby. Kevin, thanks for staying with me and for your kind remarks. The exercising nurses are very popular and I'm mulling over whether to try to find some at 1:96 scale. Steve Masts and rafts I built up the foremast. The instructions show a sort of clunky plastic support for the signal halyard crossbar but I tried to make it cleaner with a pin through the bar and a bit of brass wrapped around the mast and extending under the bar. After I installed the ladder and after seeing the photo I discovered the ladder was photo etched with two treads missing. Fortunately I have some spare railing and grabbed the miniscule replacements. The foremast and signal halyards are installed. I'll clamp the hooks a bit tighter now that everything is tensioned. While checking measurements and photos I discovered the shrouds appear to pass through the mast, rather than being wrapped and swaged, so I pulled the mainmast shrouds and re-did them to match the foremast. With the masts and rigging installed I set the carley float rafts. The one in the foreground that will sit above the awning is still loose. The top deck railing has turned the aft corner and is almost finished. Overview of the top deck The forward rigging at deck level. The real ship has a forestay but that would conflict with the removable upper decks. I added the rope reels to the bow and stern.


- 446 replies
-
- 14
-
-
- zebulon b vance
- deans marine
- (and 3 more)
-
Very fine progress Kevin. Looks terrific. Steve
- 337 replies
-
- 5
-
-
- finished
- mountfleet models
- (and 1 more)
-
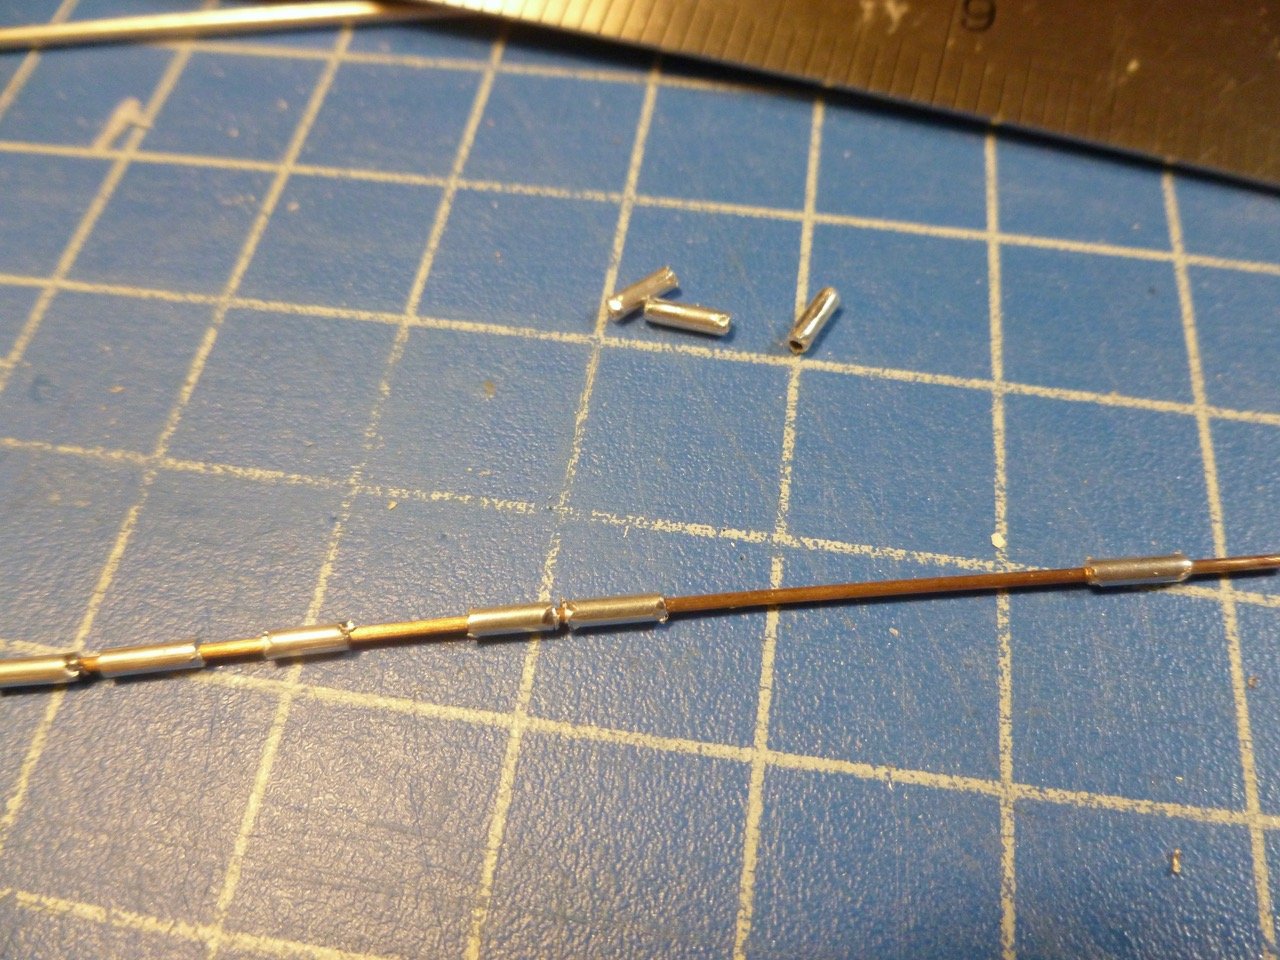
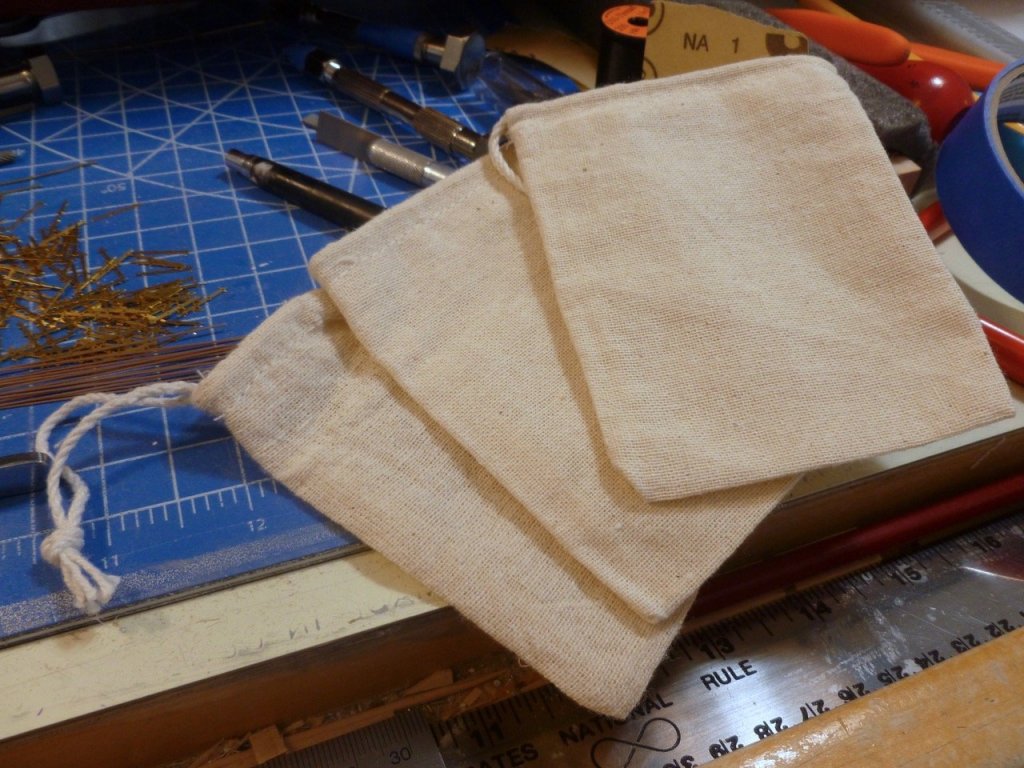
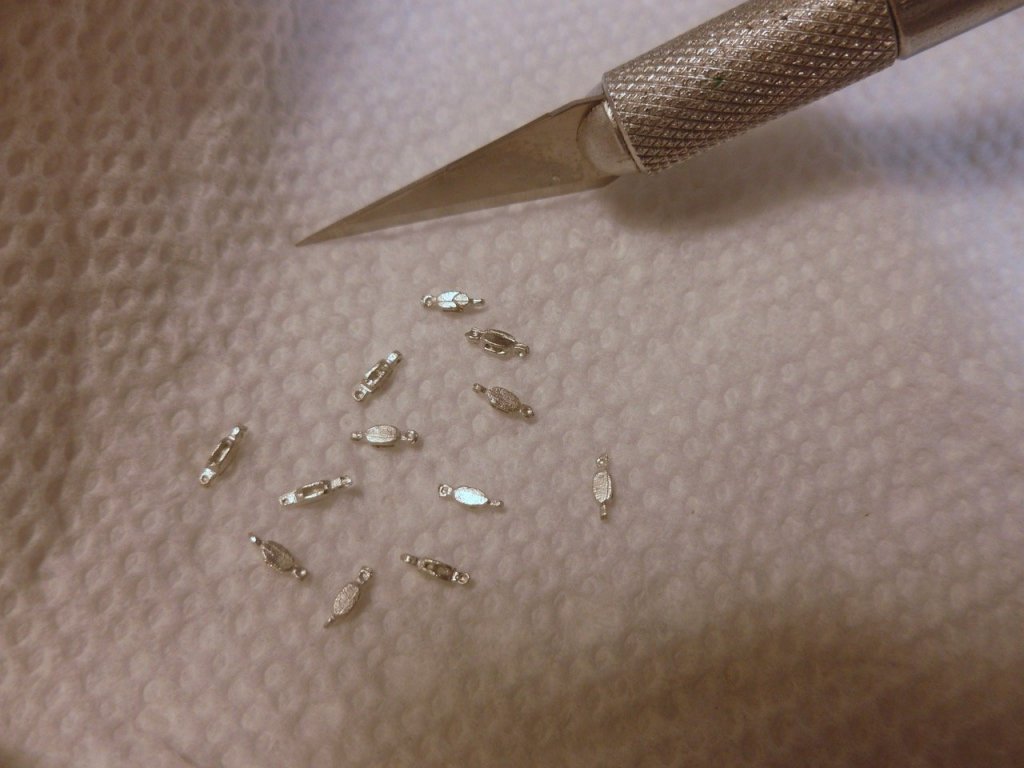
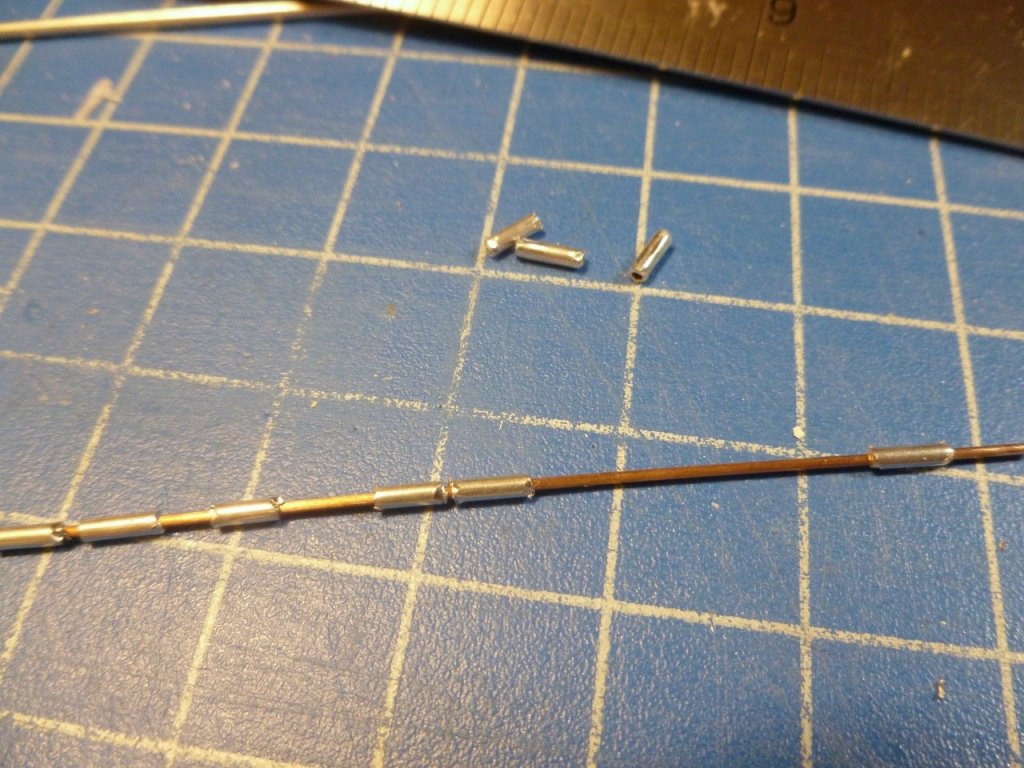
To those who gave likes, thank you and thanks for stopping by. Denis, Jack and Lou, thanks for your compliments and suggestions to use bags of ballast for final balancing. I found some small muslin bags in the local craft store that are intended for wedding mementoes but the 3 inch x 4 inch size looked perfect for small loads of lead pellets. Steve Lights out. Mast work was held up while waiting for the new blocks so I started fabricating the port side railings. The port side ship’s ladders are in place. The order of small blocks (3/32 inch) arrived promptly so work could resume on the masts. I decided to use thin multi-strand brass wire for mast shrouds, so I cut some swaging from a piece of 1/16” aluminum tube, with a piece of brass rod slipped into it for tube stability when filing. The mainmast is installed. It was late at night and I forgot to glue on the ladders before stepping the mast so they will be fiddled on later. The shrouds and rigging are representational, but more than shown in the instructions since they bore minimal resemblance to anything seen in the few photos of the ship. A progress shot of the recent work. While twisting my ancient articulated Luxo lamp for photos the head came off in my hand. The small casting holding the head mounting shaft finally fractured after 50 years. The weight of the dust probably didn't help. A near disaster if it had been over the ship. Then I recalled seeing another identical fixture laying on a shelf in the garage. I used a bunch of these in my architectural practice. After cleaning a layer of grunge I luckily found out it still works.


- 446 replies
-
- 11
-
-
- zebulon b vance
- deans marine
- (and 3 more)
-
Jack, I just checked in. It's a very nice build with lots of great detail. Where did you find your white lettering? It is very crisp and seems to have no visible backing. Thank you for sharing. Steve
-
Denis, Thanks for the compliment. Yes, the plan is a combination of jars and plastic bags. I have an ample supply of sealable lunch baggies since I bring a sandwich to work almost every day, but I'm thinking of looking for something a bit stronger since the lead pellets in any quantity are heavy. Steve
- 446 replies
-
- 3
-
-
- zebulon b vance
- deans marine
- (and 3 more)