ESF
-
Posts
381 -
Joined
-
Last visited
Content Type
Profiles
Forums
Gallery
Events
Everything posted by ESF
-
 Popeye, I apologize for incorrectly spelling your name with a double "n" in my earlier posts. Steve
- 446 replies
-
- 3
-

-
- zebulon b vance
- deans marine
- (and 3 more)
-
To those who gave likes, thank you and thanks for stopping by. Carl, thanks for your kind feedback and suggestions. I had a few jars marked Port but numbering them for exact position is a much better idea. I'm hoping the combination of screw top jars and tiny pellets will give me enough flexibility for balancing. Steve
- 446 replies
-
- 5
-
-
- zebulon b vance
- deans marine
- (and 3 more)
-
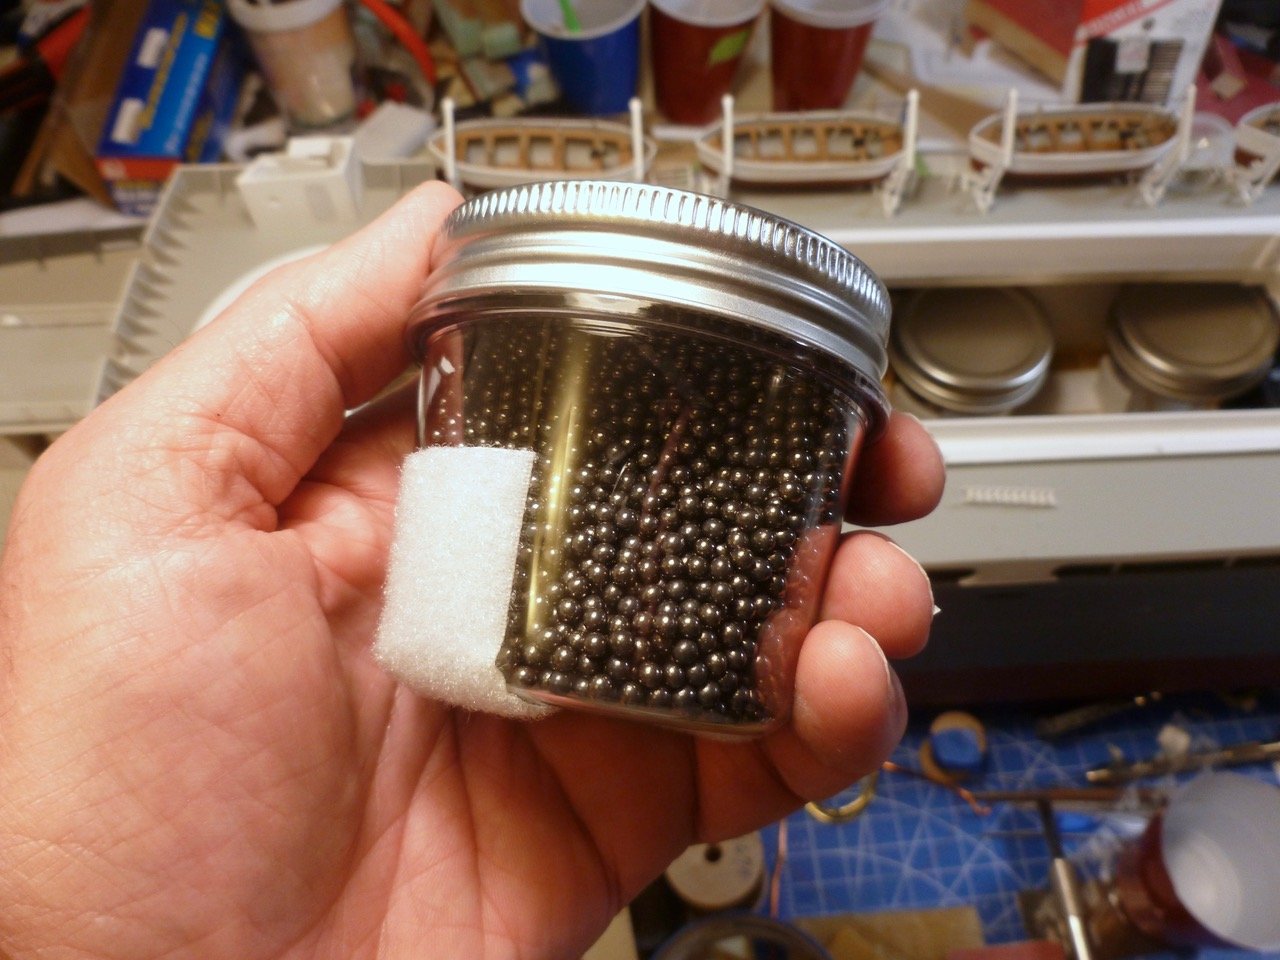
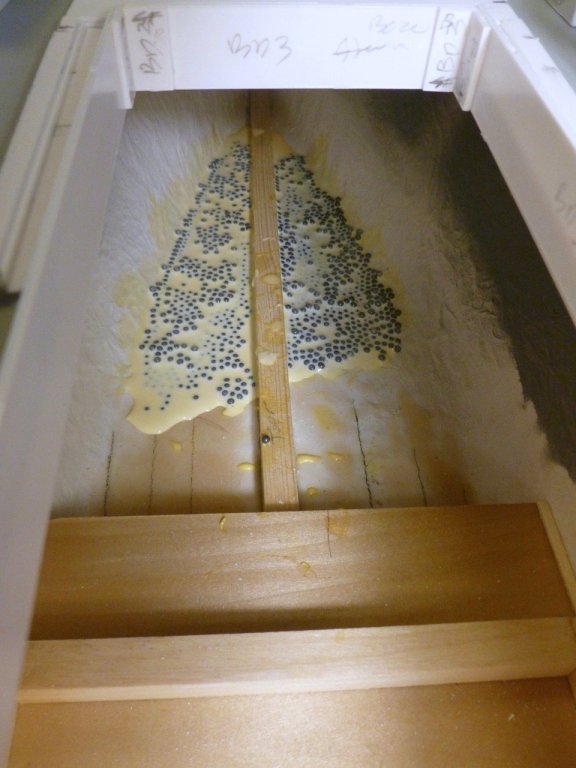
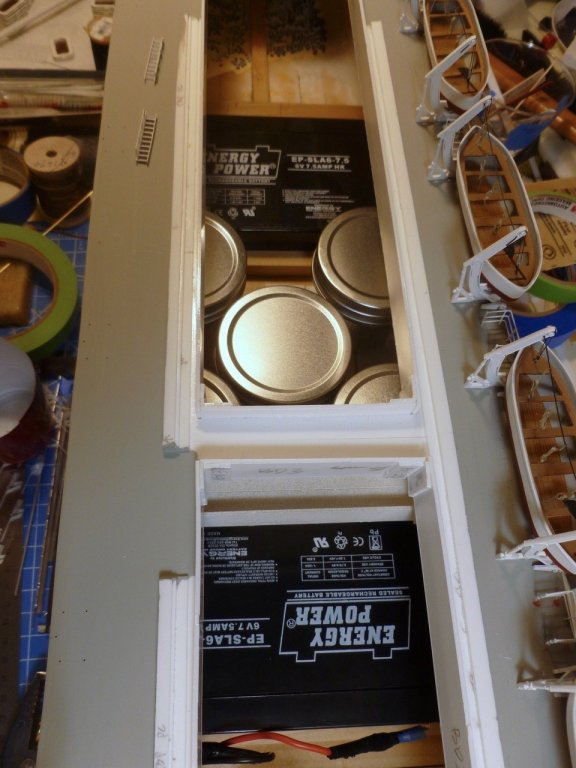
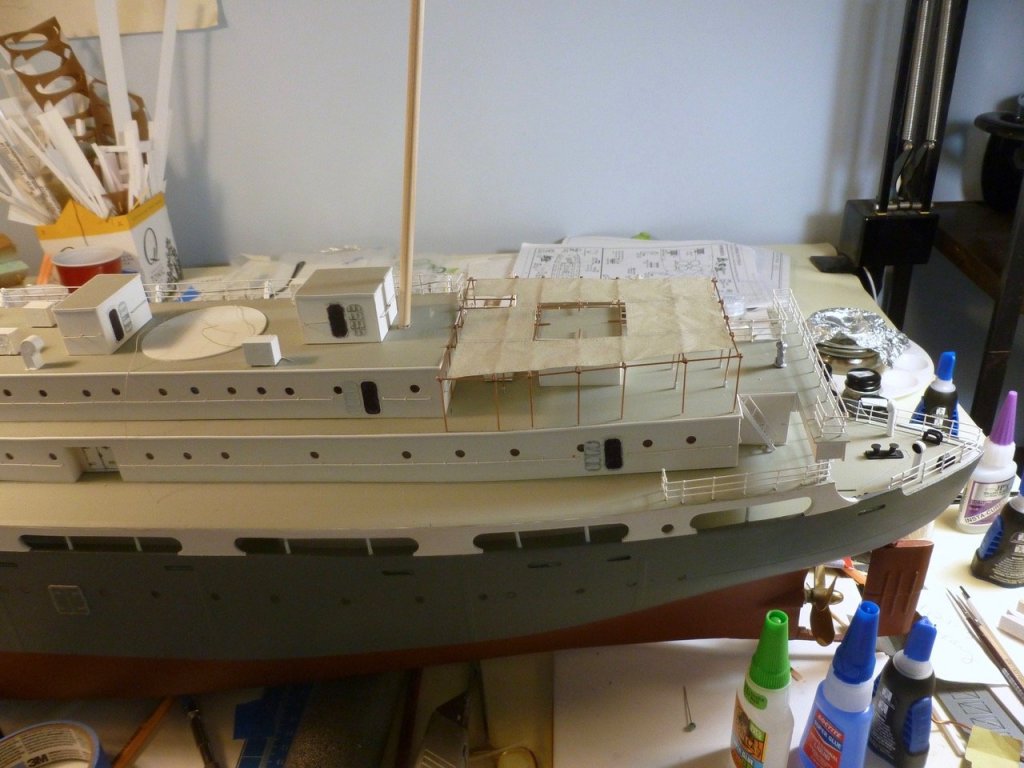
To those who gave likes, thank you and thanks for stopping by. Steve Smaller than a BB. I pulled the upper decks to experiment with ballast using the 25 pound bag of shotgun pellets that arrived recently. They’re smaller than a BB. Following one suggestion I put a flood coat of glue in a few spots fore and aft, broadcast some pellets, then brushed them around, adding a bit more glue for coverage. I’m anxiously awaiting drying. I picked up a pack of 4 ounce plastic jars with screw caps, then added a strip of velcro to the bottom and filled each one with pellets. By pure luck I can fit five jars in the open space on the battery deck. There is space for two more ahead of the battery deck. Fully loaded with ballast and two batteries the ship feels heavy and reasonably balanced and I’m getting pumped to have a test sail. Removable jars means less weight carrying to and from the water. I still have a good load of pellets and I’ll bring some plastic bags to use if I need to add weight. I have also started mast work. I prepped for the flag halyard but the kit blocks are quite out of scale. I decided I had too much work in the ship to let oversize blocks muck it up, so I ordered the smallest blocks (3/32 inch) I could get from Bluejacket. They should be here in a few days. I have to snip the big blocks off but fortunately I didn’t install the other eight before seeing the light. The awning stiching is finished and the frame awaits completion of the railings before final placement. A progress shot from the stern.


- 446 replies
-
- 11
-
-
- zebulon b vance
- deans marine
- (and 3 more)
-
It's looking very good Denis. The curves on the railings are first rate and you did a yeoman's job on squaring up the windows. Don't be so hard on yourself - you are showing you have the talent to work through all the "little" challenges (little as in small size, but not insignificant as a challenge). Thanks for sharing. Steve
-
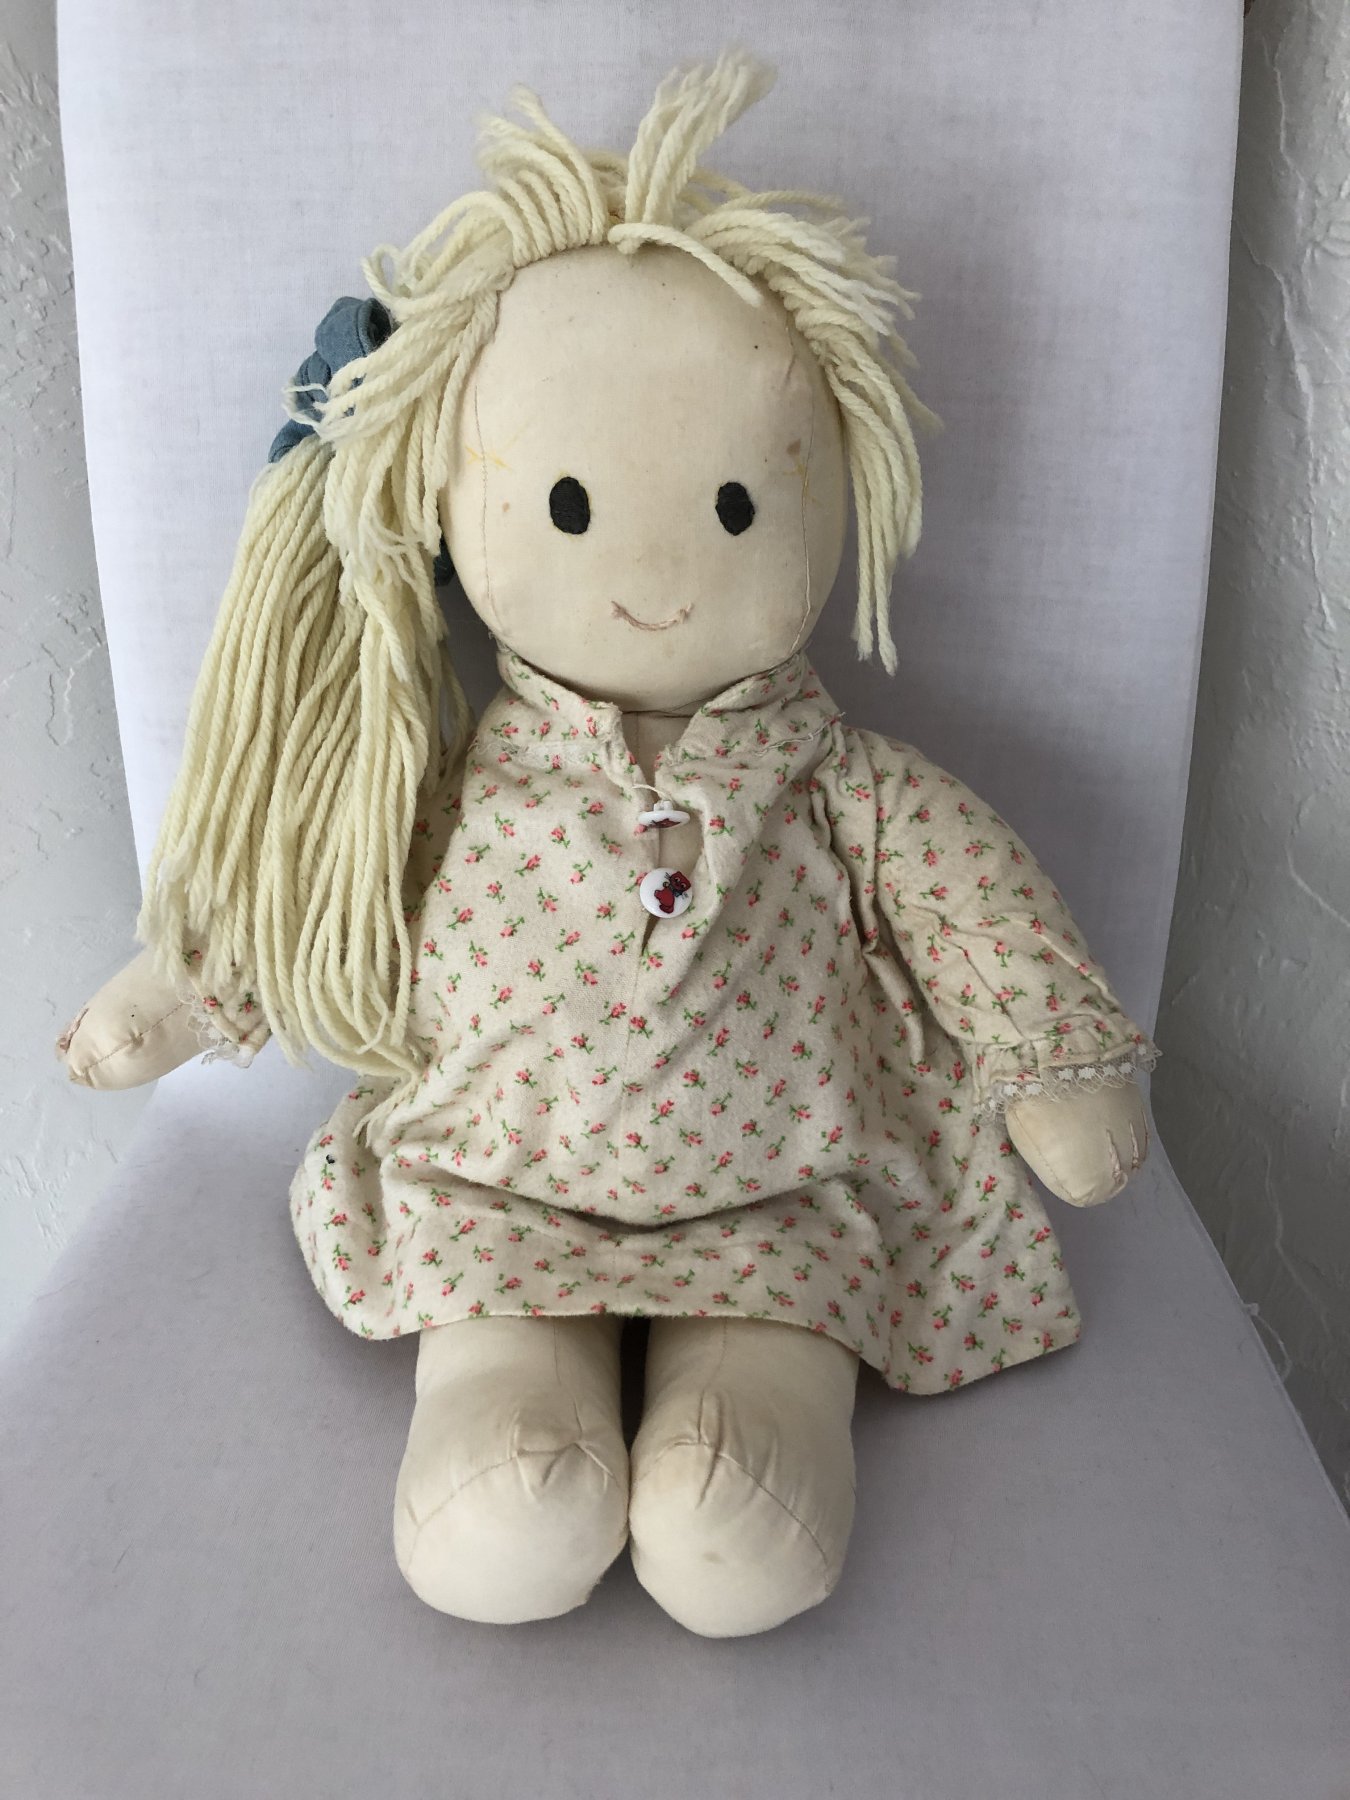
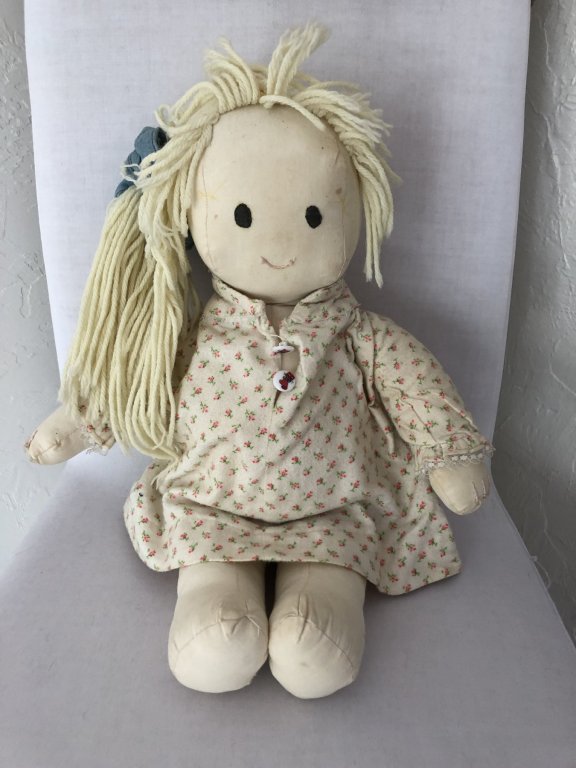
To those who gave likes, thank you and thanks for stopping by. Dennis, thanks for your kind feedback. I think it was either toe touches or side twists. Carl, my daughter thanks you. I like jumping jackies. My other claim to stichery fame is below. Gary, I appreciate your kind remarks and thanks for stopping in. I just ordered new small blocks for the signal flag halyards since the kit blocks were huge and felt wrong, especially after I installed a few. Steve Ca. 1986, scratch built for my daughter from a pattern. She has a pair of bunny slippers too but they keep sliding off. Probably need some CA but I can't bring myself to do it. The yarn rigging was given a surreptitious trim during younger years, much to my chagrin. Back to ships next post.
- 446 replies
-
- 5
-
-
- zebulon b vance
- deans marine
- (and 3 more)
-
Nic, So happy to see you back in action and hear that your recovery is going well. Making tiny wood shavings is great therapy and I''m learning great for the heart too. My doctor told me this morning my blood pressure is much better and I couldn't put it down to anything else except the peace of shipbuilding. Steve
- 356 replies
-
- 2
-
-
- red jacket
- finished
- (and 1 more)
-
Bluejacket Shipcrafters have a short tutorial in their newsletter archives on using a three-layer silkspan set up for sails. I tried it for an awning and it worked well for me. https://myemail.constantcontact.com/News--tips--and-happenings-from-BlueJacket-Shipcrafters--Inc-.html?soid=1105166336677&aid=fVLCRI0uZ9o Steve
-
To those who gave likes, thank you and thanks for stopping by. Carl and Denis, thank you for your kind remarks. The nurses jumped ship to visit the model progress and are enjoying their exercise in the shade, thanks to my daughter the web designer. Steve
- 446 replies
-
- 10
-
-
- zebulon b vance
- deans marine
- (and 3 more)
-
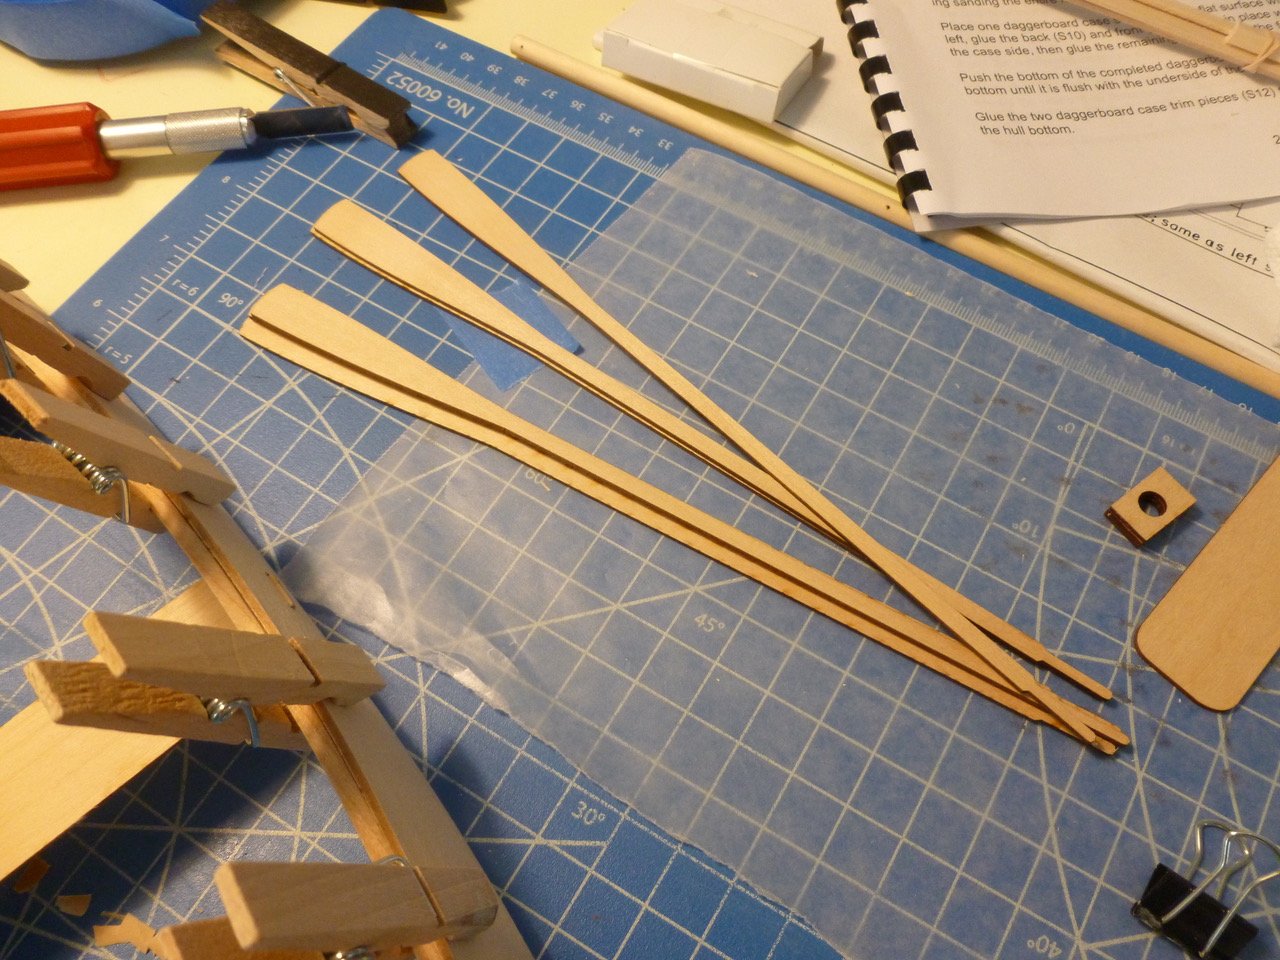
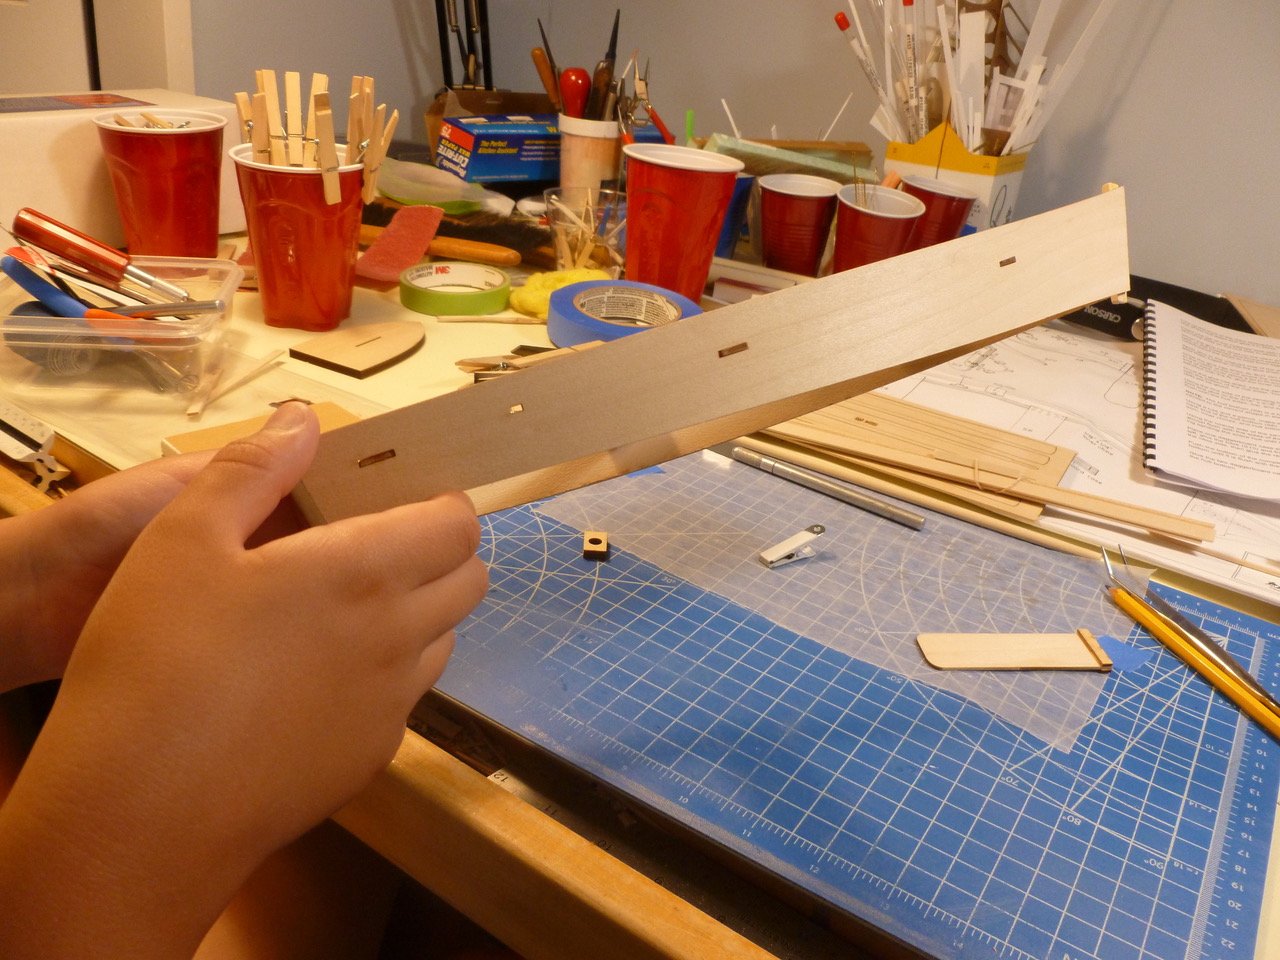
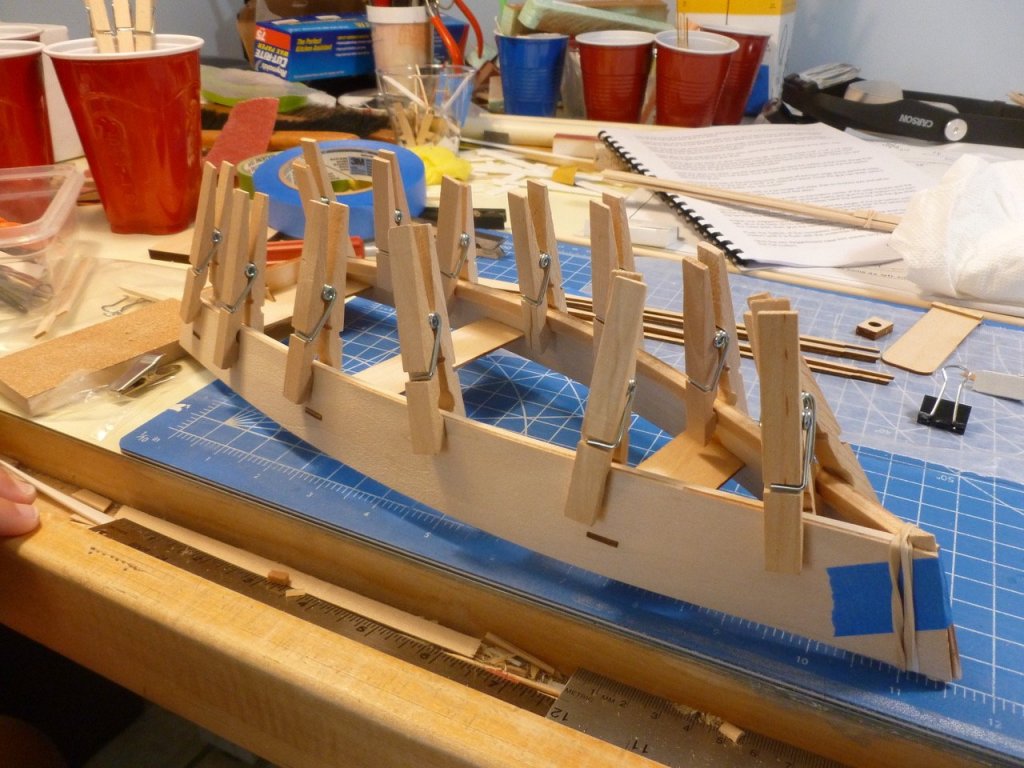
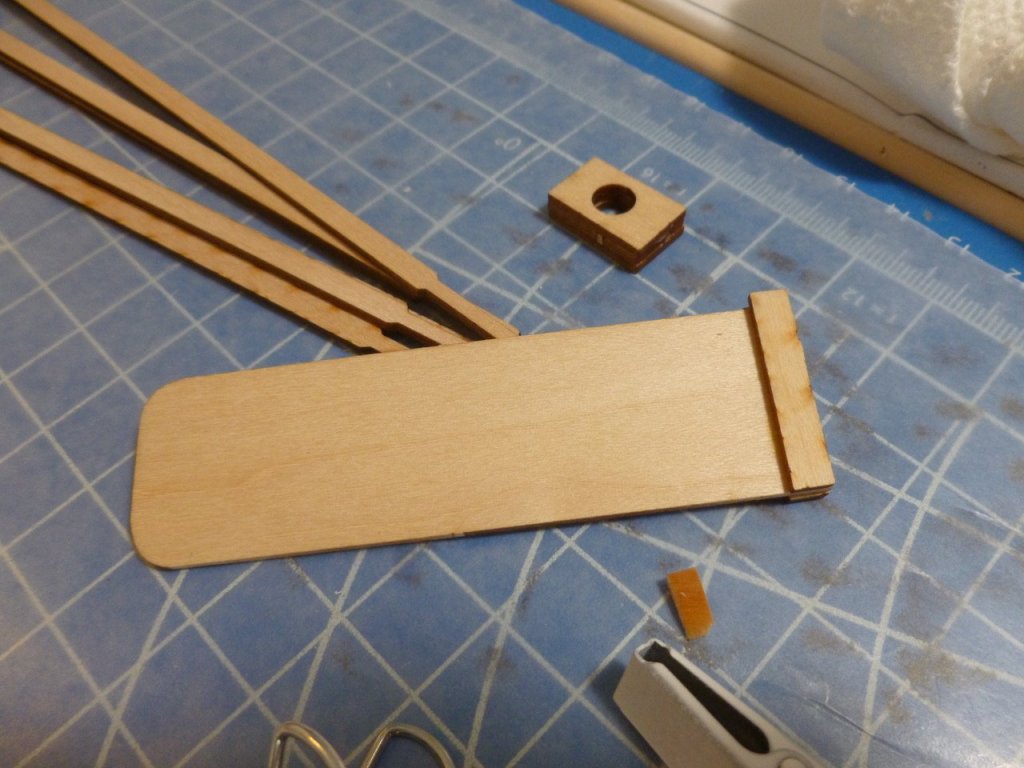
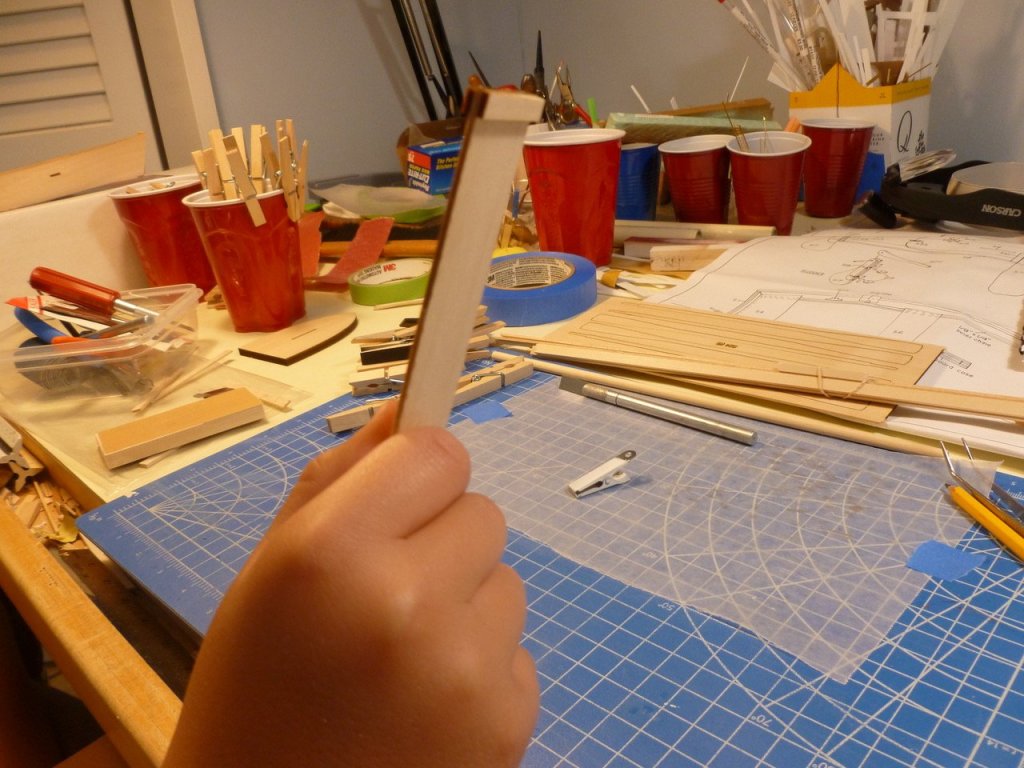
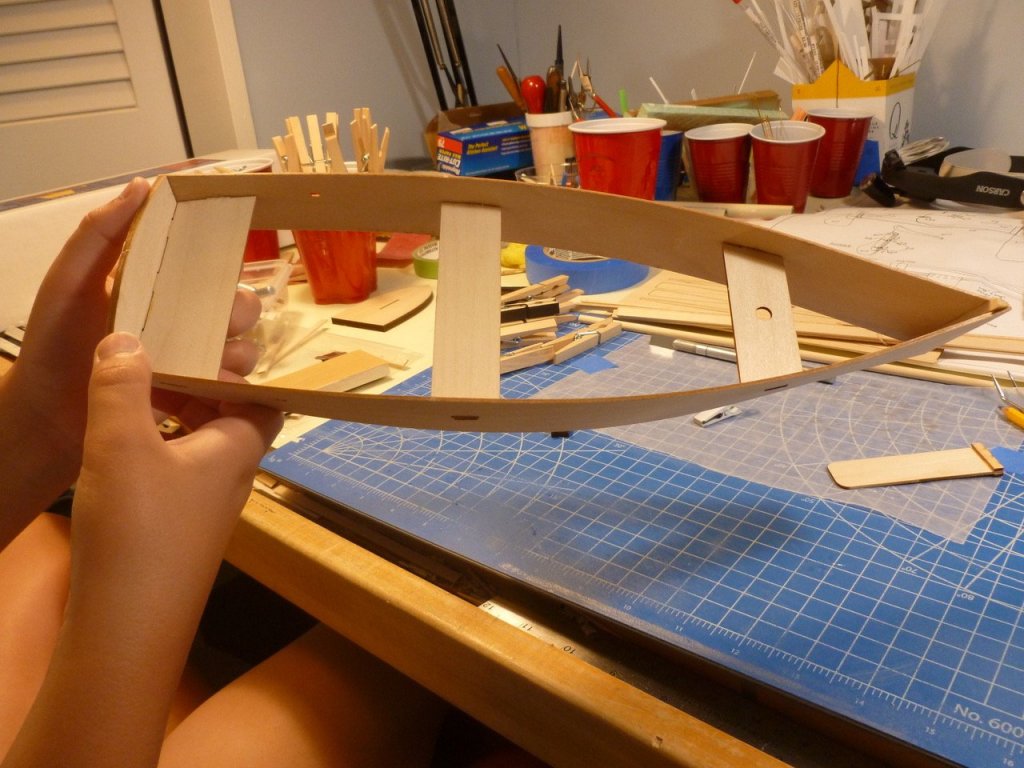
Thank you all for stopping in to see my blog and thanks to all of you who hit the like button. Have a great day! Thank you cog. Legodude I glued the sides on. When I was making the mast step I got super glue on my finger and it stuck to the wood. I got my finger off but when I touched it with my thumb my finger and thumb stuck together so I ran over to the sink and washed my hands with soap but Grandfather said soap doesn’t wash super glue off and I needed to rub my fingers together really fast to rub it off or it would wear off later. I built the daggerboard but I have to do the daggerboard case. The mast step and daggerboard are glued. Grandfather boiled water to soften the chines so I could bend them against the wood sides. The temperature was very hot. When it came out you could just cut it like cheese. I had to cut the ends to fit. This took a bit of work to cut and sand to the exact point, and I finally got it in with a few bumps and a lot of sanding. I didn’t realize how long it would take to get one piece all clamped in with clothespins. Once I come back to the house I will glue the chines to the boat so the clamps won’t have to hold them the entire time and hopefully I can glue on the bottom of the boat so I can paint it. I cut out the oar pieces using an x-acto knife and chisel. I used the x-acto chisel on the wide end of the oar and the knife on the short end. I realized the oars are 3 pieces that need to be glued and sanded to make them round.


- 18 replies
-
- 7
-
-
- skiff
- BlueJacket Shipcrafters
- (and 1 more)
-
Like a beautiful little jewel box. Congratulations Carl. Very nicely done. Thanks for sharing. Steve
-
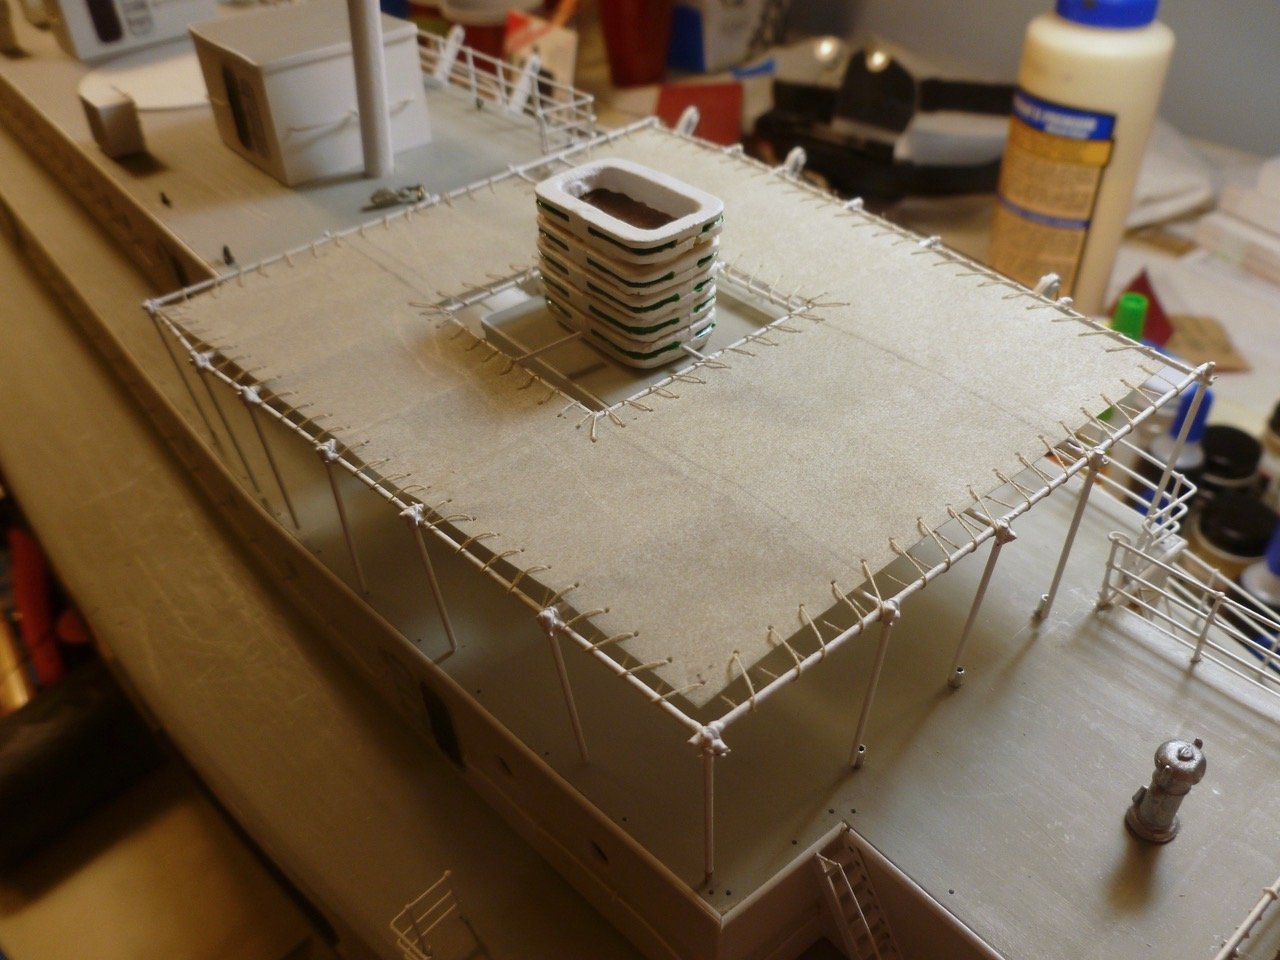
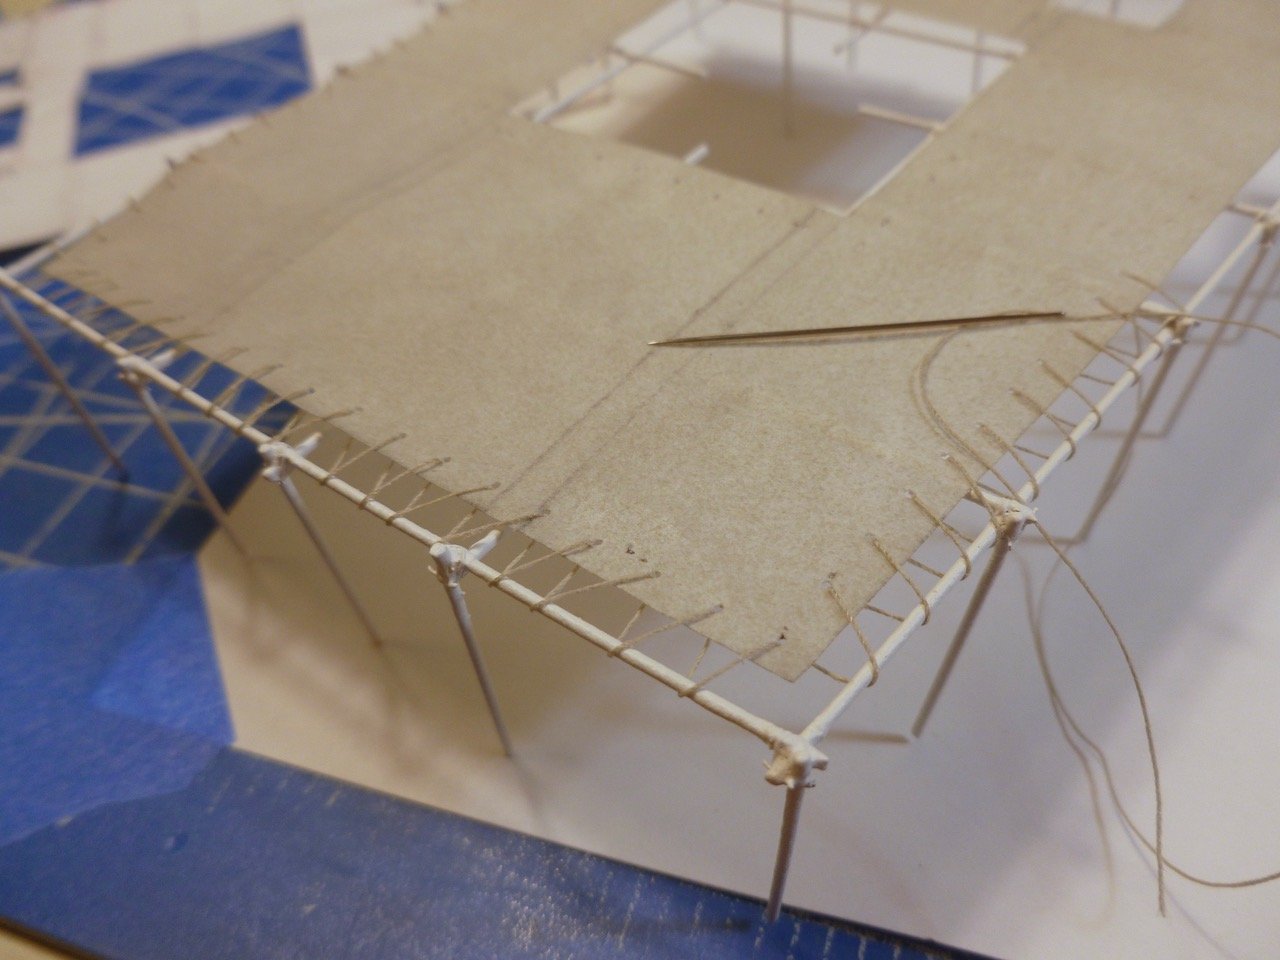
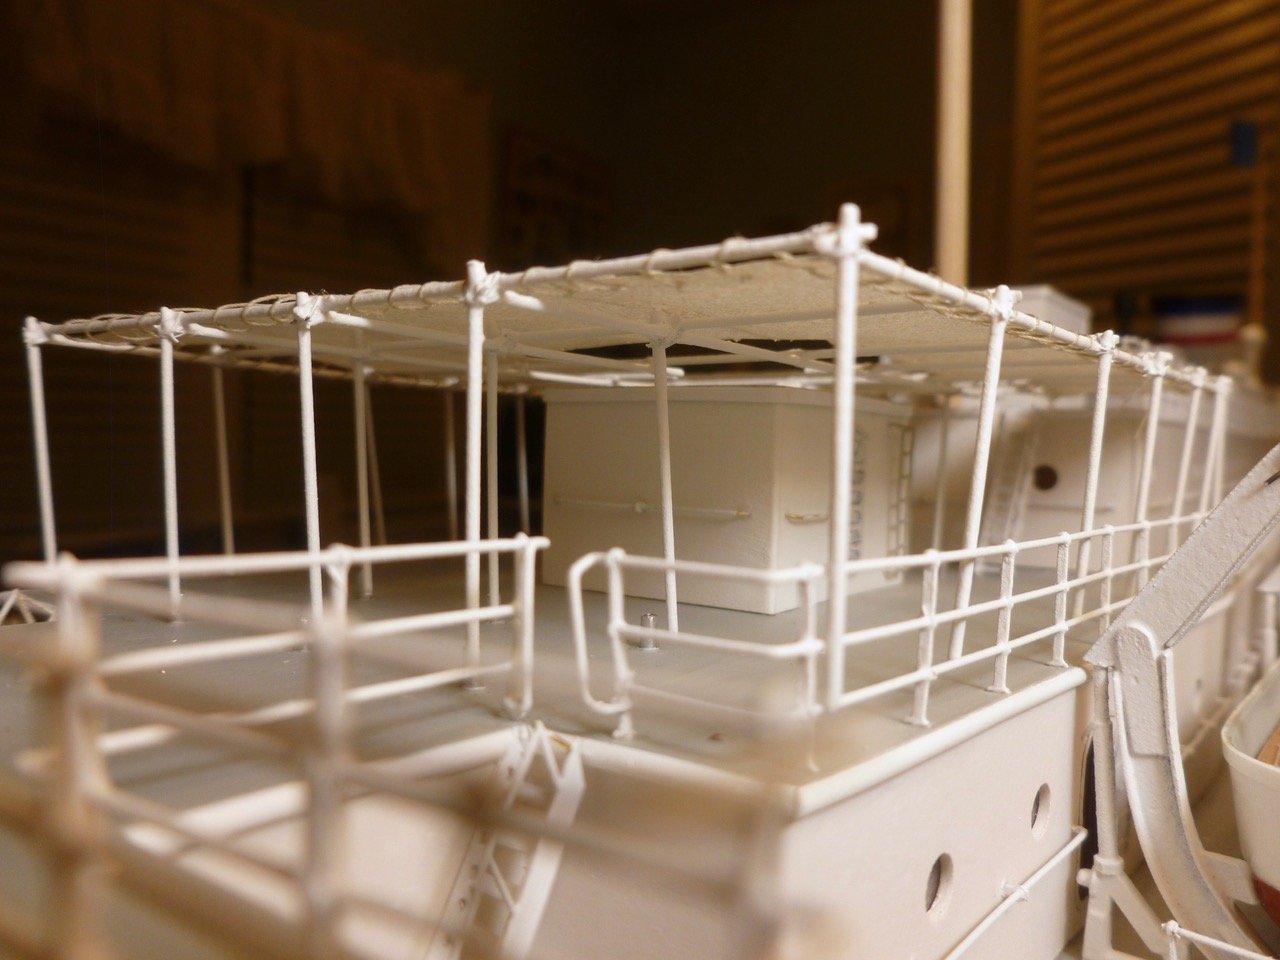
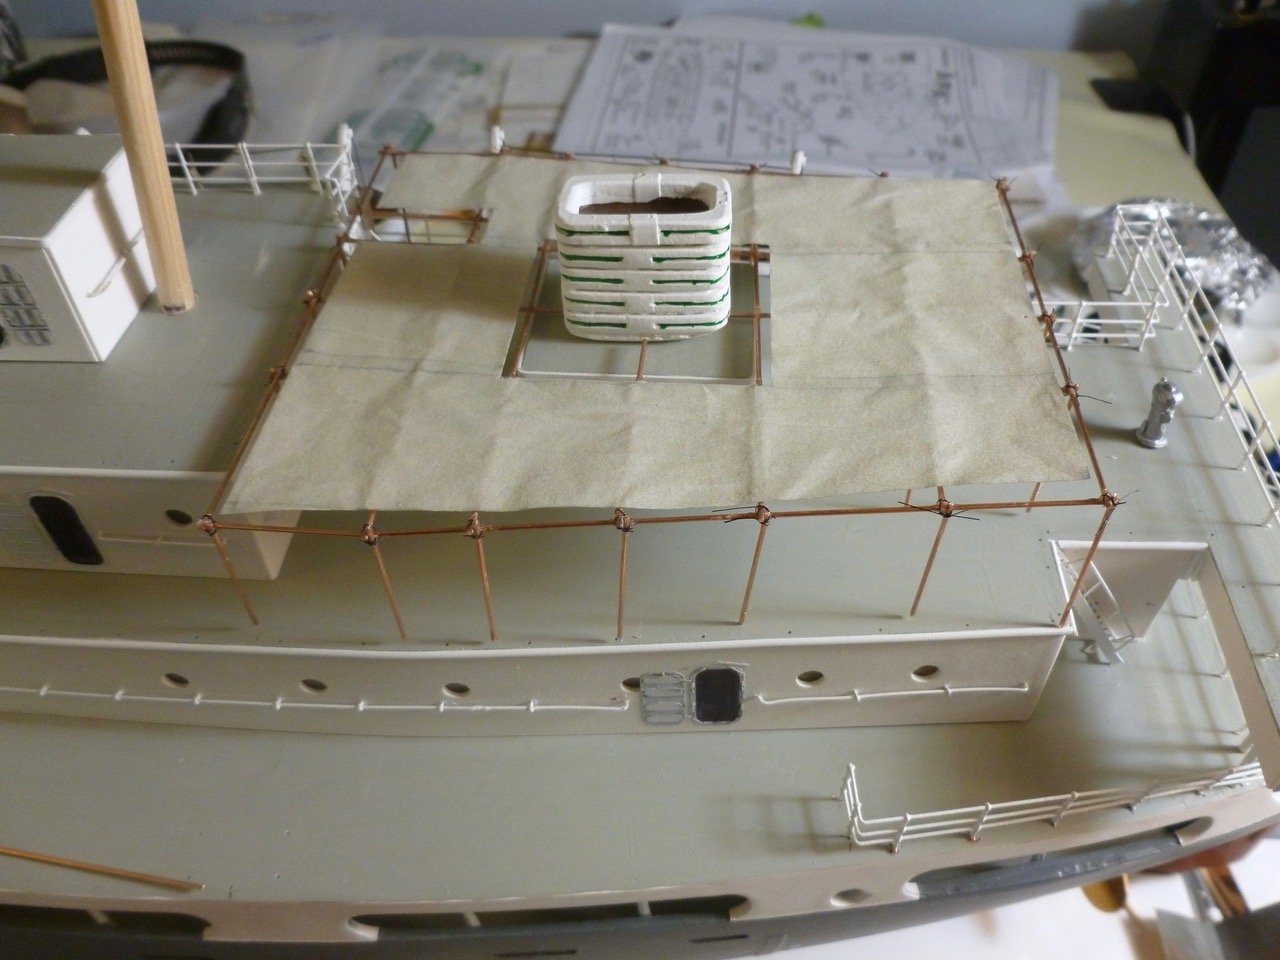
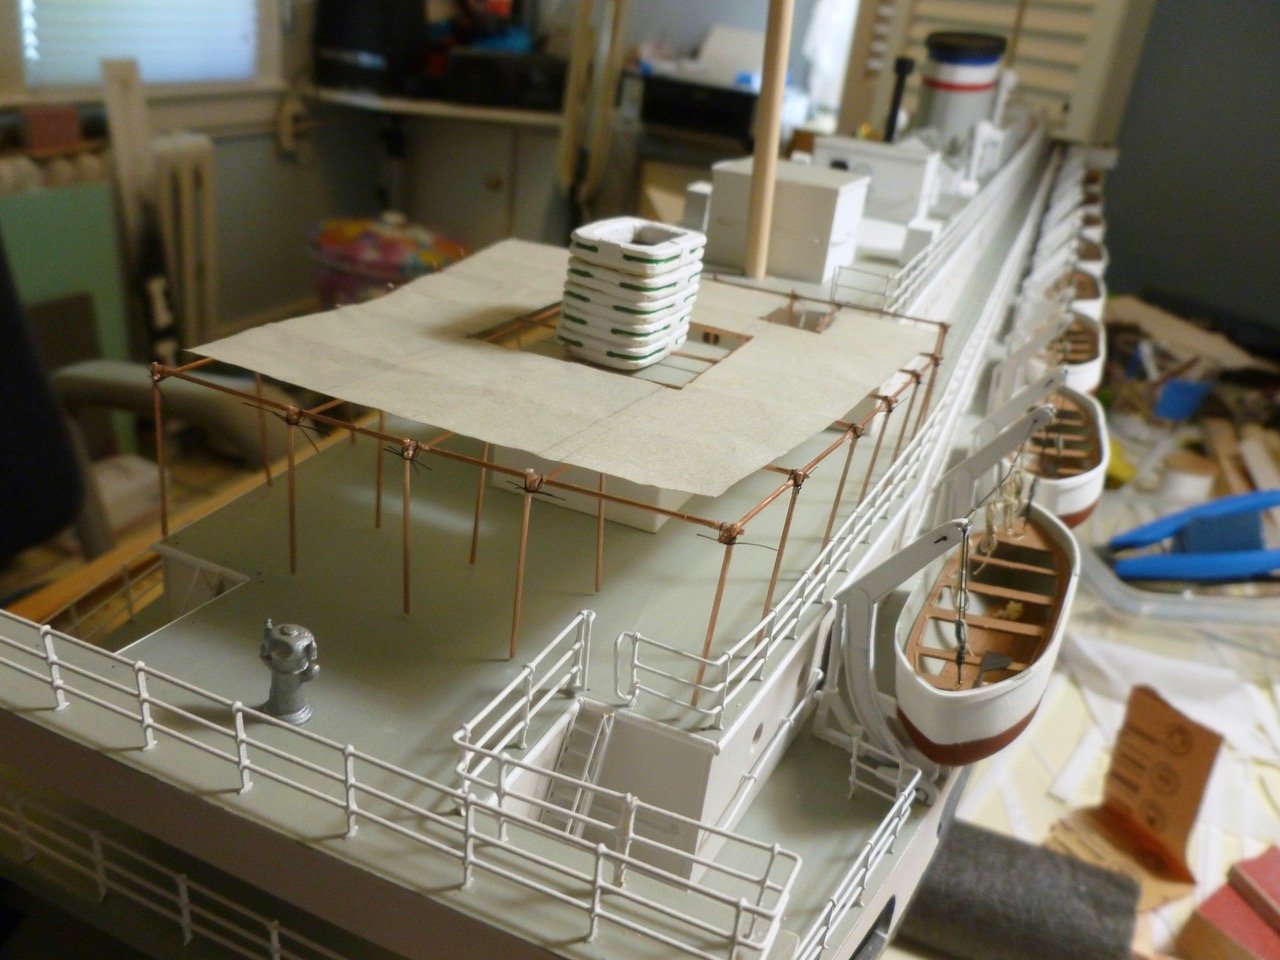
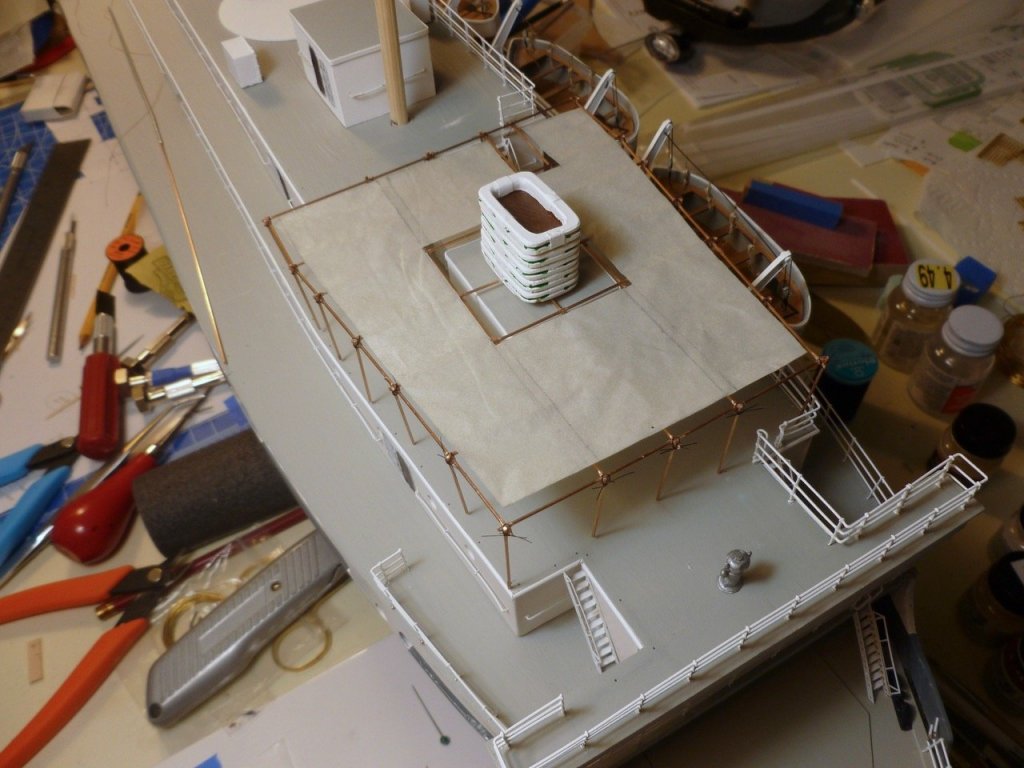
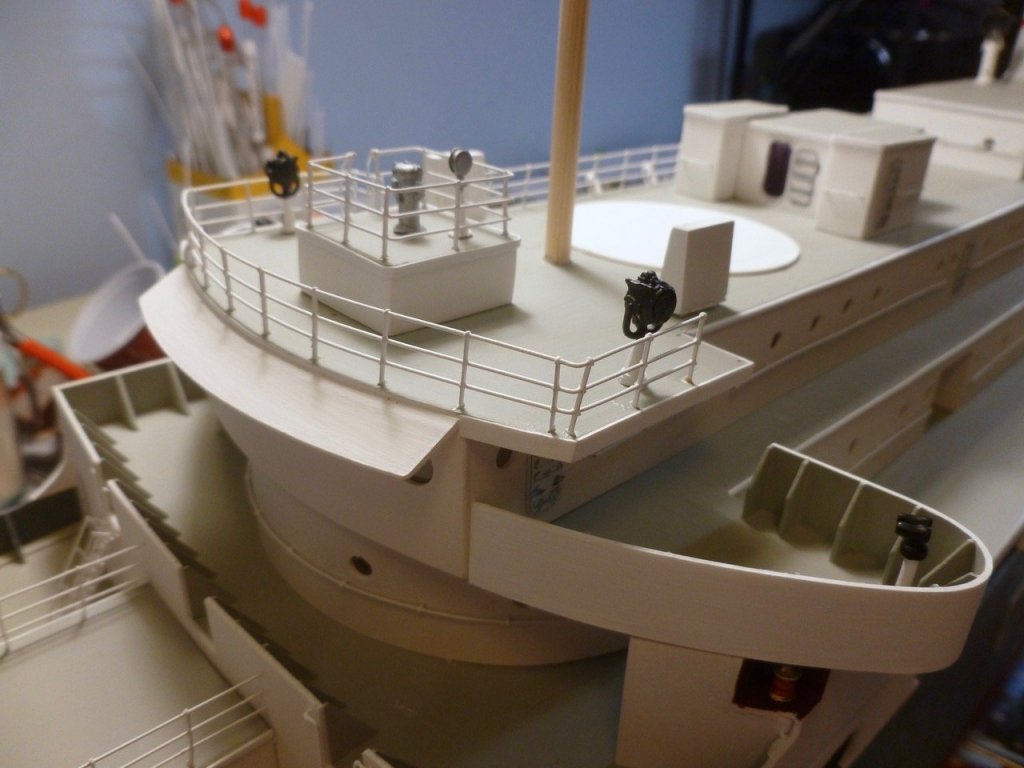
To those who gave likes, thank you and thanks for stopping by. Steve The seamster The awning lashing is thin rope with beeswax, and a level of care to prevent pull through of the three-layer silkspan. The outside perimeter lashing is finished so it was time for half-beauty shots. The awning was temporarily propped in place but no attempt was made to insert the posts into the sockets or lash the perimeter posts. The lashing is reasonably spaced and tensioned. I tried for a shot to replicate the photo of the exercising nurses, but without the nurses. Next step is the interior lashing. Then the awning will be put aside until the port railing is ready to install.


- 446 replies
-
- 14
-
-
- zebulon b vance
- deans marine
- (and 3 more)
-
Super job! The knife blade and clothes pin make me appreciate just how small this is and what you are accomplishing with it. Steve
-
To those who gave likes, thank you and thanks for stopping by. Mark, thanks for the trivia. Lou, no commute lanes in our area. The teddy was almost 30 years old when he made his one-way trip to the new home of one of our children and I thought he deserved more than being dumped in the trunk. Sorry about the sinkings. Carl, the teddy and dolly were my only stitching adventures, created many years ago. Thanks again. Steve
- 446 replies
-
- 3
-
-
- zebulon b vance
- deans marine
- (and 3 more)
-
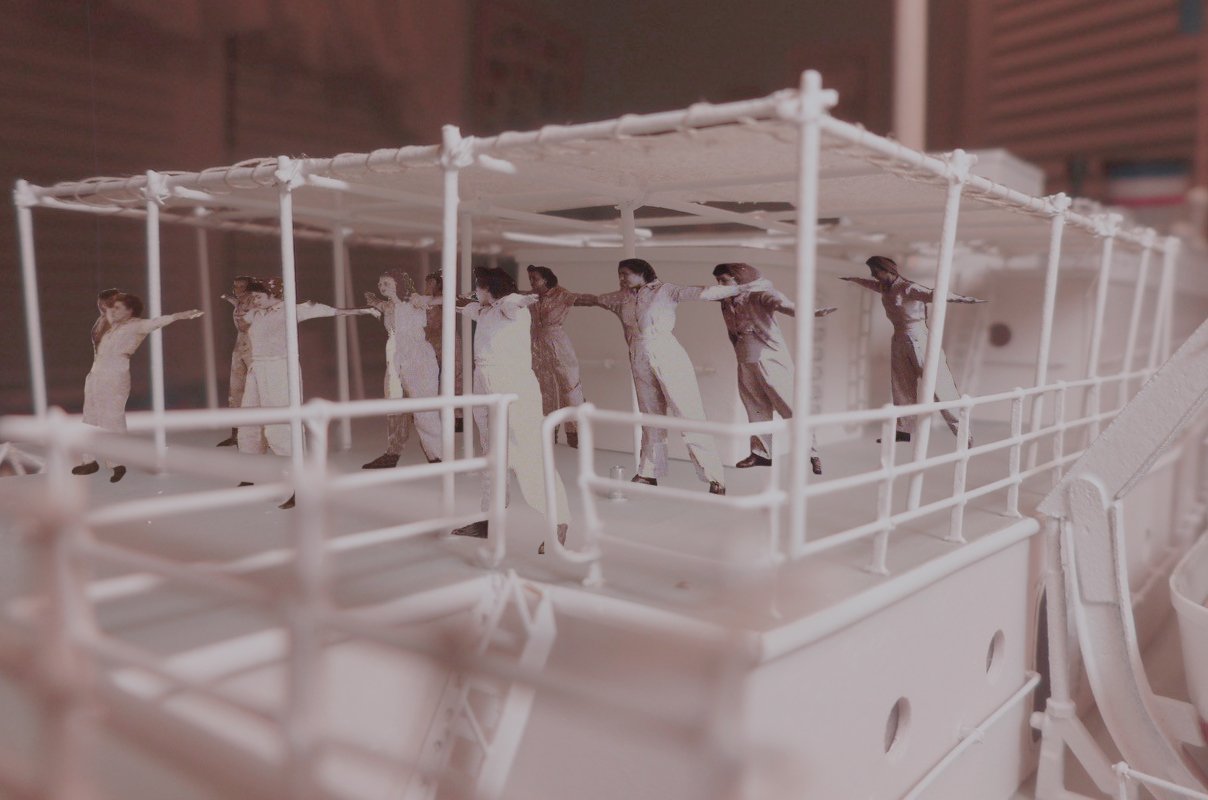
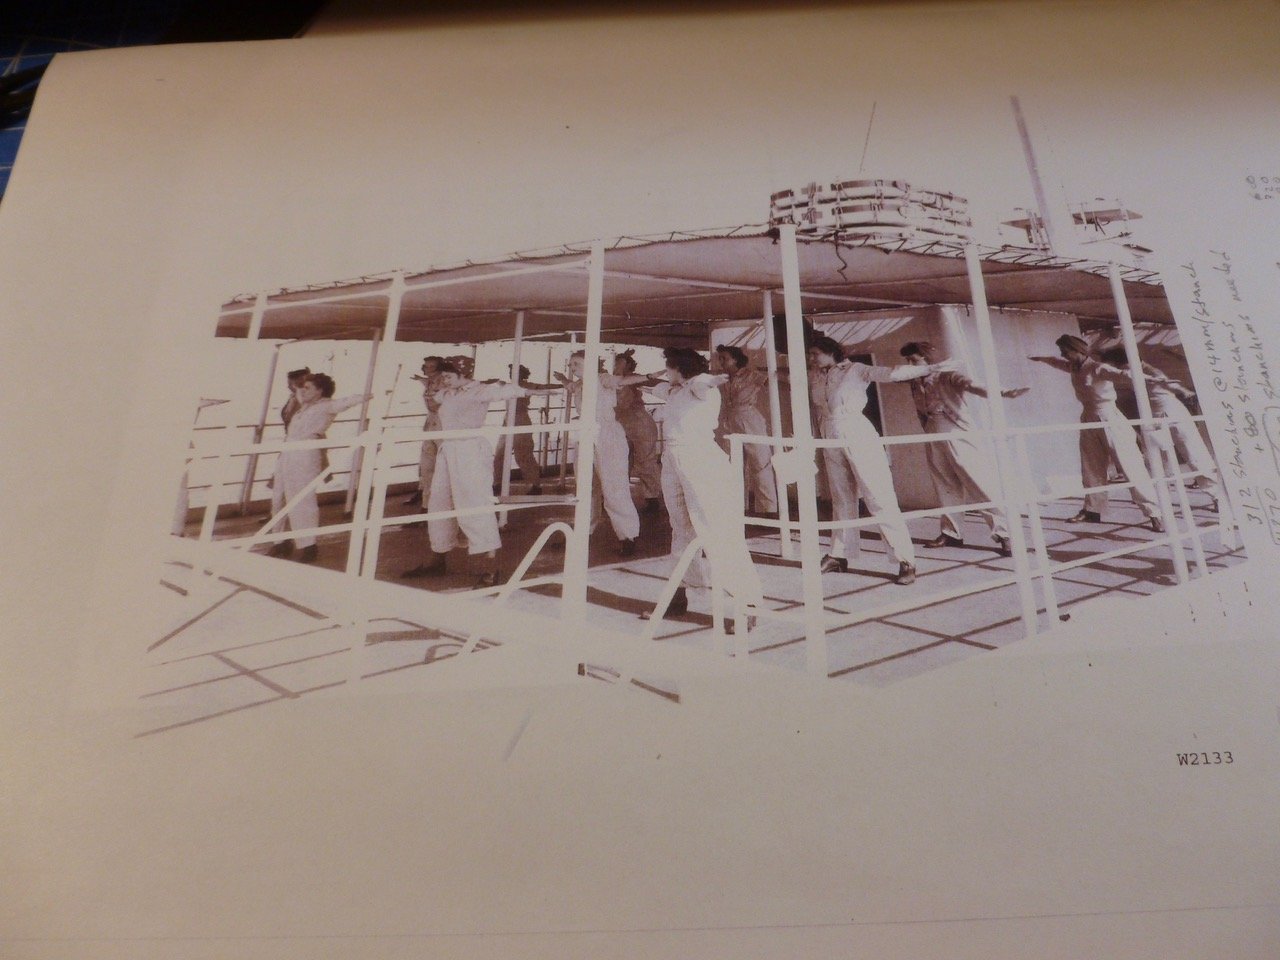
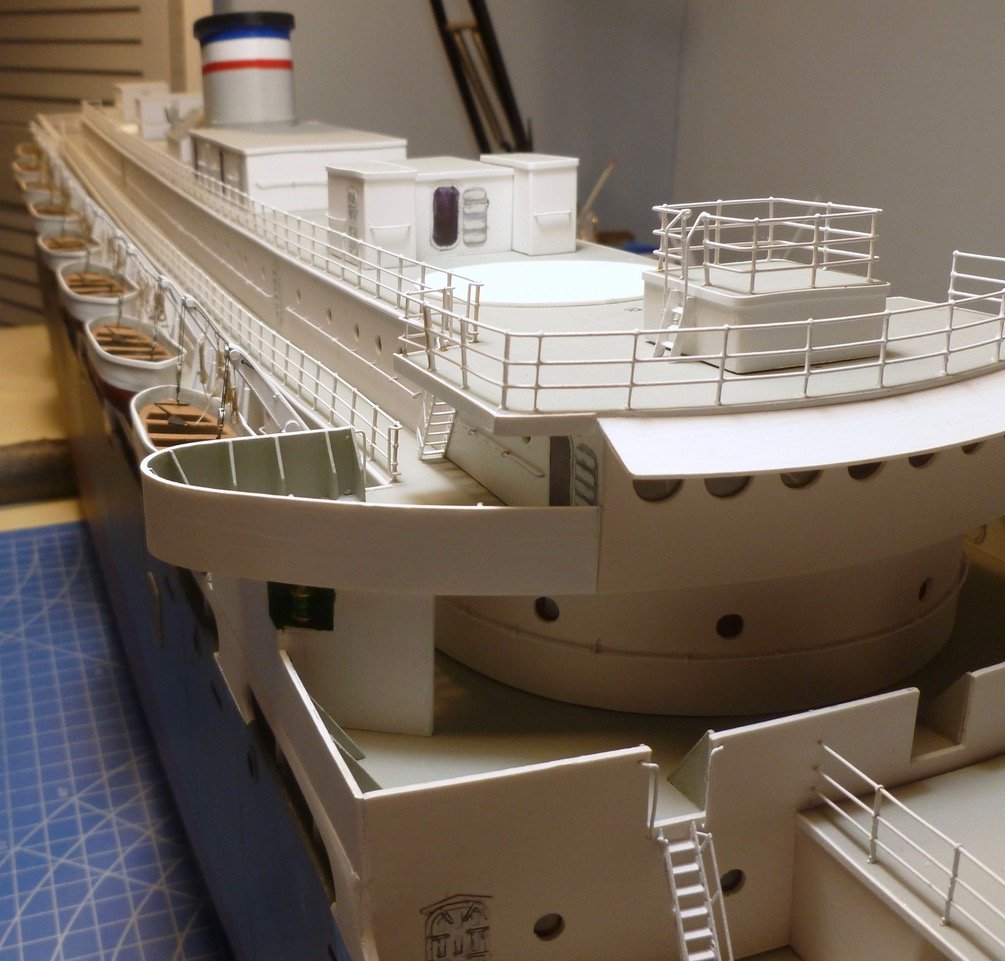
I'm not so sure Carl. In the earlier post, in the post line behind the first row of exercising nurses there are five posts. On the three interior posts there are support beams running fore and aft. The perimeter post lines didn't have any fore/aft support beams because they were tied to the railings, but I included them as a way to add stiffness to the tops of the perimeter posts. At the aft edge post line in the photo there is a short transverse beam between the three interior posts as you noted. Each of the three interior posts along the aft line actually has a diagonal brace running aft and downward from about the mid-point of the post, presumably to a deck plate. Those three posts are in an area where there is no railing so it looks like the diagonals take the horizontal load. I dispensed with all that and added a transverse top beam along the aft line, with sockets in the deck. It's all not entirely correct, so don't delete the post. I'll even give you a freebie since all my blah-blah-blahing probably left you exhausted. The aft most ship's ladder from the main to boat deck is supposed to be in the middle but the lower end would land on the removable plate that provides access to the rudder linkage arm. The instructions say to build the ladder as a freestanding piece, which would be prone to future easy damage, so I chose to shift the ladder to starboard to clear the access plate. Of course then I managed to create a conflict between a roller chock and the ladder which I didn't discover until installing the chock.... I guess artistic license is cheerfully at work here but hopefully the ship creates a reasonably good impression 🤪. I truly appreciate your ongoing interest, support, kibitzing and joy of all things shipbuilding. It's making this journey most enjoyable and has challenged me to do better. Steve
- 446 replies
-
- 4
-
-
- zebulon b vance
- deans marine
- (and 3 more)
-
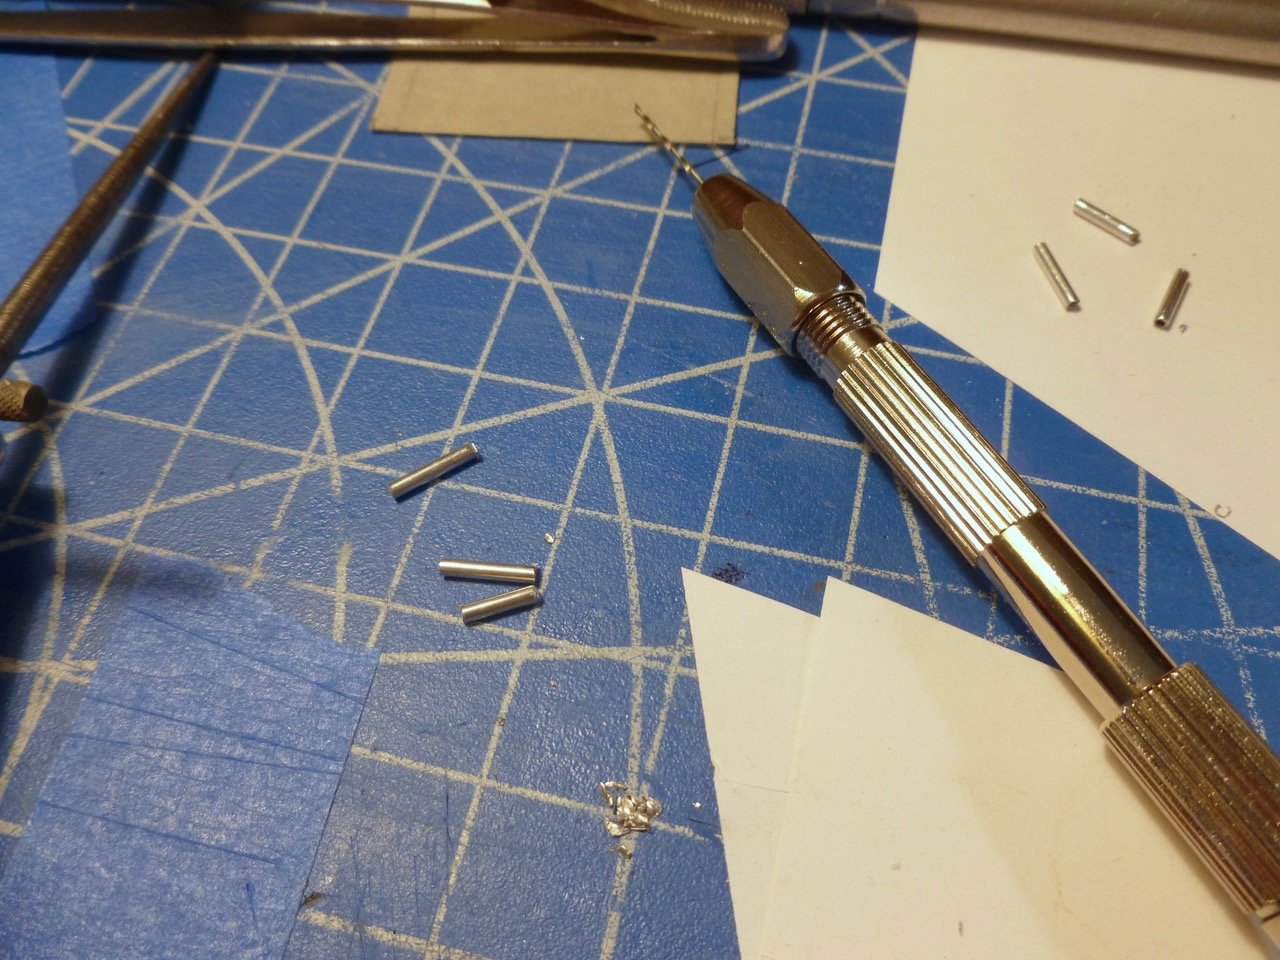
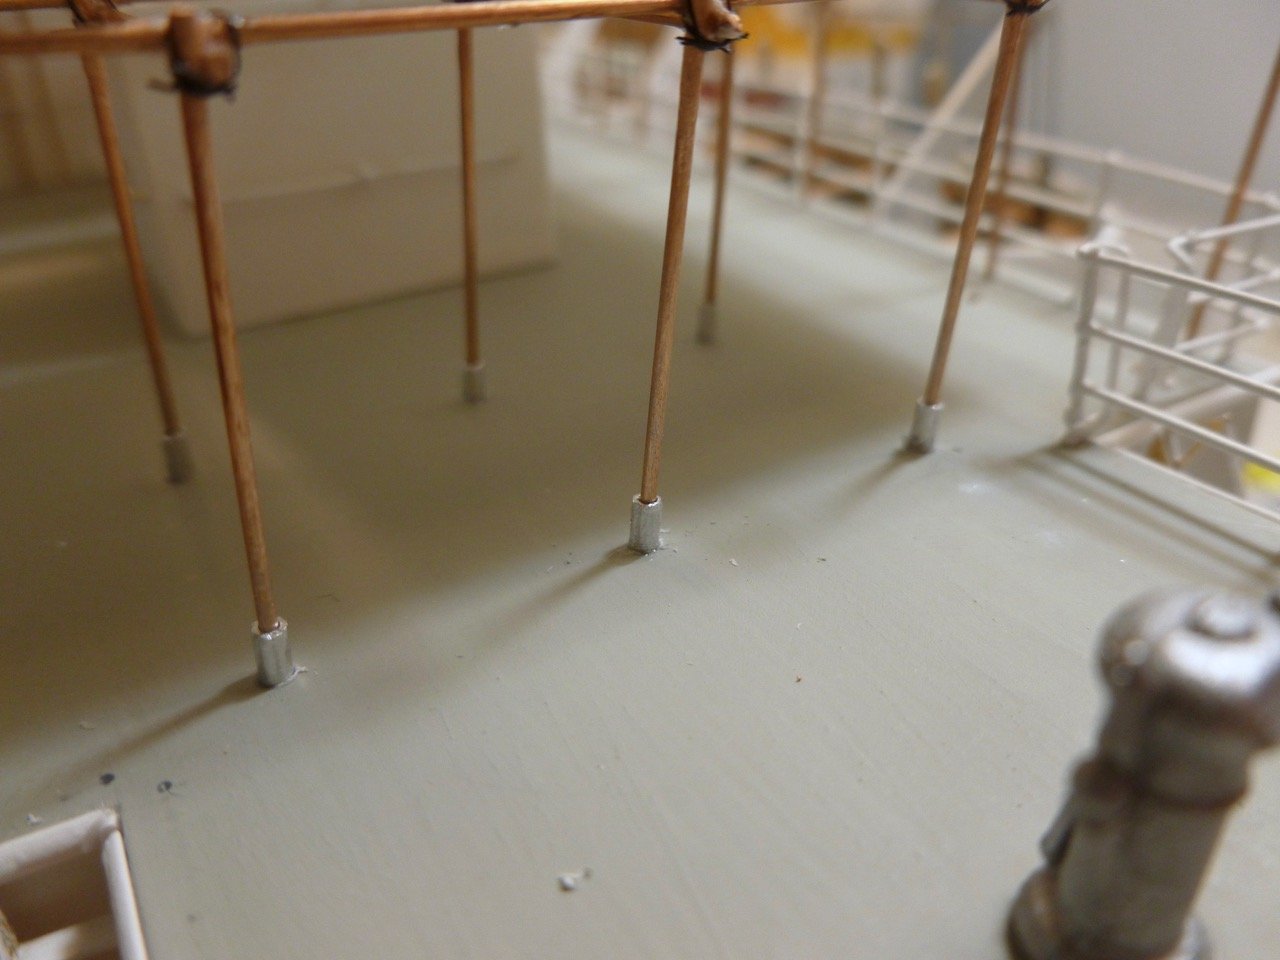
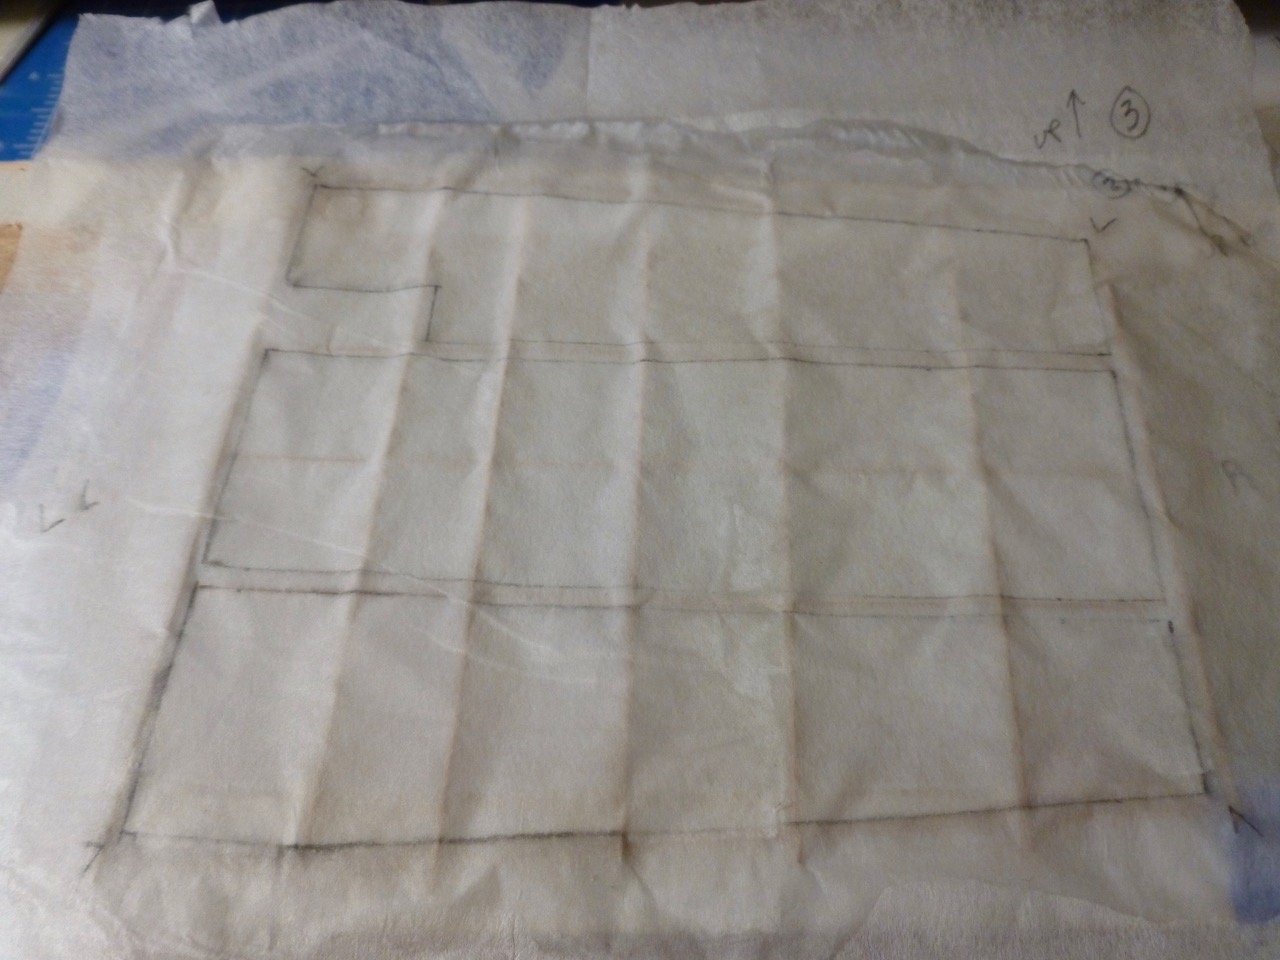
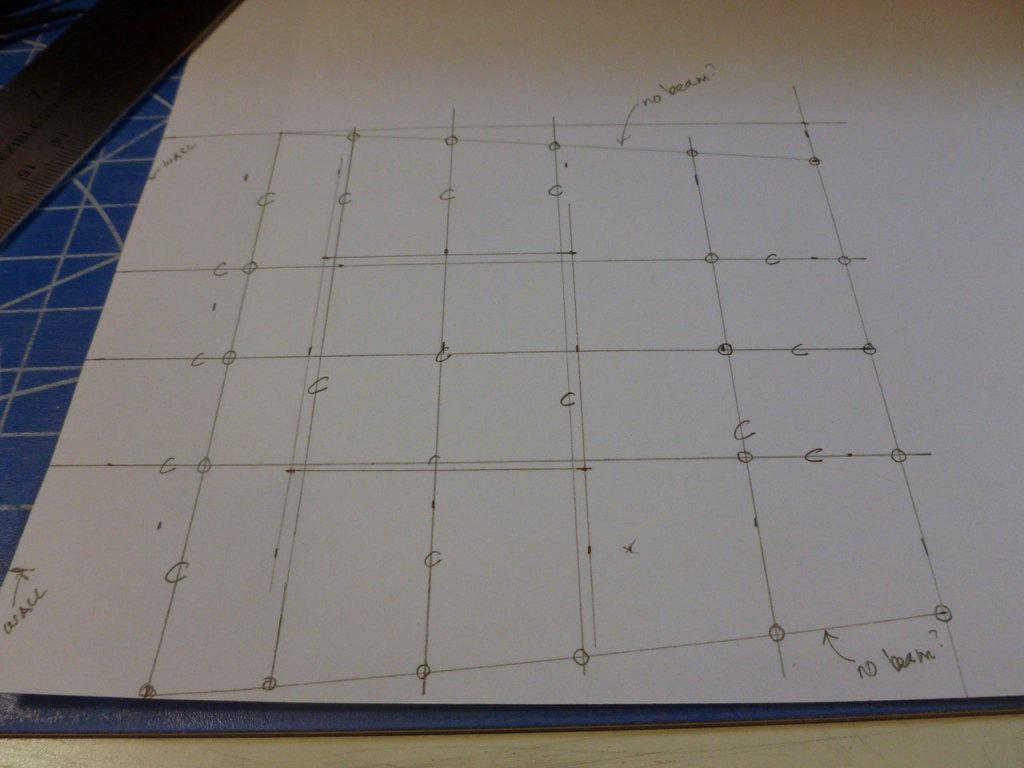
To those who gave likes, thank you and thanks for stopping by. Denis, Carl and Mark, thank you for your kind remarks and suggestion. No bear suit, but after the bear I made a doll for my daughter with yarn hair, nightgown and slippers. I’m fully committed to a maiden, and probably only, voyage and if it sinks, it sinks. What is it they say, It’s not about the destination, it’s about the journey. This journey has been well worth it, however it turns out. Steve The awning lashing holes are pierced. I cut some post sockets from 1/16” OD aluminum tube. Then I drilled holes in the deck after using the paper template for the layout. I offset the drill holes from the centerlines to match the placement of the posts, or so I thought. I added some tape strips to keep the sockets from sliding off the posts. But when I turned the frame over and slid the sockets into the drill holes the posts were slightly off vertical. I realized the frame was being kicked aft, due to projection of the roof pipes and posts beyond the end of the frame, the half round along the top edge of the cabin wall and drilling slightly too close to the template centerline. I trimmed the overhanging roof pipes close to the posts and notched the half round to increase the clearance for each roof pipe/post. Verticality of the posts at the sockets, while not perfect is much better. It reminded me of the fellow who told me he drew his own house plans because he thought architects charged too much money. When I asked him how it worked out he said the only problem he ran into was losing three feet out of the bedroom because he forgot to allow space for the stairs coming up from the first floor. After making the adjustments I reset the frame. At each socket I added a drop of CA on the outside of the socket, then slid the socket down the post and into the deck hole. This allows the frame to be removed as needed. With the basic fabrication and fitting finished I washed and rinsed the frame and am waiting for it dry for painting and lashing. The plan (I’m beginning to dislike that word) is to hold off on final installation until the port railing is installed.


- 446 replies
-
- 6
-
-
- zebulon b vance
- deans marine
- (and 3 more)
-
To those who gave likes, thank you and thanks for stopping by. Kevin, Carl and Lou, I am truly humbled. I have always appreciated your ongoing support but I am at a loss for words to respond to such kindness from you. Thank you so much. I sure hope my sewing doesn't screw this up. I think the teddy bear (below on the ride to his new home) sewing experience may give me a shot at it. Steve


- 446 replies
-
- 8
-
-
- zebulon b vance
- deans marine
- (and 3 more)
-
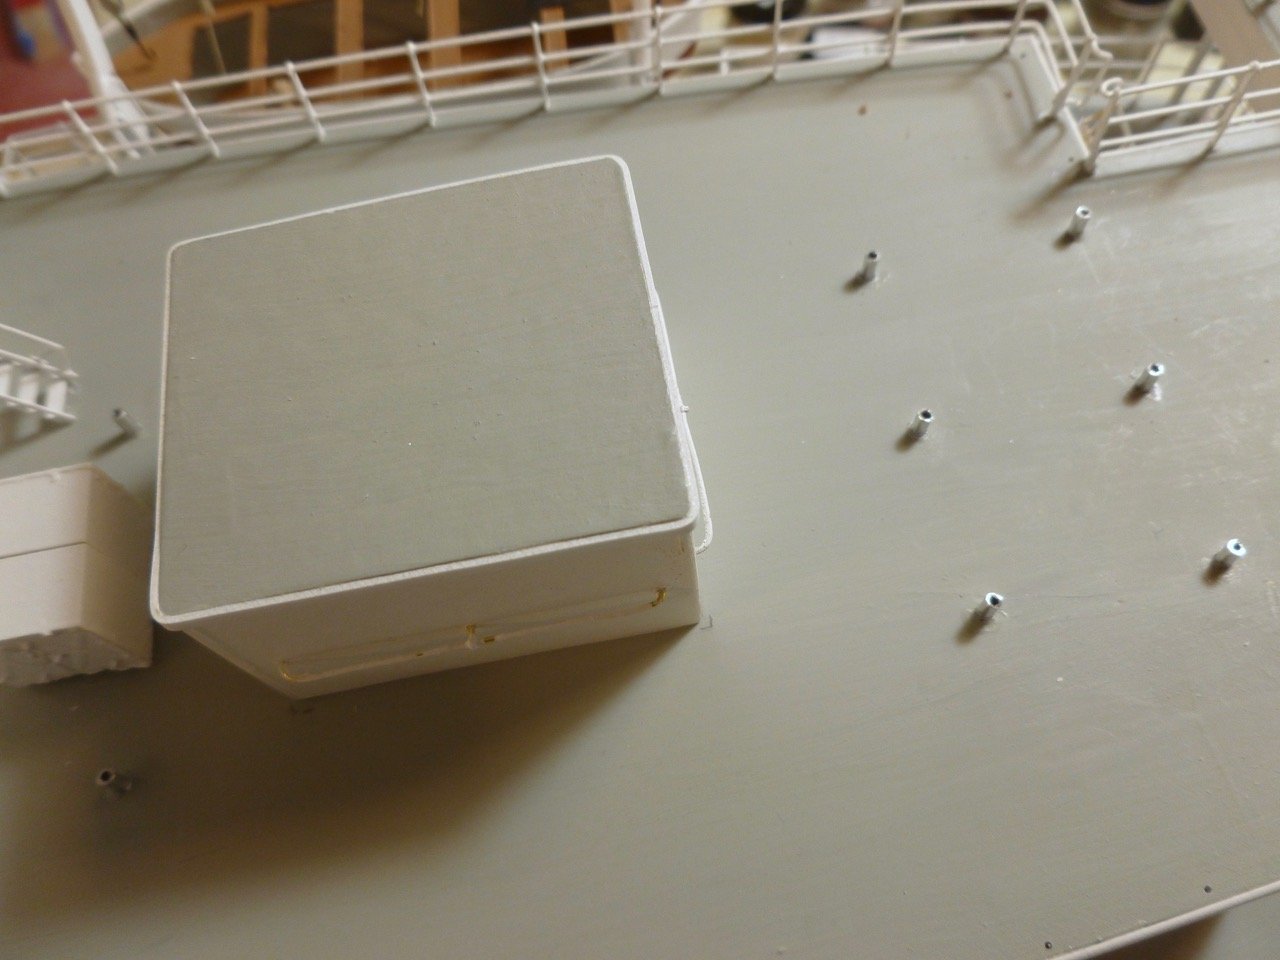
To those who gave likes, thank you and thanks for stopping by. Carl, I had access to a sewing machine when I made a three foot tall teddy bear for one of the children, but the machine eventually died so I’m reduced to hand sewing when needed. Denis, the hole is duly cut out and thanks for your color suggestion. A light gray was just the ticket. The frame will be white. Steve Awning yawning I have spent a number of late nights trying to encourage the awning parts to work together in harmony. There always seemed to be one or two miscreants who thought it more fun to drop out of line than stay in good marching order. In fact, in the beginning about half the perimeter posts went AWOL and had to be corralled back into service after stern words to all. We're making progress although there are still some slackers in the formation. I think they need boots of concrete. The hole at the carley floats is cut out and the fabric has received a one pass coat of very light gray on top and bottom sides. The fabric is trimmed back from the edge to allow for lashing to the perimeter frame. With a grazing light the awning sags and wrinkles show better. I lashed the post tops to the roof pipes to continue the temporary installation scheme but they are not trimmed yet. The lashing also helps anchor the posts which are otherwise quite fragile. And yes, in hindsight it might have been better to solder but I’ll need more skill, and probably a micro torch before I attempt that. Next steps are painting the frame, tying off the fabric to the frame and figuring out how to set all the posts even and as plumb as possible. The starboard, port and forward perimeter posts will be tied off to the deck railings as in the real ship (which means I can’t do the final installation until the port railing is finished) but the aft posts and interior posts need some sort of landing. The photo implies they set in little sockets. I have some aluminum tube that is a perfect fit for the posts and I’m thinking I might try drilling the deck, setting short tubes into it, and sliding the posts in. The question is whether I can get all the alignments to work. Alternatively I could slide a tube section onto each post, set the whole frame in place, and jigger the posts to vertical before putting a drop of CA on the tube bottom and sliding it down to the deck. Guess we’ll see what the future brings.


- 446 replies
-
- 12
-
-
- zebulon b vance
- deans marine
- (and 3 more)
-
Nic, Sorry to hear of your health problem. Wishing you a relaxing and speedy recovery. Steve
- 356 replies
-
- 1
-
-
- red jacket
- finished
- (and 1 more)
-
Bill, Congratulations on getting out of the hull. When I built my Bowdoin I didn't think I would ever get the hull buttoned up. I learned about MH Ready Patch from Charlie at Bluejacket and found it to be a great filler although I'm not sure how it would do under water. Steve
-
Carl, Great catch. I had been thinking that they used the carley floats to help hold down the awning fabric, but when I looked closely at the photo I realized sunlight was shining on the cabin wall, through the gap between the awning and the cabin. Calling the seamstress now (oh, that would be me. I do all the sewing in this family after being taught as a kid). Thanks Steve
- 446 replies
-
- 4
-
-
- zebulon b vance
- deans marine
- (and 3 more)
-
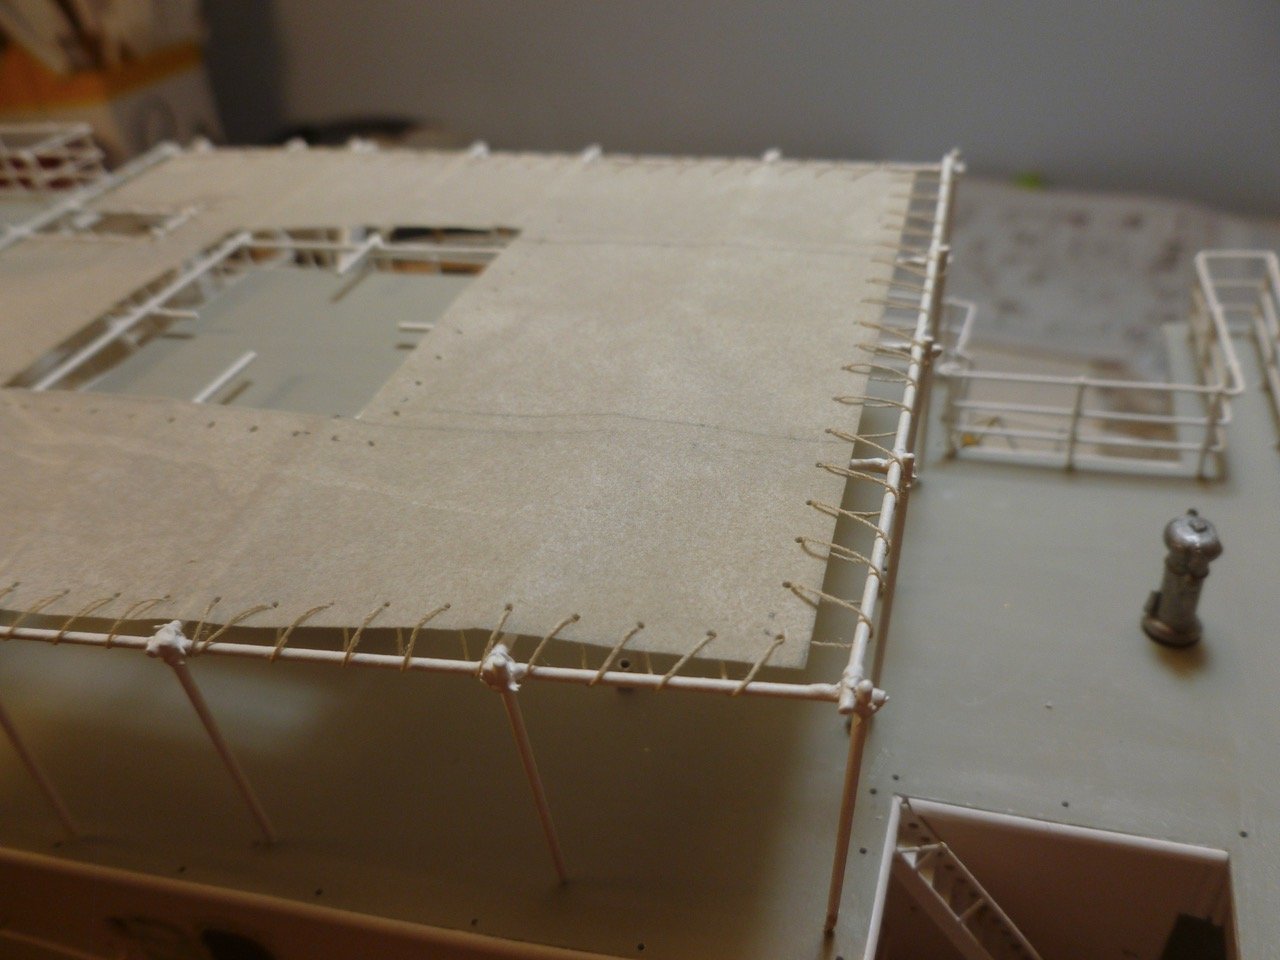
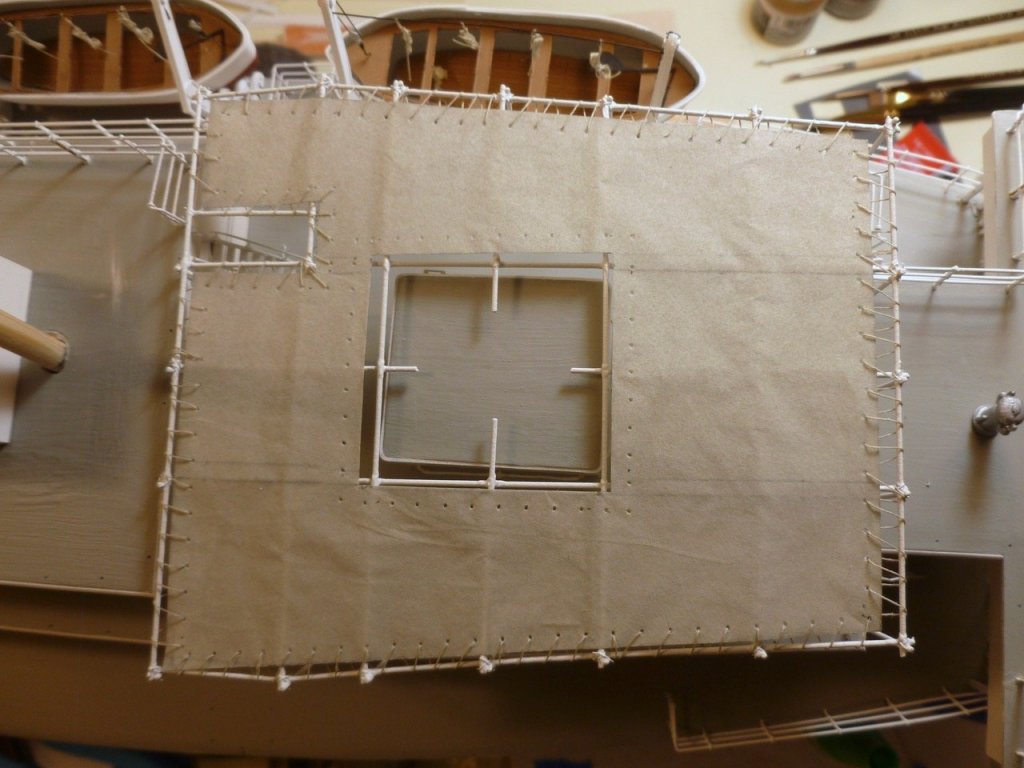
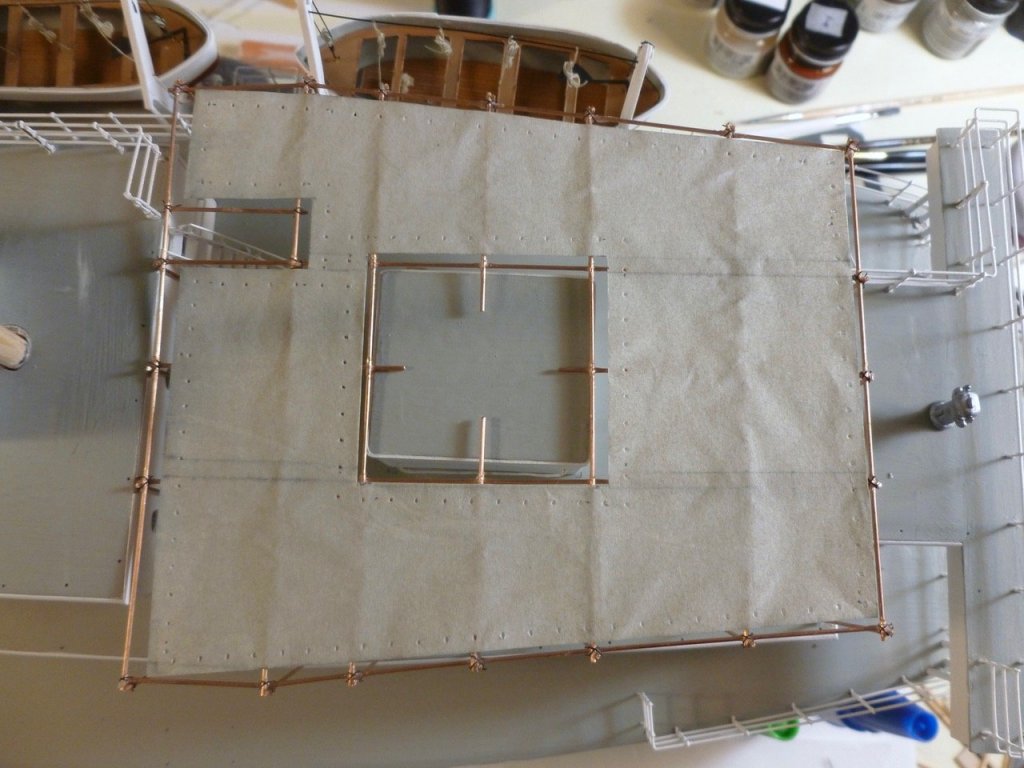
To those who gave likes, thank you and thanks for stopping by. Denis, thanks for visiting to catch up and thanks for your kind comments. Steve A progress shot of the awning fabric as it dries. It is a 3-layer silkspan construction strengthened with 50-50 white glue and water (thanks to Nic at Bluejacket for the tutorial in the newsletter archive - look for silkspan sails). I’m trying for a quickly draped and saggy canvas appearance over the brass frame. Pencil lines on the middle layer hopefully will look like seams. After trimming the edges I'll try lashing them to the frame. I’m guessing a very light paint wash may be in order (or not?), particularly if the silkspan sticks to the brass and I can't remove it to paint the frame(!) Learning, learning.

- 446 replies
-
- 10
-
-
- zebulon b vance
- deans marine
- (and 3 more)
-
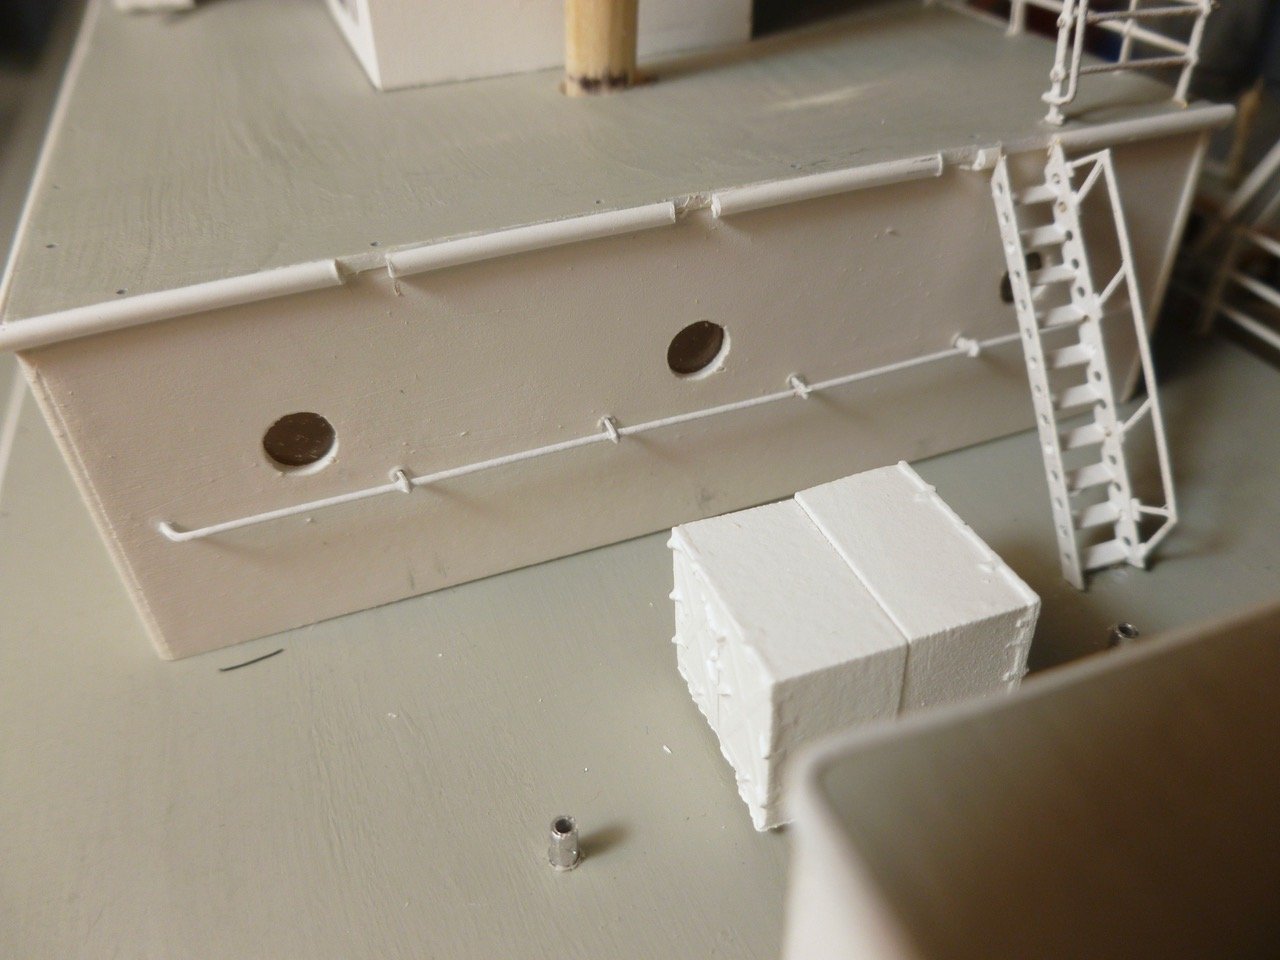
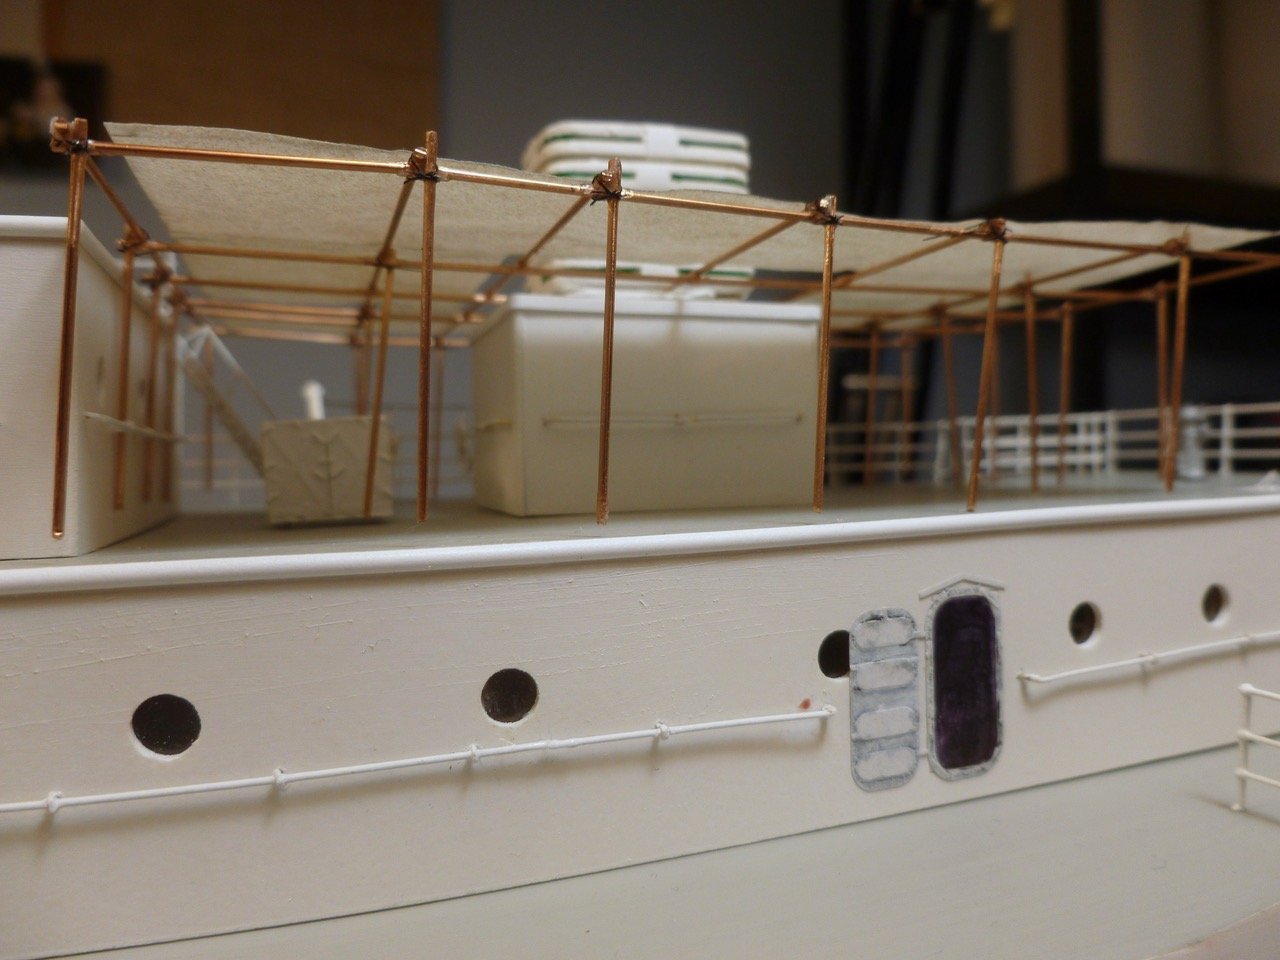
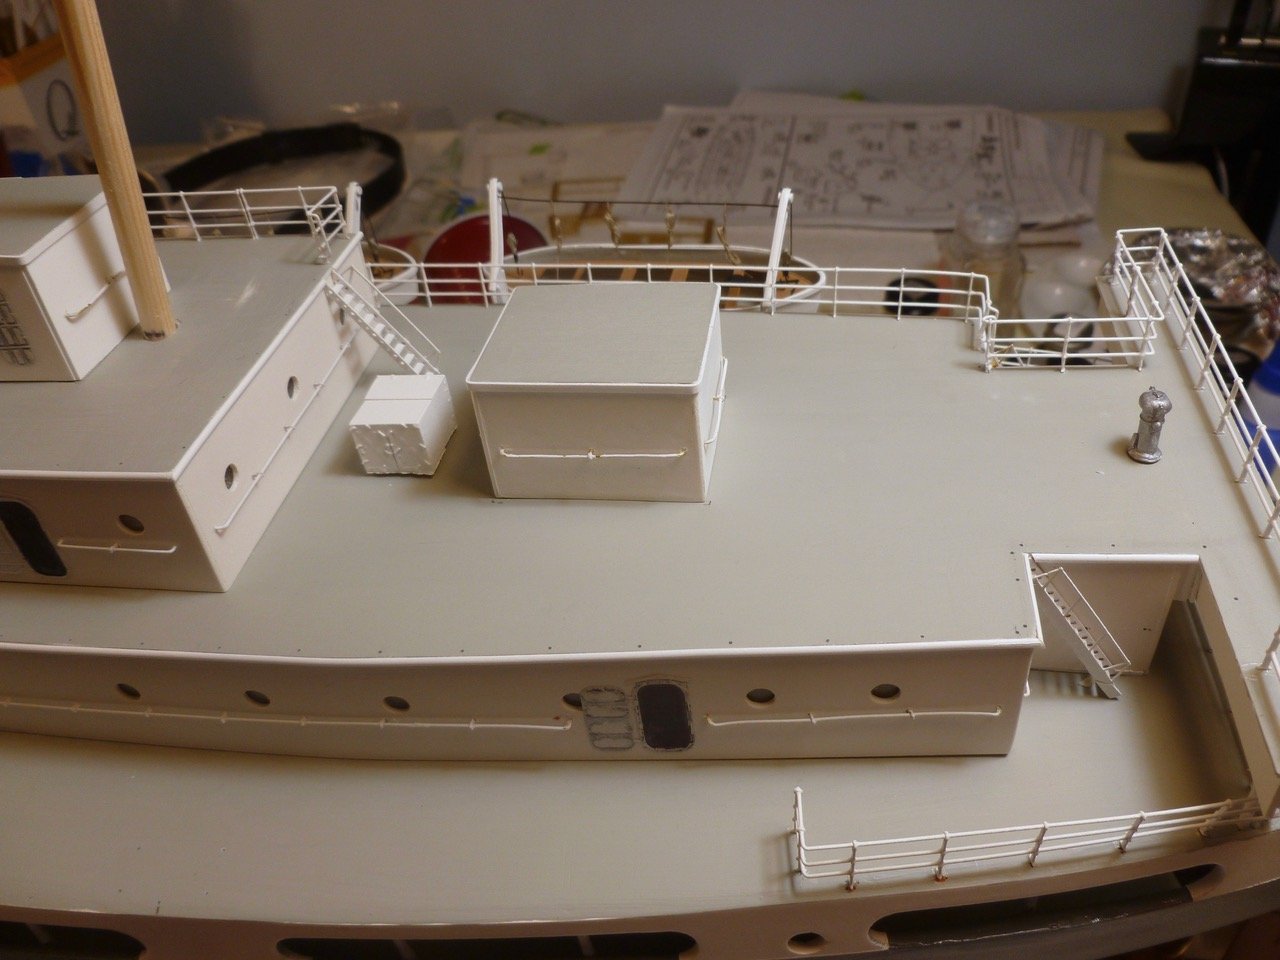
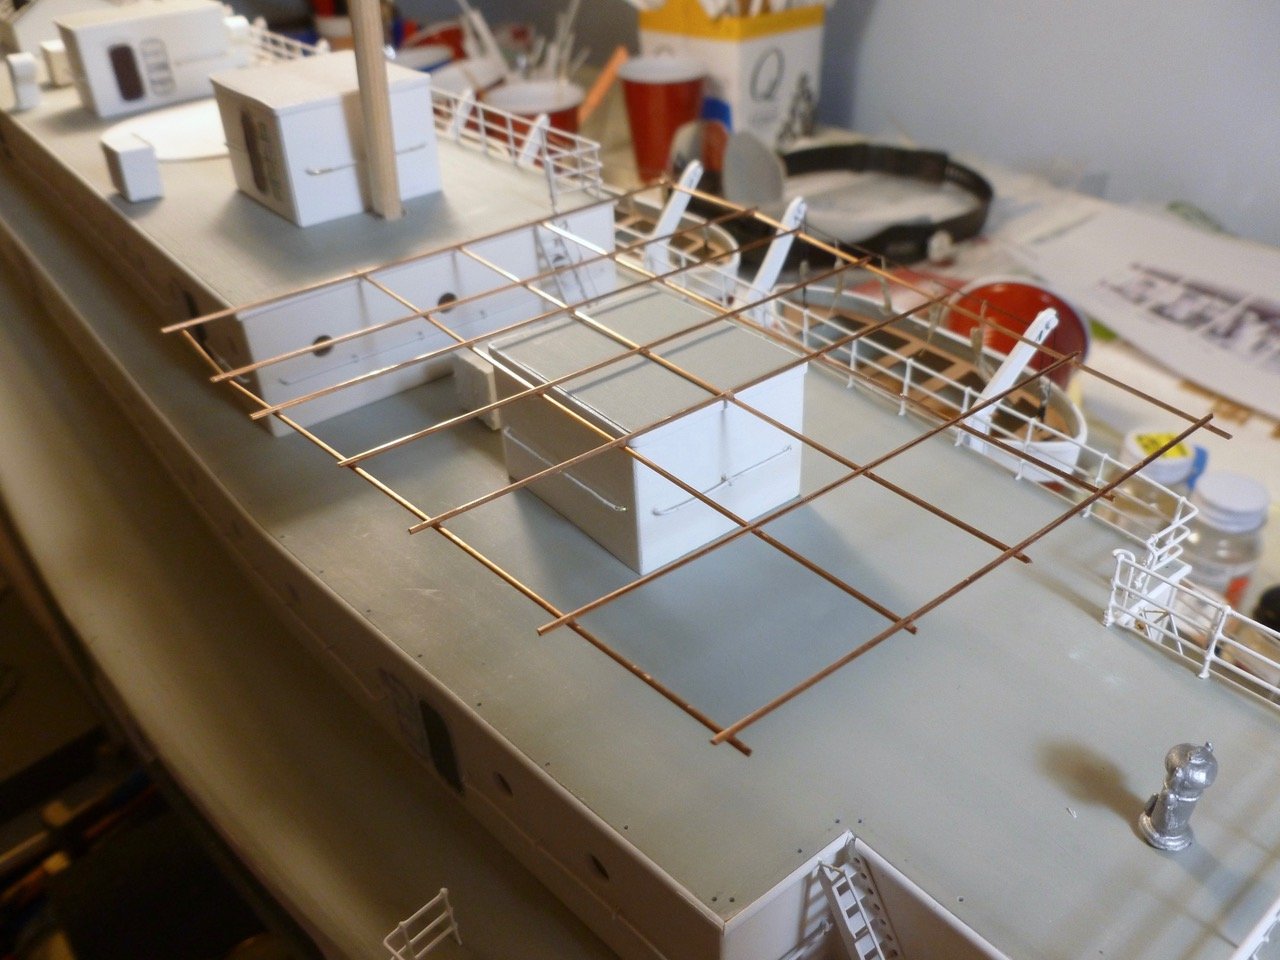
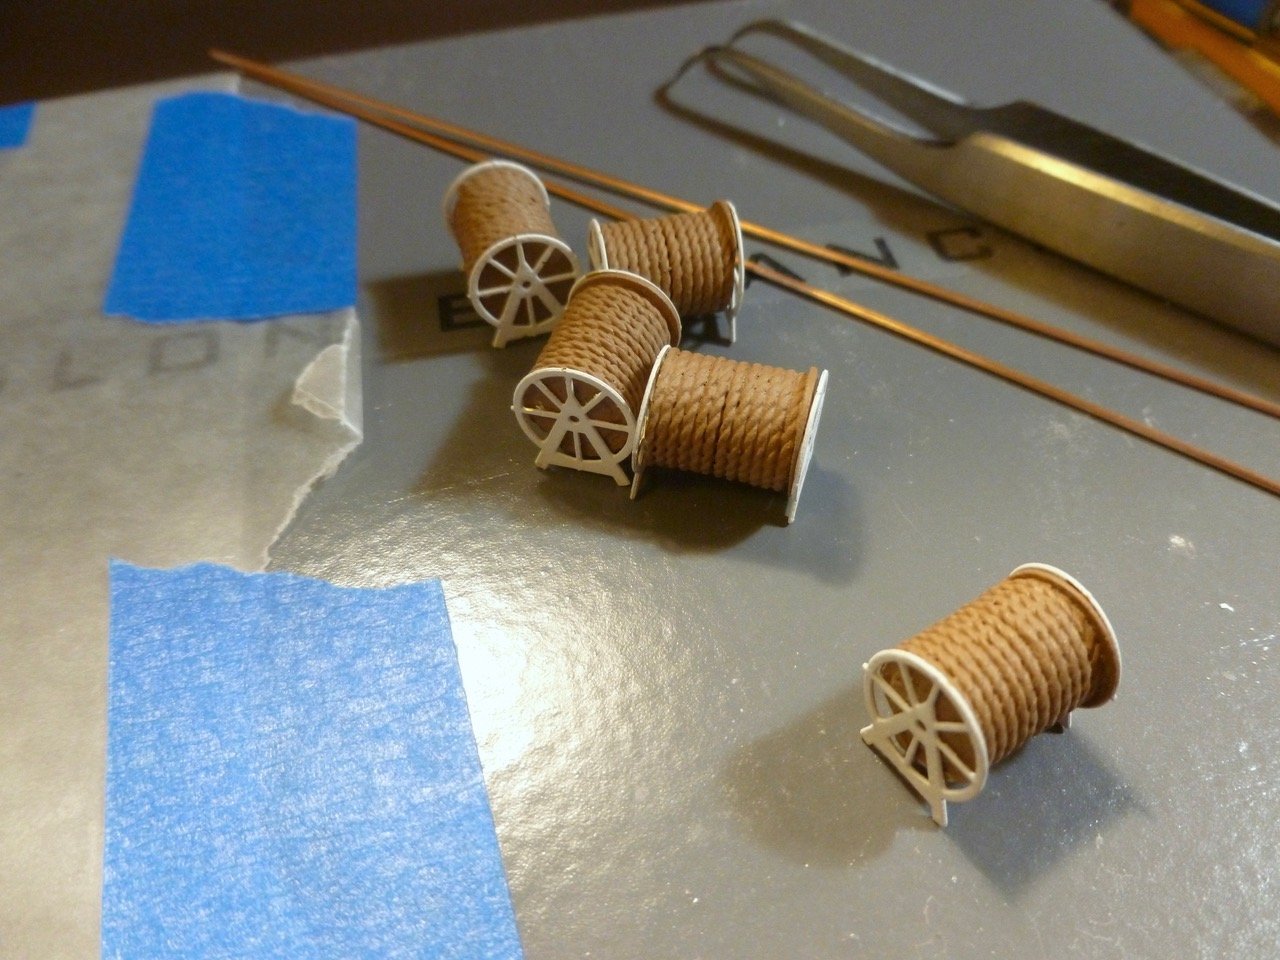
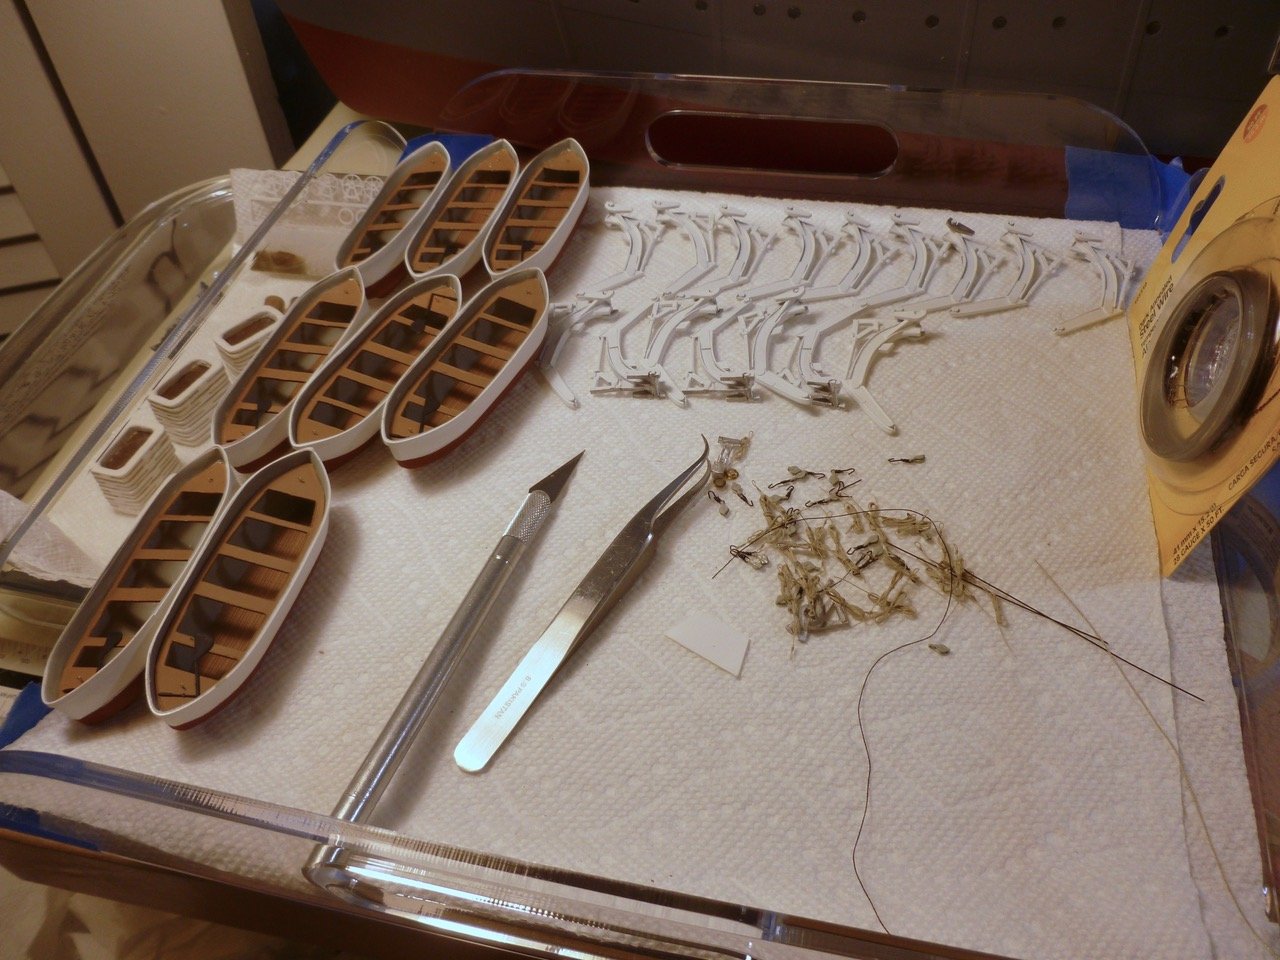
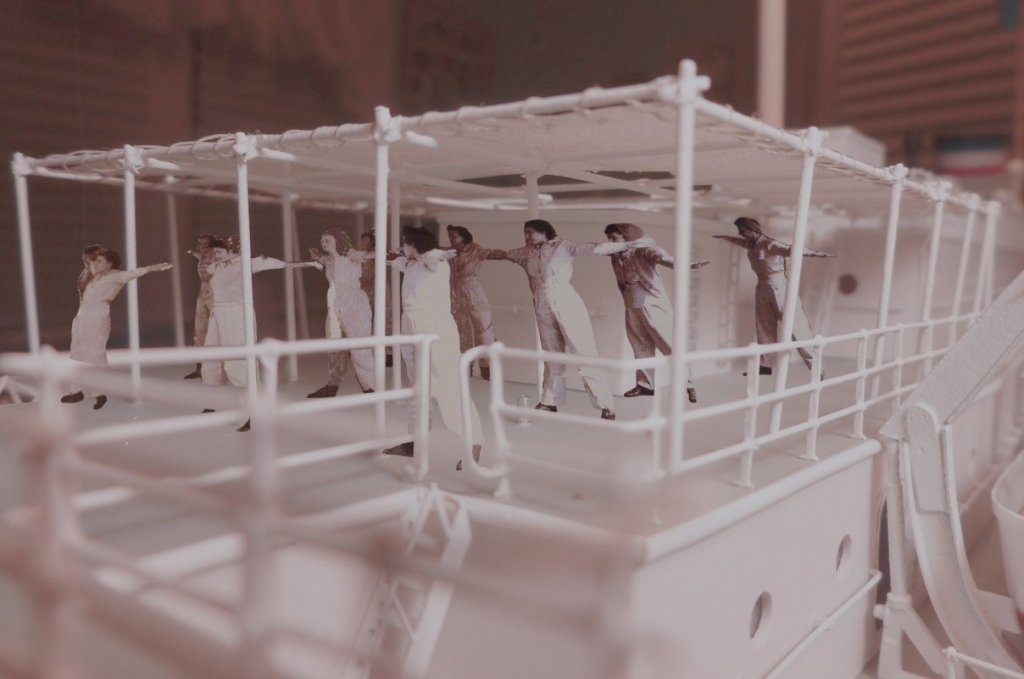
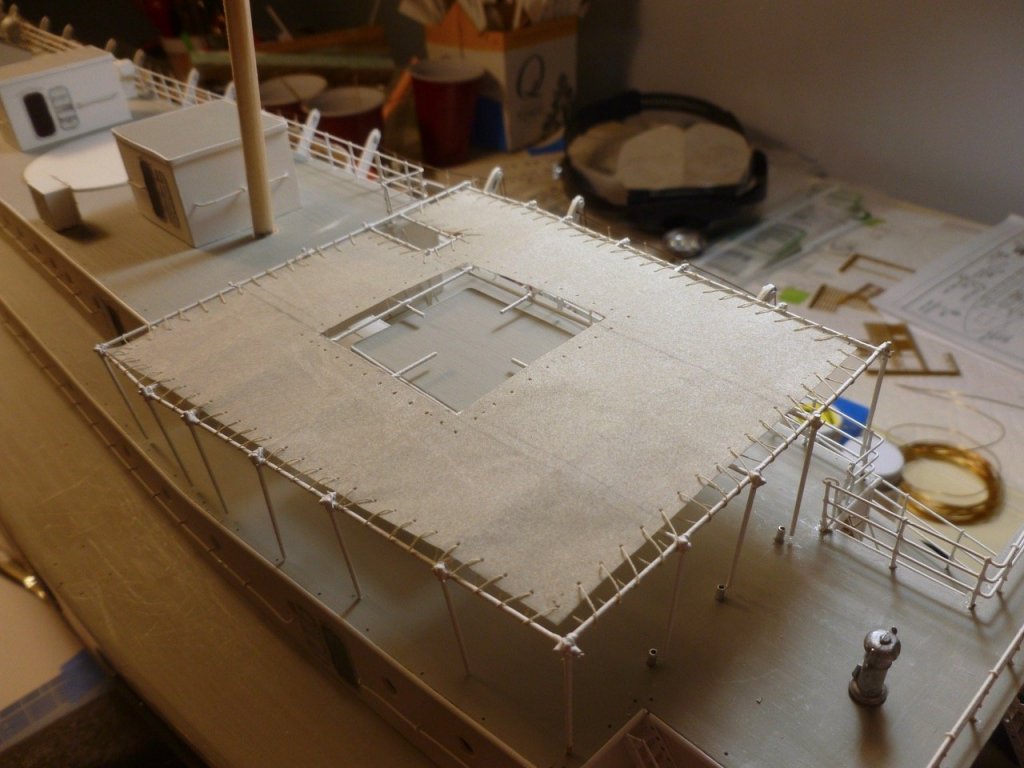
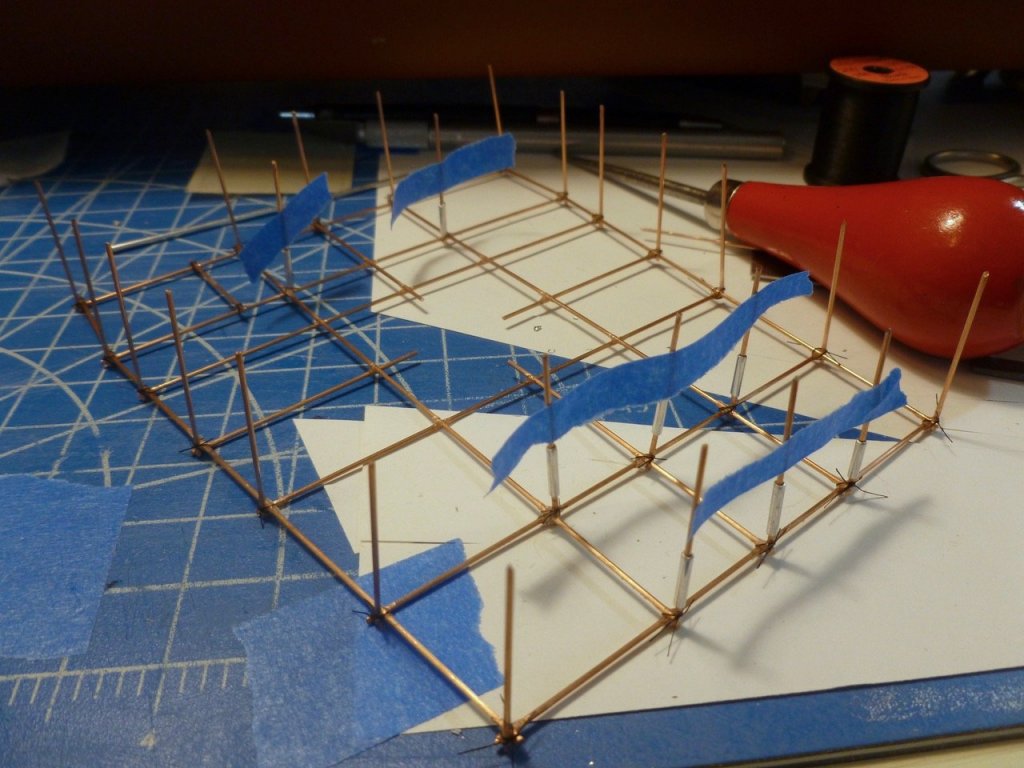
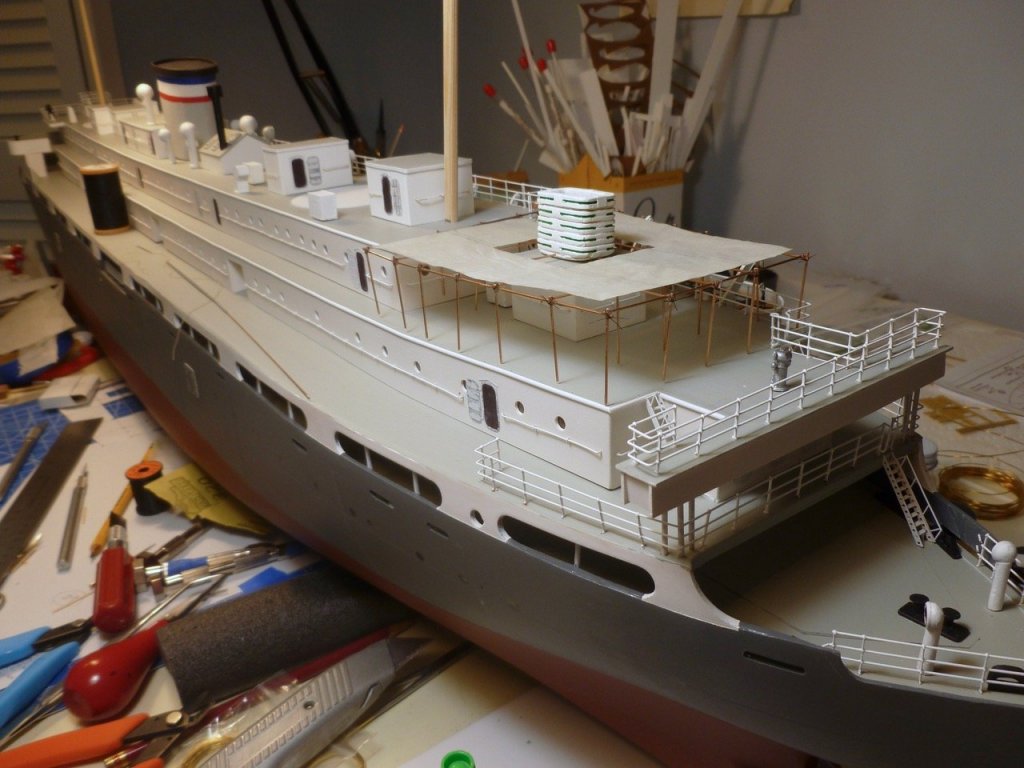
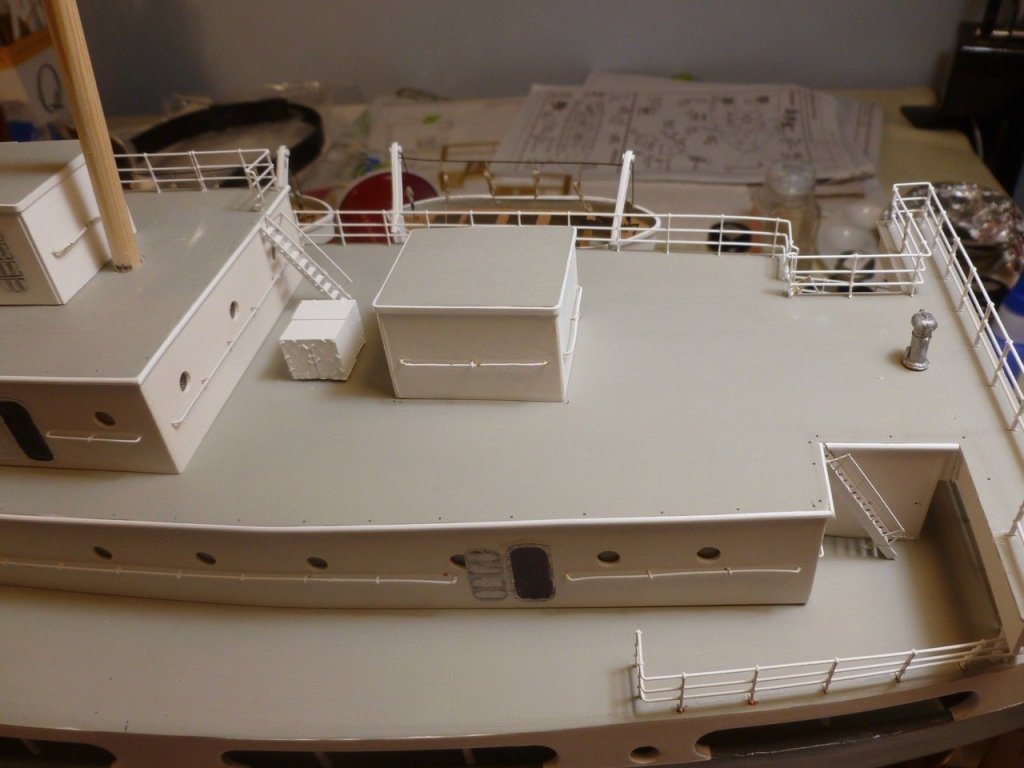
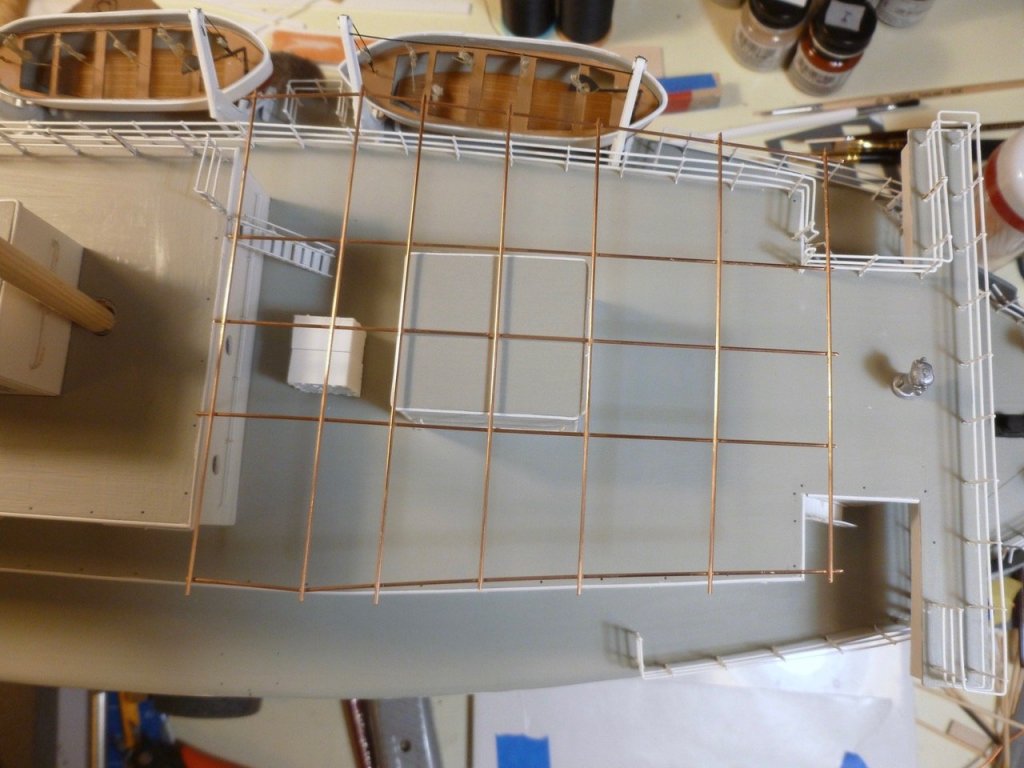
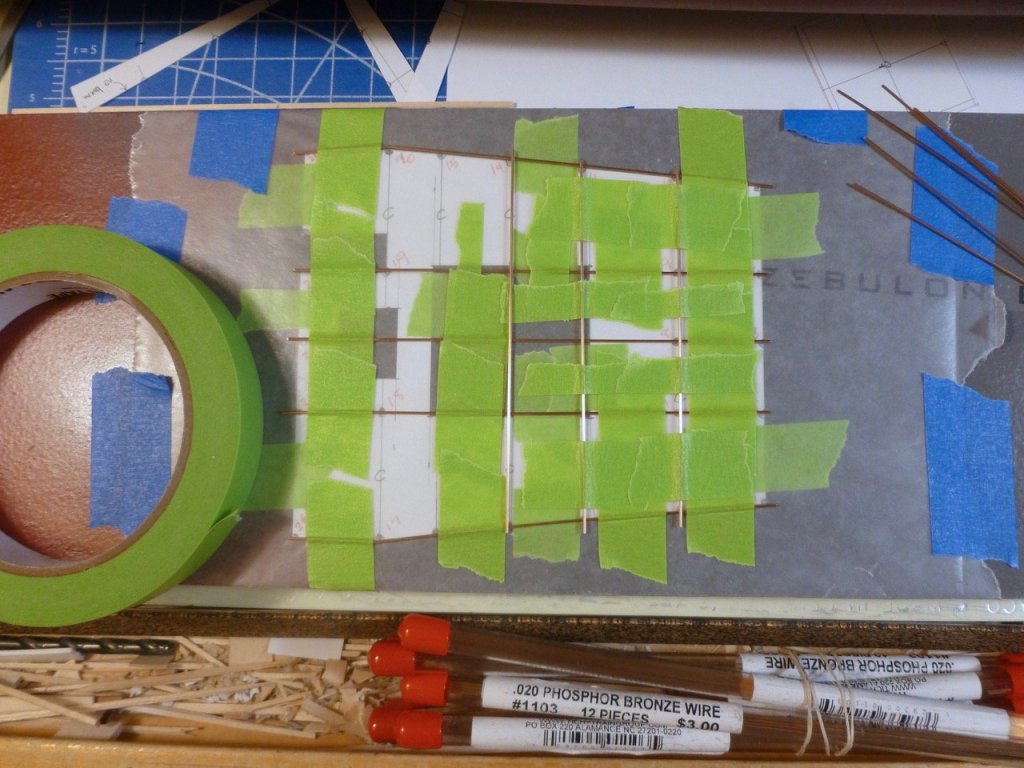
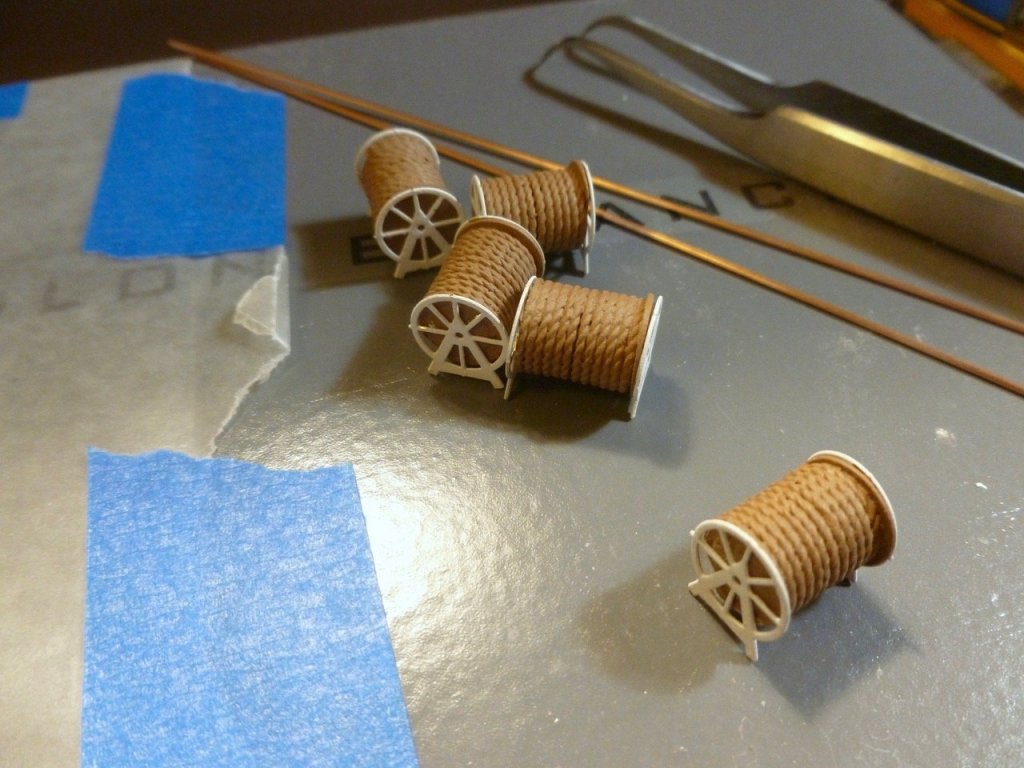
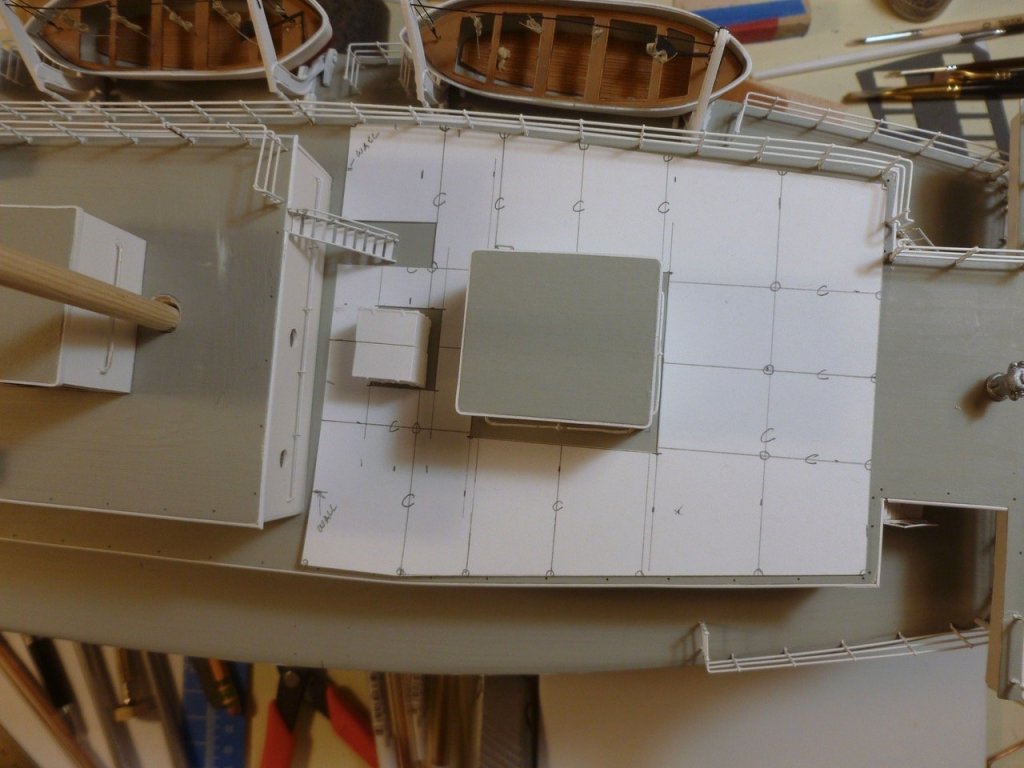
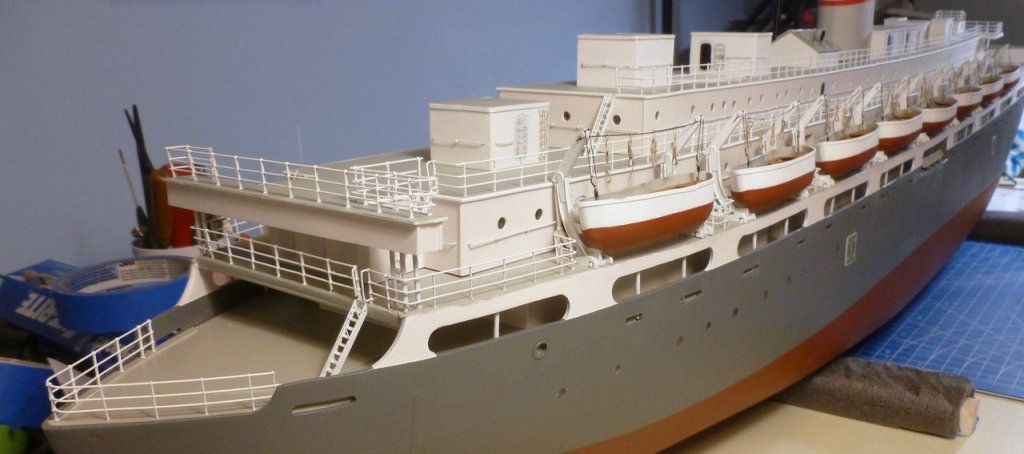
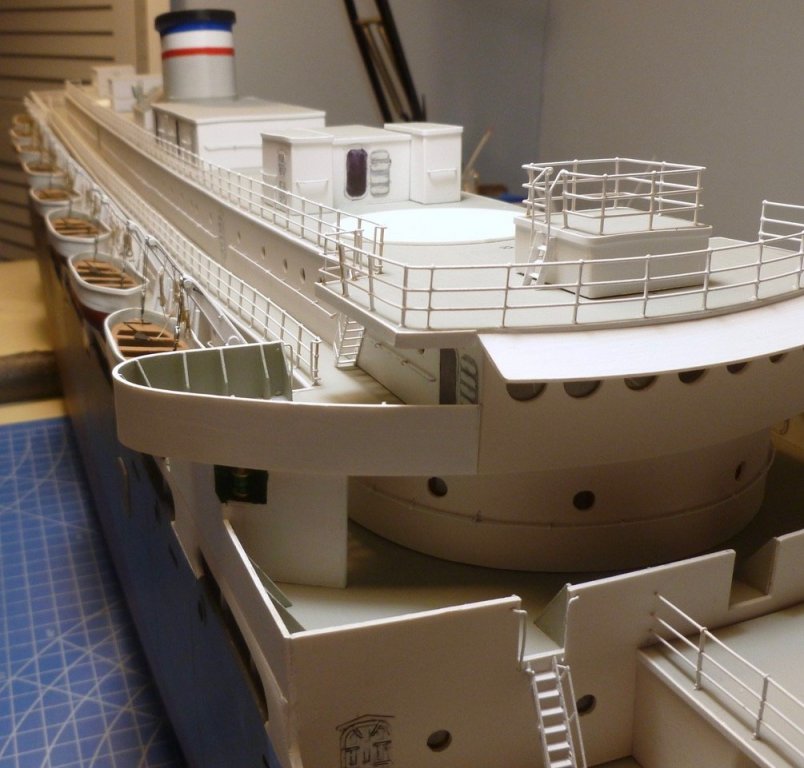
To those who gave likes, thank you and thanks for stopping by. Bill, that’s a great tip, thanks. Steve All together now, left hand to right toe. Earlier I committed to trying the awning shown in this neat pic that Dean’s Marine sent along with the kit, so here goes. The awning location on the aft bridge deck. I started with a paper template with a roof frame pattern similar to the photo. Mine will have some extra framing at the perimeter to help stiffen the assembly. The test fit went well. I cut a hole at the two lockers so the template would lay flat. The hole has nothing to do with the framework. I taped the template to a flat piece of wood, then wrapped it with wax paper. I taped the frame parts securely in place and touched each joint with thin CA. Since the real frame was demountable I overlapped the joints rather than attempting to butt them. I plan to do the same with the posts to help with the temporary look. The frame is quite stiff. The perimeter posts appear to be tied to the railing in the photo so I plan to do that too. The awning fabric will be my first attempt using silkspan. I have also been working on deck fittings and furniture and most are in place except the rope reels which just got assembled this evening, and the carley floats which still need some green stripes. A few progress photos are below.


- 446 replies
-
- 16
-
-
- zebulon b vance
- deans marine
- (and 3 more)
-
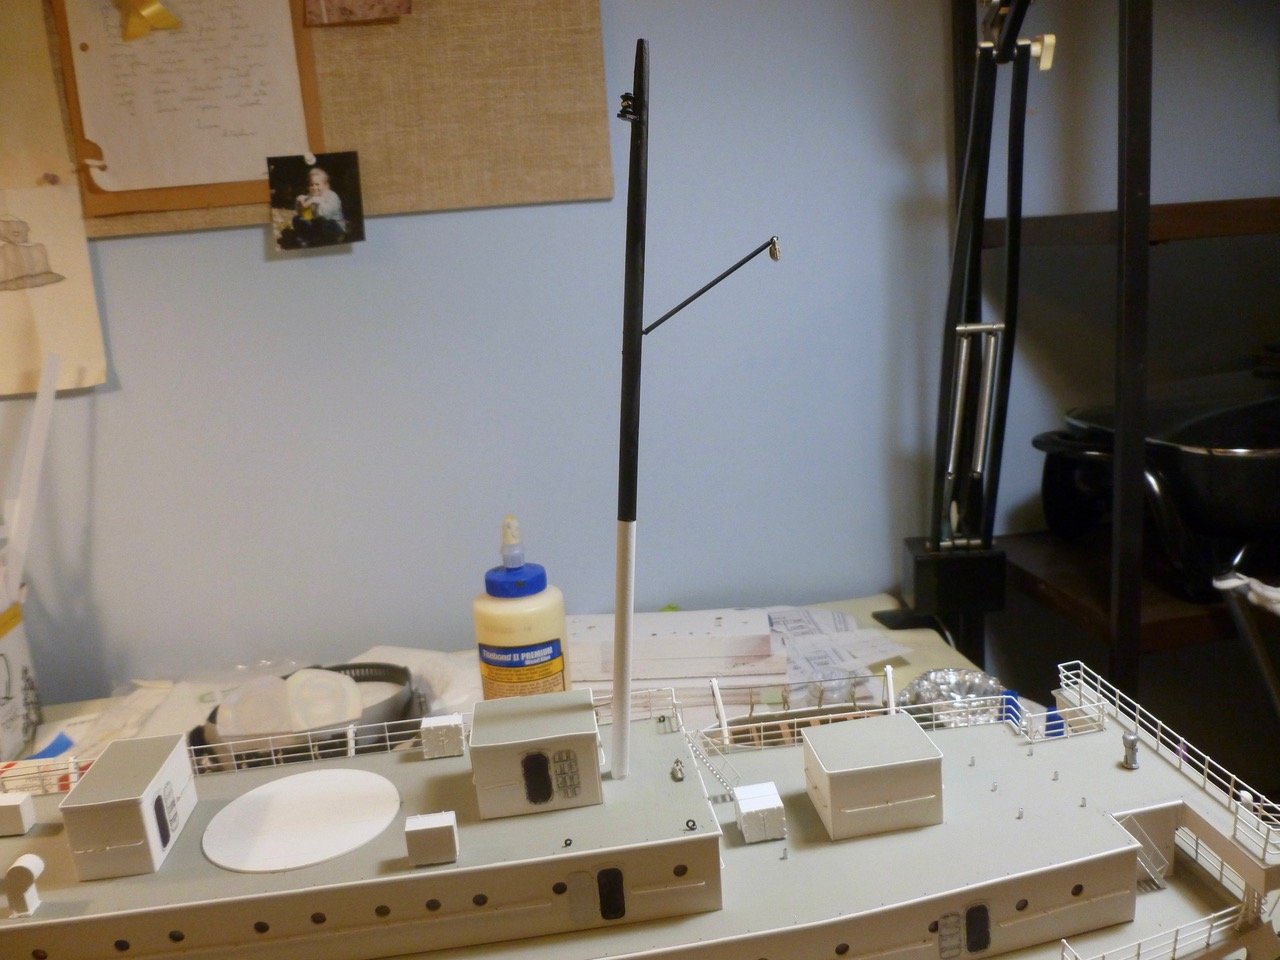
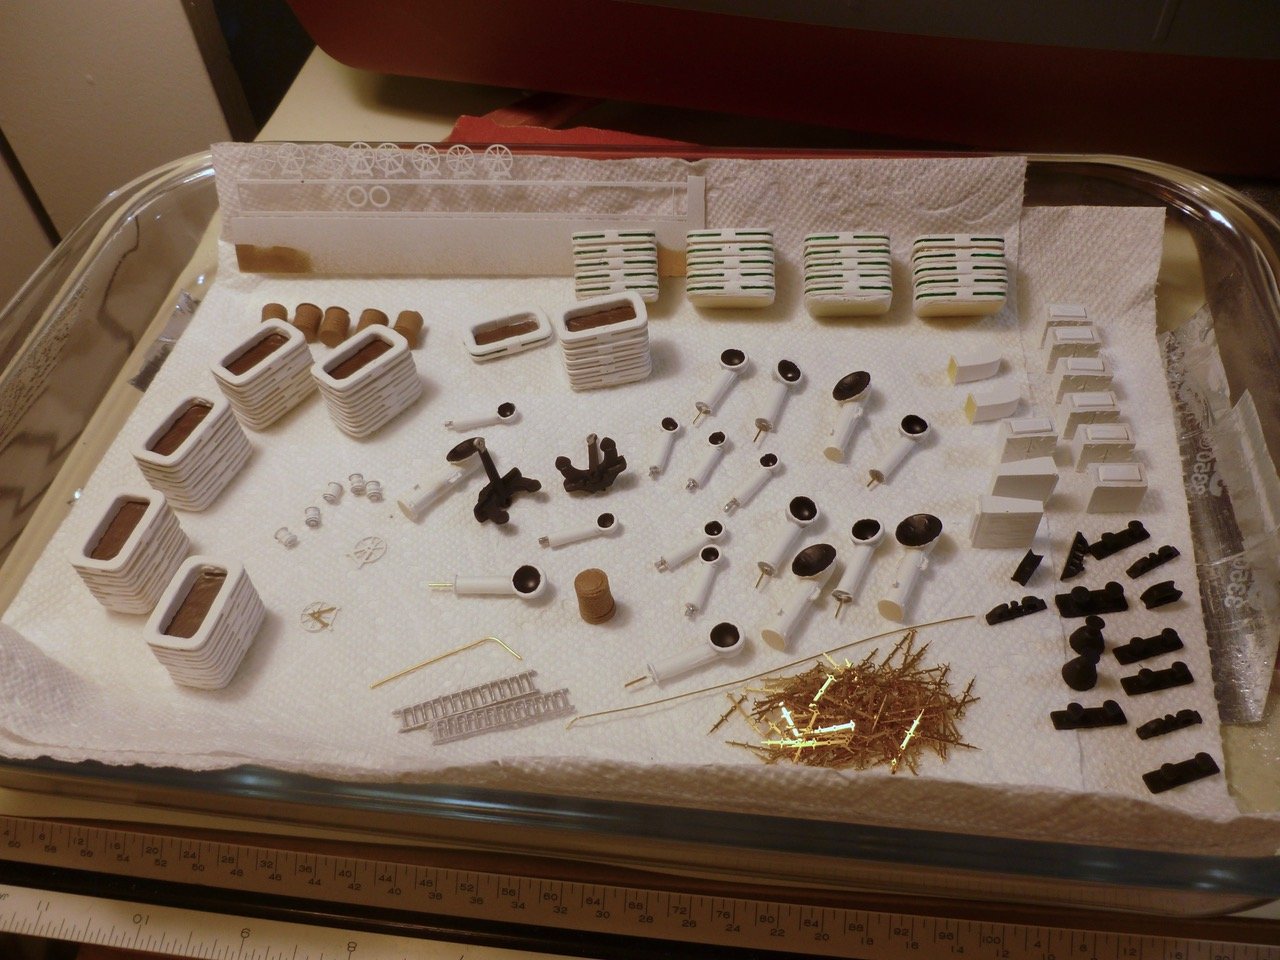
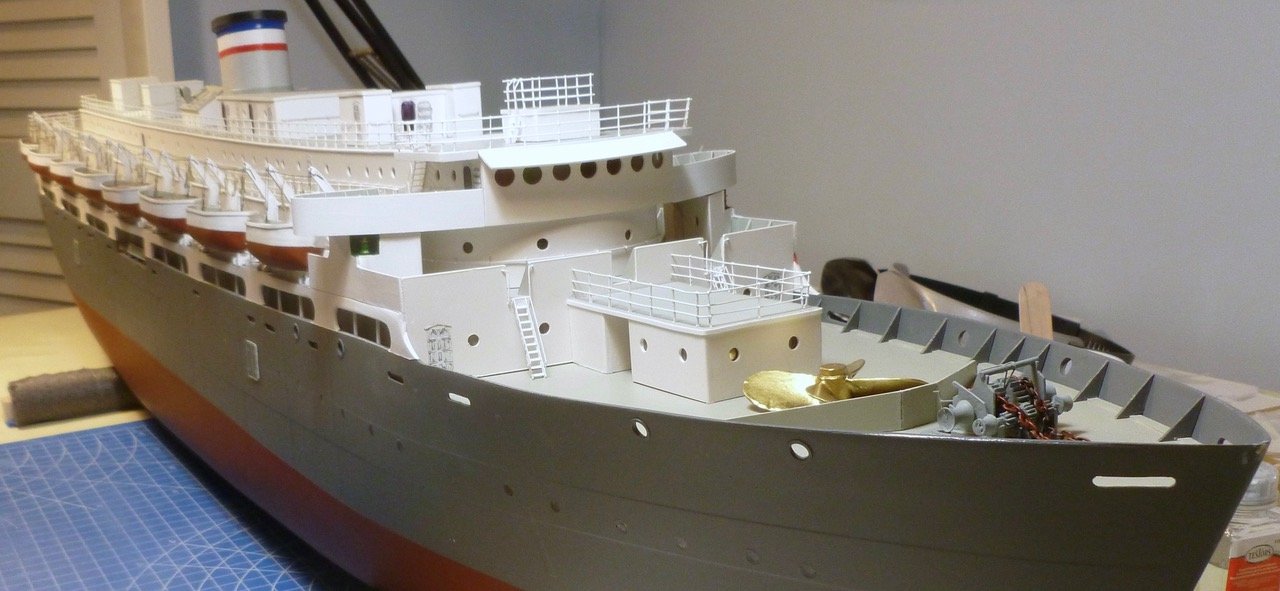
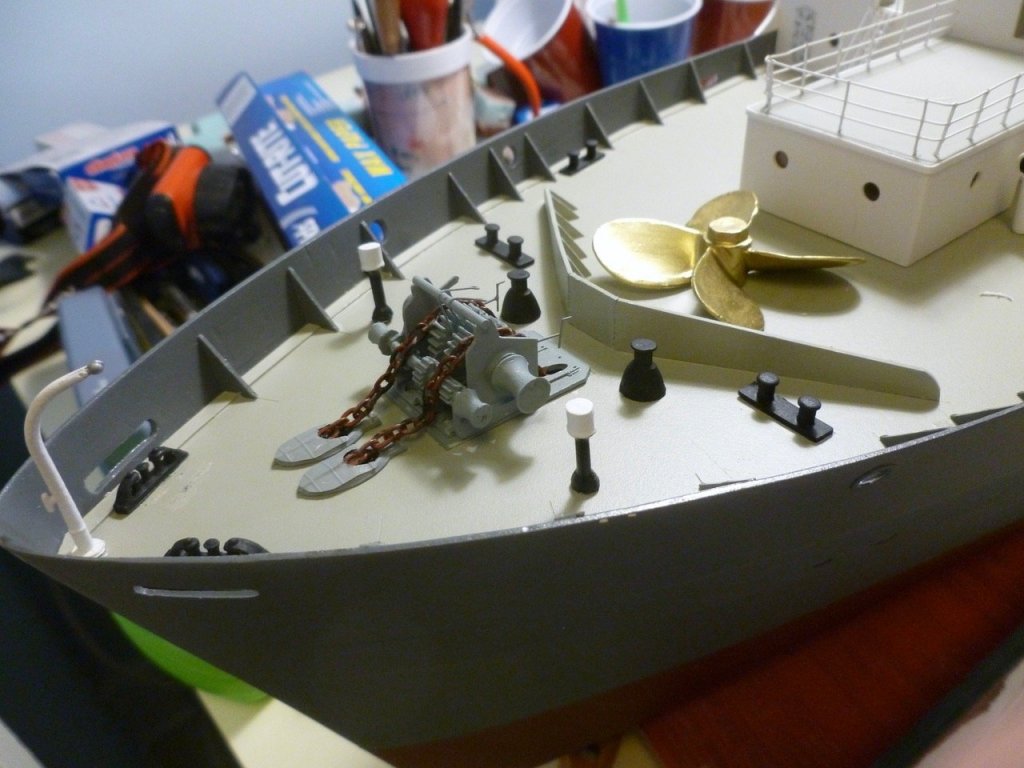
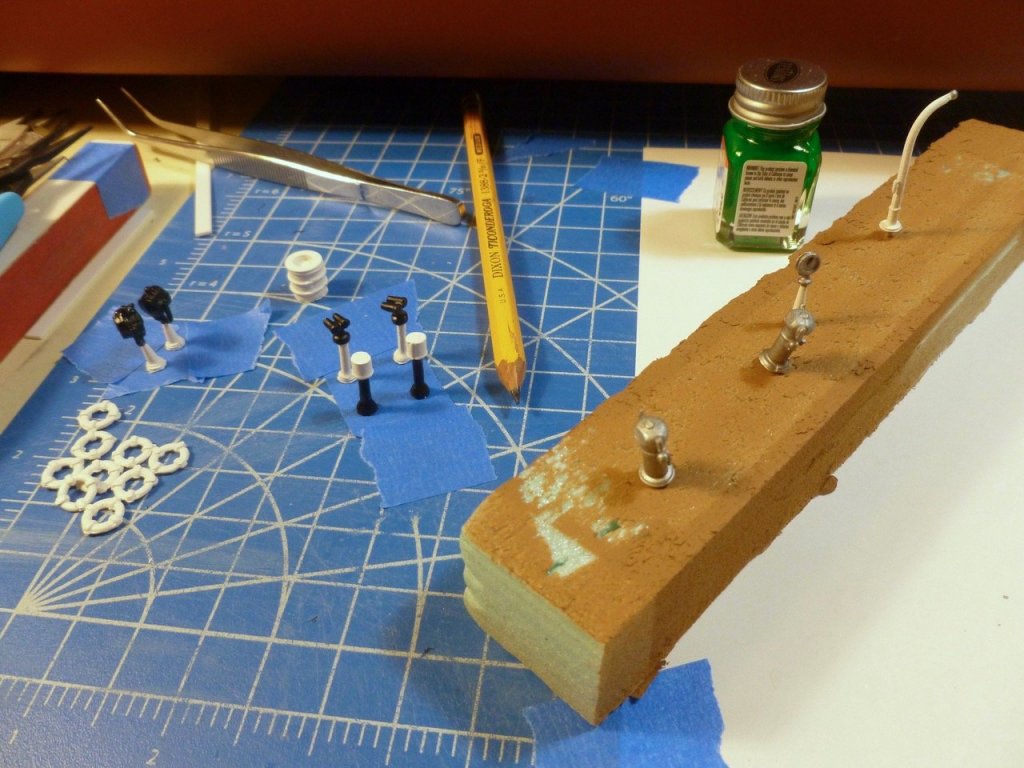
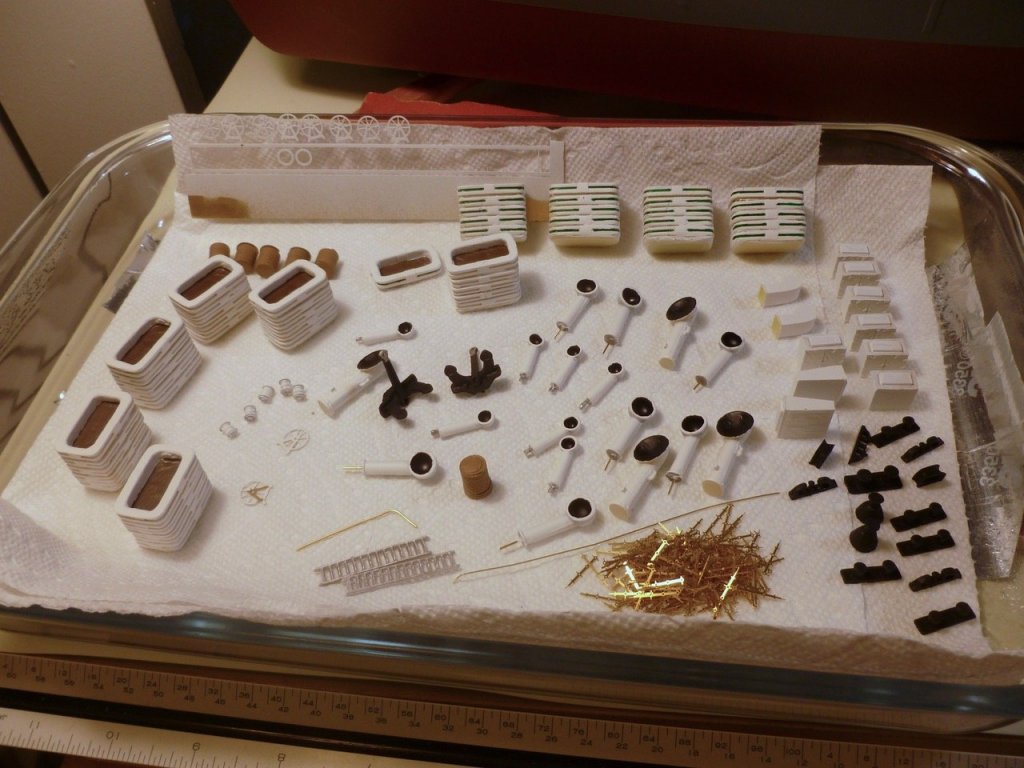
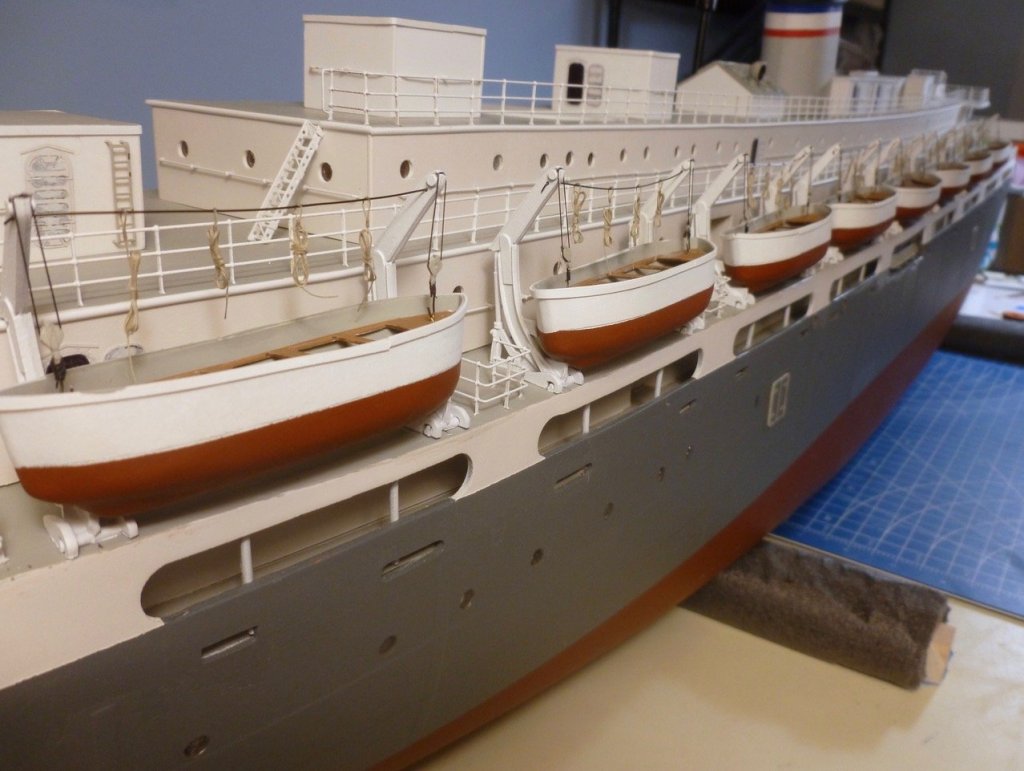
To those who gave likes, thank you and thanks for stopping by. Mark, Carl and Bill, thanks for your feedback. Steve 28 is not necessarily 28. The lead shot ballast arrived in a very timely manner. 25 pounds in a package about the size of a brick - very impressive. Now that the ship is turned to port work could commence on all the furniture and fittings. Faced with several plastic trays full of stuff to clean up and paint I dodged the work to get past the drilling for the masts. I previously added blocking below deck at each mast location. The foremast drilling went easier than anticipated, which of course meant the mainmast was destined to be a disaster. It didn’t let me down. The instructions called for 28 off vertical so I went online and found a triangle drawing with a 28 degree angle. I carefully drilled to the angle but the drill bit broke through the side of the blocking. So I pulled the upper decks off and added more blocking, then finished drilling to depth. But when I set the mast in place it looked lazy flat. Re-reading the instructions (always better to do twice BEFORE doing the work) I realized they called for 28 mm off vertical at the top of the mast. After filling the drill hole with a piece of dowel and re-drilling at the correct angle the mast was restored to its intended tilt. I’m waiting for paint to dry on the signal halyard blocks before continuing with the mast work. The portside lifeboats and davits patiently await their turn. Below are a few pics of the small parts progress. Continuing my stellar performance I spilled an entire bottle of paint on and under the cutting mat. The flood somehow managed to engulf only one piece that was to be painted that color anyway. The carley floats had a green stripe and red cross during hospital days. I assumed the red crosses were painted over during the changeover to war bride duty. I initially assumed the green stripe was also painted over but the float stacks looked dull so I'm painting the green stripes to add a bit of life. A 5/0 brush really comes in handy since it is a perfect fit for the groove. 4 stacks down, 6 to go.


- 446 replies
-
- 11
-
-
- zebulon b vance
- deans marine
- (and 3 more)
-
great job on the PE Denis. Very delicate work. Wish you all the best on the rest of the journey. Looks like you have a lot of support for a worthy build. Steve
-
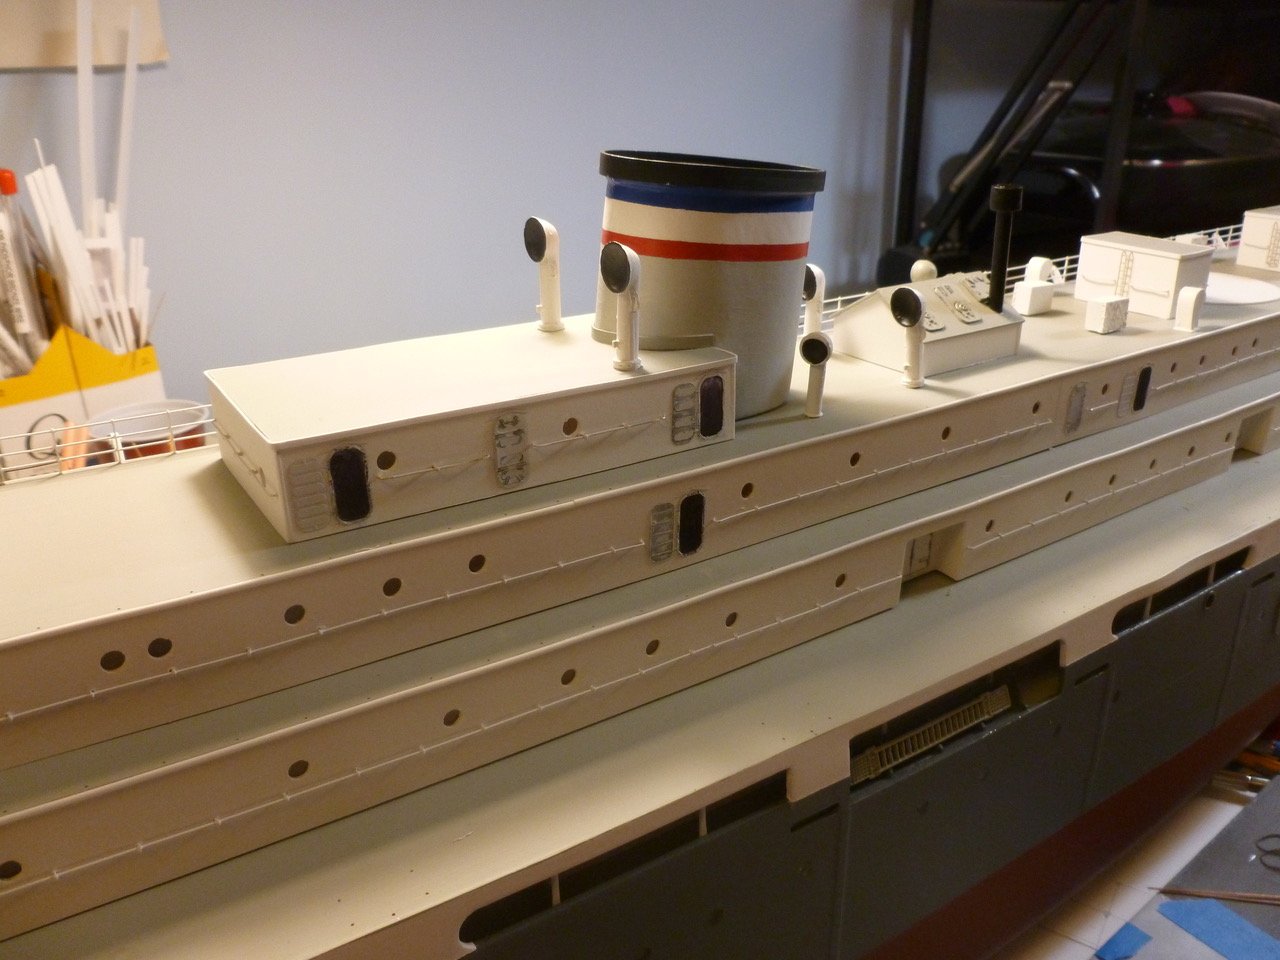
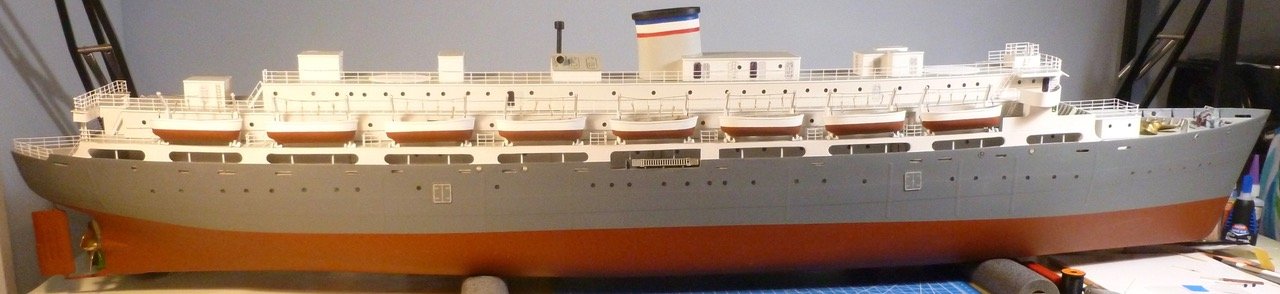
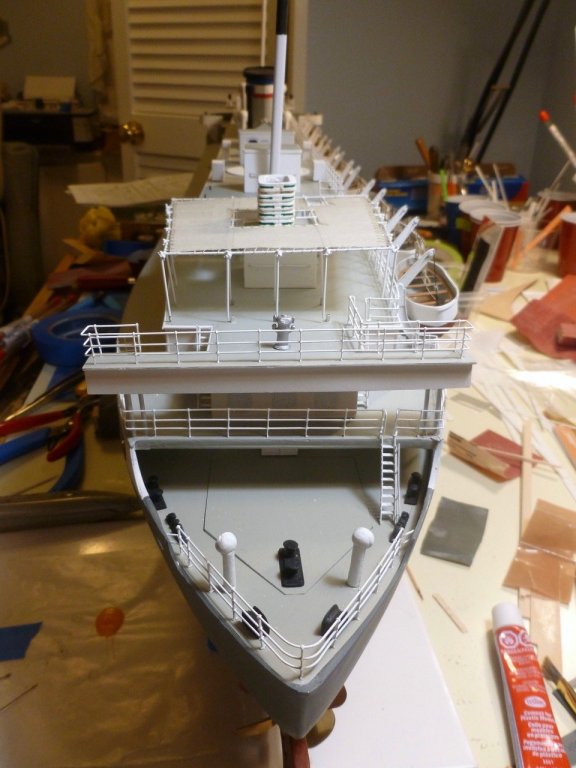
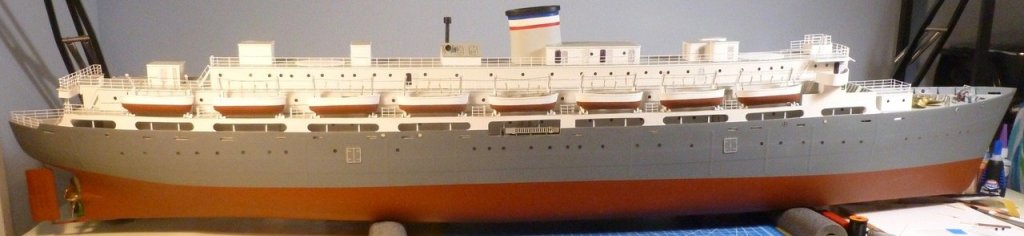
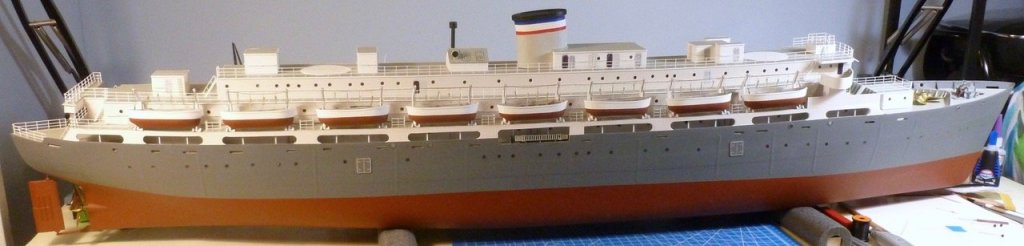
To those who gave likes, thank you and thanks for stopping by. Lou and Bill, thank you both so much. I was approaching sailing with much trepidation, but thanks to your feedback, advice and lessons learned I now have reasonable confidence that I can at least get the ship in the pool without it turning turtle immediately. Hopefully when I do I can bring back some video to share. No motorboats in the pool but I understand there was a recent addition of a Millennium Falcon float which hopefully will be stowed during test and tune. My ballast is on the way! Steve The turn. Apart from lettering and an anchor, both of which will be done later, the ship is ready to turn to work on the port side, the masts, the awning and deck furniture (is it all furniture or are cleats, chocks, rope reels and such considered something else?). More shots below. Need some straightening on the manrope tails. Not sure what is causing the yellowish cast at the sunshade but it is white like everything else.


- 446 replies
-
- 11
-
-
- zebulon b vance
- deans marine
- (and 3 more)