ESF
-
Posts
381 -
Joined
-
Last visited
Content Type
Profiles
Forums
Gallery
Events
Everything posted by ESF
-
 To those who gave likes, thank you and thanks for stopping by. Mark, I agree. This is my first time working with a very small, very thin bit of sheet brass, and inside curves in tight quarters are a challenge as you can see in the first attempt in the background. Hopefully I won't run out of spare PE doors before I get two good ones. Kevin, thanks for the photo. That's actually the one that inspired the pollywog above. Steve
- 446 replies
-
- 4
-

-
- zebulon b vance
- deans marine
- (and 3 more)
-
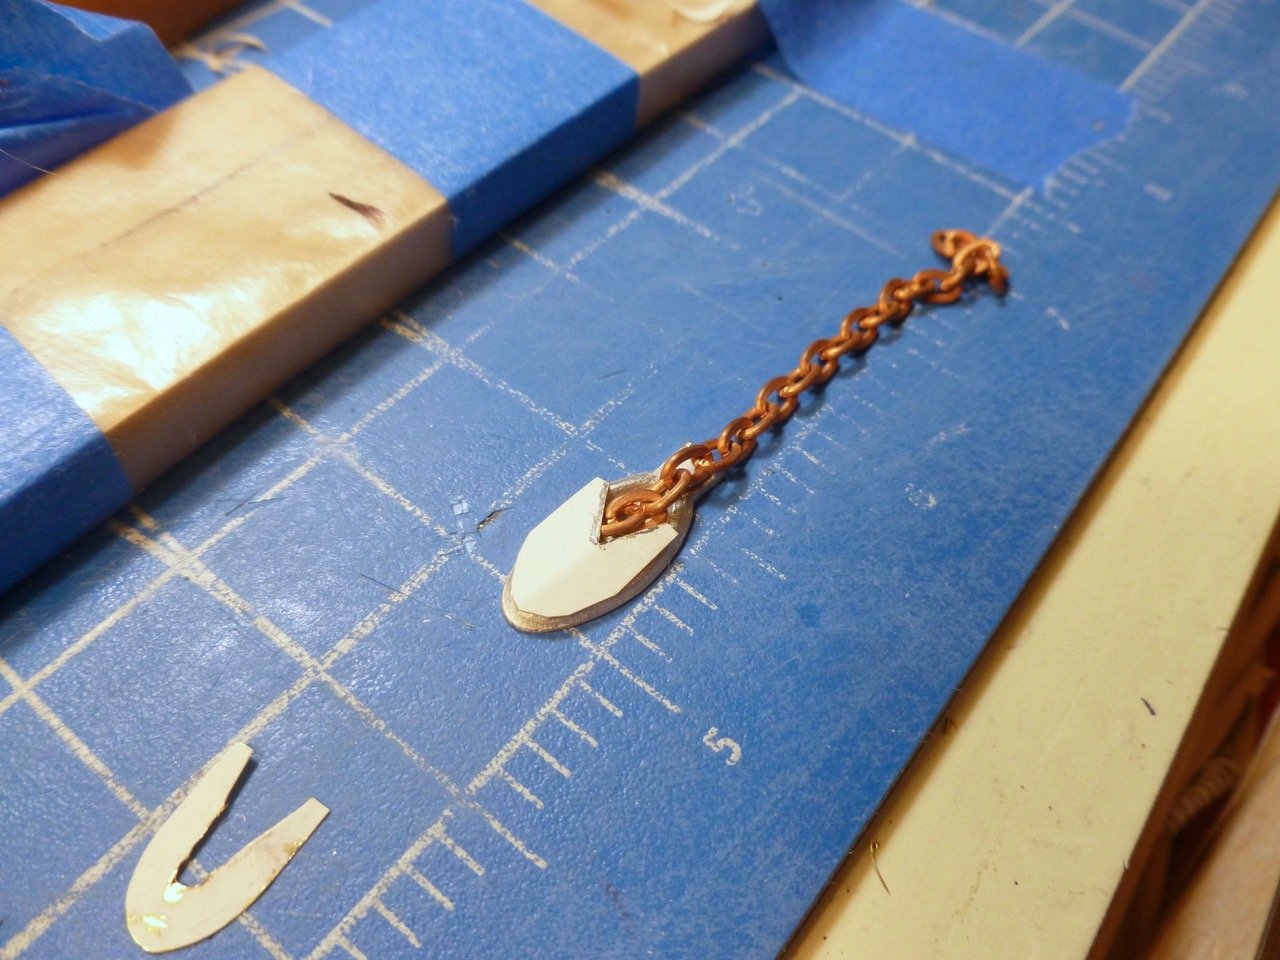
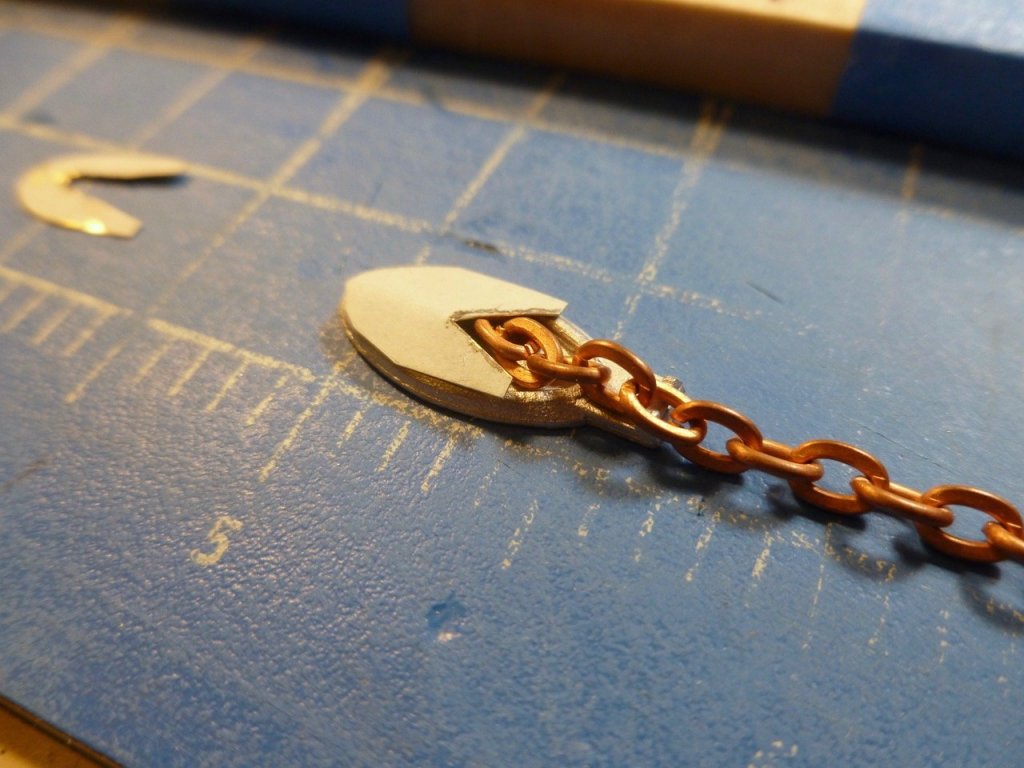
To those who gave likes, thank you and thanks for stopping by. Bill, I found some photos of hawse covers. I made one (actually two but the first was a bust) from a spare PE door. With a little sanding and paint it looks like it could conceal the end of the chain. Okay, bad, indifferent, or better left off? Thanks Steve

- 446 replies
-
- 6
-
-
- zebulon b vance
- deans marine
- (and 3 more)
-
To those who gave likes, thank you and thanks for stopping by. Bill, thanks for offering guidance on the windlass. I'll also search on chain stopper and hawsepipe cover and see what comes up. Hopefully it's not just the rubber drain stopper and little chain we used to have on our bathroom sink! Steve
- 446 replies
-
- 2
-
-
- zebulon b vance
- deans marine
- (and 3 more)
-
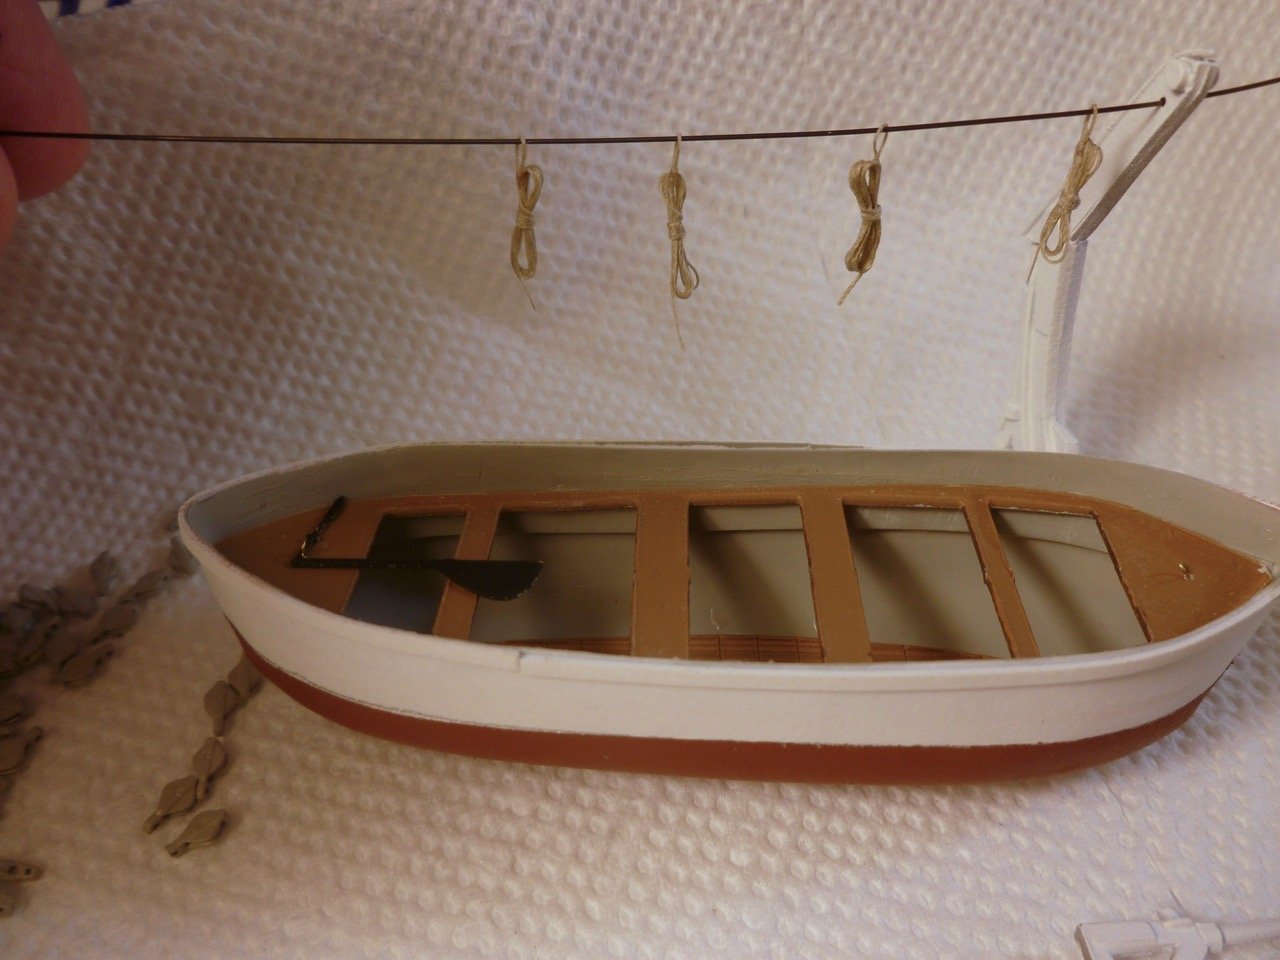
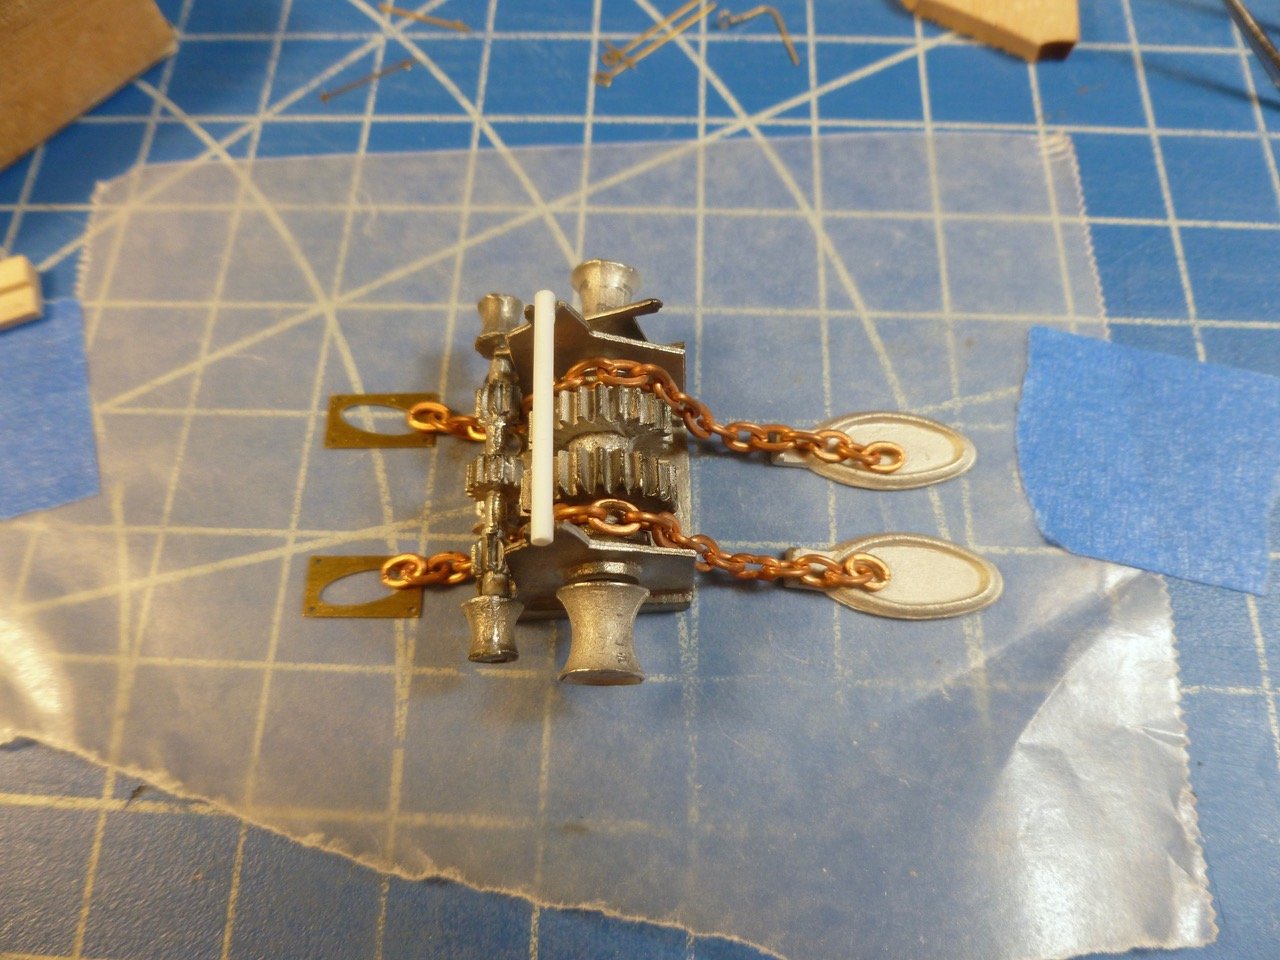
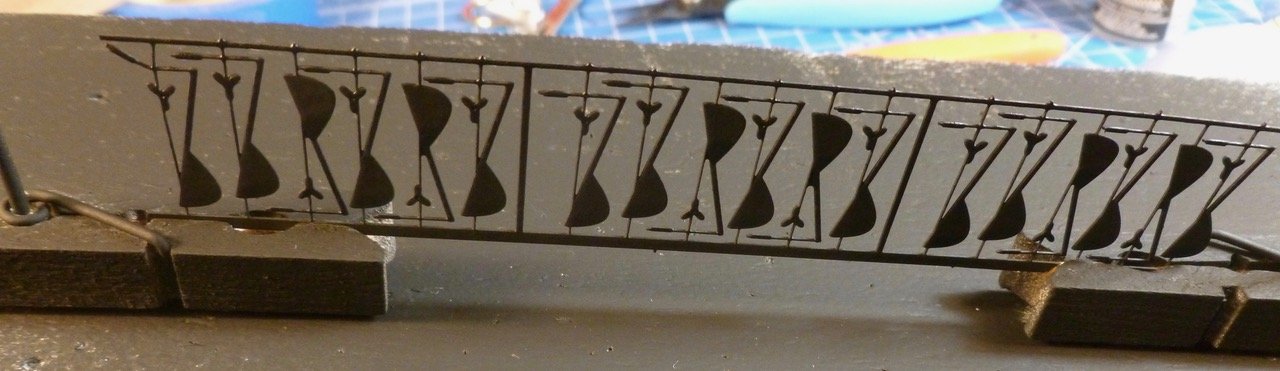
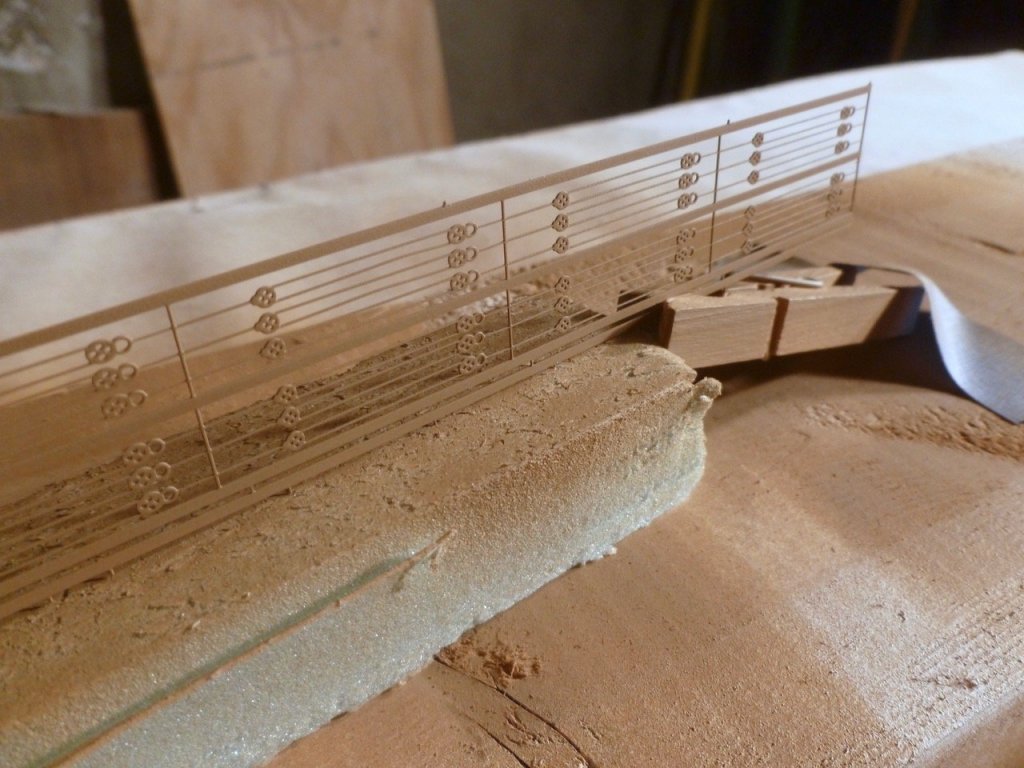
To those who gave likes, thank you and thanks for stopping by. Carl, thanks. Would that I could make myself buffed as easily. When I cut the chain in half I had two nice half links and as I threw them away a little bird chirped “you’ll probably wish you kept that”. So now two already short chains will be a little shorter. I thought about drilling out the chain holes through the deck but when the ship sails I want as few openings as possible and I don’t have good access under that part of the deck to build a sealed box. So half-eyed natural will be as good as it gets. Denis, the Progress winch work is great but I see how delicate it is. I think I’ll stick to the lumpy one I’ve started. The windlass color in the black and white hospital ship pictures varies from dark to light. Taking your advice I think I’ll try a Model Master flint gray on the windlass to add some life to the forward area. Steve Bouncing from windlass to rope After looking at a lot of photos I believe I had the windlass orientation backward. Several photos place the secondary shaft toward the bow, with the anchor chain draped over it, rather than under it. Above and below are the new orientation, which can easily be swapped back if the members think the first way is correct. The kit photos of completed models show no man ropes (person ropes? hand ropes?) between the davits but they are clearly in all the real ship shots. The challenge is which way to display 64 of them; either hung down with knots every three feet, or stowed (with knots conveniently “hidden” amongst the coils) and ready to be dropped. I have seen photos of both. The stowed version looked like it could be a rope coil cinched in the middle with an eye at one end and a tail for pulling at the other. Easy to make since I have experience in rope coils from the Bowdoin. The knots are another matter, there being about 900 of them to cover the full scale length of rope from davit to waterline for all locations. Since I was leaning toward the stowed look anyway I decided to make up a few to settle on a method for production. The good news is they don’t have to be identical - the real ones weren’t consistent in their stowed appearance, some taller, some shorter and fatter, even within one boat. I tried one with a fatter rope but it looked out of scale. These seemed to be better, particularly alongside the davit rigging (not shown). The proportions between stowed length and lifeboat will be much better once the boats are up on the davits, but overall the stowed version looks workable and do-able. Only 60 more to go.


- 446 replies
-
- 10
-
-
- zebulon b vance
- deans marine
- (and 3 more)
-
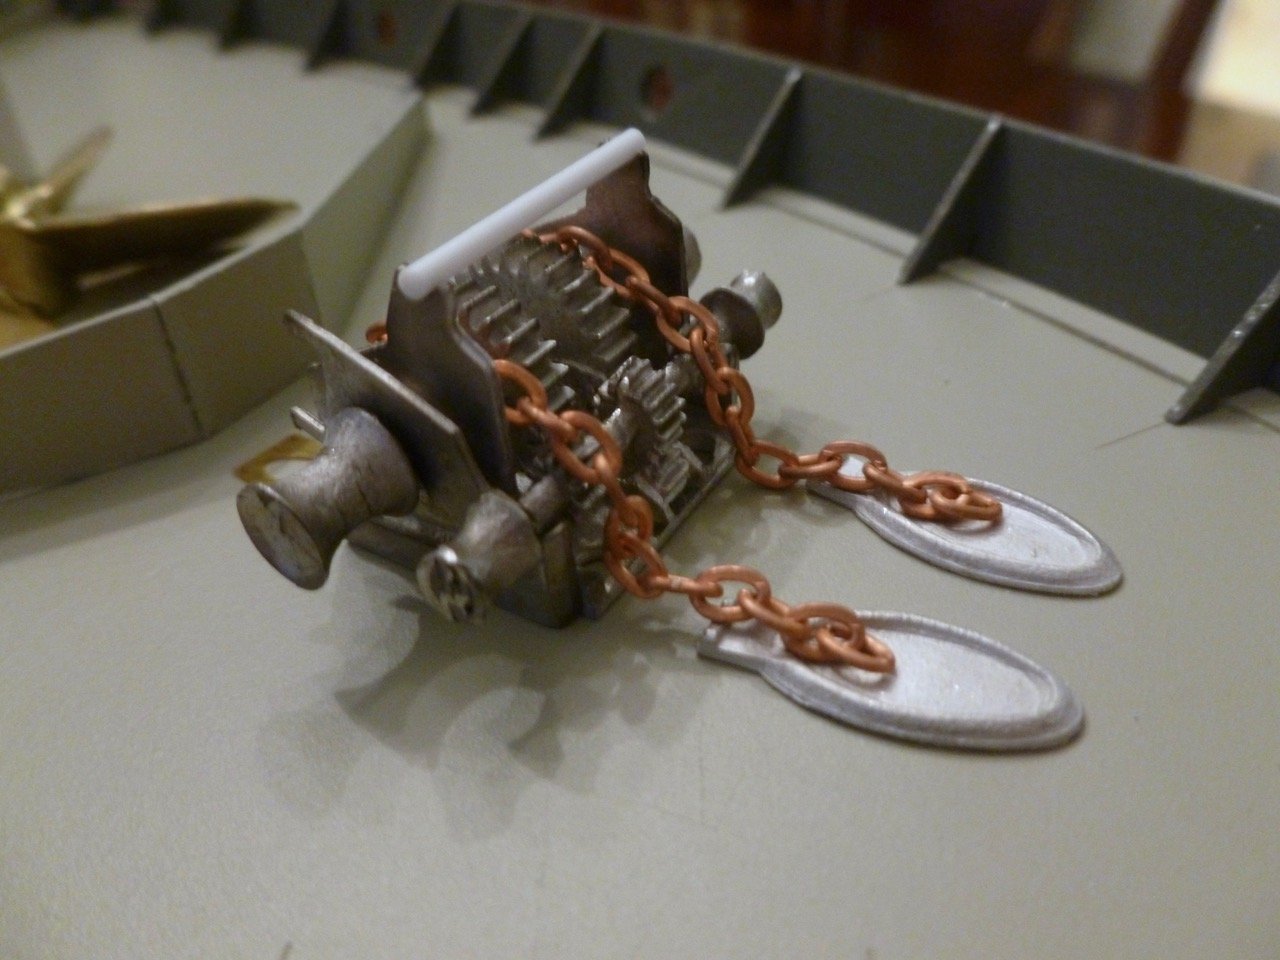
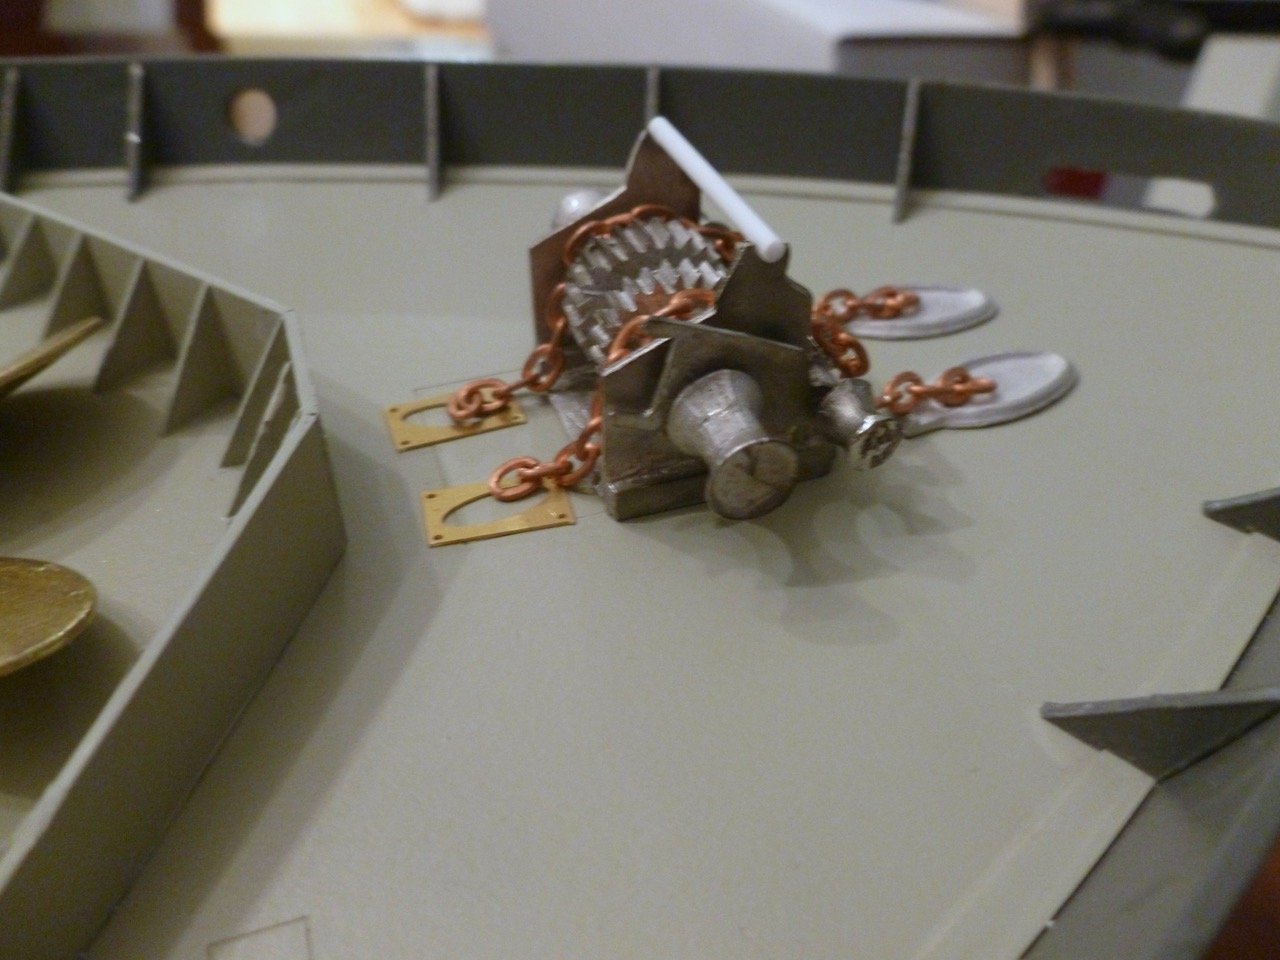
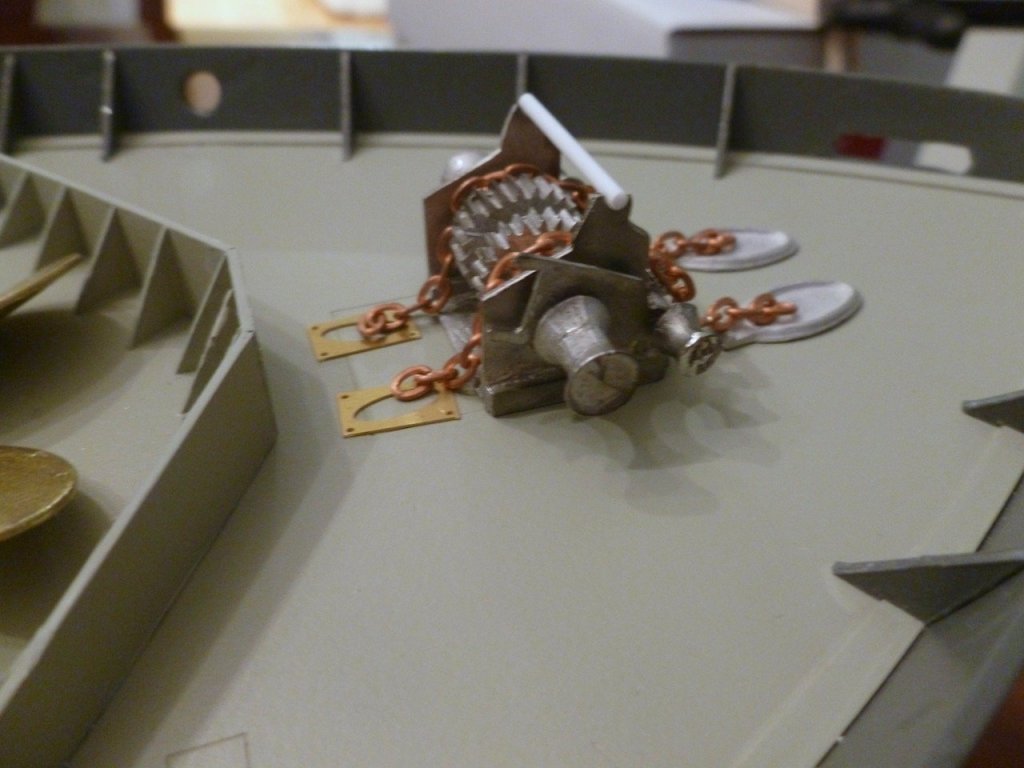
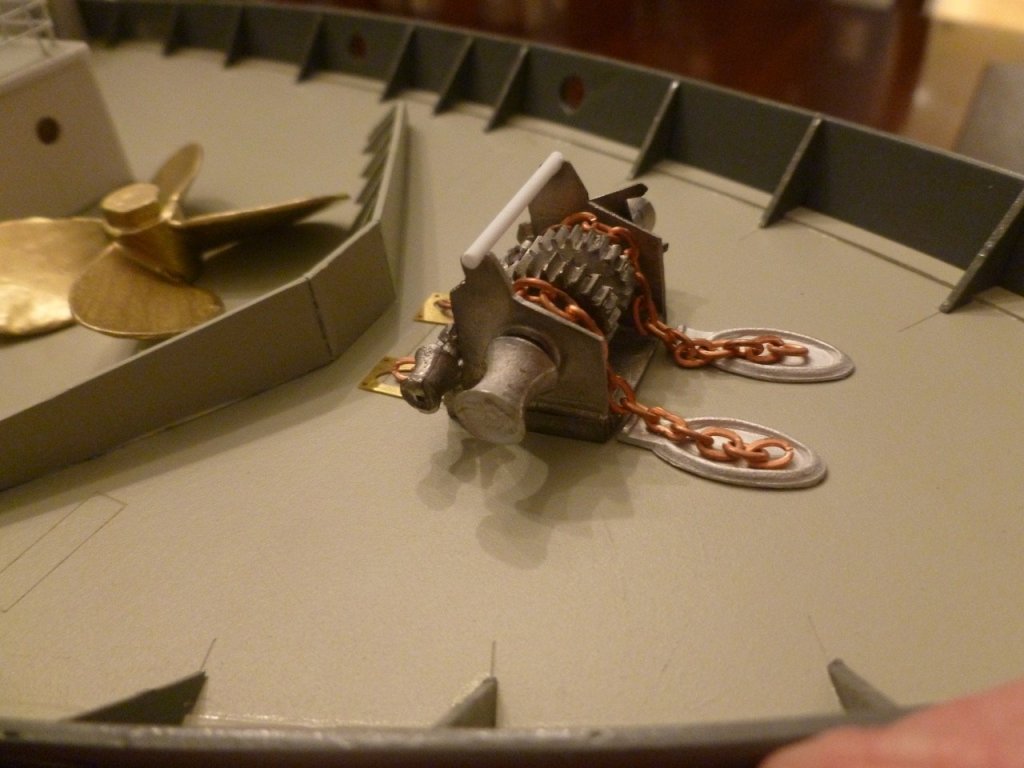
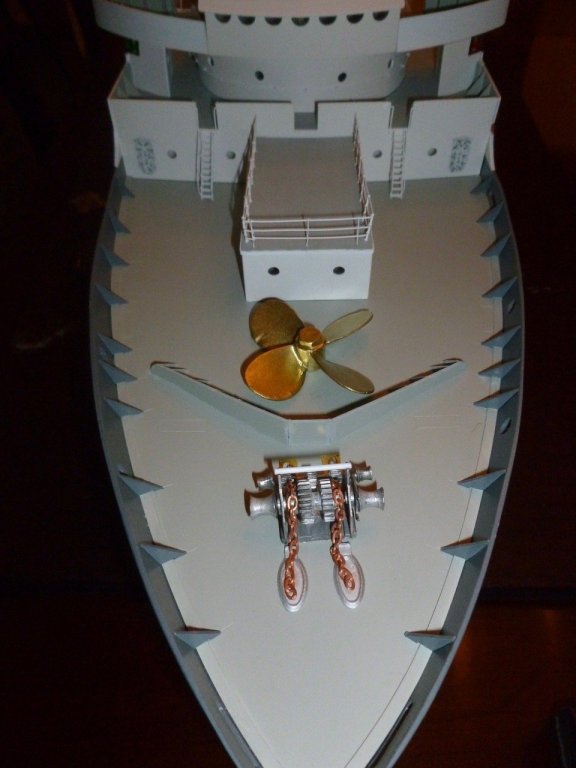
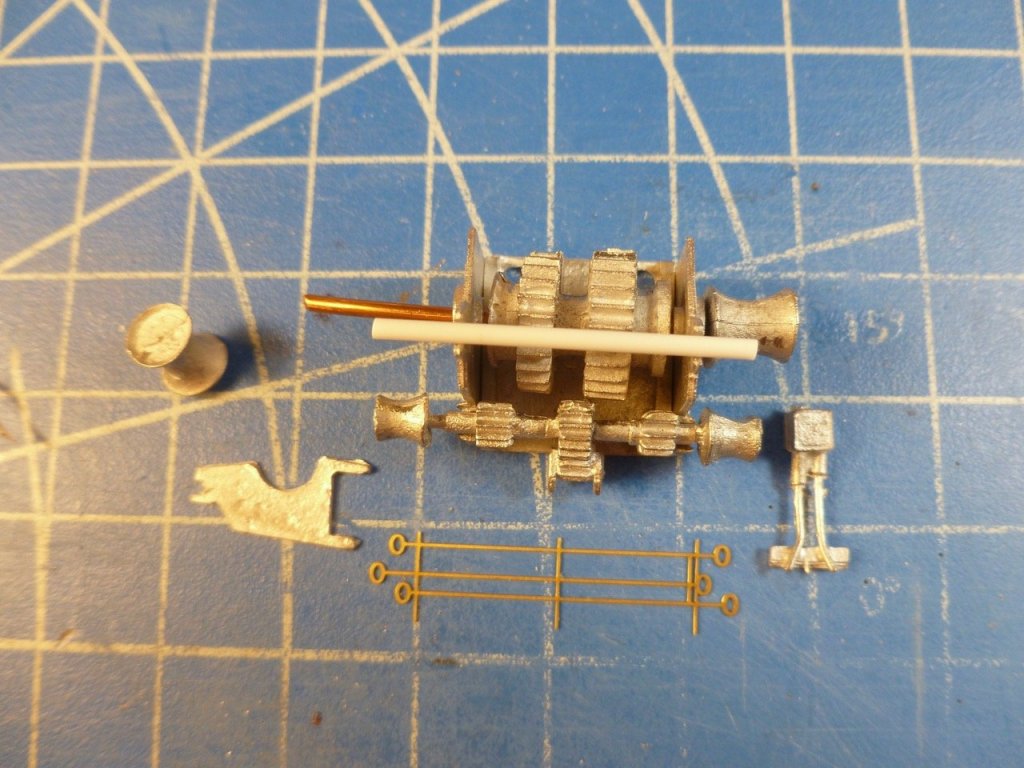
To those who gave likes, thank you and thanks for stopping by. Carl, thanks for the photo and links. Lots of good info on various configurations. Denis, thanks for the suggestions. I took your roughness observation to heart and worked the parts with a Dremel buffing wheel and a file which seems to have taken the curse out of the finish. Flat black should help disguise defects too. I have a few pictures from my Hospital Ships of World War II book that capture a view or two, and the kit unit has a general resemblance. Steve As mentioned above I took X-acto blade, files and Dremel buffing wheel to the windlass parts which seems to have helped their appearance. Photos typically show the main shaft (large windlass wheels) toward the bow and since there needs to be something to pull the chain over the large drum it makes sense that the chain would pass under the secondary shaft before dropping into the chain pipe. So I mocked up the installation, both off and on the ship. Thankfully the windlass is not glued in crooked as in the last photo below. The chain has a nice profile as compared to real chains but the length seems a bit skimpy after cutting it in half. I would have thought the hawse pipes would be farther forward. Sorry the last three pics are dark. The ship is still moored in the dining room, waiting for the return call to install the boats and davits. The hospital ships book shows the windlass farther forward than the laser layout line on the deck. If I push it forward it should look better with more clearance forward of the breakwater. I expect to paint the windlass and the centers of the hawse pipes and chain pipes flat black, the hawse pipe surrounds and chain pipe frames gray to match the deck, and rust color on the chain. I’m thinking I should cut the last link of chain at each location and glue the remaining half link so it looks like the chain descends into the blackness. Still haven’t figured out the PE handles and the junction box and conduit(?) locations. The junction box doesn’t fit anywhere on the windlass except on the side between two drums which looks completely out of place. I need to learn how the handles were used to better understand how they interact with the main and secondary shafts.


- 446 replies
-
- 8
-
-
- zebulon b vance
- deans marine
- (and 3 more)
-
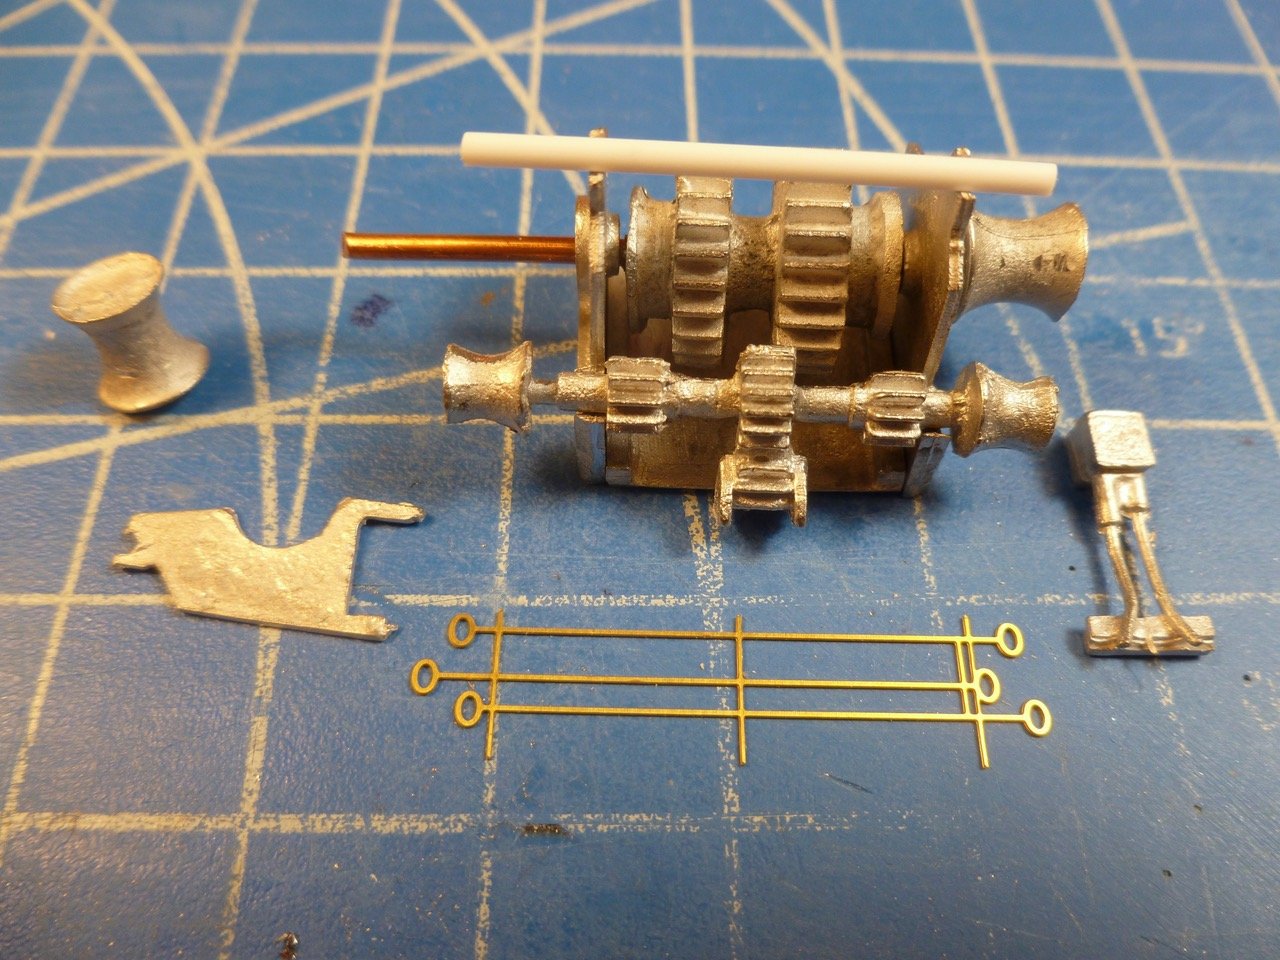
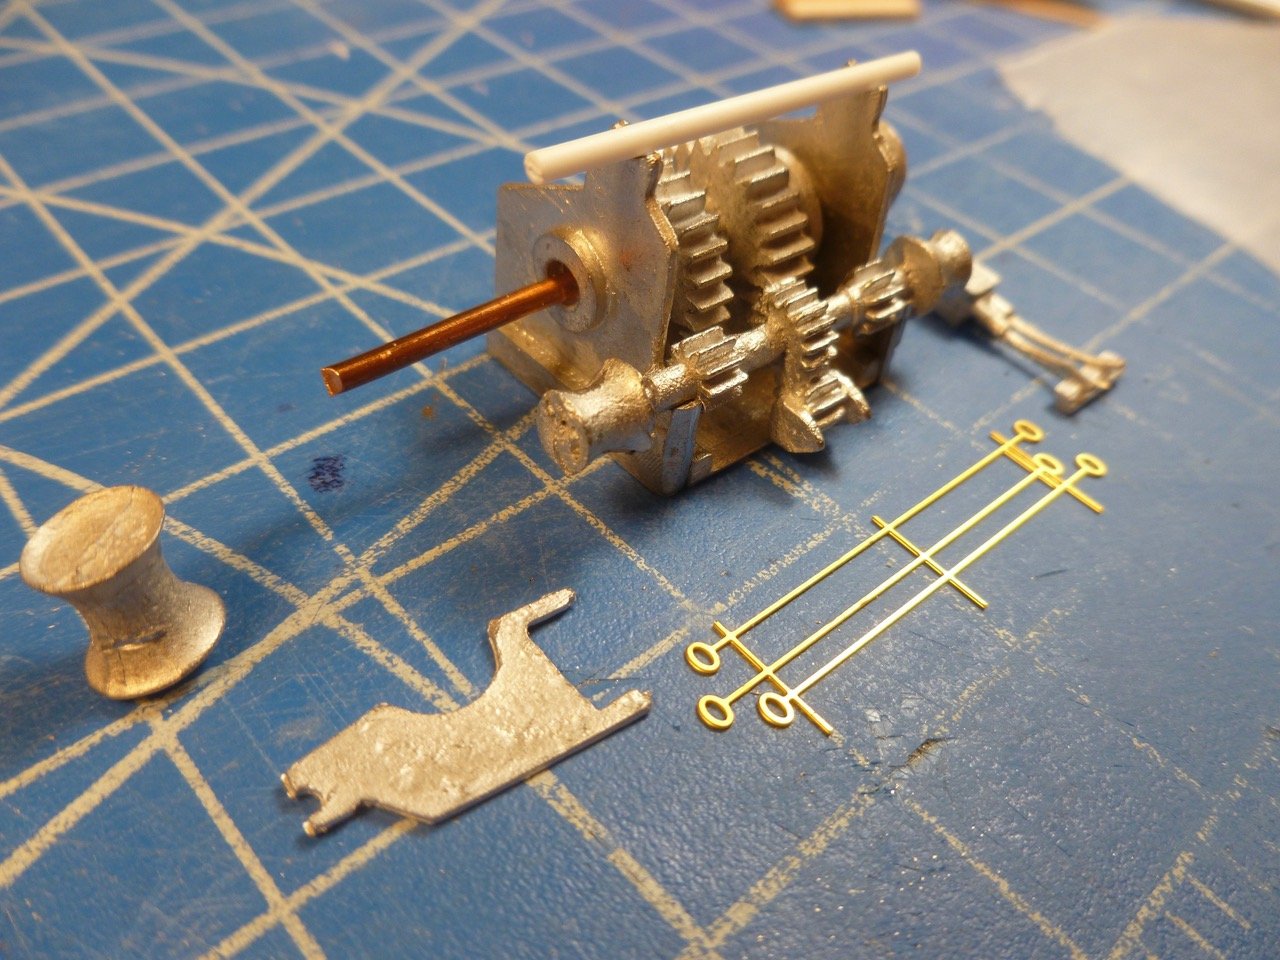
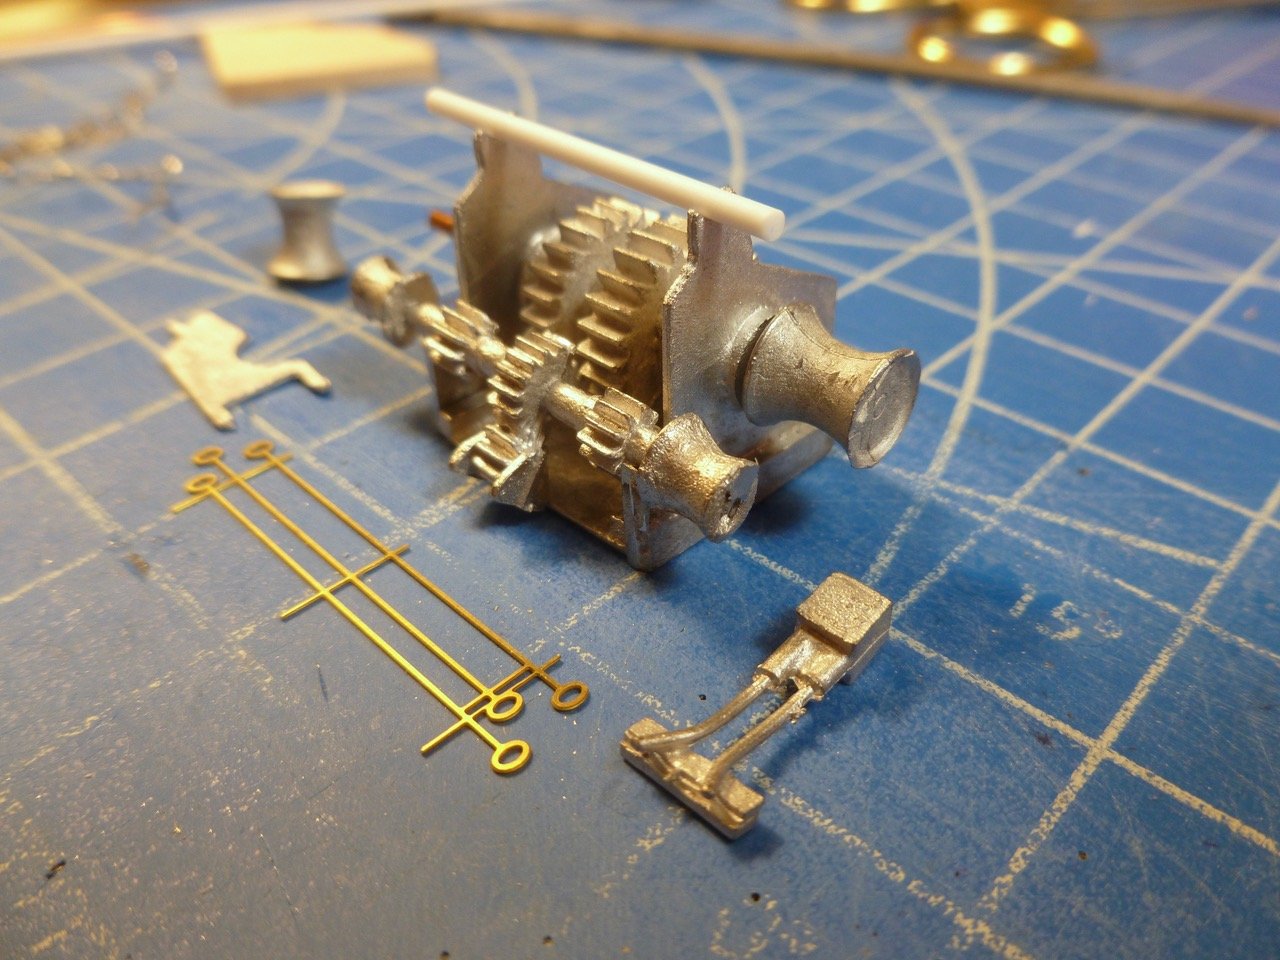
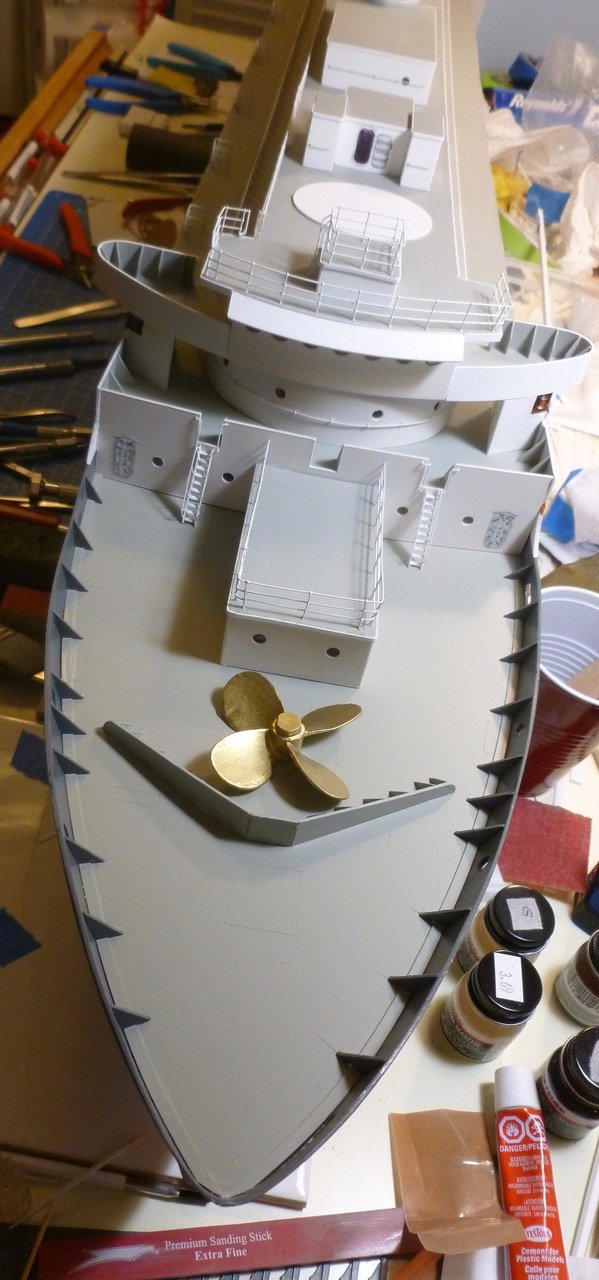
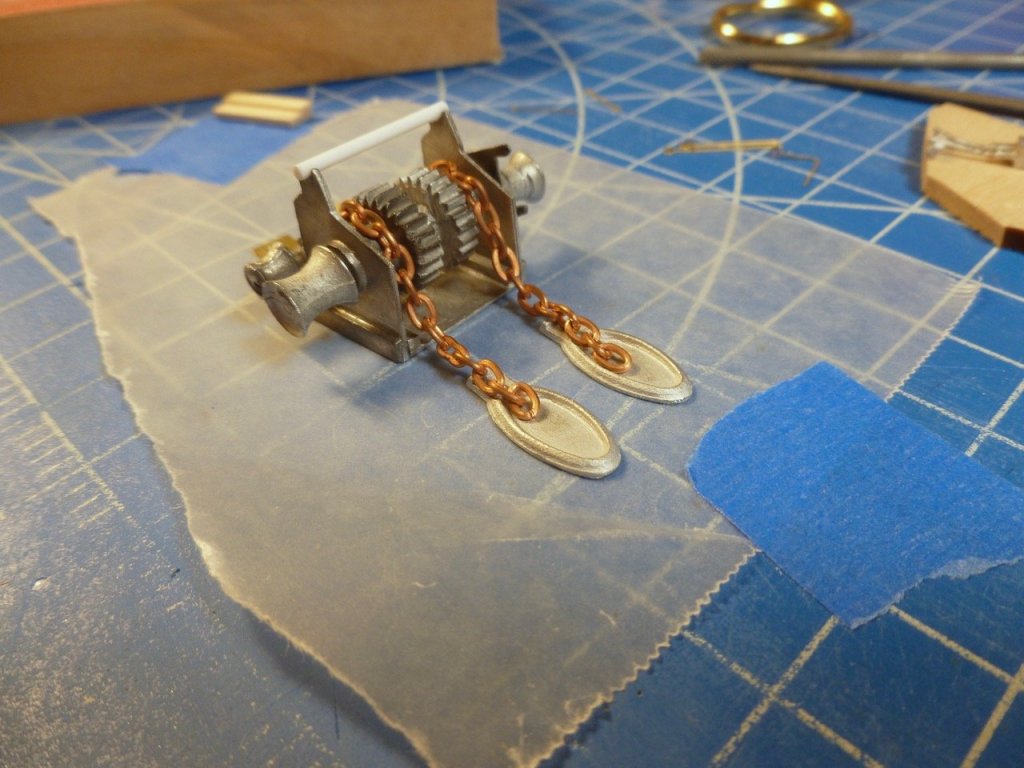
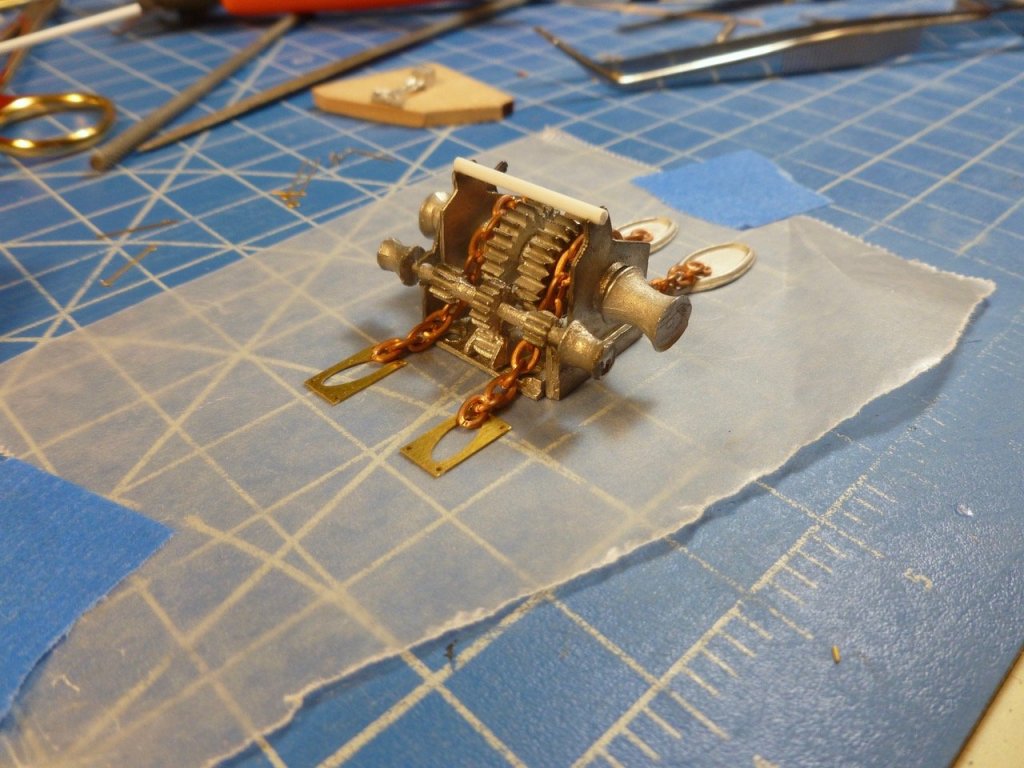
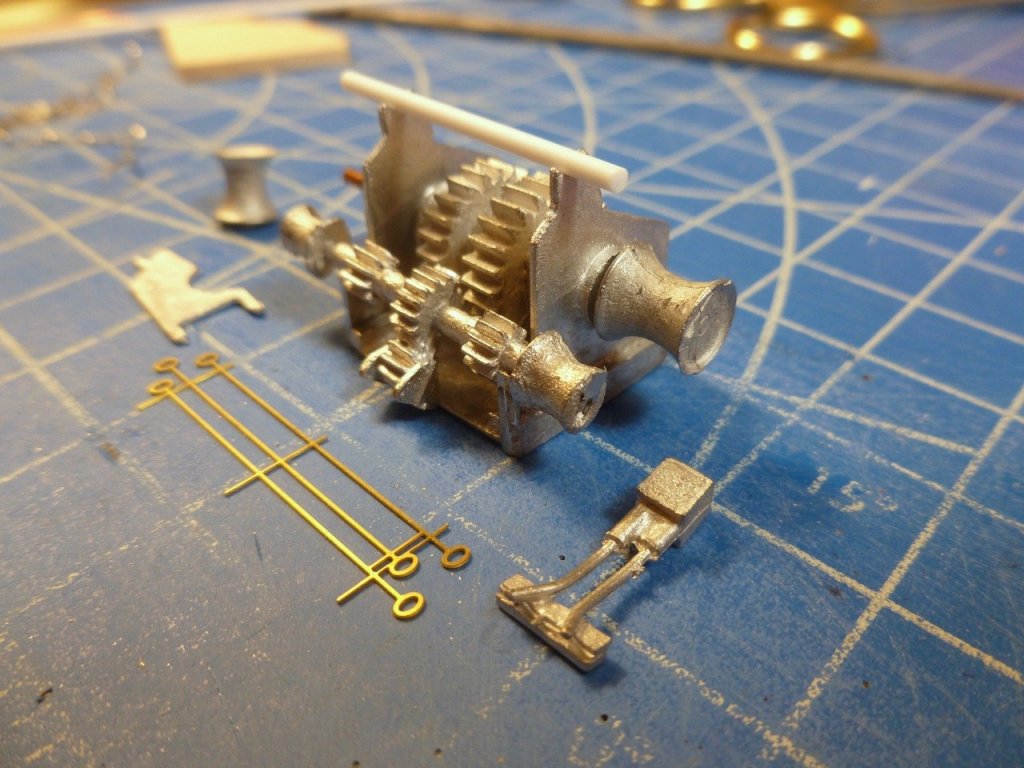
To those who gave likes, thank you and thanks for stopping by. Carl, you may be a shoe-in for the entertaining contributor award. Steve Windlass Wondering The windlass instructions are limited to a simple isometric and a square drawn on a plan view showing the location. The drums at the end of the main shaft were cast with shafts of their own, so the shafts were cut off and holes drilled to accept the main shaft. The main shaft also needed trimming down and in the process I managed to snap one end off, necessitating drilling into the main shaft gear to accept a piece of brass wire, which is waiting to be trimmed. The kit makes mention of a brass rod across the top, around which the PE handles(?) are to be bent 90 degrees “to engage the main shaft”. I used a piece of plastic rod but could use a thinner brass wire if the plastic is out of scale. There is no mention of the flat plate with cutouts seen in front of the windlass, or what looks to be an electric box and conduits. It is also curious the secondary shaft would be cast with the left hand drum spaced away from the thicker part of the shaft, unless that is where the curved nib on the cutout plate rests. The windlass in the kit photos is painted glossy black which obscures most of the detail, but it appears that the main shaft faces forward, the anchor chains rise out of the hawse pipes, pass over the main shaft to the outsides of the main shaft gear wheels, pass under the secondary shaft and descend into the chain pipes. Does that sound right? What is the flat plate with cutouts for and where should it go? Should the handles be attached to it or to somewhere else on the main shaft? Sorry for so many questions but I’ve been looking online and in the blogs and haven’t seen a similar configuration. More windlass pics are below. The rudder-tillers are painted. The PE also contains a bunch of propellers which don’t look like they belong on the lifeboats. Below is a proposal for placing the rudder-tiller stored in each boat. I also thought it might be placed on the footings but it seemed to be more accessible laying on the thwarts. Opinions or firm direction are welcome.


- 446 replies
-
- 9
-
-
- zebulon b vance
- deans marine
- (and 3 more)
-
It sure would have been a simpler way to do the railings (and ladders, and portholes, and doors....) Glad to hear that Thomas improved clogging problems. I once had to prove to a contractor that his proposed substitute cheap toilet for a large housing renovation project was not the equal of the quality unit we spec'd. Anyone care to confirm the standard test?
- 446 replies
-
- 3
-
-
- zebulon b vance
- deans marine
- (and 3 more)
-
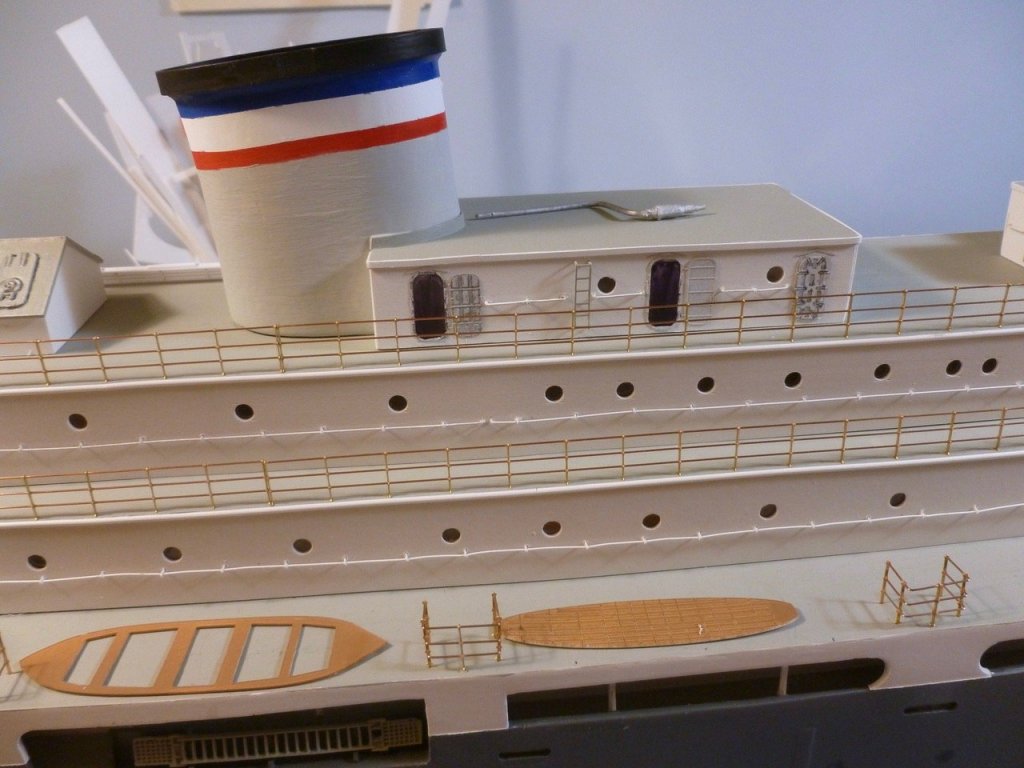
To those who gave likes, thank you and thanks for stopping by. For the crapper contingent (I believe it was Thomas Crapper who invented the flush toilet), I am more than pleased to get rid of the outhouses. In the photos I have of the sister hospital ships the cabin only shows up once looking longer and lower, and in a John J. Meany photo (the Vance in hospital mode) a blurry image implies there might be one but the blur also looks longer and lower. Consider them gone - what a relief! Steve
- 446 replies
-
- 4
-
-
- zebulon b vance
- deans marine
- (and 3 more)
-
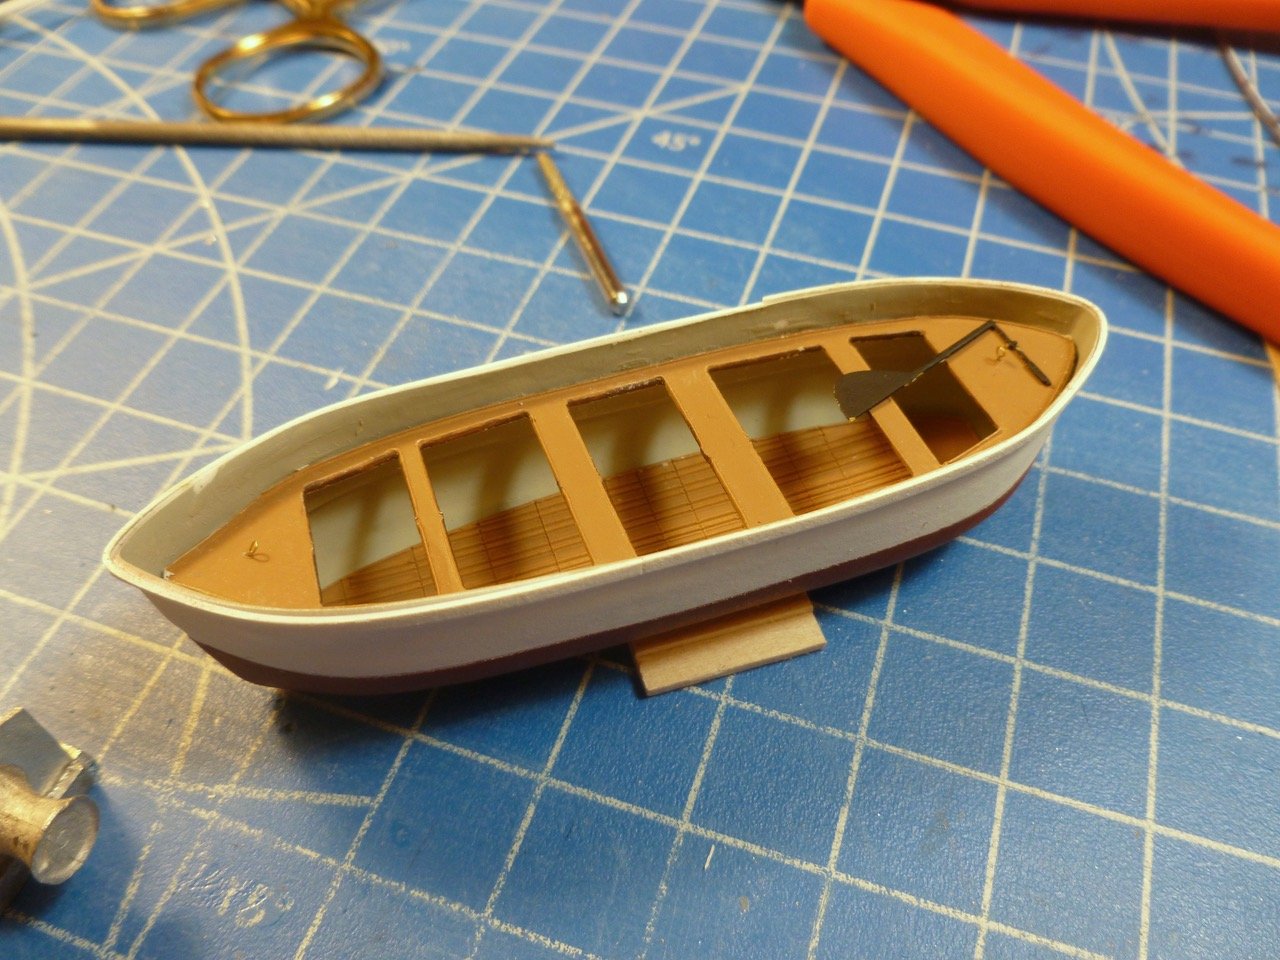
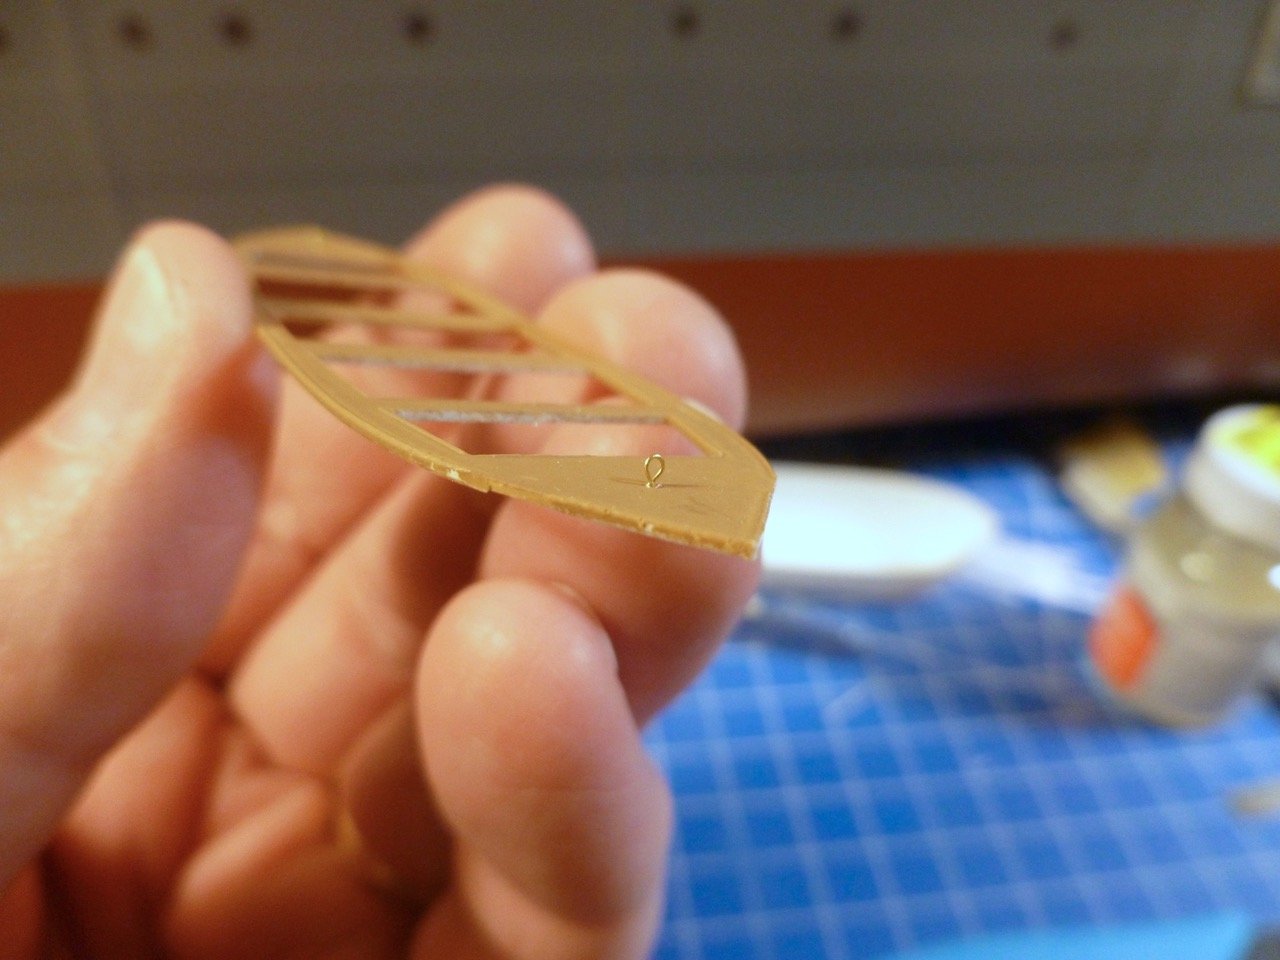
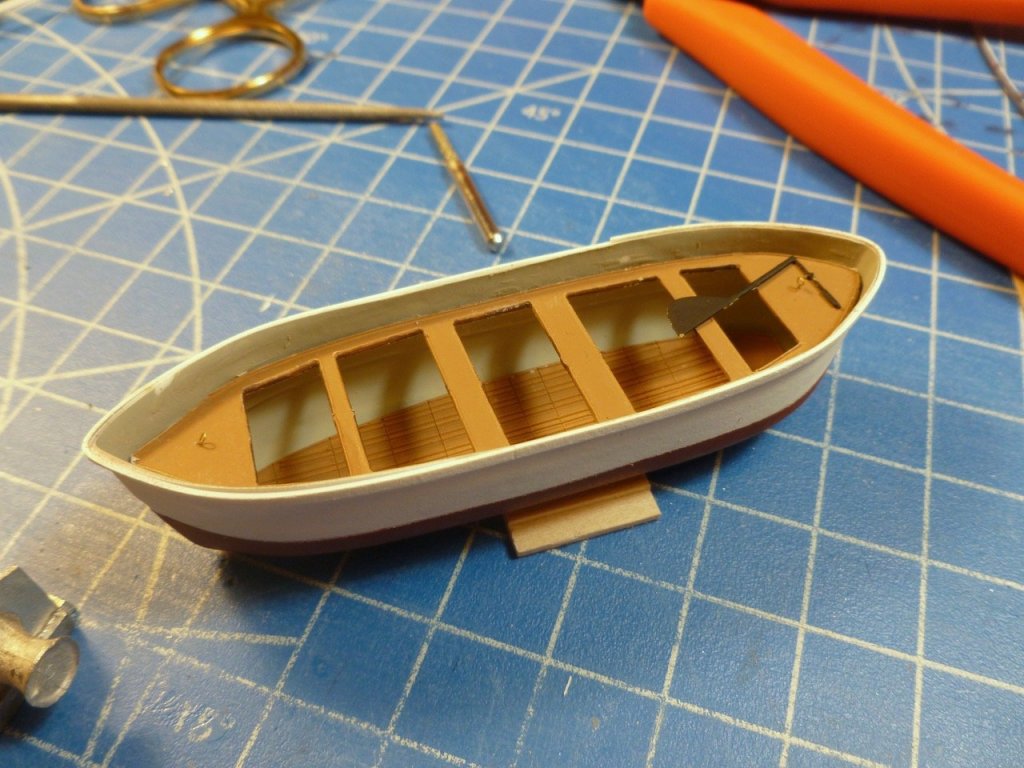
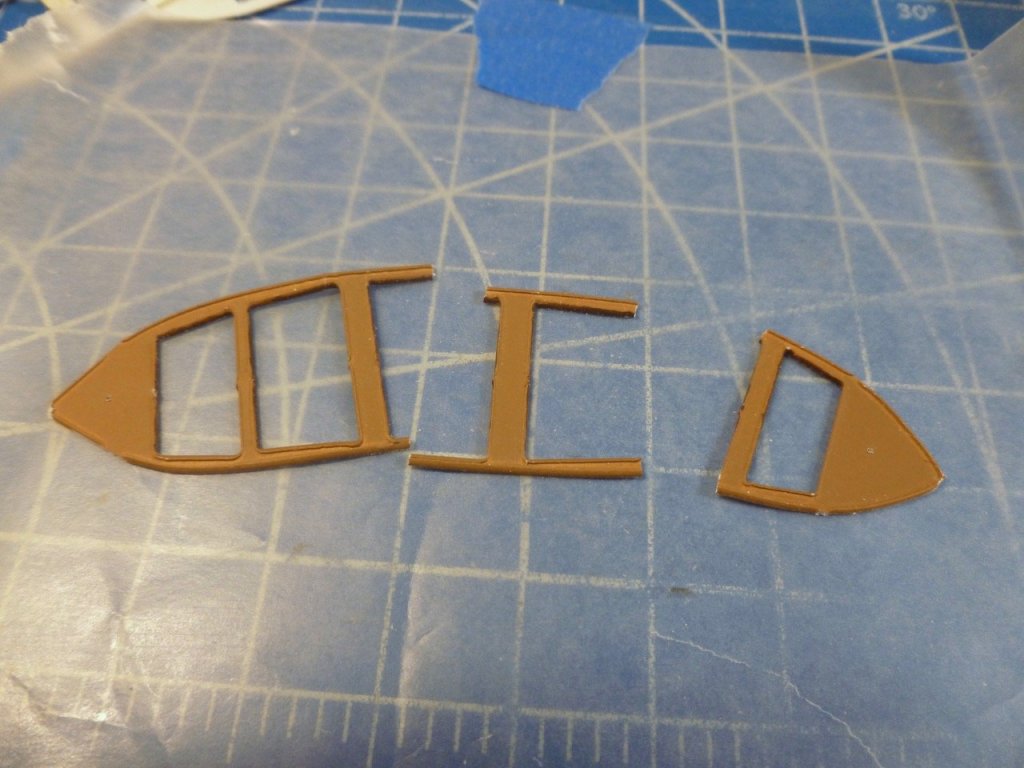
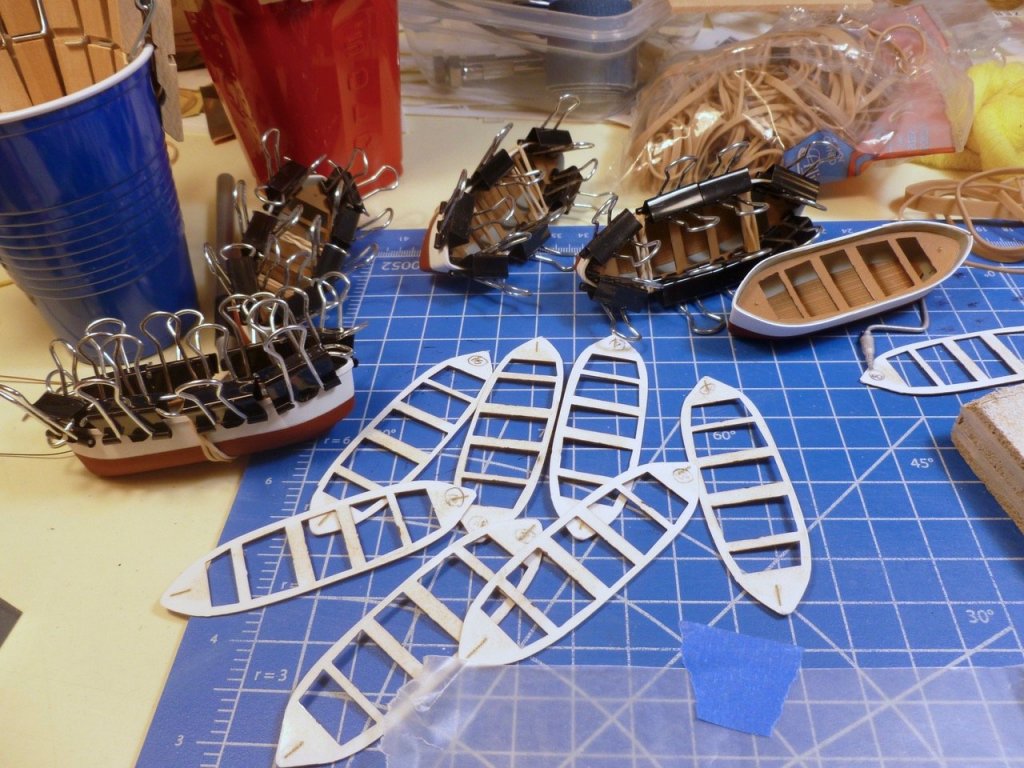
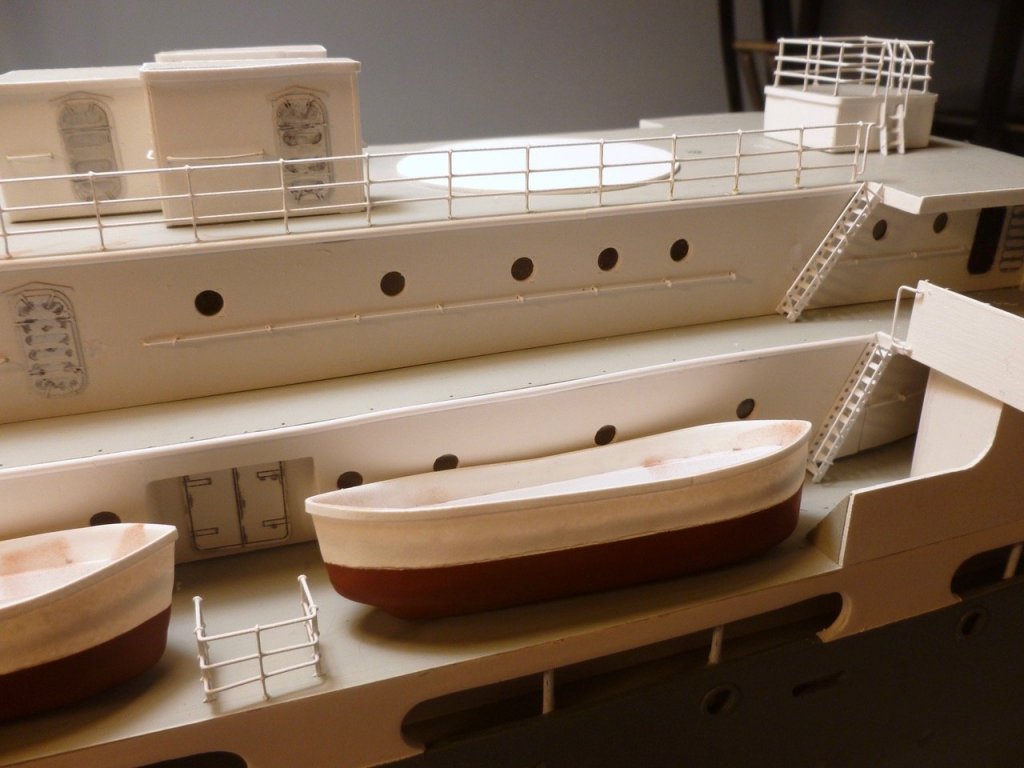
To those who gave likes, thank you and thanks for stopping by. Carl, thanks for clarifying. Thwarts it is. Legodude is anxious to get back to work but he also wants to finish the school year. Steve Lifeboat Assembly the saga Back to the thwarts. Here’s what happens with a moment of inattention while scuff sanding. Fortunately CA came to the rescue. After matching up all thwarts to boats and gentle(!) sanding where needed the assembly process was medium CA along the underside perimeter of the thwarts, allowing some carryover to the edges, set the thwarts in place, pinch the hull snug to the thwarts, install a rubber band near one end, apply binder clips at that end to push the thwarts onto the supporting strip, repeat at the other end, then fill the gaps with more binder clips. Repeat 16 times. The thwarts are now assembled. The PE rudder/tillers are in the paint shop. Two boats shown as motor launches have their respective cabins but they need portholes, doors and paint.

- 446 replies
-
- 10
-
-
- zebulon b vance
- deans marine
- (and 3 more)
-
Looking very sharp Jo. Nice graphics in the last pic. Makes your intent very clear. Steve
-
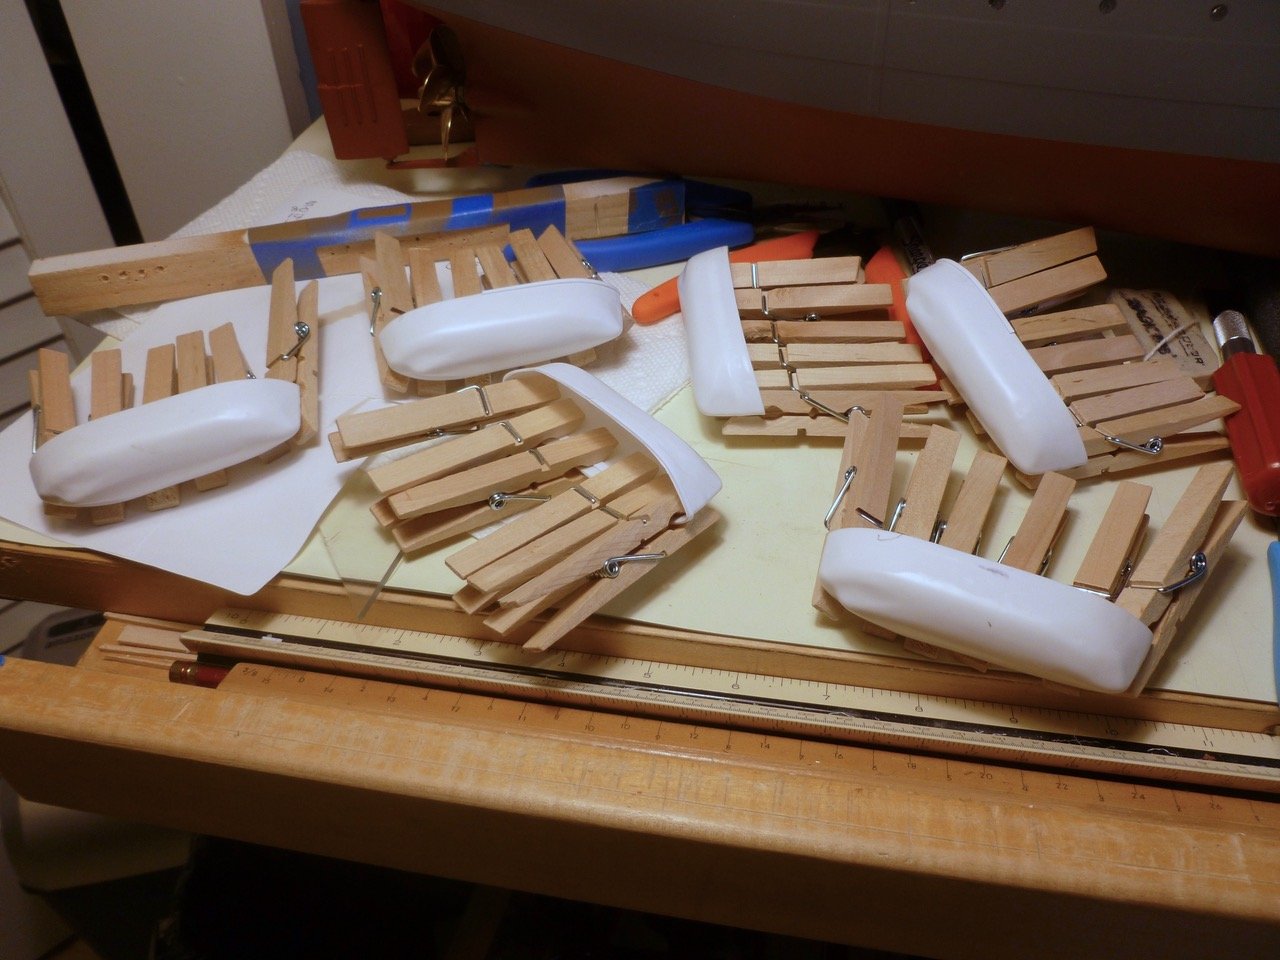
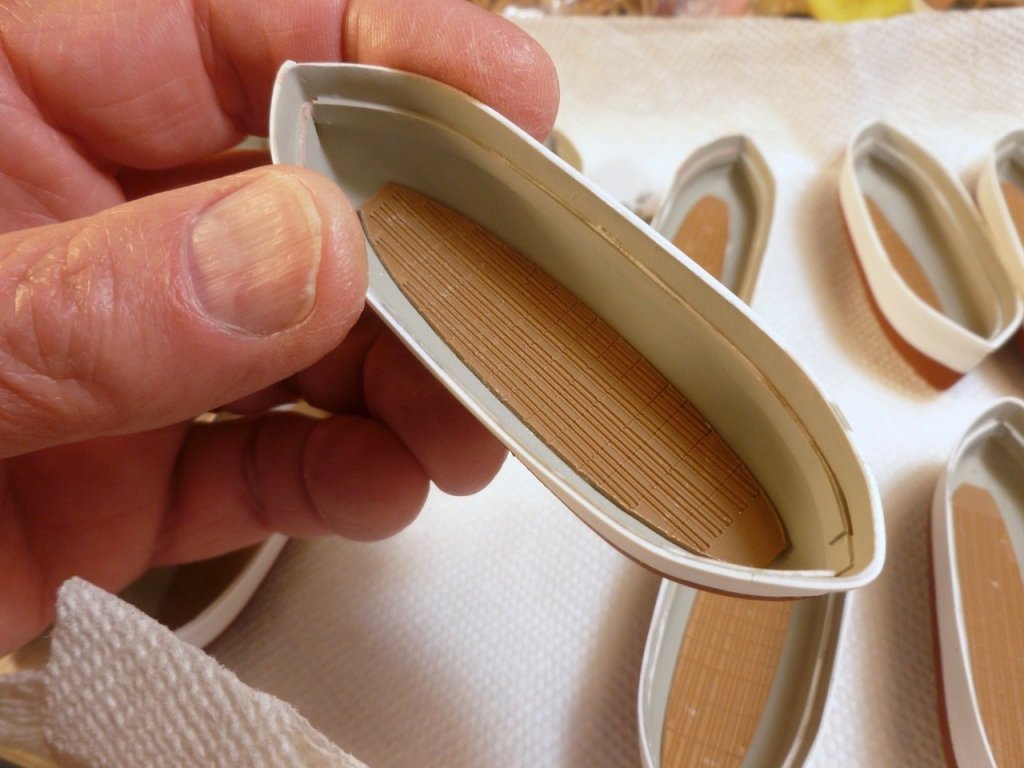
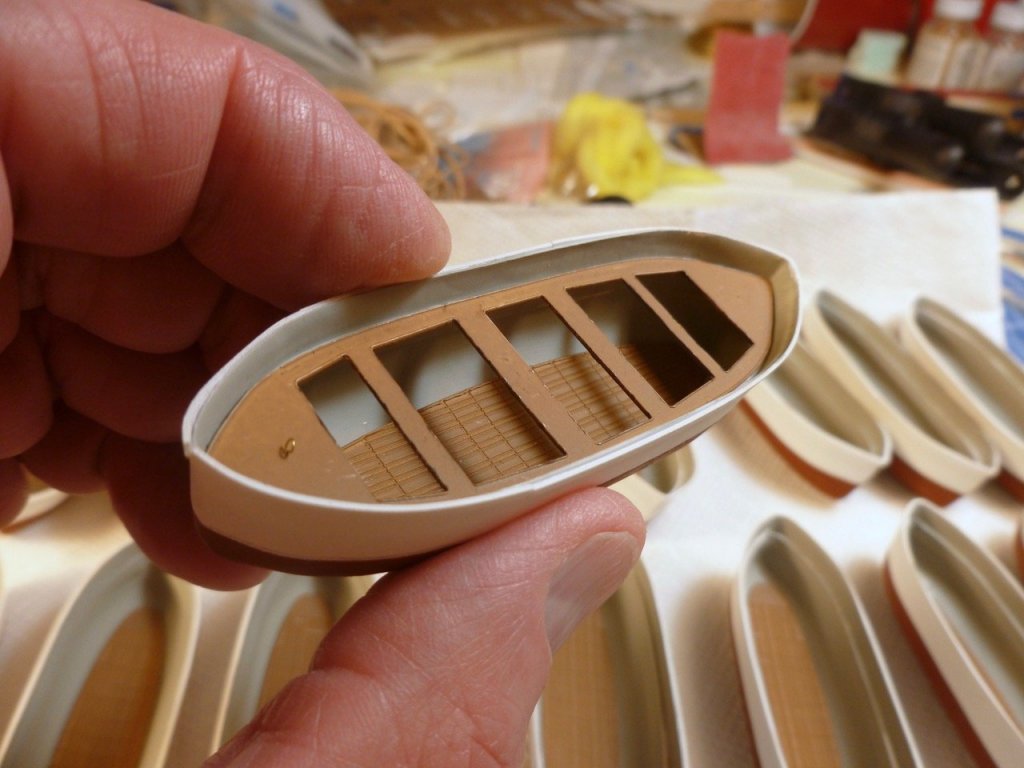
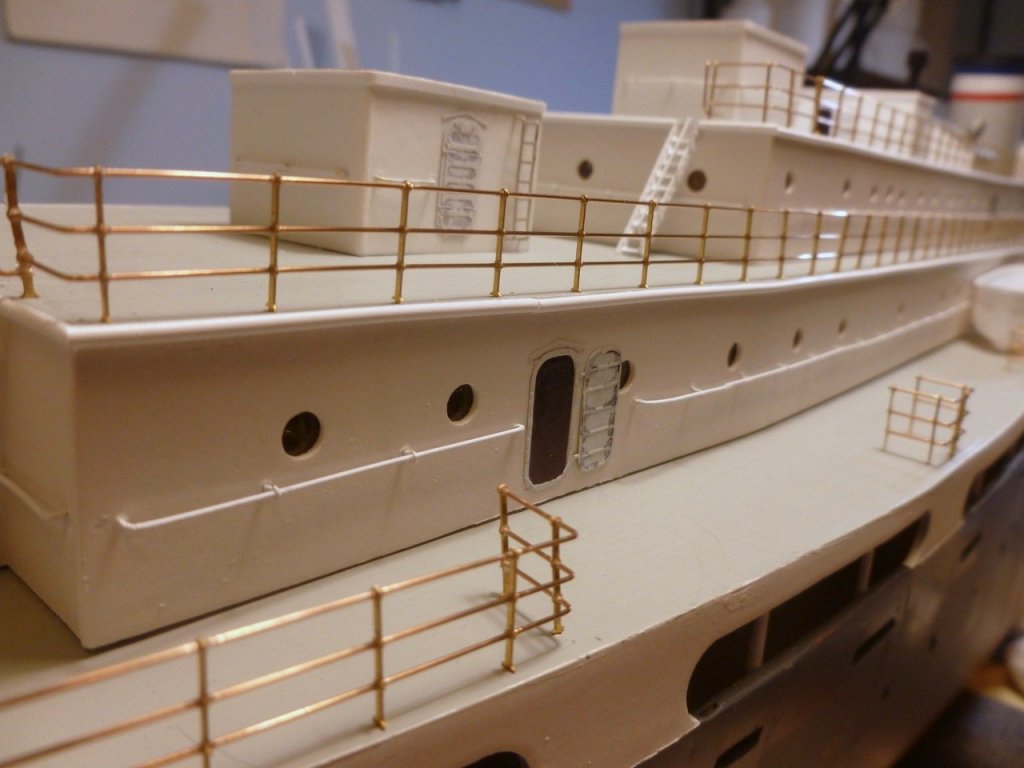
To those who gave likes, thank you and thanks for stopping by. Carl, when I installed the first railing section I used the tweezernose pliers to push the stanchions down, which did a fine job of stripping the stanchion paint. I changed to gentle finger pushing from the top. So no paint loss on almost all the railings but a bunch of touchups needed on the first section. And thanks for your kind comment. The good news/bad news is I have the shipyard to myself while waiting for Legodude to finish the school year so we can have another weekend of skiff construction. Steve Lifeboat Assembly Apart from installing the eyes for the davit hooks the lifeboats are all prepped and the assembly line is set up. I have to make the most of the shipyard while Legodude’s skiff is on hiatus. The footing installation was tricky since the inside of the boat is not flat. I thought I could lay a few medium CA beads down the middle and squash the footing in place but it has just enough stiffness not to work. And the footing is grooved with a tendency to split both longitudinally and transversely. After a few false starts I settled on a thin bead of CA on the underside, right along the edge of the footing, and clamping the footing edge with clothespins, resulting in a good perimeter bond and a flat footing surface. The footing has a molded in simulation of wood planks. A test fit of the thwart. The thwart (thwarts?) has (have?) a slightly different end profile relative to the boat but a few sandpaper swipes at each end takes the curse away. The 1/8” cargo blocks are painted and ready for davit rigging.

- 446 replies
-
- 9
-
-
- zebulon b vance
- deans marine
- (and 3 more)
-
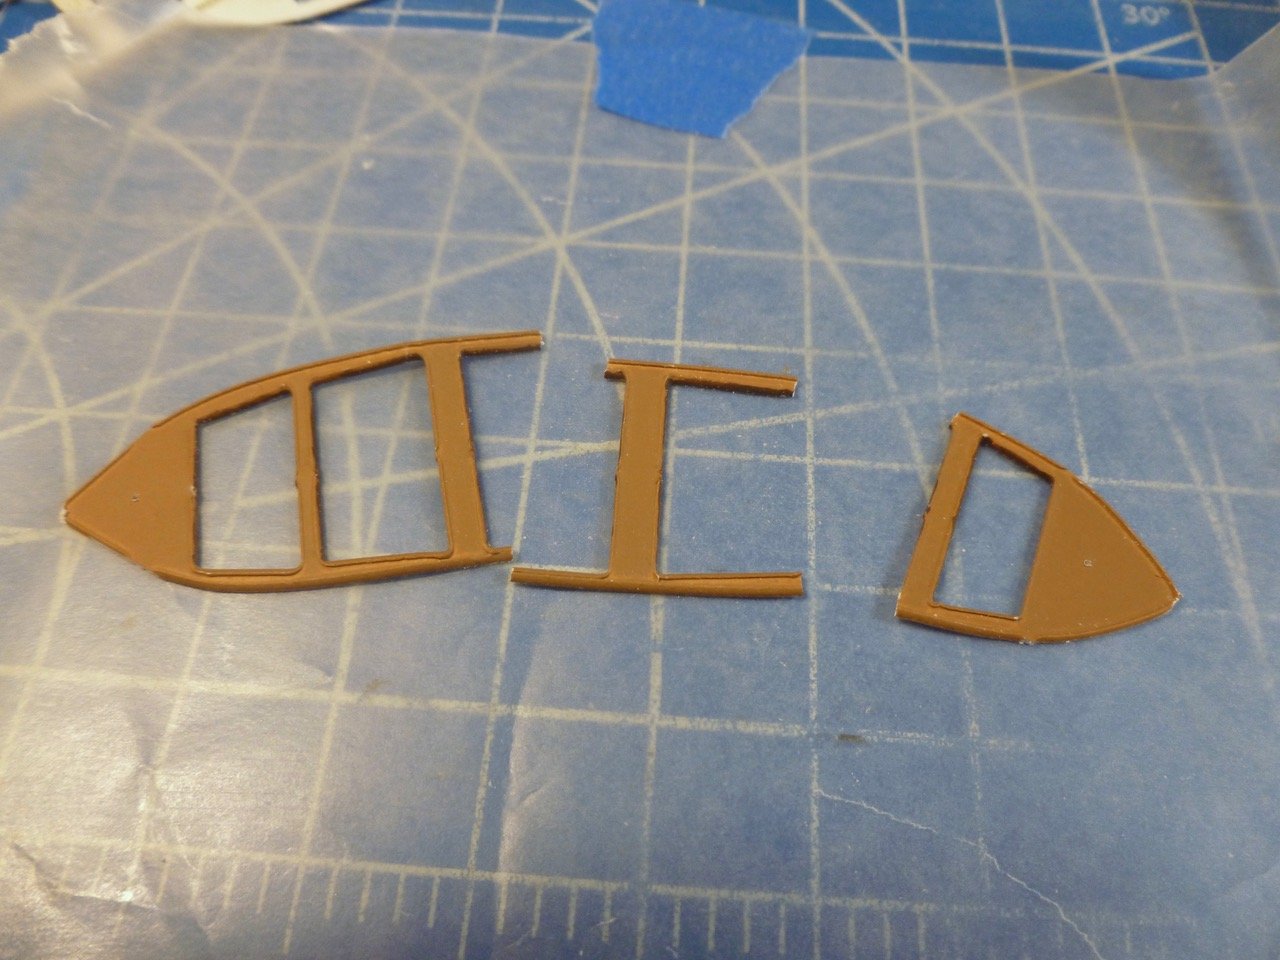
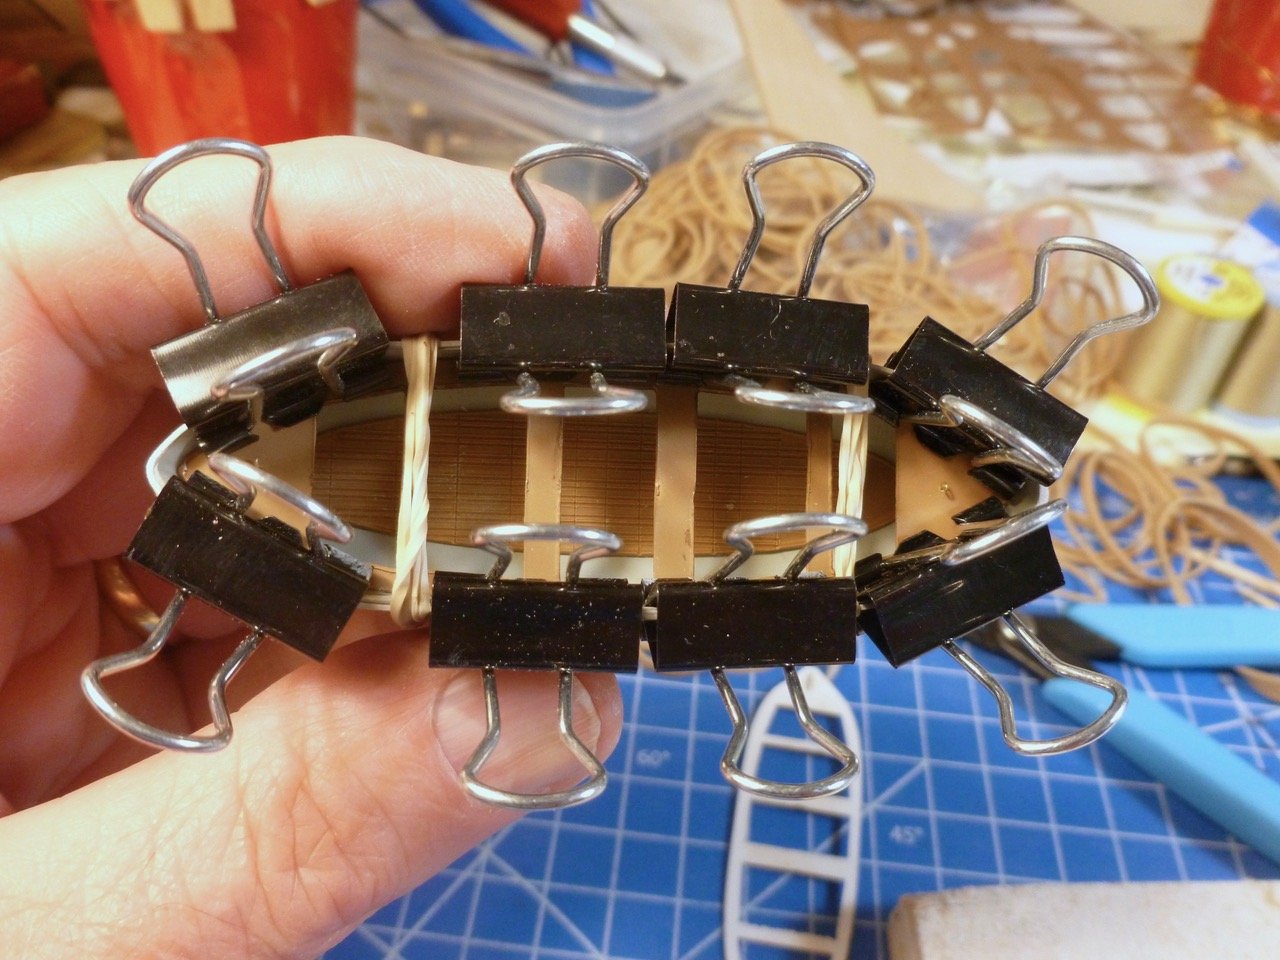
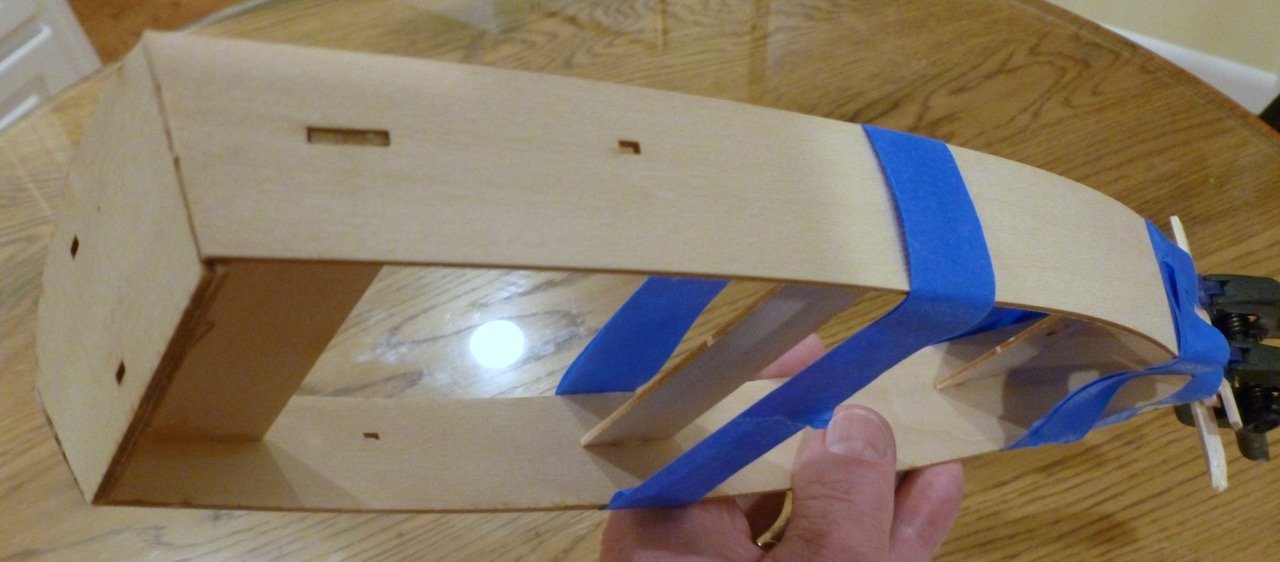
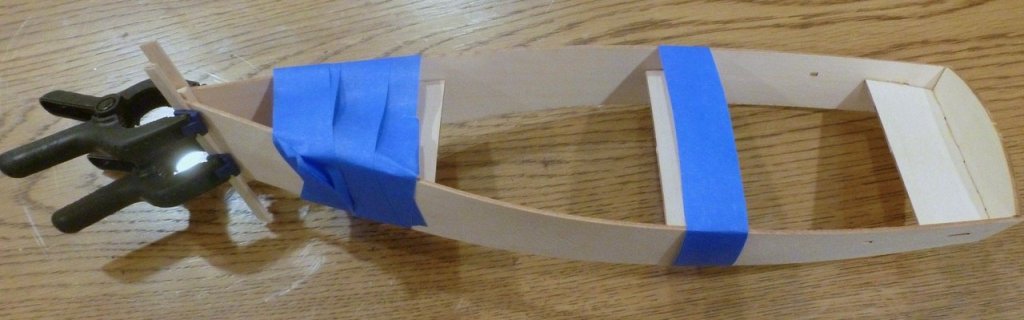
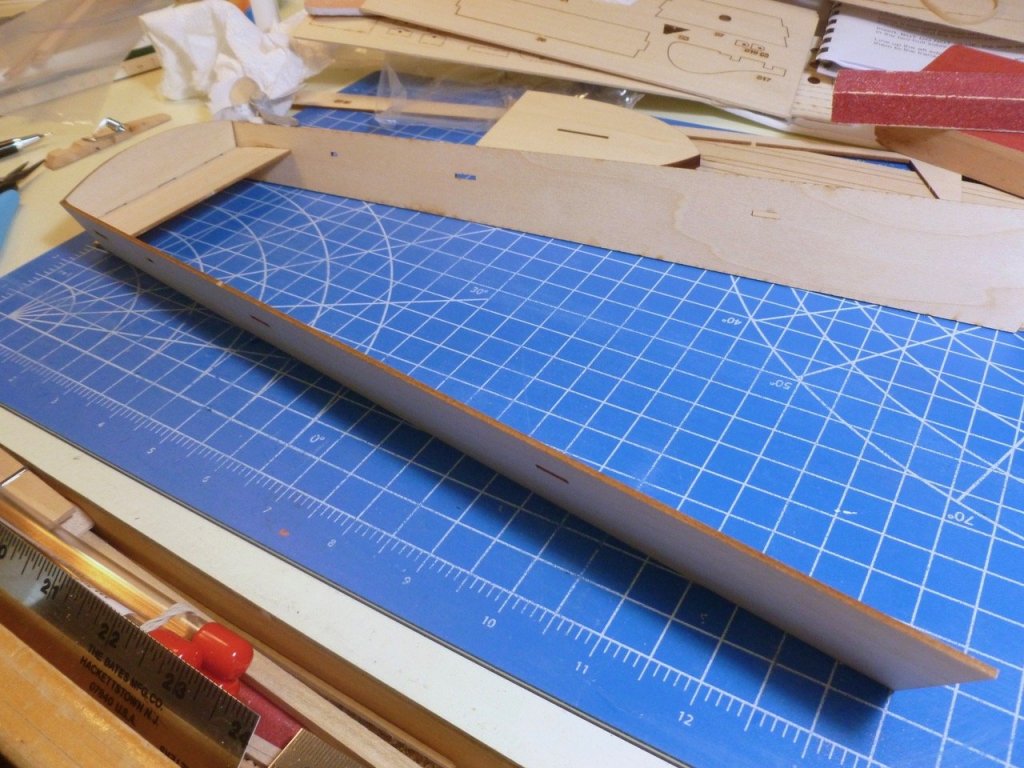
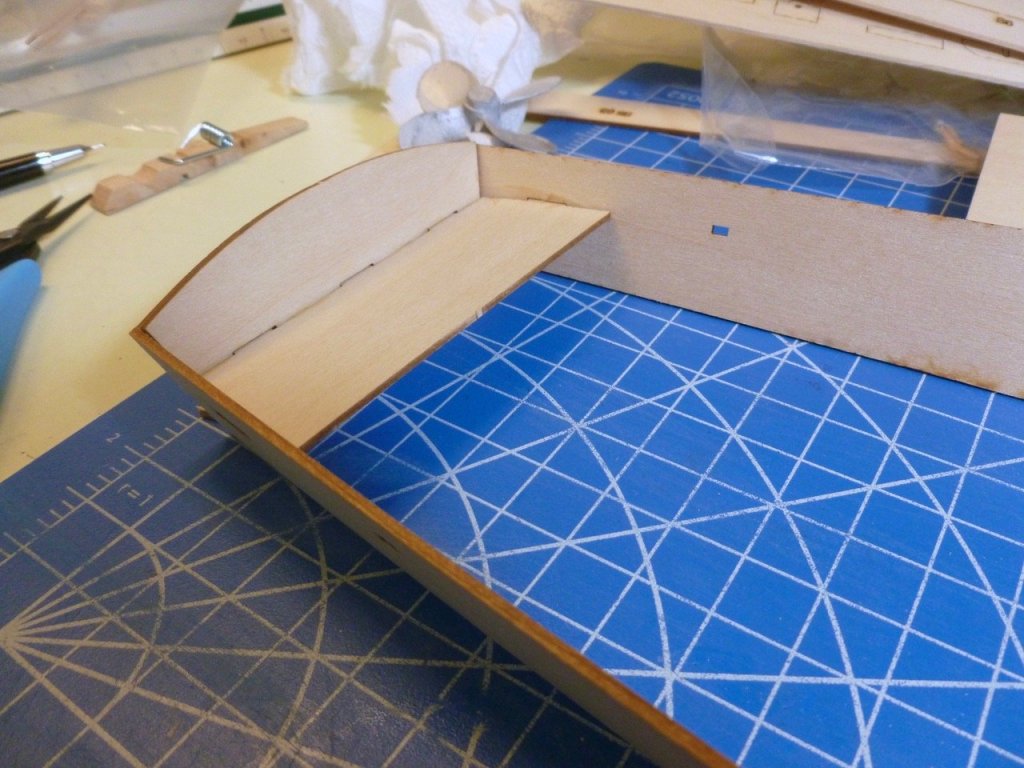
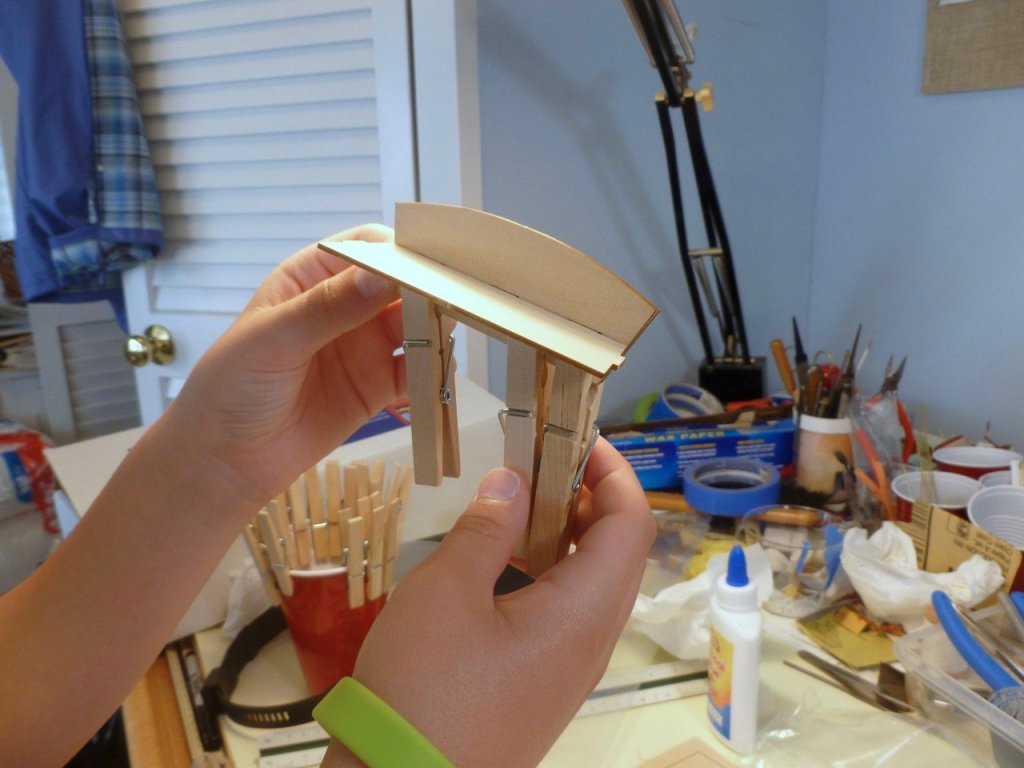
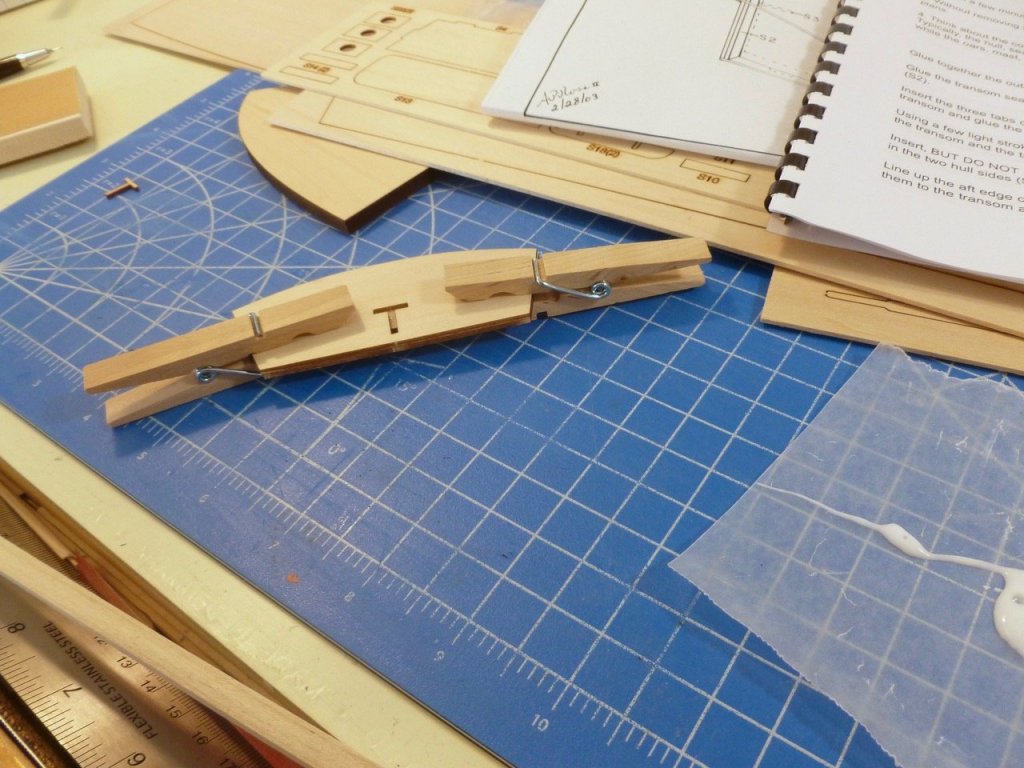
Legodude had to return home but we took some pictures of his progress before grandfather gave him a lift. He asked that I say thank you to everyone who gave likes and more encouragement. Lou, your wish is our command (again). And a thank you to Mr. Bluejacket for your kind offer. Legodude is already talking about a next build. First step was to glue the inner and outer transoms together. Grandfather thought it would be a good idea to clamp with two clothespins but the pressure in the middle caused the edges to flare out, so Legodude got his first experience with Titebond yellow glue, toothpicks and multiple clothespins, after which the transom seat was installed. Next up was the two sides. Legodude had his first opportunity to use an X-acto chisel blade to nip the laser tabs off the carrier sheet. When we tried dry bending the sides for test fit, one side popped off at the transom, which led to a new opportunity with The Kra-Gl (medium CA - see The Lego Movie), plus some Titebond strengthening between the underside of the transom seat, the transom and the sides. Legodude also learned to sand off the laser char before gluing. While Legodude is at home grandfather soaked each side in a pan of boiling water for a few minutes for easier bending, and clamped them in place so they are formed and ready for gluing at the next visit.

- 18 replies
-
- 9
-
-
- skiff
- BlueJacket Shipcrafters
- (and 1 more)
-
From Legodude, thanks to everybody who gave me encouragement. I'm surprised where everybody is from. It's a great experience. I'll write you back soon. From Legodude to cog, thank you for keeping an eye on my grandfather and I hope you have a great rest of your life building model ships.
- 18 replies
-
- 2
-
-
- skiff
- BlueJacket Shipcrafters
- (and 1 more)
-
A little bit of parallel build logging underway. See Skiff by Legodude with ESF, introduced today. I'll do my best to keep up with both.
- 446 replies
-
- 3
-
-
- zebulon b vance
- deans marine
- (and 3 more)
-
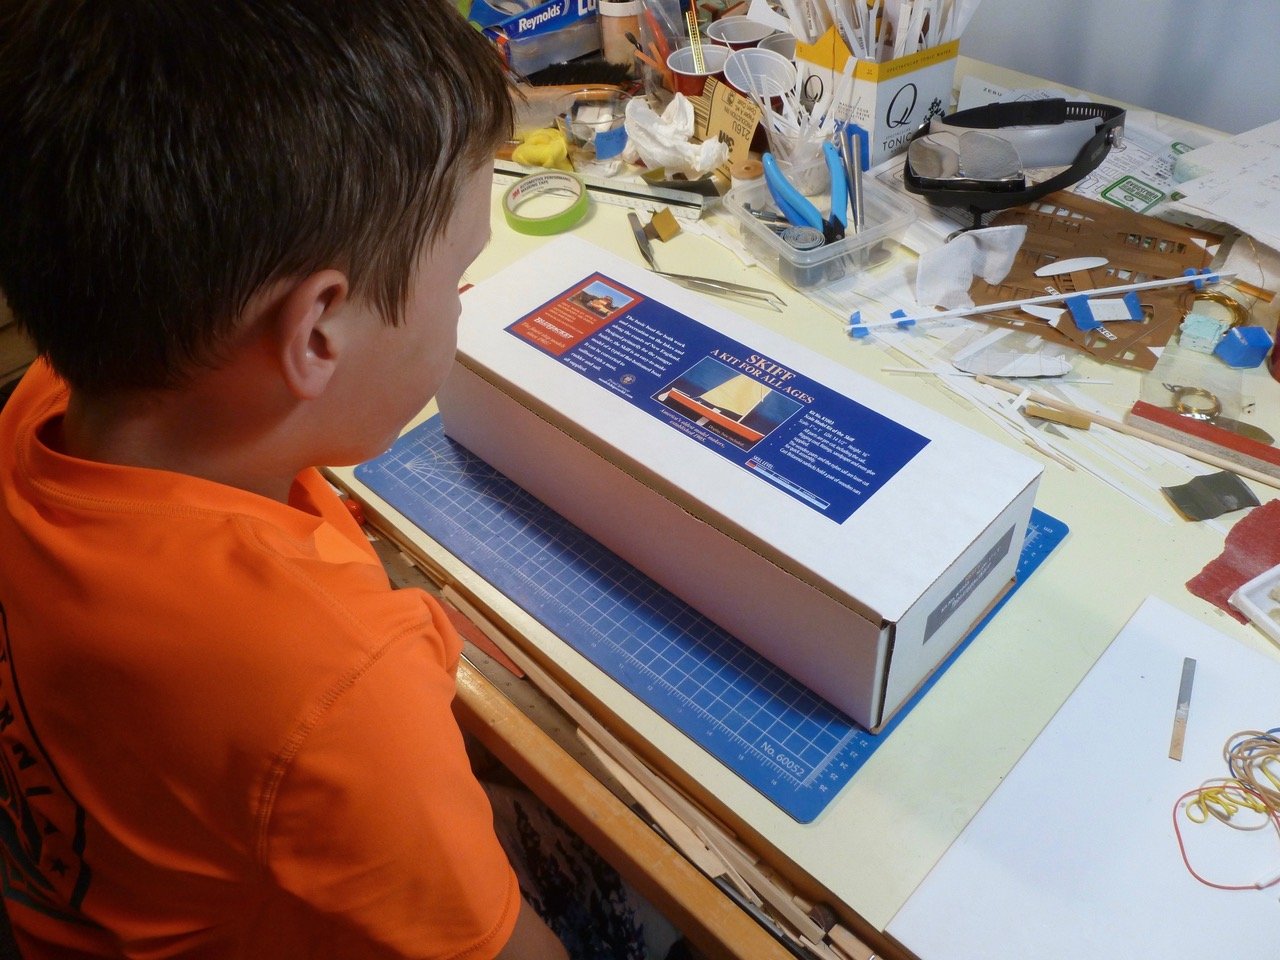
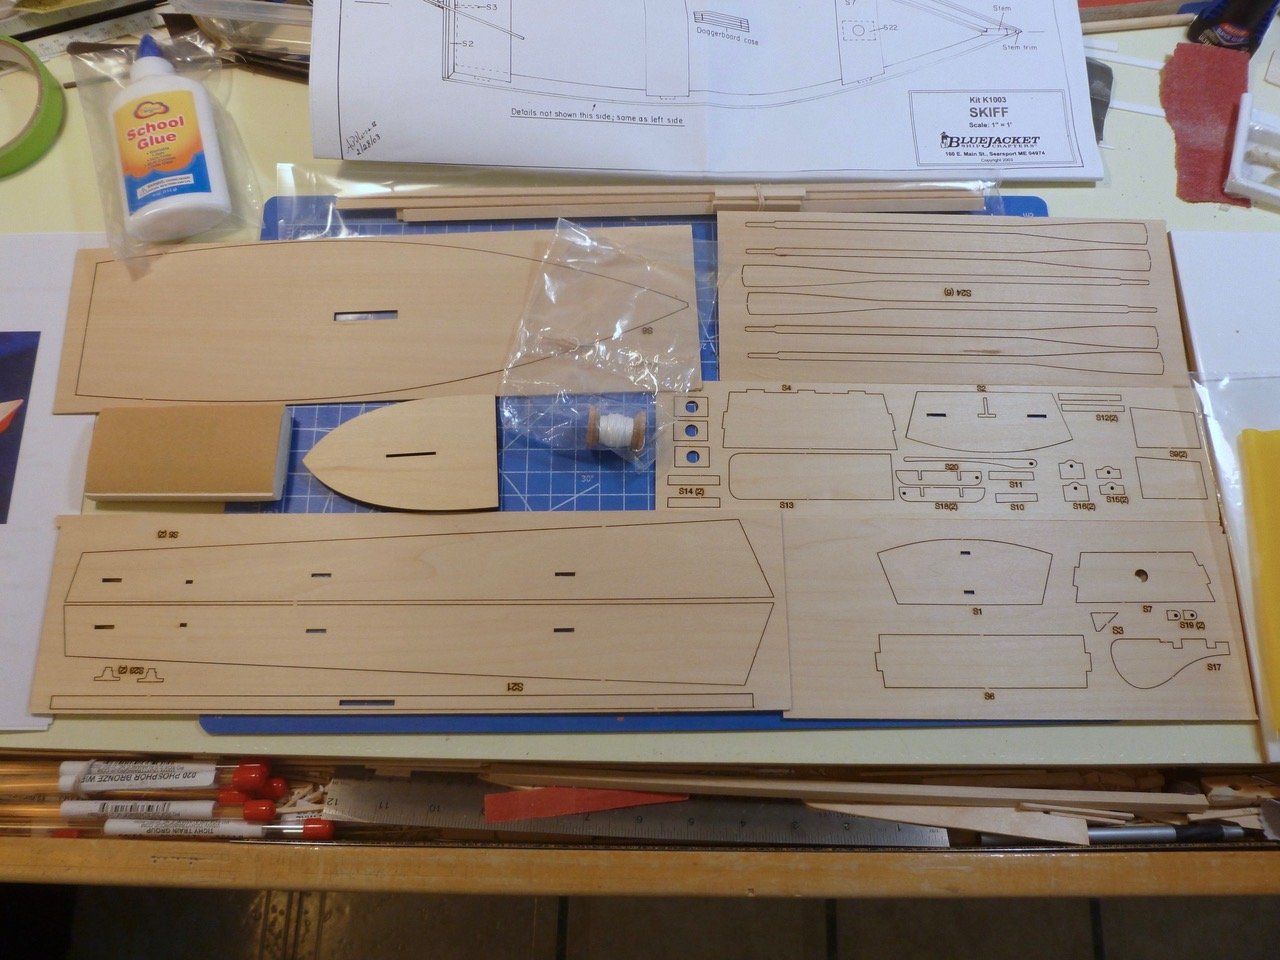
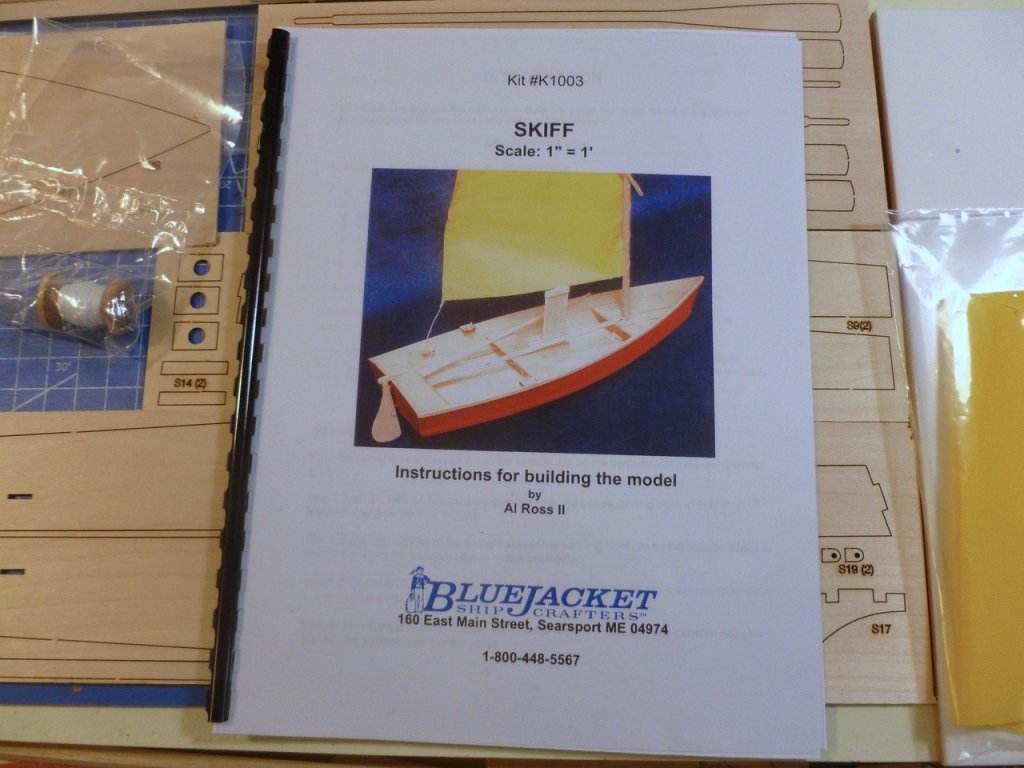
The kit arrived in very short order a few weeks ago, well-packaged in a sturdy box. The reveal to the builder has been anxiously awaited and was greeted with much enthusiasm. But it is a hot day today, especially after a morning's worth of first grader lacrosse, and the pool around the corner beckoned, which stymied initial progress. Contents include a well drawn full size plan, elevation and assorted details, a pre-cut and pre-punched sail, a laser package with wood of a good thickness to ensure it holds up under less-experienced fingers, a mast, strips for chines and gunwales, a sanding block with coarse and fine grits, rigging thread, a pre-slotted and shaped base and even a bottle of non-toxic white glue.


- 18 replies
-
- 10
-
-
- skiff
- BlueJacket Shipcrafters
- (and 1 more)
-
While showing my grandson the Zebulon B. Vance progress I gave him my magnifiers and let him trim a PE stanchion. Since he's a first rate Lego constructor he did an admirable job of trimming, but finished with a question about whether anyone makes a kit with bigger pieces for beginners. I jumped onto Bluejacket's web page after he left and found the perfect answer, the Skiff wooden kit. Big, with not too many pieces to help ensure a timely and successful finish. When I revealed it to him he said a great idea would be for us to have a blog(!) to see if anyone is interested and to see where and how far away the other shipbuilders live. So this will be an on again, off again build dependent upon how often we can steal him from Mom and Dad for an overnight visit. The goal is to have Legodude (his choice) do the building with guidance limited to explaining the instructions and how to read a drawing.
- 18 replies
-
- 4
-
-
- skiff
- BlueJacket Shipcrafters
- (and 1 more)
-
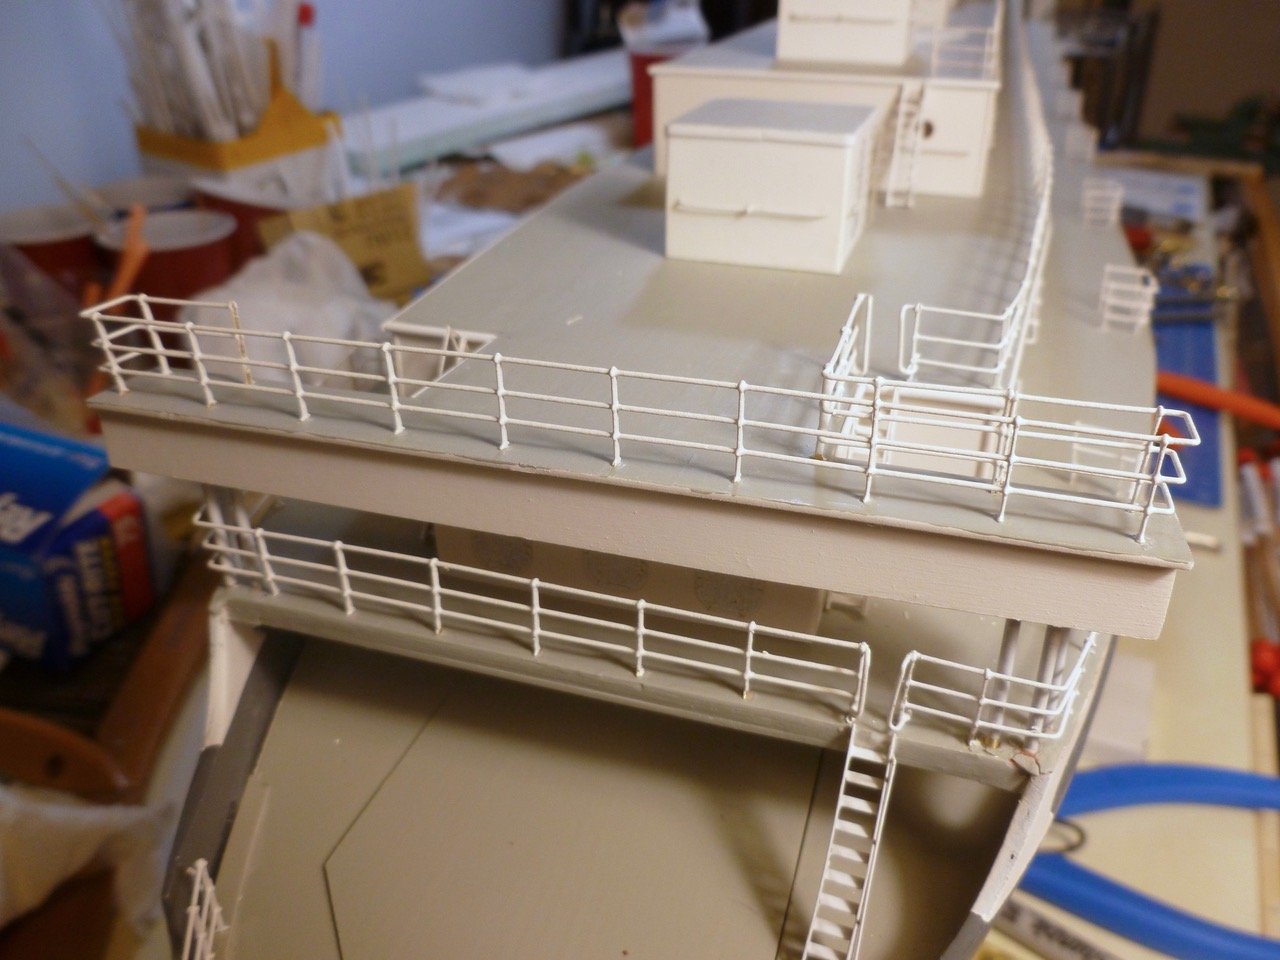
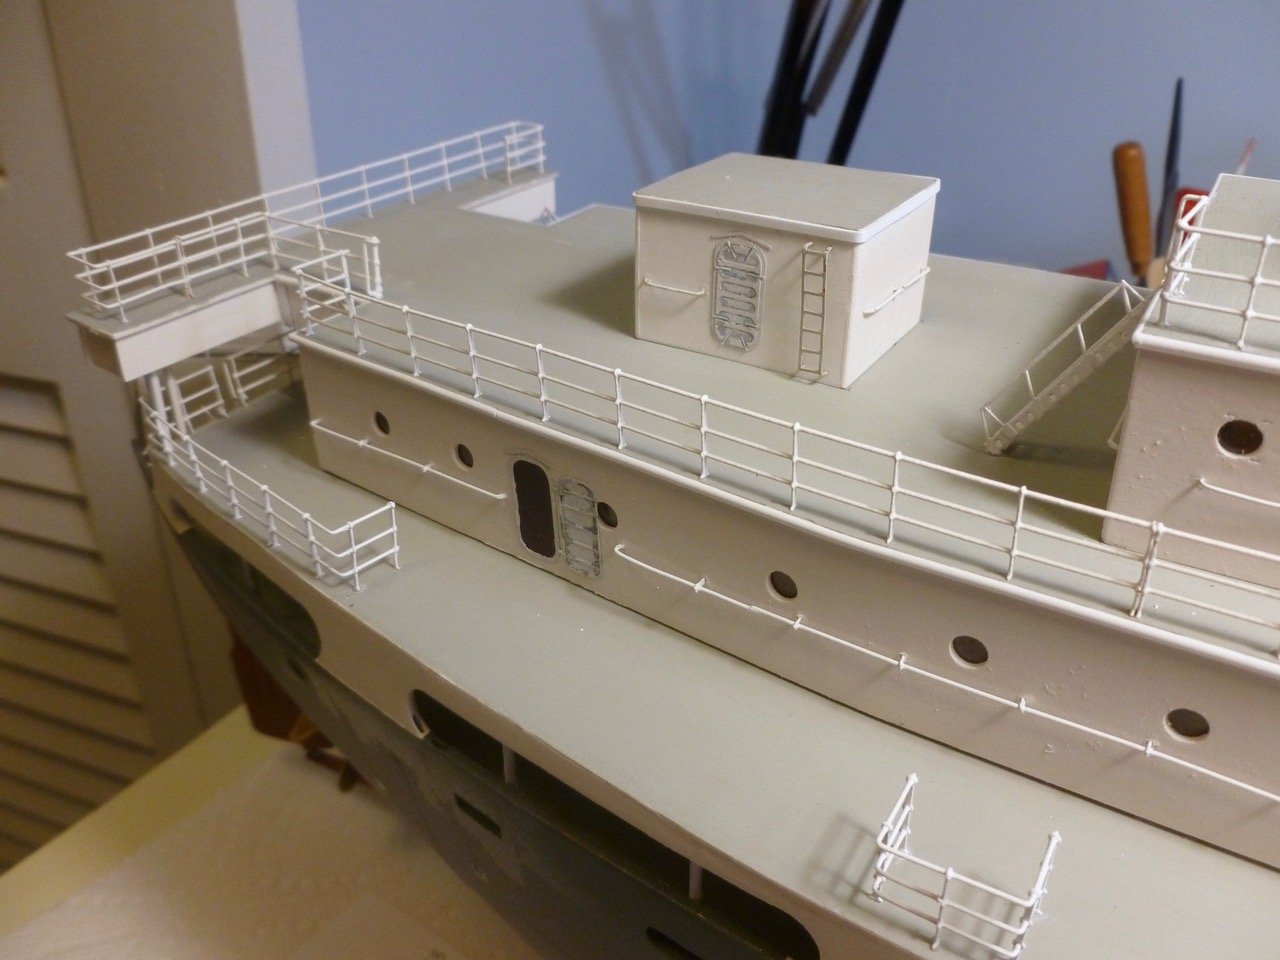
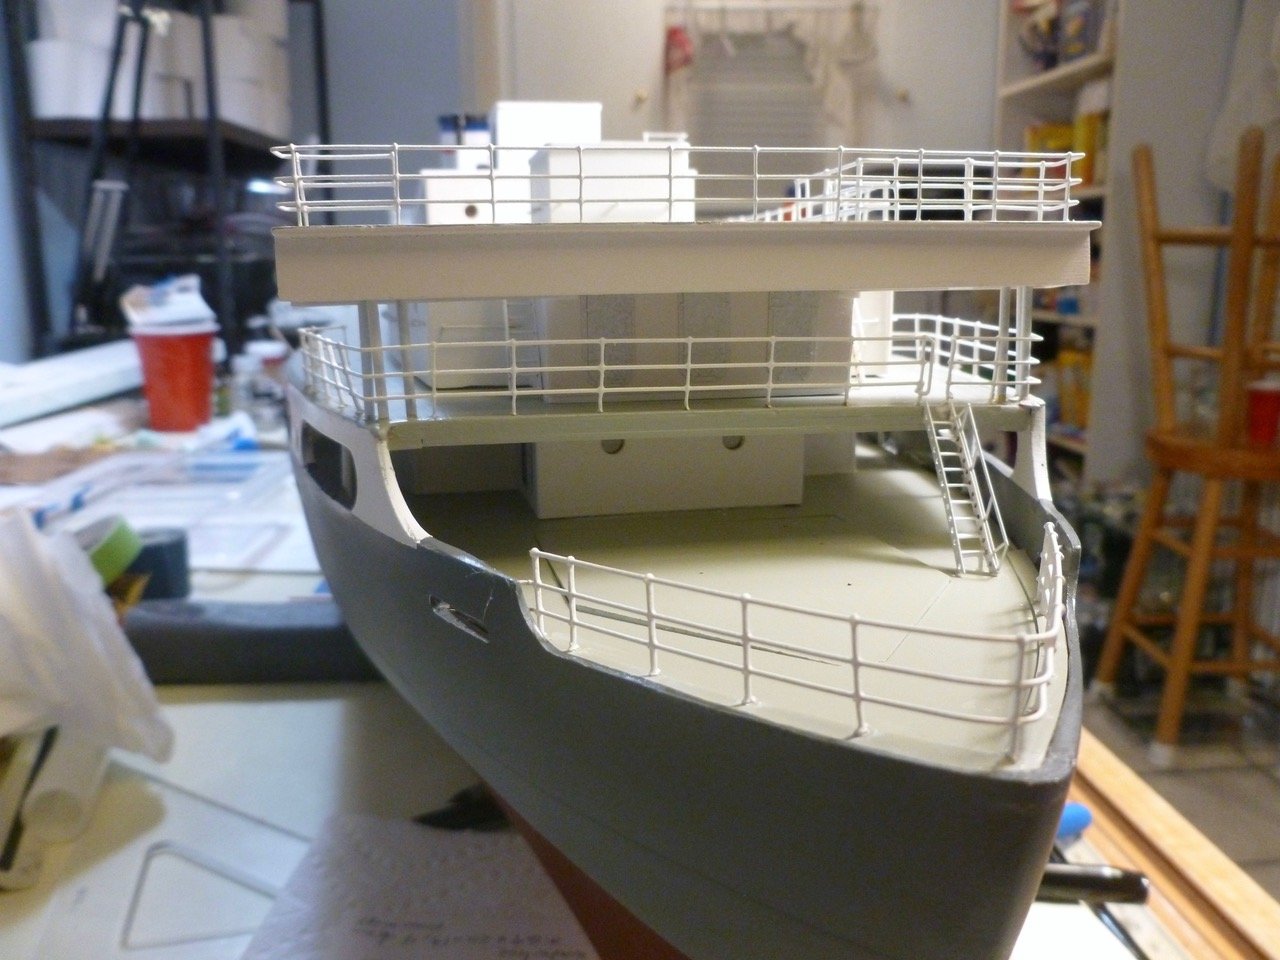
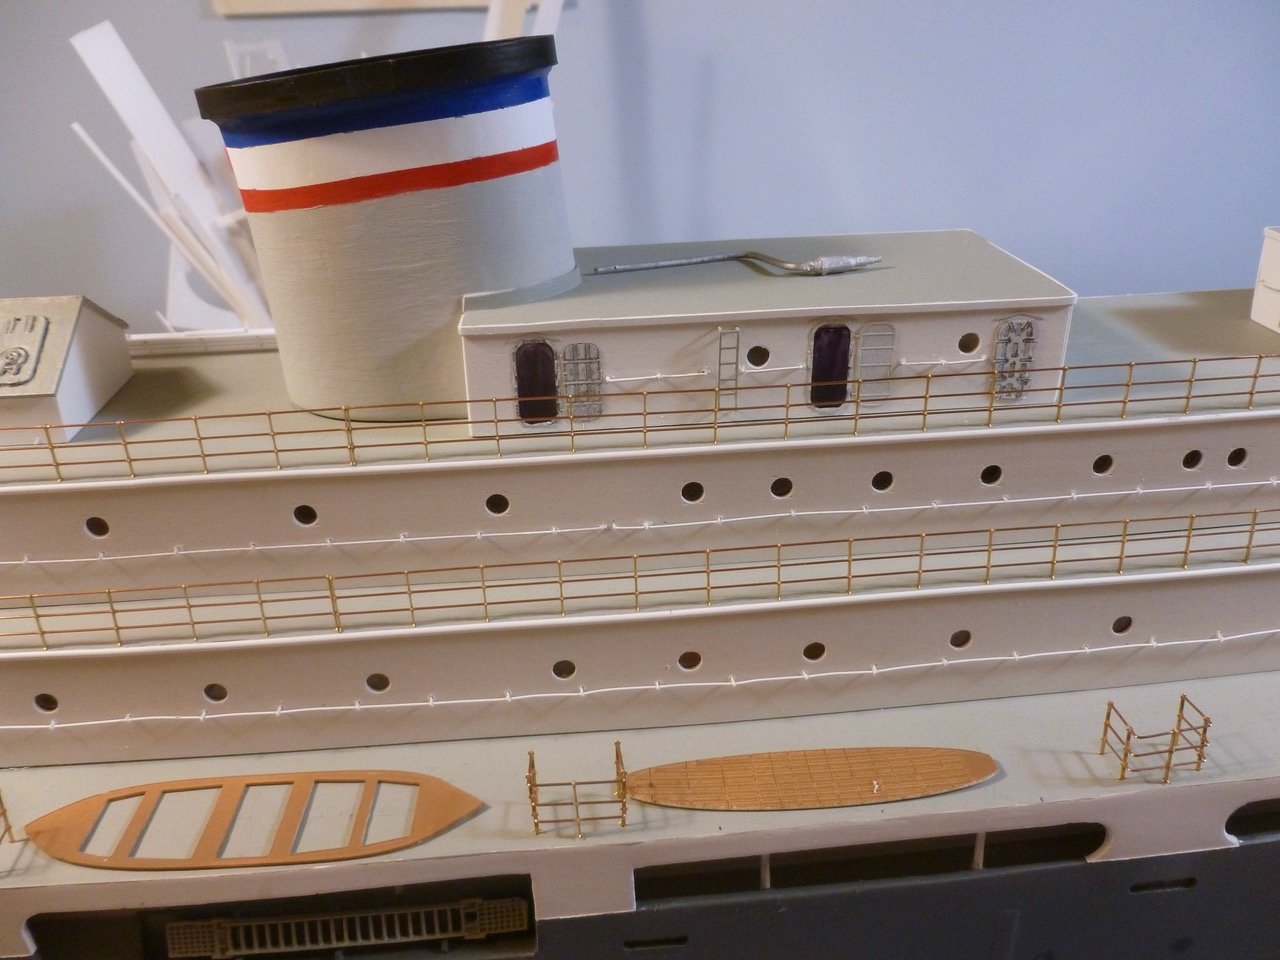
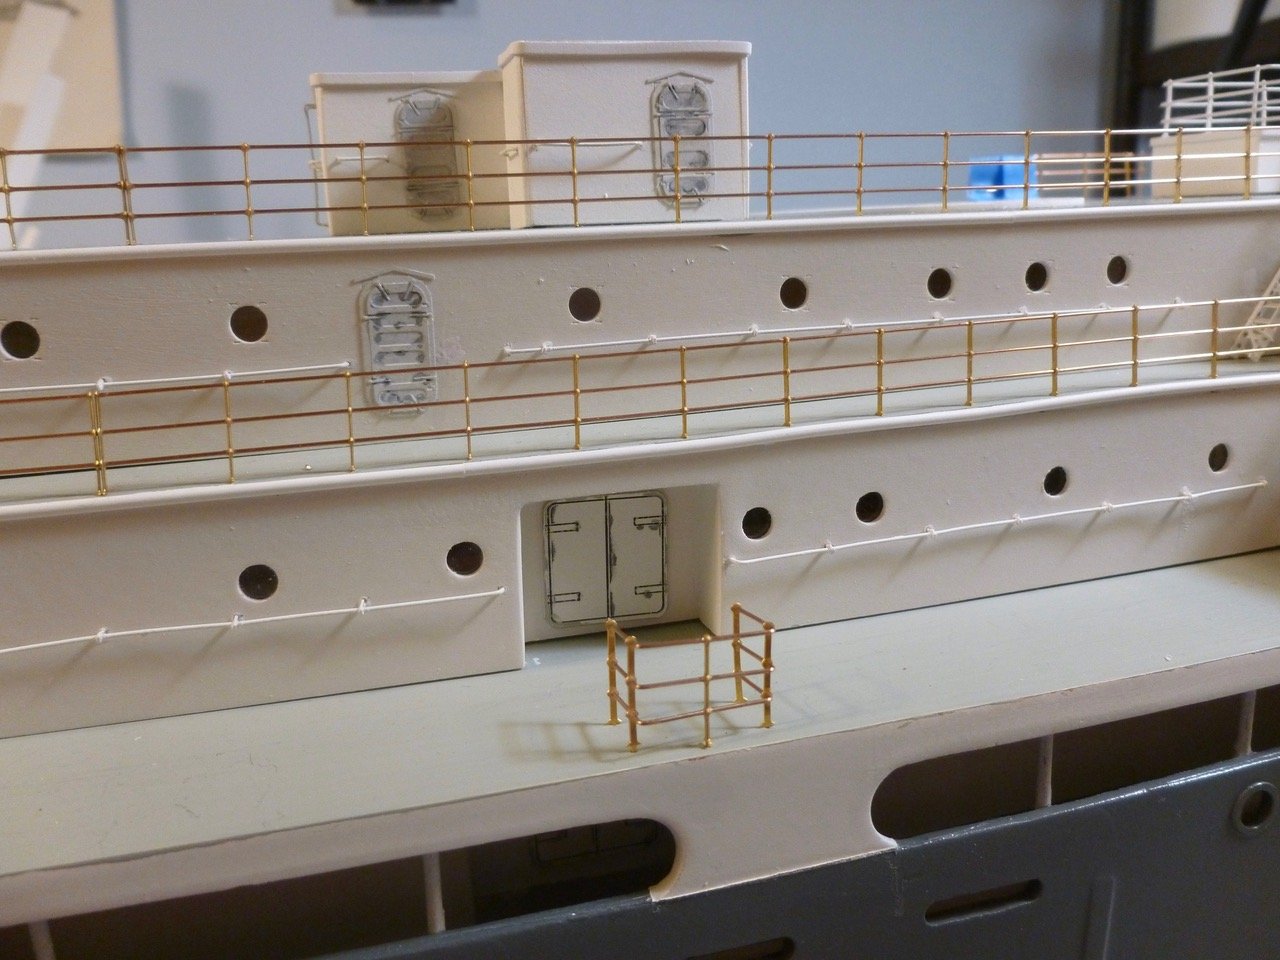
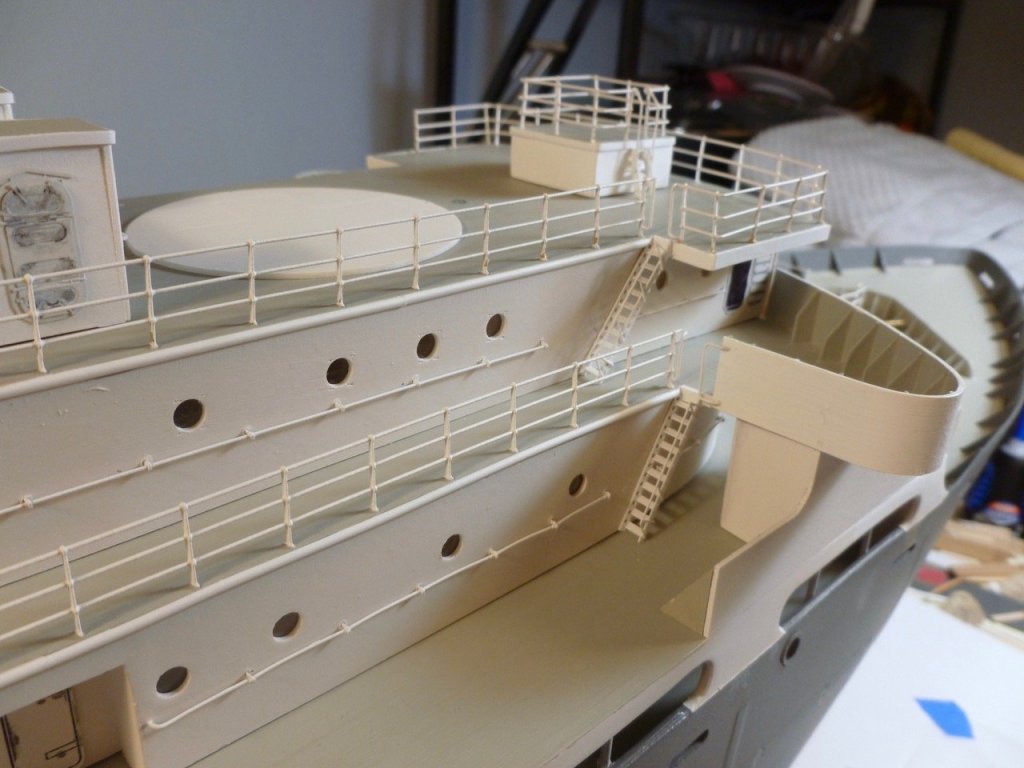
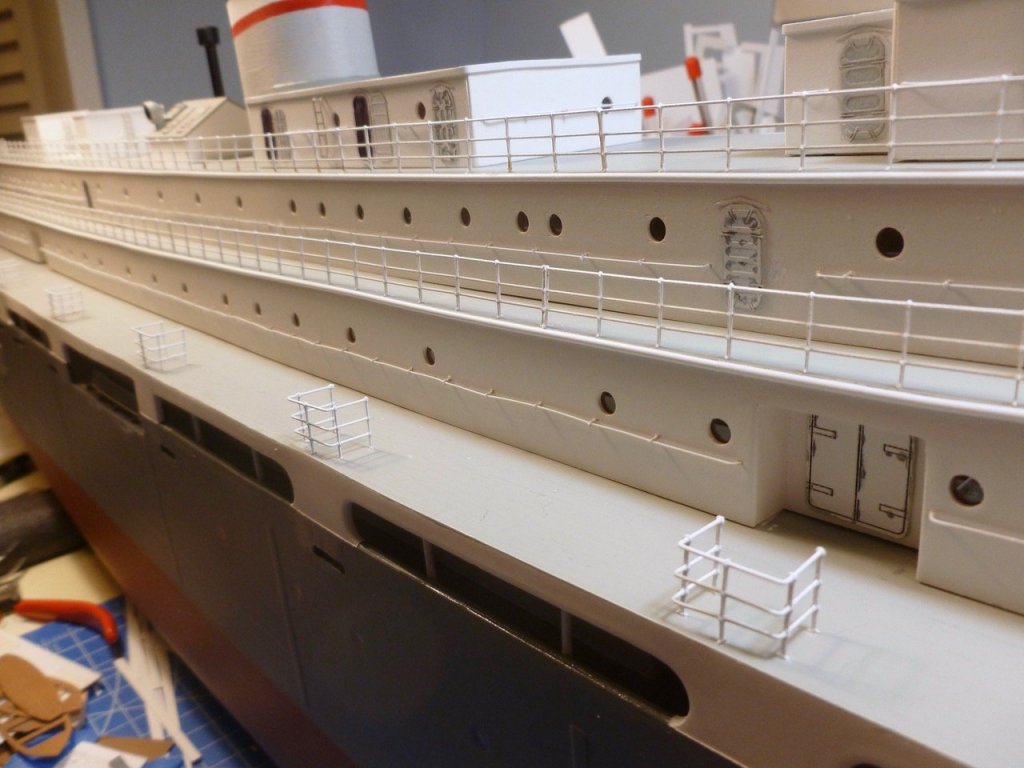
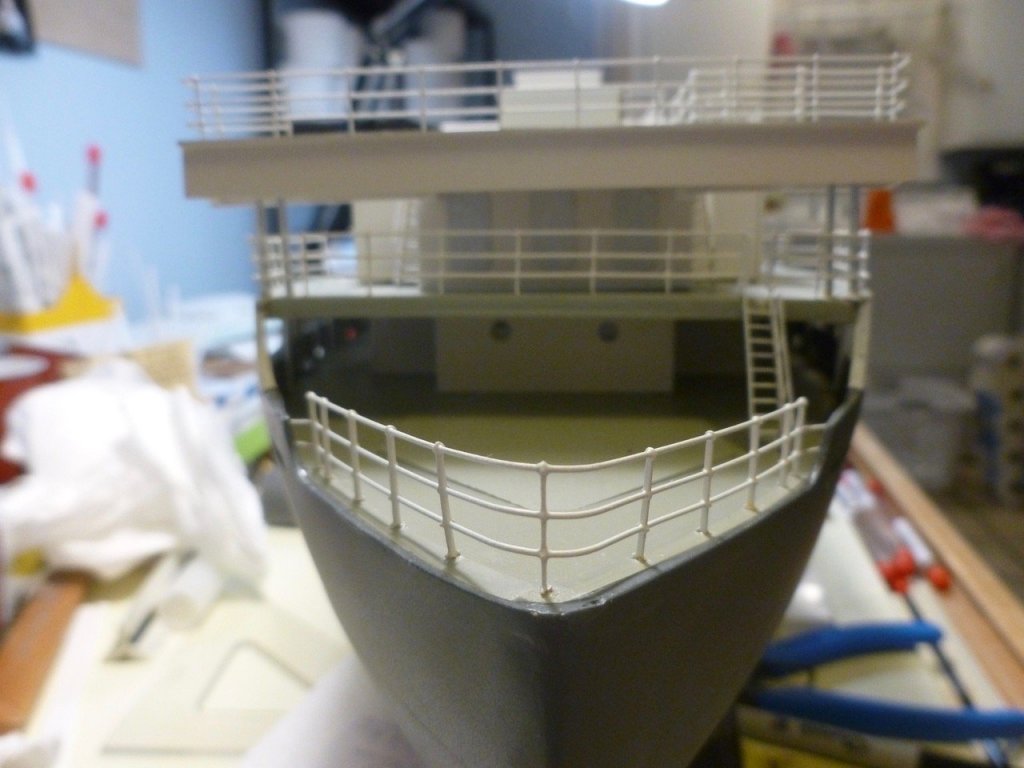
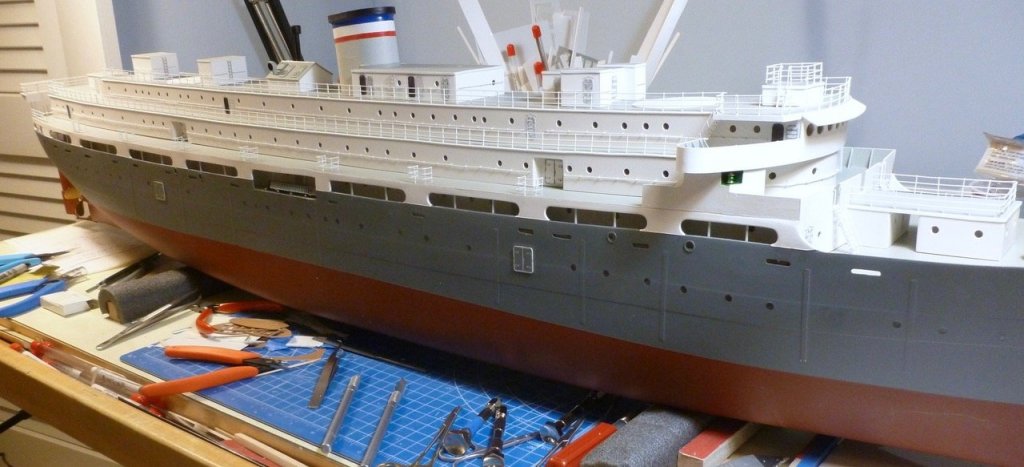
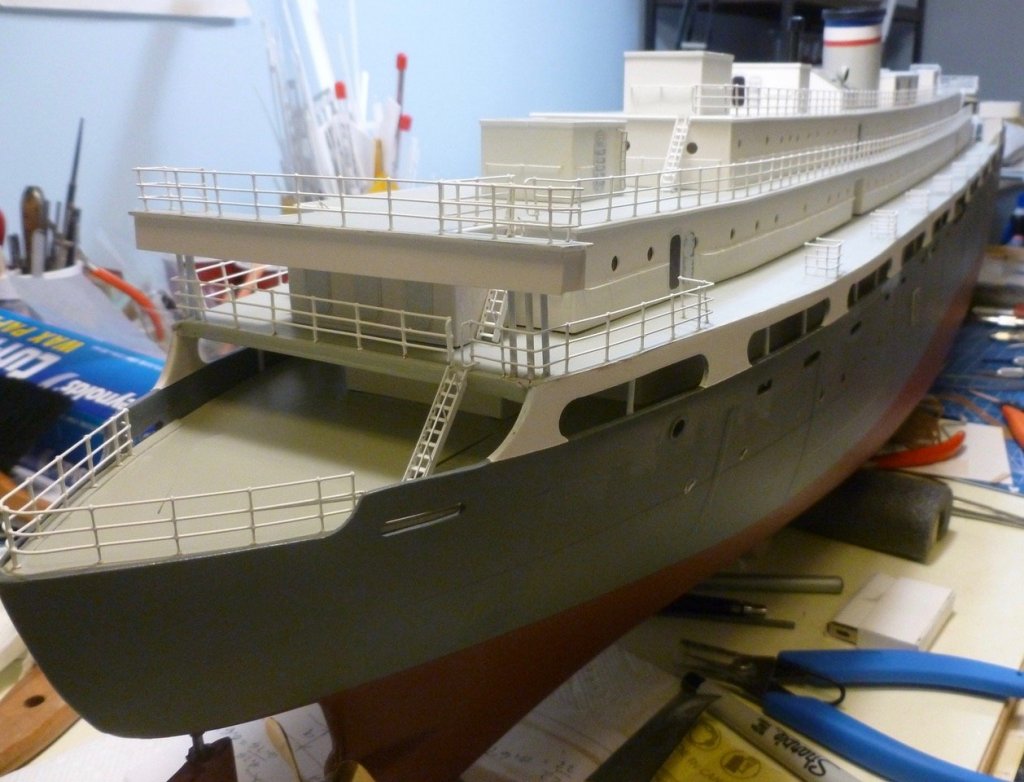
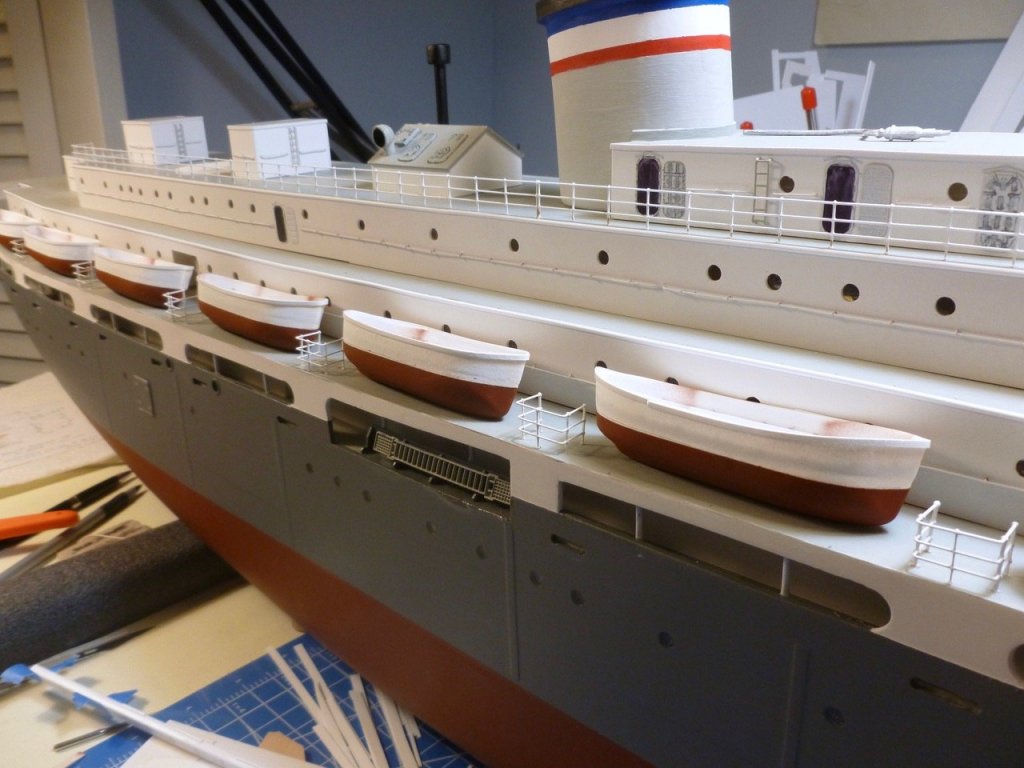
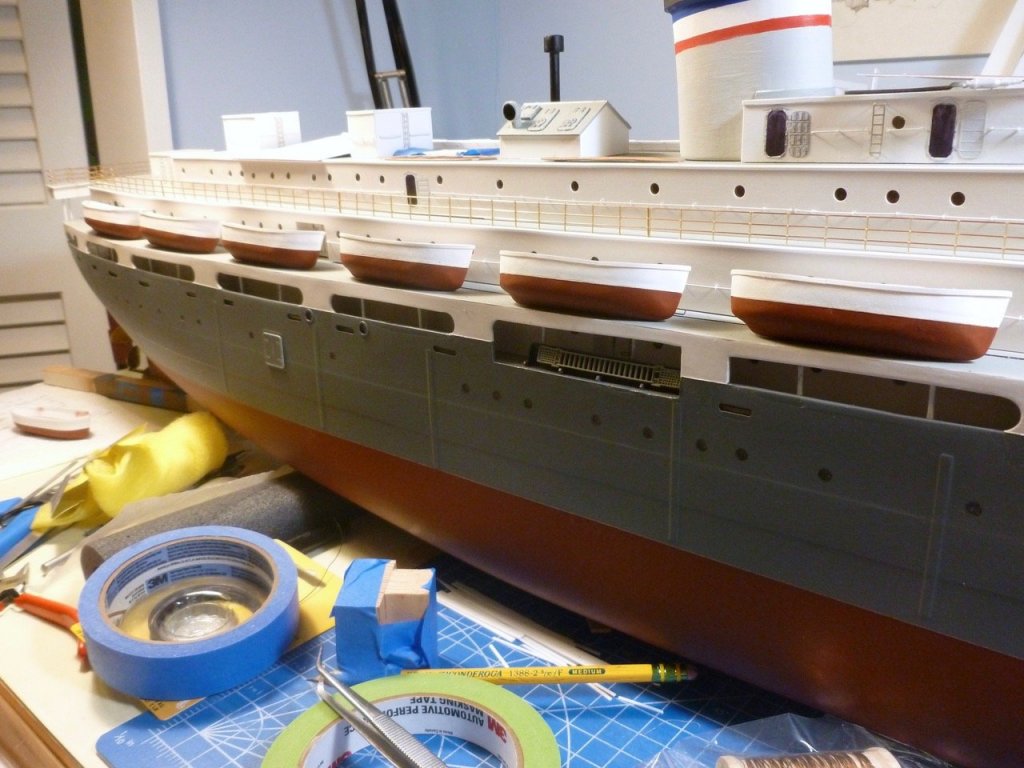
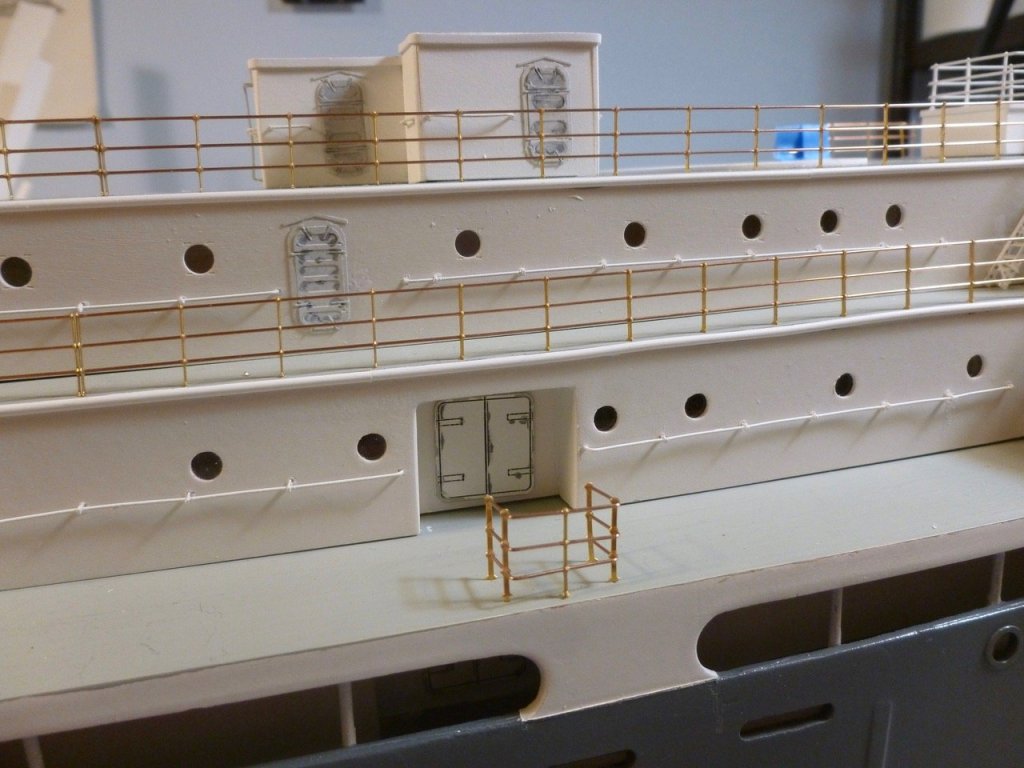
To those who gave likes, thank you and thanks for stopping by. Bill and Ben, thanks for your feedback. Bows forward, probably with rudder/tillers laying on the thwarts. Carl, your wish is my command. Denis, thanks for your kind comments. Steve A milestone day Tonight marks the completion of all forward, aft and starboard railings, except for paint touchups and some final alignment tweaks. Thanks to everyone who offered guidance, feedback, and encouragement. Celebratory photos follow. Next up are starboard davits and boats. I should probably do the railing touchups first.


- 446 replies
-
- 14
-
-
- zebulon b vance
- deans marine
- (and 3 more)
-
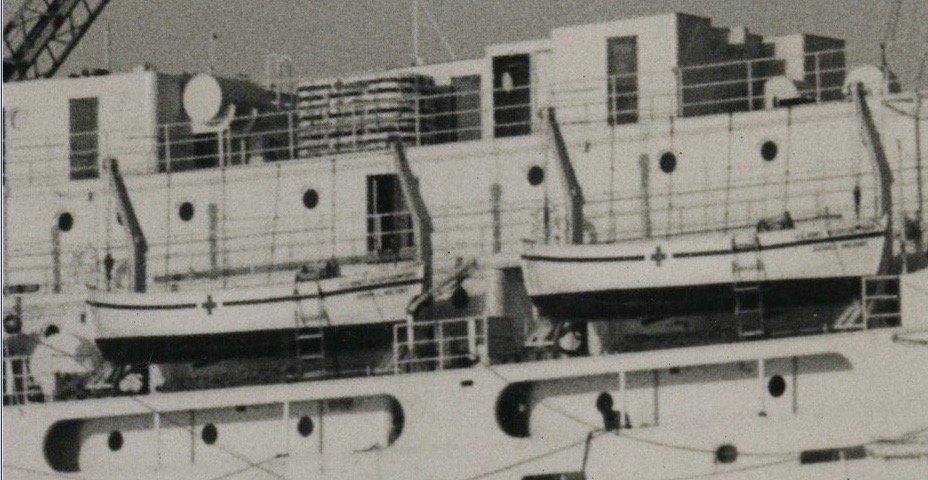
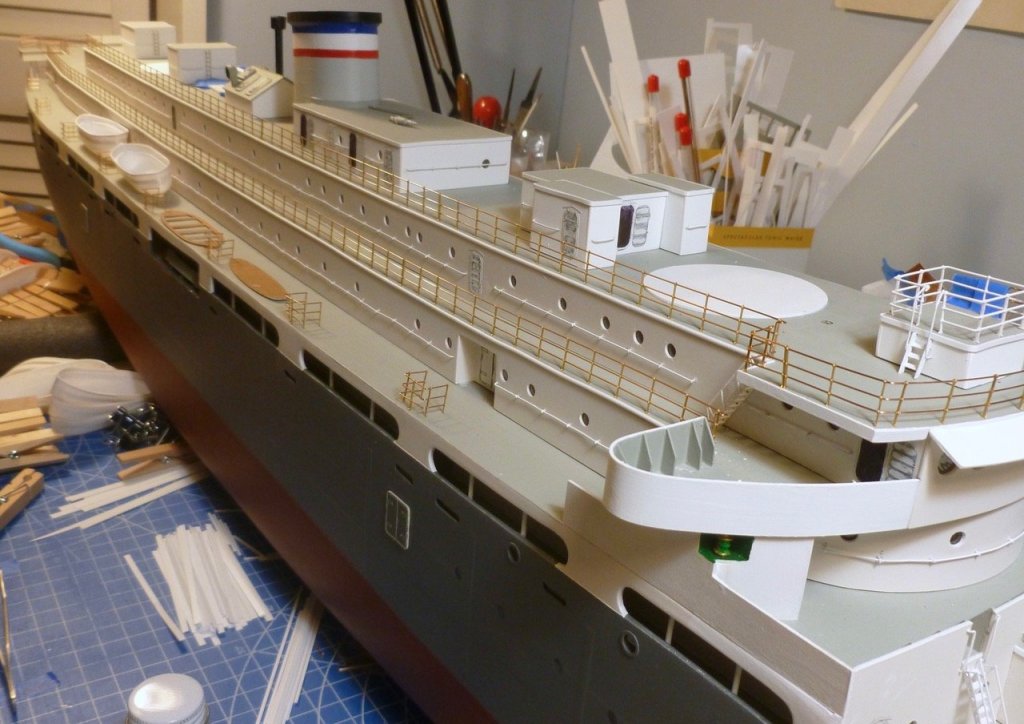
To those who gave likes, thank you and thanks for stopping by. Carl, thanks for your insight. I cleaned the minimal flash off the cargo blocks and one side now has a coat of flat light gray paint - same color as decks. Kevin, thanks for your kind comment. The next construction will be much smaller I assure you. Bill, thanks for your feedback. I had the gray coat on the cargo blocks before I read your message. Below, courtesy of the National Archives, is a pic of the davit rigging from the Vance in her John J. Meany guise (they changed the name to Meany during her hospital duty, than back to Vance for war bride transport). I think my current configuration will give a reasonable representation of the rigging. Steve Since it is a Sunday afternoon and I just finished the permanent installation of the first batch of railings (top deck starboard, boat deck starboard) I thought I’d share some progress pics, tarted up with incomplete lifeboats for effect. It brings up a question - are lifeboats stored bow forward or aft? I'm guessing bow forward from the photo above, assuming the name was on the bow. And would the rudder/tiller be stored in the boat or in place (shipped?)? There's a fragile PE piece I'd just as soon leave in the boat if that would be acceptable protocol.


- 446 replies
-
- 15
-
-
- zebulon b vance
- deans marine
- (and 3 more)
-
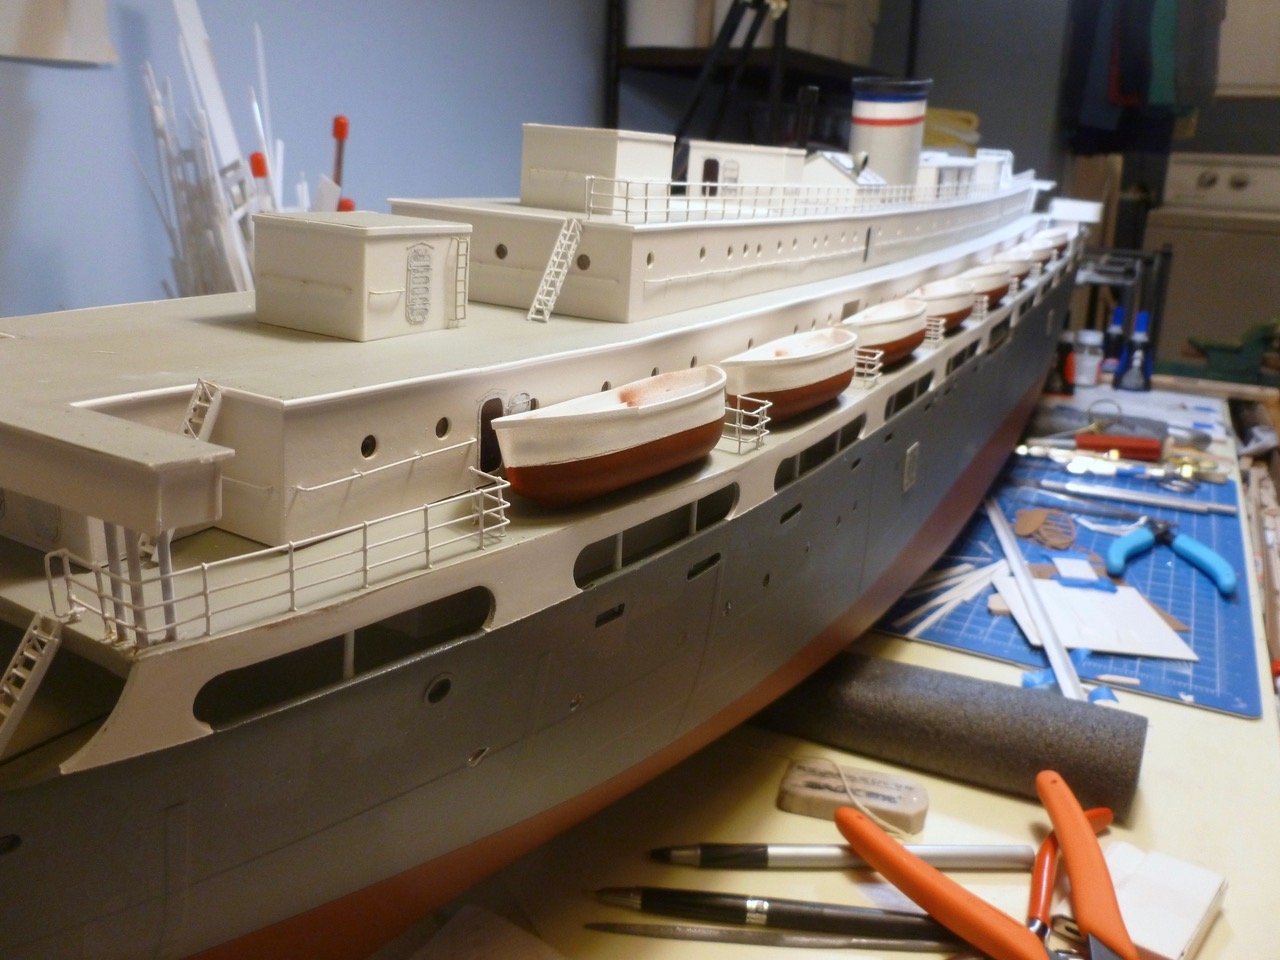
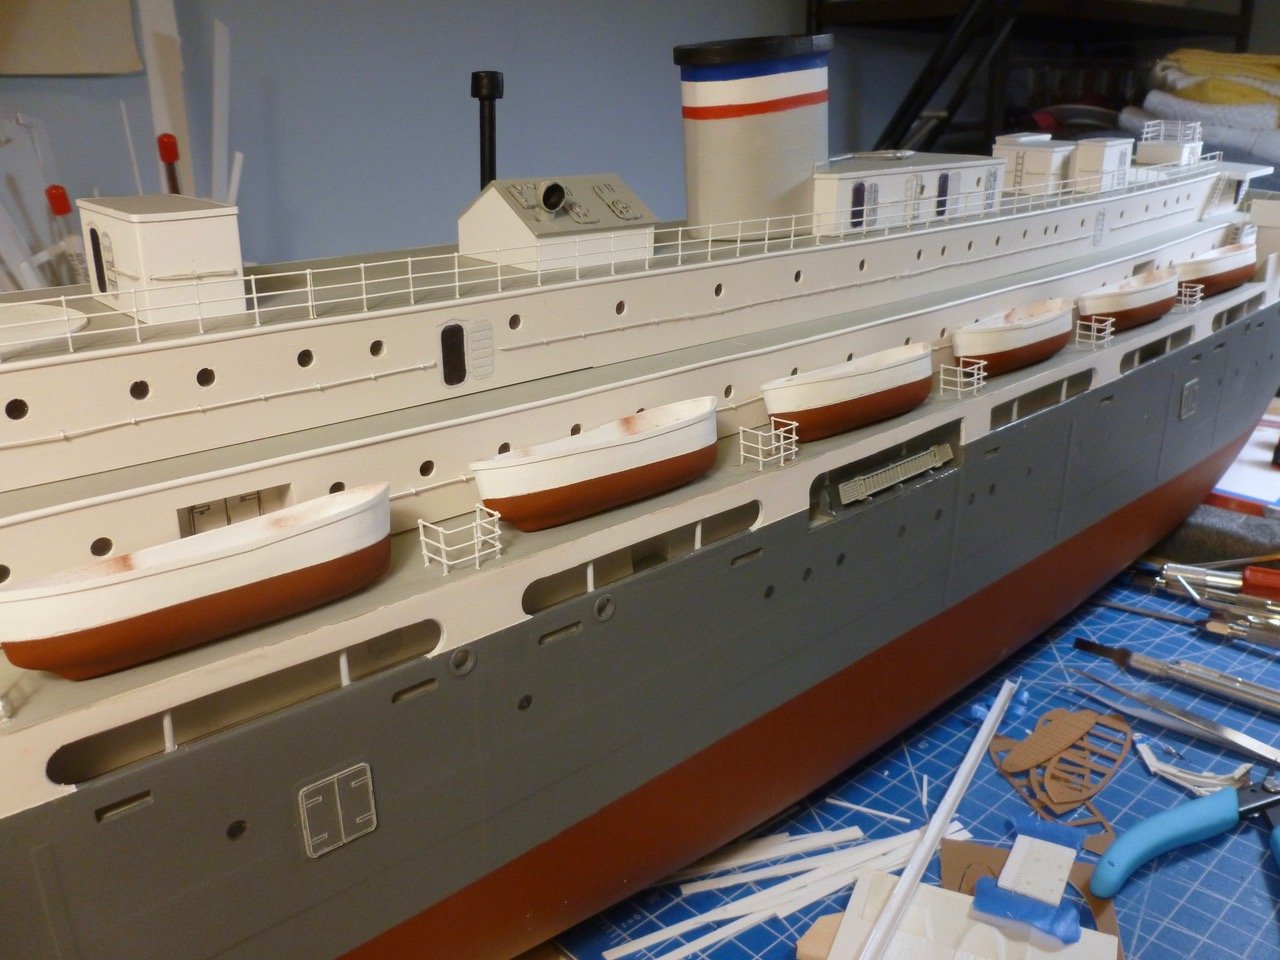
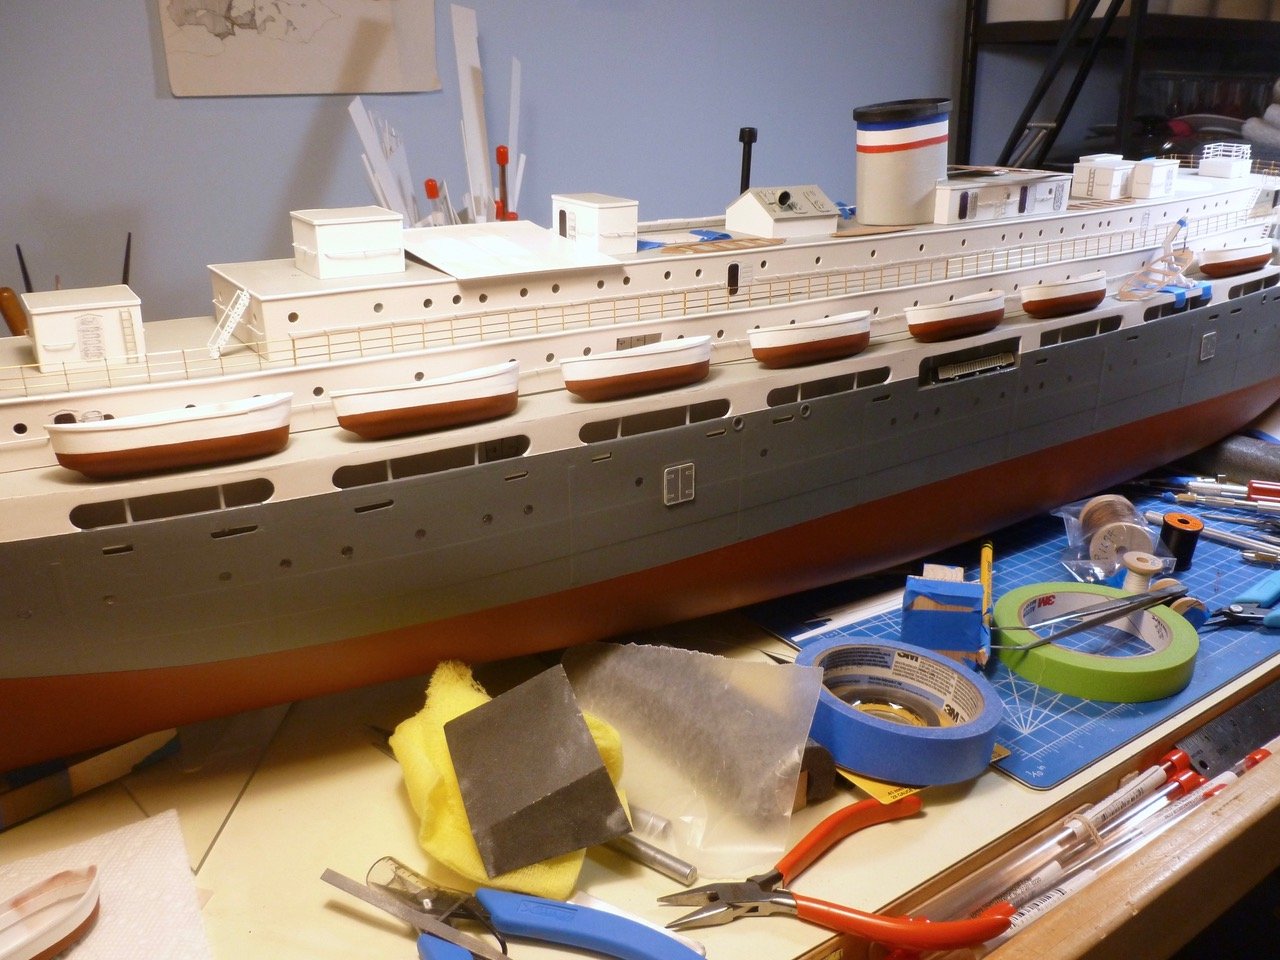
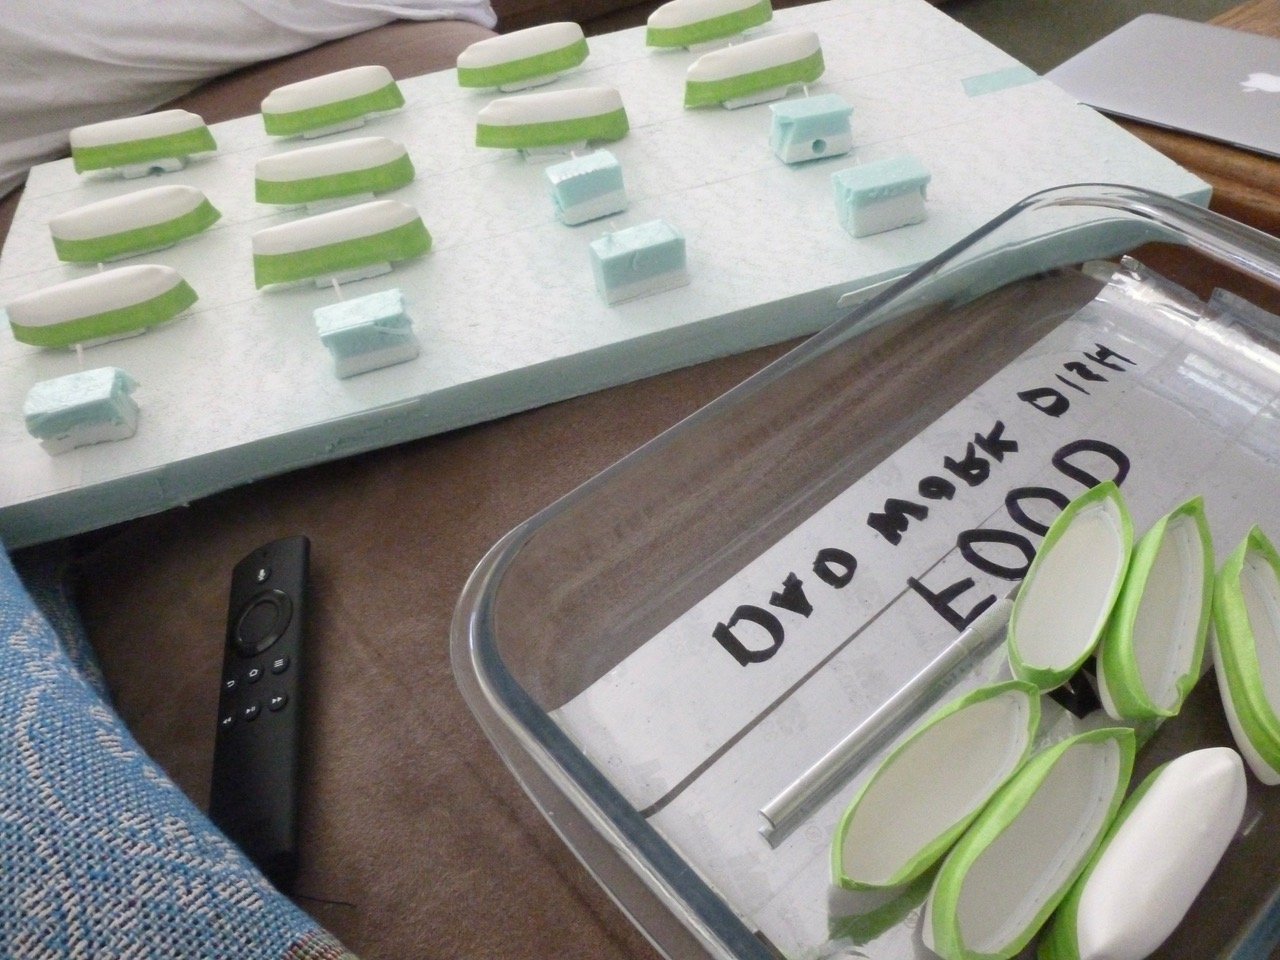
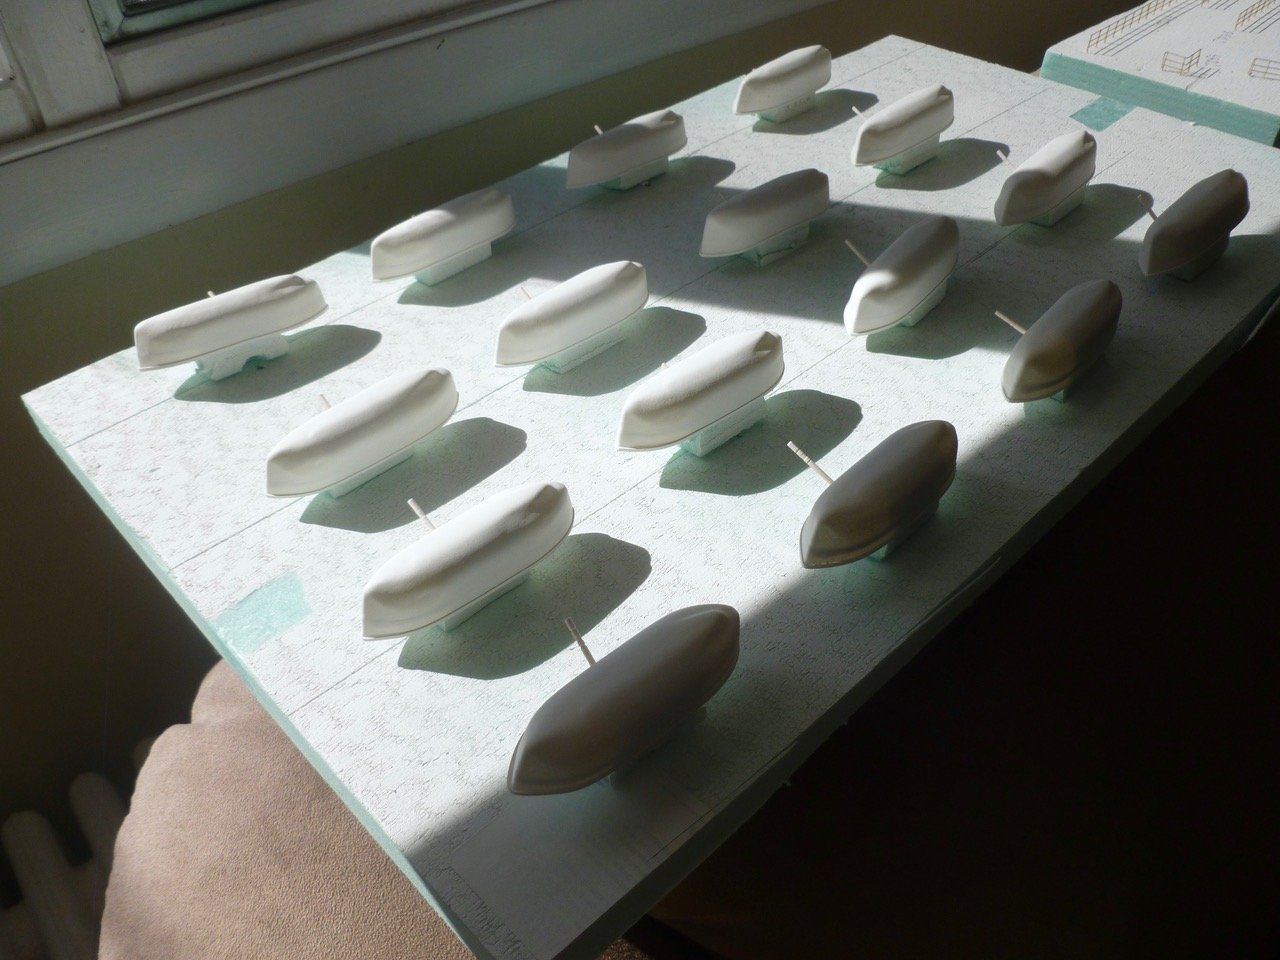
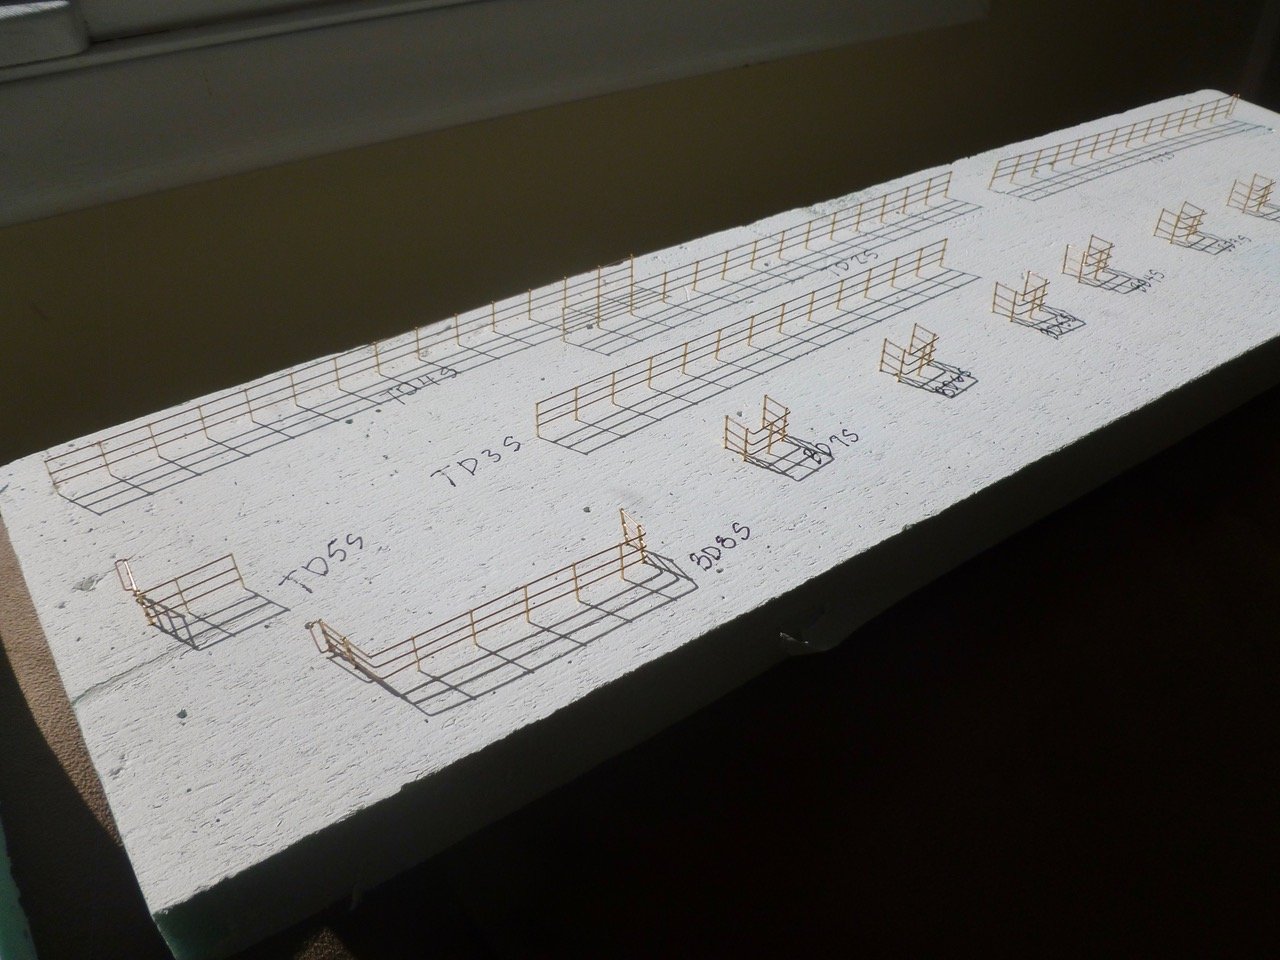
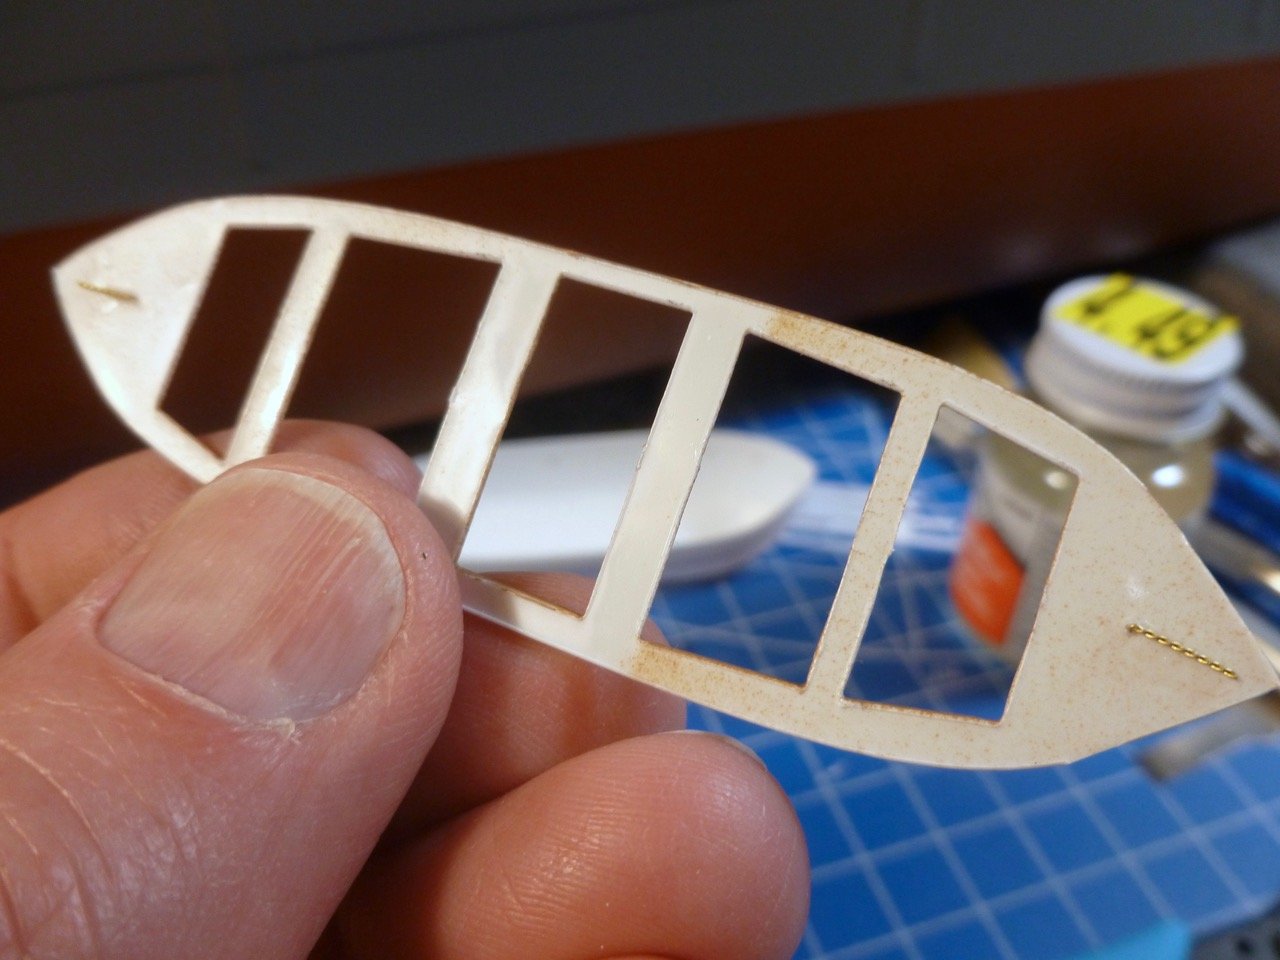
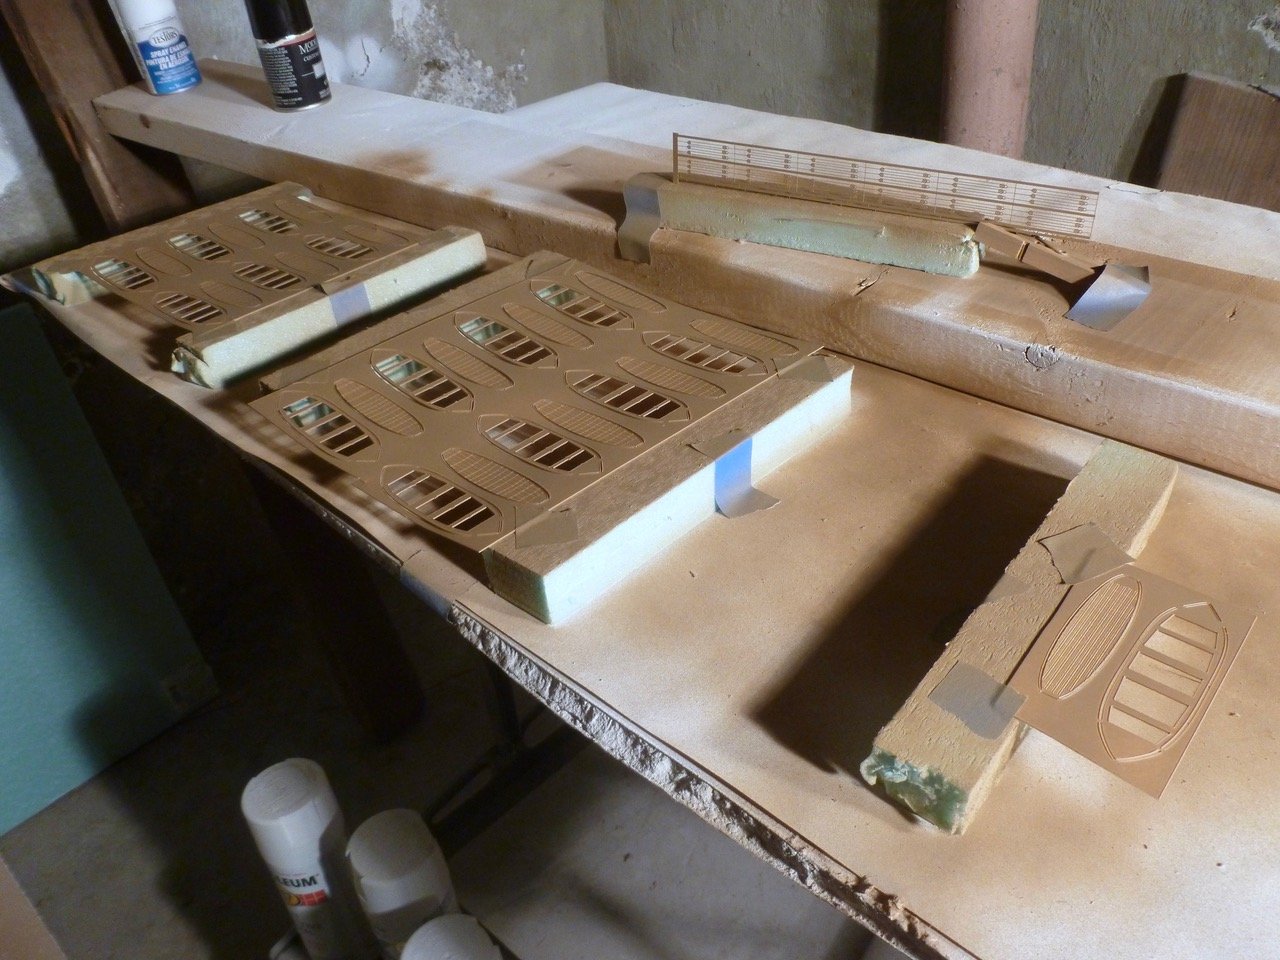
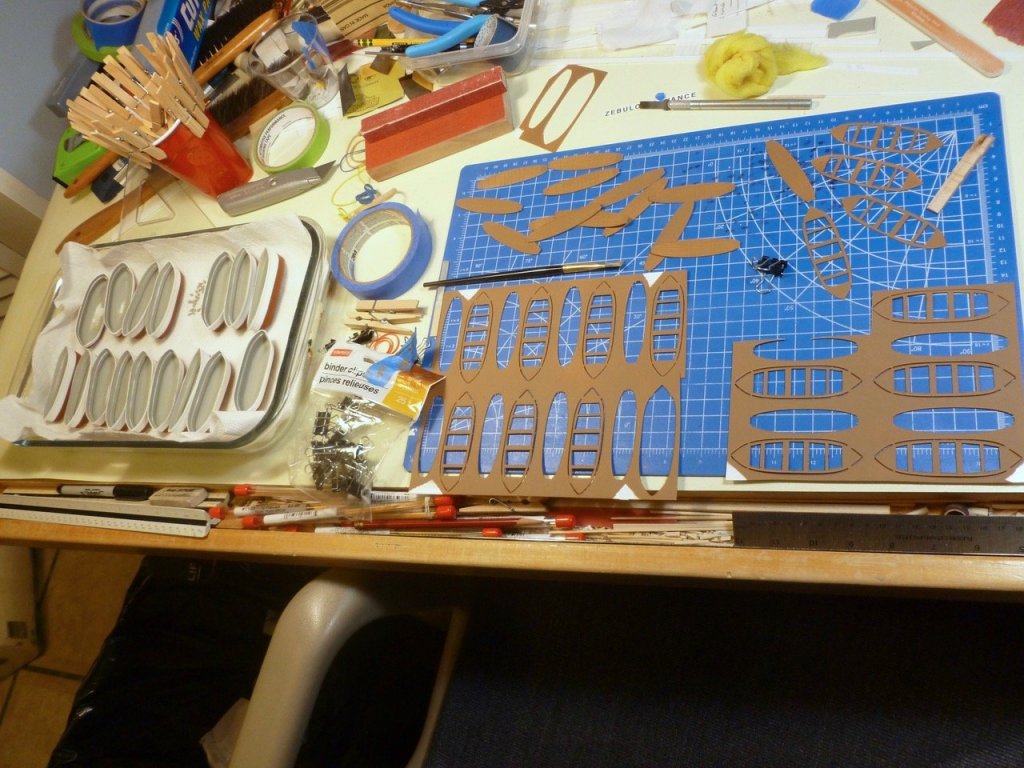
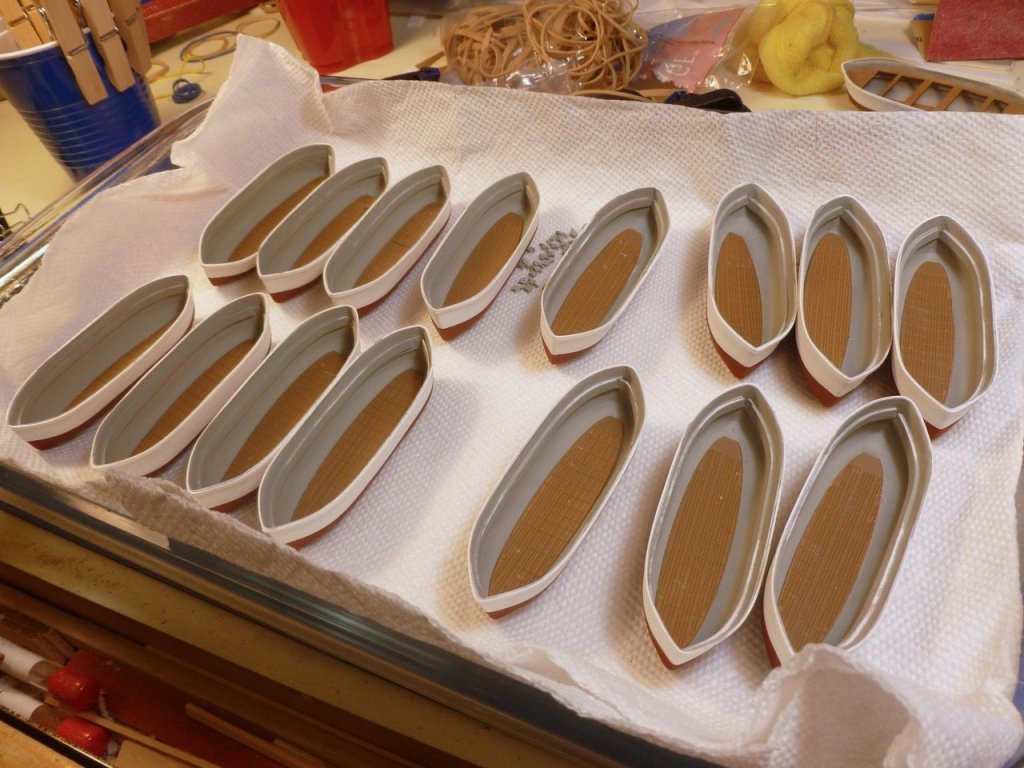
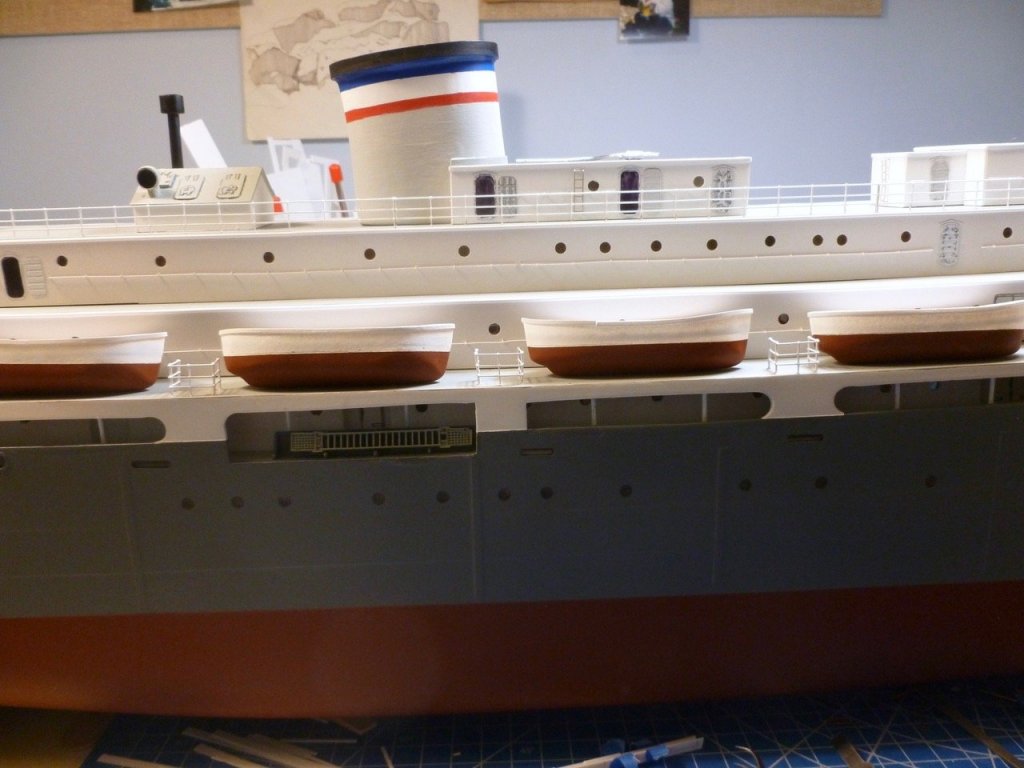
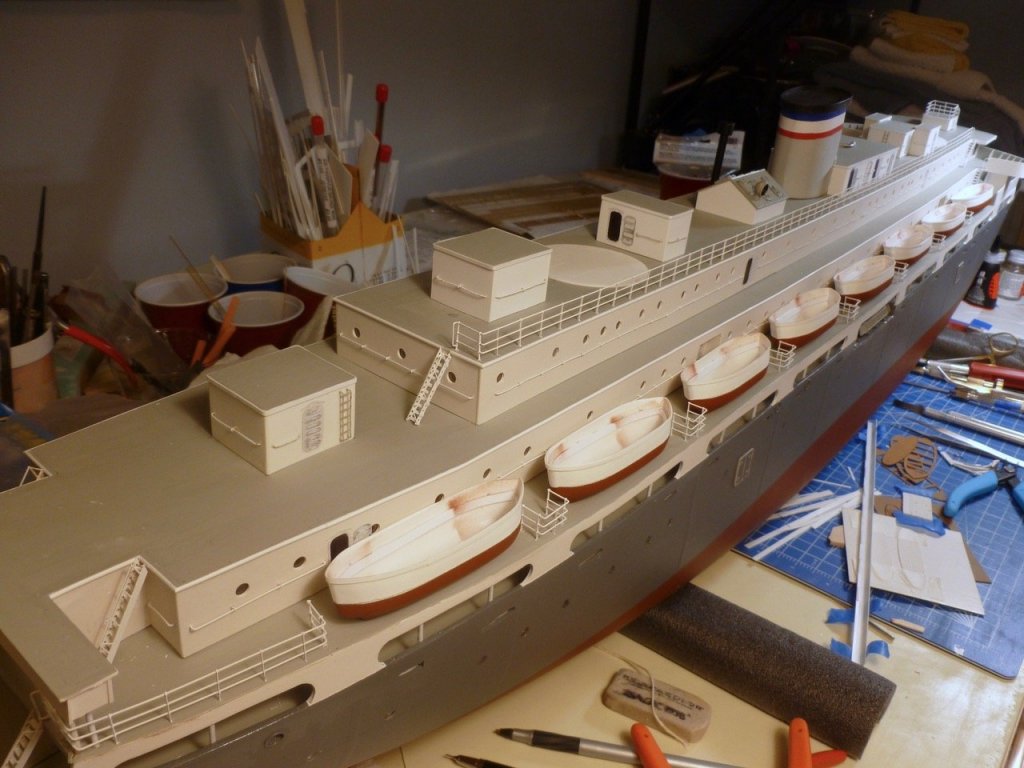
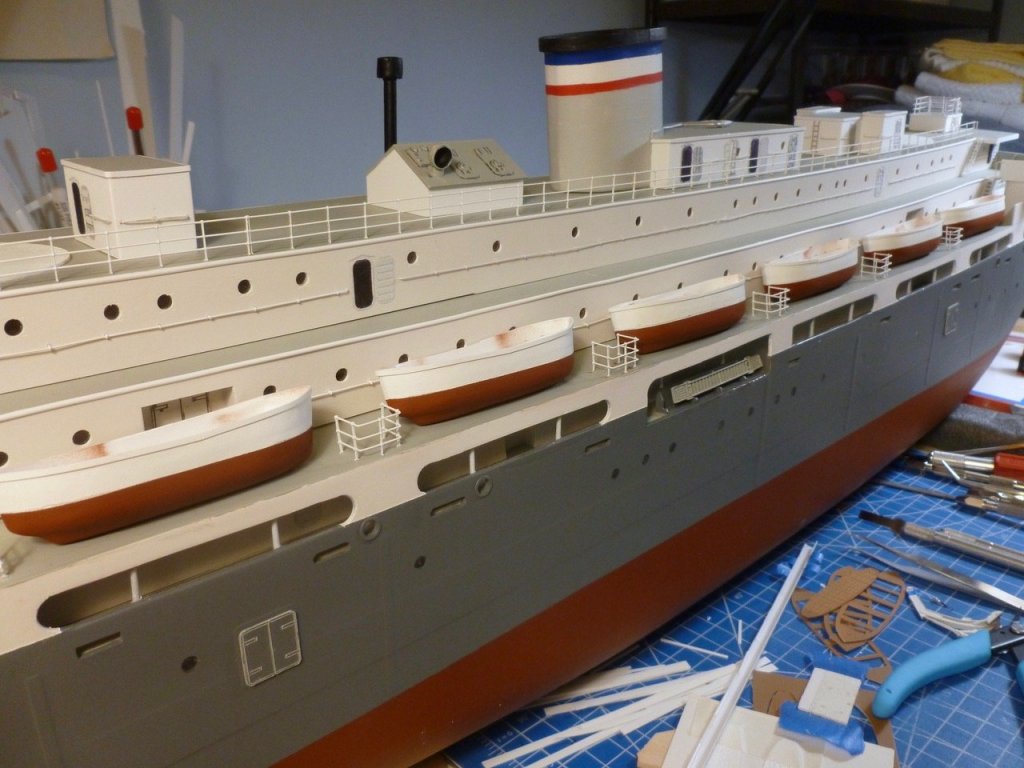
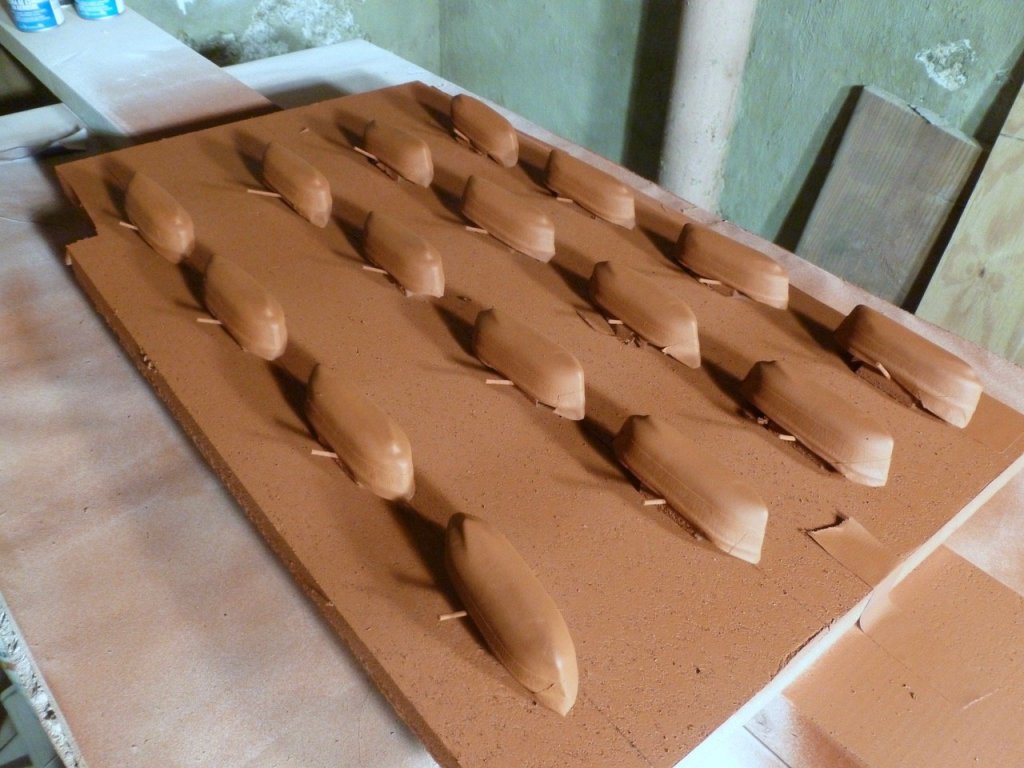
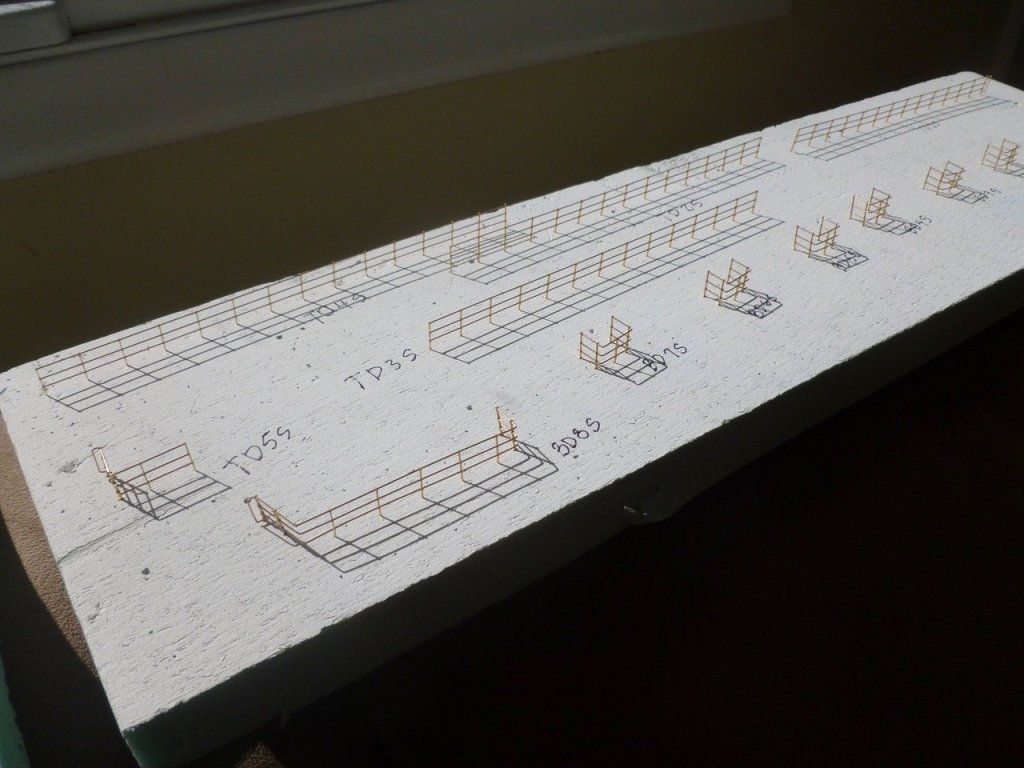
To those who gave likes, thank you and thanks for stopping by. Denis, you are always welcome and I appreciate your advice and feedback. Carl, thanks for the promo. Your ongoing support has carried me a long way and encourages me to always try to do better. Steve Lifeboats and railings I was on the road for a few days, part business, part fun but I'm back at it. In the spirit of the Liberty ships the production line for lifeboats worked well and hull fabrication was finished. I cut some foam to fit inside the hulls, then toothpicked the pieces to a foam board and primed and painted the hulls. I wasn’t sure if I could draw a waterline on each lifeboat but the pencil on a block method worked easier than on a larger model. I eyeballed vertical to hold the boat in place on the table while I guided the pencil around the little hull. I masked all the hulls with green autobody tape, well-burnished along the edge. Then back to the foam blocks for the second color. I’m pleased as punch with the hull painting. Only one hull needed a second trip to the paint shop, due to thin coverage in a small spot. The waterlines were clean and there was no paint pulling when removing the tape, probably because I let the base coat dry for about five days. I removed a group of railings, gave them a soapy water wash, rinse and dry and set them into foam, with markings for each section. I protected the marks with tape to ensure they didn’t get painted over. The first batch of railings is ready for final installation but I was still pondering how to handle the davit downfalls. The solution was some nice cargo blocks I found at Bluejacket and in short order I received a little pile of them from which I made the mockup below. I think it is a good improvement over the kit PE and will allow the lifeboat eyes to be installed at thwart level where they belong. The overspray on inside of the lifeboats is no big deal since they will be painted gray with dirty tan thwarts and footings. The cargo blocks need to be painted - or might they have been galvanized metal in WWII?


- 446 replies
-
- 10
-
-
- zebulon b vance
- deans marine
- (and 3 more)
-
RC Boater Bill, thanks for stopping by and thanks for the white letter link and notes. I'm going to have quite a library of white letter info courtesy of our great community. Steve
- 446 replies
-
- 4
-
-
- zebulon b vance
- deans marine
- (and 3 more)
-
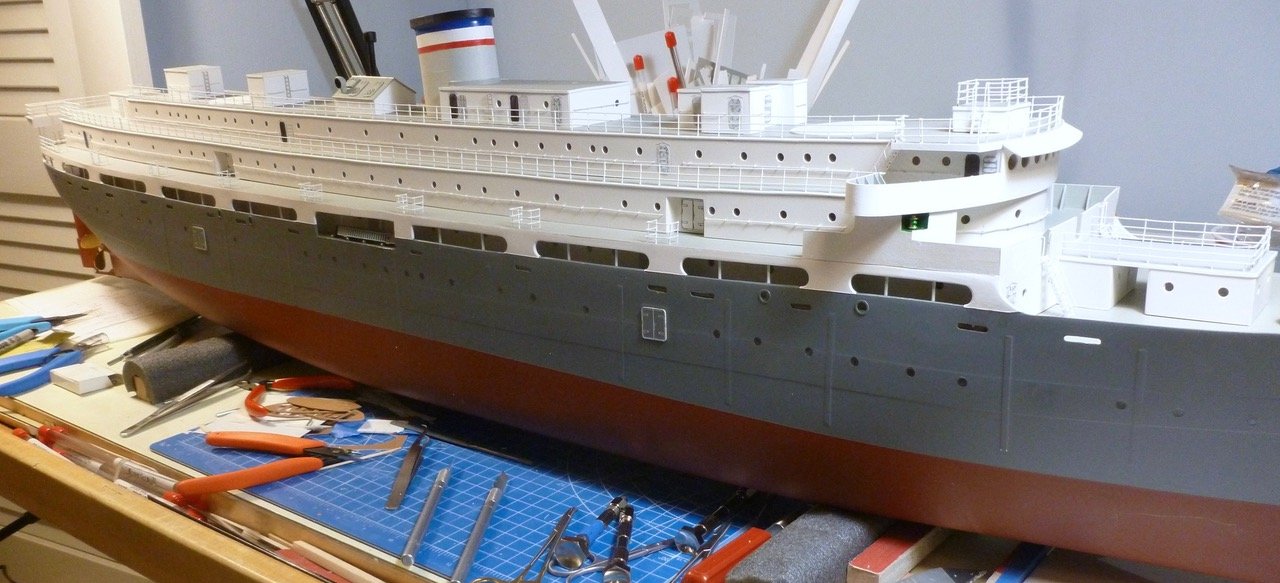
To those who gave likes, thank you and thanks for stopping by. Bill, thanks for your kind words, and a special thanks for your detailed info on lettering options. As a lapsed (if you call 60 years a lapse) model railroader I still pick up the annual copies of MR's great layouts and have wondered how so much white lettering was being made. Popeye (Denis)also offered great insight and between the two of you I have a lot to think about. BC (before computers) I went through many, many sheets of Letraset dry transfer letters and in fact I still have my wood stylus (dull pointy on one end for transferring, broad flattish on the other for burnishing under a scrap of yellow tracing paper). Back then the alignment was easy because we worked on flat media taped to flat drawing boards. Lou, sorry I sneaked down lifeboat alley while you weren't looking. I'm convinced passenger ships are bits of hole-punched metal held together with railing tape. Steve
- 446 replies
-
- 5
-
-
- zebulon b vance
- deans marine
- (and 3 more)
-
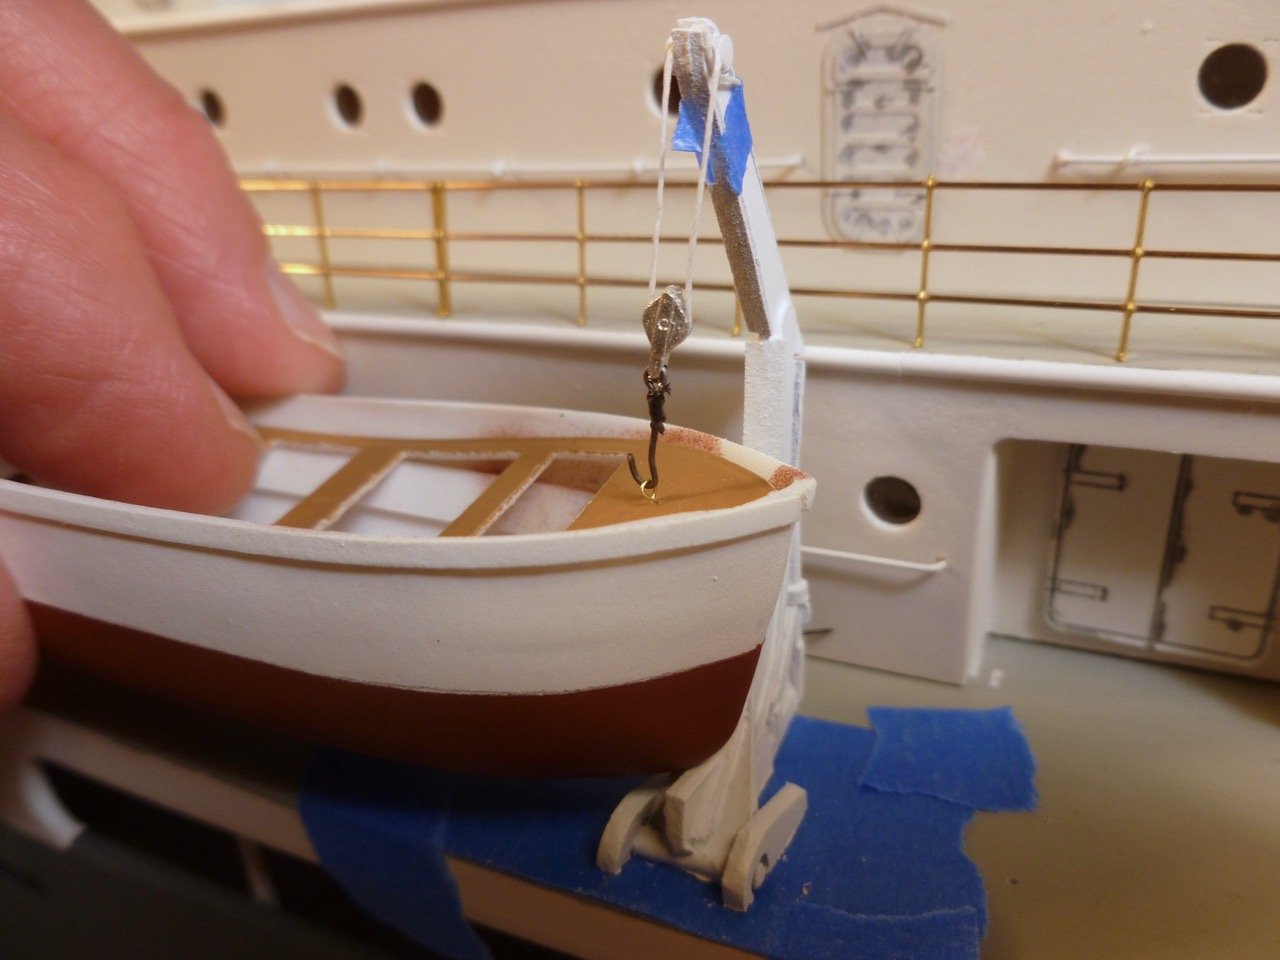
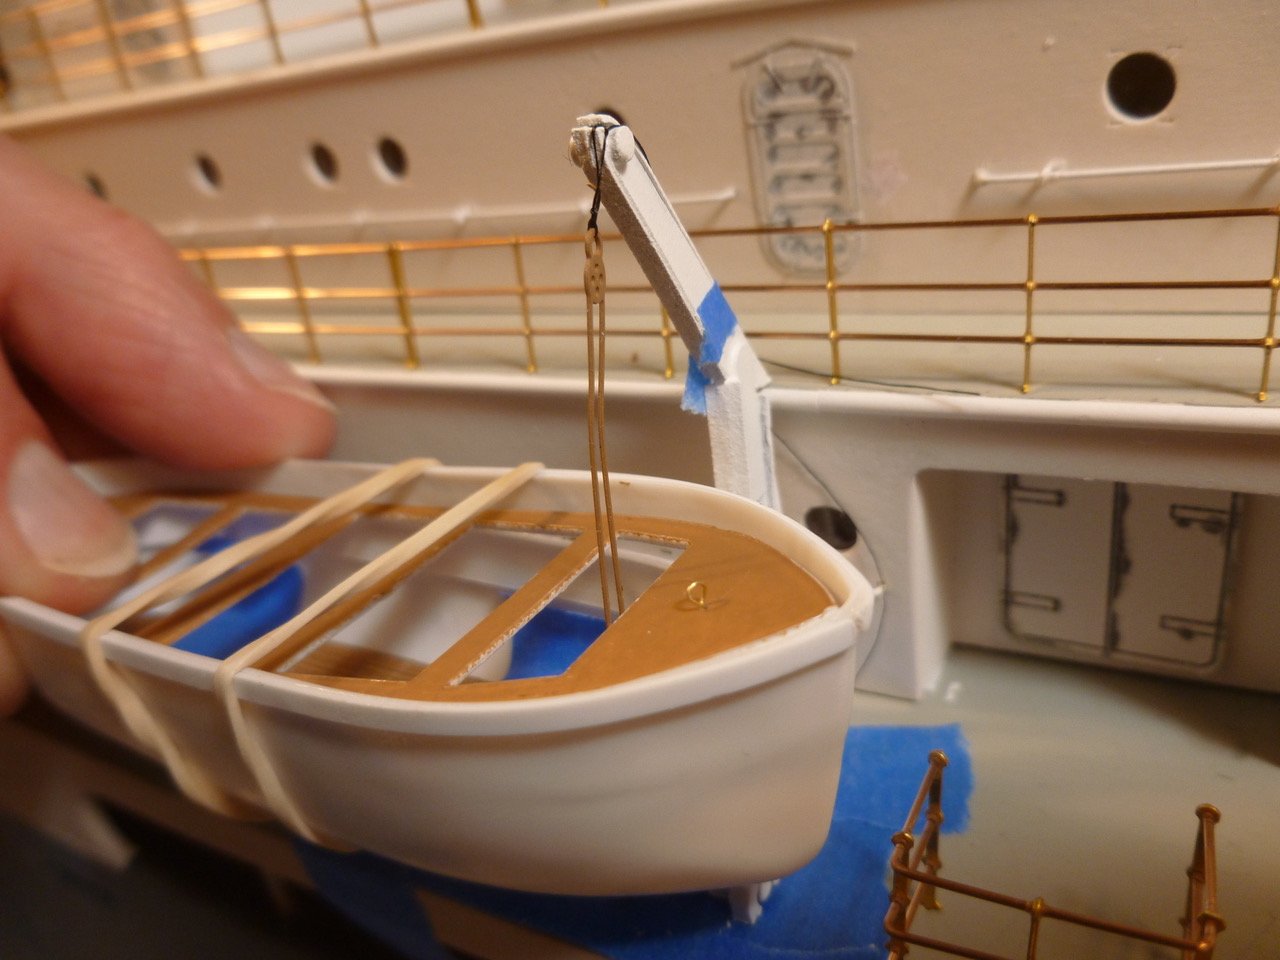
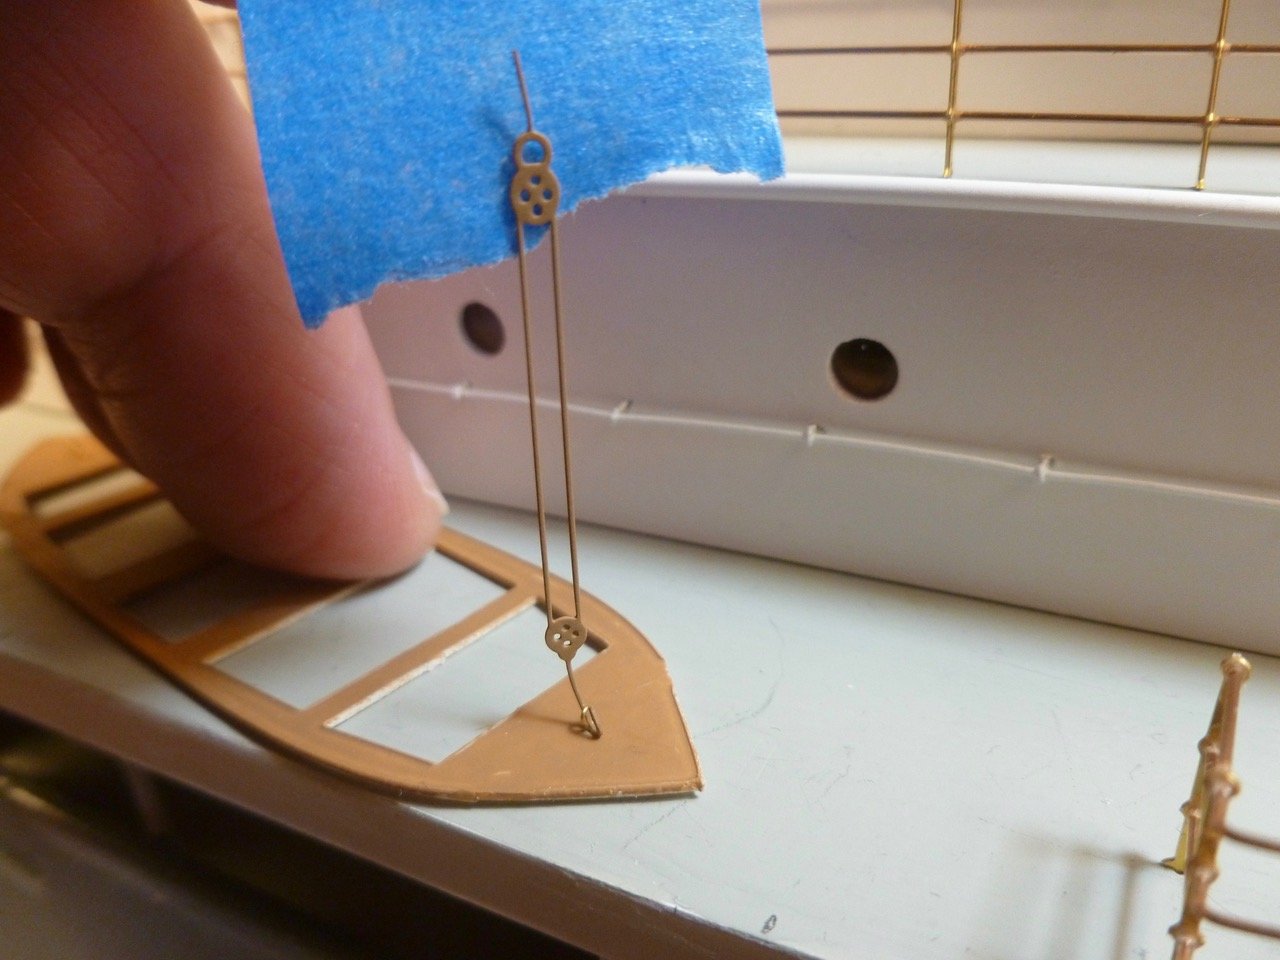
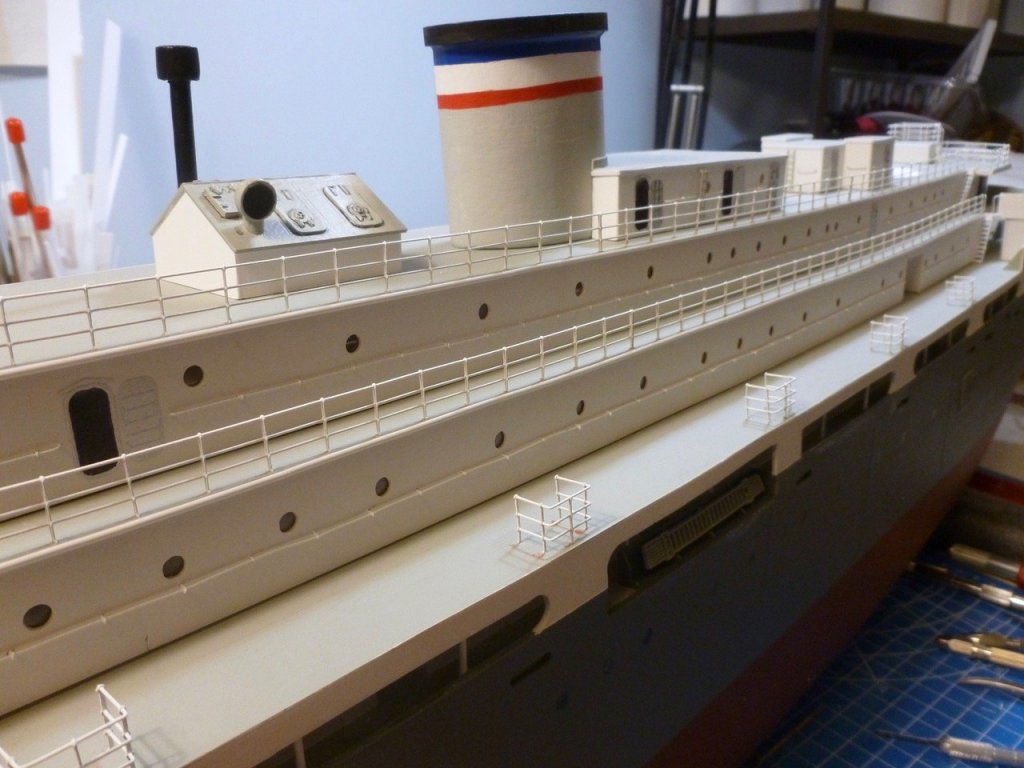
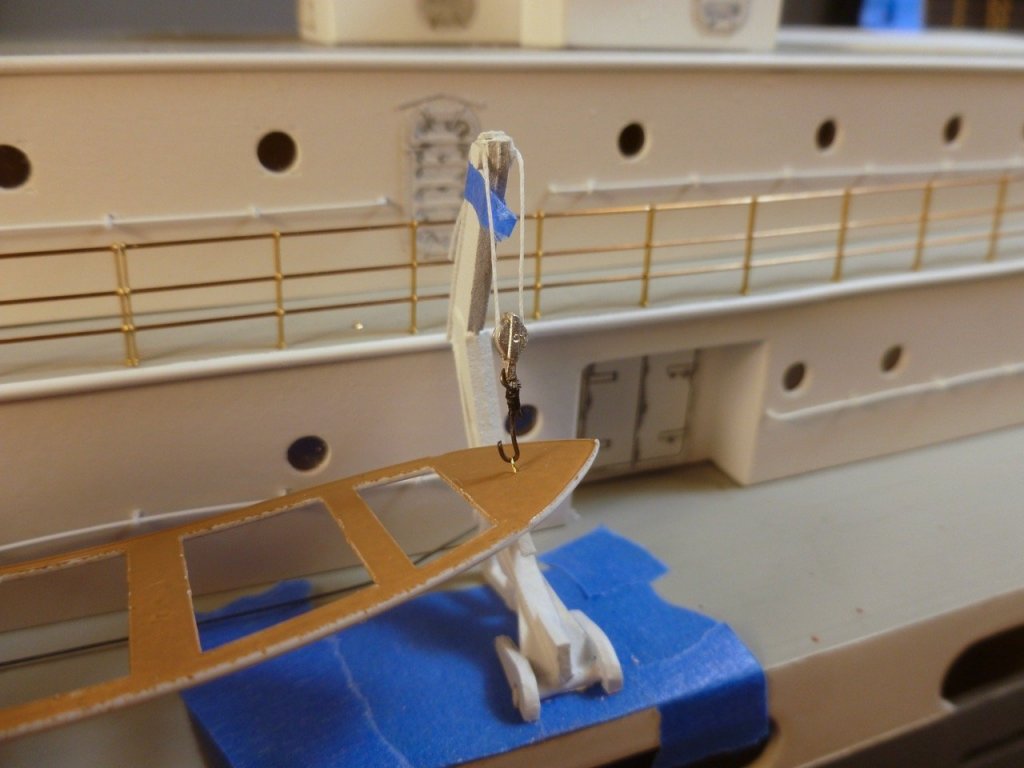
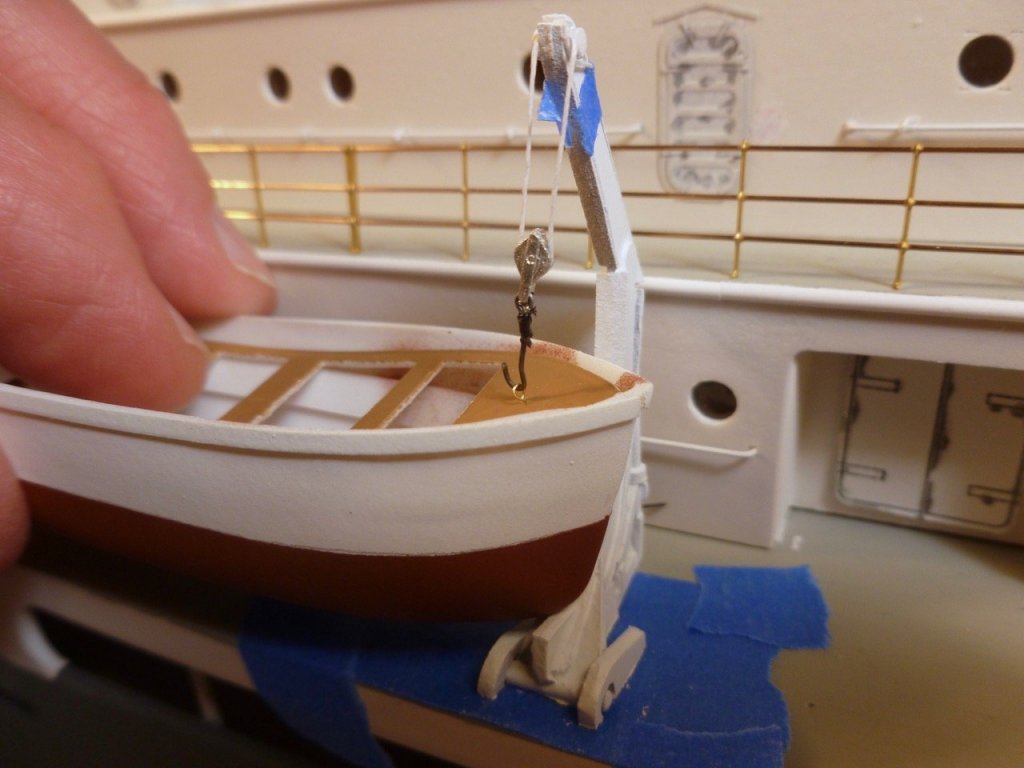
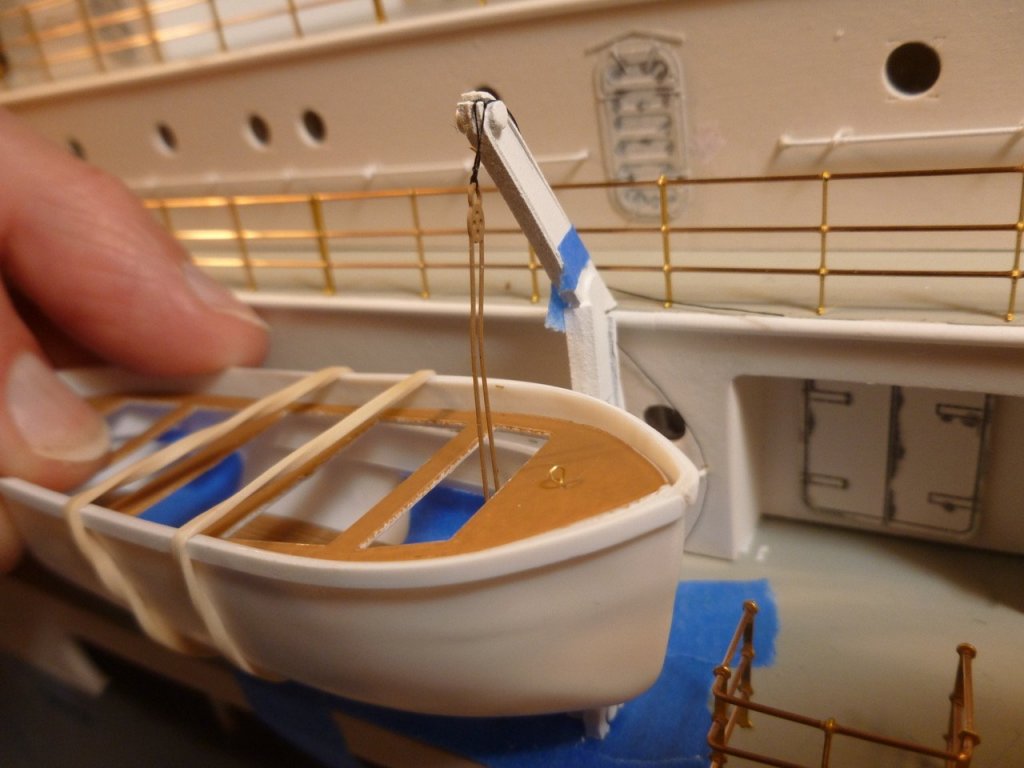
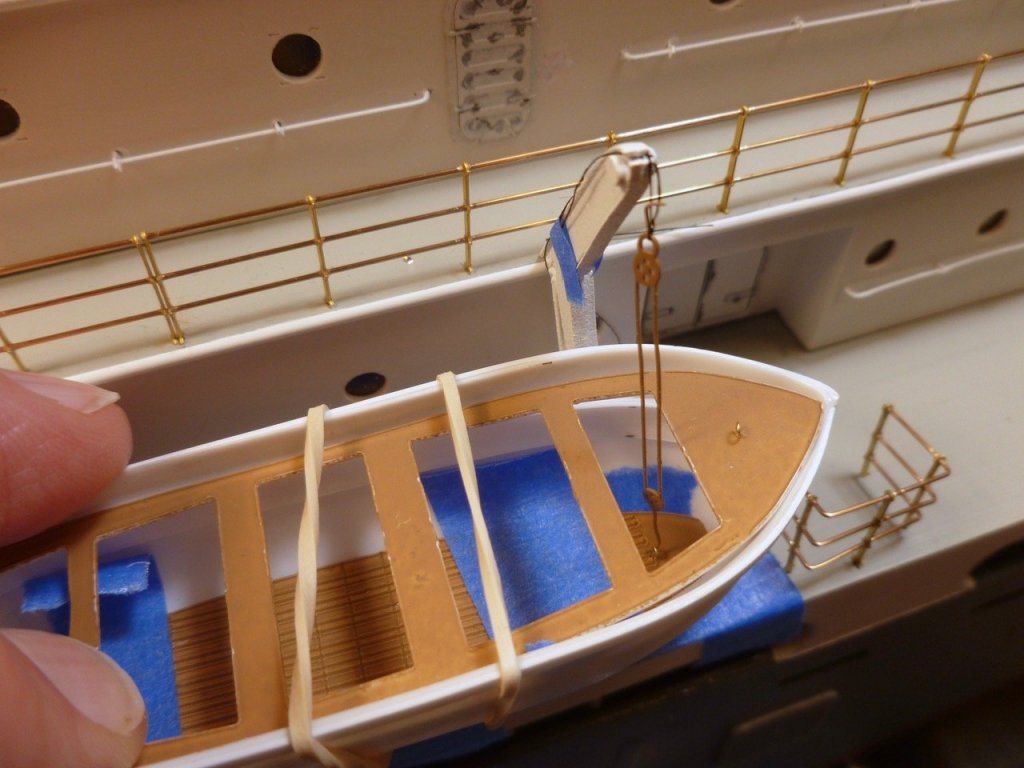
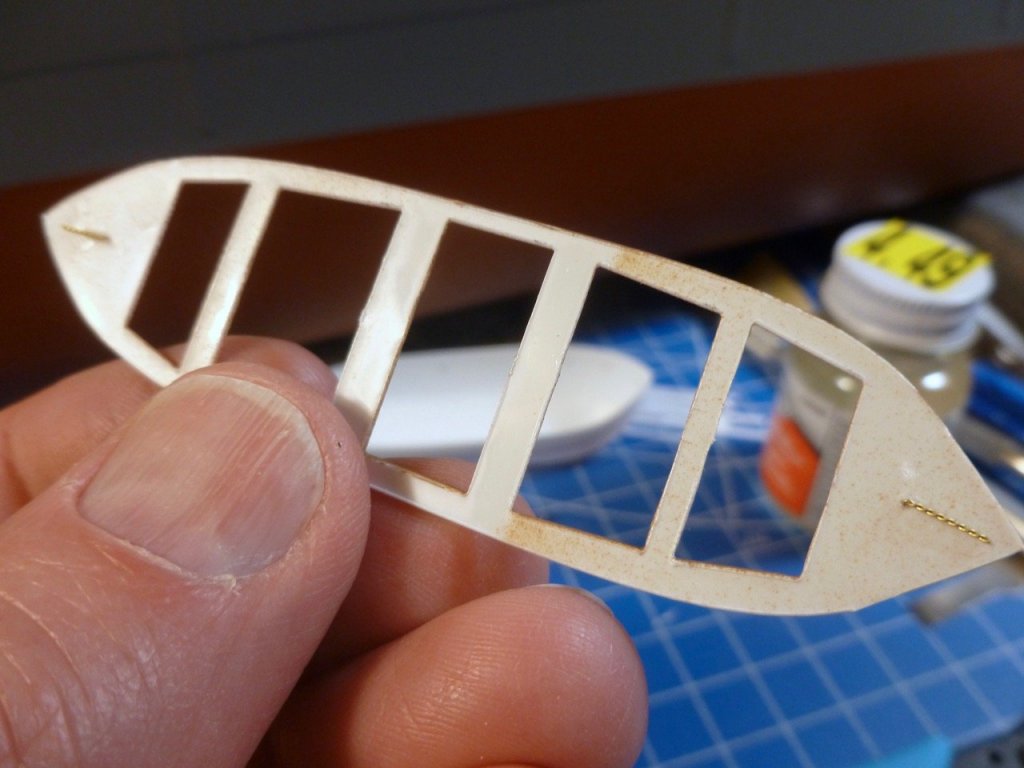
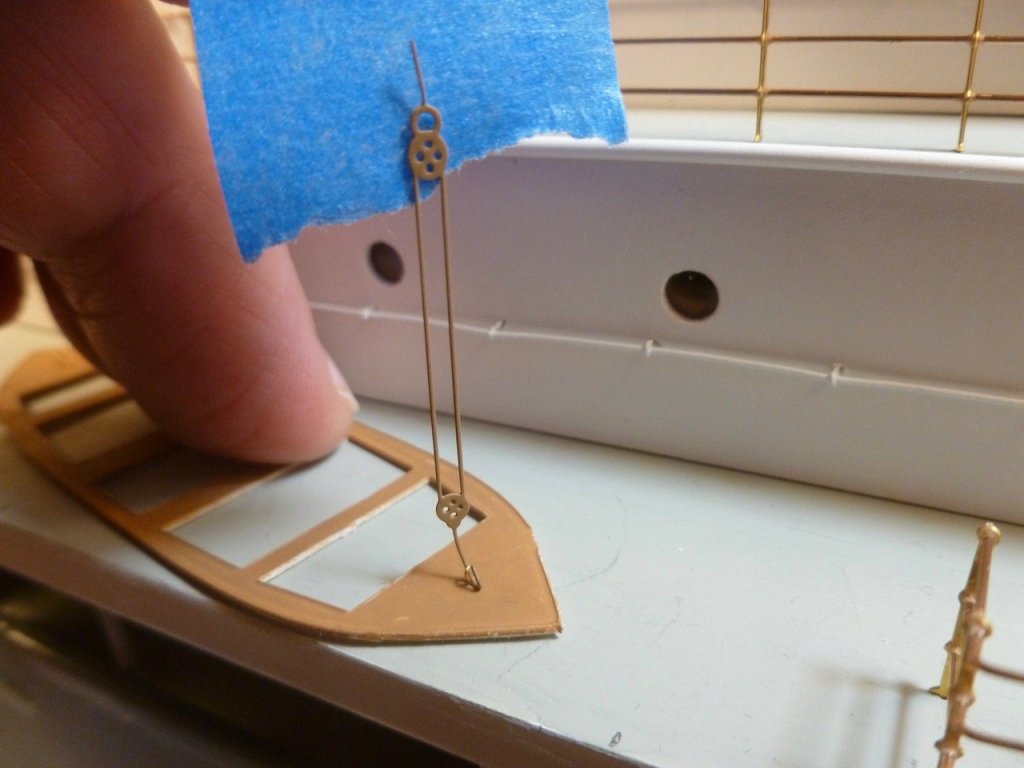
To those who gave likes, thank you and thanks for stopping by. Carl, thanks for your kind comment. My eyes are getting sore. I can’t imagine what 1/350 does to vision. Denis, thanks for your compliments and suggestions. I had seen a portion of Michael’s restoration but not the part with the lifeboats. Michael and you are in a whole other universe of talent and skill that I can only aspire to. I will definitely check out your Cutty Sark build before I get back to decal work. Steve Sidetracked After celebrating the completion of starboard railing fabrication I got sidetracked with the 16 lifeboats. My first attempt for mounting the lifeboats is lifting eyes mounted at each end of the thwarts, as an attachment point for the PE downfall leg, instead of trying to heat sink the leg into the footings as recommended in the instructions. Pictures I have seen of lifeboats show some sort of attachment point at the thwart level. I started with some kit wire that was too small for railings. It twists up into a small eye using a standard steel pin for a twisting post. The eye scales about 3 inches. A view topside of a sample thwart. Under the thwart I left the lift eye long and glued it in place for more pullout strength. After painting, the PE downfall has a bit more heft and roundness, and seems to be a middling substitute for rigging up 64 stropped blocks. Looks like an easy job doesn’t it. Unfortunately when I test fit the davit, boat, thwart, lift eye and downfall I discovered the downfall is too long with no way to shorten it, other than cut and solder which would probably be a massive muck up on 32 downfalls, although probably quite humorous to the membership. The only way it works using the PE is to fasten the downfall bottom leg at the footing level and make up the difference between the top of the downfall and the davit with rigging rope. Back to the drawing board, er instructions. This cobbled up bit of kit is the second test to see how downfall length and boat position is impacted by following the instructions, but with a lift eye added to allow installing the downfall after the thwarts are glued in place. I removed a lift eye from the test thwart and reset it into the footing, then straightened out the leg of the downfall and rebent it into a short hook. Wishing I had three small hands I hung the downfall off a taped-in-place davit and hooked it into the lift eye. The length works okay for boat position but I’m curious if a boat would ever actually be suspended by a downfall anchored into the bottom of the boat. It seems like it would make the boat very tippy during launching, unless there were ways of stabilizing it until it reached the water. The alternative is to spring for 64 blocks and make real downfalls, which would allow the lift eye to be installed at thwart level. Returning to pondering while working I primed the remaining davits and continued adding thwart supports to the lifeboats, neither one of which is pic-worthy.


- 446 replies
-
- 10
-
-
- zebulon b vance
- deans marine
- (and 3 more)
-
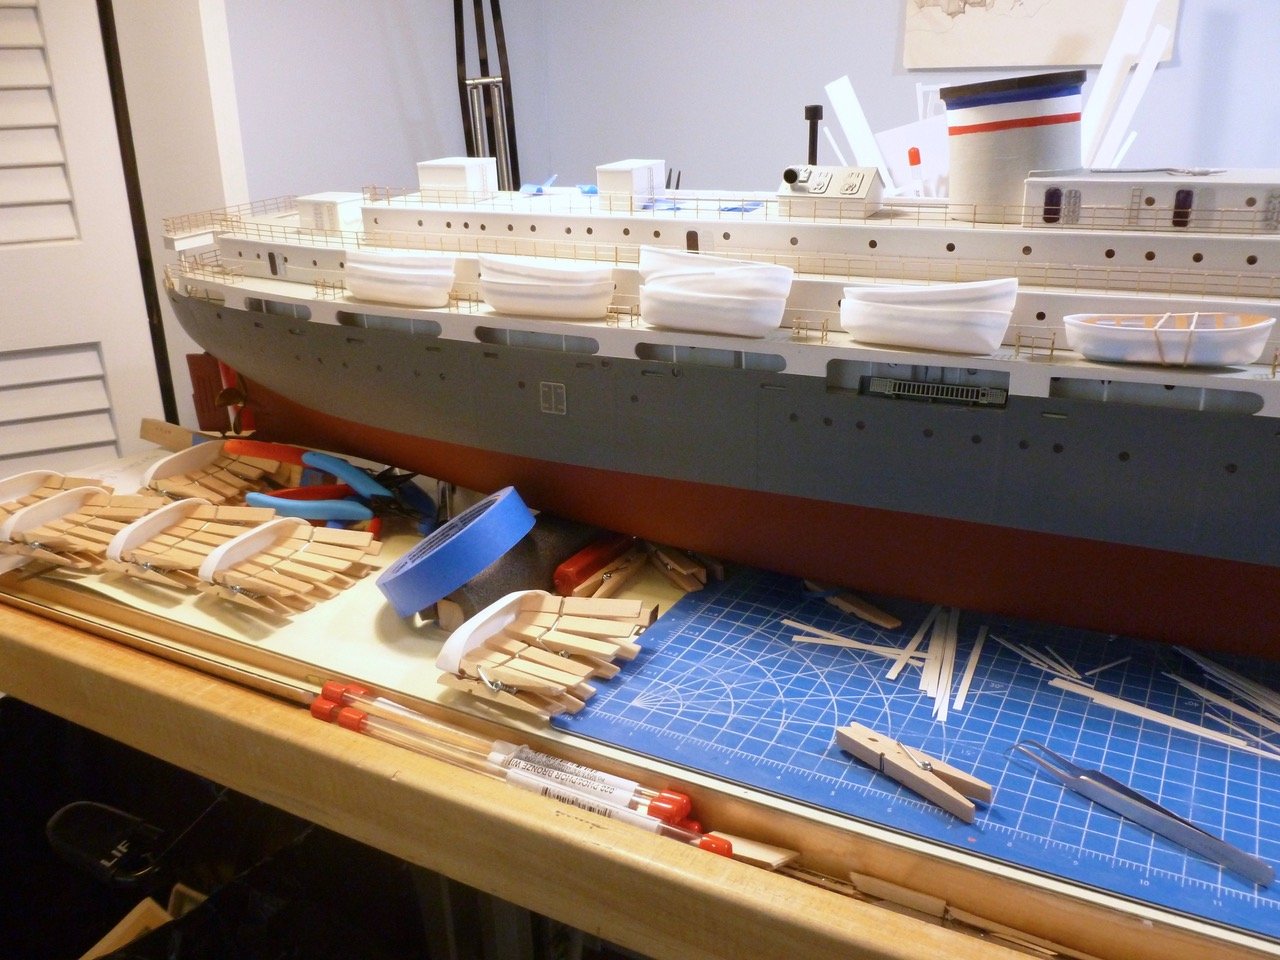
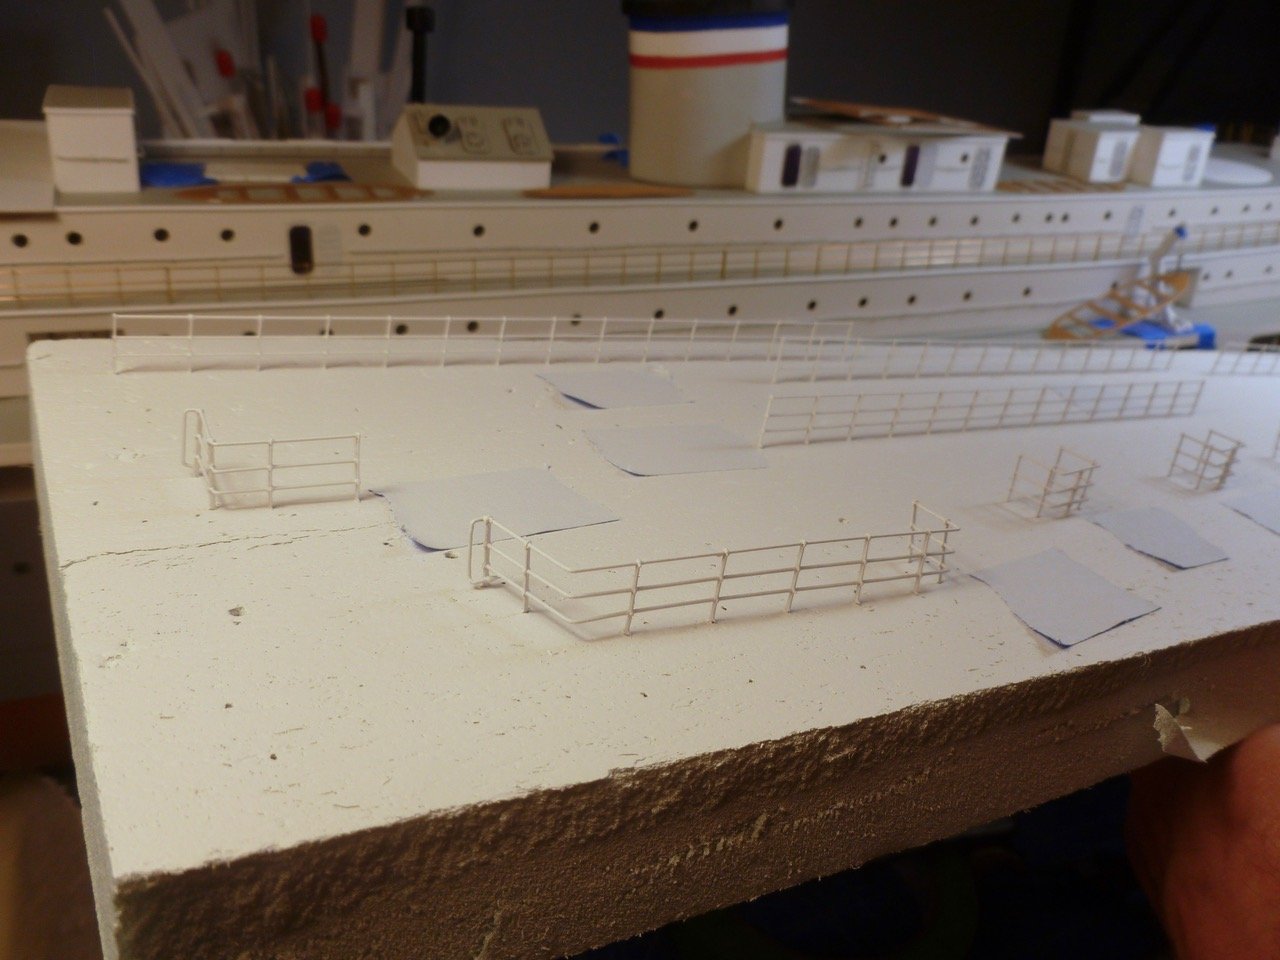
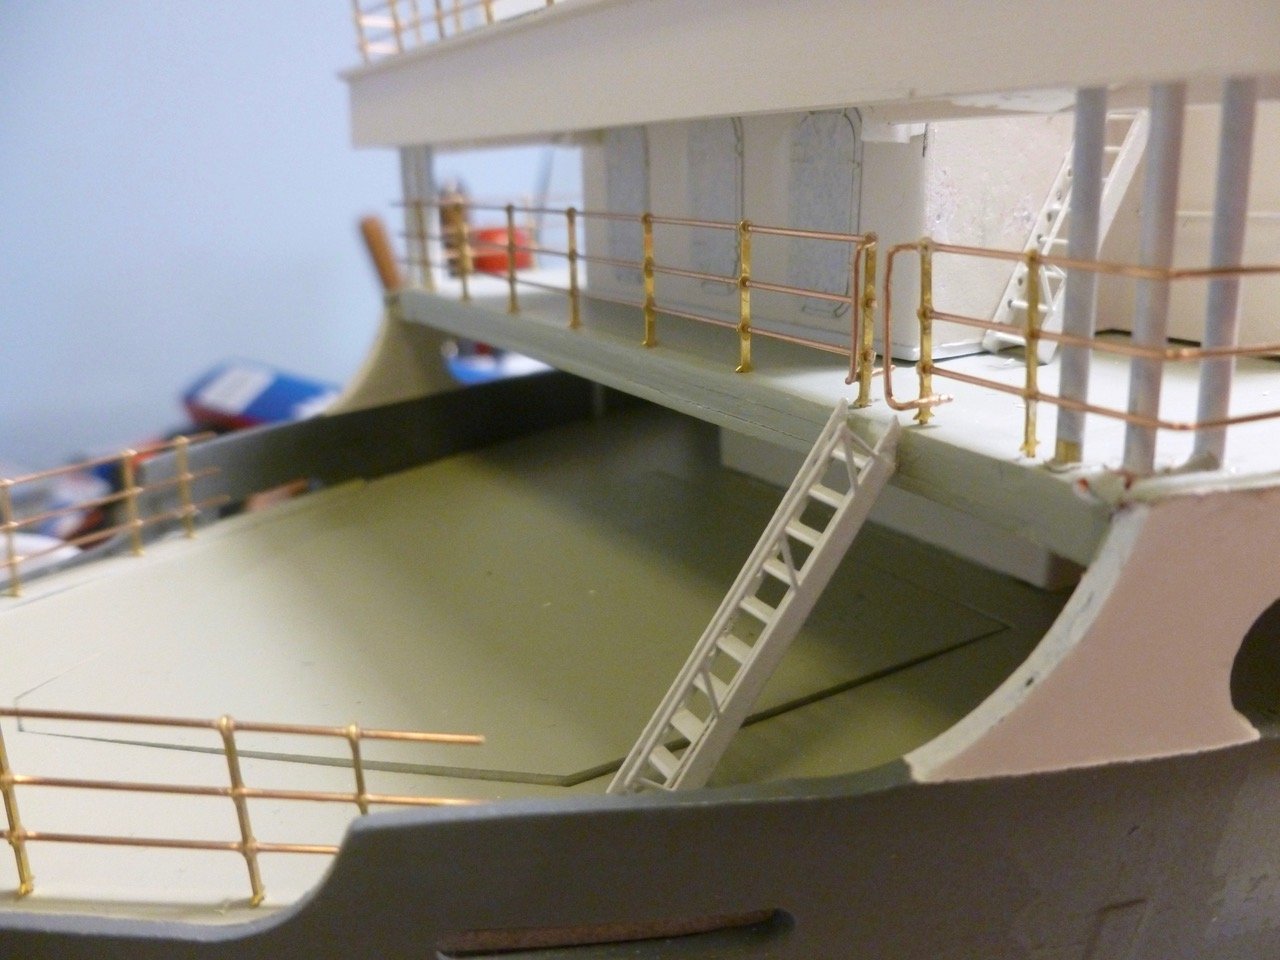
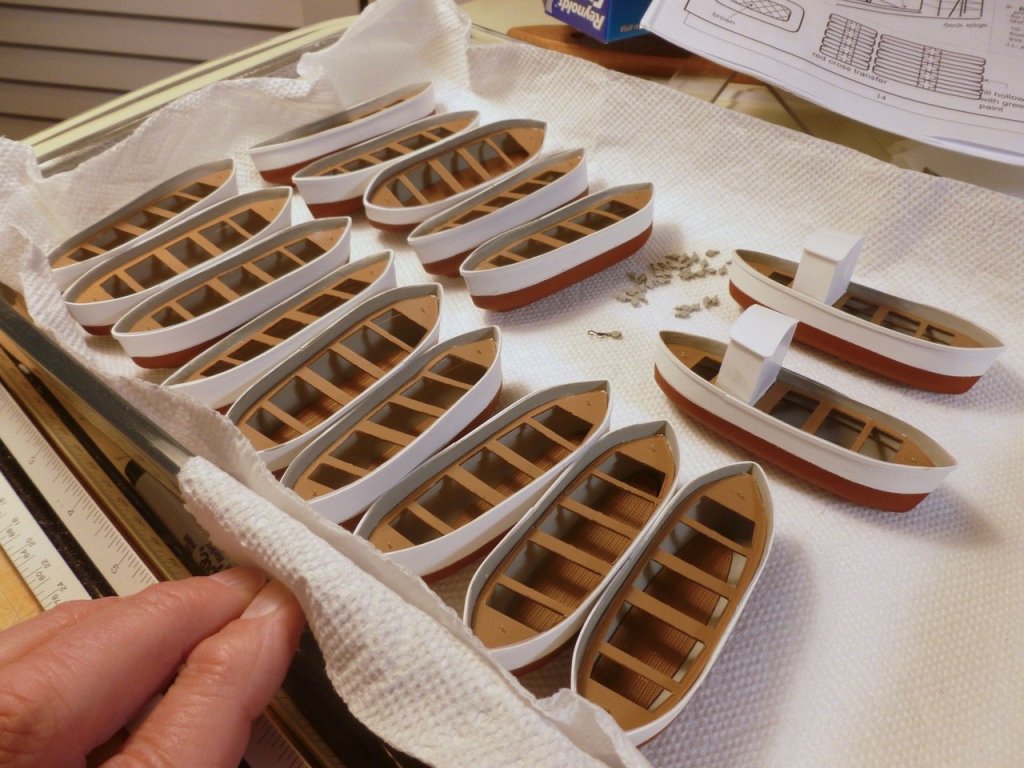
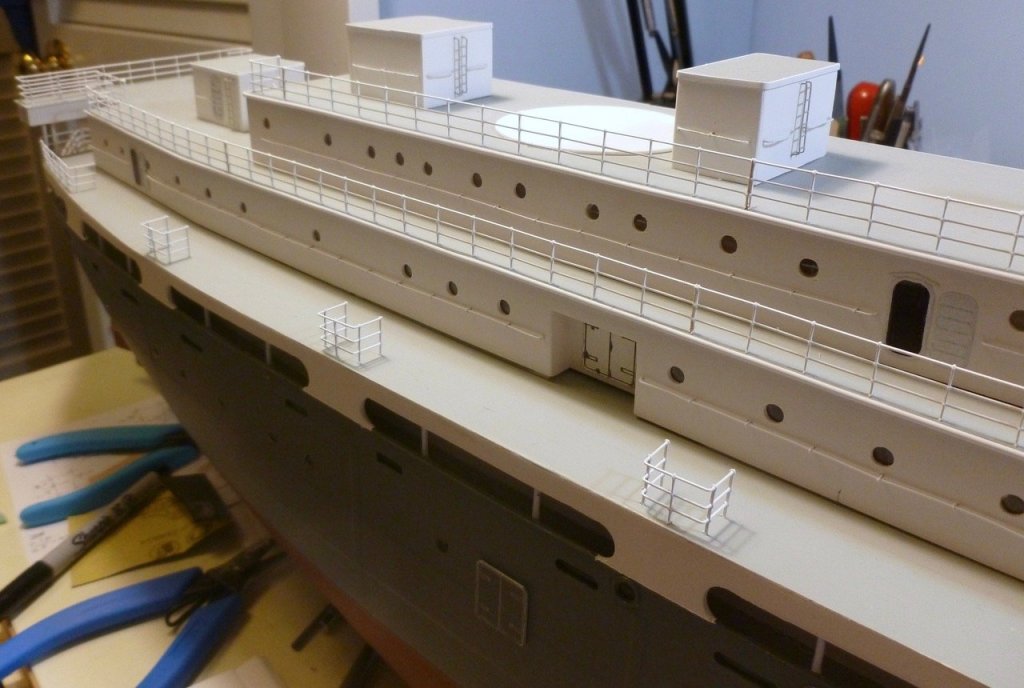
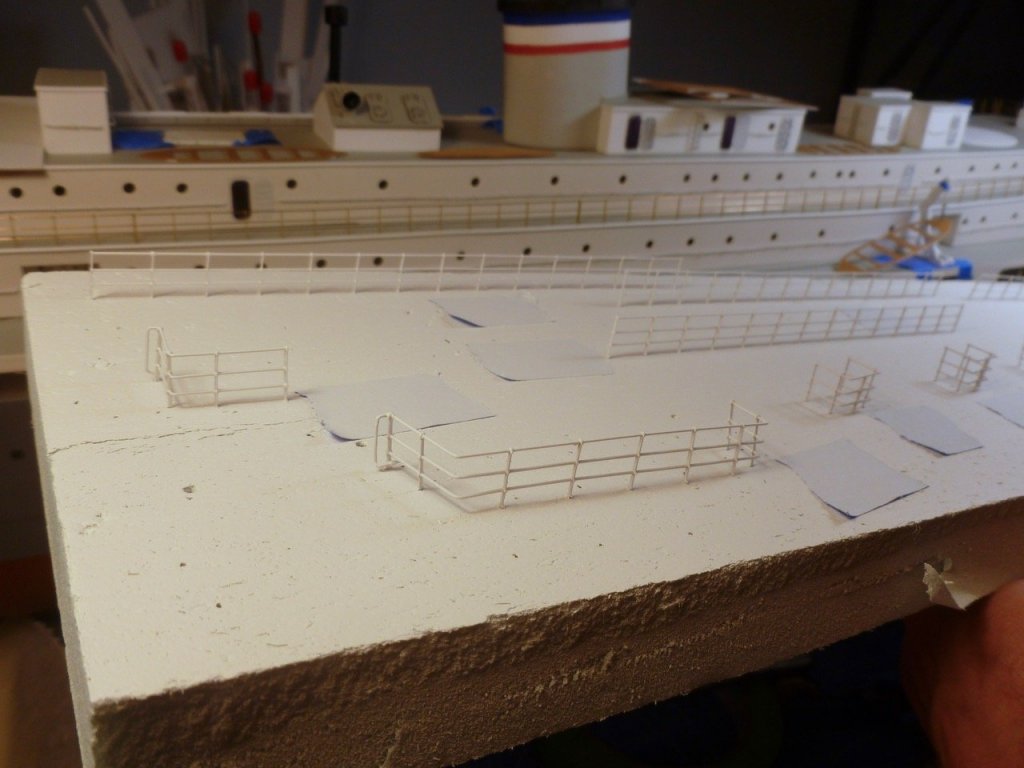
To those who gave likes, thank you and thanks for stopping by. Lou, with all you’ve been through you deserve a break. Rescue is not necessary. Tempting sometimes, but not necessary. Steve Railings - starboard yay! Apart from some railing end nipping, the forward, starboard and aft railings are all fabricated and ready for the paint shop. Below are some cheesecake closeups (no final gluing yet). In the pic above you can see the unfinished railing ends and the starboard aft corner of the boat deck with some wonkiness where the deck and columns for the bridge deck come together Needs a repair but I'm wondering what the repair should be. The 16 lifeboats are underway. See below. A strip must be added at gunwale level, and the thwarts/side benches are supported with doubled up 0.5 x 3.2 mm strips. Clothes pins are allowing much faster progress. Meanwhile the lifeboat rigging, thwart pieces and footings (floorboards?) are in paint. The instructions call for the rigging to be all white but somehow dirty tan seemed more appropriate although it may be a bit much with the thwarts the same color.


- 446 replies
-
- 12
-
-
- zebulon b vance
- deans marine
- (and 3 more)
-
Very nice job Jack. The weathering looks super and the propeller looks for all the world like the real thing. Thanks for sharing. Steve
-
Carl, great job, and quick too after your injury is discounted. Thanks for sharing. Steve