ESF
-
Posts
381 -
Joined
-
Last visited
Content Type
Profiles
Forums
Gallery
Events
Everything posted by ESF
-
 Beautiful work Kevin. Thanks for the video - it was most informative and gives great insight to your build. Steve
- 337 replies
-
- 4
-

-
- finished
- mountfleet models
- (and 1 more)
-
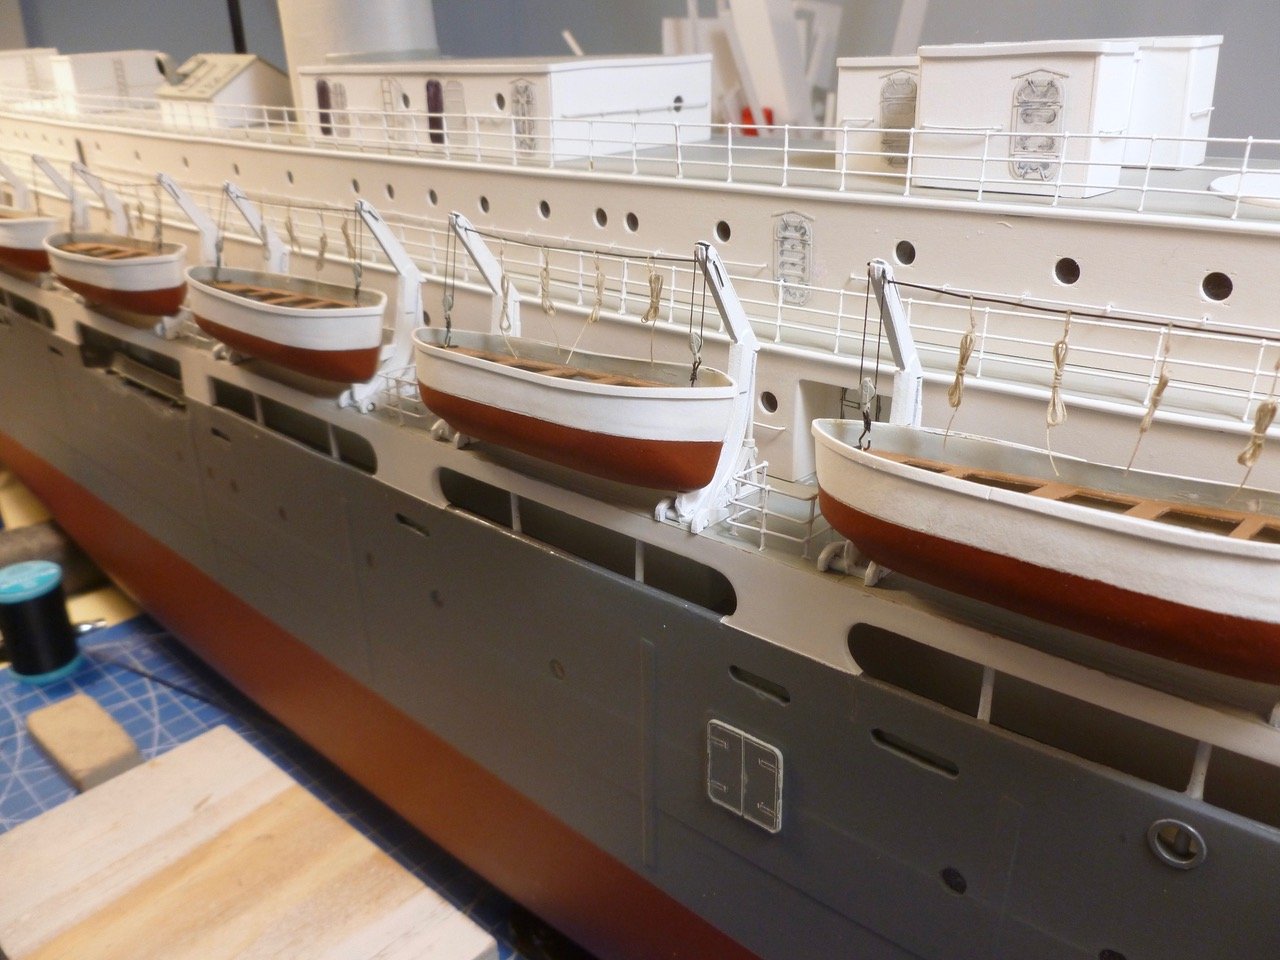
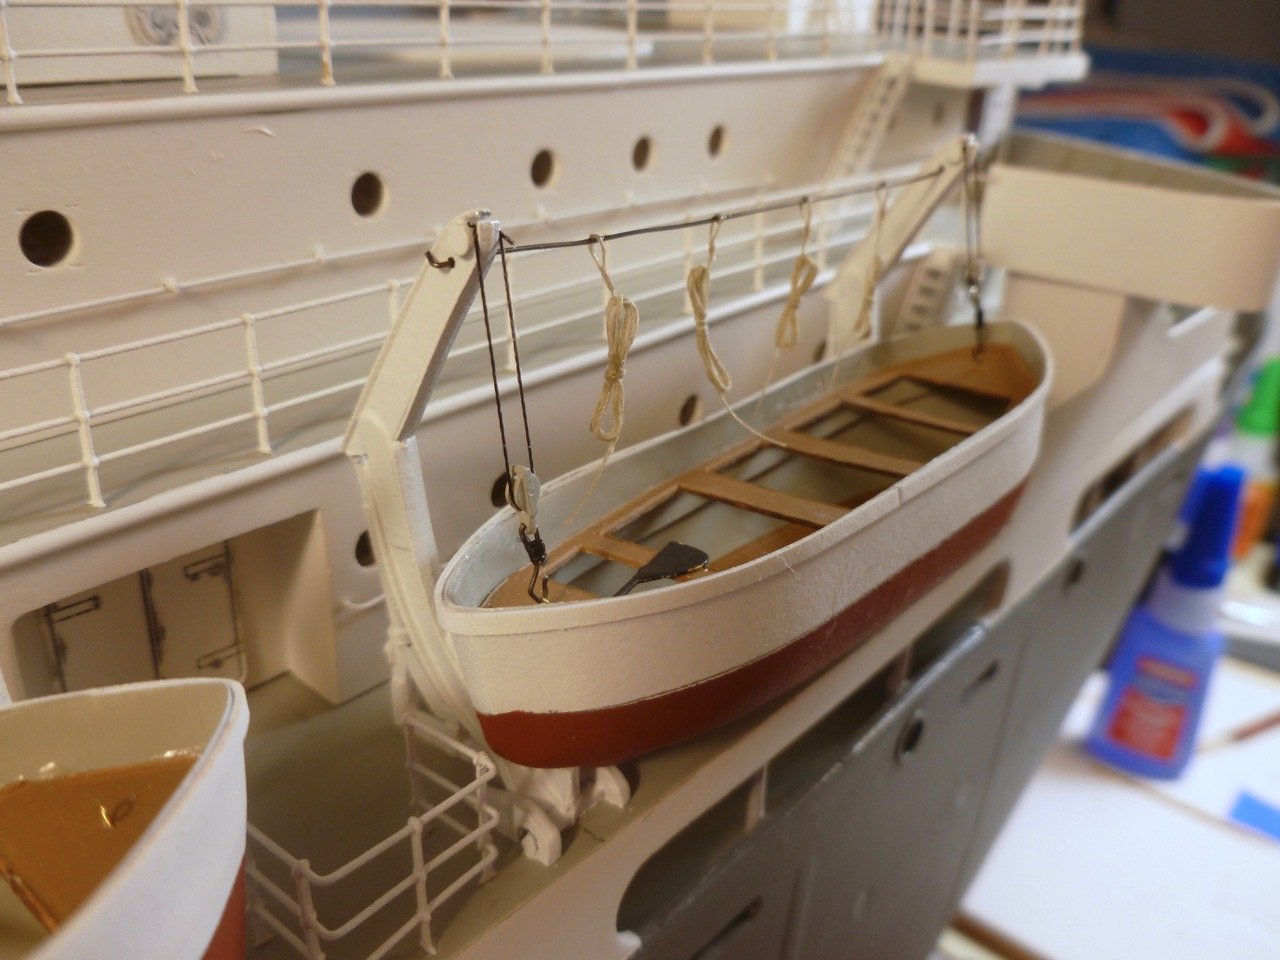
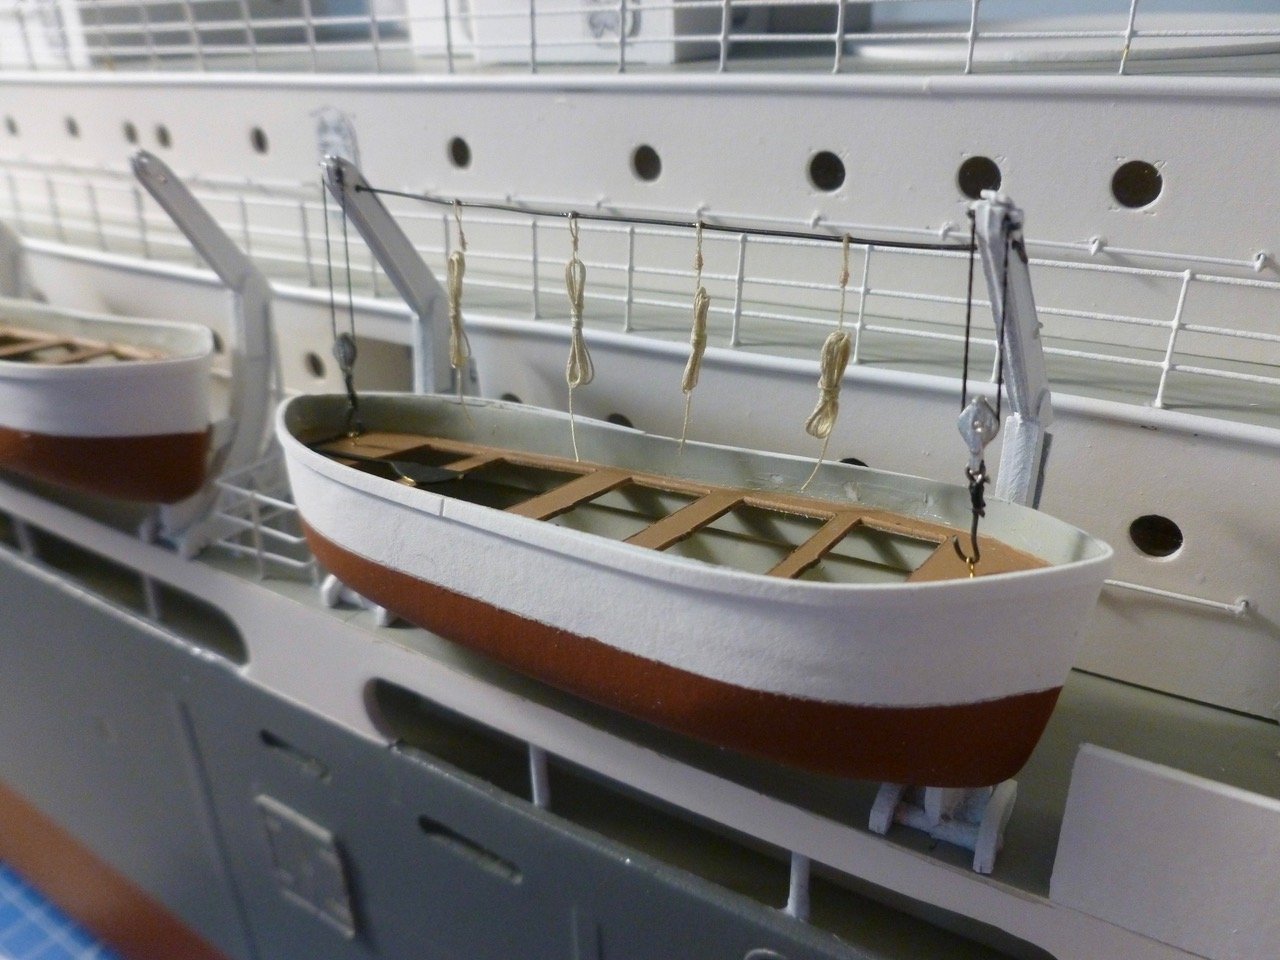
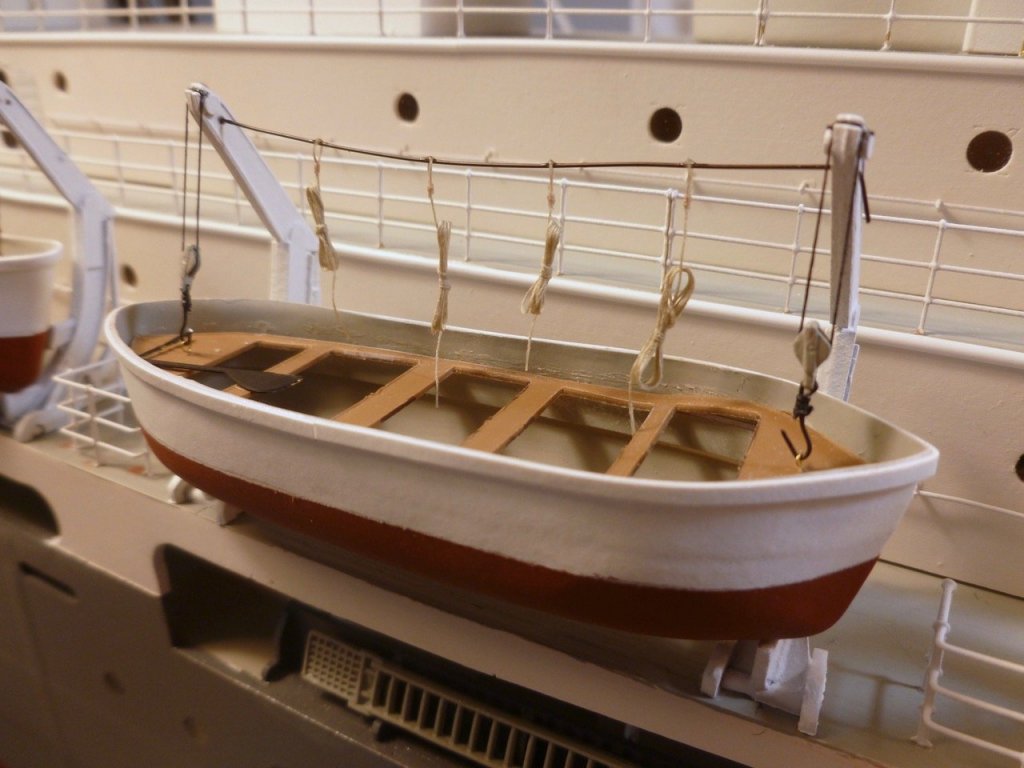
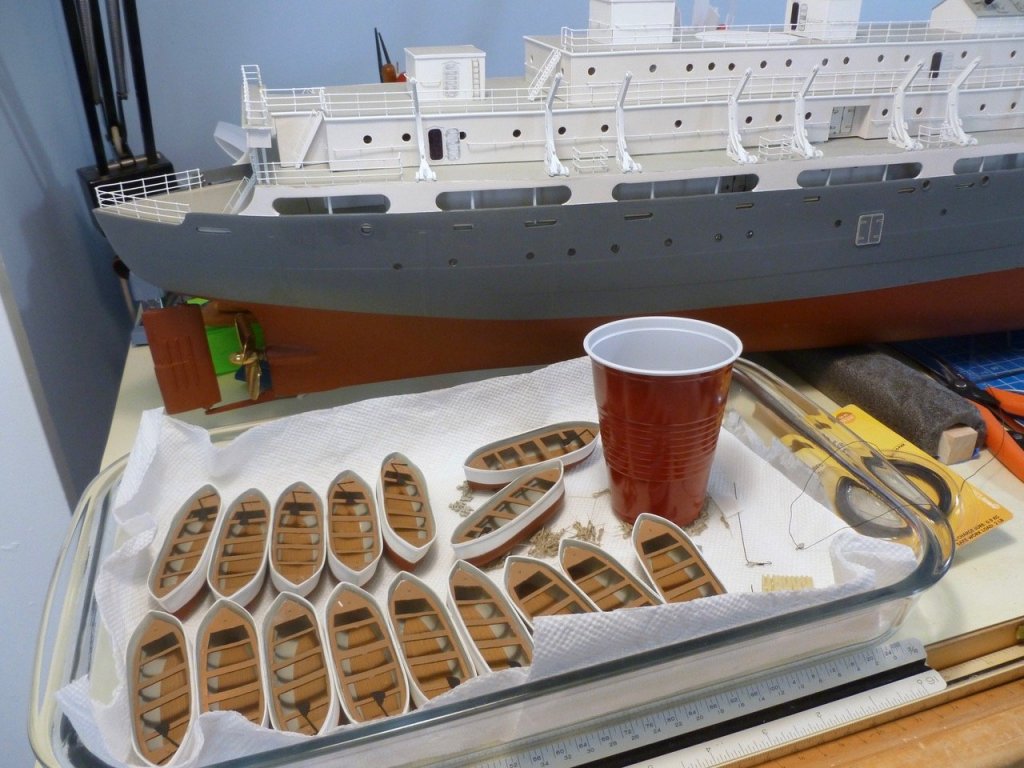
To those who gave likes, thank you and thanks for stopping by. Bill, more wonderful guidance. Thanks so much. I really appreciate it. I ordered a 25 lb bag and maybe I’ll get a stash of baggies since all my 35 mm canisters went in the trash when digital took over. A pound in a canister - who would have guessed. Steve Sunday fun day. Cargo blocks and hooks were united. The first four lifeboats are rigged and manropes hung. On the real ship the lifeboat rigging extends over to blocks and cleats of some sort on the cabin wall, but since the cabin section is removable for access to the innards the rigging had to be terminated at the head of the davit. A few more photos are below.


- 446 replies
-
- 10
-
-
- zebulon b vance
- deans marine
- (and 3 more)
-
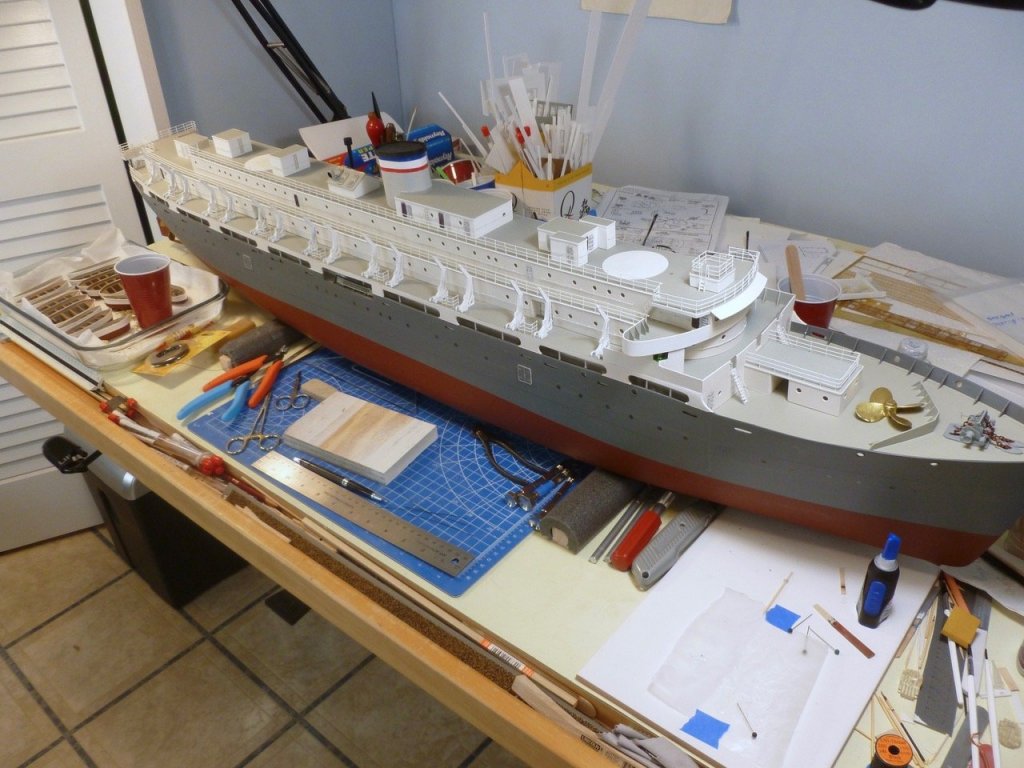
Bill, thanks for the detailed explanation and for your research. That's an eye opener! I just weighed the ship with batteries and it is about 15.5 lbs, assuming any sort of accuracy from our bathroom scale, so it looks like I'll need about 20 lbs of additional ballast if I am understanding the calculations correctly. I can get a 25 lb bag of shot online so hopefully that will do it, plus a gallon or so of epoxy to fix it all in place. I guess I better enlist an interested family member to help lug the ship around😅 Steve
- 446 replies
-
- 2
-
-
- zebulon b vance
- deans marine
- (and 3 more)
-
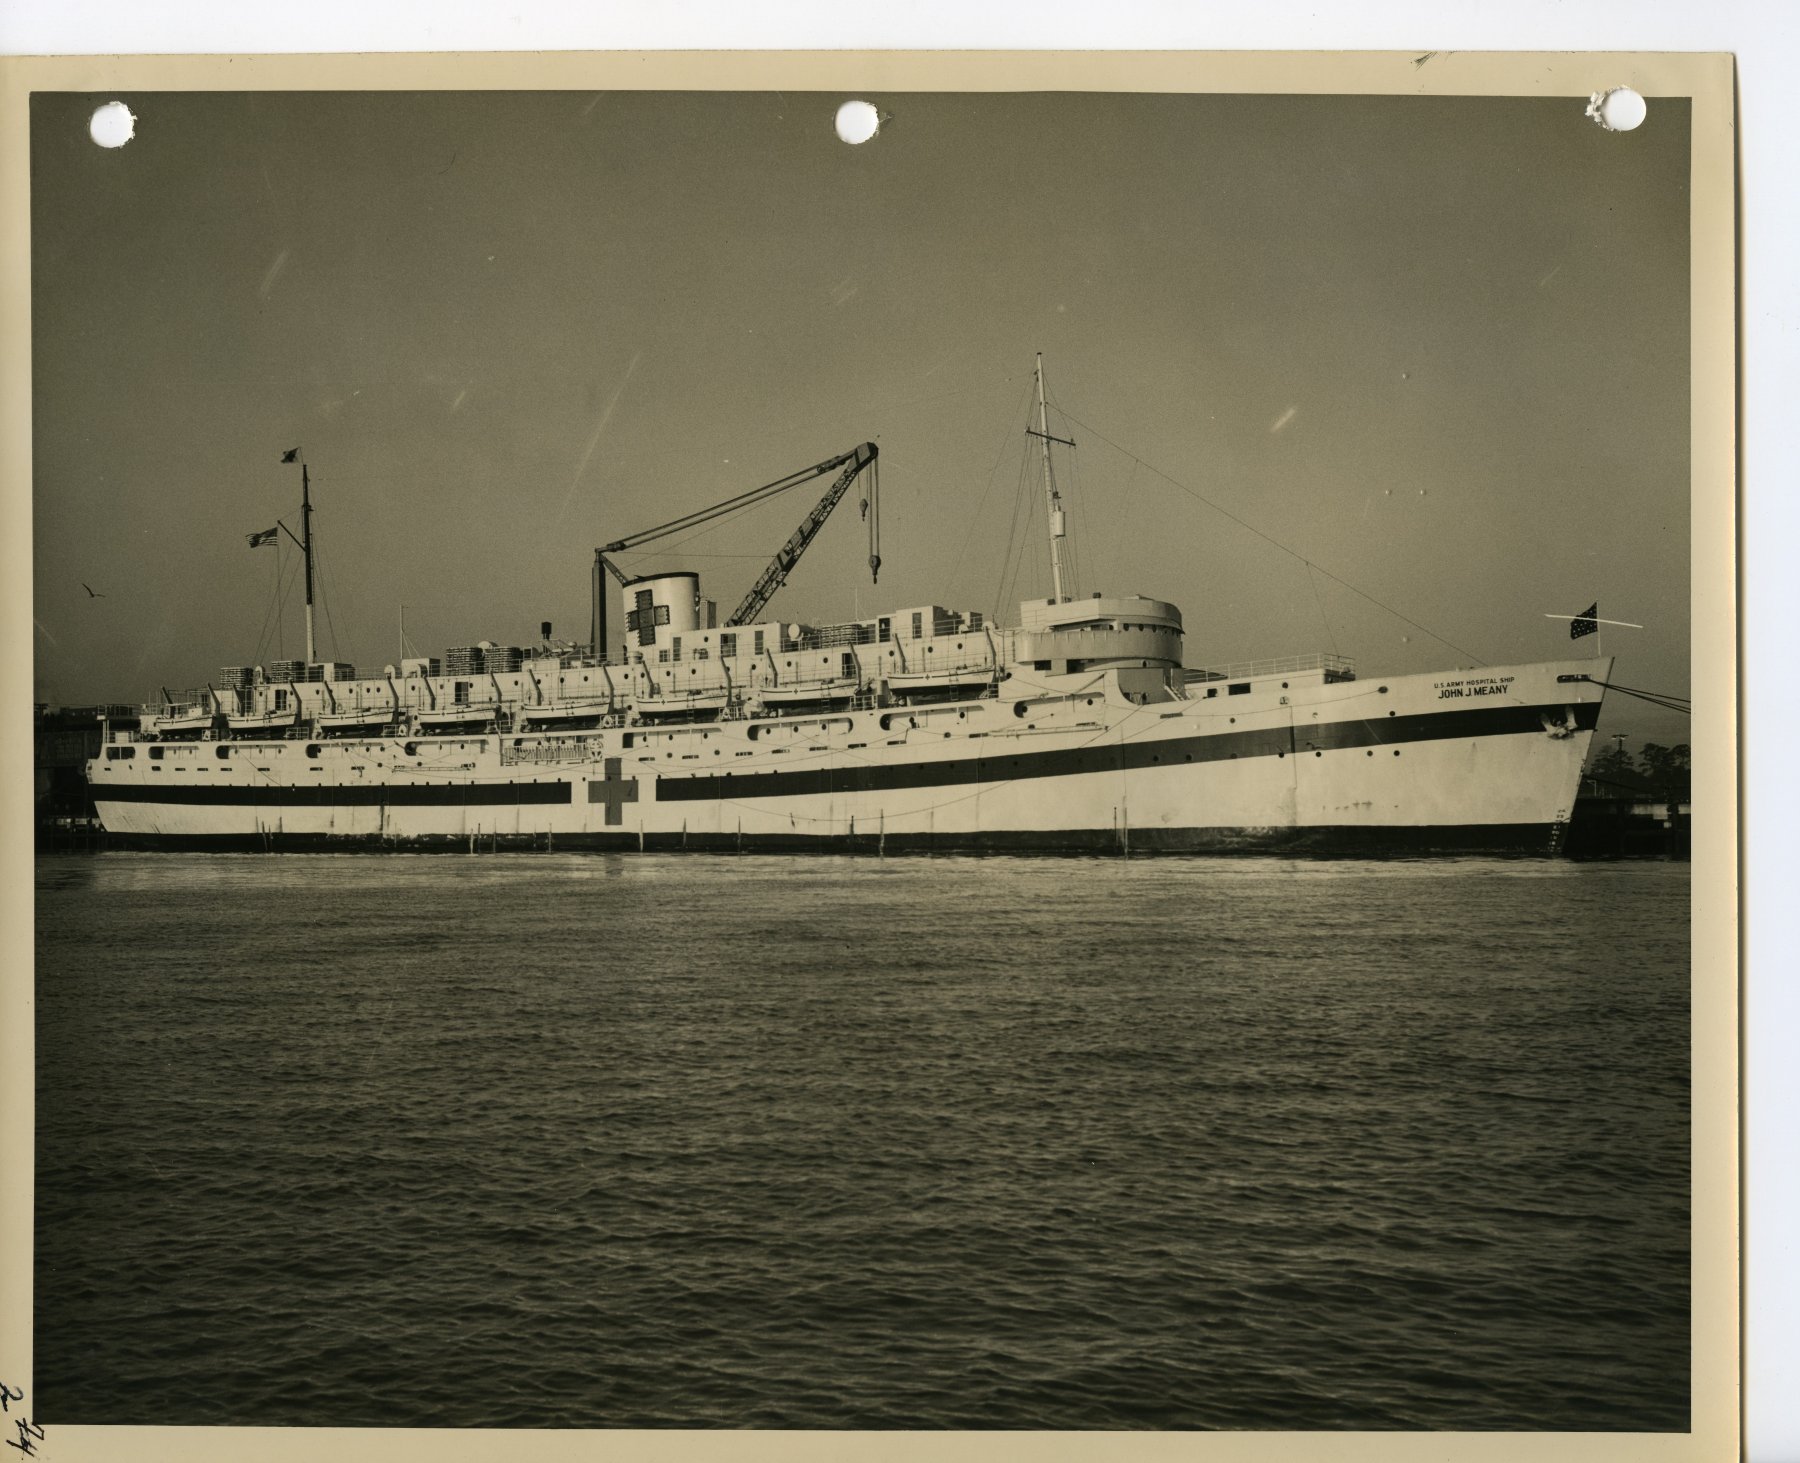
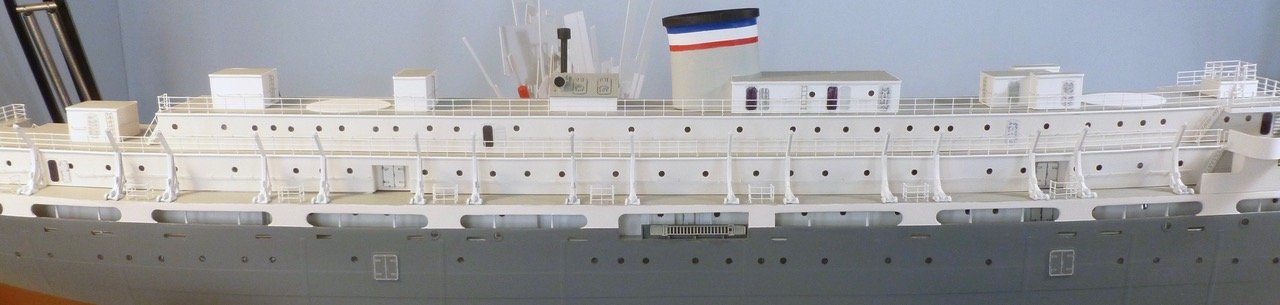
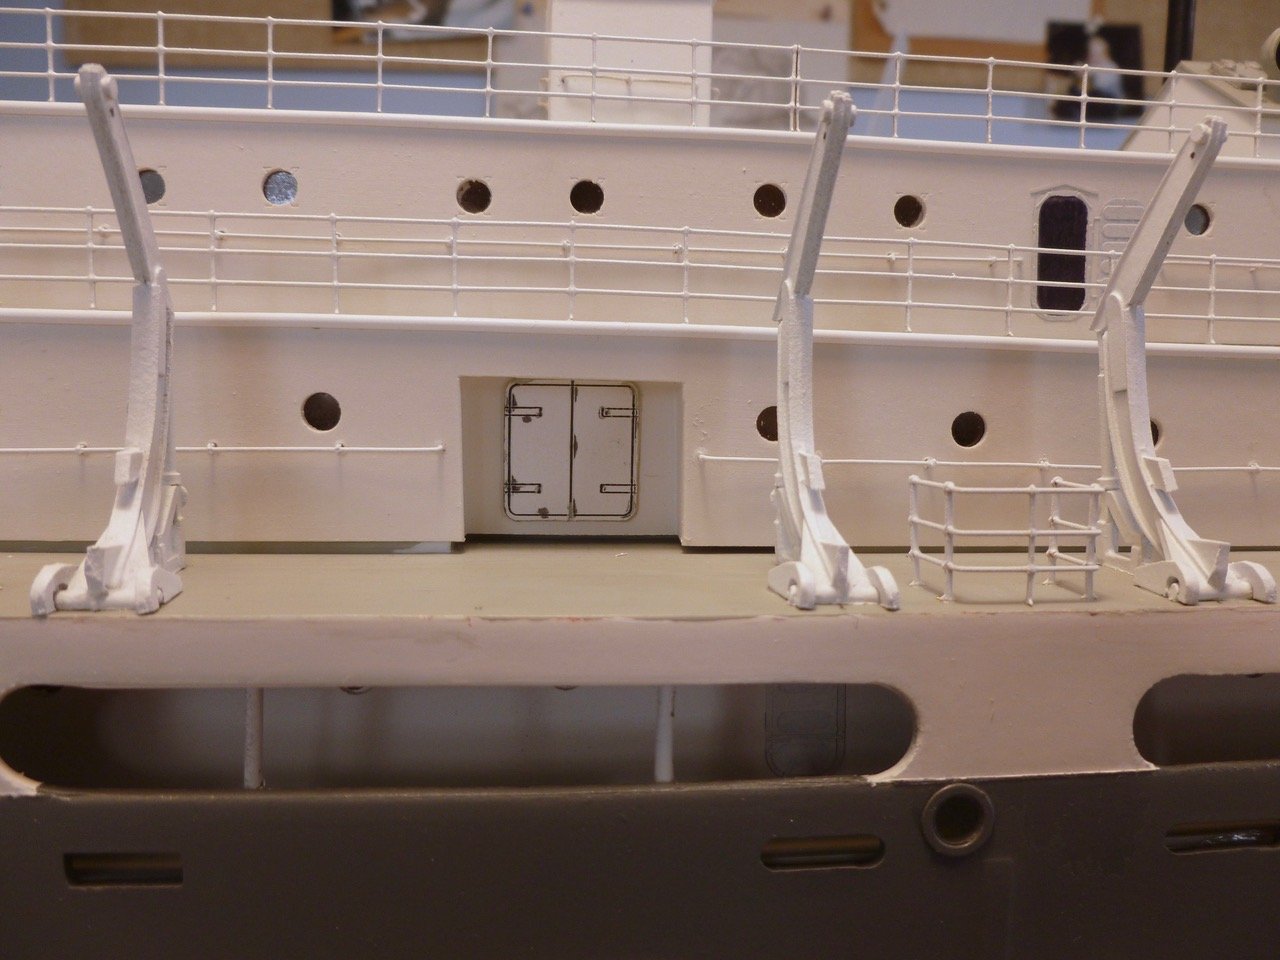
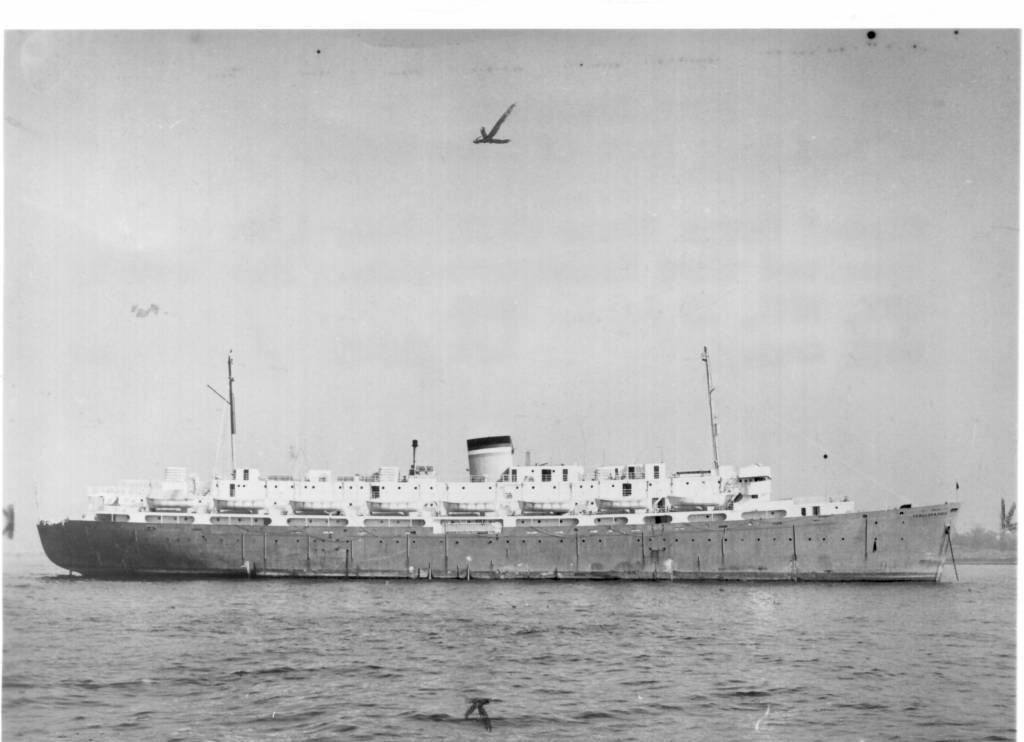
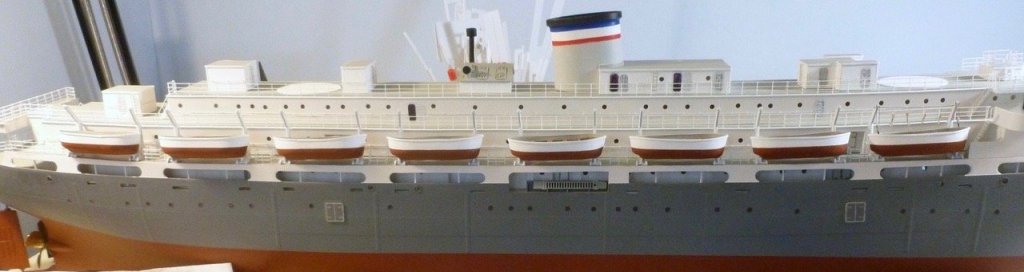
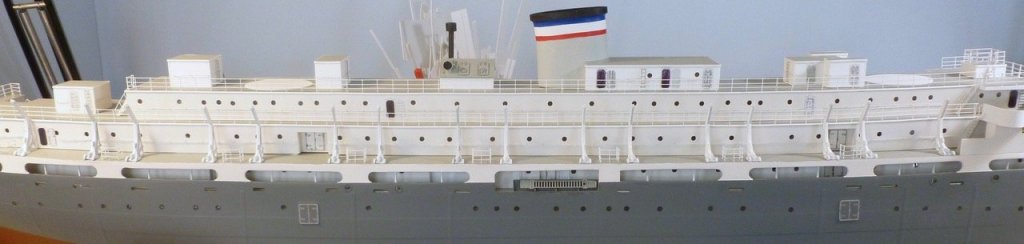
To those who gave likes, thank you and thanks for stopping by. Lou, thanks for your insight and ongoing guidance. When you say a lot of ballast how much do you think I should have on hand - 5 pounds, 10 pounds? Do you have any suggestions for ballast type? Lead bars don't seem to be available locally. Would pea stone in plastic baggies work? Bill, thanks for your feedback. Sorry about the Bristol mishap. When I was building plastic car models as a youth I was so anxious to get to the finish that I usually opened the box on the bus ride home to inspect the contents, and mostly skipped painting so I could get the wheels rolling. Mark, thanks for your ongoing interest. The promenade openings I'm referencing are the horizontal, oblong, racetrack shaped holes in the superstructure wall along the main deck. In the photo above there are 11 openings in the white area above the dark bulwark, just below the lifeboats. In the photo below (also courtesy of the National Archives) of the Vance in its hospital (John J. Meany) mode there are 10 openings just below the lifeboats. If the openings in the photo below are numbered 1 -10 forward to aft, the second and third openings magically became three openings in the post-hospital configuration. I went to my go to reference (Hospital Ships of World War II, by Emory A. Massman) just now and discovered that the Blanche F. Sigman, one of the six converted liberty ships, had a promenade opening configuration that matches the photo in post above, which leads me to believe the ship in the photo above is of the Blanche F. Sigman, not the Zebulon B. Vance (aka John J. Meany). More supporting evidence is that the narrative of the Sigman indicates she was decommissioned as a hospital ship in April 1946 before returning from France to New York. If the hospital markings were painted out as part of the decommissioning, and since both ships were in New York in early 1946 it seems reasonable that a photo of the Sigman may have been mis-identified as the Vance.

- 446 replies
-
- 6
-
-
- zebulon b vance
- deans marine
- (and 3 more)
-
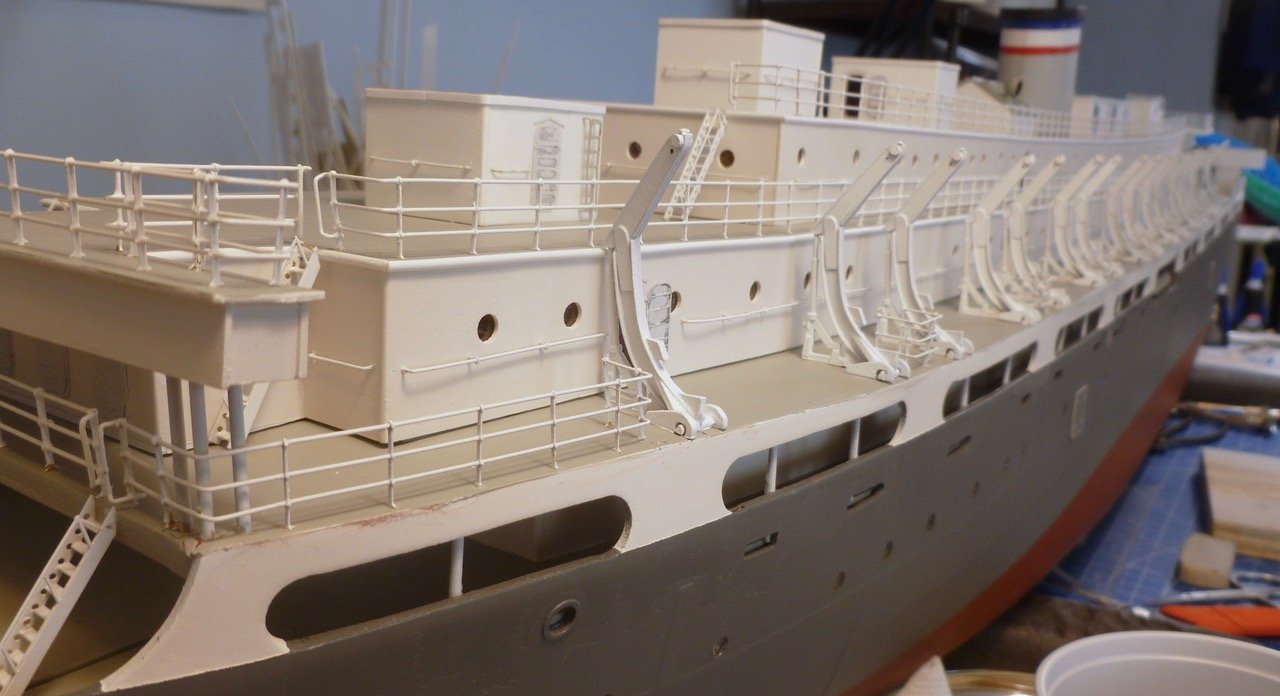
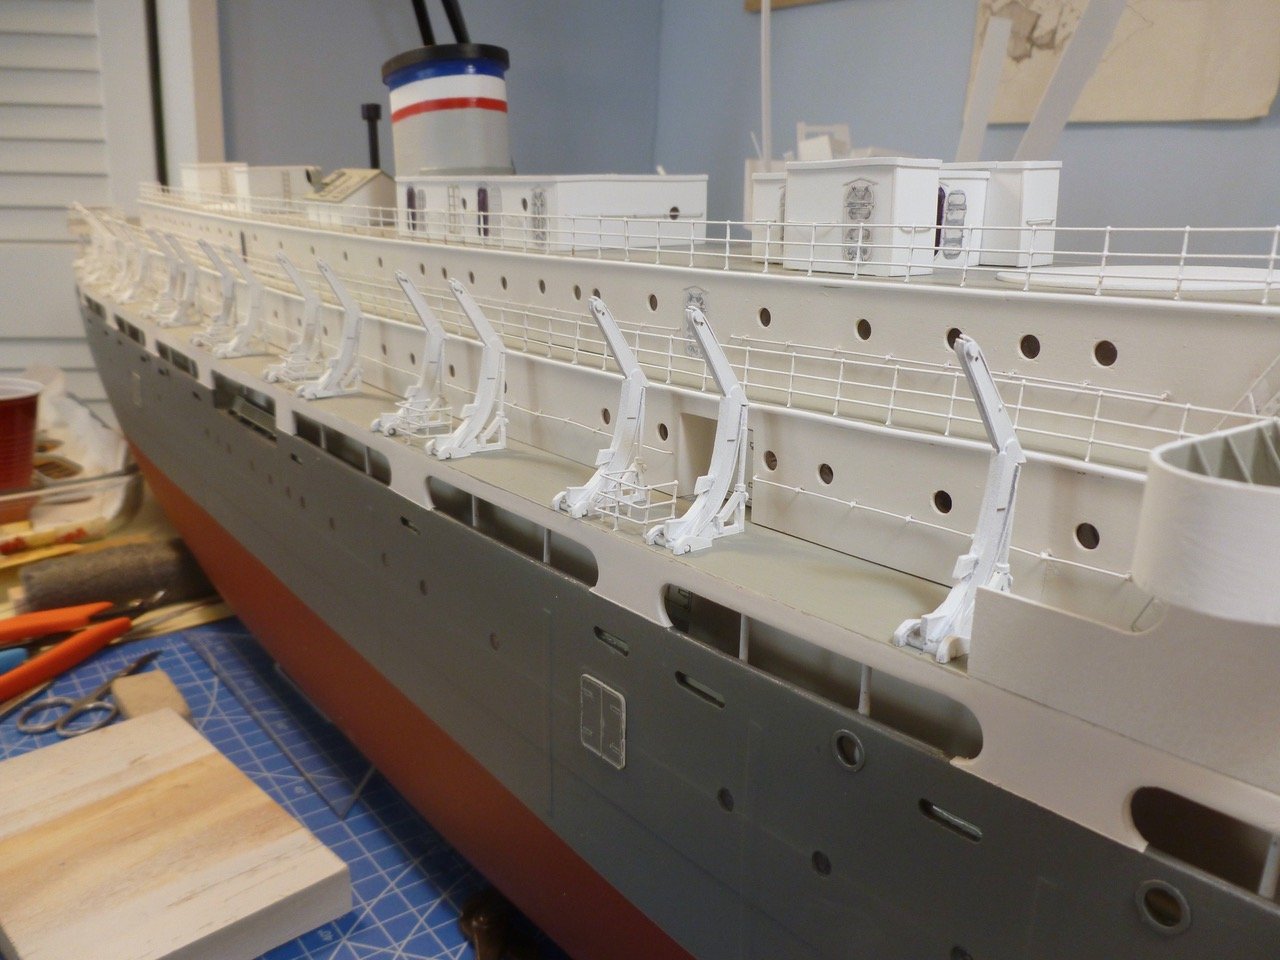
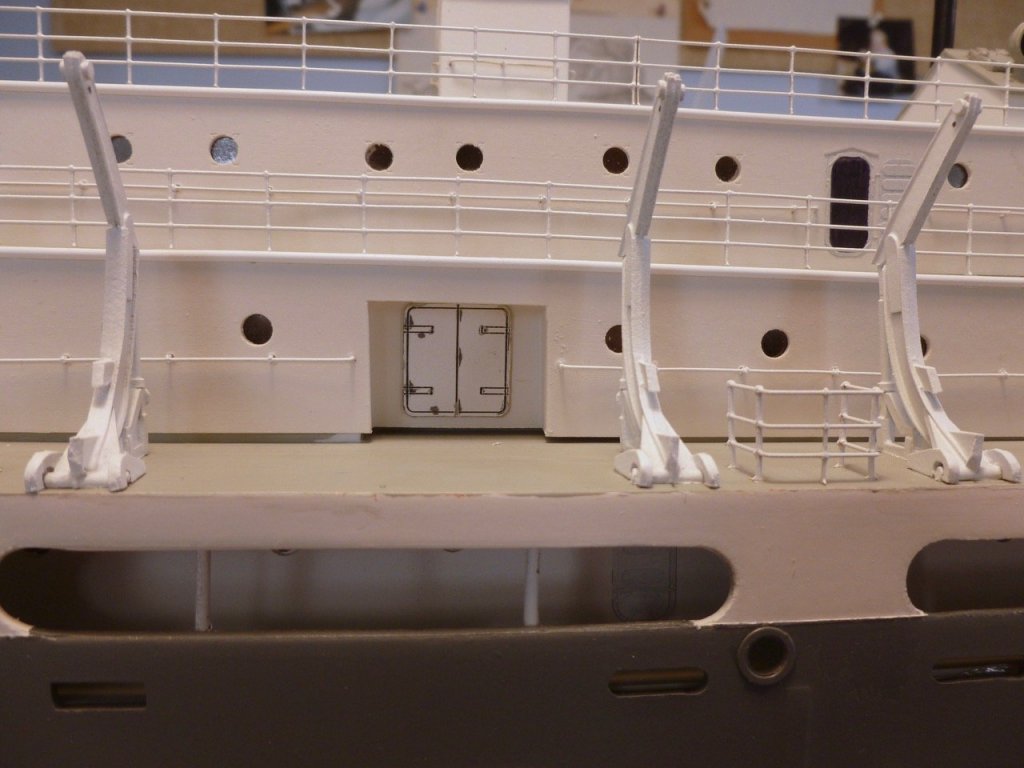
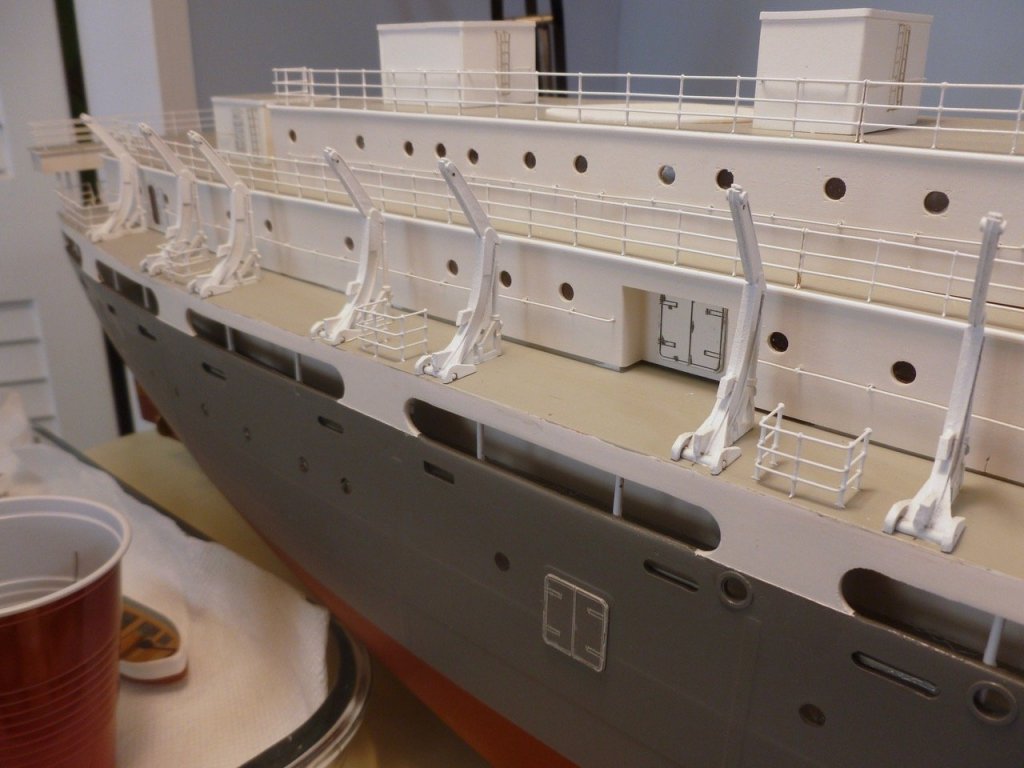
To those who gave likes, thank you and thanks for stopping by. Bill, in hospital mode (with name temporarily changed to John J. Meany) the Vance lifeboats had a stripe and crosses. But in the photo below, which the National Archives sent to me when I inquired about the Vance appearance in post-hospital period, the boats are painted out a single color (assumed white) above the waterline. This didn’t surprise me since they also painted out the large cross and green stripe along the ship’s hull. In fact they repainted the entire hull from white to a darker color. Now if someone could explain to me why the post-hospital Vance in the photo below seemed to suddenly sprout an extra promenade opening at the main deck level (11 total) while the hi-resolution photos of the Meany all show 10.... The ship was only in the dockyard for a month between hospital and war bride duty and it seems strange that a major superstructure change would be undertaken during a quickie refit. And if this isn't the Vance, what is it? Rhetorical questions for me since I'm sticking with 10 openings as shown in the Meany, but puzzling just the same. Gary, thank you for your kind comments. Regarding railings, I drilled the holes along the deck with a template and used straight rigid lengths (8 inches each) of brass for railings. The deck holes were snug enough to allow me to pack the stanchions onto three railings, then spread them out to plug temporarily into the holes. Once everything was aligned each joint received a dab of CA. Then the completed sections were removed, washed, air dried, painted and glued in place. I don’t know if this is standard procedure but it seemed to help keep the railings straight. For joints between sections I snipped the mounting tab off one end stanchion which allowed me to glue it to the last stanchion of the previous section. After painting, the double thickness stanchion isn’t that noticeable and the extra stiffness allowed me to dispense with angle bracing. Oh, by the way there are some wonky ones, mostly in short sections around corners and where I was trying different techniques. But thanks for not noticing. Carl, no hole in the lifeboat keels. I figure I’ll use the previously suggested eyedropper technique if needed. Steve
- 446 replies
-
- 4
-
-
- zebulon b vance
- deans marine
- (and 3 more)
-
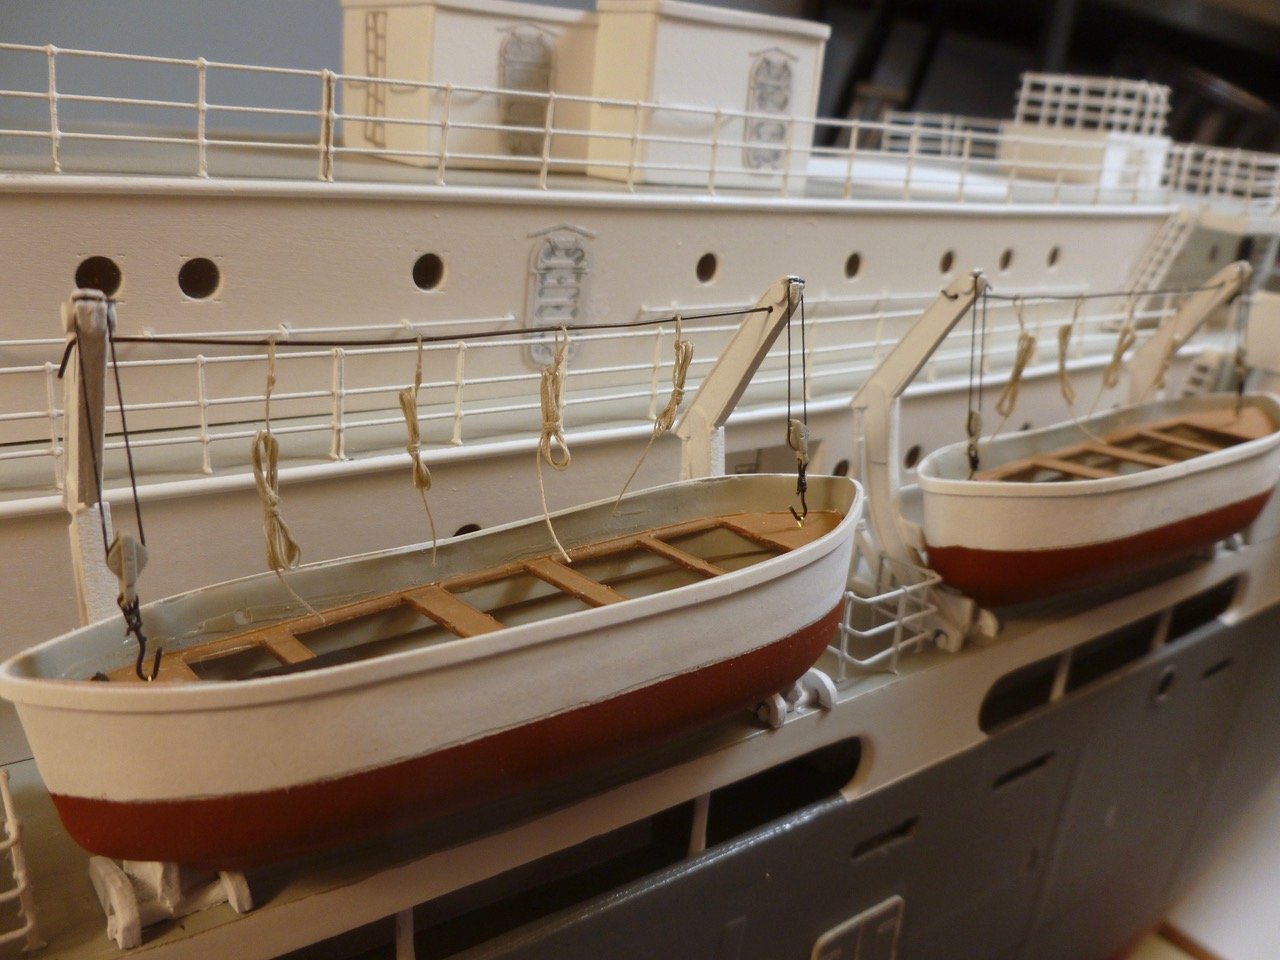
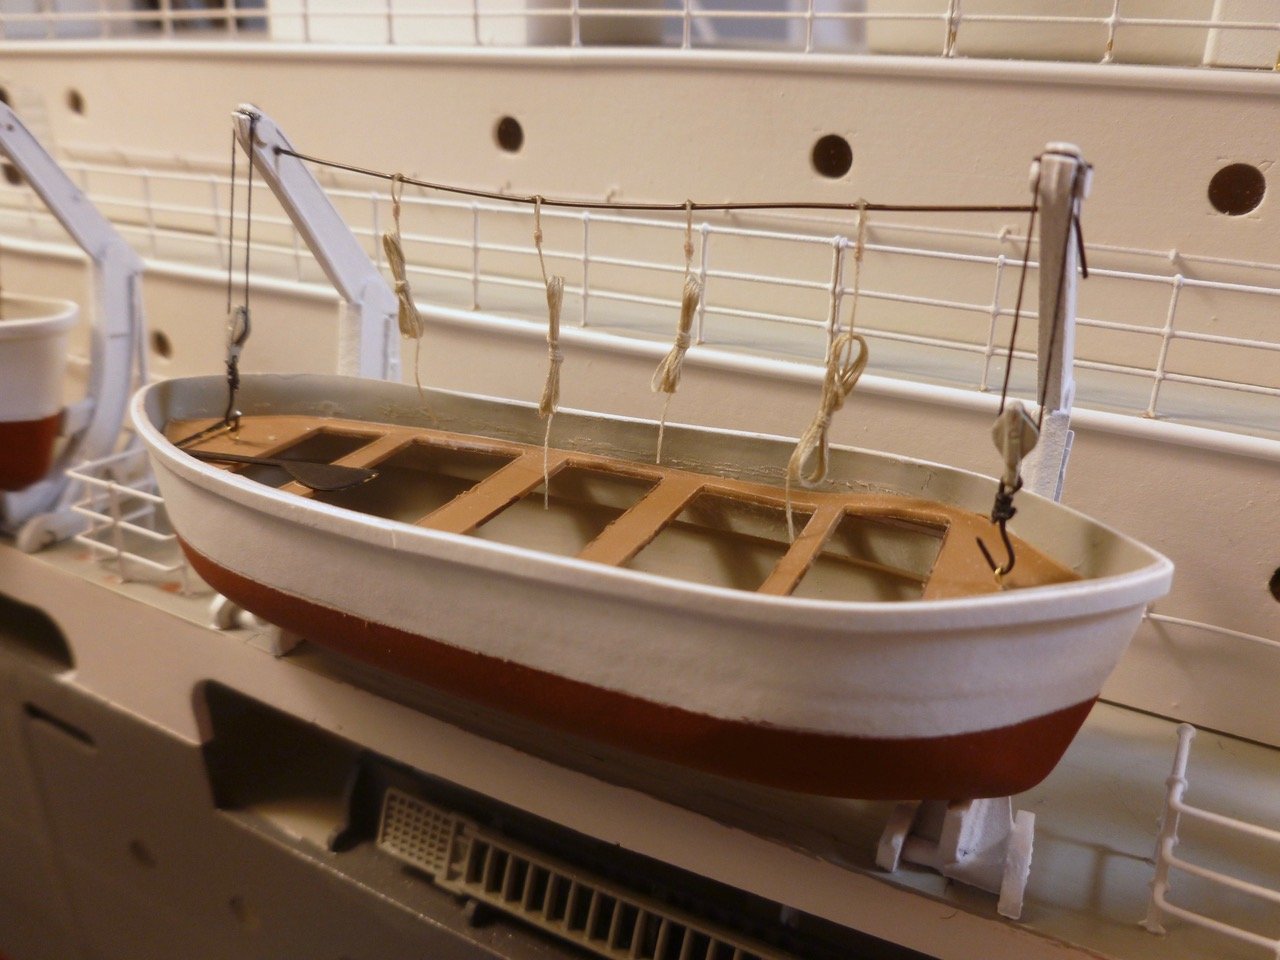
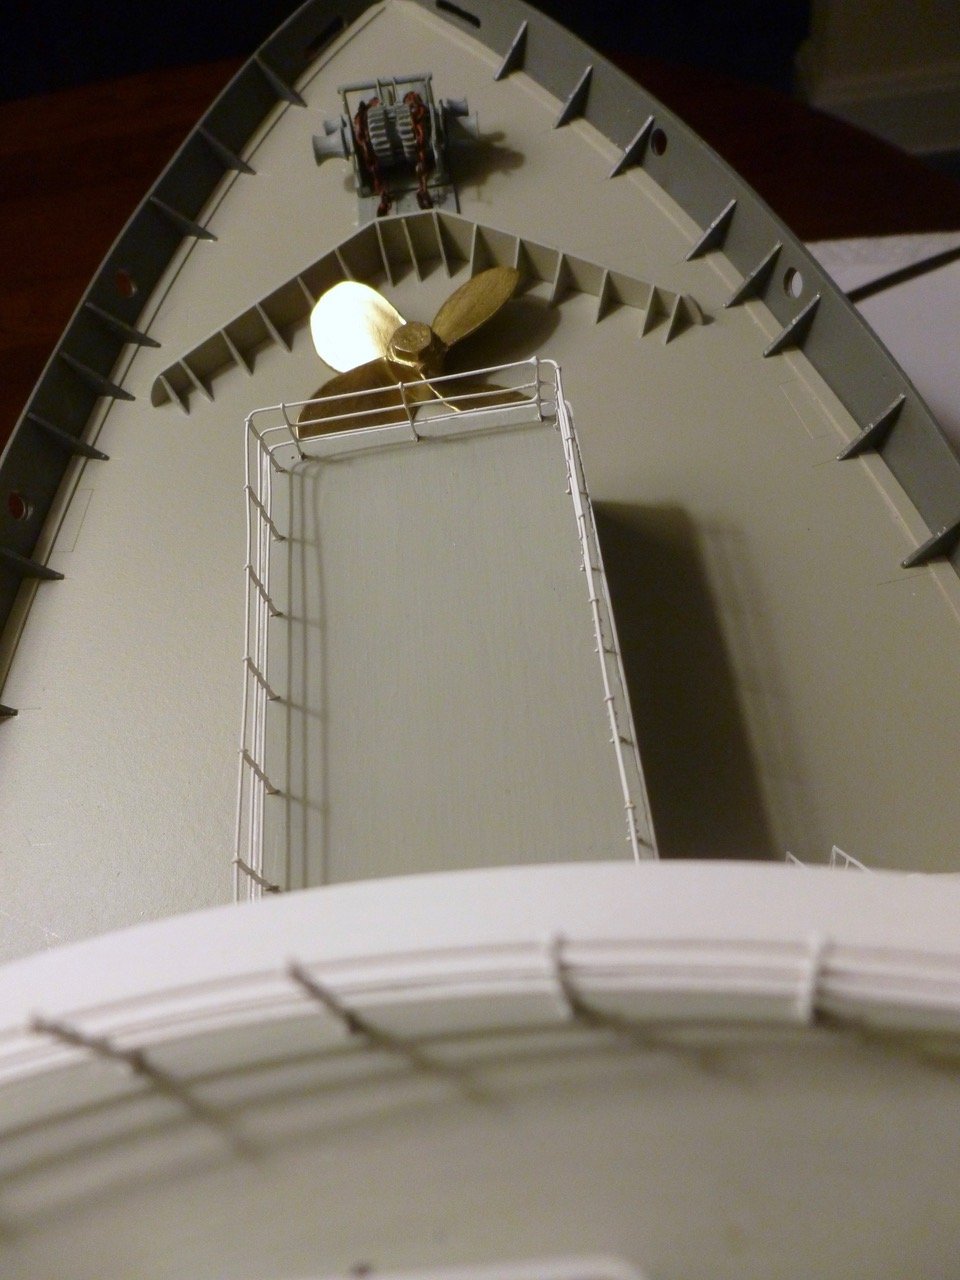
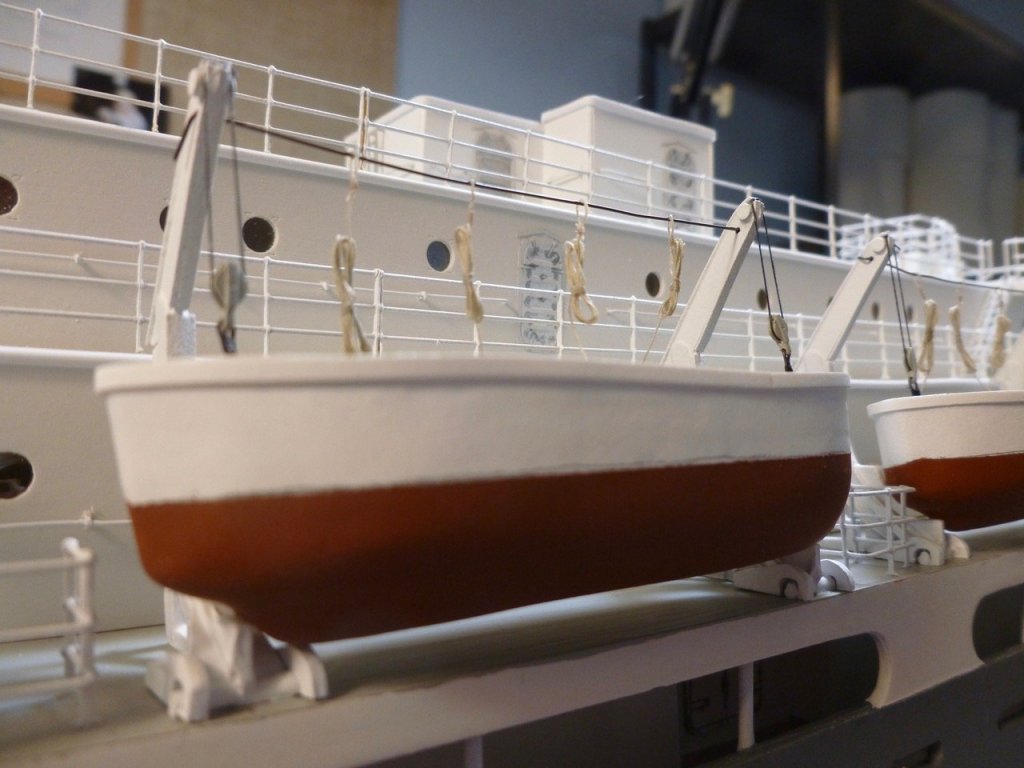
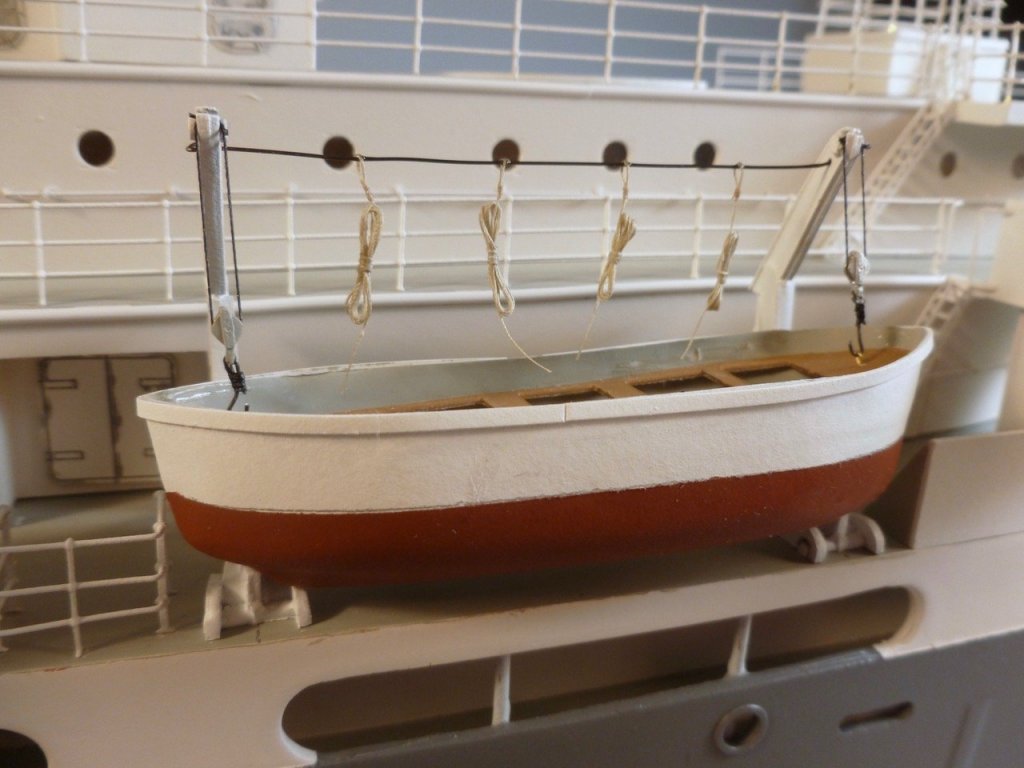
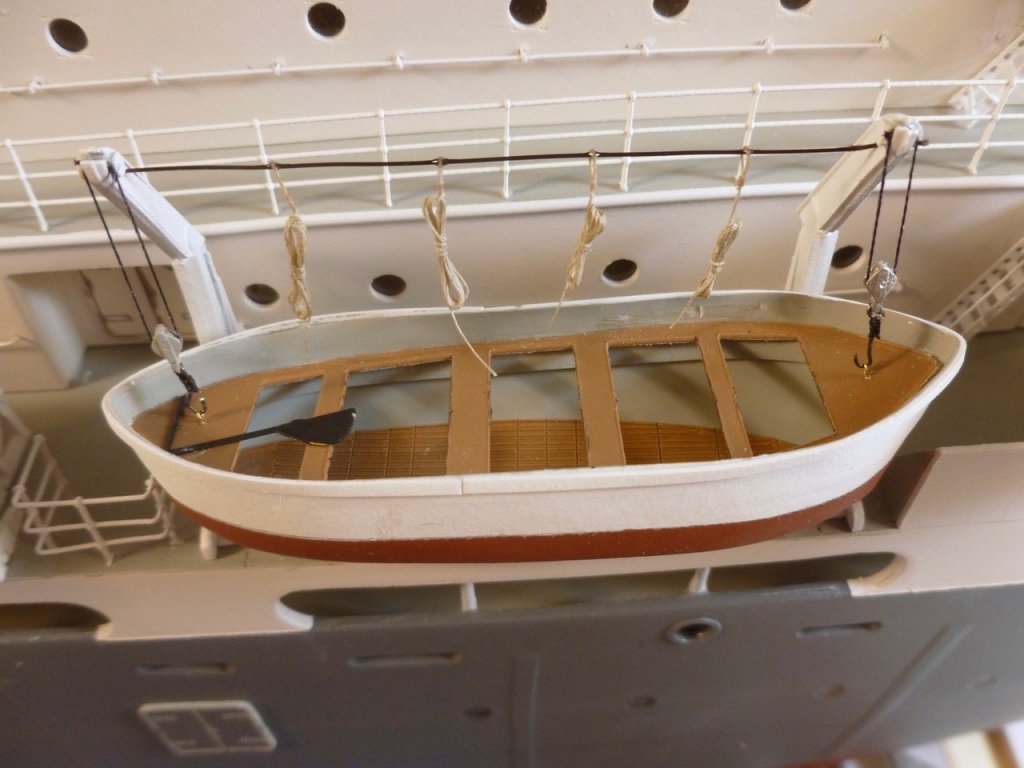
To those who gave likes, thank you and thanks for stopping by. Bill, thank you for your feedback and guidance. The antenna is just below the main deck along the inside face of the hull so hopefully it will get a good signal. Steve Lifeboats in the fray The battle plan took a sudden turn for the better when the lifeboats discovered that with a little CA help they could ascend to the davits sans rigging. In moments they were engaged. With the lifeboats solidly in place the rigging should go quickly. Above and below are shots of the first result. Some fine trimming is in order. The annealed steel wire gives has enough stiffness to give extra support to the top of the davits; and some photos show a fairly sturdy cable supporting the manropes so I'll stick with the wire unless the group feels rope is more appropriate. The last pic has different coloring since the photographer was trying for an artsy shot.


- 446 replies
-
- 10
-
-
- zebulon b vance
- deans marine
- (and 3 more)
-
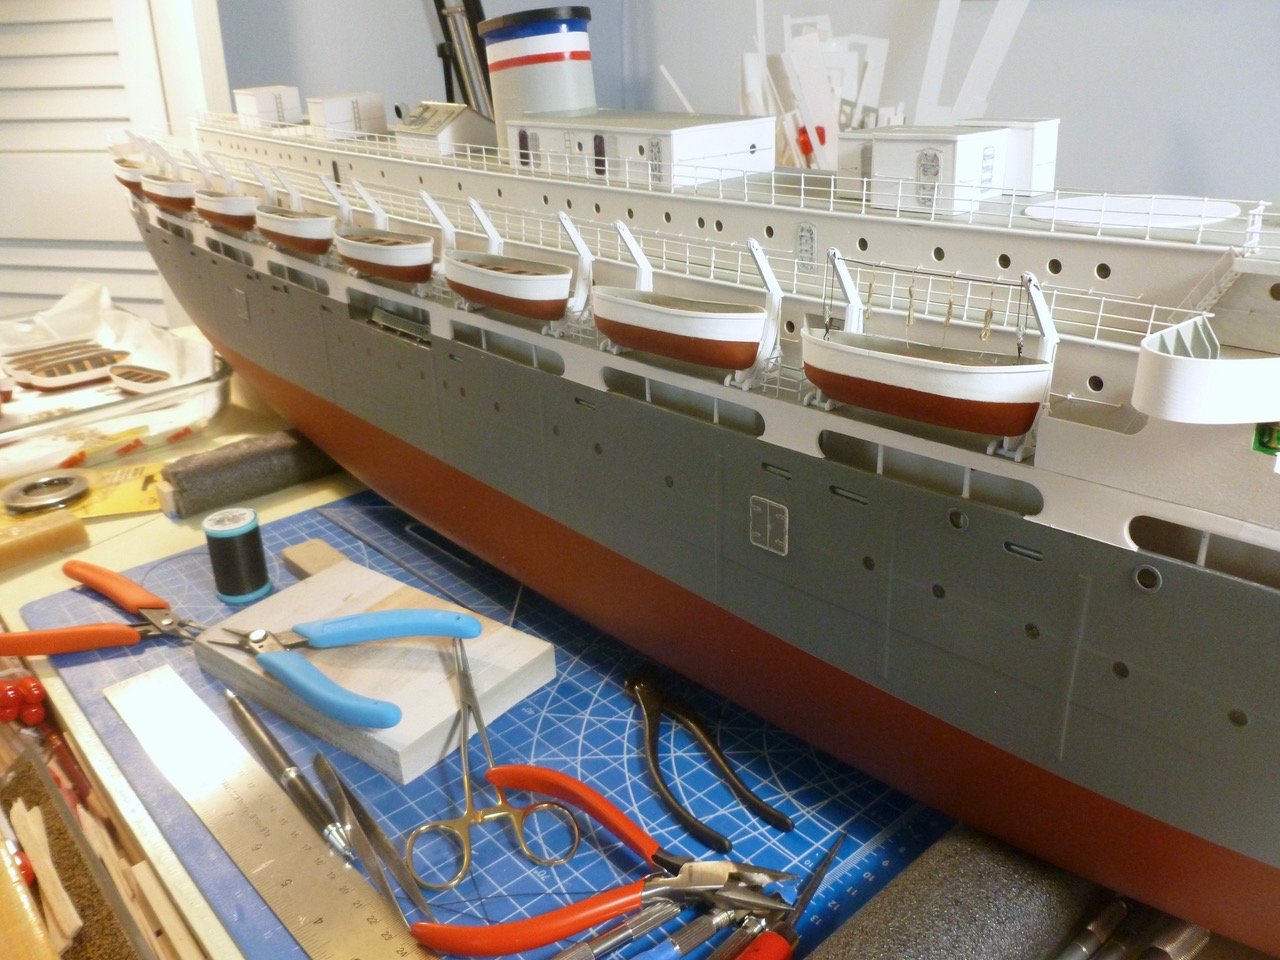
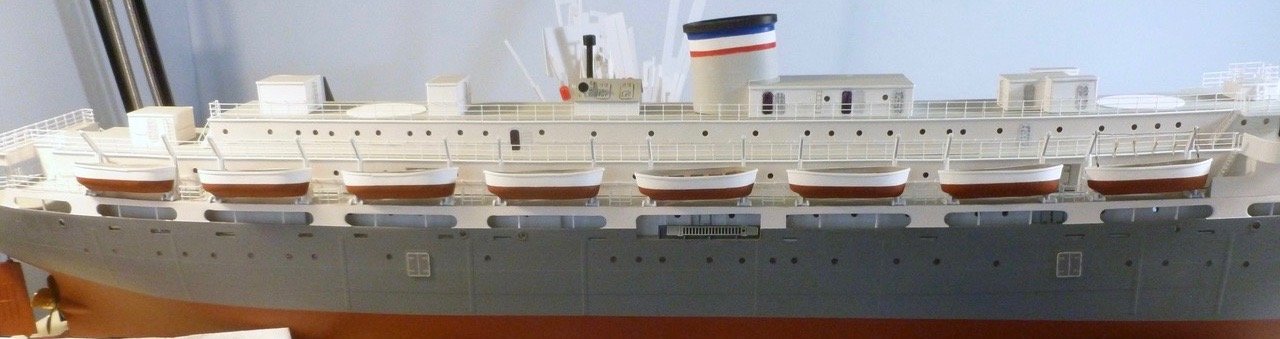
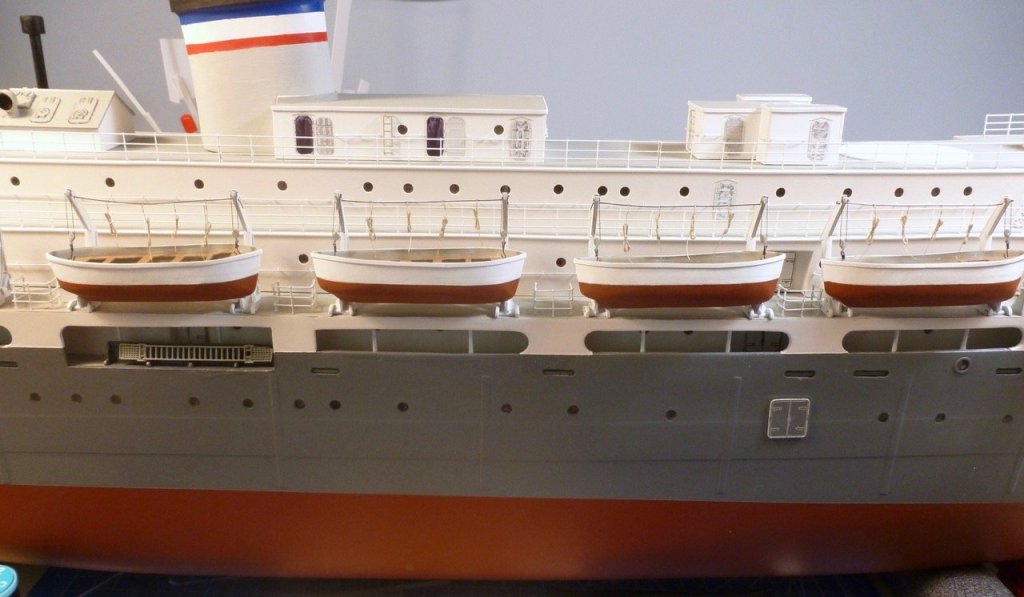
To those who gave likes, thank you and thanks for stopping by. Bill and Lou, quite awhile ago I discovered the bathtub trick wasn’t an option because the ship is too big. I have been scouting the nearby pond but it has two large aerating fountains that create continuous ripples, waves at 1:96. I am unsure how far my two channel radio signal will carry and I don’t want the ship lost to the waves or spray circles. The next test option (other than buying waders) is my son’s swimming pool which was kindly offered and will likely be accepted. I was thinking today or tomorrow on the eve of the lifeboat invasion but the forecast is storms both days. I’m just as anxious to finish the ship as to sail it, so for better or worse the lifeboats will be installed prior to sailing. I guess it’s all in or go home. At the moment the ballast amount and positioning is my biggest concern (unless you say otherwise) but the upper decks are removable which should make for easier shifting, adding or subtracting. The ship starts with two six volt gel cells, one for power centrally located and one forward for backup and to balance the aft motor so think I’m headed in the right direction. Steve Invasion! At dawn the lifeboat invasion commenced, starting with a sweep of the landing area. An aerial overview and other early images were quickly dispatched to avoid duplicating the tragic loss of the D-Day photo record. The warriors remain packed and hunkered down in their landing craft until the davits are solidly dug in to the boat deck. Some are trying to quell their anxiety with illicit rum. Digging in - one man slightly off the mark but not bad for the fog of battle Starboard positions established The buddy system Surrounding the accessways. All eight positions achieved Awaiting the next wave


- 446 replies
-
- 9
-
-
- zebulon b vance
- deans marine
- (and 3 more)
-
Mark, thank you for your kind comment. I'll definitely work on a Sousa sound bite. Kevin, thank you for your kind comment. The ship has been languishing on the dining room table in somewhat dim light to make room for marshaling. But it will be back in the shipyard shortly to start the davit installation. As to what's left after lifeboats, the list includes portside railings, carley floats, deck furniture, vents, anchors, masts, aft awning, rope reels and lettering. And most important, launching and sailing! Steve
- 446 replies
-
- 4
-
-
- zebulon b vance
- deans marine
- (and 3 more)
-
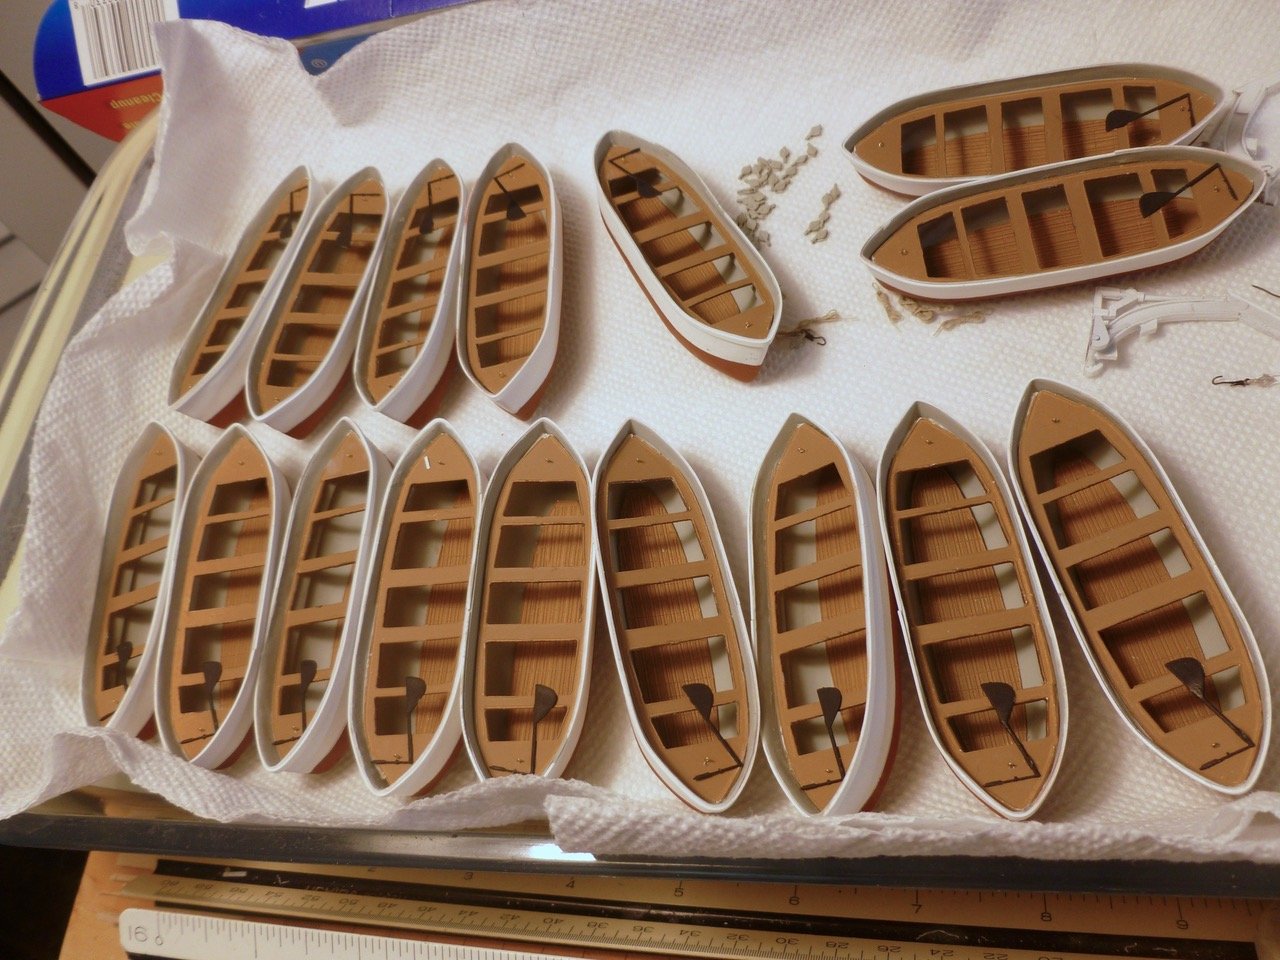
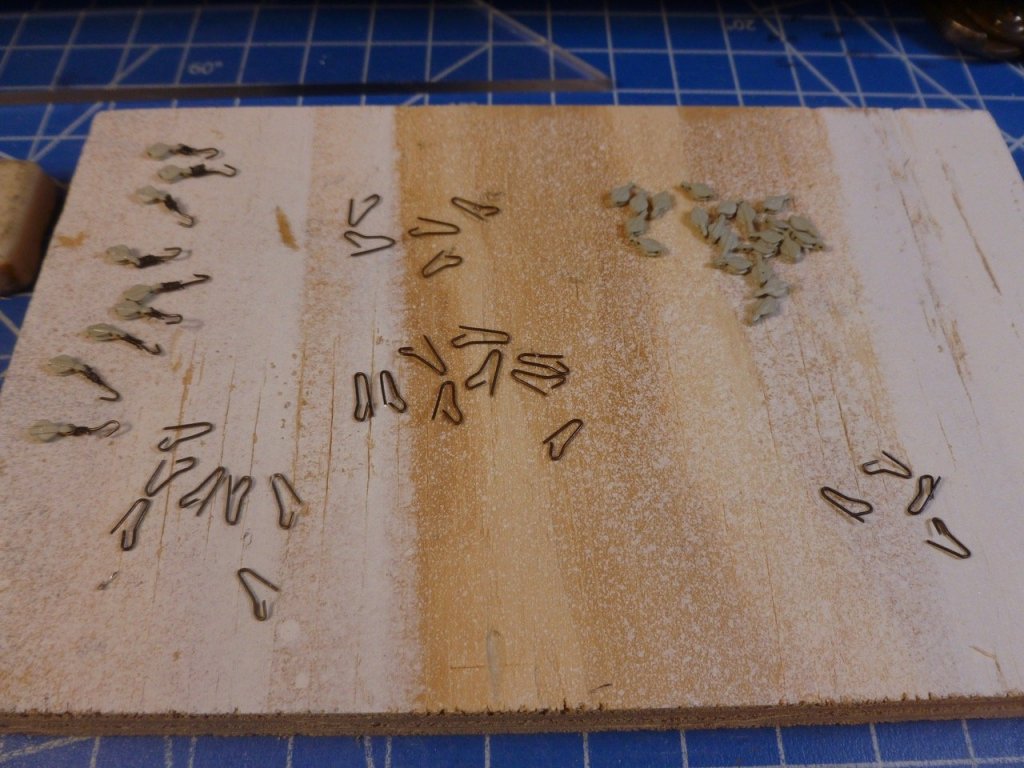
To those who gave likes, thank you and thanks for stopping by. Carl, a toes-t to you for keeping all the blogs lively! Steve Marshaling troops at the border The troops continue to gather at the border in anticipation of the invasion. An impressive array of 16 boats, 32 davits, 32 hooks (not yet in fighting trim), 32 cargo blocks and 50 manropes (soon to be 64) are fit and ready to descend on the boat deck. Boats, davits and blocks have moved into position on the left flank out of sight. Wishing them all the best of luck but knowing full well that the best plan of attack rarely survives the first engagement.

- 446 replies
-
- 11
-
-
- zebulon b vance
- deans marine
- (and 3 more)
-
Denis, Thanks for taking on such an important ship. It's looking great and is weathering your self critiques very well 😉. I had a chance to visit the Arizona memorial many years ago and it was both humbling and very moving. I wish you all the best with the build. Steve
-
Nils, Thanks so much for your quick feedback and clear explanation. No more floppy brass sheets for me! Steve
-
Nils, Beautiful work as usual. Thank you for sharing. Is the brass one piece, and if so what did you use to cut out the center? I would think a thin sheet would be devilish to keep flat. Thank you Steve
-
To those who gave likes, thank you and thanks for stopping by. Mark and Lou, I appreciate your kind comments. Carl, if the anchor can pass through your slippers you deserve another award.... Steve
- 446 replies
-
- 5
-
-
- zebulon b vance
- deans marine
- (and 3 more)
-
Great job progress. Xuron also makes scissors specifically for PE. Tiny little hardened edges let you get really close and they go through PE like the proverbial hot knife. I'm doing a bunch of PE trimming and have found them to be indispensable. Steve
-
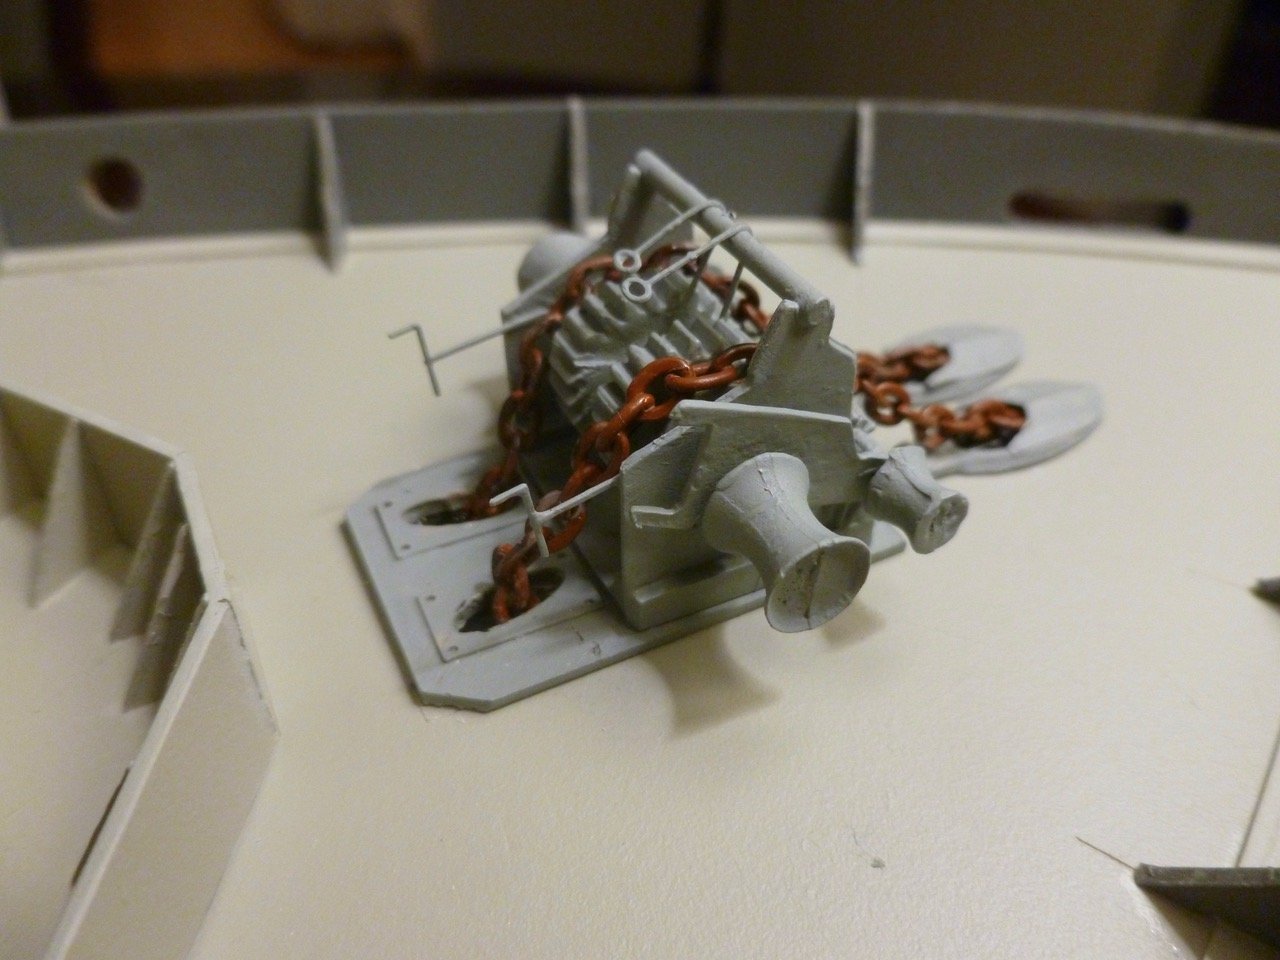
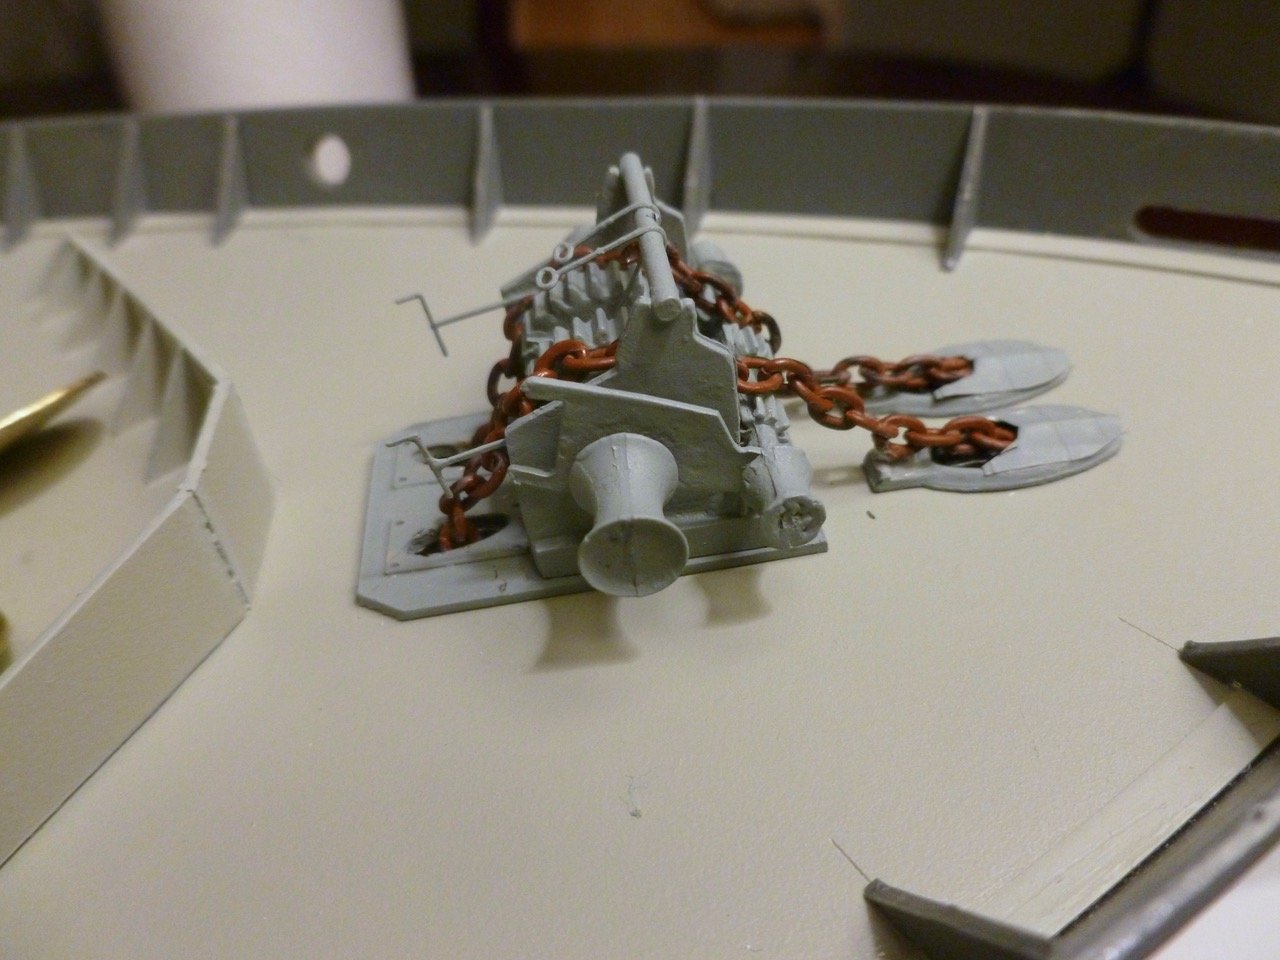
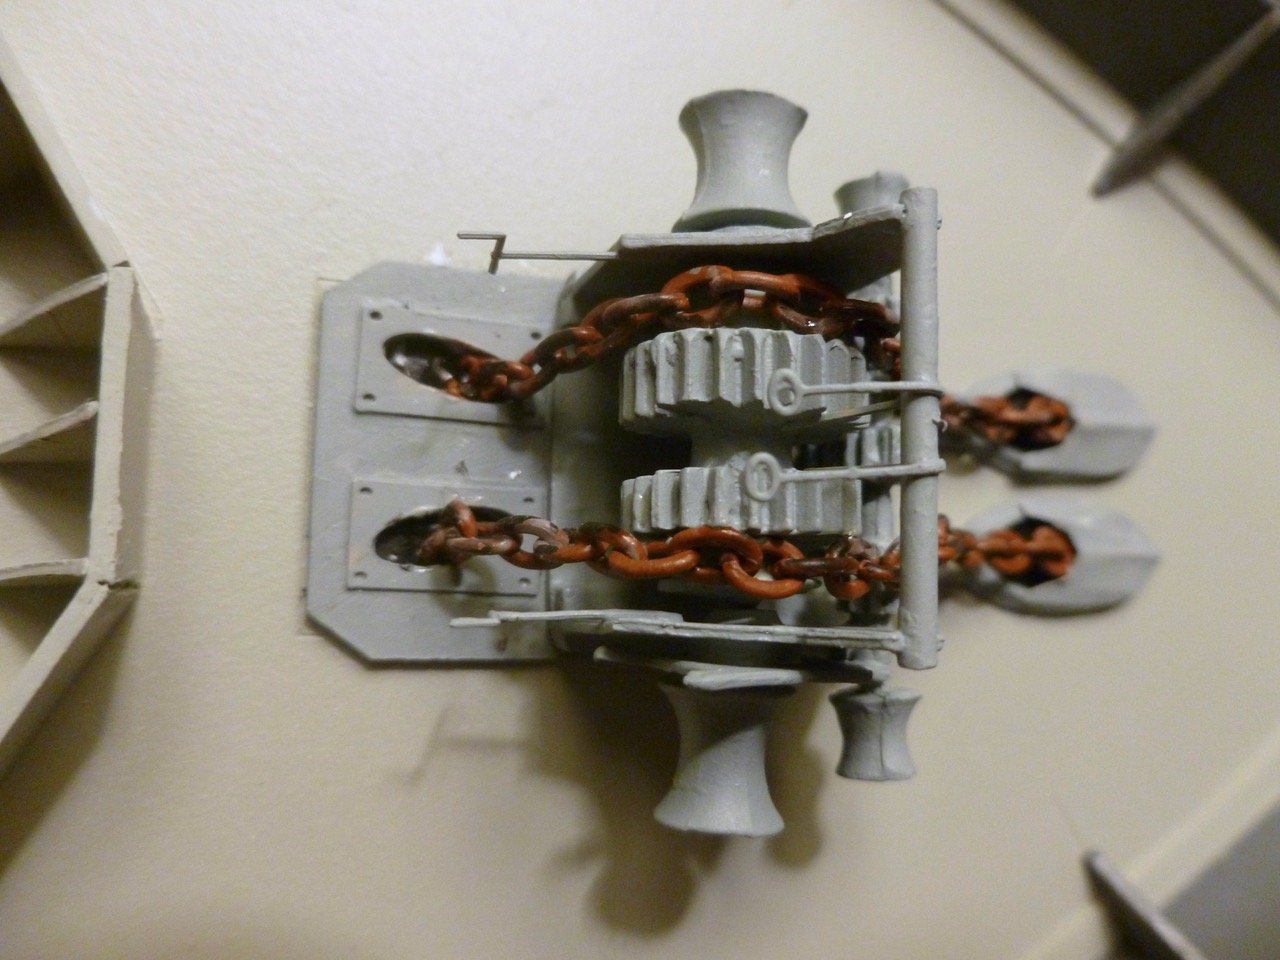
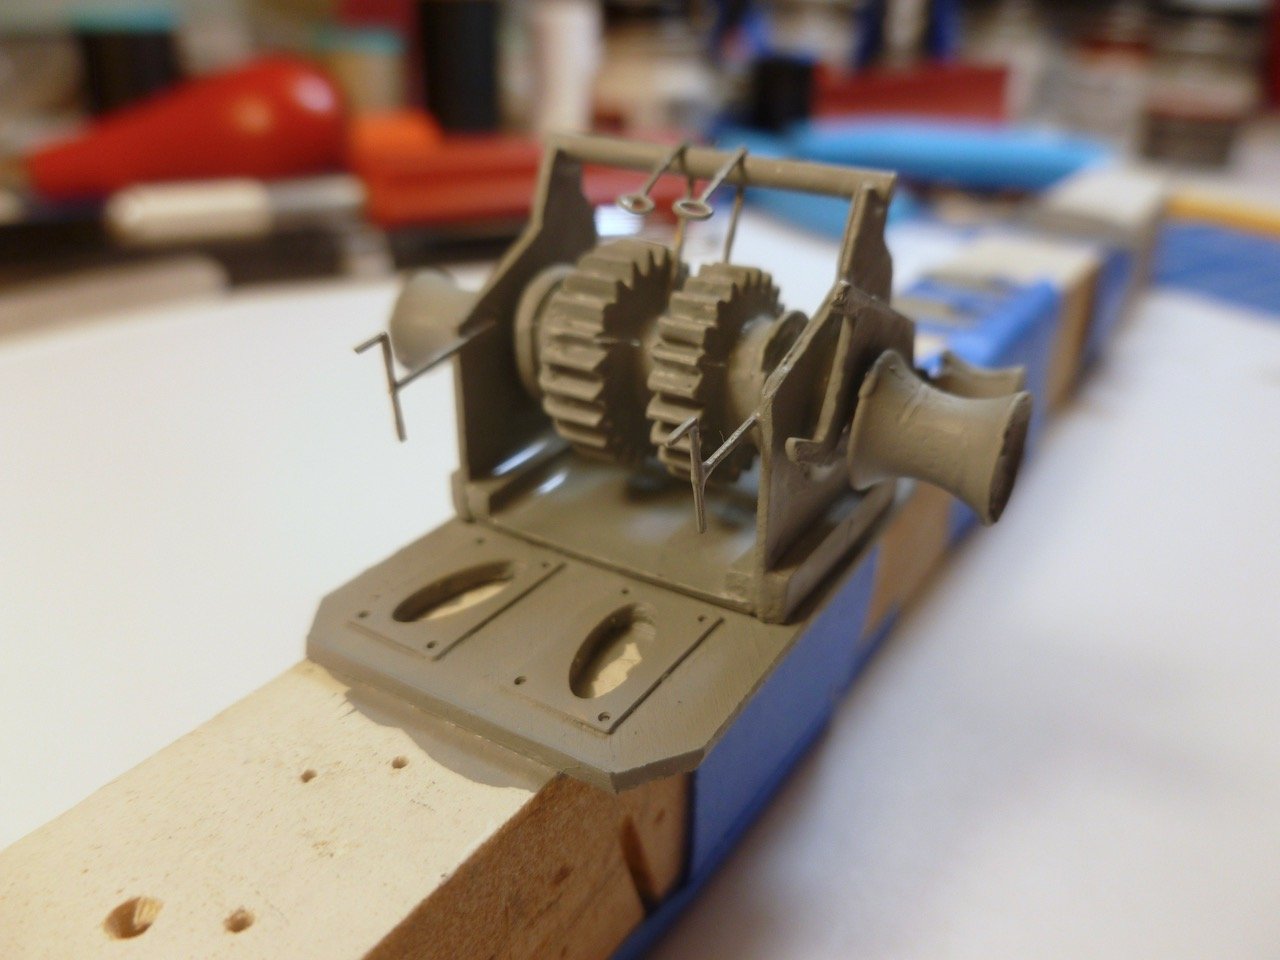
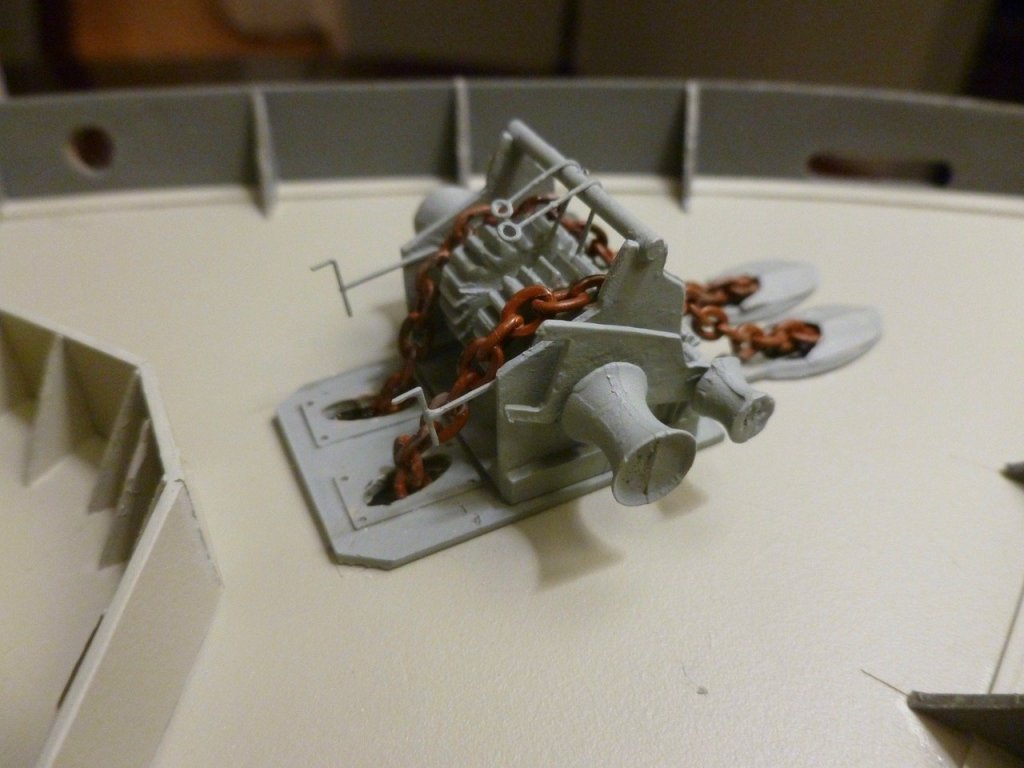
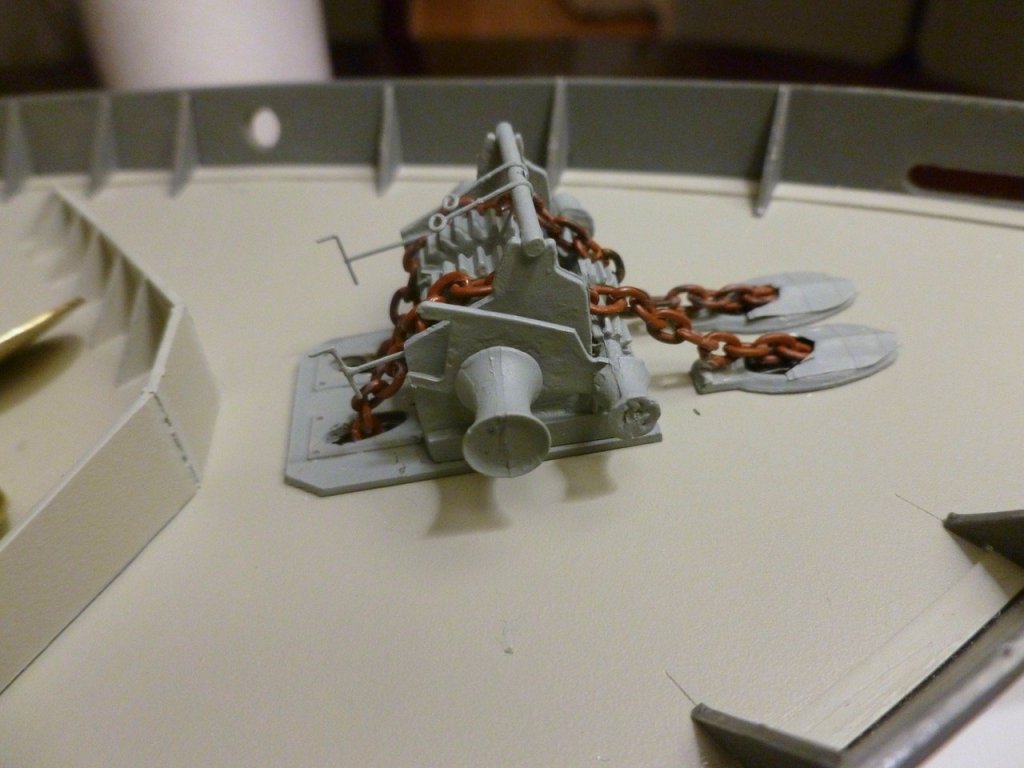
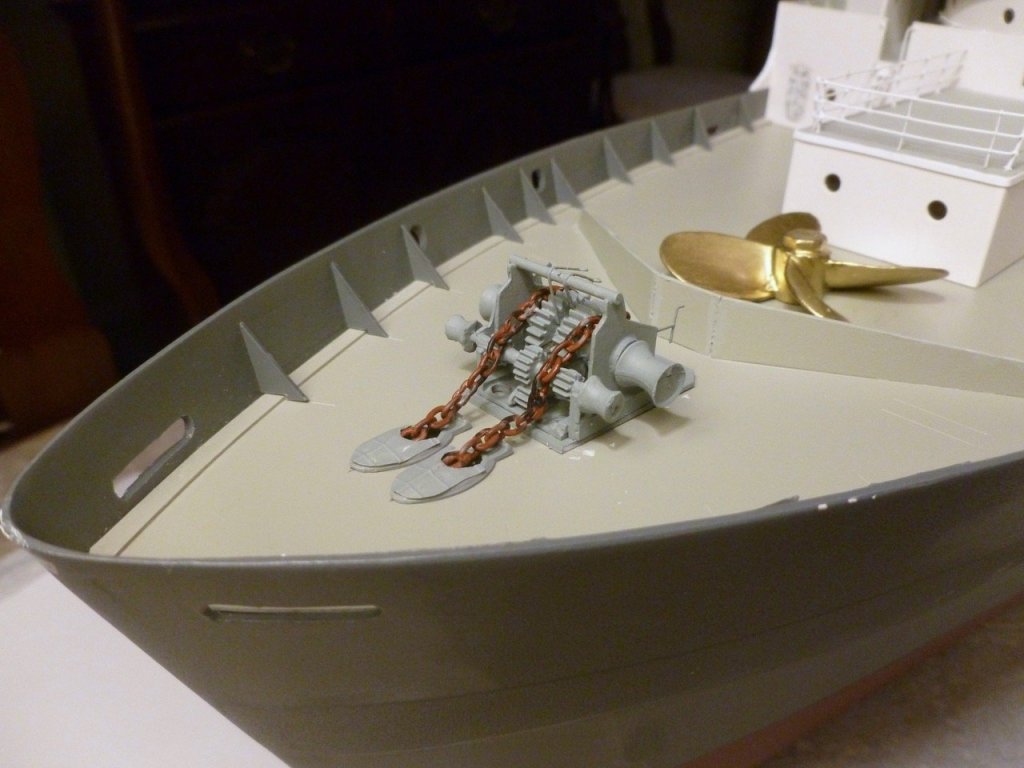
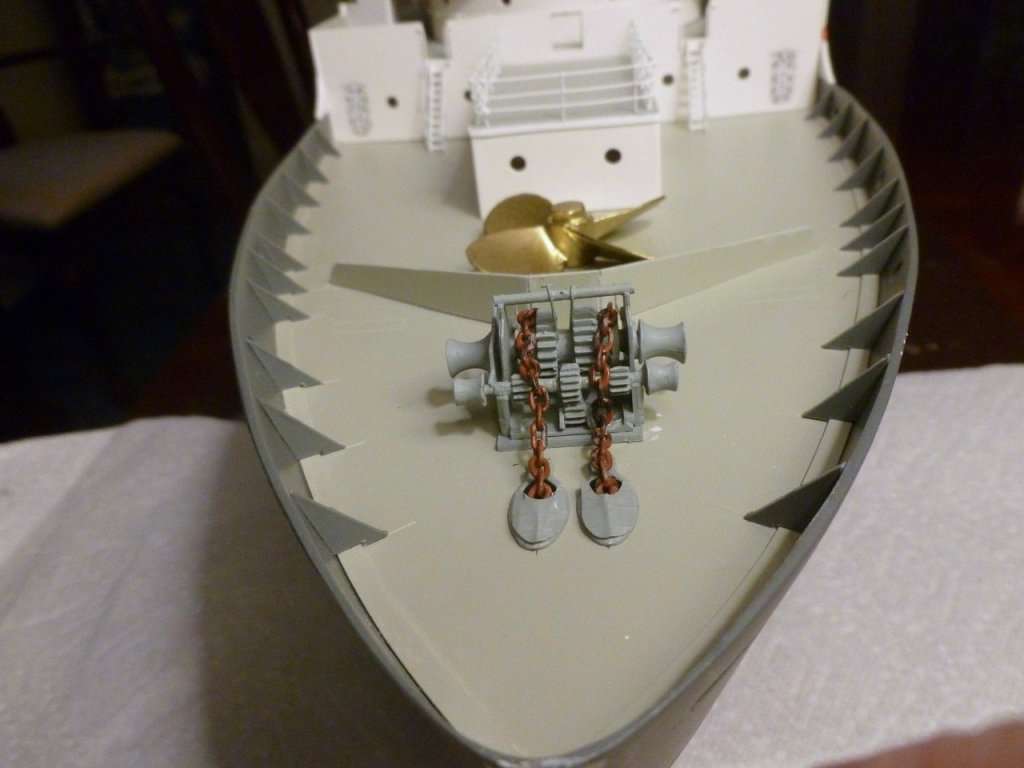
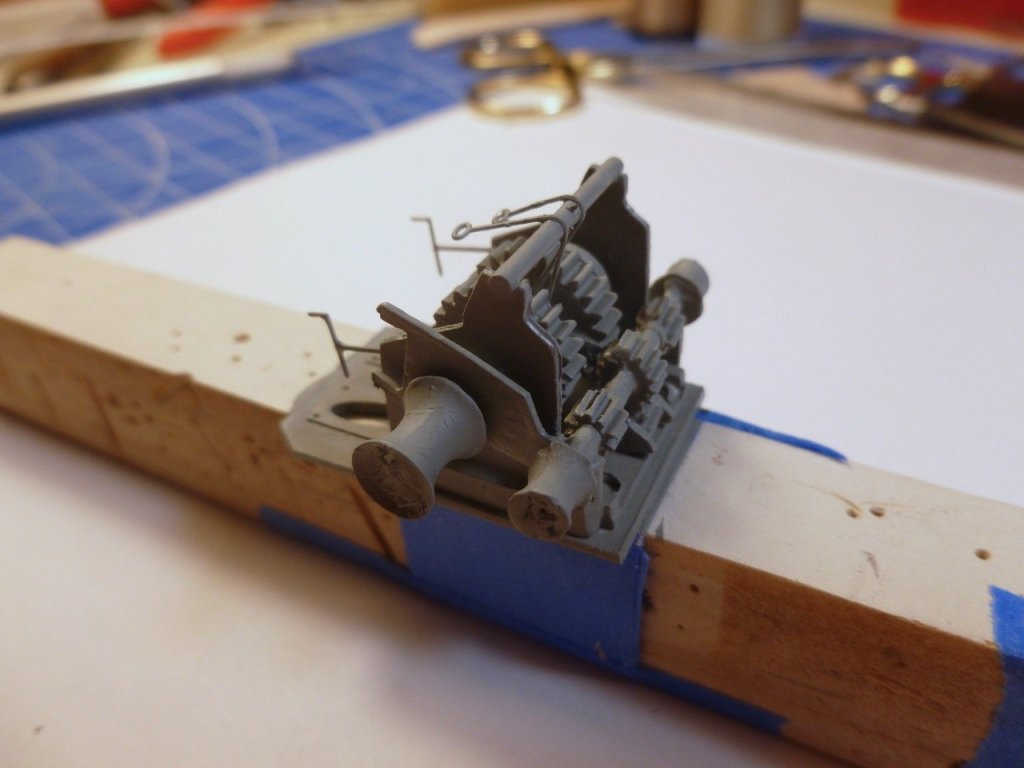
To those who gave likes, thank you and thanks for stopping by. Steve Windlass welcome The ship’s crew welcomed the finished windlass. A few heart-pausing moments including squishing a link on an already short chain while trying to cut it in half, and gluing the base off-center on the deck - why is it that CA dries so quickly when you are making a mistake? Fortunately some quick chiseling popped it loose before it permanently bonded. Deck touch up is in order. But it’s in and the chain ends look like they go somewhere, thanks to all your contributions. Celebratory photos are below. I might dig up a picture of my late father since he had slippers that bore a remarkable resemblance to the hawse pipe covers. But the covers do make a nice concealment for the chain.

- 446 replies
-
- 10
-
-
- zebulon b vance
- deans marine
- (and 3 more)
-
A wonderful master class for those of us still in the early stages of ship building. The first few photos of the diorama looked for all the world like the real thing. I kept looking for a diorama within the diorama. Thank you for sharing and explaining. Steve
-
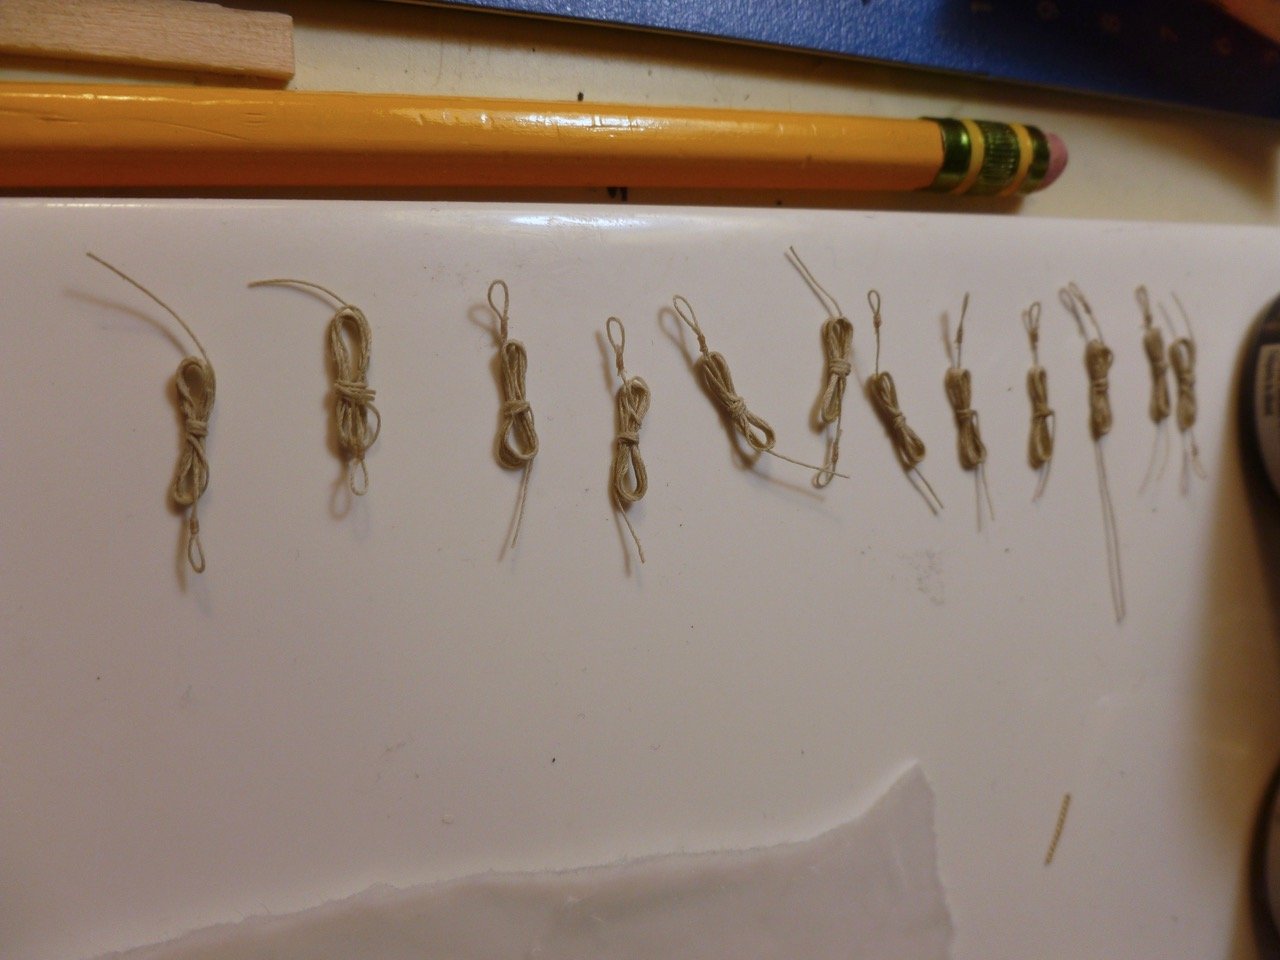
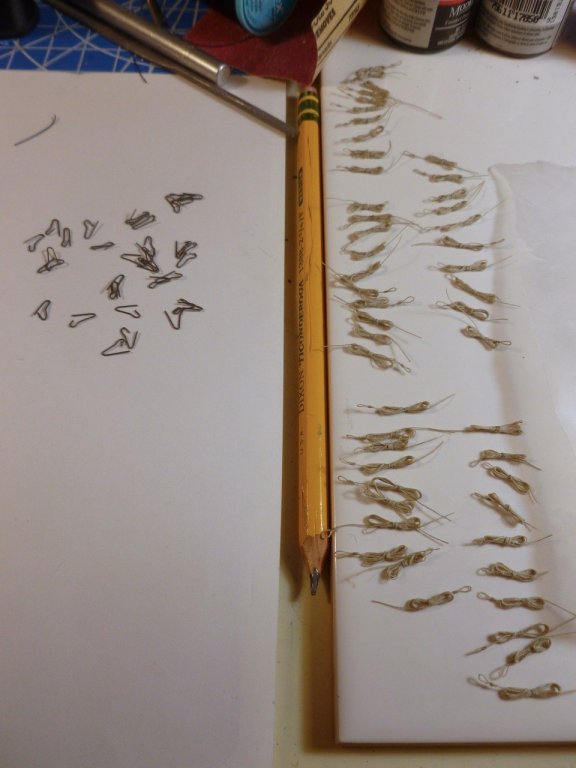
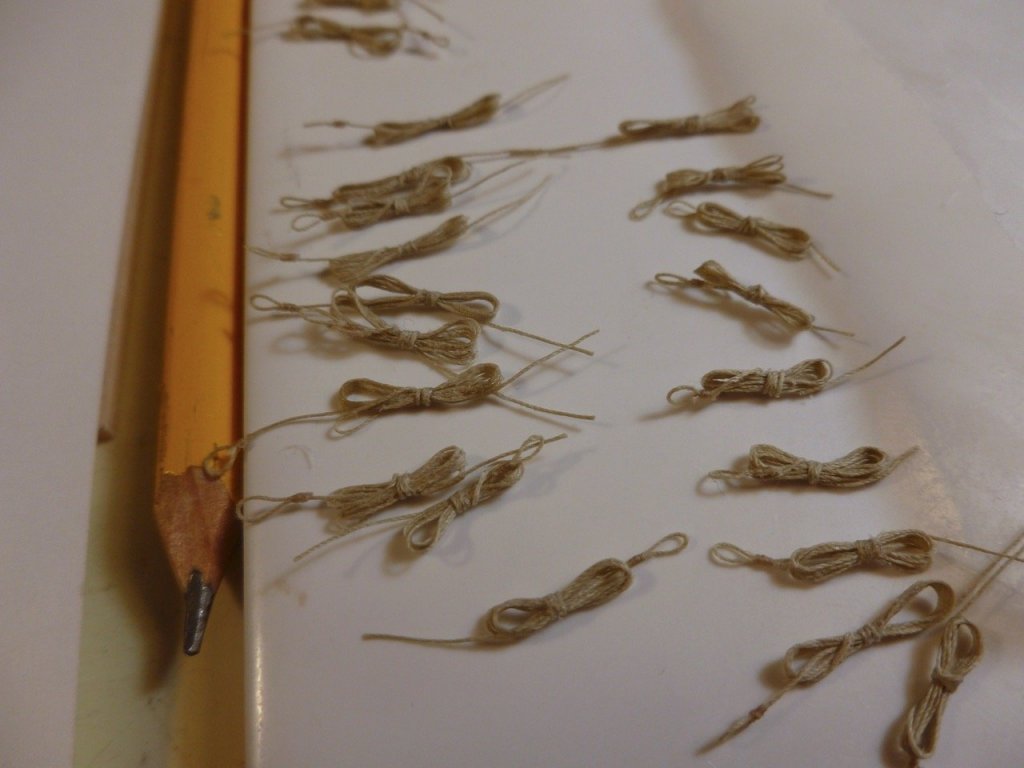
To those who gave likes, thank you and thanks for stopping by. Steve The manropes lend themselves to sequential fabrication. First, cut a bunch of lengths and seize in the eyes. Then shift to the jig to develop the wrapped coils. So 16 of 64 are done (only 12 shown in photo in case you are counting) in a timely way and the task no longer looks endless.

- 446 replies
-
- 8
-
-
- zebulon b vance
- deans marine
- (and 3 more)
-
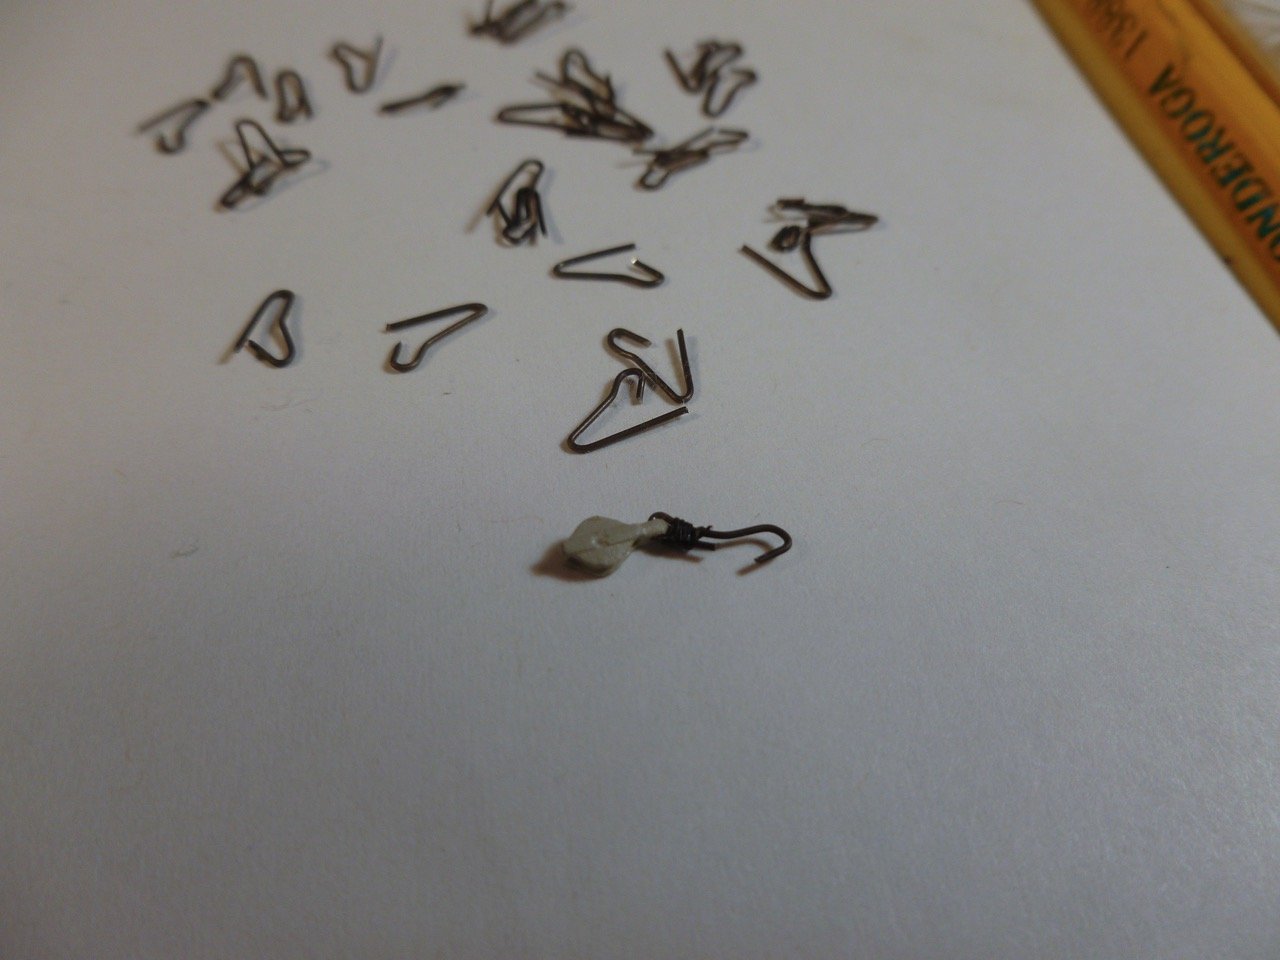
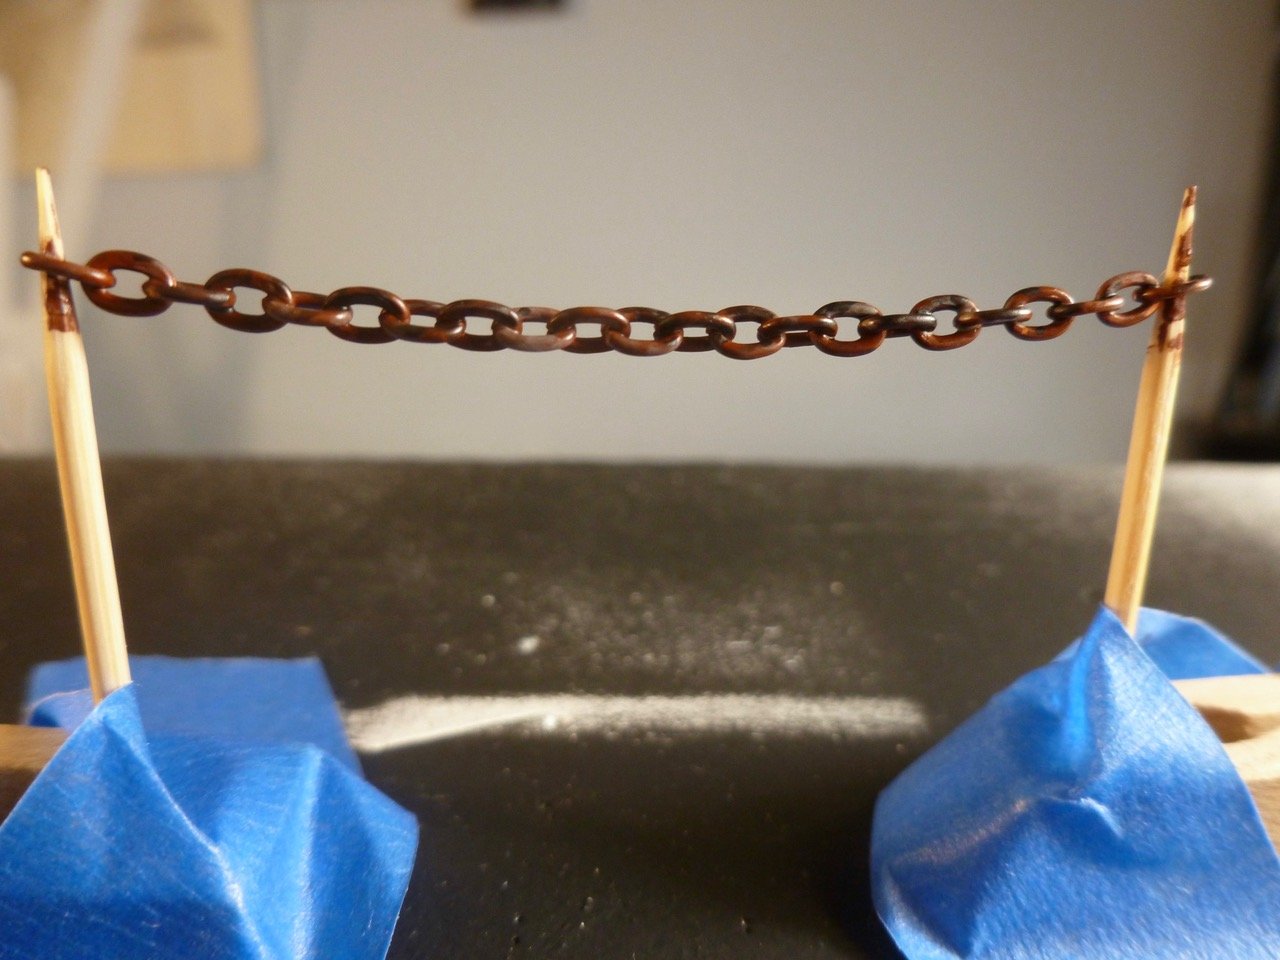
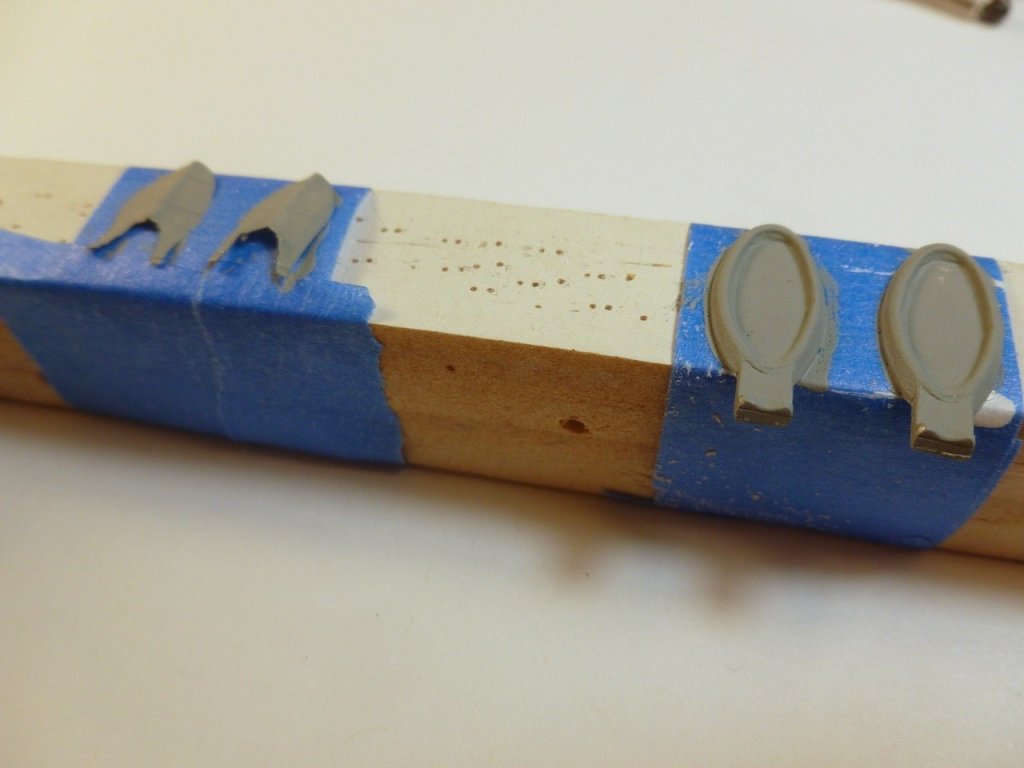
To those who gave likes, thank you and thanks for stopping by. Carl, the windlass is blue gray, more like the second photo than the first. Steve The anchor chains were easier to brush paint suspended between toothpicks. I started with a rust color and then gave highlight washes with gray and black, each one diluted with thinner. They still need a spray of clear flat after the color dries. The rudder-tillers are all stowed, one step closer to hanging the boats from the davits.


- 446 replies
-
- 8
-
-
- zebulon b vance
- deans marine
- (and 3 more)
-
Congratulations Tim, a wealth of detail and craftsmanship to match and a visual feast. Thanks for sharing. Steve
- 115 replies
-
- 1
-
-
- Scottish Maid
- artesania latina
- (and 1 more)
-
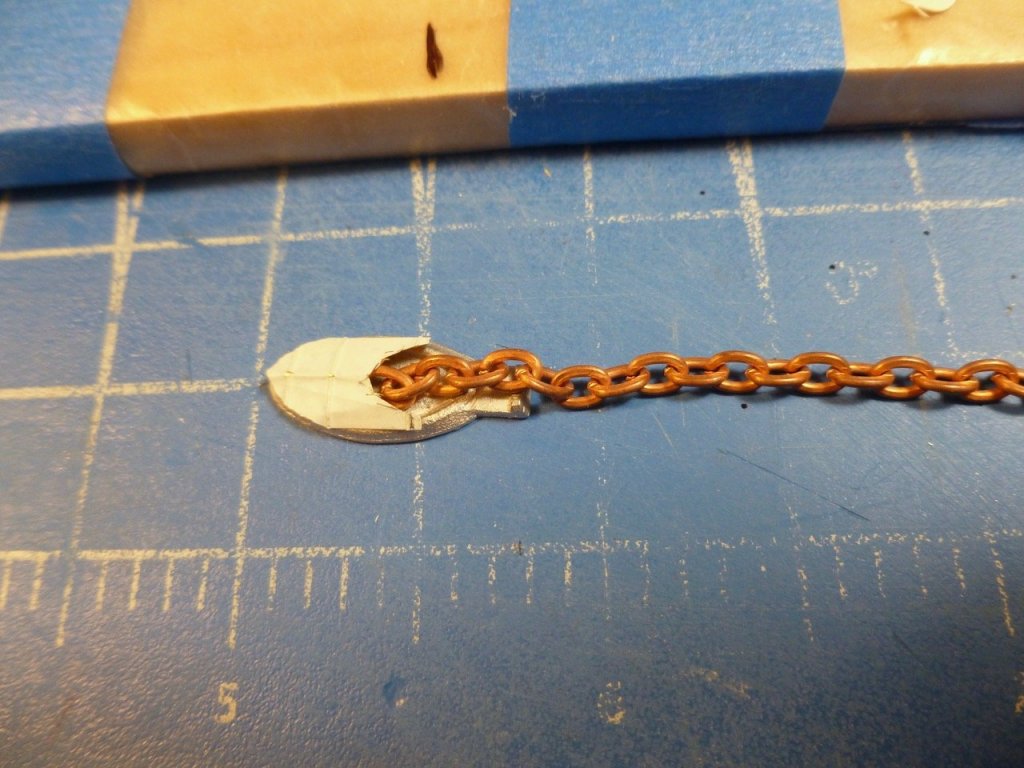
To those who gave likes, thank you and thanks for stopping by. No more waffling, gotta git’er done. Steve The anchor chain, windlass, hawse pipe lips, chain pipe plates and hawse covers are painted one coat. Since the hawse covers will hide one end of the chains I needed something at the chain pipes. Some photos show windlasses and chain pipes on a mounting pad. I cut a piece of plastic large enough to incorporate the windlass and the chain pipes, then drilled and filed the area of the chain pipe holes. This will give more depth for setting the half-link of the chain to help the illusion.

- 446 replies
-
- 9
-
-
- zebulon b vance
- deans marine
- (and 3 more)
-
Bill, Nice job to date. Maybe it's too late but I found if I use boiling water in the PVC pipe a plank softens quicker. Looking forward to the rest of the build. Thanks for sharing. Steve
-
just realized, in the earlier post I should have said Kevin's photo inspired the rounded one, not the V-version.
- 446 replies
-
- 5
-
-
- zebulon b vance
- deans marine
- (and 3 more)
-
To those who gave likes, thank you and thanks for stopping by. Bill, thank you for the wonderful photos. The detail is incredible. Some day when my skill level goes up far beyond my current ability maybe I'll be capable of that sort of fabrication. For now I'll be happy if I get the covers to a reasonable spec. Carl, are you talking about my second or third attempt? The third is more curved and I thought more in line with Kevin's pic and Bill's second photo. I don't think either one has built up sides - the sides look like the top edge of the hawse hole, which at the moment is hidden under my overlapping cover. Steve
- 446 replies
-
- 4
-
-
- zebulon b vance
- deans marine
- (and 3 more)
-
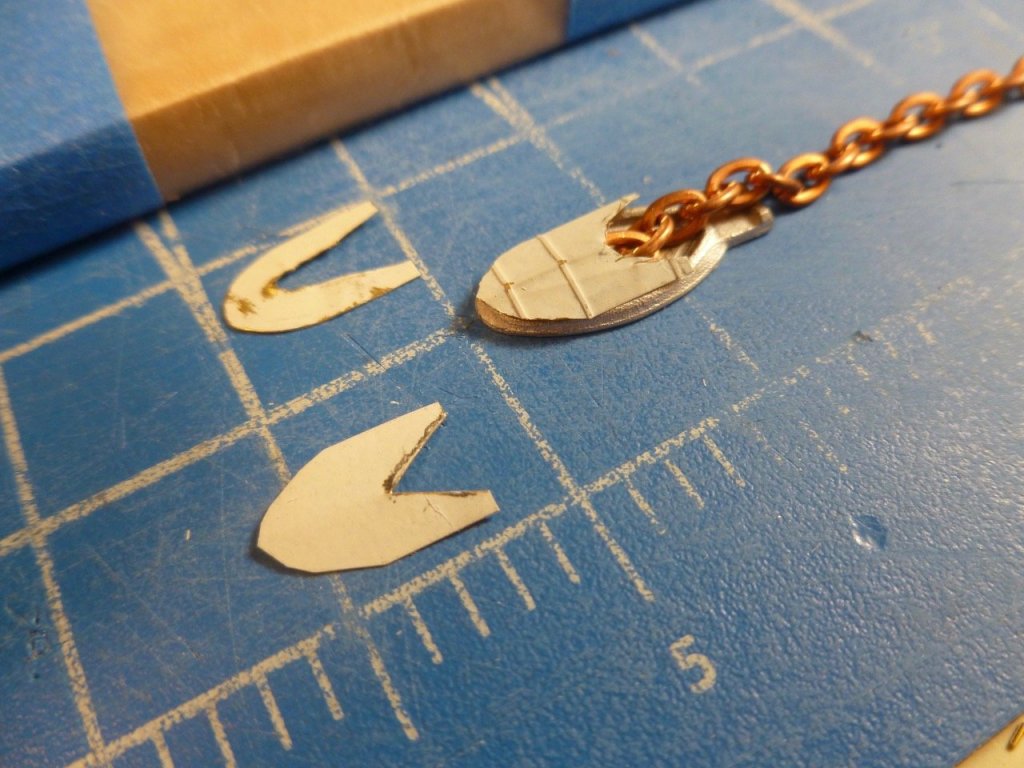
To those who gave likes, thank you and thanks for stopping by. Here’s hawse cover attempt 3, photo-bombed by the disappointed first and second. I realized that if I folded the PE in half the inside curve is easier to cut. I also used a PE door with surface detail to add a little bling. With some edge filing and painting this looks like it could work. Steve
- 446 replies
-
- 9
-
-
- zebulon b vance
- deans marine
- (and 3 more)