
vulcanbomber
-
Posts
396 -
Joined
-
Last visited
Content Type
Profiles
Forums
Gallery
Events
Everything posted by vulcanbomber
-
Lovely work. I'm reaching the masting stage of my build and I'm finding it a little daunting, they are far more complicated than the masts on my San Francisco!
- 122 replies
-
- 1
-

-
- caldercraft
- agamemnon
- (and 1 more)
-
Thank you John and Mustafa. I'm working on the boomkins and bowsprit next.
- 161 replies
-
- 3
-
-
- pegasus
- victory models
- (and 1 more)
-
I've never done a solid hull, it looks like a lot of wok to get the profile correct. I like the look of the Red Jacket, very nice lines. Keep up the good work.
-
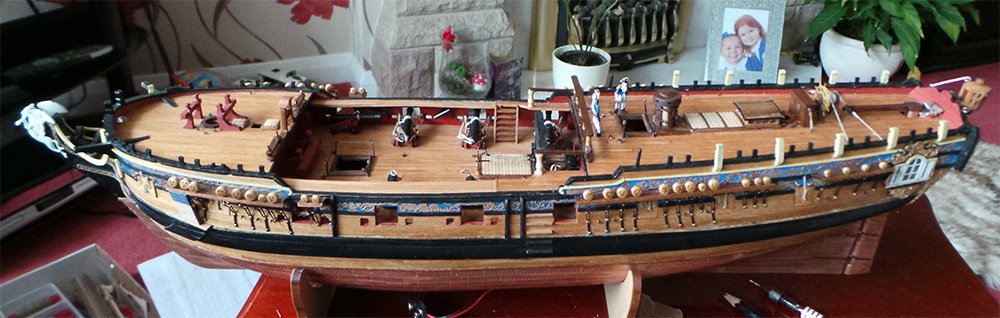
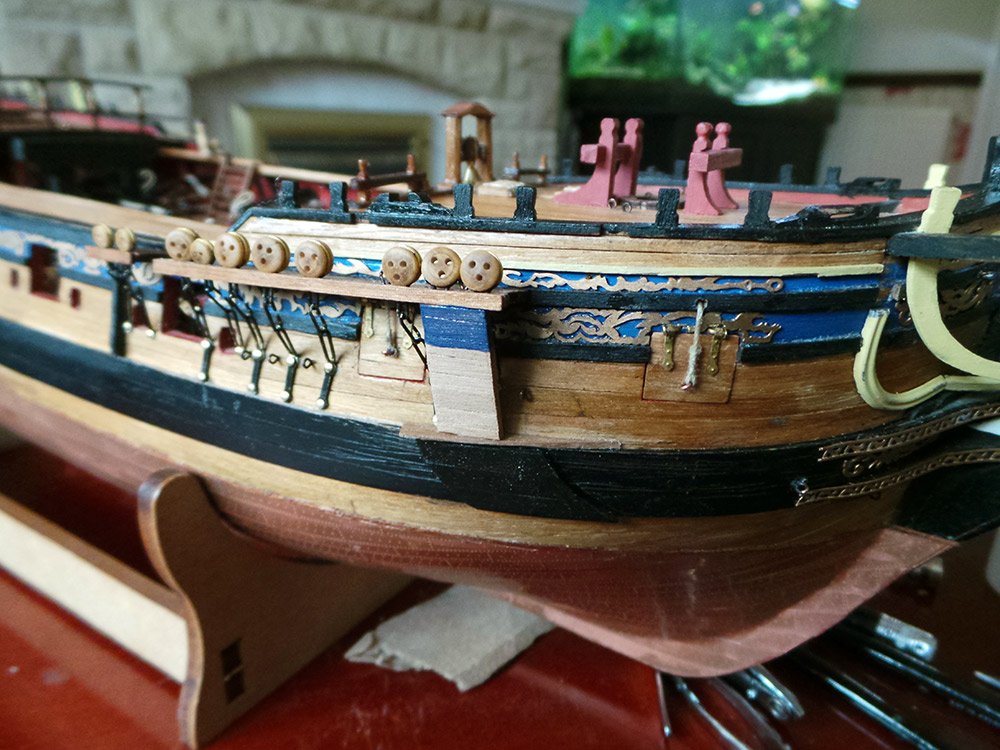
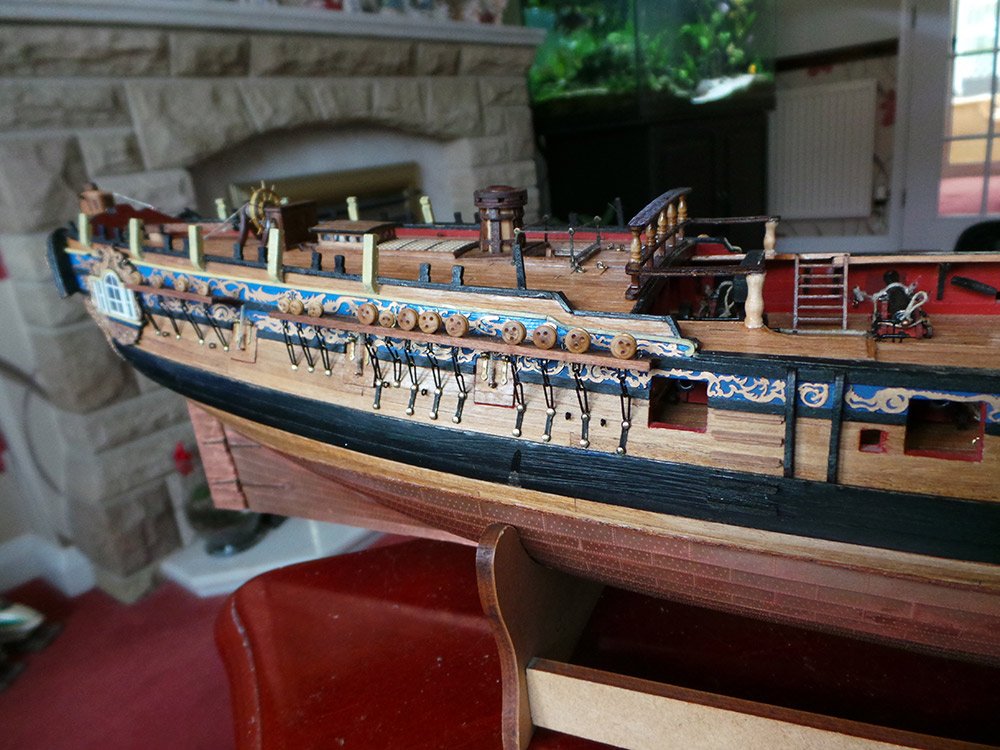
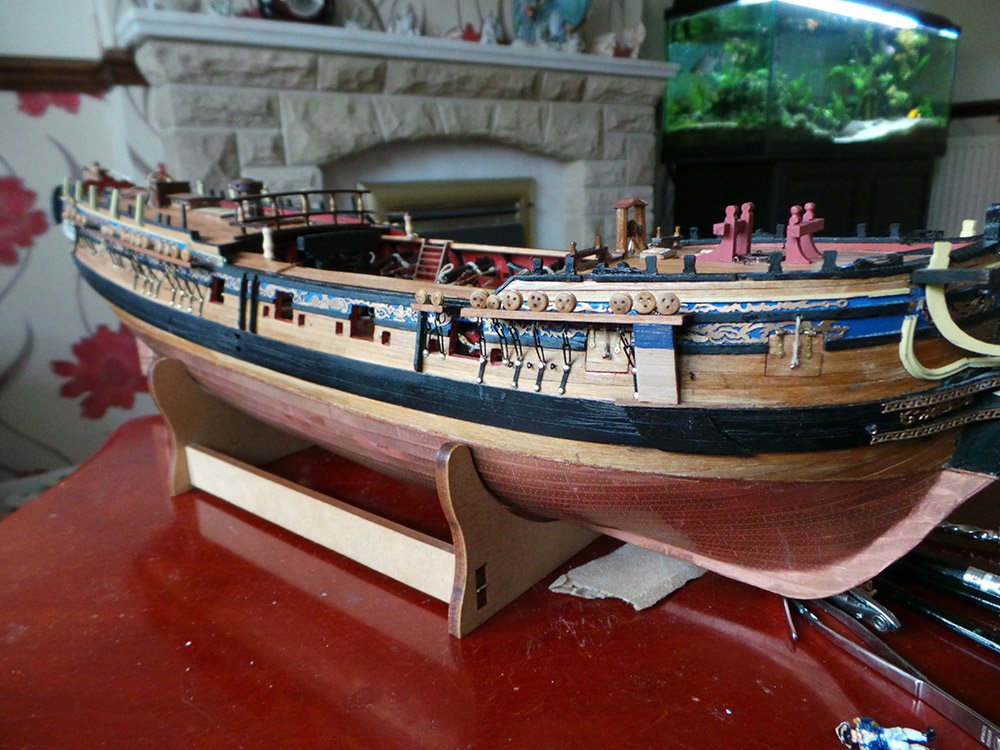
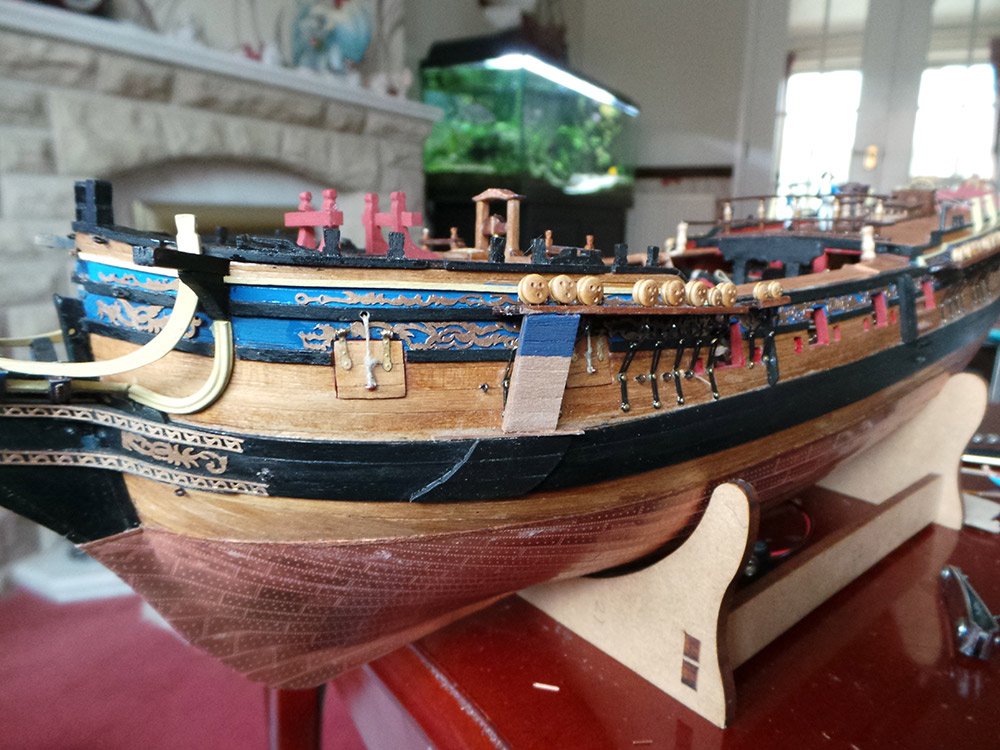
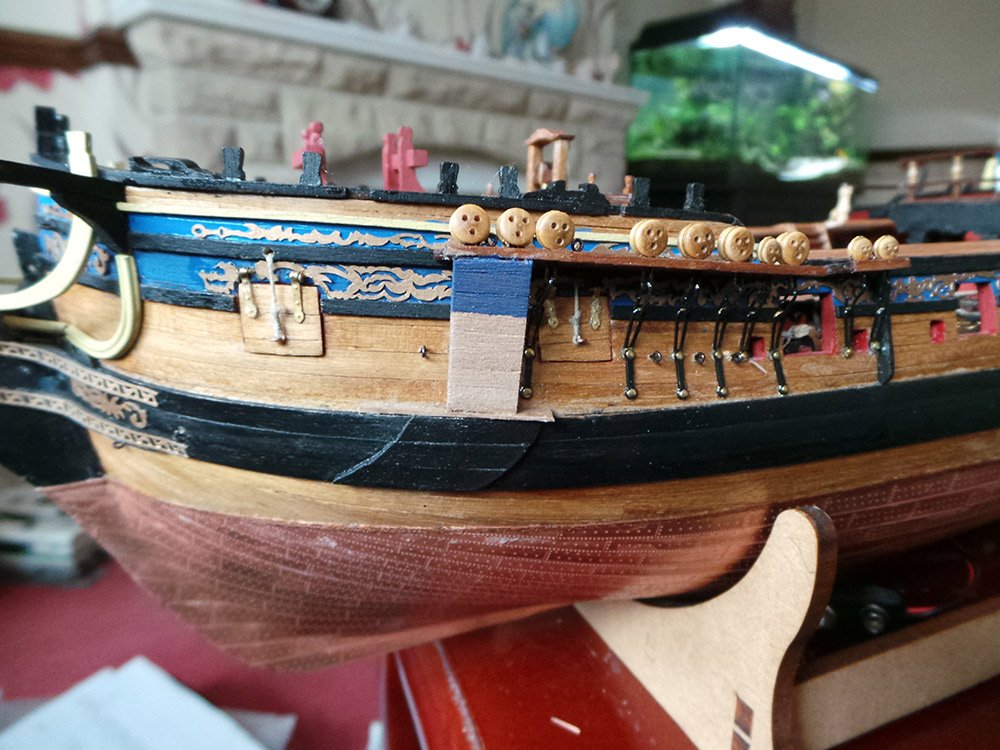
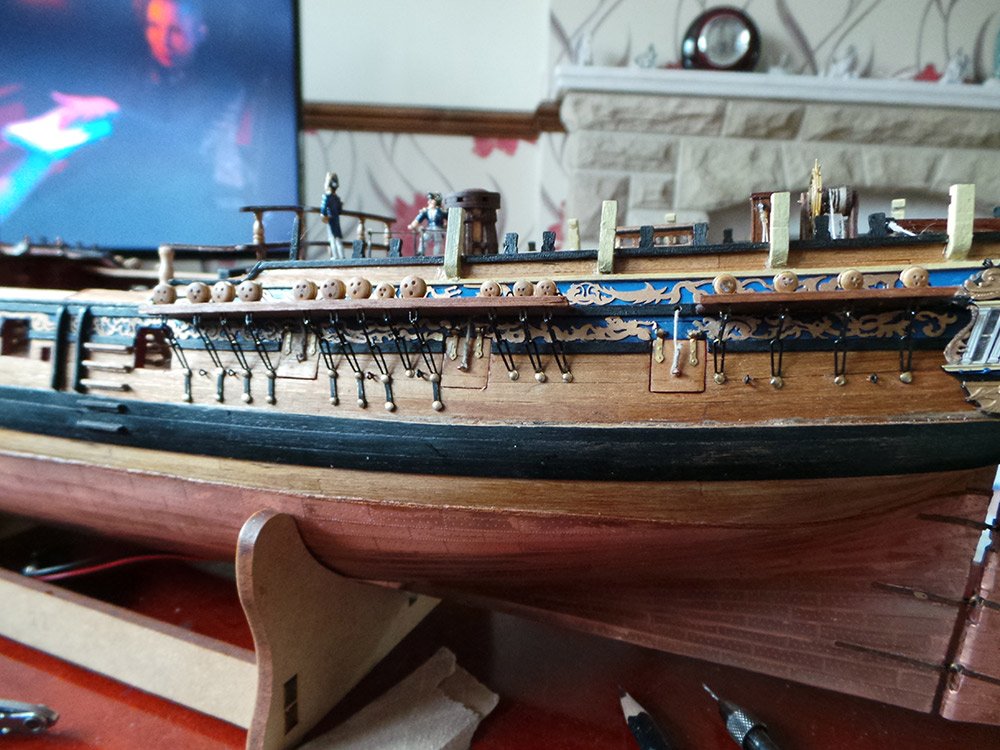
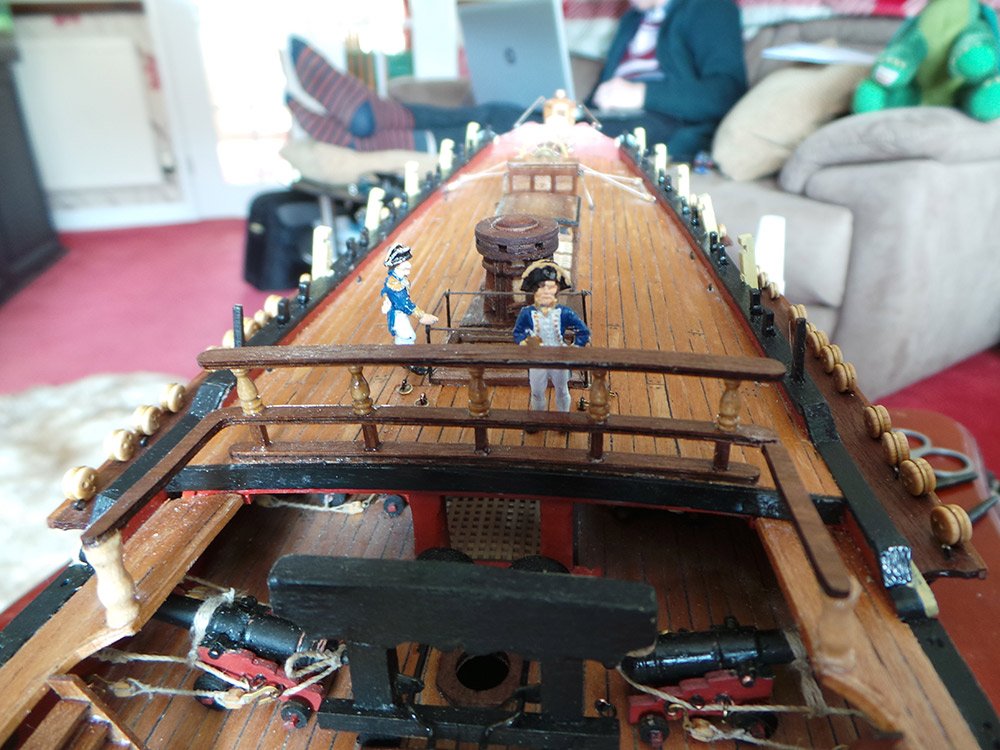
Channels and chain plates now done. I have also added the bolsters, billboards and linings as seen in Blue Ensign's Pegasus. Captain Fraser and his second in command, Mr Patrick, have visited Pegasus today to cast their eye over her progress. I think they are pleased with what they see!

- 161 replies
-
- 15
-
-
- pegasus
- victory models
- (and 1 more)
-
She's coming together very well Mustafa.
-
Hi Pat, looking very good. I like the colours you have chosen, they suit the model very well.
-
Looking good. Those ratlines are very neat and tidy.
- 128 replies
-
- 2
-
-
- panart
- anatomy of the ship
- (and 1 more)
-
I think you nailed it with the tackles, they look really good. She's a very tidy looking ship.
- 574 replies
-
- 1
-
-
- cheerful
- Syren Ship Model Company
- (and 1 more)
-
As far as I know the San Francisco is a fictional ship and didn't actually exist. What I mean by 'original' is that the kit manufacturer Artesania Latina has made two versions of the ship - the San Francisco and San Francisco II. Mine is the first version. It has differences from the later versions - the main one is that it was double planked and the beak was not made from separate parts. there are also some differences in the deck layout.
-
I'm glad you managed to fix the gratings, they look fine to me. We have all make mistakes like these before - I did something similar with my bow gratings and had to play around with them a bit to get them to fit.
- 88 replies
-
- 1
-
-
- finished
- artesania latina
- (and 1 more)
-
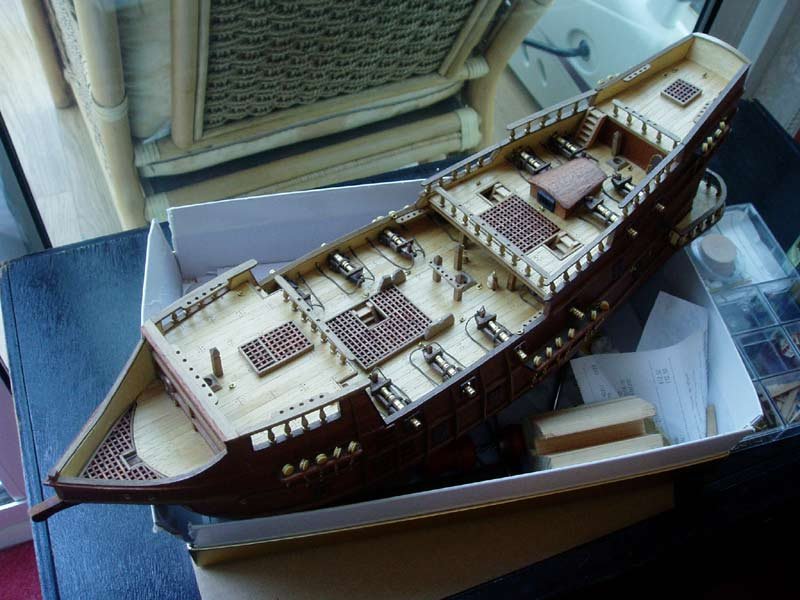
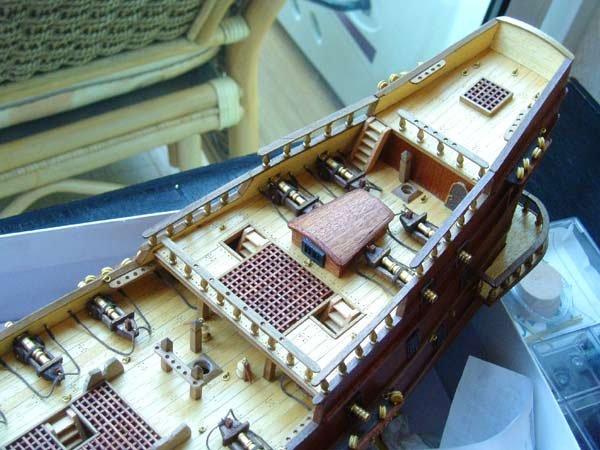
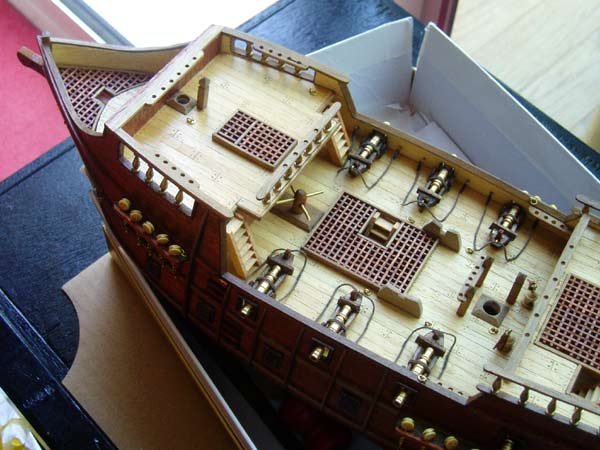
Hi, I have the original San Francisco, and my deck layout is slightly different to the second version. Mine has a much smaller grating at the stern and bow. The San Fran didn't have a ship's wheel, it had a whipstaff (a simple tiller configuration that was in use before the more complicated wheel). The little cabin is where the helmsman in control of the whipstaff would stand and be able to see out through the front (not that he would be able to see much anyway!) There is a capstan under the deck overhang at the bow. I hope this helps you.
-
I'm going to see how Bruce's holly turns out, from reading the comments, it should be fine. Thank you everyone for your help and advice. Caroline
-
I'll keep my fingers crossed for you!
-
It seems that holly would be the best choice by far. If I can't find a supply, I think I will go with the cherry. Wow, thank you! I have had no luck finding holly strips at the moment, only planks, but I have no way to get them down to the sizes I am after. I'm looking for strips 0.5mm x 2mm and 0.5mm x 3mm and probably about 3-4m of each size, I don't know if this is something you can do, but would be great if you can. Caroline
-
Thanks for the recommendations. Allan, I really like the holly on your boat, it contrasts really nicely with the other wood. I have some left over cherry I can use for the thwarts and other bits and I think the holly would look lovely with that. Does anyone know where I can get holly strip wood from in the UK?
-
Thanks Druxey, I'm leaning towards maple at the moment, but I've never worked with it yet.
-
Hi all, I want to scratch the ship's boats for my Pegasus. I am going to purchase from Cornwall Model Boats and can't decide between cherry, maple or walnut for the hull planking for them. I will be purchasing a mixture of 0.5mm x 2mm and .05mm x 3mm. What are the for's and against for the three woods? Which would look best left natural and only varnished? My Pegasus is mainly walnut that came in the kit. Thanks
-
You have a nice looking ship there.
-
Coming along nicely. Your planking looks good.
-
Superb work, as always. Looking at the photo of Victory's cannon , the tackles 'sag' quite a bit and hang down over the wheel, maybe recreating that would help with the look of them? (and I'm sure your crew would make sure they are tidied a bit better that Victory's!)
- 574 replies
-
- 2
-
-
- cheerful
- Syren Ship Model Company
- (and 1 more)
-
Hi B.E, Thanks for your offer, much appreciated. PM sent. I love the modification you made to the stern of your Pegasus, it looks fantastic. I would not be brave enough to attempt anything like that!
- 161 replies
-
- 2
-
-
- pegasus
- victory models
- (and 1 more)
-
Looking good. You are doing a nice job, the gun ports have come out very nicely.
- 88 replies
-
- 1
-
-
- finished
- artesania latina
- (and 1 more)
-
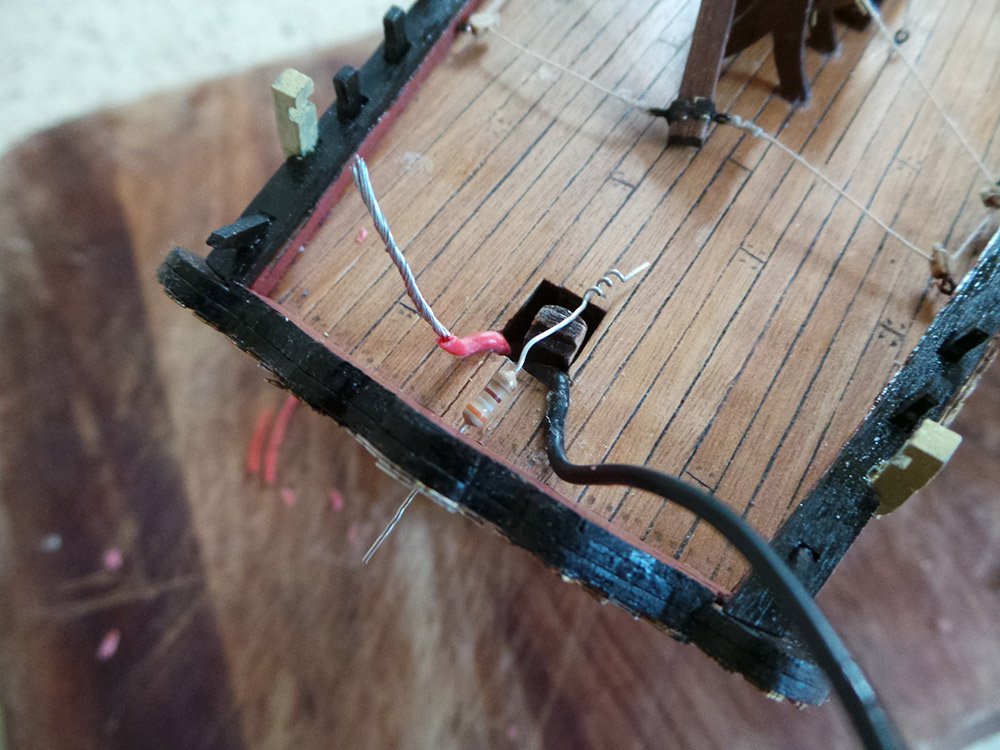
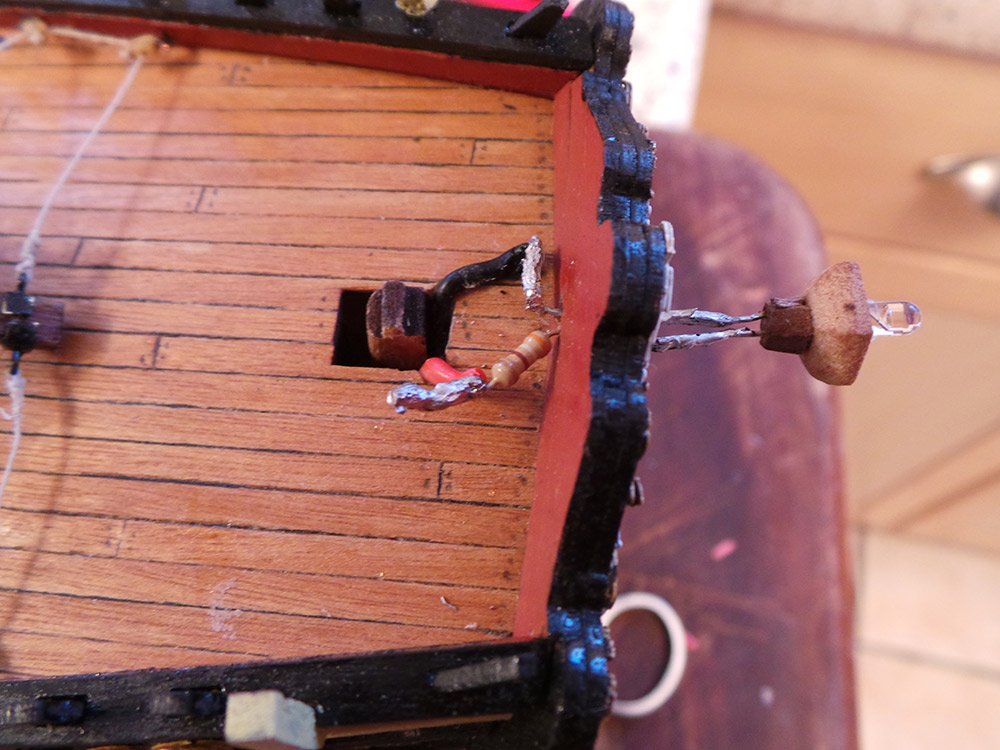
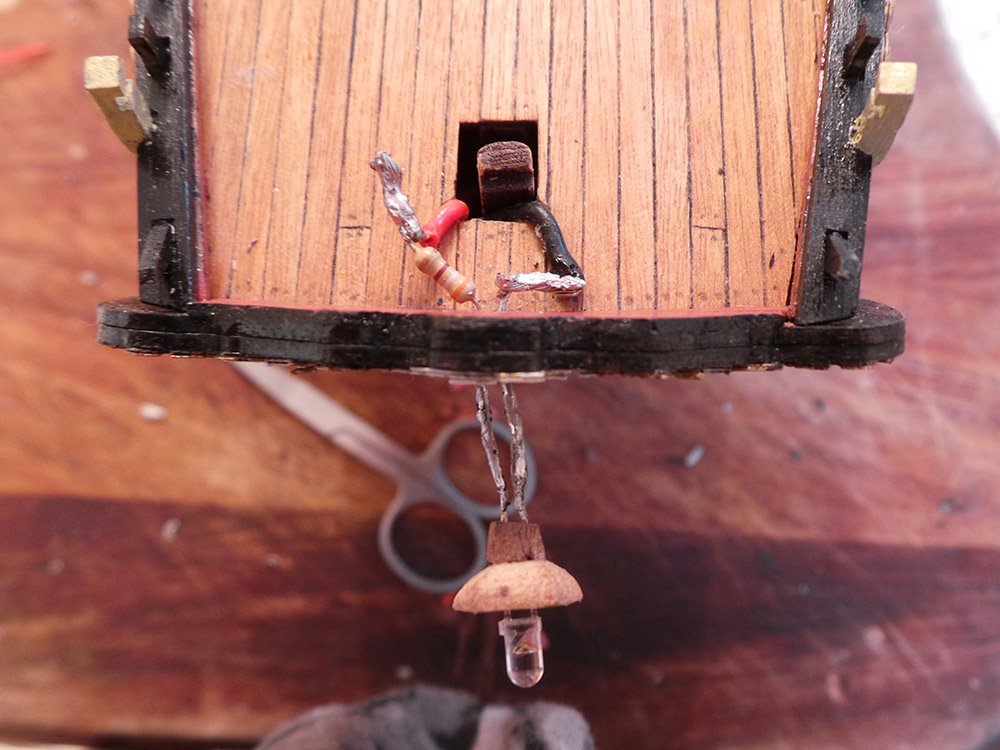
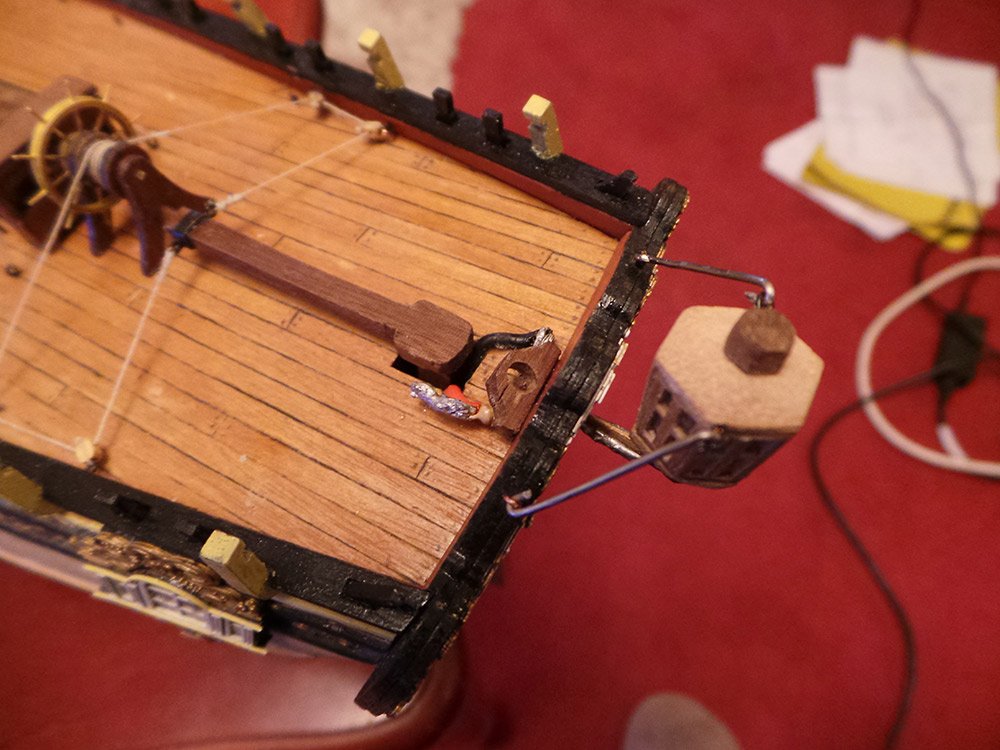
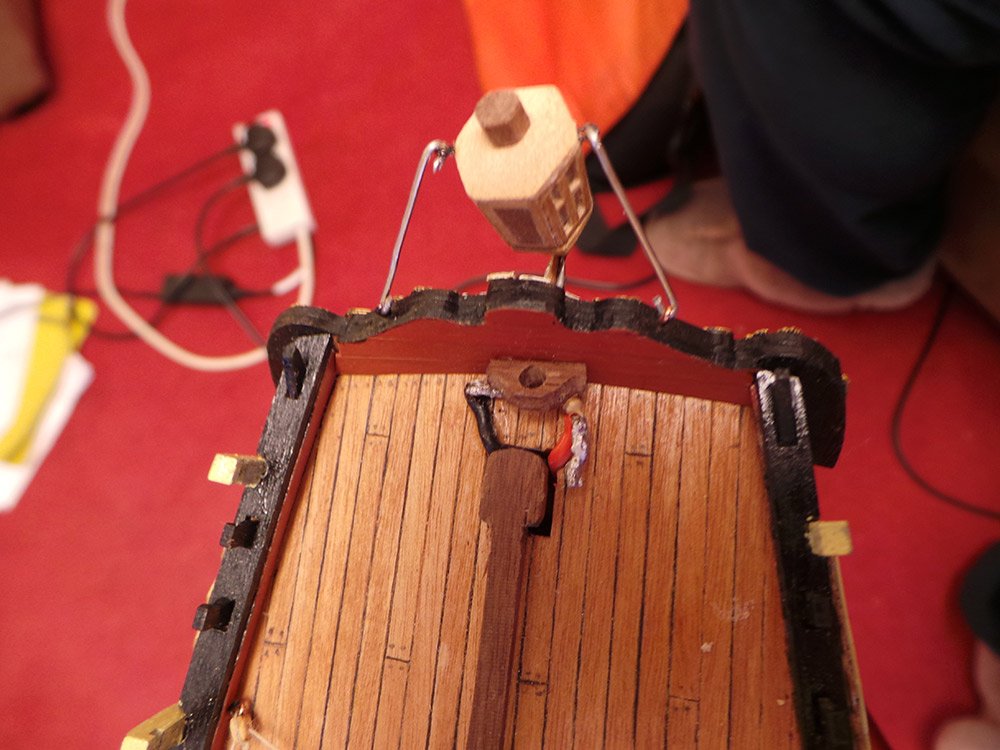
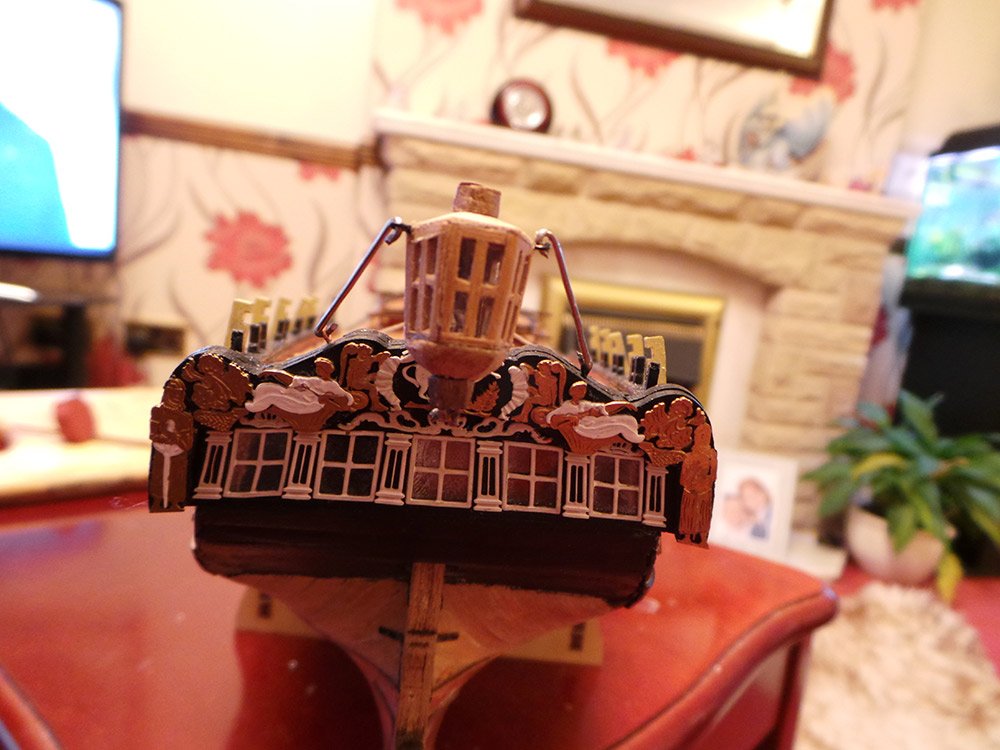
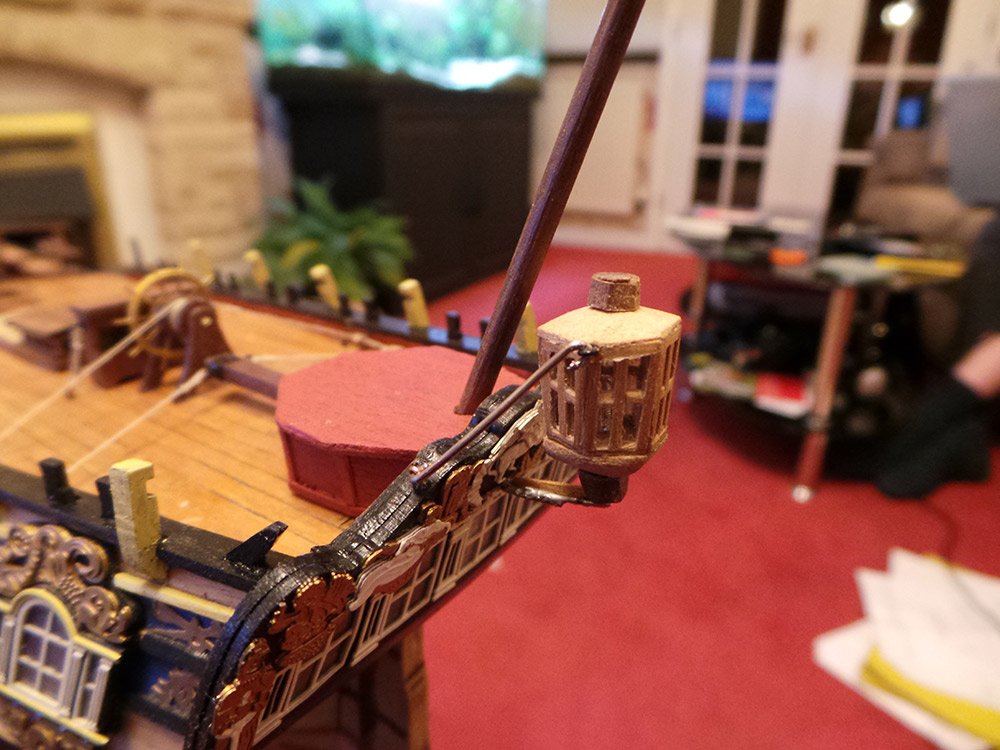
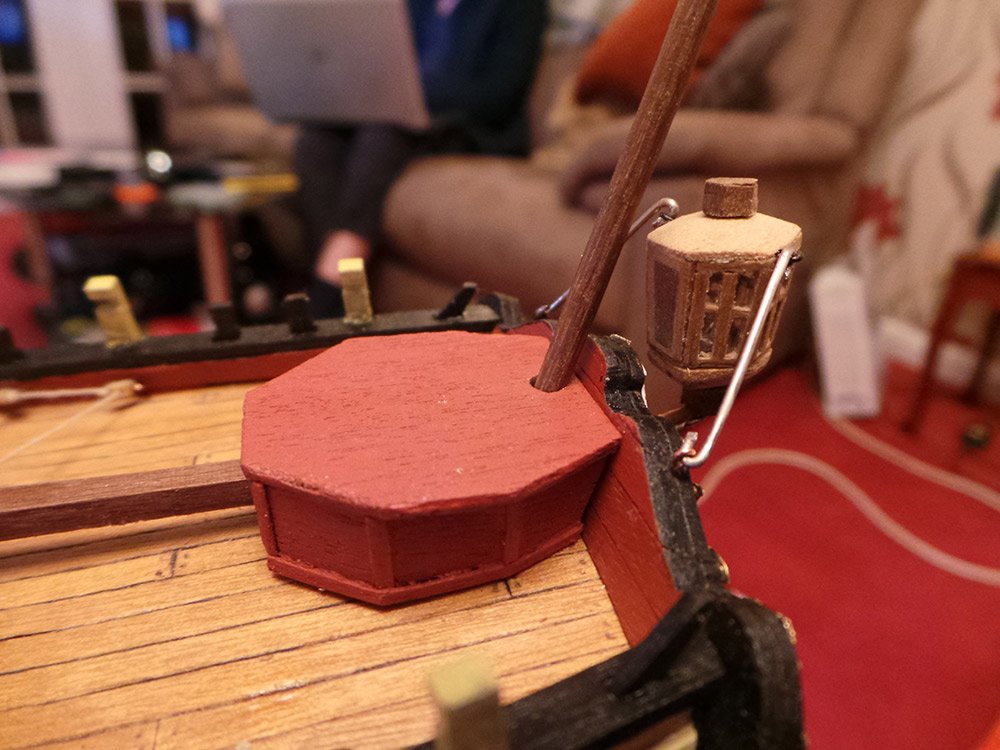
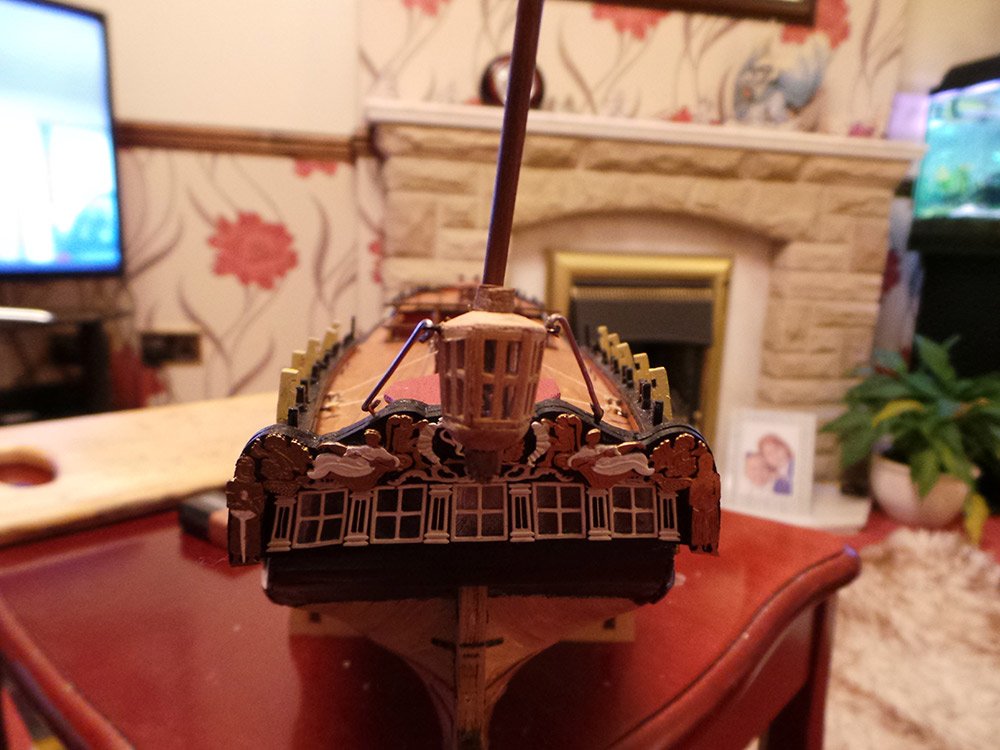
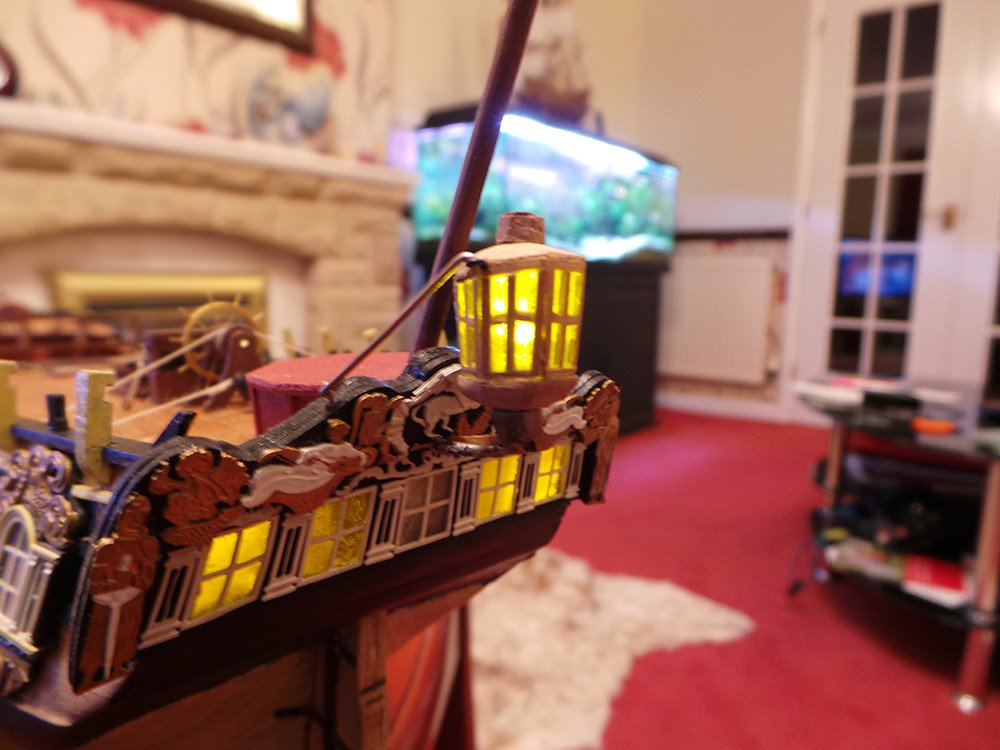
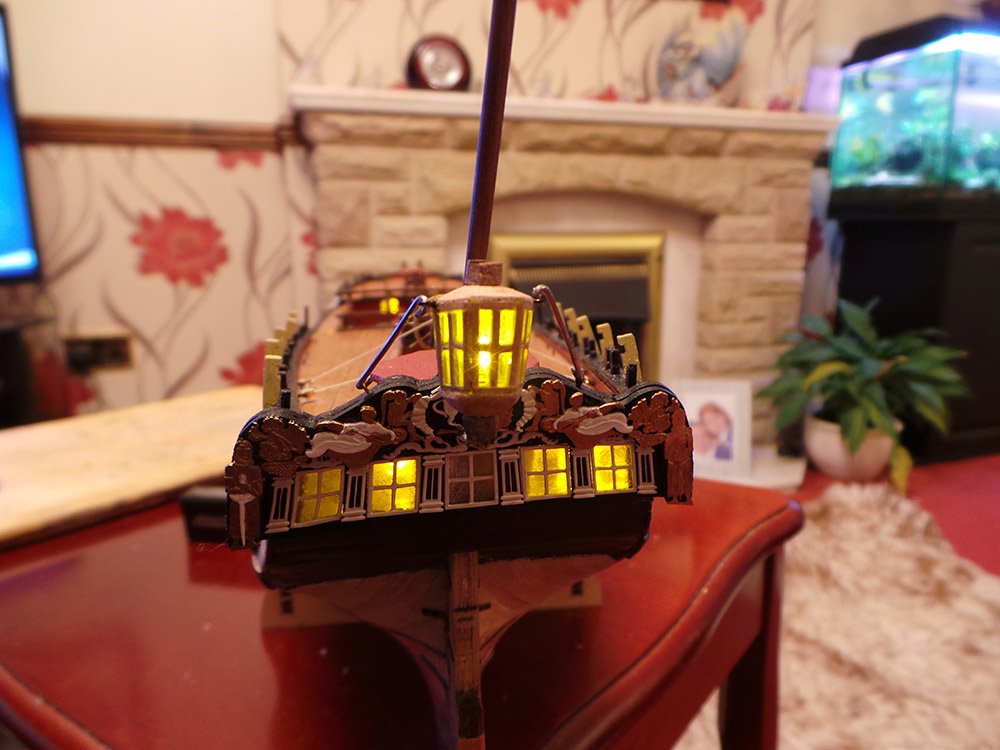
Thanks to everyone for your likes. I have completed the lantern and am quite pleased with my handiwork. I extended the LED 'legs' by using the excess ends of the resistor. One end of the resistor was threaded through a hole made in the stern fascia and soldered to the long leg of the LED. Then soldered the other end of the resistor to the red wire, after cutting it down to length. The cut off length of the resistor wire was threaded through another hole through the fascia and soldered to the other 'leg' of the LED. The other end of the resistor wire was then soldered to the cut down black wire AND it all fit neatly under the rudder head housing! Finally a small 0.5mm strip was inserted between the LED 'legs' so they wouldn't make any contact. The only problem I can foresee is the 'legs' of the LED are quite soft and too much bending would break them, so I fitted the lantern supports and this has made the whole lantern now quite solid (as long as I don't give it a hard knock!) I have also fitted a bracket on the inside of the fascia and a hole in the rudder head housing for the flagpole. All lit up. Next I think i'm moving onto the channels. I am also considering scratching the ship's boats, but can't decide on what wood strips to buy. I have narrowed the choice down to Cherry, Maple or Walnut, they will be 0.5 x 2mm and 0.5mm x 3mm strips from Cornwall Model Boats. I think I'm going to leave the boats natural and just varnish them. What wood would you recommend? I've just noticed the top two brass etch layers of the right hand knight have disappeared, does anyone know if it's possible to get replacements? Thank you.
- 161 replies
-
- 7
-
-
- pegasus
- victory models
- (and 1 more)
-
Thank you Sam. I have never heard of magnet wire, I'll look it up.
- 161 replies
-
- 2
-
-
- pegasus
- victory models
- (and 1 more)