


Mldixon
-
Posts
152 -
Joined
-
Last visited
Content Type
Profiles
Forums
Gallery
Events
Posts posted by Mldixon
-
-
8 minutes ago, Mldixon said:
like this for the elegoo series
I found this article, good explanation to get you going
https://3dprinterly.com/how-to-calibrate-resin-3d-prints-testing-for-resin-exposure/
- thibaultron and mtaylor
-
 1
1
-
 1
1
-
4 minutes ago, Mldixon said:
More’s the pity there isn’t a reference file like this for the elegoo series
Yep, but you can still do it, by downloading a reference model as an stl. Then printing them individually one at a time for your resin. Then observing the best result and using those settings. This is labor intensive and a Pain in the a**. But if you use the same resins over and over well worth the effort. Much better than making wild guess only to have repeated failures.
I'm still amazed that the Anycubic can print all eight at once with those different settings.
- thibaultron and mtaylor
-
1
-
1
-
2 hours ago, Kevin-the-lubber said:
More’s the pity there isn’t a reference file like this for the elegoo series
I'm not familiar with that printer, so maybe those timed cycles won't with their LCD screens. I'll check and post if I find a solution.
- mtaylor and thibaultron
-
2
-
2 hours ago, Patrick Matthews said:
Cross section through the STL reveals gaps that would cause print problems:
Download windows 3d builder, it also is free. When you open it use the import feature to bring in your seated figure, then when you import it, it will ask you if you want to repair, say yes. Then when it's done you will see multiple objects on the right side panel. Use the edit feature, select all the objects and then merge them. This creates a solid figure, save this as new stl file. Open in Chitubox, also free, and you will see that your figure is solid. Also in edit you can then resize the figure to the appropriate scale. This took me a lot of headbanging to get to, as their is no one source for doing these things.
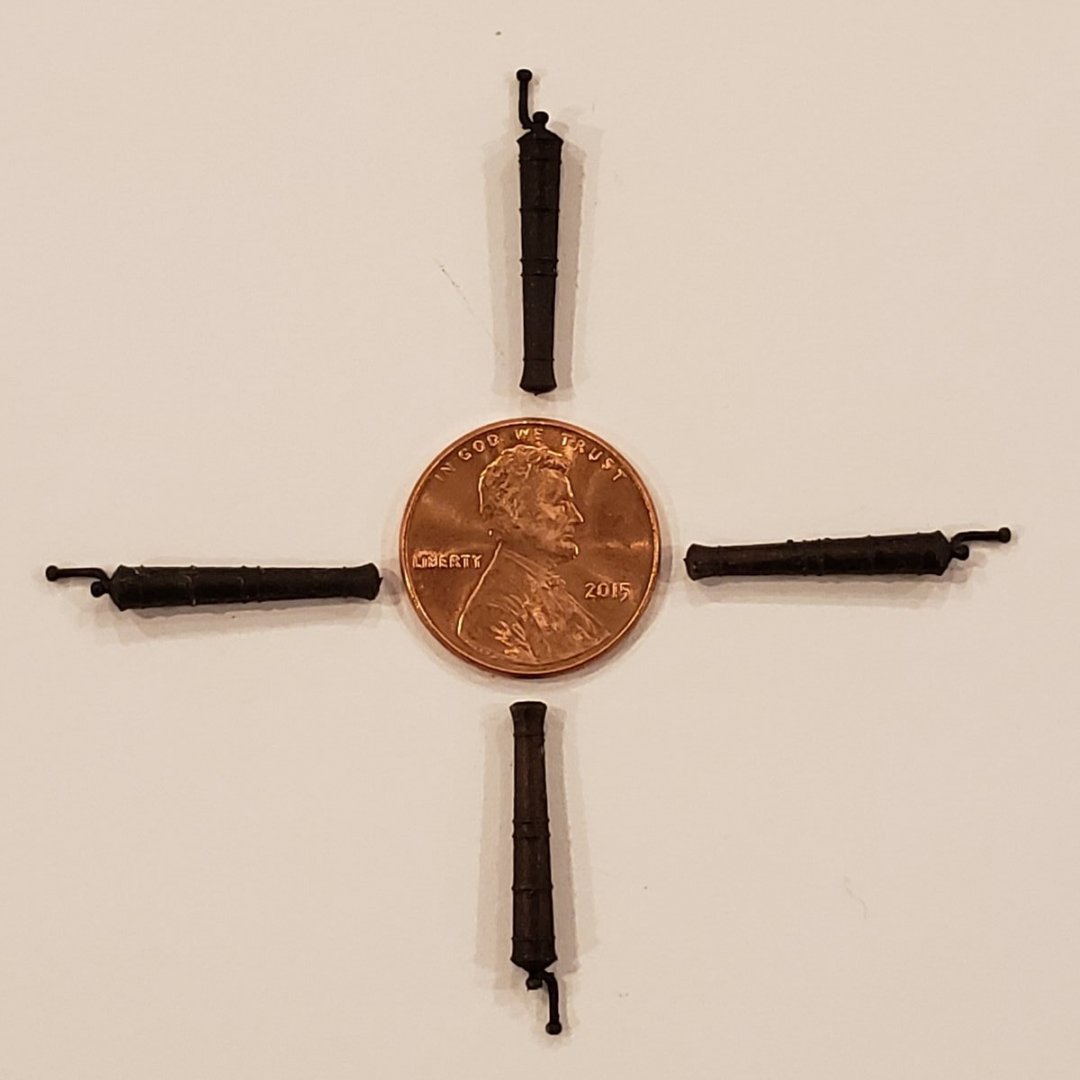
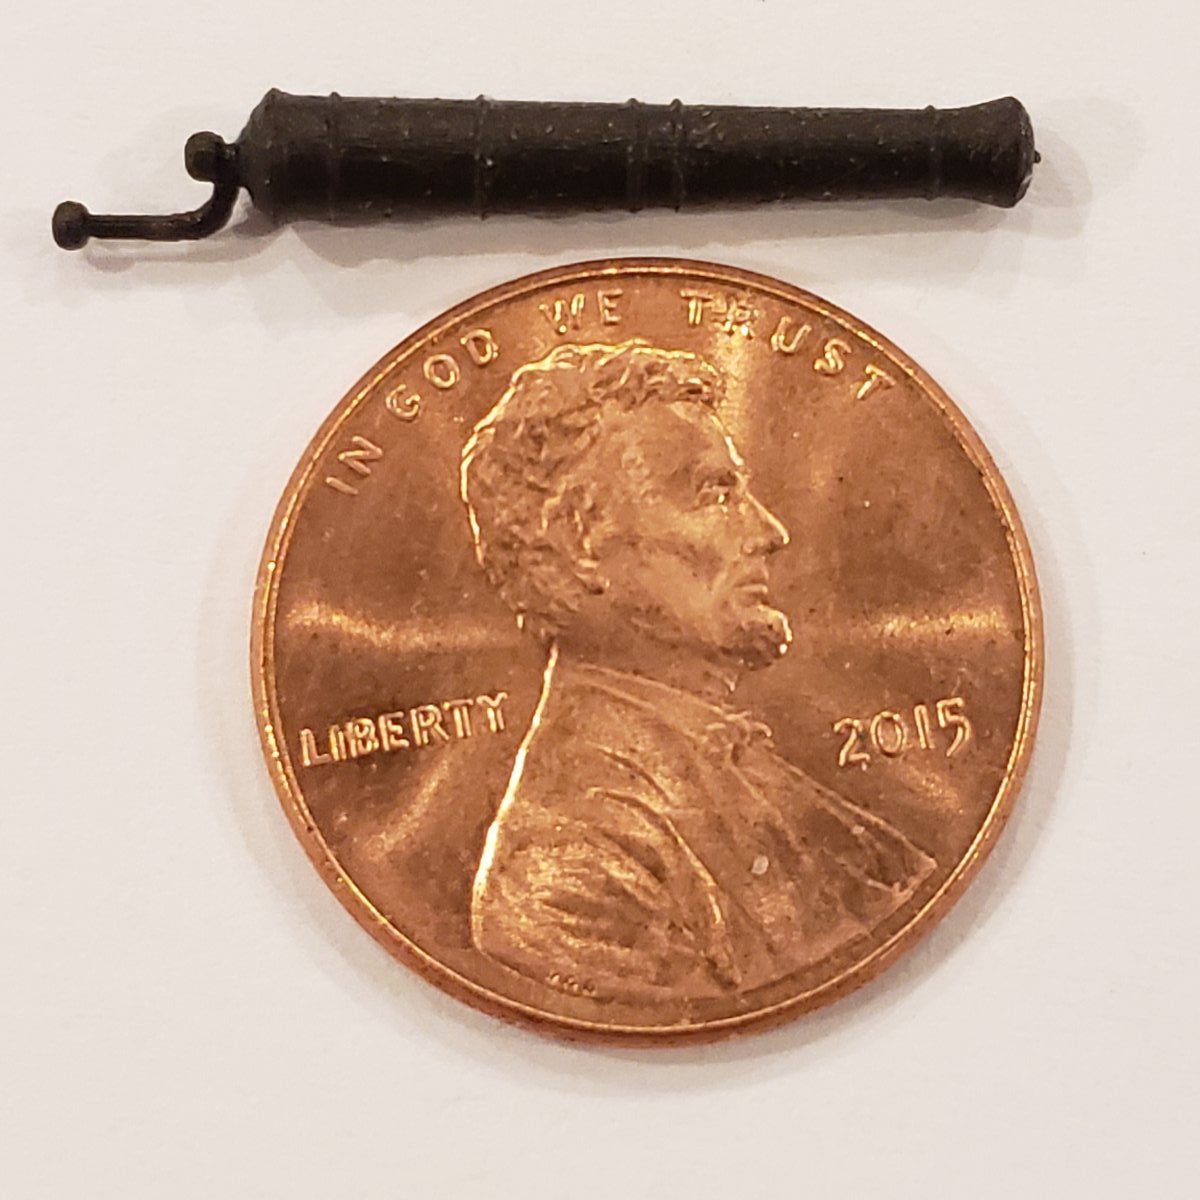
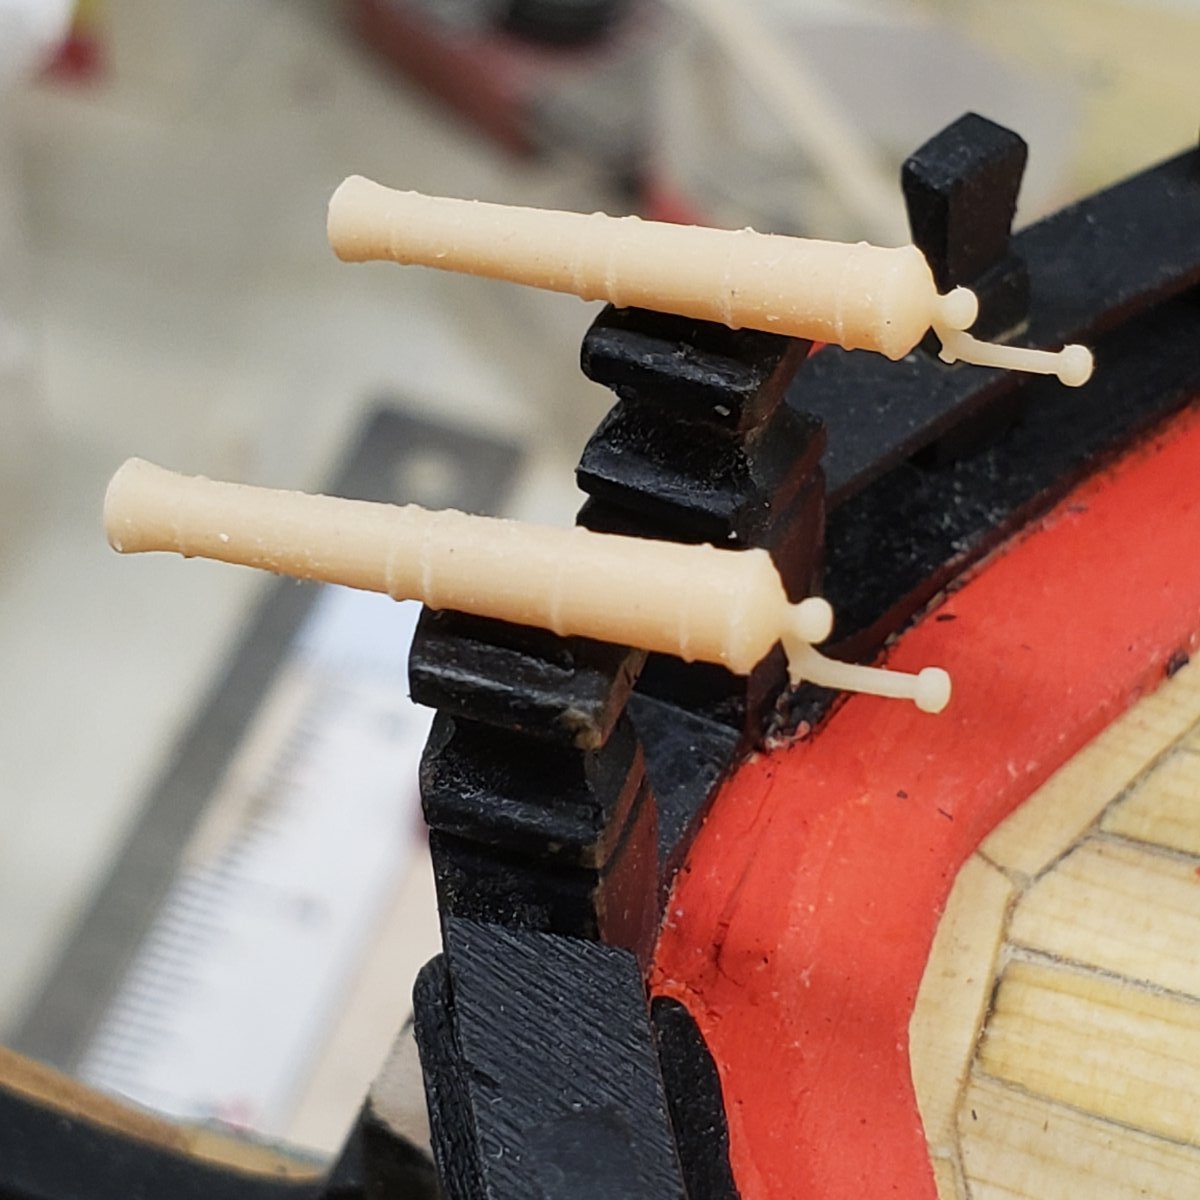
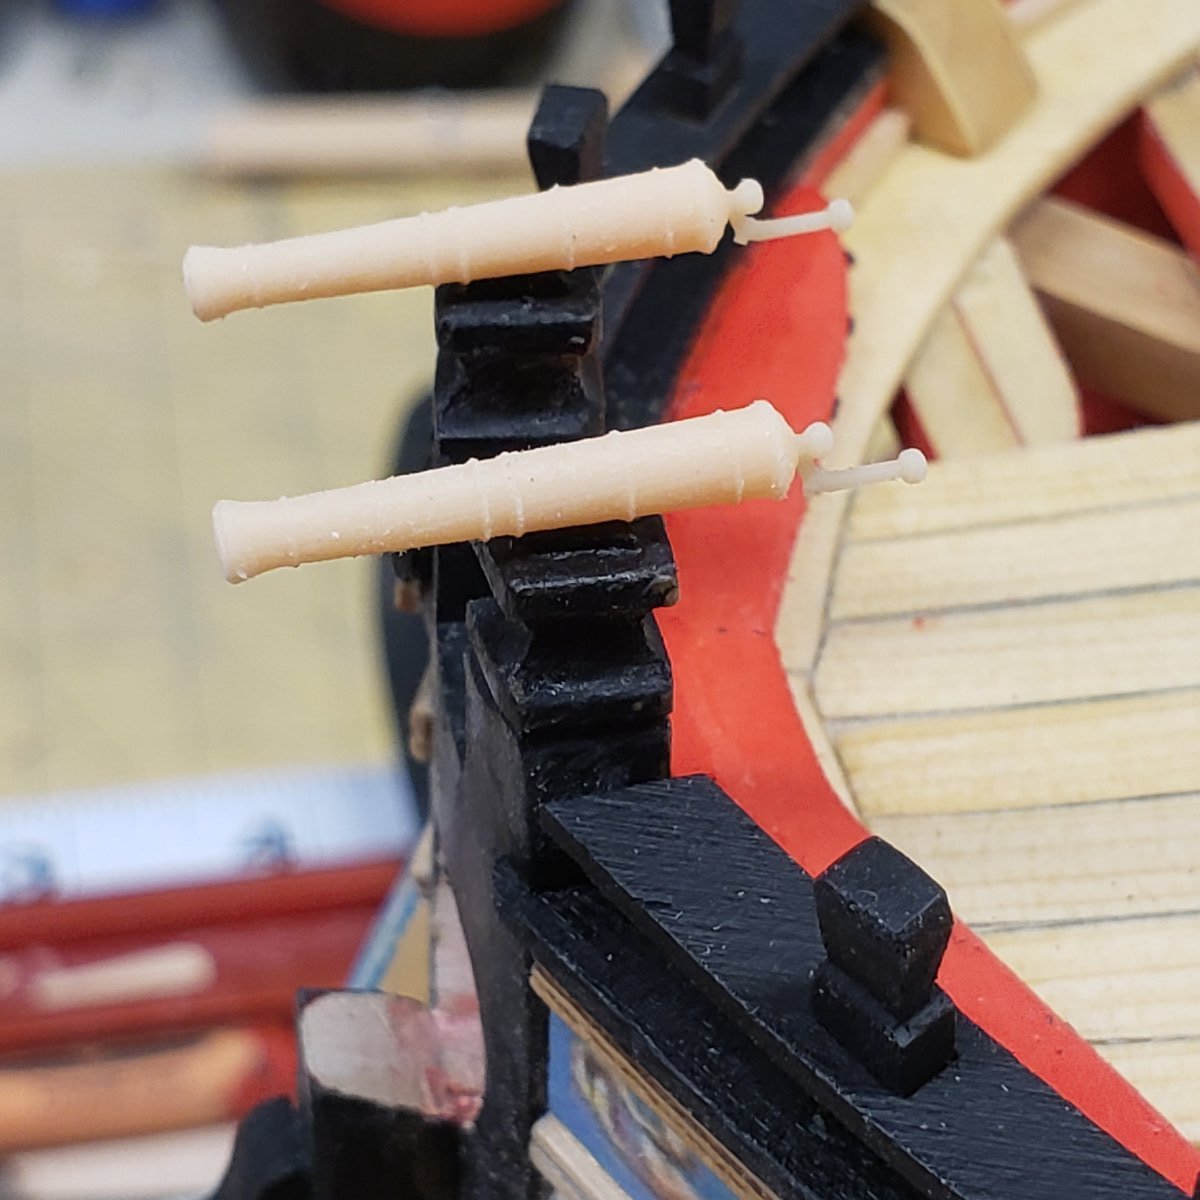
As far as printing little things, like laces, my Anycubic mono has no problem with this a very small scales. See cannon handle. If you don't want print it, when you see the objects in windows 3d builder just delete the laces and they'll be removed from the final merge.
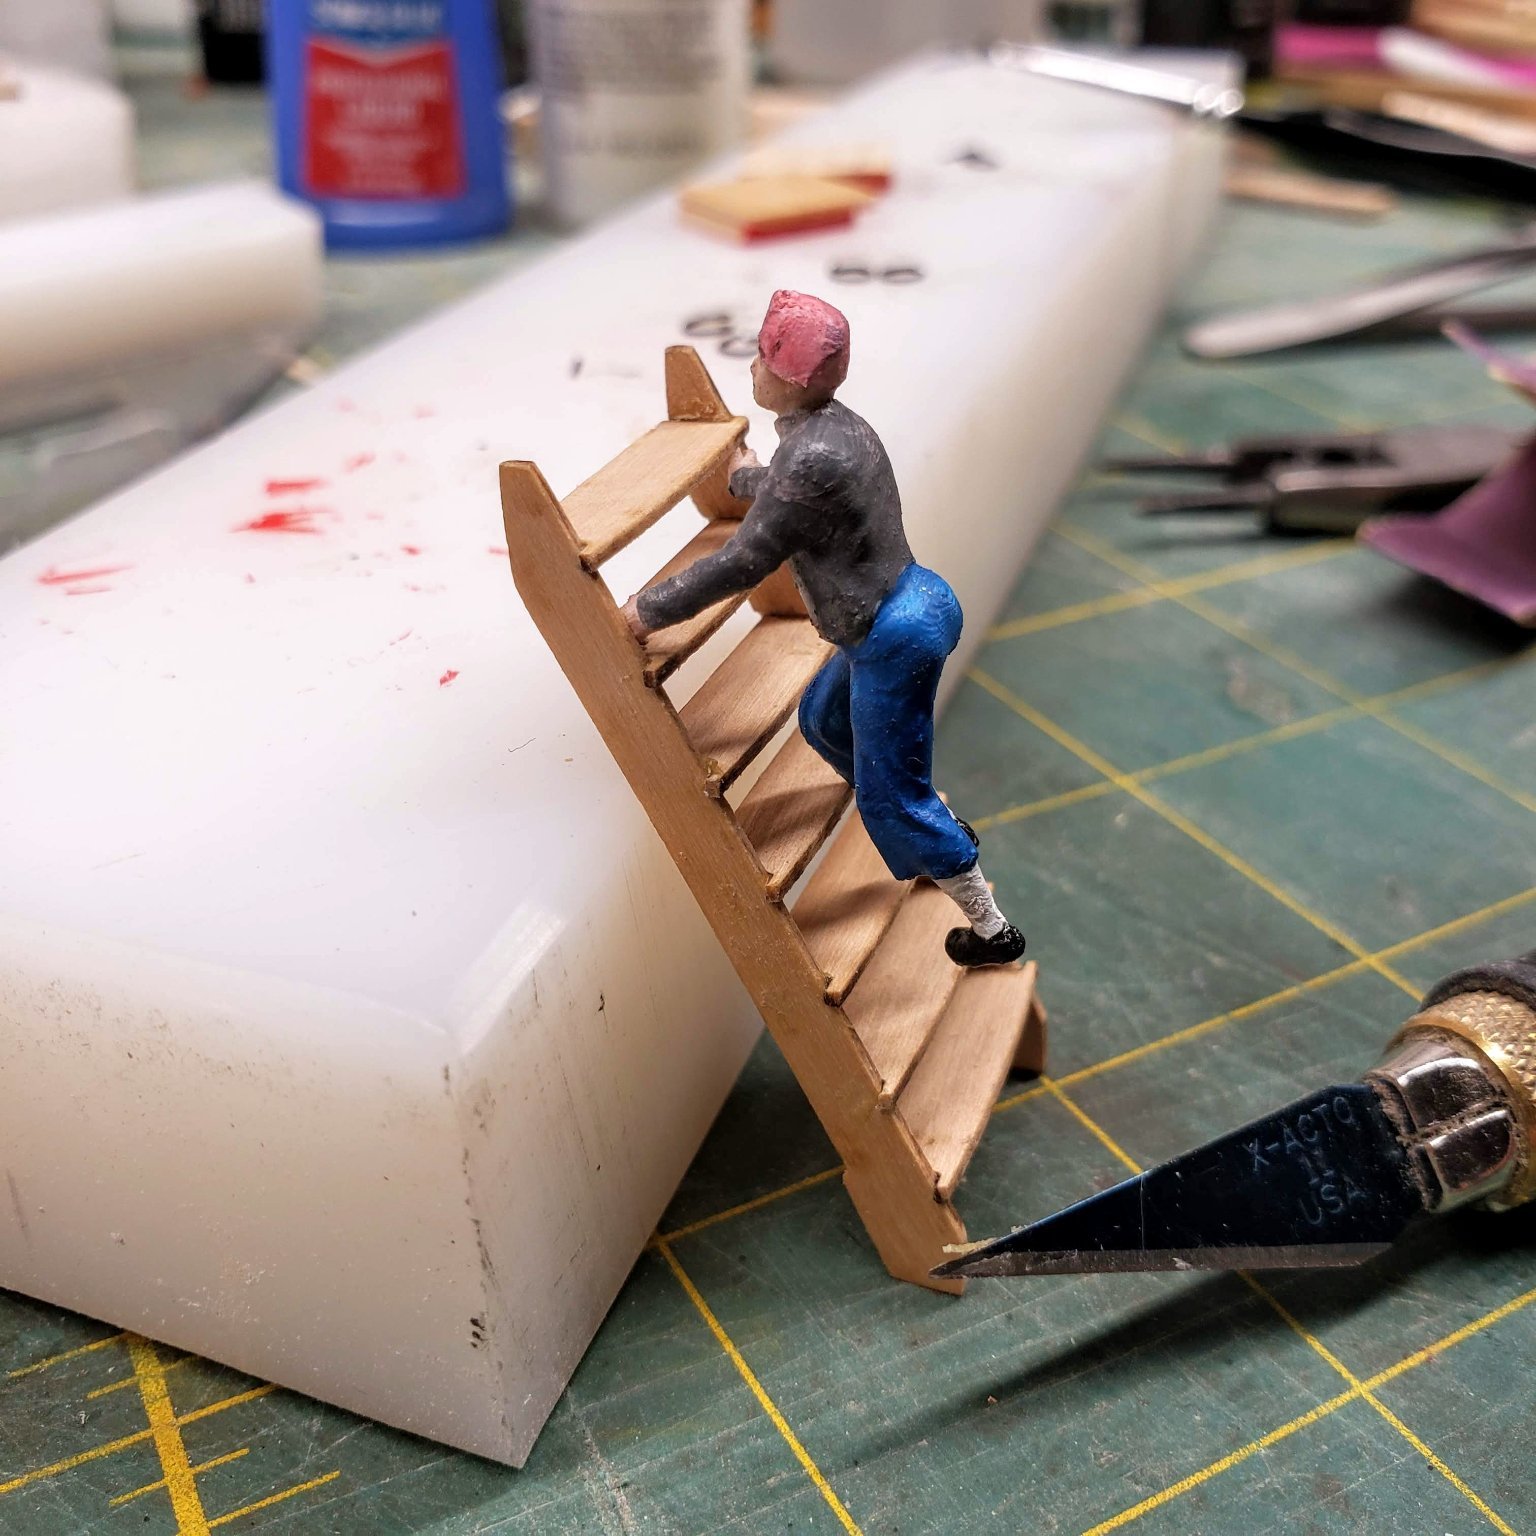
The steering wheel import into Daz is only for reference for positions. I would print it separately and then add seated figure.
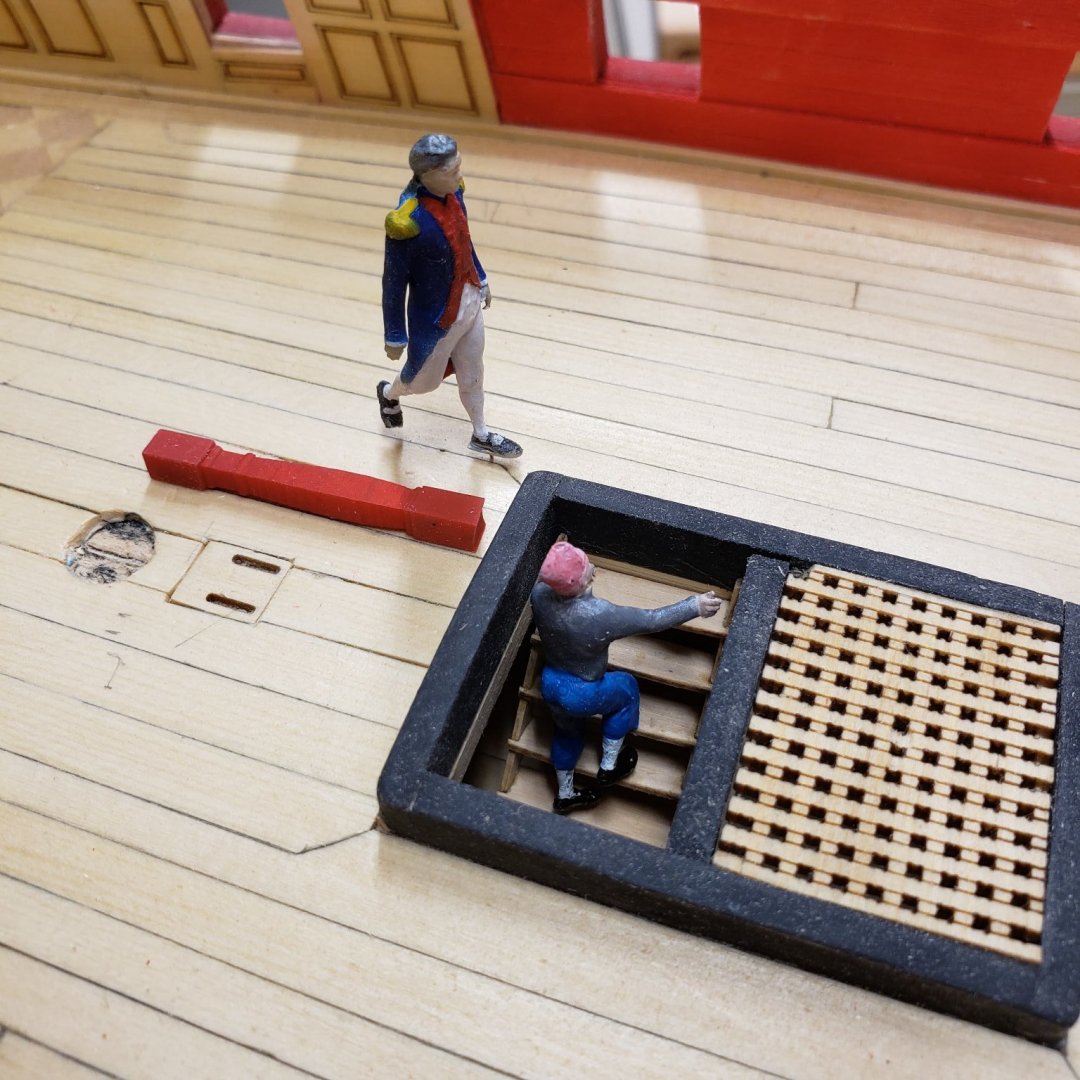
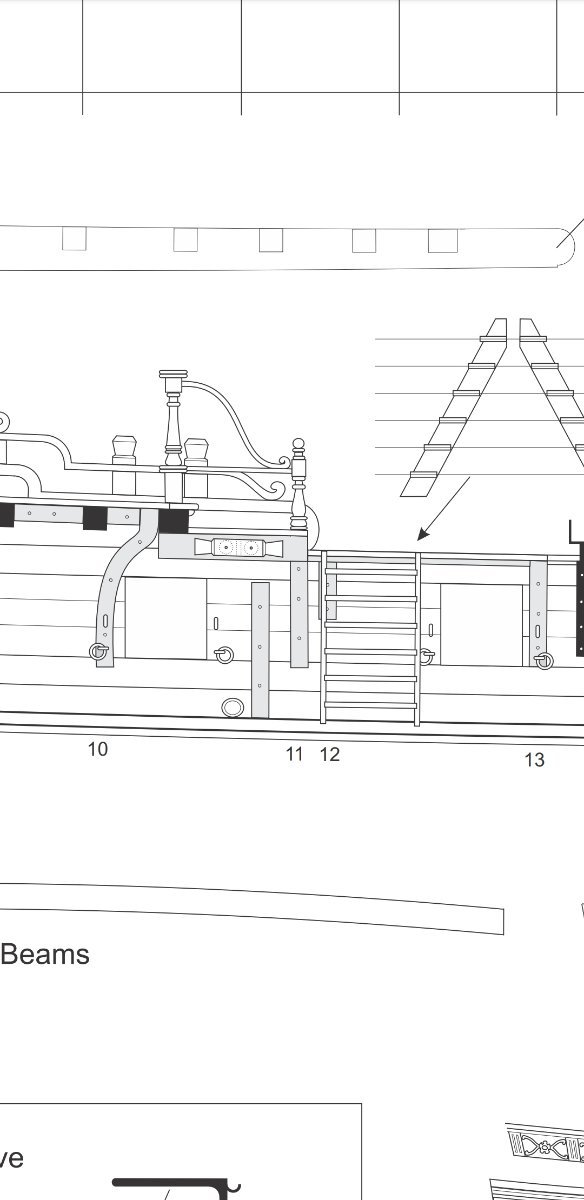
This is how I positioned the powder monkey for my ship model. The stairs were made in cad and imported into Daz. Then figure was set to that scale position
.png.ee1ff91c5e8b1bb5509e1b8f703128b0.png)
🔻and the final result.

- JGR, mtaylor and thibaultron
-
2
-
1
-
Anycubic Photon S - Resin Exposure Test - R_E_R_F with custom timing
YouTube · Jonathan Carroll
- mtaylor and thibaultron
-
2
-
1 hour ago, Kevin-the-lubber said:
Good stuff - can you tell us more about the reference file, I have very little hair left but would quite like to hang on to it 😬.
-
1 hour ago, Kevin-the-lubber said:
Good stuff - can you tell us more about the reference file, I have very little hair left but would quite like to hang on to it 😬.
Yes if you search the net, you can find the files everywhere. I use the files provided with the anycubic printer. It prints eight different models, all at once. The eight models are different settings set up by whatever genius figured this all out. I have no idea how they do it, but the eight different models are numbered, you pick the one that prints the highest details and use its settings for your resin and printer. I used to cuss up a storm until I ran across this technique. Now I never print with a new resin until I run the reference files. I use Syartech and like it, but this was printed with
ANYCUBIC 3D Printer Resin, 355-410nm Fast UV-Curing Photosensitive Wax Resin for SLA/LCD 3D Printing, Rapid Precise Printing Craftsman Liquid for Jewelry Anime Figure and Character Design
its flexible and holds paint and primer.
- mtaylor and thibaultron
-
2
-
1 hour ago, henrythestaffy said:
I like your figures. Did you design them yourself?
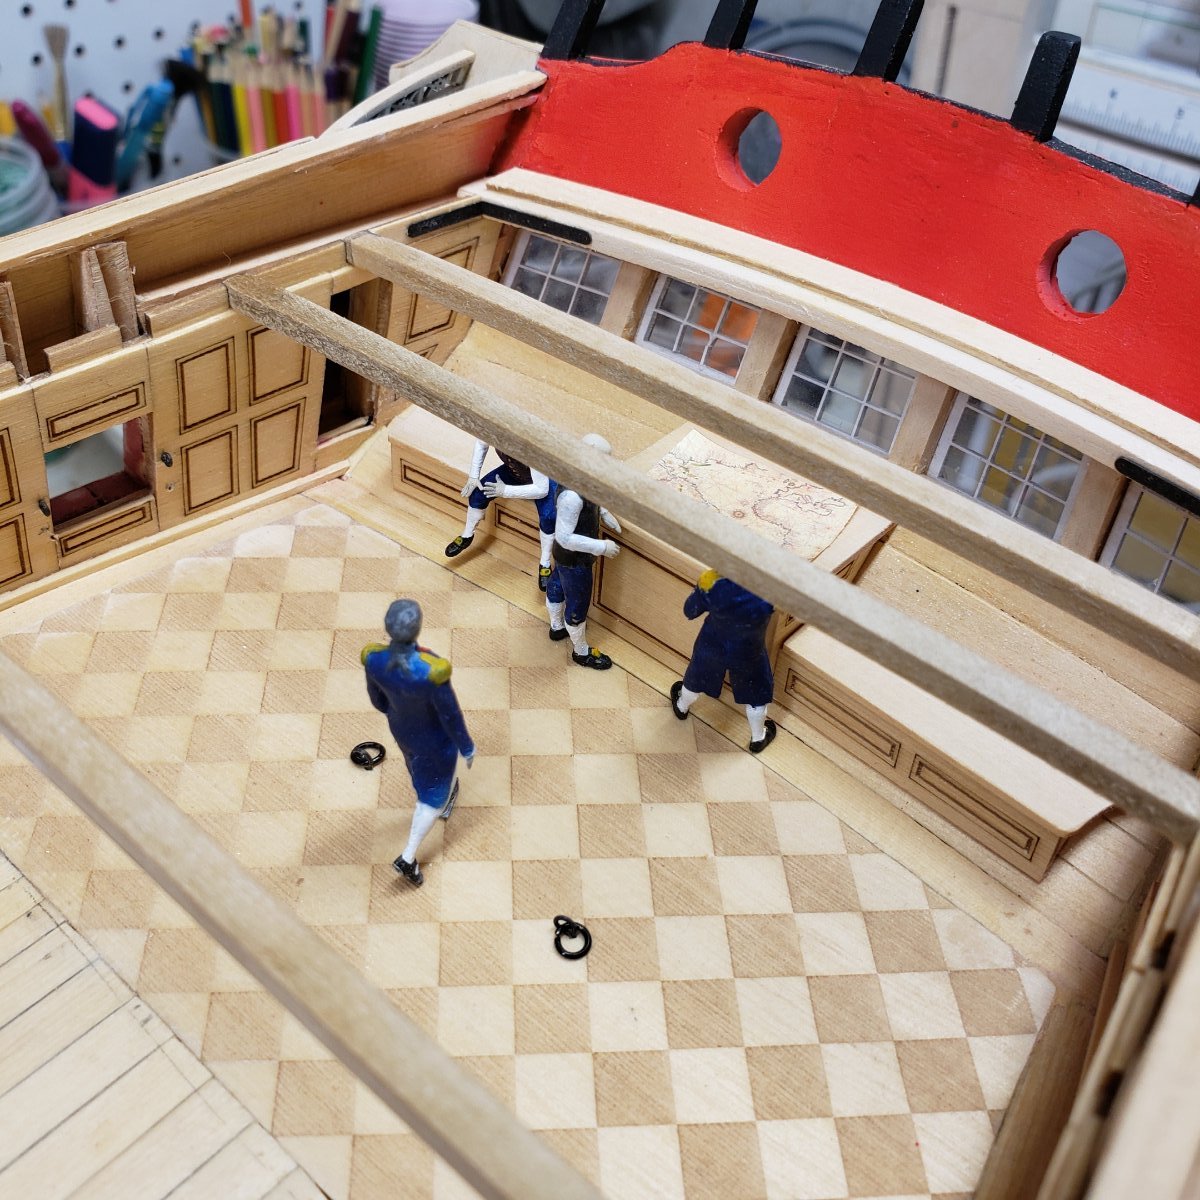
Those originate from Daz a posing program. Its free. But a learning curve. I design the parts of the ship they interface with and import them into the program. Then I pose the figures into whatever action I want the involved in. Then I export them in scale to an stl file. I repair that file to make it watertight, then print. I also use a program called z brush to add details I otherwise couldn't get. Accessories to figures, hats for example
-
I've been printing parts for the Winchelsea. I started this process out of frustration with not being able to buy figures in the poses I wanted.
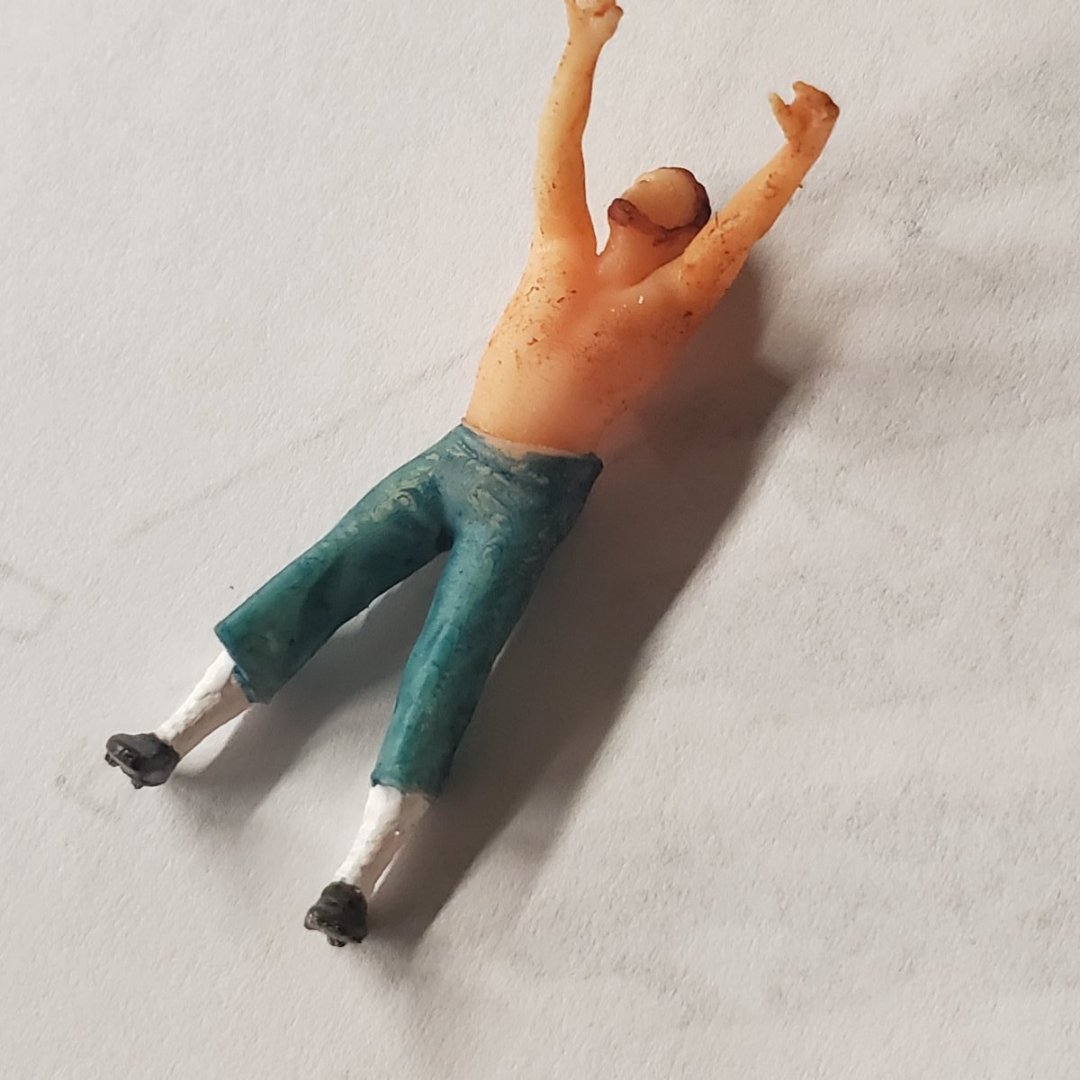
It's an Anycubic Mono X printer. I've attached a pic of the Swivel Cannon. I had to print this with a flexible resin in order to get the handle to print without breaking off with handling

🔻The raw unpainted part.

But the primary reason I turned to 3d printing was for scale figures for the ship. It is a 1:48 scale. This sailor is posed for a chain pump gang.
I'm using many of the methods you have outlined. However I always print a reference file with any resin I use and make that my starting point. Saves a lot of hair pulling and anguish.

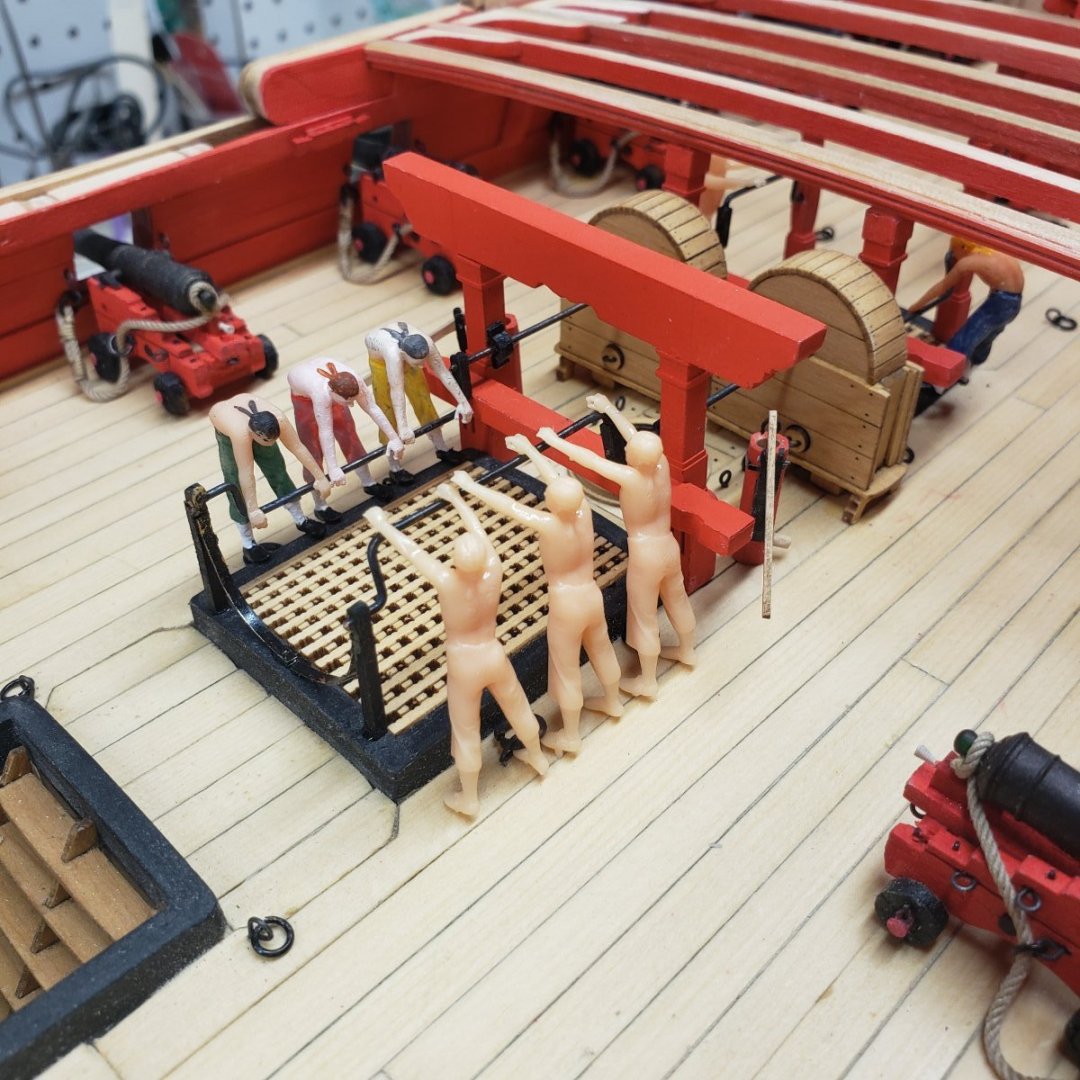
🔺️Three figures printed for Captains Quarters.
- thibaultron, JGR and mtaylor
-
3
-
Well heck. I see that now. Off it will come. And I'll stow it for later...thanks for keeping me on the straight and narrow.
-
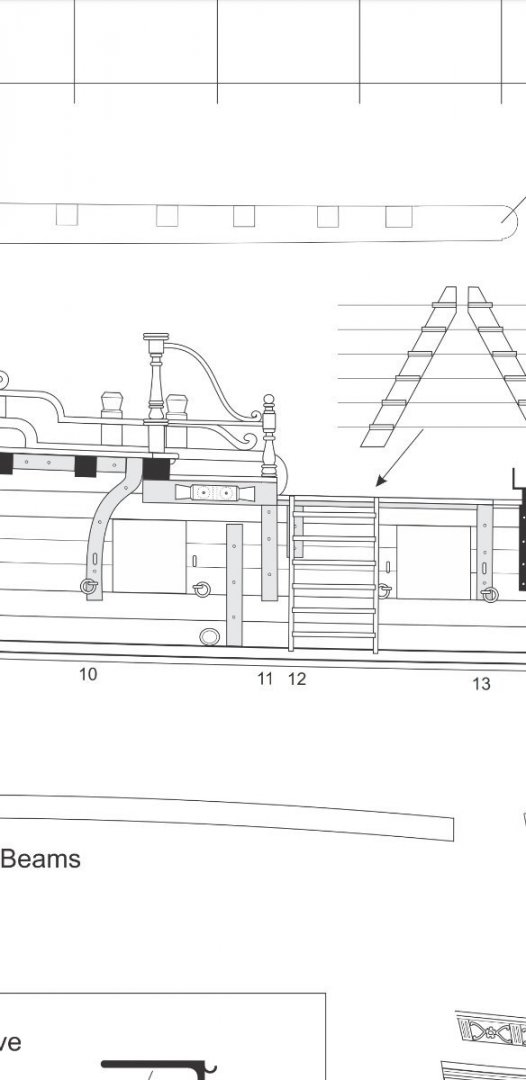
Is this the location? Or did I read this print wrong.
-
3 minutes ago, Chuck said:
looking good.....Those kevels you added along the bulwarks close to the qdeck will be a problem. They will certainly get in the way of the gangways and platforms. I would remove them if I were you.
I could of sworn i placed those based off the plans. Anyway should I move aft or to the bow.
-
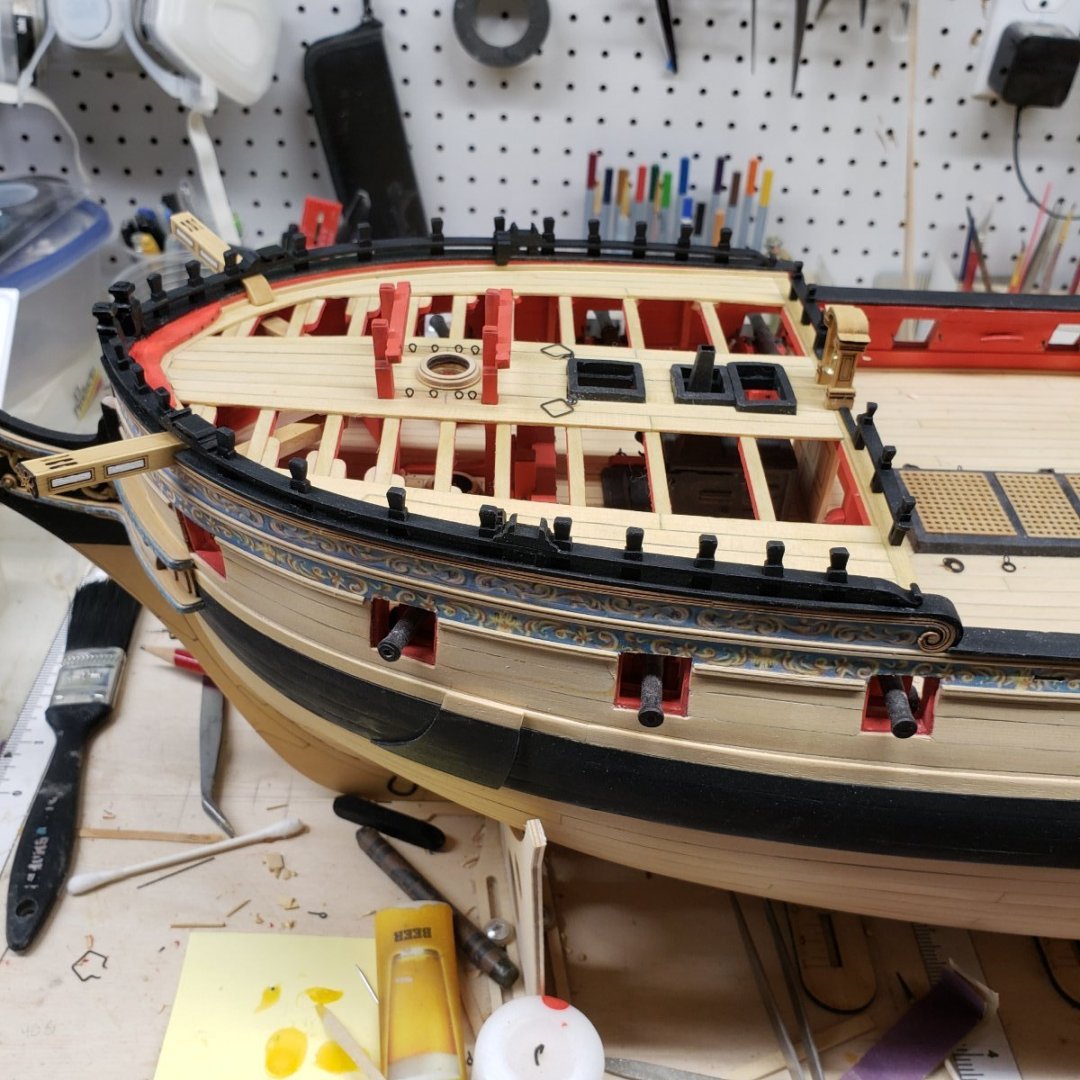
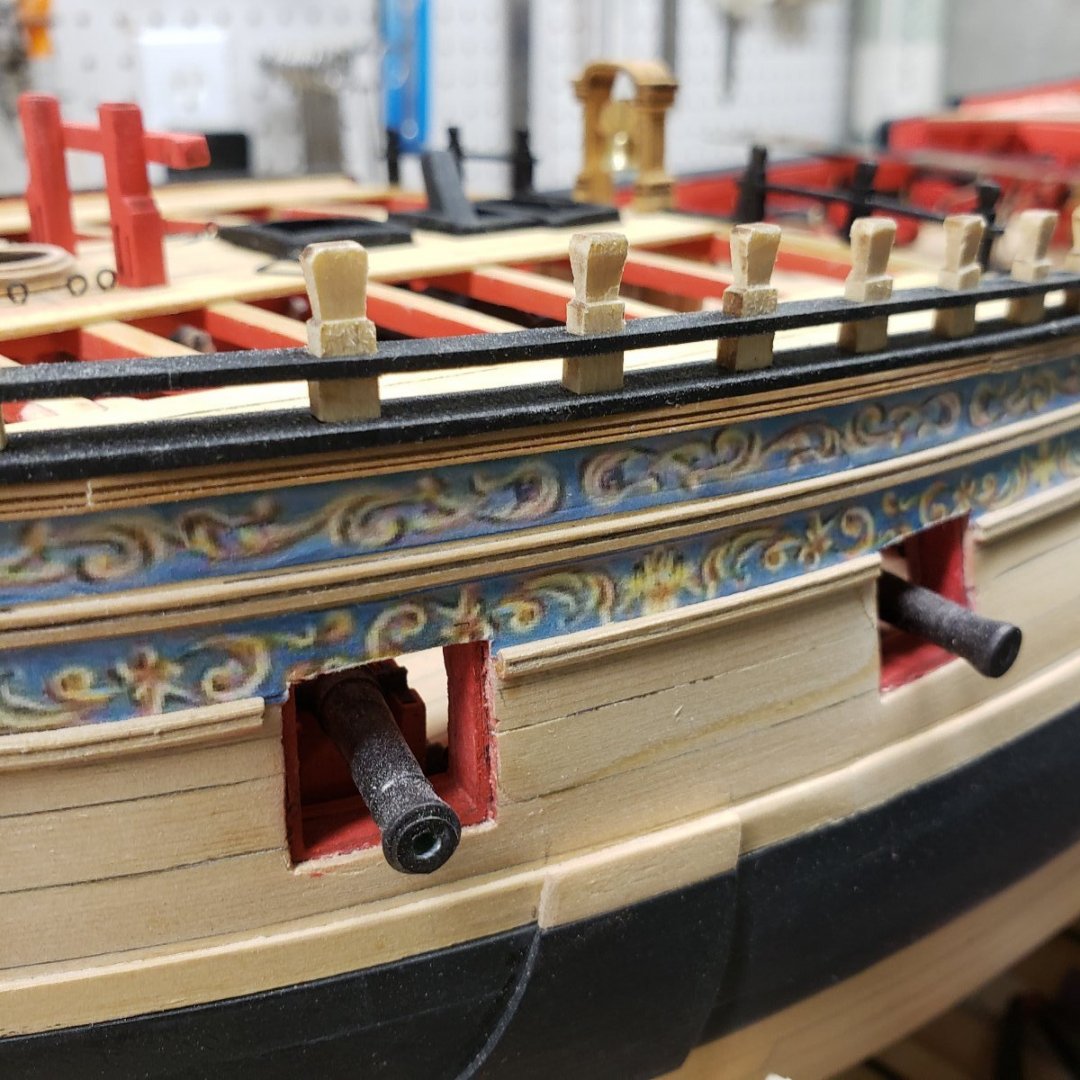
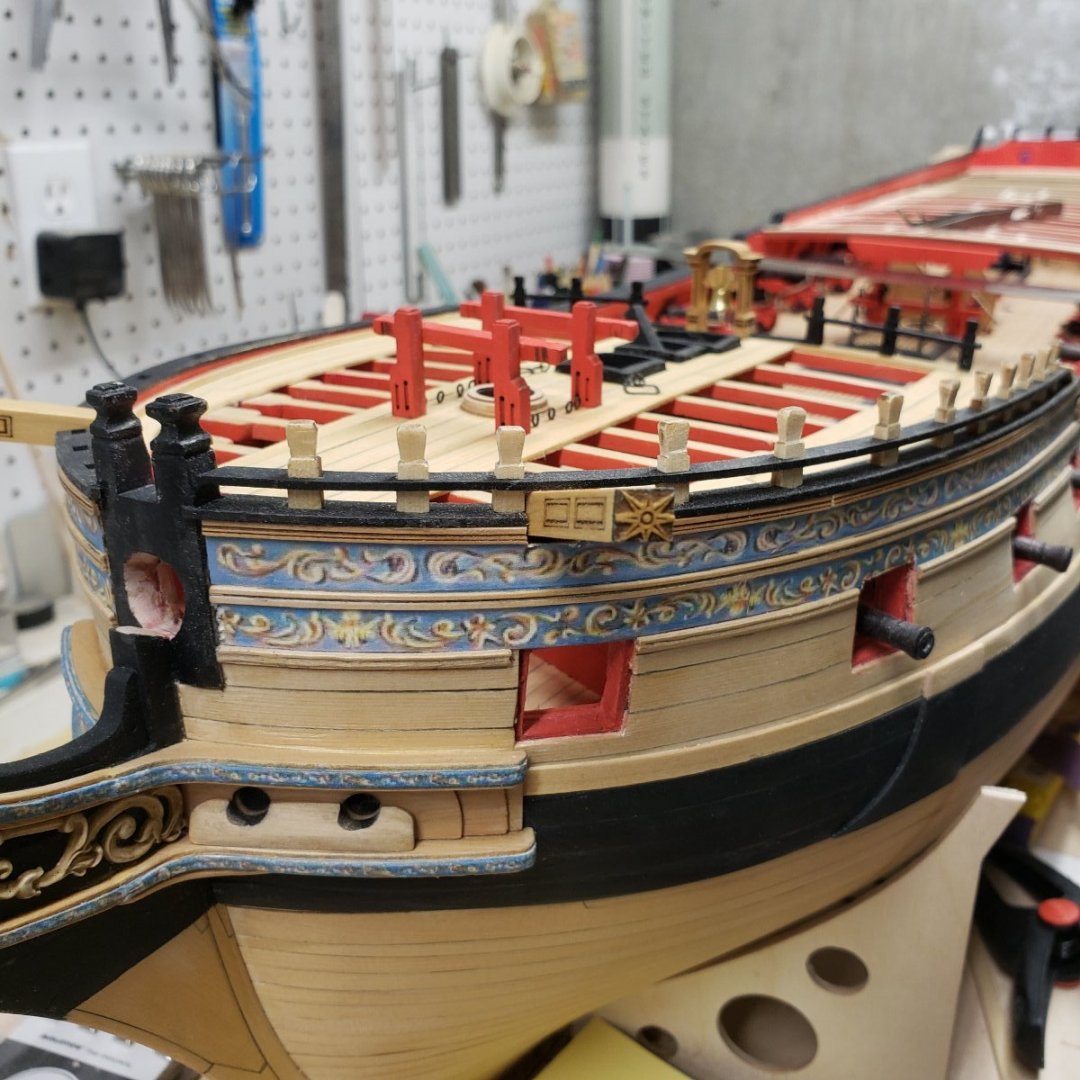
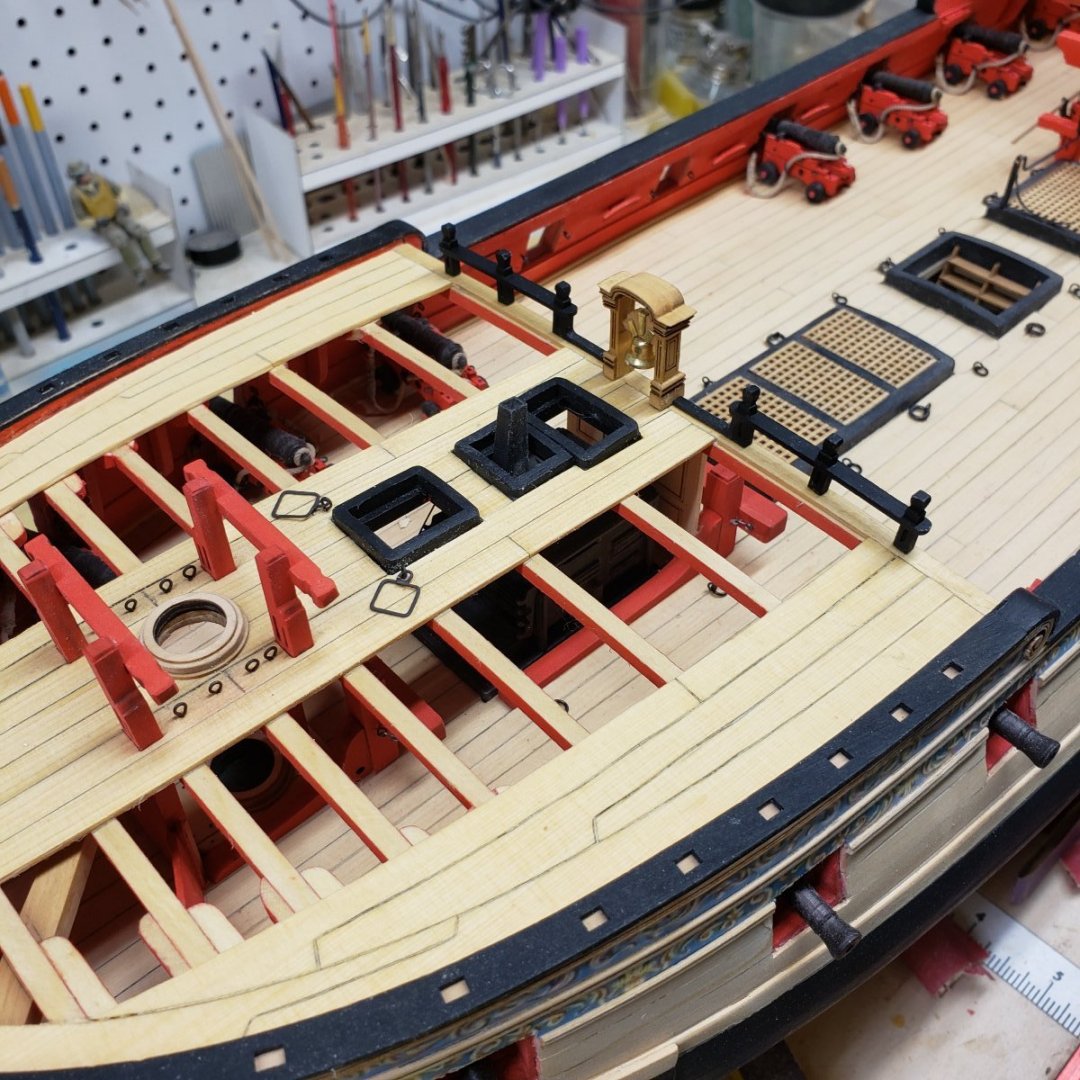
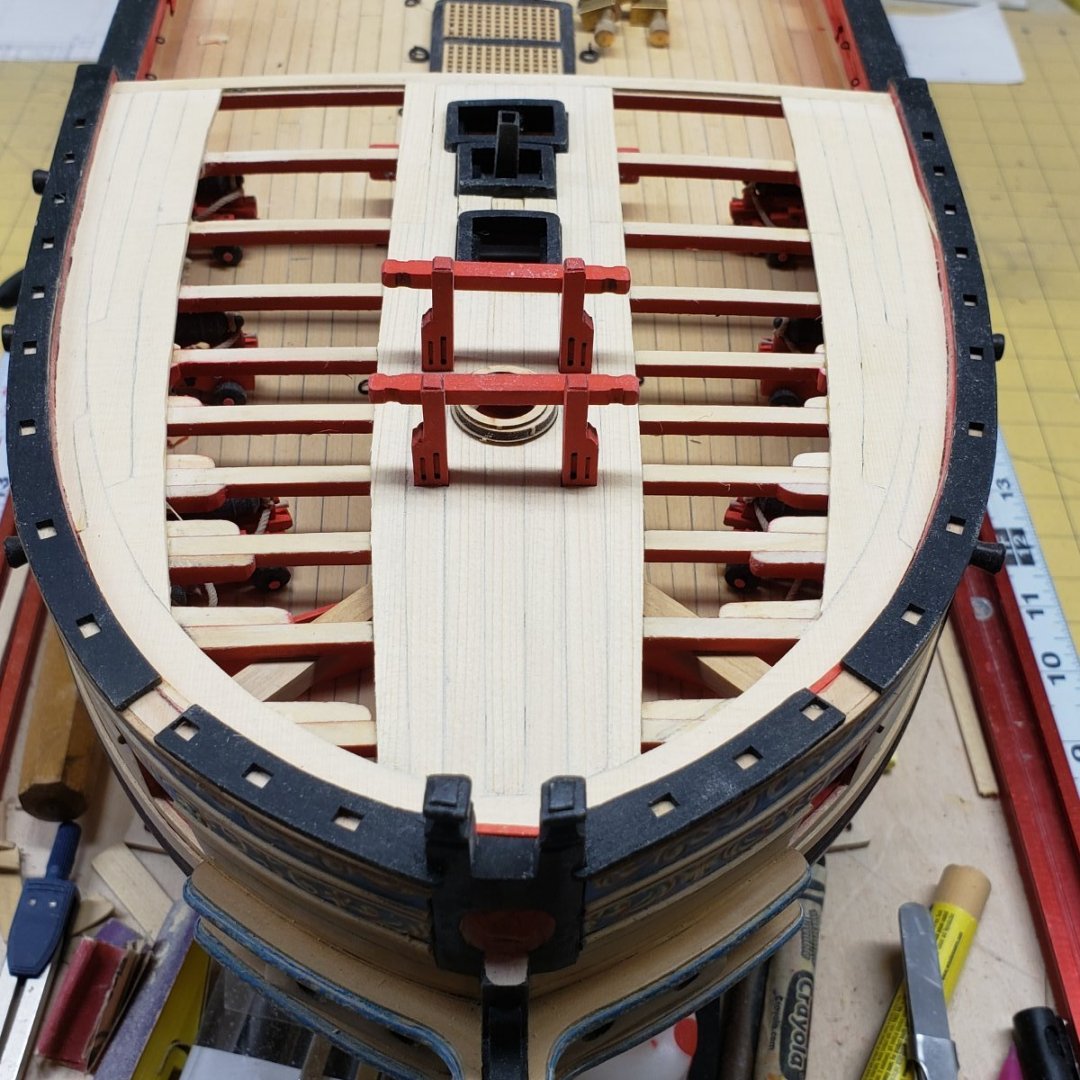
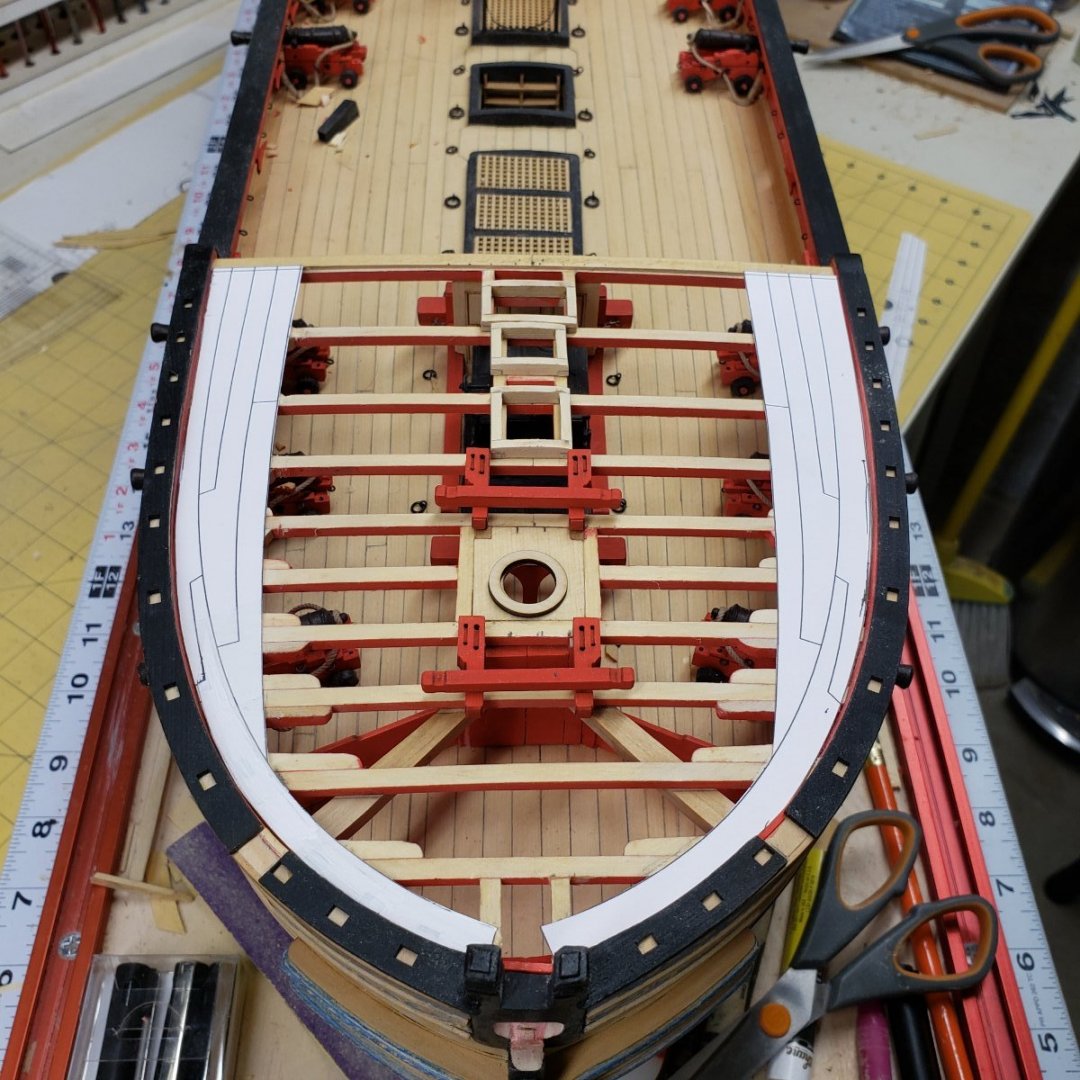
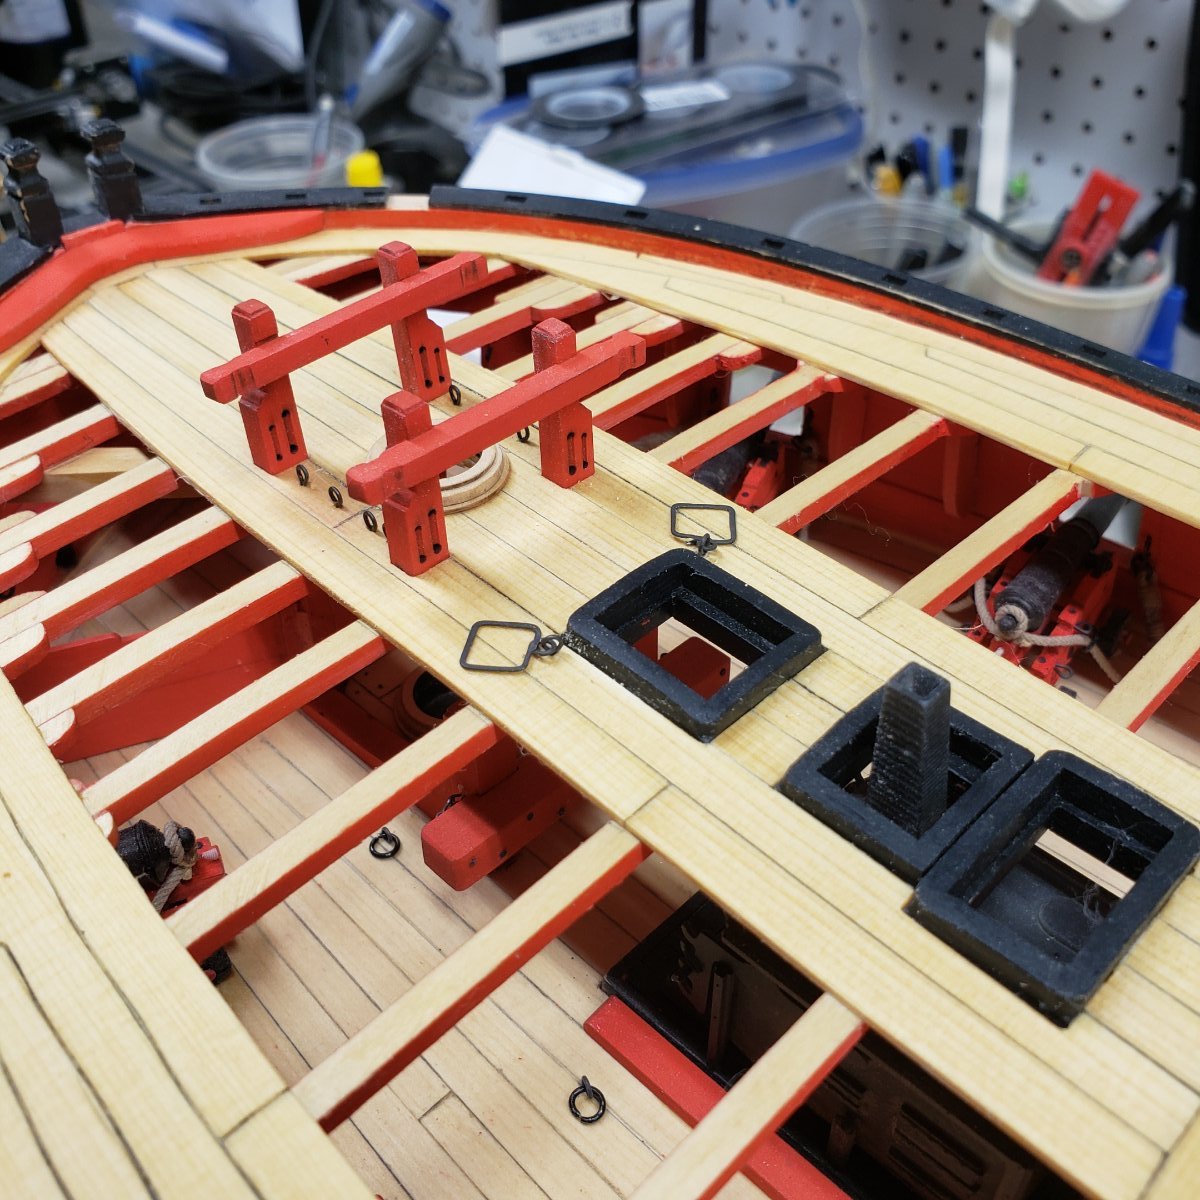
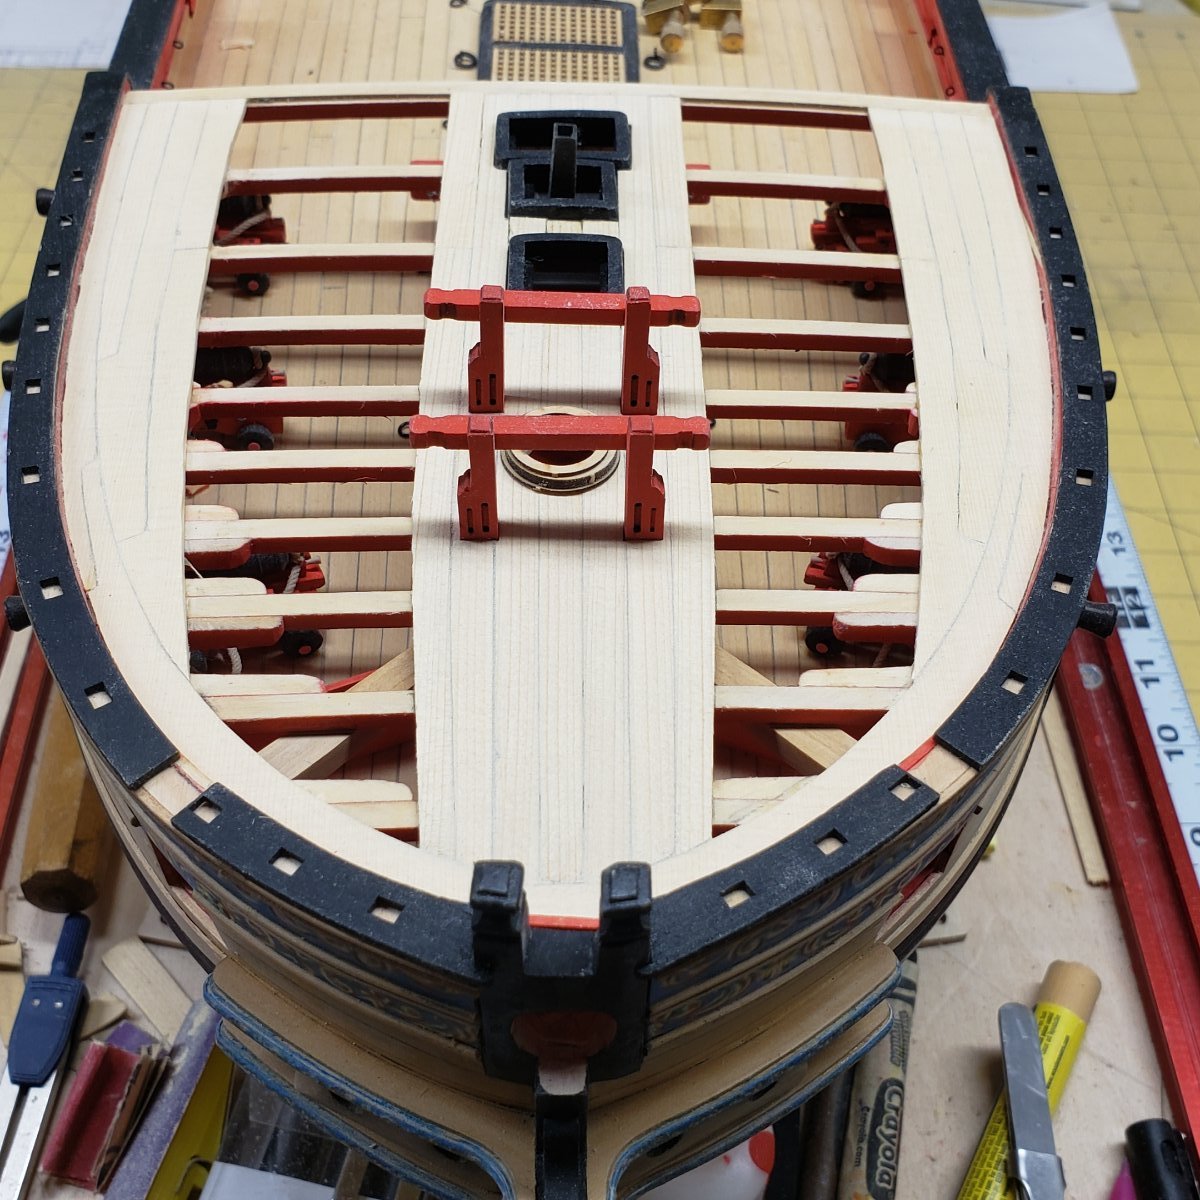
Forecastle complete except for grates. I still need to glue in the catheads.
I took some time out to play with the printing of the swivel guns. These are very small parts, and I had a heck of a time tuning in the right settings, and the right resin.


🔻Still need to add the mounting bracket, that should be fun...

🔻All railings painted and glued into position
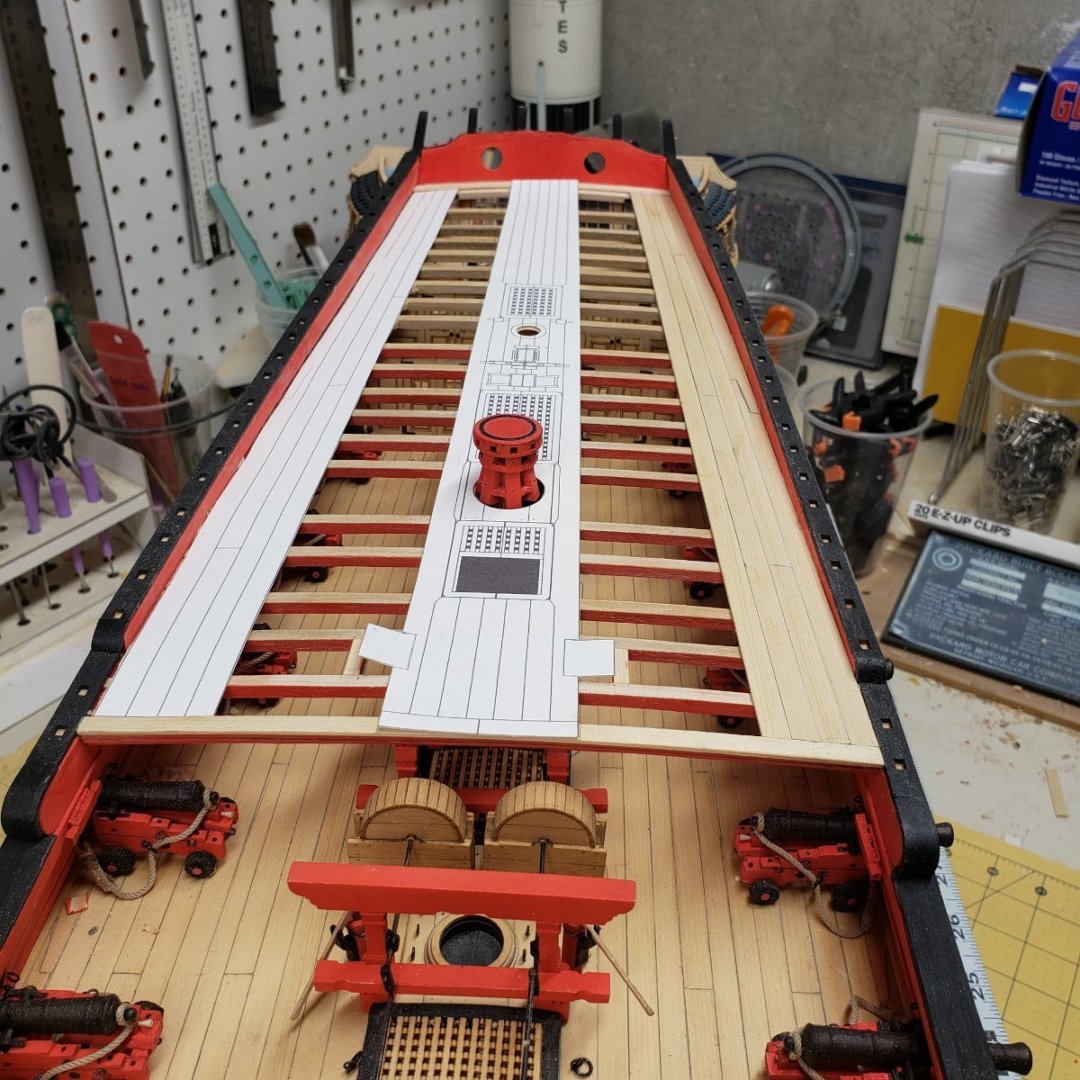
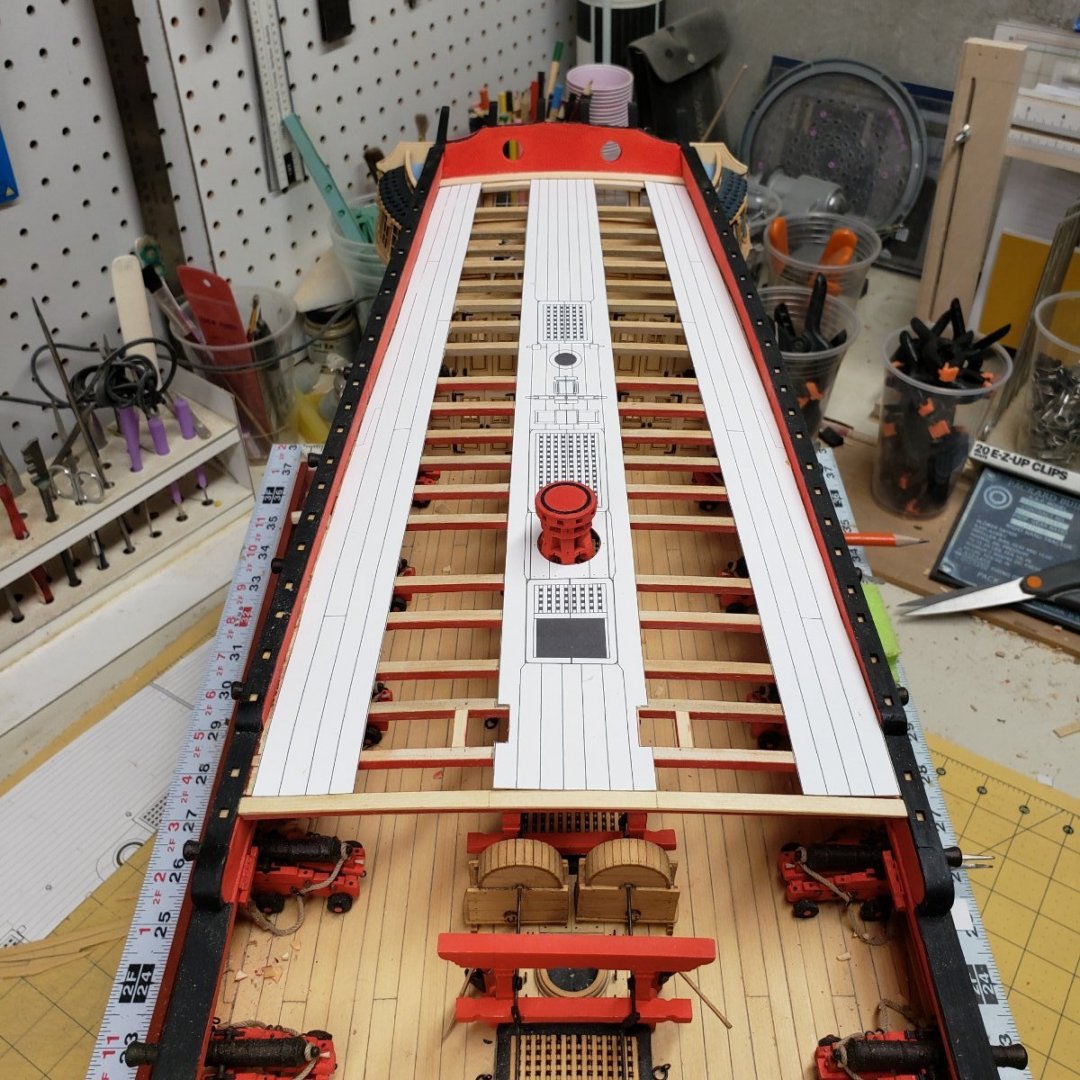
🔻First planking run on the Qdeck, this one is straight...
- FrankWouts, Rustyj, Edwardkenway and 3 others
-
5
-
 1
1
-
23 minutes ago, Chuck said:
Nicely done…thats a tricky part of the project. You did real nice work of it.
Thank you sir, I agree about the tricky part...it was an adventure on the entire forecastle. Looked so simple in the pictures😀
-
So a little more progress, I made the catheads and cut the channel for setting them. I painted the black line on the end of the catheads rather than taping them. I painted the rails black, after breaking it twice. I super glued it back together and used black filler to clean up the breaks. I am fine admitting my mistakes, and am getting really good at fixing them. The timberheads and rail were dry fit to check that the catheads were going to pass through. These timberheads and rails are delicate and required some finess to fit properly, which is why Chuck numbered them. Pretty much a custom fit to each location. The good news is they look like they're going to fit perfectly. Nothing glued up just positioned in the pics
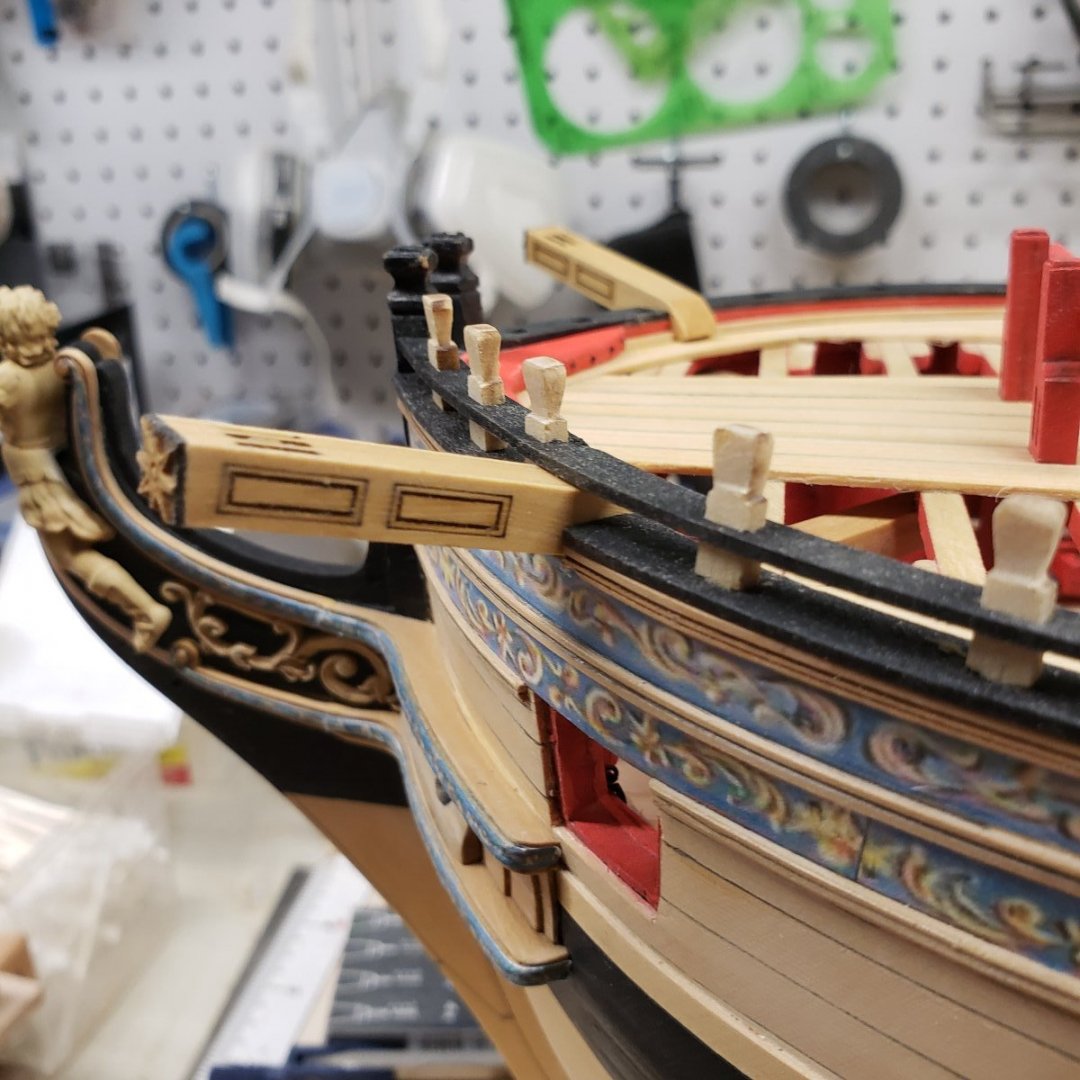
🔺️I broke the rail just on either side of the cathead. Hard to see, CA saved the day


-
1 minute ago, glbarlow said:
Nice work and nice photos, I like the angles.
Thanks, always looking for the best shot. Thanks also for all the likes. I really like it better when viewing it without the camera, it looks so much nicer.
-
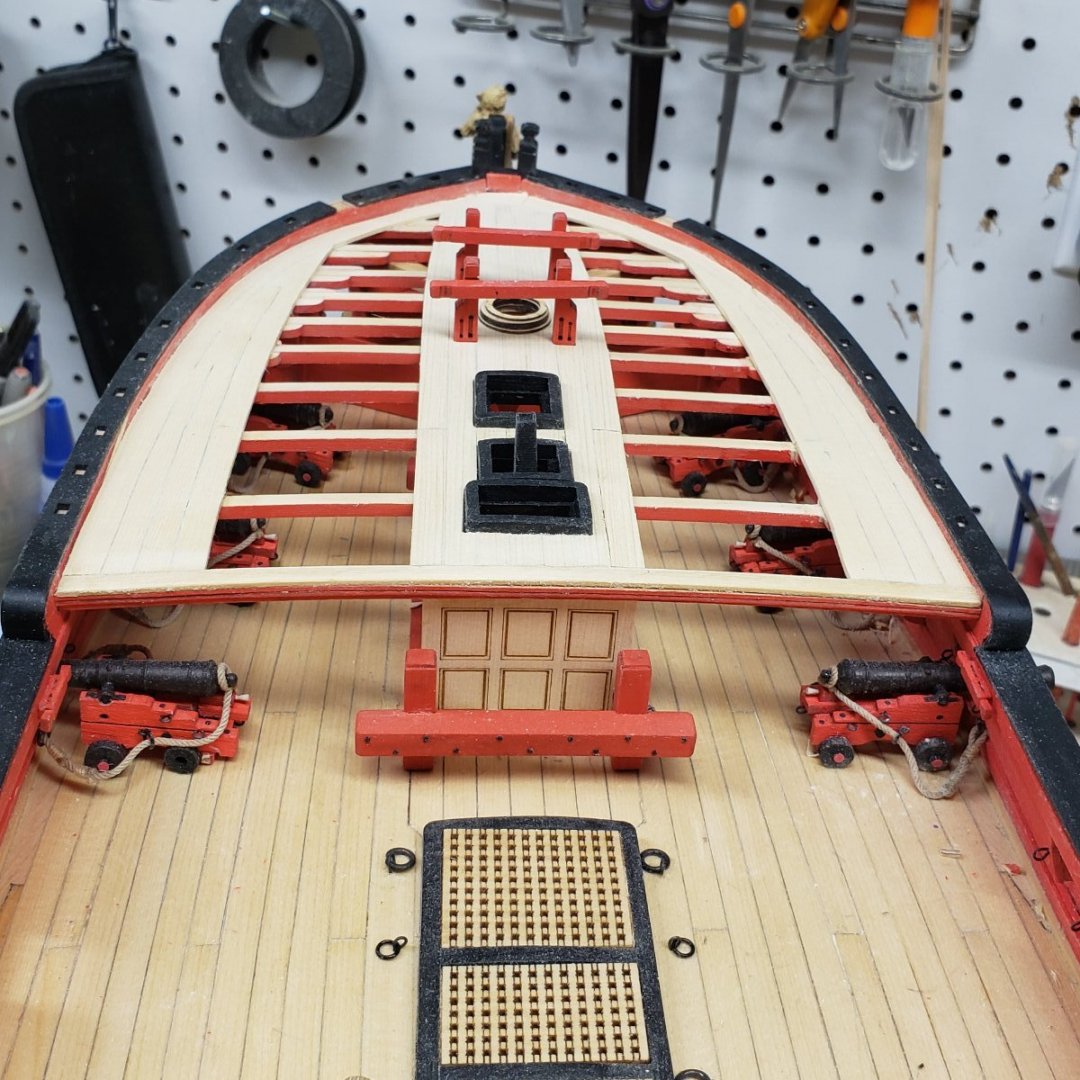
Belfry and forecastle rails completed. I made the square shackle wire by bending the round wire to the required shape, and then whacked it with a hammer on an anvil and voila it was flat and square. Took several tries to get the proper shape, but wire is cheap.


-
-
-
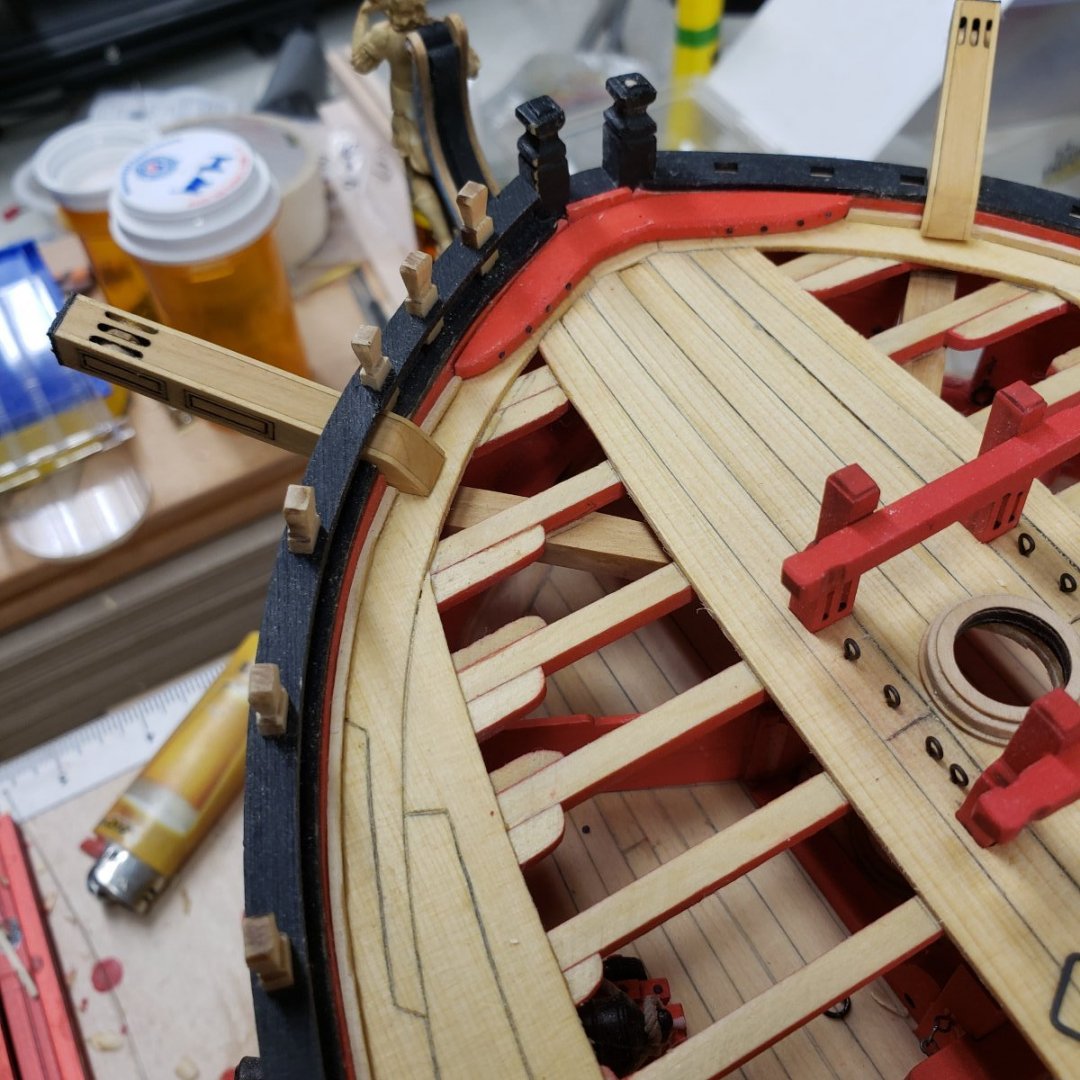
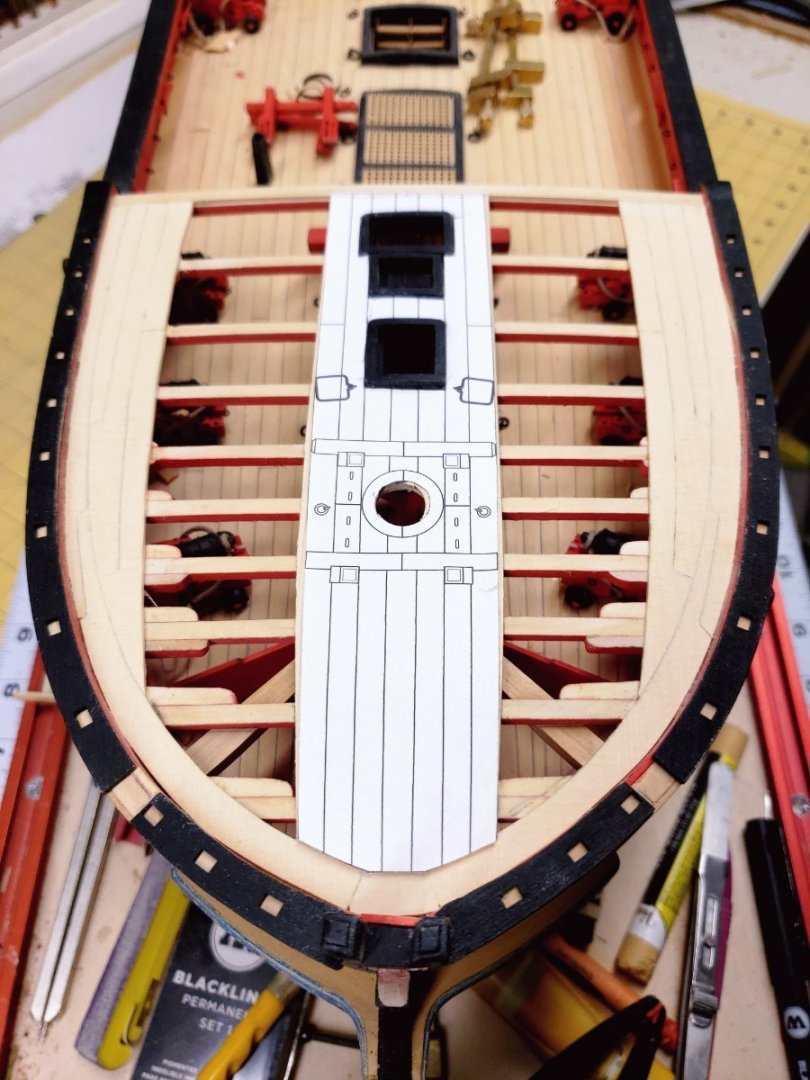
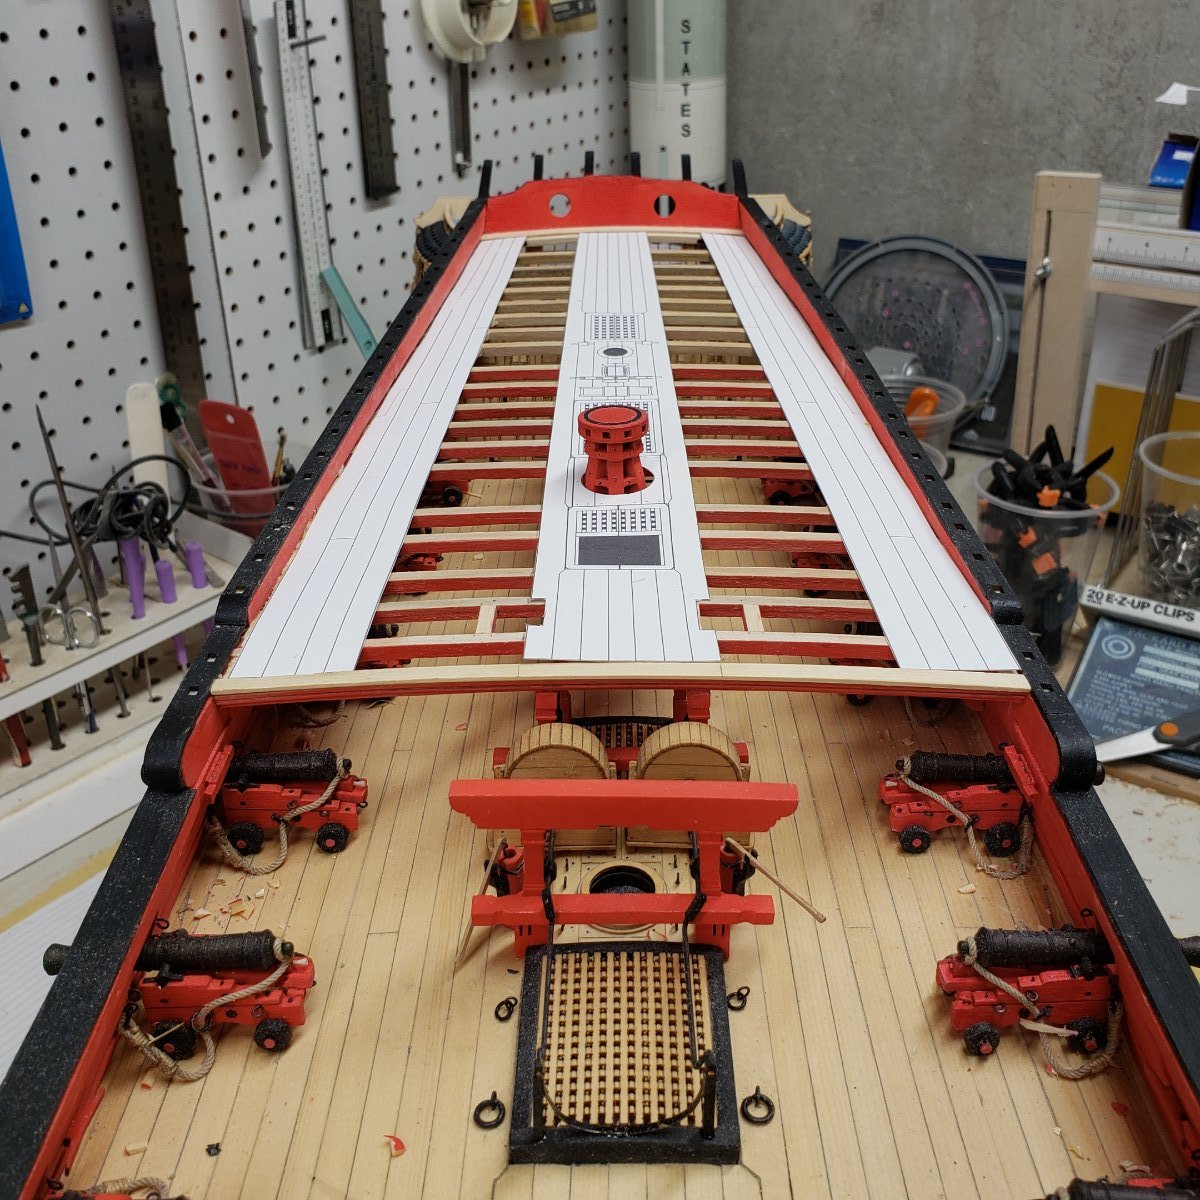
So I fixed the forecastle decking. In the one photo you can see the paper overlay and the itty bit I added to get things right again.
Still more to go, but at least its moving along again.
- rafine, Vladimir_Wairoa, FrankWouts and 4 others
-
6
-
1
-
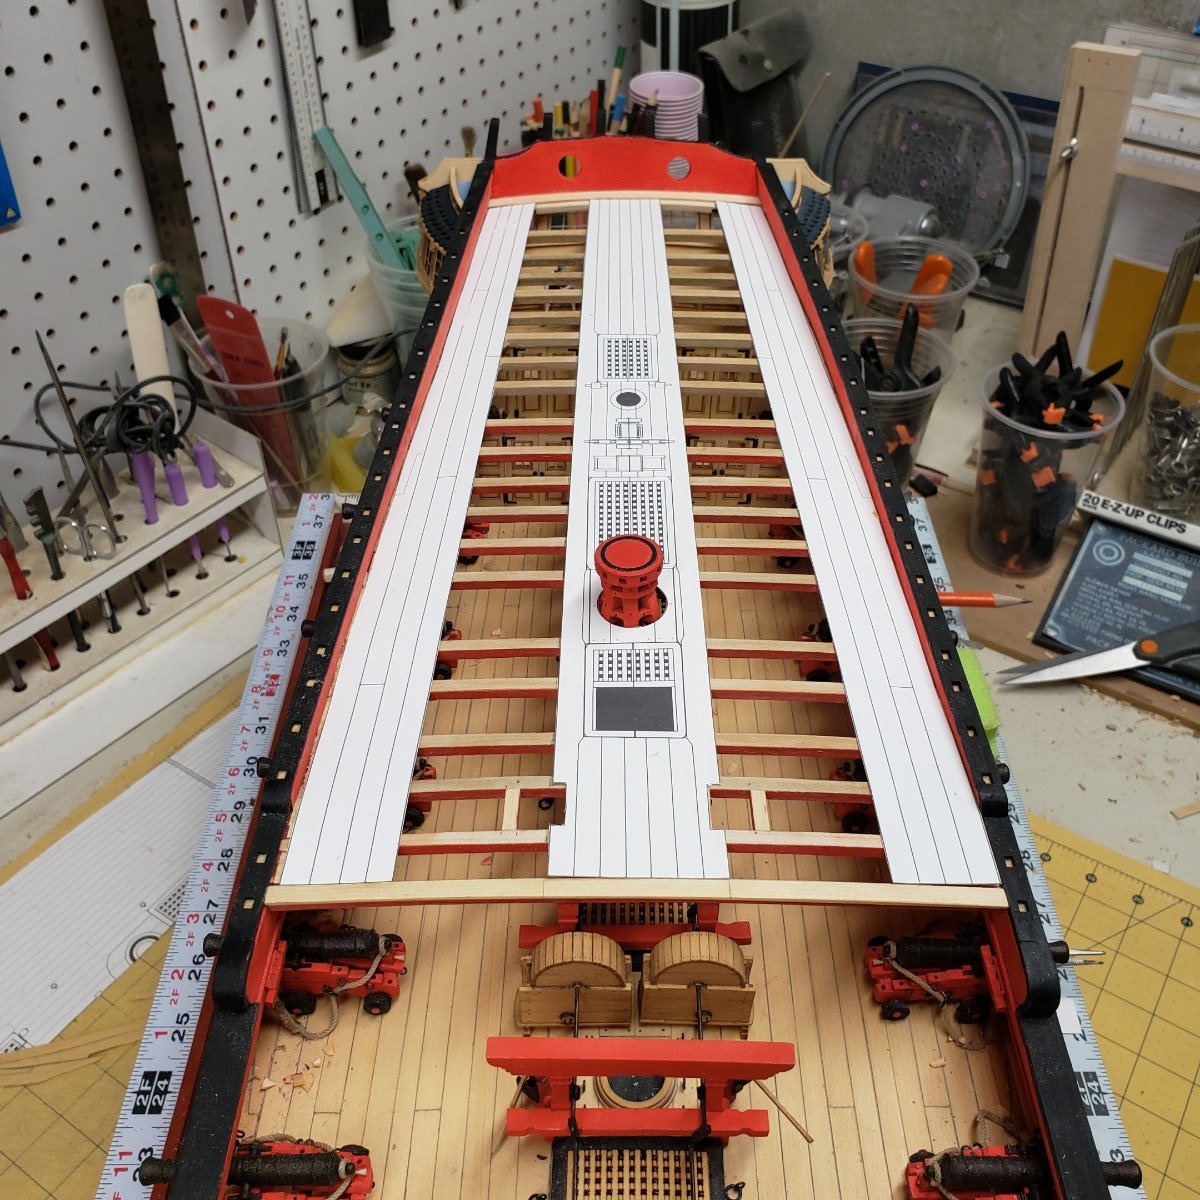
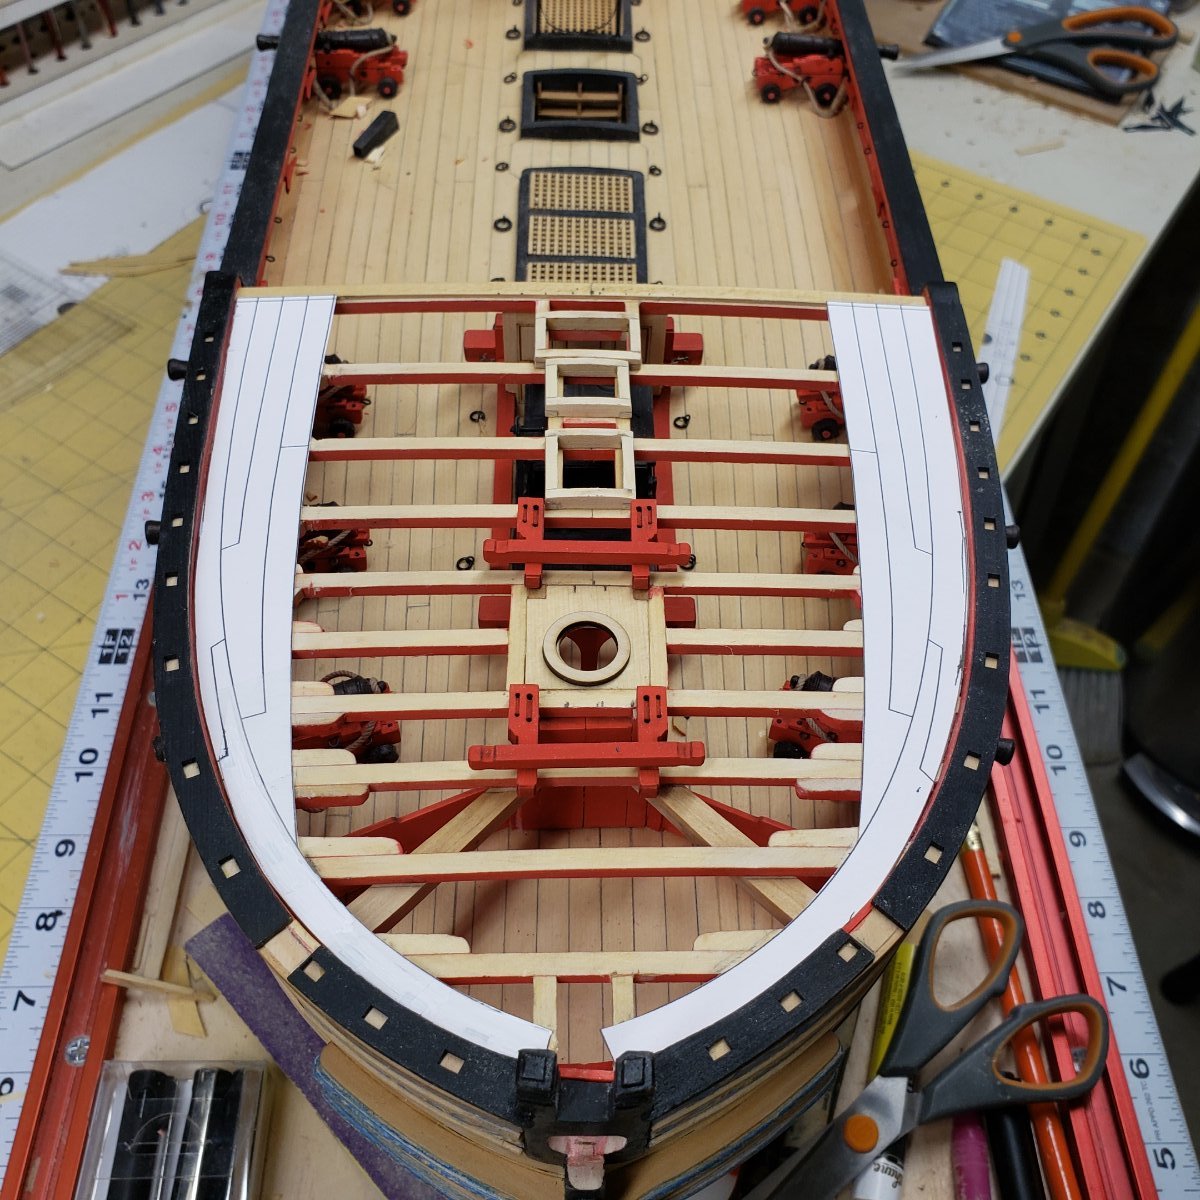
Ship corrections 101.
An adventure into paying more attention to the little things that can wreck your otherwise boring life.
I made the corrections to the margin planks at the qdeck. I did a scribe onto a blank paper that was taped to the beams, then scribed the existing deformity onto that sheet, cut to the scibed line, and then laid that onto the planking templates and then cut the margin to that new shape. Laid those onto the beams and measured and confirmed all was as it should be. Looks right now. The forecastle i'm afraid will be a little more involved, but is the same procedure.
Onward and upward.

-
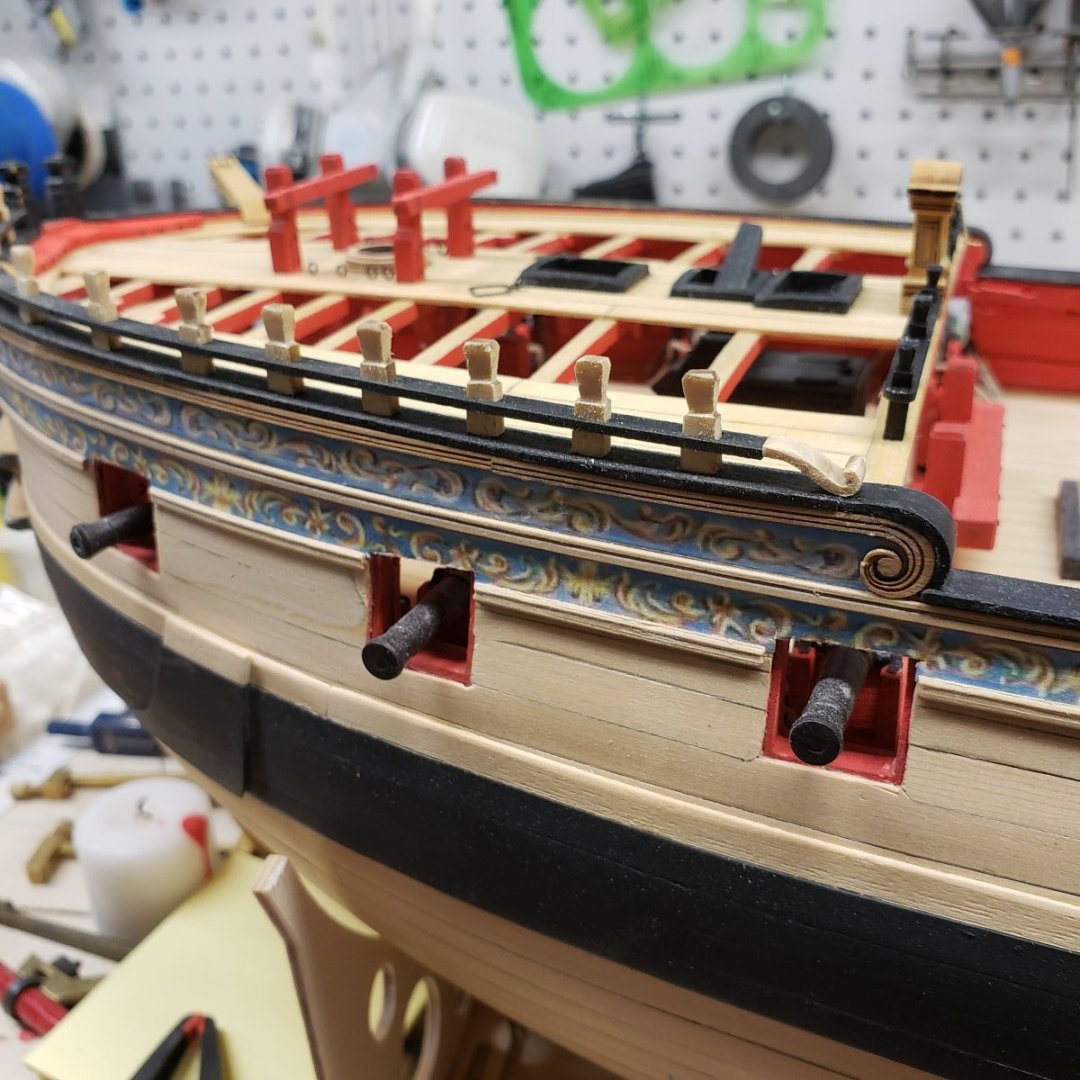
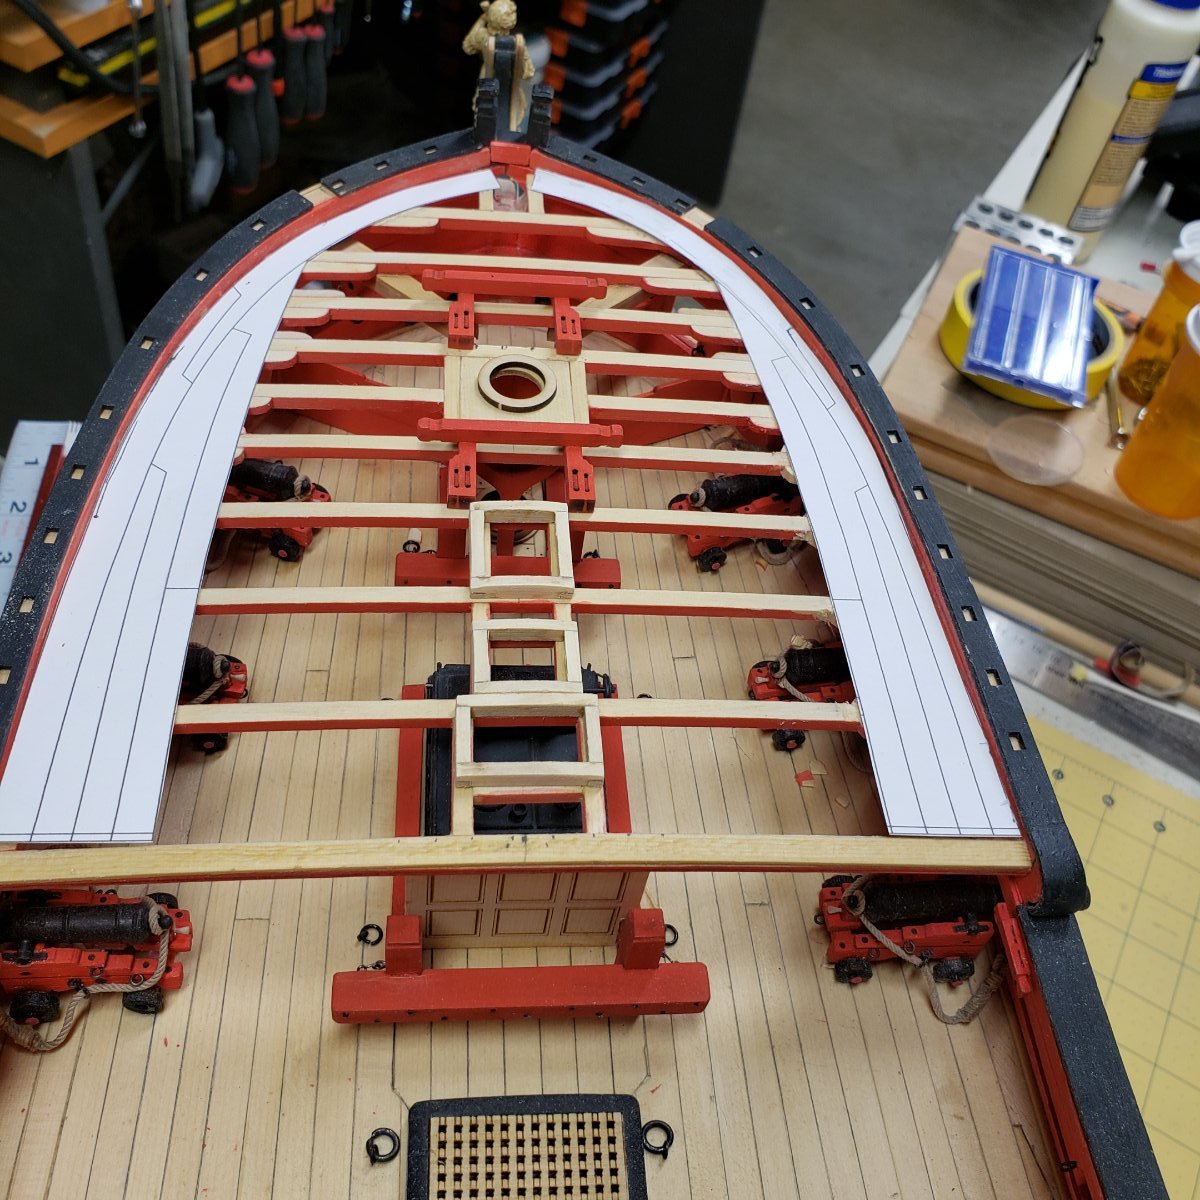
And the corrections to the forecastle templates, you can clearly see the narrowing of the starboard margin plank. It's a lot better than it was but not perfect, I'm going to blame this on hogging from long sea voyages resulting in the ships carpenter having to make repairs underway...
The cap rail however fit with no effort of force. Strange, but for those who can still benefit from this, check your bulwark sanding , and I'm pretty sure Chuck emphasized this. Too bad I wasn't hearing the warning....

-
Ship corrections 101.
An adventure into paying more attention to the little things that can wreck your otherwise boring life.
I made the corrections to the margin planks at the qdeck. I did a scribe onto a blank paper that was taped to the beams, then scribed the existing deformity onto that sheet, cut to the scibed line, and then laid that onto the planking templates and then cut the margin to that new shape. Laid those onto the beams and measured and confirmed all was as it should be. Looks right now. The forecastle i'm afraid will be a little more involved, but is the same procedure.
Onward and upward.
- Edwardkenway, scrubbyj427, JpR62 and 9 others
-
11
-
1
-
"Oh I feel you. Good luck with repair, youre not alone repairing. awaits me some too"
Thanks, just a big pain going backwards. Working out new templates now, slow going...


3d printing process
in 3D-Printing and Laser-Cutting.
Posted
Yep, my figures are in the 18 to 30 mm range in Z axis, so I suspect that could be part of the issue. Your driver looks pretty good though.