Tim Moore
-
Posts
326 -
Joined
-
Last visited
Content Type
Profiles
Forums
Gallery
Events
Everything posted by Tim Moore
-
 Thanks Yves, yes the Fifie is on deck, been doing some research into these class of boats just to settle on a colour scheme for it. Slight delay while I finished off a new coffee table for the living room...which is now done. I’ve decided to first do a Guillows 403 Spitfire model which my son had given it to me for my birthday last Christmas, for something different around the holidays. Think I built one of these about 50 years ago! Kit is slightly different now with all the frames beautifully laser cut as opposed to having to cut them out from a printed sheet. So fragile as compared to boat modeling material, will have to take care and not be too ham fisted with my work. Isn’t too complicated so shouldn’t take long. Just a display model to hang in here I think. Vaguely recall destroying the last one in a rubber power misadventure. Think I will upgrade it a bit - cover with balsa as opposed to tissue, and hope I can find some upgrades for a proper propeller and wheels etc.. if anybody has done this and happens to know a source for this please do pass on.
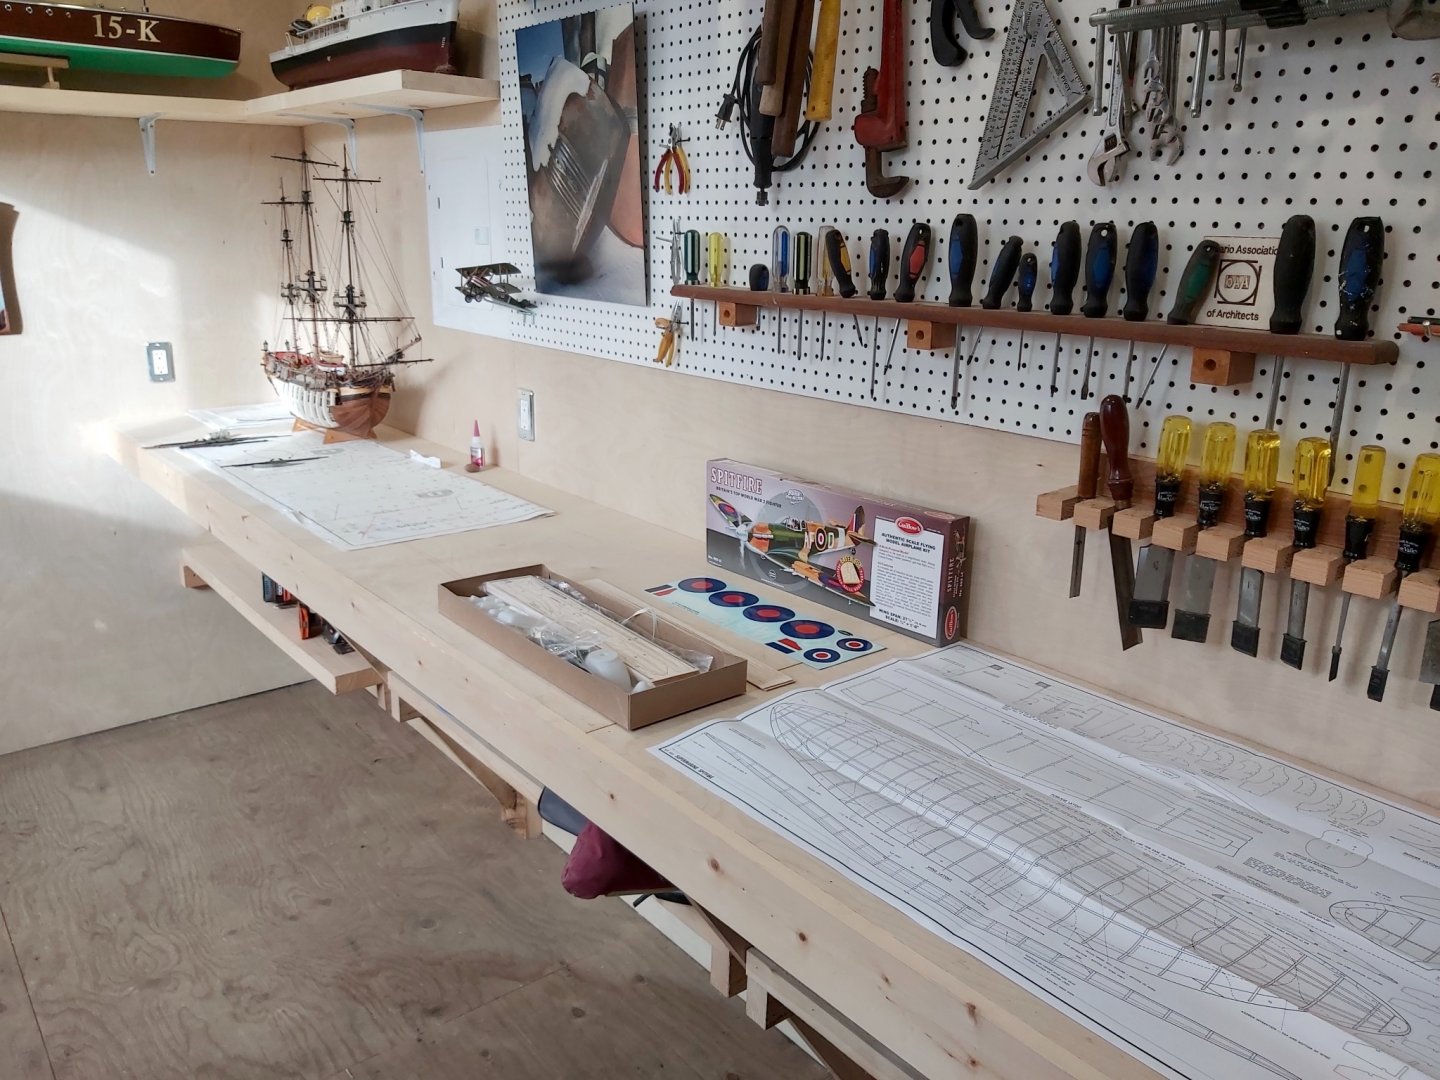
- 171 replies
-
- 5
-

-
- artesania latina
- bounty
- (and 1 more)
-
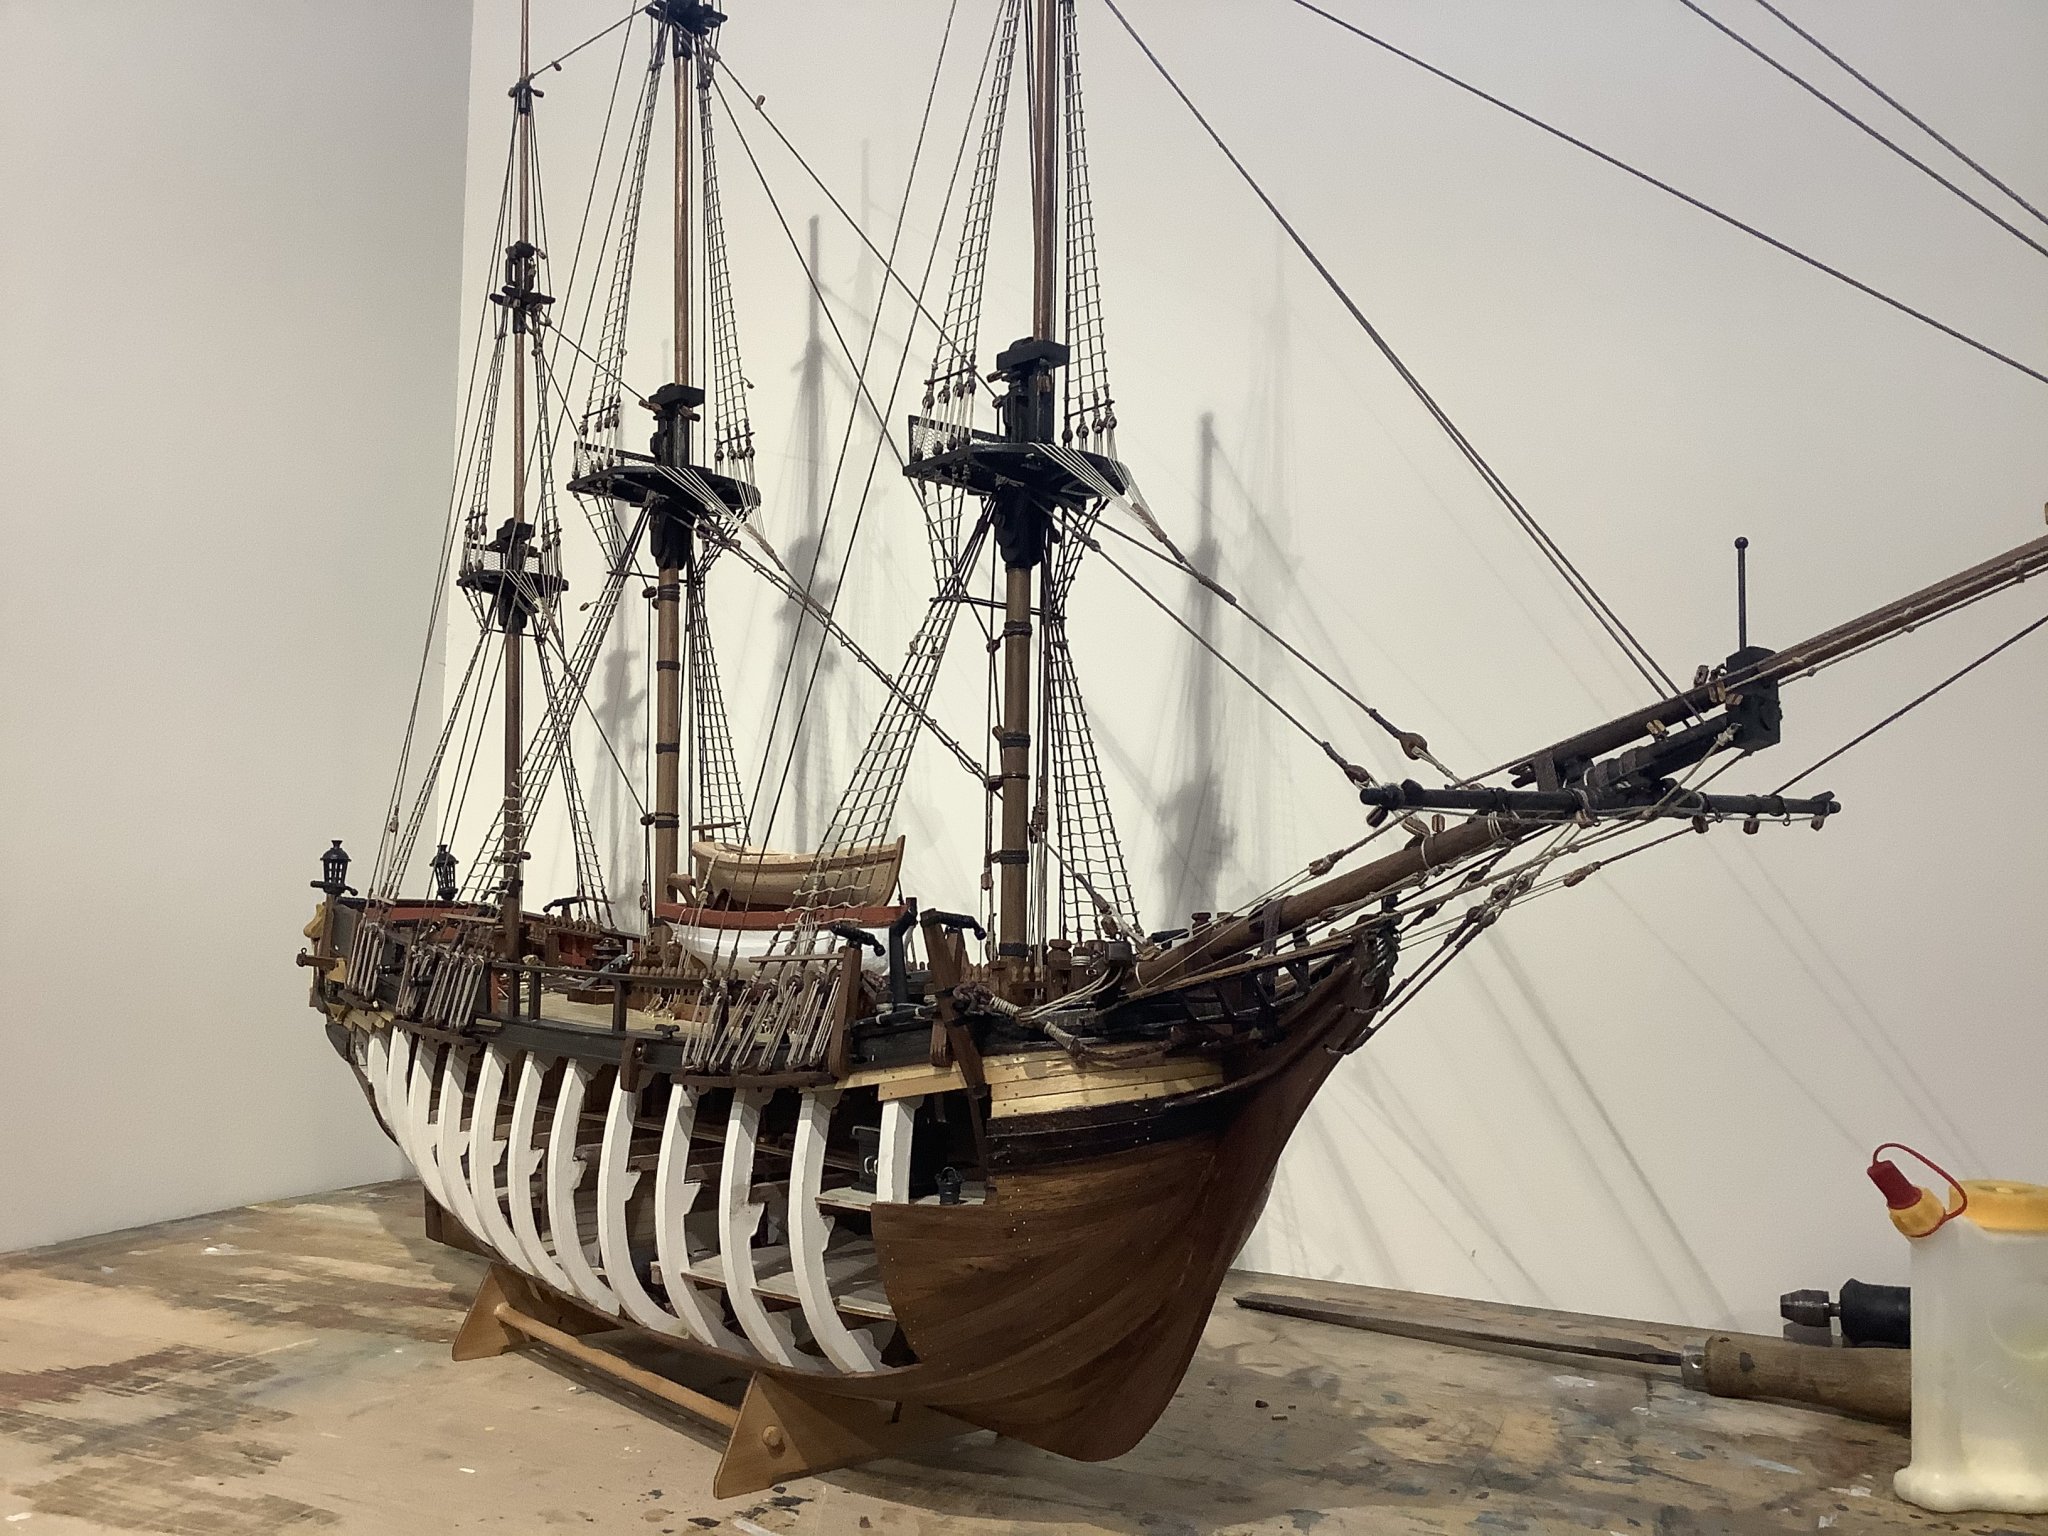
Ok after a long hiatus working on various construction projects I’m about to start up again finishing the Bounty here in my new cabin. First step is to figure out exactly where I left off and get back up to speed on the final rigging. And find myself a chair.

- 171 replies
-
- 7
-
-
- artesania latina
- bounty
- (and 1 more)
-
A Model Builder’s Cabin
Tim Moore replied to Tim Moore's topic in Modeling tools and Workshop Equipment
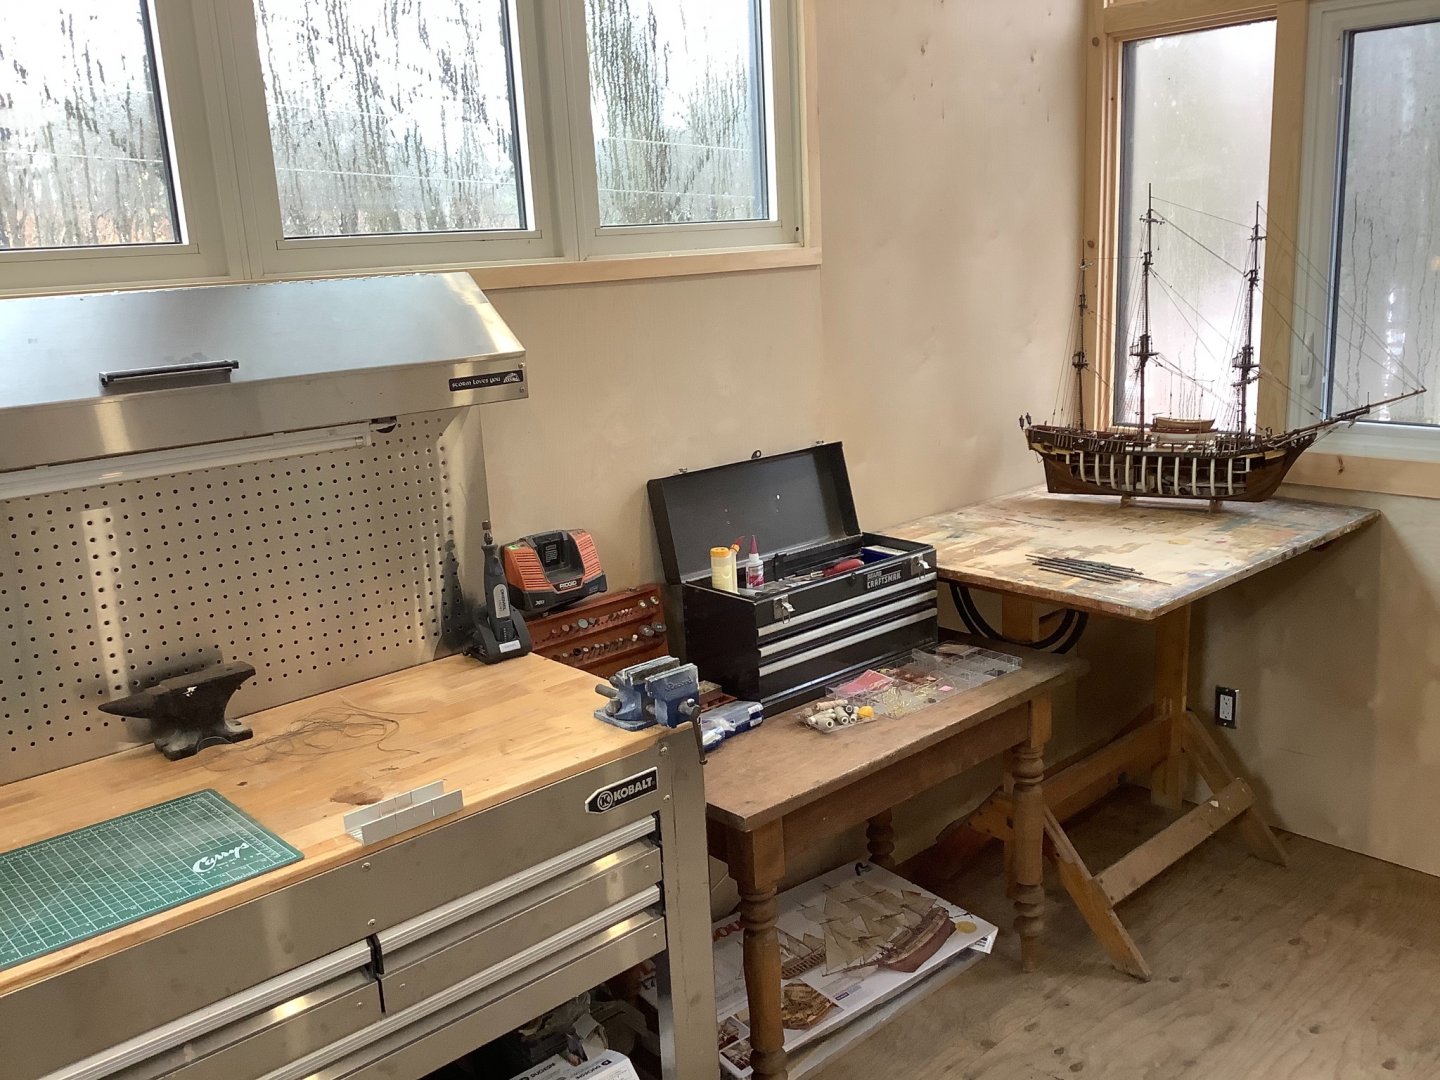
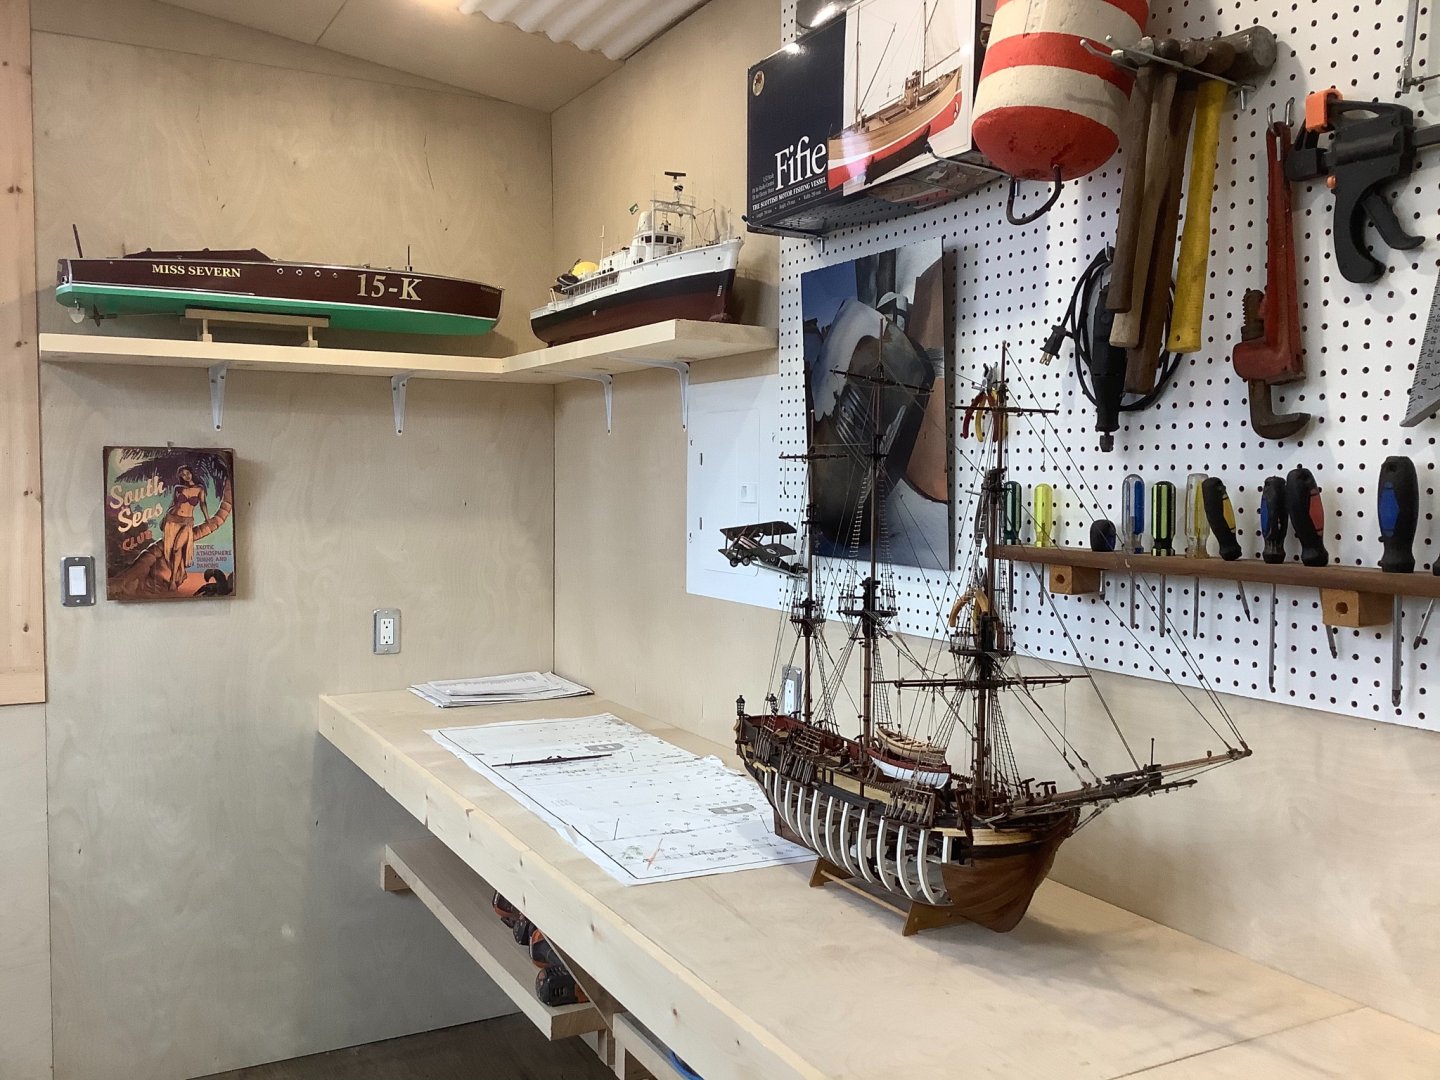
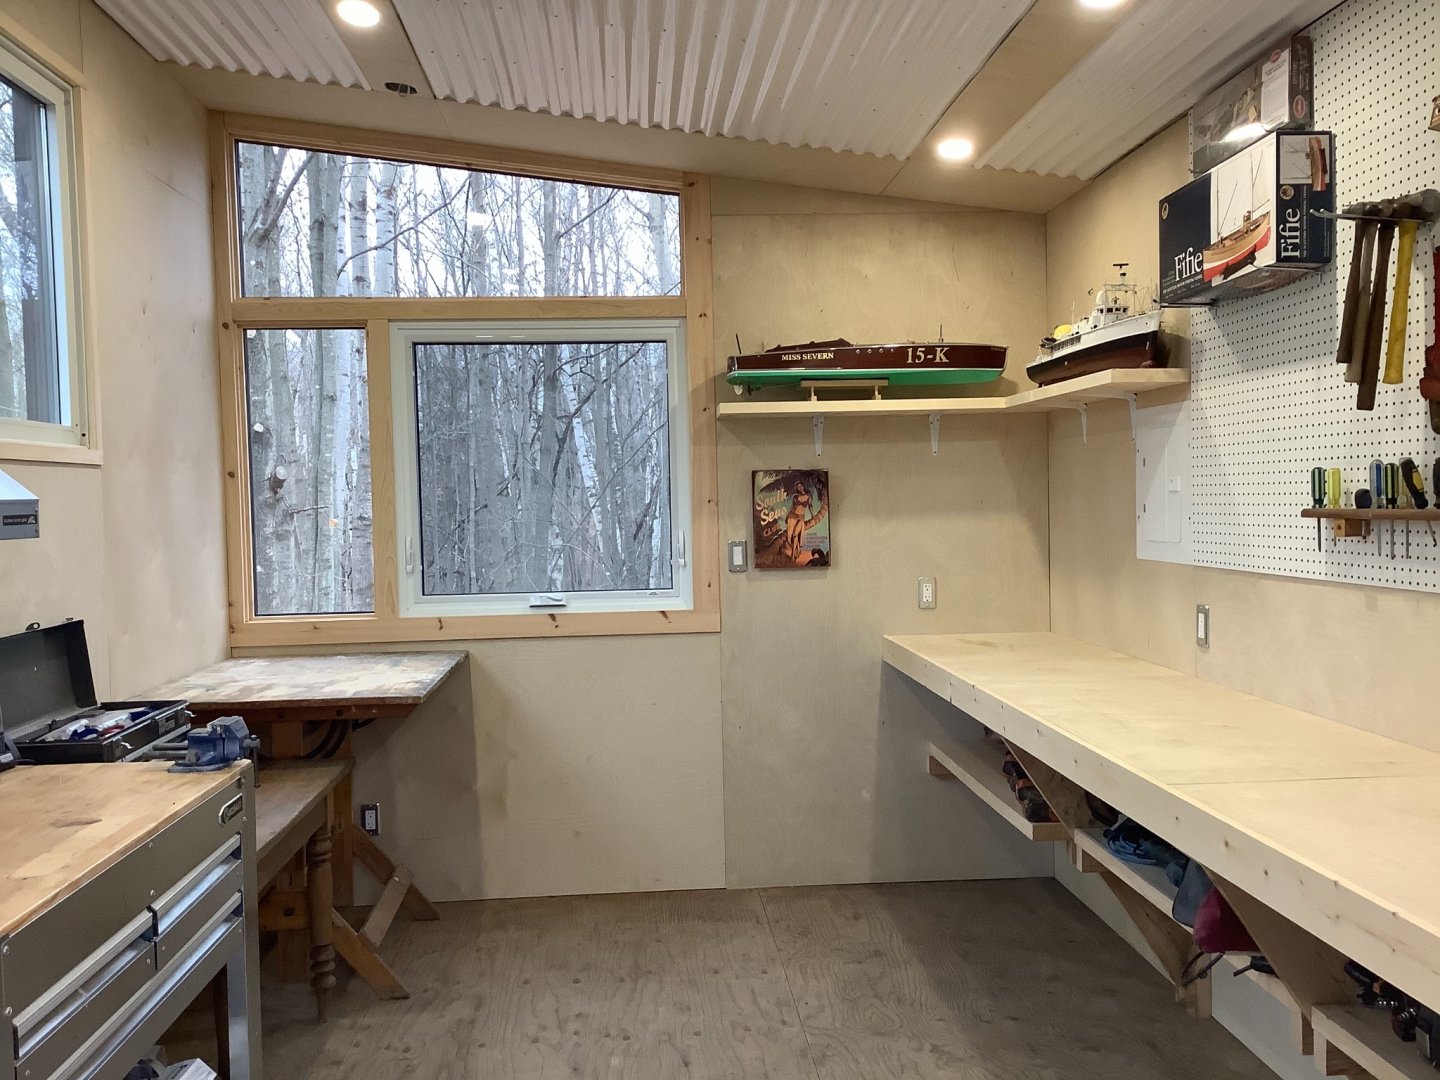
Thanks guys for the kind comments. Yes I think both of us will be happy in our own workspace since we are together every hour of the day right now! The drafting table is actually my wife’s old drawing board. She thought it was a good fit in there and she was bang on. Presently looking for a recycled drafting stool to go with it. Funny you mention the barn conversion Barkeater - I’m about to start constructing a workshop in a barn for a friend here, just working out a plan for partitioning it off and a scheme for introducing natural light which I think is key to a satisfactory creative space. -
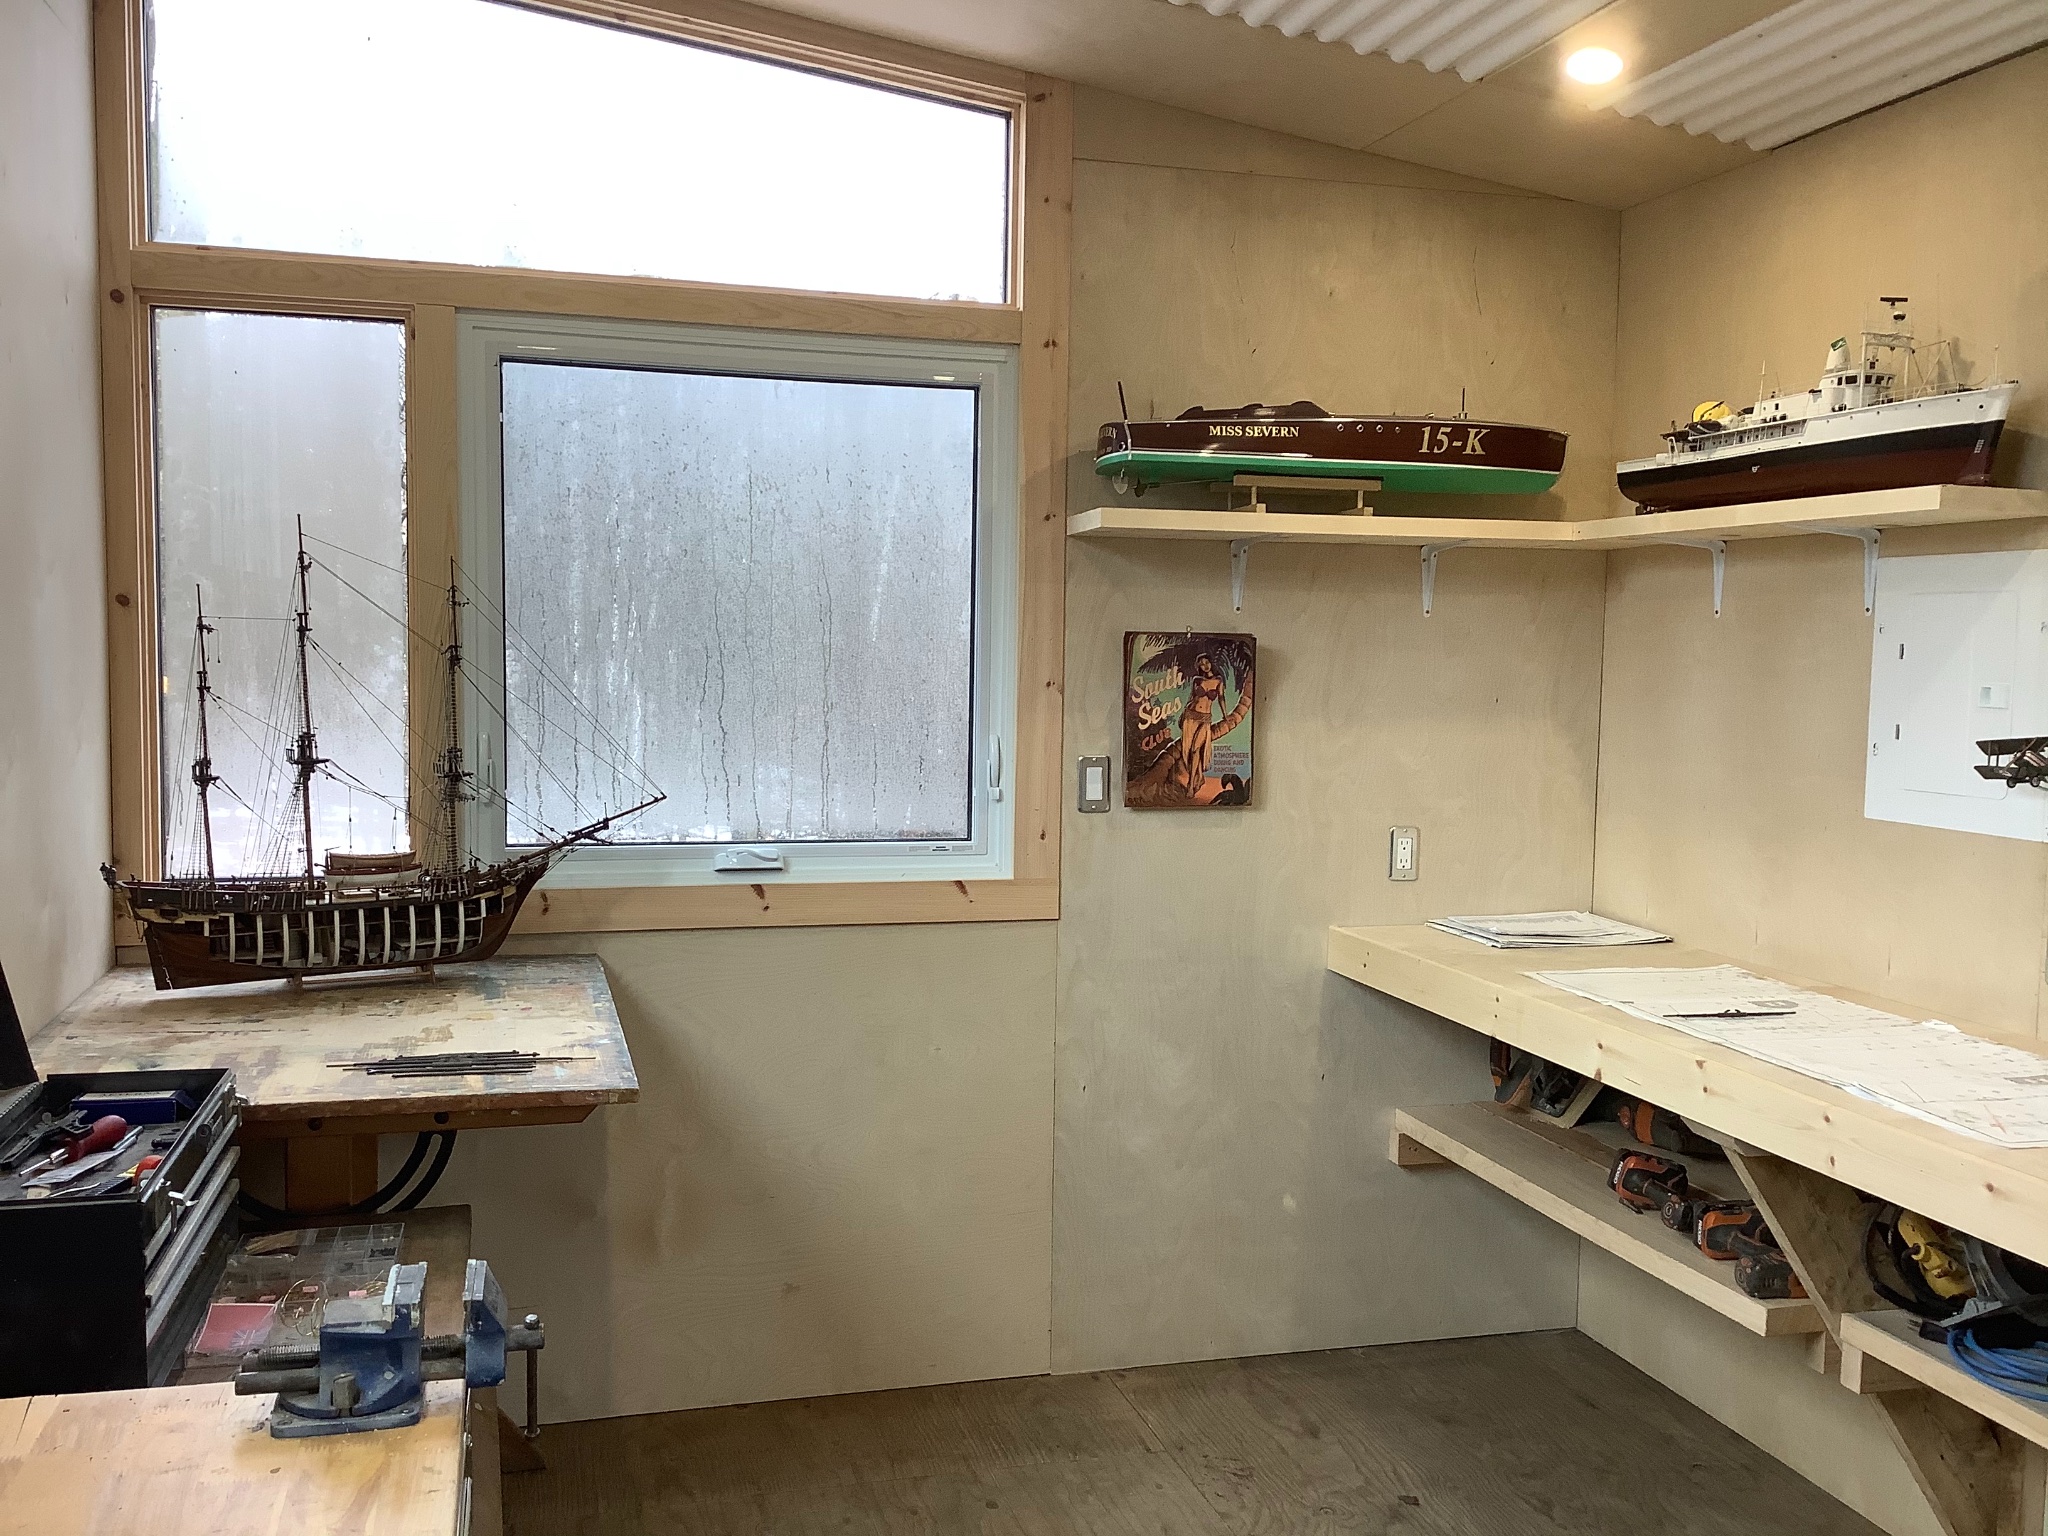
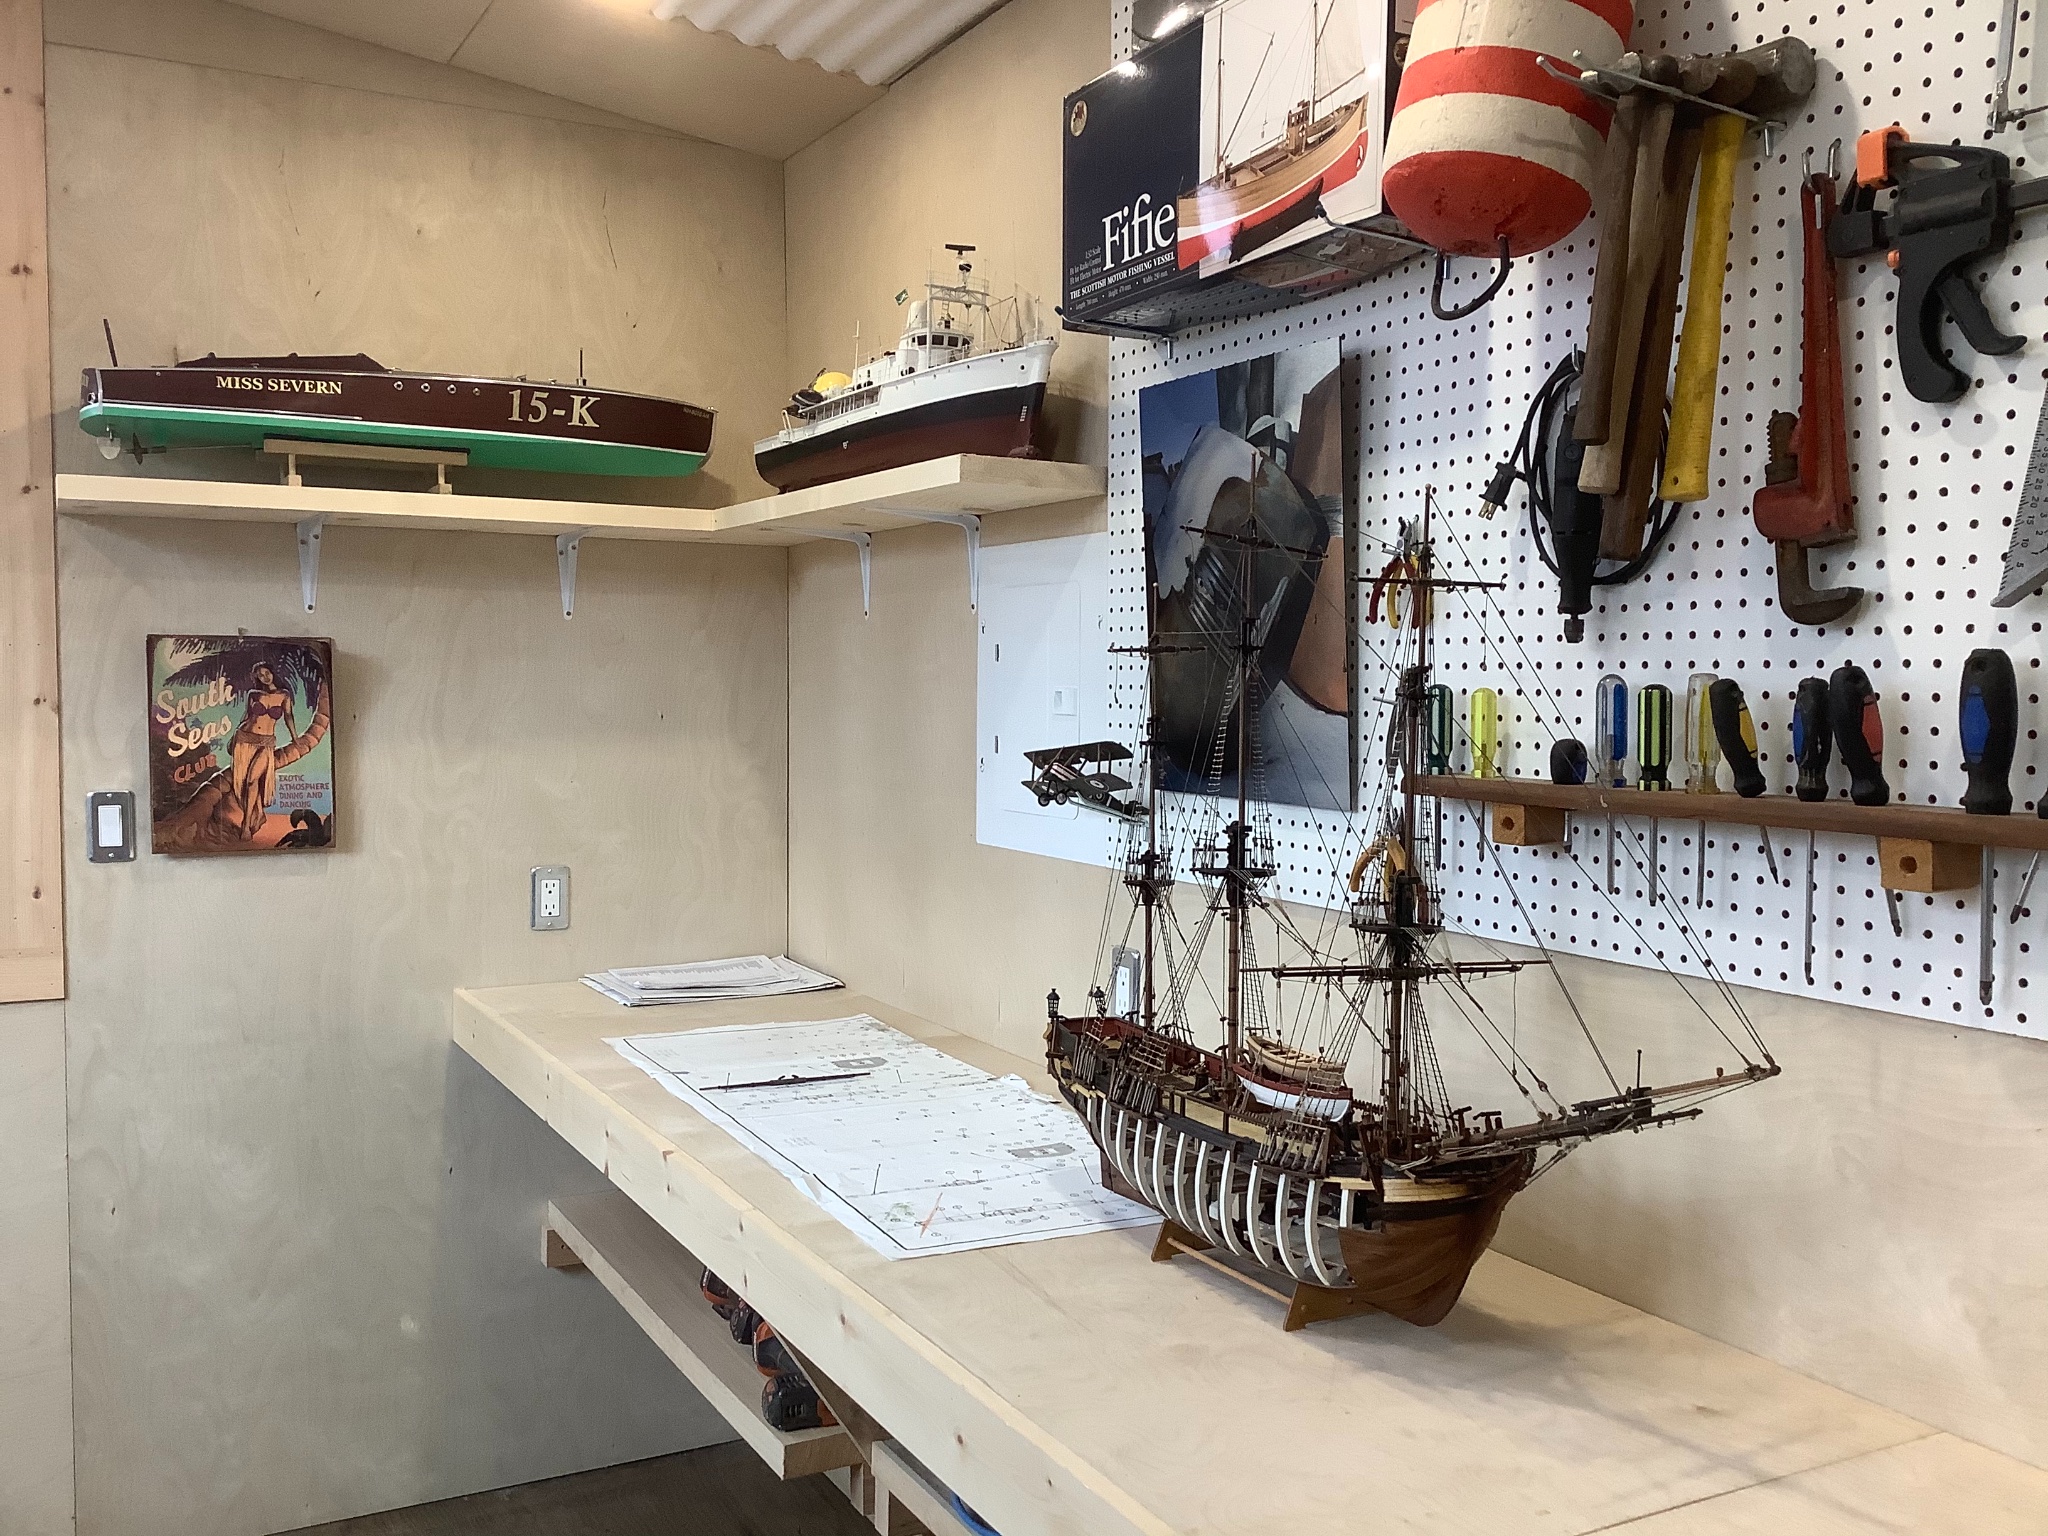
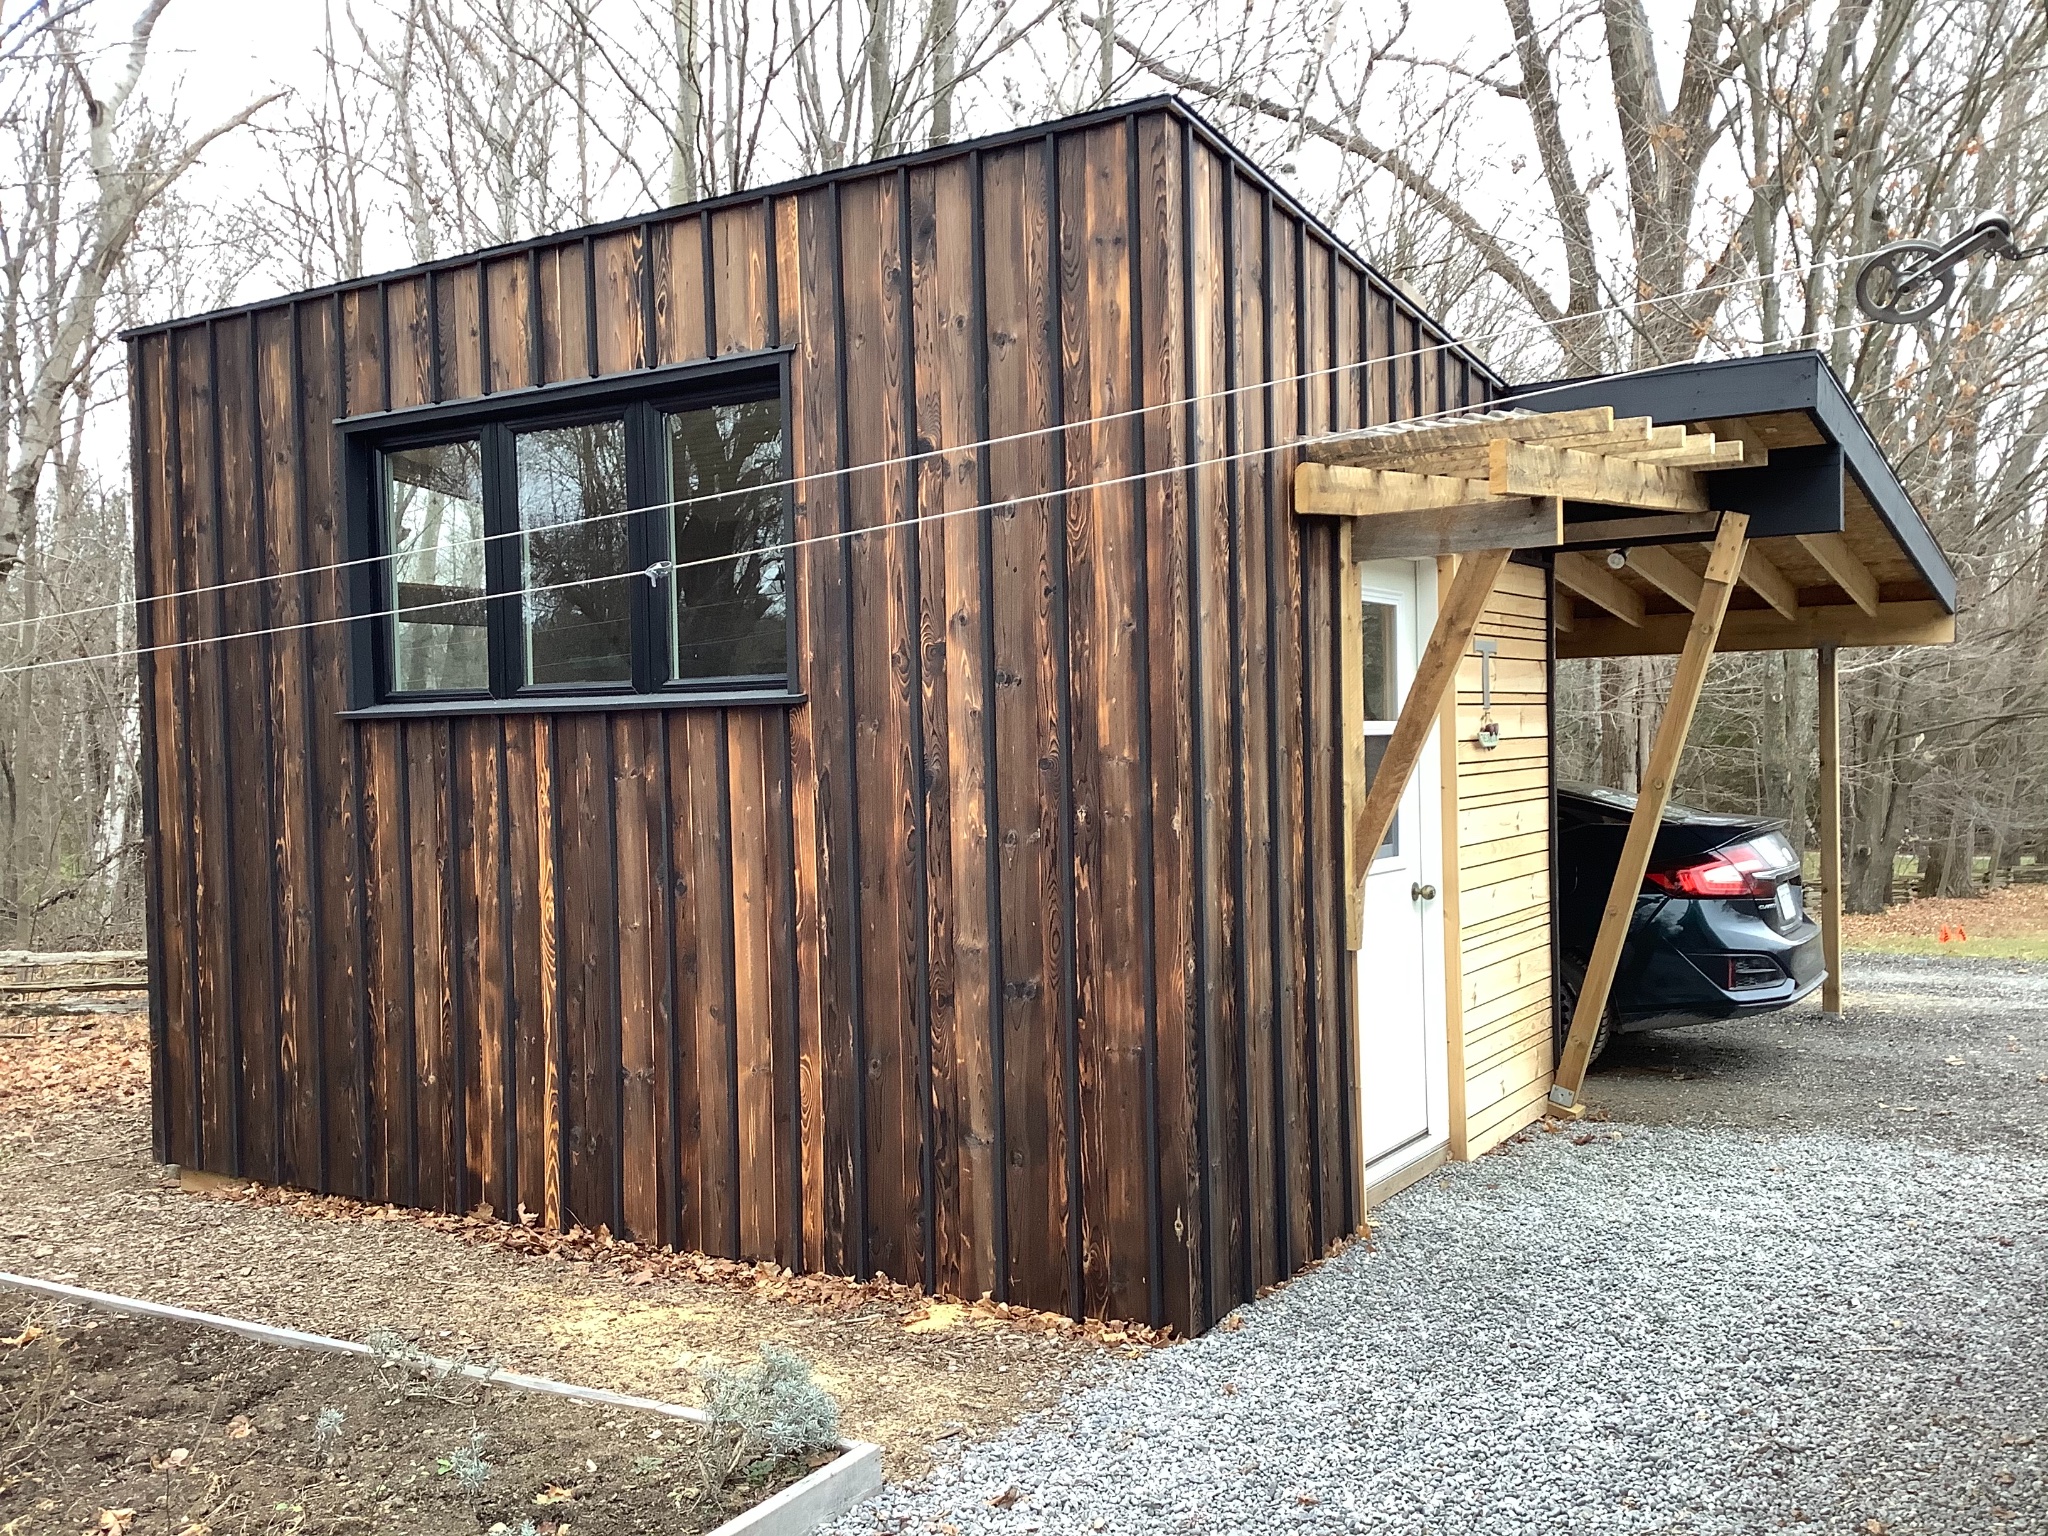
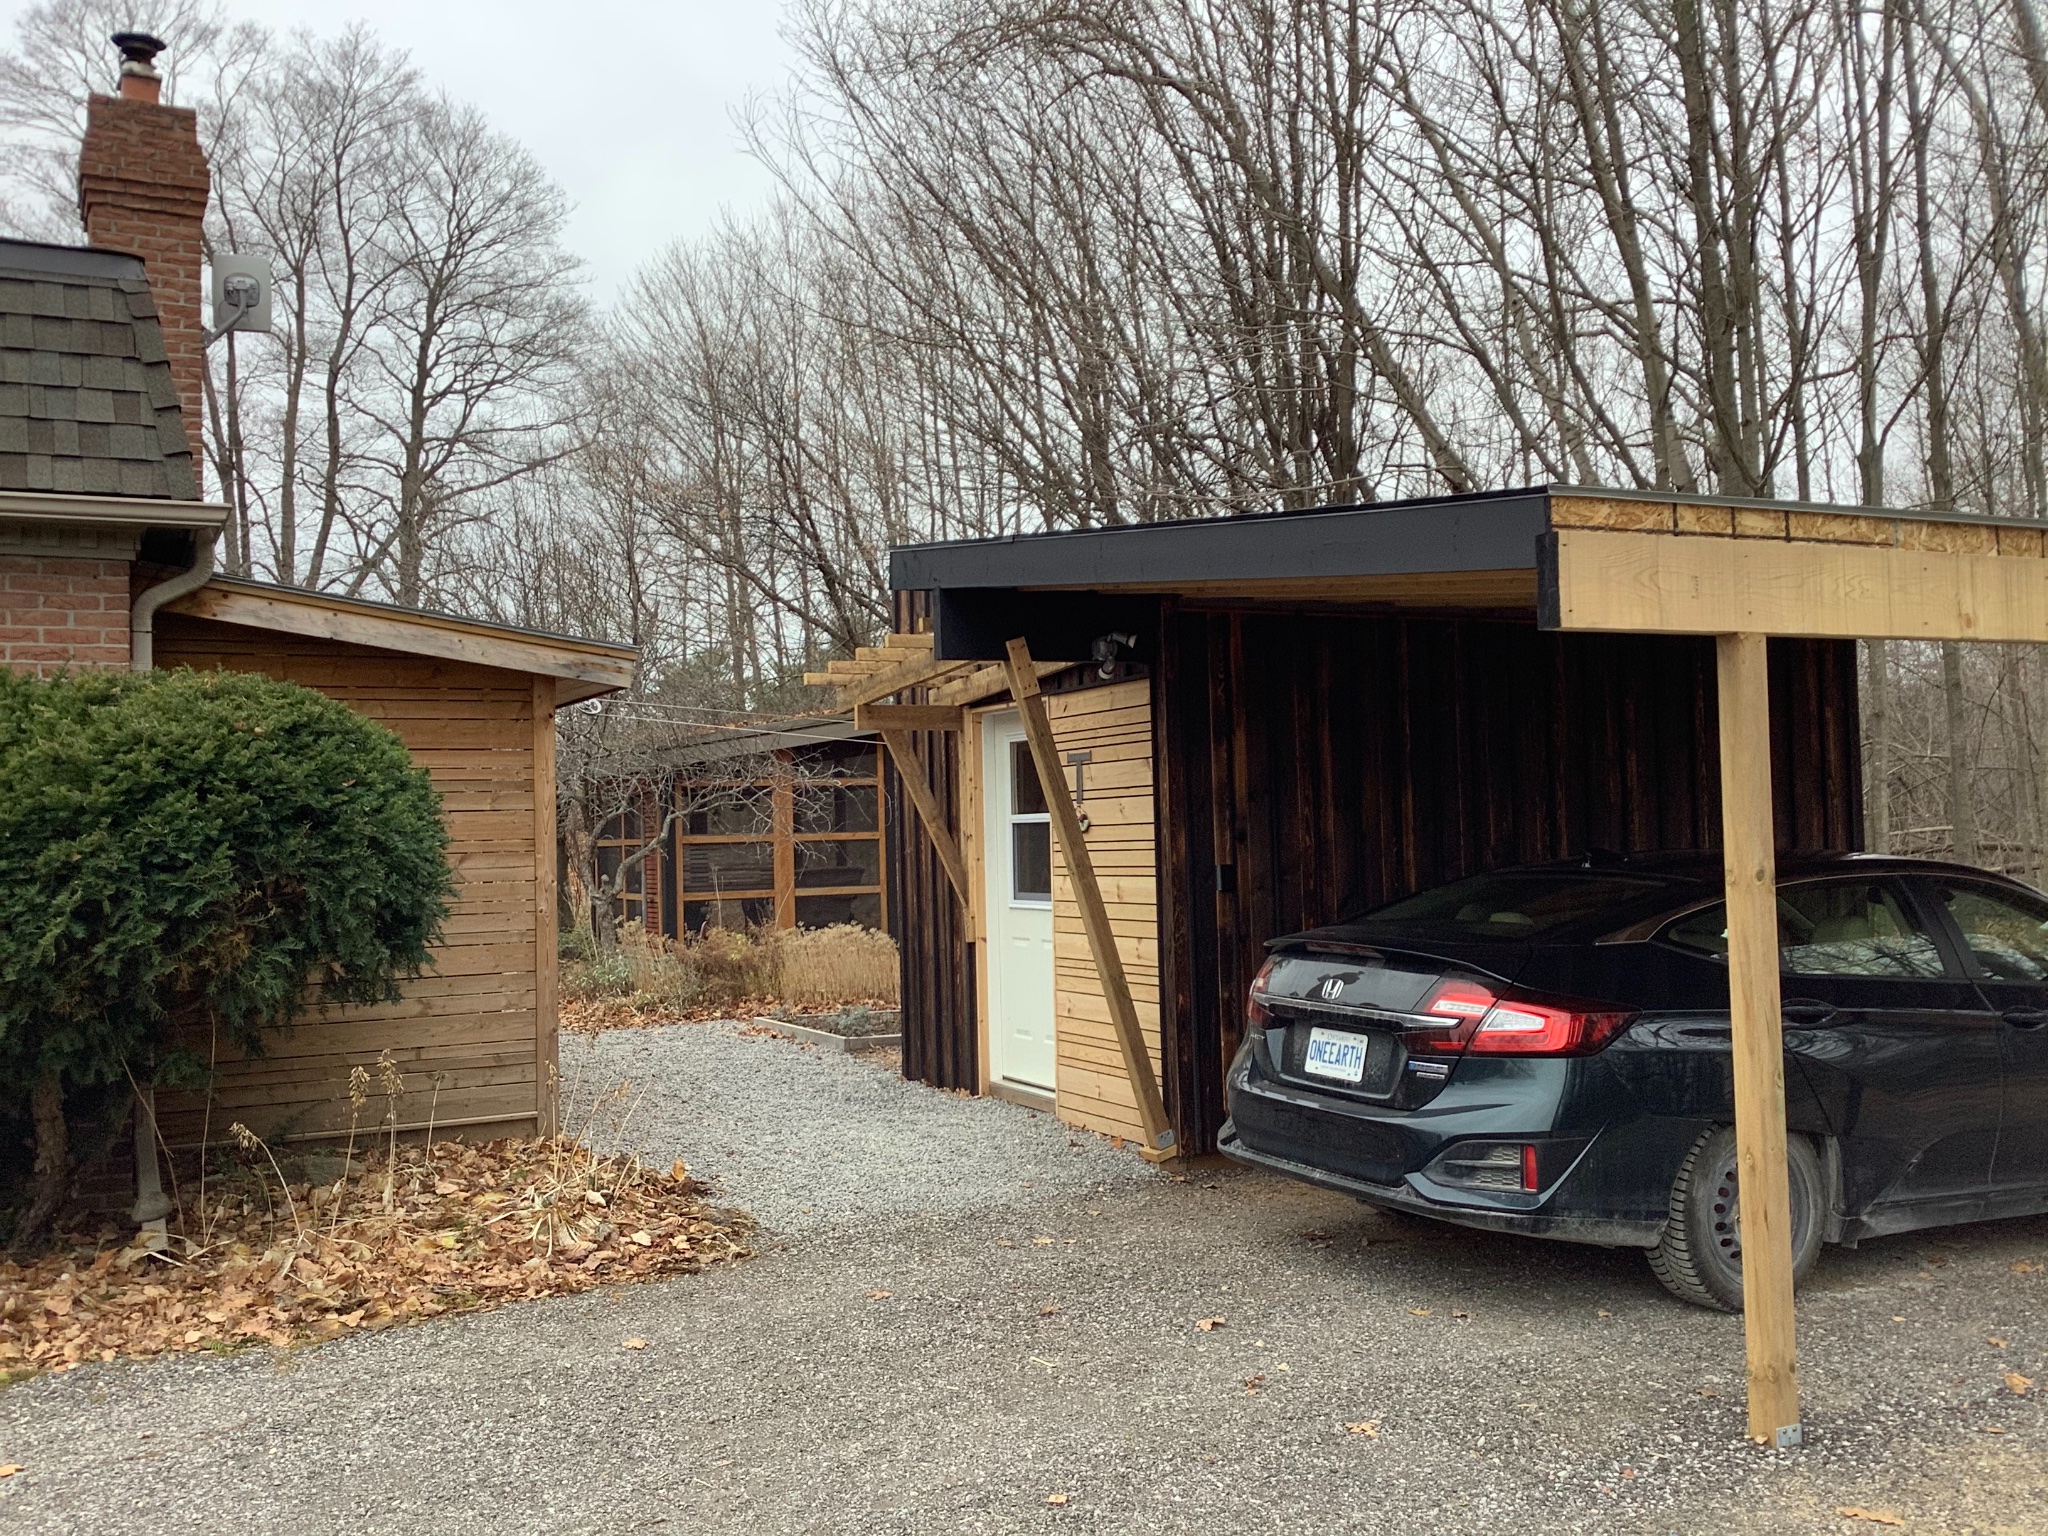
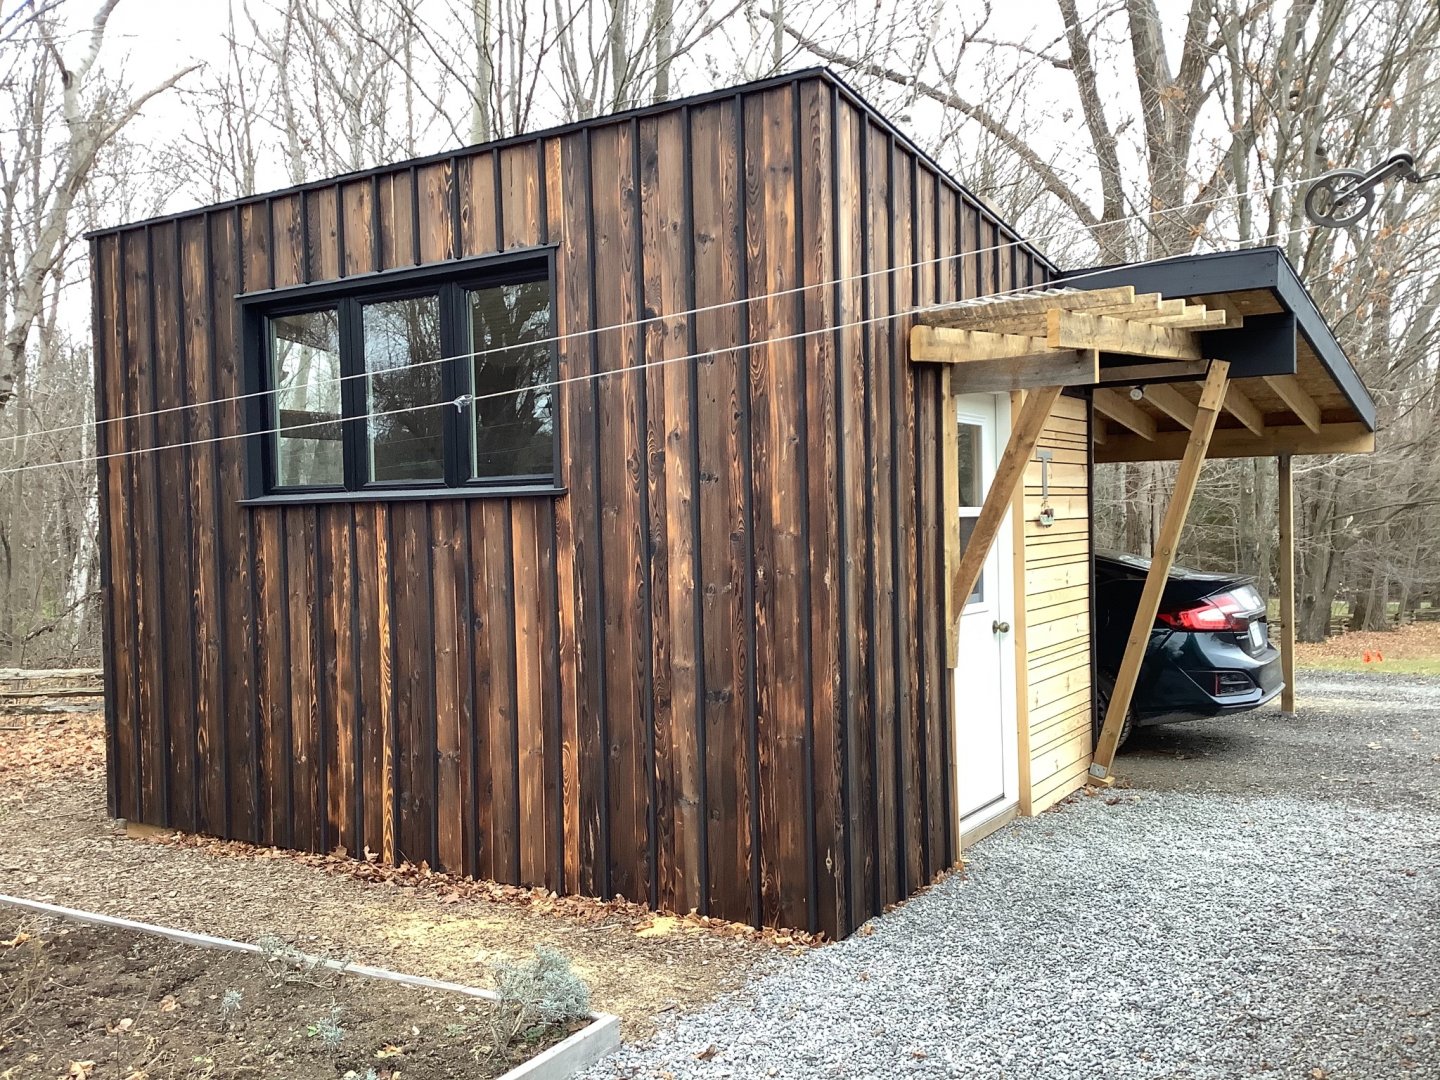
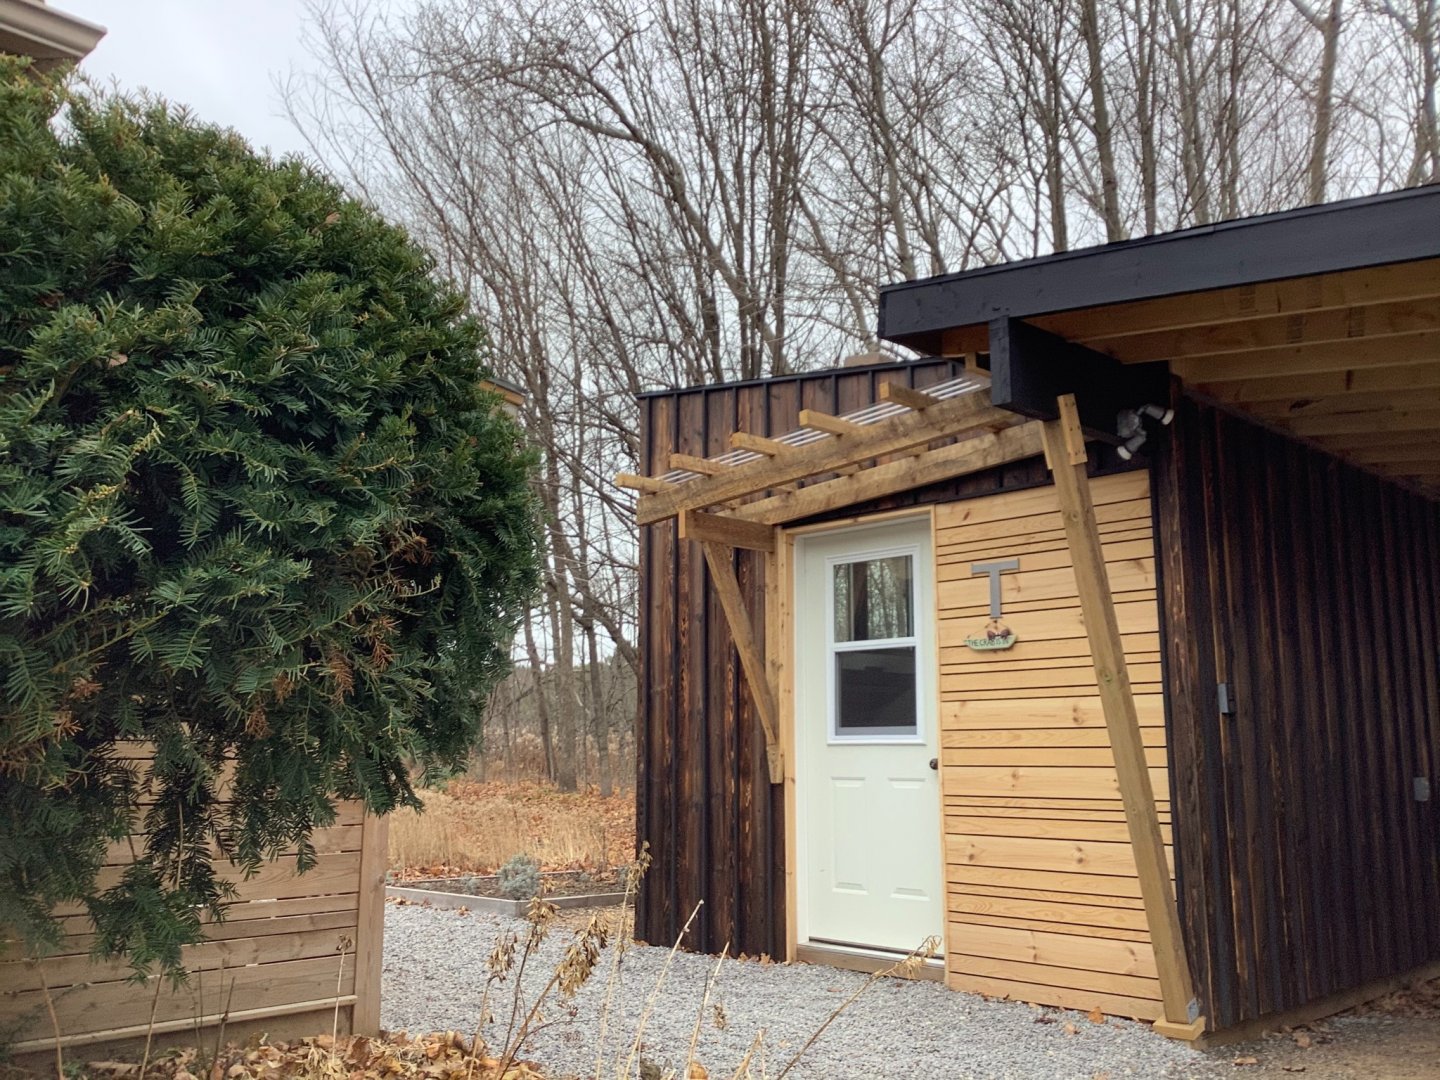
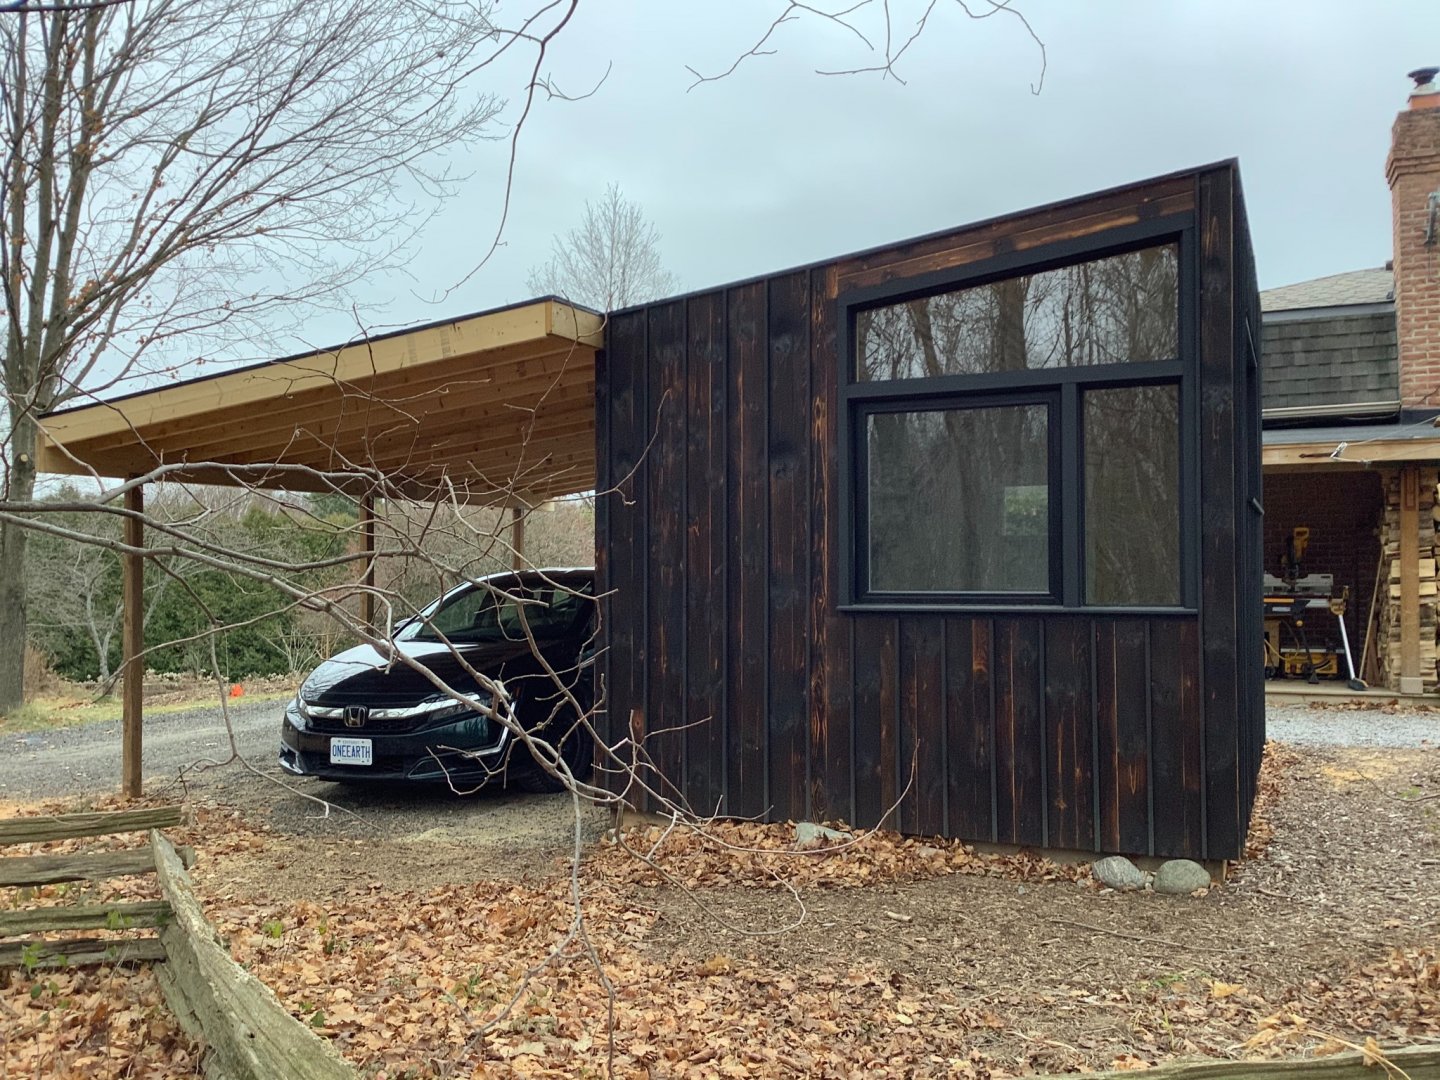
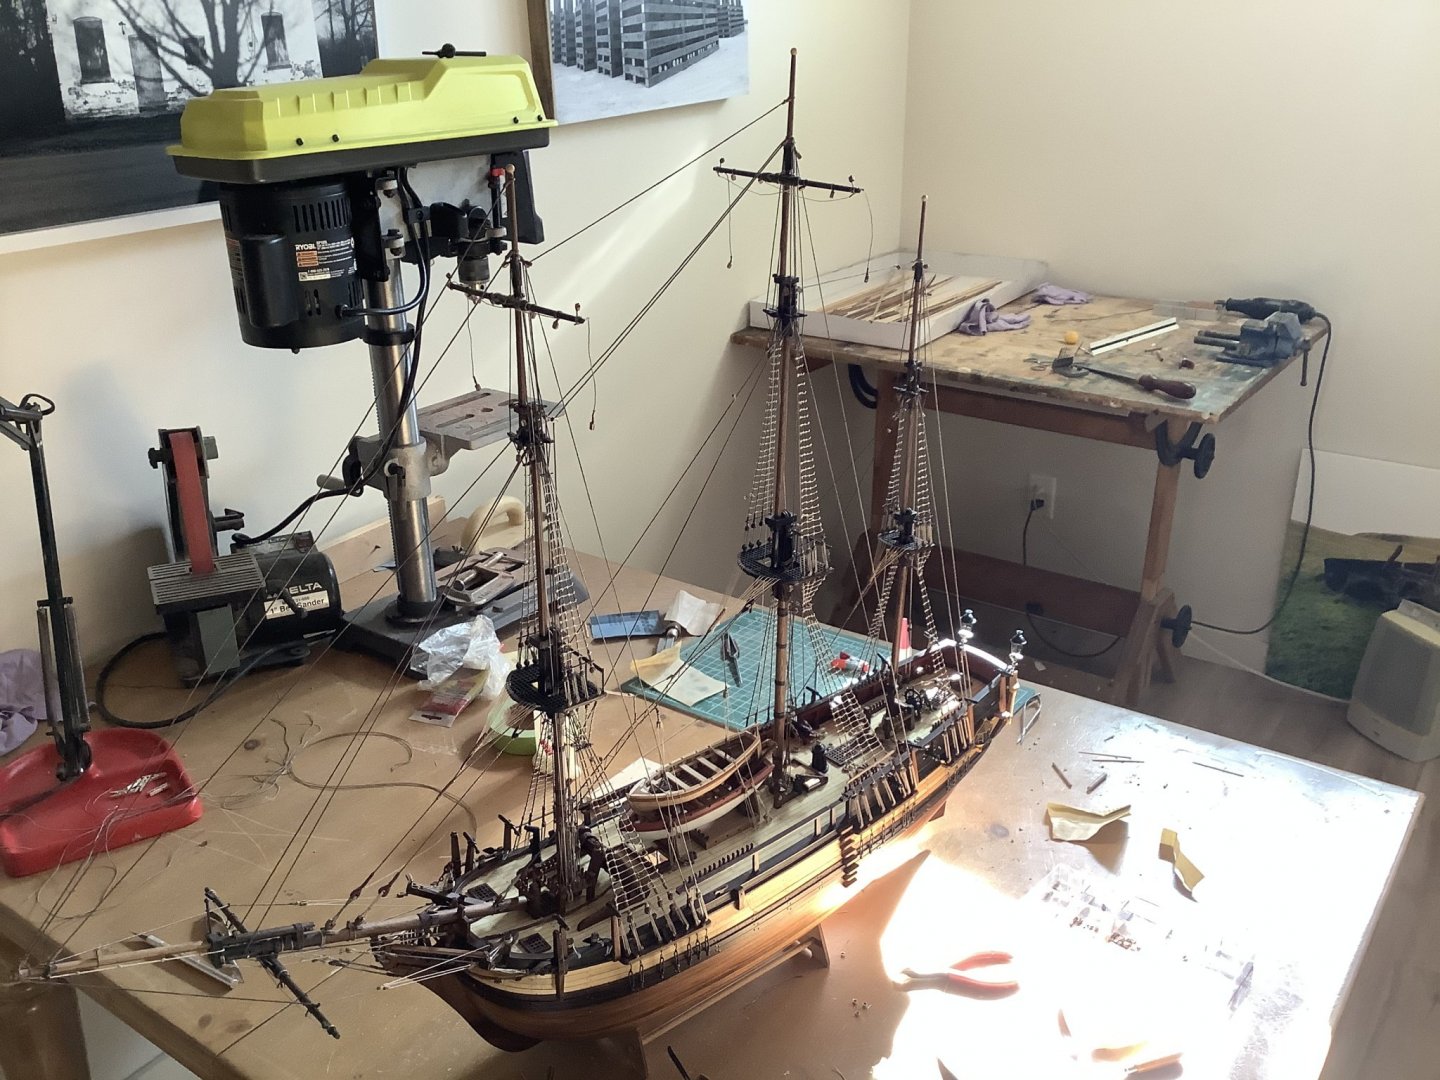
I was sharing a studio (converted garage) with the admiral who is a potter, but we found that it didn’t really work to best effect for both of us. Serious pottery is a pretty messy business and she needed the extra space I was taking up as her business grew. I was relegated to the basement last year. So after I got back this fall from my latest construction gig up north I set to building a small model workshop for myself just out back, which I’m just finishing. The cabin is a compact 10x14 and is fully insulated and heated with a small 240v system. It houses an electrical sub panel for my level 2 car charging power unit, and I extended the roof to create a carport. This will be my light duty workshop for model building and assorted projects. I’m an architect and builder so my main power equipment (compressors, saws, planers etc) is located in another space. I created one long wall hung 14’ bench on the one side, and the other houses various tables I use. I’ve yet to install the flooring and all my small modeling tools but you get the idea. Shortly I’ll be setting up here to finish the final rigging stage of my Bounty, and then move on to my next victim.

- 8 replies
-
- 30
-
-
HMS Bounty by Artesania Latina problem/question
Tim Moore replied to LyleK1's topic in Wood ship model kits
You’re very welcome. Looking good - nice work on planking. Your building board looks pro. -
HMS Bounty by Artesania Latina problem/question
Tim Moore replied to LyleK1's topic in Wood ship model kits
Hi Lyle - it goes under the deck at the stern. See photo 24 in the booklet if you have one. It is misnumbered on the index sheet and is actually part #170. tim -
Hi Reneke sorry for delay in responding...yes I definitely have a fix having needed to do it myself earlier in this build. Rather than go to all the trouble of sanding and refinishing I just mixed some of my ebony and chestnut stains with the varnish until I got the darker tone I wanted and put on another coat. It worked well.
- 171 replies
-
- 1
-
-
- artesania latina
- bounty
- (and 1 more)
-
Hi Reneke - thank you for the kind remarks! Hope the rest of the build is satisfying. I’ve been immersed in a couple of building projects for many months so the Bounty has been waiting patiently for me to finish her. I converted our garage into a studio where I could work on ship modeling a few years ago, but my wife’s pottery business has really taken off so she now needs the whole space. I am presently building my own workshop on our property and as soon as it’s done I’ll be back in business. Should be back at work on Bounty before winter In my new space and will resume my log to completion.
- 171 replies
-
- 1
-
-
- artesania latina
- bounty
- (and 1 more)
-
kit review 1:32 Fifie – The Scottish Motor Fishing Vessel by Amati
Tim Moore replied to James H's topic in REVIEWS: Model kits
I purchased the kit after reading your review...it’ll be my next project after I finish the Bounty rigging. -
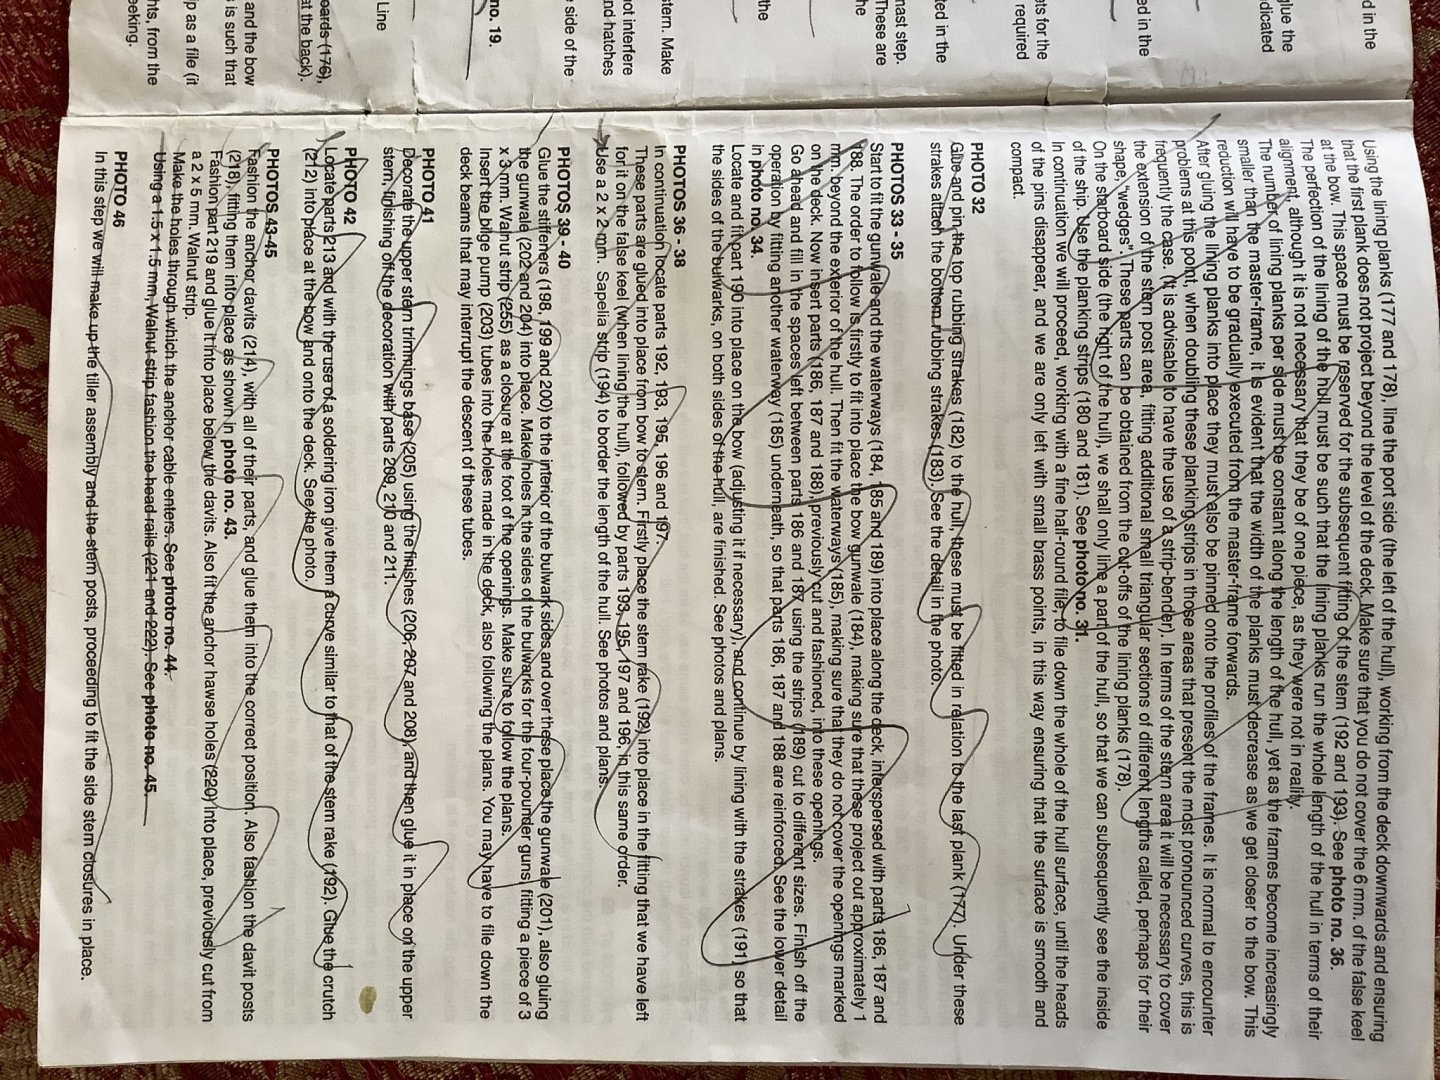
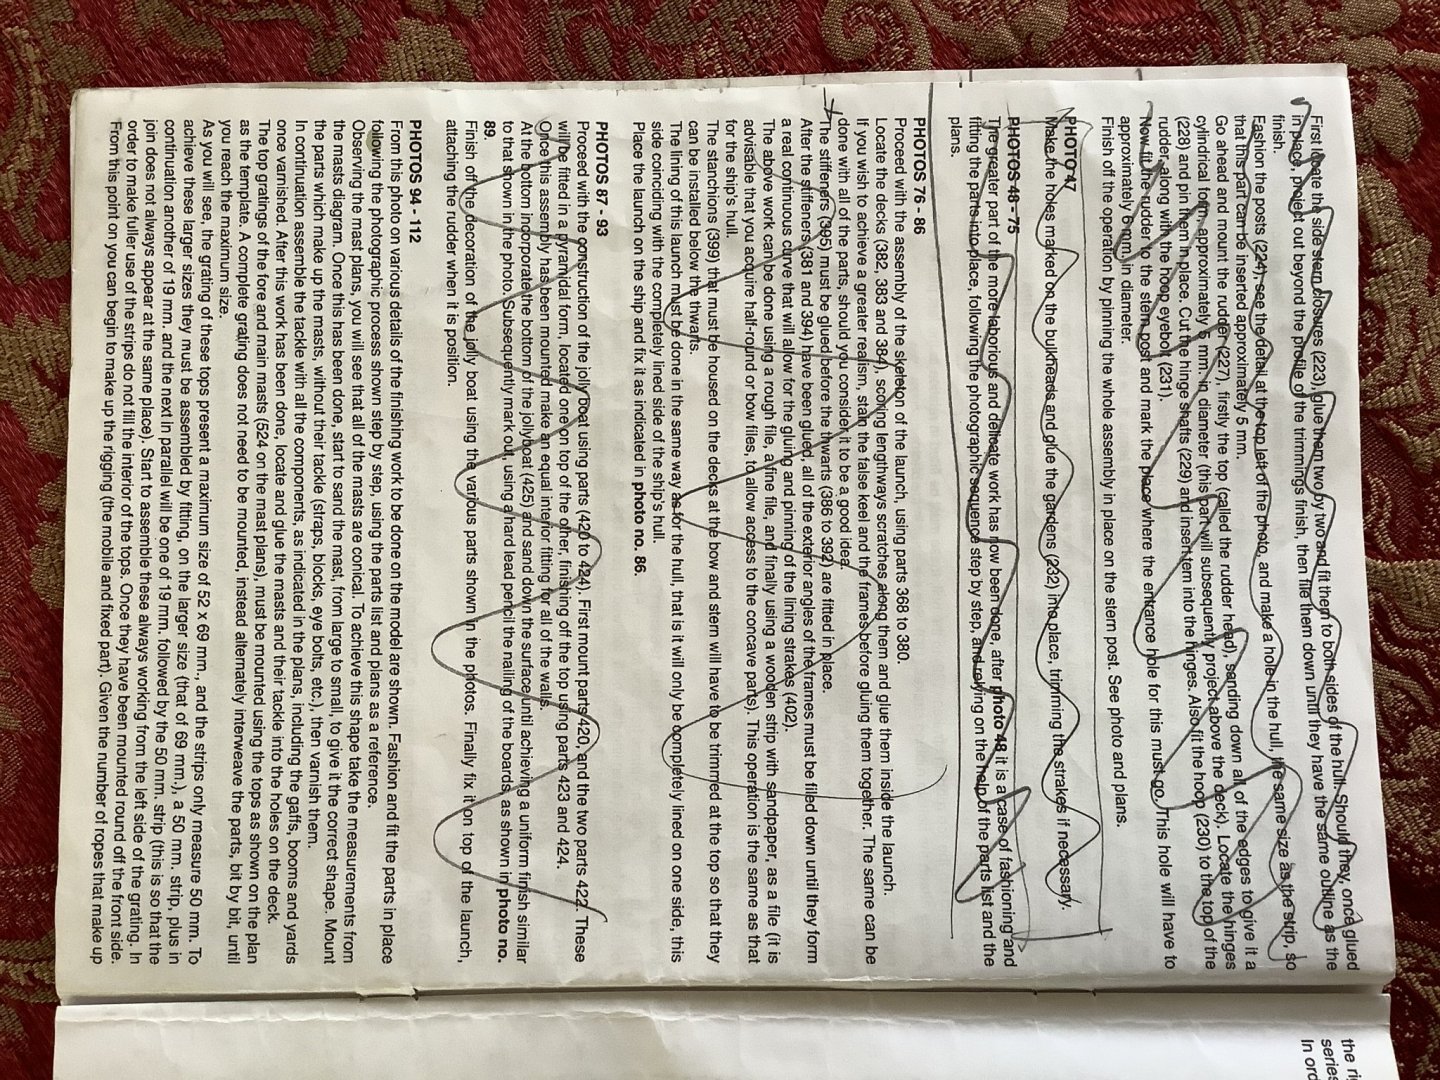
here are remaining instructions from the parts list booklet.
-
Hi Geehard - I’m just finishing up an AL Bounty - where are you at & what do you need to know?
-
Hi Yves, yes that is the Billing’s Calypso up there... good eye.
- 171 replies
-
- 1
-
-
- artesania latina
- bounty
- (and 1 more)
-
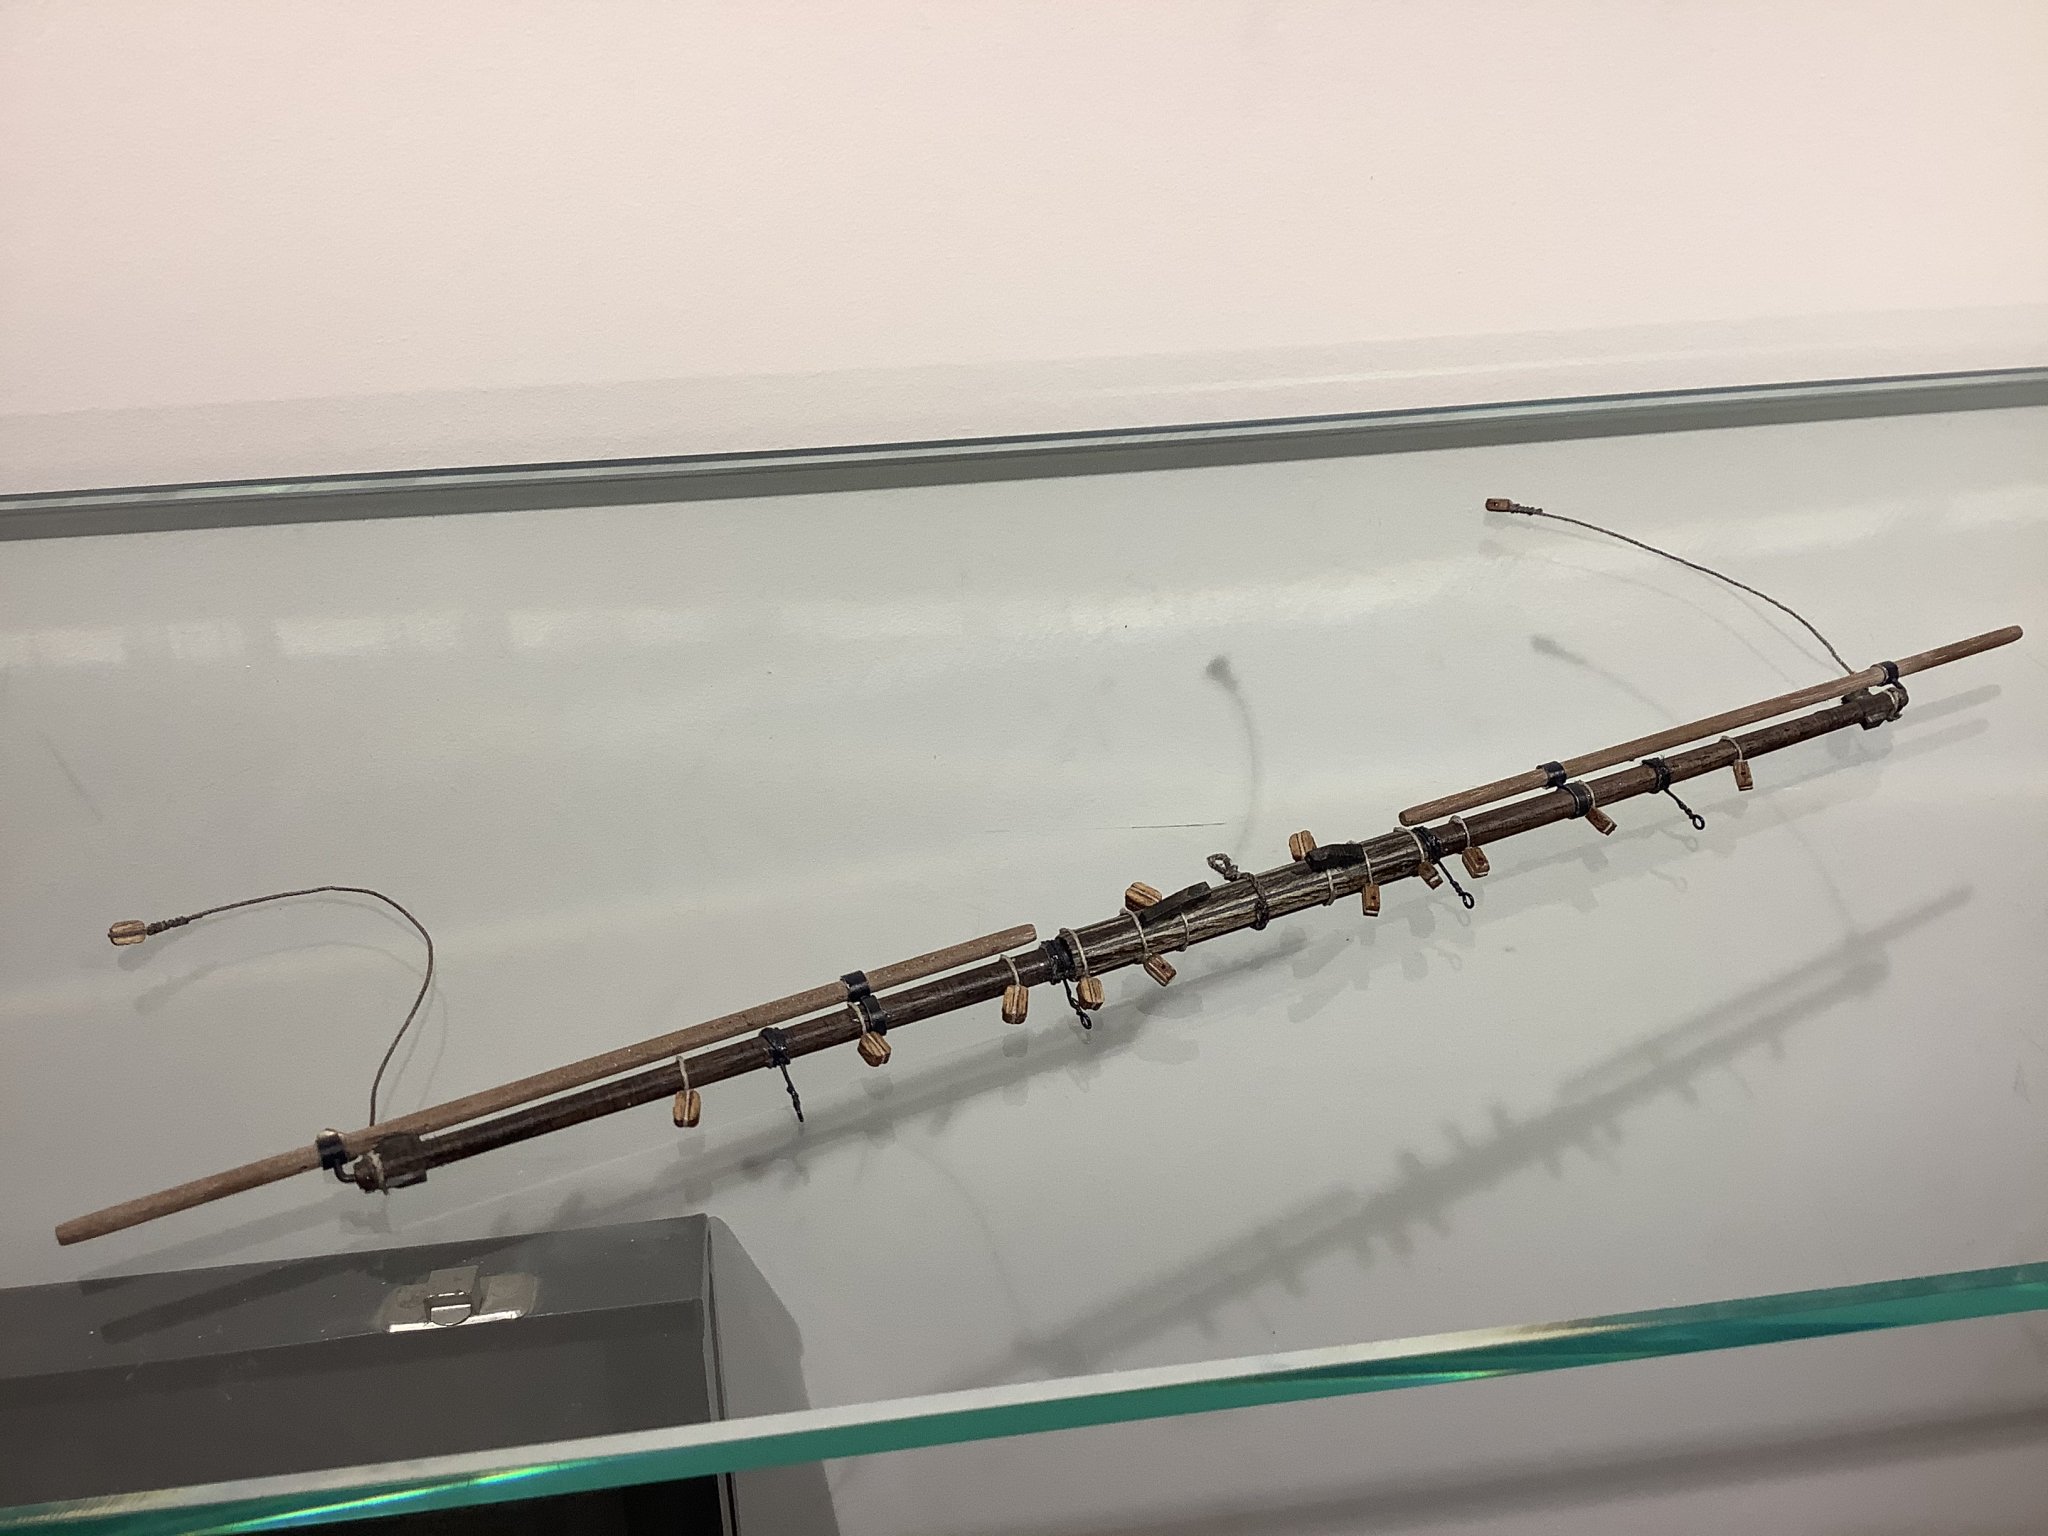
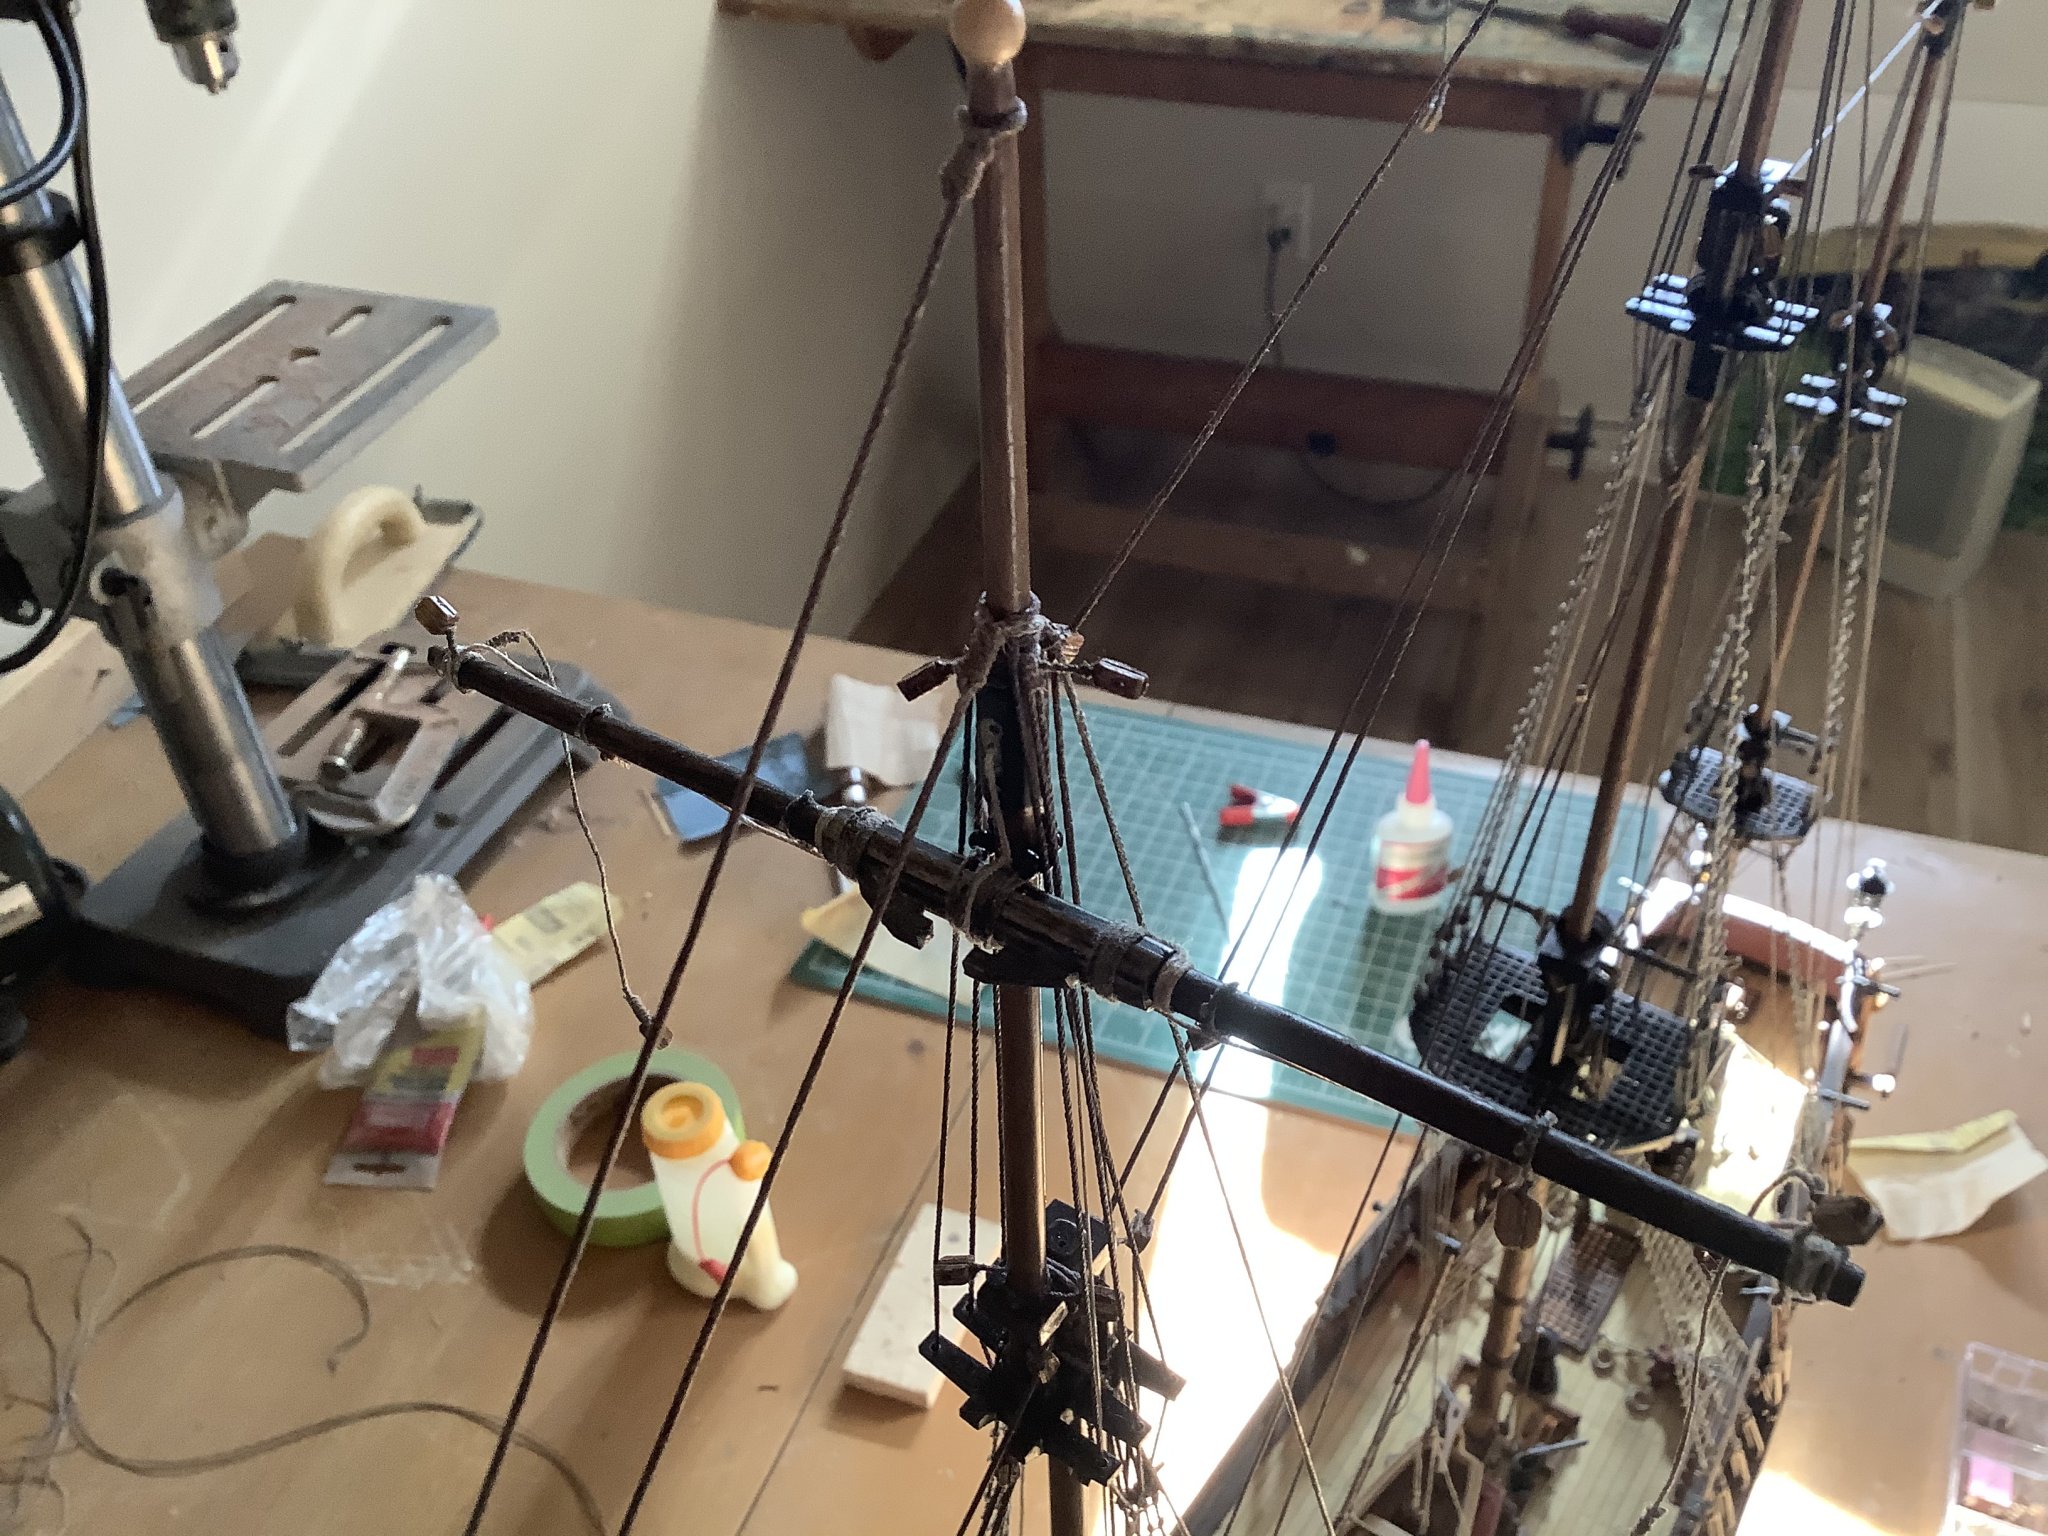
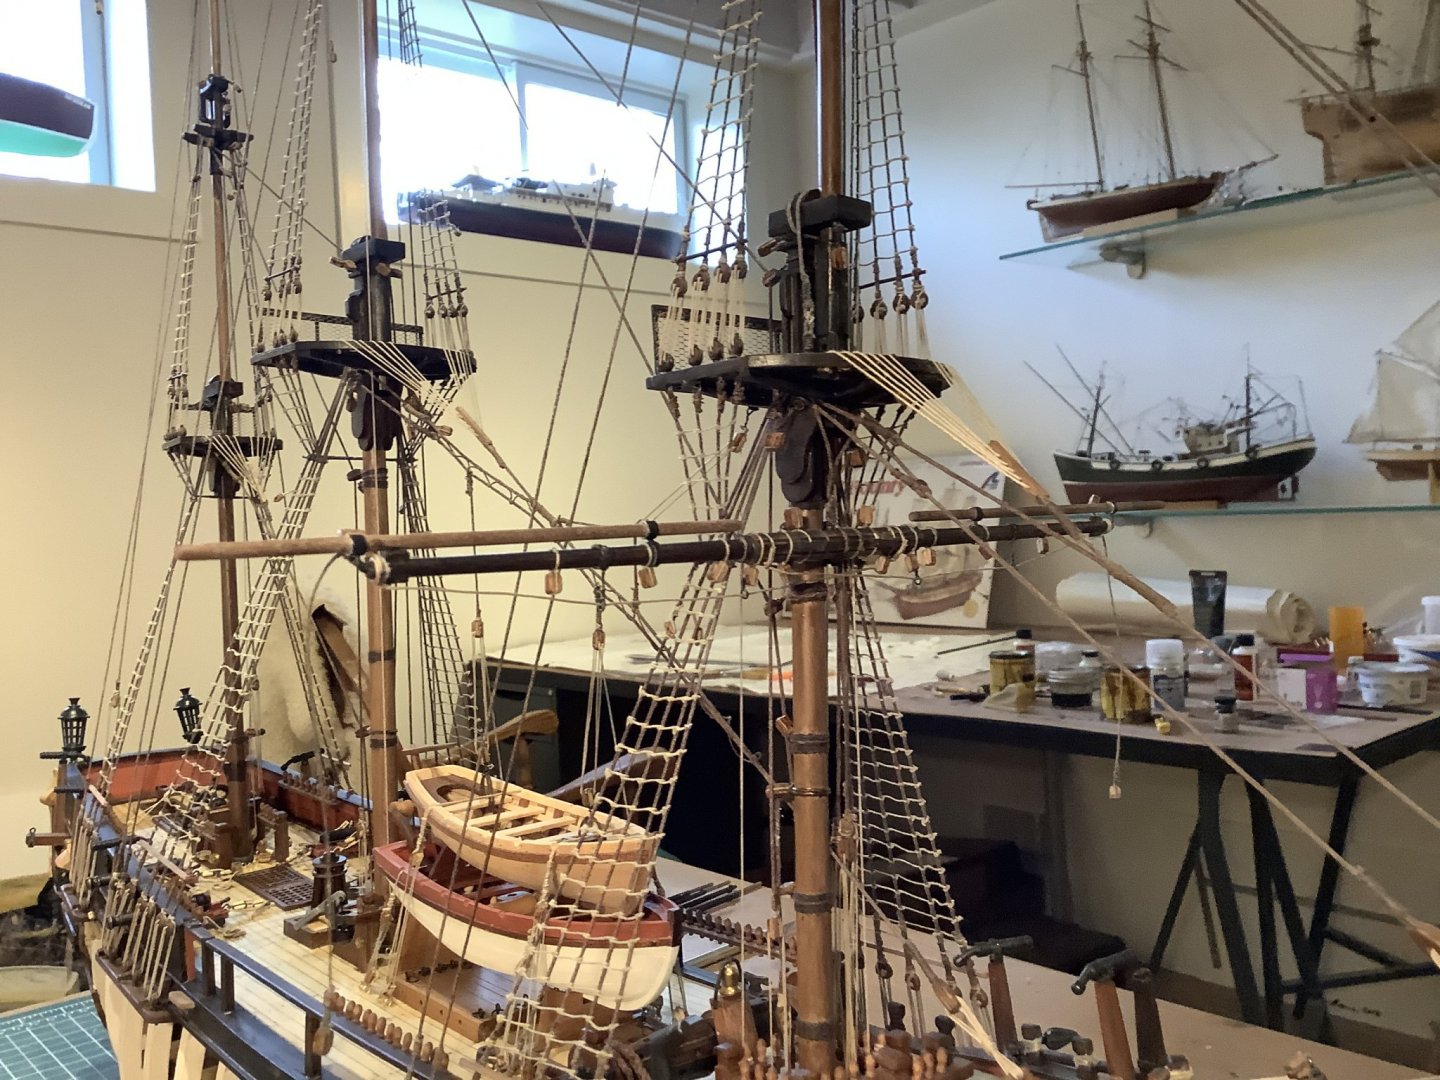
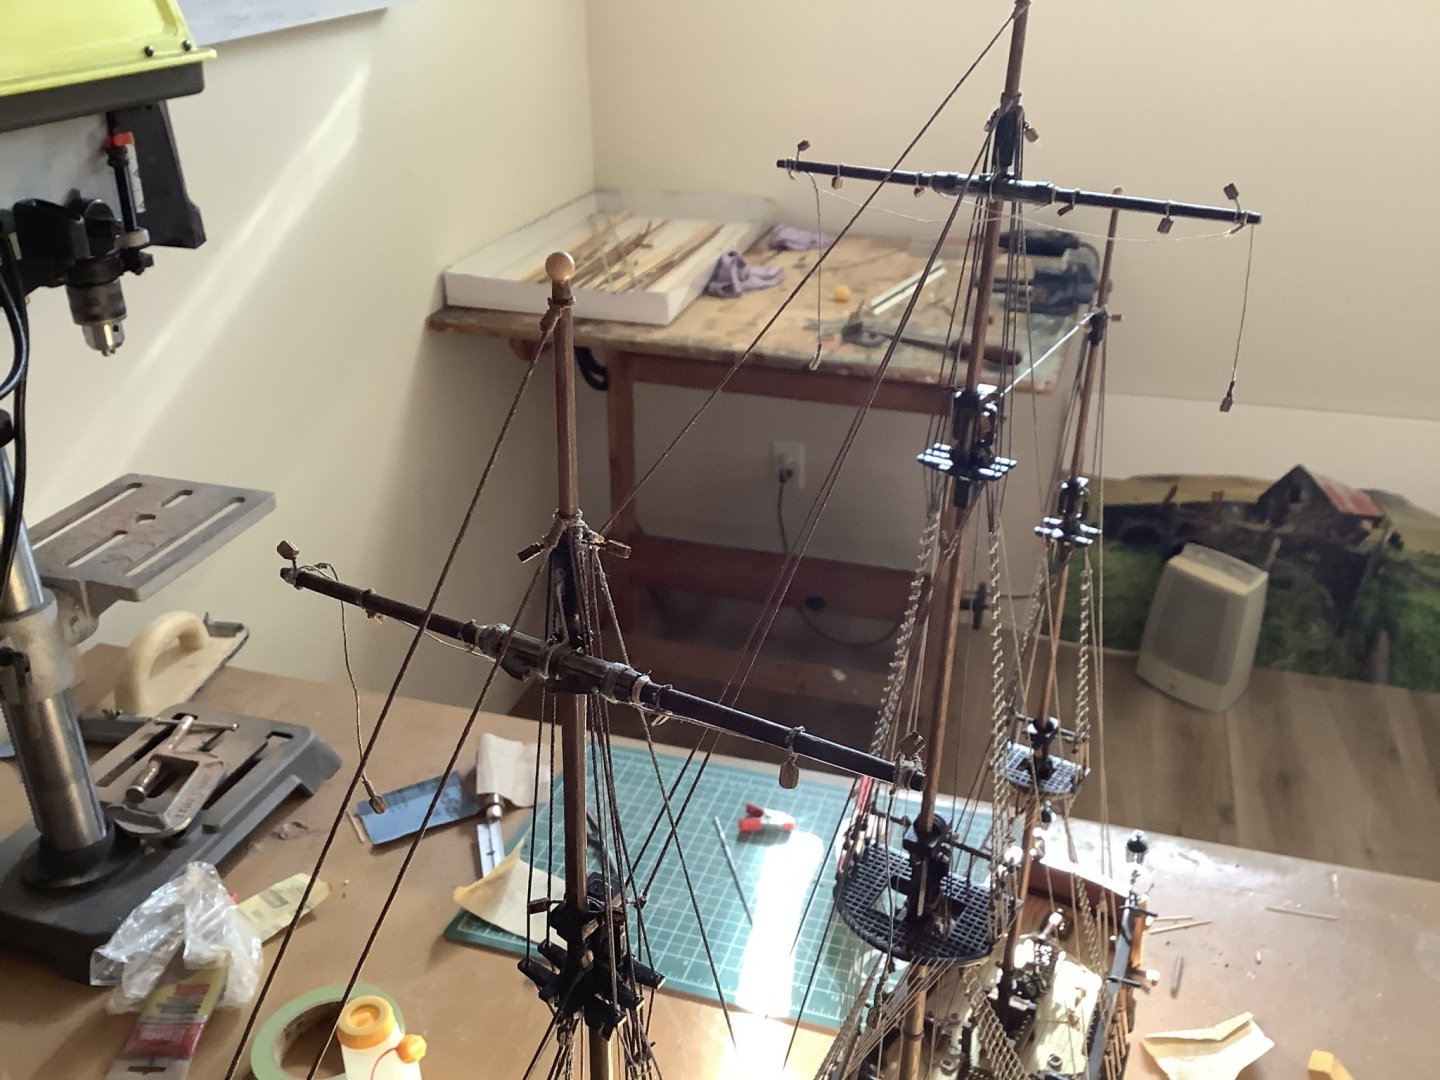
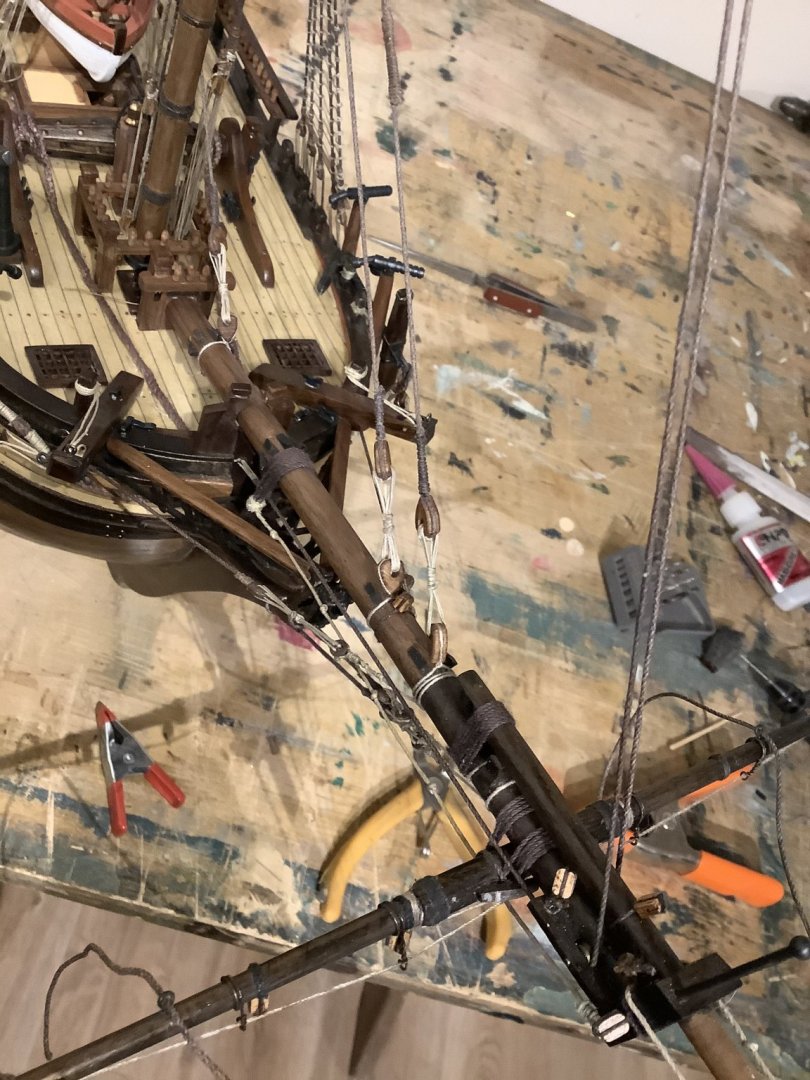
Lower foremast yard is hoisted. Messed up the chain (actually rope) length slightly as it’s a complicated loop assembly that had to be pre made. The end result is just that the lanyards between loops are a bit short. I’ll get the mainmast right, decide whether to fix this later.
- 171 replies
-
- 9
-
-
- artesania latina
- bounty
- (and 1 more)
-
Thanks! I use CA, find it’s very effective tool, faster and less messy if used sparingly. I find the carpenters glue tends to leave more residue but do use that sometimes.
- 171 replies
-
- 1
-
-
- artesania latina
- bounty
- (and 1 more)
-
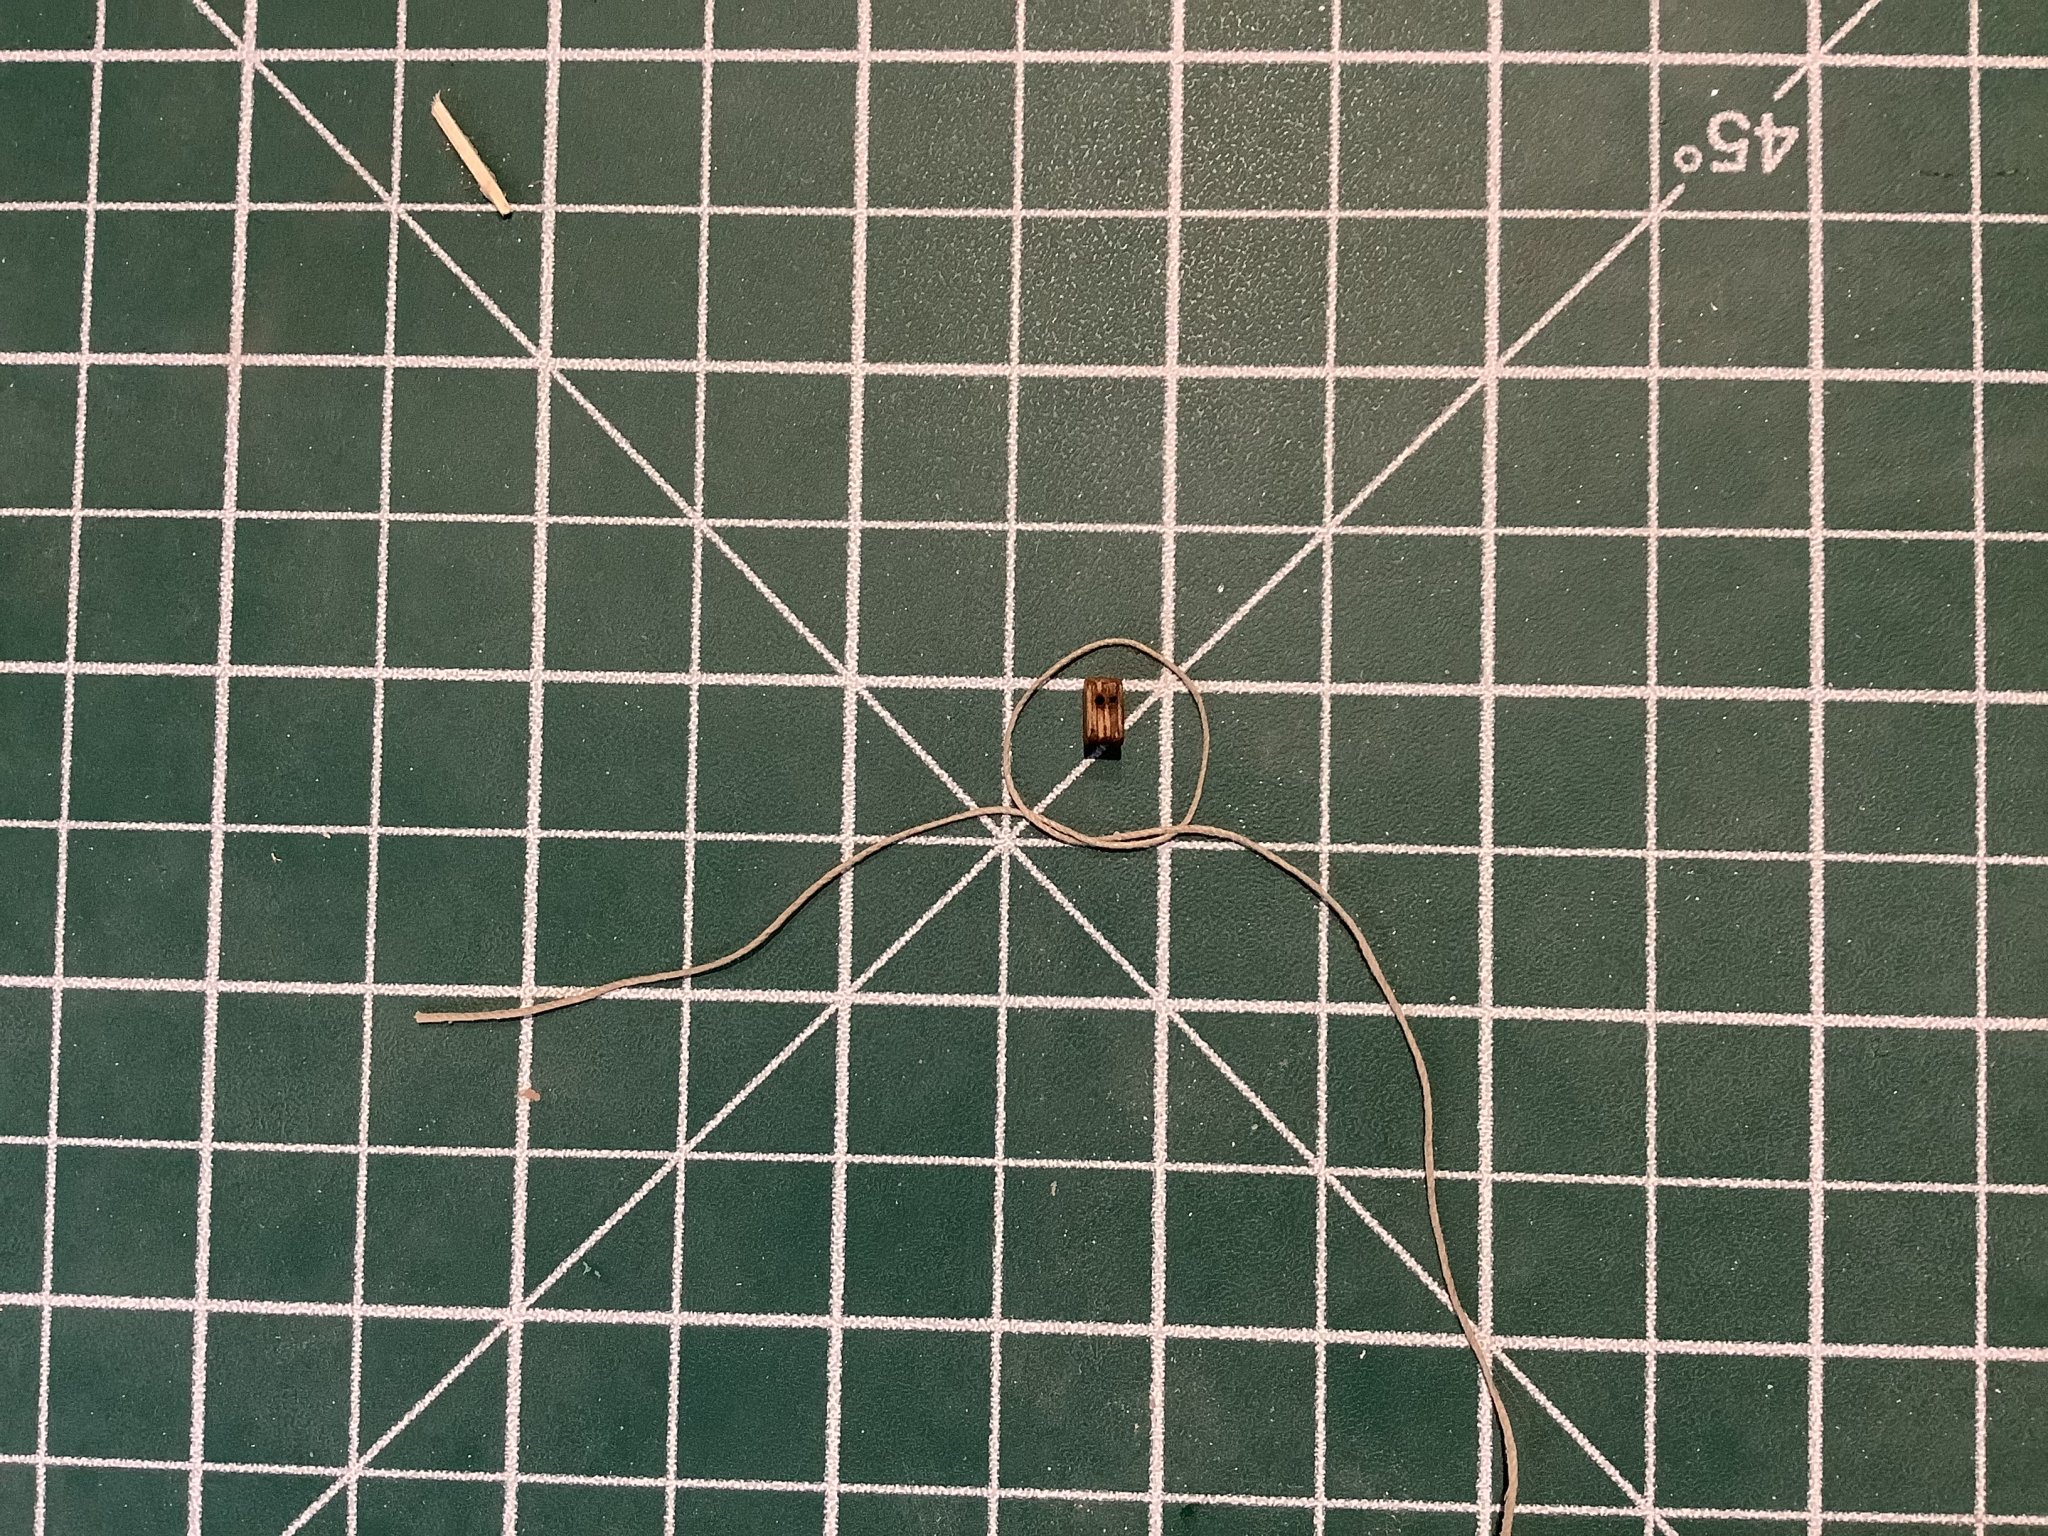
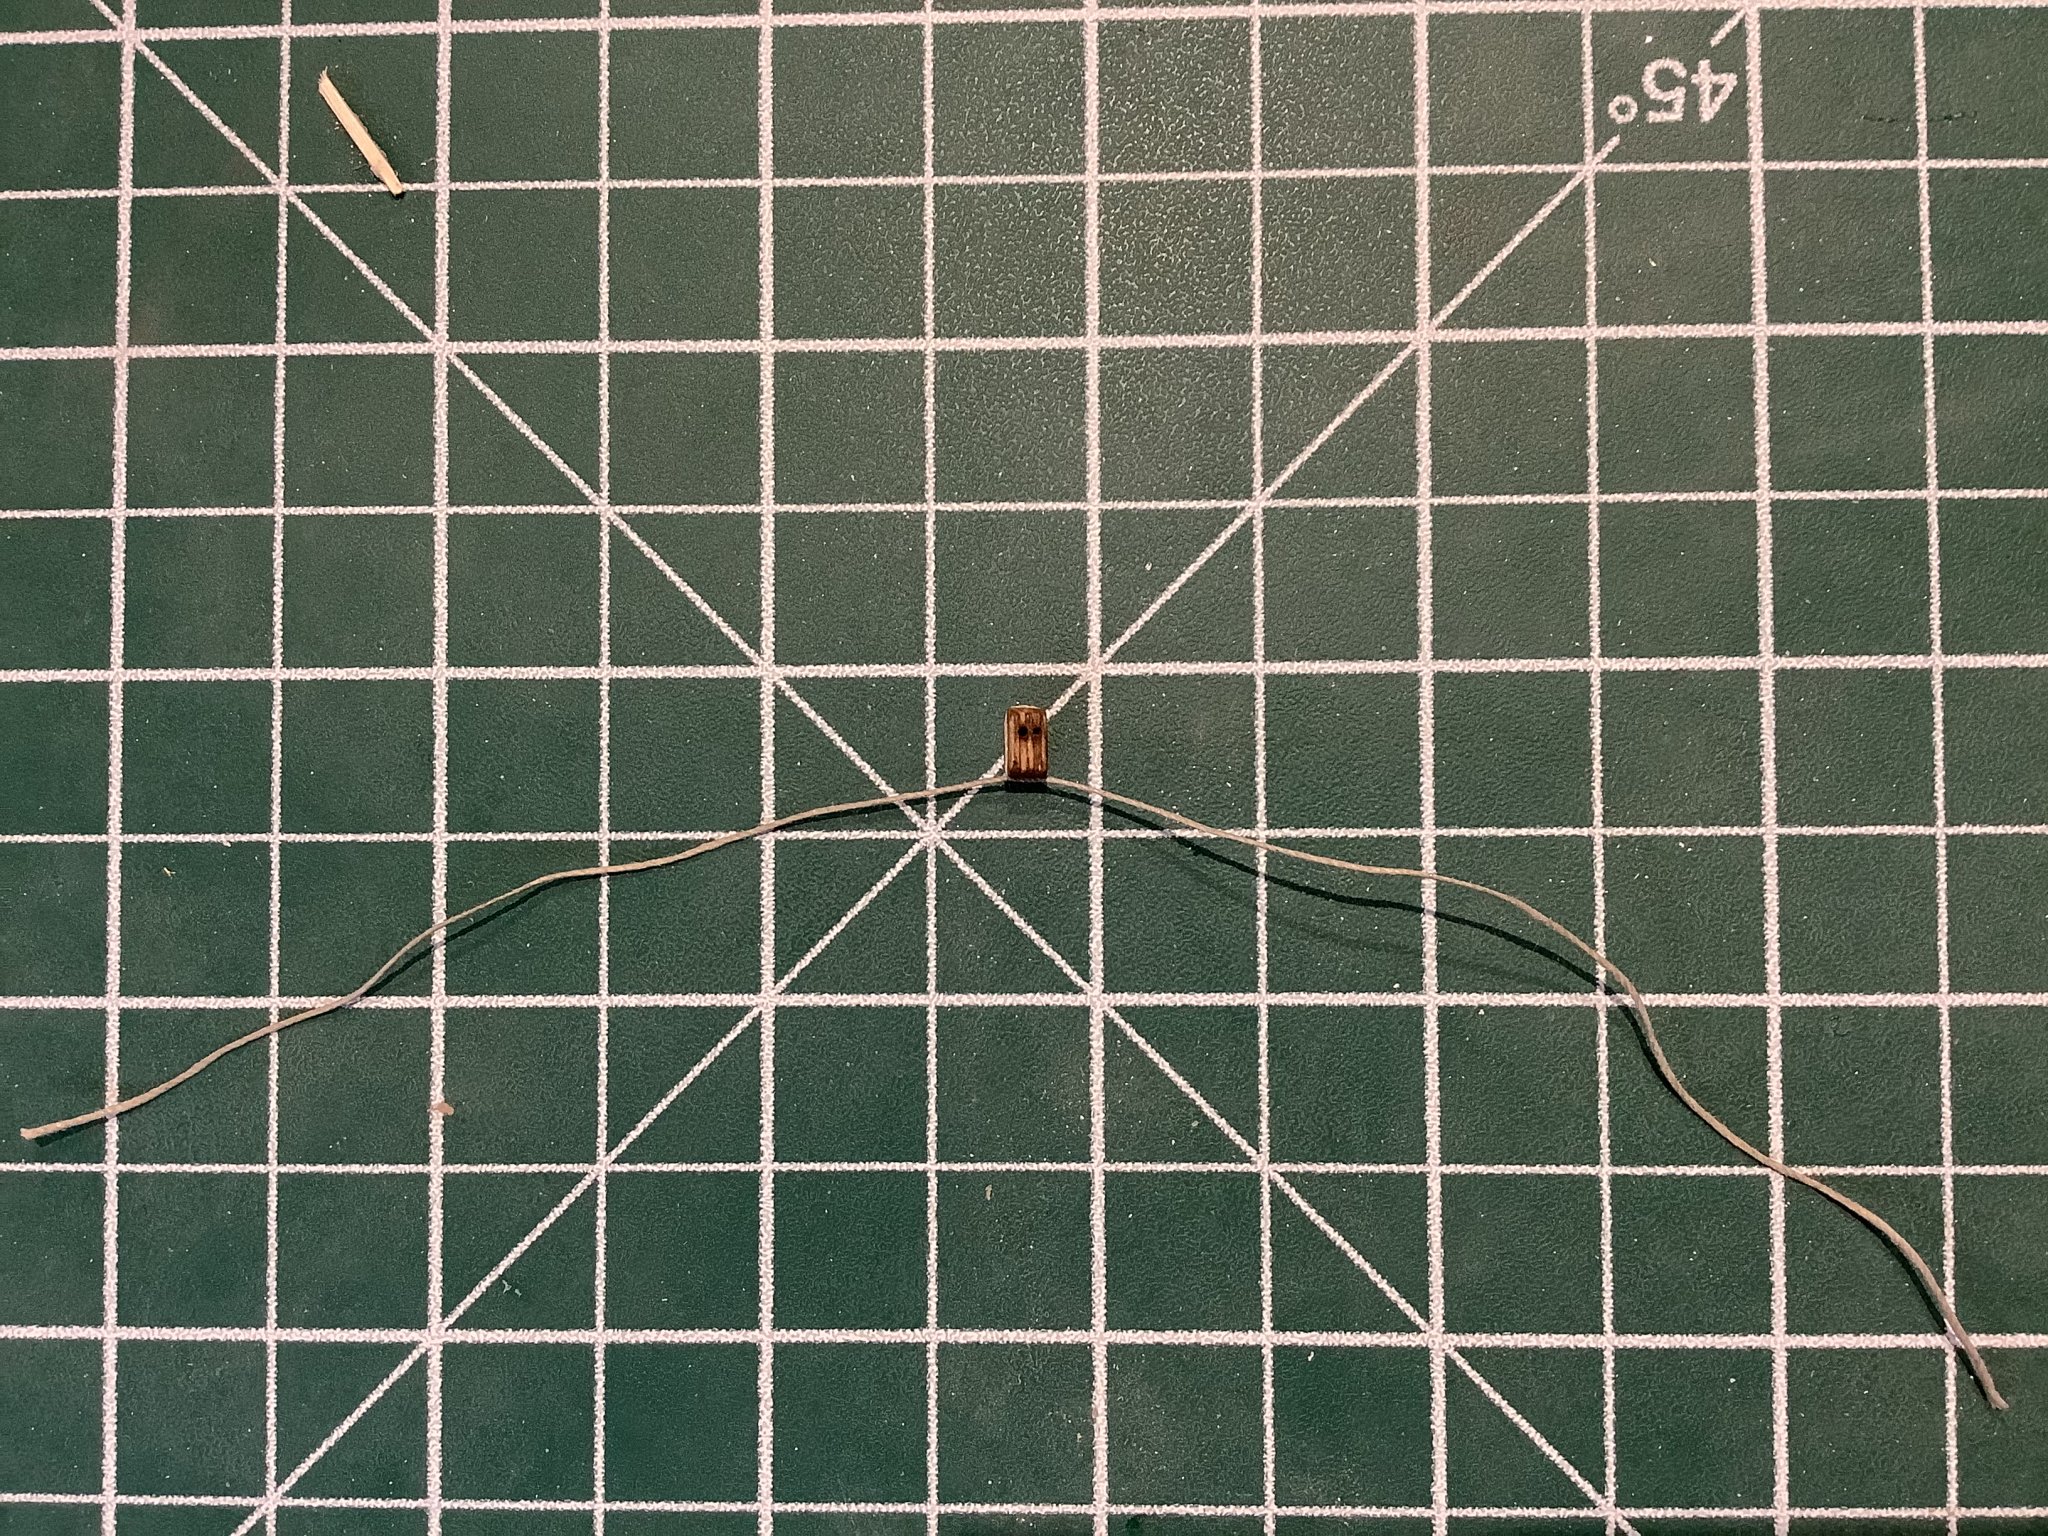
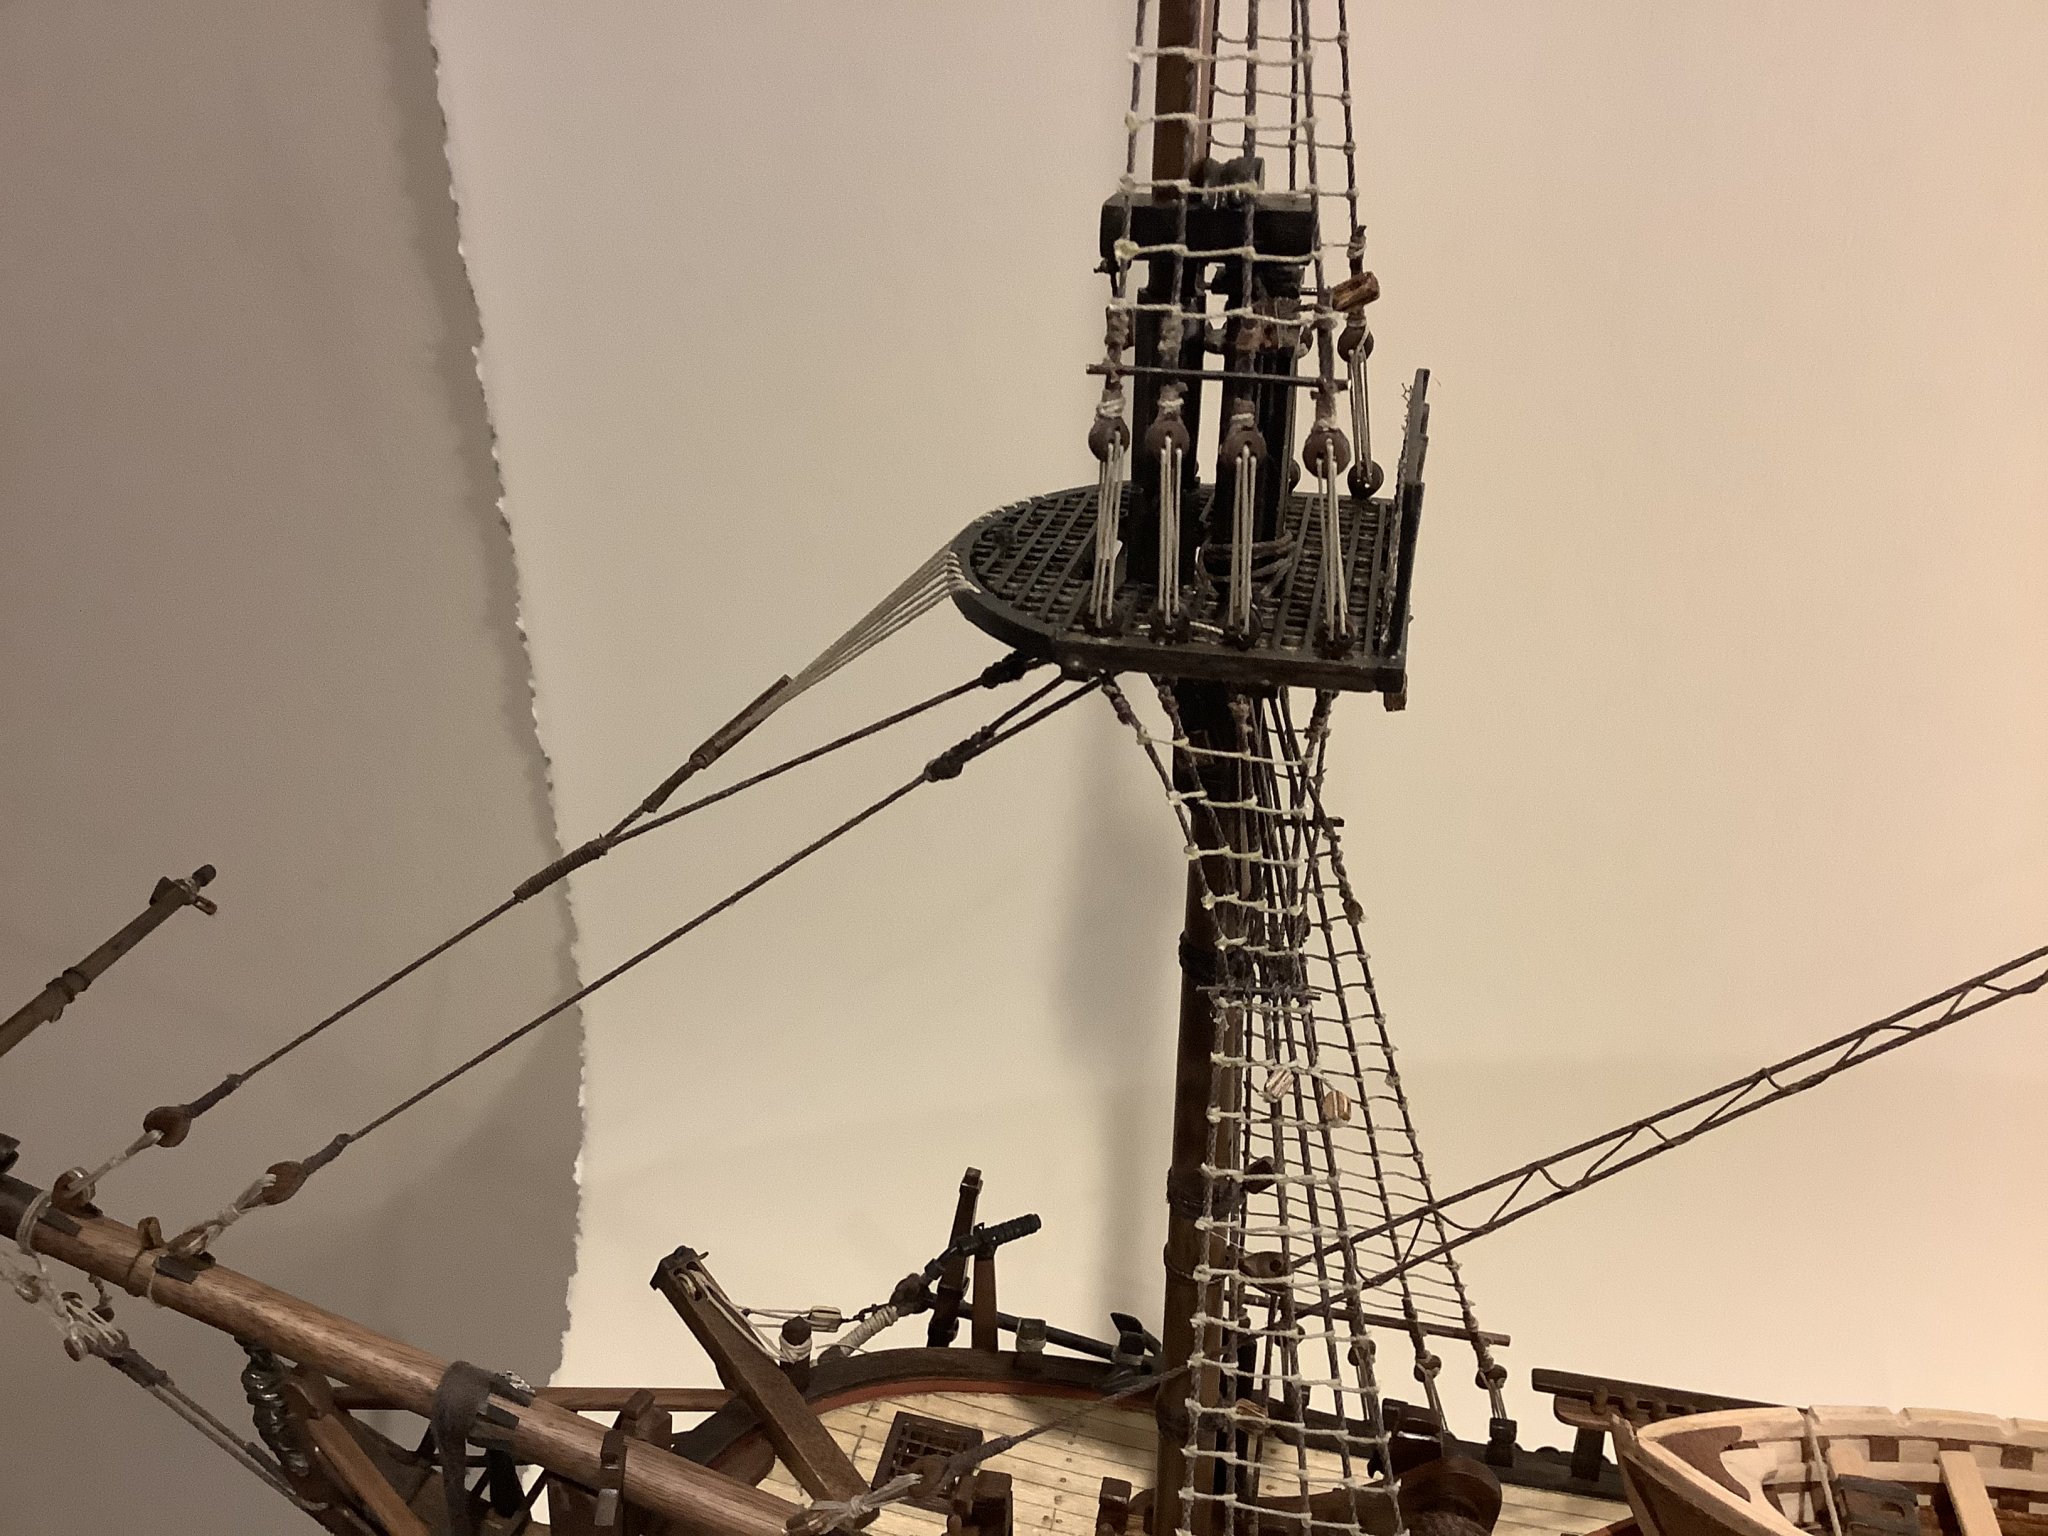
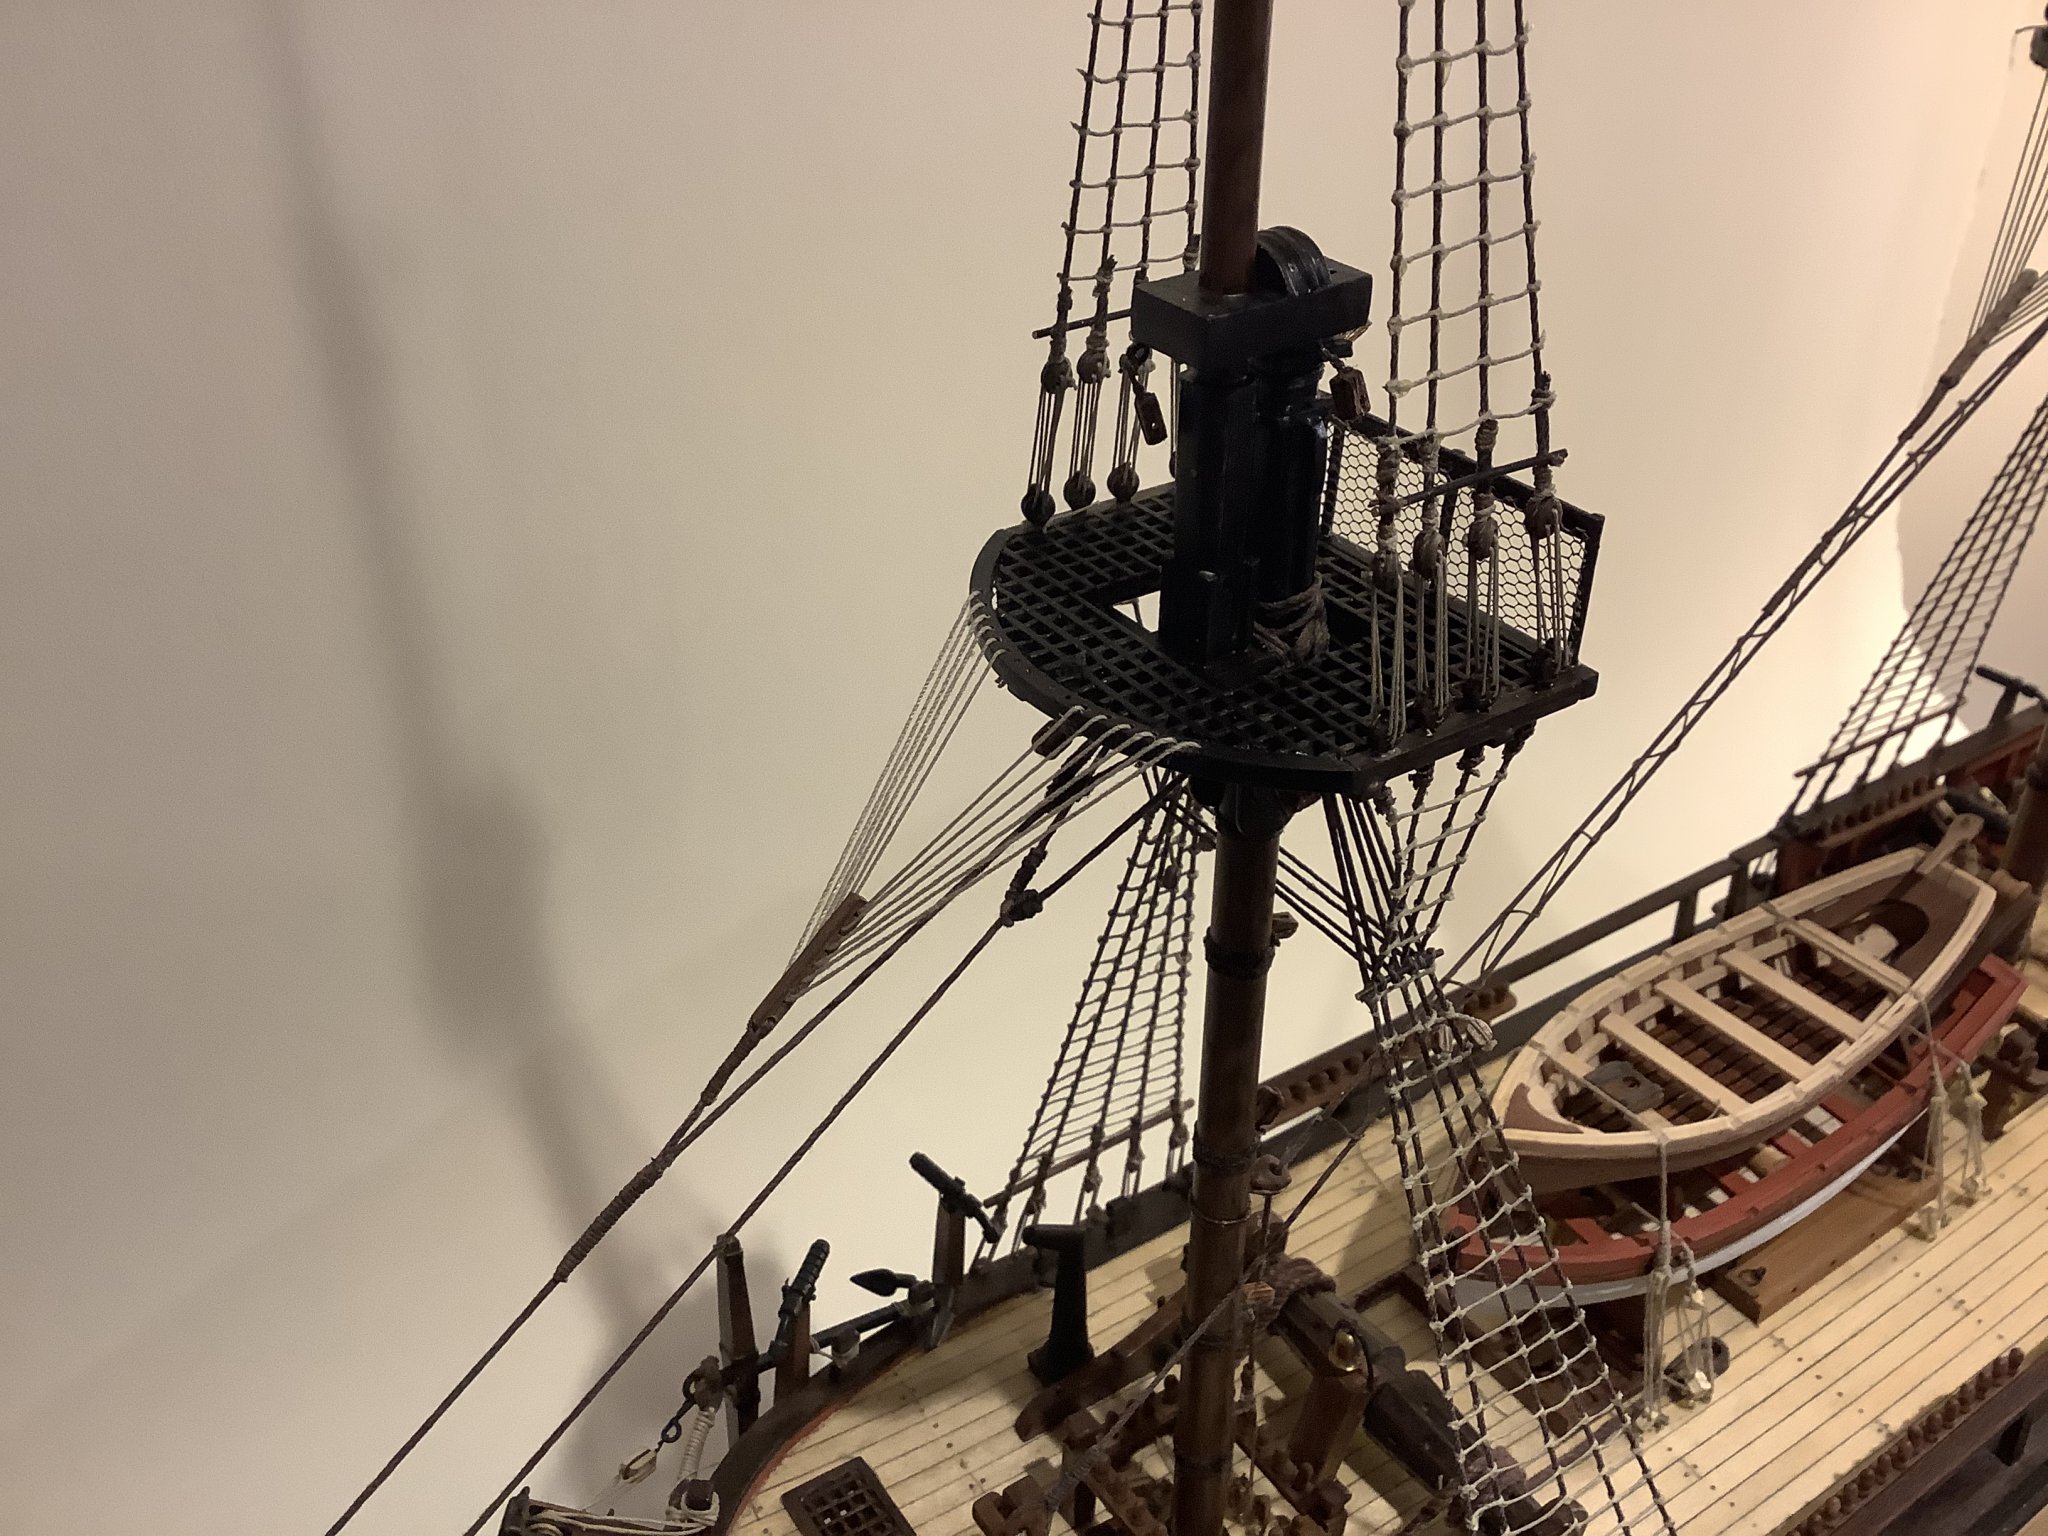
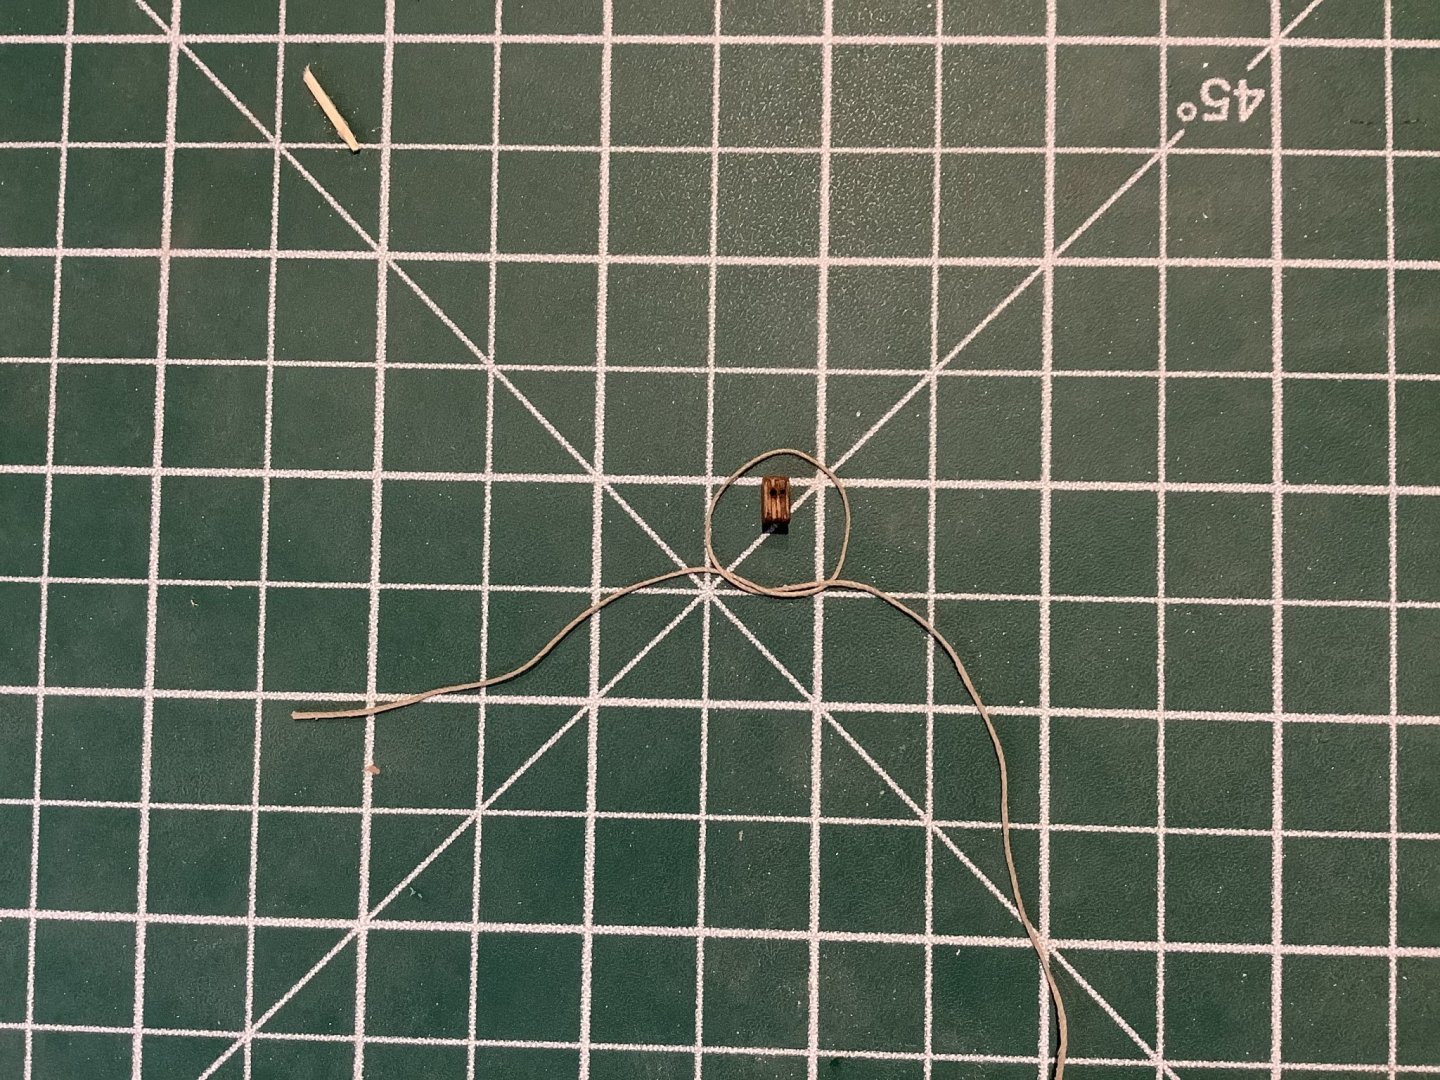
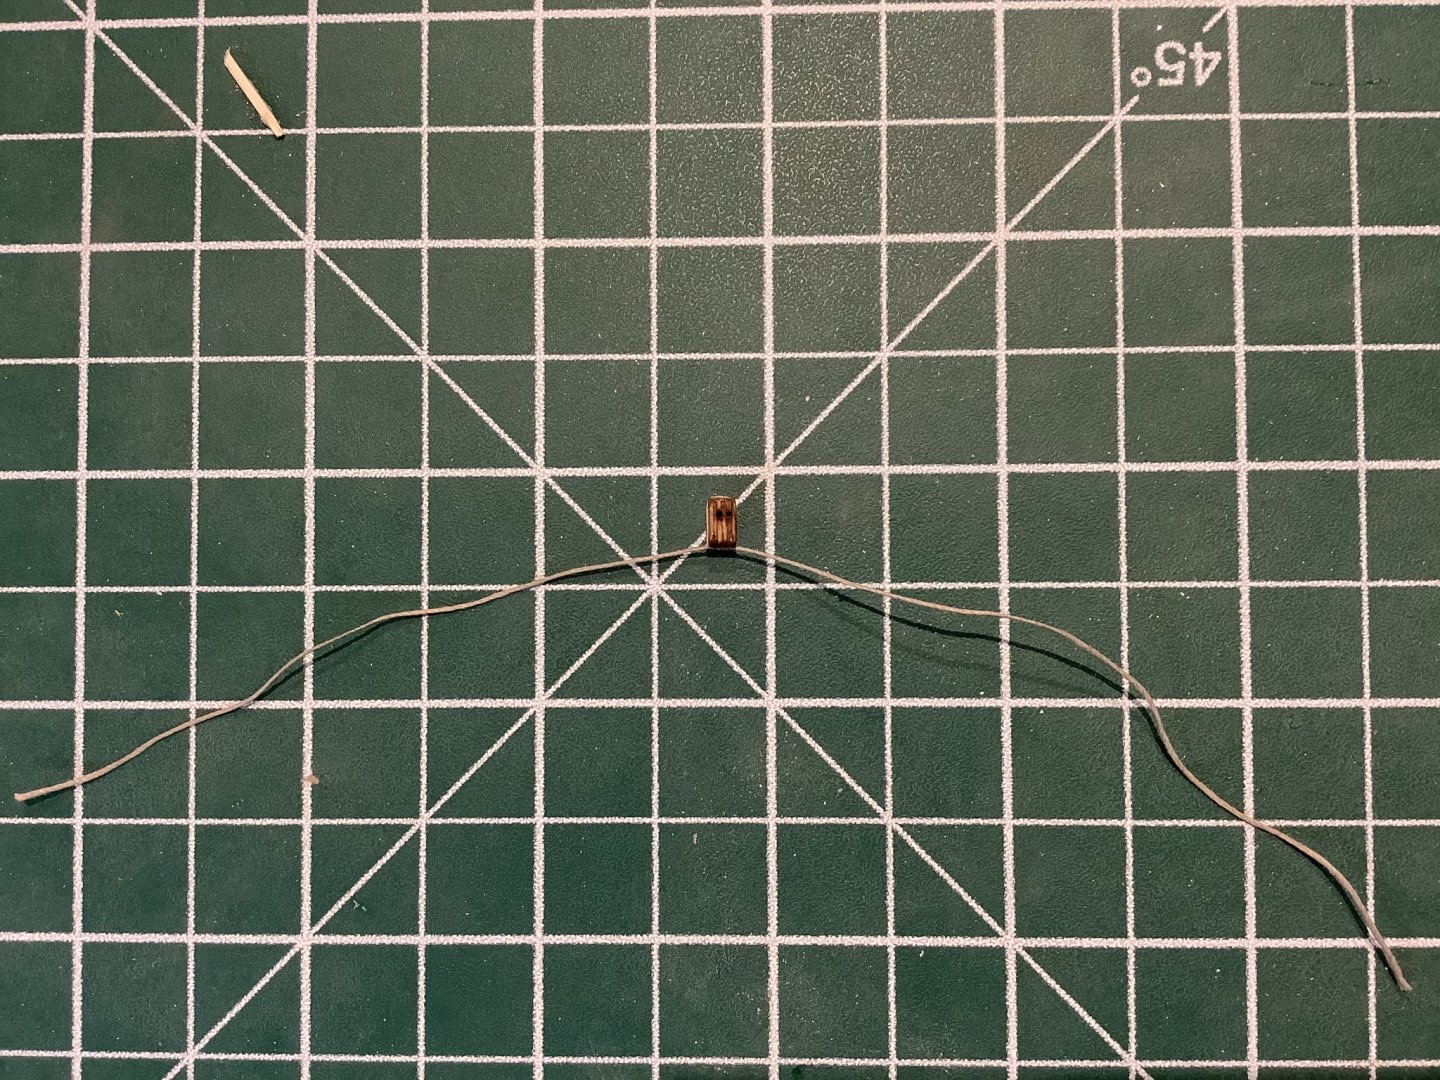
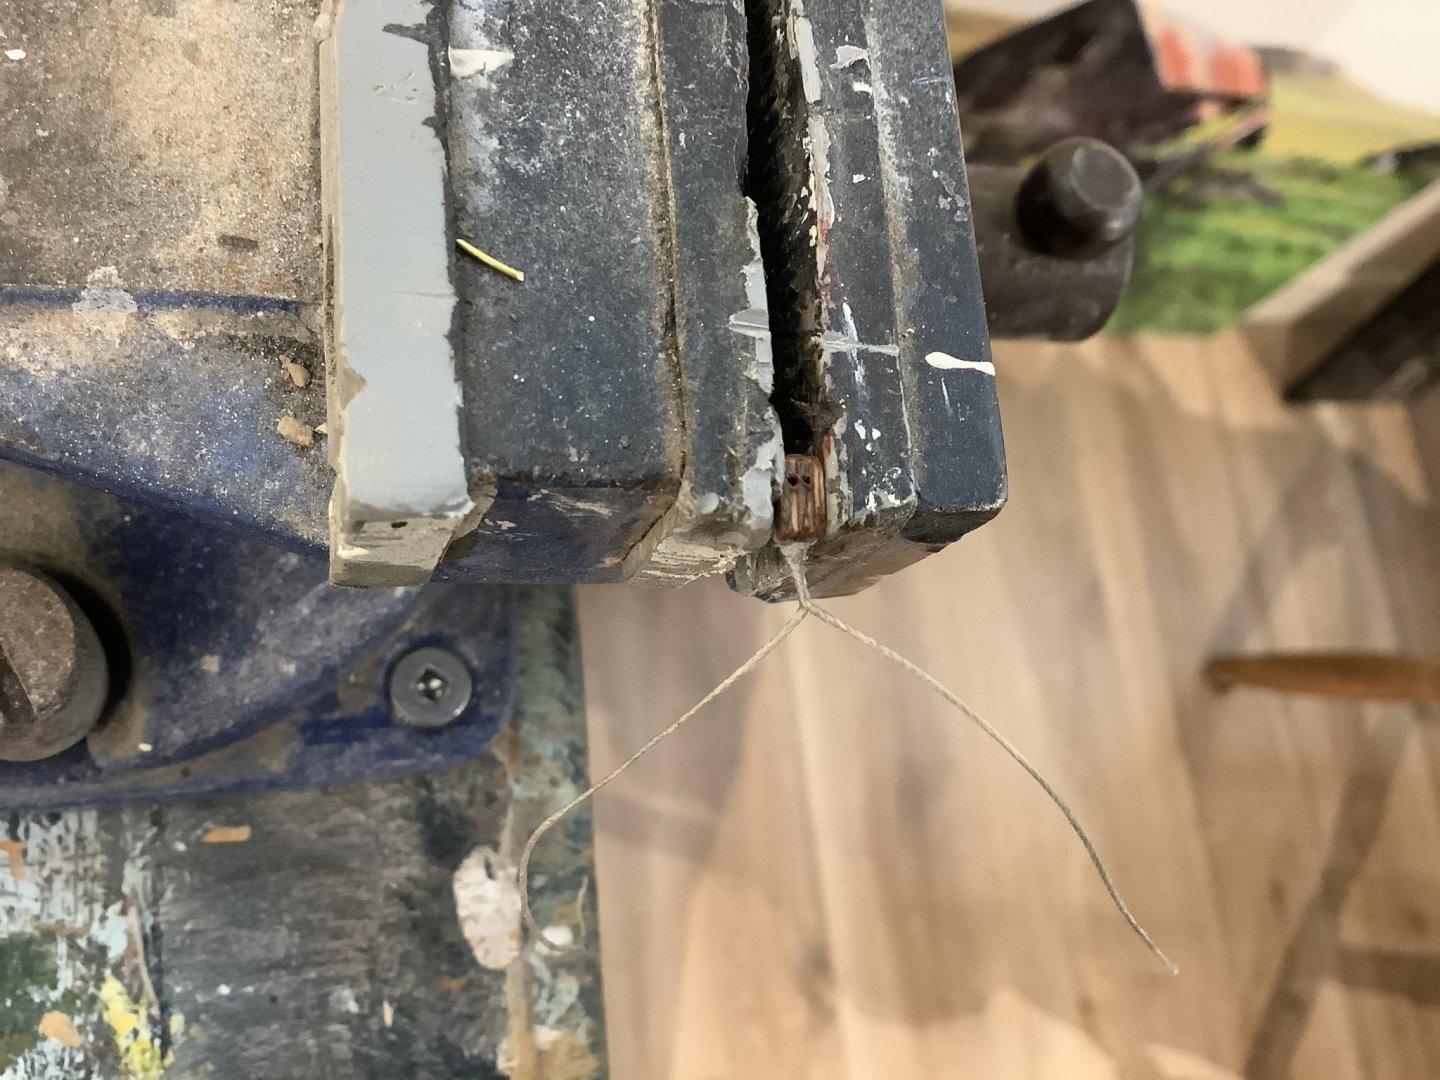
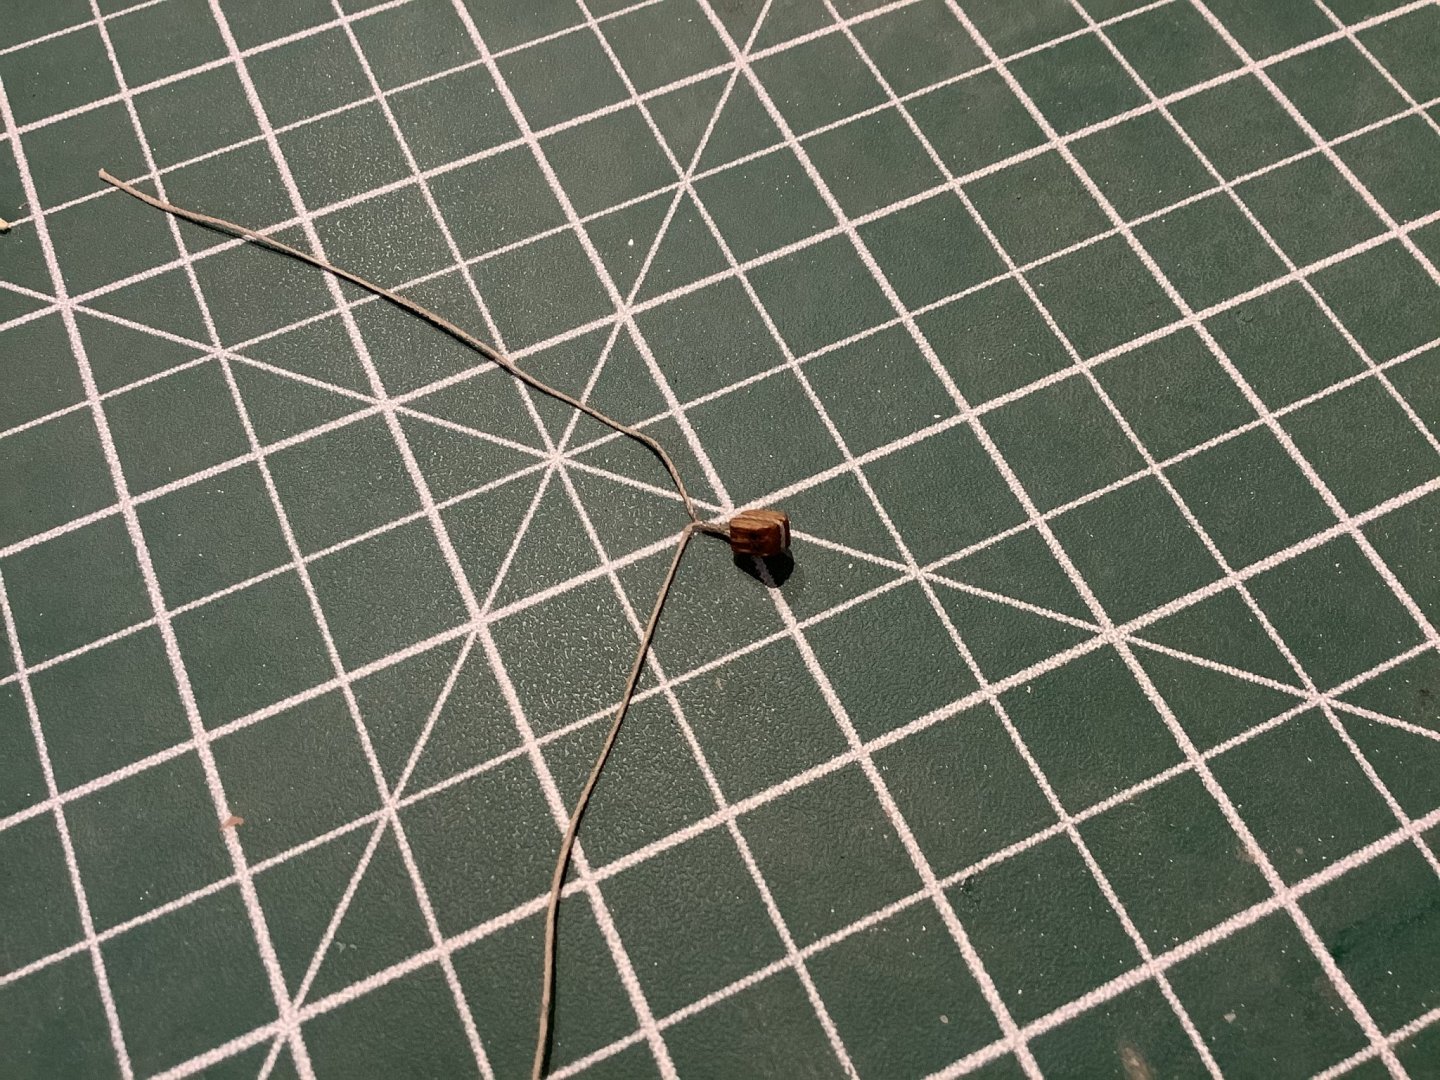
Hi. I just use thread. My block tying routine (illustrated below) is: 1. Rub thread with beeswax 2. loop around block and tie knot at bottom 3. stick the block in vice and twirl thread a few times if you need the block to stand off yard or mast. Rub a drop of glue on thread to fix it. 4. tie the open ends of thread around yard or mast, fix with glue and trim
- 171 replies
-
- 5
-
-
- artesania latina
- bounty
- (and 1 more)
-
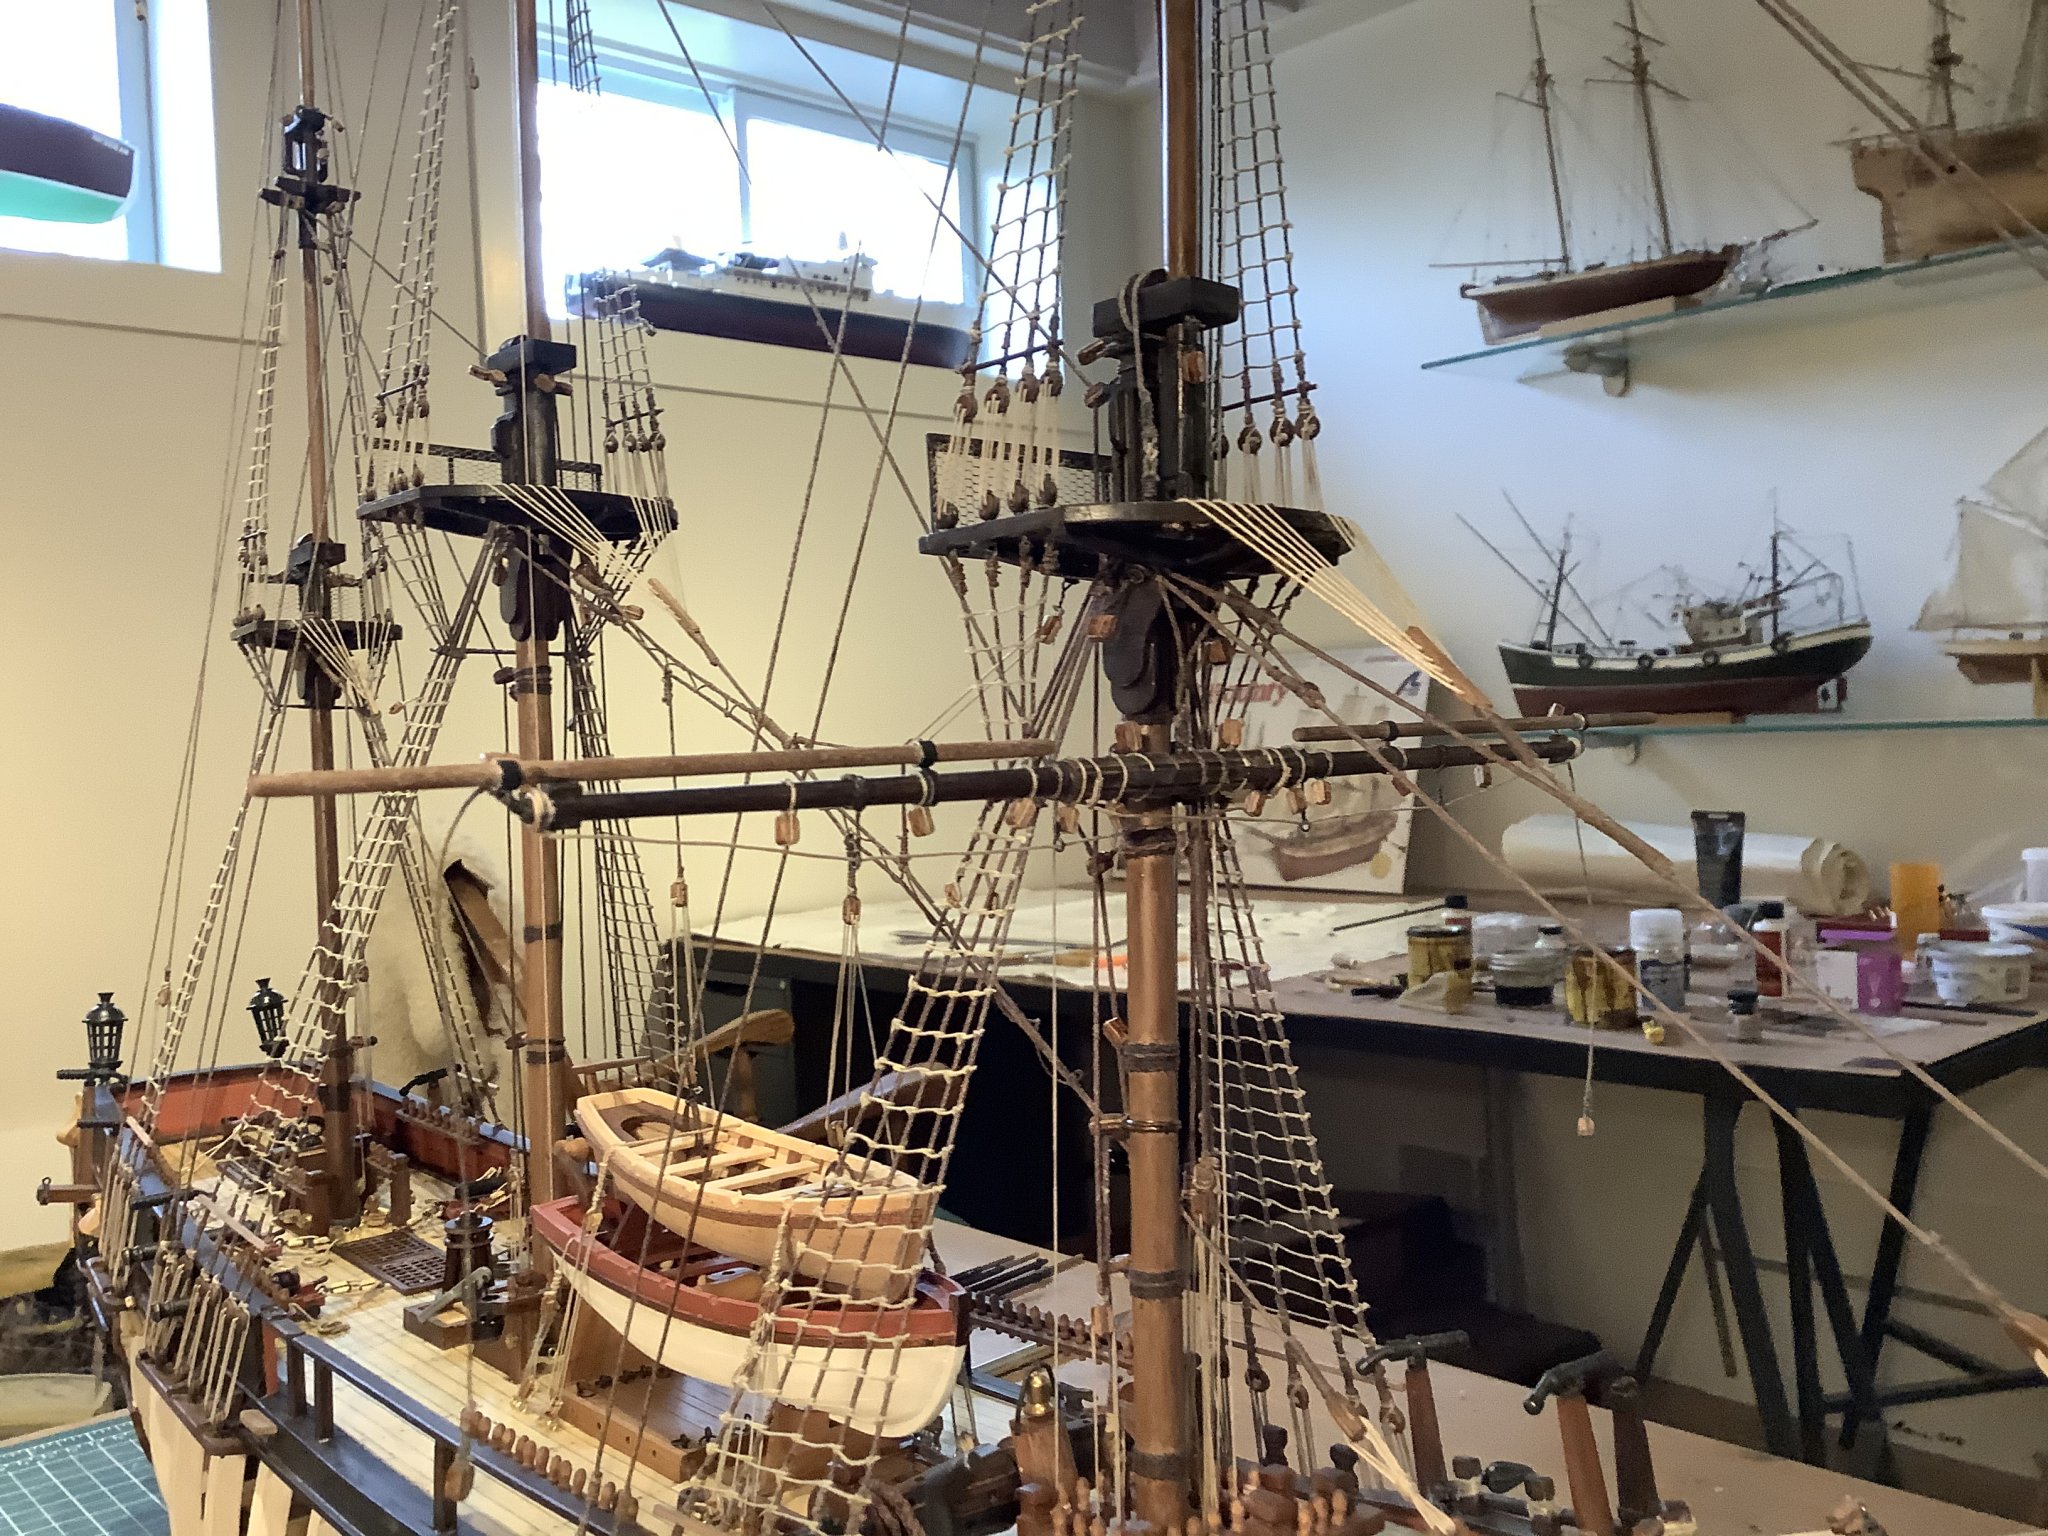
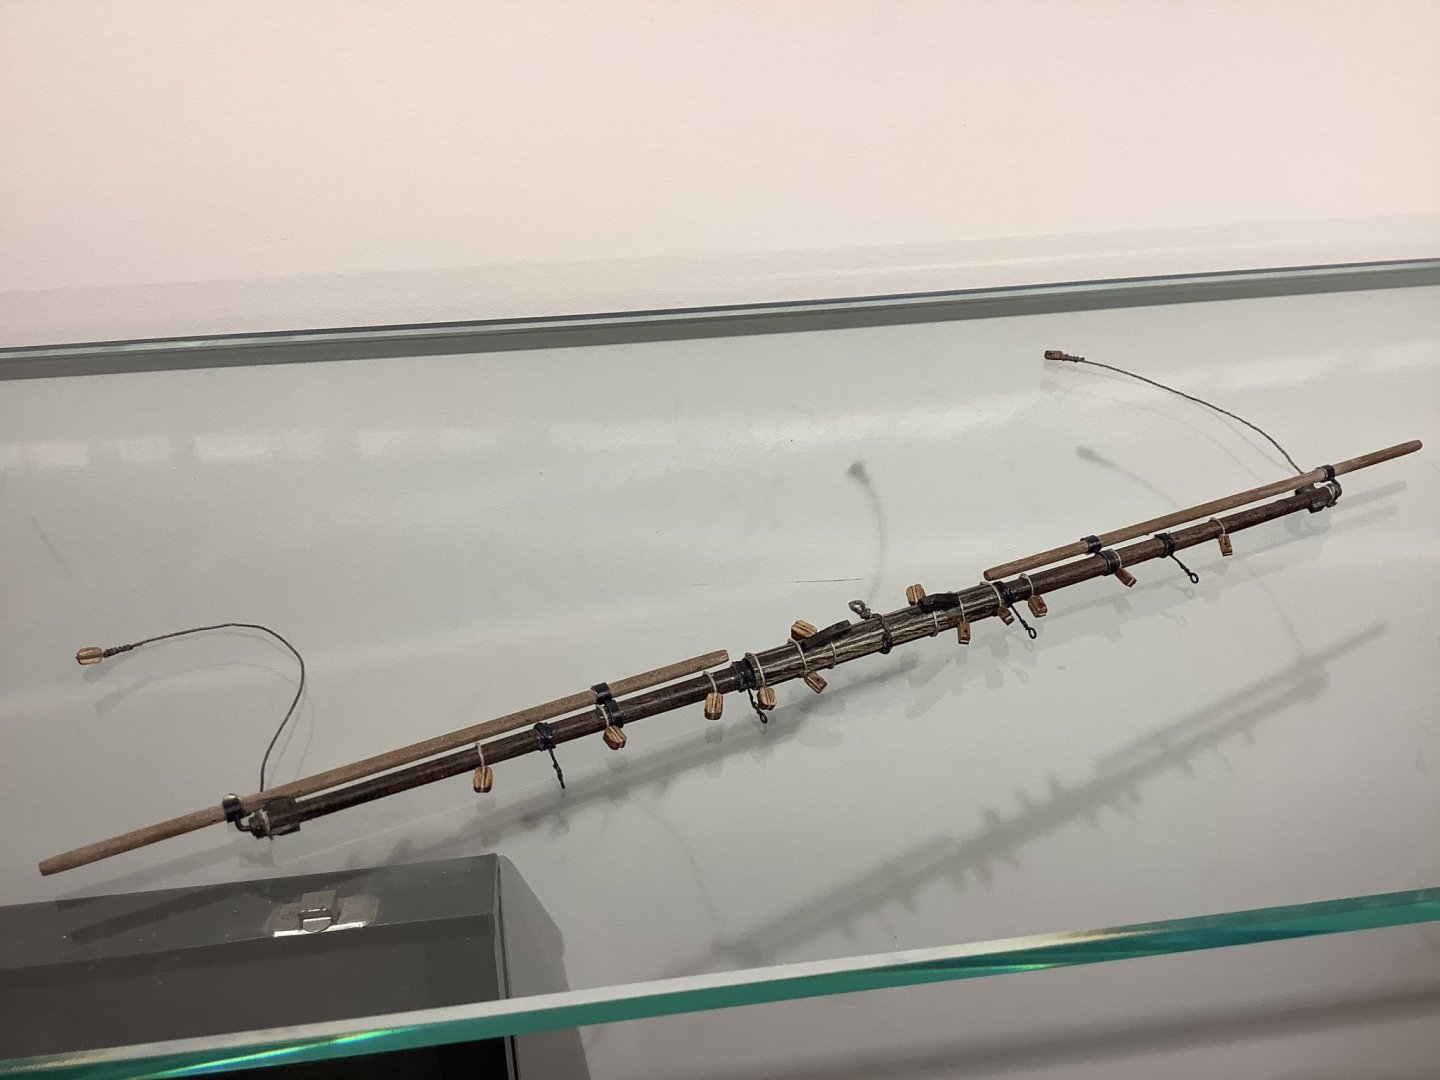
The lower yard on the foremast showing scope of all the gear that must be attached. This isn’t quite finished yet, still needs the foot ropes and parrel assembly and some final tidying up.
- 171 replies
-
- 4
-
-
- artesania latina
- bounty
- (and 1 more)
-
Yes my plan at the moment is to do sails, unless it ends up looking too cluttered.
-
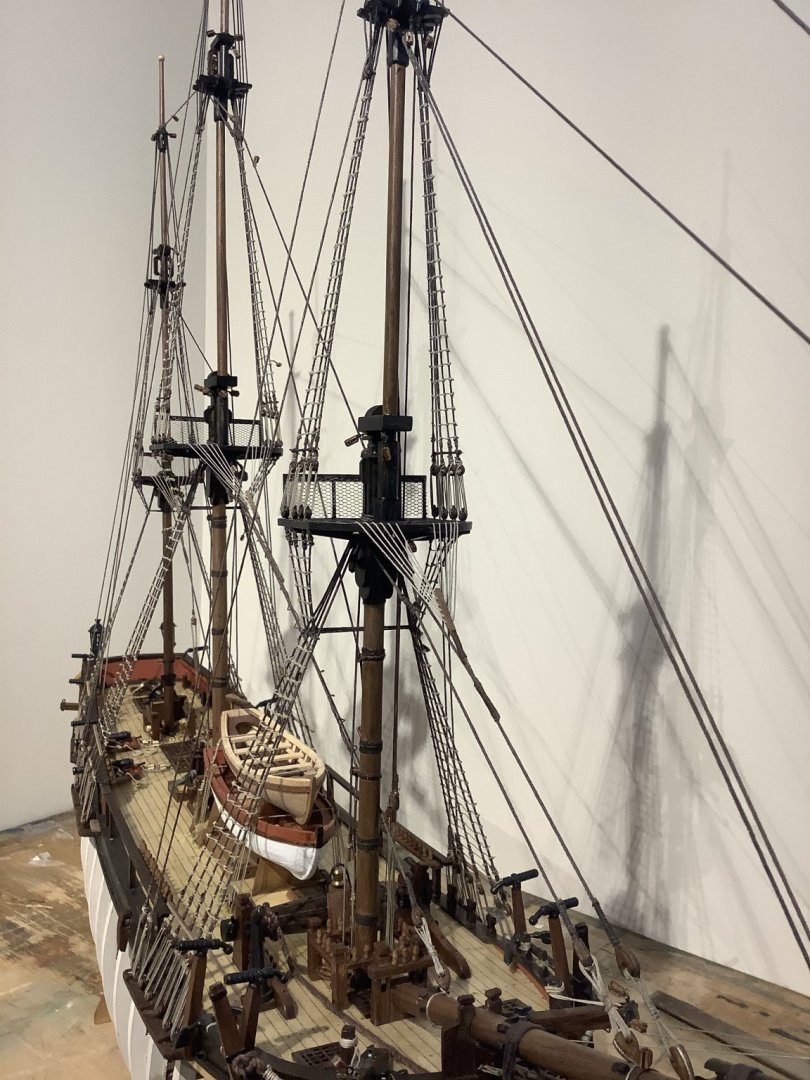
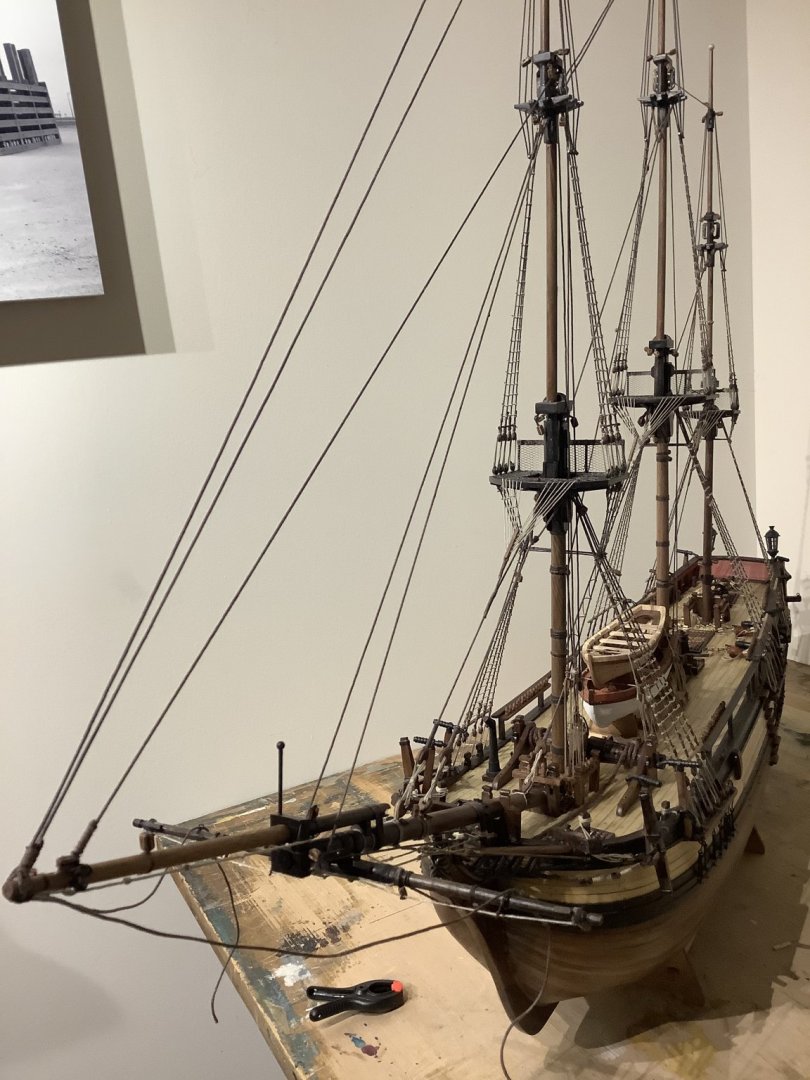
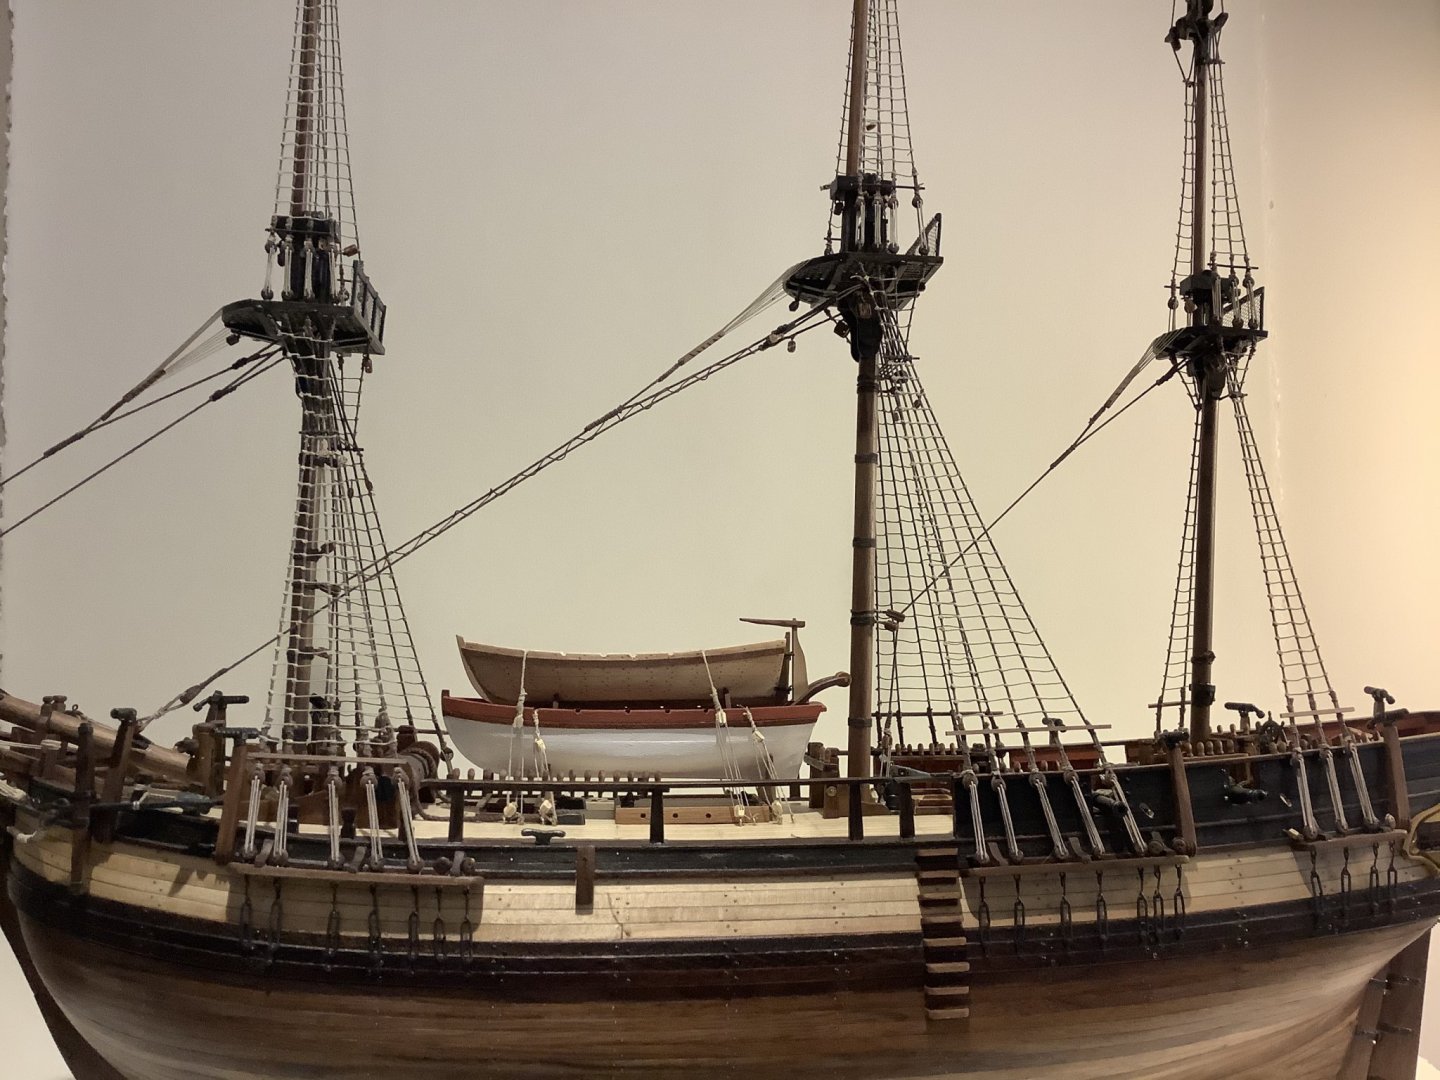
Thanks Patrick and Sam for the kind comments. The first two yards have been hoisted in place, using the parrels and without need for any temporary pinning. Man there is a ton of rigging on this puppy. Ropes everywhere. Nice to have such a great hobby for these strange days.


- 171 replies
-
- 9
-
-
- artesania latina
- bounty
- (and 1 more)
-
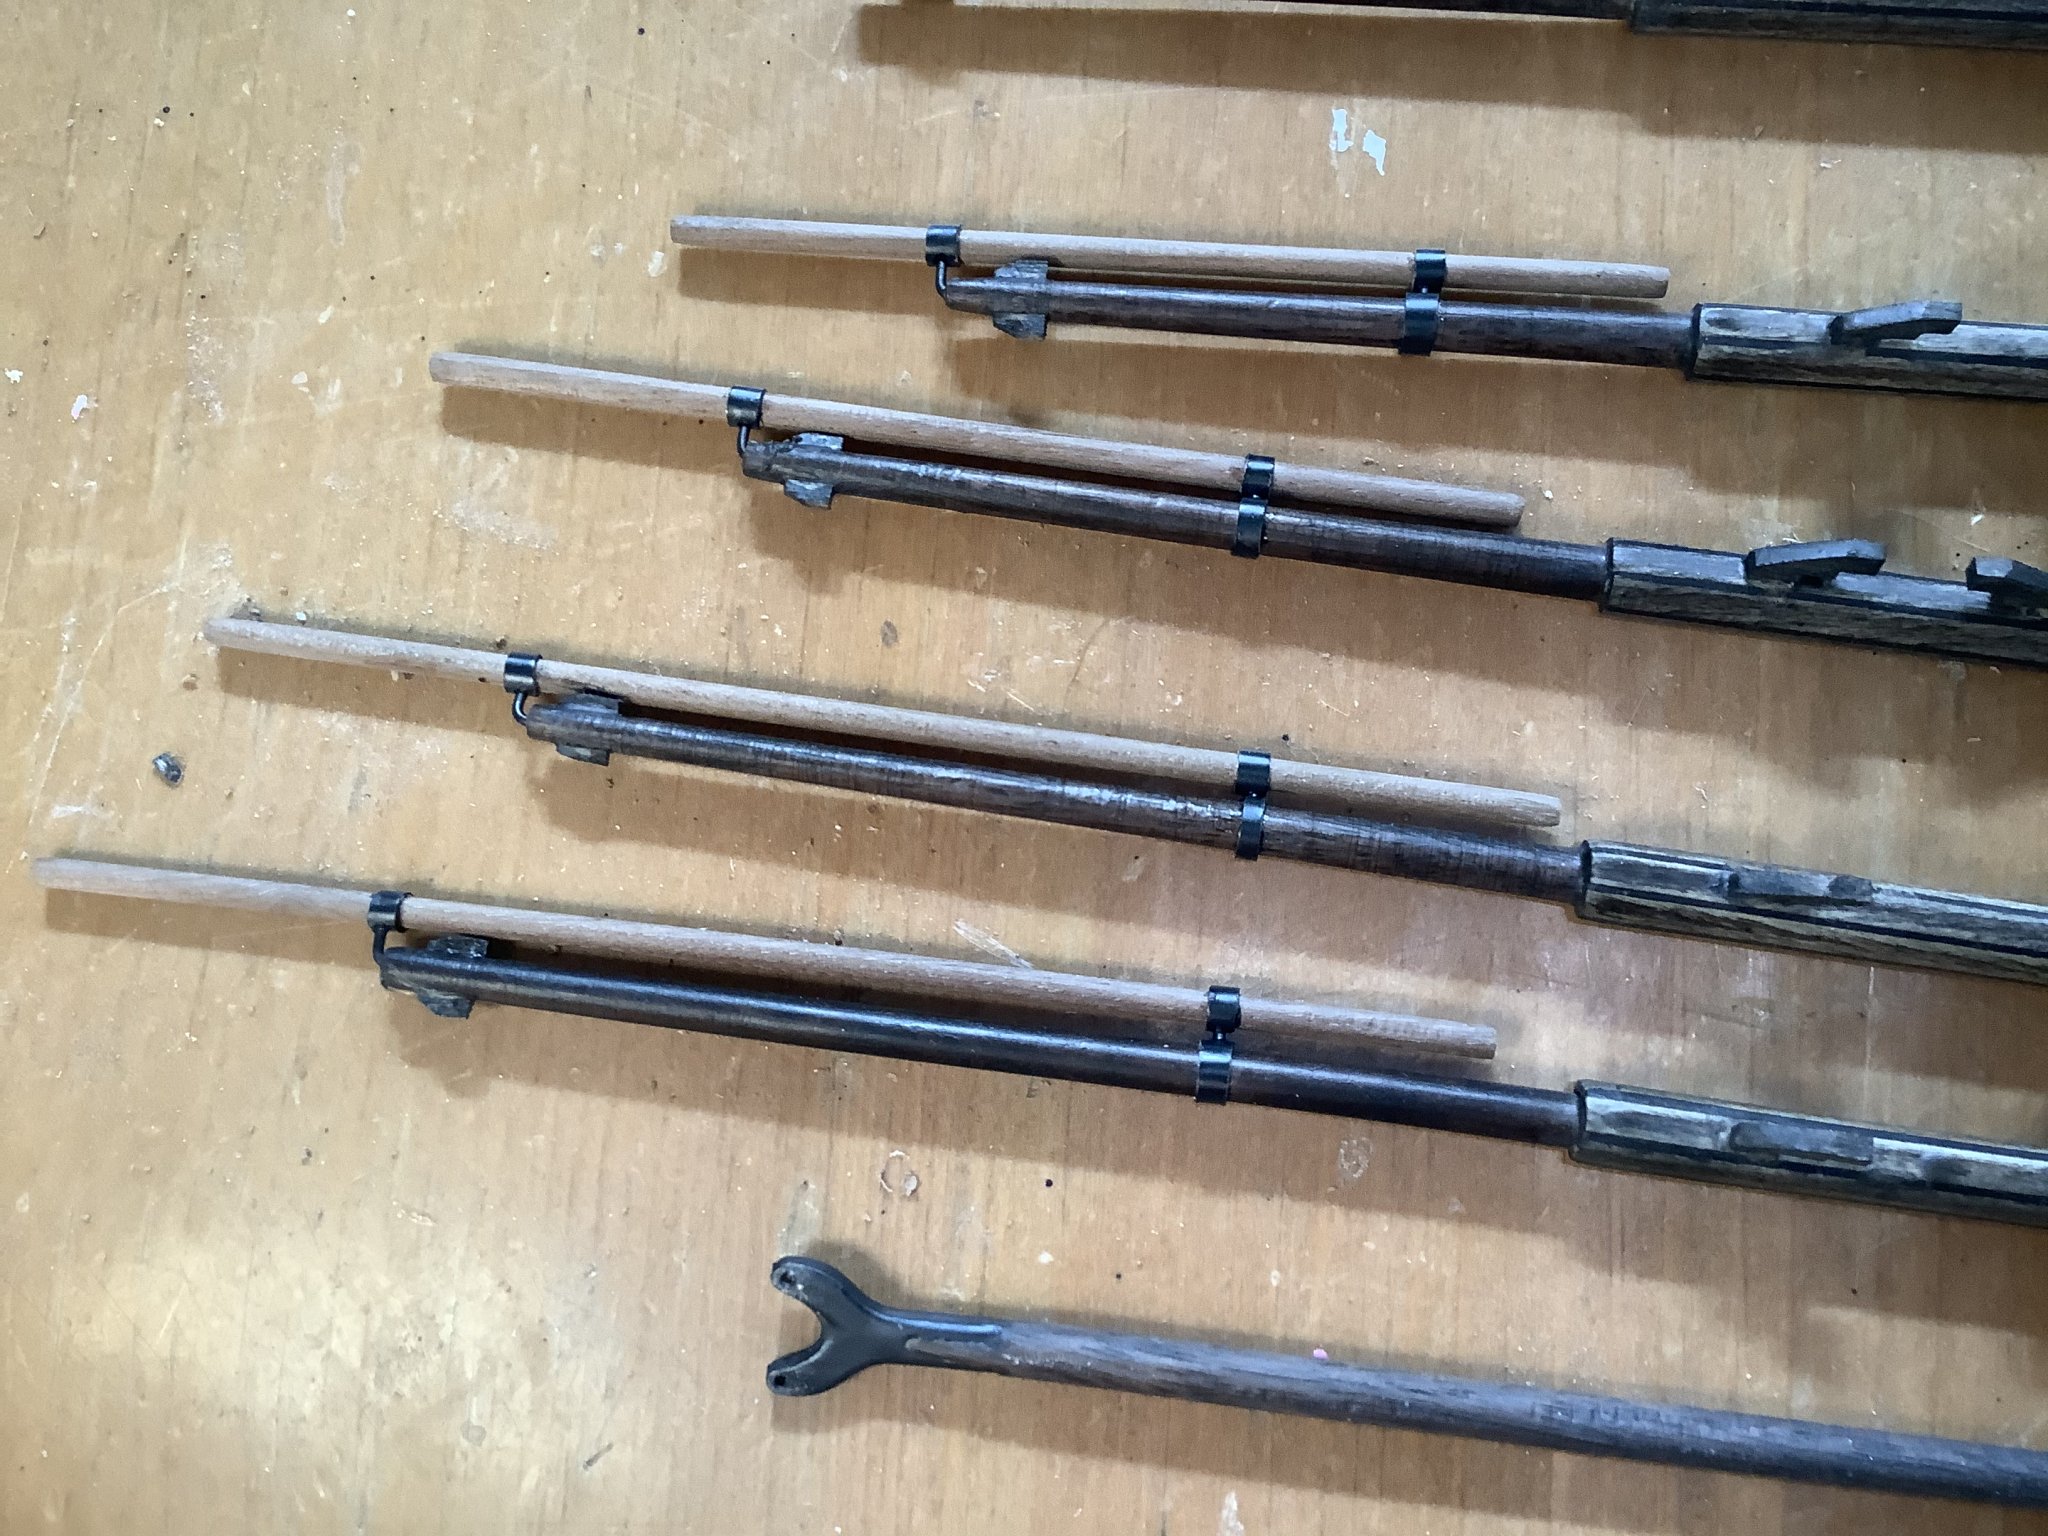
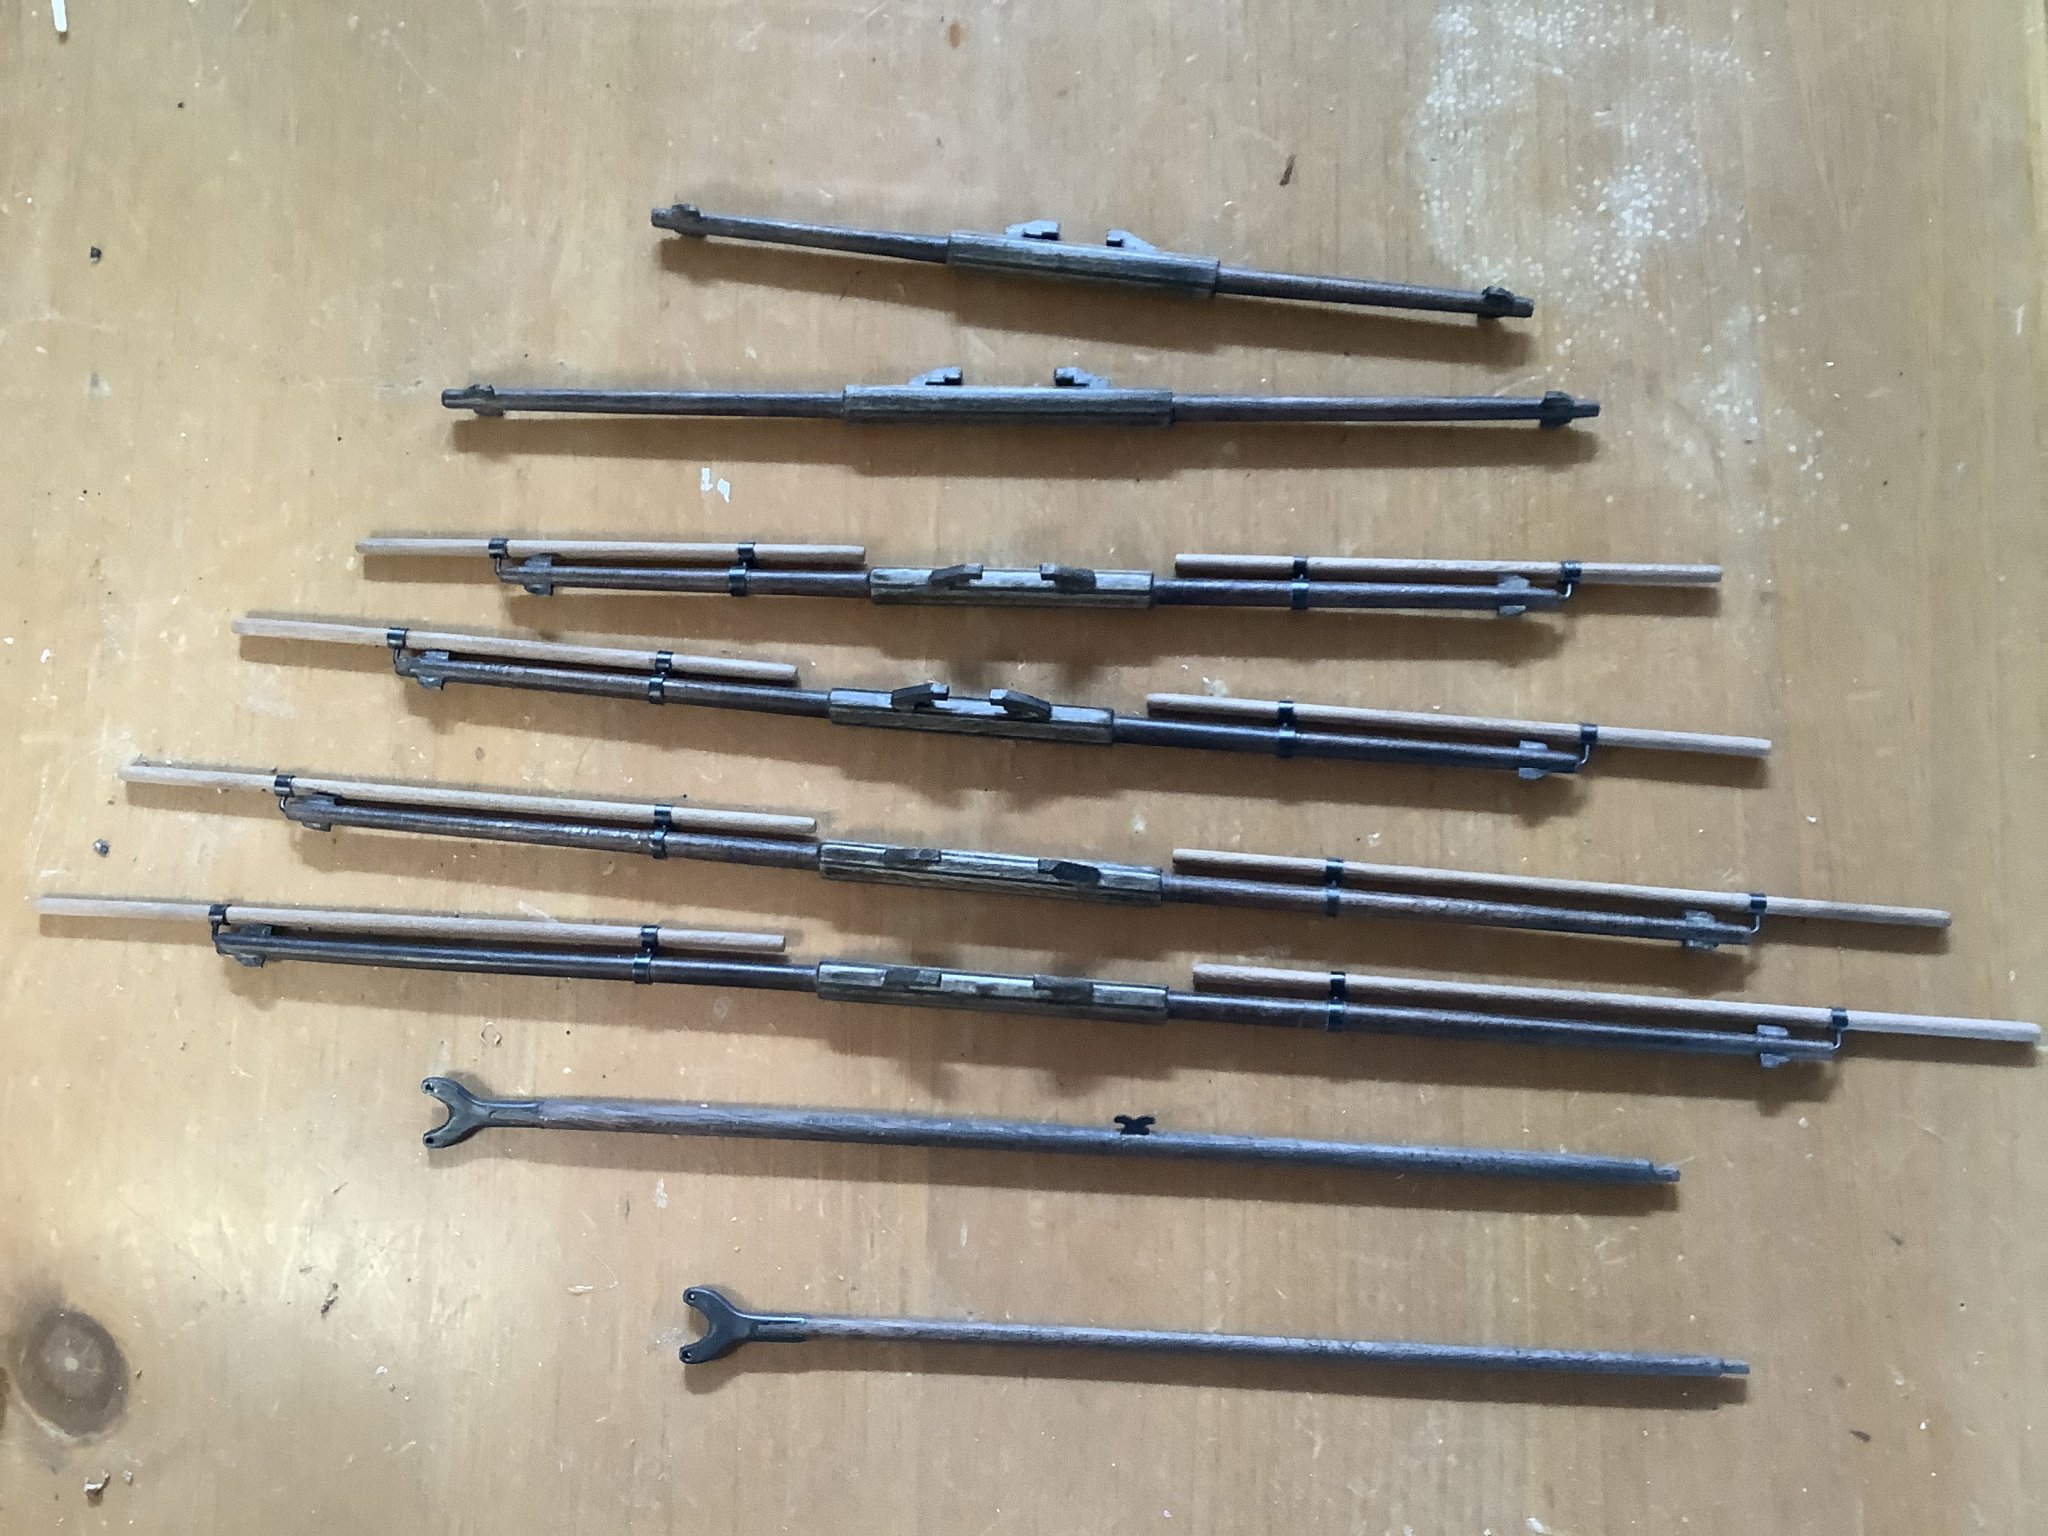
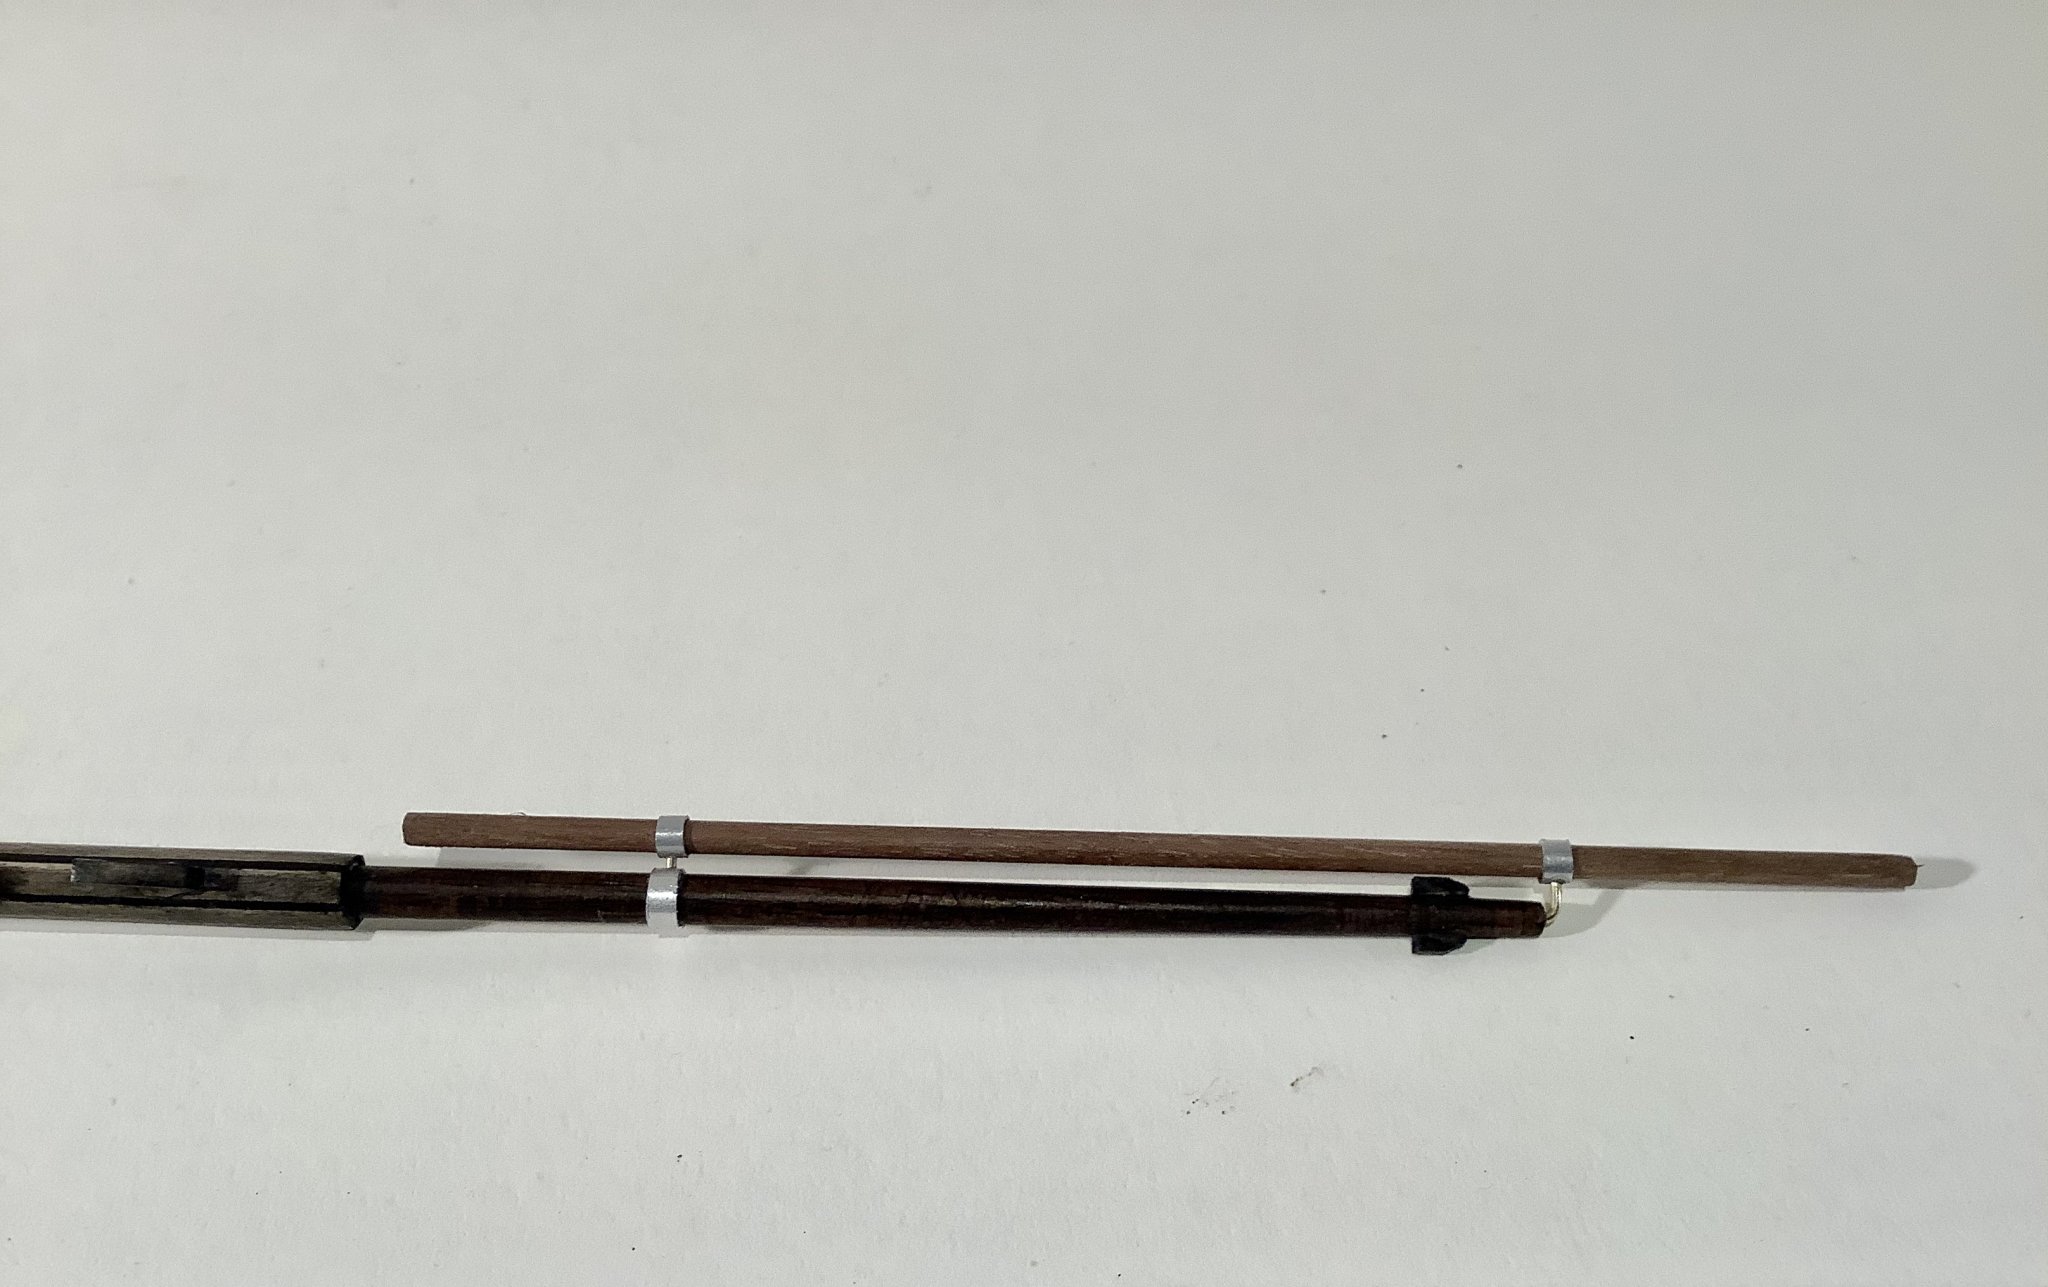
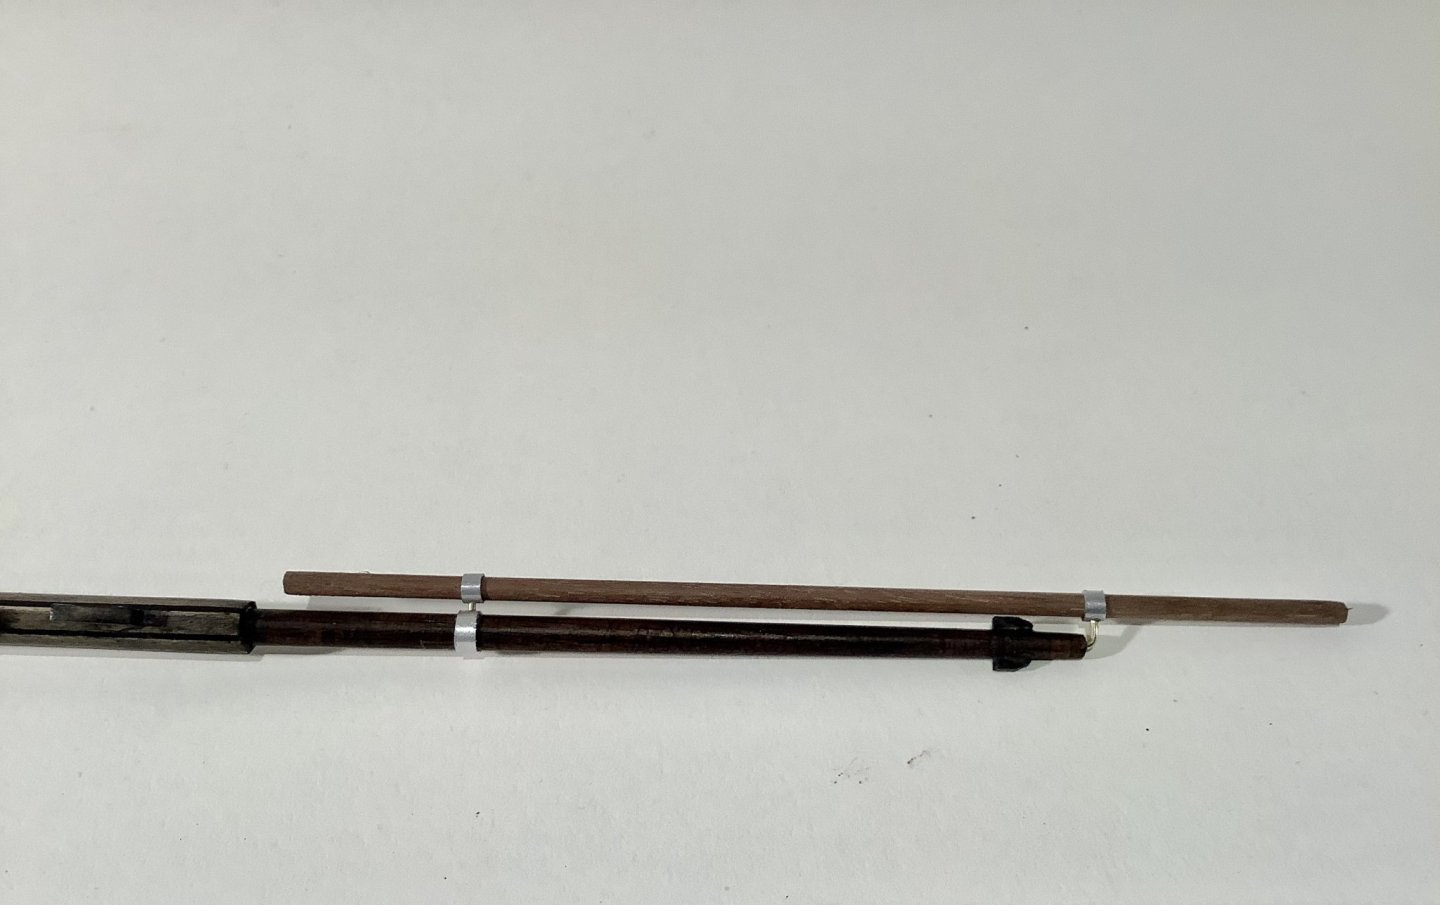
Working on the yards. The hoops for attaching the booms to the lower yards in the kit were unusable, so am fashioning something from slices of aluminium tube, brass wire and a dab of Ca. Should look acceptable all painted up with gunmetal.
- 171 replies
-
- 5
-
-
- artesania latina
- bounty
- (and 1 more)
-
Thanks Nils - much appreciated coming from an accomplished scratch builder; and likewise to all for the likes. Im currently splicing together pieces of walnut from the remains of old completed kits to make up some of the Bounty spars as there were a few pieces of dowel missing from my kit. Knew I saved all those bits and pieces for a reason.
-
Thanks Mark. Yes been pushing the Bounty onwards, in the groove on completing the rigging. Looking forward to seeing your Victory work when you are able to get back at it.
-
So that’s it for the fixed rigging - next step is the running rigging and sails, so I’ll have to head back to the wood shop, fire up the drill press and finish fashioning all the yards and attachments.


- 171 replies
-
- 9
-
-
- artesania latina
- bounty
- (and 1 more)
-
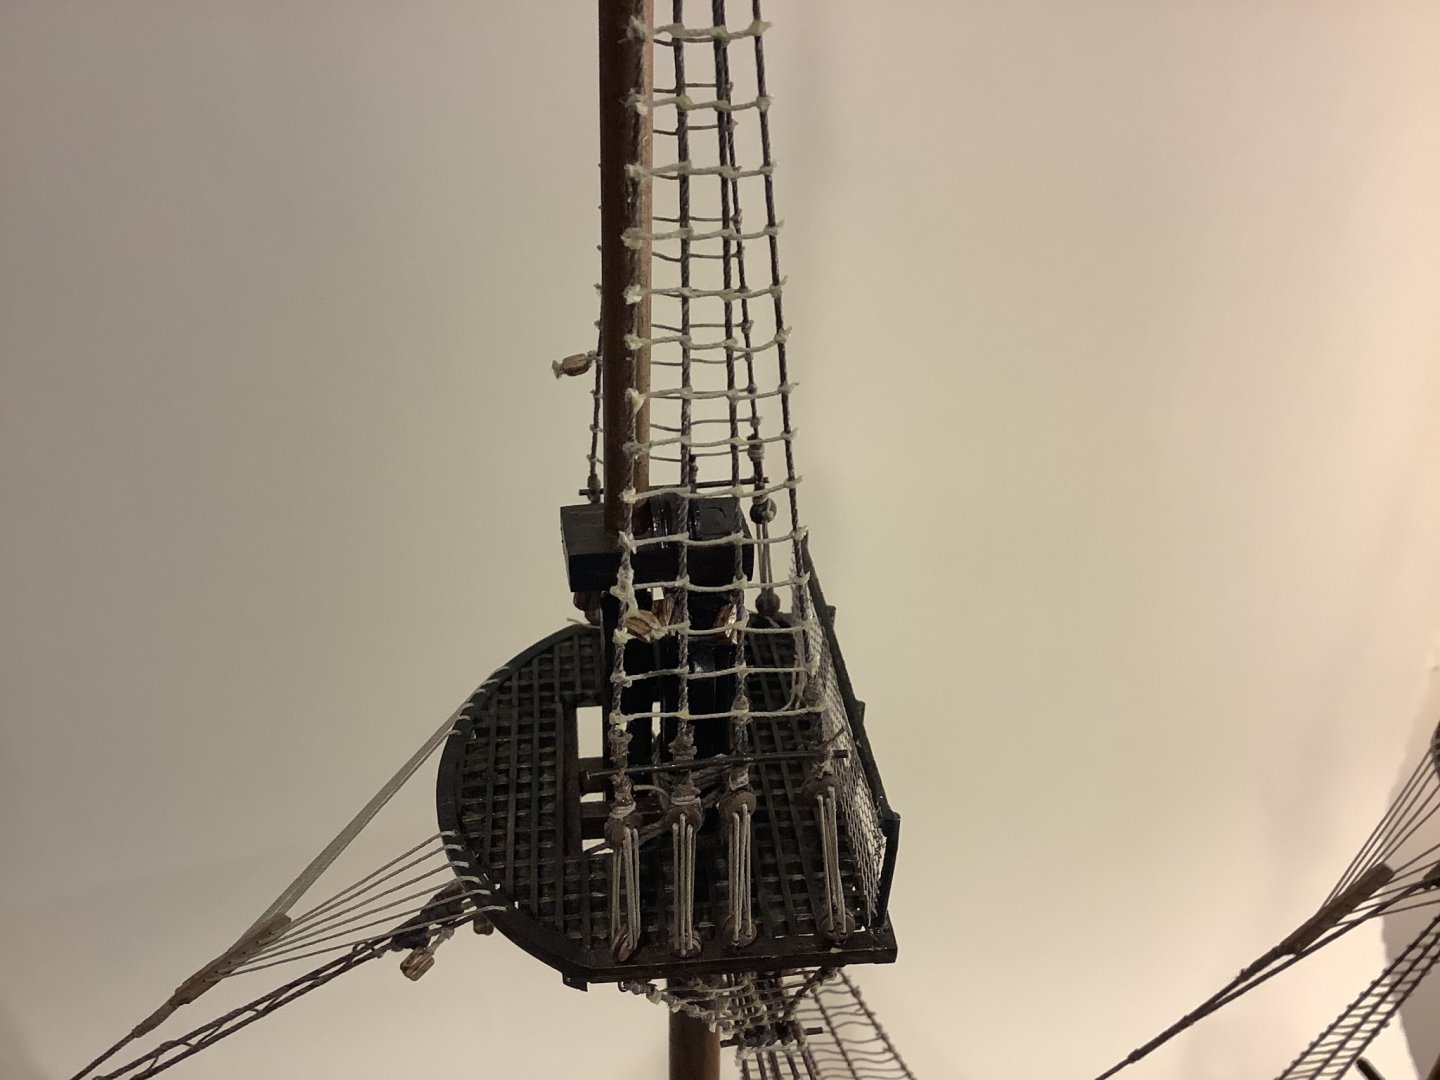
Thanks Yves, and everyone for the thumbs. Just about finished diagram 5 of the 21 Bounty rigging plans. Drawings are ok except for a few educated guesses that need to be made, and a few errors in numbering. Made a little more tedious by the fact there was no dark thread provided in the kit except for one small spool of 0.8mm brown that ran out immediately, so I’ve had to stain the natural stuff as I go along. Managed a fairly even taughtness of all the lines so far without any of the back stays in place yet, which is a good sign.
- 171 replies
-
- 8
-
-
- artesania latina
- bounty
- (and 1 more)
-
Just over 1200 knots later, the Bounty ratlines are all done.


- 171 replies
-
- 9
-
-
- artesania latina
- bounty
- (and 1 more)