Tim Moore
-
Posts
335 -
Joined
-
Last visited
Content Type
Profiles
Forums
Gallery
Events
Everything posted by Tim Moore
-
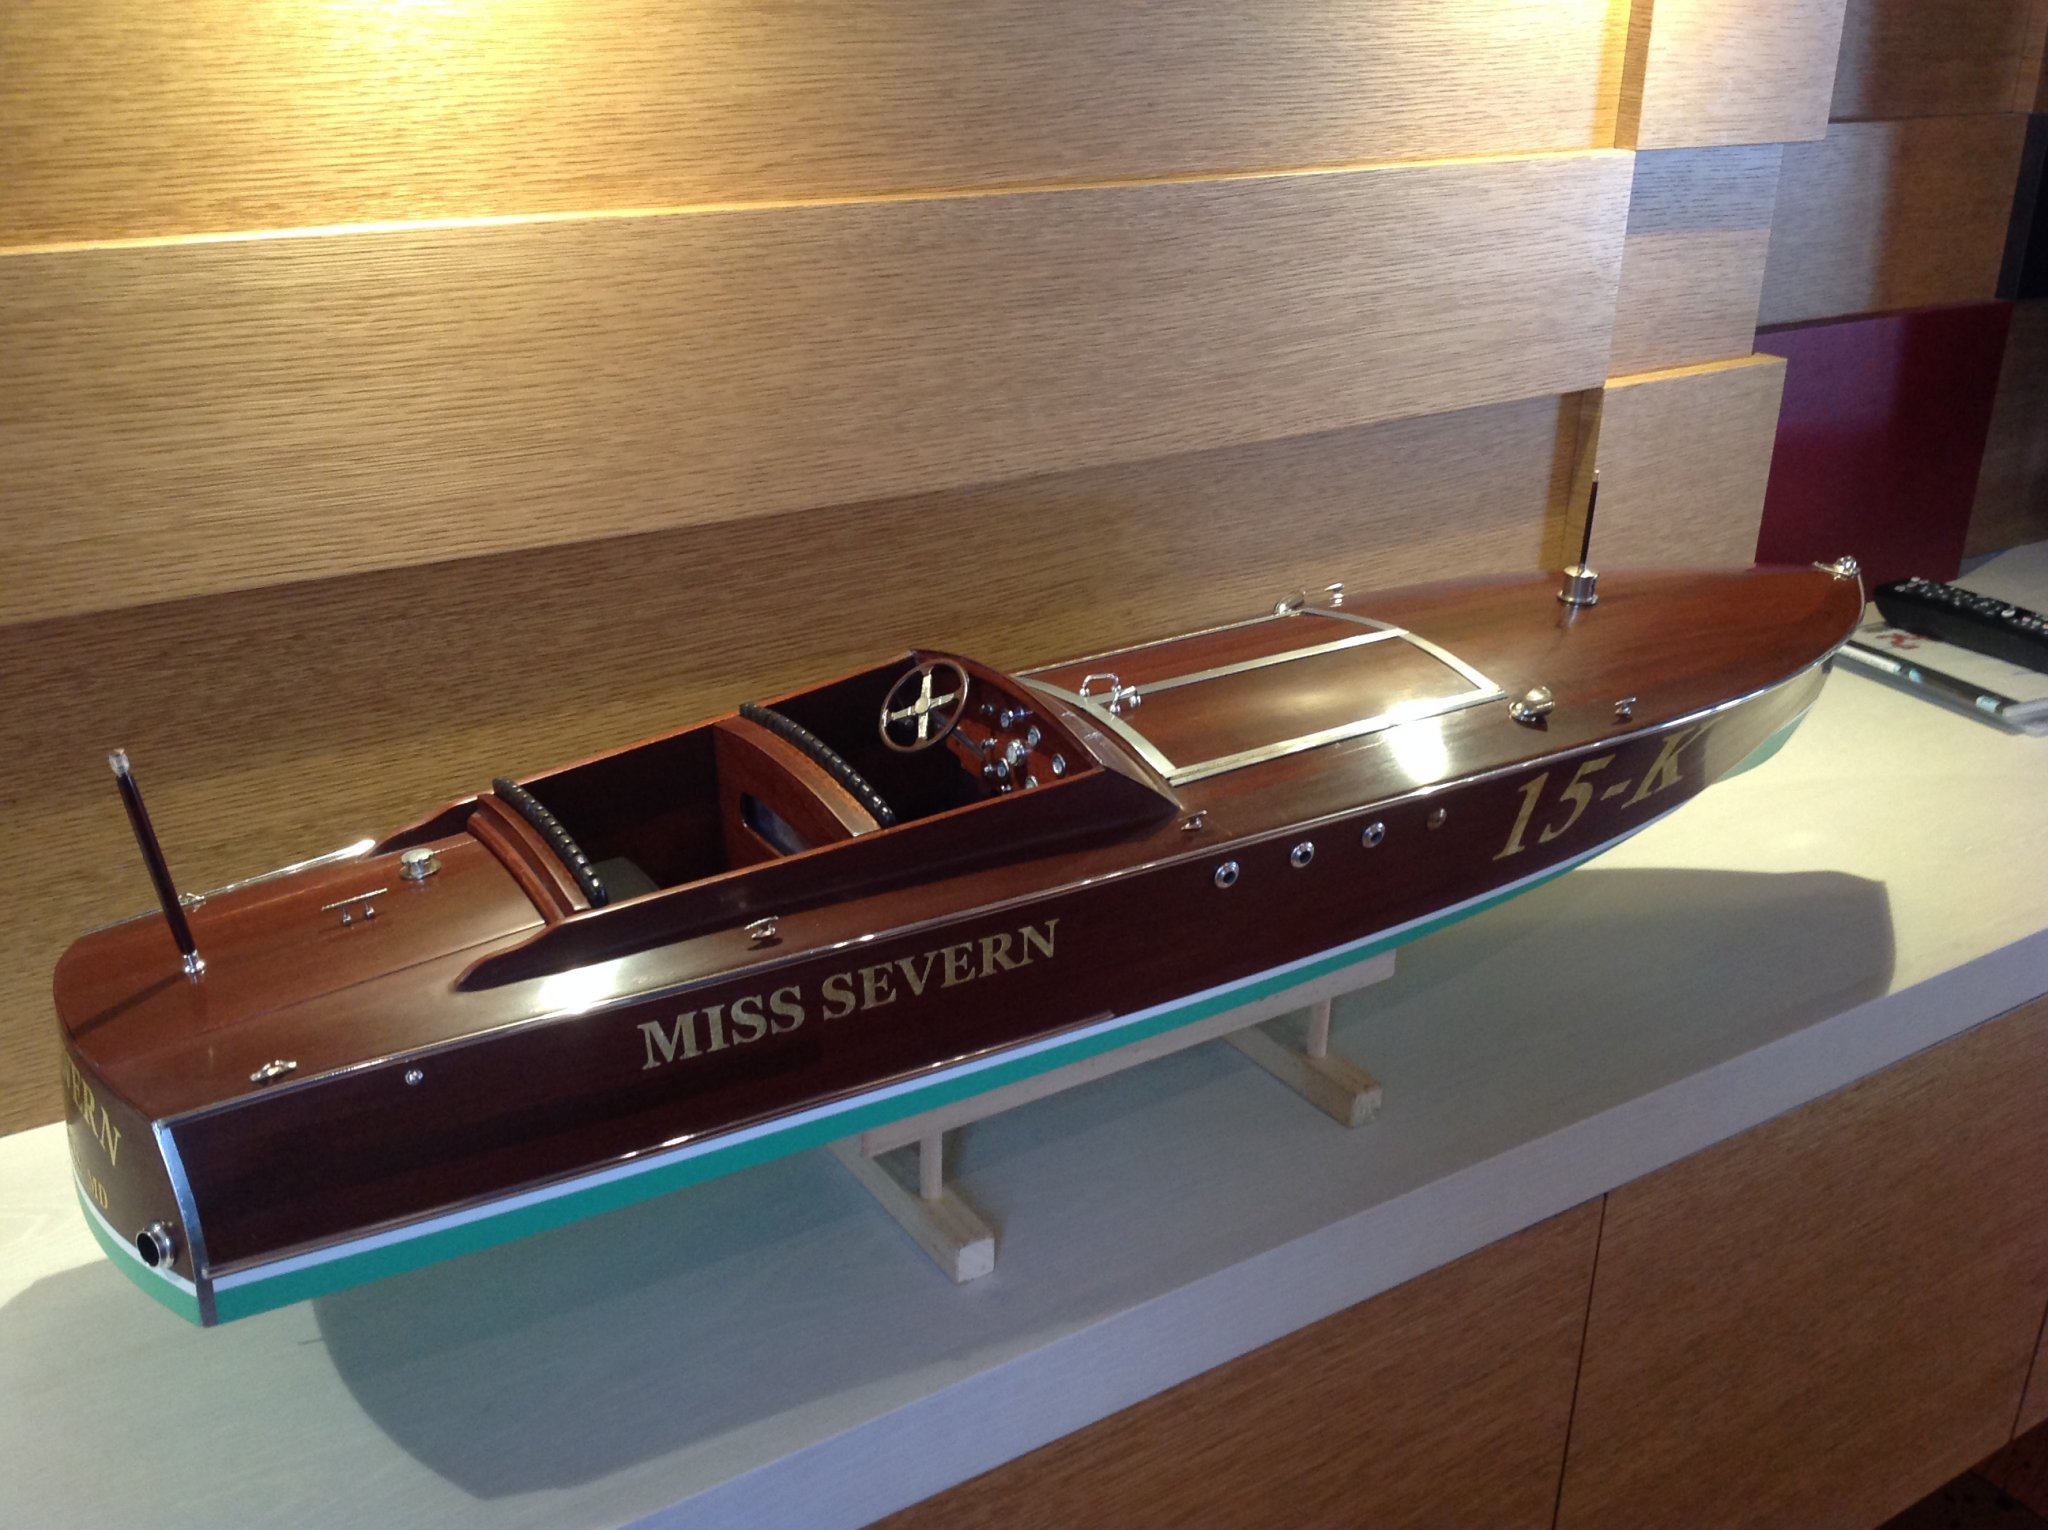
 Hi Mike. That colour is going to look sweet with the mahogany when you get the Typhoon finished - used a similar colour below the waterline when I did my Miss Severn, thought it risky at the time but really liked the contrast in finished product.
-
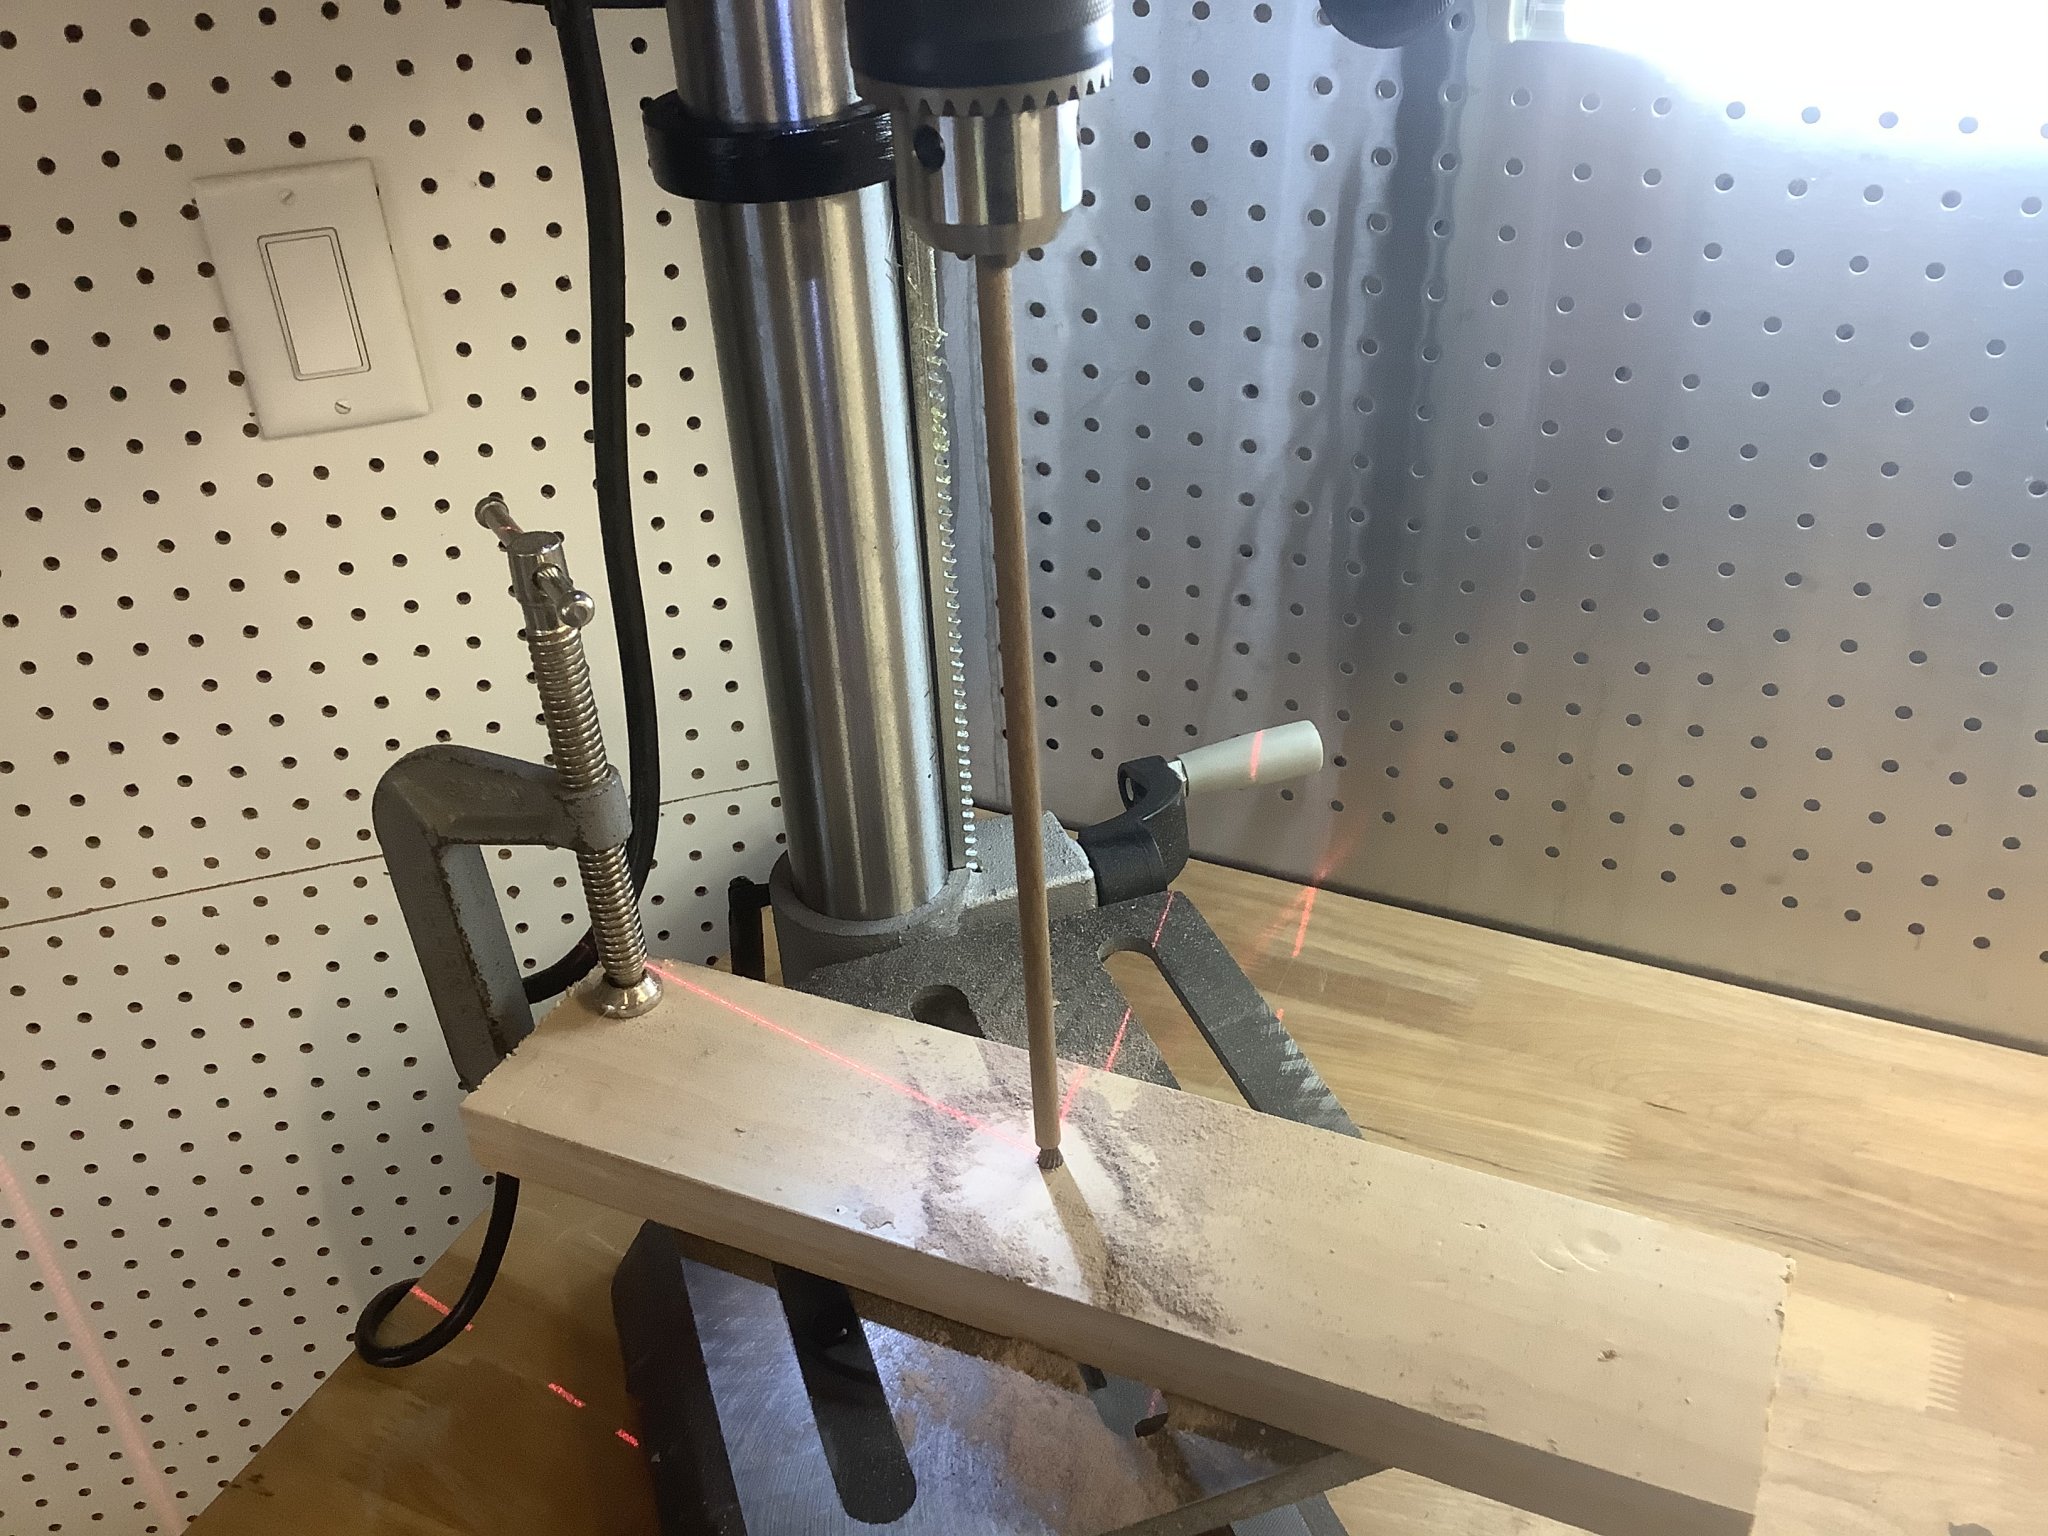
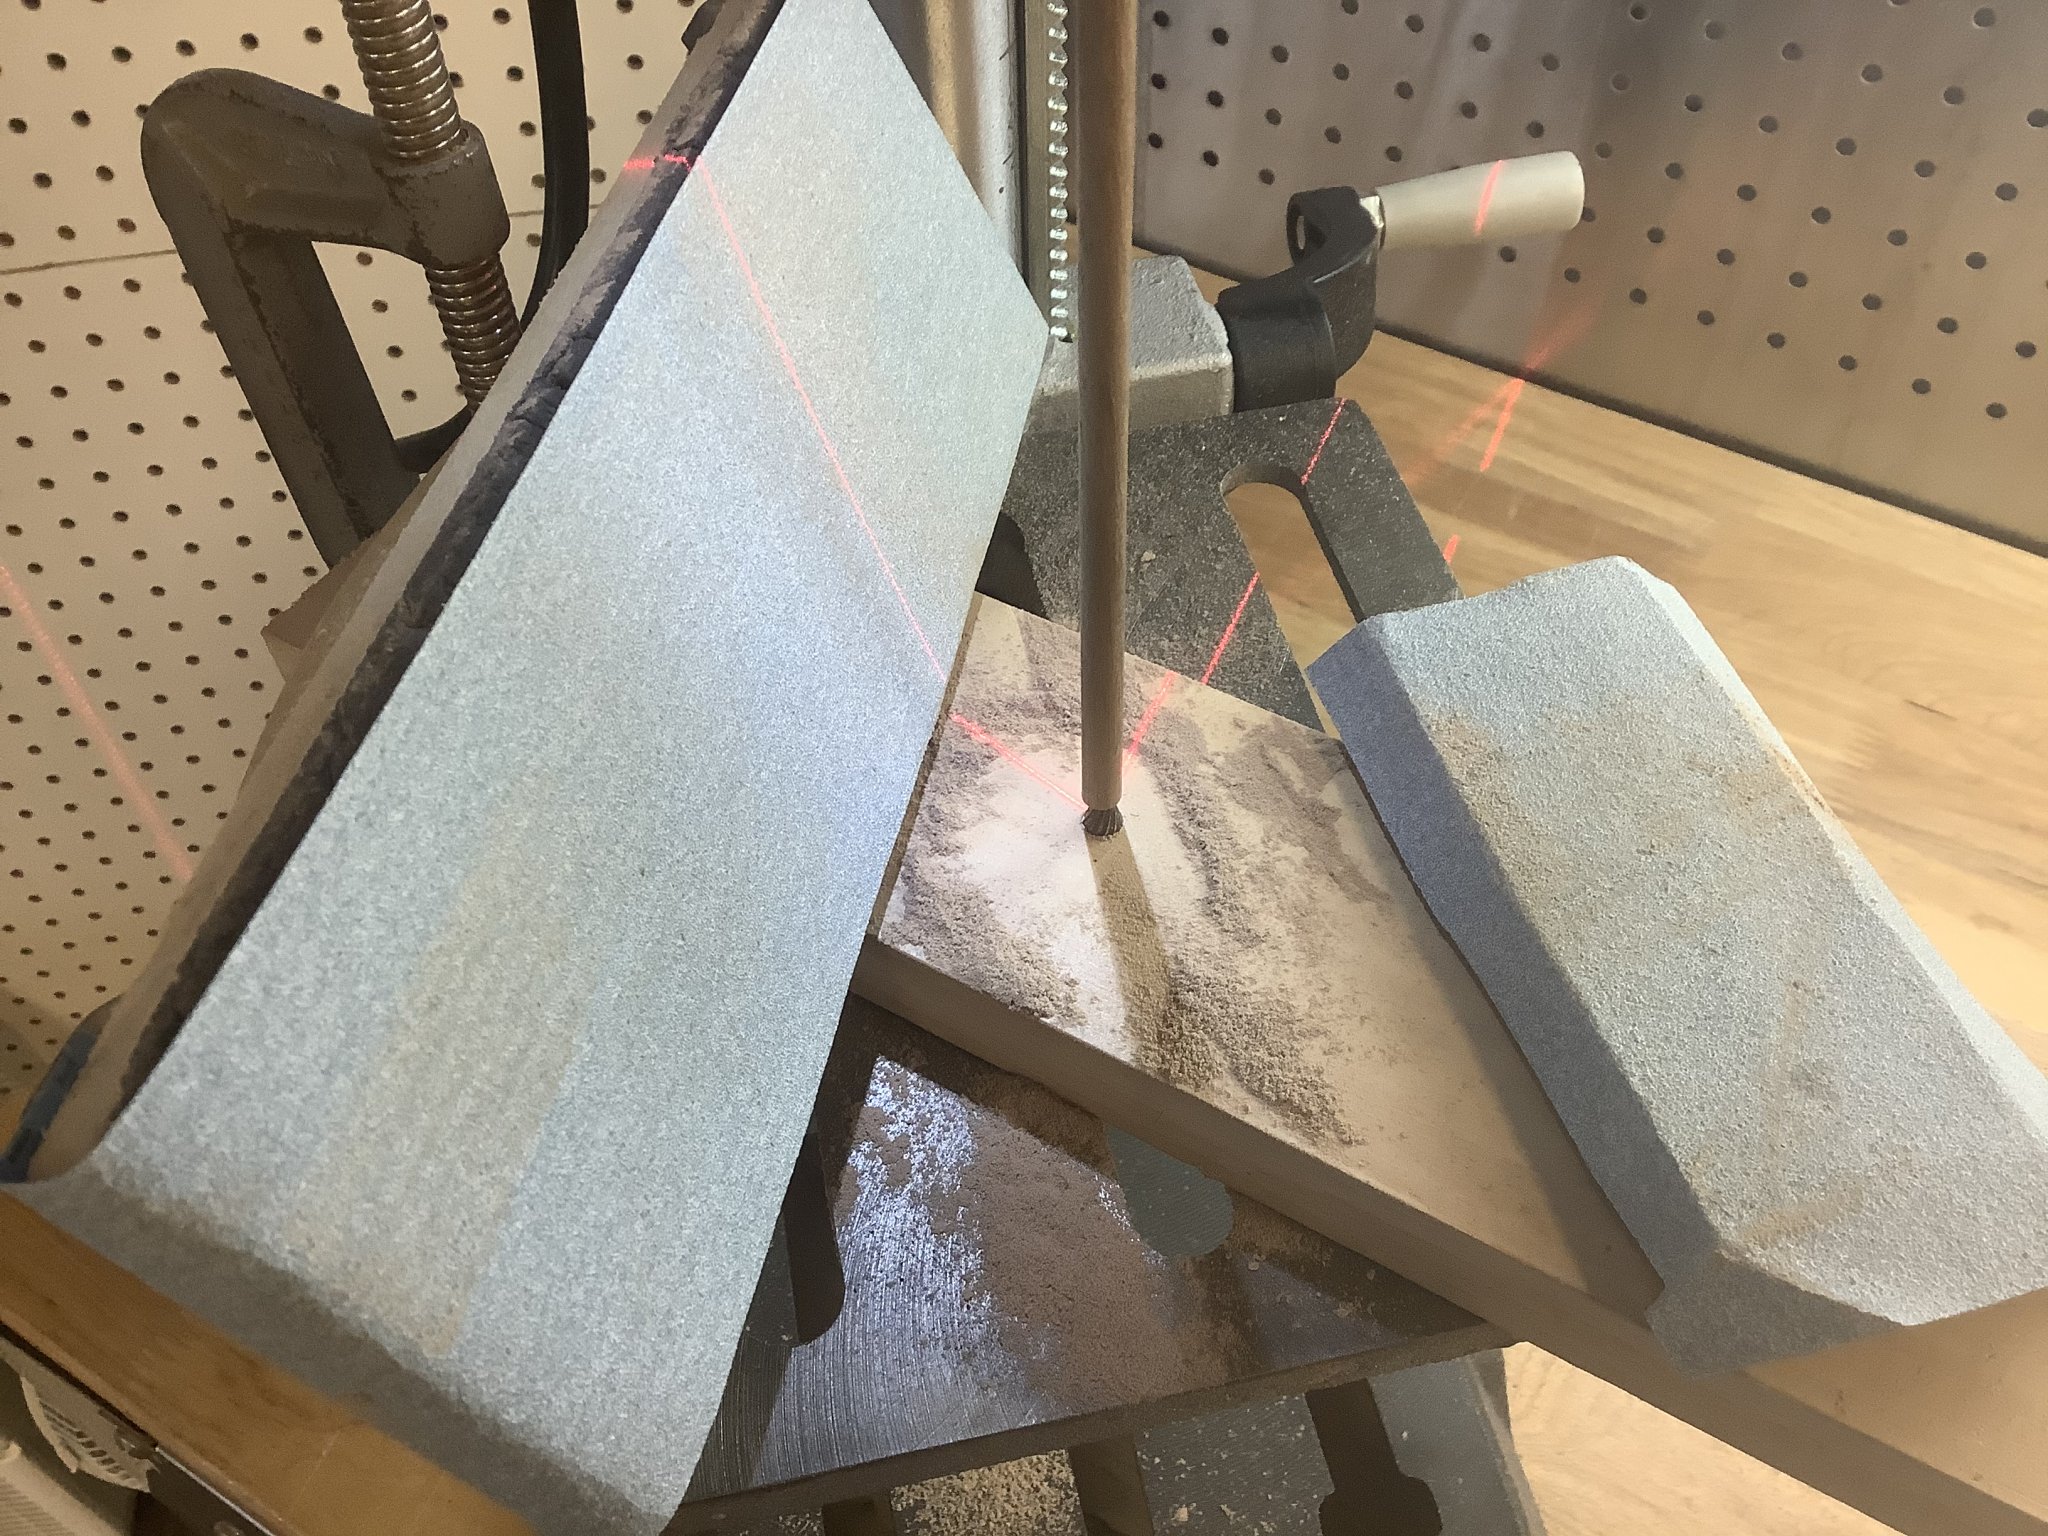
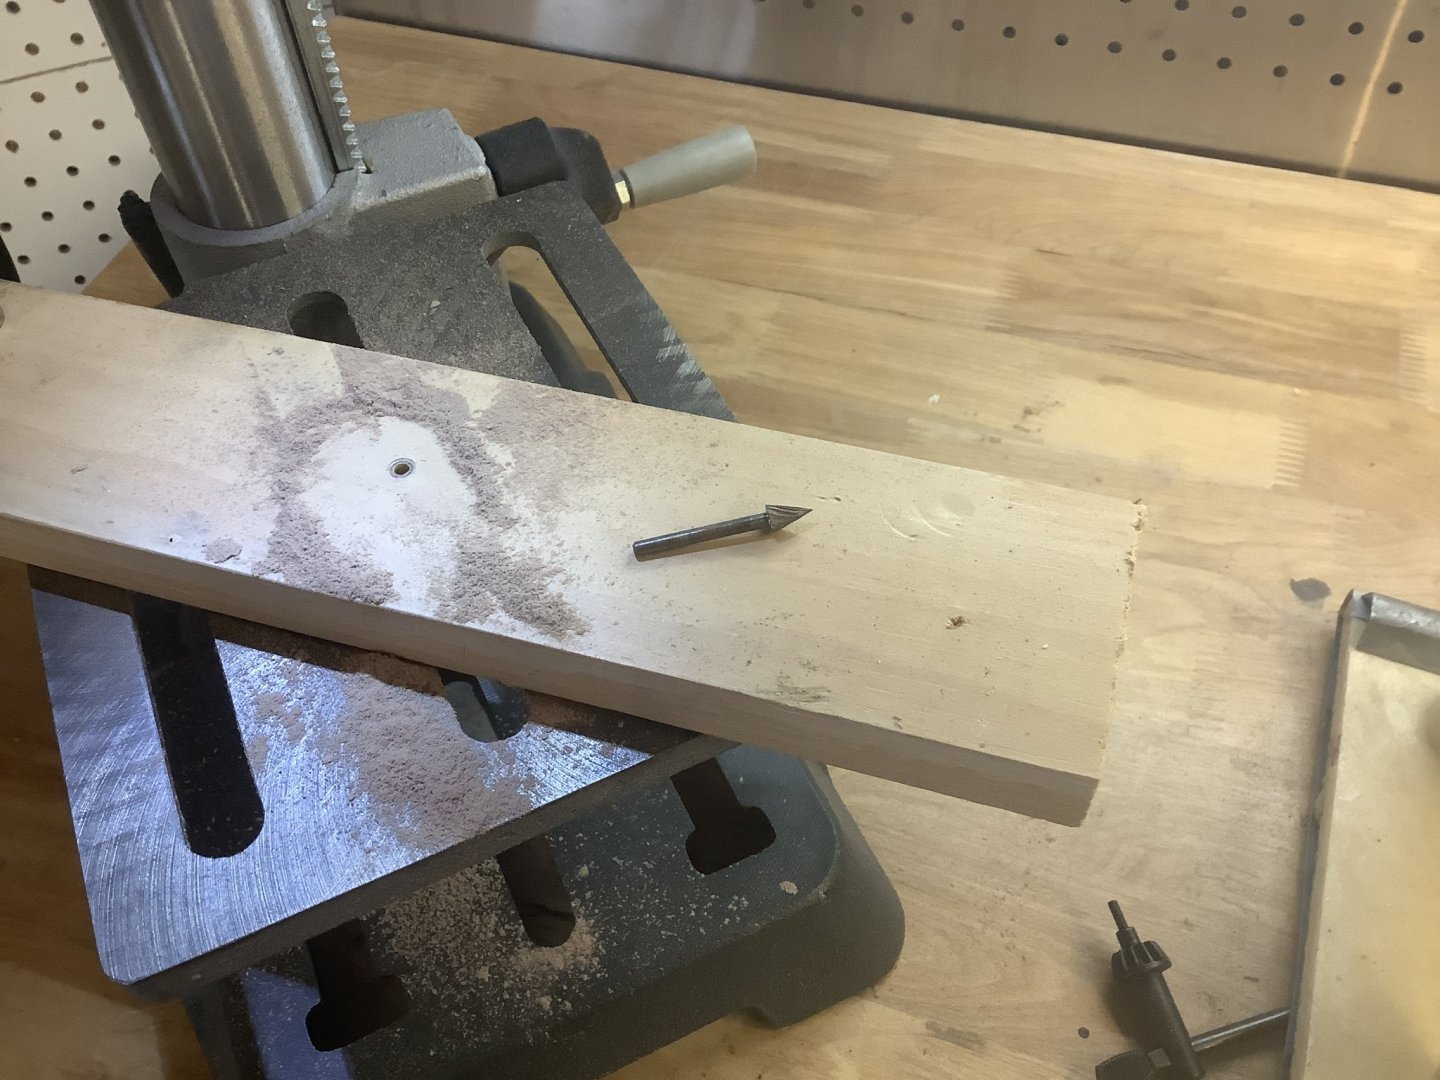
First time I’ve had the pleasure of using a drill press to taper the masts, bowsprit etc. Man it sure makes it fast and easy. I used a step drill bit from my Dremel for the lower spindle, drilled a hole same size as bit shank in a piece of wood and clamped to the drill press table. Bit of oil on the shank. Created a shallow hole in the dowel to seat the spindle and raised the table so it is set. Drill on low speed and a couple of sanding blocks with medium paper and it’s done less than a minute, ready for final fine sanding etc by hand.


- 171 replies
-
- 4
-

-
- artesania latina
- bounty
- (and 1 more)
-
Cool! Perfection. It is such a pleasure to see your craftsmanship, and how you execute every detail.
-
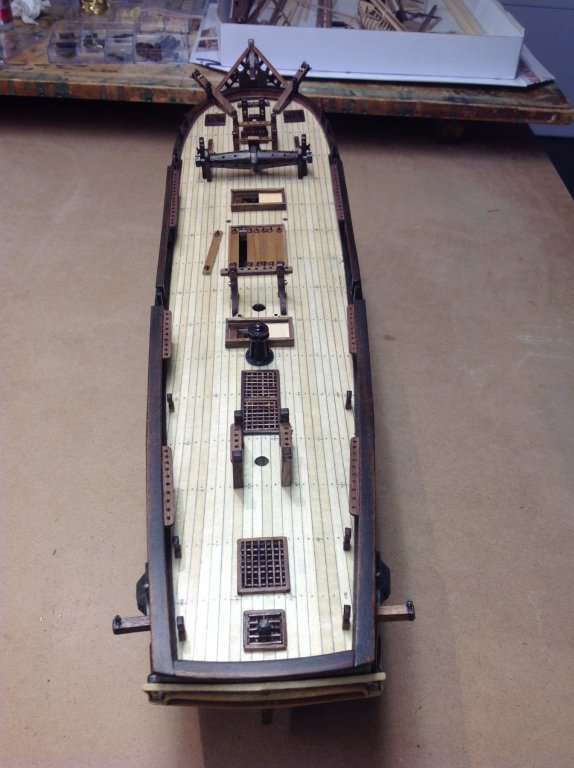
Thanks Mark! and everyone giving the thumbs up. So the base Bounty is now all finished, except for a little detail trim painting fore and aft that I’ll take care of when I get a chance to pick up a few paint colours. Pretty nice kit when all is said and done. Now it’s on to the bowsprit and mast assemblies. Going to need my drill to do the tapering I guess, which stupidly is still up at that cottage so may be a slight delay. Unless I can think of someone with a lathe or drill press can drop in on.


- 171 replies
-
- 9
-
-
- artesania latina
- bounty
- (and 1 more)
-
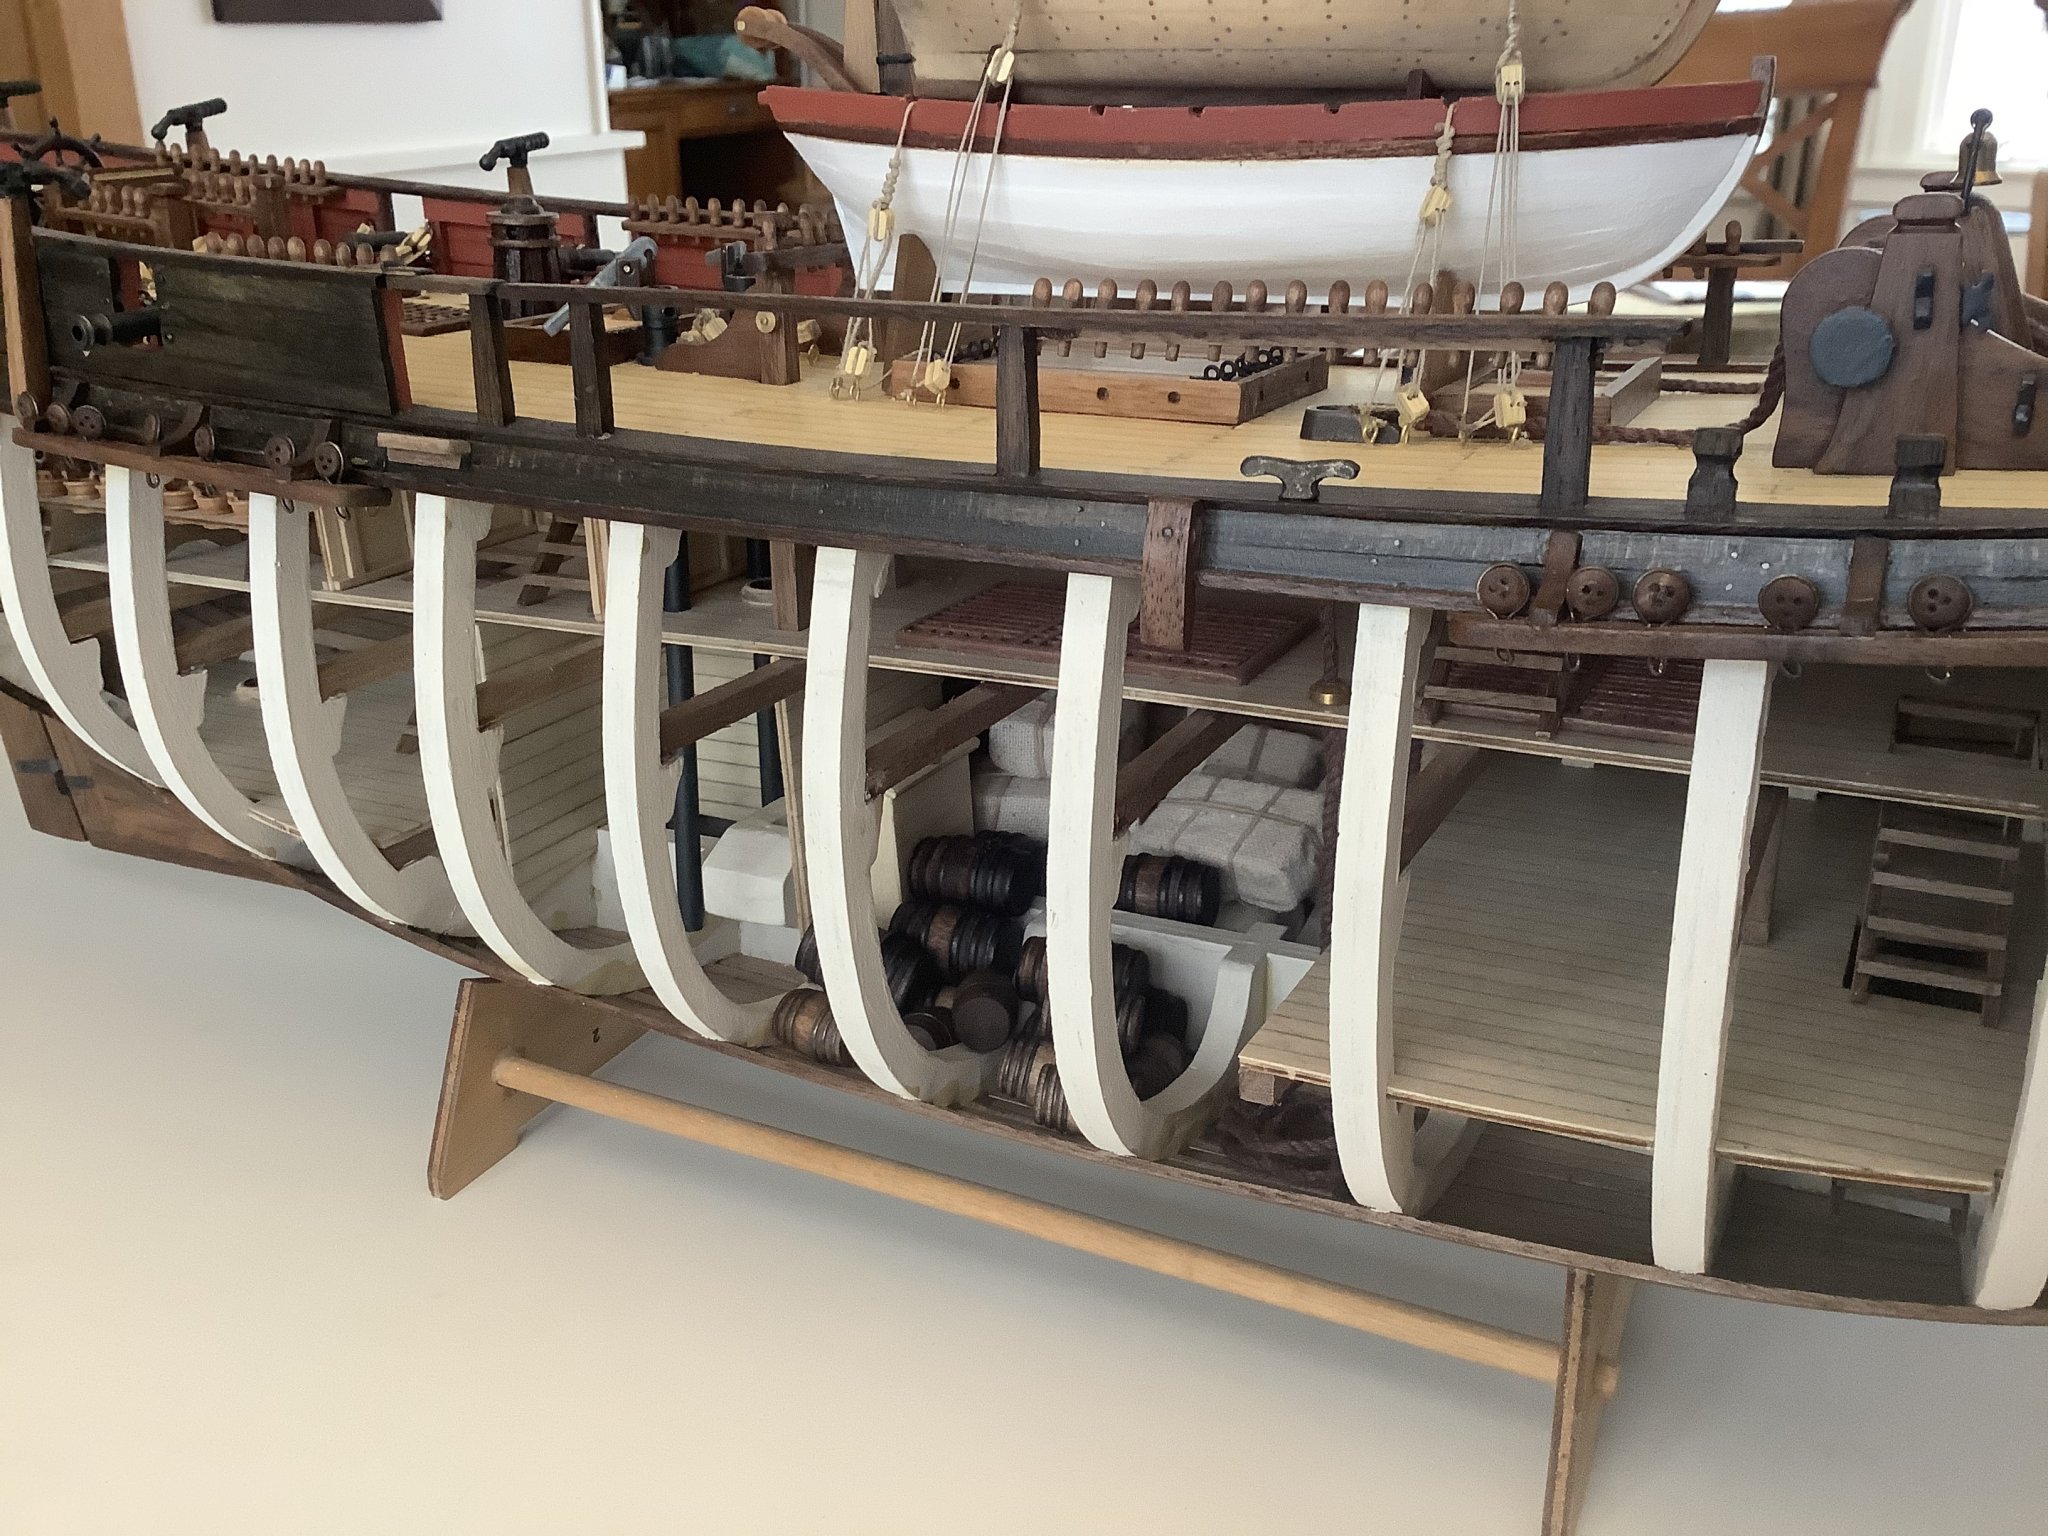
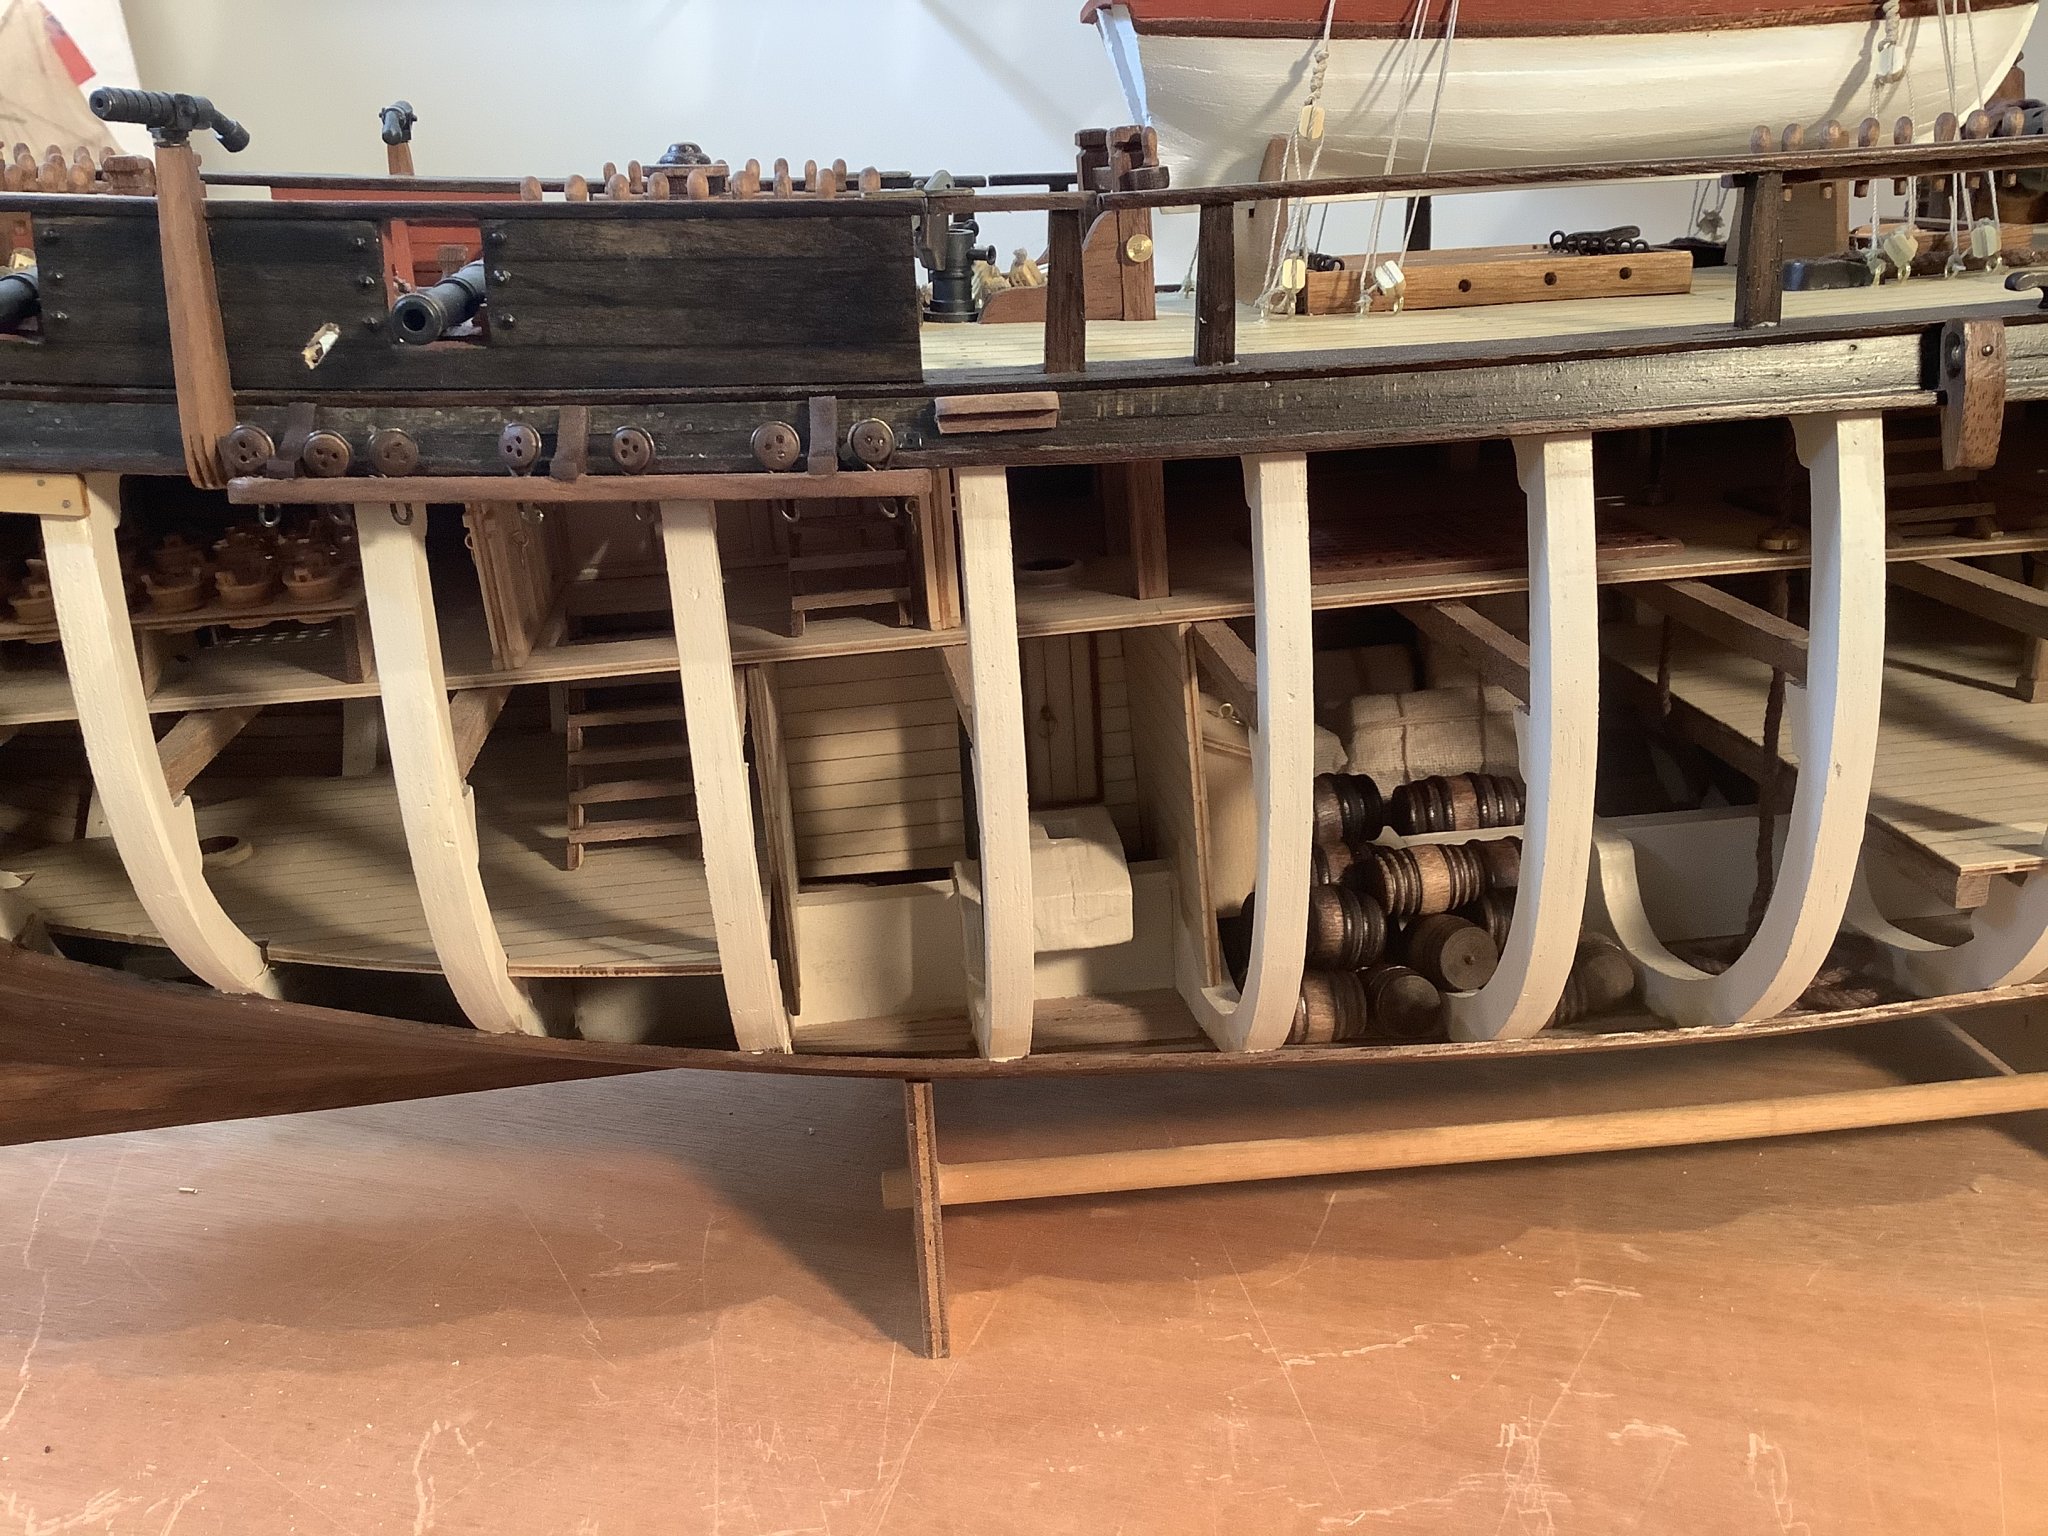
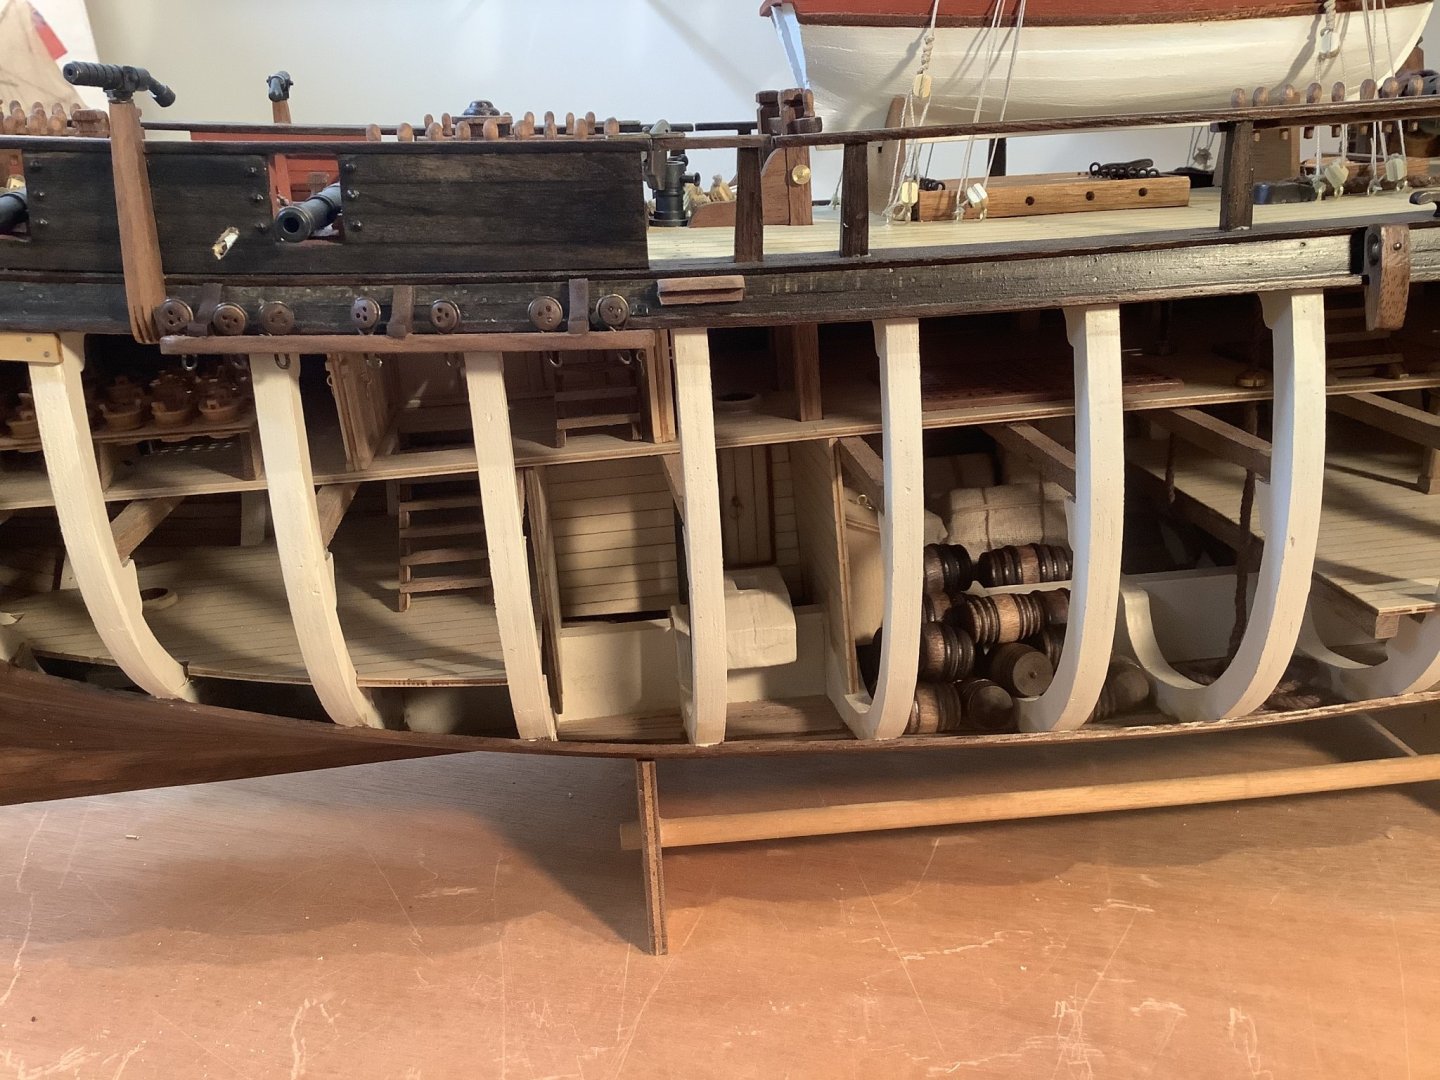
Deadeye assemblies finished, and all the provisions are in the hold. I dipped the barrels in stain and highlighted the hoops using a graphite pencil for the smaller barrels and marker for the larger ones, then hand rubbed them with a cloth.
- 171 replies
-
- 7
-
-
- artesania latina
- bounty
- (and 1 more)
-
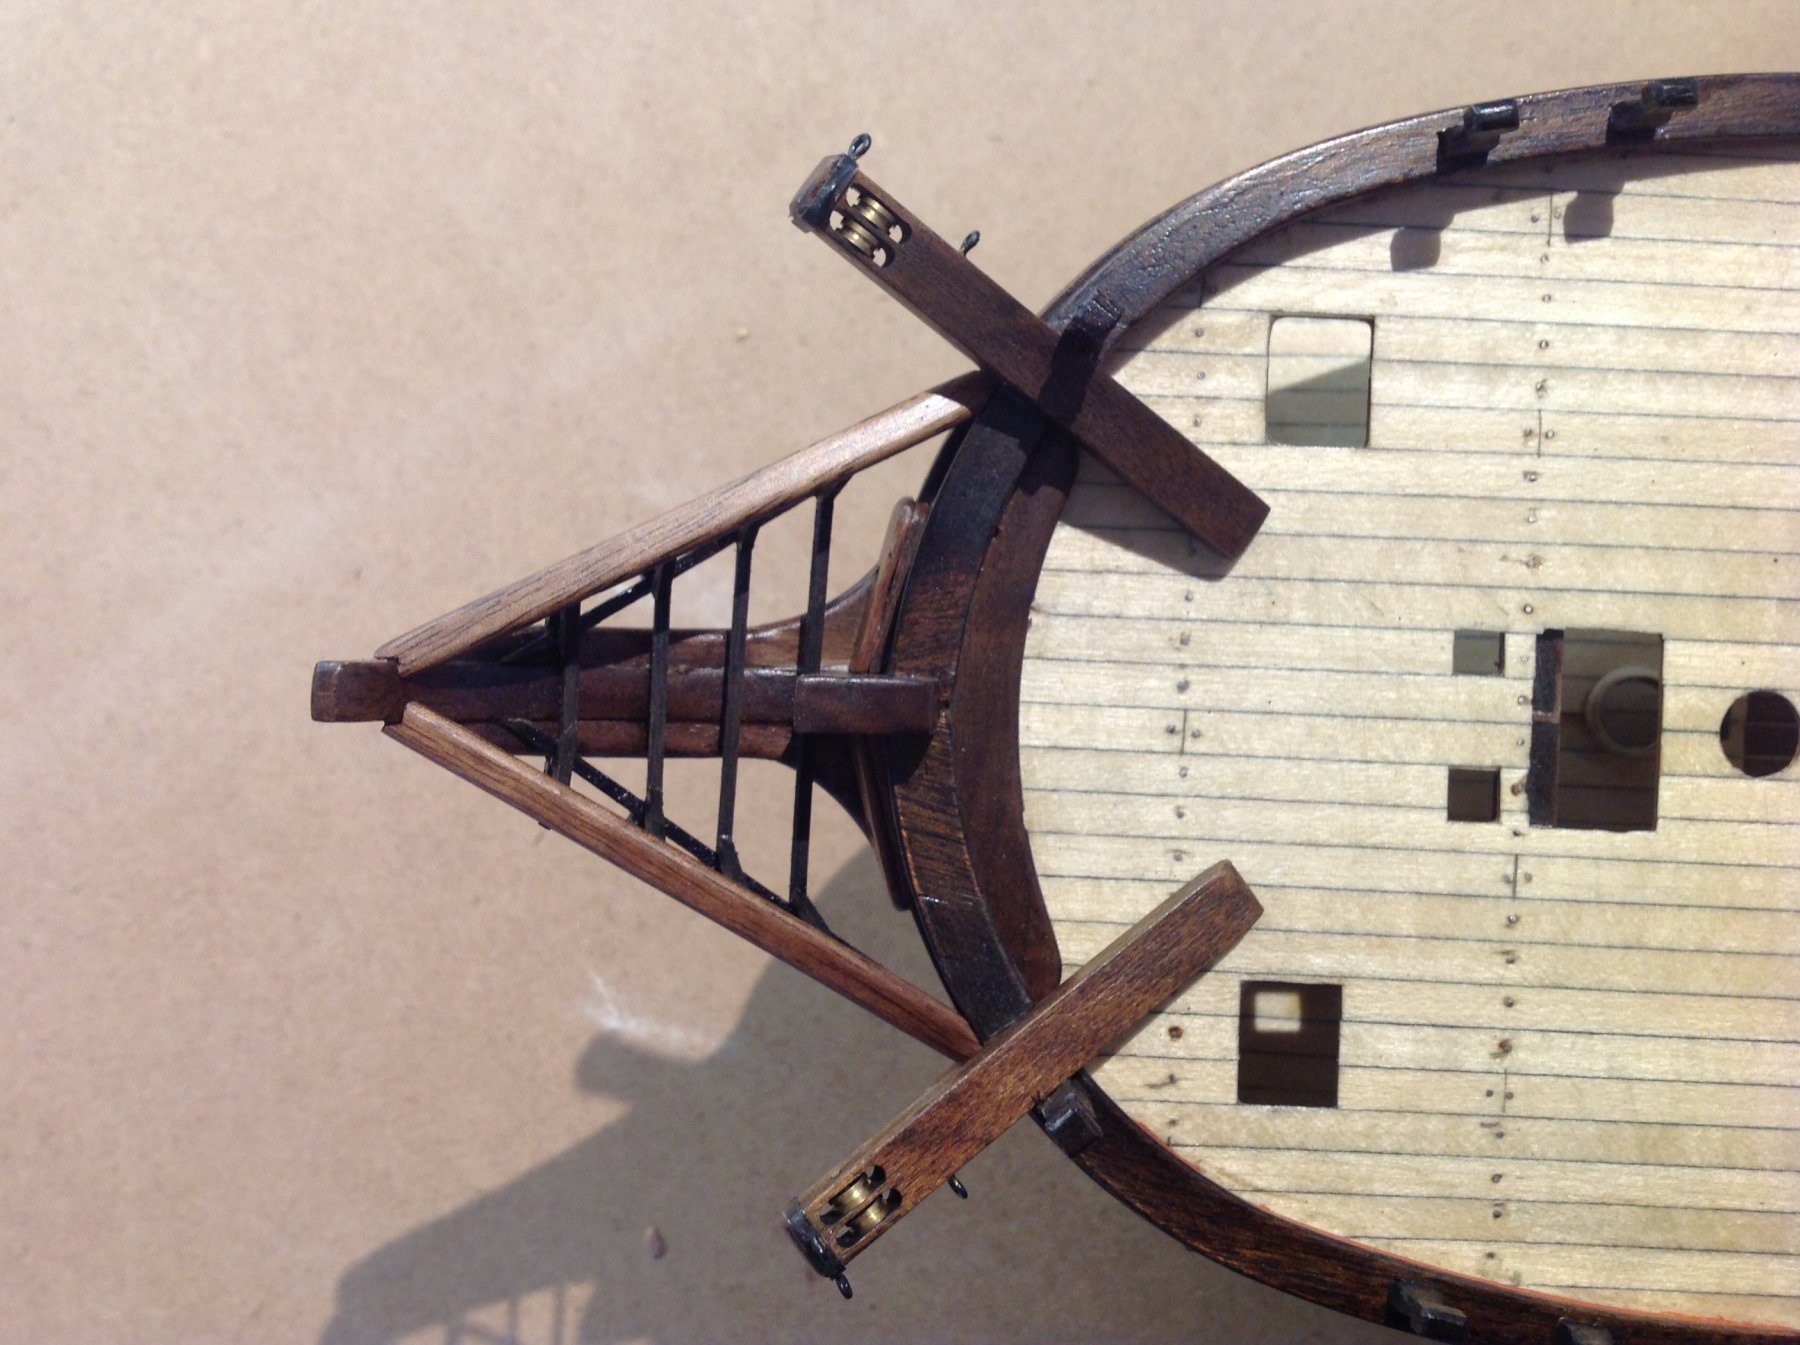
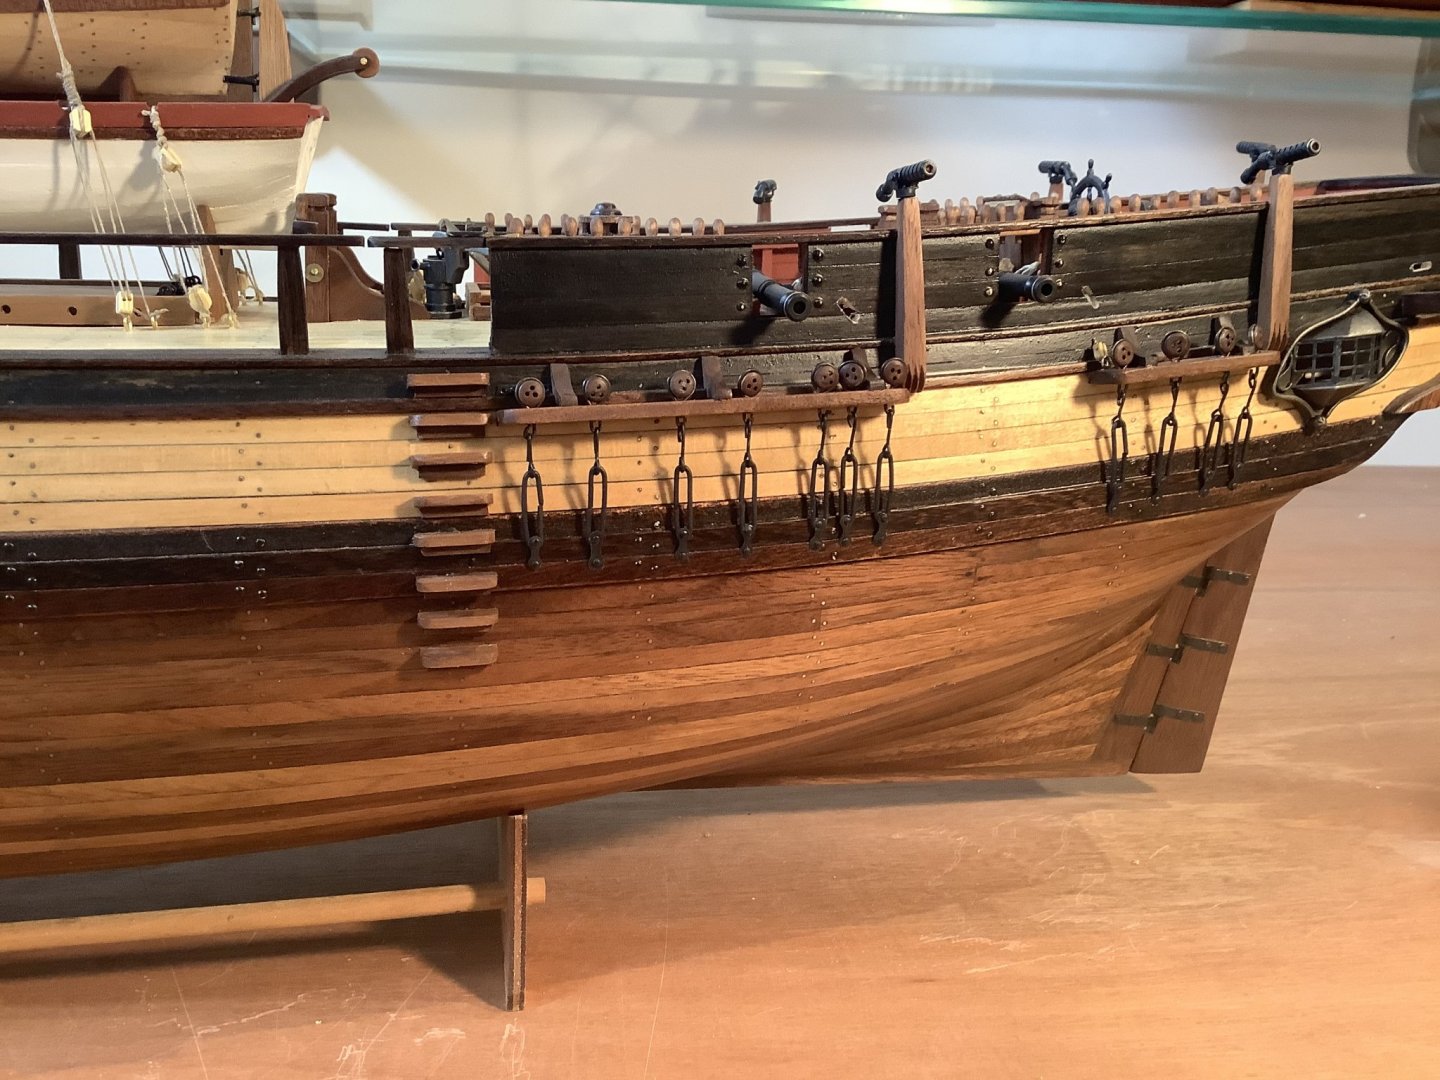
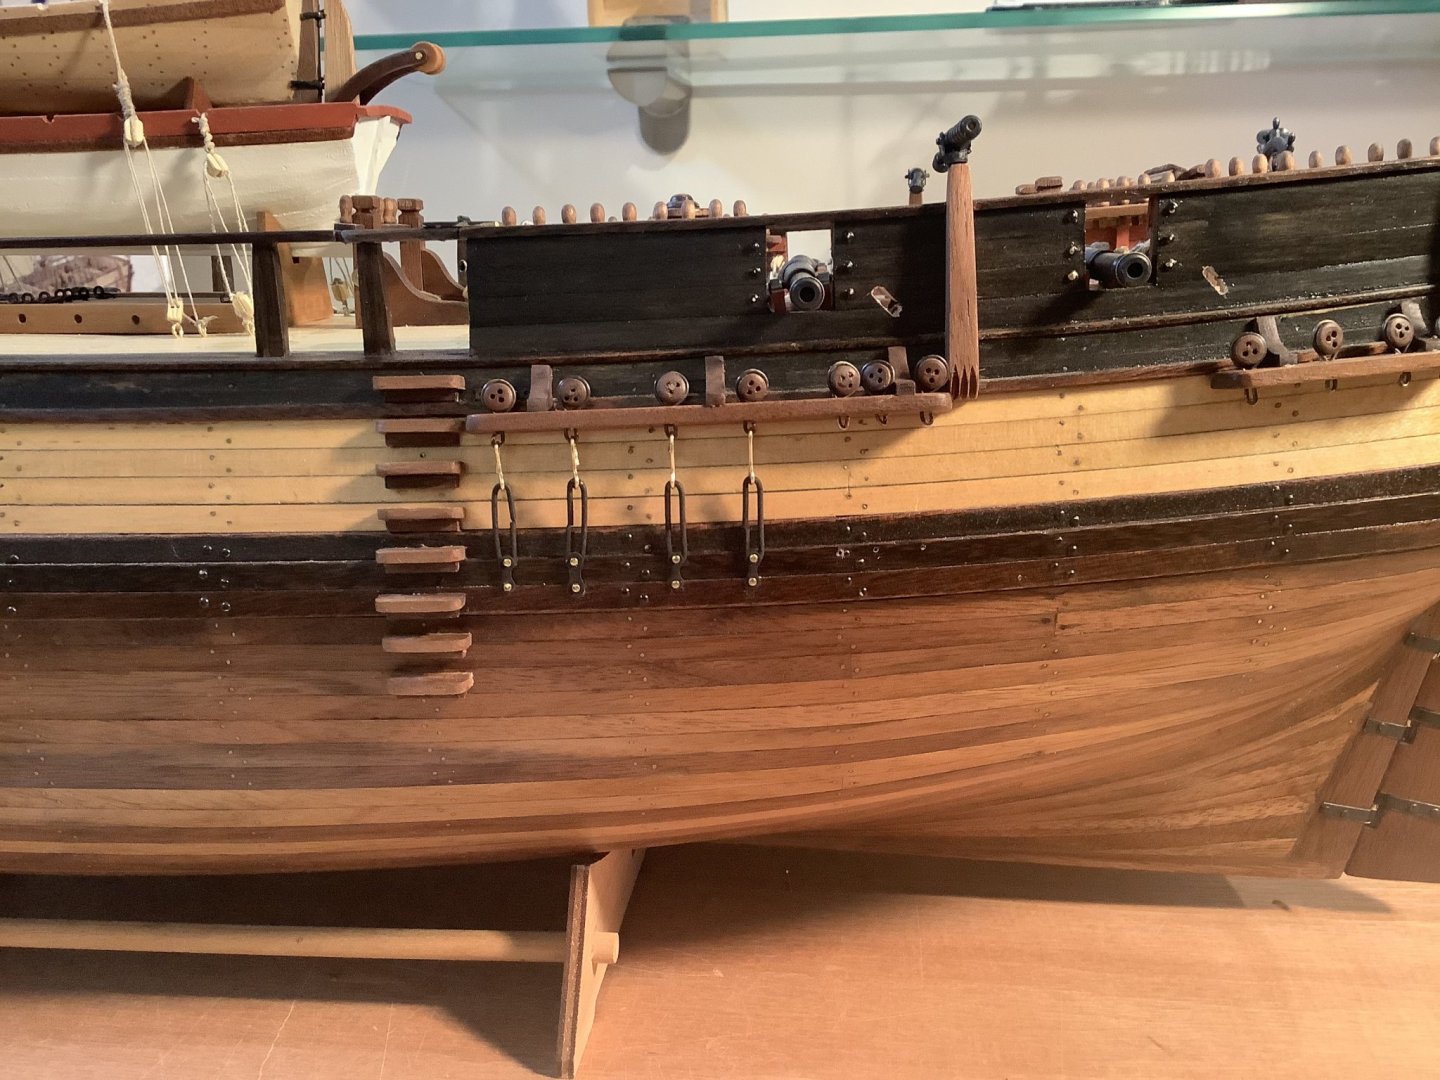
Could have used some rigging building that cottage actually, one end of it is perched 40 feet over the edge of a cliff. Just finishing installing the dead eyes on the respective channels. The 1mm wire supposedly used for the chain plates in this kit is really too thick to work so I used some thinner wire, and an eyebolt instead of wire for the upper stiffening links. I’ll apply gunmetal to the lot after it’s done as with all the other brass.
- 171 replies
-
- 5
-
-
- artesania latina
- bounty
- (and 1 more)
-
Heading back into the workshop after a long hiatus - have been busy over many months building a cottage for my brother in the north here, looking forward to getting back to finishing the Bounty over the winter. First step is to reacquaint myself with the kit and where the heck I left off. Hope my skills haven’t left me and that I don’t make a hash of the completion.
- 171 replies
-
- 6
-
-
- artesania latina
- bounty
- (and 1 more)
-
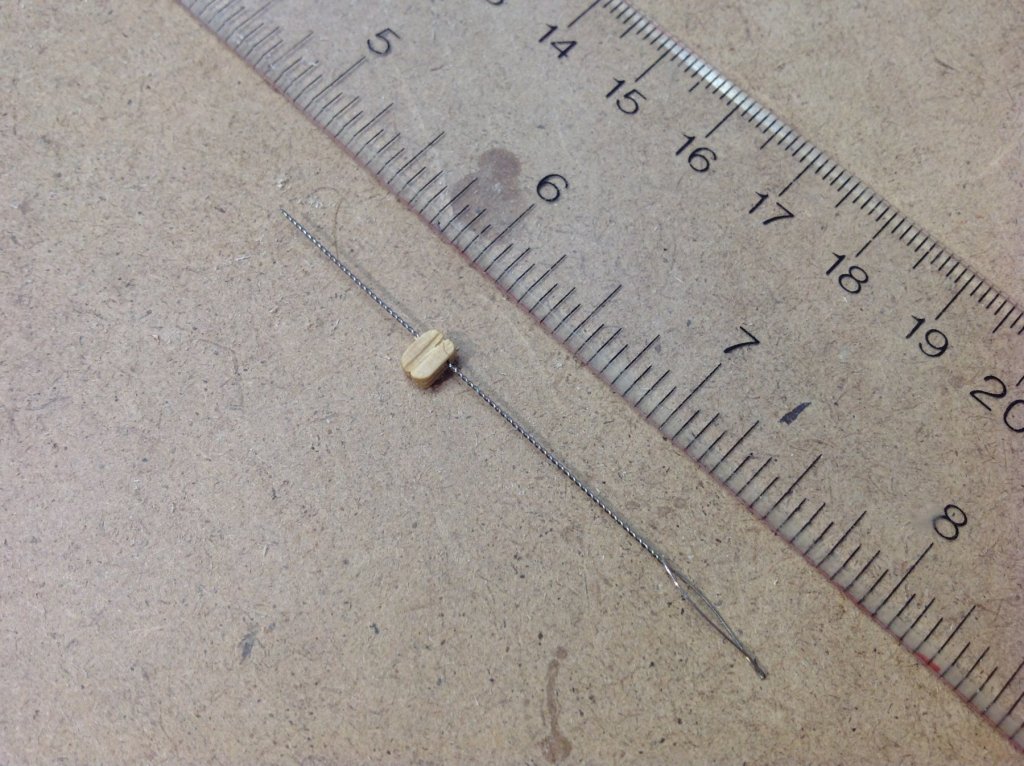
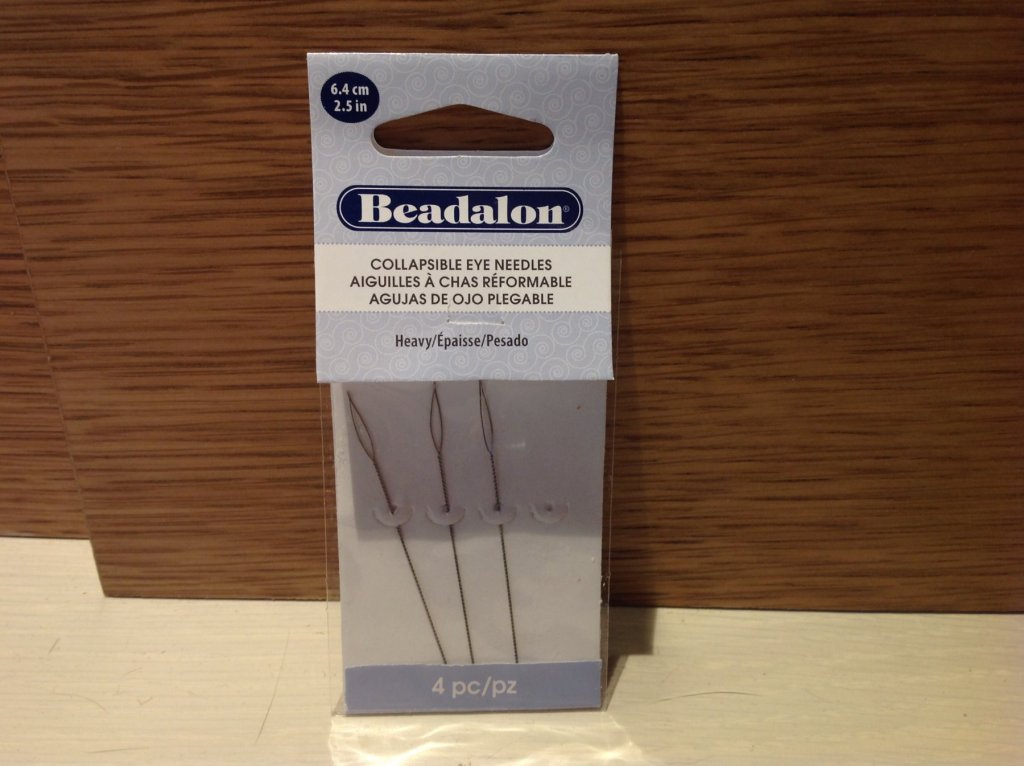
Hi Snow in Darwin - I picked mine up at Michaels, a large craft store chain in US and Canada. In the jewellery section.
-
The good thing about these particular ones is the 'needle' is very bendy so you can easily use them in tight spaces, as compared to a straight needle. It's basically two interwoven fine wires. The eye grips the thread at the end so it never comes out when you pull it through the block. Here's a closer shot.
- 171 replies
-
- 3
-
-
- artesania latina
- bounty
- (and 1 more)
-
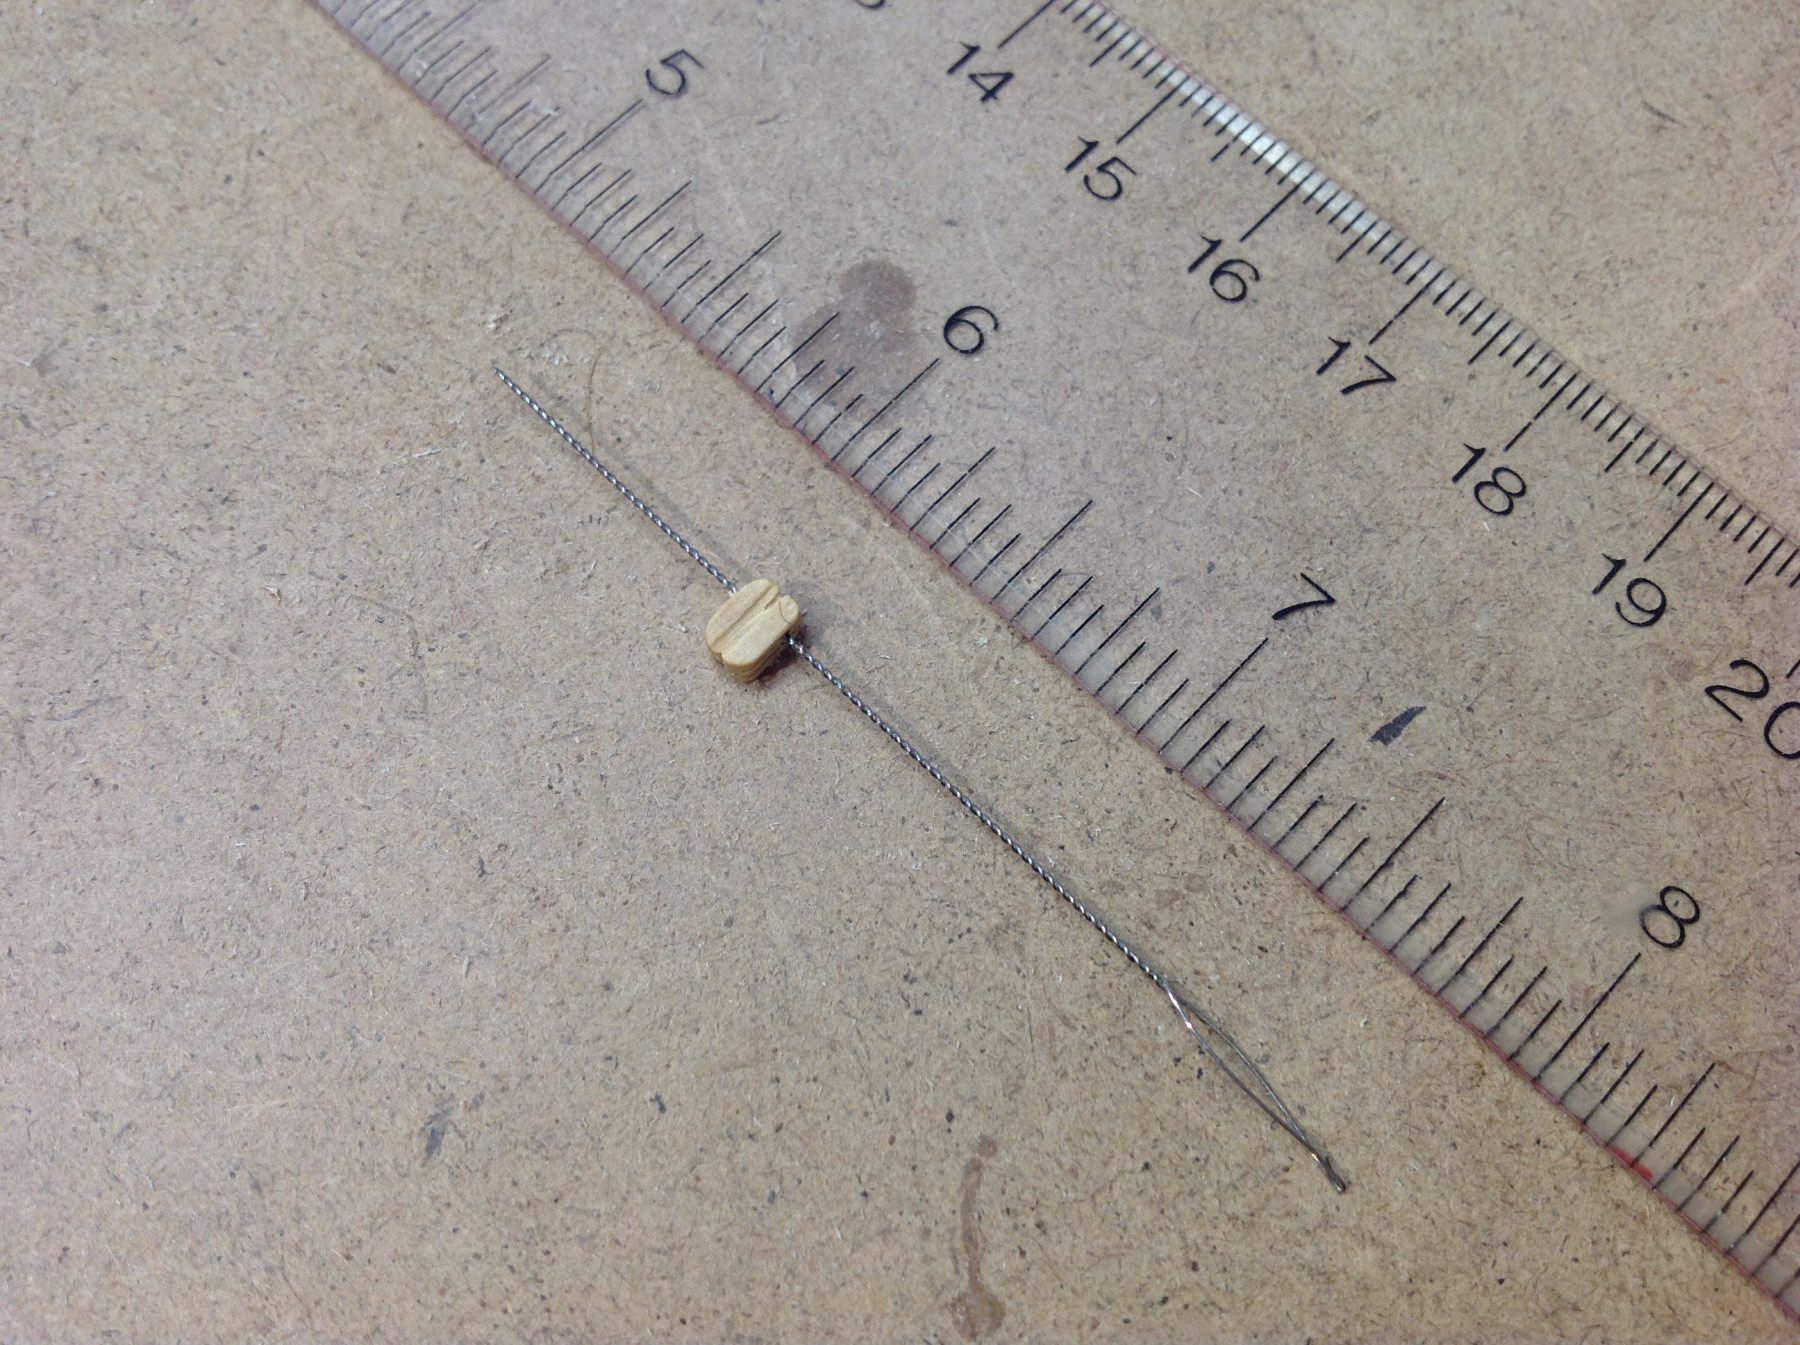
Just tried out one of these collapsable eye needles to use for rigging - wow they are genius and work incredibly well. No more drilling out holes or struggling to find a tiny hole and push finicky thread through blocks. This will cut the $&!&#$@&$! rigging time considerably.
- 171 replies
-
- 3
-
-
- artesania latina
- bounty
- (and 1 more)
-
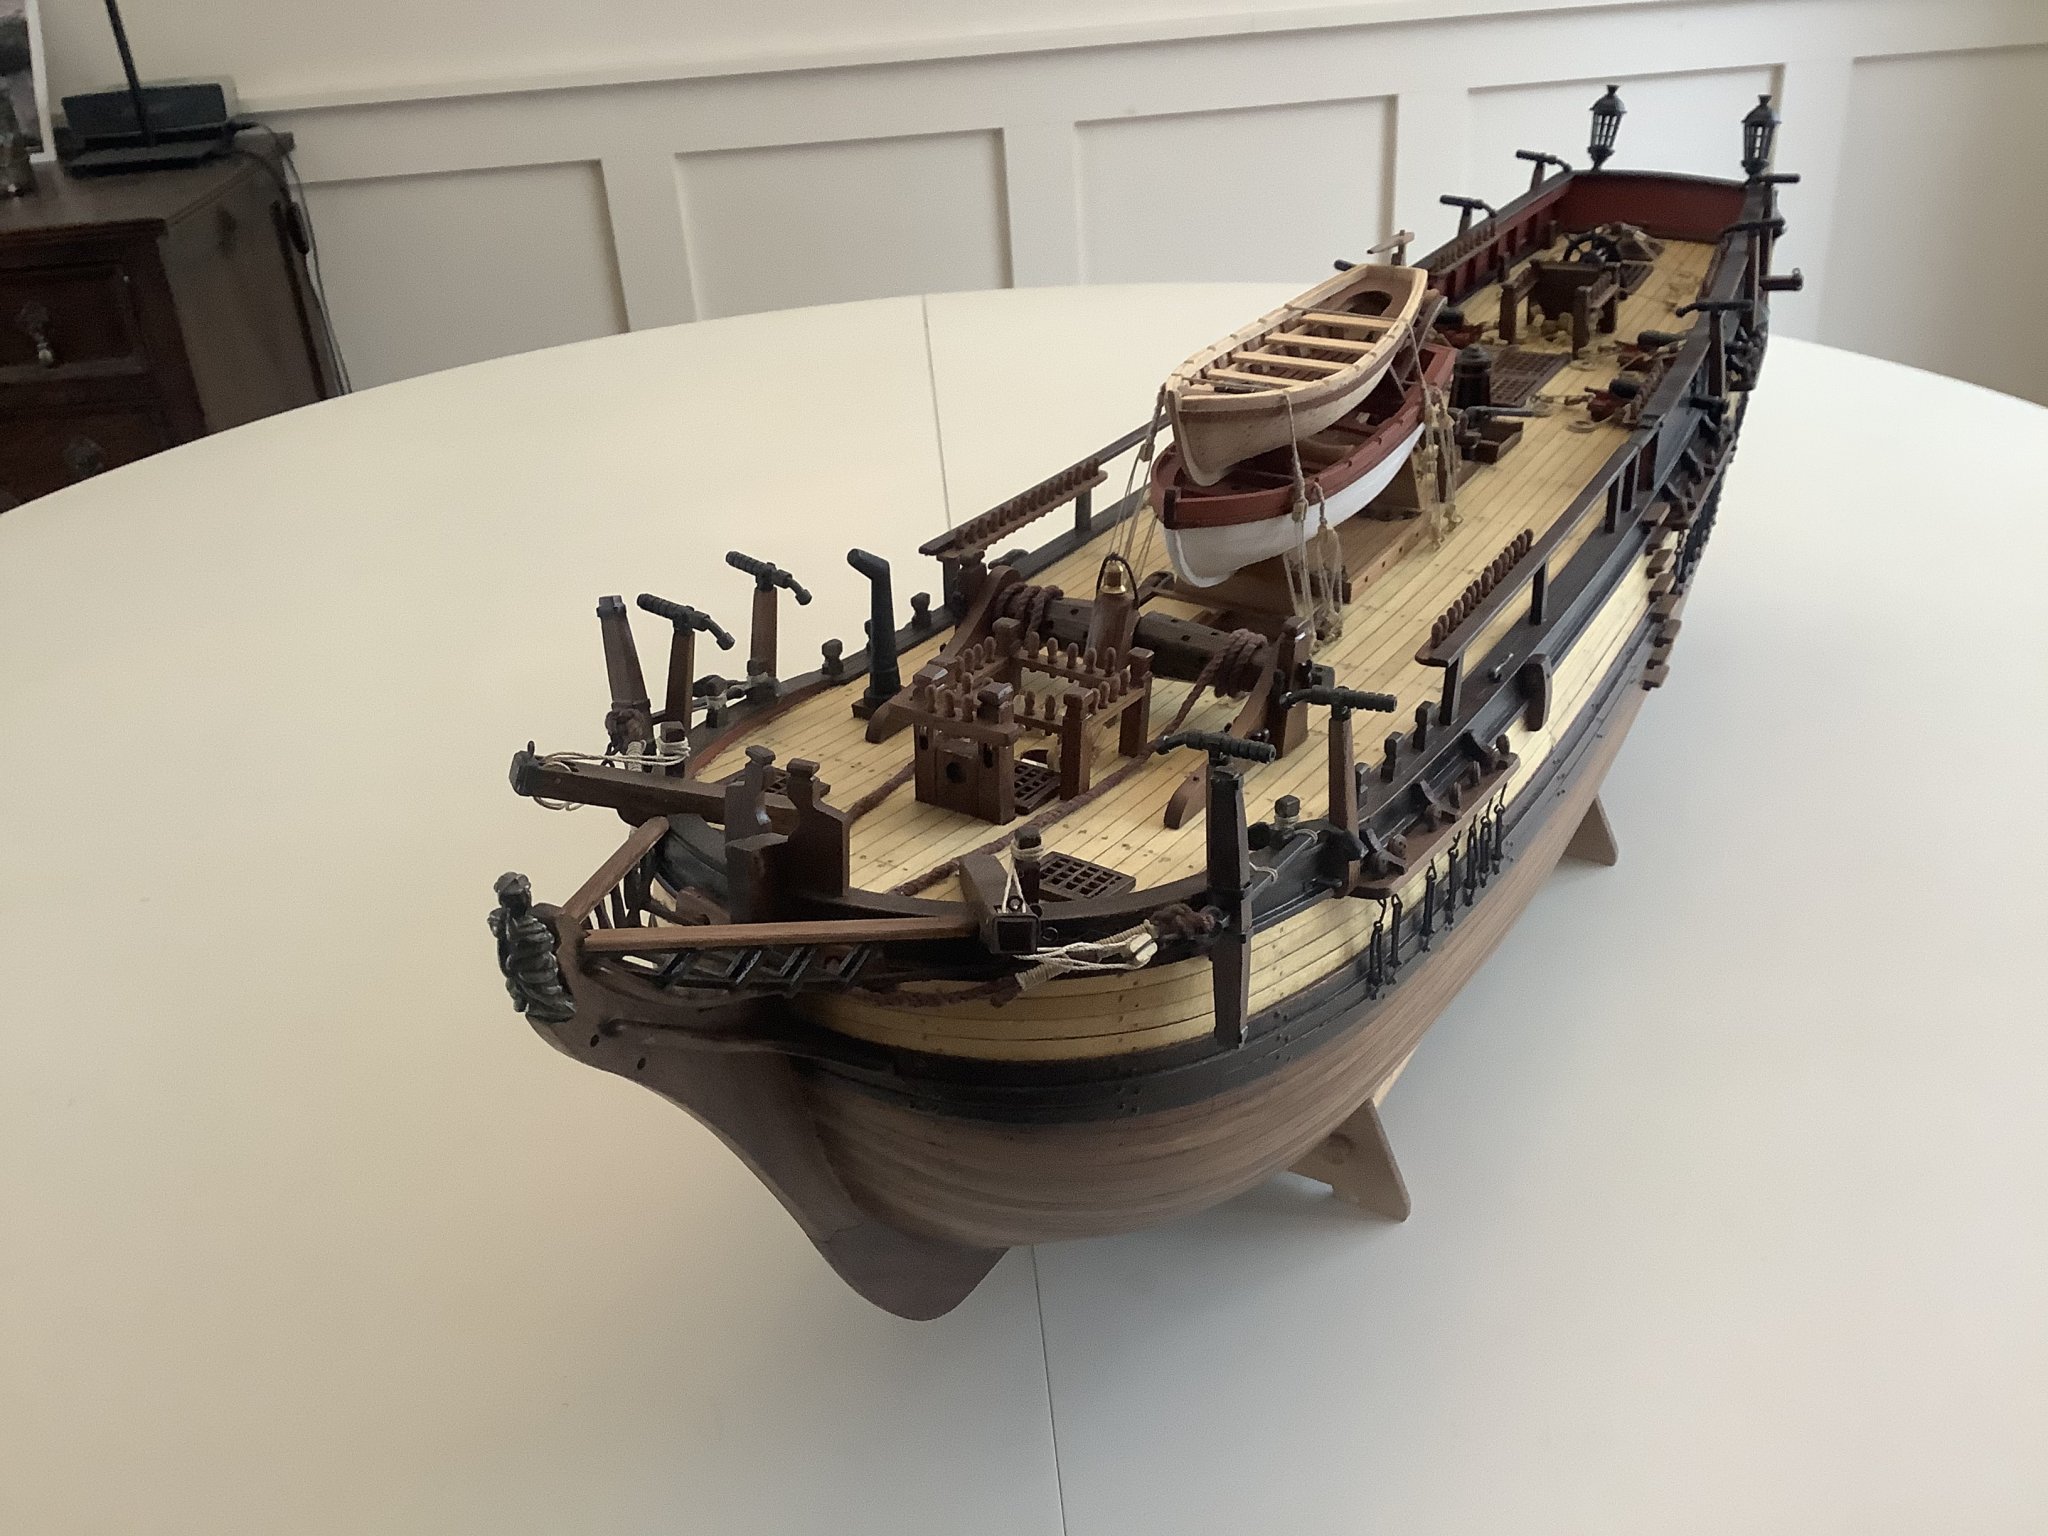
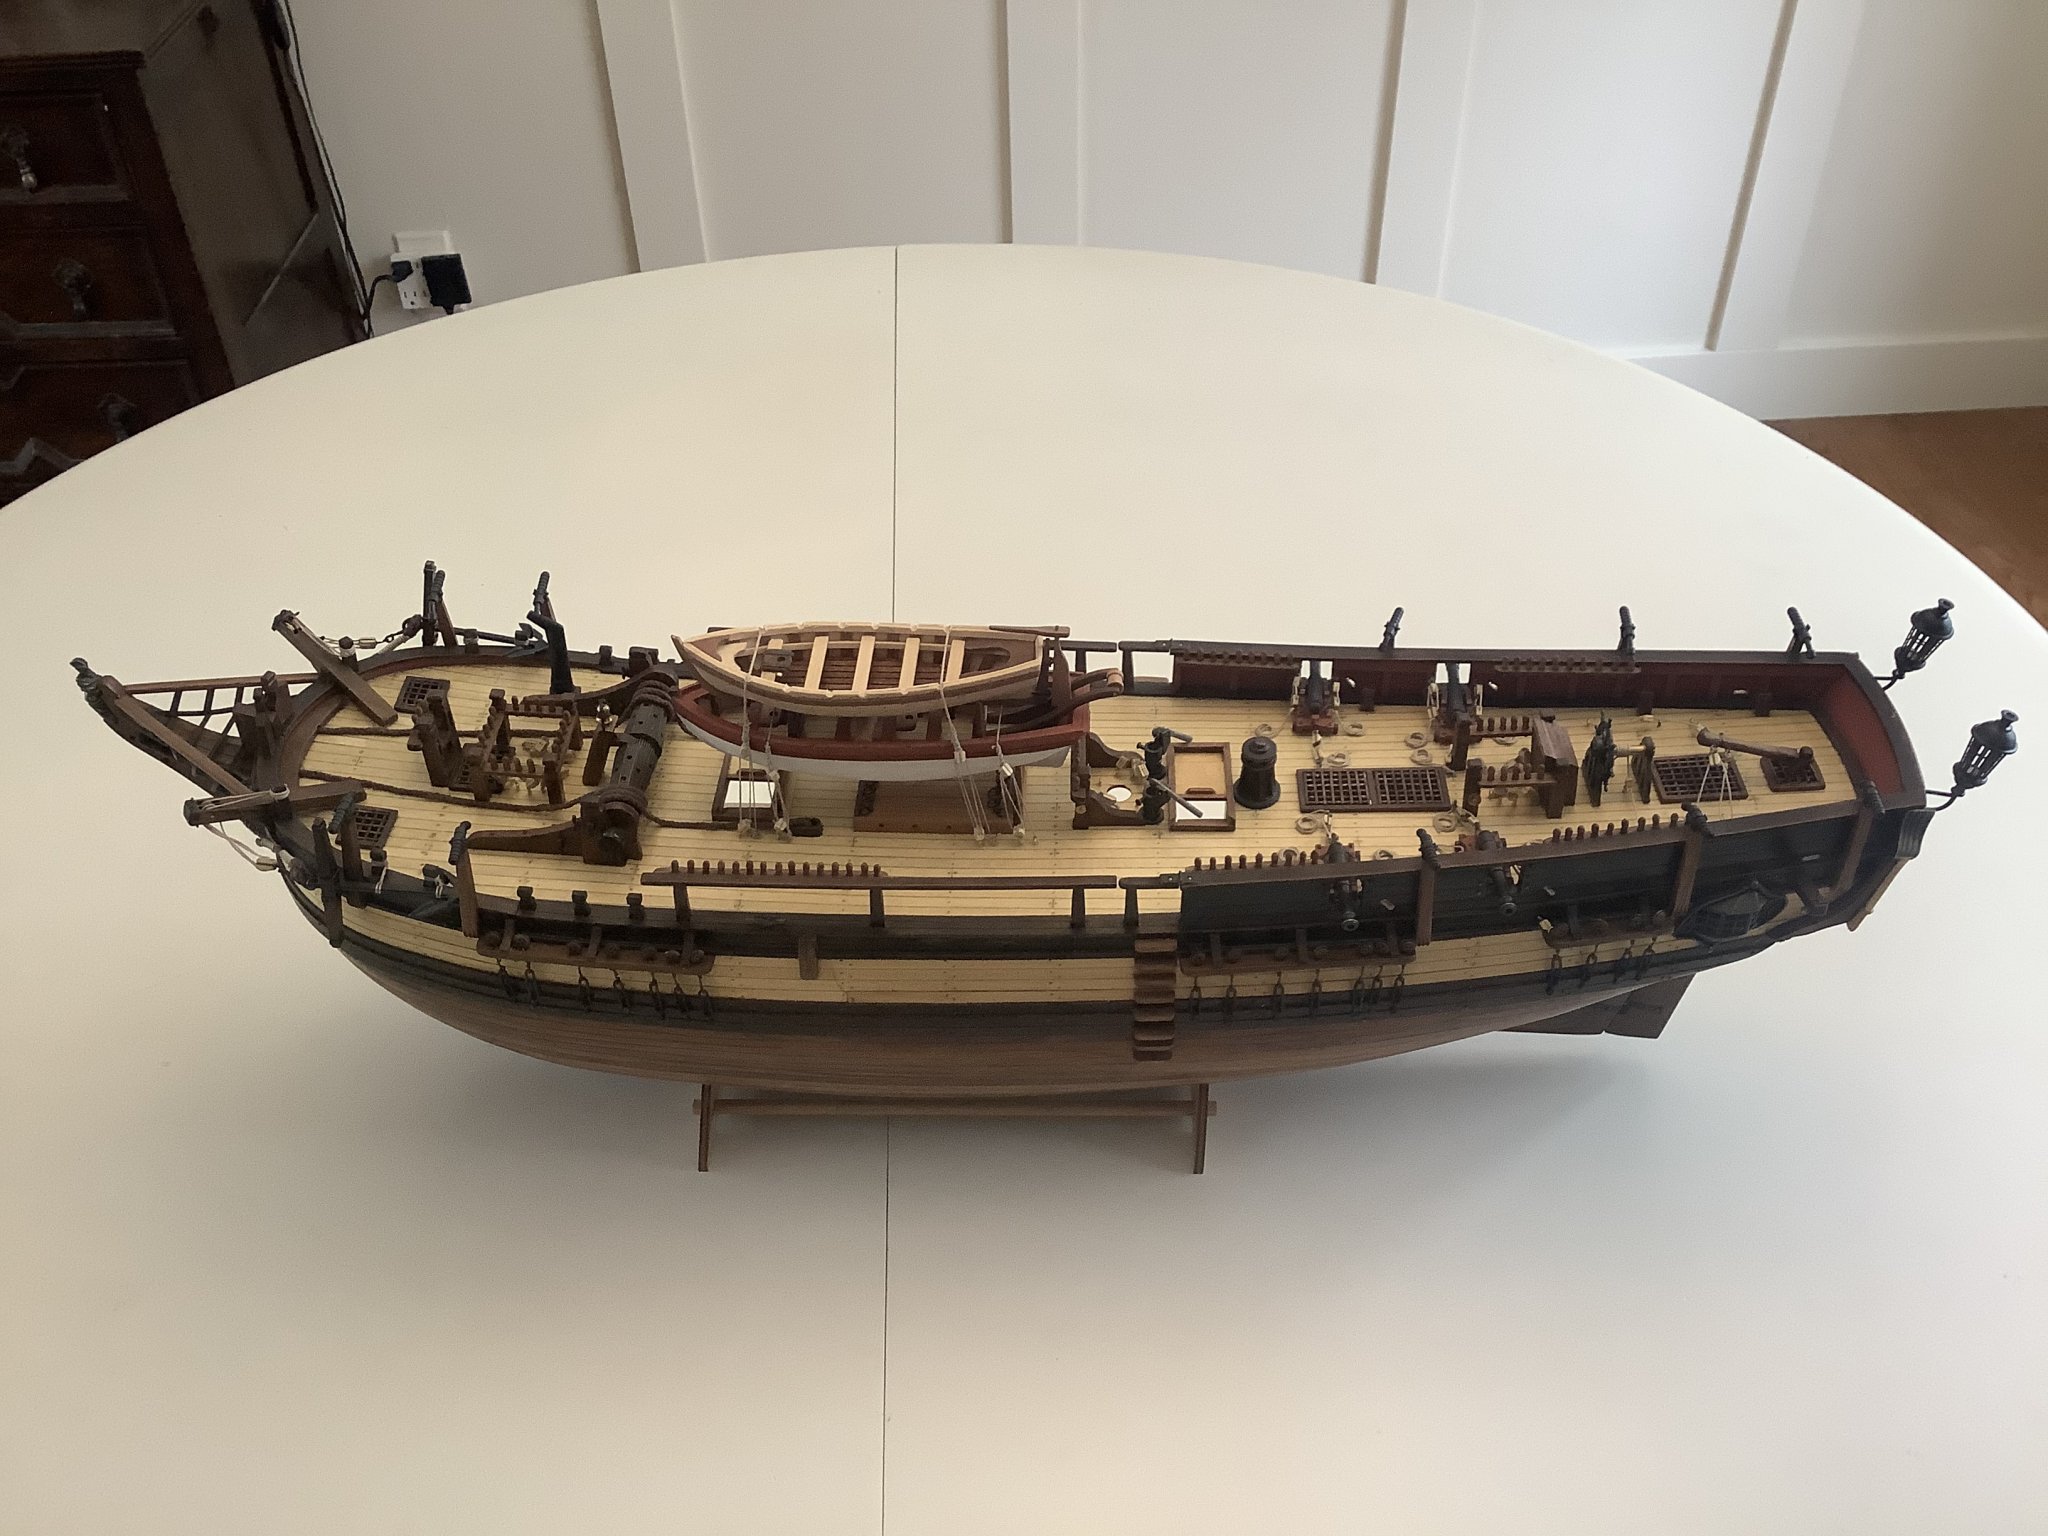
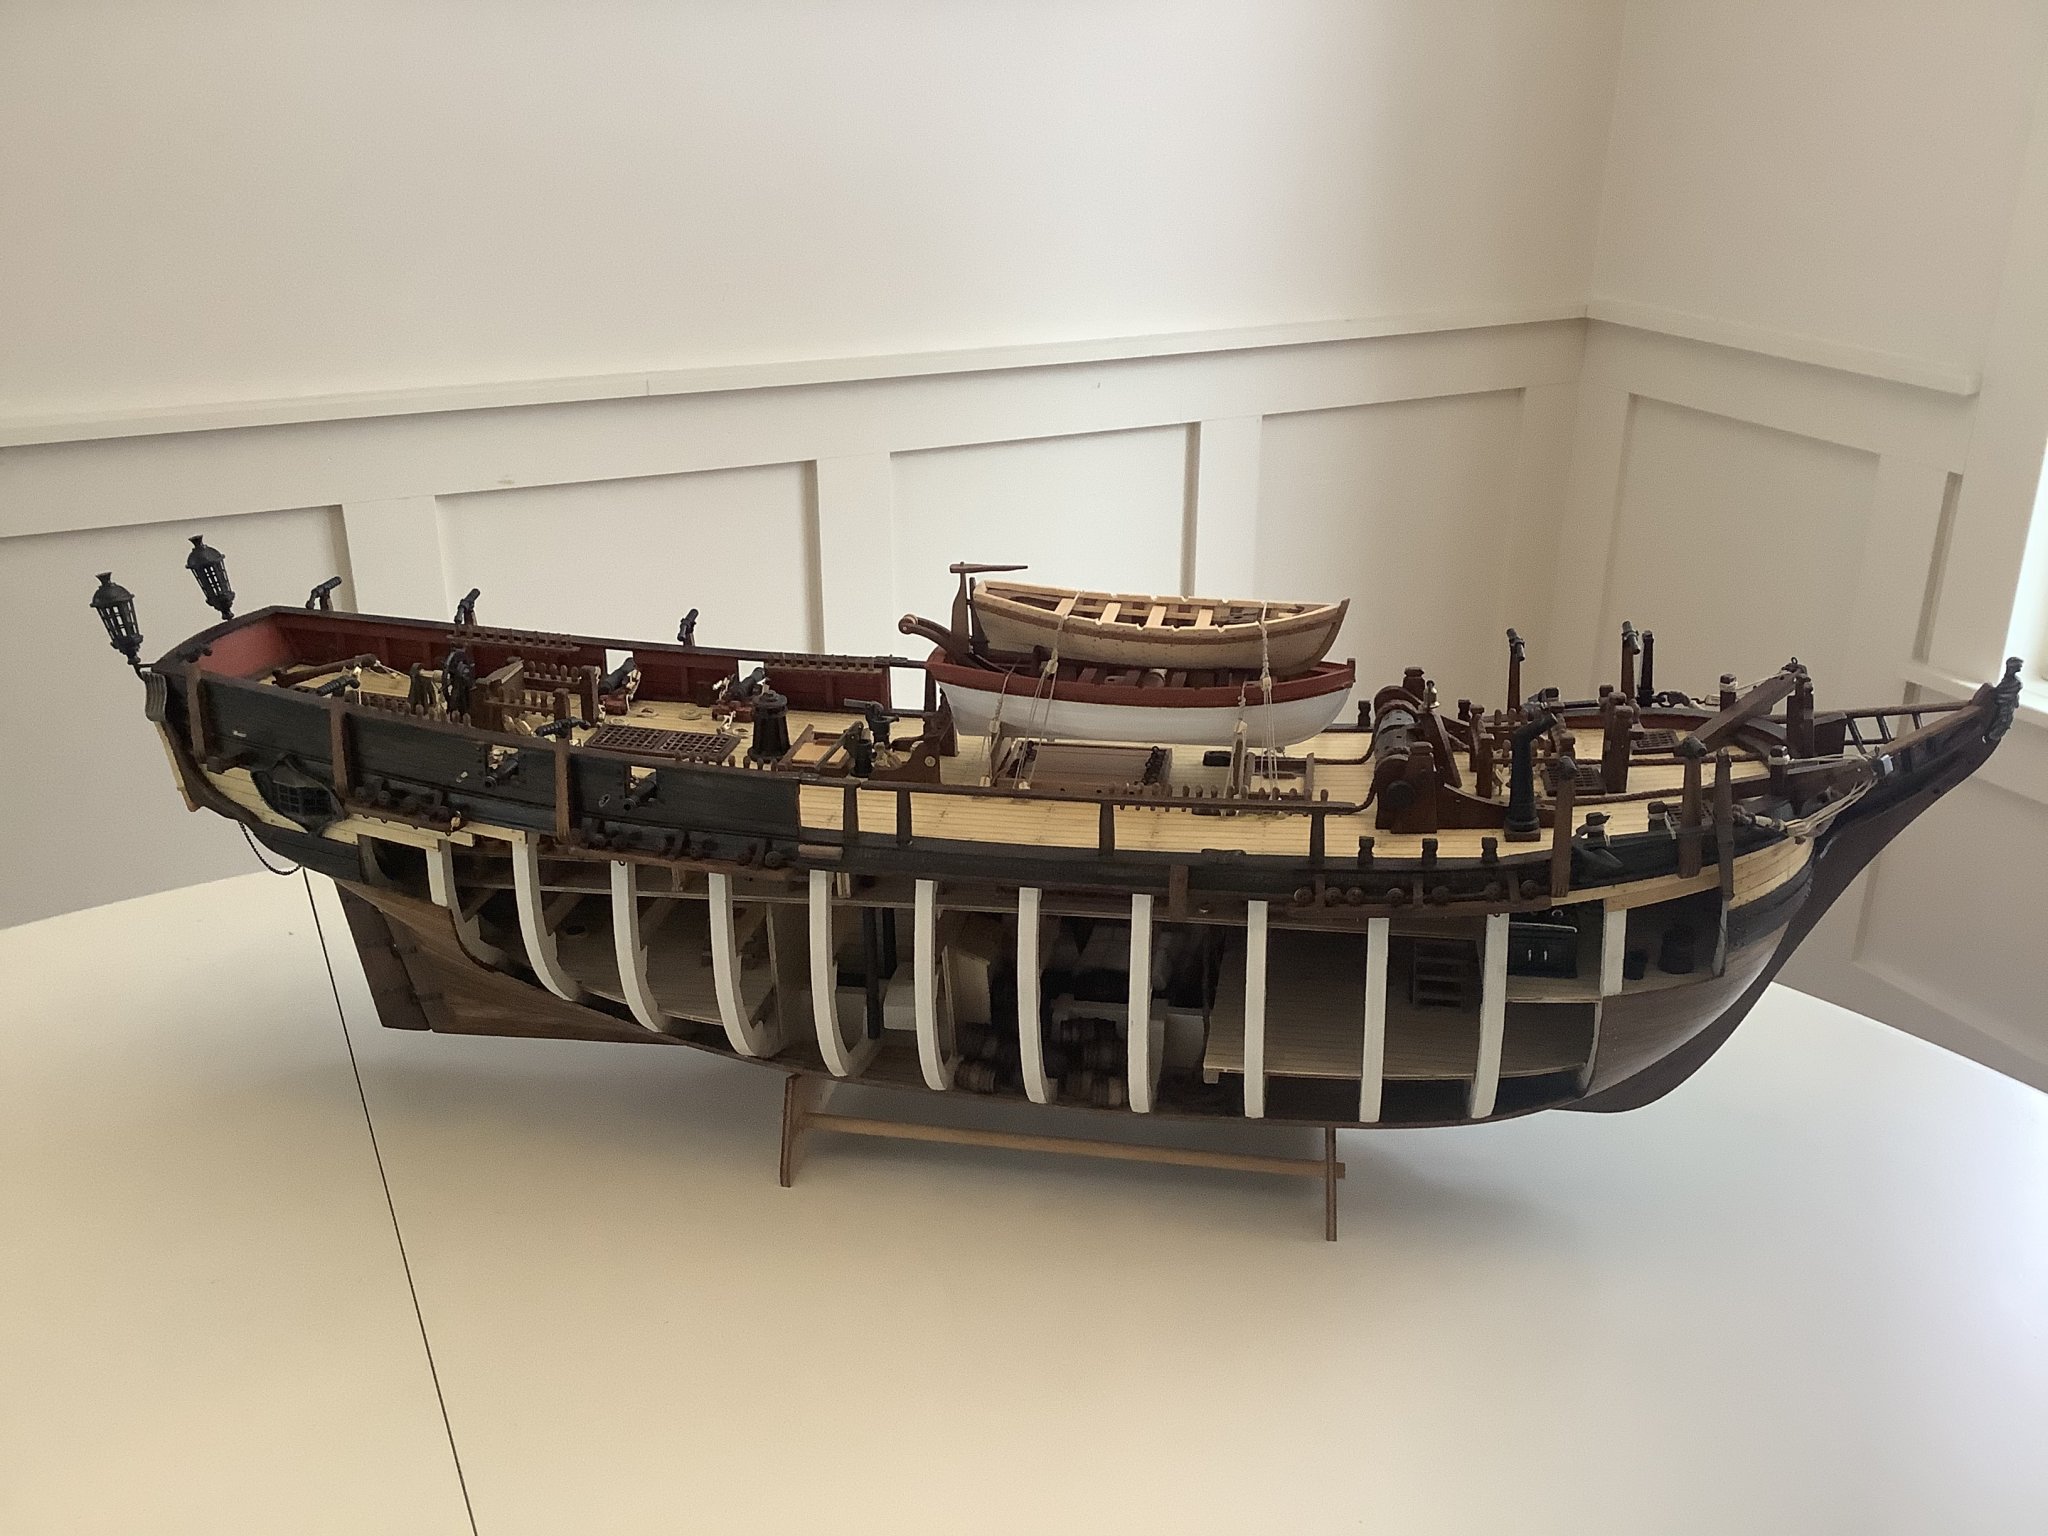
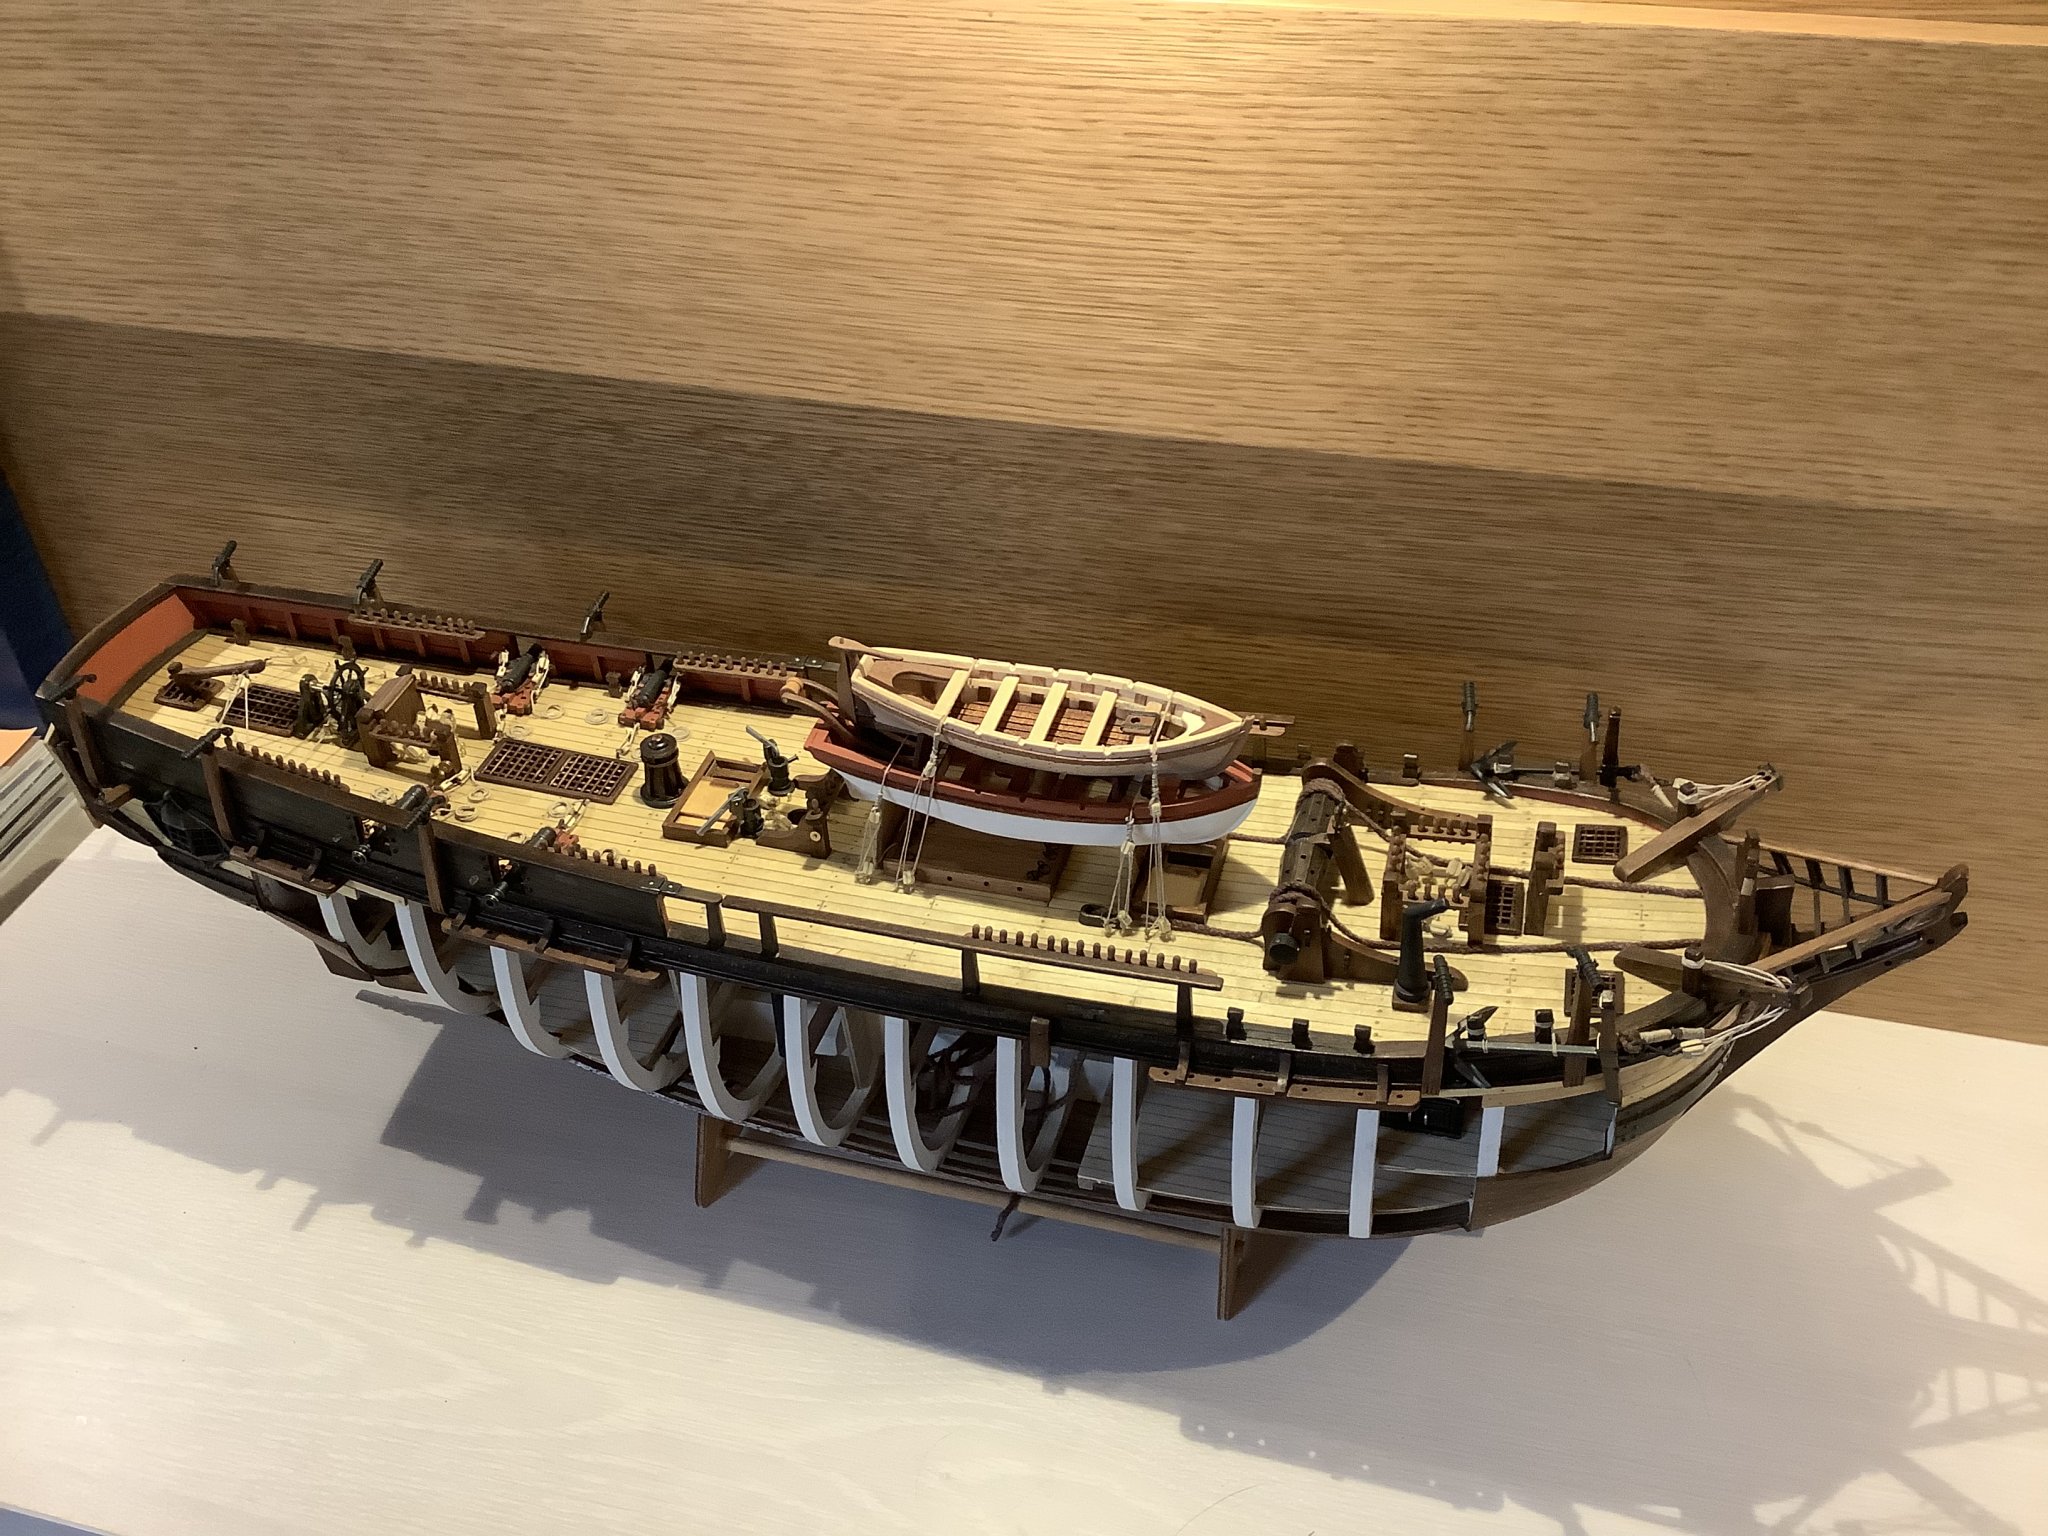
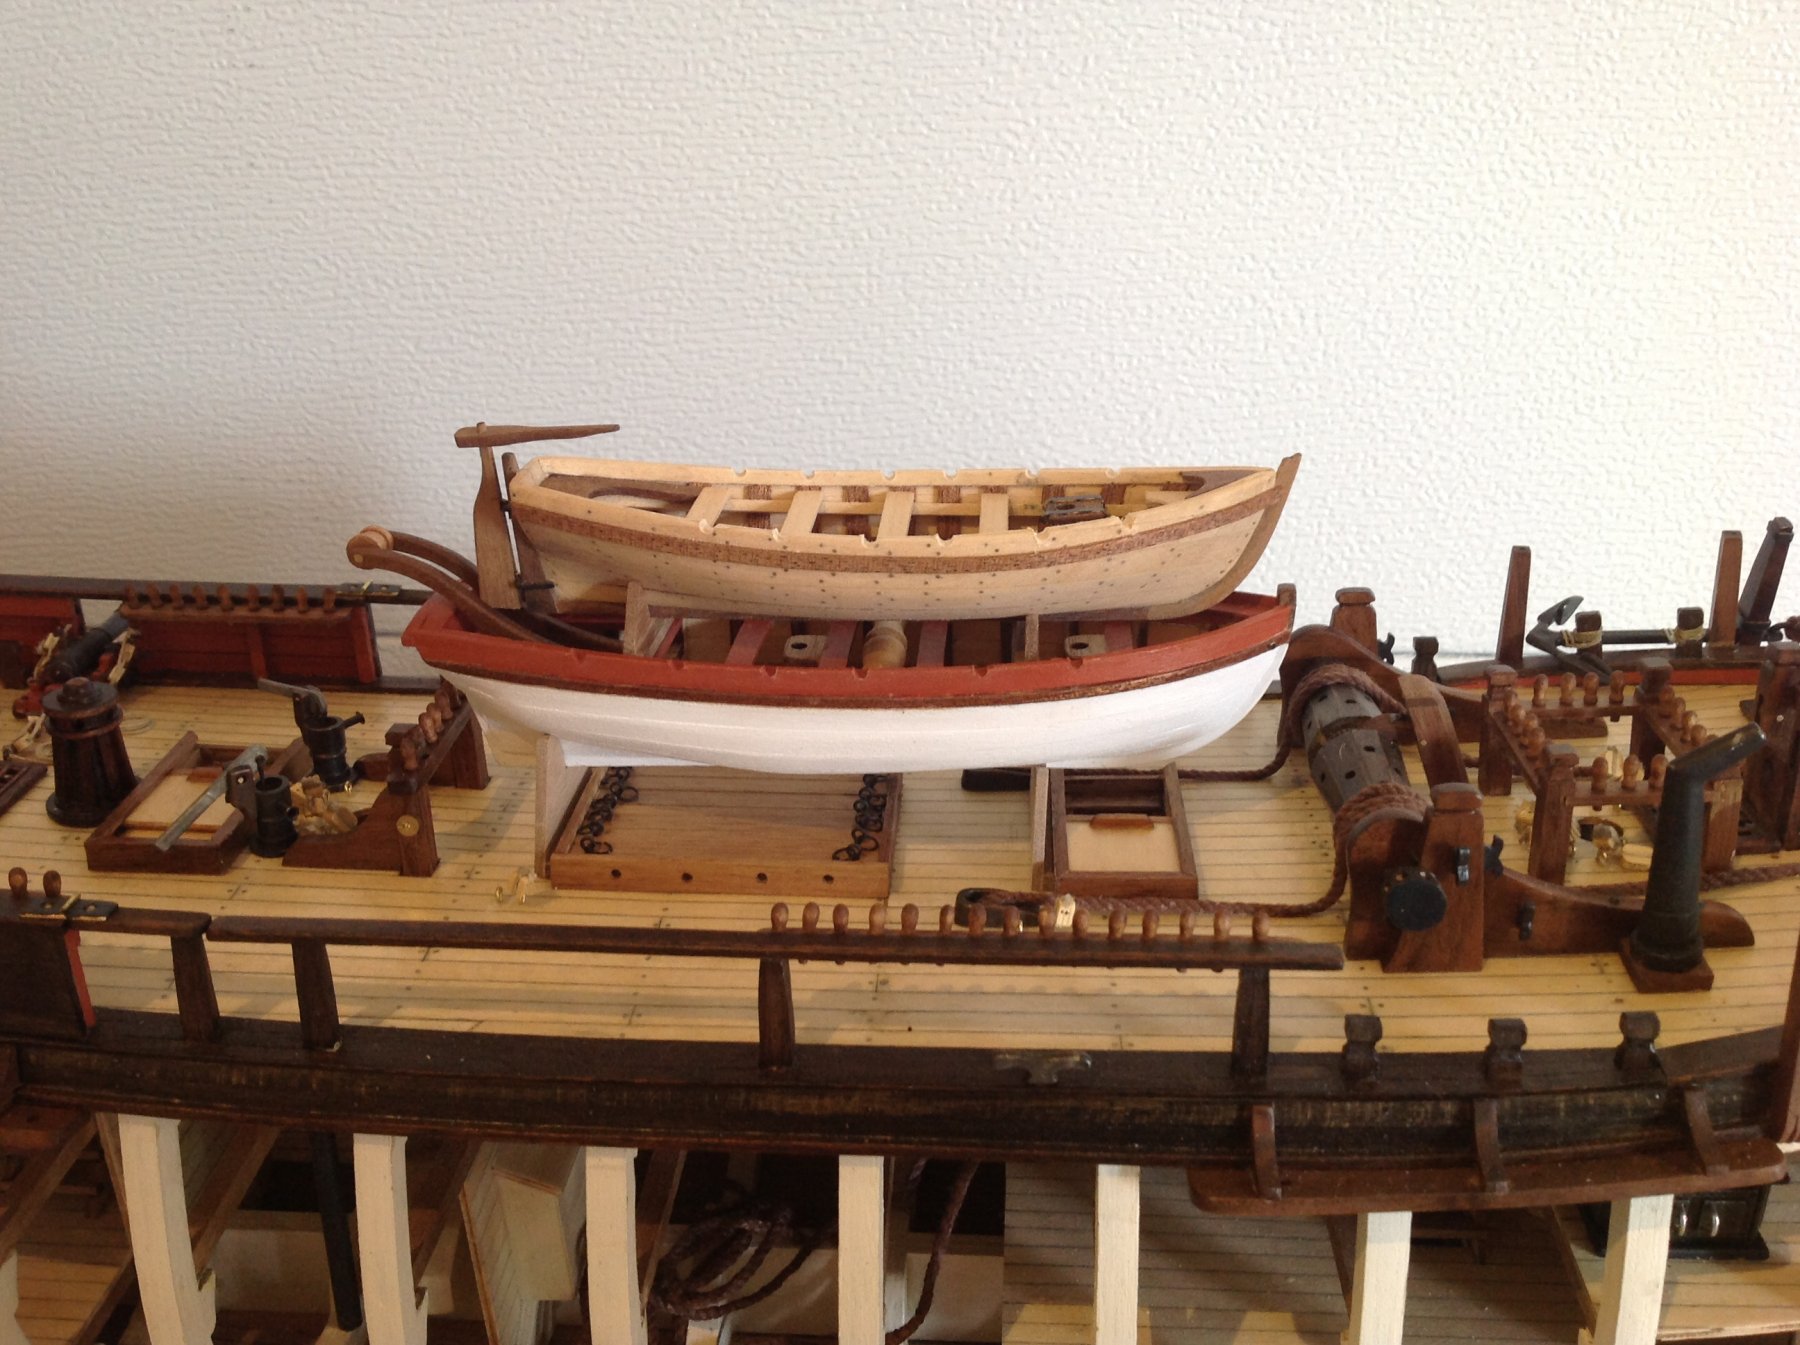
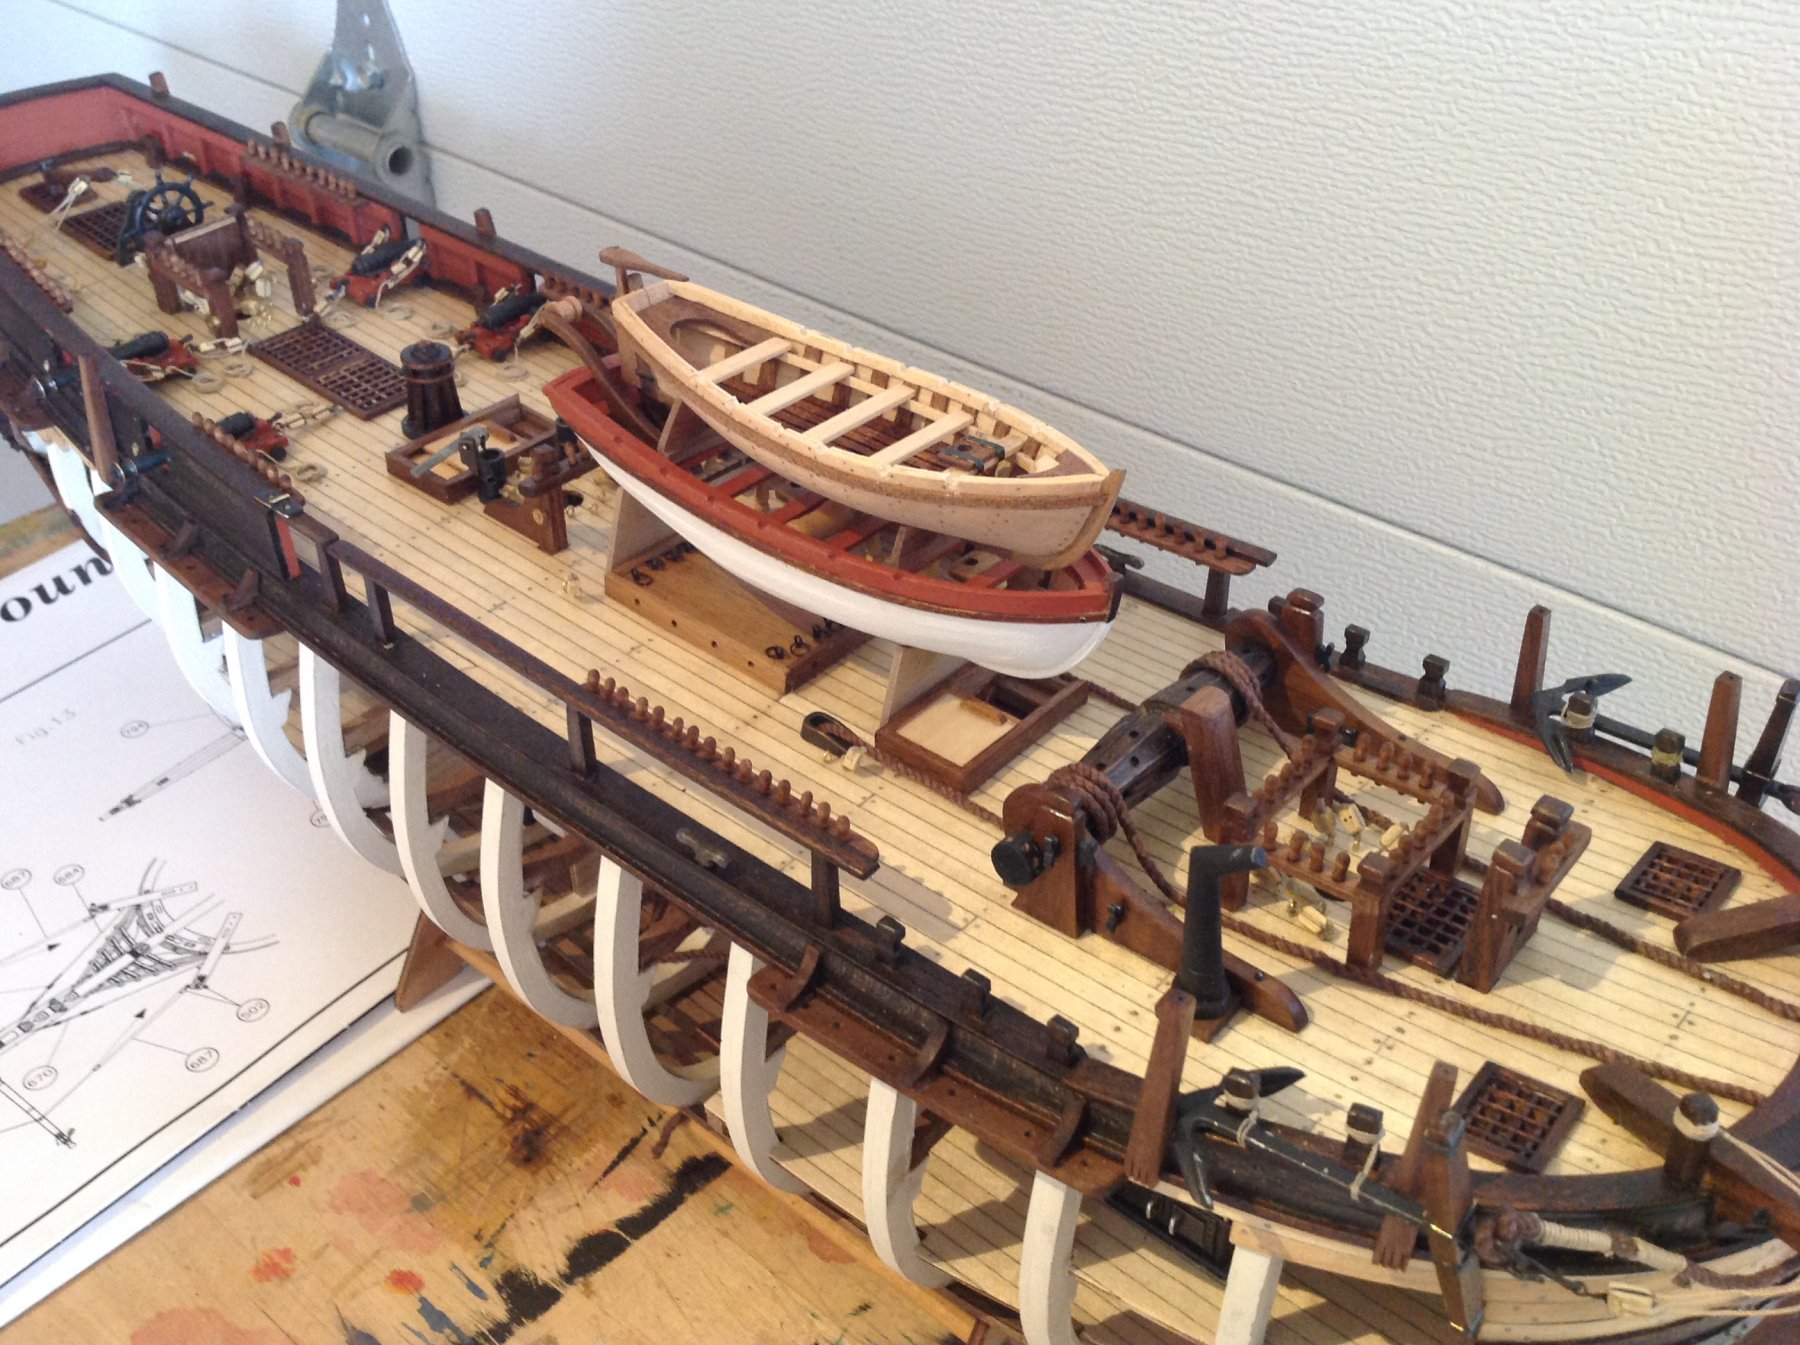
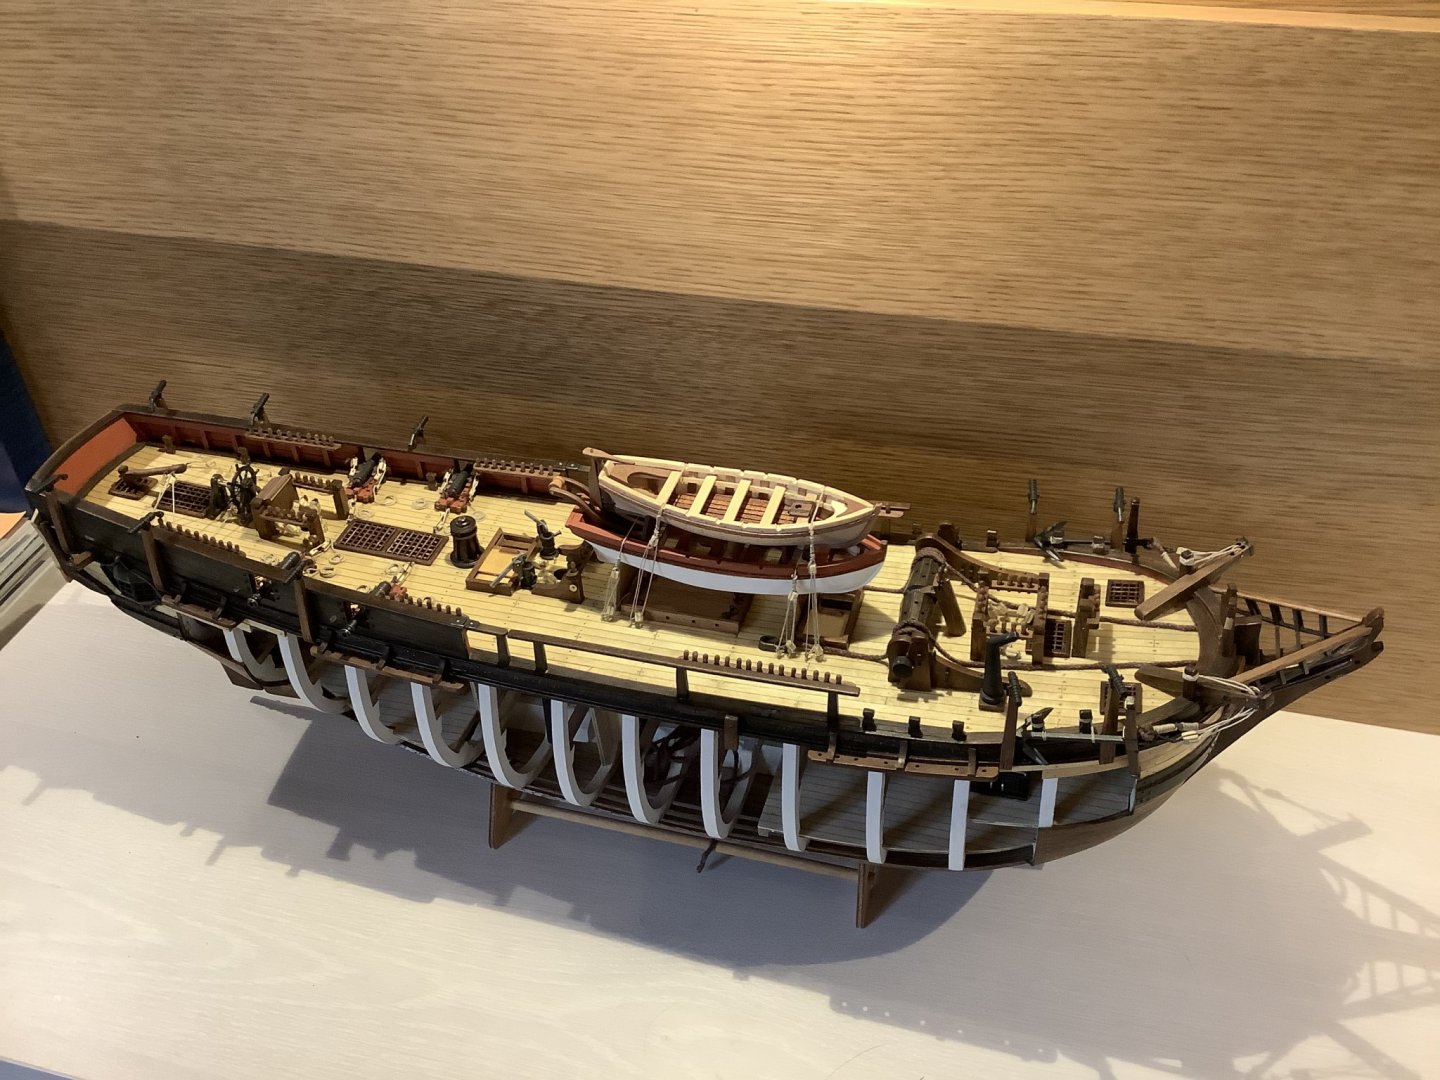
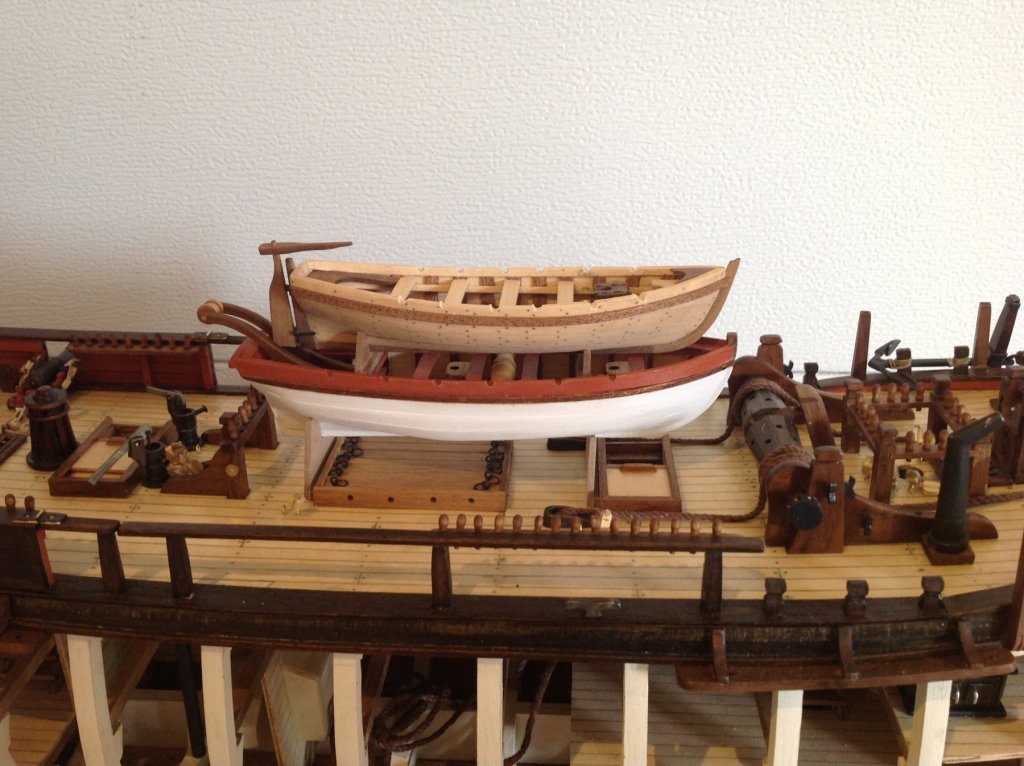
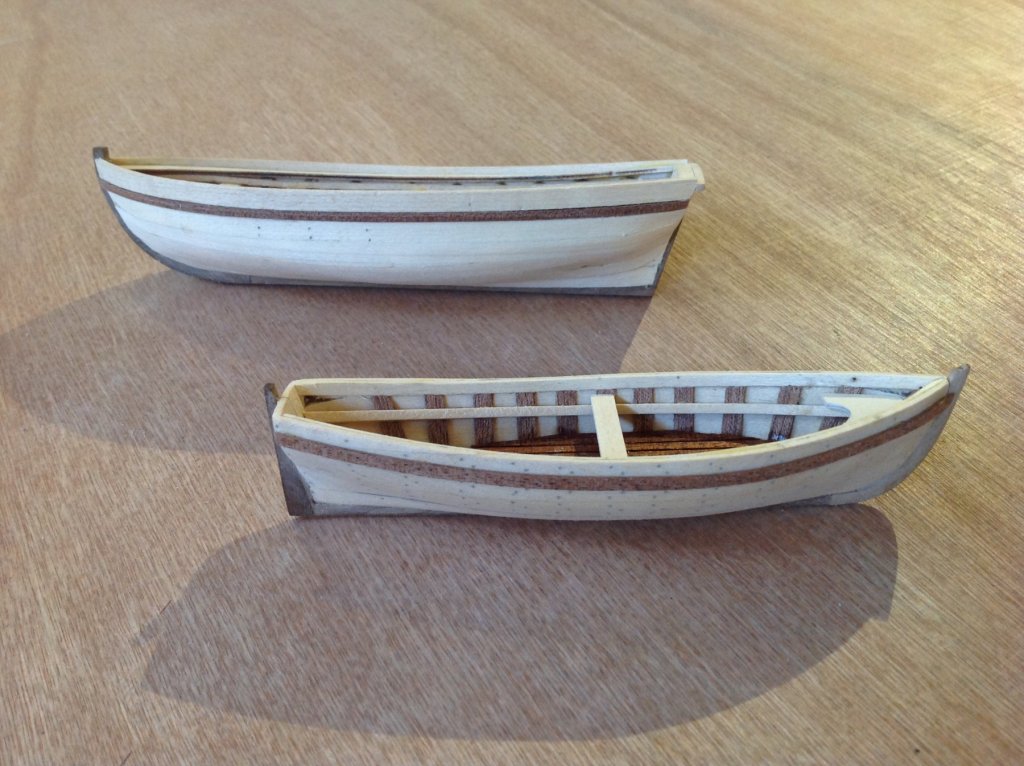
Completed my interpretation of the launch and the jolly boat, trial run on setting them up on the deck before I tie them down. A lot going on on this model - I have to say you get a lot of boat for the money with this particular kit.

- 171 replies
-
- 6
-
-
- artesania latina
- bounty
- (and 1 more)
-
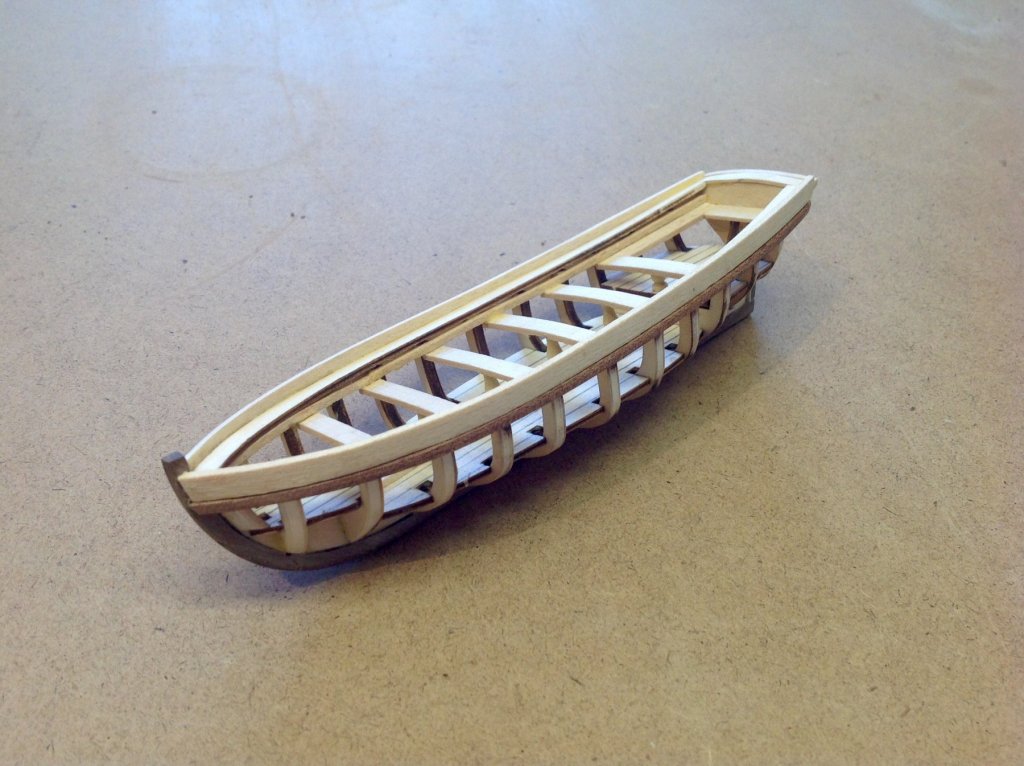
Thanks Mark. The shipwright was laid up for a while after getting a wisdom tooth removed, which didn't go well. Back to constructing the Bounty's launch and jolly boat. Nice little mini models actually. Rather than pinning the hull planks as suggested which I think could be a mess at this scale, I instead drilled the nailing pattern on the jolly boat using a 1/32" bit, pasted the hull with walnut wood filler and sanded. Think I'll maybe paint the launch and leave the jolly boat more au natural. Still a bunch more to do on these though before finishing.

- 171 replies
-
- 4
-
-
- artesania latina
- bounty
- (and 1 more)
-
The bulk of the bounty up to the masts and rigging stage is now done, except for the launch and jolly boat which are to be stacked on the deck. Building the mini model of the launch. Only enough 1.5mm basswood in the kit for planking one side so I'm using 1mm material below the top plank, since there's lots of that left. The plans call for only planking one side of the launch, same as the bounty herself, but I'm not doing that. I placed the stem and keel first before planking, same as the ship, since I prefer that approach.
- 171 replies
-
- 5
-
-
- artesania latina
- bounty
- (and 1 more)
-
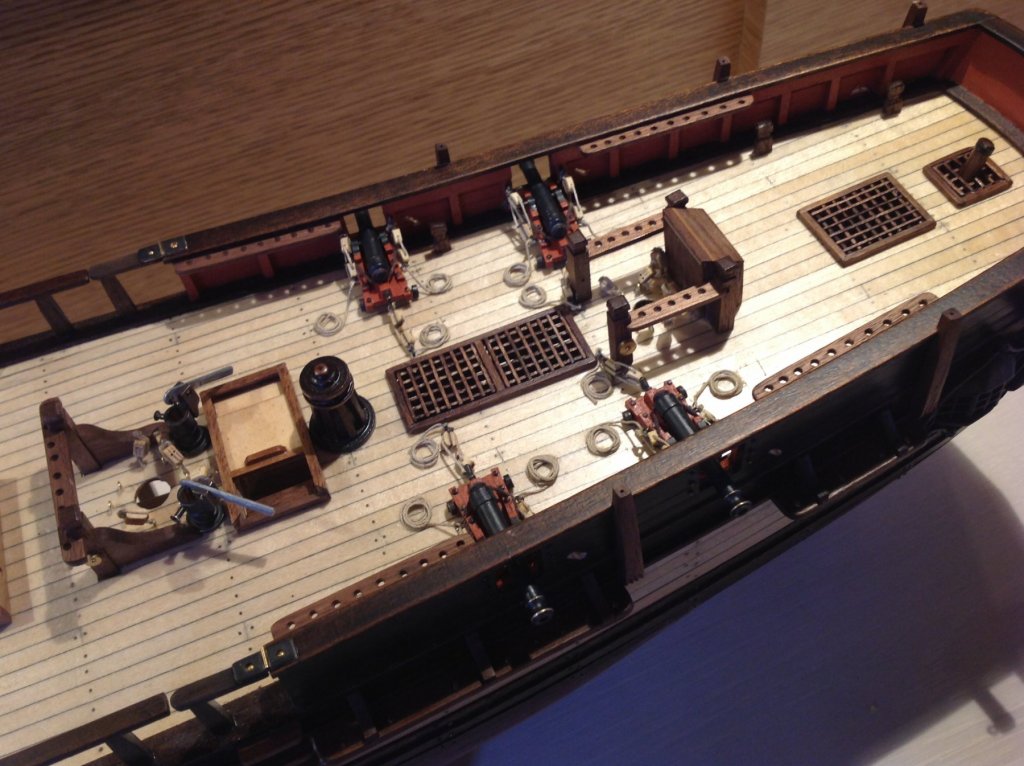
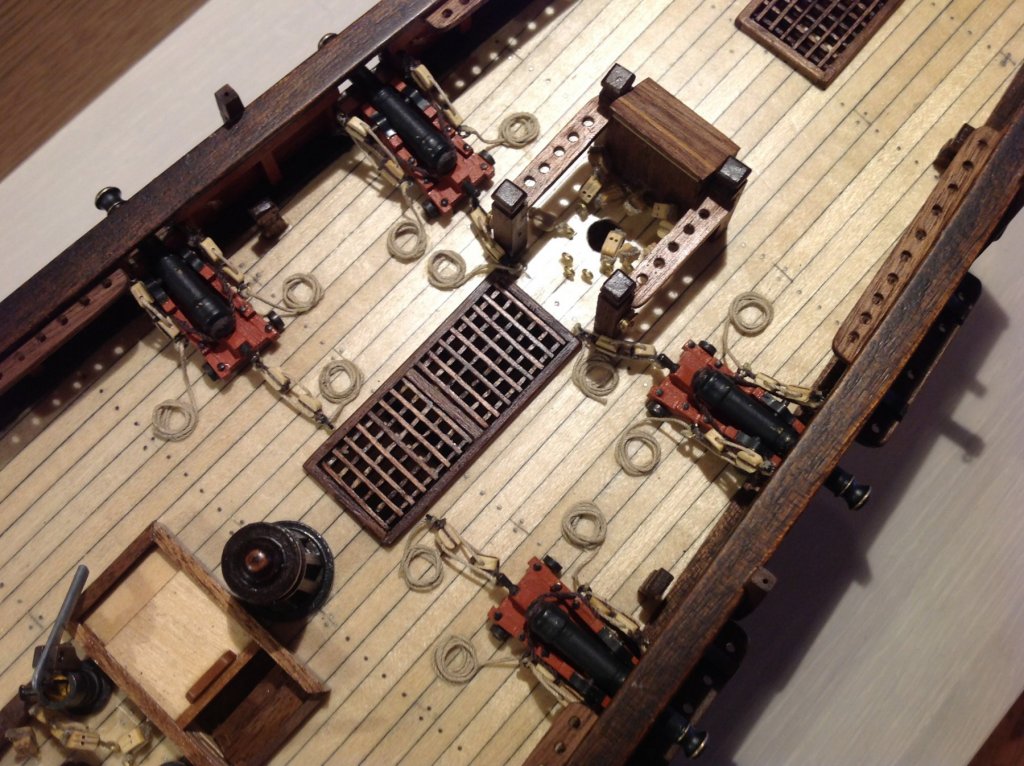
Bit of a holiday from the Bounty - just got back from the sublime South Pacific, specifically the Cook Islands where ironically this ship visited. They even had a 'Bounty Bookstore' on Rarotonga which I visited. The beachfront at our tropical paradise from the reef, we were living at the white dot in the centre. Ok I digress but you'd understand if you knew the Toronto winter we've been enduring. Back at it in the studio.....finished up the cannon and some assorted deck rigging...


- 171 replies
-
- 12
-
-
- artesania latina
- bounty
- (and 1 more)
-
Newbie Hull Questions
Tim Moore replied to Tollyman's topic in Building, Framing, Planking and plating a ships hull and deck
Hello Tollyman hope life is good out there on the Island! Good questions, I think we all eventually do what works for us given our own patience, skill and available time. This is what I do: Plank gluing: CA is sometimes capricious for me. I used CA medium exclusively on a double planked mahogany runabout hull and works well if you are careful to use very sparingly and hold firmly for about 15 seconds. Doesn't always hold in practice in my experience. I actually prefer wood glue with a high initial tack for all applications wherever possible. Very reliable and forgiving. My best authentic work has been when I pre-drill using a 1/32 bit, apply wood glue and pin planks to the ribs or bulkheads using a very small pin hammer. Of course you'd probably only do this if you want to make nailing visible for authenticity. Plank bending: have tried various techniques, now just use a plywood shape which approximates a good general bend, use a small steamer and pre bend several planks at once and clamp to the plywood form. When dry, fit, trim and place on the hull. I've found most plank breaking during bending is due to angle of grain in the plank, so I use straight grain planks for critical bends. Plank cutting: I roughly trim overhanging planks with an ultra thin razor saw ($10 from lee valley), sand to within about 1/16 along the form of the stern using my dremel 8050, and then block sand using fine sandpaper to perfection. Keel gluing: I don't think it's critical one way or the other. Most models will be a full hull anyway. Yours can be done in two pieces which is easier to do given you can pin the half down firmly and flat on your worktable and plank away. If it's fixed down warpage shouldn't be an issue. If it was me, I would probably do some of the planking by halves, then glue and clamp the two parts together and finish off the more bendy planks to make sure the ends line up on the bow. Another related question is whether to install the finish keel and stem before or after planking. I do it before and then plank up to the finished keel and stem, because I find it easier to get a more perfect final fit. Hull filling: for under planking I use whatever works, it's just creating a form. On single or outer planking I have never used anything like compound. I try to fit the planks to the best of my ability (back sanding the edges before fitting planks etc), and use a tinted woodfiller for any less than perfect spots before block sanding. Deck planking: I always use the high initial tack wood glue for this. Its a great hobby. Tim -
Hello Gren from cold and snowy Toronto , welcome to the wood ship model community. I'm currently building the AL Bounty and have a build summary going. I'm at 350 on the parts list, perhaps similar to where you are at. Happy to share any thoughts if I can be of any help. Tim
-
I've now been using the 8050 micro for about a month, replacing my old corded and flex shaft models. Haven't experienced any major problems with it as far as ship modelling uses. I'm now using it all the time - does everything and ive found it very light and agile to use. Battery seems to run forever. I also bought the 4486 chuck which lets you install anything from all their tooling bits to micro drills, much better than dealing with all those collet things for me. The only possible practical drawback I've found so far might be the size of the chuck when drilling in situ in tight spaces on the ship, as Wefalck pointed out.
-
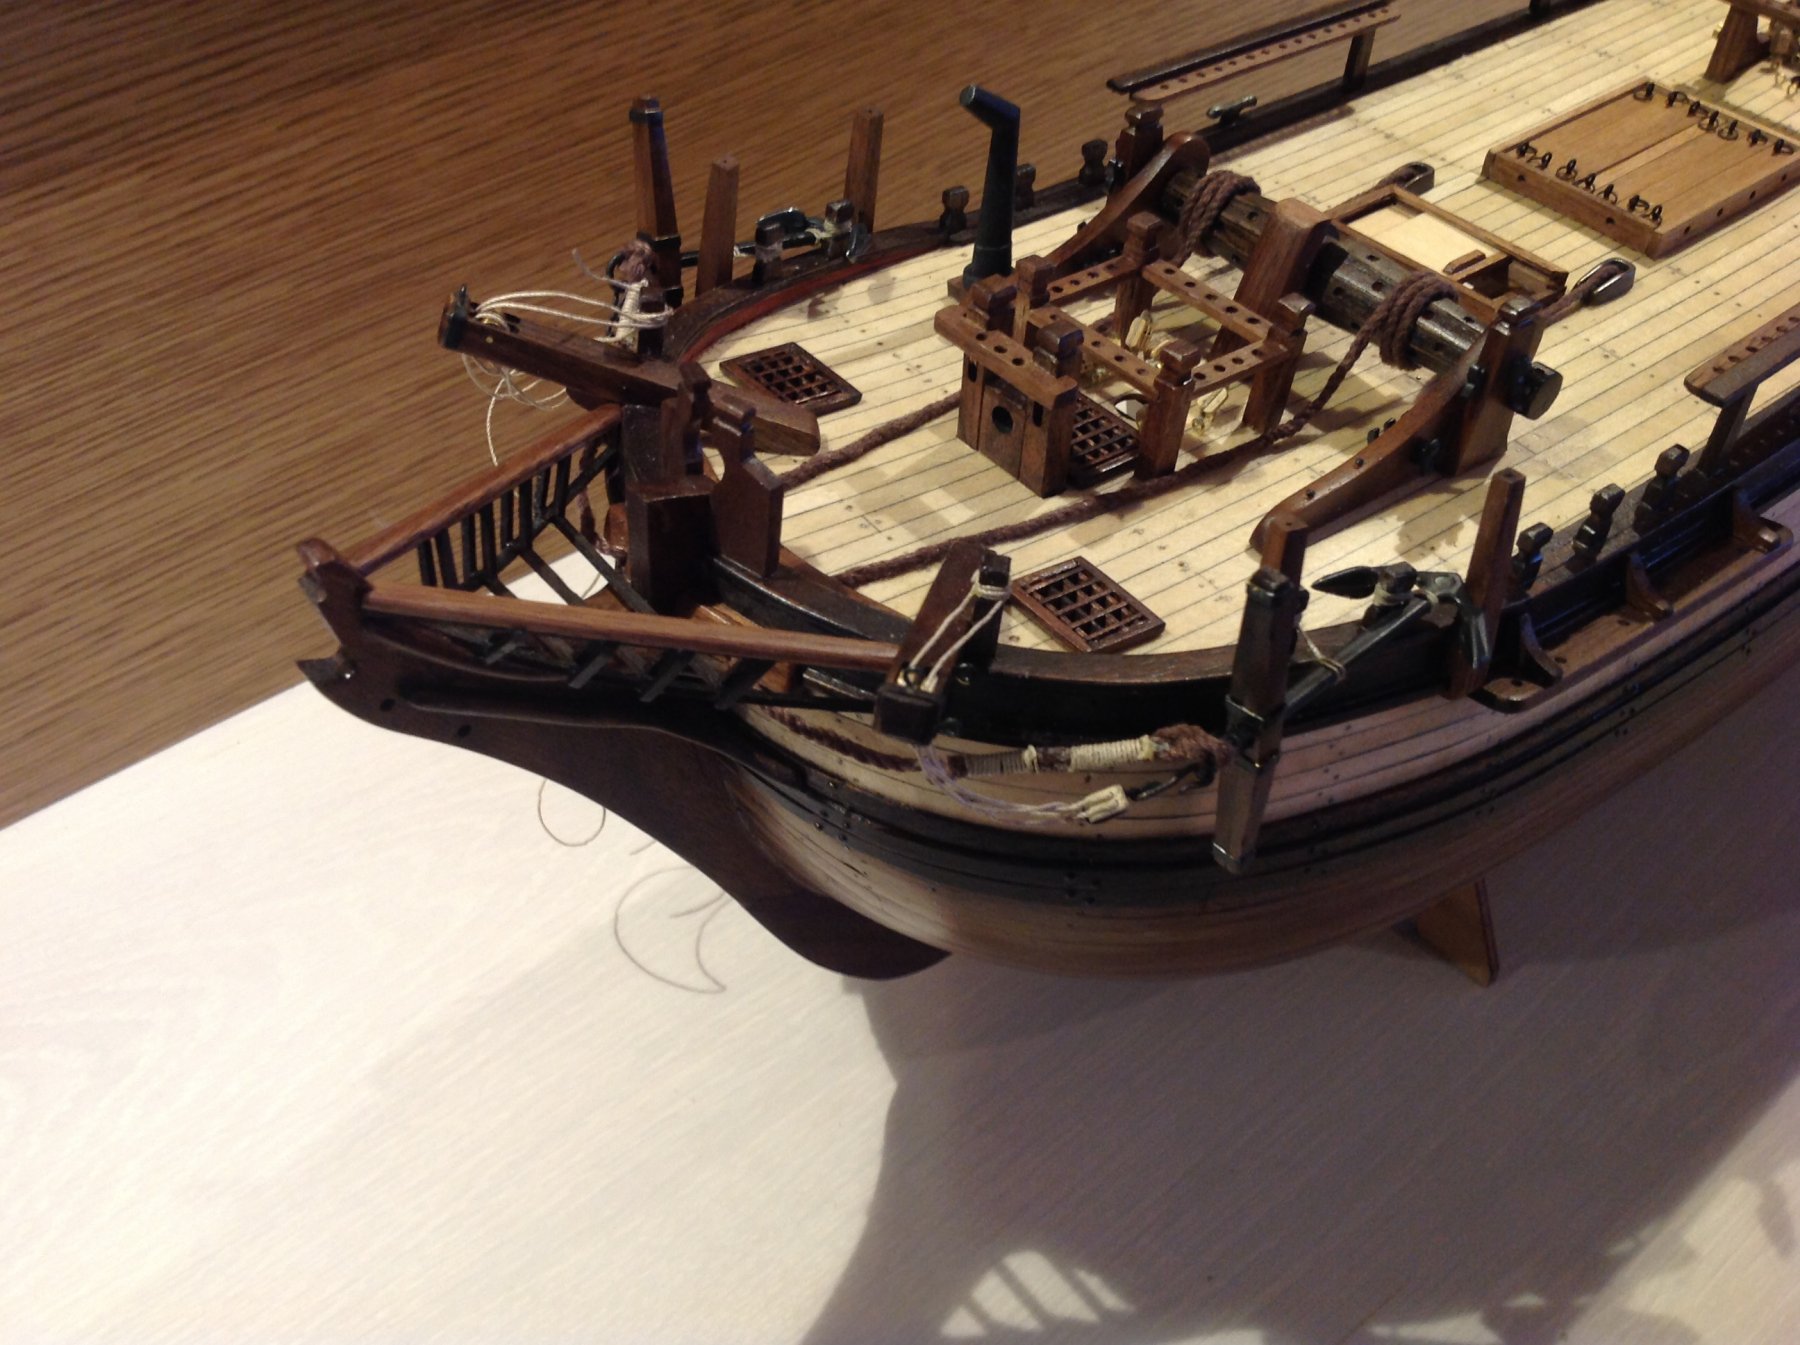
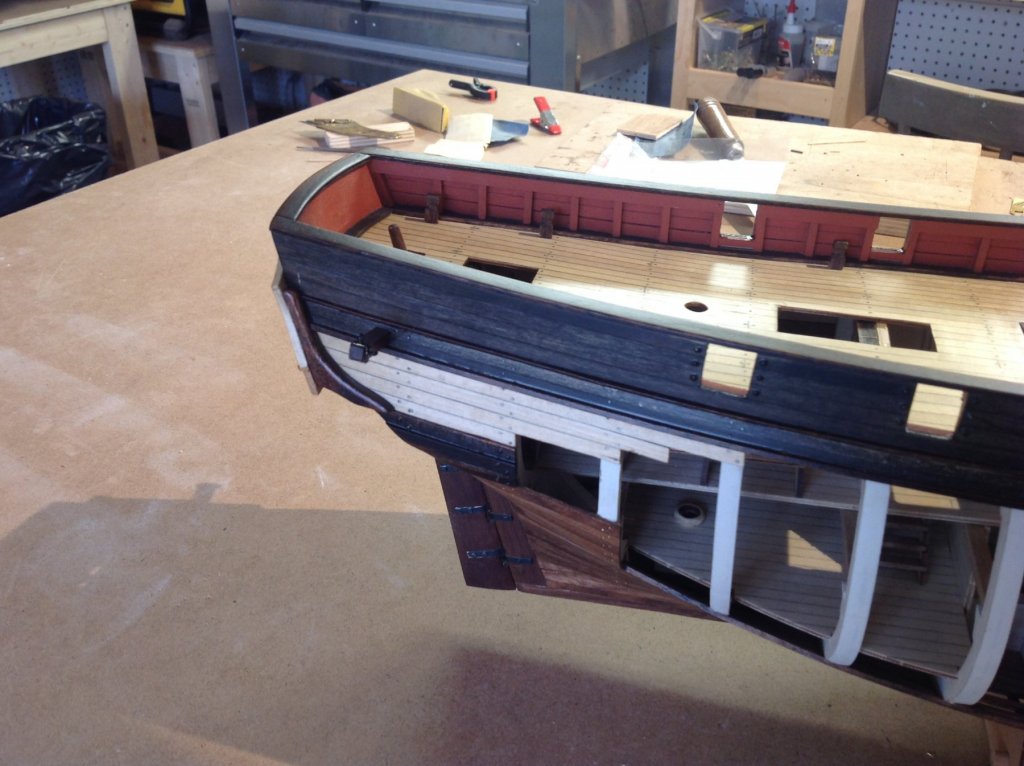
Steady progress with the deck and hull apparatus - just the cannon, anchor and associated rigging to go and then I'll start the two launches. Have done a capital job of sanding the flesh off the ends of my thumb and two working fingers in the process. Think I need to look into a small hobby sized belt sander perhaps? Not sure what is available or if anyone has a favourite tool of this sort they could point me to. Temporarily evicted from the studio I share with my spouse while she has a pottery show going on. - should get back in there Friday.


- 171 replies
-
- 6
-
-
- artesania latina
- bounty
- (and 1 more)
-
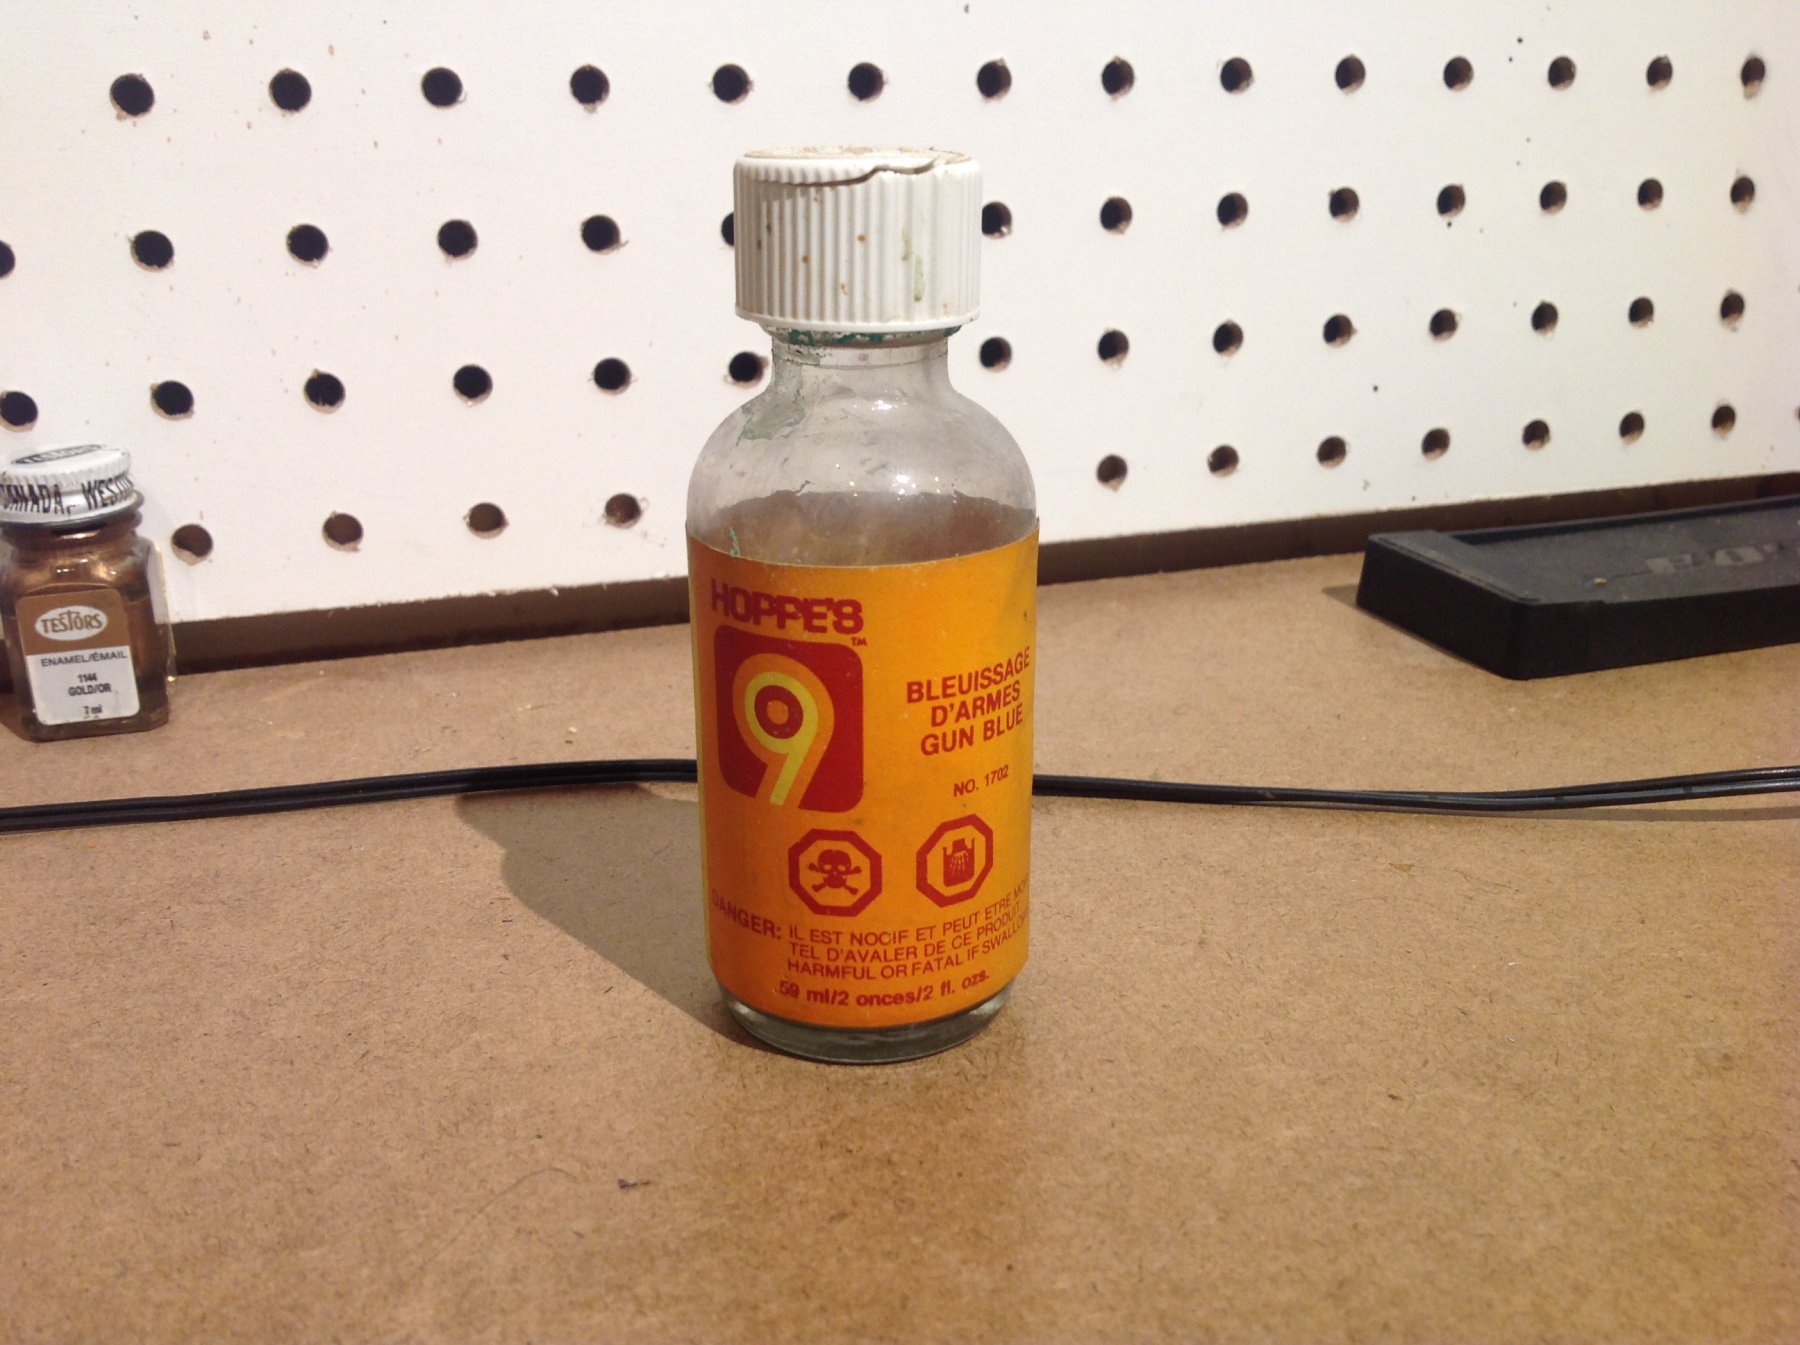
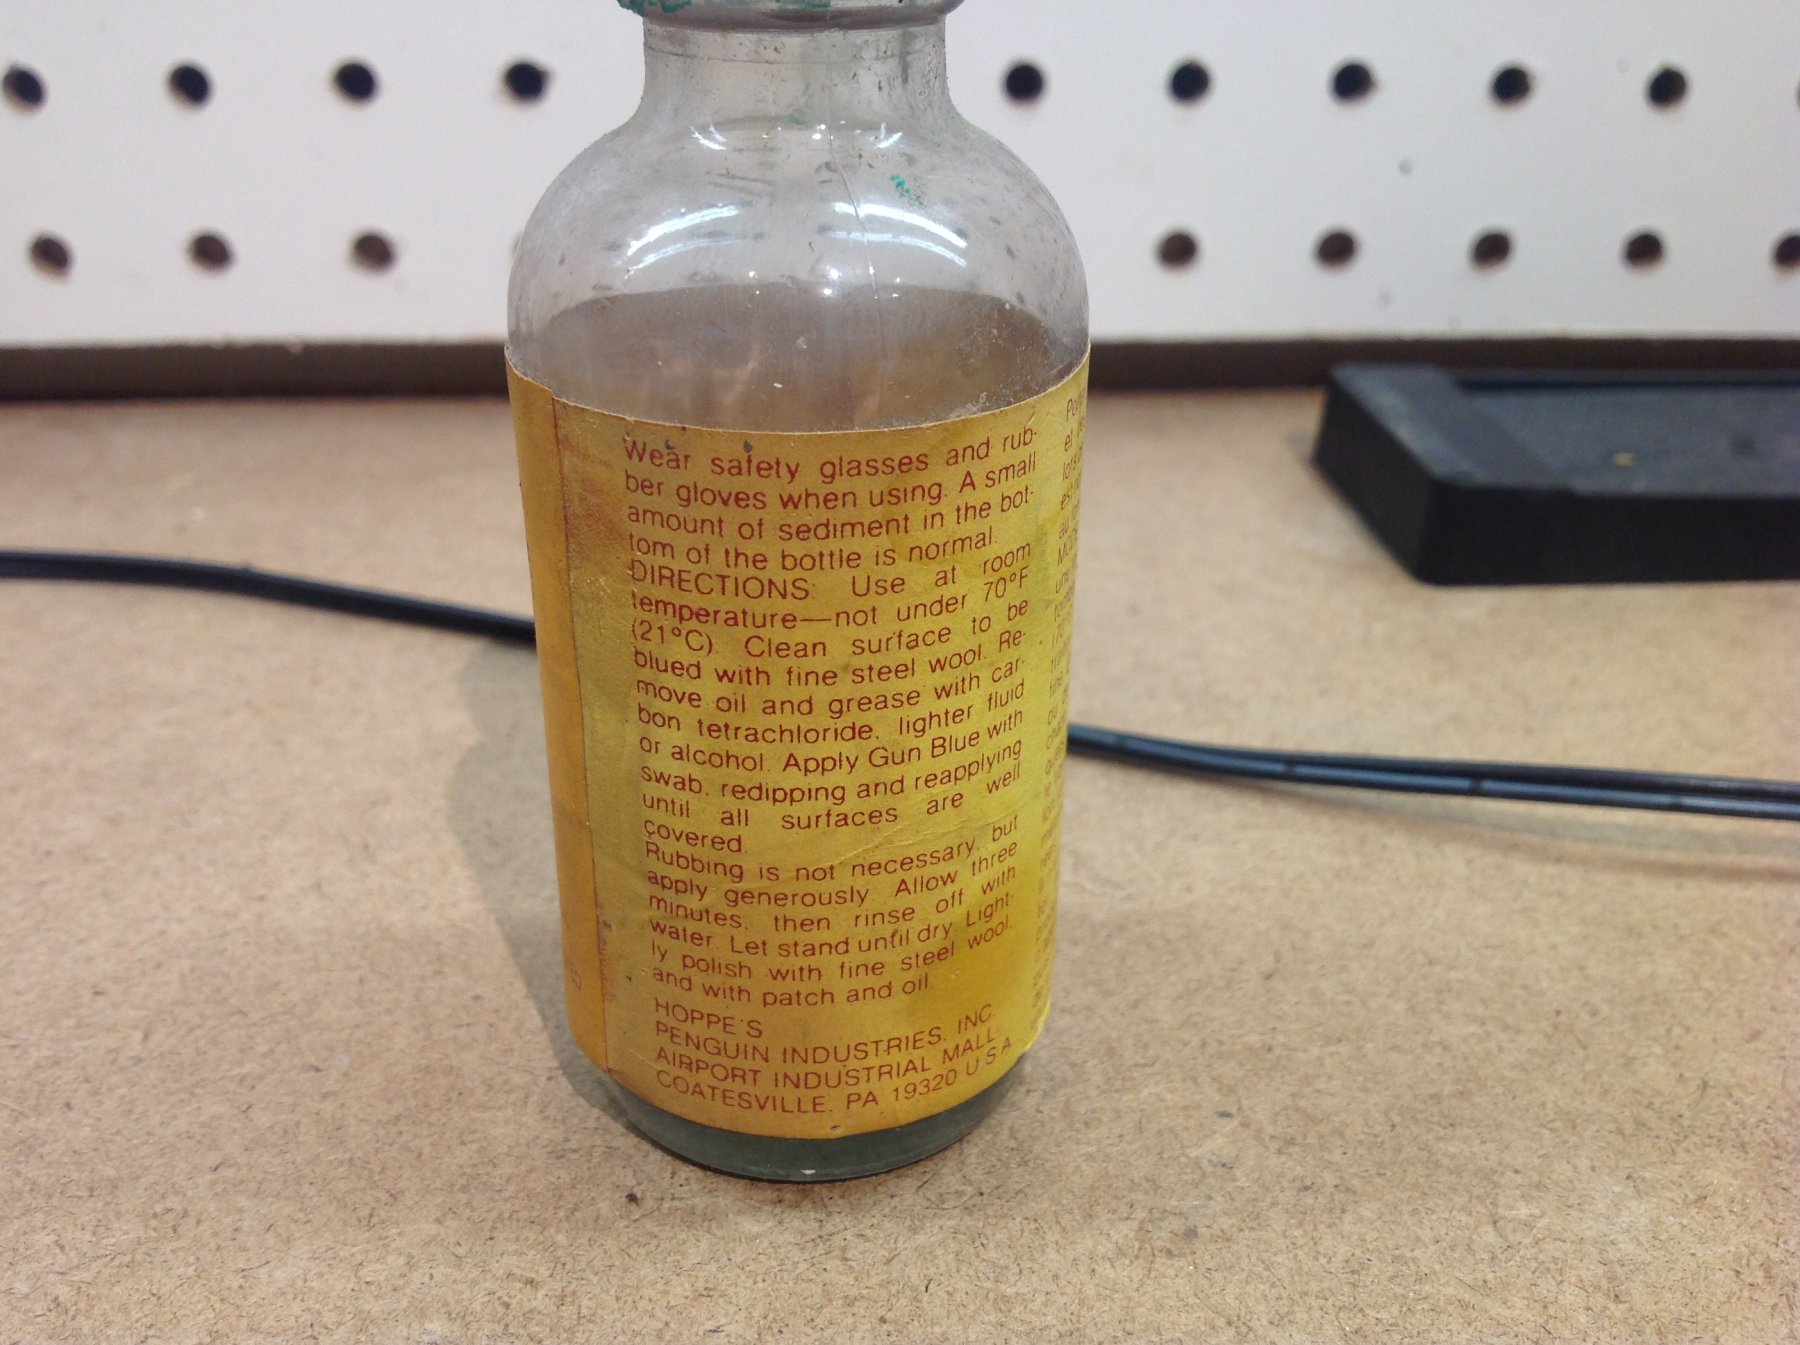
My wife did a lot of oxy acetylene welding and had this, about 40 years old. Not sure of the chemistry but here is a shot of the label.


-
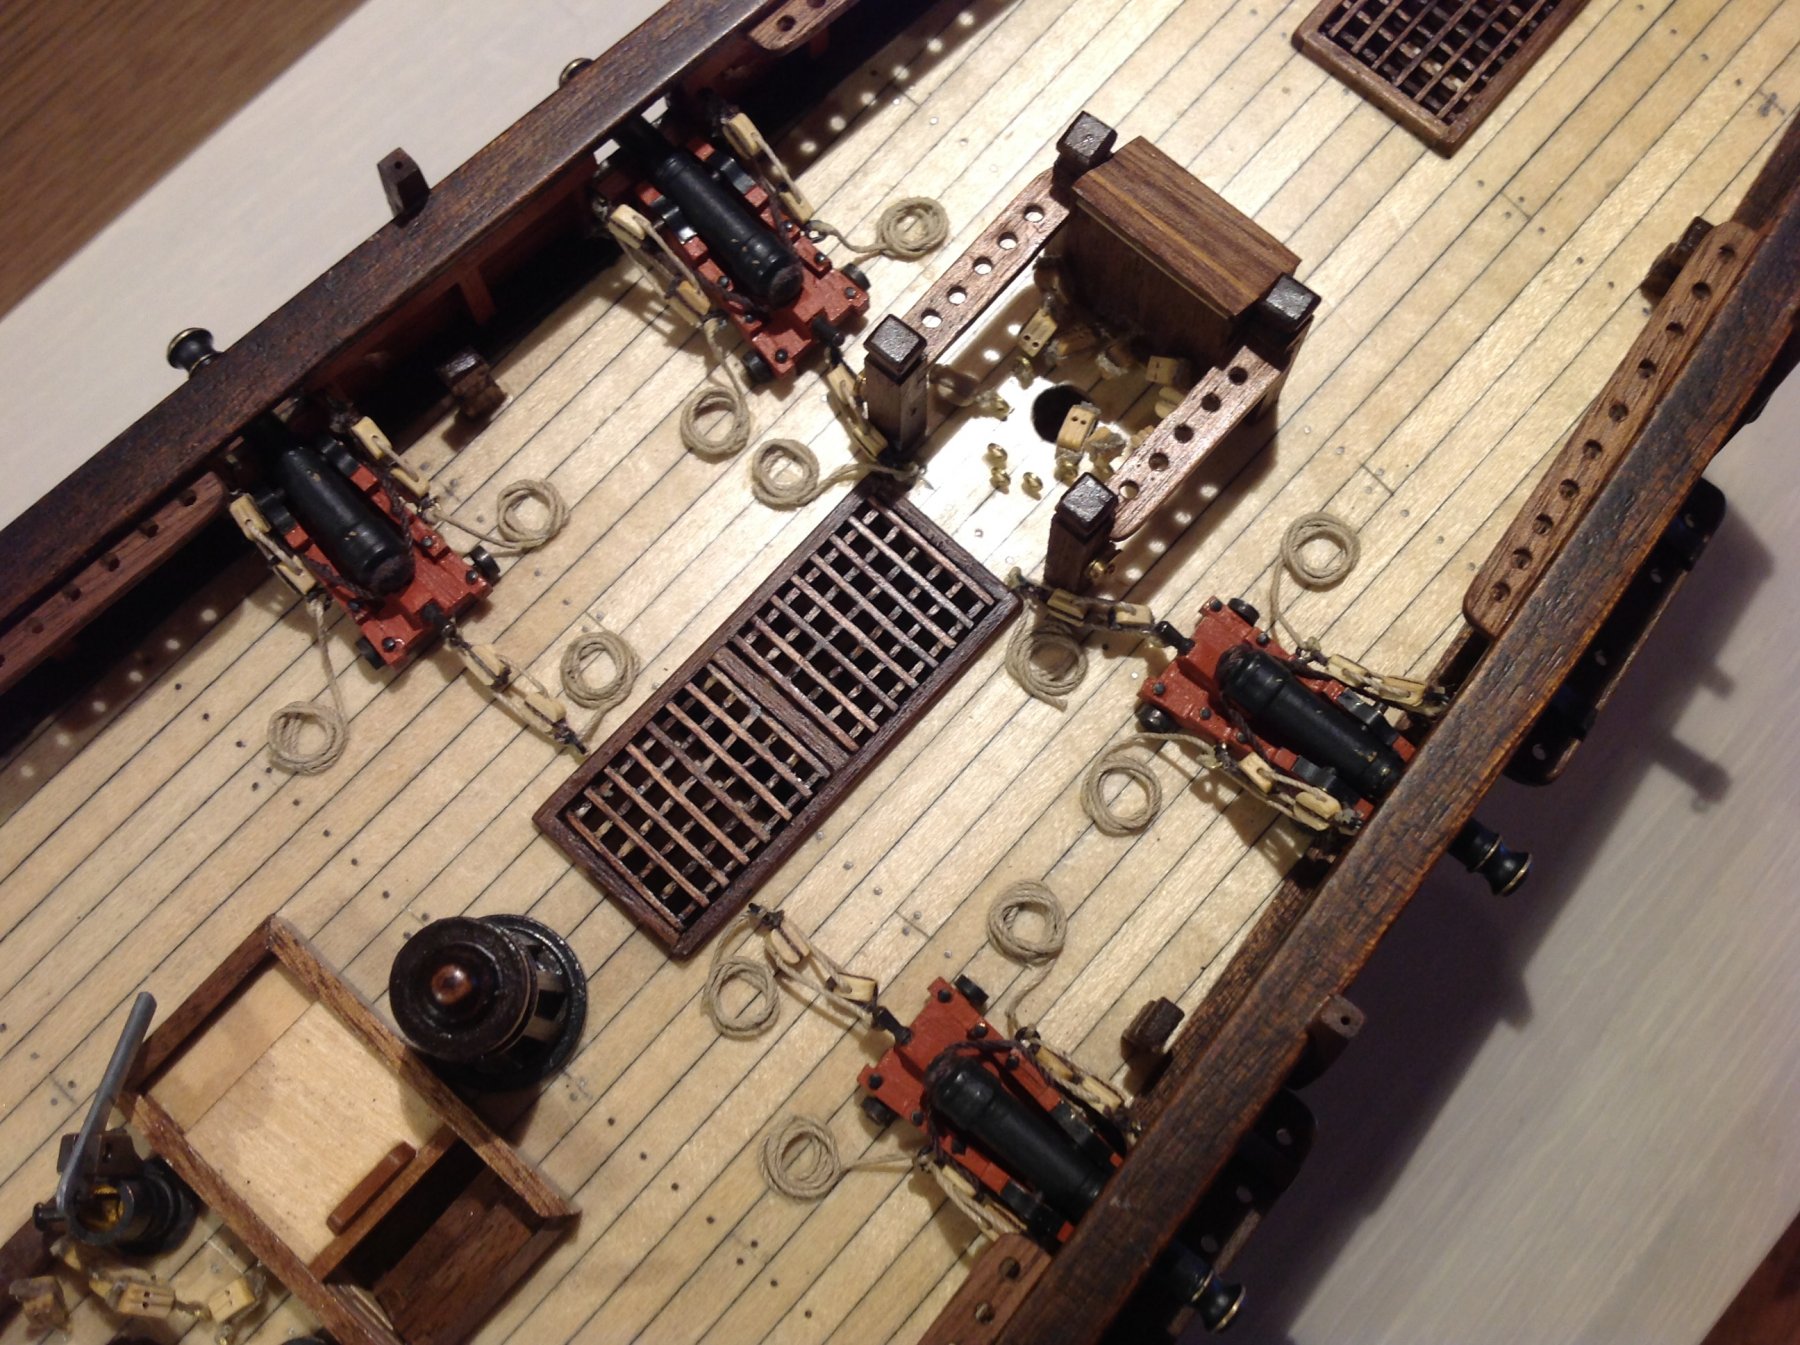
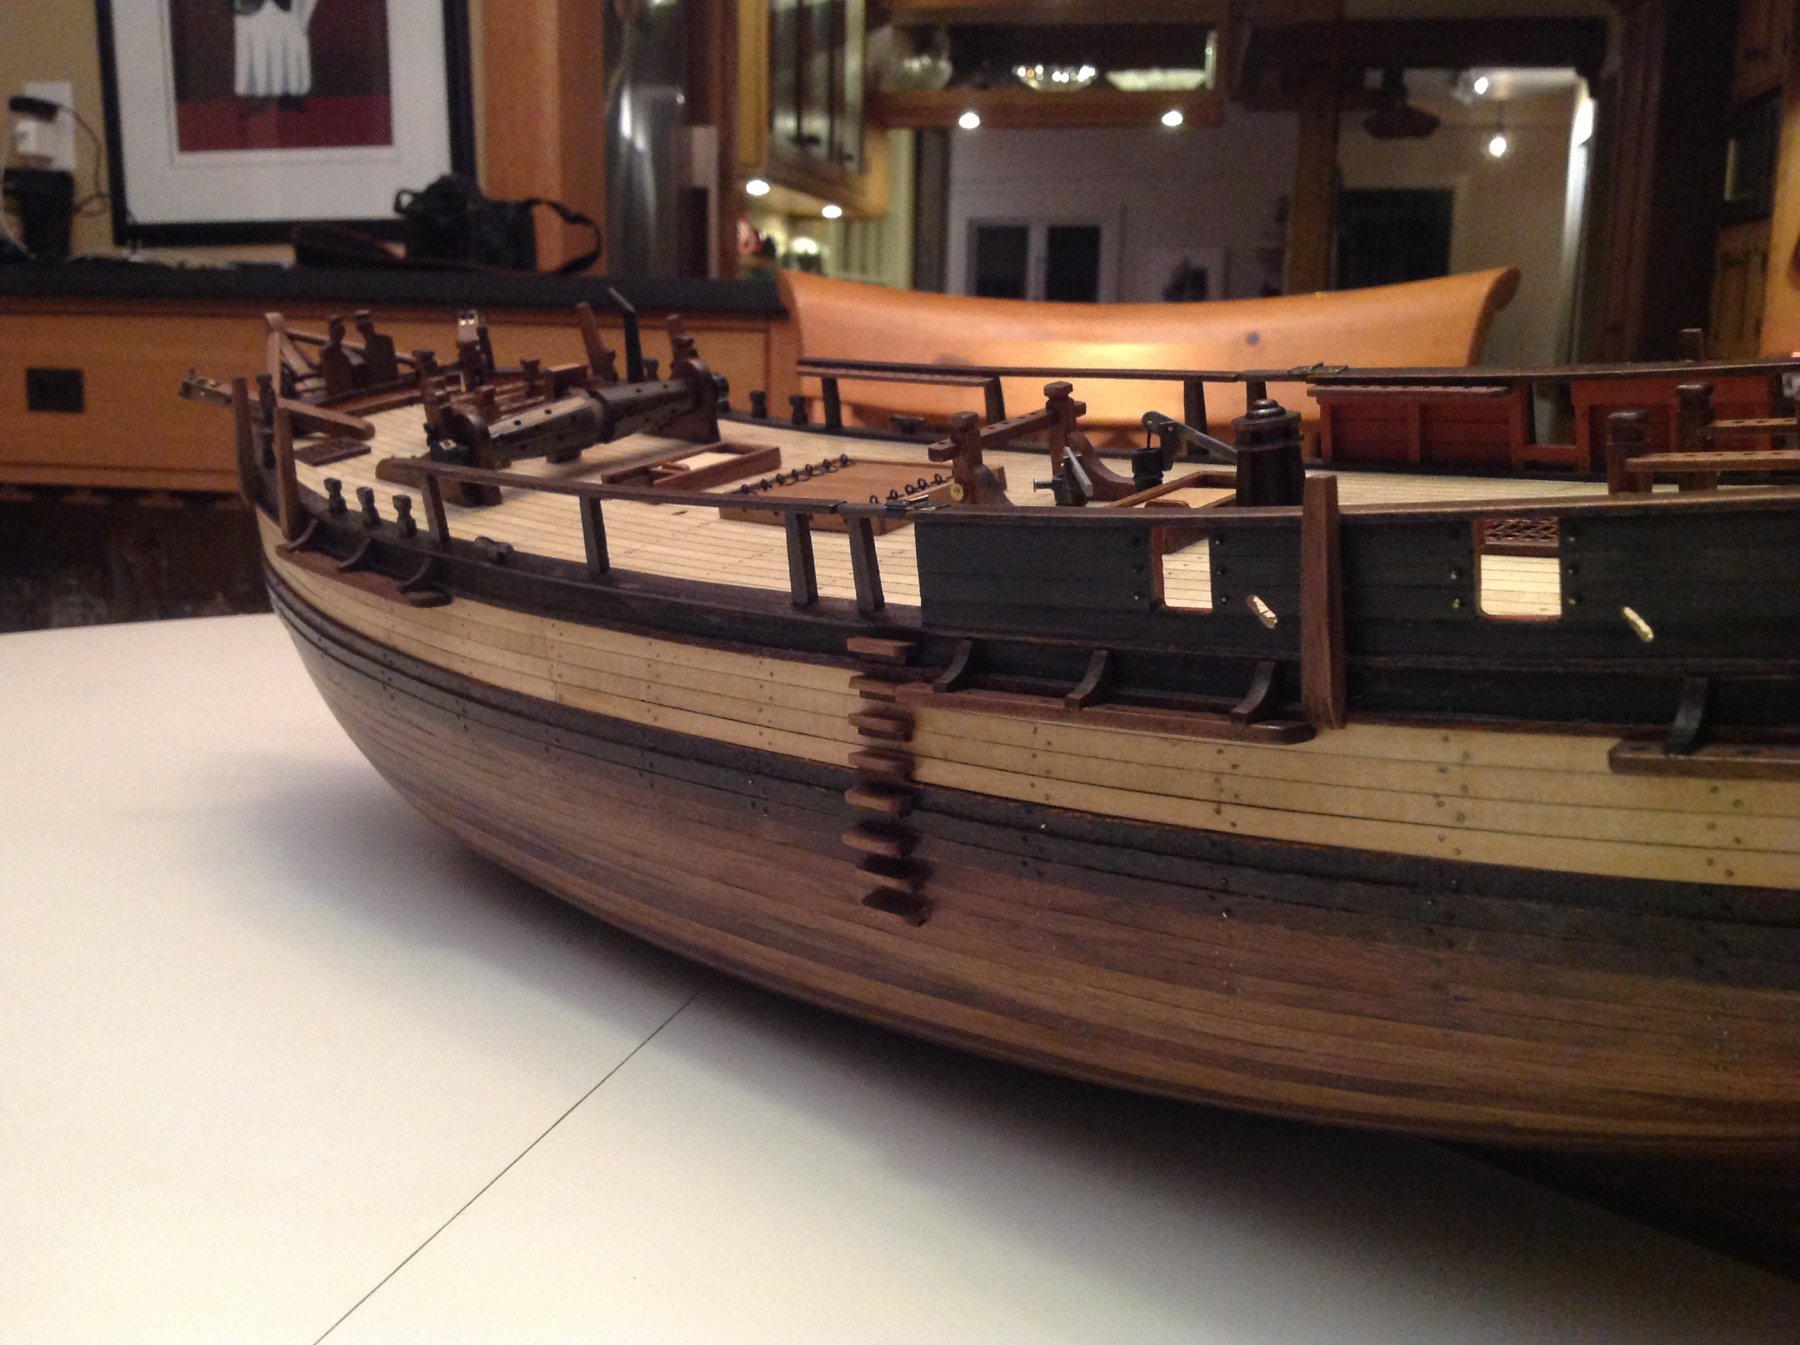
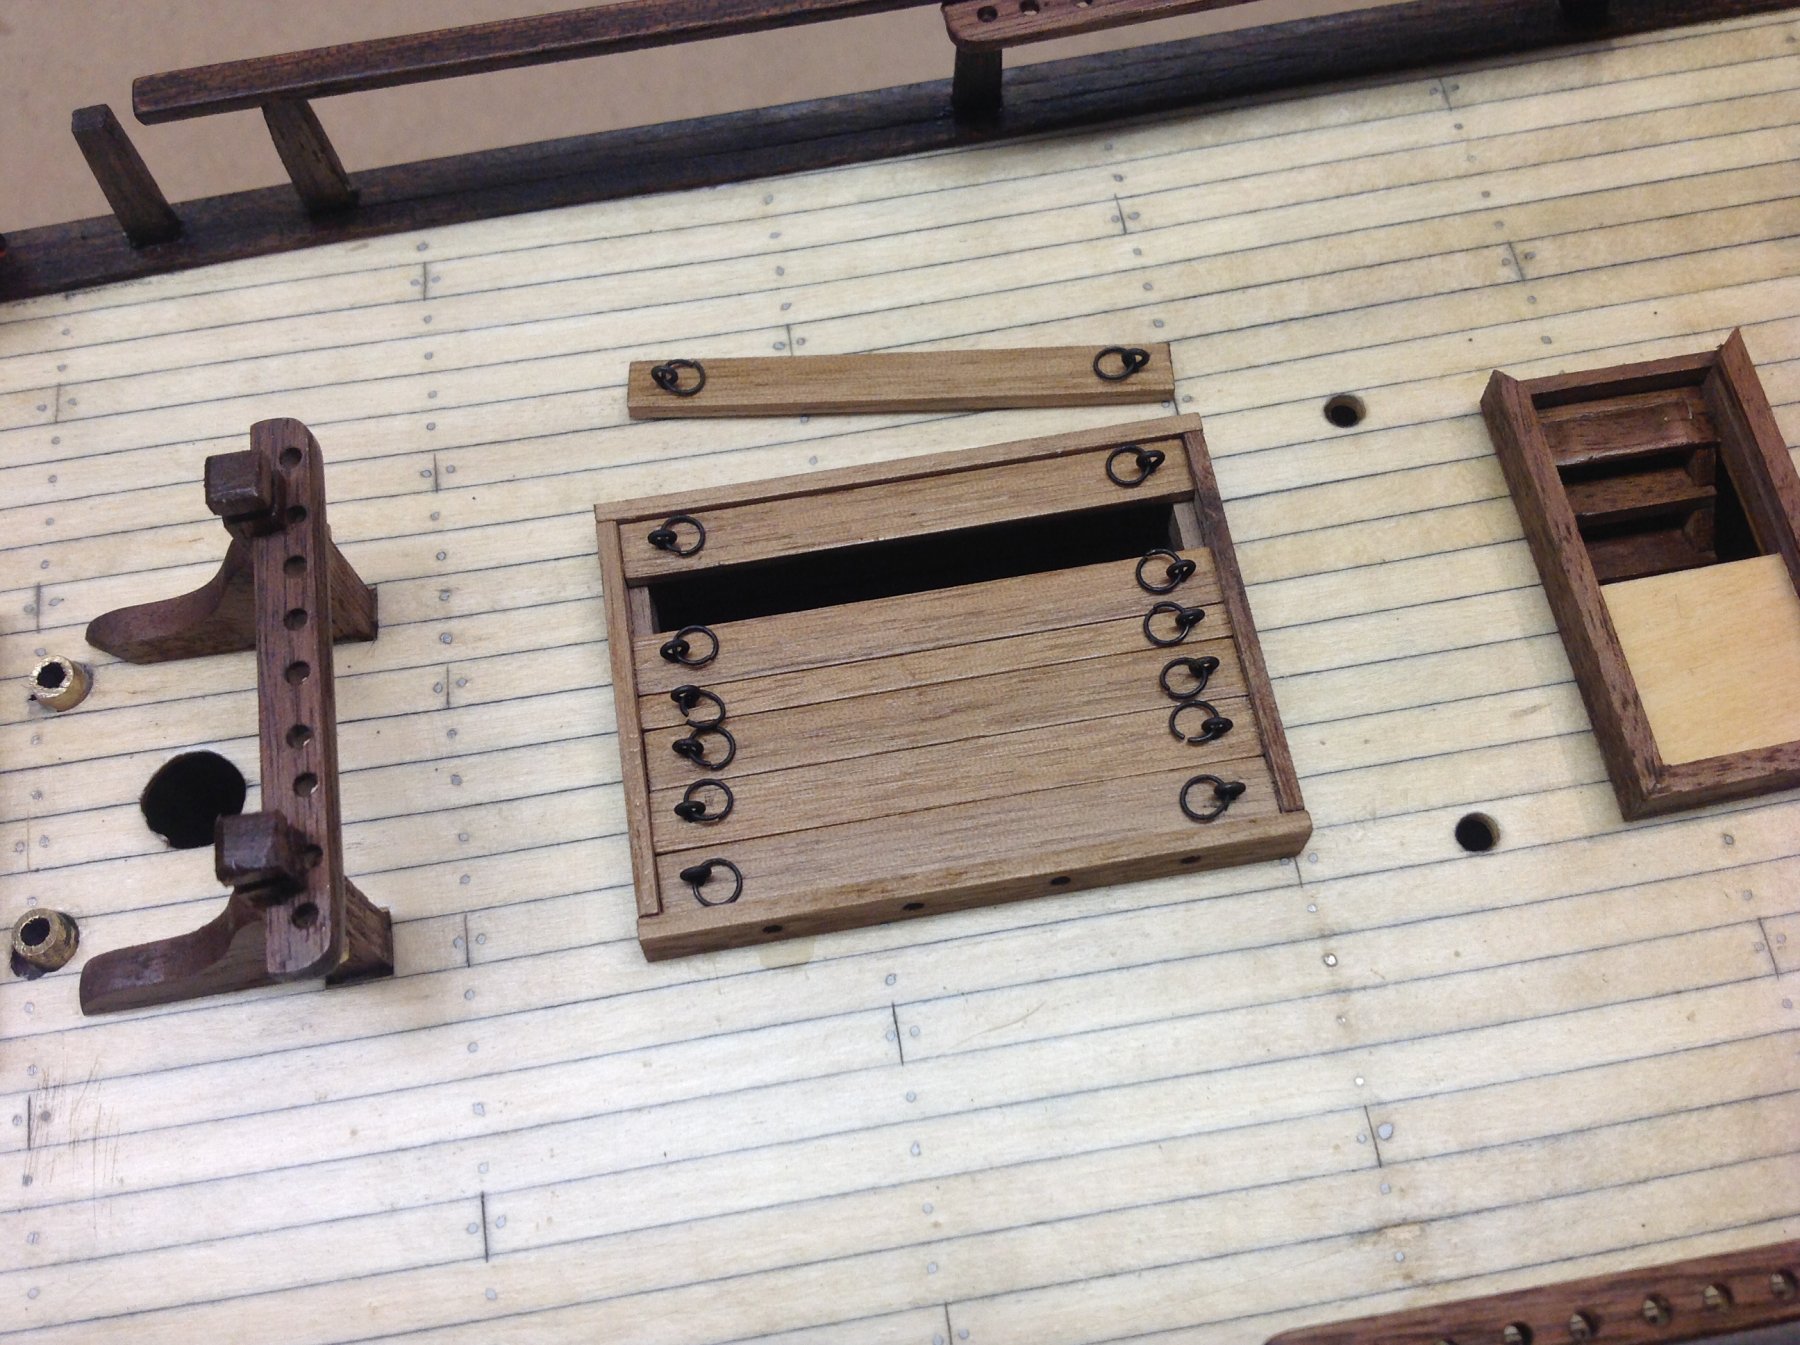
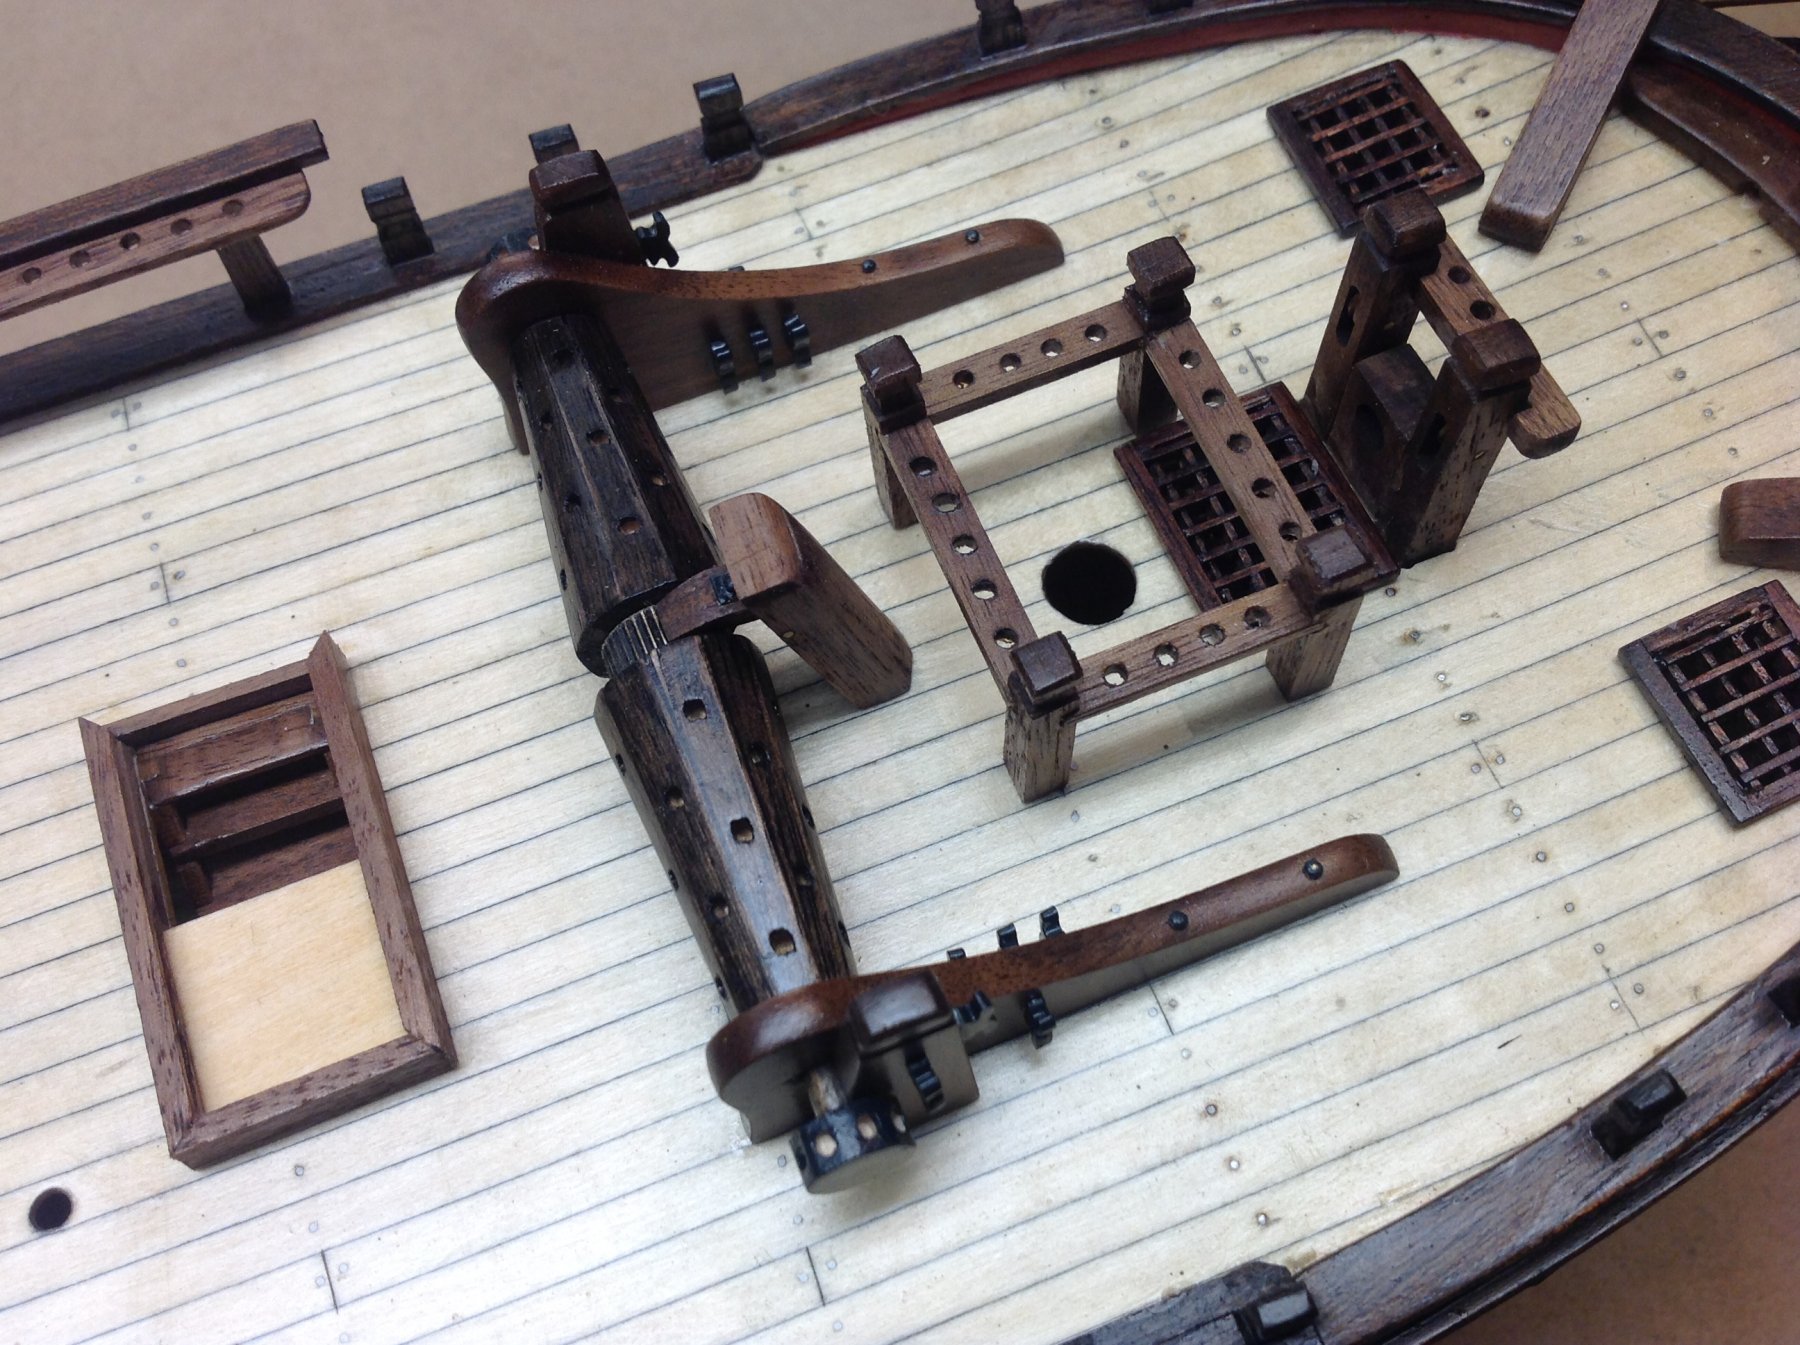
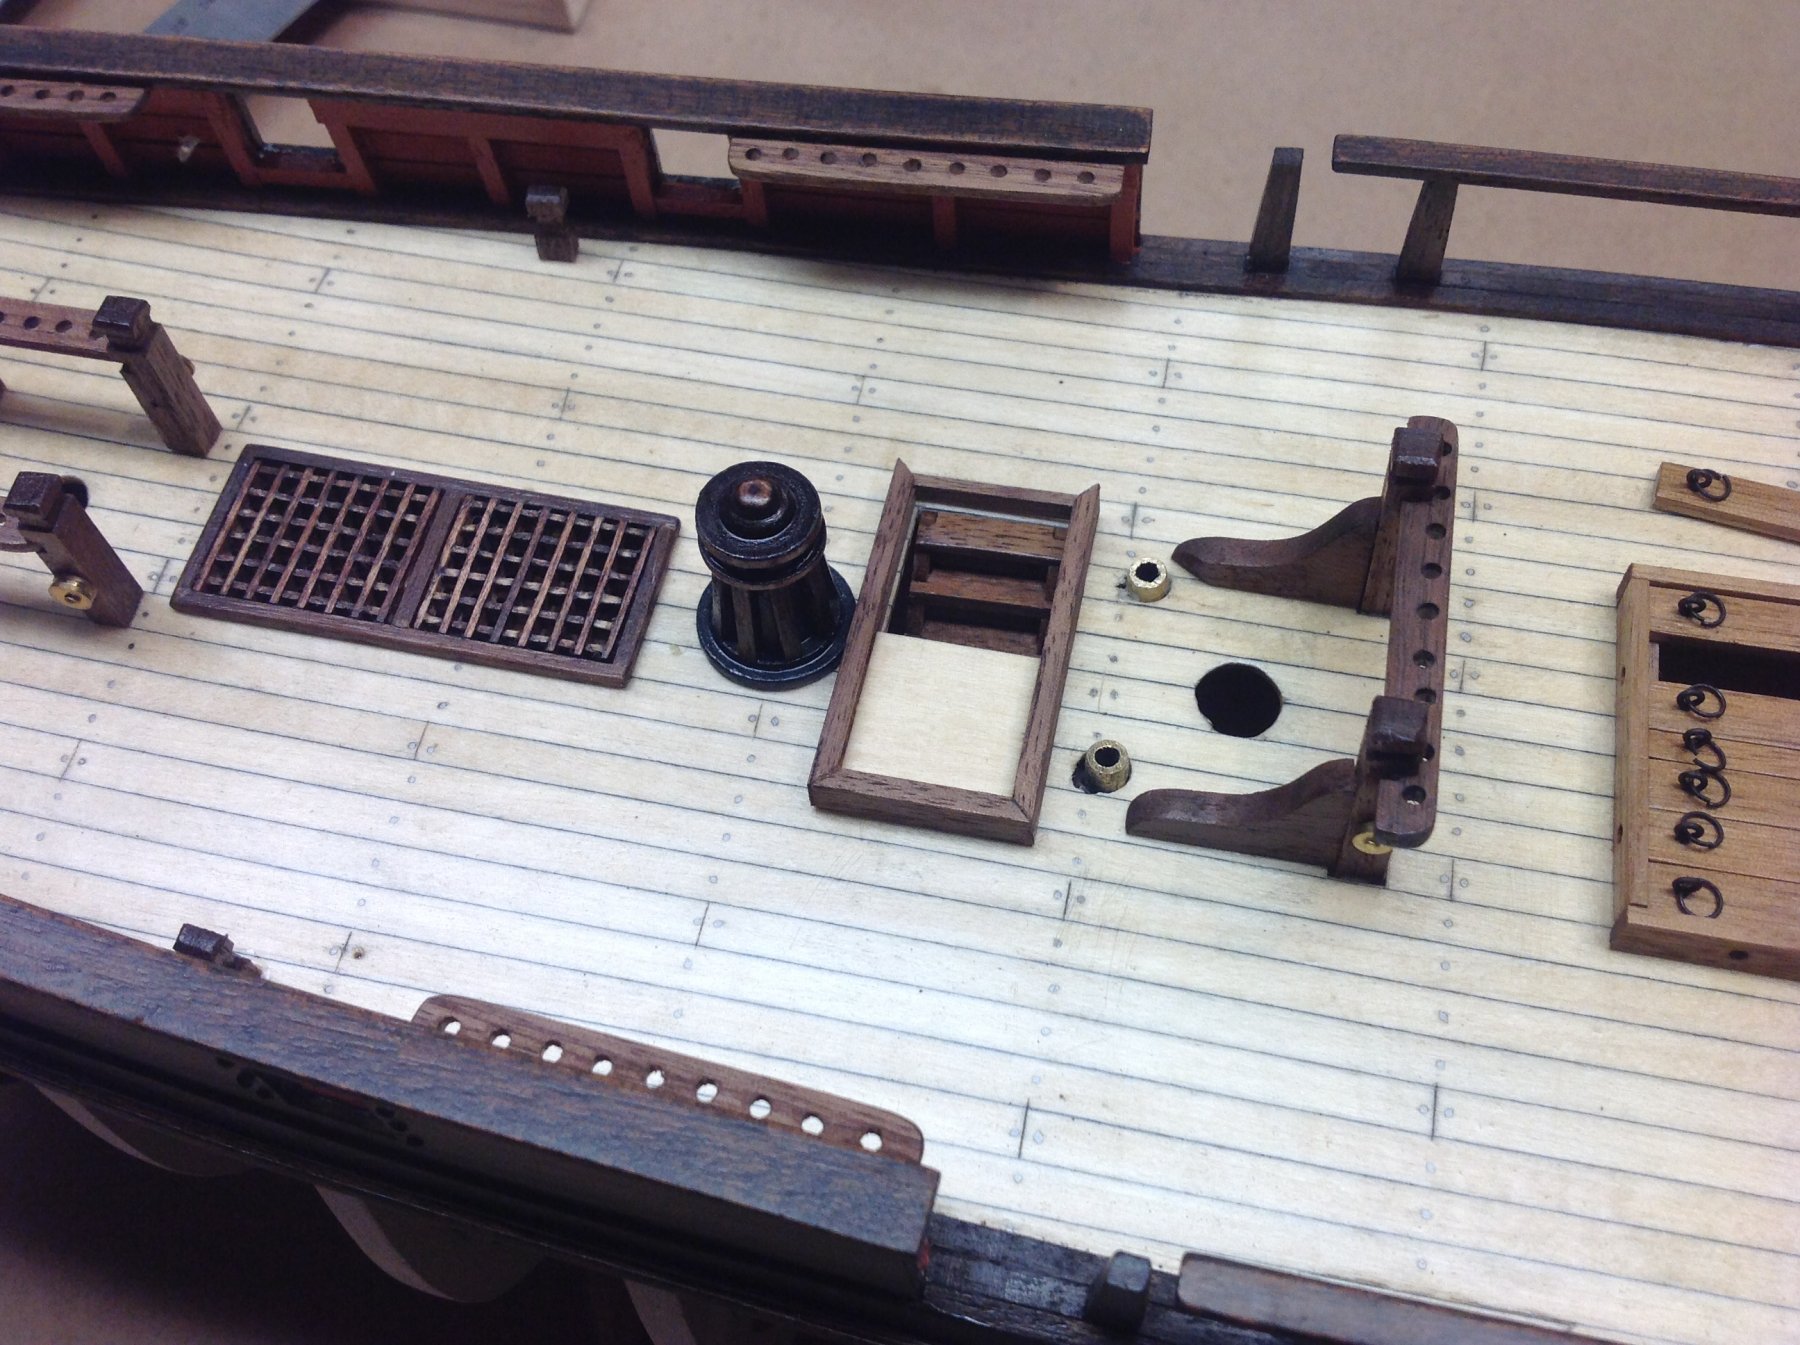
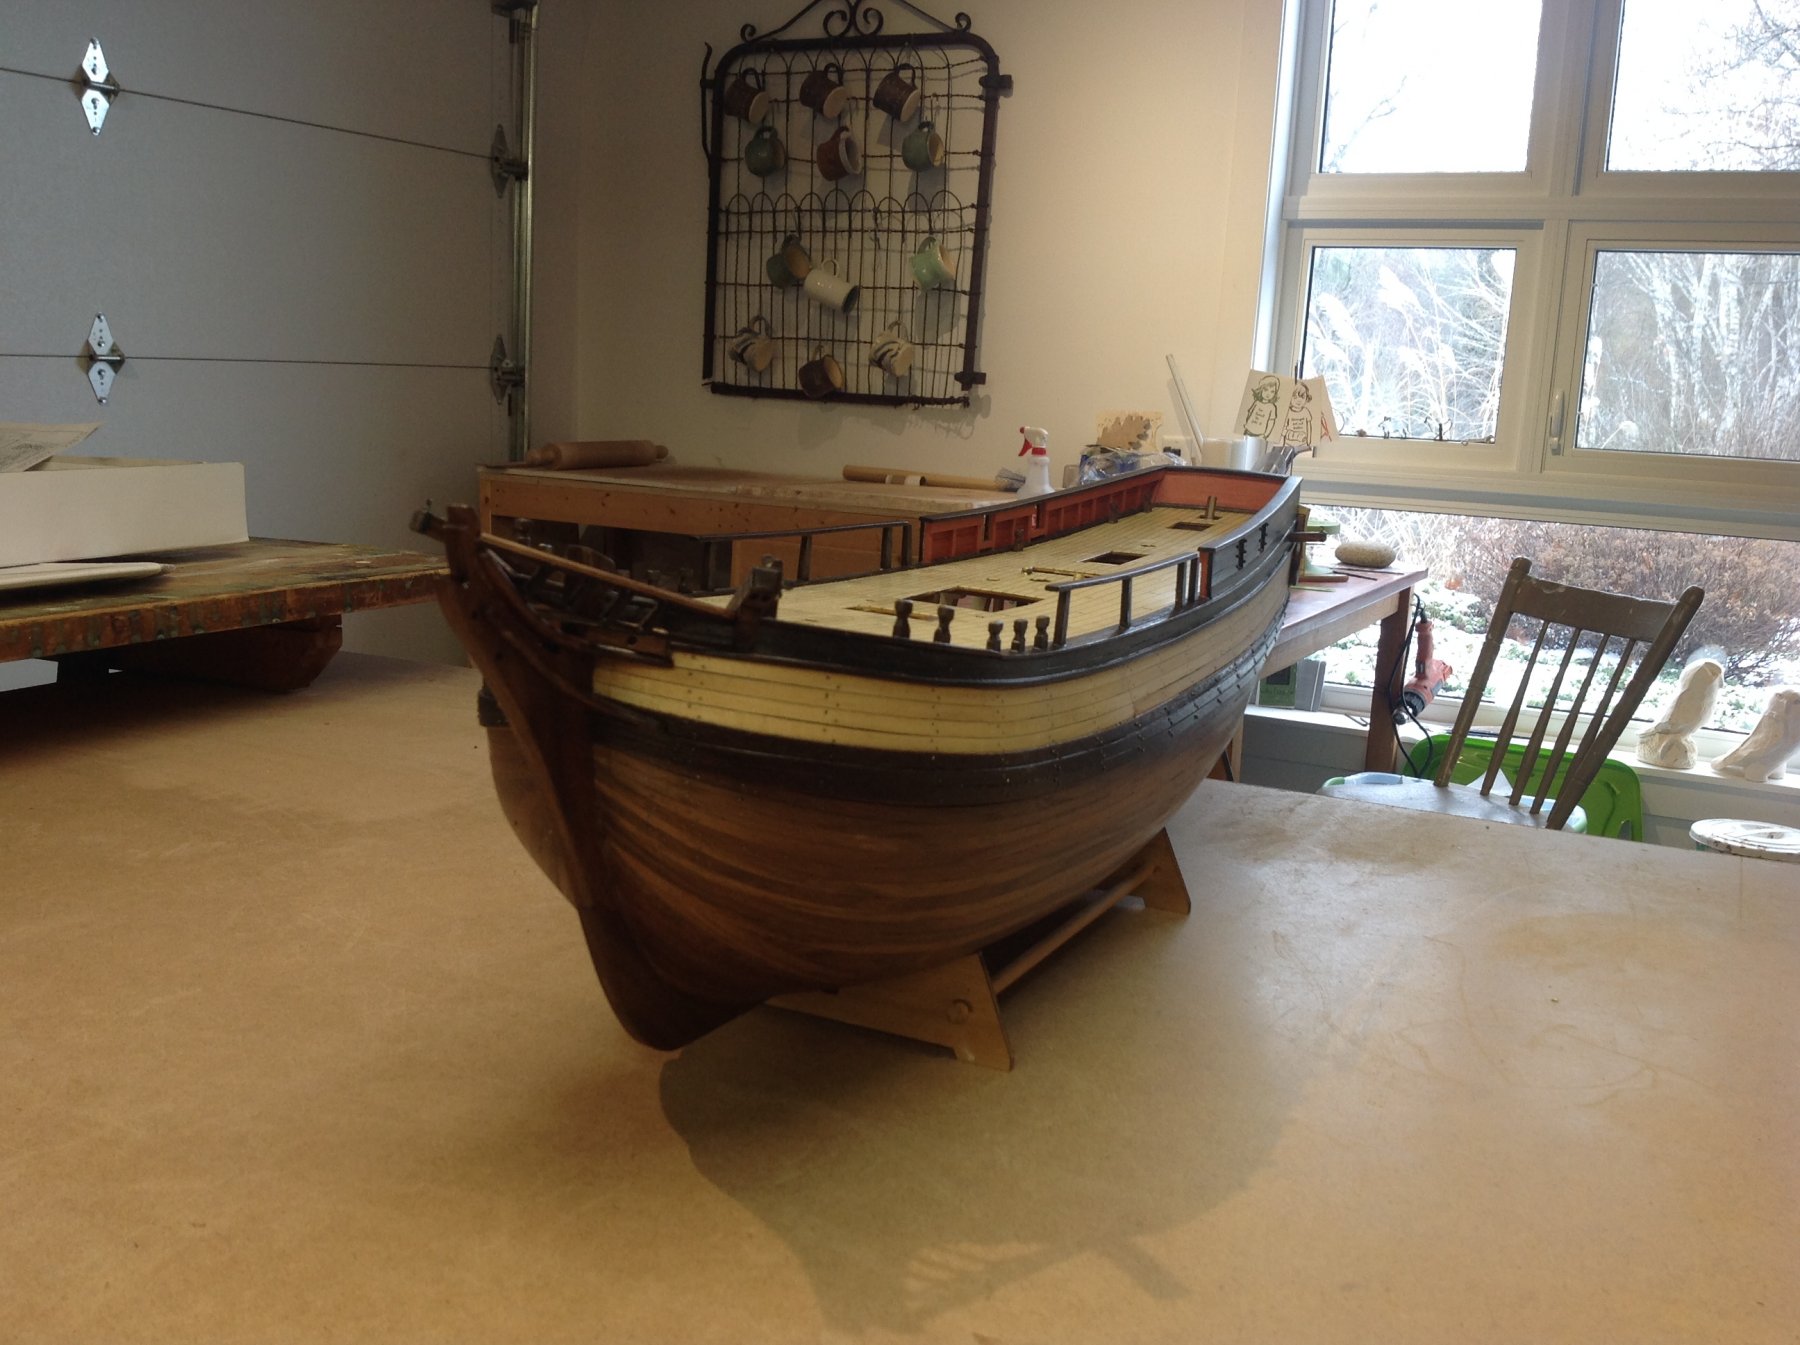
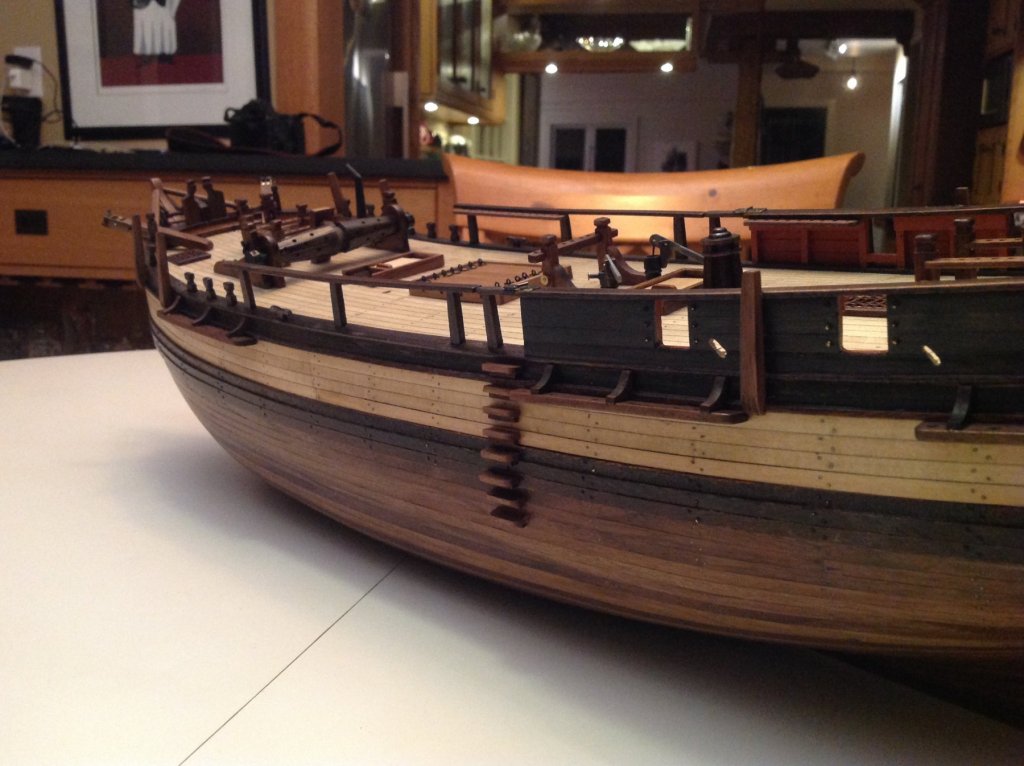
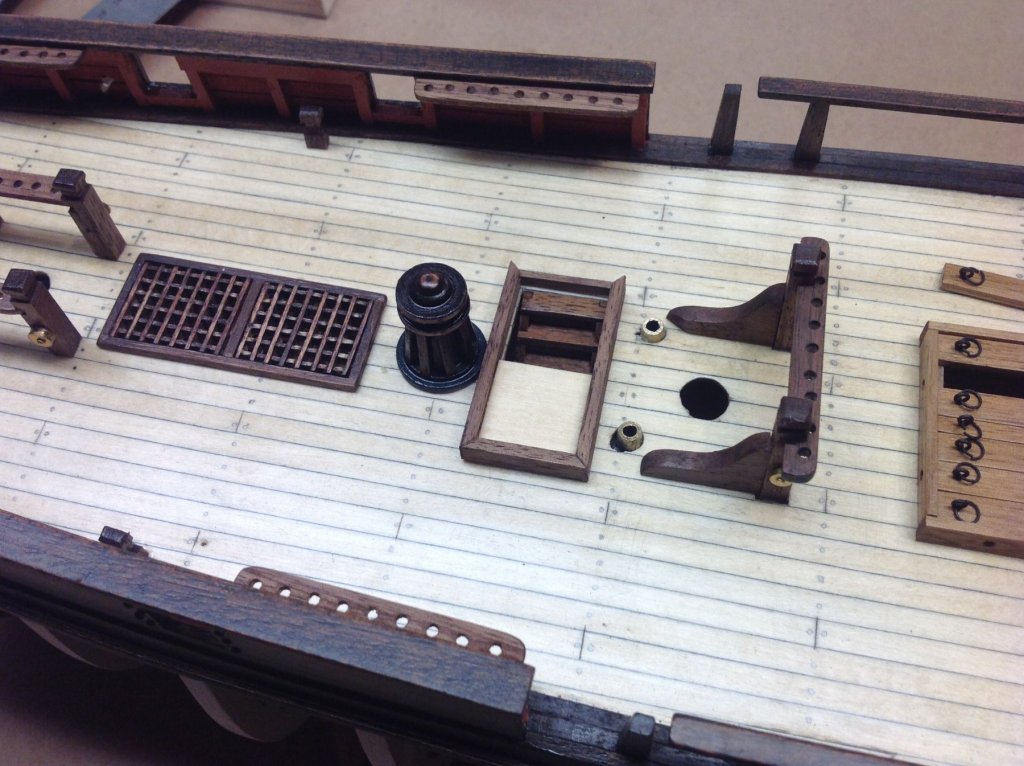
Making my way through all the deck apparatus, windlass, gratings, companionway covers, pinracks and such.....the plans are actually very good, a few mistakes on the AL parts list but generally easy to sort things out. The gun blue solution works really well on the small brass fittings - just a few seconds and the eye bolts and rings get a nice black patina.


- 171 replies
-
- 4
-
-
- artesania latina
- bounty
- (and 1 more)
-
Thanks Johnothan...just read through that archaeology link. Gives me an idea to perhaps copper the one full side of planking, to be representative of the actual ship, and leave the other open side planks exposed. Will have to source some copper strips and compatible nails at the correct scale though. Worth investigating. If you have any questions about any parts whenever you begin building I'd be happy to pass on anything I learn during my build.
-
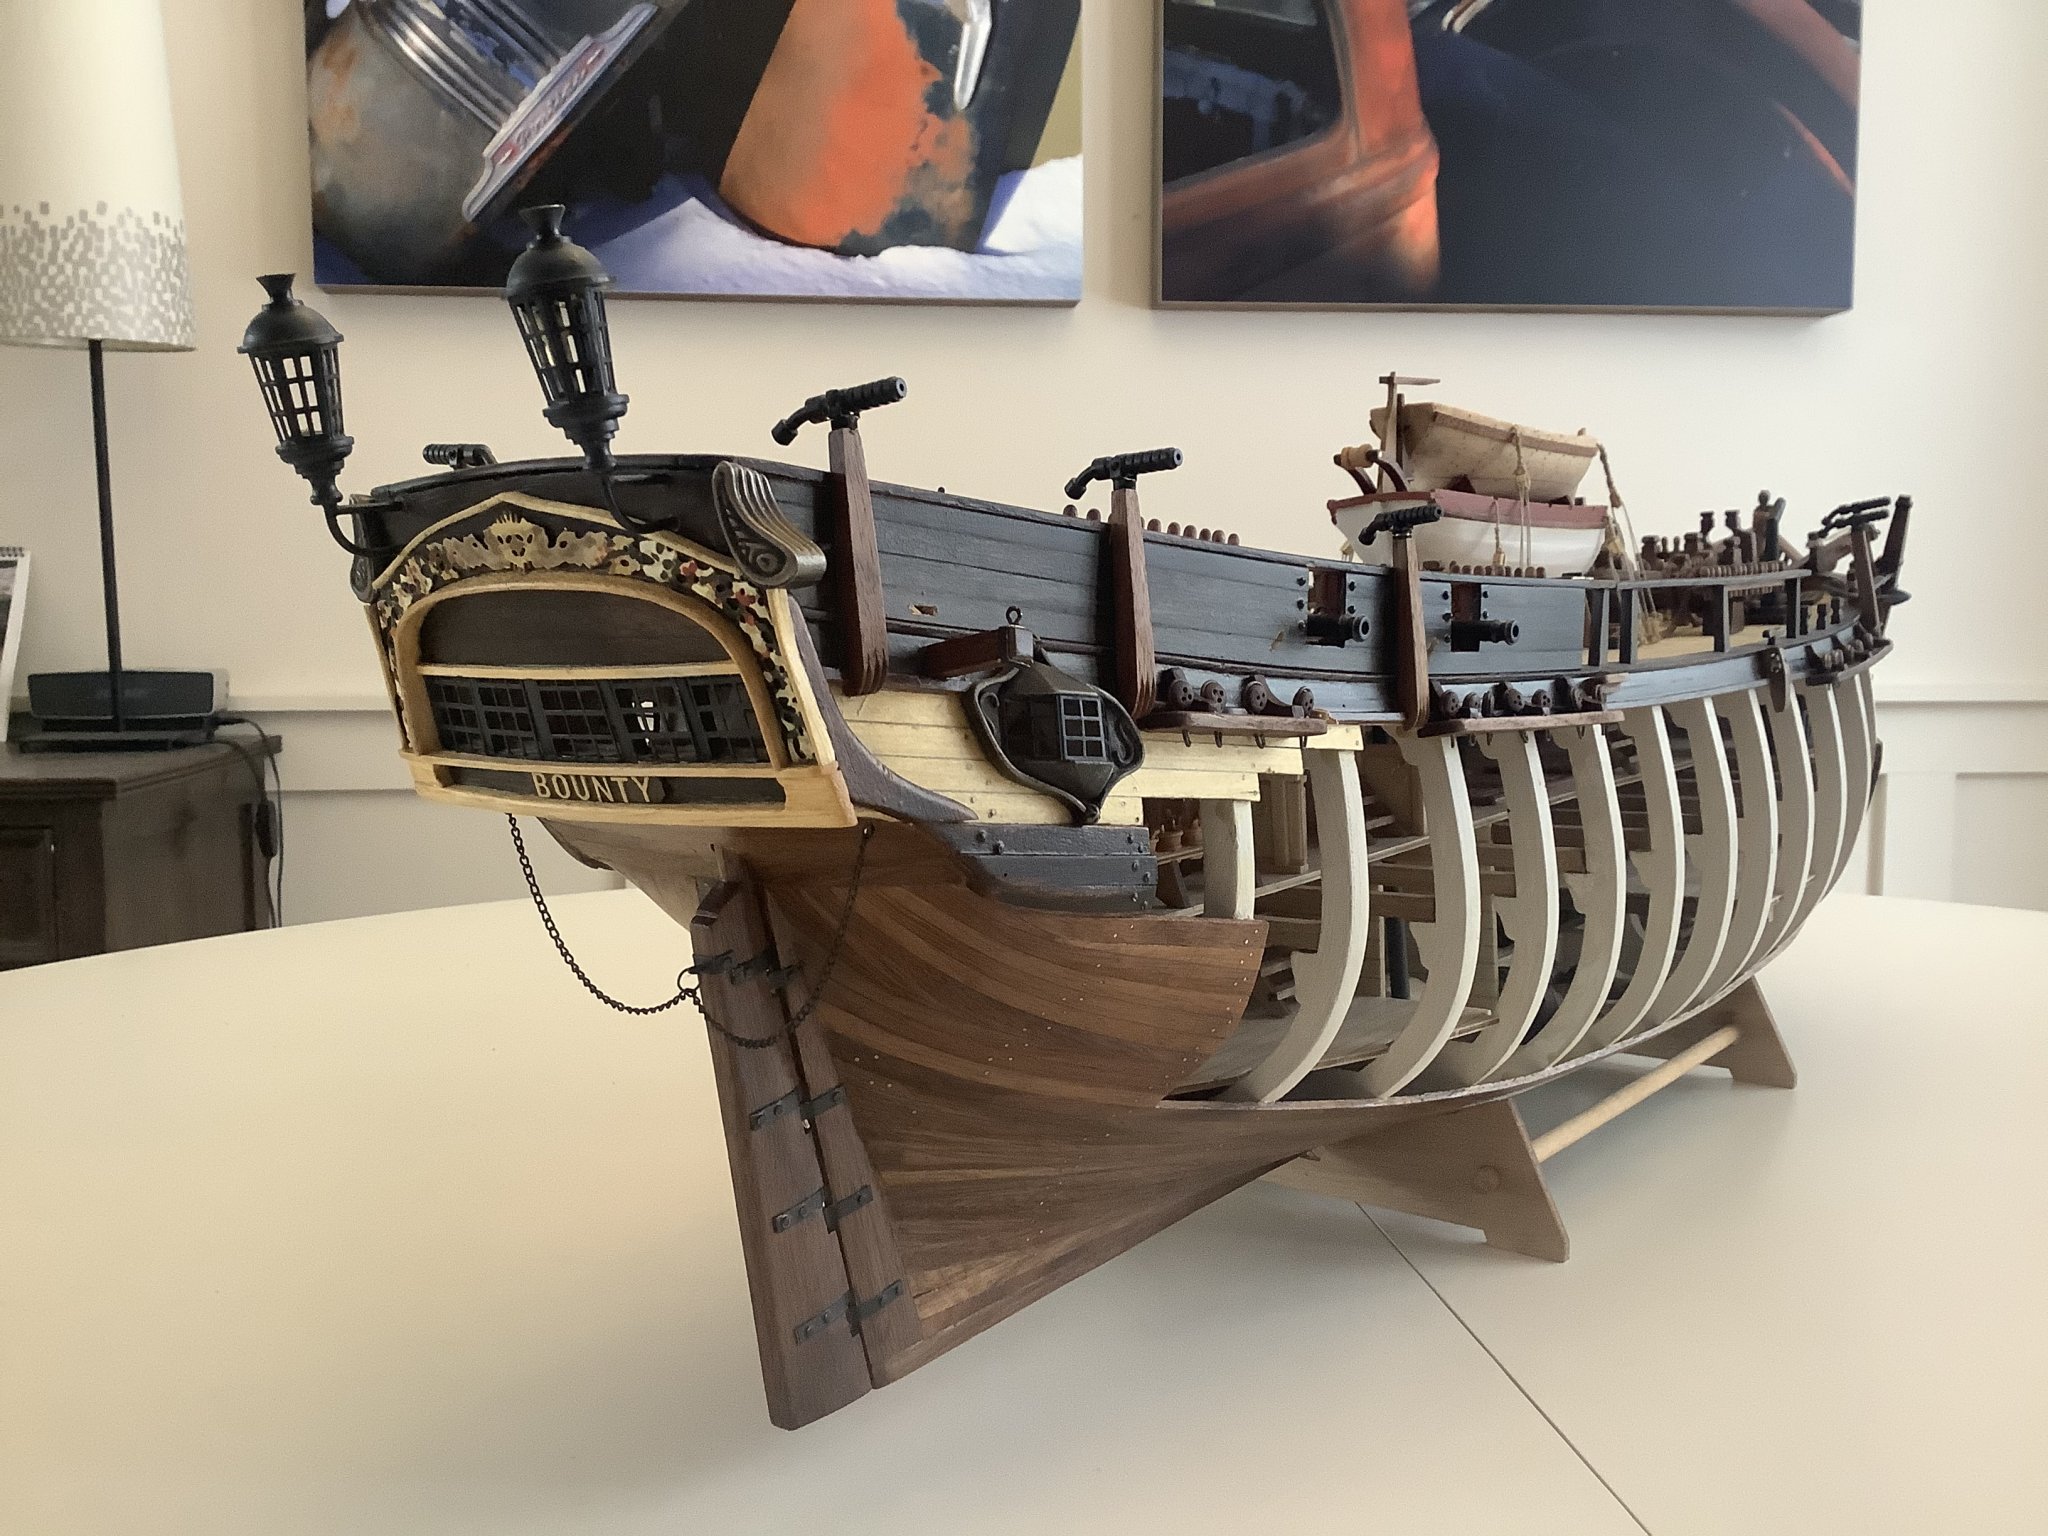
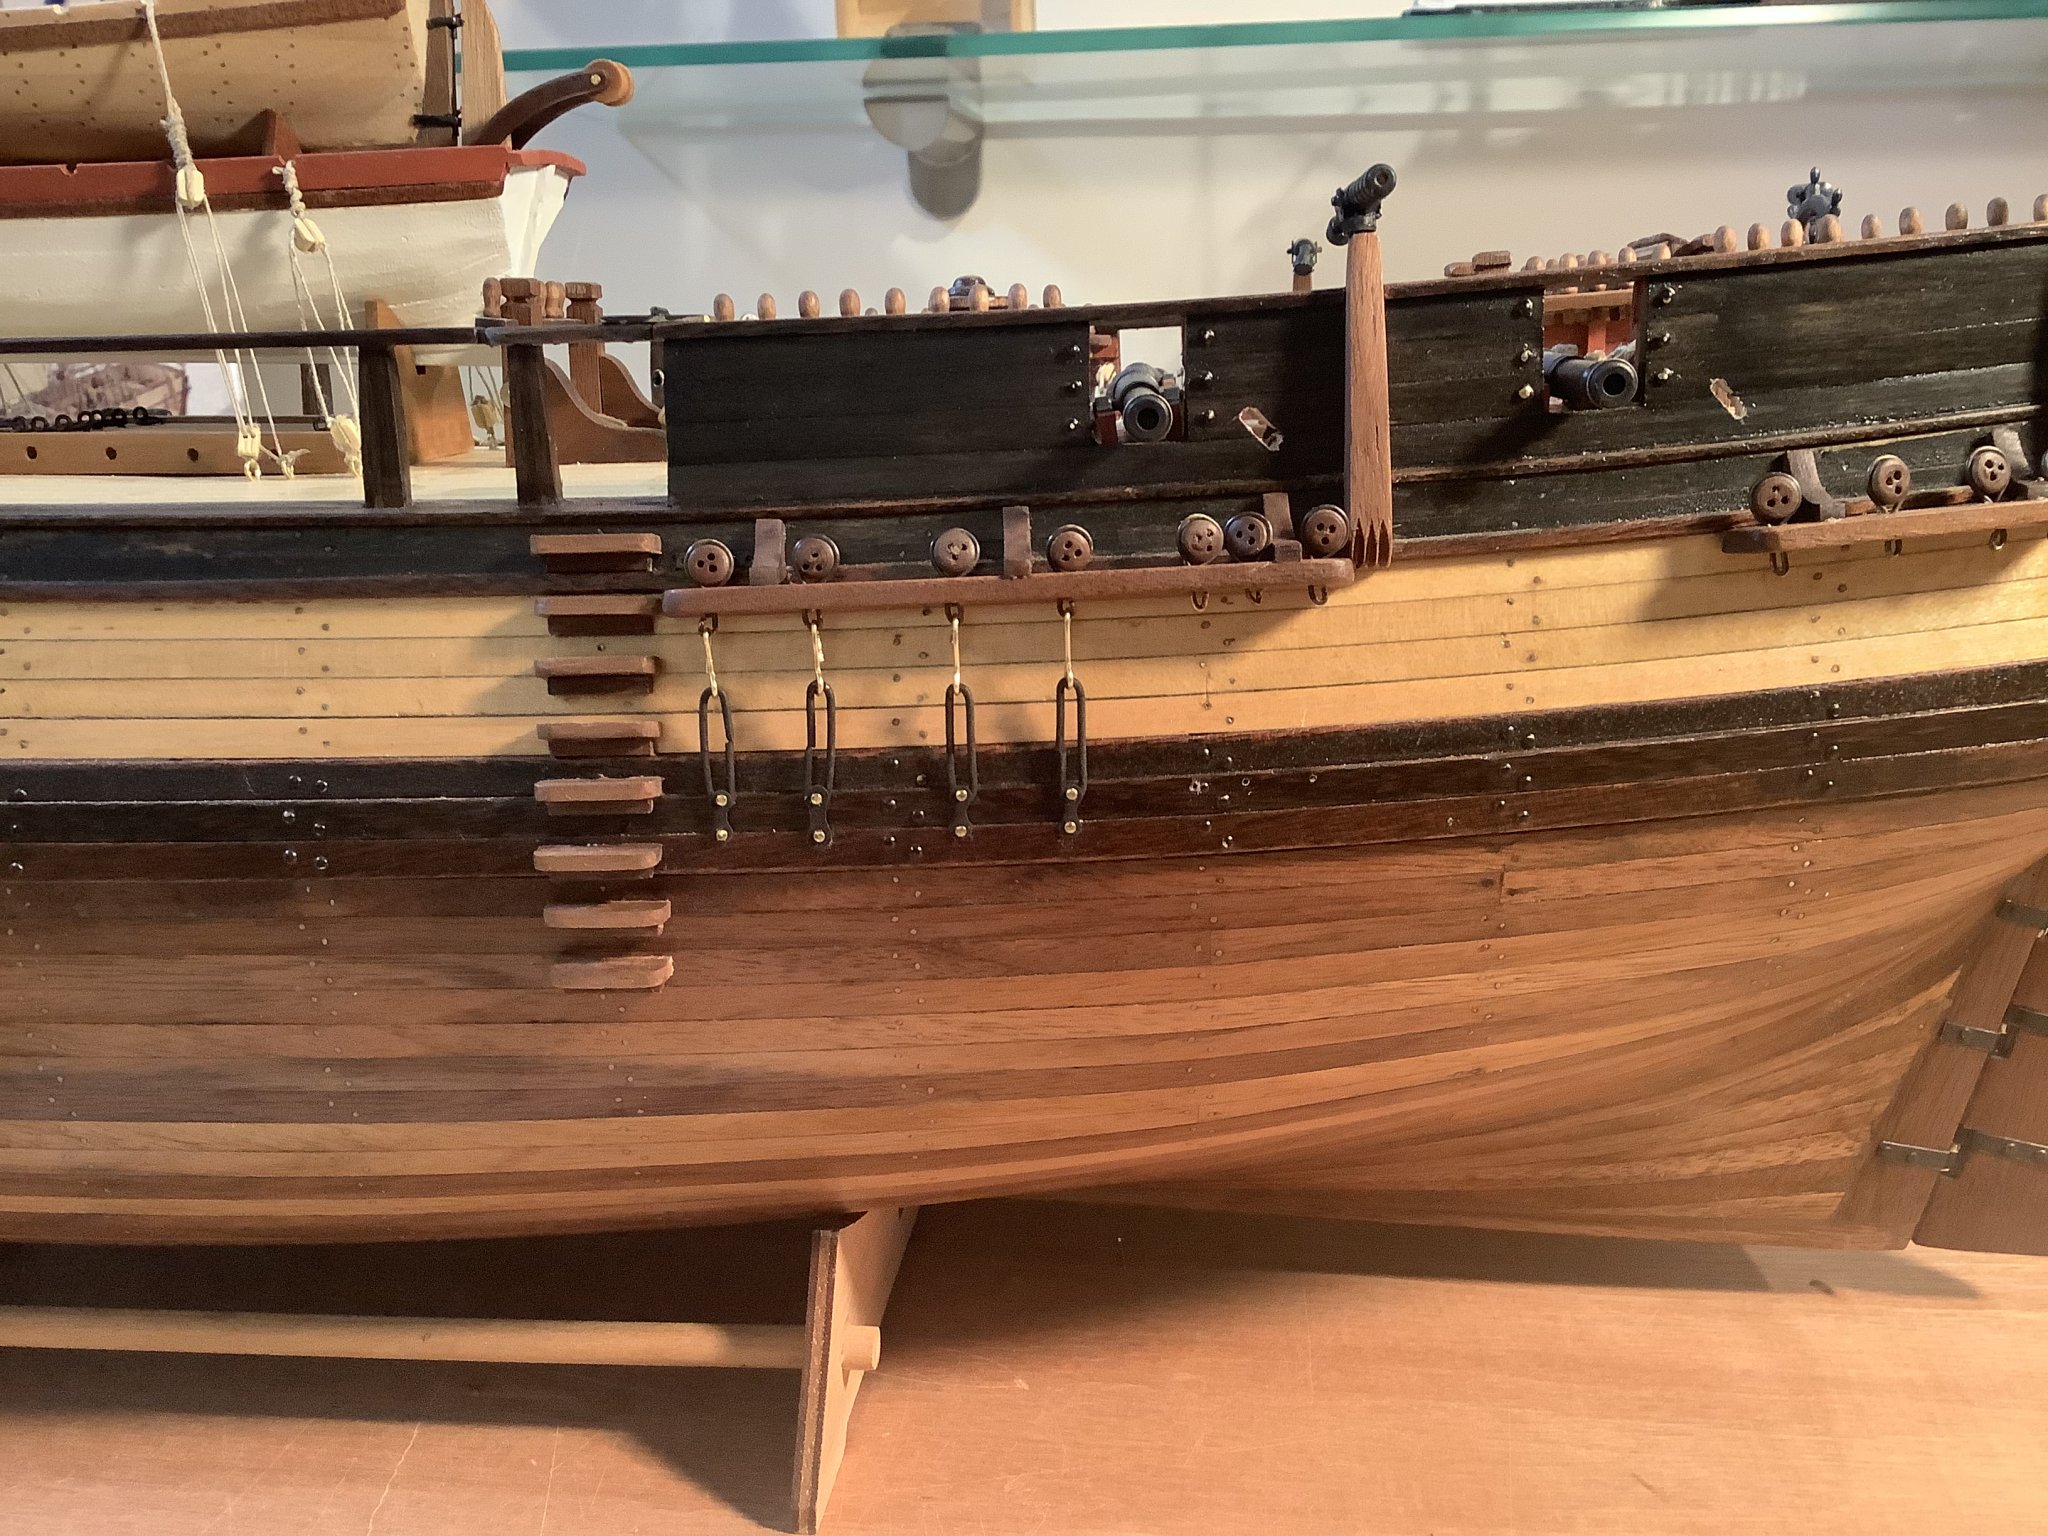
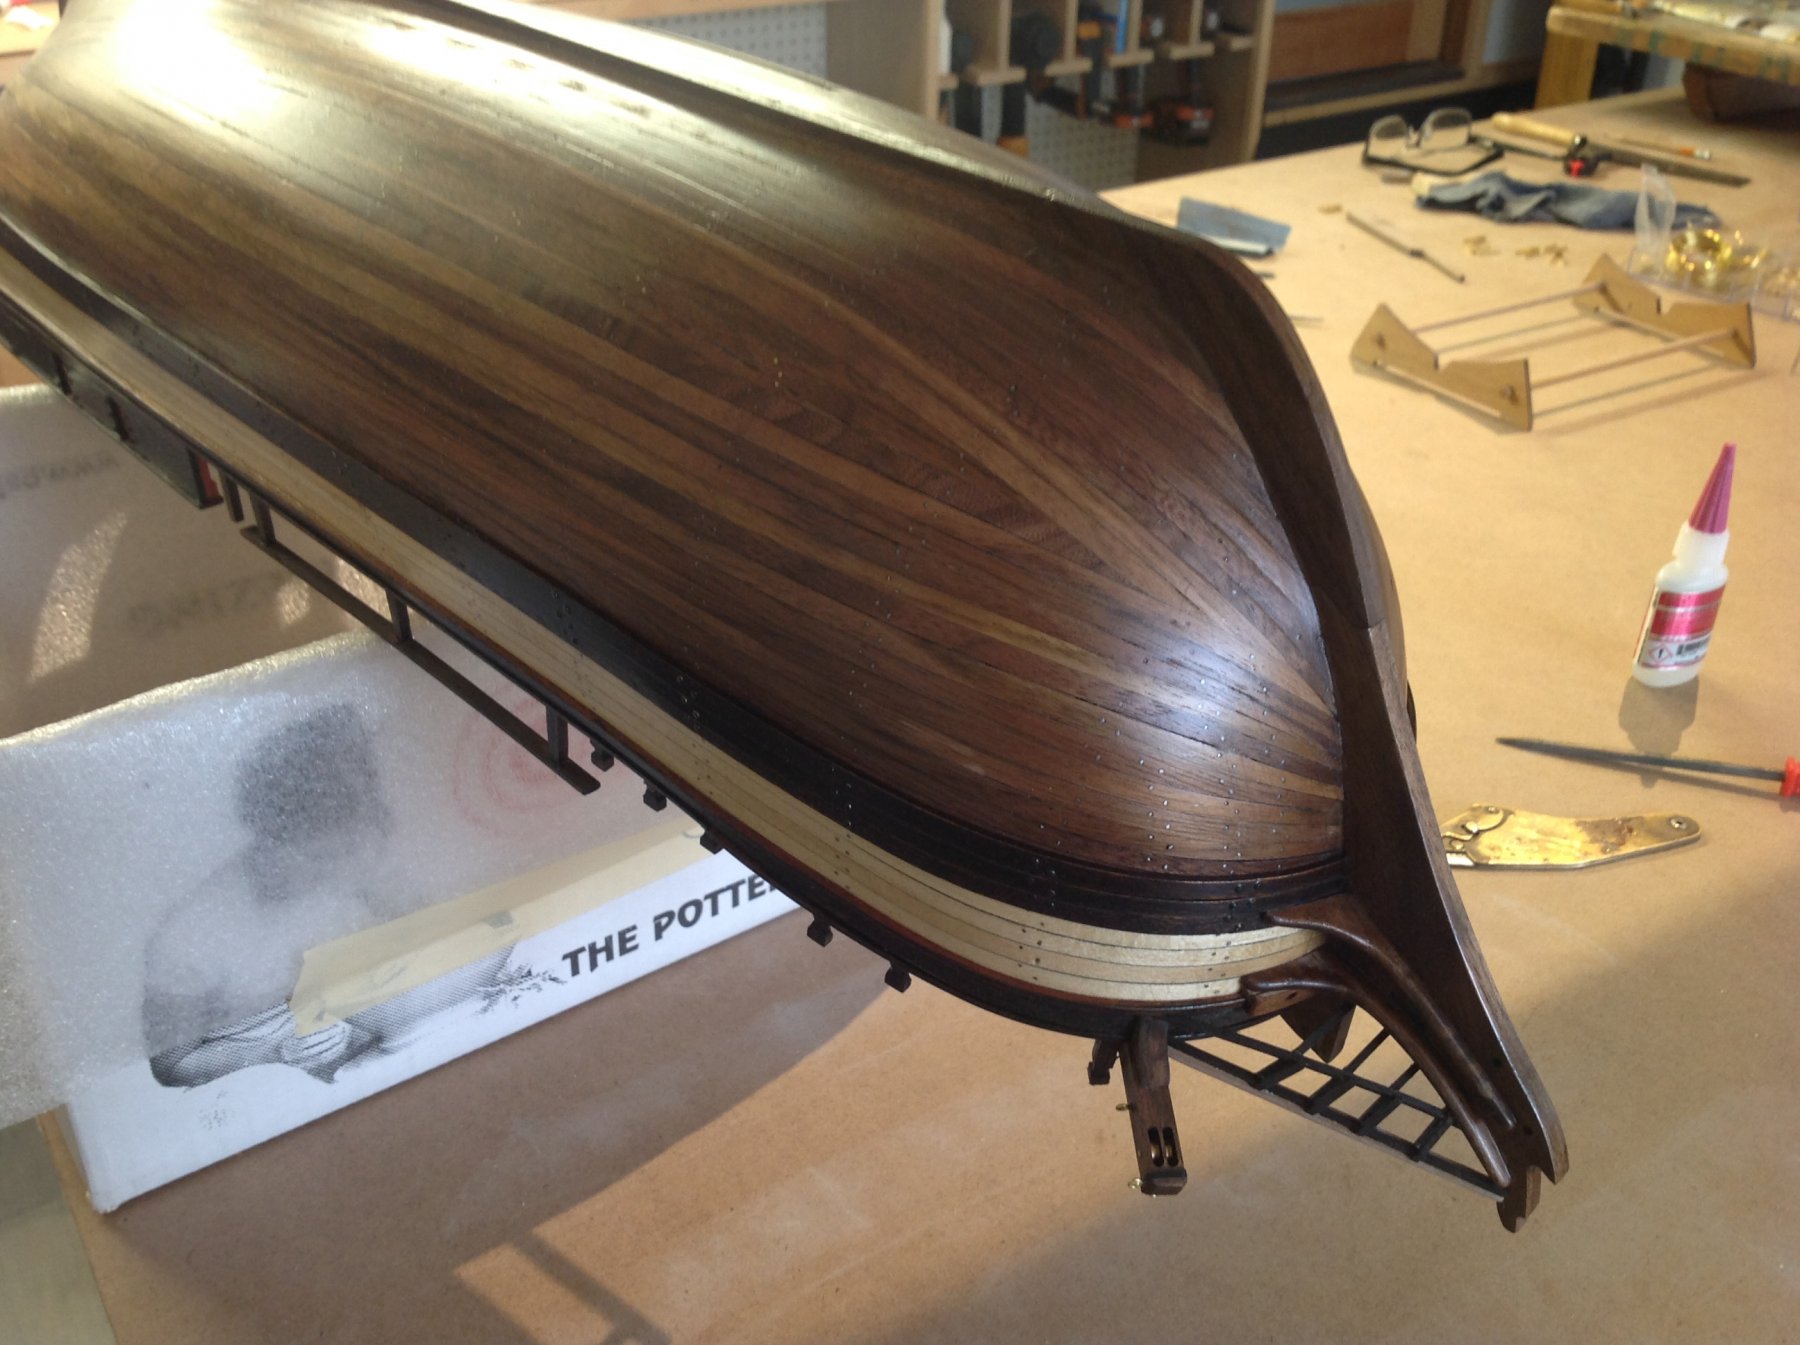
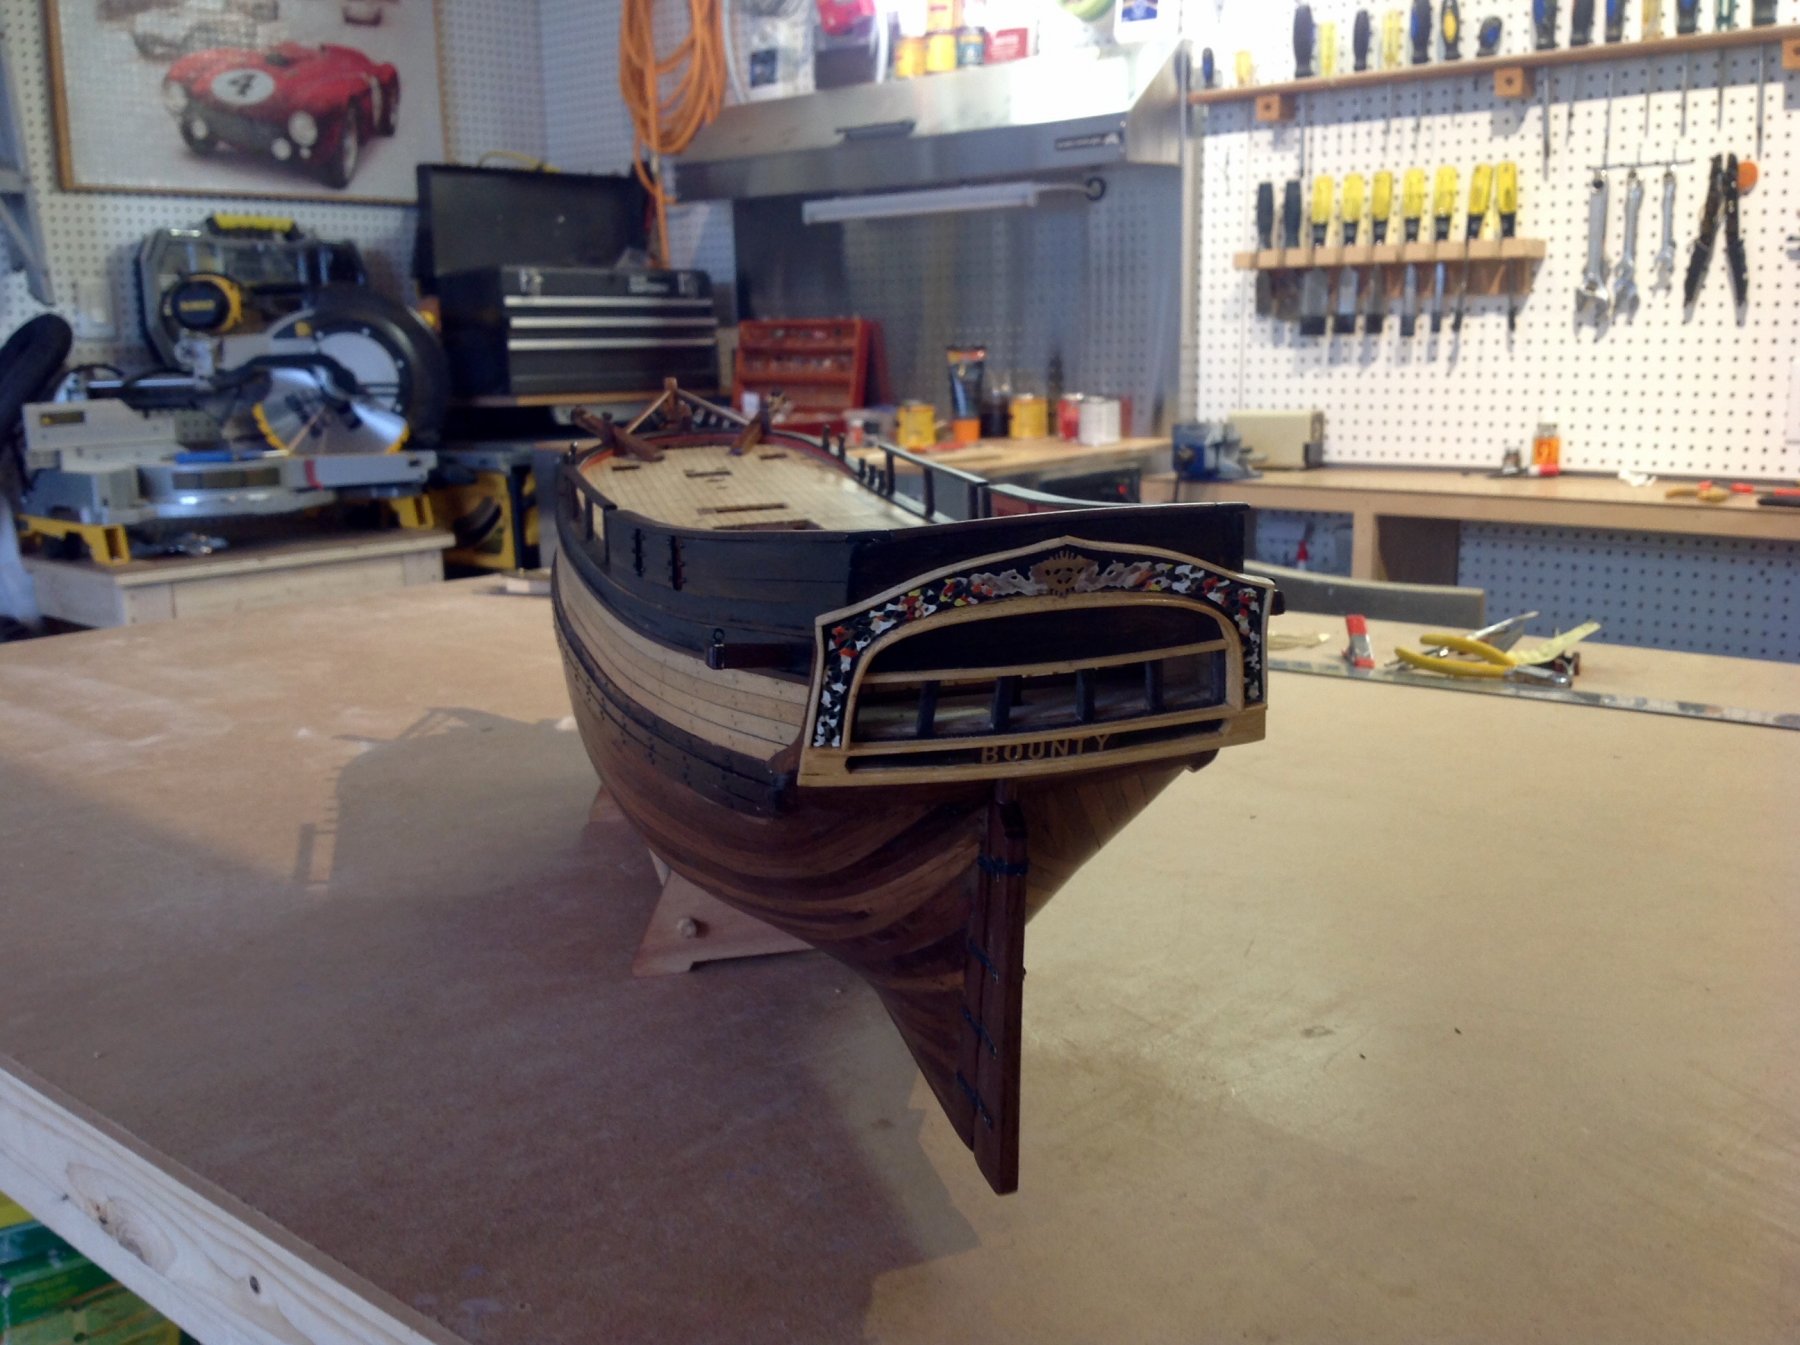
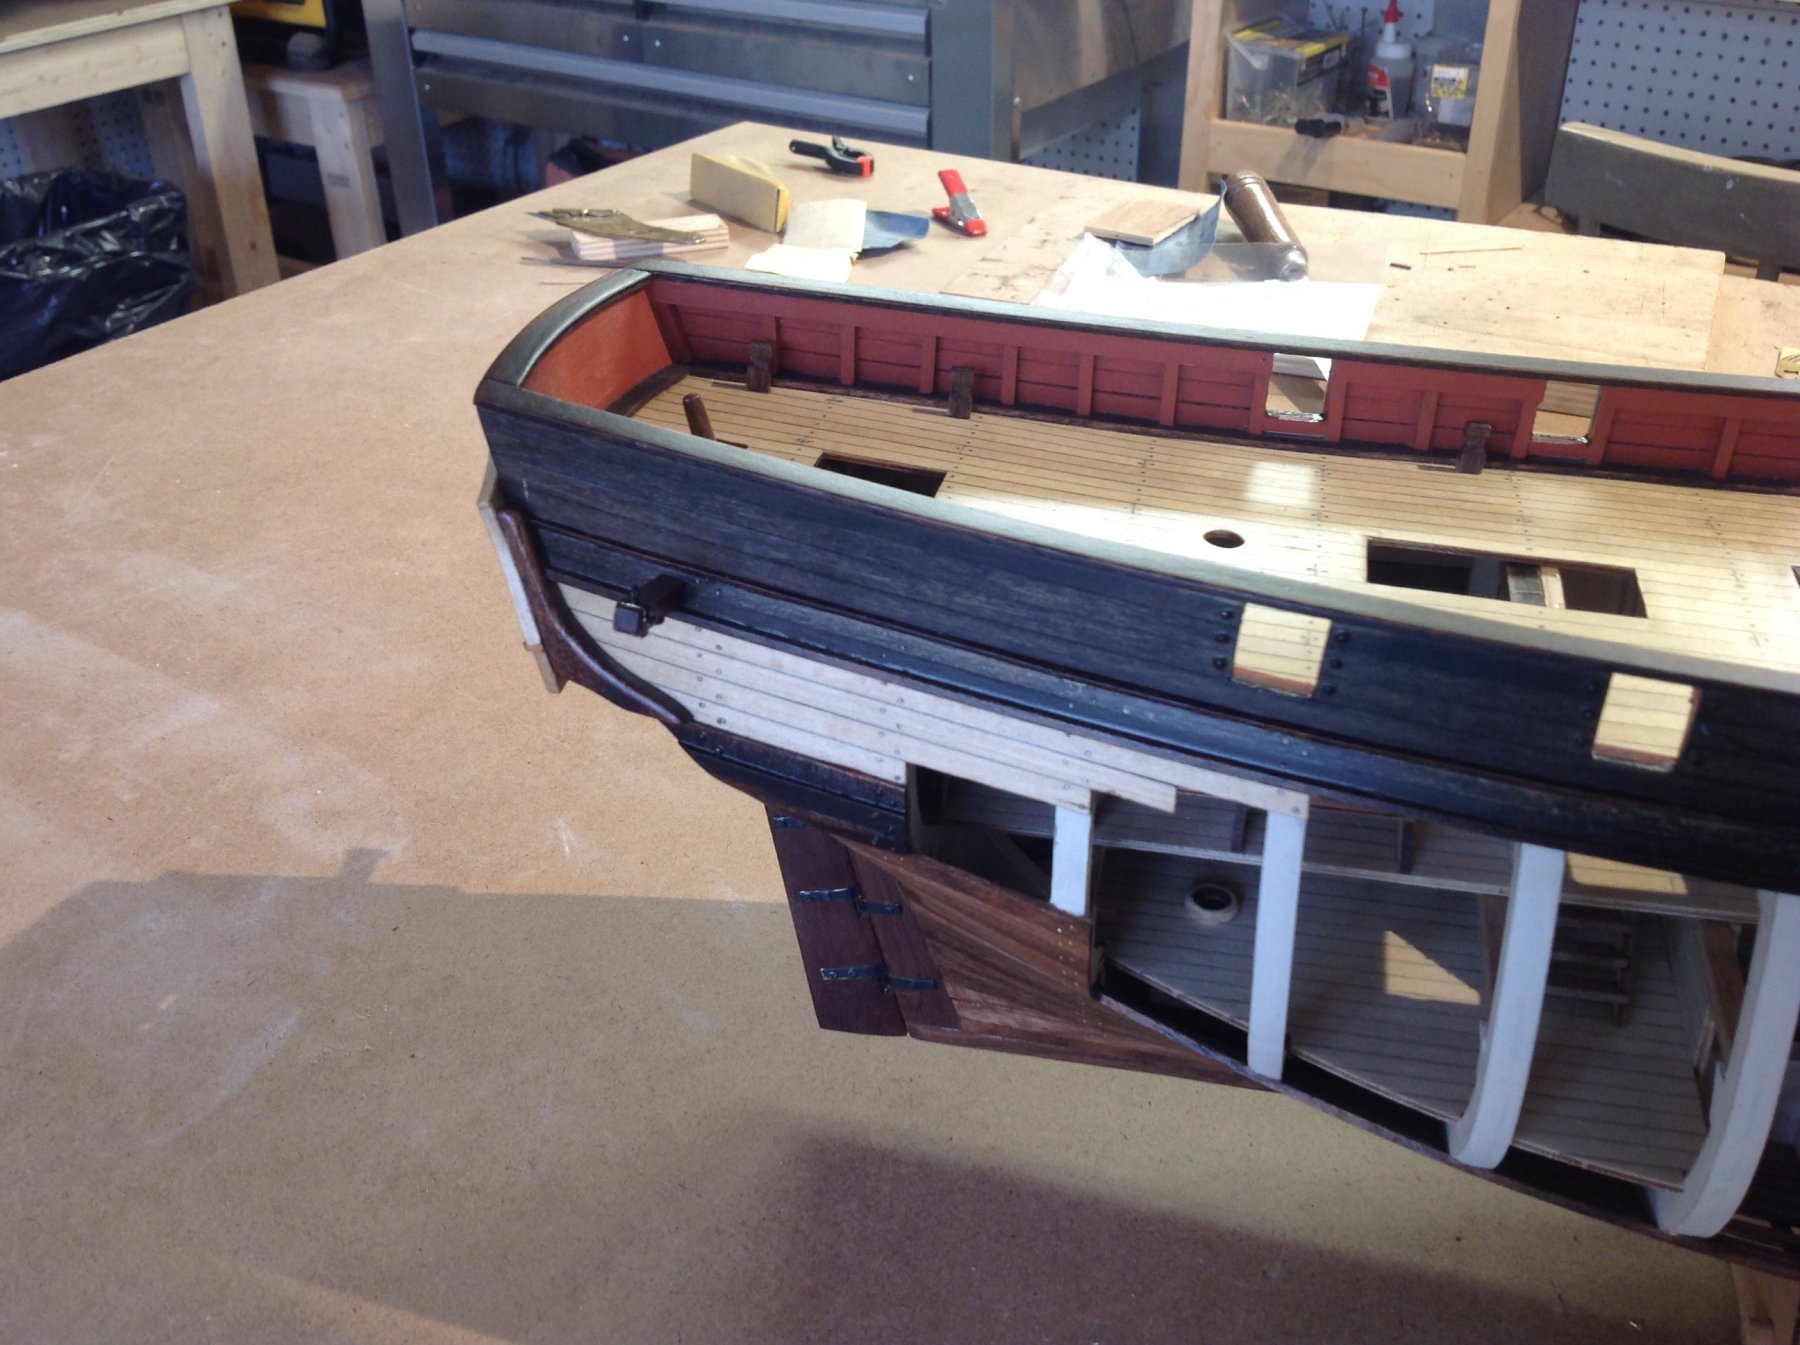
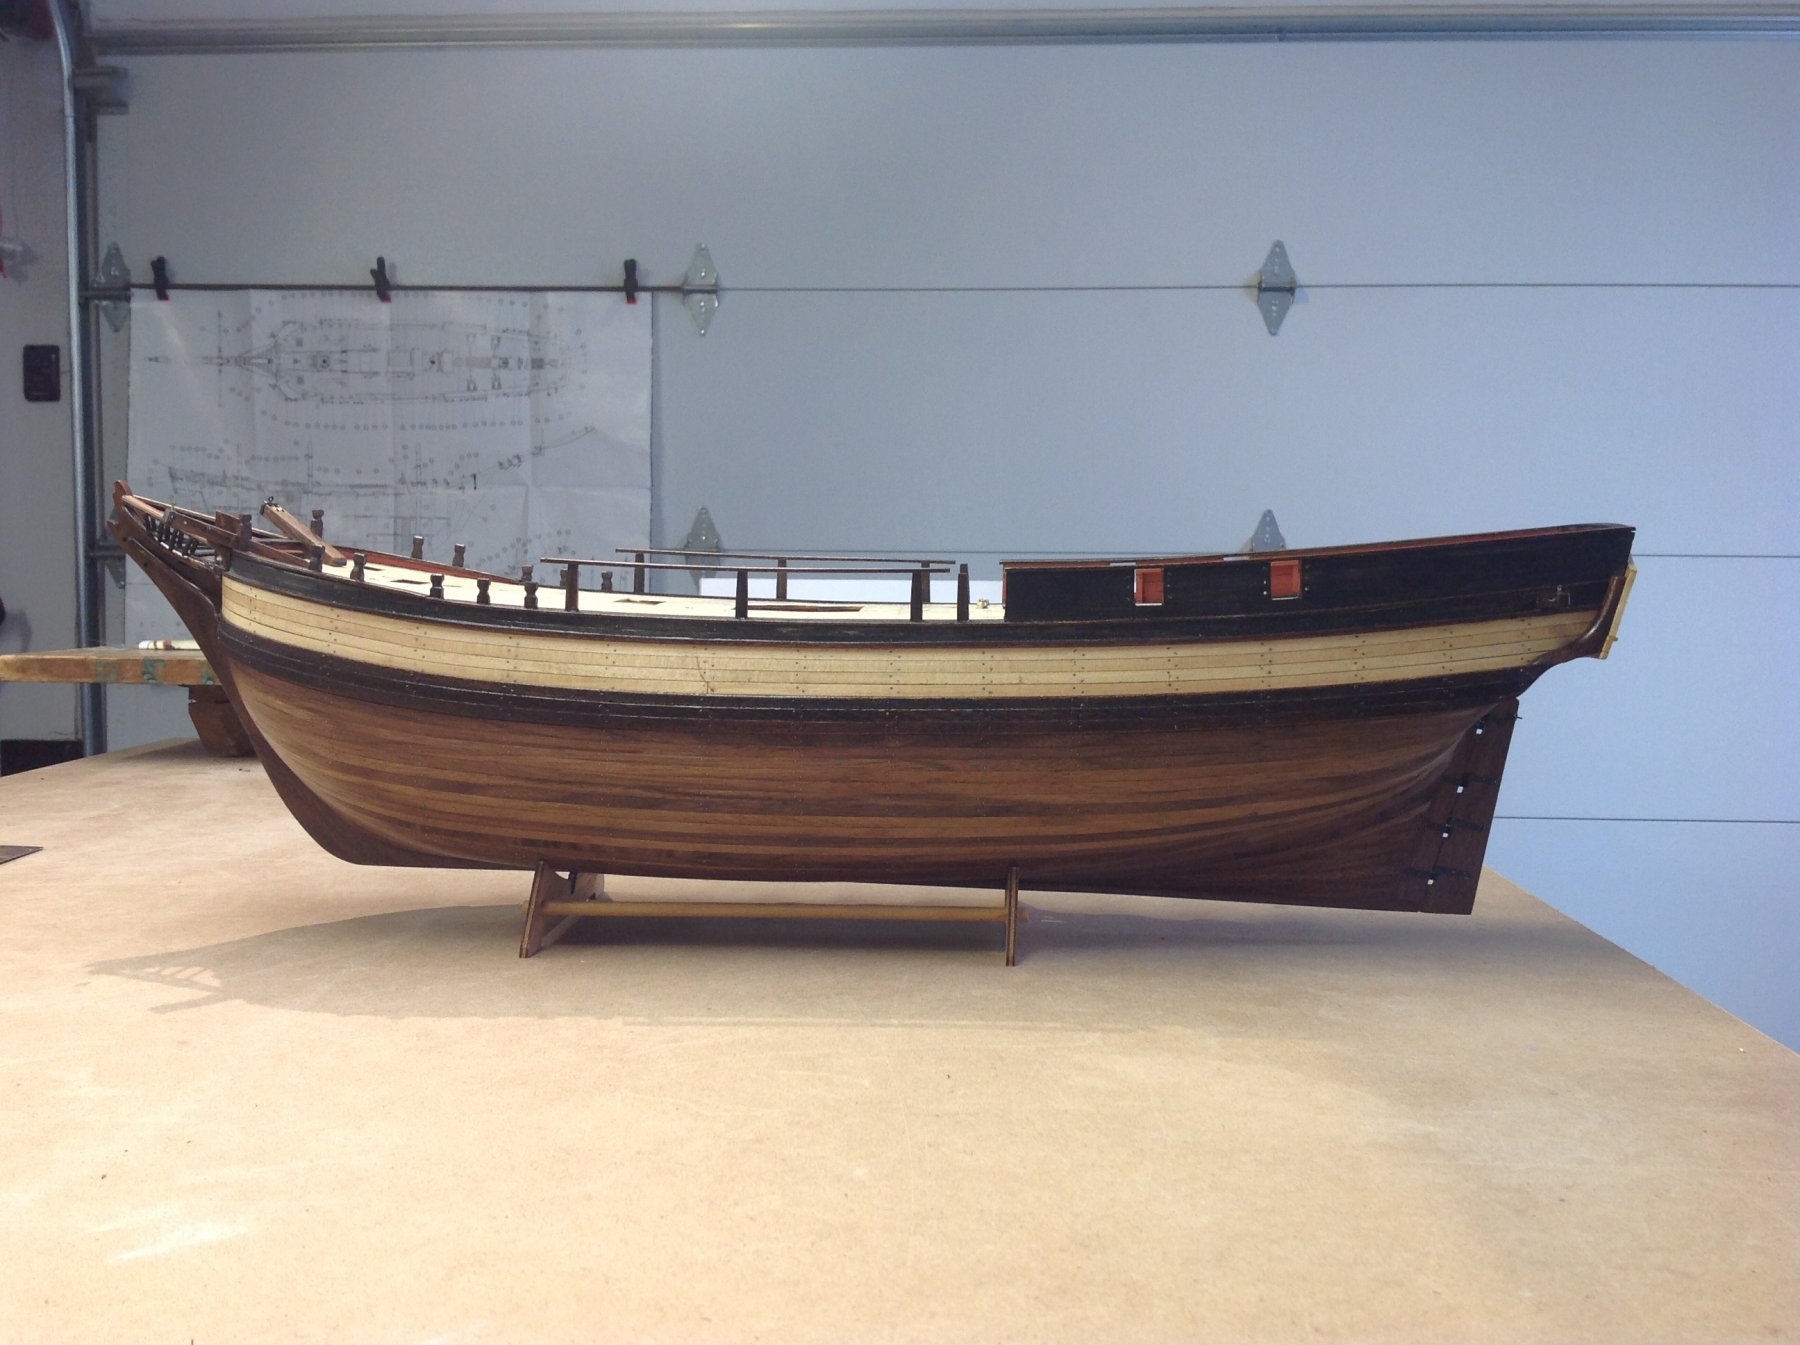
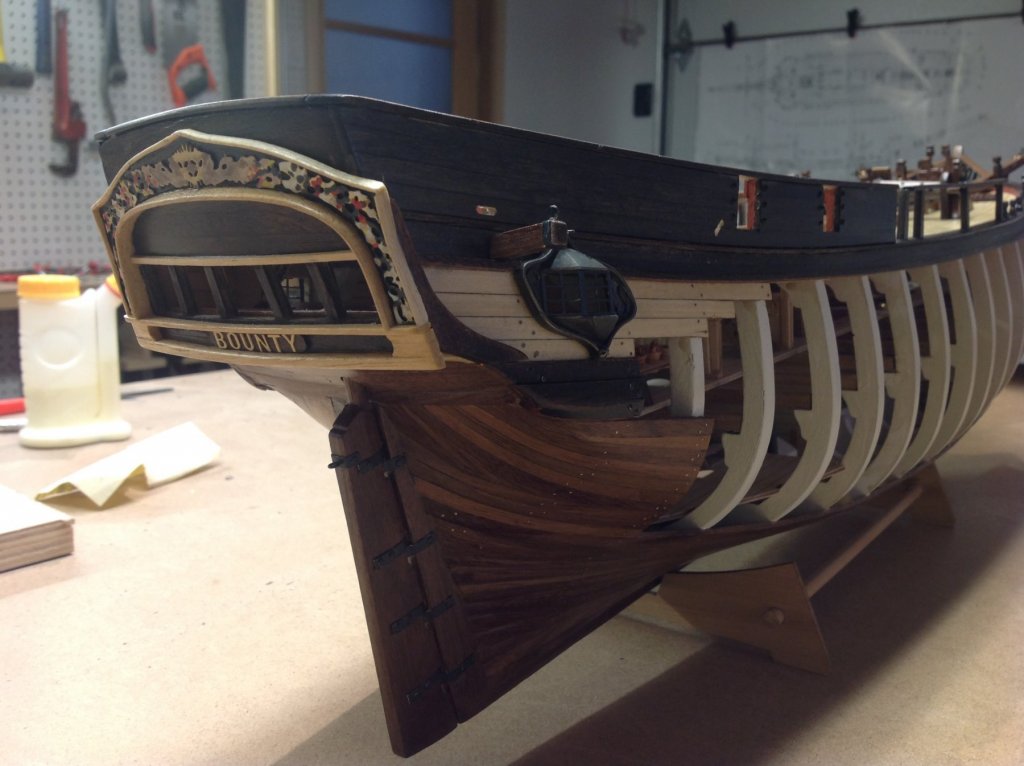
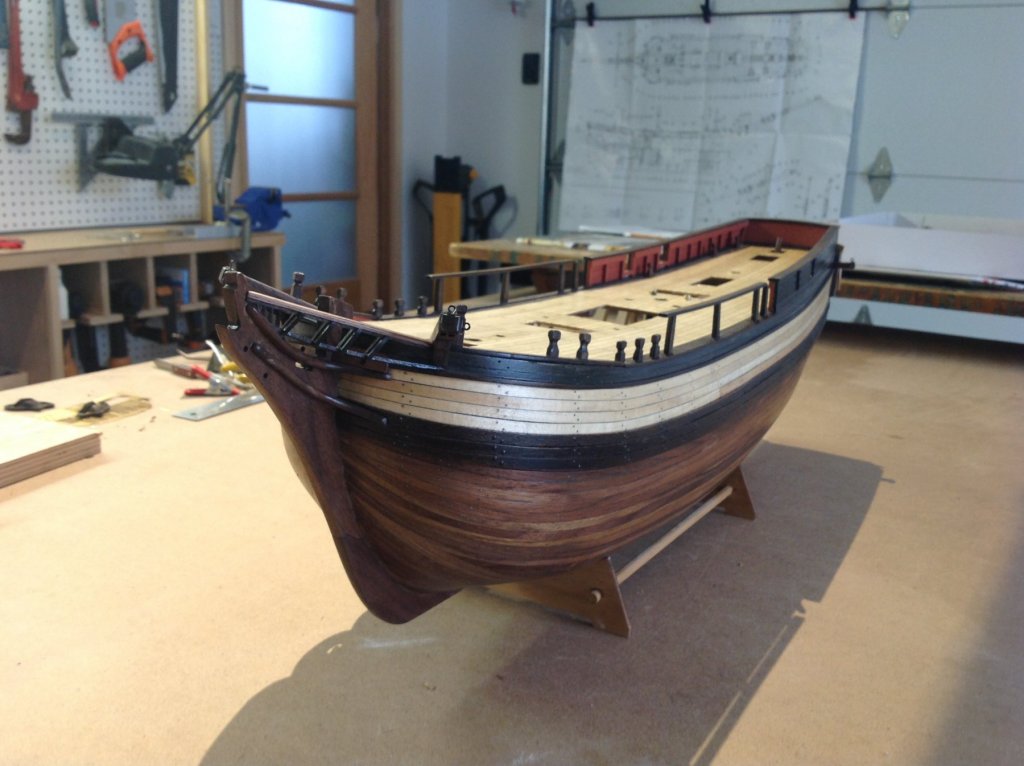
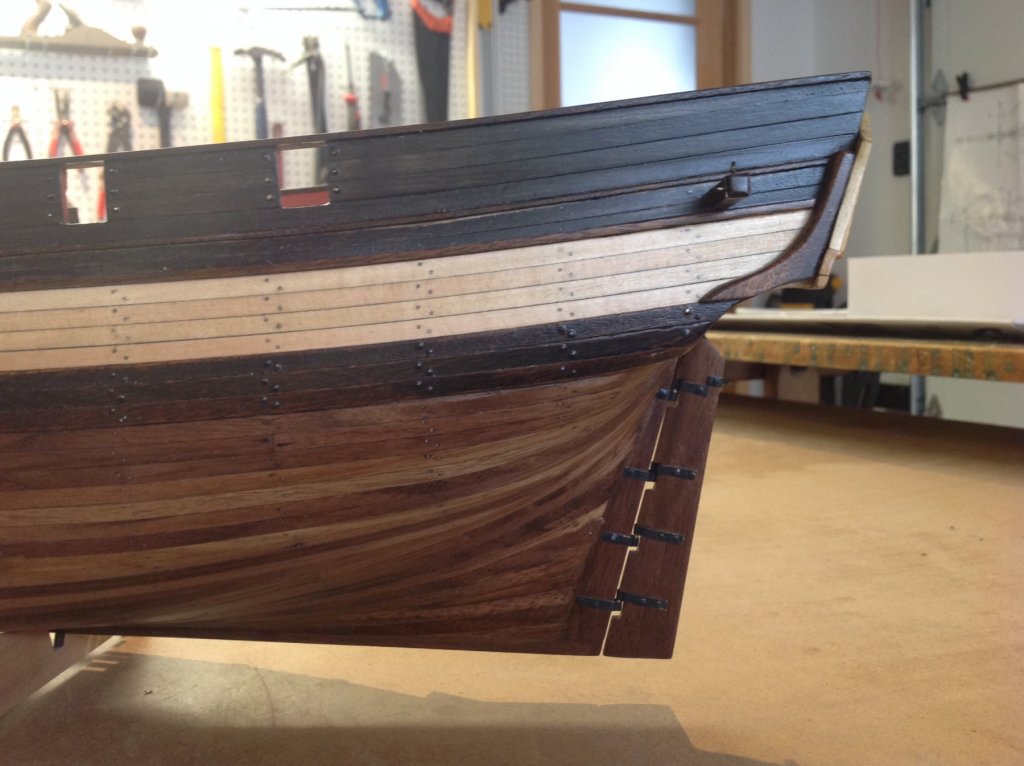
Happy holidays to everyone! Bounty progress: hull now finished with two coats helmsman satin spar varnish, may do one more final finish coat later on. Finished the rudder, stern and bow trims. I'm turning most of the brass to iron colour using either a gun blue solution or a gunmetal paint. Not sure whether to paint any of the trim the yellow ochre - may leave it as a black/oiled wood colour scheme.


- 171 replies
-
- 8
-
-
- artesania latina
- bounty
- (and 1 more)
-
Dremel rotary tool - which one?
Tim Moore replied to RPaul's topic in Modeling tools and Workshop Equipment
Just to reaffirm what others have said on this topic - I recently replaced my flex shaft dremel with the dremel 8050 N/18 micro and a 4486 keyless chuck on Amazon. Far better, smoother and more controllable than the awkward flex shaft and other older corded unit I have. The 4486 is a really useful add on to me as it holds anything from micro drills to all the other tool bits. -
Lighting the Work Area
Tim Moore replied to Richmond's topic in Modeling tools and Workshop Equipment
I just renovated my 18 x 20 workshop and redid the lighting. It's now far better than anything I previously had. I have 8 - 7w LED in a track configuration for general overhead illumination. Lights the room efficiently. Directly over my work areas, on a separate switch, I have 3 sets of 2- 32w 4100k fluorescent task lights. tim -
And amazingly the missing nails just arrived in the post - so now I can get cracking on this - go back and nail all the remaining planks, block sand and put the final finish on the hull. I'll post a pic when I have that all done and am ready to proceed with the deck furniture and other superstructure.