hamilton
-
Posts
1,933 -
Joined
-
Last visited
Content Type
Profiles
Forums
Gallery
Events
Everything posted by hamilton
-
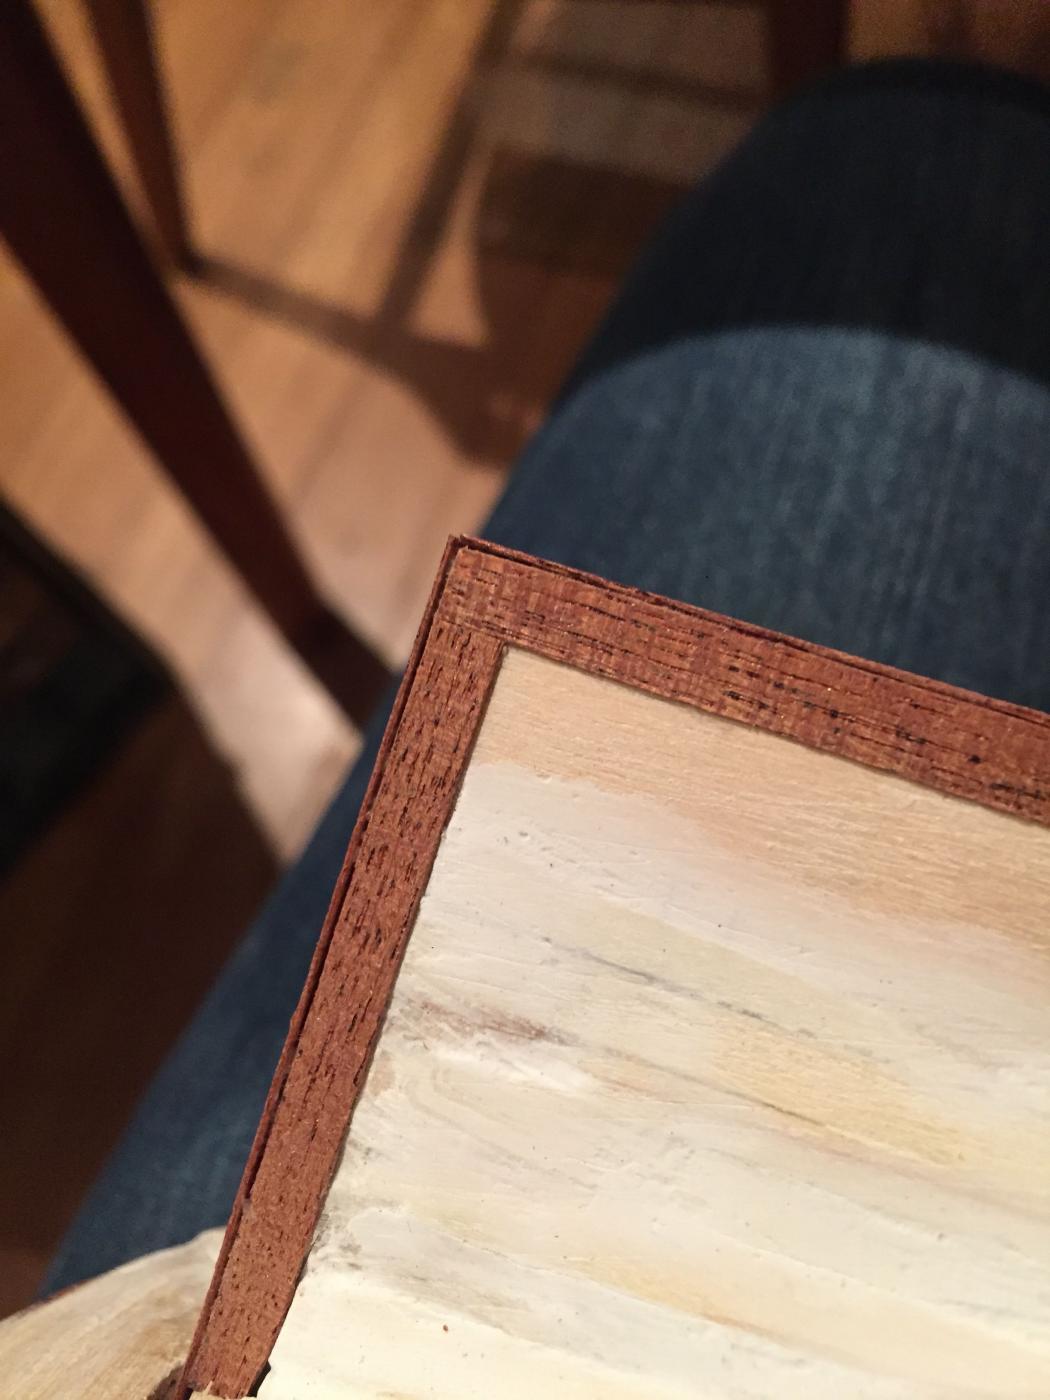
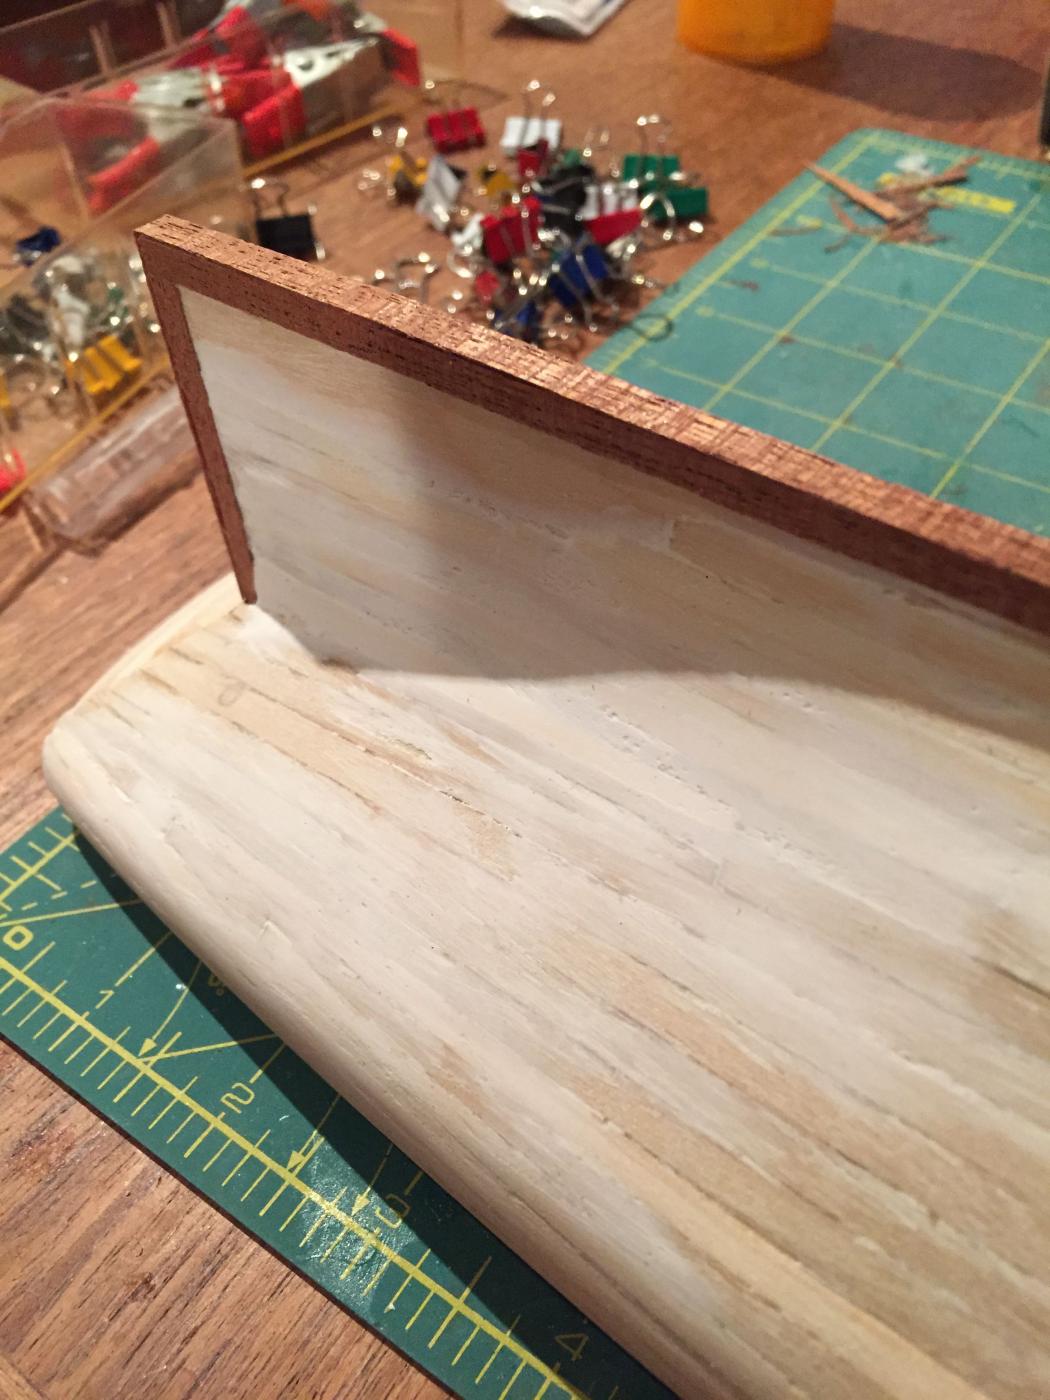
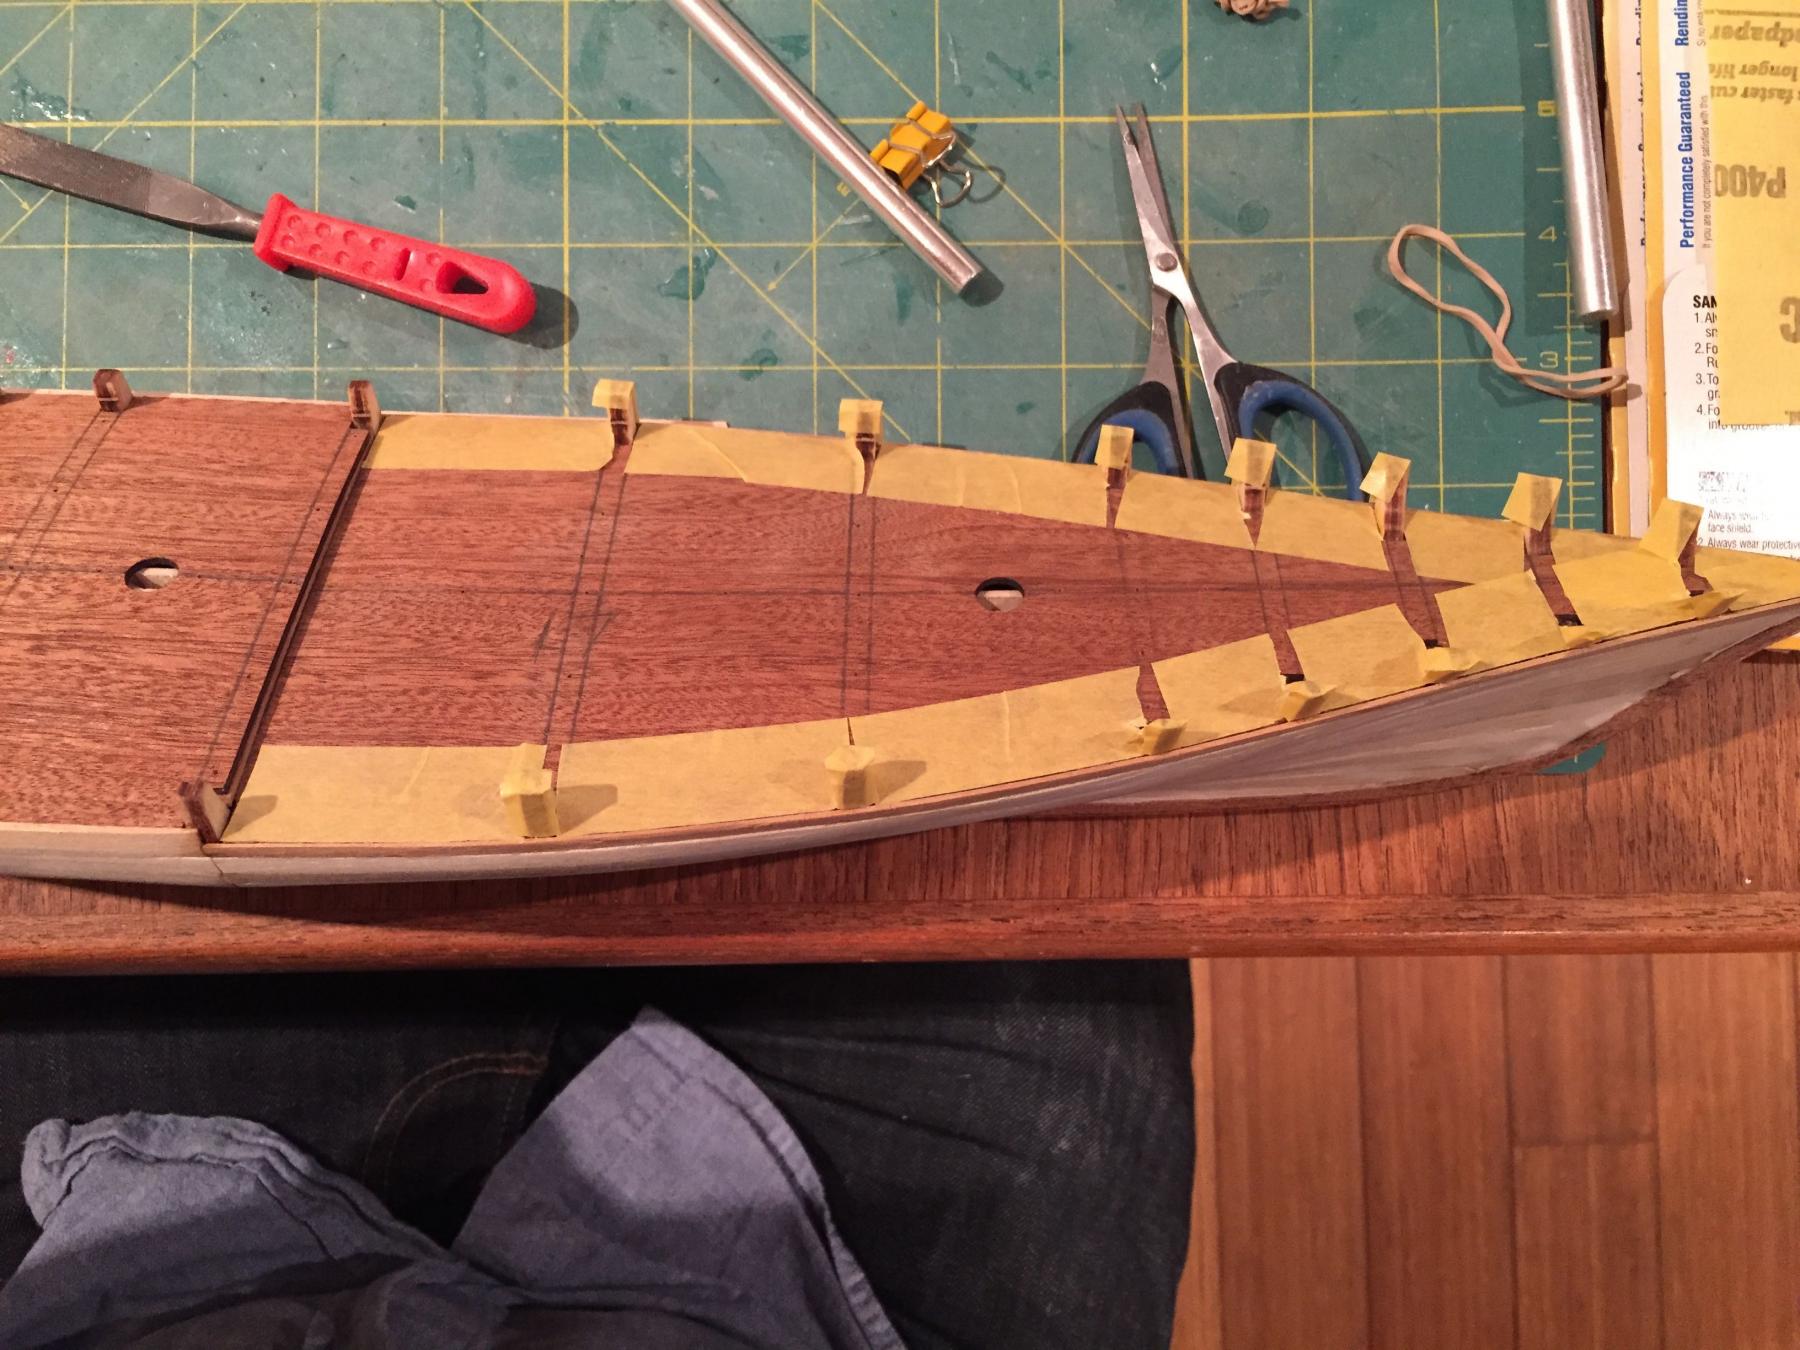
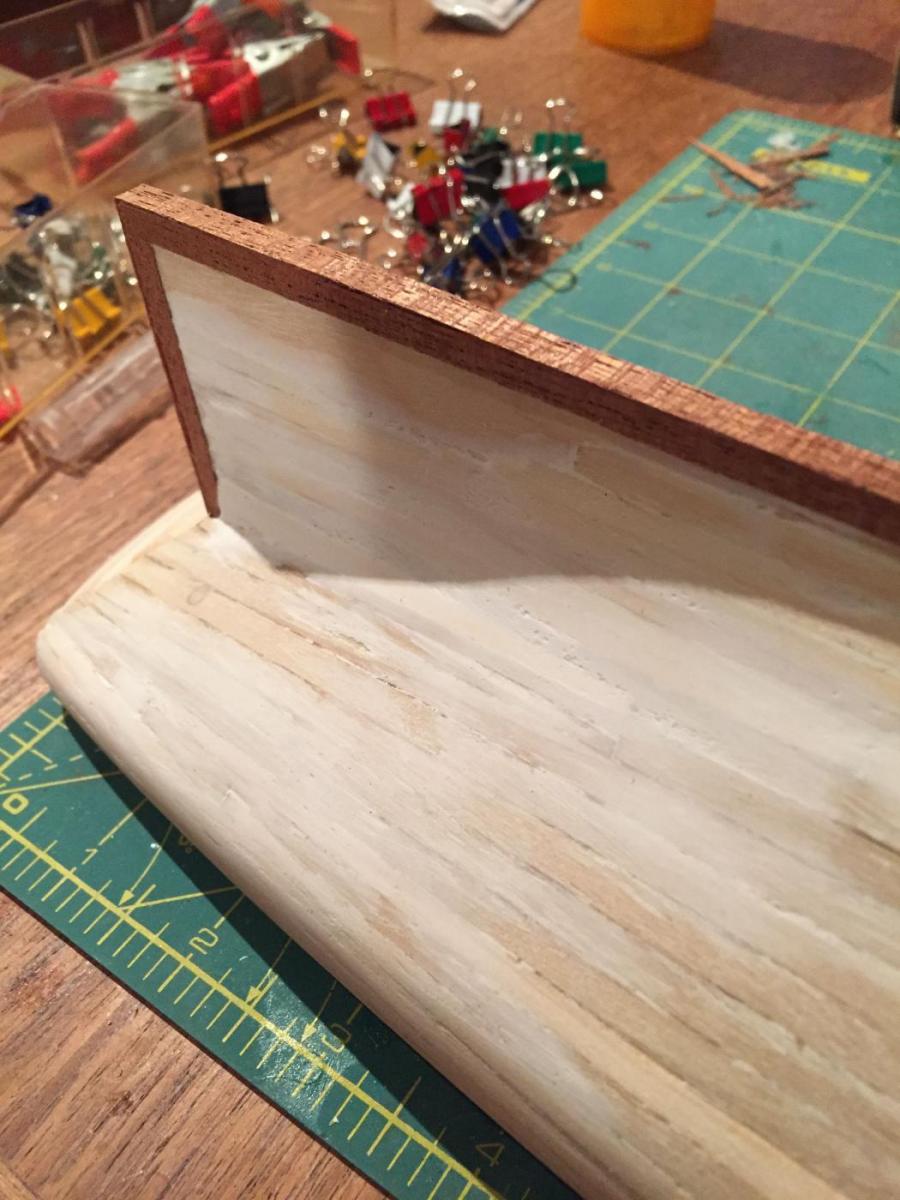
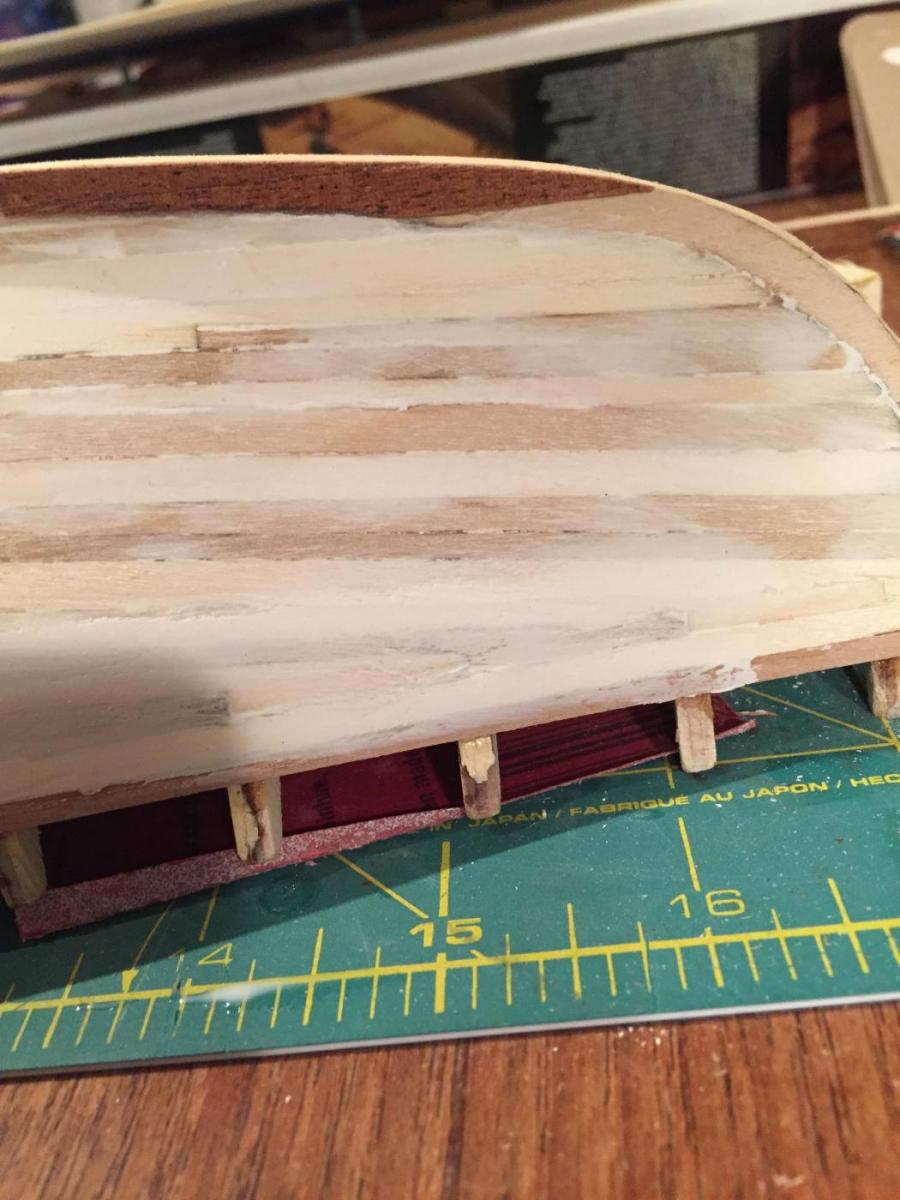
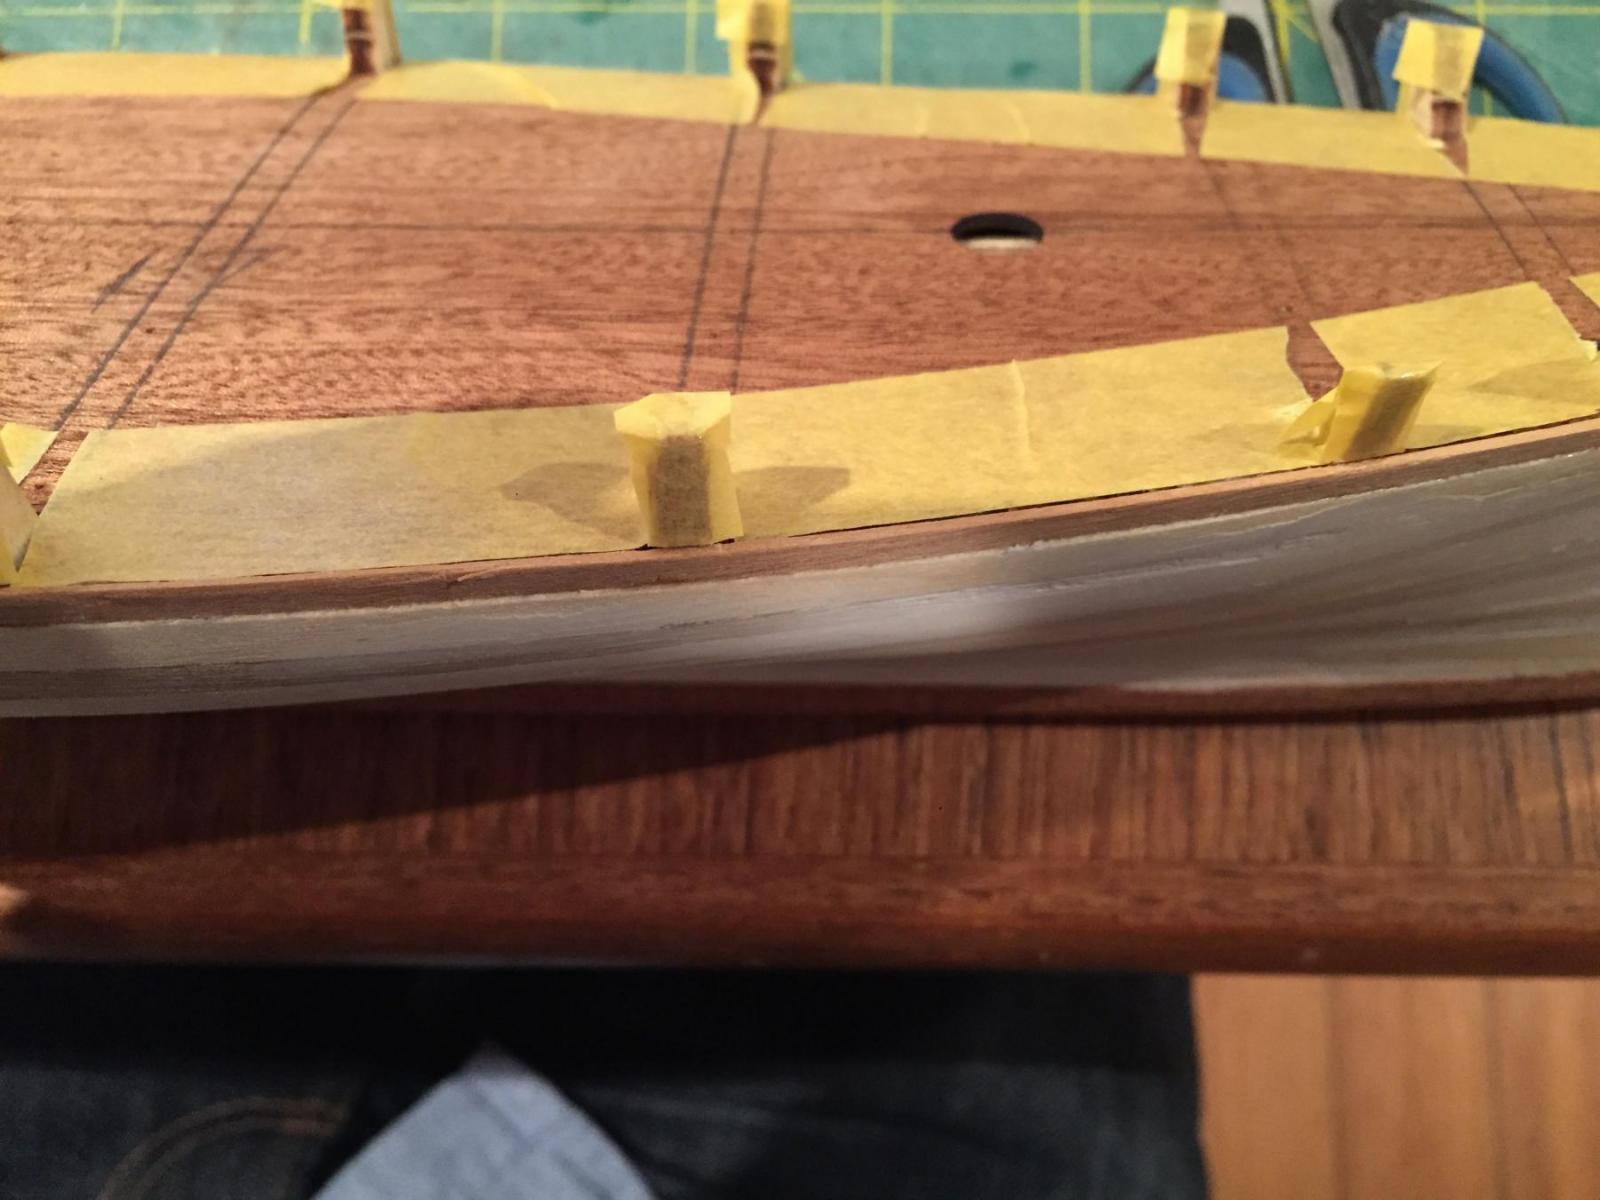
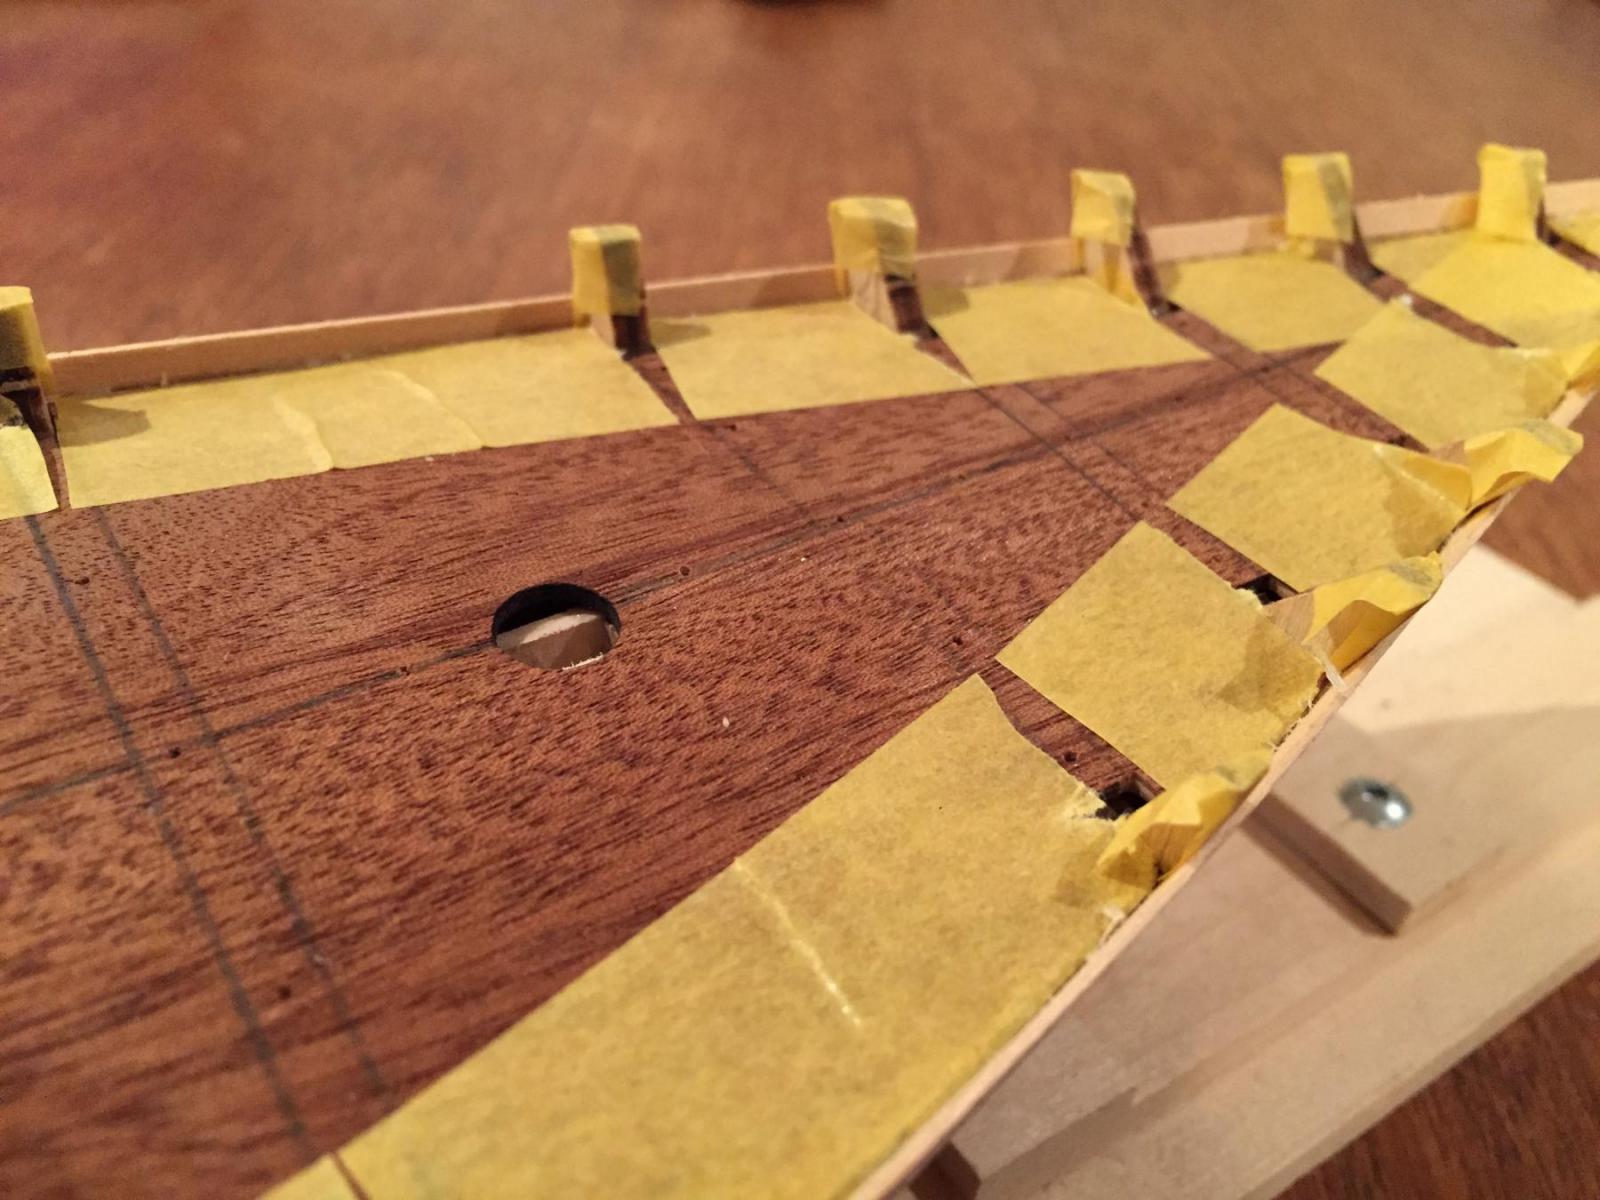
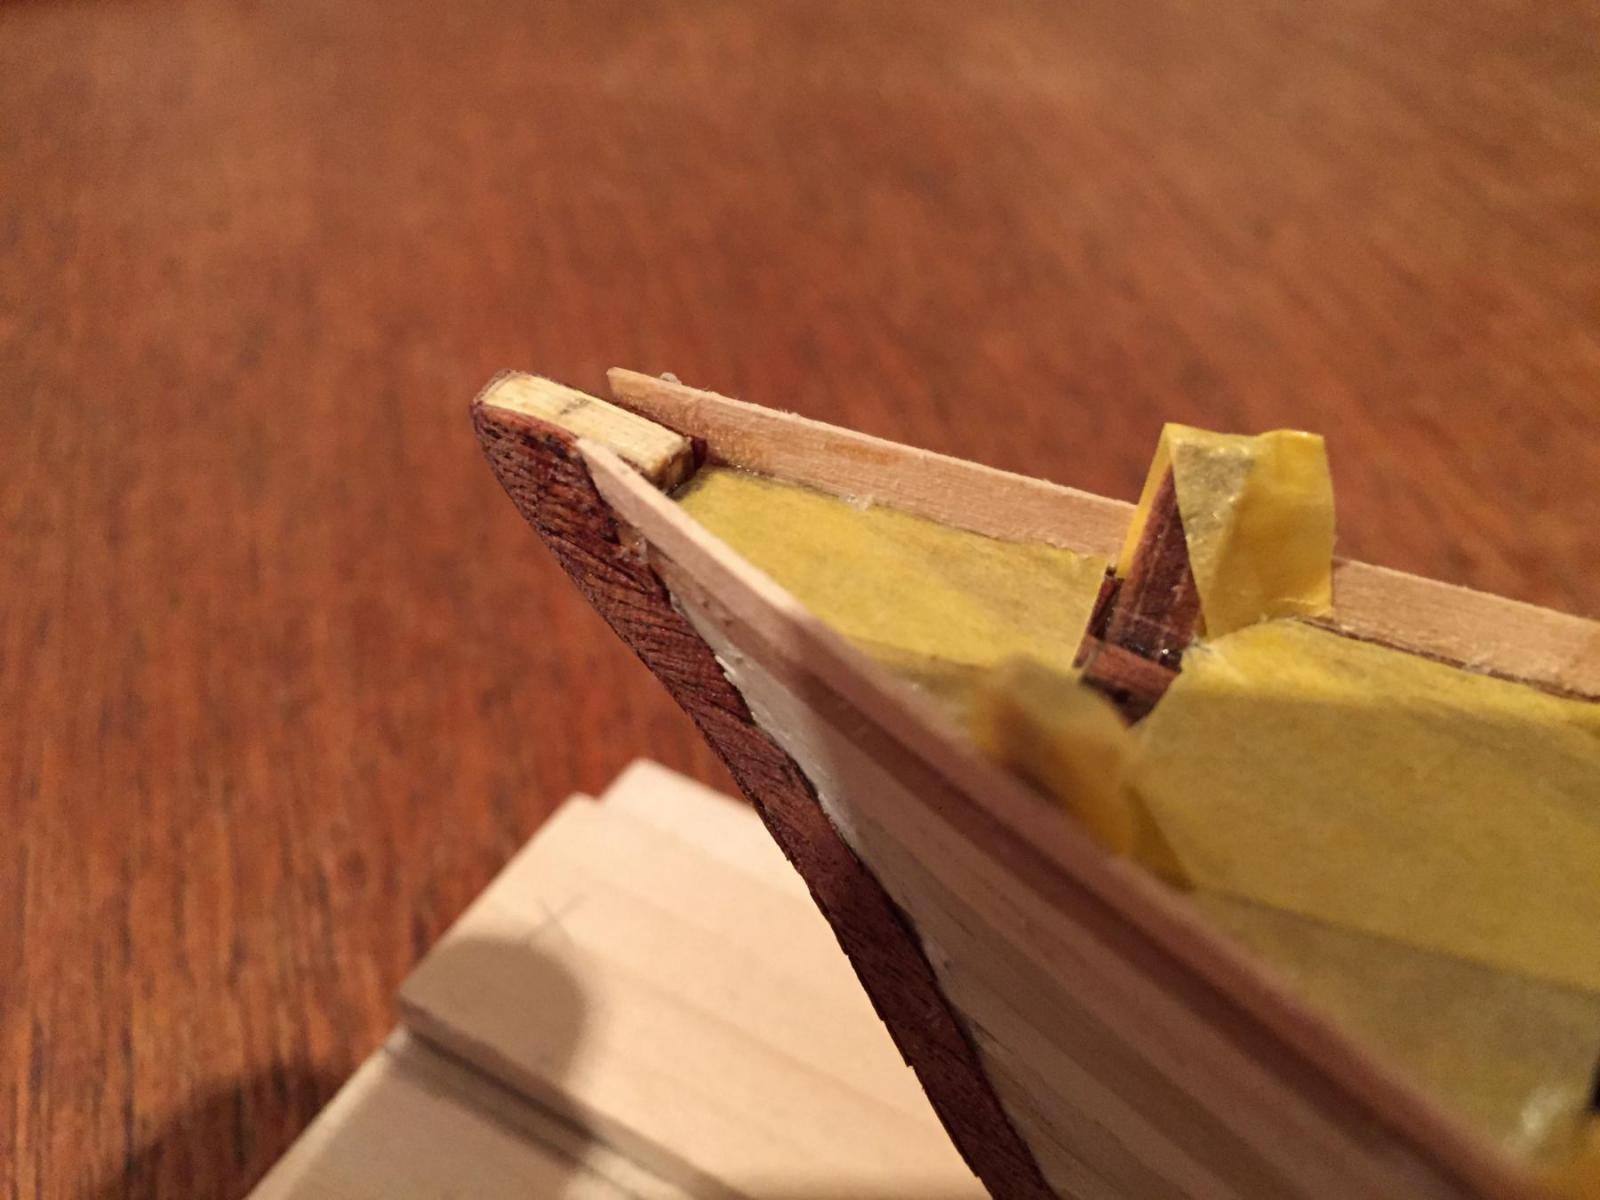
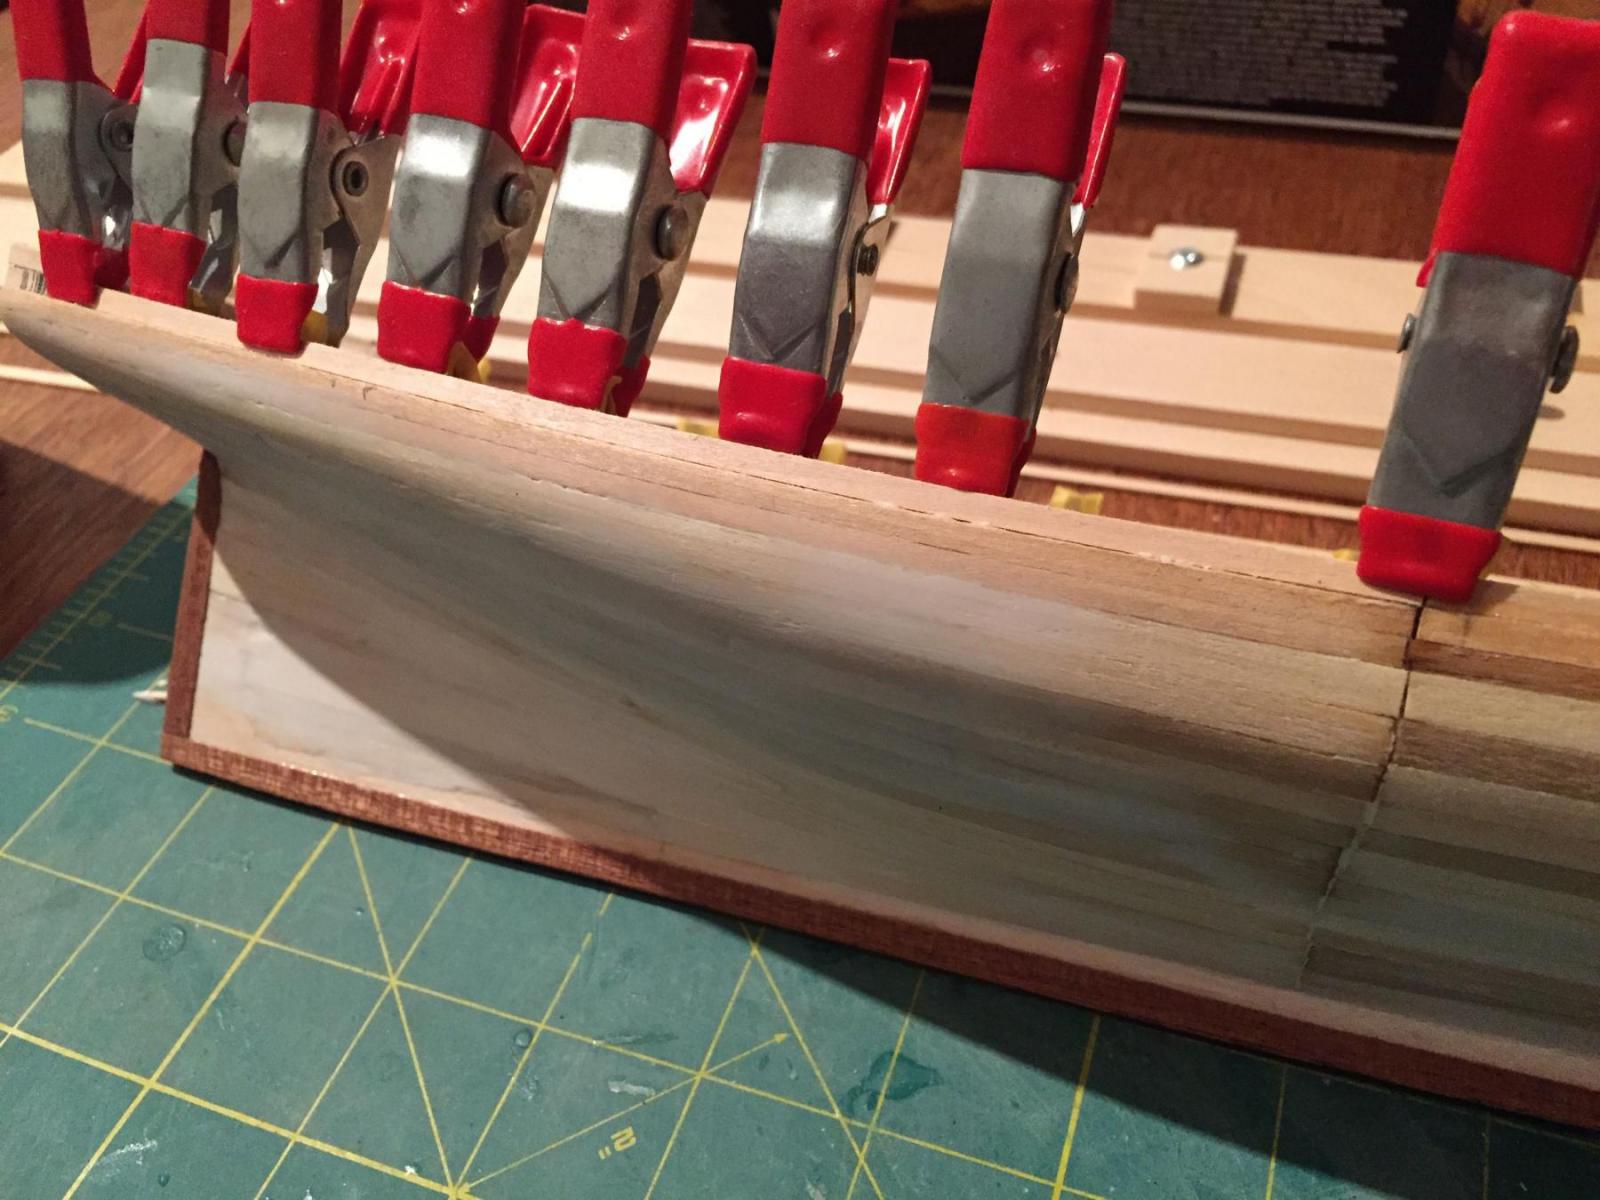
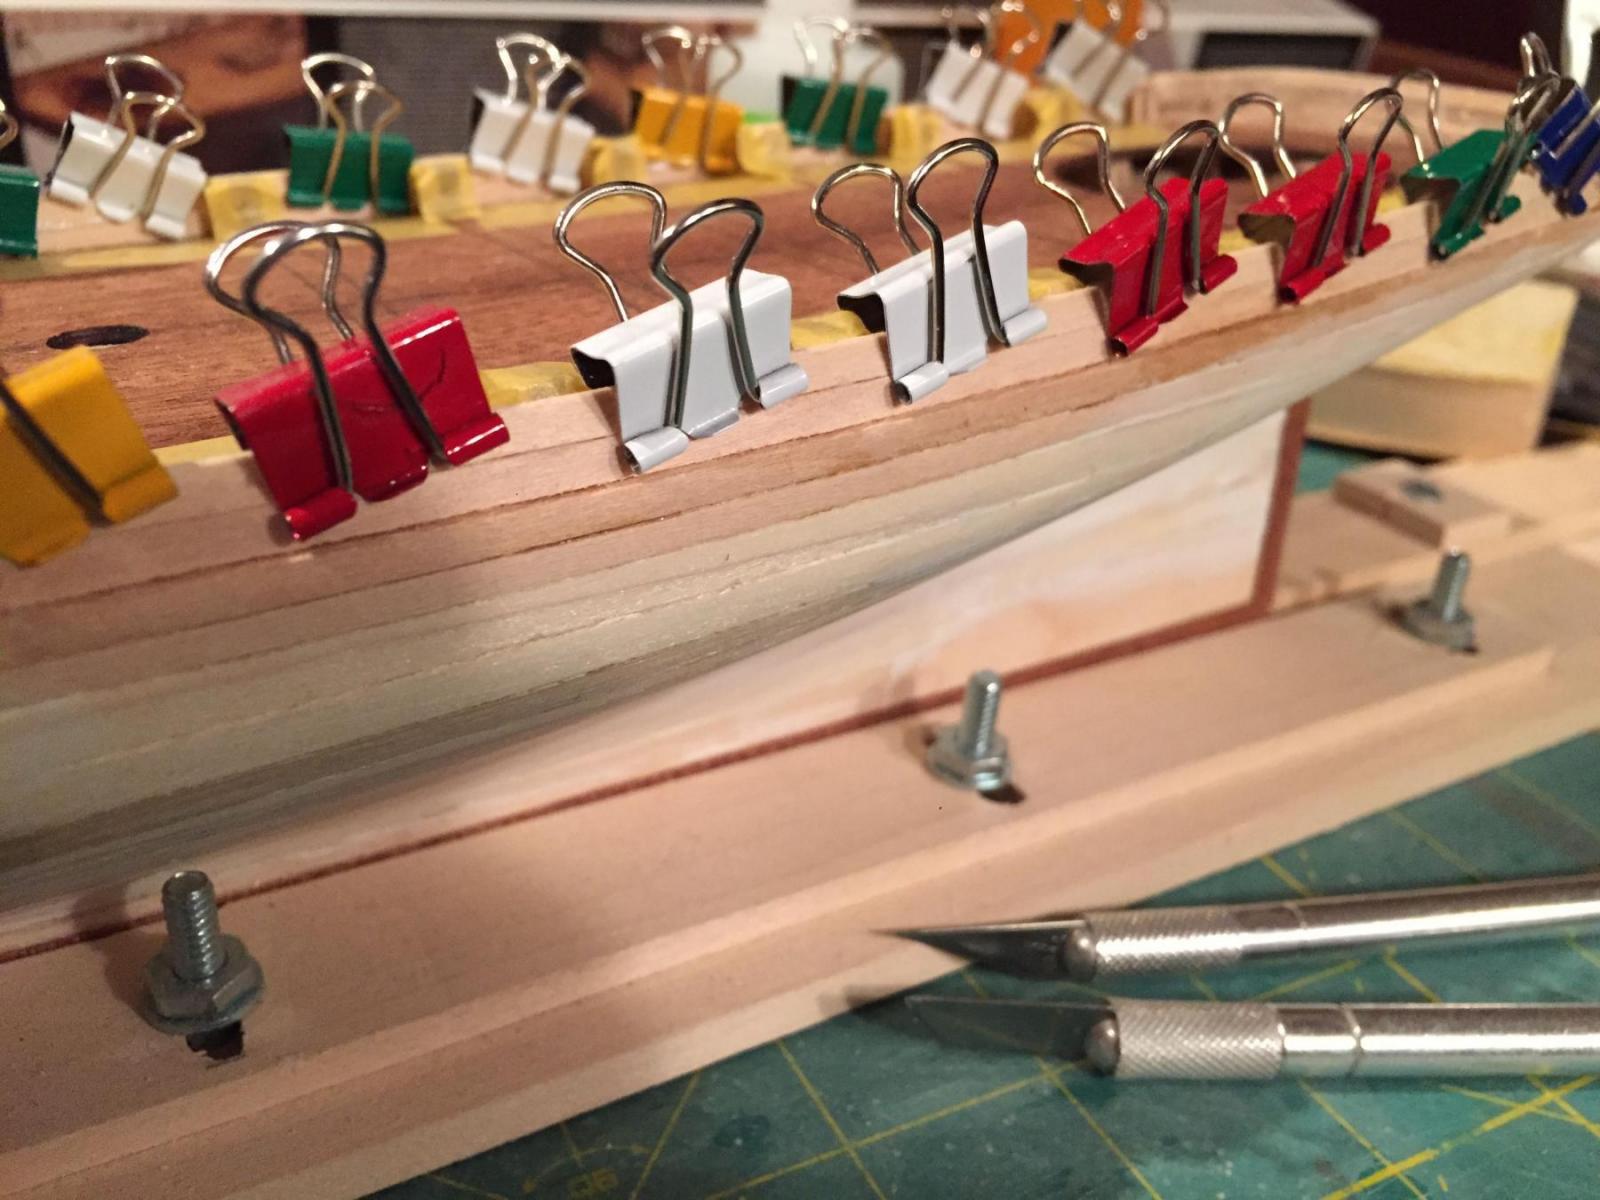
 Yikes!! I see my last real update on this log was back in mid-December.....To be honest my work on this model (and on modelling in general) has been very sporadic since I finished the Fair Rosamund last year. After about 6 years of consistent modelling (and 13 completed models) maybe I've just needed a break.... In any event, it's not that no work has been done. I've been working on the second planking and on deck planking, but it's been 2 weeks since I've worked on it at all.....this update is really a throw-back to when I was planking the bulwarks. I elected to create a small rabbet for the second planking by throwing some .5mm sapele left over from my San Francisco build onto the sternpost, keel and stem. The first photos show this. I then masked the edges of the subdeck and the bulkhead extensions to protect them from glue and edge-glued the bulwark planks in place....this needed some finessing and a lot of clamping to make sure they ran properly and were solidly fastened onto the hull plank edges. Even then, as I've done the second planking I've had to re-glue the bulwarks at the bow a couple of times.....fortunately I think I'm past the point in planking where I'm putting a lot of pressure on the planks....and I also hope that once the outboard hull is painted it will hide at least some of the imperfections.....Anyway, here are some more photos! Enjoy! hamilton

-
Really beautiful work Tim! Love the finish on the deck - can't imagine doing all those treenails!! Wonderful results hamilton
-
Looking really nice! For the windows, I used transparency paper - a thick acetate. It's ok, but it has quite a gloss that makes it look kind of weird and I also made the mistake of using CA to install the "windows" on the frames - the CA crystalises on the acetate, which both ruins the effect and makes it impossible to see through....in future I would use epoxy for this purpose to avoid these kinds of results......keep up the great work, regardless of how slow!! hamilton
-
Hi Bob - this is one project I'll be sure to follow closely - love your work and the Granado is a beautiful vessel - can't wait to see how she shapes up in your able hands! hamilton
-
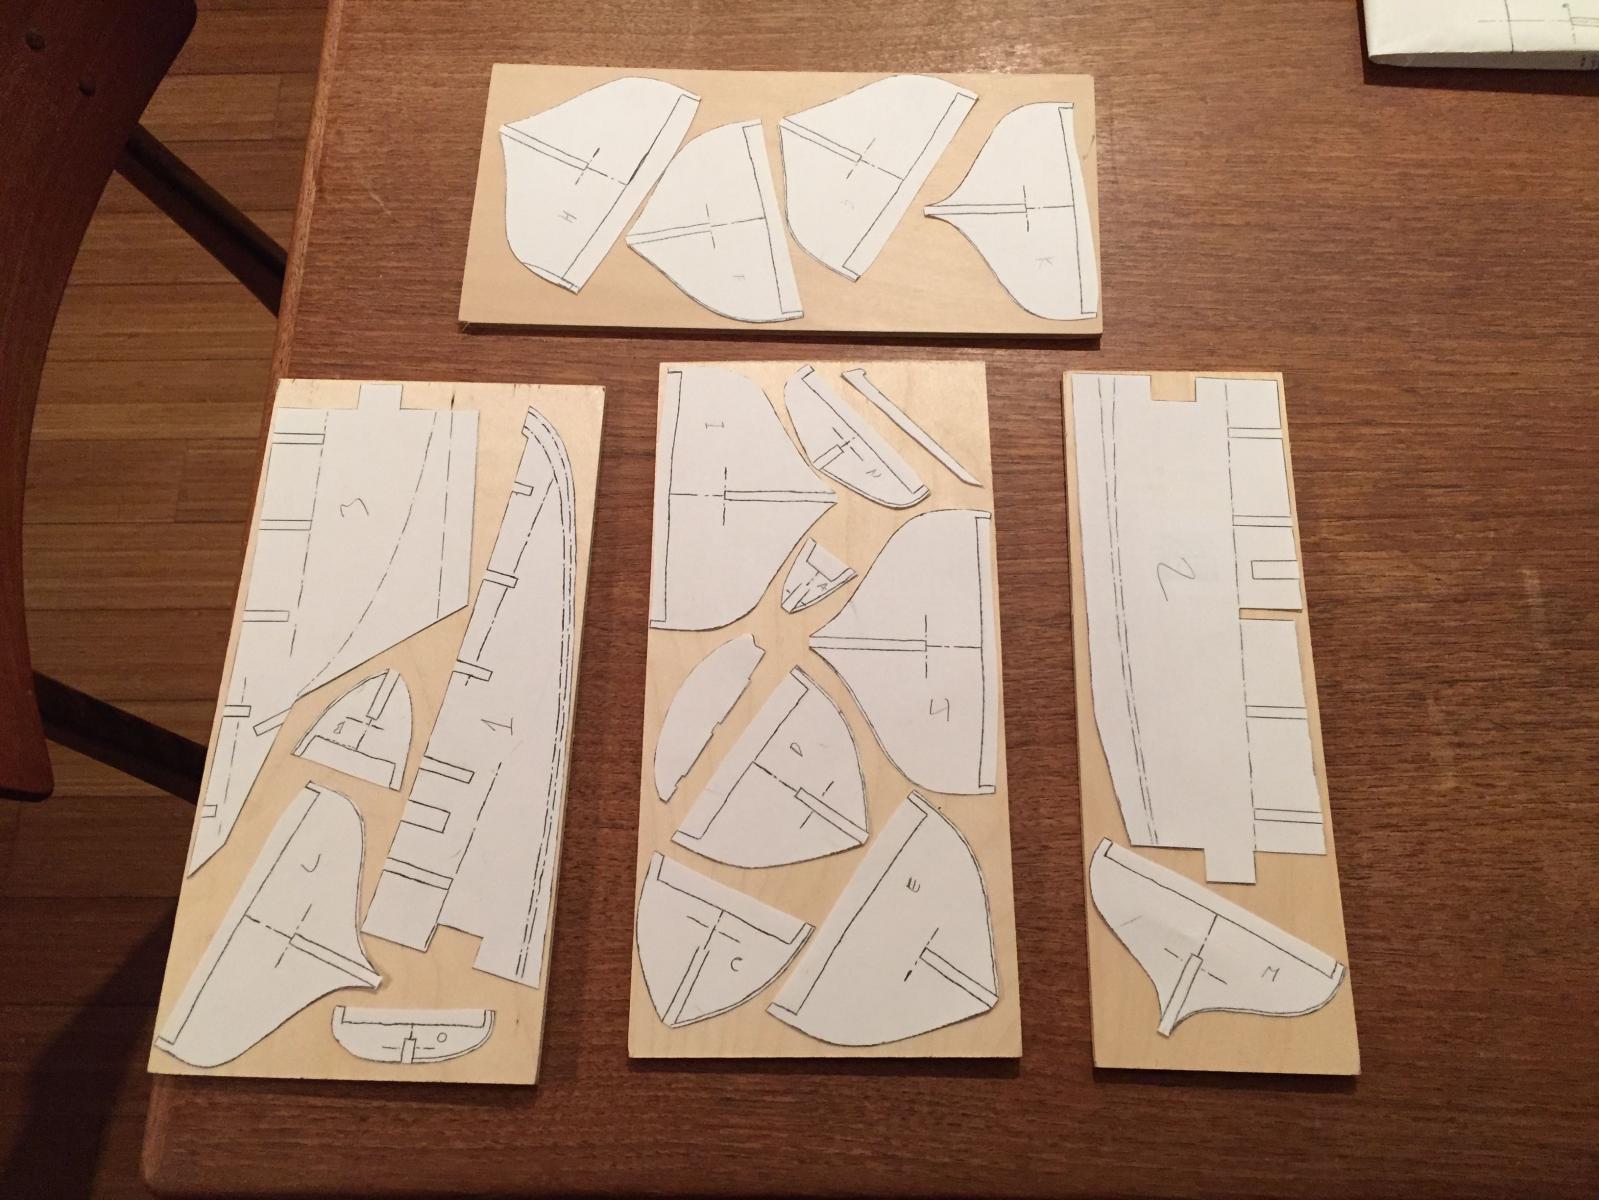
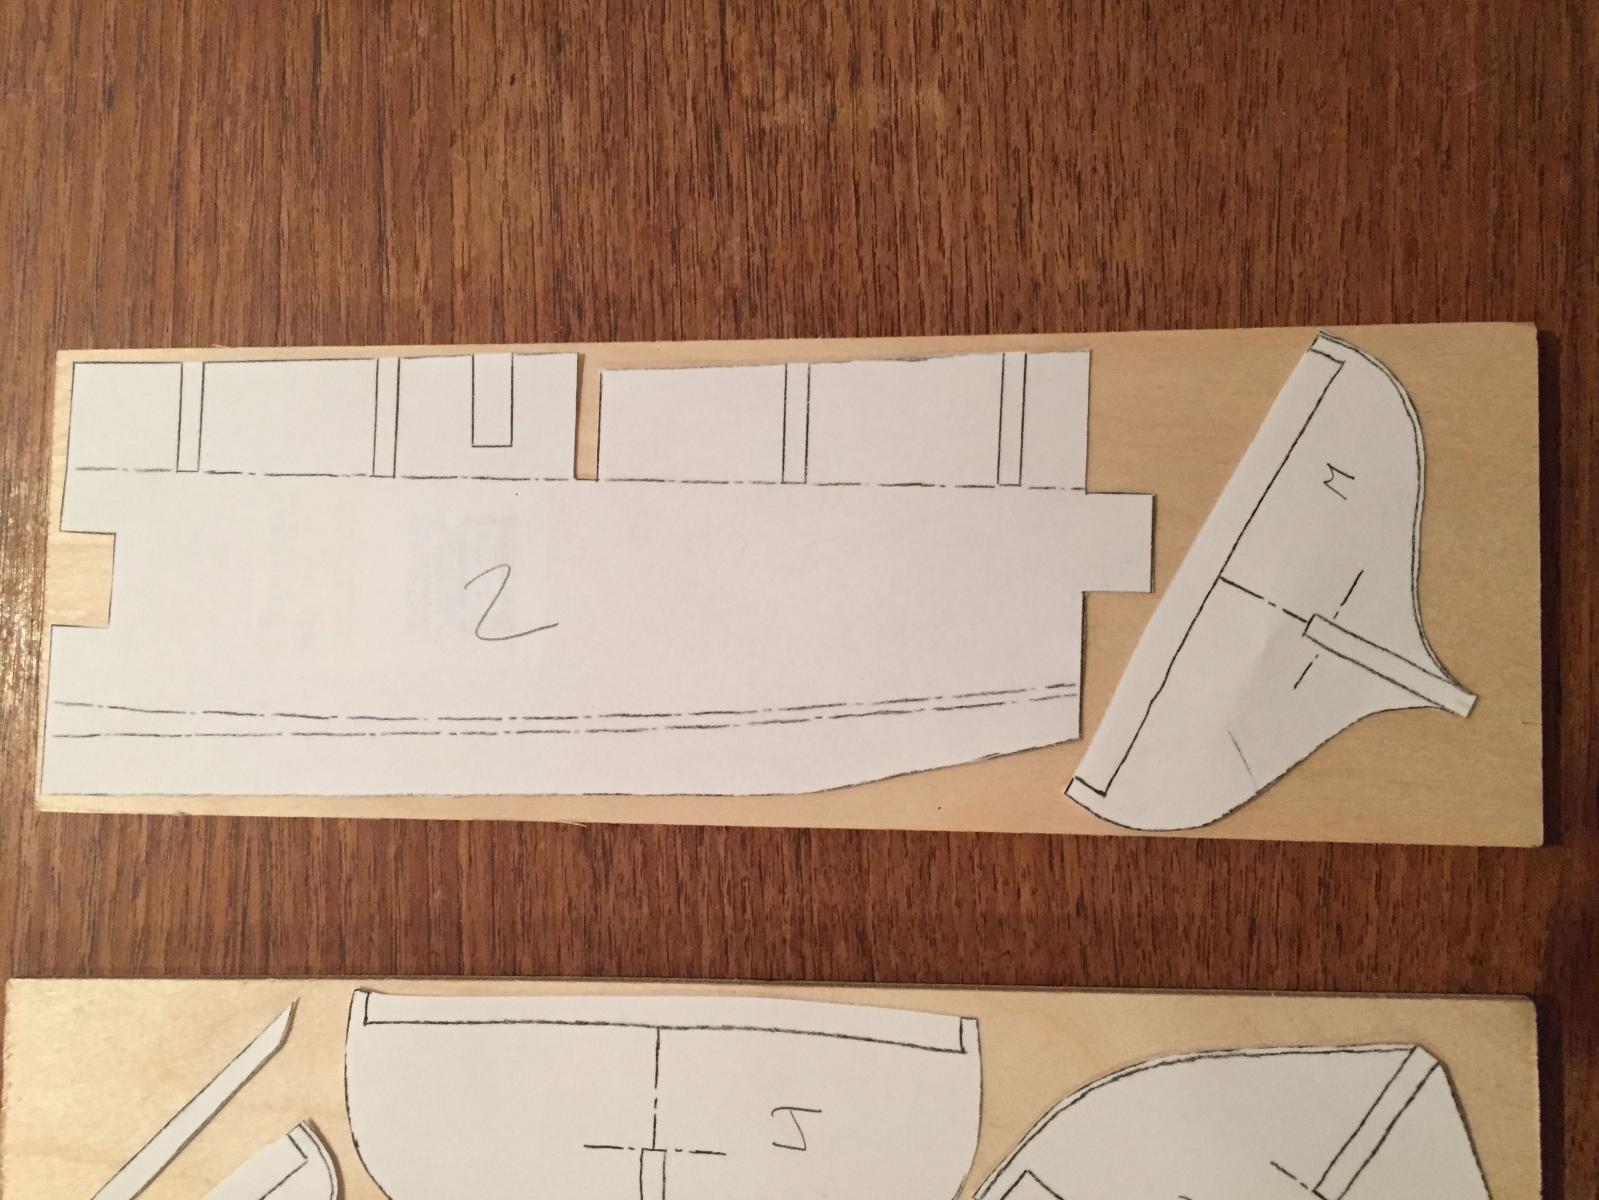
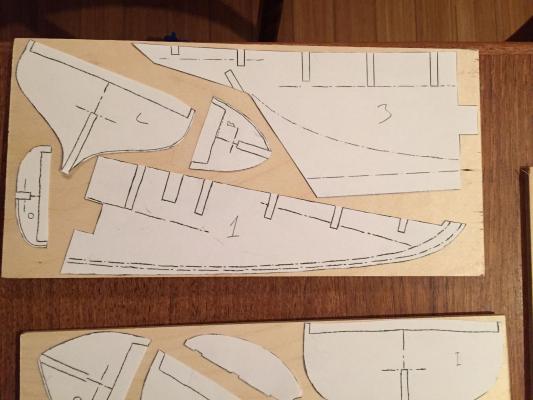
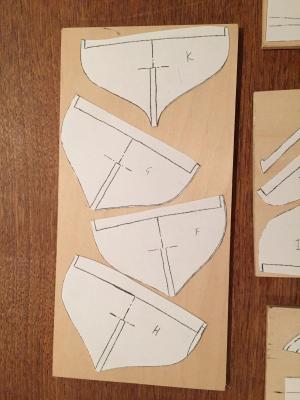
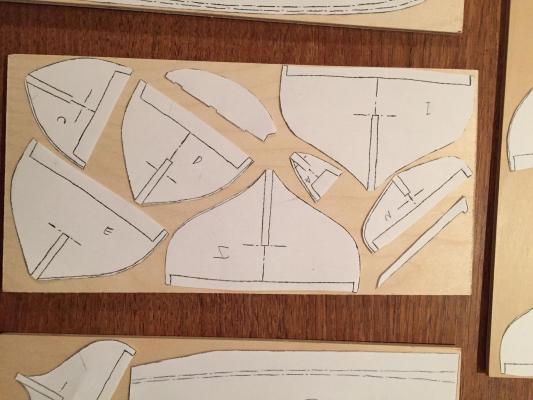
Thanks Russ - we'll see if that ends up being the case! Anyways, I've finished making initial test patterns for the 3/16" keel pieces, bulkheads, sternpost and rudder. I've laid them out on the maple ply I bought to make billets, trying to be as sparing as possible with the wood, despite the fact that these will not likely be the pieces I actually use. Maybe I'm being overly cautious......but I think a bit of practice will help. Here are the patterns laid out on the billets. I'll use rubber cement to fix them on the plywood and then get to cutting! Not sure if I'll be able to do this anytime soon, but.....looking forward to a rough assembly. hamilton

- 250 replies
-
- 16
-

-
Hi Tim: Just went through your log - your model is gorgeous! I do not think the patina on the hull is too much - it has a very nice well-used look. You mention above about the planking - I've been using 3mm x .5mm planks for the deck (a compromise) and the results seem ok - though some of the features shown in the photos of the replica would have been nice to include - particularly the coamings and what looks like a king plank - not a feature of the Mamoli kit......Anyway, beautiful work! hamilton
-
Hi Tim: Thanks for this! My planking experience is still happening (I've almost finished the second layer on the starboard side and about half done on the port....as I mentioned earlier I've altered the planking to make things a bit "easier" for myself - not sure it worked out that way in reality!! Isn't that always the case! I'm pretty sure my kit came with the jibboom iron, though it's been a while since I sorted through the fittings.....there were some missing parts though - I only got 2 of the palls for the capstan (there should have been 6) and one of the windows for the aft skylight is missing....Cutting the tiny palls could be a real pain, and I've not yet figured out how I'm going to scratch build the skylight windows..... Natural ageing on the copper takes a while. My Kate Cory, which I built back in 2010-11 is now a really nice "old penny" tone, as you say. But it took a couple years to get it to this stage. There are some suggestions out there for artificially ageing the copper, and various patina products you can get (I'm not sure if the product you mention is by the same people that make "Blacken-it", but I know they have a patina product, too - never used it though, so can't comment on results). If you look at aliluke's Fly log, you'll see a very original, if somewhat off-putting, approach to weathering the copper. His results look really good, but the method takes some nerve, I think.... I'm just going to go have a look at your America - thanks again for dropping by! hamilton
-
Thanks Mark and Russ Great suggestions! I guess I can always test the scanned/photocopied patterns against the plans (which, from my experience, are also likely to be "off" a bit, since they themselves are copies!) and check for distortion. At the same time, there is something meditative about doing things by hand. Since I'm really in an experimental/tool-learning phase I feel like I can try both approaches and see what happens.....I have a lot of scrap wood lying around to use for testing, so I'm really just messing around before getting serious about making the parts that will frame the model.....hopefully there will be some time this weekend for finishing the 3/16 patterns and doing some test cutting on the crappy maple ply I have.... hamilton
-
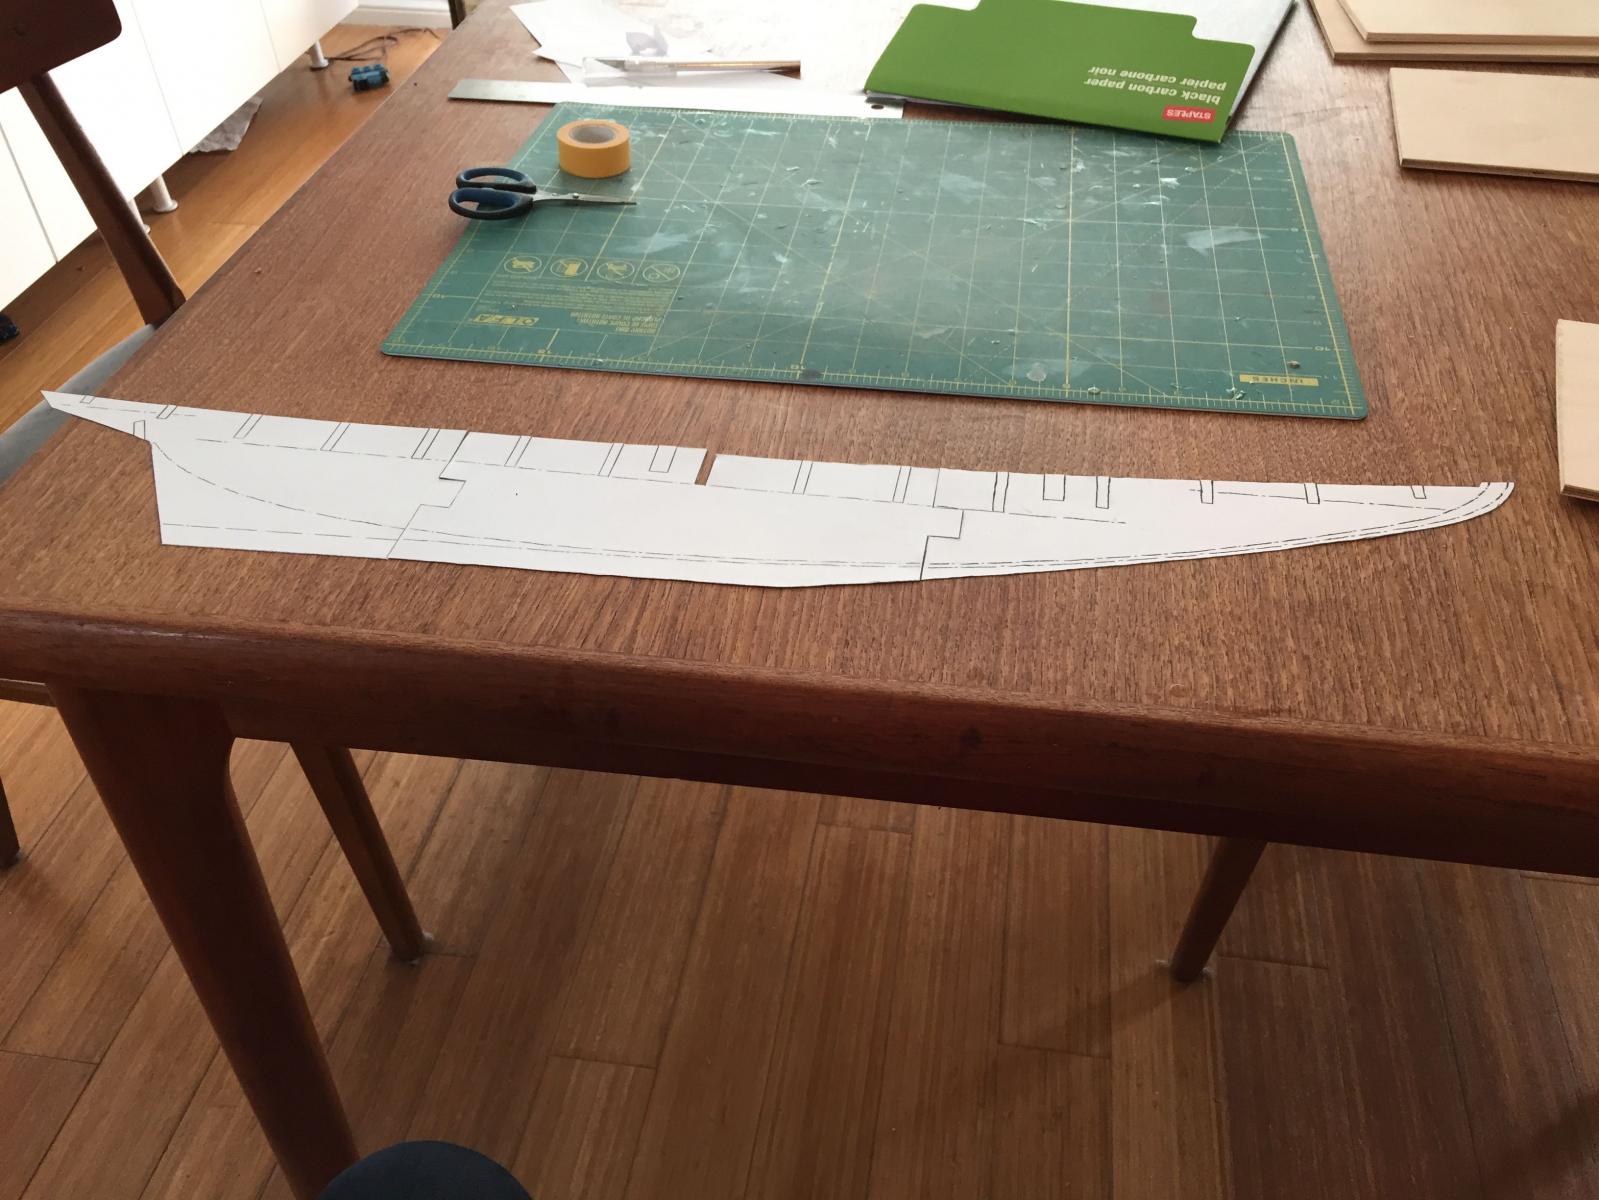
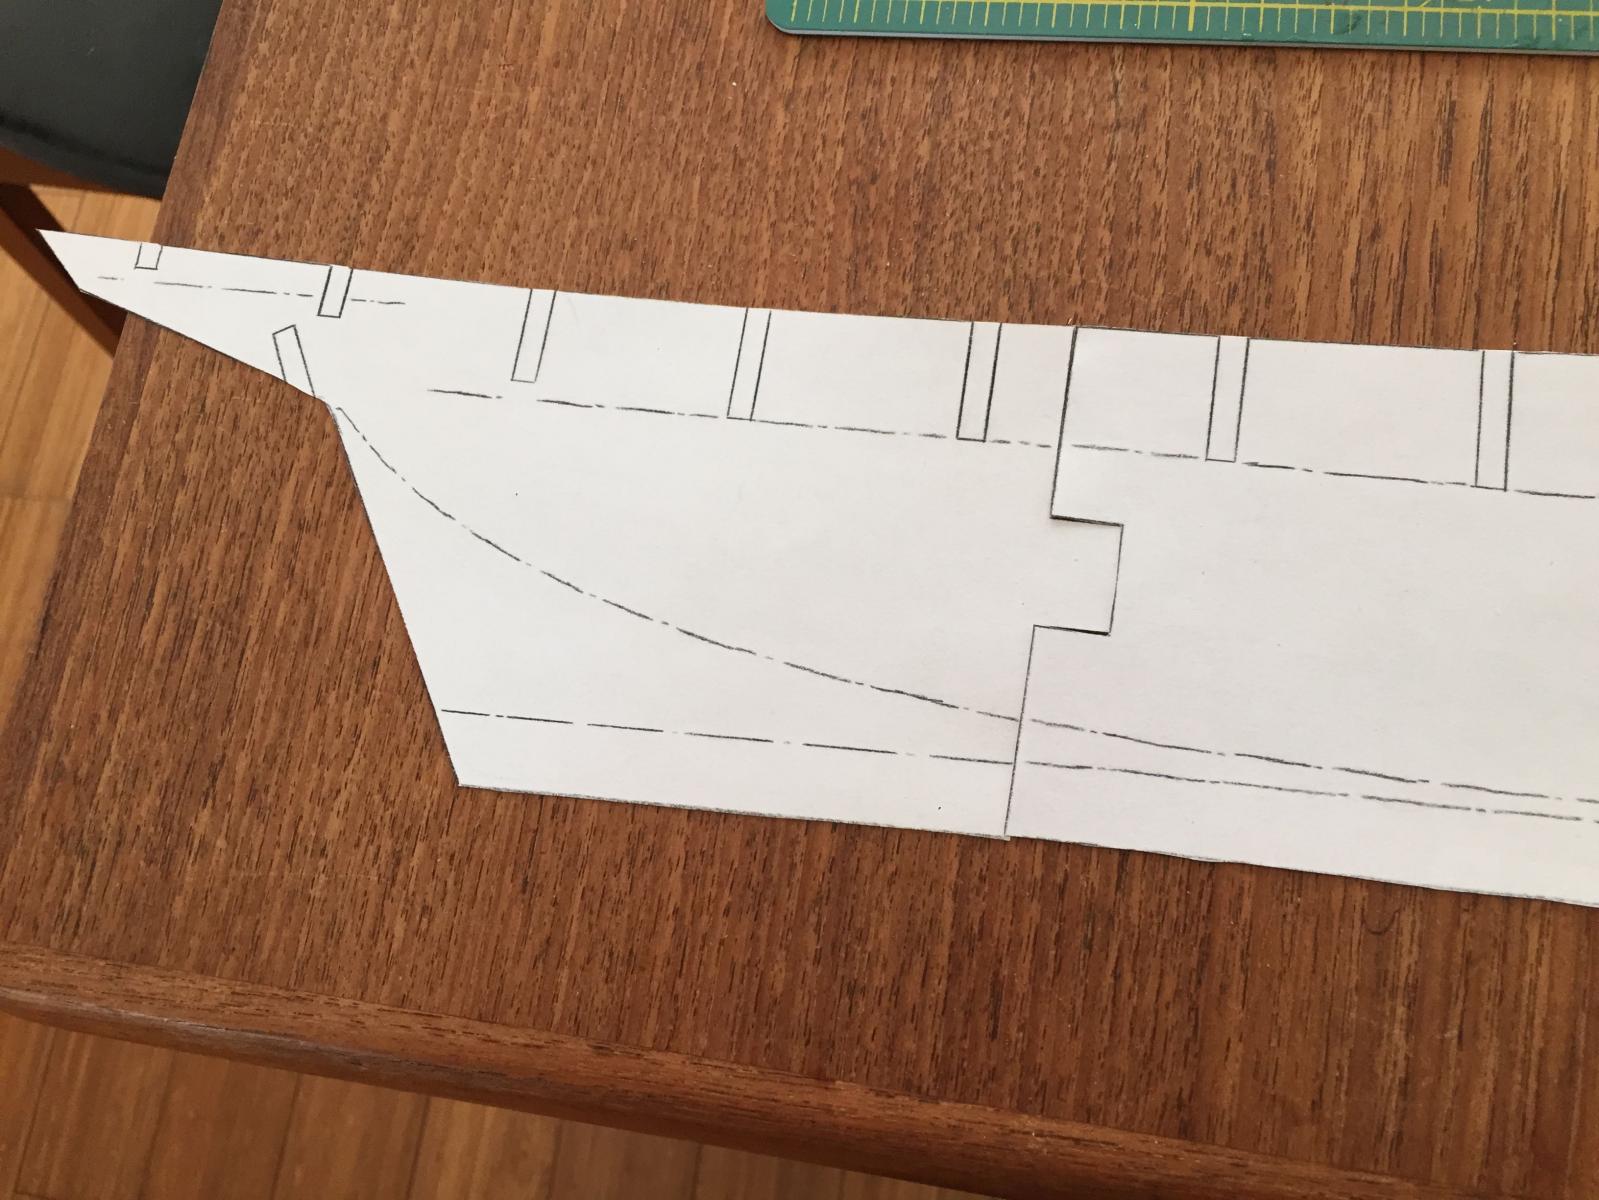
Just a quick note on technique - for comment, if anyone has better ideas. To make the templates for the centre keel and bulkhead pieces, I use relatively heavy A4 paper, carbon paper and the patterns provided on the MS Bluenose plan sheets. Placing the A4 paper on my work surface (the dining room table), I tape the carbon paper atop it carbon-side down. I then lay the plans on that and trace the patters with a sharp pencil. An alternative would be simply to photocopy the patterns from the plans and use cut-outs of those - this might increase the accuracy as less would depend on the steadiness of my hand.....the issue is that, after so much earlier consultation of the plans and so much unfolding and refolding, I'm worried that it would be difficult to get an undistorted image....so my by-hand technique will do for now - at least for cutting some test parts. I've managed to make patterns for the centre keel (as noted above), and bulkheads A-L. I'll finish up the other 3/16" pieces (bulkheads M-O, rudder, sternpost and one deck beam) tomorrow.....photos when they're done hamiton
-
Welcome John, Patrick and Elijah - thanks for the comments and likes! Of course I don't mind if you follow along - though you might mind at how slow I am.....The Bluenose is a beautiful subject - having built her at 1:100, I'm excited to see her come alive at a larger scale. I have a lot of learning to do through this process, especially around the fabrication of the structural elements. I'm not as accurate as a laser cutter, so I'm guessing there will be a lot of scrap ply generated through the early stages of this process.......bye for now! hamilton
-
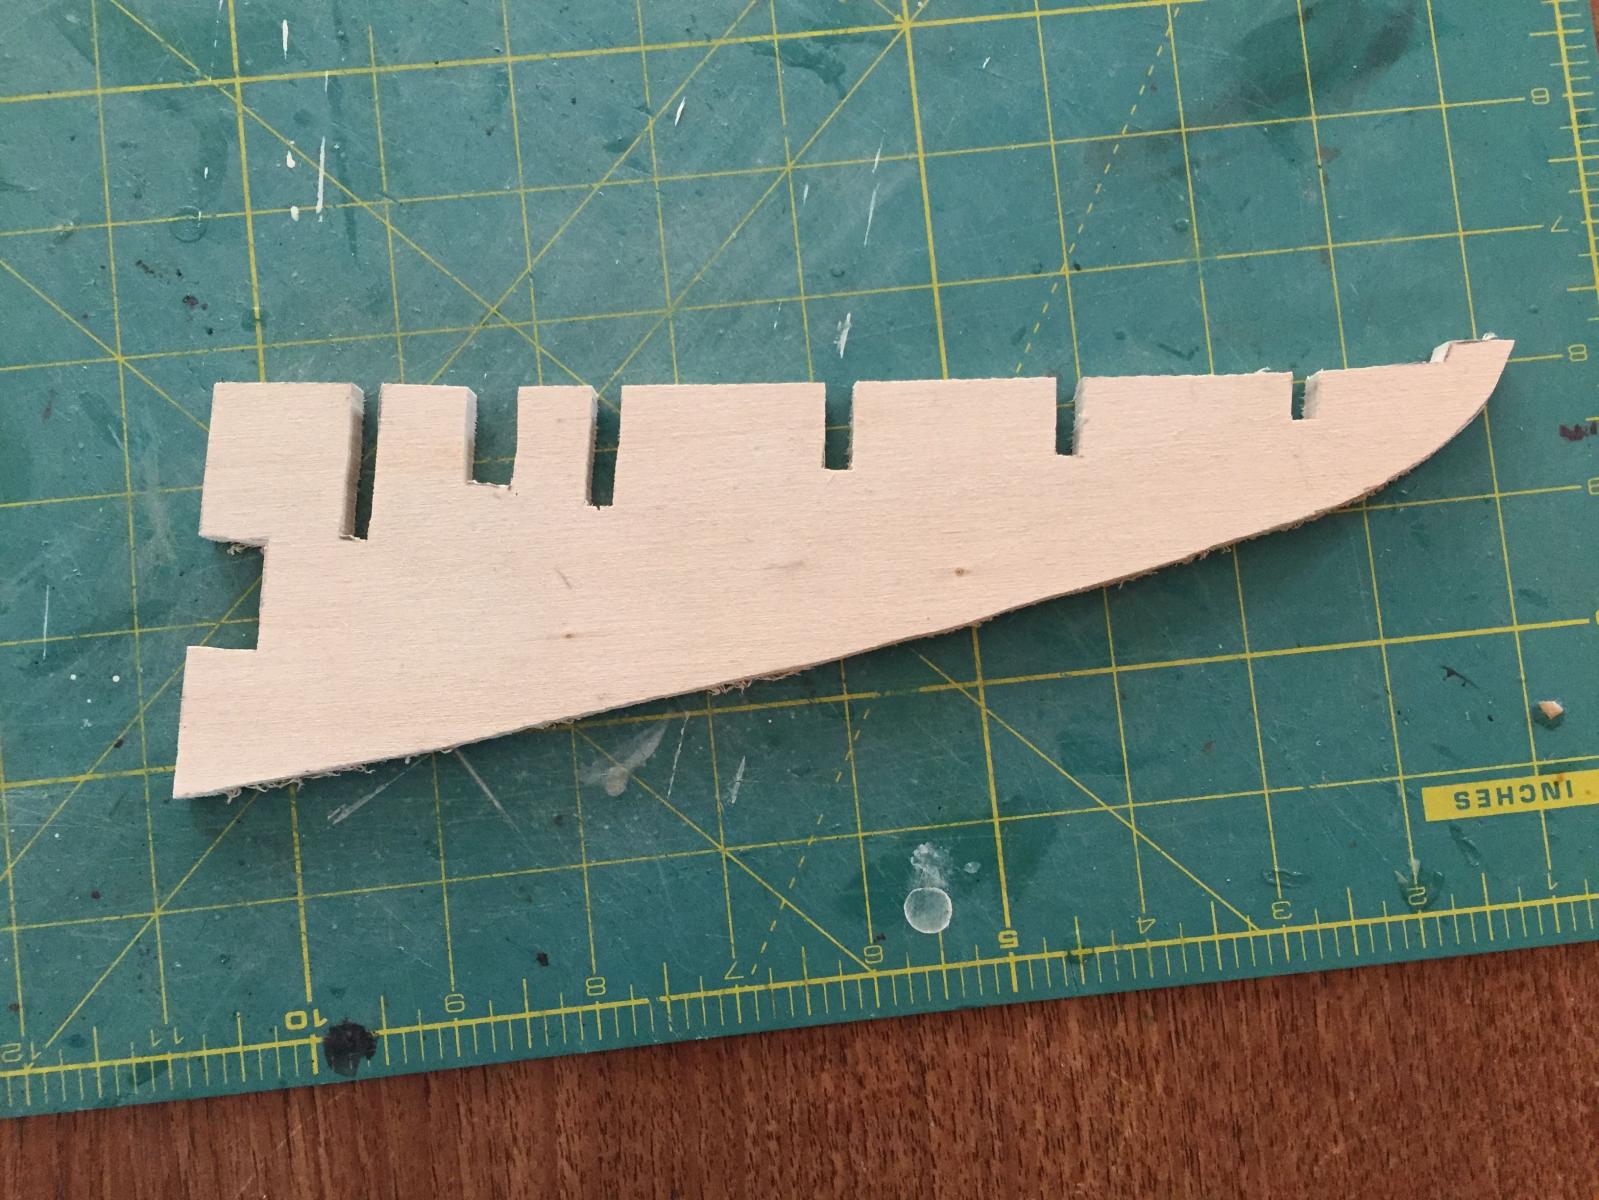
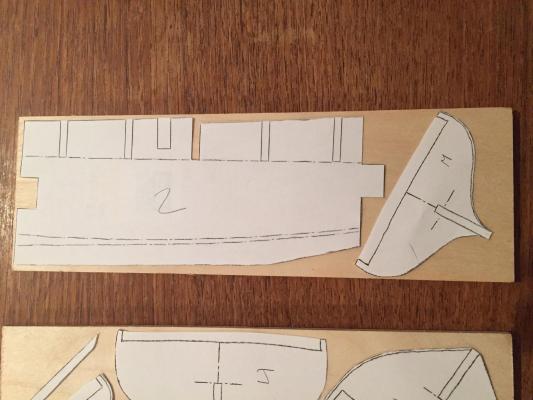
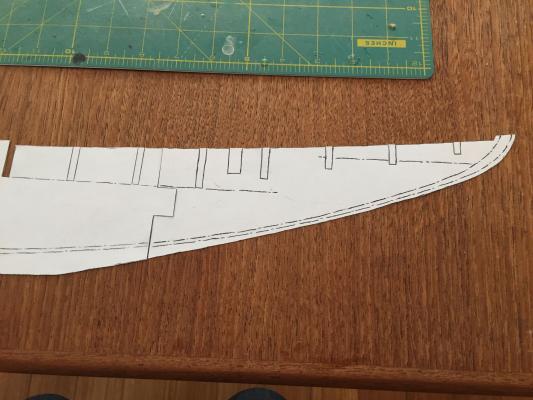
Hello there: This log will document my first attempt at a scratch built ship model. I've chosen to start with something more or less straightforward -- a 1:64 scale plank-on-bulkhead Bluenose based on Model Shipways' plans. I purchased the plans for the 1:64 MS Bluenose several years ago while I was working on the Amati 1:100 Bluenose. I wanted the plans as reference for the rigging, which on the smaller Amati kit had been quite radically simplified. Since then, the plans have been gathering dust in a drawer. But I always imagined that I might return to them once I felt ready to embark on a scratch build. The choice of Bluenose, then, was guided by the fact that I own the plans, which include reference drawings of all the laser cut parts, as well as by the fact that I've built the Bluenose before (though in a smaller scale). I also felt that, though clearly the principles are different, cutting my teeth on a p.o.b build would be a good way of getting into scratch building with an eye to a fully framed ship model. In any case, everyone knows the history of the Bluenose, so I won't repeat it here. This log will be more like a documentation of my clumsy entry into scratch building. Since I'm also working on the Mamoli America as a gift for a friend, the Bluenose build will no doubt be very slow. I also plan on continuing with kit builds alongside this project, which will also no doubt slow it down. The need to acquire some tools (and save some money in order to get them) will also slow things down a bit - currently, I'm equipped with a bandsaw, which I'll use to cut the centre keel pieces and bulkheads, but I can already see the utility of a disc sander and mini drill press.....I think for this build I can wait on other things like a mini table saw, but I'm going to assume that the priority of tool acquisition will become clearer as I work through the build.... I know that there are a lot of Bluenose logs here on MSW, but I hope that this log will add something to the mix. For starters, here are a couple of photos - my tracings of the centre keel pieces and a practice-run at the bow piece using 1/4 basswood - it's pretty rough, as you can see. This was made to help me get a feel for the bandsaw and is out of scale thickness in addition to being kind of ratty. I'll be using 3/16 birch ply for centre keel, bulkheads, rudder, and sternpost. I bought some of this today at a local hobby shop, but it is not very good (lots of warping). I'll use this to do more bandsaw testing and try another source for the ply. Well that is all for now....those who've looked in on my America (and perhaps other logs) will know that the frequency of my posting is quite idiosyncratic, so sorry about that....I'll try to be more diligent in the future!! hamilton


- 250 replies
-
- 21
-
-
Size of blocks & rigging thickness ?
hamilton replied to Senior ole salt's topic in Masting, rigging and sails
Lees' Masting and Rigging of English Ships of War 1620-1860 is also a useful source - though not being familiar with the other two texts I'm not sure how it compares - it is quite generic in relation to the rates of English ships, and I don't know how much any one particular vessel might have deviated from the generic descriptions provided by Lees.....good luck! hamilton -
The only thing I would suggest is taking more turns around the bowsprit - but this looks like a good start! I can see how at this stage it would be tough to put the gammoning on, navigating the tight spot in there at the front of the headrails.... hamilton
-
Sorry no pictures, but hopefully I can describe it clearly..... I know that the gammoning begins by splicing a small eye into the end of the gammoning line, reeving the line through the eye and hitching it around the bowsprit. It then passes between the gammoning hole and up around the bowsprit moving forward to aft on the bowsprit (each turn lying aft of the previous one) and aft to forward through the gammoning hole (that is, beginning at the aft end of the gammoning hole and working forward). Alternative this way is what gives the gammoning its unique twisting shape. The line is then frapped (circled around) the mid-point of the gammoning. Lees states that the number of turns on the frapping is equal to the number of turns around the bowsprit. The frapping is pulled tight to pinch the gammoning in the middle - this means that the gammoning itself must not be too tight around the bowsprit, otherwise pulling the frapping will not be possible and the gammoning won't look right. To be honest, I've never been able to get the gammoning looking great - only adequate.... I've also often wondered when the best time to attach the gammoning is - you can't wait too long otherwise the area will be too crowded to easily work the gammoning on......I hope this helps! hamilton
-
Hi Joe: I remember a long time ago the Amati Vanguard was offered in partnership with ME - I think this may have either been when the model was first produced, or maybe (if there was a lag) when it was first introduced to the US market.....The deal didn't last too long because it was shortly after I saw it that ME stopped carrying Amati kits.....They did the same thing with the Amati 1:100 Bluenose - I bought it from ME and it was packaged as an ME kit, but the contents were the Amati design. I think it must have been a collaboration between the two companies to promote these two products...... hamilton
-
Wow! Someone messed up there!! Nothing a few strips on the edges won't cure, I suppose, but still......more evidence that the only things that truly improve with age are wine and cheese.....and those only to a point.... Are you going to set up the cabin roof so that the interior is visible? Either by making it removable or through some other means? I've always regretted not modifying the roof in some way to make the interior details visible..... hamilton
-
Looks great so far - I like your mods to b/h 5 - a unique approach to adding cabin details - looking forward to seeing what you do with it. By the way - my bulkheads and keel were CNC - I notice that your version has laser-cut parts.....an interesting difference - how have you found the quality of the ply? Mine was very soft, but I wonder if they switched to different materials for a later edition of this kit? hamilton
-
Constructo Dos Amigos / Fair Rosemond - need instructions
hamilton replied to BIGMAC's topic in Wood ship model kits
Hi Big Mac Thanks. I didn't realise Constructo made a version of this ship....interesting! Judging by the picture on the box it looks very similar except without the sail option (I didn't mount the sails anyway, since I thought it would make the model look extremely cluttered). The OcCre version is also at a slightly larger scale (1:53)....I'll check to see if I have a copy of the instruction booklet, but again, I did not find it of very much use and primarily (in fact pretty much exclusively) used the plans..... hamilton -
I'm glad this thread has produced such a great and informative discussion!! Thanks all! hamilton
-
Constructo Dos Amigos / Fair Rosemond - need instructions
hamilton replied to BIGMAC's topic in Wood ship model kits
Do you mean the OcCre Dos Amigos? I just finished building that kit last summer - it has some deficiencies and weirdness for sure. There's a link to my build log in my signature...I'm not sure I still have the instructions - I did not find them helpful anyway, but mostly just followed the plans.....the only use of the instructions (not so much a manual as a very short set of photo-illustrations of the various construction phases) is to get a sense of the overall process of building the model - but if you've build a couple of kits already you would already be familiar with this........ hamilton -
So would it be better to invest in a small bandsaw? From what Bob just said it seems that apart from inside cuts the bandsaw does the same work....? But what is the advantage of the band saw over scroll saw where they overlap in utility? hamilton
-
Thanks Michael! Brief update - now that my work schedule has eased up a bit, I'll finally have a bit of time to dedicate to America. I actually put in some work on it last night - the first time in almost a month....I'm now in the process of planking the keel, stem and sternpost to create a rabbet for the second planking and contemplating how to do the bulwarks....it's a bit of a puzzle....I have this weird idea that once I get the first planking on the bulwarks the build will become easier and more fun!! We'll see if that theory is accurate! hamilton