-
Posts
1,931 -
Joined
-
Last visited
Content Type
Profiles
Forums
Gallery
Events
Everything posted by hamilton
-
Wow! She's shaping up very nicely Mobbsie! Makes me wish I could afford one of these myself!! hamilton
- 1,279 replies
-
- agamemnon
- caldercraft
-
(and 1 more)
Tagged with:
-
Simple yet effective jig! She looks even better now with the yards on! hamilton
- 92 replies
-
- finished
- caldercraft
-
(and 1 more)
Tagged with:
-
I guess "phew" doesn't really cover it! I've had my share of mis-steps - hand getting caught in rigging, normally....always a cause for alarm, even when the damage is minimal! Lucky your incident didn't case more mayhem hamilton
-

belaying lines on knightheads...yes or no?
hamilton replied to hamilton's topic in Masting, rigging and sails
Thanks BE! - this settles it hamilton -
I guess the subject says it all, but to give some context, I'm working on an early 18th century 6th rate (or post ship) - the Blandford of 1719/1720. Thanks in advance for your answers! hamilton
-
Thanks Augie - it's actually not that bad - it's about time I revisited this work anyway, since I'm at the stage when it's really going to start to guide my work. This final revision will make it almost like a kit-basher's tool kit for the Greyhound. hamilton
-
Hello all: I've now finished the rails (photos later) and though I thought they would be pretty straightforward I found myself having to come up with a compromise between the modification of the kit as the HMS Blandford and the structural aspects of the Greyhound kit as supplied by Corel - more on this later. In the meantime, earlier in this log, I reported on my redrafting of the kit parts list, rigging tables and belaying plan. Foolishly, I did this before receiving the Lees and Goodwin books that I ordered to assist in the build....now I'm at the point where I'm adding the rigging elements on bulwarks, deck, rails and outboard hull. Looking at Goodwin (in particular) it's clear I need to re-do my belaying plan and rigging tables (and ultimately the parts list) to take into account the modifications I'm planning to the kit based on the Blandford..... So the long and the short of it is that after tonight, I'm going to be draw away from the modelling table and back to the drafting board....At least for a couple of days. I don't know how big the job is going to be until I get into it - but I will not feel comfortable proceeding until I've worked out my "road map" so to say..... Anyway, hope everyone is having a good time at the bench! hamilton
-
Hey Brian: I have a copy of the AOS Bellona as well - both are beautiful books, though I wish there were more model shots in the Bellona book...there is a great diversity of examples of contemporary models of 20-gunners in the Goodwin book - the variety makes for a lot of options for building, which is nice to have in the trickier phases of the build! hamilton
-
Yikes, Alistair - I don't think my car goes that fast....try not to get blown away - and watch it on that kayak!! hamilton
-
Hi Doug - looks amazing! A nice clean finish and beautiful craftsmanship - very nice to look at hamilton
- 92 replies
-
- finished
- caldercraft
-
(and 1 more)
Tagged with:
-
Alistair! It's been a while! I'm happy to hear that the Fly is on the horizon - it will be a beautiful model no doubt! The challenges with this build do not stop - in fact when I decided to move to what I thought would be an easy part of this build, I confronted yet another deep structural problem (albeit one that was produced by my adaptation of Corel's kit)....I think I've solved it in a way that is satsfactory to me, but it is essentially a compromise between the limitations of the kit, my attempt to adapt it, and obtaining a result which tends to sacrifice historical accuracy to a minimisation of aesthetically offensive results....sorry if this seems vague - my next update will document what I'm talking about. Anyway - great to hear from you - hope you're having fun down there! hamilton
-
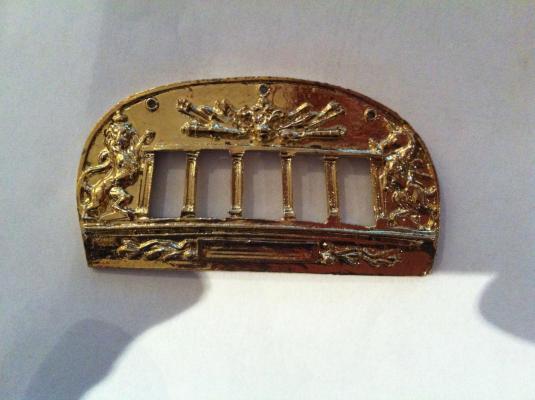
Wow Harlequin - talk about making a silk purse out of a serious sow's ear! My hands are nowhere near steady enough to get so accurate a finish! I have to carve out some time in the coming week or weekend to trawl through the local pawn and thrift and craft shops of Vancouver to see if I can't find some fixtures that could sub in for decorations on the Blandford...There is still quite a bit of work to do back there - but I needed to take a break from the scratch work and get back to some more straightforward parts of the build - the rails and frame ends/stanchions for the main cap rail...After this I'll move on to the stern again and to the decorative elements....a little worried.... My present solution to the decorative elements (using brass bare tree frames at a very small scale) is likely to produce an aesthetically "satisfactory" but not historically accurate result - unfortunately, my strategy for dealing with limitations in my craftsmanship is to pretend they don't exust by seeking out convenient solutions....at some point I will have to overcome my limitations by practicing (a novel idea)....! Anyway, good to hear from you! hamilton
-
Again - really beautiful work here Ferit - everything is finished to such a fine tolerance you would never know you were looking at a model (except for the fact that these photos are on a ship modelling forum!) - excellent craftsmanship! hamilton
-
Thanks for the tips Andy! I took a look a while back through the miniature figures at the local train store, but none of them really seemed appropriate....I couldn't imagine adorning the stern of my Blandford with a grocer and a guy with a briefcase....some of the child figures might be turned into cherubs I suppose, but I'm not sure the results would merit the effort and cost required......I'll give it some thought.... hamilton
-
Hi Andy: To tell you the truth I'm not sure....BE also pointed out that Corel seems to have lifted the transom decoration from the Victory. Goodwin shows a few options - some with figure carvings, some with just decorative patterns similar to those on your Pegasus bulwarks.... I've said before that my carving skills are non-existent, so I don't think I'm going to be making anything.....not at this stage of my modelling career anyway. This means I'll have to try and find something....this could prove an endless search. I do have some brass bare tree frames purchased from a model train store a while ago. I had thought of using clippings from the tree branches to render the decorations on the transom and bulwarks, but maybe I'll post a picture of these brass parts to see what the consensus is first....However, I don't really have a backup.... hamilton
-
Thanks Ferit, BE, Augie & Andy! Clearly I didn't do enough research to lead me away from the diamond-shaped windows....though now that I look at Goodwin's AOS Blandford again I see that none of the transom drawings have this type of window frame....I'm not sure I'll replace them, though, since I spent so much money and time on them and despite historical inaccuracy, I think they look alright and add some interest to the build....sorry! I'm actually more concerned with a structural aspect of the model that will somewhat skew the otherwise nice-looking open bulwarks on the blandford...I had the suspicion some time ago that the quarter galleries and forecastle were too high by about 2-3mm...but I didn't do anything about it, since I wasn't really sure and making the adjustments would have involved me cutting new bulkhead frames - for which I do not have the appropriate tools. Anyway, you'll see what I mean in a future post. In the meantime, I still have to figure out the decorative details on the transom and at the bottom of the quarter galleries, so technically this part of the build is not quite over.... Thanks again all for the comments and support - much appreciated! hamilton
-
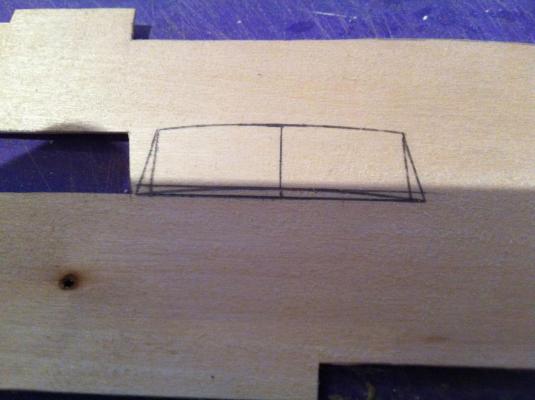
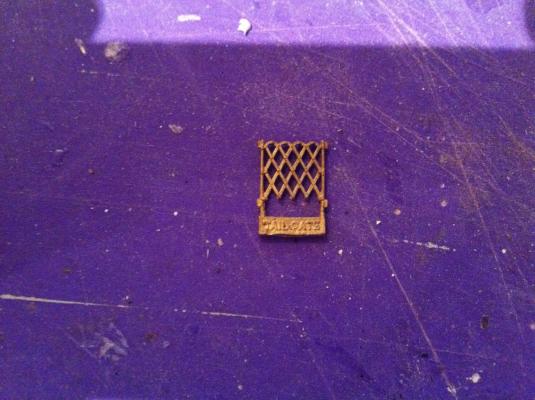
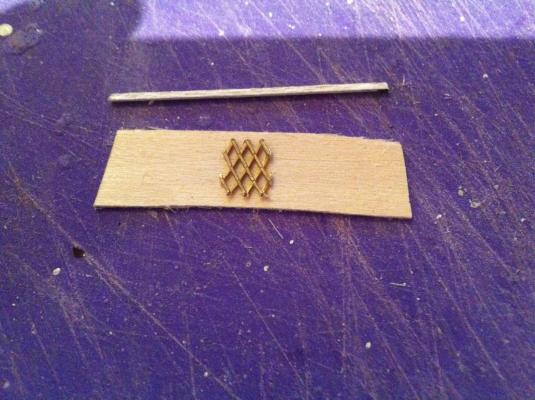
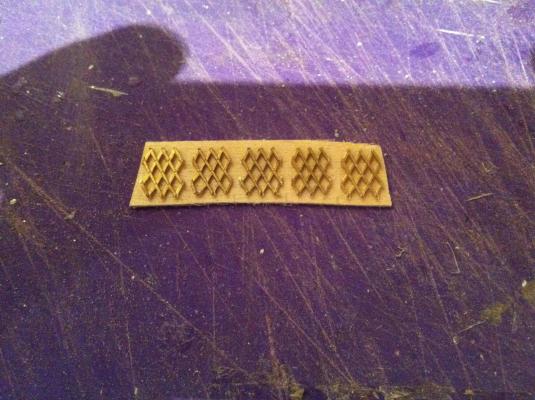
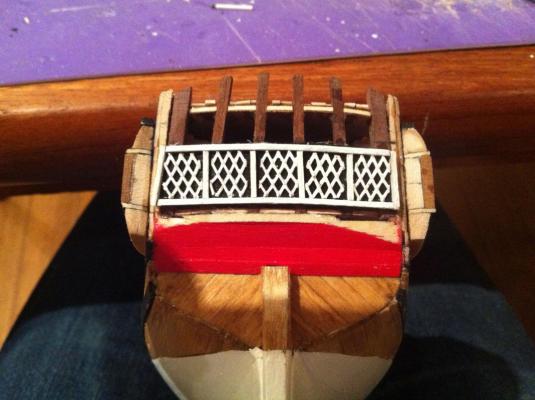
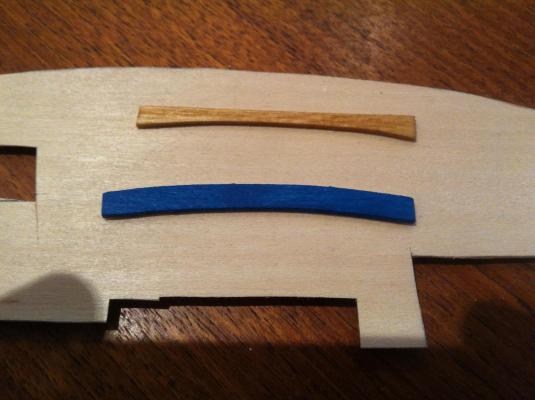
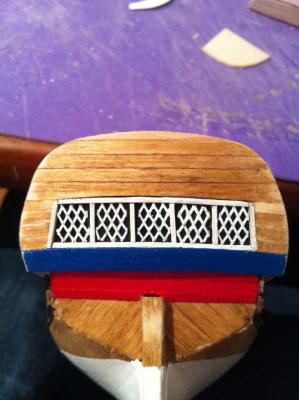
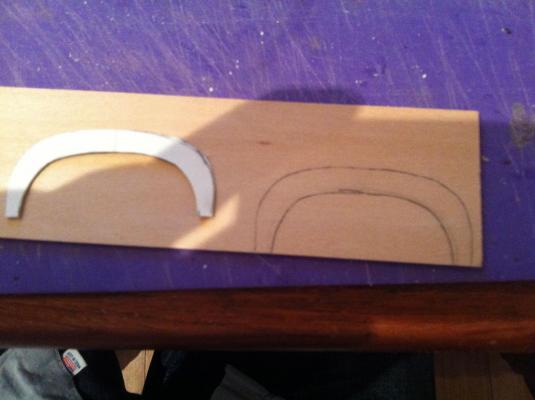
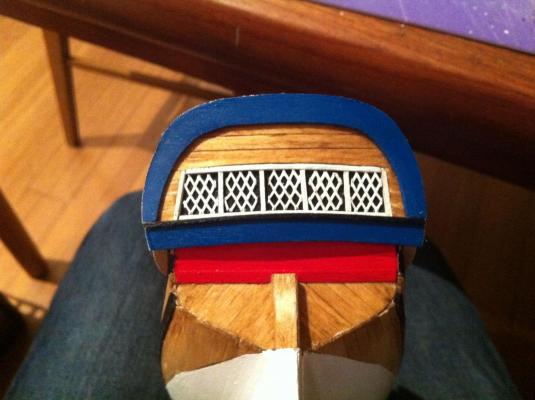
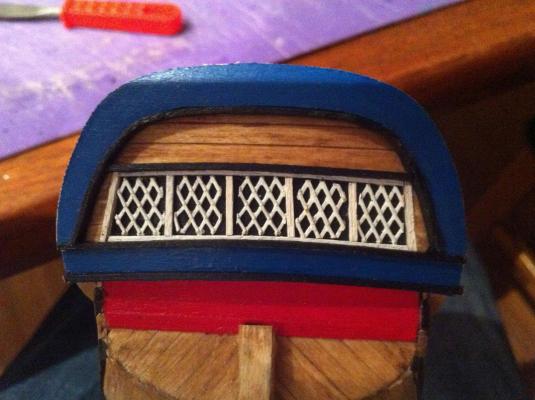
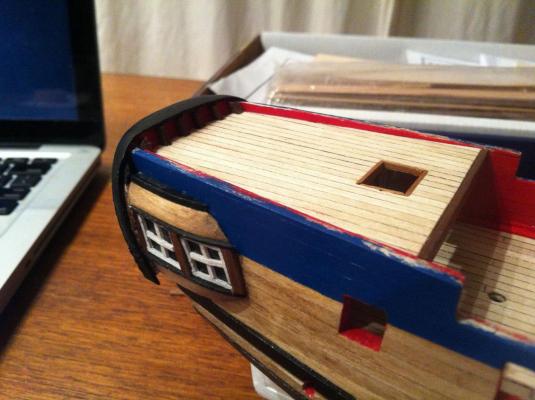
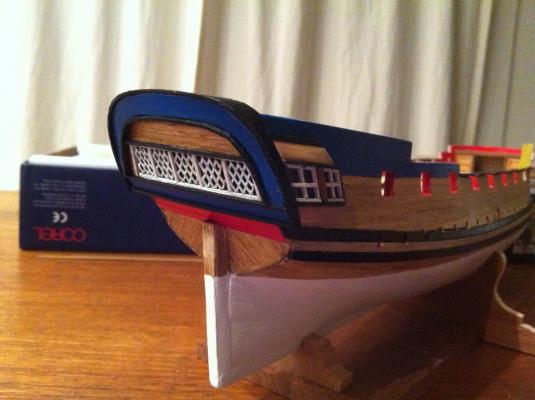
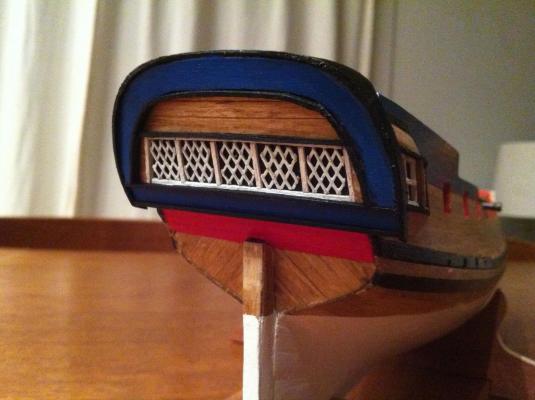
Well everyone, the transom is almost finished - I have some decorations to add, but I'll save this for a future post. For now, I'll explain how I went about things. 1. Cabin windows: after a lot of thought about how to approach things, I decided to first construct and install the cabin windows and then plank around them. I made this backing out of 1/32" basswood - The shape of it was based on the angle of the stern framing installed earlier. The window frames were at first a bit of a challenge - given that the area of the windows is much smaller than the quarter galleries. Fortunately, I found these brass tail gates at a local model train shop - I thought I could adapt them as window frames. I trimmed the brass parts to leave a basic frame - I eventually trimmed 5 and laid them across the window backing to get a sense of spacing. The backing was then painted black, and the frames painted white. I then glued the centre frame and added 1mm x 1mm strips (also white) as vertical frames. I finished off the assembly with some white 1mm x 1mm strips at top and bottom. The whole assembly was then fixed on the model. Here it is. 2. Planking: The planking was done with 3mm x 1.5mm basswood, except for the planks immediately above and below the windows, which were spiled from a 1.5mm sheet. Here they are, with the upper plank stained Golden Oak and the lower one painted blue - this is the strip on which the name plate will be fixed - another future addition. Here is the basic planking finished on the transom 3. Moldings: I added a curved piece around the edge of the transom - cut from 1/32" sheet & painted blue (I don't know if this feature has a name....can anyone enlighten me?). I also added some 1mm x 1mm moldings as well as a 1mm x 2mm curved molding on the inside of the curved transom piece. I started by making a template and tracing it onto the sheet: I then simply cut it out, painted it and installed it: Then the moldings went on - painted black.... 4. Cap rail: I then fabricated the cap rail. This was spiled from a 1mm x 6mm strip. It needed to be thicker across the top (the taff rail) and tapered around the quarter galleries. A little tricky but not too bad - also painted black. Here it is.... And here is the transom again and a closer shot with cap rail installed. And here, for comparison, is the part supplied by Corel.... So that's it...I have to say that I'm quite relived that this part of the build is done. It was a lot of fun puzzling the transom out and putting it together and even though it's not perfect, I'm very pleased with the results. One thing I tried to do and didn't was to apply the name to the lower strip on the transom. I had a sheet of dry transfer letters, but they were black, so they did not really show up - I'm going to try to find some white lettering and apply it to a .5mm x 5mm strip to add later.... I also bought some brass bare tree frames from the model train shop, which I'm going to use as decorative elements on the bulwarks and transom - later for that, though. In the meantime, I've begin to install the cap rails & frame ends for the open bulwarks. I'll update this once it's done. For now - hope you're all having a great weekend and happy summer!! hamilton
-
Really nice work on the sails, Richard! Impressive detail - it'll look great when rigged up hamilton
- 135 replies
-
- willie l bennett
- model shipways
-
(and 1 more)
Tagged with:
About us
Modelshipworld - Advancing Ship Modeling through Research
SSL Secured
Your security is important for us so this Website is SSL-Secured
NRG Mailing Address
Nautical Research Guild
237 South Lincoln Street
Westmont IL, 60559-1917
Model Ship World ® and the MSW logo are Registered Trademarks, and belong to the Nautical Research Guild (United States Patent and Trademark Office: No. 6,929,264 & No. 6,929,274, registered Dec. 20, 2022)
Helpful Links
About the NRG
If you enjoy building ship models that are historically accurate as well as beautiful, then The Nautical Research Guild (NRG) is just right for you.
The Guild is a non-profit educational organization whose mission is to “Advance Ship Modeling Through Research”. We provide support to our members in their efforts to raise the quality of their model ships.
The Nautical Research Guild has published our world-renowned quarterly magazine, The Nautical Research Journal, since 1955. The pages of the Journal are full of articles by accomplished ship modelers who show you how they create those exquisite details on their models, and by maritime historians who show you the correct details to build. The Journal is available in both print and digital editions. Go to the NRG web site (www.thenrg.org) to download a complimentary digital copy of the Journal. The NRG also publishes plan sets, books and compilations of back issues of the Journal and the former Ships in Scale and Model Ship Builder magazines.


