hamilton
-
Posts
1,933 -
Joined
-
Last visited
Content Type
Profiles
Forums
Gallery
Events
Everything posted by hamilton
-
 Really nice work on the sails, Richard! Impressive detail - it'll look great when rigged up hamilton
 -
Hello Druxey, Brian, Frankie and Augie: Thanks for the clarification - black it is! hamilton
-
masts used to support ship's boat
hamilton replied to hamilton's topic in Masting, rigging and sails
Hi Janos, Druxey, Dan and Frankie: Thanks a lot for the input - I think I may fashion full lower masts to support the ship's boat....the more detail the better, I say! hamilton -
Hi there: I don't know if this is the right forum for this question, but.... I know that frequently ship's boats were stowed on deck supported by spare masts laid down across gallows bitts. But would these masts have been completely shaped and finished in the same way as the installed masts or would they have simply been poles cut to length and unshaped.....any wisdom on this question would be greatly appreciated. Thanks a lot! hamilton
-
Hello all: I'm working on a modified HMS Greyhound (Corel) and am wondering (in advance) how the channels would have been finished. Corel supplies these as laser cut in Walnut ply - I am tempted to paint them black, which I think will fit better with the scheme of the vessel as I've been building it. I'm assuming this is one of those "up to you" kind of things, but I thought I'd ask the membership just in case. Thanks in advance! hamilton
-
Amazing work here! I've always been curious about this kit and it's nice to see it come alive in such capable hands. Just read through this log with great interest - I'm also happy to hear that you put your modelling work to such good causes!! hamilton
-
Take your time Harlequin! Though pics would be nice...... hamilton
-
Cheers Mobbsie! I'm actually gaining quite a bit of confidence - the trick is not gaining too much!! hamilton
-
Ummm...didn't you say this was your first model? I can't get results this nice and I'm on my 12th!!!! hamilton
-
Thanks ZyXuz - much appreciated! hamilton
-
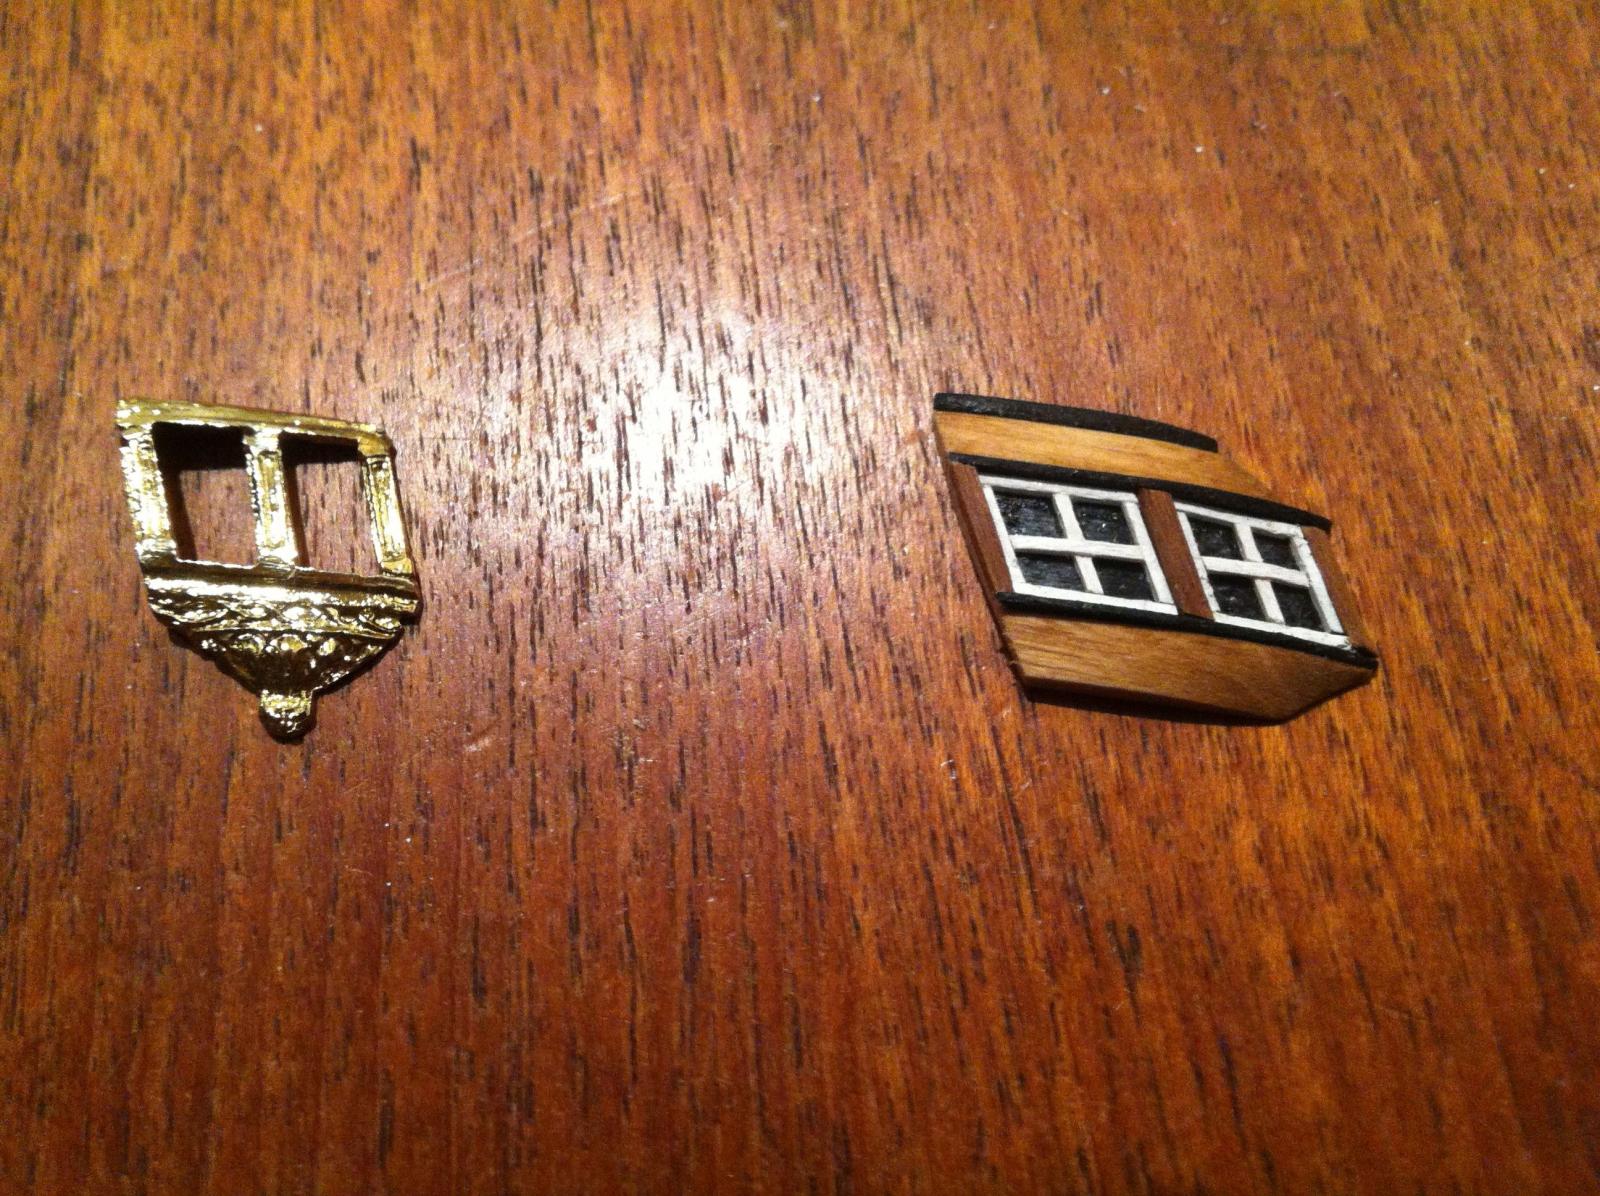
Thanks Ferit, Andy, Augie and BE!! It was definitely worth the effort, though some refinements could have been made - particularly with the window frames....A thinner styrene instead of 1mm x 1mm basswood might have made for a cleaner finish.... In any case, last night I started on the transom and though my mind is a little muddled on how to put it together and finish it off, I'm confident that it will look at least a little better than the horrendous part supplied with the kit..... I will post photos documenting and explaining my approach to building it once it's all done - I've just got the cabin windows and frames completed now and will begin planking it up sometime soon - maybe tonight or Thursday.....hopefully it will be all done by the end of the weekend and I can move on to some more straightforward elements of the build! hamilton
-
Wow Mobbsie! You weren't messing around! That would have taken me forever to complete and it wouldn't have looked half as good as yours! Very well done! hamilton
- 1,279 replies
-
- 1
-

-
- agamemnon
- caldercraft
- (and 1 more)
-
Hi Jason The knighthead fix is very well done! And it's a good thing that BE clarified the timberhead question (now I can add that to my modelling lore, as well and free myself from many mistakes!). The model now looks even more beautiful than before! hamilton
-
Hi Augie - I don't know what you mean by "doesn't look like a whole lot" - looking at your Syren, this phrase literally makes no sense! It looks like a whole lot to me! hamilton
- 1,668 replies
-
- 2
-
-
- syren
- model shipways
- (and 1 more)
-
Good luck with the planking - head down, eyes open, bottle to hand (but not too close!) hamilton
-
Beautiful work, Jason! Re, the knightheads - I'm not too sure, but the knighthead's I've seen are normally either side of the bowsprit - it might have been different with the Snake, and it's also possible that I get this idea from exceptional (and potentially incorrect) models! Others can confirm. Also - the timberheads would actually be the ends of the frames, so they wouldn't run in line of the gunports, as far as I know....I wonder if you could cut it off, sand it down, refinish and place the timberhead forward of the gunport...again others can confirm She looks fantastic in any case! hamilton
-
Amazing work, as usual Ferit! Isn't it nice to see the ship finally start to move upward? It would be nice to see a profile shot with the mast to get a sense of the height - no pressure, of course!! I know it's far ahead, but are you going to add the sails? hamilton
-
Hi Jim - this is really incredible work! The planking looks great and the detail is fantastic. I wish I had read your very simple explanation of how to finish the shields when I was building this model a year ago! Now I know! Keep up the good work! hamilton
-
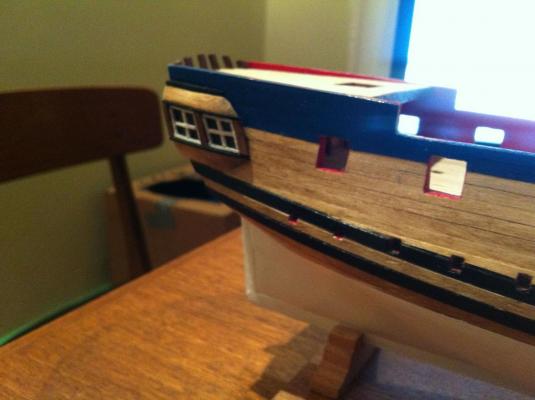
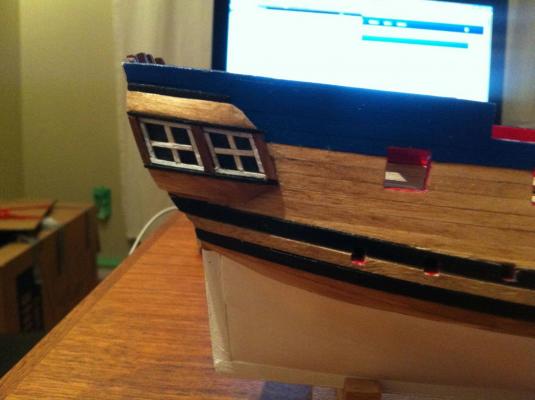
Thanks a lot Andy, Augie, Ferit & Mark! Your compliments mean a lot - especially coming from such great craftsmen. I don't know about going to the dark side......yet....though in secret I've been looking at a couple of lumberyard kits..... Tonight I finished the port side quarter gallery, and so now it's a nice pair. I still have to make the decorative finishing elements on the bottom of both pieces. I'll do this tomorrow. Here's how they currently look on the model. Next up is the transom - I have to say that I feel a lot more confident in making this now that I've made the quarter galleries. It's not going to be incredibly decorative, though I've been on the hunt for things that I could use as decorations in a pinch....Hopefully I'll be able to build the transom in such a way that I can add elements (if I find them) later but if I don't it'll still look ok.... Until next time hamilton

-
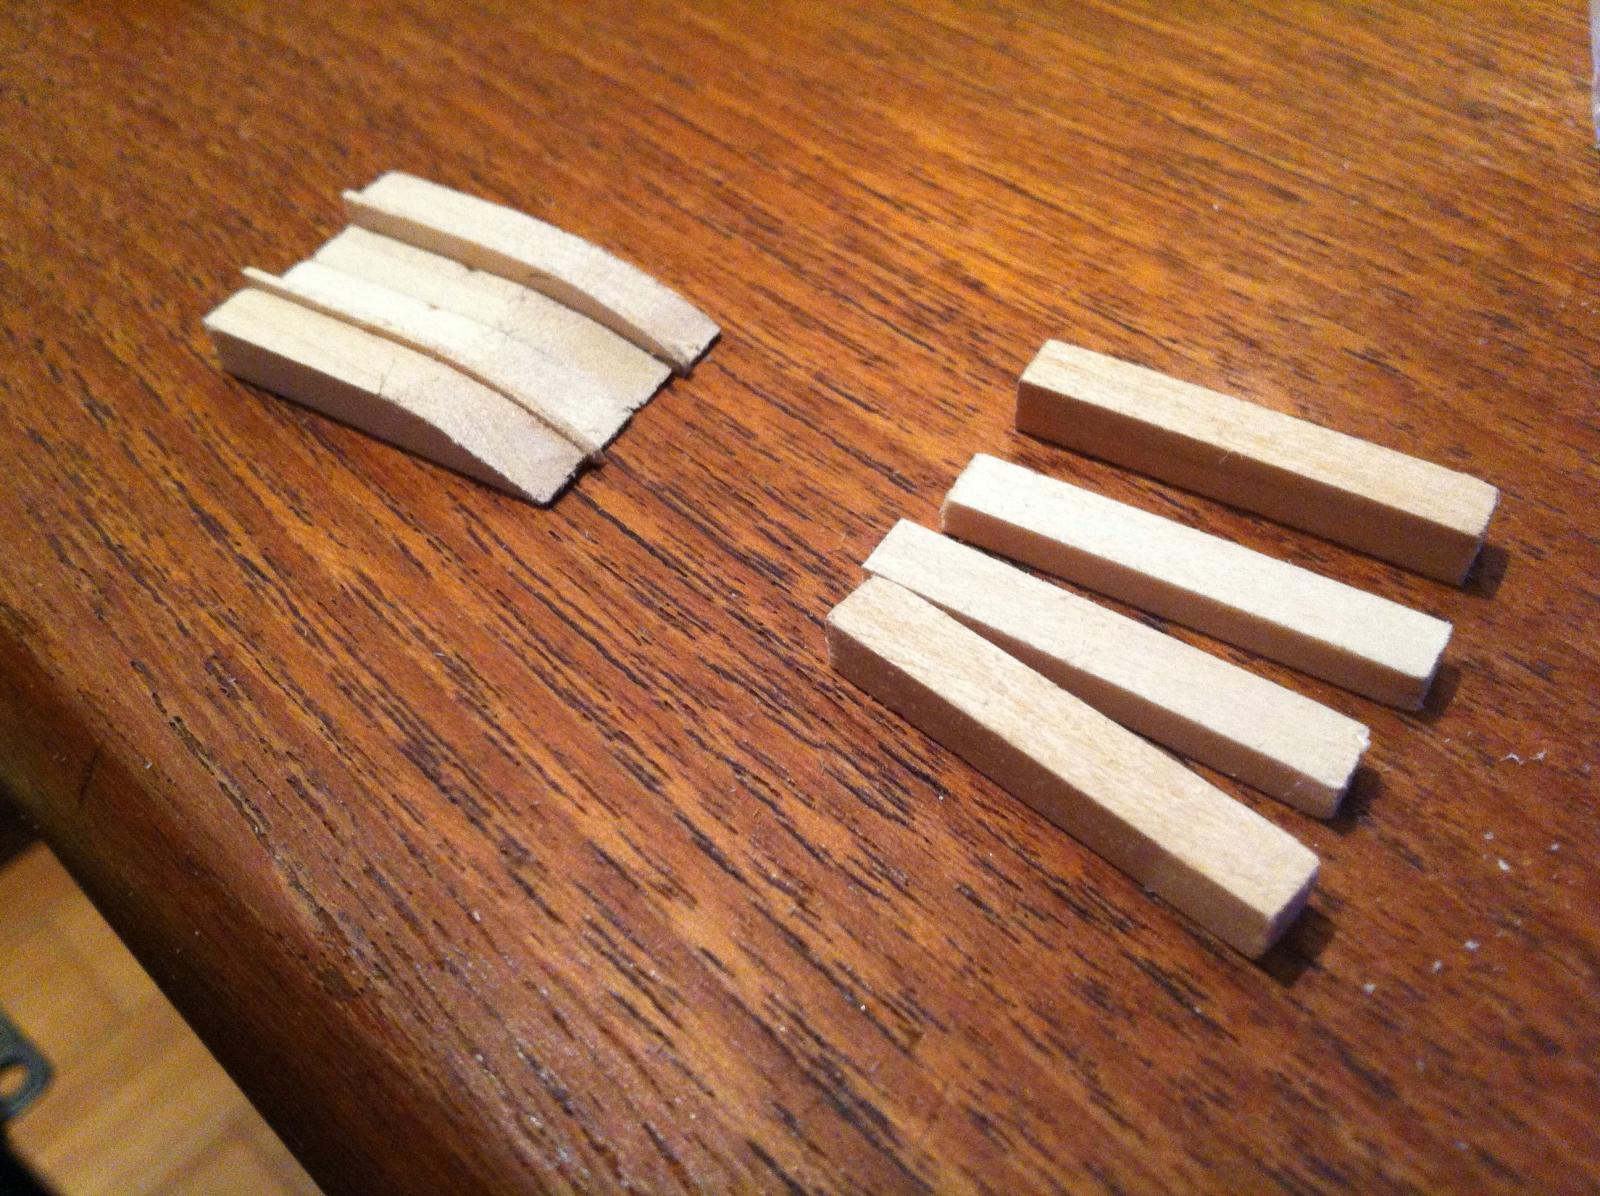
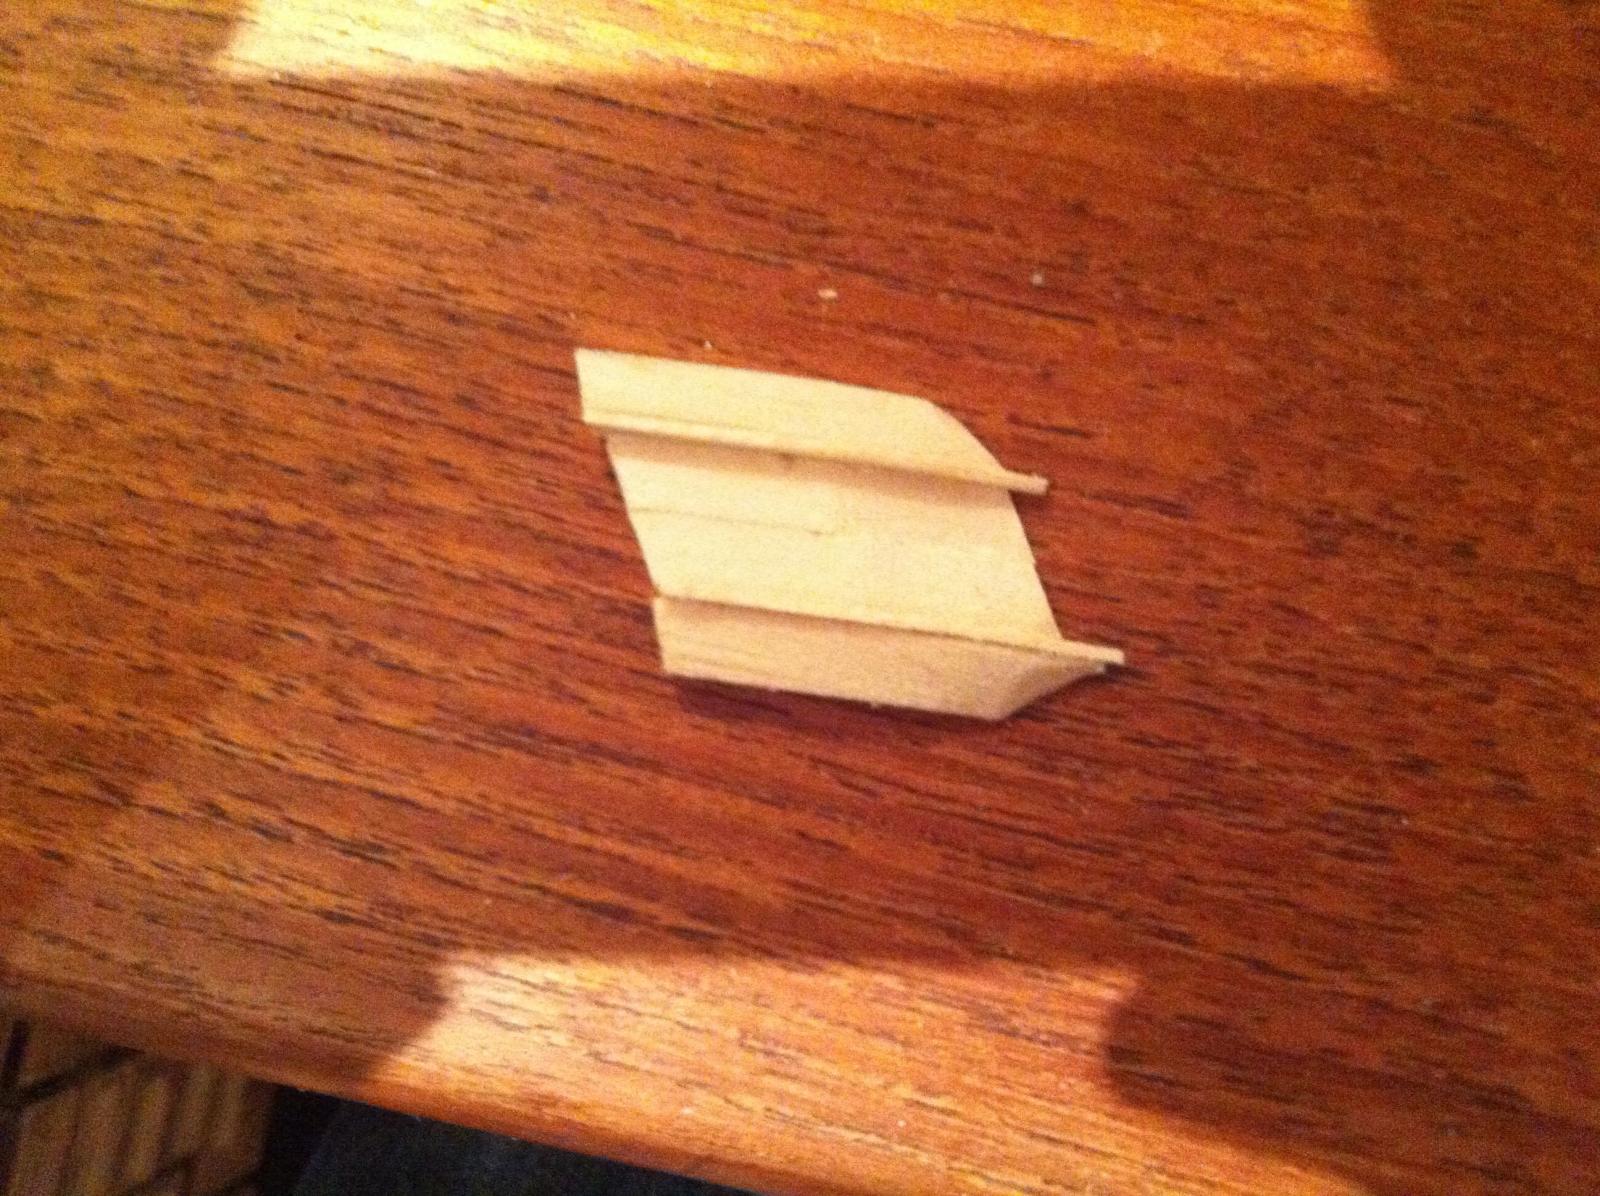
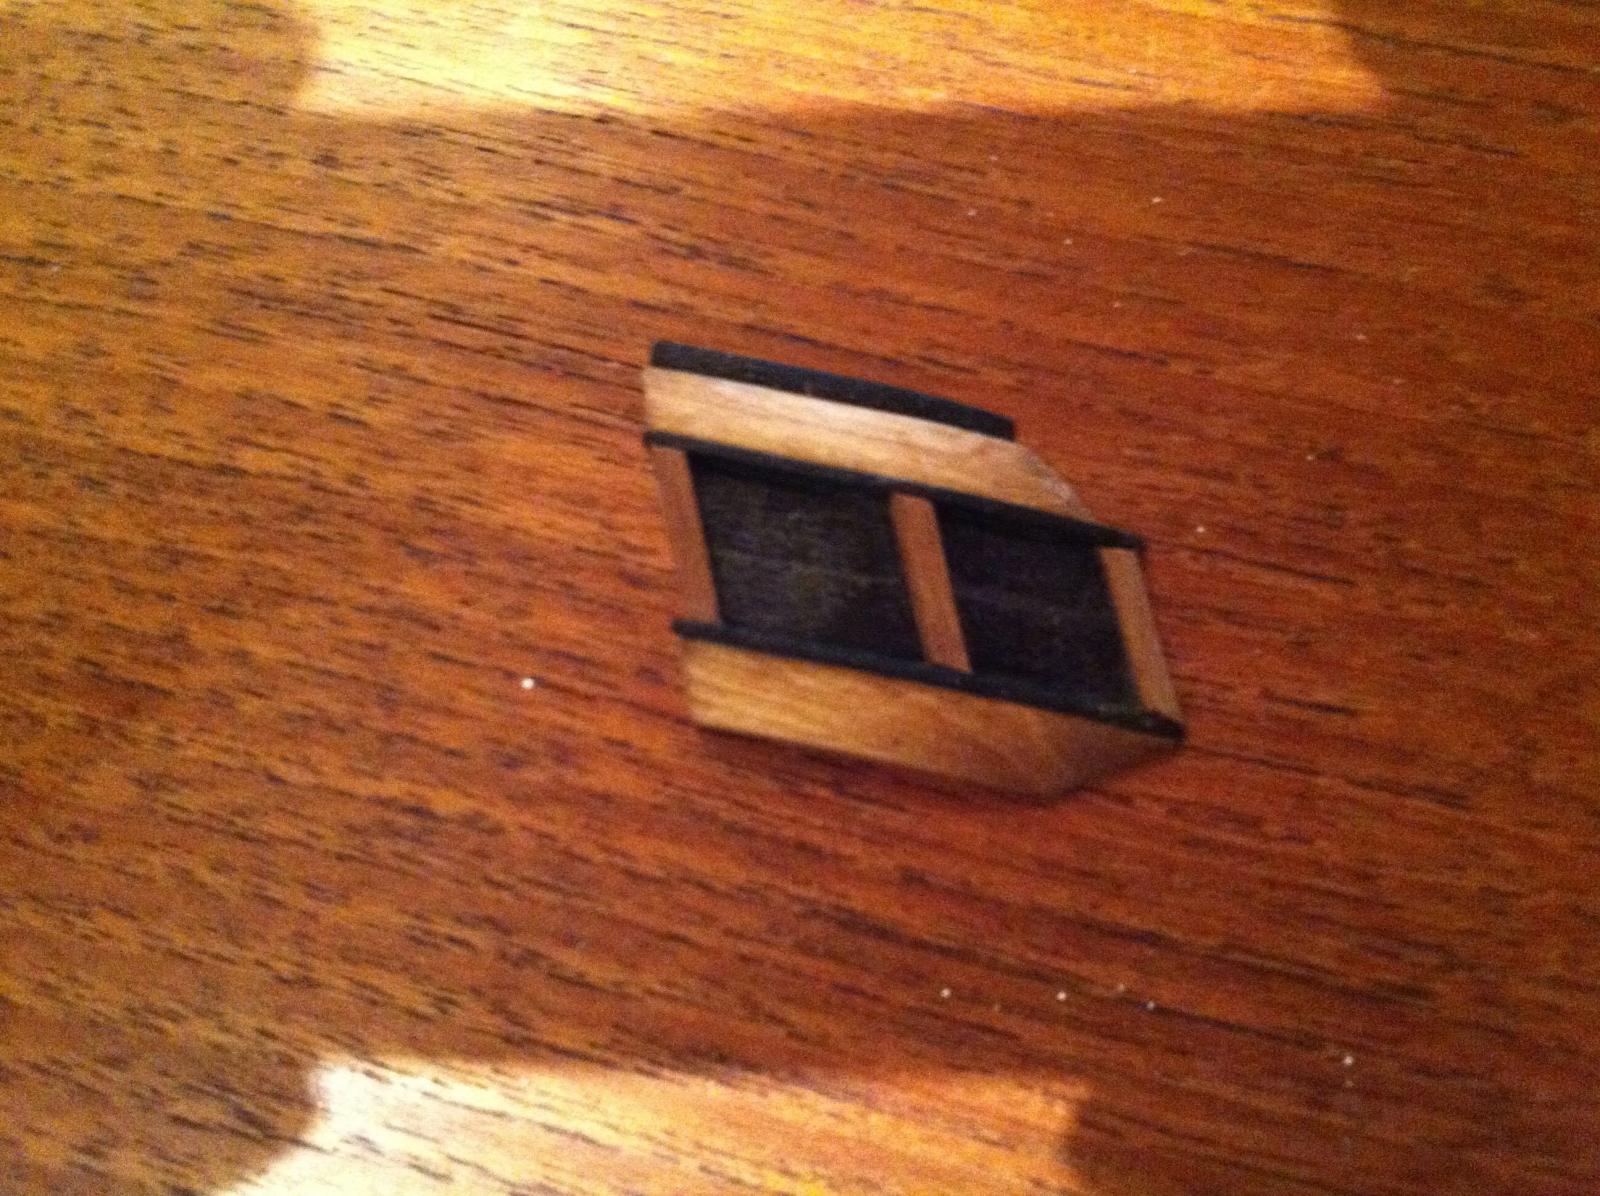
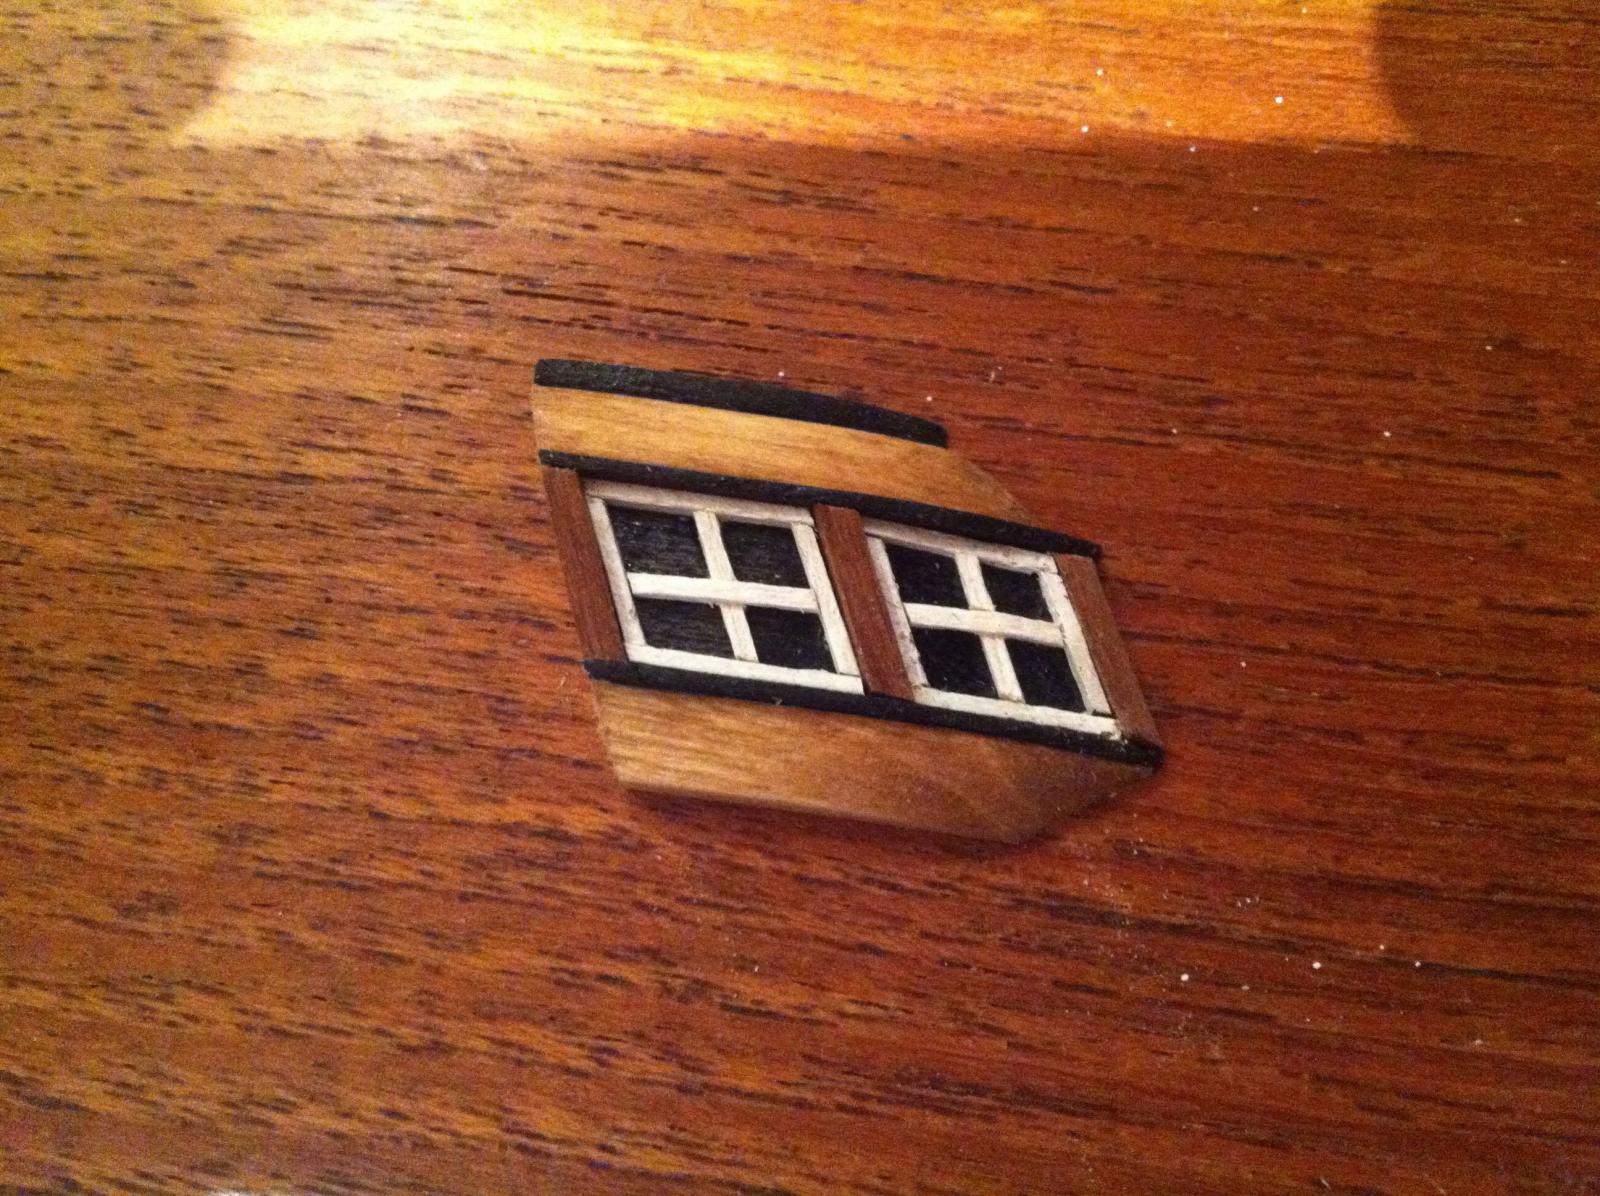
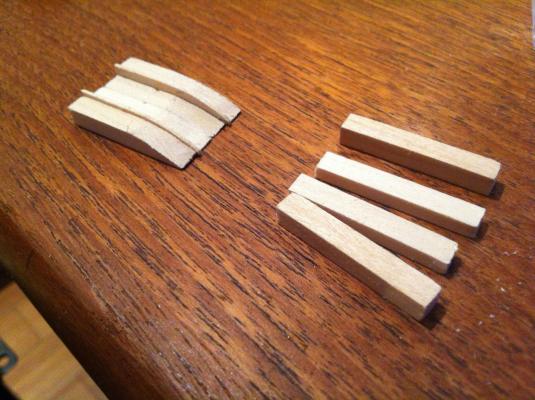
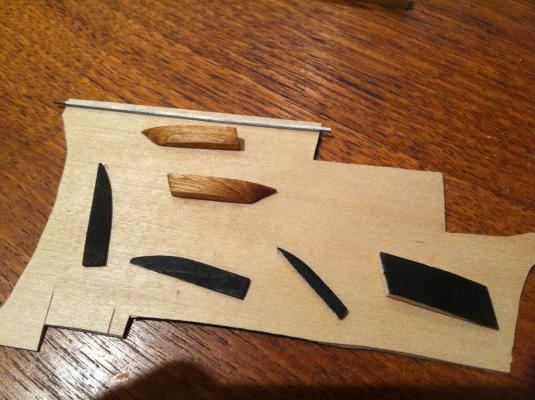
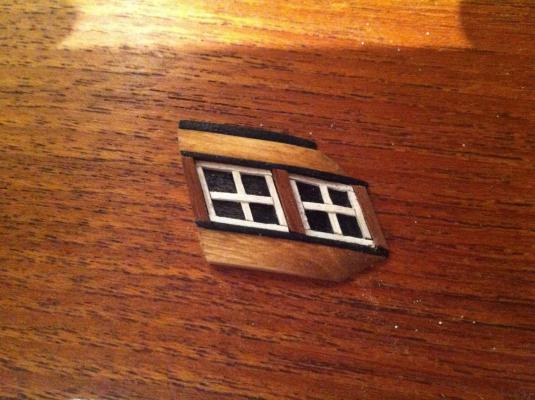
Thanks Mark! - I've managed now to (almost) finish the starboard side quarter gallery and am very happy with the results. I cut all the parts for both quarter galleries at the same time to ensure they will be of equal size. And I'll wait until both are complete before attaching them to the hull....Here's the process Each quarter gallery is built up out of 7 strips - 2 5mm x 5mm strips for the roof and the lower part; 2 5mm x 3mm strips as a false backing for the windows; 2 6mm x .5mm strips for the sill and head of the windows; and 1 3mm X 1mm strip for a finishing strip on the top. I shaped all the pieces according to a curve I determined. I then shaped the pieces to get the appropriate cant into the quarter gallery. Next step was to finish the pieces - I stained the rood and the bottom piece and all other parts were painted black. I then assembled it and added posts using 2mm x 2mm walnut. Finally, the window frames were added using 1mm x 1mm strip wood, painted white Here is a comparison between the kit supplied part and the one I made. I still need to add a fnishing piece at the bottom, which I will attempt to make out of sculpy, since I need to do some shaping and my carving skills are nonexistent. Tomorrow I'll do the port side quarter gallery, and then spend the following night making the sculpy finishing pieces and designing the scratch built transom....lots of fun ahead! hamilton


-
Hi Mark: Just took some time to read through your log - very impressive! I'll be following with interest hamilton
-
Funny you mention that, Mark - I almost glued the roof of the starbard side quarter gallery to the model, thinking that it would be easier to get a sense of proportion and install the windows & bottom part afterwards - but something held me back, fortunately! The good news is that I've already transferred the basic outline of the port side quarter gallery onto the appropriate wood stock. I think I will attempt to build up the quarter galleries before installing them rather than constructing as I install the components....There are a couple of elements I'm still trying to wrap my head around.....very tricky hamilton
-
Thanks Andy - there's a model train specialty store close to me that carries styrene - I may go that route. Mark - actually, you were on the money since Goodwin shows both quarter galleries and quarterbadges.....our house is in a bit of disarray at the moment with the painters having essentially taken over our main living area....so no modelling in my immediate future as impatient as I am to continue with the quarter galleries....I managed to construct a roof for the starboard side quarter gallery last night, and while I'm happy with the shape, I'm not sure about the scale - it might be a tad too big....so I might re-make it starting whenever I can get back to the bench.....until then....hope the rest of you are having fun hamilton
-
Thanks Andy - it seems relatively straightforward - did you use styrene for the molding/window frames? If so where did you get it in such small dimensions? Thanks again! hamilton