Check out our new MSW Sponsor Innocraftsman
×


DSiemens
-
Posts
1,060 -
Joined
-
Last visited
Content Type
Profiles
Forums
Gallery
Events
Everything posted by DSiemens
-
 Wow incridible work on the stairs and railings. That takes a great deal of talent.
 -
Great work! Well done sir. Oh and don't get lost in the snow it's crazy out there. Think I'll stay in where it's warm with a cup of cocoa and a ship to build.

- 1,668 replies
-
- 1
-

-
- syren
- model shipways
- (and 1 more)
-
Thanks. I'll have to get out the macro lens and see if I can't get a better shot. Problem is you look close enough and you see all my mistakes. As far as giving it away yea I have had second thoughts but a deal is a deal. And I am getting a bonsai tree out of this so I guess it's not really giving away. Thanks. I actually came up with a plan that worked out well. Got all my ratlines done in about an hour and they turned out pretty good for the most part. I do have some unwanted globs of glue on one side. Any ideas on how to get it off? If I can't fix it I guess I'll paint them black and hope no one notices.
-
Thought I'd stop in and see what you were up to since you have so graciously been commenting on my builds. Beautiful work. I'm with Popeye I can't wait to see more. To bad I missed the plane talk. I used to build rubber band ones as a kid. Couldn't ever get the Guillows to work though. Probably lack of actual model plane glue. I better stop wouldn't want Floyd or Sjors to yell at me.
-
Beautiful work. I really like the America she's such a cool ship. Your doing an excellent job on this one. Keep it up.
-
I thought the same thing. Turn's out we're a little tall for the job.
-
Ok I'm understanding better. I'm still a bit of a newb with this style of building as I've always done the smaller ships in bottles. I hope to get into a good kit soon. I guess it is hard to have "everything" planned out on a scratch build. That's the fun in it though.
-
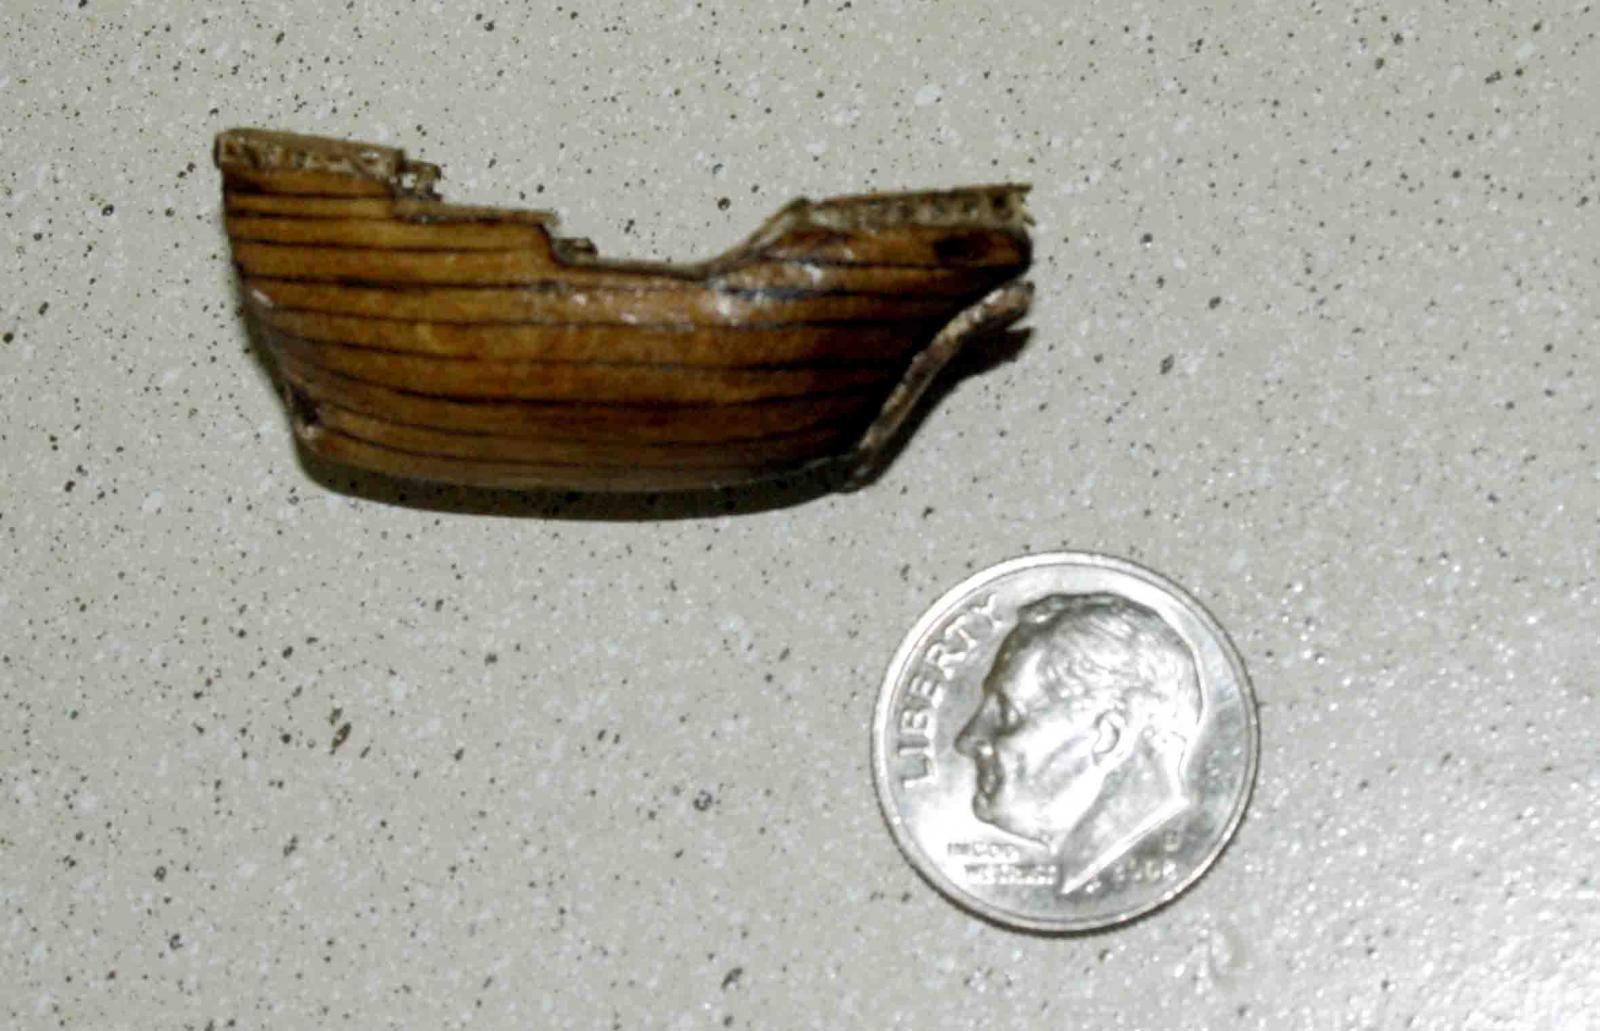
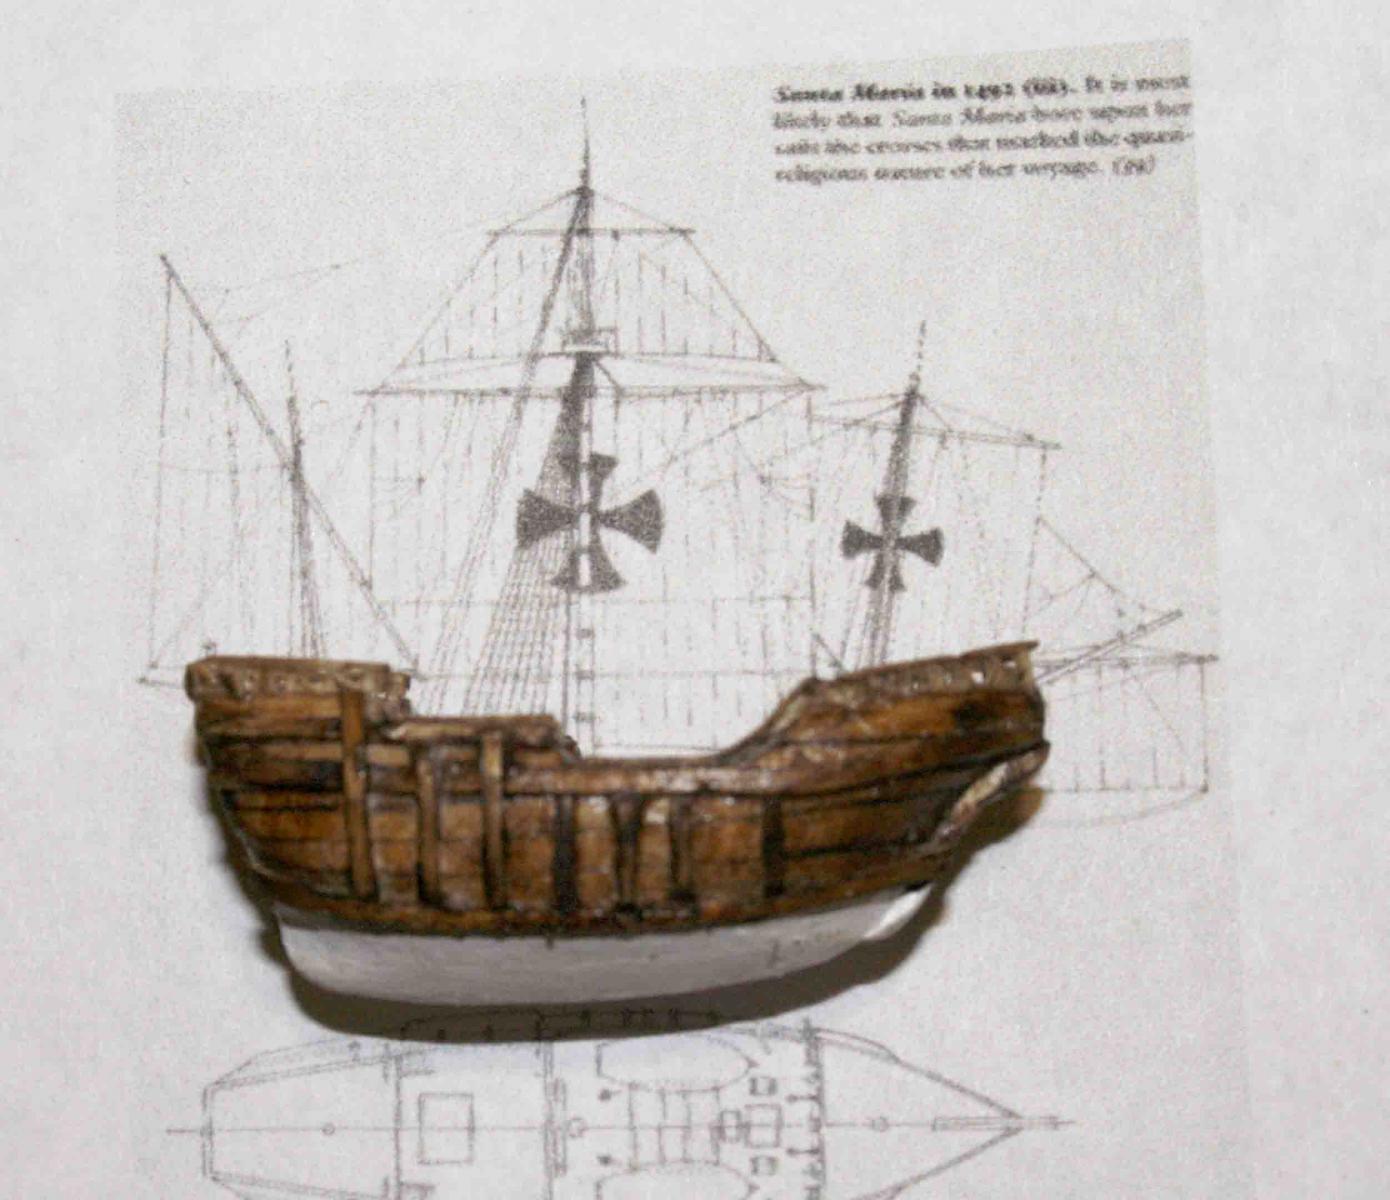
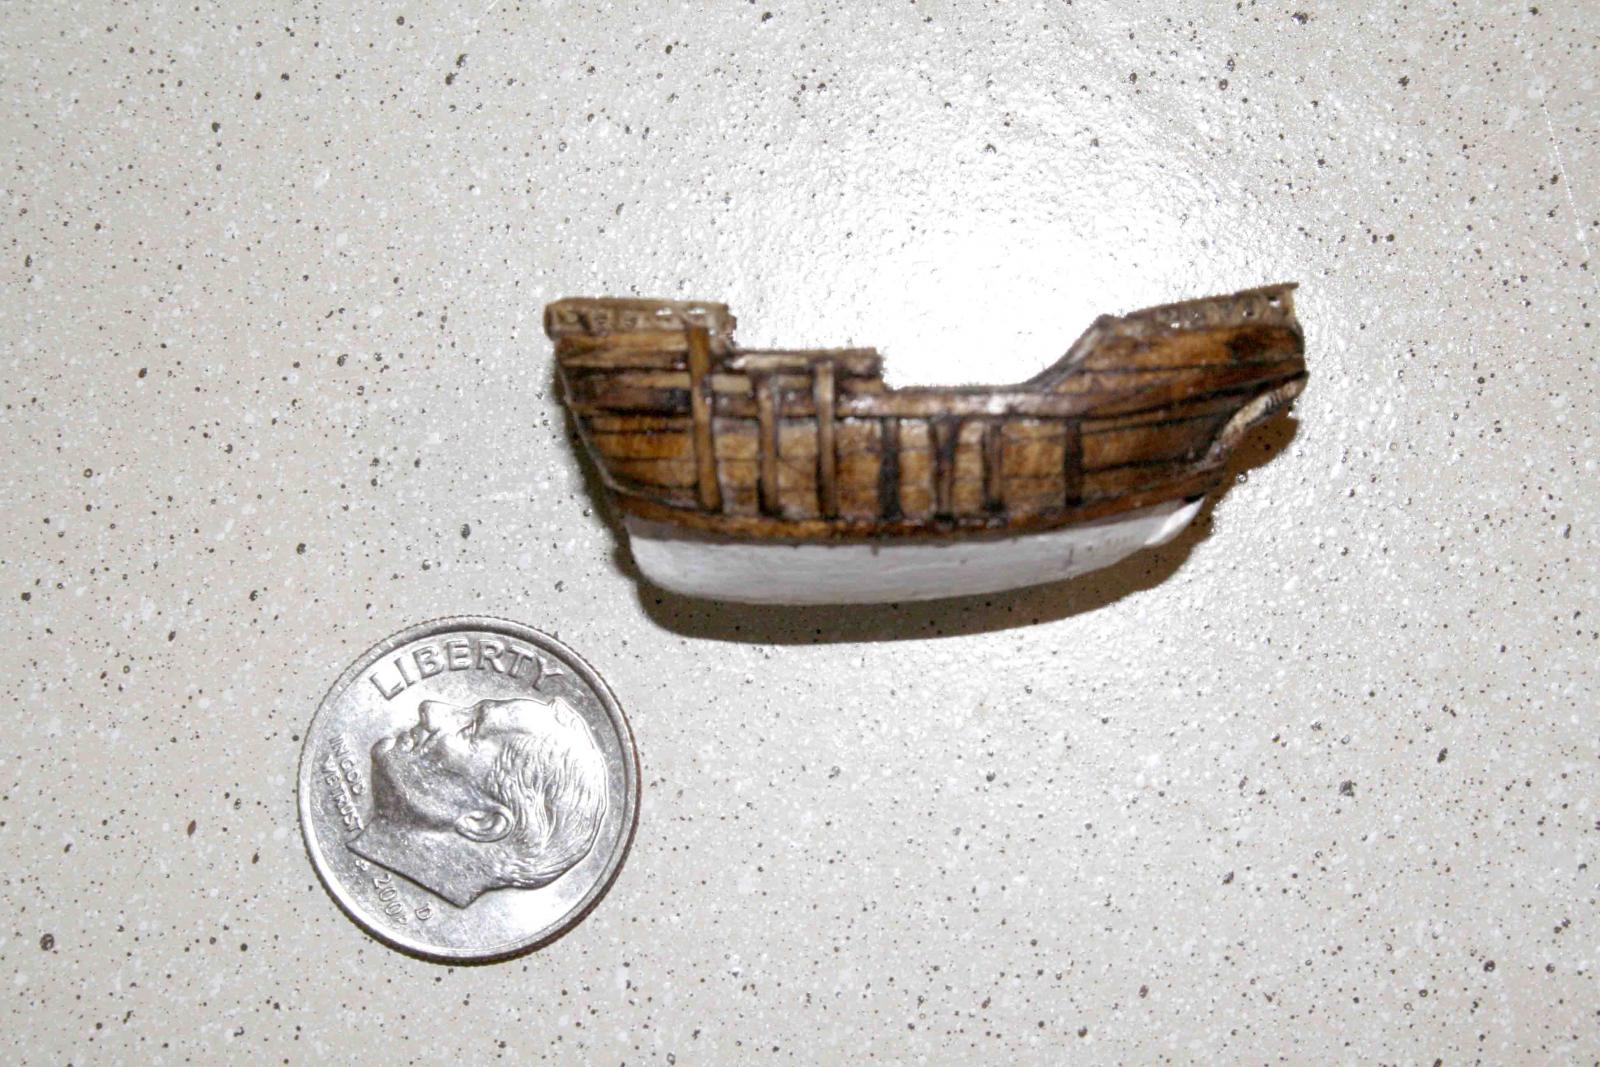
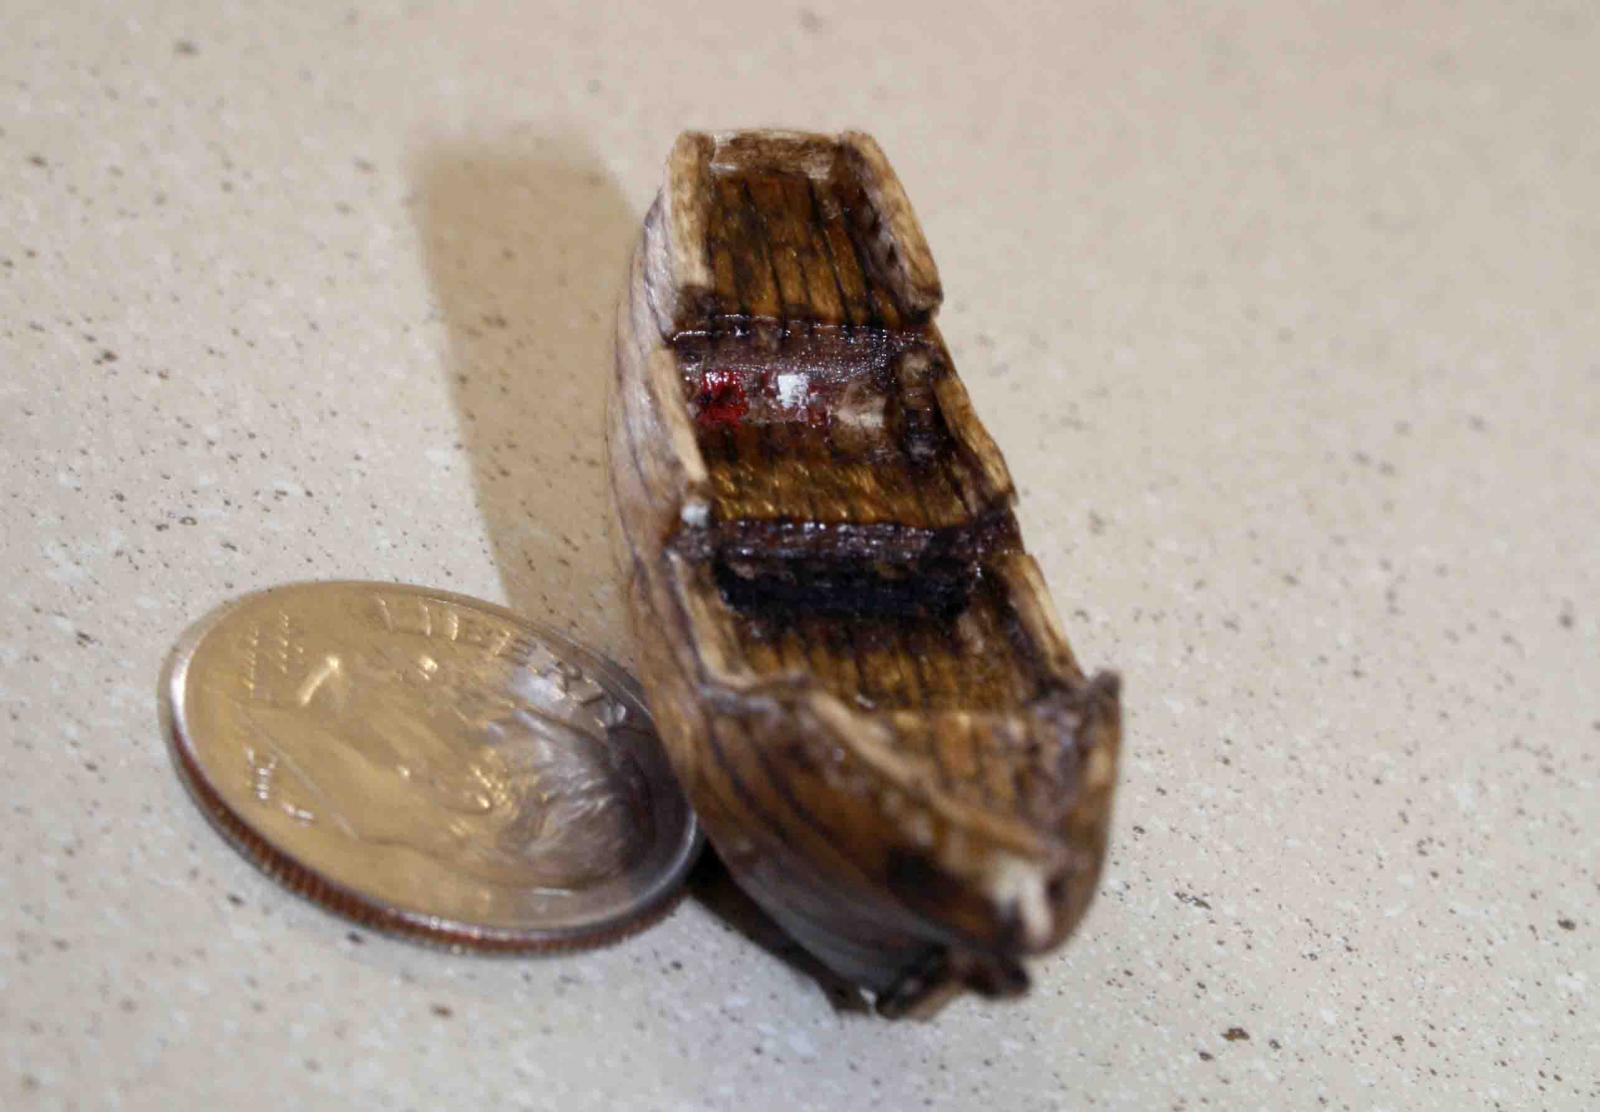
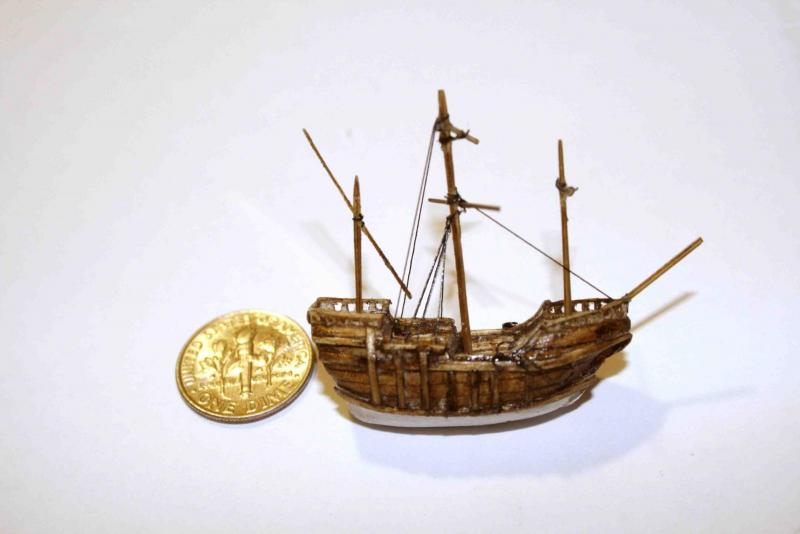
First let me say Hyposphagma, your a genius. The paper stairs worked great! I folded the paper back and forth and then pulled it open and got great little stairs. I noticed I can bend it around enough that I think I will be able to use it for an upcoming ship that has spiral stair cases going around 90 degrees. Thank you for your help. Augie you'll be happy to know I got one of these. Still getting used to the distortion but it is easier on the eyes. Here's some better pics of the current progress. I admit the hatches could be a little better. I'm still debating staining them with a lighter stain. I want there to be some contrast so they can be seen but not to much. This is the first time I've been able to fully rig a ship and not worry about masts folding. With as wide as the bottle neck is the fore mast is the only one that will need to fold. So that's what I got for now. I forgot I have to add some rails to the decks which will be a little more difficult with the rigging in the way but all well I'll get it. I plan on putting in as much of the sheet's as I can as well so I will need the rails. Oh yea and Augie does your charge for tying ratlines go down any now that I have a magnifying glass?


- 62 replies
-
- 1
-
-
- santa maria
- finished
- (and 1 more)
-
I think it was a good catch even though it turned out to be nothing. Your welcome to critic my builds any time.
-
Just discovered tying back stays while holding a wiggly child isn't as easy as I first imagined.
-
Bout time you get this build log up! Jk. Great work. It's really coming along. Sounds as though you've made great use of research and used all the best techniques. The quality of the build shows that it's paying off.
-
Pretty little ship. Great work.
-
Stated a new very simple kit today of a Brigantine. It's kind of kiddish beginner but I'm upgrading it to look a little better. Been kind of fun so far.
-
I like flutes as well I think they are neat looking with all the decks. Makes me curious as to why you would build a ship if you think its ugly. Also I have heard the term kit bashing used before and I'm wondering if that would be what this type of build is considered in that your taking a kit and changing it to build something different. Either way it's still scratch. It sounds as though you have it all planned and know exactly what you want. I look forward to seeing your ship progress.
-
I always judge a good model as one where I feel like I could climb aboard and sail away on. This one is a thousand times more then that. Incredible work to the last detail.
- 662 replies
-
- 3
-
-
- bonhomme richard
- frigate
- (and 1 more)
-
Thanks. That's what I like about SIB's they are quiet a bit quicker. I'm looking forward to how I do the rigging as well. I got a lot to figure out and some new techniques techniques to try. I'm going to give your idea a shot it sounds like it will work. I just have to go pick some up. Yea cost me all of .10 cents to print can't believe the cost of printing these days. Hard to store too takes up a whole 3 inches in my tool box. I'm using the same thread I used on my Bounty. I will unravel a little and use some glue to get it a bit thinner. I've been meaning to get some fly tie thread I just need to buckle down and spend the 1.50 it takes to get it. Thank you all for your comments. I hope to post more soon.
-
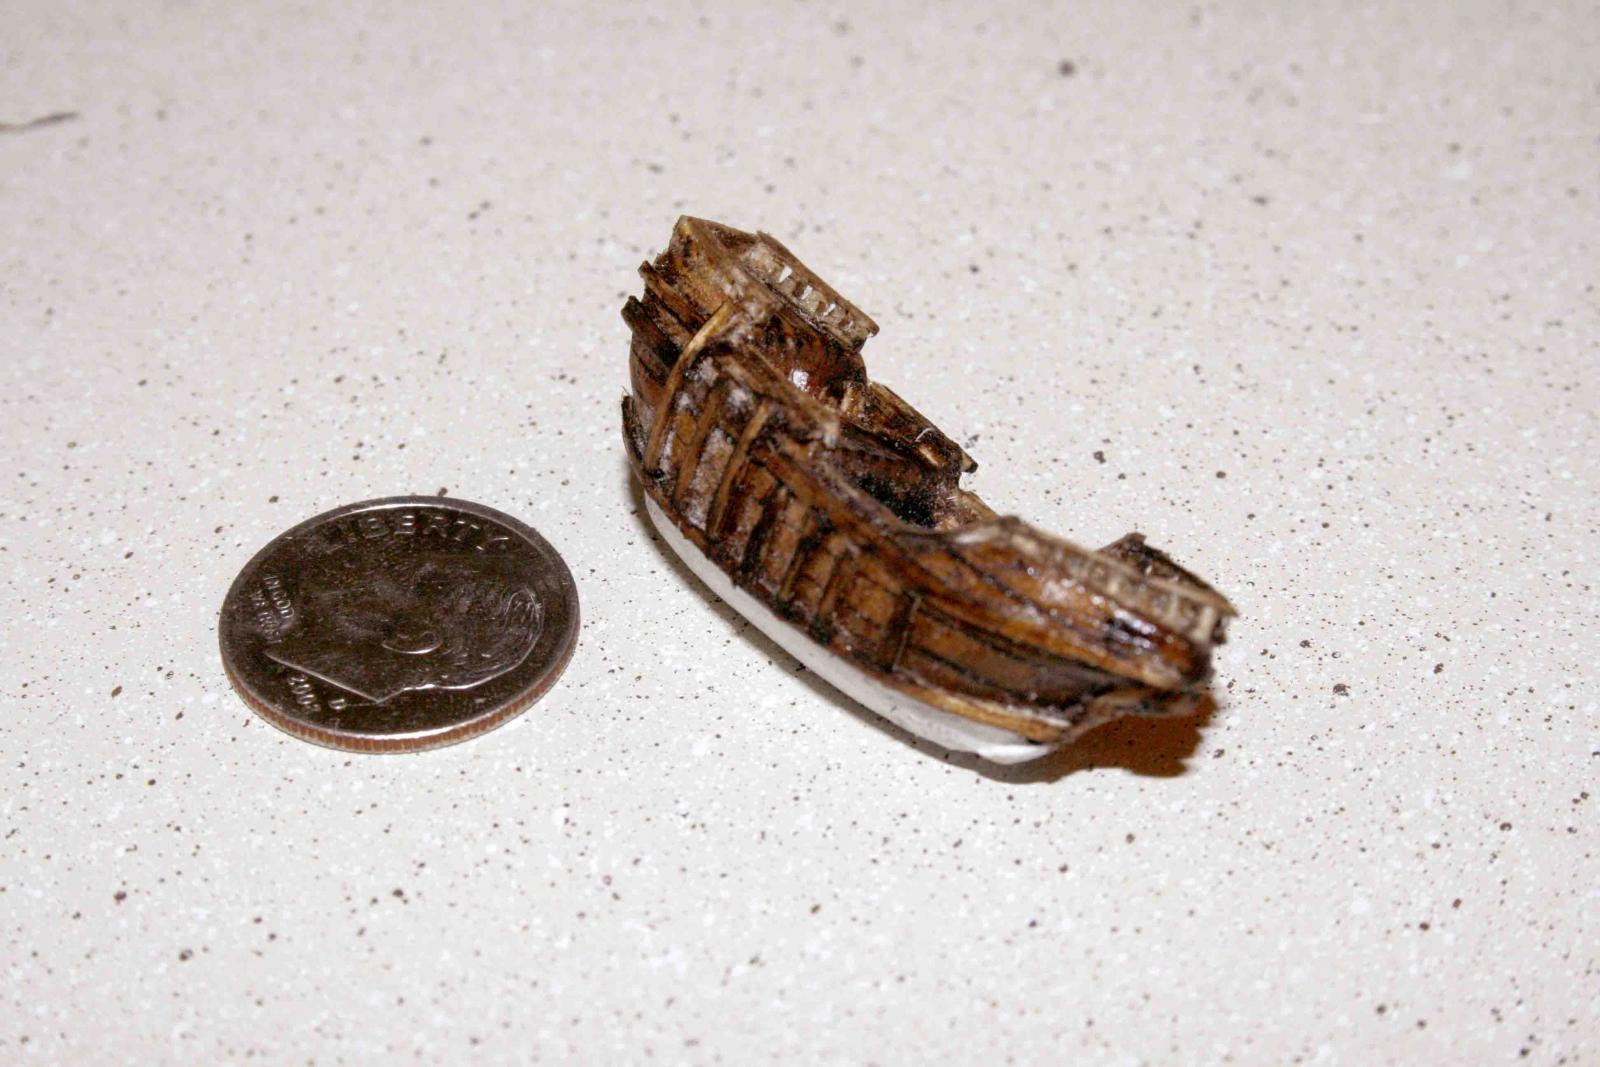
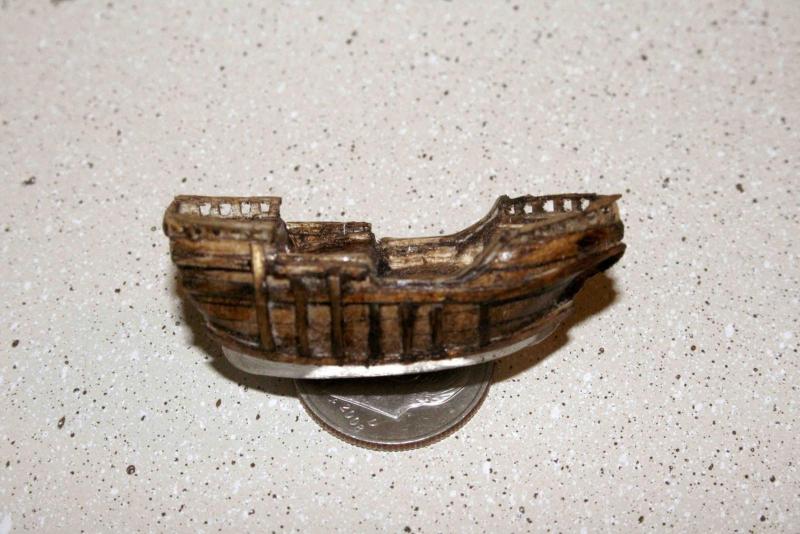
Here's a few shots of my latest progress. Now I have to do the same on the other side. I took out the stairs they just didn't work. I will have to figure something else out. Not sure what that will be yet. I guess I can leave them out all together I doubt that it would be noticed.


- 62 replies
-
- 1
-
-
- santa maria
- finished
- (and 1 more)
-
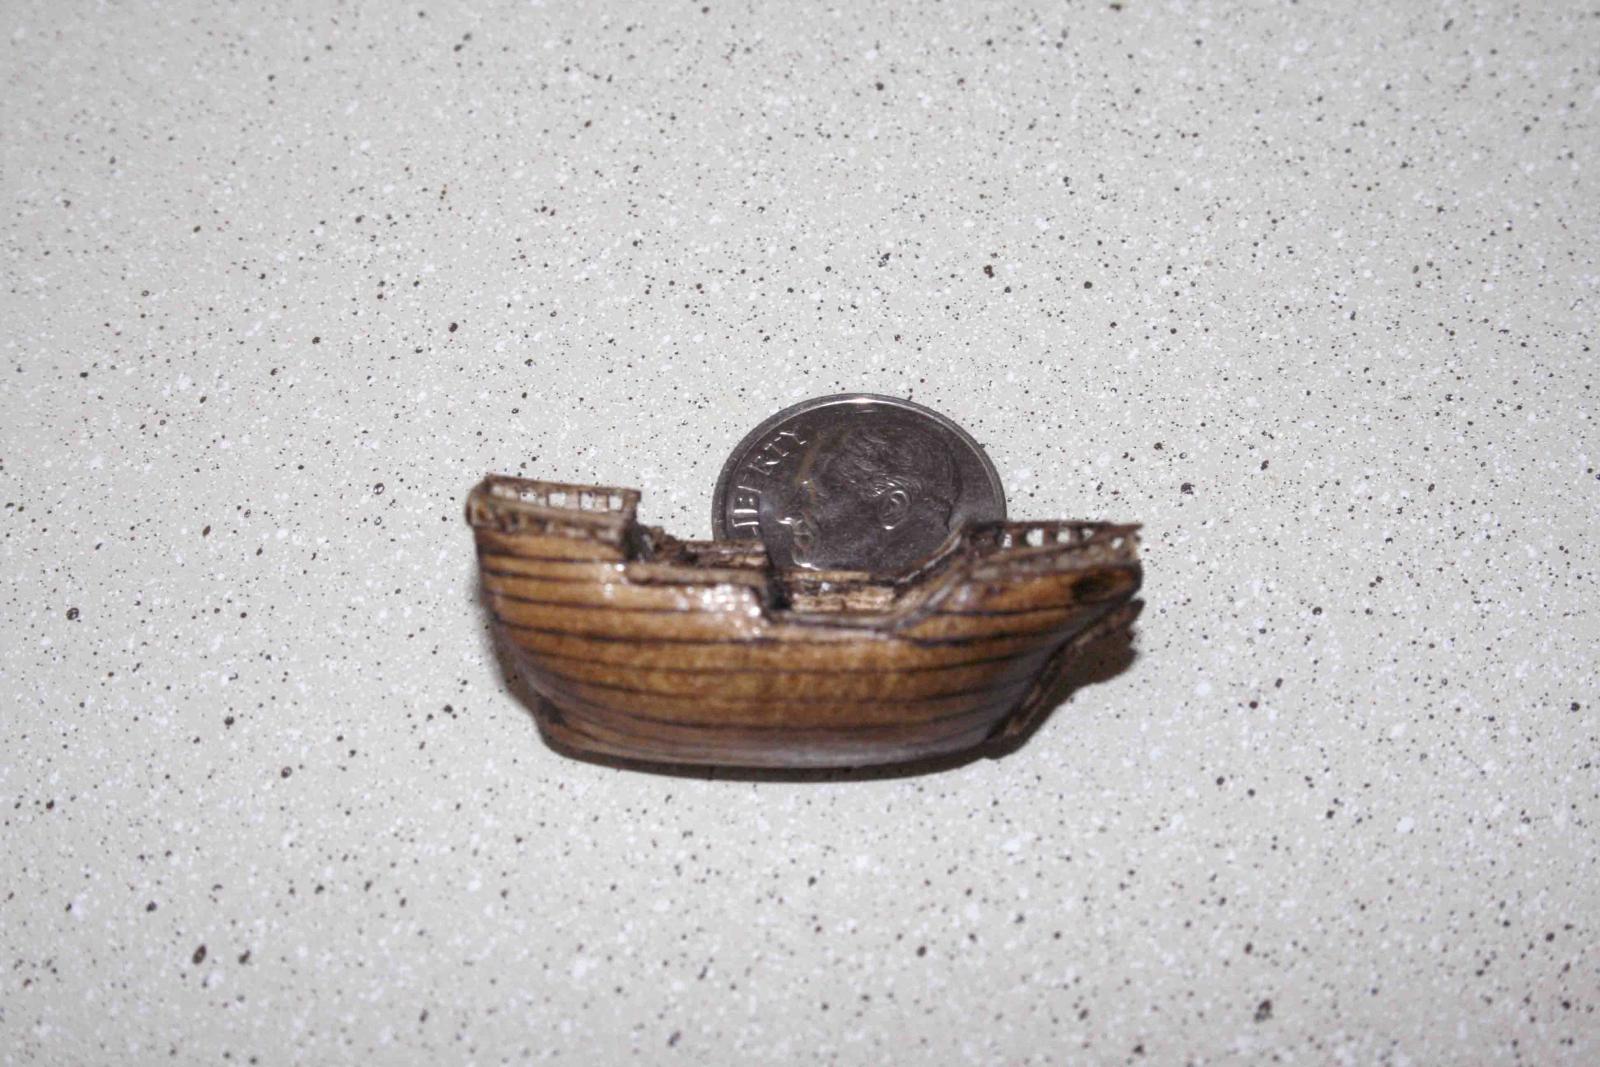
Making small progress. Pun partially intended. I got the rails on painted on a door and a window. I chose red doors and white windows so they stand out against the dark wood. I also added a set of stairs but I'm debating redoing them since they run right into the upper railing. Appears I need to swab the decks as well.


- 62 replies
-
- 2
-
-
- santa maria
- finished
- (and 1 more)
-
I remember this build from the old forum. I'm glad you brought it back. Your work is incredible! Every thing is precise to the smallest detail.
- 662 replies
-
- 2
-
-
- bonhomme richard
- frigate
- (and 1 more)
-
Built a simple kit with my son today. Turned out to be a lot of fun. He picked all the colors which made for a every colorful little boat being he's only three.
-
This is one reason why I work at 1:400 and smaller scale. Michael, Need to have mini you lift some weights. Maybe a bolt with a nut on the end. Your work is incredible I'm far to impatient to make my own rope. The detail on this model is going to be very nice. Do I remember right that this will be RC?
-
Great looking blocks! I can't wait to see the rigging come together. To me that when the ship starts really coming to life. This reminds me in our ship modeling club they did a presentation on making blocks. The guy giving it sanded them round and then threw them in a rock tumbler full of sand over night. They came out rounded and smooth and he didn't have to do a lot of the work. I thought it was an interesting idea.
-
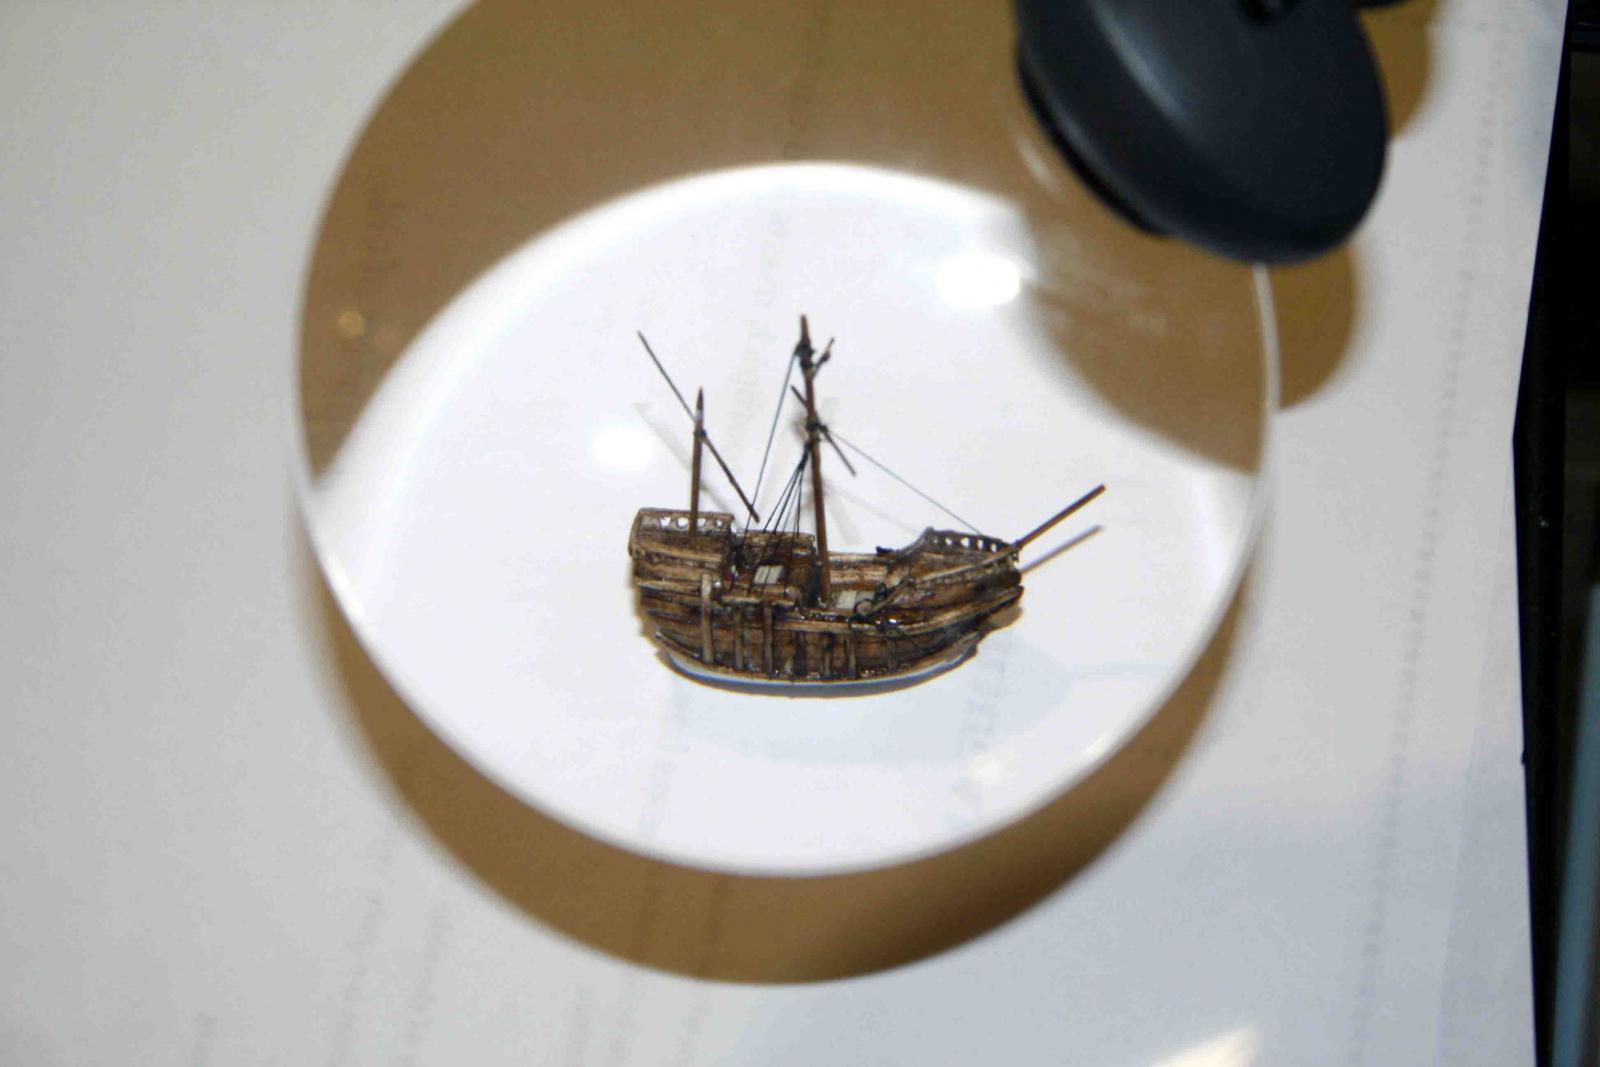
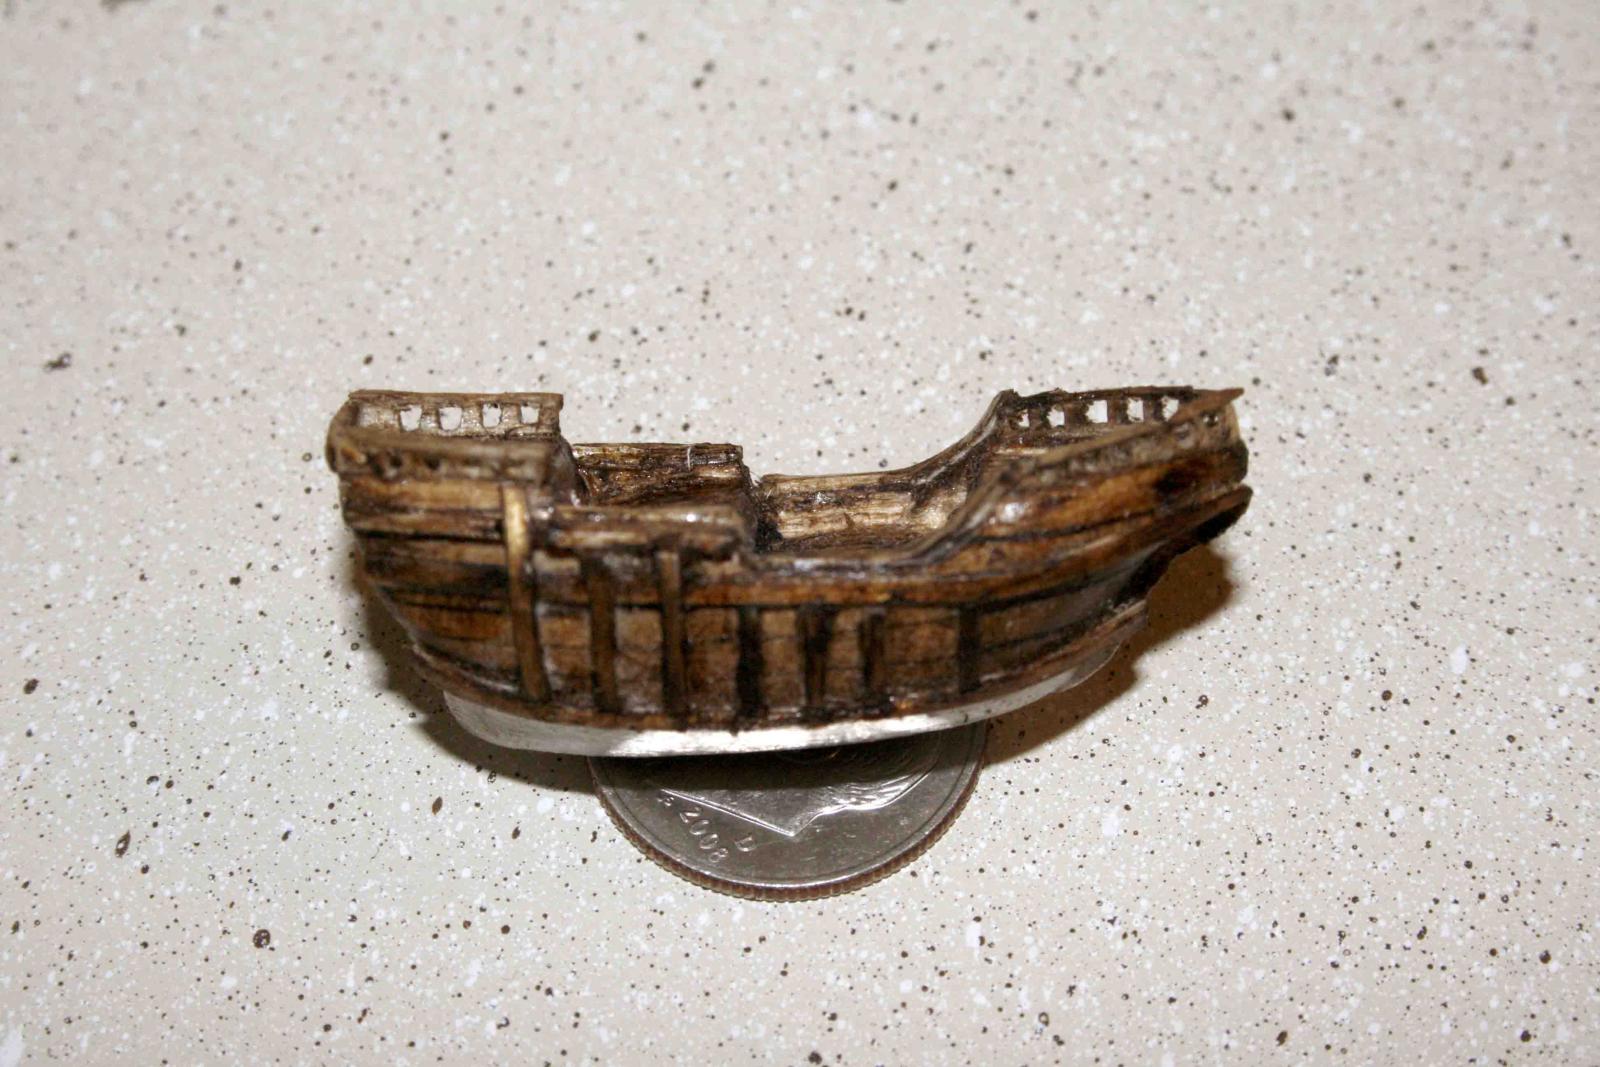
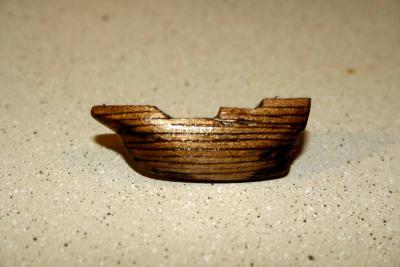
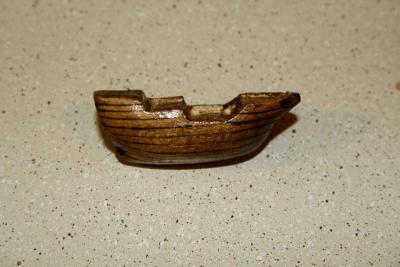
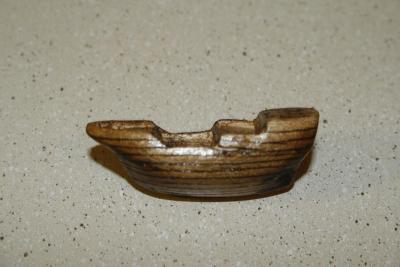
This was a long process because I only have one stain. I stained the hull lightly so it was all one color. I then painted the whole thing with two coats of clear fingernail polish. After that was dry I used an exacto knife and scribed the lines cutting just deep enough to get below the nail polish. I then stained the ship again only this time I laid it on nice and heavy then wiped off the excess. The stain went into the cut lines and stained the wood but didn't stain any where the fingernail polish was.
-
What do I start on RC Sailboat electronics wise?
DSiemens replied to DSiemens's topic in RC Kits & Scratch building
Wow a spinnaker I don't think I'll get that crazy. I will try putting booms on the jibs. It makes sens that smaller sails don't react in the same way large ones do. It may not be "correct" for the ship I'm building but I want the thing to work. Could probably use some wire in a sleeve at the base of the sail and no one would notice. -
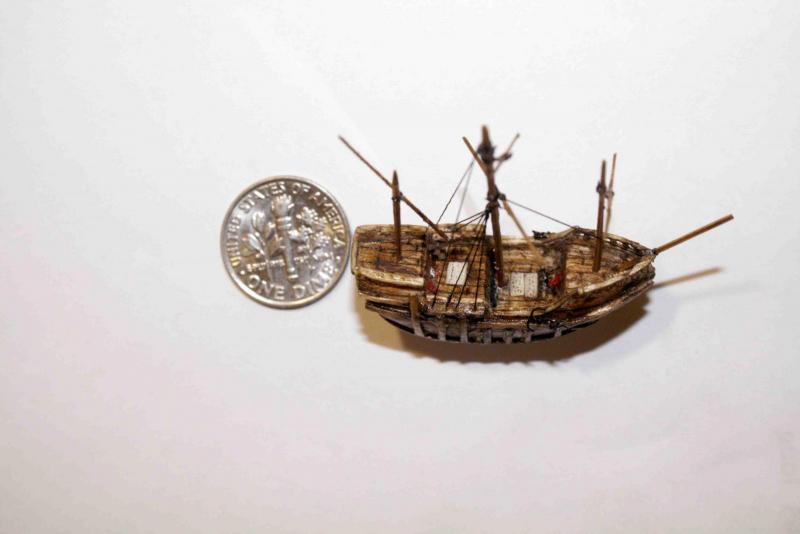
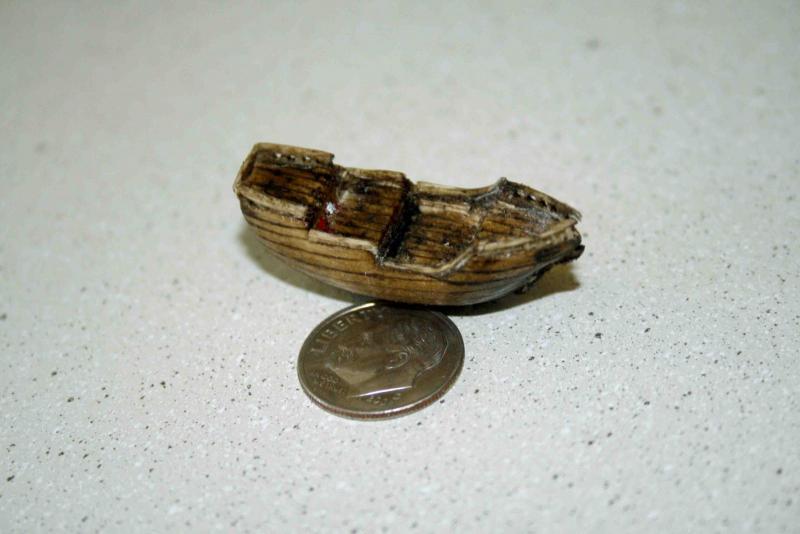
Thank you all for your comments I really appreciate the compliments. Augie - Are you kidding me? The hull's not nearly done yet, still got a ton of work to get the channels and bulwarks on. Thanks for following I enjoyed your feedback on the Bounty. Hyposhagman- I laid the bottle down because the back ground was a bit messy. I do most my modeling on the kitchen table and decided to use the counter for photos this time. Trouble is I just bought a ton of baby food for the little one and didn't want to show it all off. I got the hull stained and the planking scribed. It turned out well I think. I guess it could be better but trying to draw invisible lines with an exacto knife isn't easy.
- 62 replies
-
- 1
-
-
- santa maria
- finished
- (and 1 more)