HOLIDAY DONATION DRIVE - SUPPORT MSW - DO YOUR PART TO KEEP THIS GREAT FORUM GOING! (83 donations so far out of 49,000 members - C'mon guys!)
×


GrandpaPhil
-
Posts
6,128 -
Joined
-
Last visited
Content Type
Profiles
Forums
Gallery
Events
Everything posted by GrandpaPhil
-
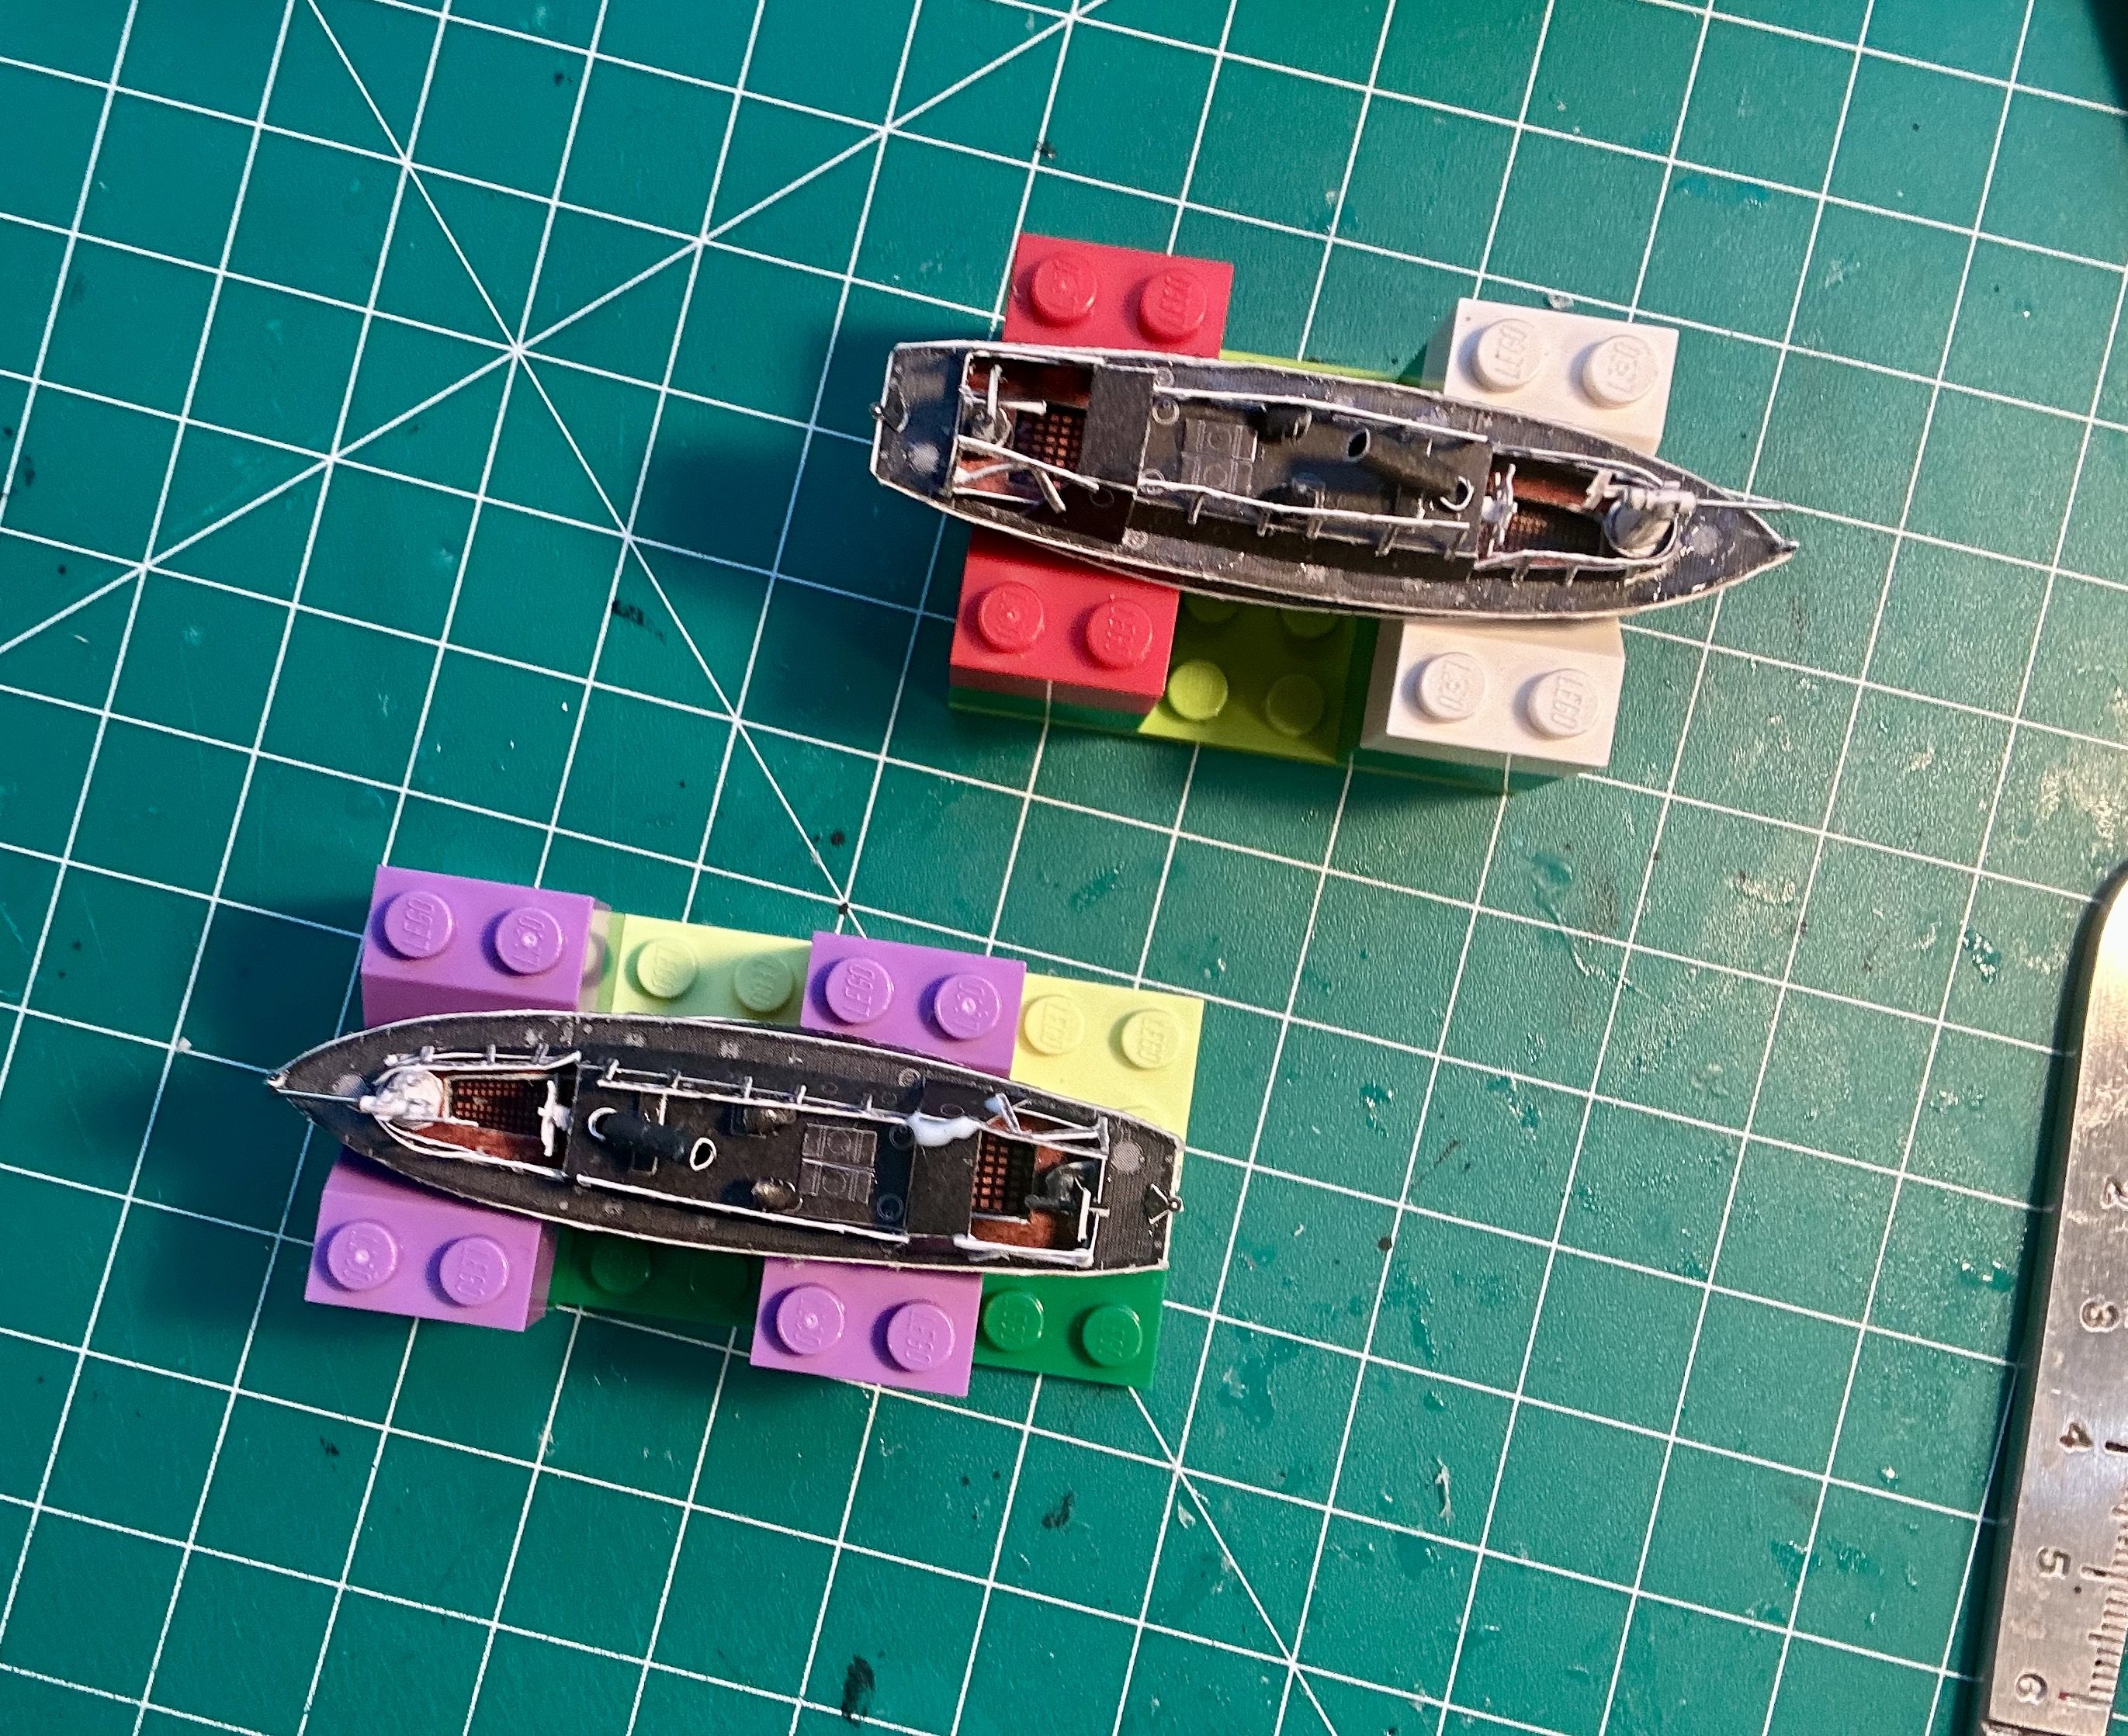
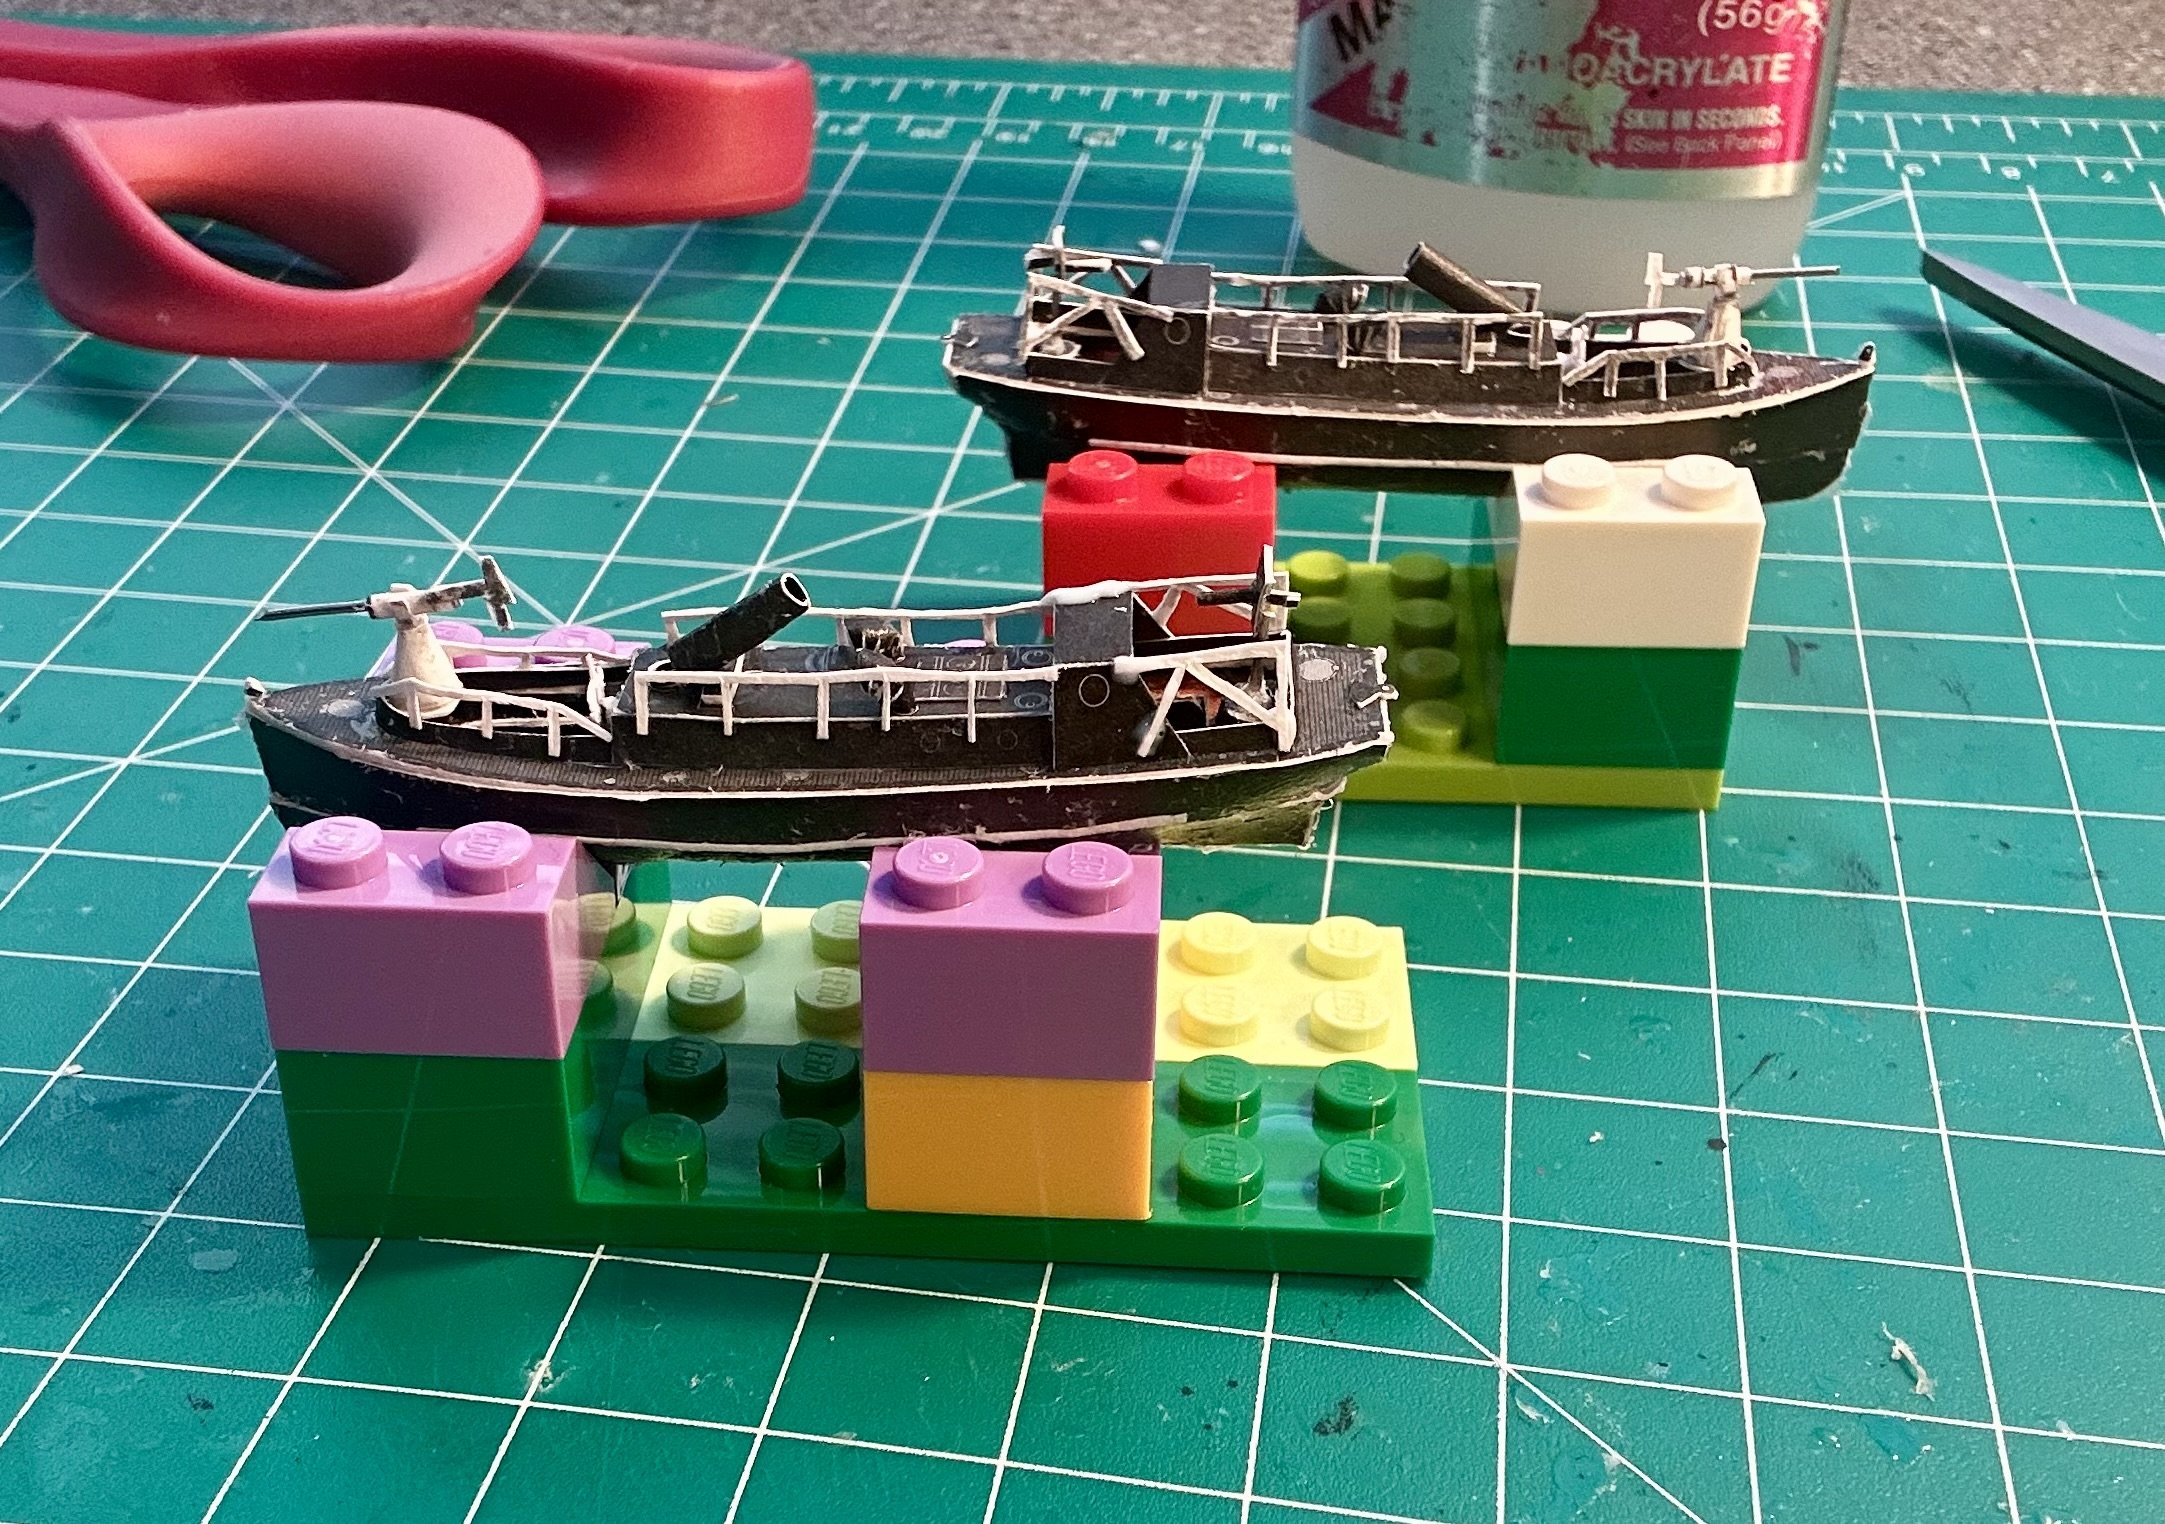
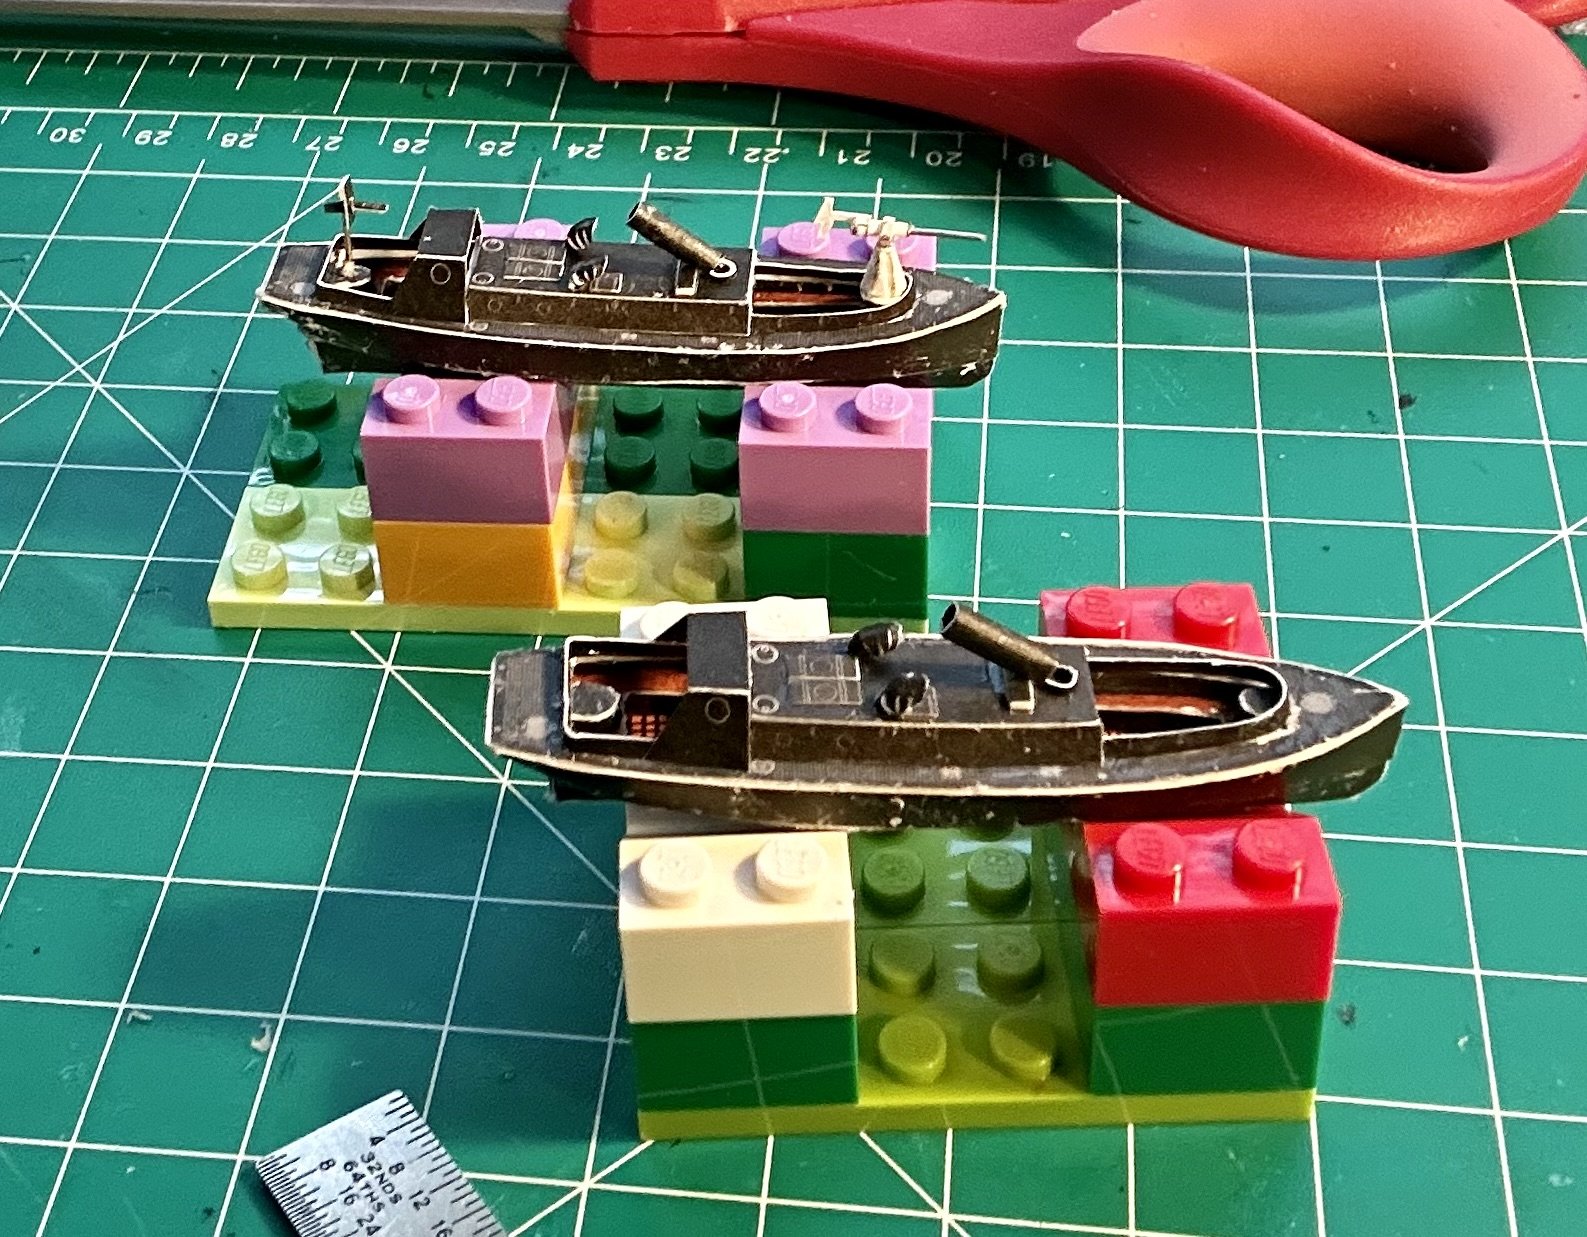
Glen, Thank you very much! I found out about that trick on this forum. Legos make excellent quick customizable jigs and temporary cradles. I bought a box of 1000 bricks and then a couple of those small suitcase type starter sets from Walmart when they went on various pre-Christmas/Easter sales. They have been immensely useful on several different projects. Also, they make a great square for traditional POB construction. They are 90 degrees, especially when built into a block and can be clamped into place, thus ensuring square construction of a POB hull. OC, Thank you very much!
- 288 replies
-
- 7
-

-
- Card
- Pre-Dreadnought
- (and 3 more)
-
The railings and other small pieces are made and installed on the mine launches: The rudder structure shown in the instructions/plans won’t fit on the boat in the cradle. I cut that structure off once I realized. Once the boats dry I will paint and seal them. Then, I’ll make the flag masts for them and lay them down in a storage configuration. After that it’ll be time for the rowed ship’s boats. Then I’ll finish painting the cradles and get the rest of the yards and running rigging installed.


- 288 replies
-
- 14
-
-

-
- Card
- Pre-Dreadnought
- (and 3 more)
-
Welcome!
-
Very nicely done!
-
Very nicely done!
-
Orel, HMV and Schreiber kits are still available on Amazon. Hopefully the other card kit sellers figure out the tariff situation and adjust their shipping policies/prices accordingly.
- 106 replies
-
- 2
-
-
- digital navy
- v108
- (and 3 more)
-
Alan, Excellent work! Very nicely done!
-
I would also enjoy painting that set on its own. Those miniatures look incredible!
-
Lol! @ccoyle was one of the significant influences to my getting into card kits!
-
Ages of Sail has Shipyard’s full line.
-
Making good progress on the 40’ mine launches: It didn’t come with the keels/rudder assemblies, so I just made my own: I still need to make the bilge keels and a bunch of railings. Maybe I’ll make a couple of quick three bladed props while I’m at it.


- 288 replies
-
- 13
-
-
-
- Card
- Pre-Dreadnought
- (and 3 more)
-
Welcome!
-
Welcome!
-
Welcome!
-
Hi All - new member intro.
GrandpaPhil replied to Jezza from the UK's topic in New member Introductions
Welcome! -
Welcome!
-
Welcome!
-
Very nicely done!
-
Very nicely done!
-
Card makes a great substitute for PE. It works beautifully for railings, ladders and gratings! You just have to coat both sides in sealant prior to cutting.
- 106 replies
-
- 1
-
-
- digital navy
- v108
- (and 3 more)
-
Welcome! Incredible work!
-
Sorry to hear about that Kevin. Hope everything goes well and that she is okay soon!