HOLIDAY DONATION DRIVE - SUPPORT MSW - DO YOUR PART TO KEEP THIS GREAT FORUM GOING! (Only 72 donations so far out of 49,000 members - Can we at least get 100? C'mon guys!)
×


GrandpaPhil
-
Posts
6,112 -
Joined
-
Last visited
Content Type
Profiles
Forums
Gallery
Events
Everything posted by GrandpaPhil
-
Anyone out there working on a card model?
GrandpaPhil replied to gagliano1770's topic in Card and Paper Models
Seahorse makes some amazing stuff! I ended up buying most of the base kits off their website. The Seahorse Zeven Provincien is one of my bucket list builds, built to 1/64 scale to match my Revenge. -
Welcome!
-
Welcome!
-
I use the Folk Art Clear Primer and brush both sides, even after laminating pieces. It helps prevent (or at least reduce) delamination when cutting small pieces out. If they still delaminate, I just clue them back together with PVA (Mont Marte to be exact). I apply the CA after cutting small pieces out to reinforce them. It essentially plasticizes them. That’s how I got my davits to retain their shape, and be functional, on my model of the Solferino.

- 106 replies
-
- 4
-

-
- digital navy
- v108
- (and 3 more)
-
For really thin pieces, pre sealing both sides, and scalpels are your best friends. Then, if the pieces are super thin, I add CA to the cut edges to stiffen them up. It works quite well.
- 106 replies
-
- 1
-
-
- digital navy
- v108
- (and 3 more)
-
I would also likely be interested if they have something in my area of interest. I like predreadnought era battle wagons personally, although I would also love to get ahold of a card kit of the Akagi.
- 106 replies
-
- 2
-
-
- digital navy
- v108
- (and 3 more)
-
I will, I need to finish my other projects first though. I’m going to enlarge it to 1/64 when I build, so it matches the scale of two of my other models.
- 12 replies
-
- 2
-
-
- Le Coureur
- Shipyard
- (and 1 more)
-
Clare, Looking forward to seeing this model as a build log! I have Shipyard’s 1/96 scale version of this kit.
- 12 replies
-
- 2
-
-
- Le Coureur
- Shipyard
- (and 1 more)
-
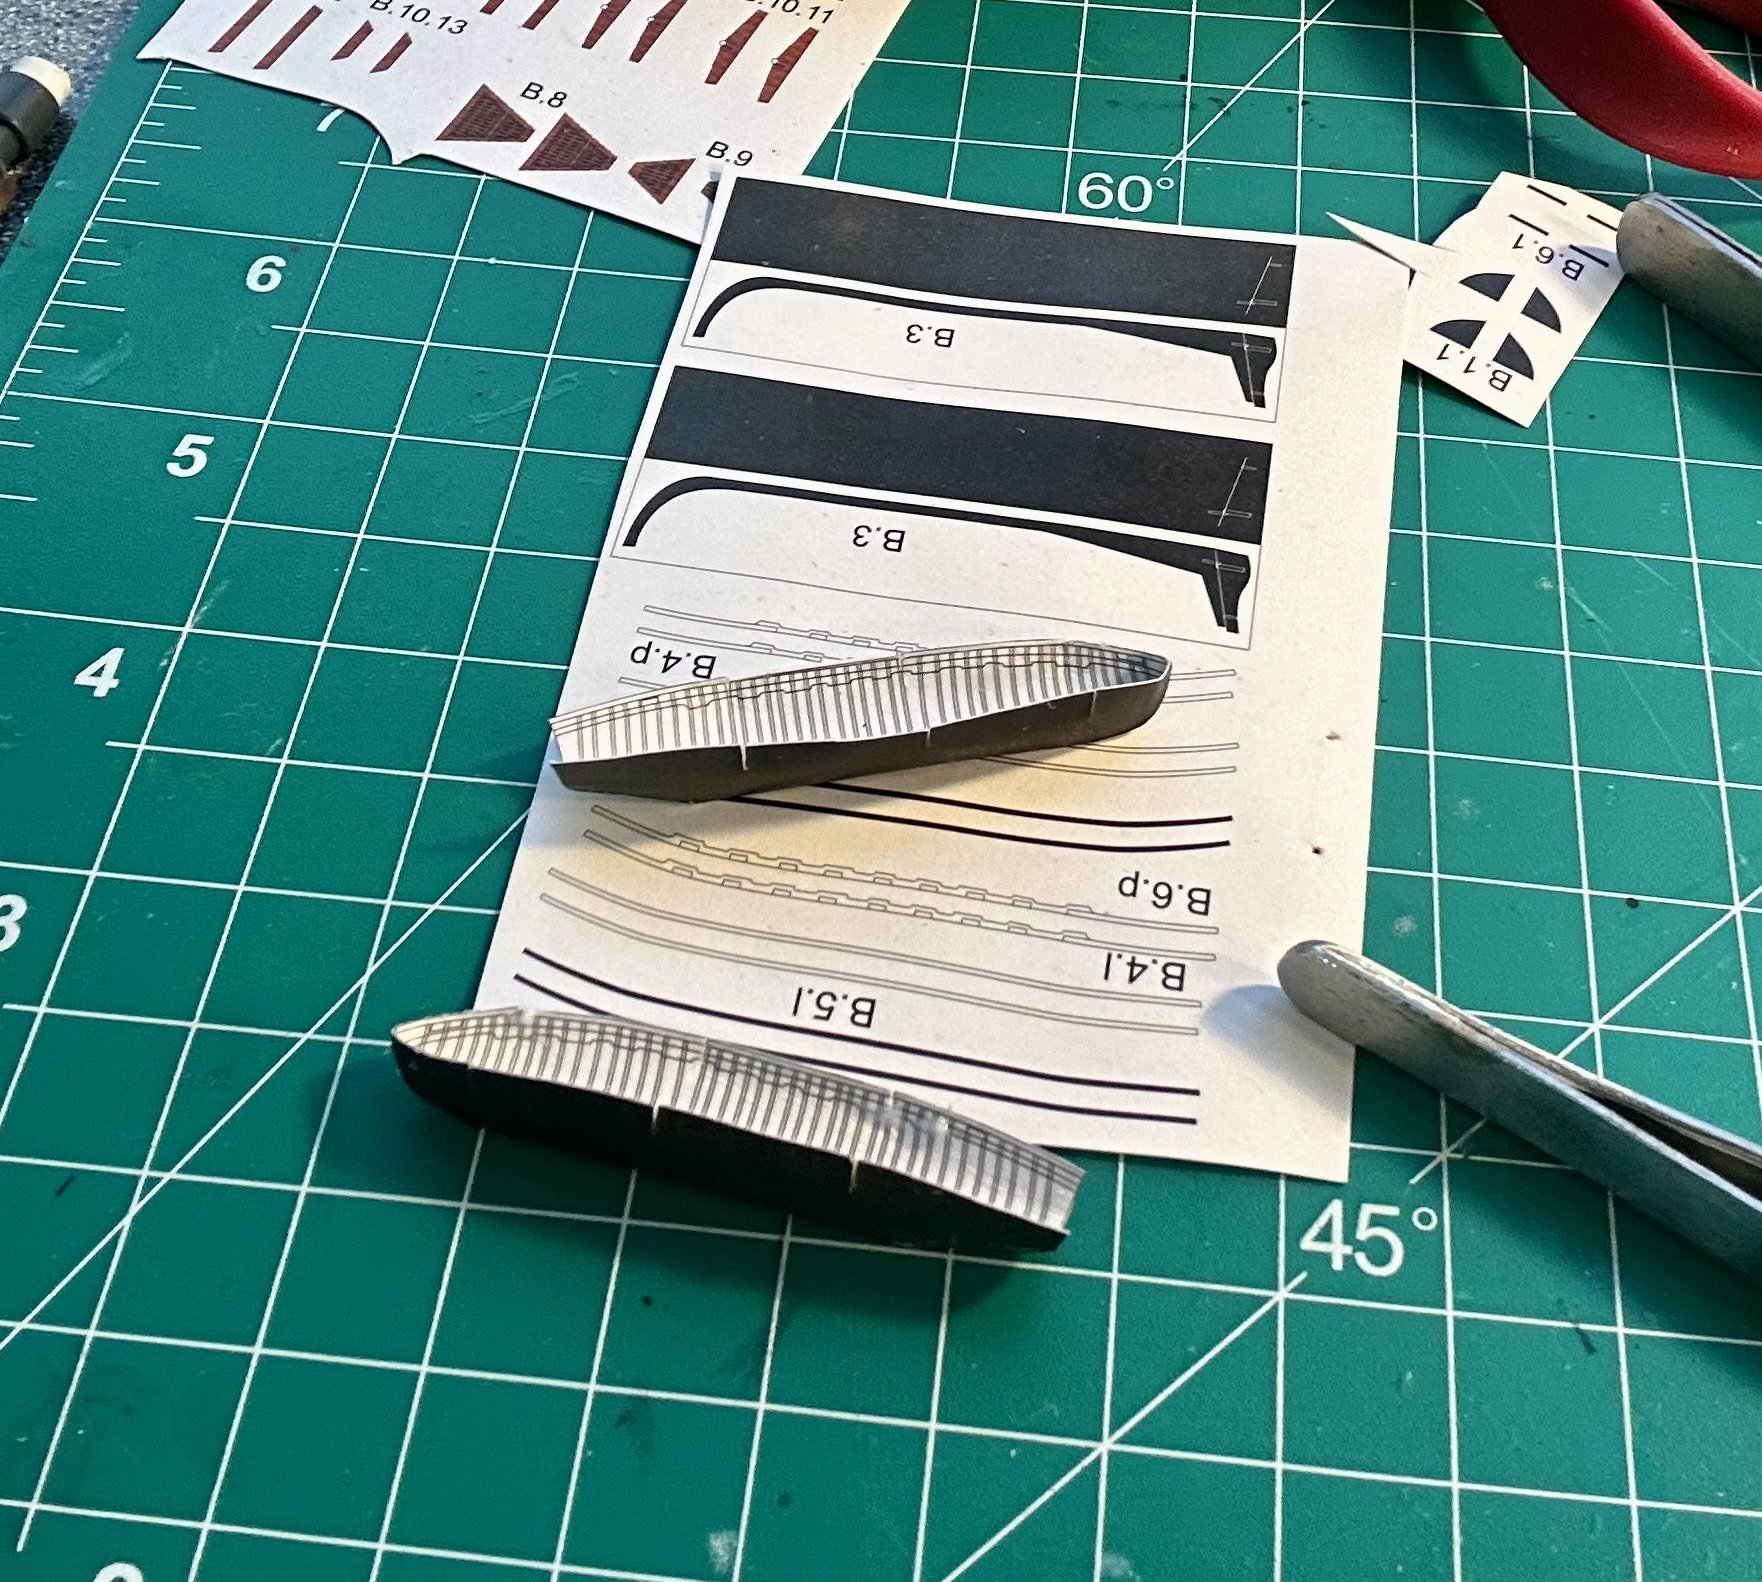
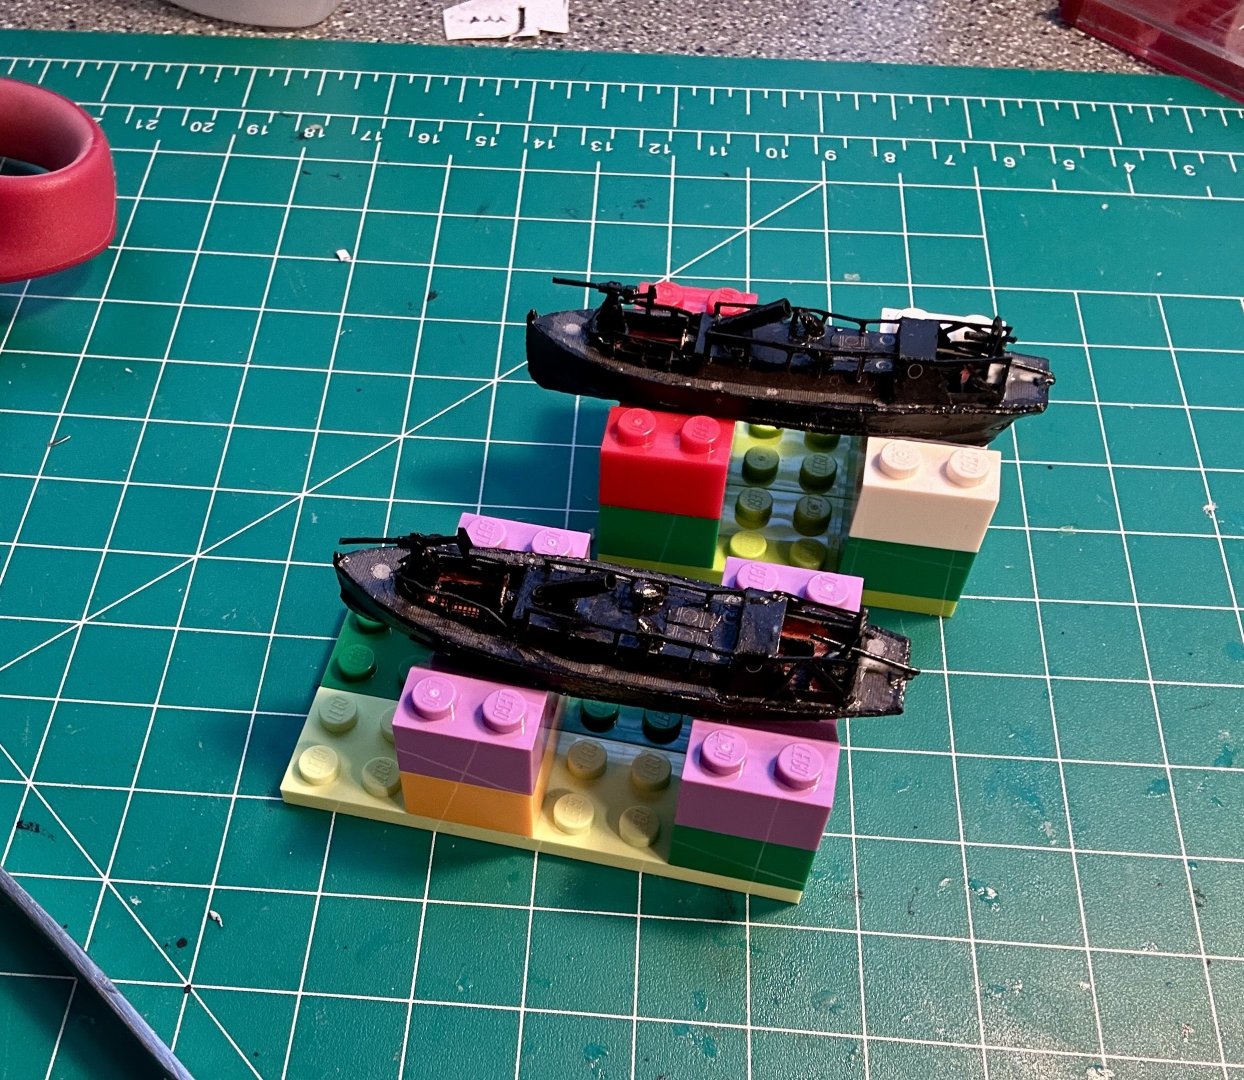
Here are the 40’ mine launches ready for installation: Here are the first of the rowed launches in progress:

- 288 replies
-
- 13
-
-
- Card
- Pre-Dreadnought
- (and 3 more)
-
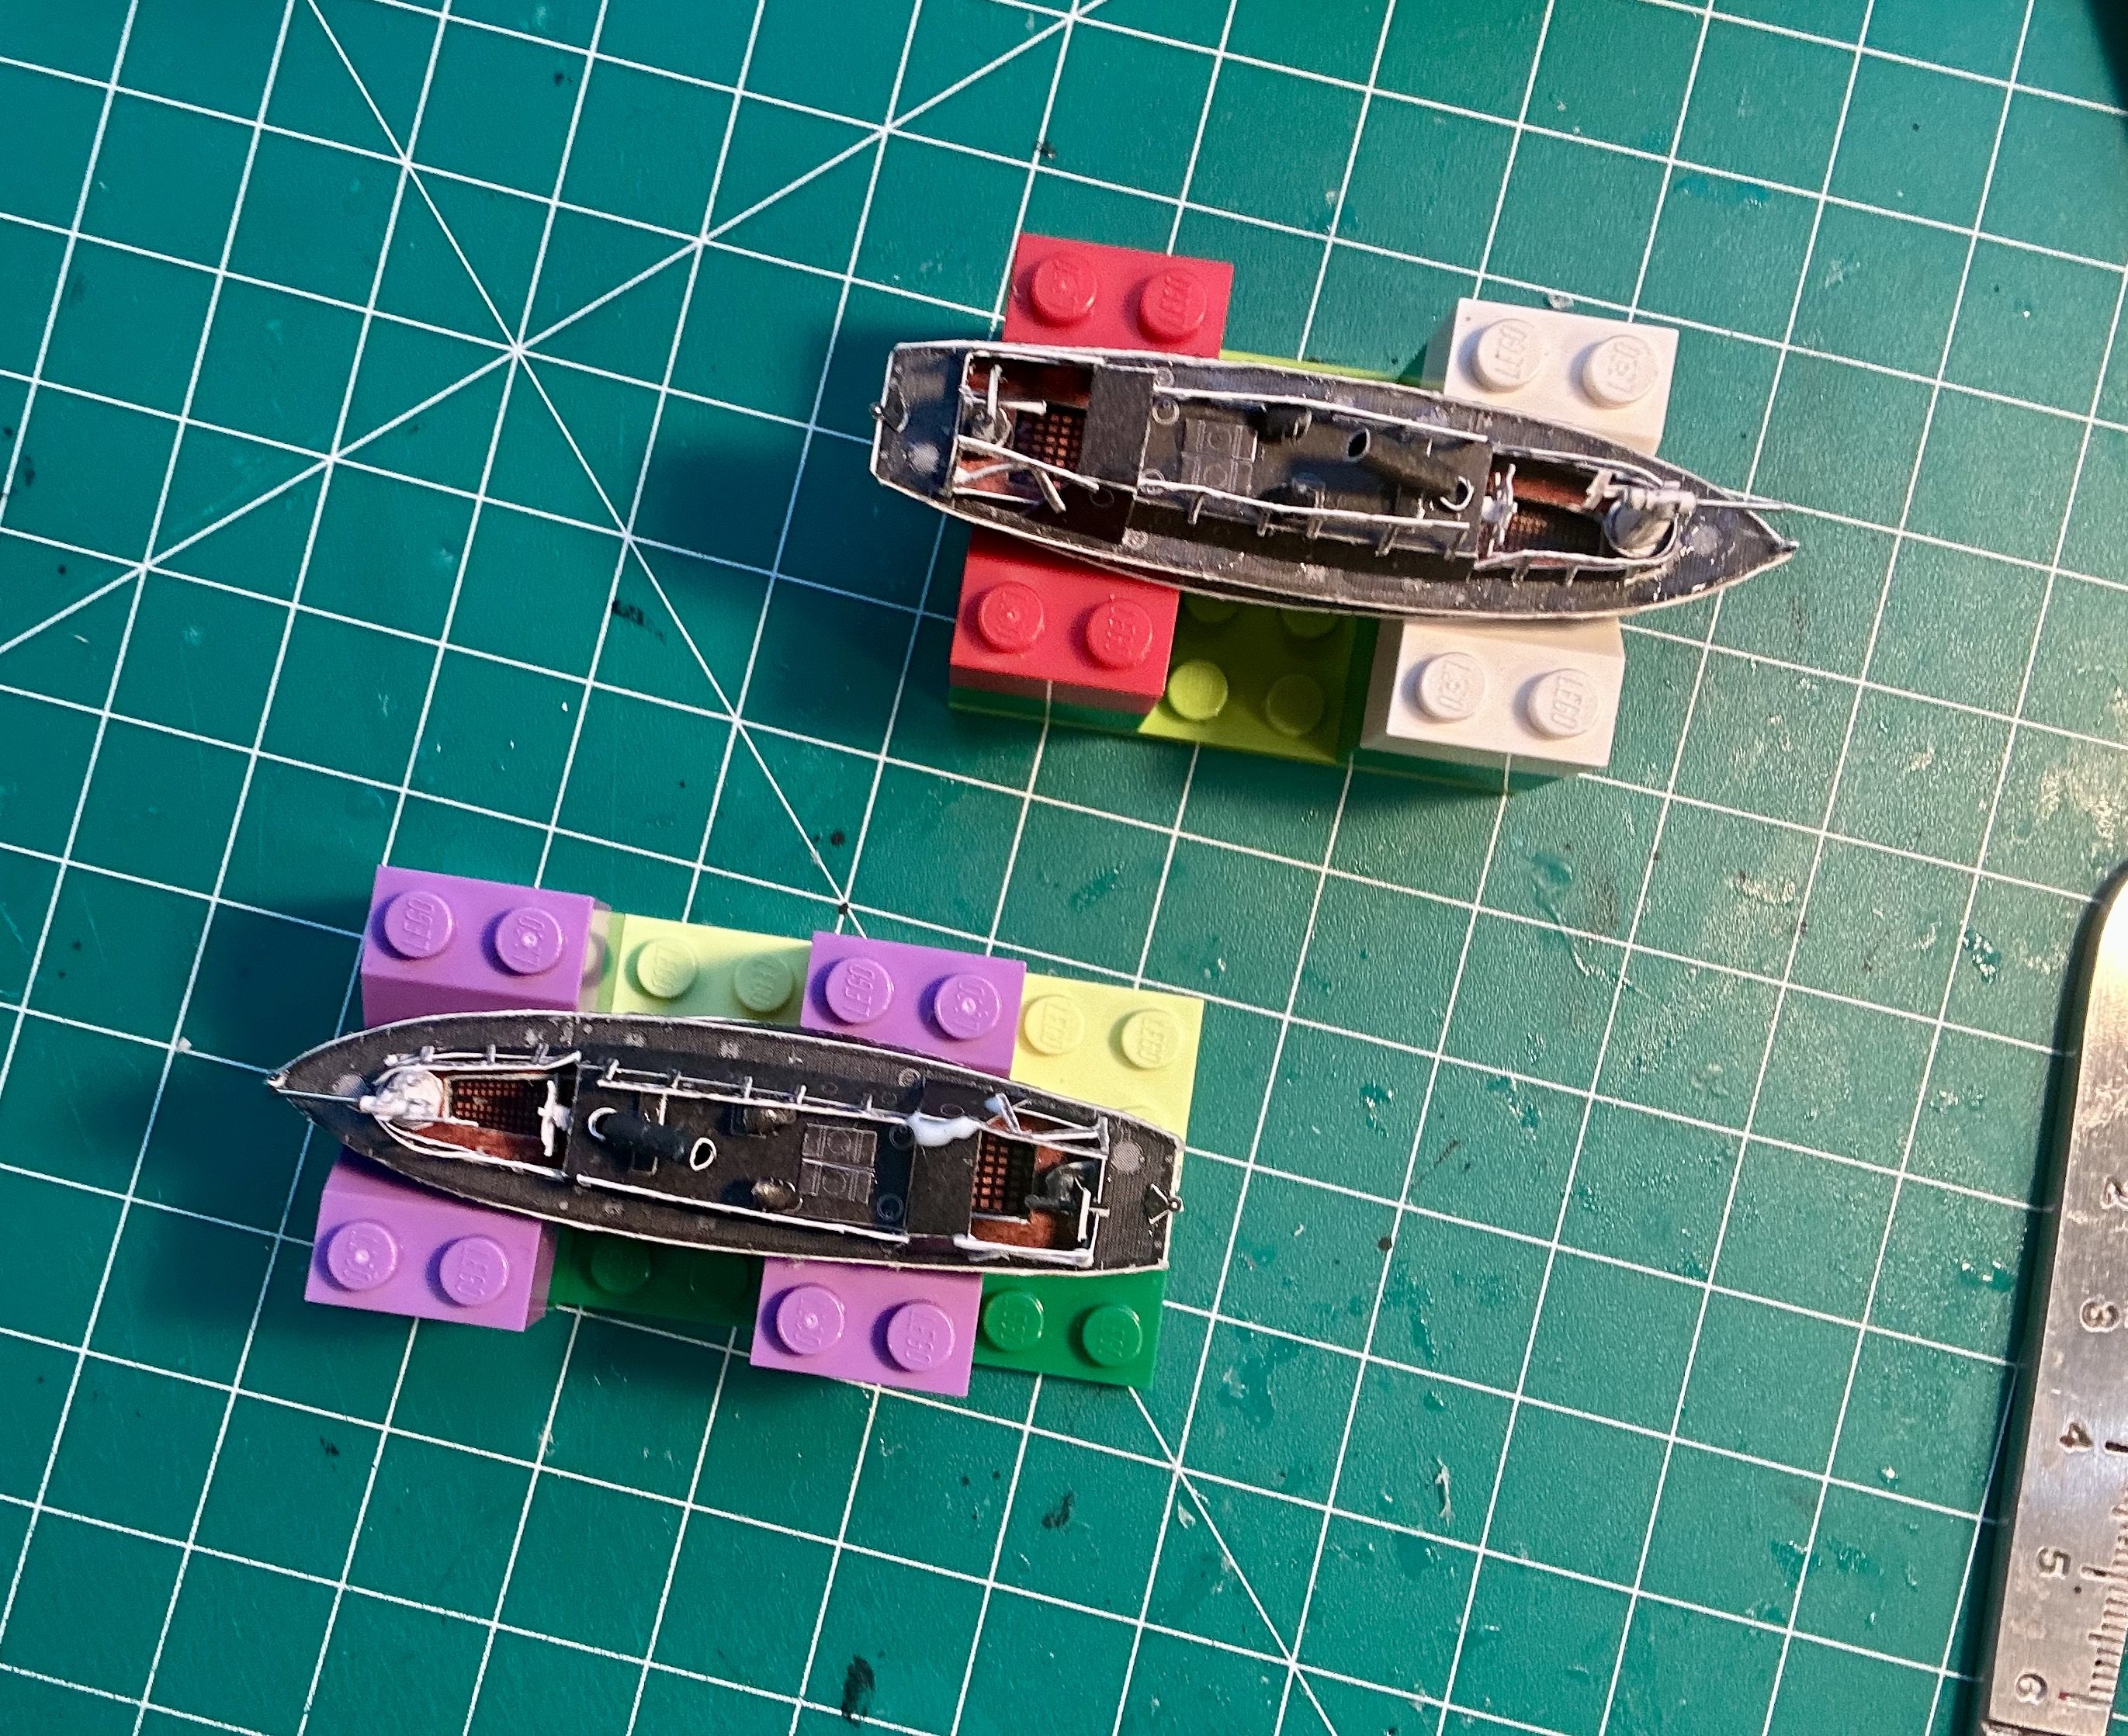
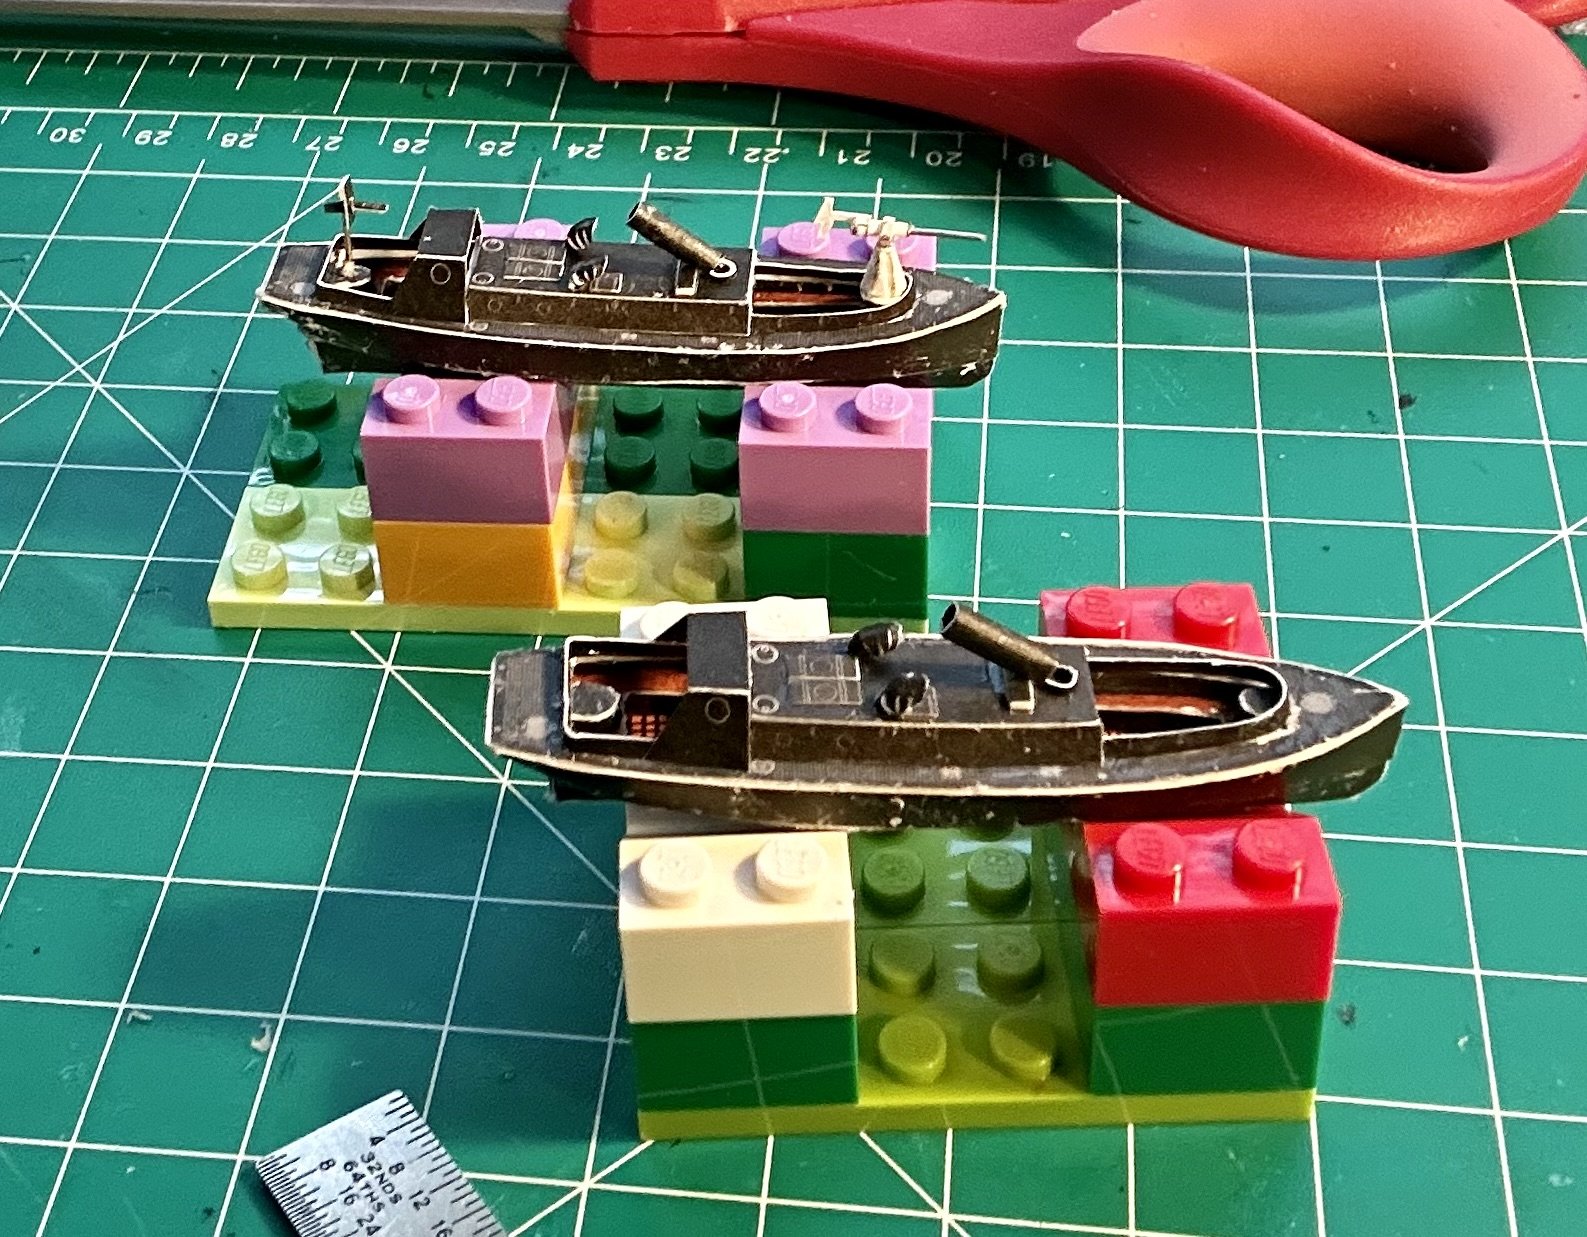
Glen, Thank you very much! I found out about that trick on this forum. Legos make excellent quick customizable jigs and temporary cradles. I bought a box of 1000 bricks and then a couple of those small suitcase type starter sets from Walmart when they went on various pre-Christmas/Easter sales. They have been immensely useful on several different projects. Also, they make a great square for traditional POB construction. They are 90 degrees, especially when built into a block and can be clamped into place, thus ensuring square construction of a POB hull. OC, Thank you very much!
- 288 replies
-
- 7
-
-
- Card
- Pre-Dreadnought
- (and 3 more)
-
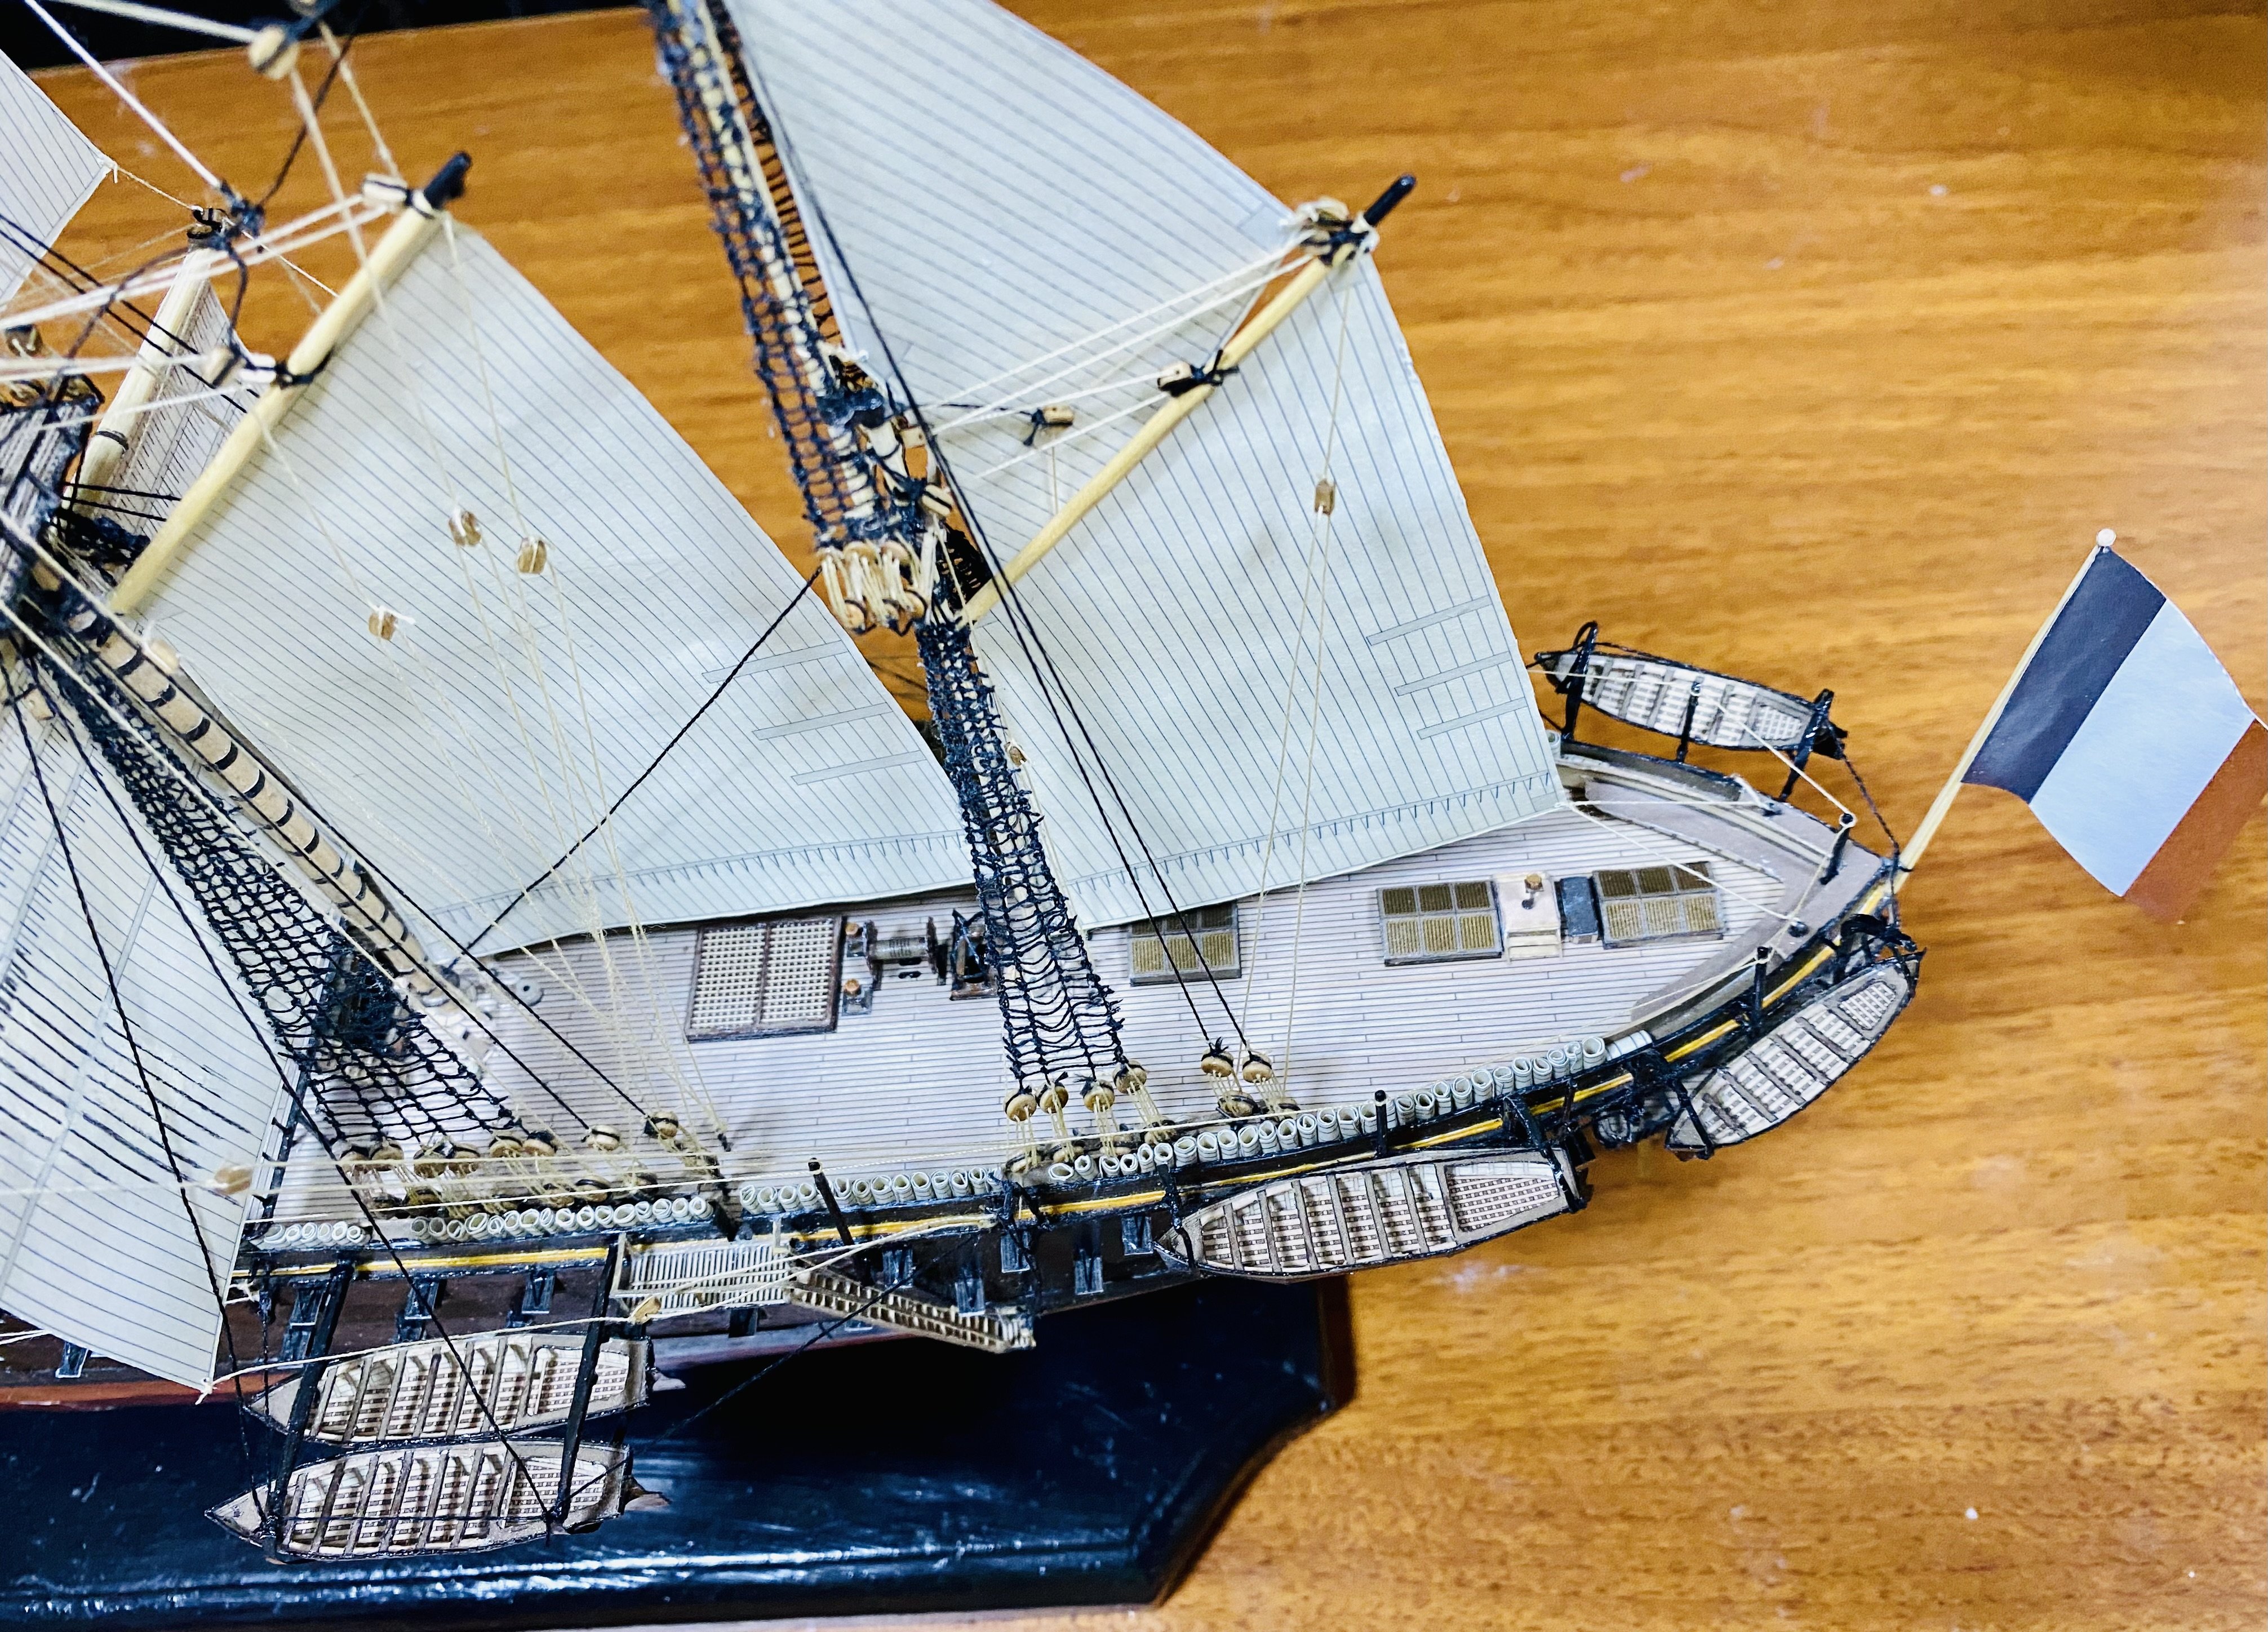
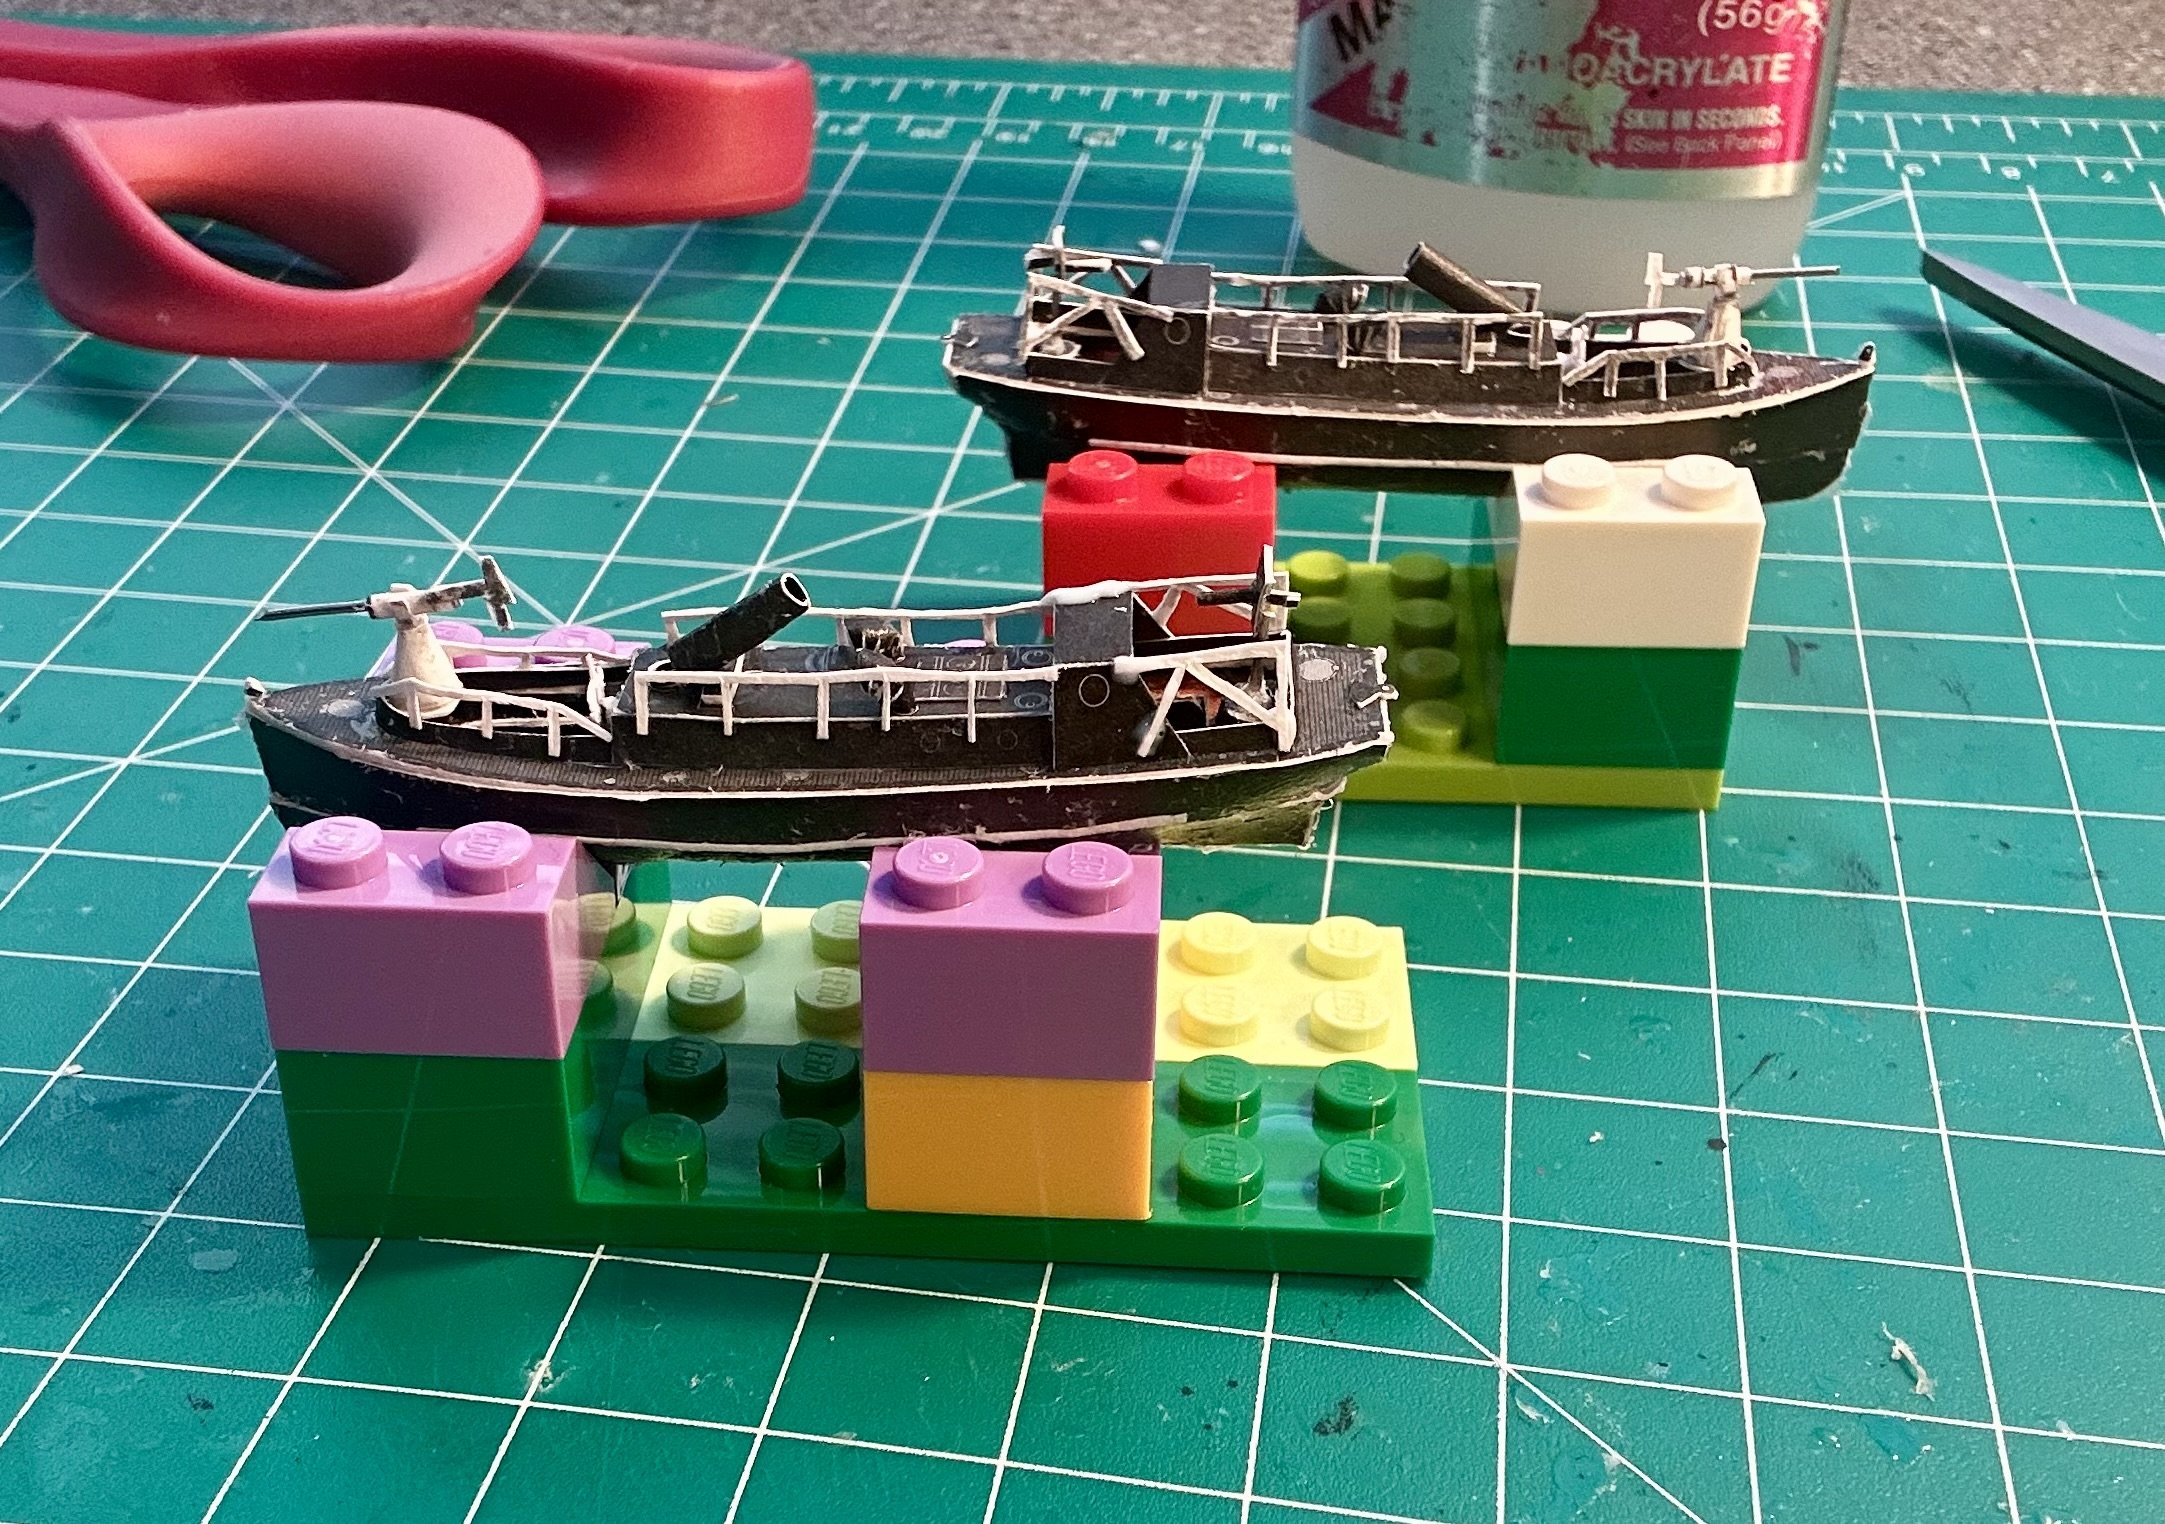
The railings and other small pieces are made and installed on the mine launches: The rudder structure shown in the instructions/plans won’t fit on the boat in the cradle. I cut that structure off once I realized. Once the boats dry I will paint and seal them. Then, I’ll make the flag masts for them and lay them down in a storage configuration. After that it’ll be time for the rowed ship’s boats. Then I’ll finish painting the cradles and get the rest of the yards and running rigging installed.


- 288 replies
-
- 14
-
-

-
- Card
- Pre-Dreadnought
- (and 3 more)
-
Welcome!
-
Very nicely done!
-
Very nicely done!
-
Orel, HMV and Schreiber kits are still available on Amazon. Hopefully the other card kit sellers figure out the tariff situation and adjust their shipping policies/prices accordingly.
- 106 replies
-
- 2
-
-
- digital navy
- v108
- (and 3 more)
-
Alan, Excellent work! Very nicely done!
-
I would also enjoy painting that set on its own. Those miniatures look incredible!
-
Lol! @ccoyle was one of the significant influences to my getting into card kits!
-
Ages of Sail has Shipyard’s full line.
-
Making good progress on the 40’ mine launches: It didn’t come with the keels/rudder assemblies, so I just made my own: I still need to make the bilge keels and a bunch of railings. Maybe I’ll make a couple of quick three bladed props while I’m at it.


- 288 replies
-
- 13
-
-
-
- Card
- Pre-Dreadnought
- (and 3 more)
-
Welcome!
-
Welcome!