

Scoot
-
Posts
90 -
Joined
-
Last visited
Content Type
Profiles
Forums
Gallery
Events
Posts posted by Scoot
-
-
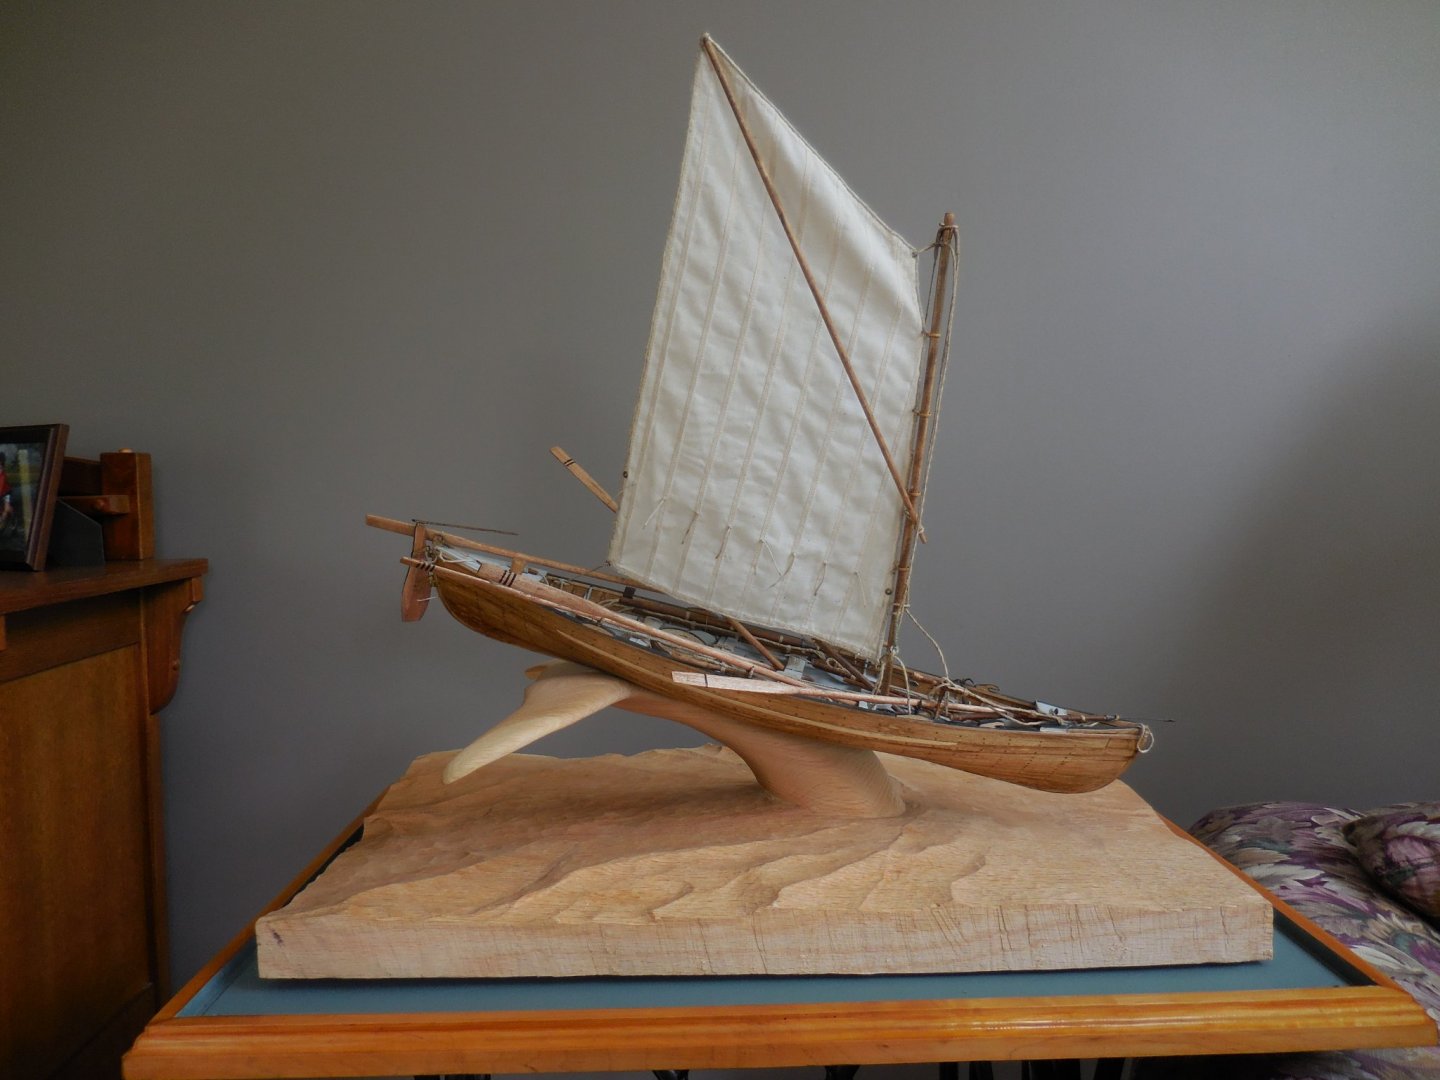
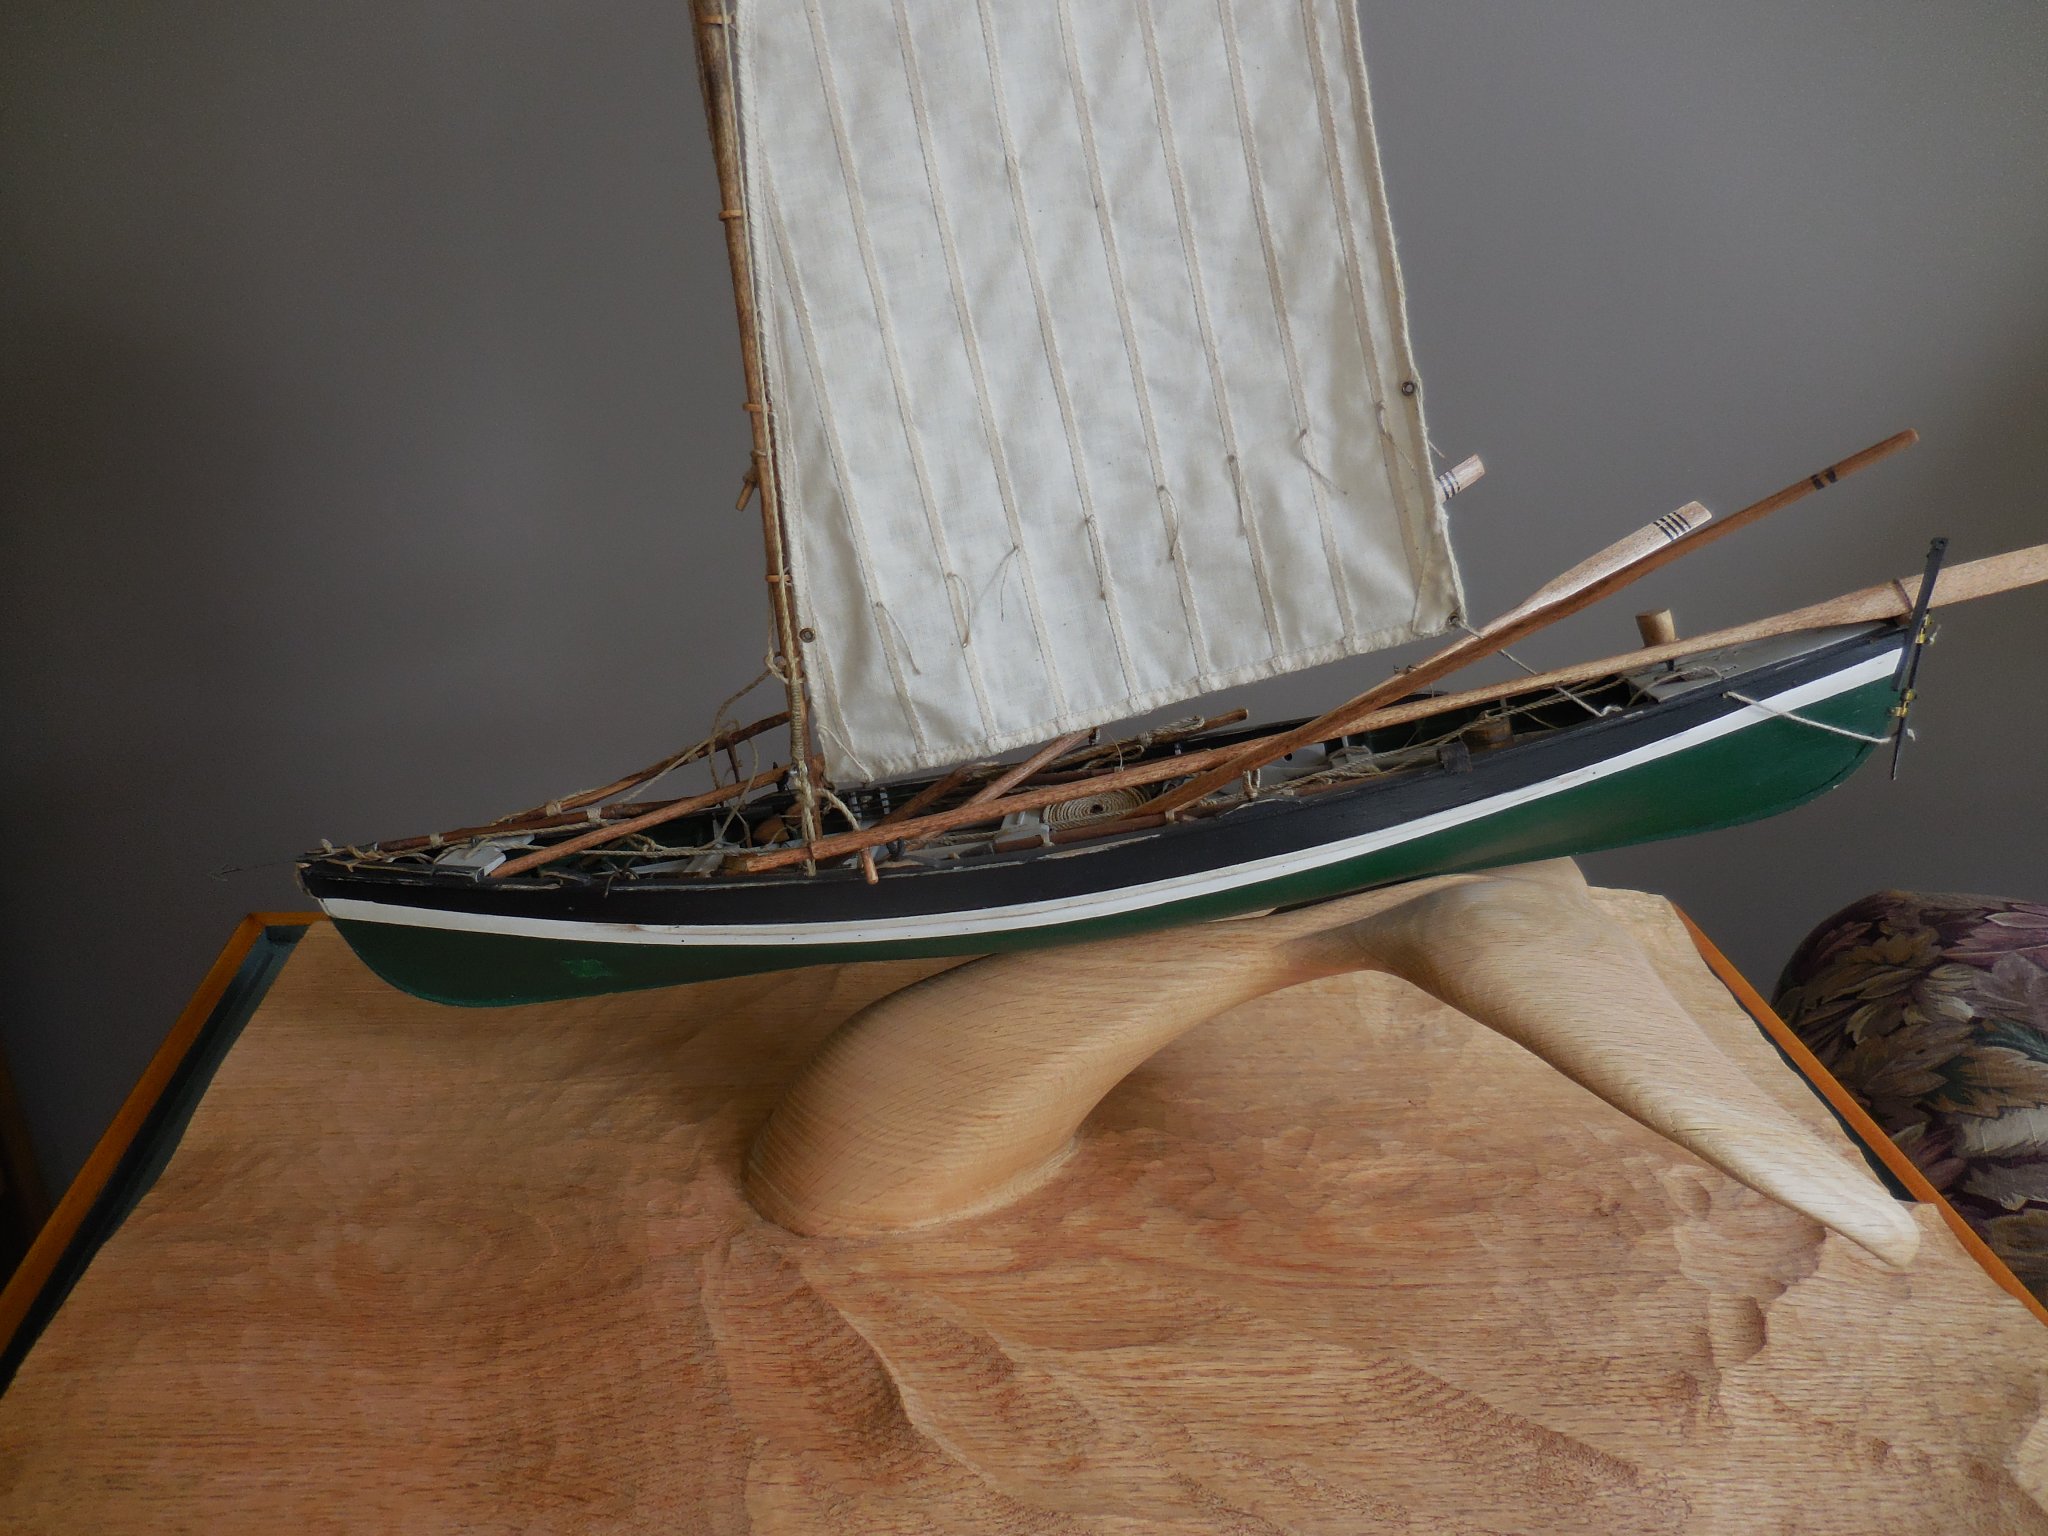
Had the paint decision on my Whaleboat also. Decided to leave one side natural and paint the other. that way it could be displayed two ways.
Fun model to build. Yours is coming along nicely. Enjoy.
Scoot


- G.L., GrandpaPhil, J11 and 1 other
-
 4
4
-
What a beautiful piece of work Ed. Must be fantastic to see in person. Hats off to you.
Scoot
- BETAQDAVE, druxey and CaptainSteve
-
3
-
Very nice job on the pump and handle refab. The Model Shipways Morgan plans do seem to require a lot of attention to confirm all of the dimensions. Build is coming along nicely.
-
-
Great job on those whale boats Bruce. May seem like a pain in the butt, but when you get to the tiny details it makes all the difference.
Scoot
-
-
Looking good Bruce. Love the comment "my next full ship-likely Granado". Goes to show you, the rigging of this ship ain't got you down.
Love it.
Scoot
-
Bruce. I think your work looks great. Hard to see several steps ahead sometimes.
No doubt that your patience and perseveration will get you to the end. Plod on.
Scoot
-
More than one way to skin a cat. Or maybe,... pivot a mast.

-
-
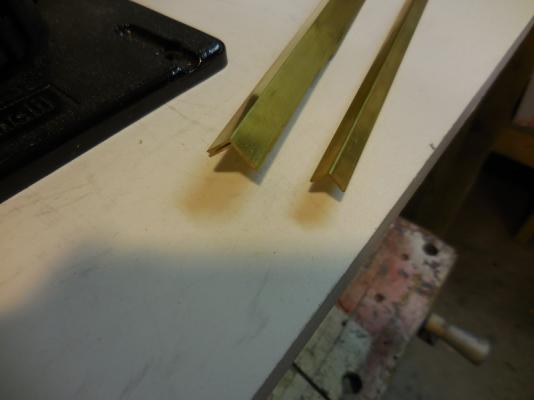
Hi Homer. Sorry for the delay in answering your question regarding cutting angles in the angle brass. I used a scribe to mark the angles at the corners and a hand held Dremel with a cutoff wheel to cut the angles and for any fine tuning. 1/8” plexiglass was used with 3/8” angle brass. A thin bead of clear silicon was laid on the inside corner of the angle brass and pressed into place. Holding the brass in place with tape. Angle brass was purchased from Specialty Shapes for not much over a hundred bucks. Plexiglass was purchased from a local glass shop. Gave the glass shop the final dimensions and they cut it to size. That may have been close to $200.00. I didn’t think the overall cost was too bad. Plus the satisfaction of doing it yourself. Hope this info helps. Your build is coming along nicely by the way.
Scoot
-
Homer. The link from the previous post has what you need. Special Shapes.
I bought angle brass from them, for my display case, for my Model Shipways New Bedford Whaleboat.
Bought eight, 36" pieces for just over a hundred bucks. I used 1/8" plexiglass. 1/4" angle brass was too small.
3/8" Angle brass covered the edges just right. One pic attached showing size difference between 1/4" and 3/8".
Also couple of hasty pics taken tonight showing scale of brass trim to display case size. 3/8" seemed to work well.
Have been watching your build. Just started my "Morgan". Enjoy.
Scoot


-
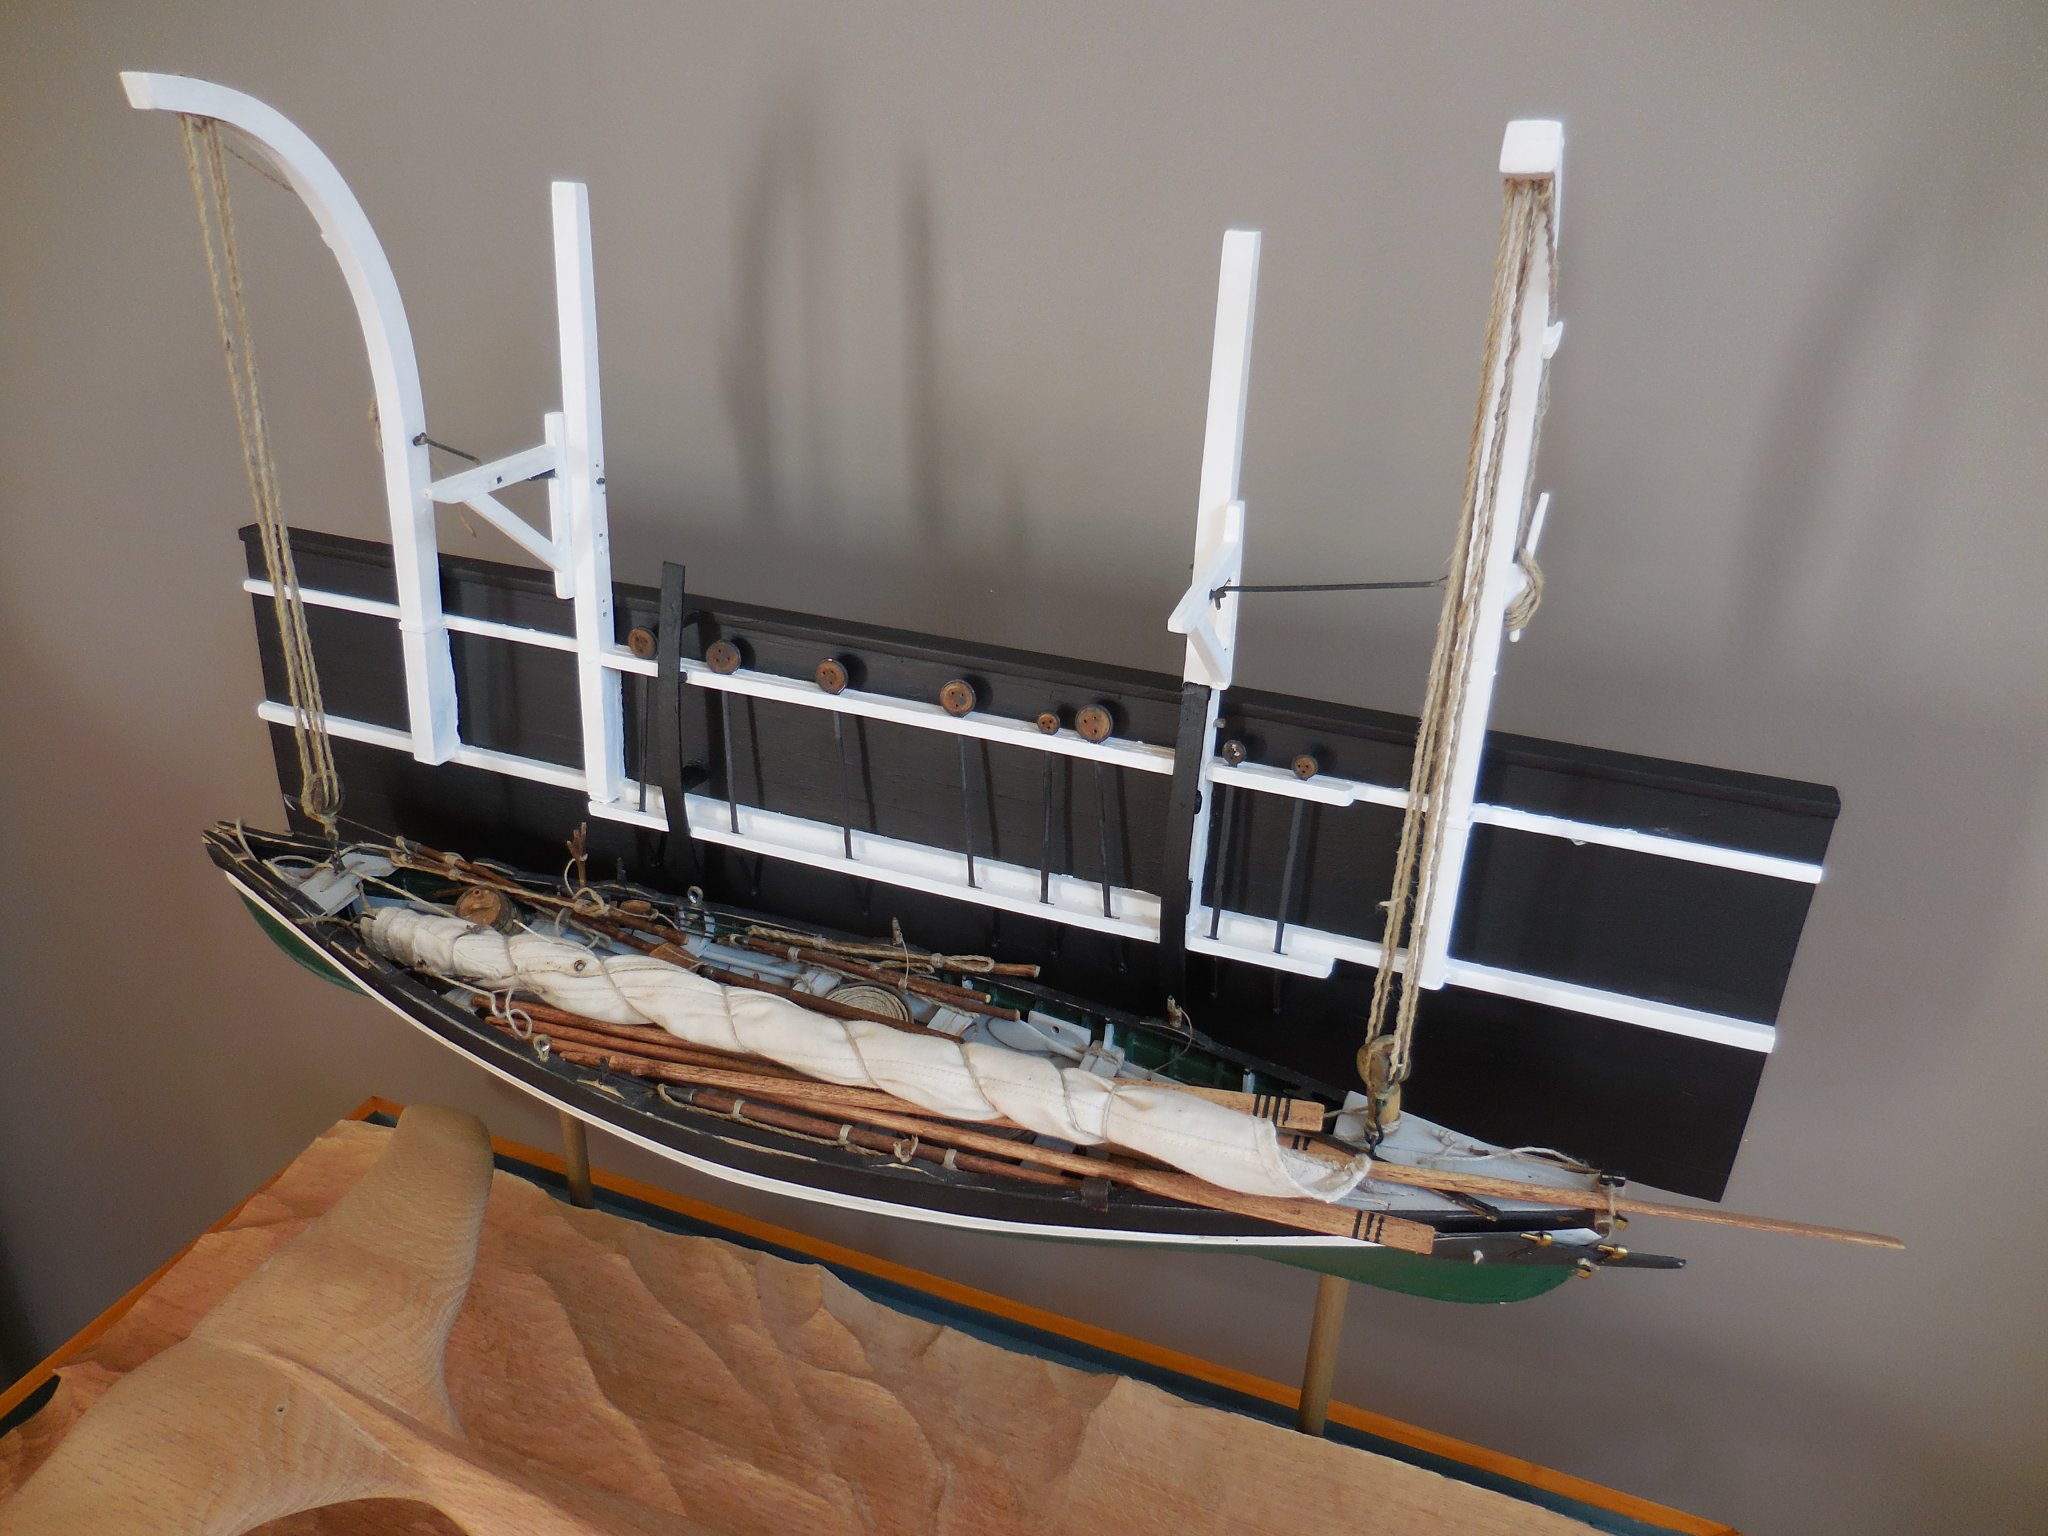
All of my previous posts on this build log are from work that was done four years ago. I was eager to start the “Morgan” build after finishing Model Shipways “New Bedford Whaleboat”. Other things arose and the “Morgan” ended up sitting on the shelf for four years. Time flies. So now I have a vision for the completion of the build and will pick up where I left off. I can see some mistakes that were made in haste and will have to be corrected before I proceed.
My plan for this model is to show the “Morgan” on her way home from a multi year voyage.
A moment in time. A hold full of whale oil(a greasy ship), and in the process of dismantling the try works. The dismantling of the try works was a task that meant that the ship was nearing home port. The hold was full and a long whaling cruise was nearing an end. What crew was left was about to set foot on dry land. Spirits were higher than they had been in a long while and what grog was left flowed freely.
-
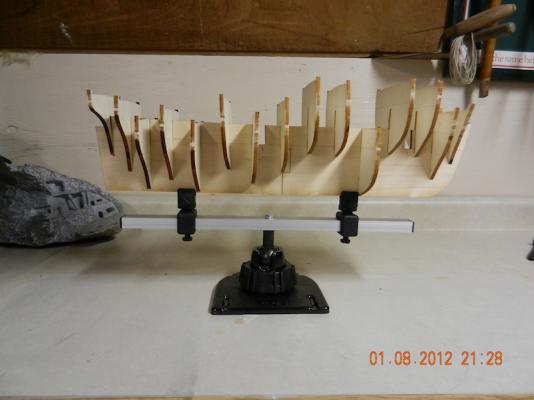
Mike. As far as single or double planking. I plan on single planking. If I get the bulkheads faired properly, hopefully the planking will come out OK. The lower part of the hull will be coppered. Everything I have posted so far is work that was done four years ago. Playing catch up now. I am just now getting back into the thought processes for modeling. I have noticed some mistakes I made when adding the bulkheads that will need to be addressed.
Top of some bulkheads are above top surface of center keel and bottom of some bulkheads do not fair into bearding line. This is where this build really begins.
-
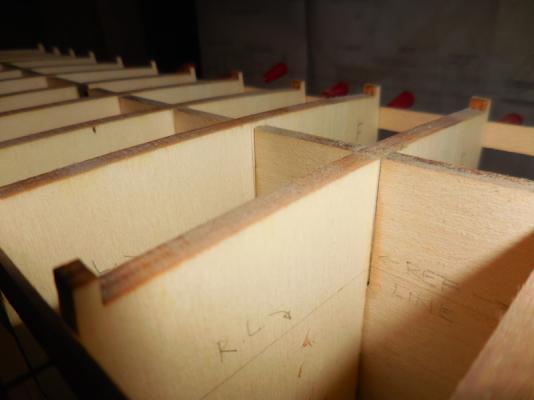
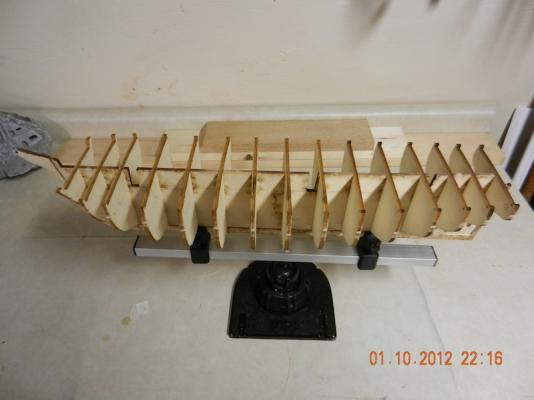
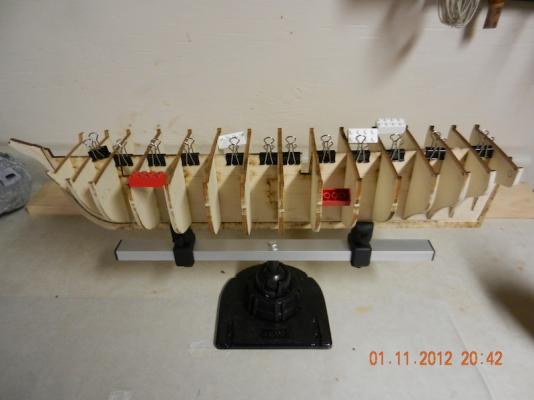
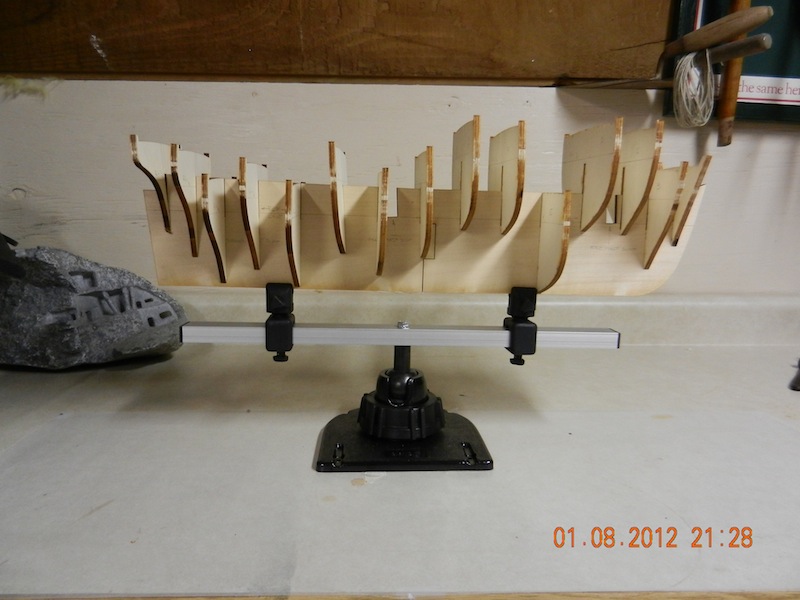
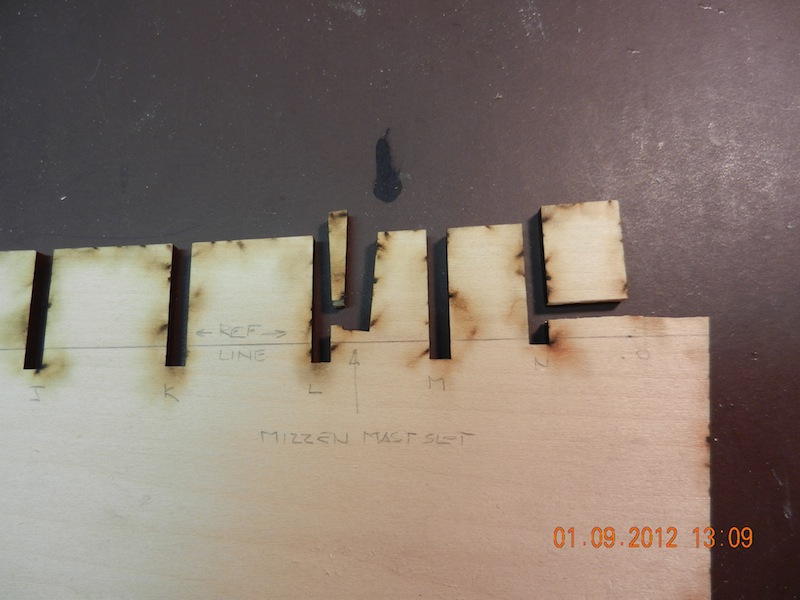
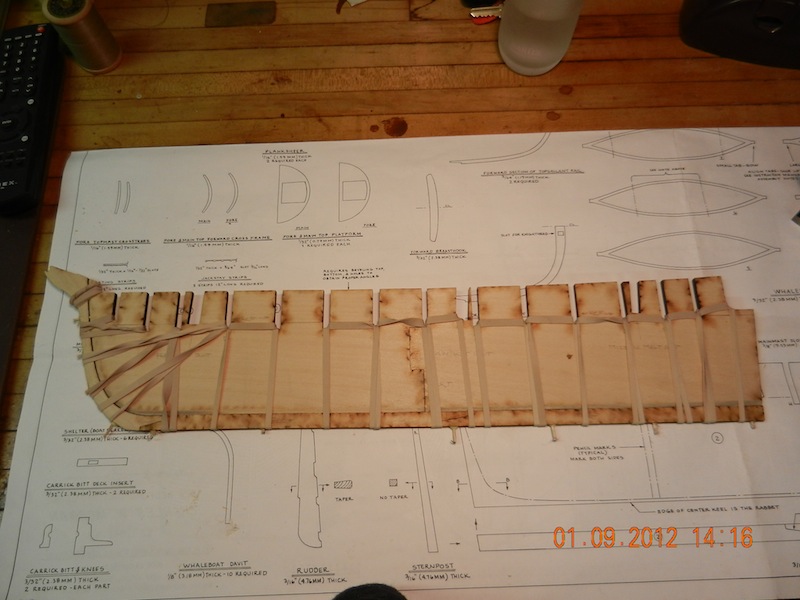
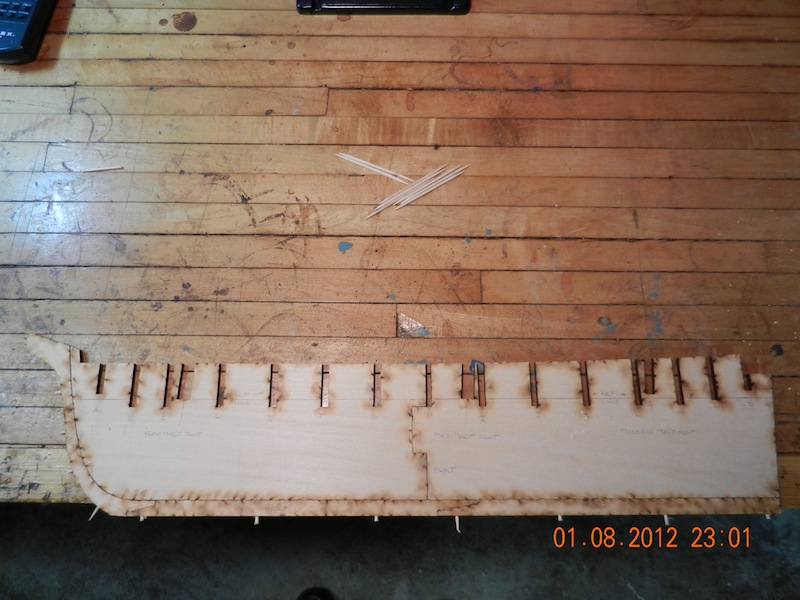
The next step was to fit and install the bulkheads. Minor filing was needed to get a good fit.
Clamps and blocks were used to keep things square while the glue set.
-
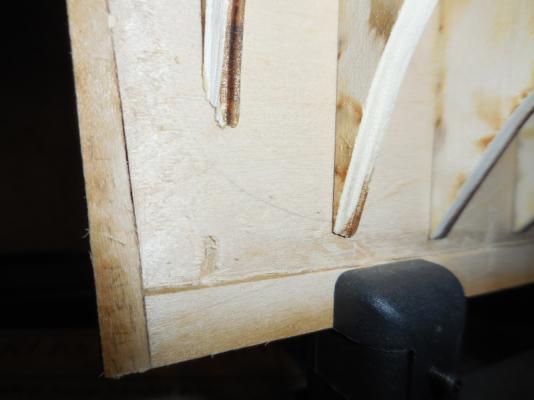
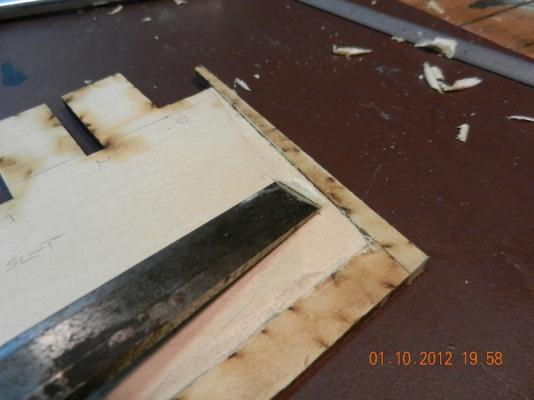
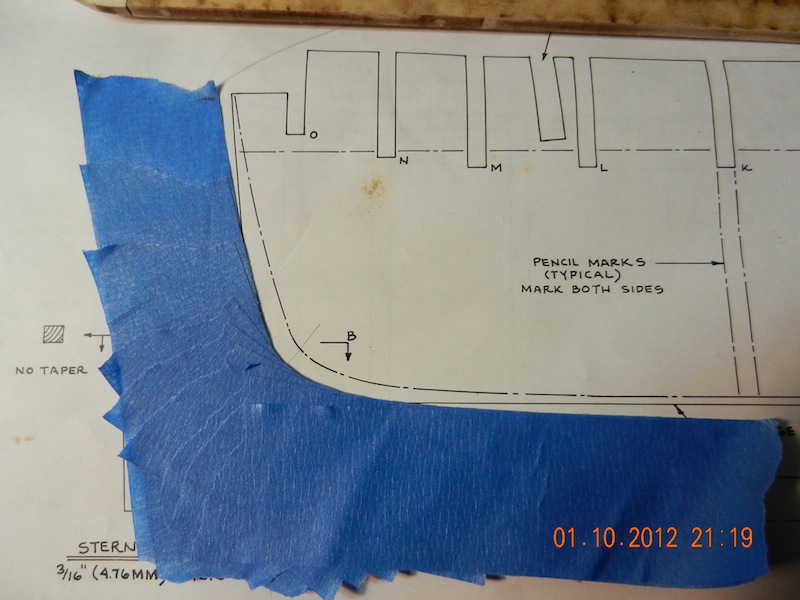
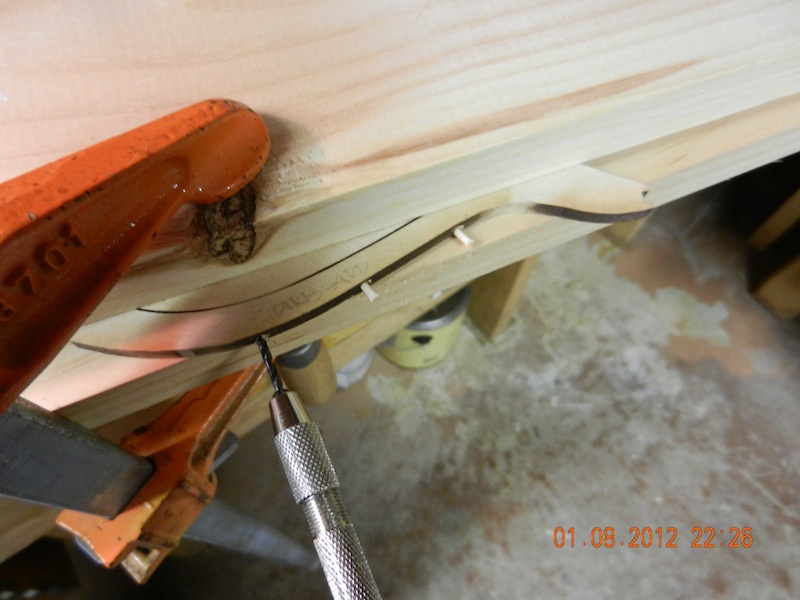
Next was to pare down the material from the bearding line to the depth of the rabbet. And to test for proper depth with a scrap of planking.

-
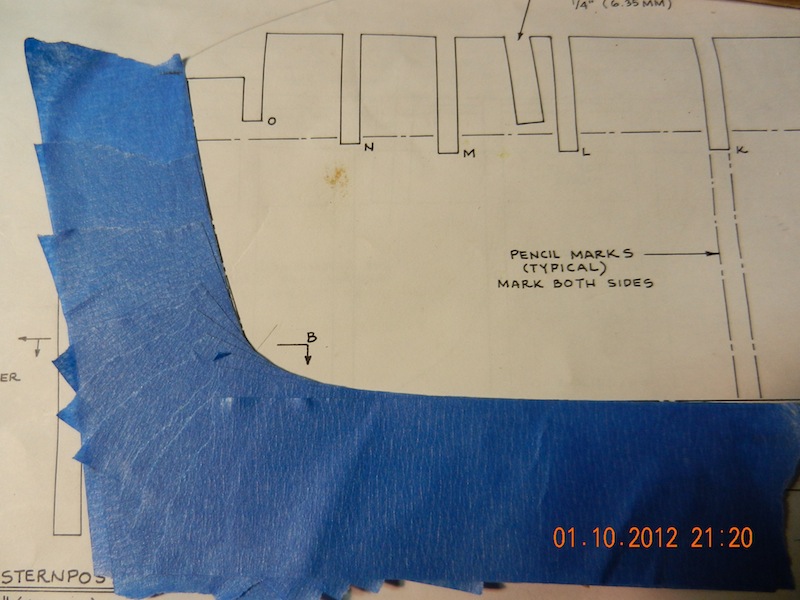
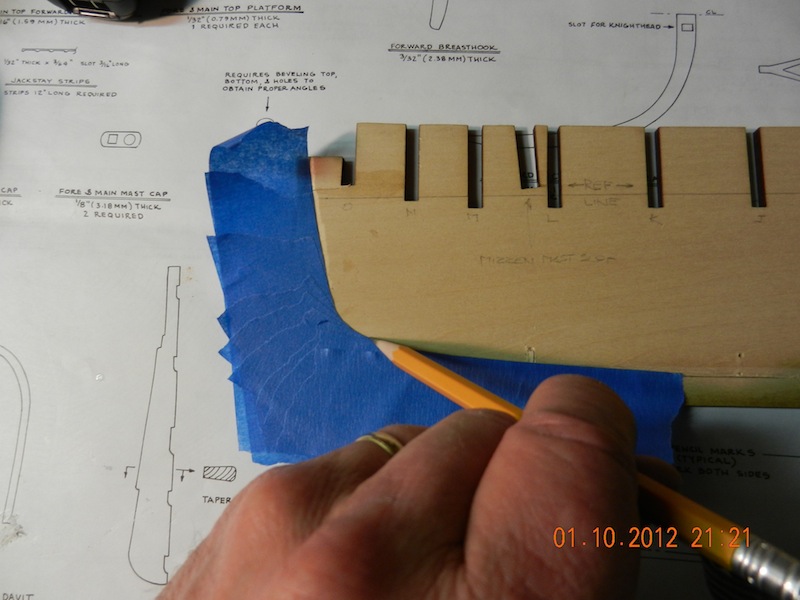
Next was to transfer the bearding line from the plans to the center keel. The bearding line is the intersection of the center keel and the inside surface of the hull planks. From the bearding line to the rabbet will be the attaching or glue surface for the planking. To transfer the bearding line I used painters tape to make a template from the plans and transferred it to the center keel. There may be an easier way to do this but a roll of tape must have been within reach at the time.


-
Mike. It just seemed natural to add the stem now. If there is a reason not to, I will find out down the road. Hopefully nothing negative.
I see you have started the Morgan also. Should be fun watching the progress of each.
Scoot
-
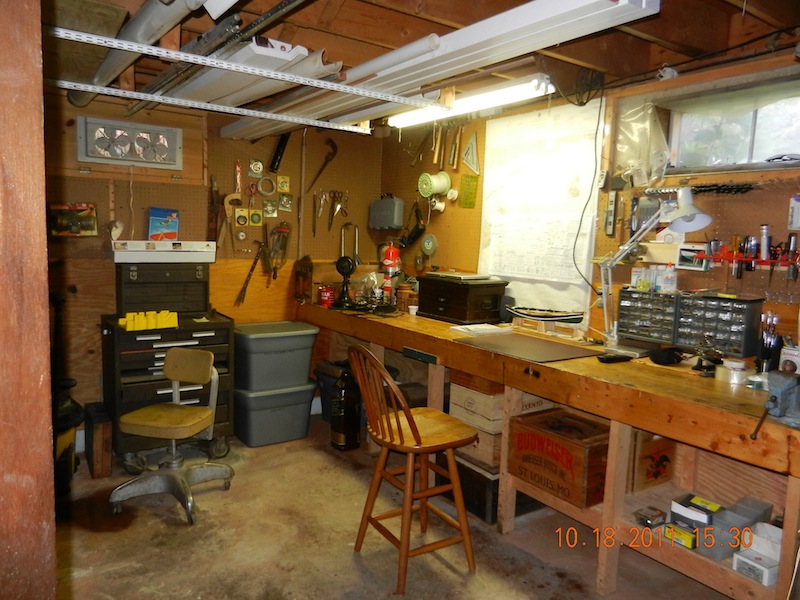
Hi Frank. Trying to get used to posting efficiently. Probably could have put the last six posts into one post. Haven't learned how to split up texts
and pics. The work bench is 15ft of a bowling alley that was in town and dismantled in the 1980s. You may have bowled there as a
youngster. The bench top is going with me to the Cape when I retire. Solid as a rock.

-
Mike. It will be interesting building the Morgan side by side. By the looks of your other impressive builds you will be leaving me in the dust.
Enjoy.
Scoot
- Canute, Burroak, popeye the sailor and 4 others
-
7
-
-
-
-


Charles W Morgan by Papa - FINISHED - Model Shipways - 1/64th scale
in - Kit build logs for subjects built from 1801 - 1850
Posted
Nice job on the build. Coppering looks good. Here is a pic of a section of coppered planking from Mystic Seaport.
Not sure if it is from a real vessel or made as a display.
Scoot