


Richmond
-
Posts
383 -
Joined
-
Last visited
Content Type
Profiles
Forums
Gallery
Events
Posts posted by Richmond
-
-
-
Nice post such clean work , nice video as well
Richmond
- mtaylor, Canute and Captain Slog
-
 3
3
-
Thanks for commenting Slog
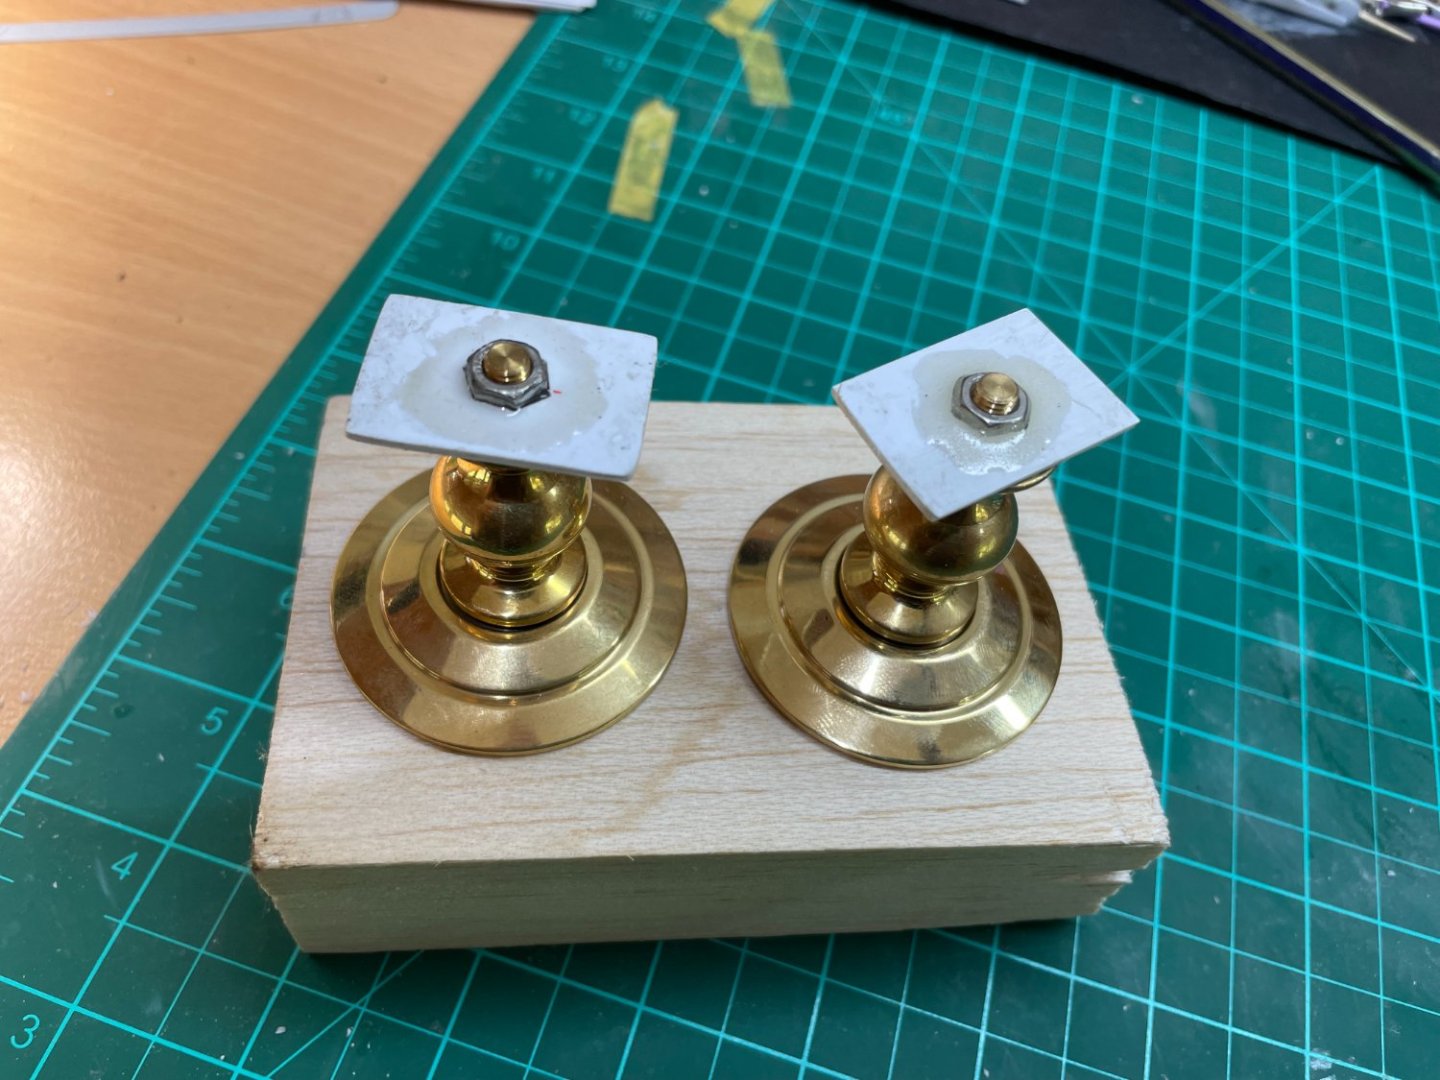
Thanks re the styrene to lower deck - I was a bit ashamed to post that photo but glad I did now - like you it was just airbrush practice - I was watching a video last night and they said black prime is good for white - maybe will try that next time before I blow any white. Apparently the Tamiya LP version is better to work with then either of the Tamiya or Mr Colour flats.
Re Pedestals sorry forgot to mention this was your idea - I have since edited my post - I couldn't get the pedestals as neat and tidy as yours but no one will see them
May need to do some clean up around the portholes but I really like the idea of using clear coat in lieu of glue on these small flat parts. At least I can clean up the clear coat I wouldn't be able to do this with CA
Yes the tool is the Vallejo pick up tool I find it easier to use then the wax pencils - I don't get much traction with the pencils it may be the humid climate or perhaps I am not using them properly
")
Looking forward to your update.
- Captain Slog, Canute, king derelict and 1 other
-
4
-
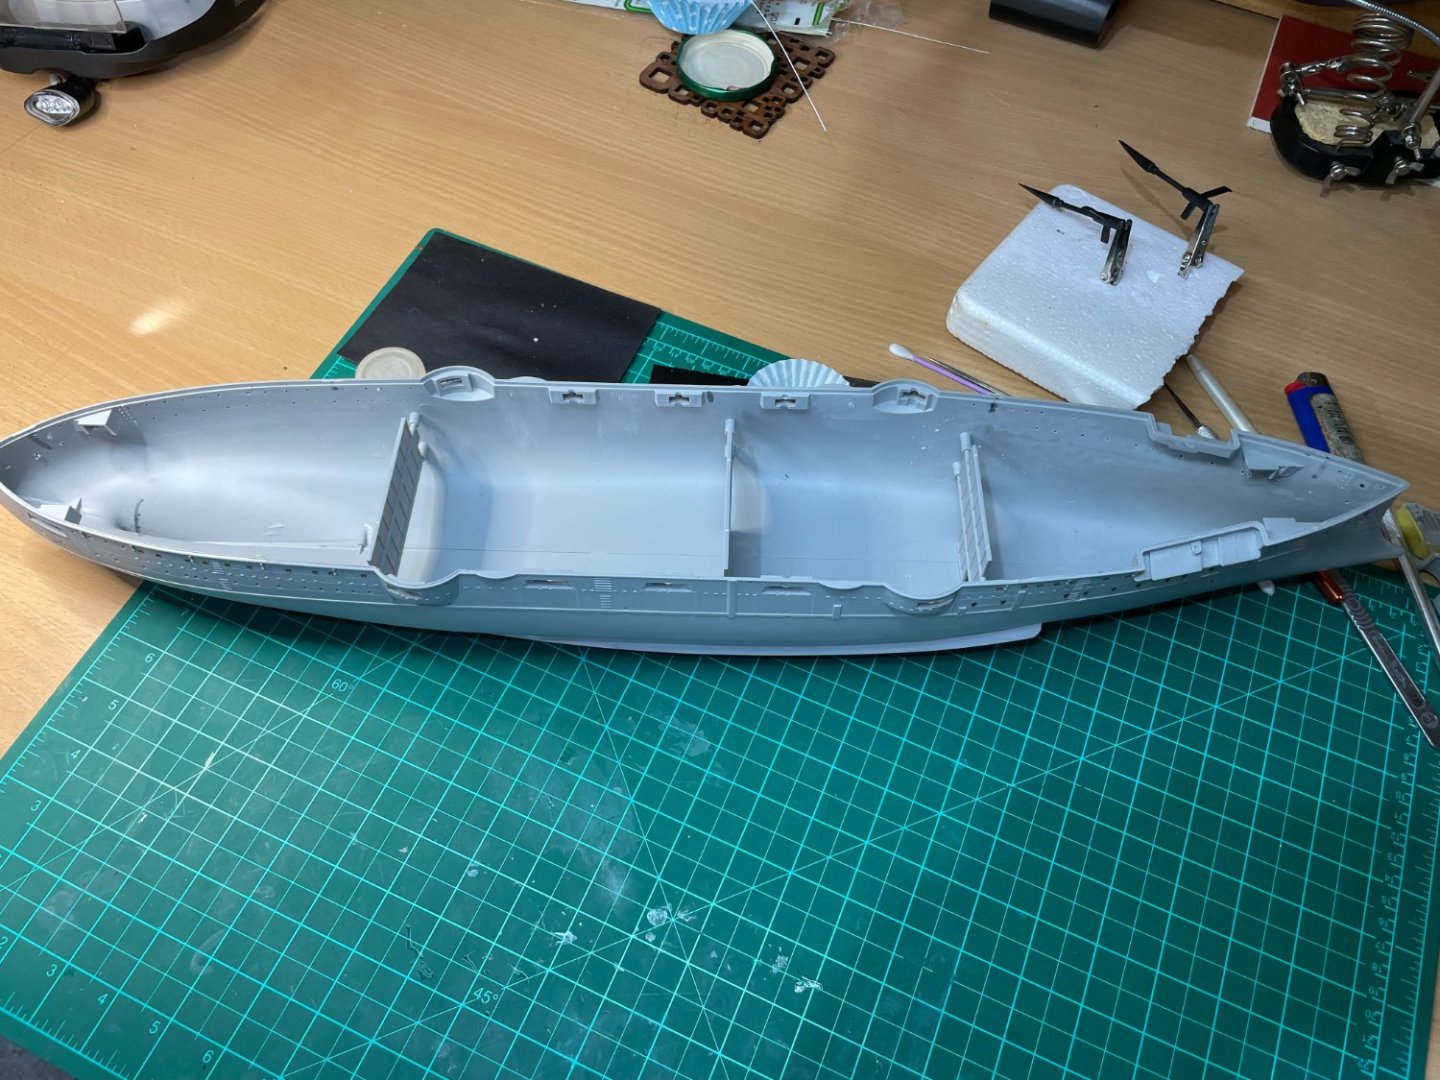
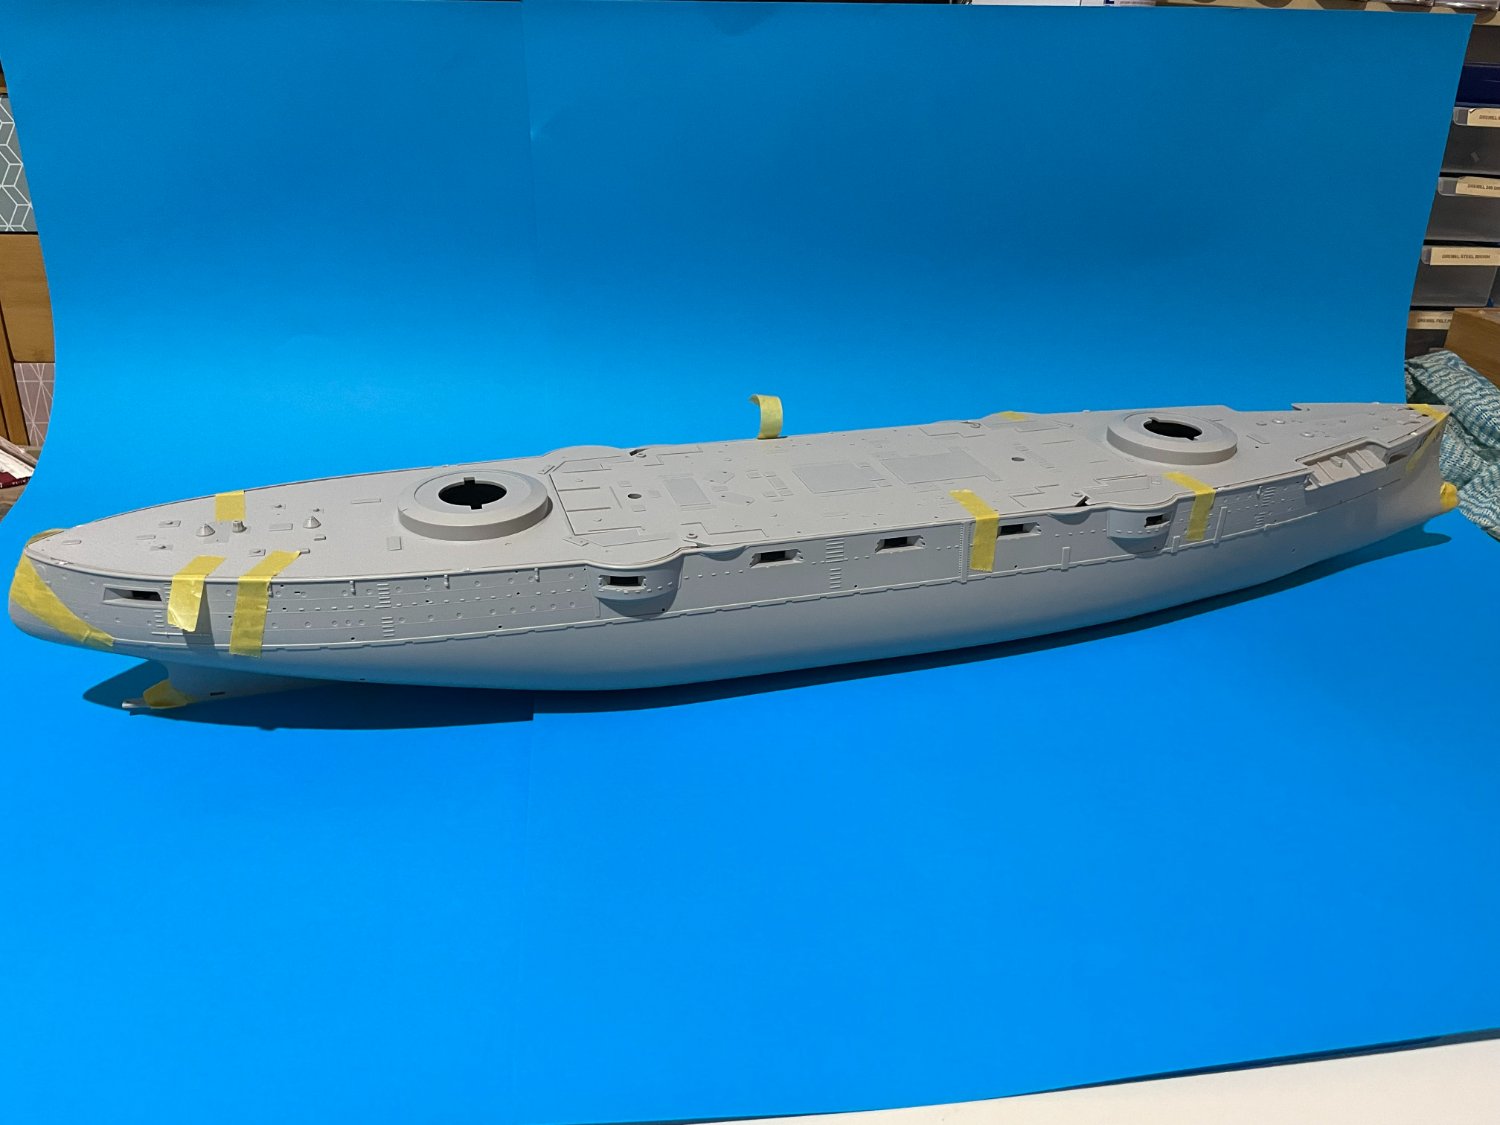
Week 3 (01/01/23) - 22 Hours (Total Build Time 38 Hours)
Hull & Rudder
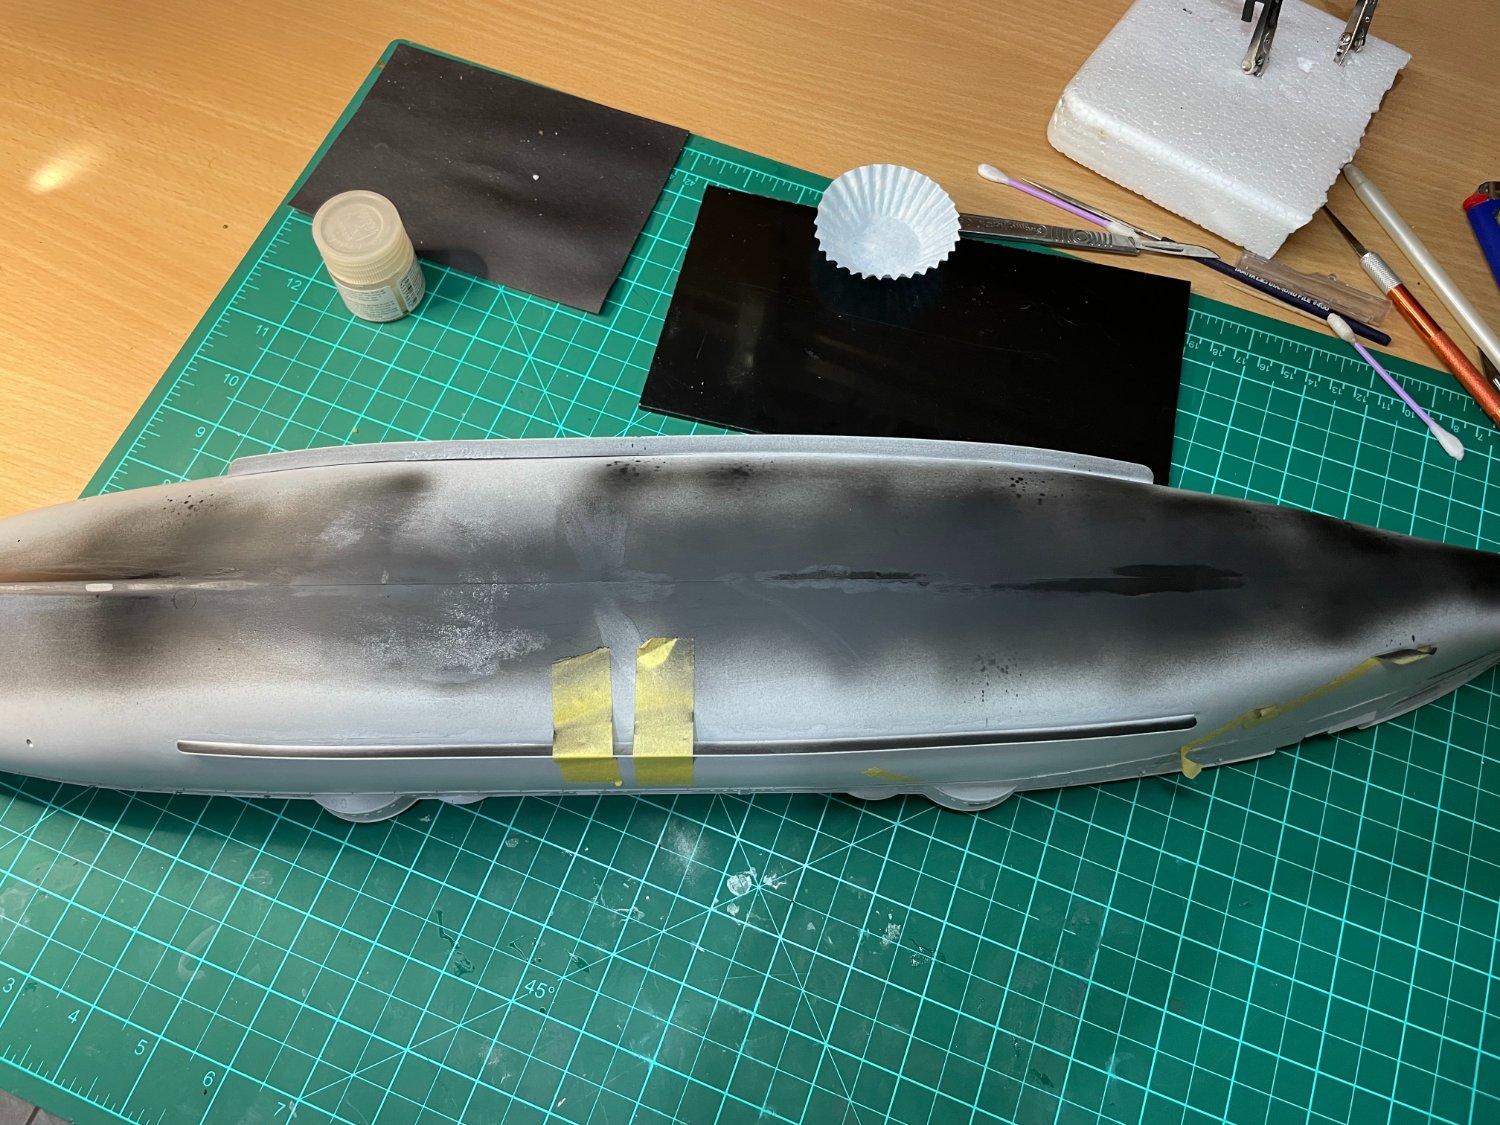
Hull halves glued together and seams filled with mixture of Mr Surfacer 500 / Sprue Glue / Plasticard strip - then dry and wet sanded with 400 and 1000 grits - hull seam was primed with Mr Surfacer 1500 black to check for remaining gaps. Still have work to do in this area.
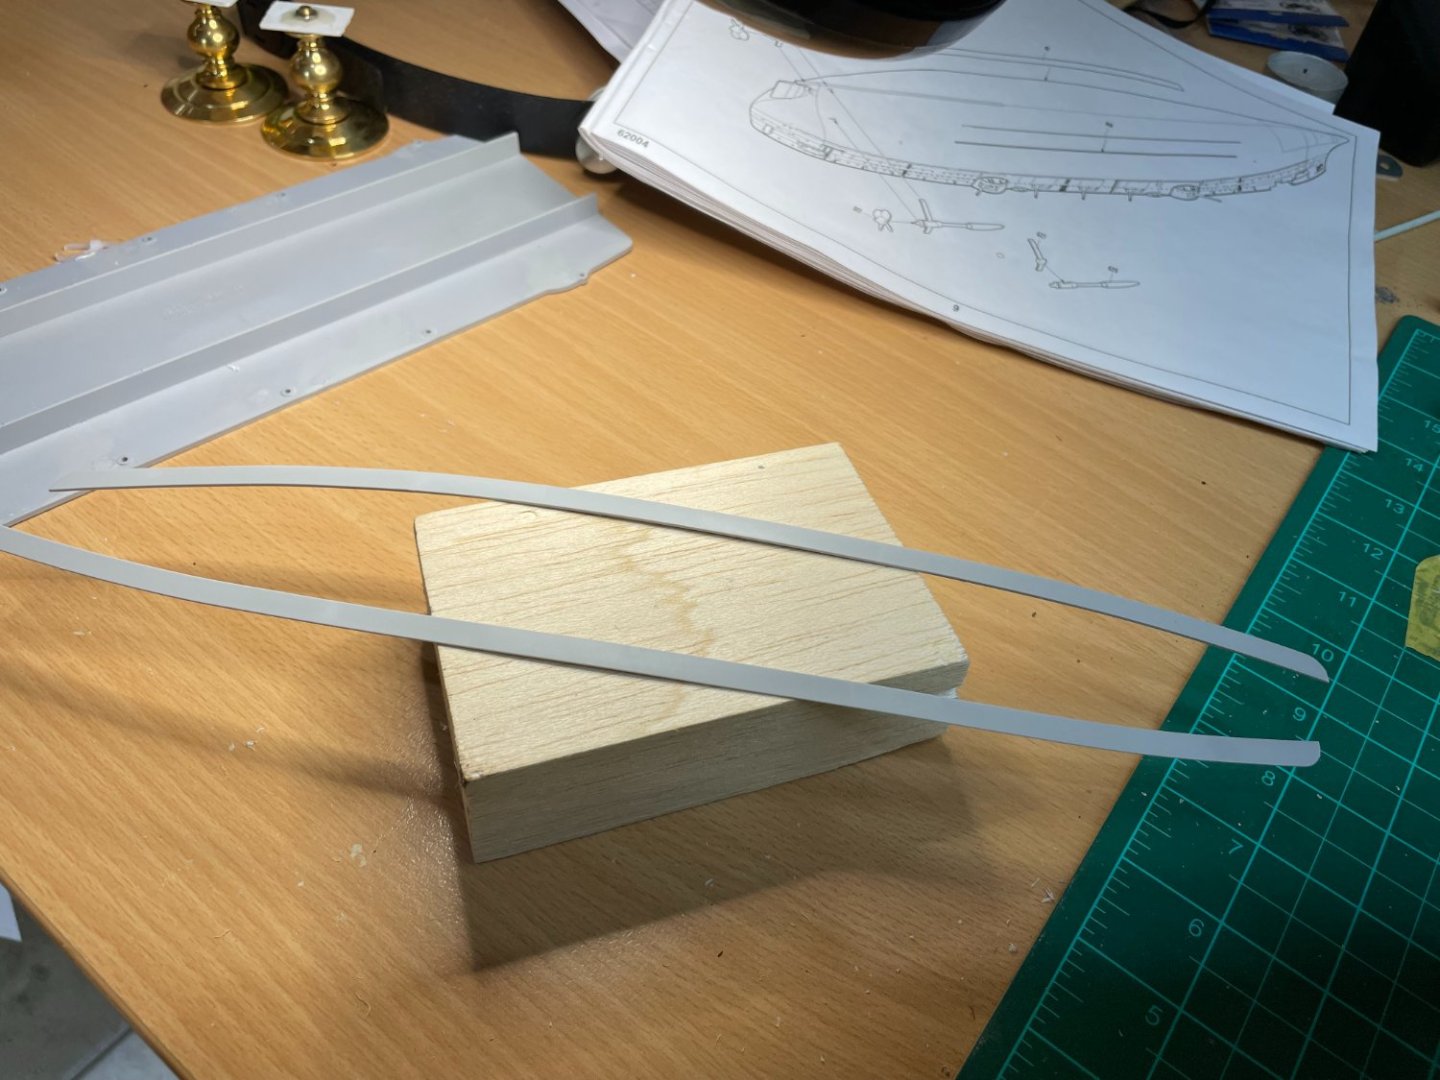
Bilge Keels
Both bilge keels fitted and gaps filled with Mr Surfacer 500 /Sprue Glue and sanded - I am struggling to keep these attached as I rest hull in my lap working on other hull 'furniture' perhaps should have reconsidered build sequence.


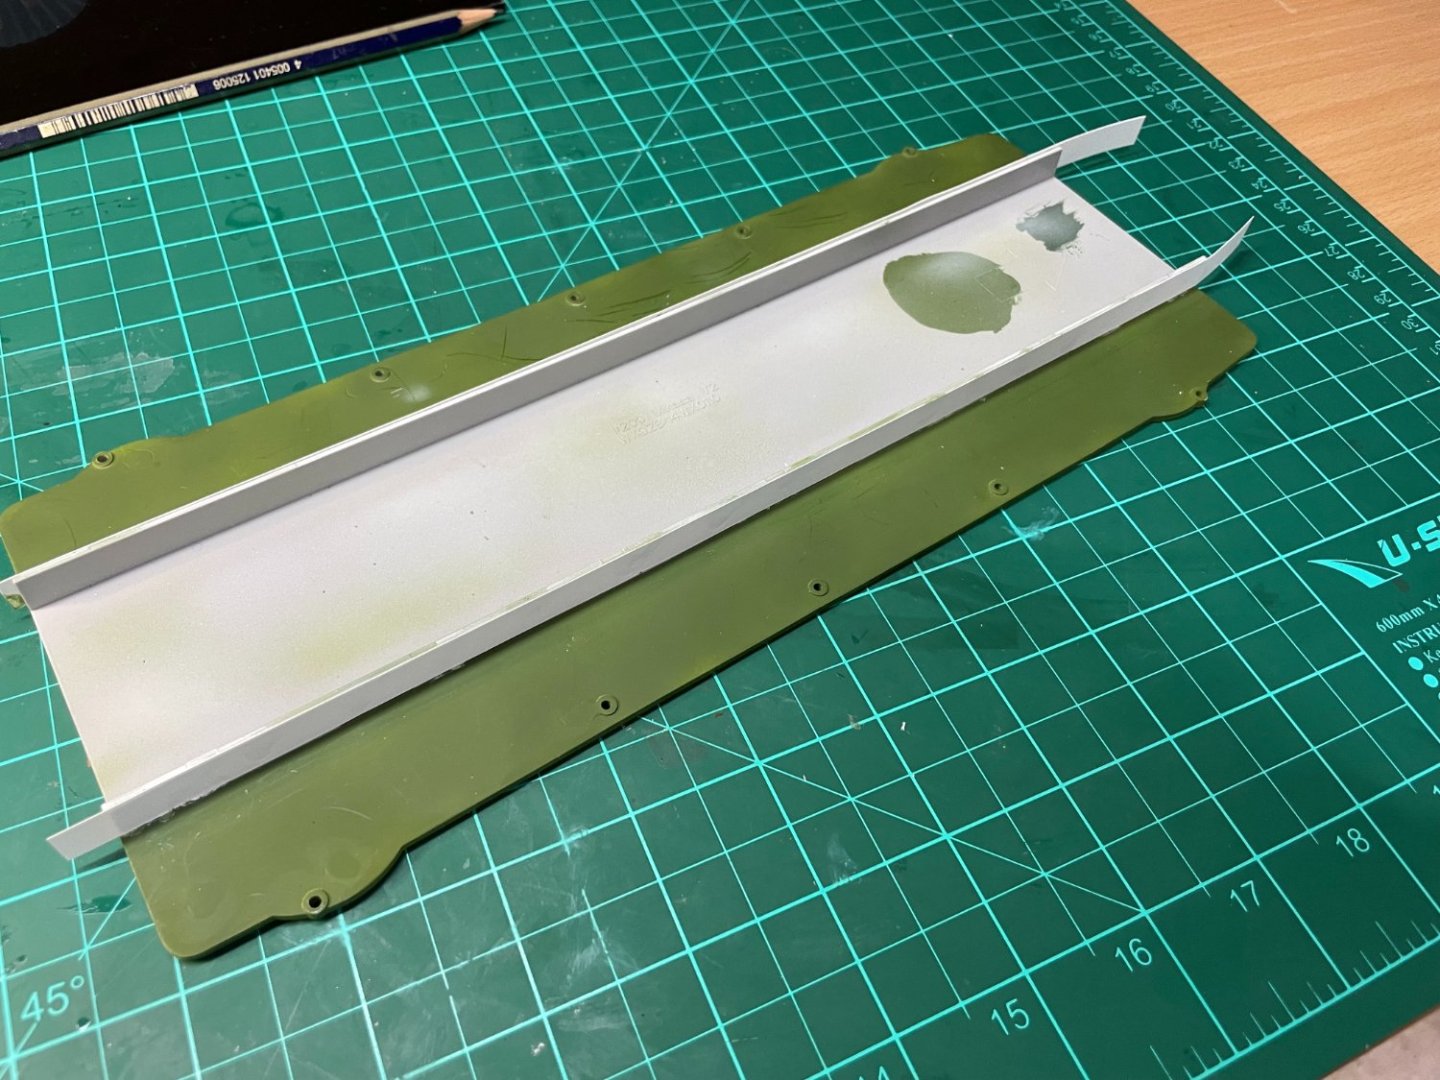
Propeller Shafts
Propeller shafts assembled and cleaned up - the fit was terrible and needed a lot of fill and sand - I then primed with Mr Surface 1500 black to check for inconsistencies. I will nopt glue to hull unbtil I am 100% happy with hull finishes.


Lower Deck
Lower deck prepared and painted - this is probably a total waste of time and little care and attention was taken as you can see from the finishes.
Anyway you would need some form of endoscope to see it on the finished model.
As always I struggled with white paint application for the walls and in the end covered in white styrene sheet. The green colour of the floor is a weak attempt to match the 'historical' photographs with the greens and yellows I had on my shelf which were mixed 50/50 and blown through airbrush.
6 Inch Guns (Casemates)
The original prime of the guns turned out be a disaster probably due to handling of the guns before drying and or laying on the Primer R too thick with a brush. I stripped back the guns and re-primed the barrels with a 50/50 mix of Mr Primer R /Mr CLT blown through airbrush and paid careful attention to its drying state - hopefully this works out better.

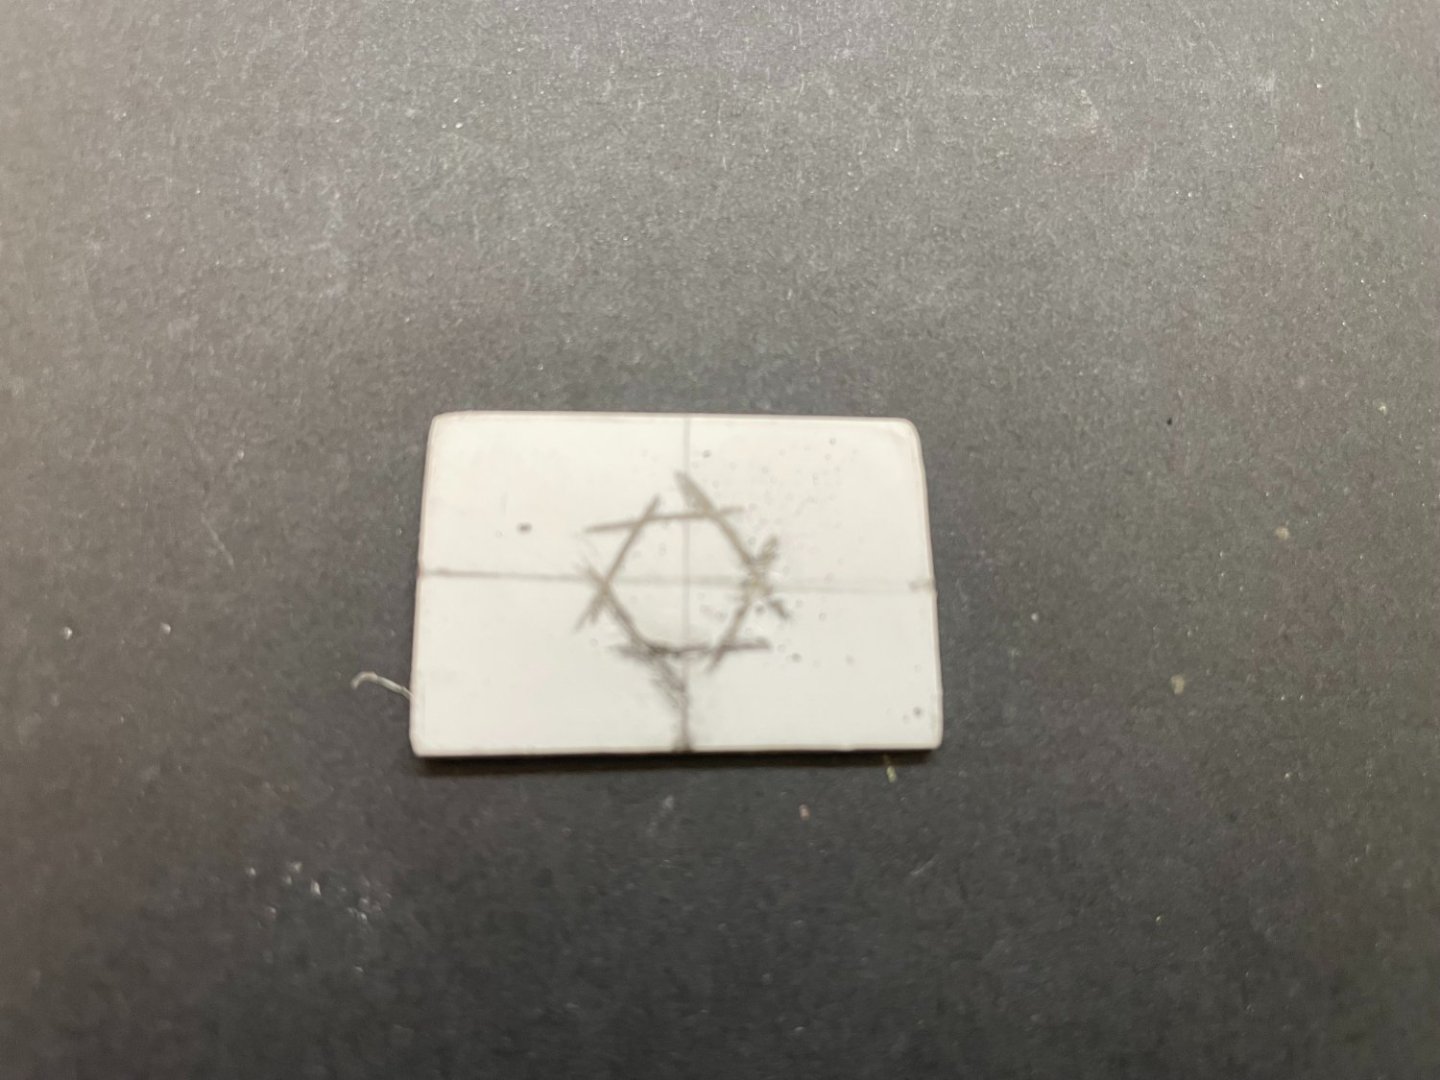
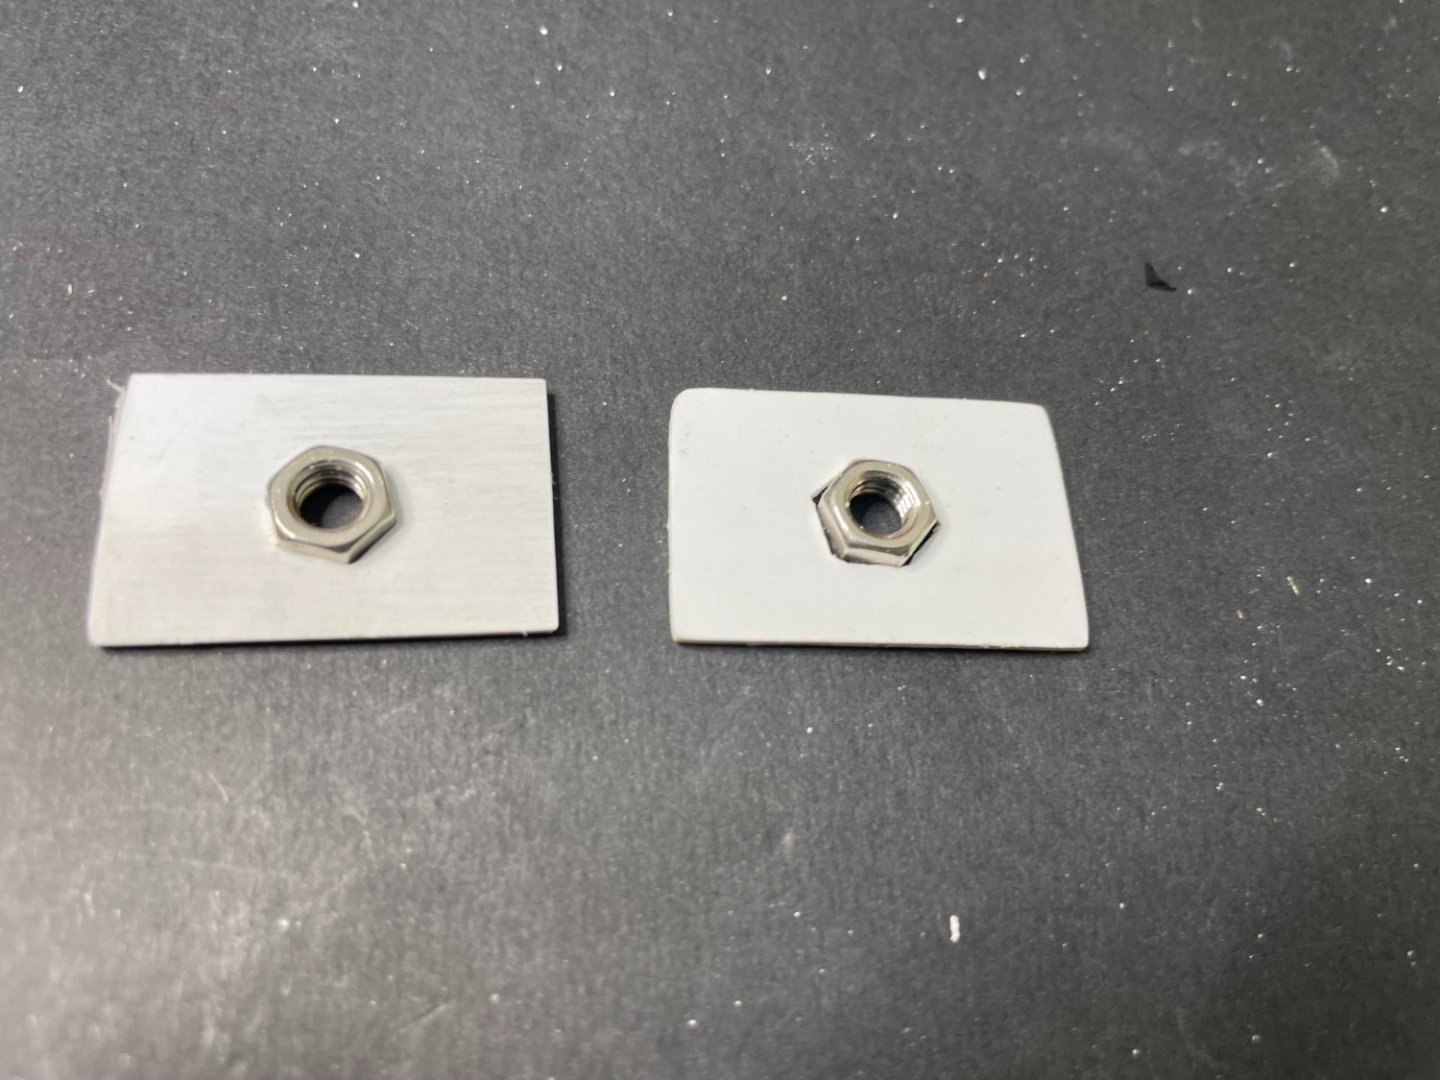
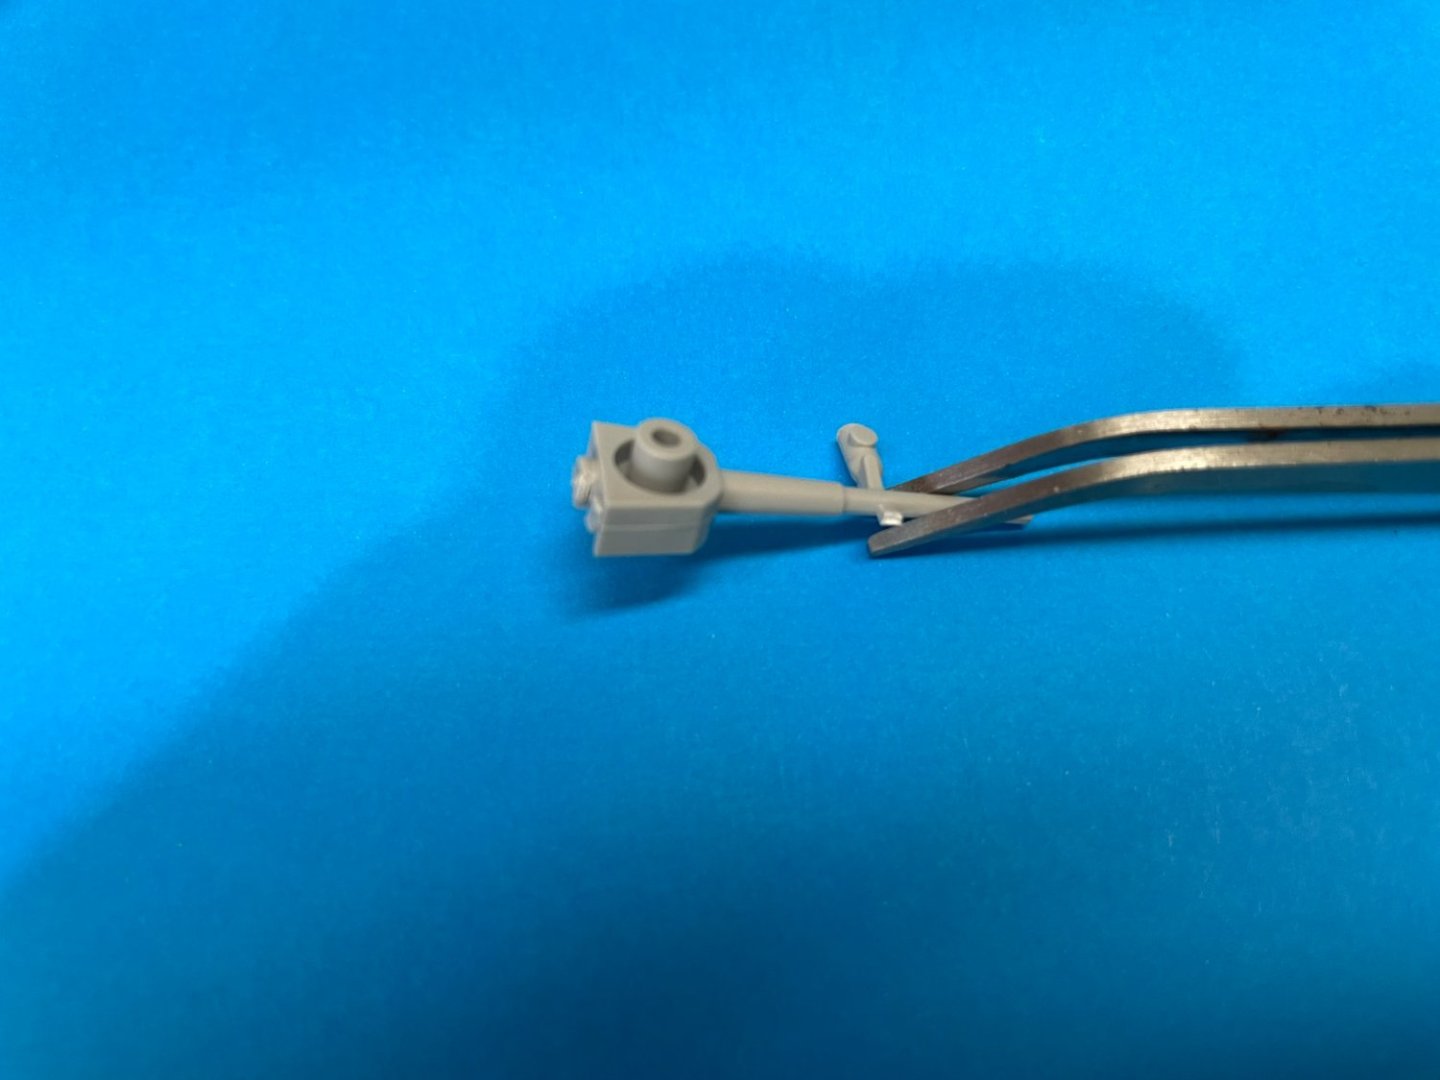
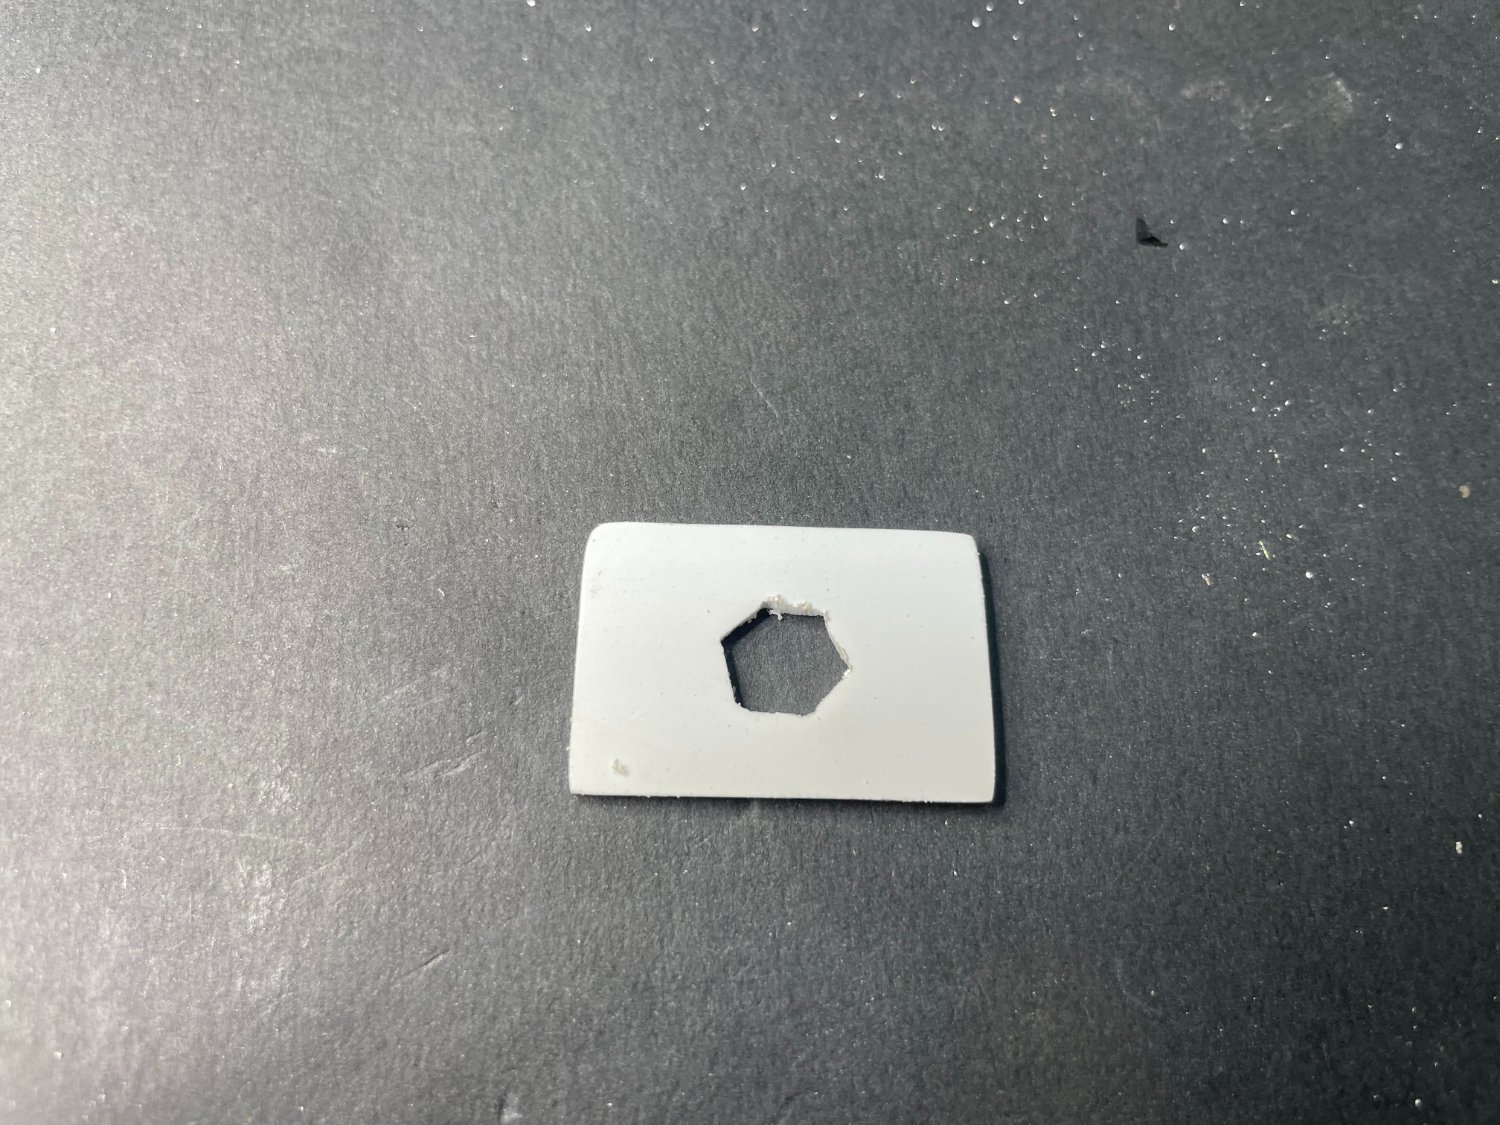
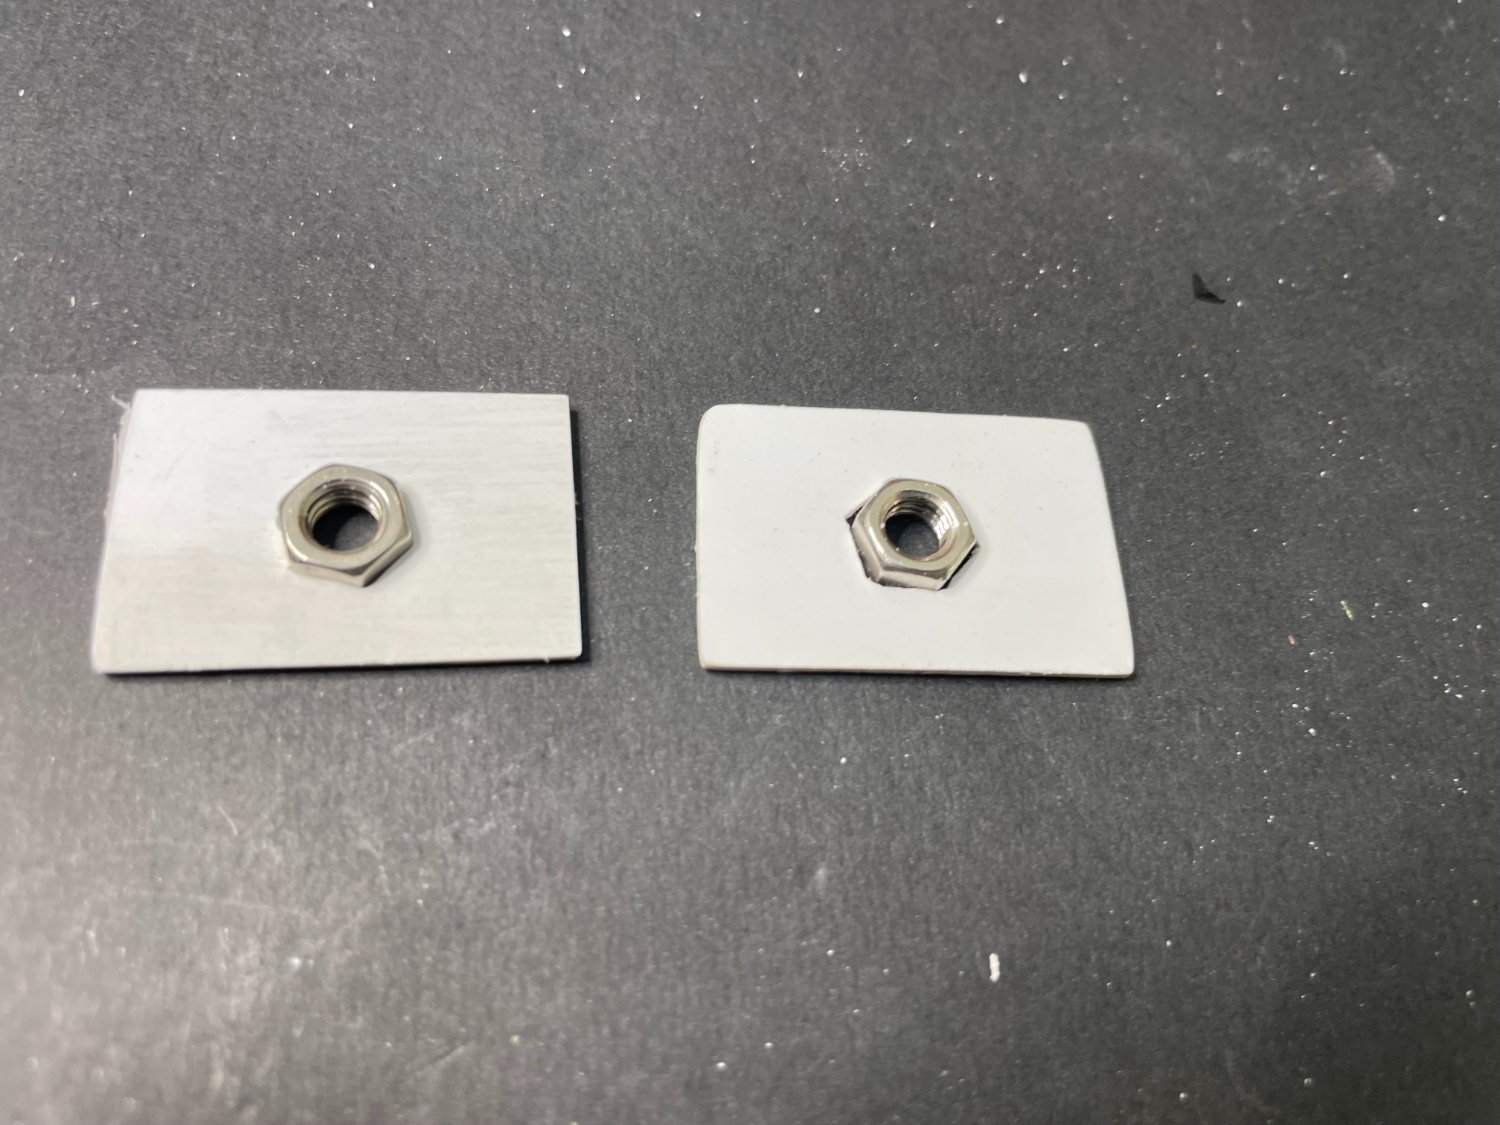
Pedestals
Prepared nuts for pedestal bases based on a idea given to me by Slog - mine consist of 1.5 mm card (as opposed to Slogs 2 mm) x 20 30 mm with opening cut out to the shape of the nut - the nut was then epoxied into the card - these will be glued into the internal based of the hull

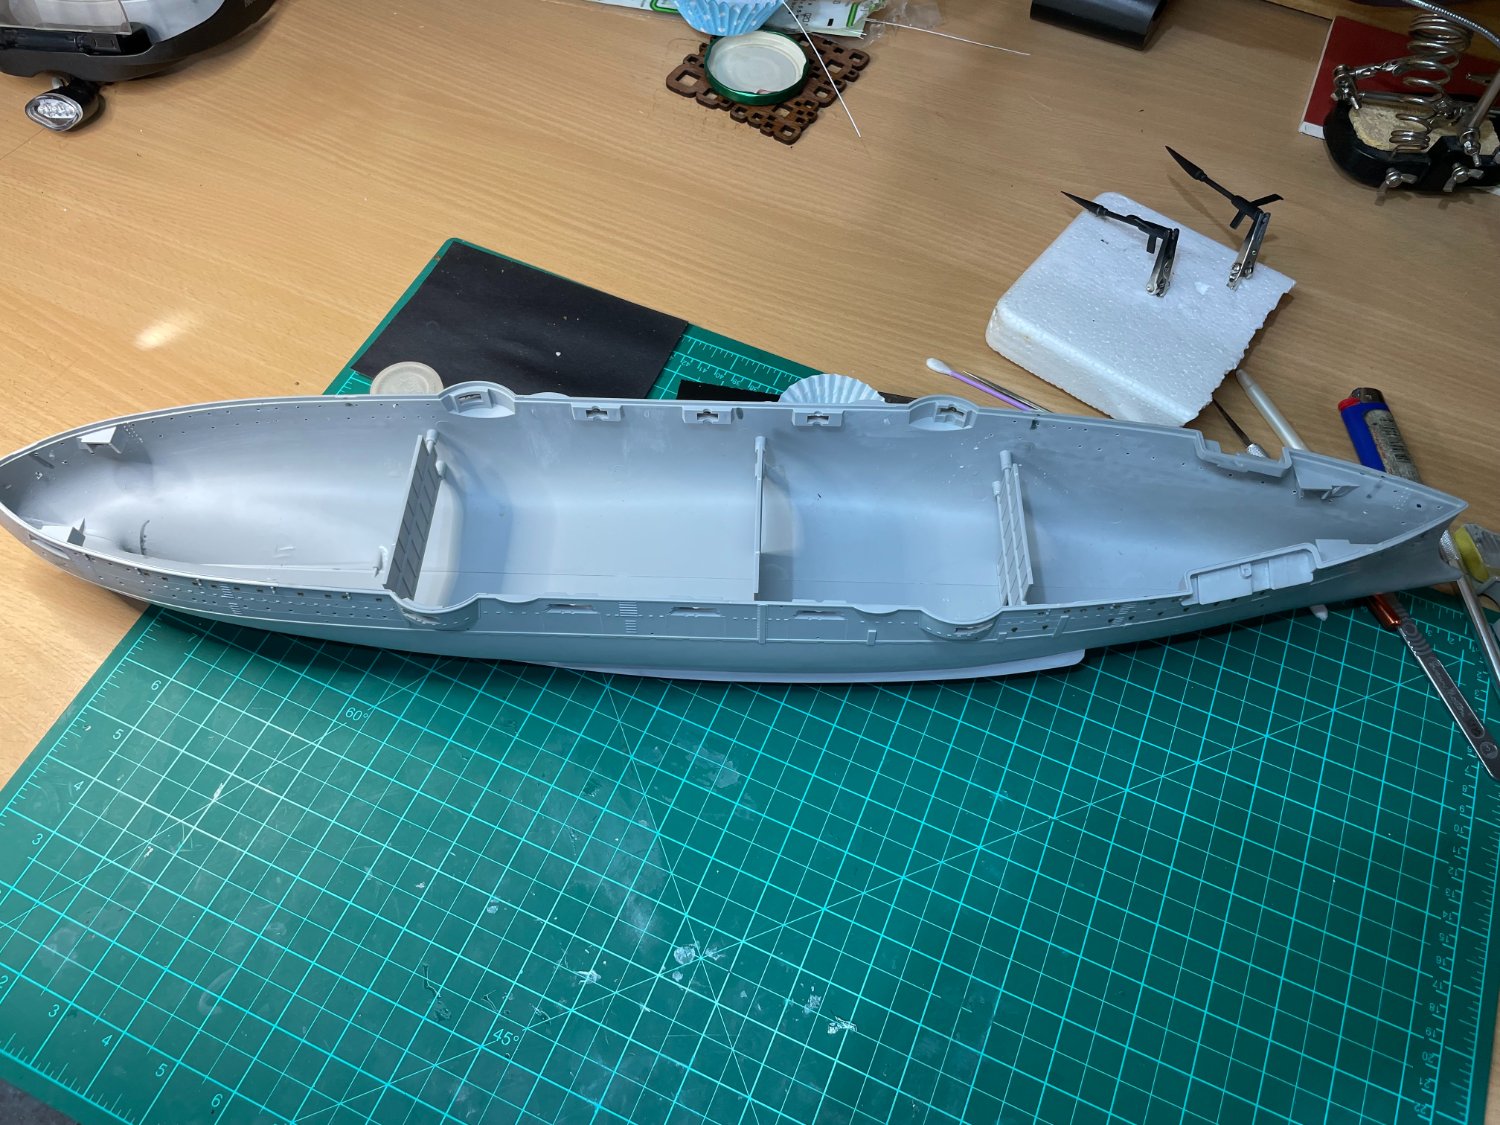
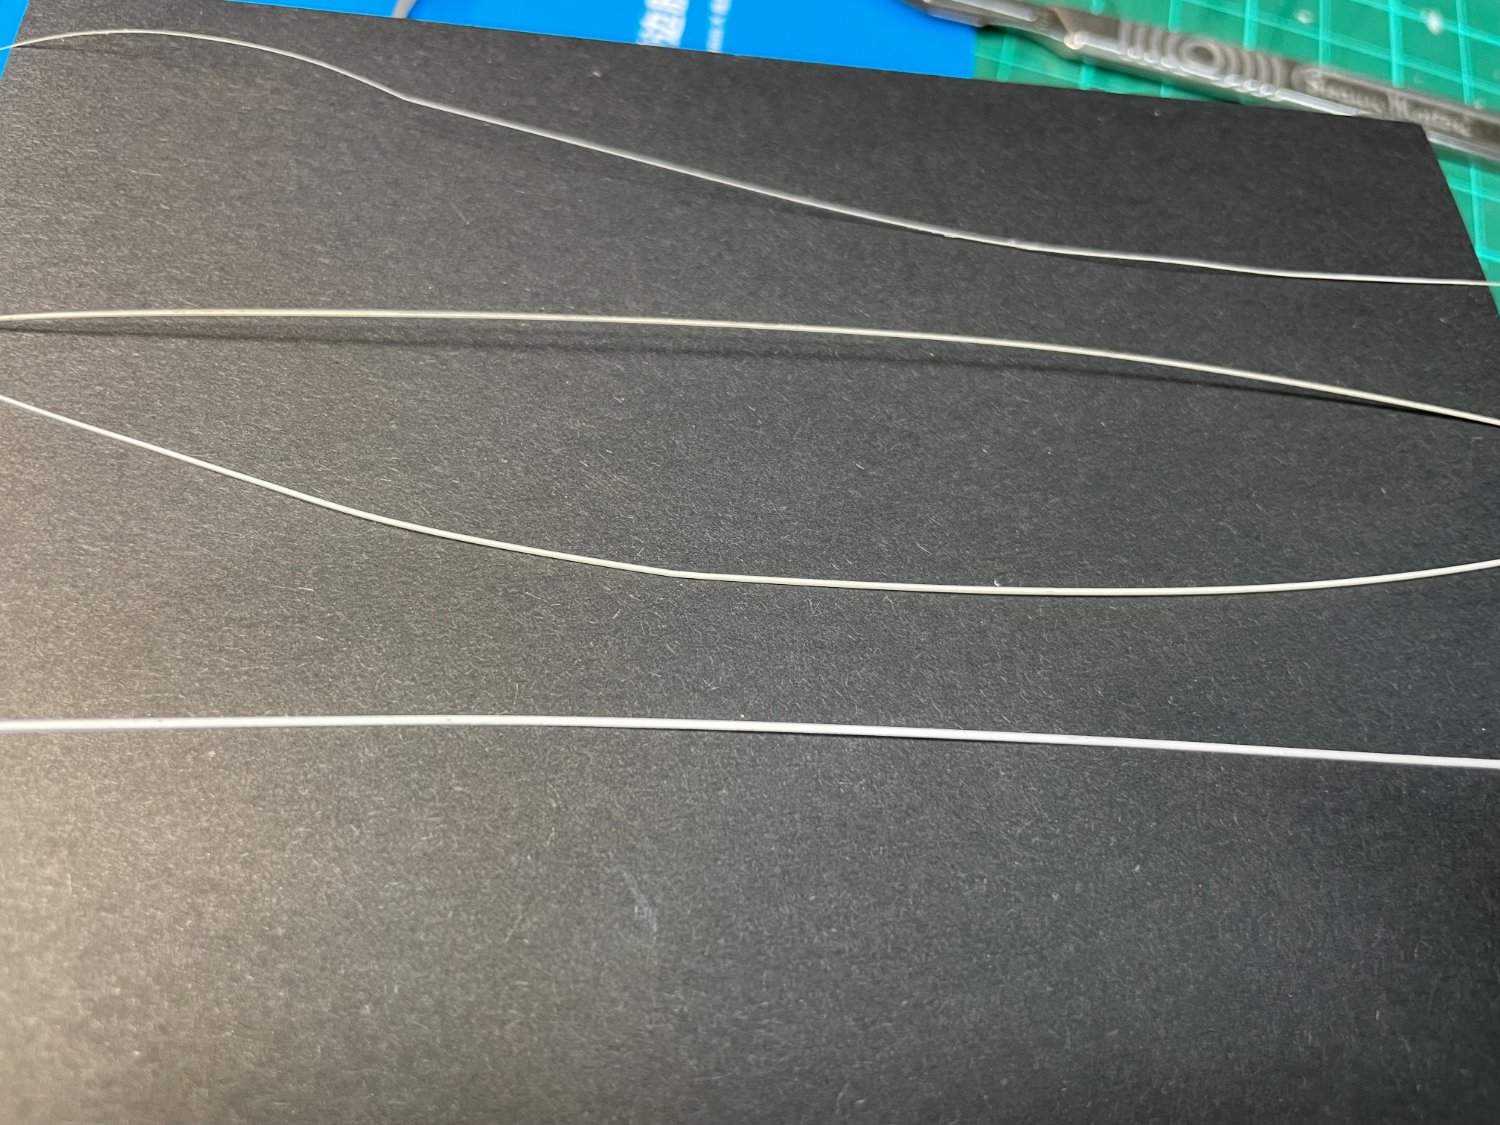
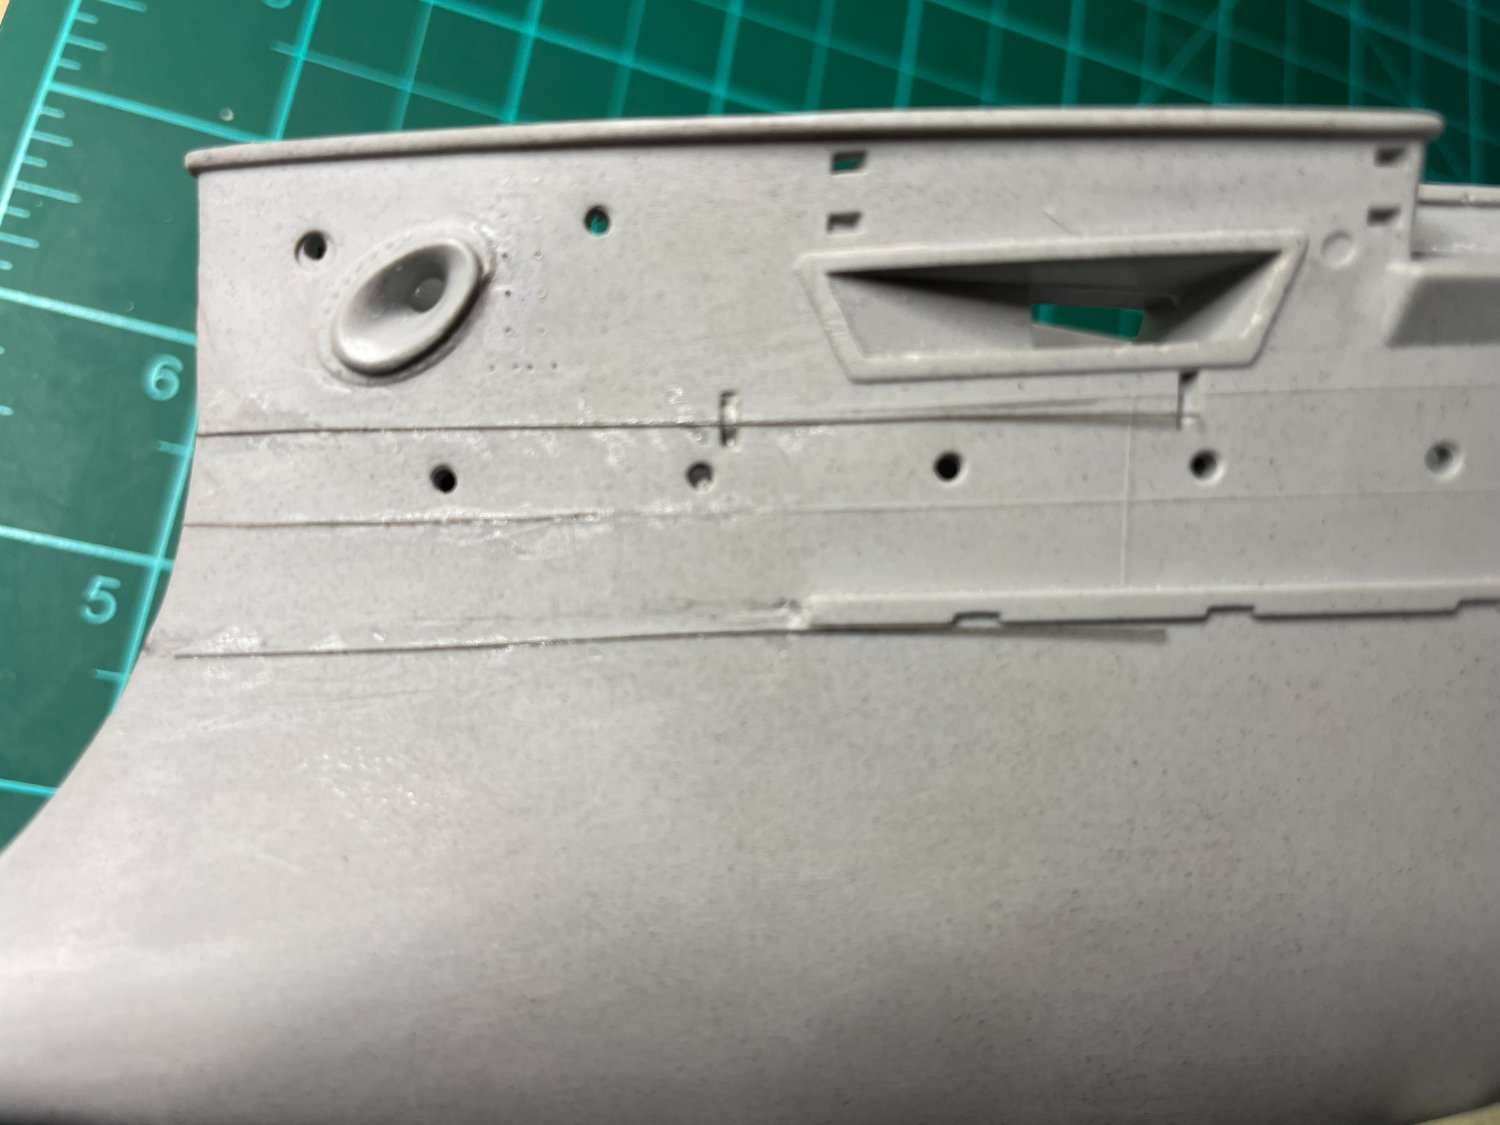
Reinstate Seams
Commenced reinstatement of seam lines to various parts of upper hull which were removed during sanding operations - stretched sprue was used for the seams once correct thickness was manufactured
Its a case of trial and error any sprue attached which I am not happy with can be scratched off - once I am happy with alignment I will lightly sand to blend in.


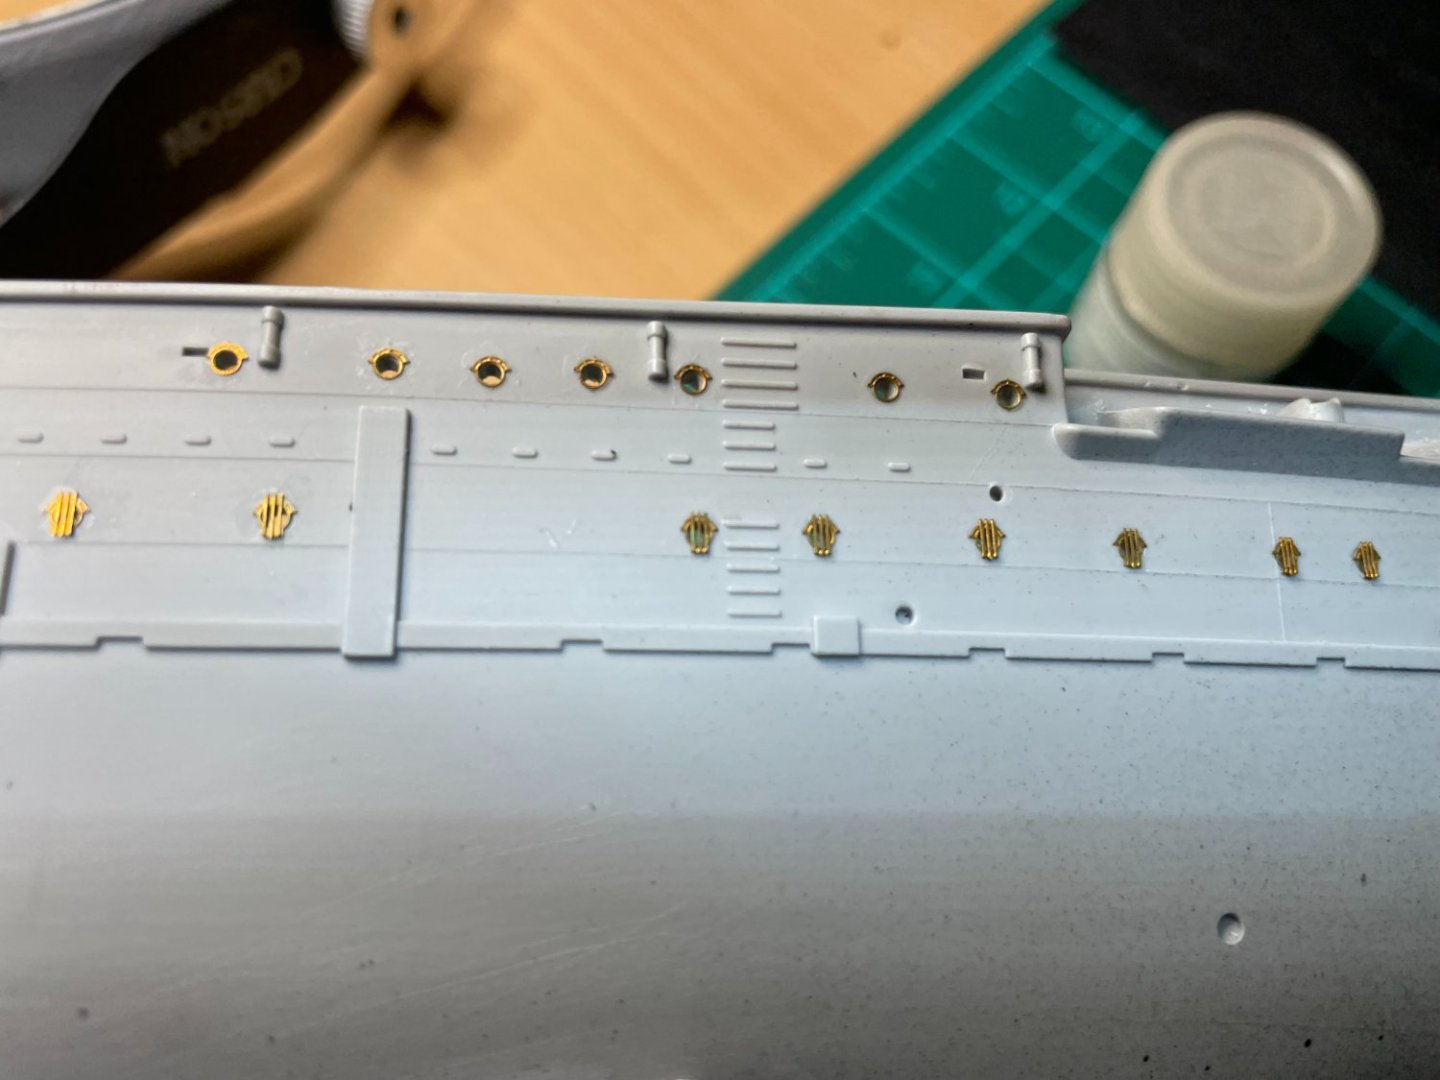
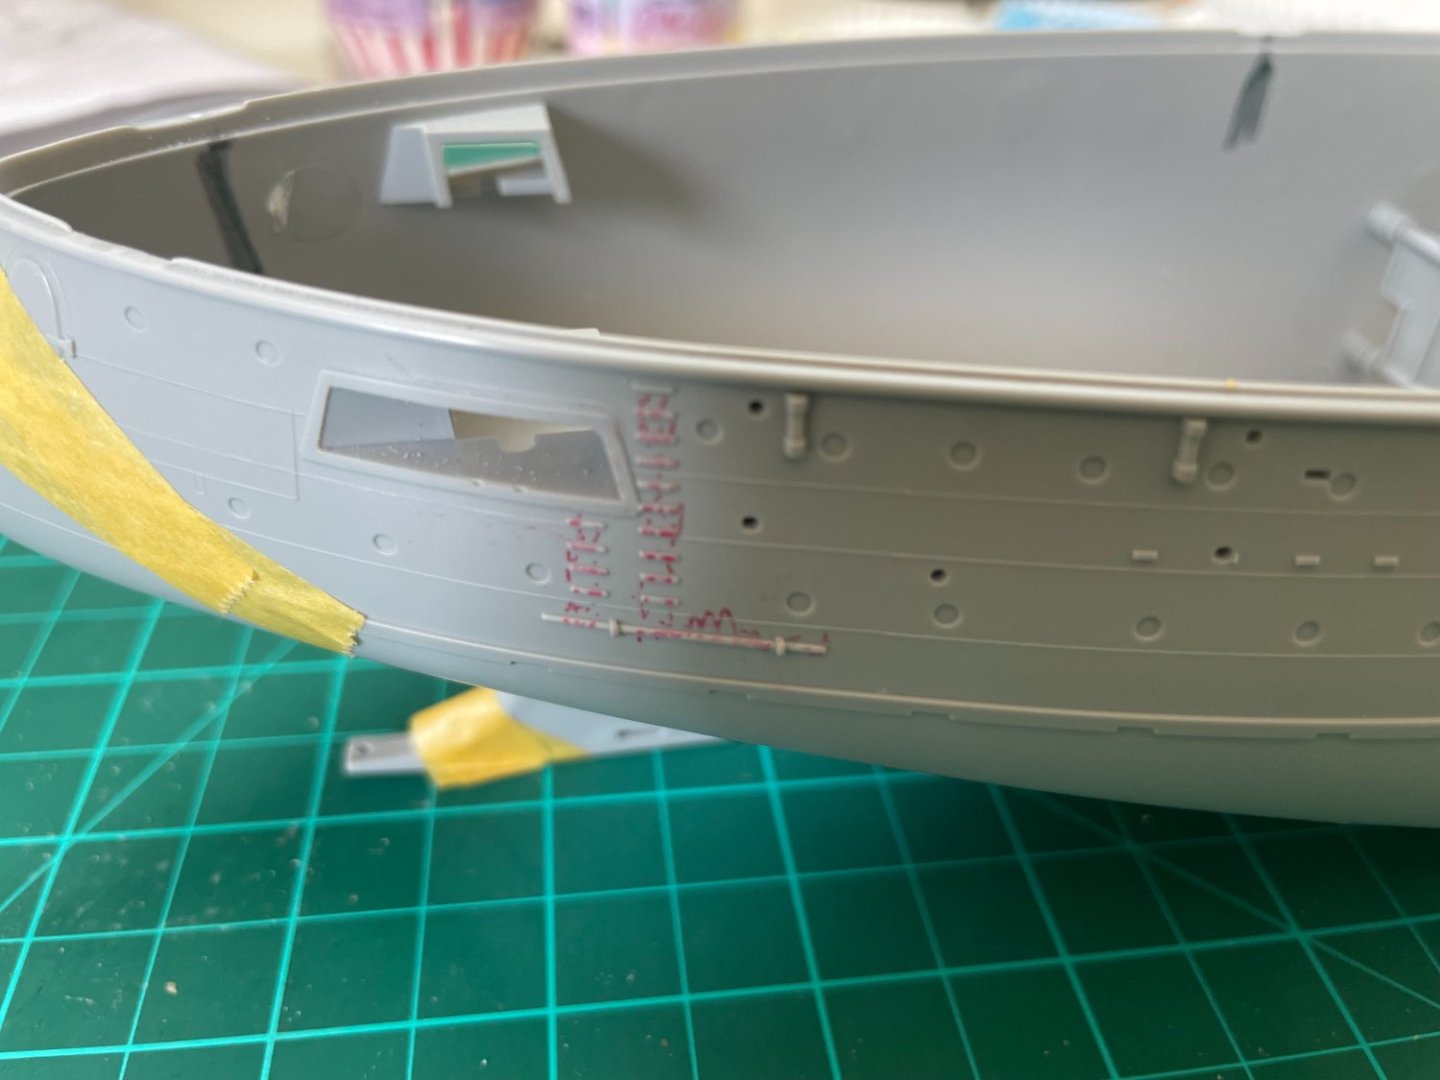
Portholes
Commenced working on the hull portholes - there are 116 portholes to be installed 48 standard and 68 barred portholes. The barred portholes are bent into shape which is a simple operation.
I selected a clear coat to affix the portholes which will be sealed in with an initial light prime (and later the final paint layers). Pontos make no reference to hull portholes in their instructions however they have supplied 320 portholes for the kit. I will remove any overspill of the clear coat by scratching with a tooth pick being careful not to dislodge the porthole.
If I had my time again I may have tried the relieving the portholes as per Slog and Jeff59 they do look much better however I never really had the confidence to do it.
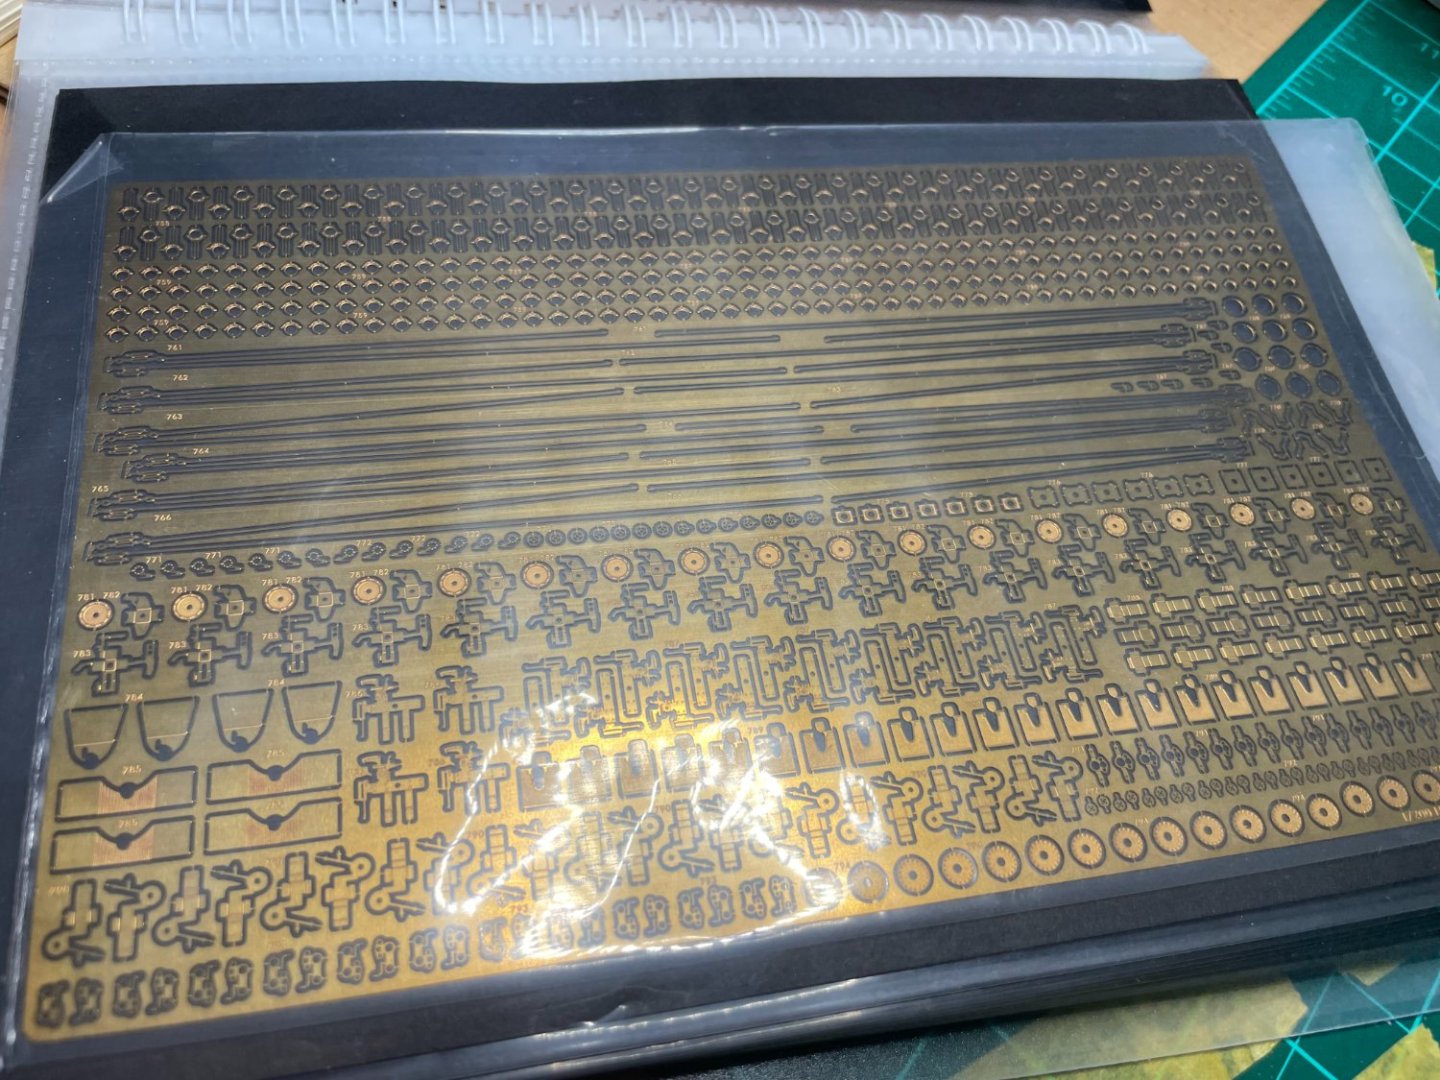
Note all my PE Sprues are stored in a A5 booklet with plastic pockets (recommend by Slog) which I then backed with black card which makes the Srues 'pop'.

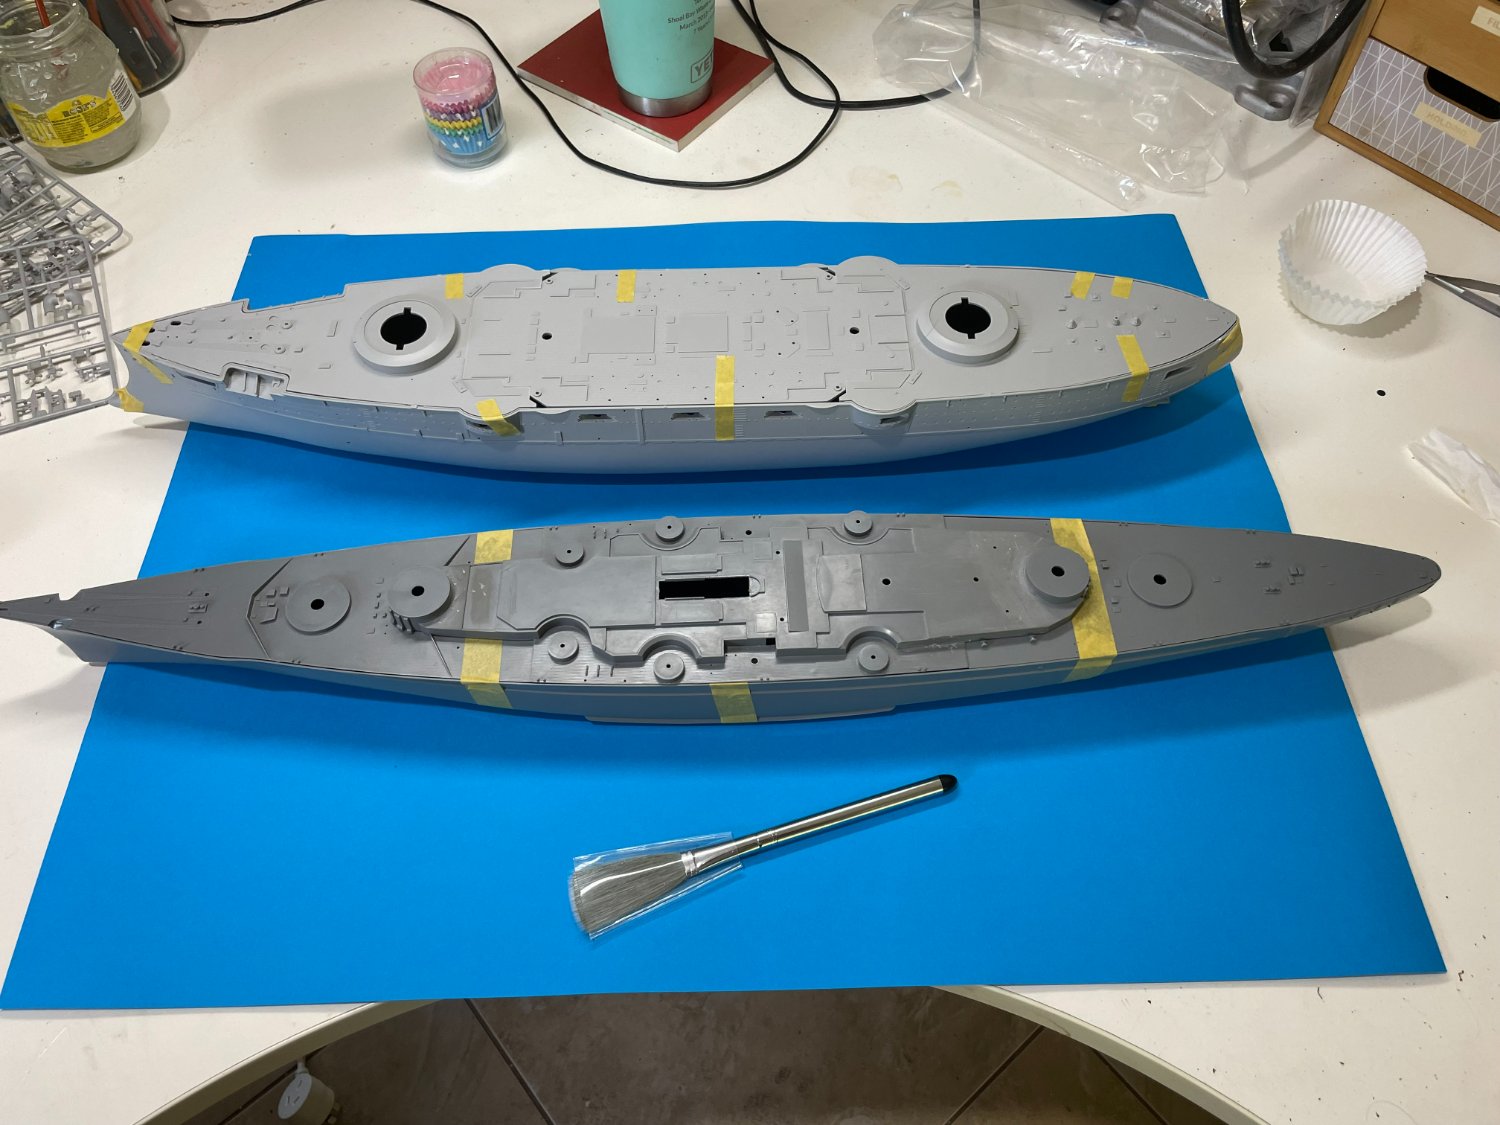
Richmond
-
If I had my time again I would pick a POB ship rather than POF
I believe it would be much easier to hone planking skills on POB then on a POF.
But that's just me.
- HardeeHarHar, mtaylor and Keith Black
-
3
-
Here is the boxart
https://www.scalemates.com/kits/shipyard-nr10-hms-bellona-1761--1391274
Its still on sale in some places - if you Google search
- Canute, GrandpaPhil, mtaylor and 1 other
-
4
-
Thanks Slog - didn't think off that - I would still burn off, but now only once I have removed the old glue, in case the smooth surface is key to the glue's longevity
Richmond
- mtaylor, Captain Slog and Canute
-
3
-
Hi Ken - yes that's all I do - It's a tip I picked up on Youtube. When it gets too much I light the candle to 'burn' it off (whilst leaving the room!)
For application, I used a cocktail stick in this instance, however I am more more inclined to use a looper when I need more accuracy or when using extra thin.
Richmond
- Canute, mtaylor and Captain Slog
-
3
-
Thanks Slog
Yes the turned brass is beautiful. Probably could have done a better job of getting the guns flush with the turret but I don't think its noticeable once they are placed
I brush painted the Primer-R - apparently it self levels. You are meant leave it a day to dry before you do the main prime. I may have handled a few when they were not set - however I can always sand back and start again. Anyway jury still out for now, I'll keep you posted.
Yes I use the tea-candle for the CA - I think it was sitting in there for more than hour and was still usable.
Storing the CA in the freezer has been a game changer for me. Its been in there for over year now. I will probably only ever buy scale model extra thin and just get the thicker CA's from Bunnings.
To me epoxy seems over the top for these smaller lighter guns but time will tell
Richmond
- mtaylor, Canute and Captain Slog
-
3
-
Week 2 (18/12/22) - 12 Hours (Total Build Time 16 Hours)
Portholes
All portholes were drilled out with a 1.5 mm drill and Tamiya pinvise. I note Slog will be relieving his portholes for realism and I did consider this and then put it in the too hard basket. Apologies for some reason MSW is doing strange things to the photos it put this one upside down (I will repair when I work out what is going on)
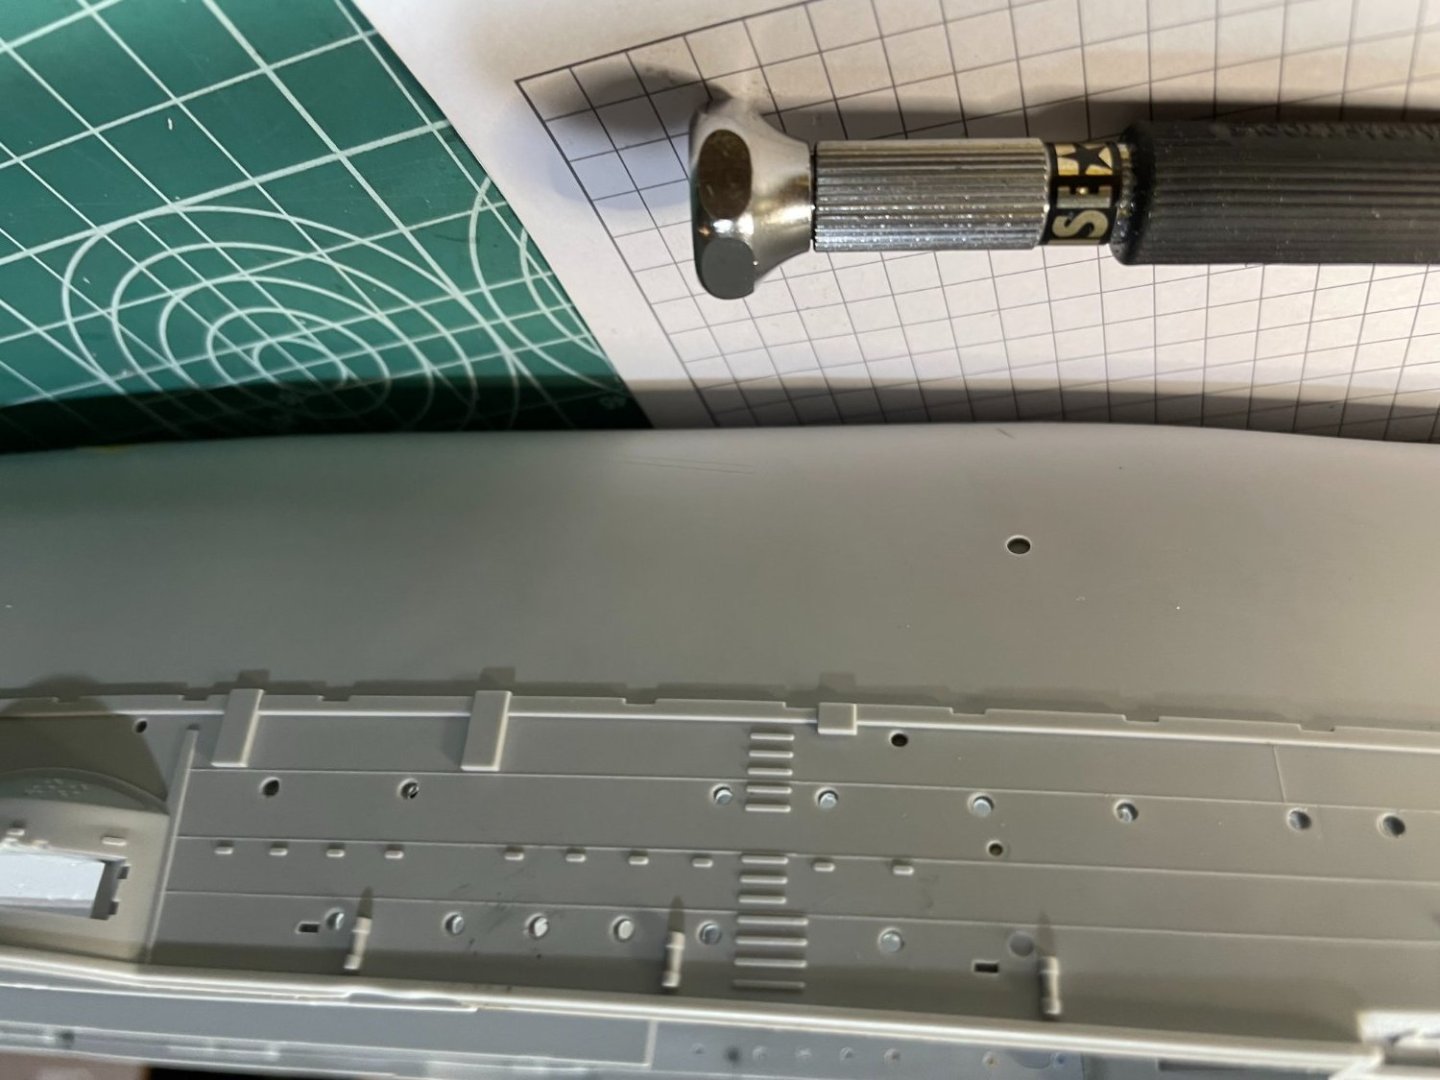
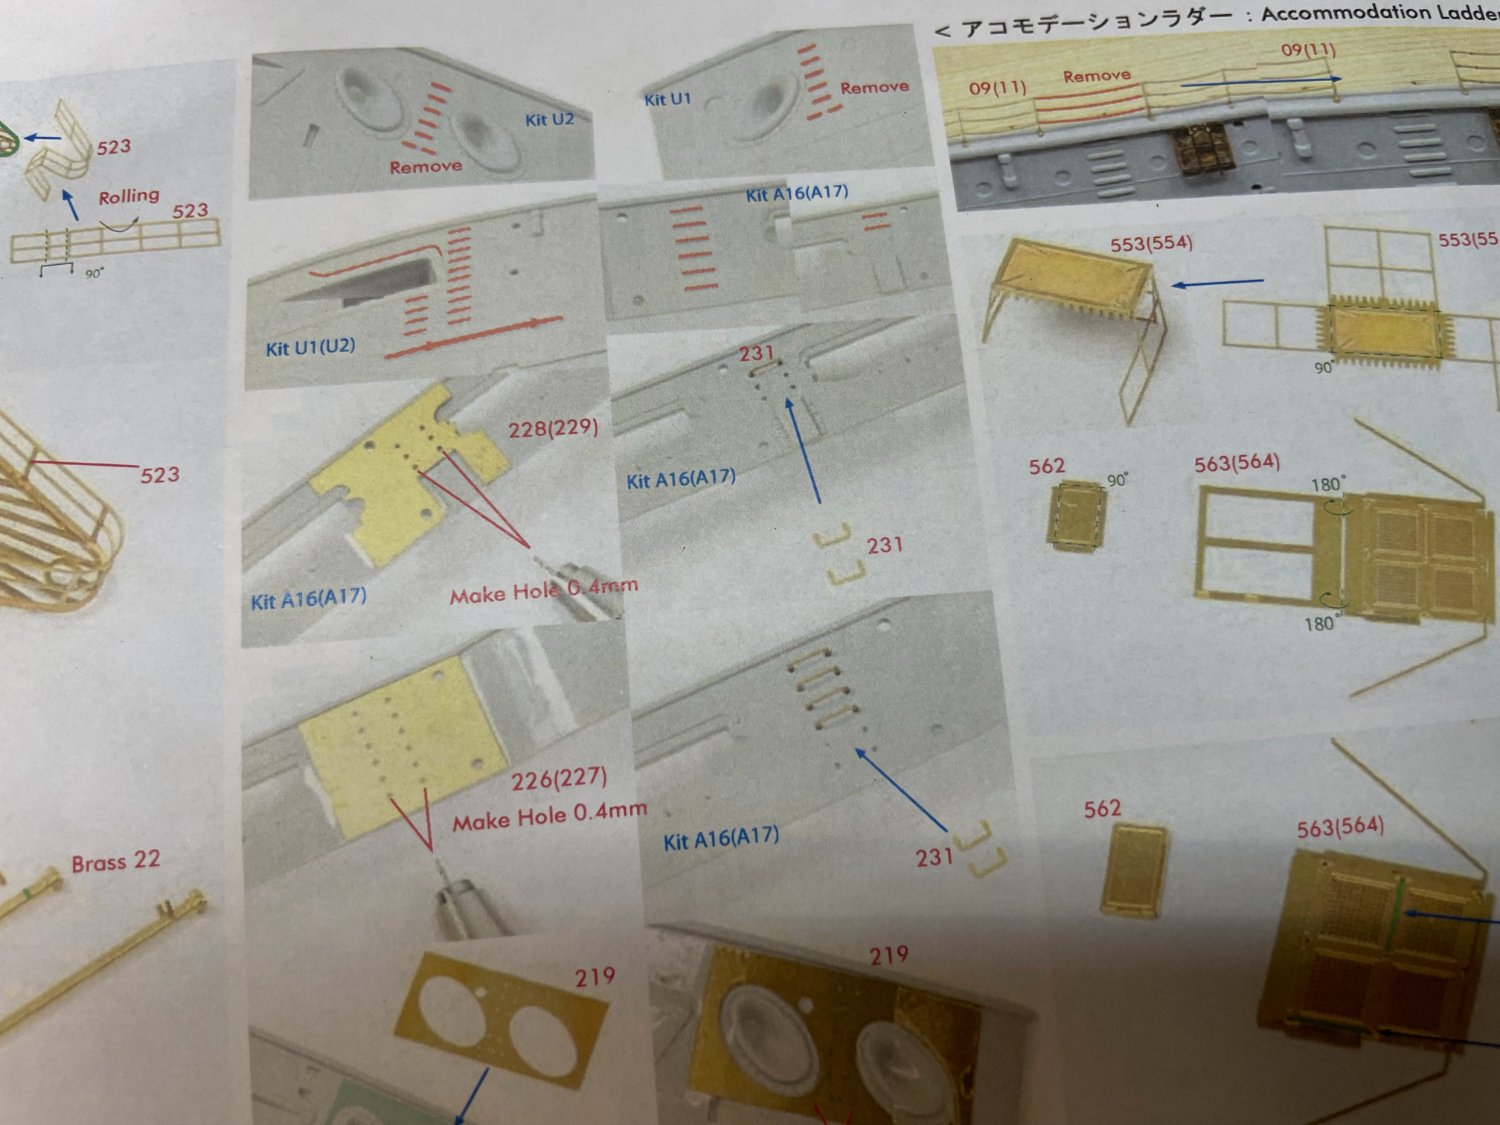
Ladder Steps/Step Irons (Pontos)
Step Irons are provided in the Pontos set, for some strange reason they only provide step irons for the bow and stern and miss the middle steps entirely. First Pontos require us to remove the existing detail and then affix some templates to align the holes.

First I first marked the removal areas with red pen
I first removed the detail with a sharp knife and the sanded down and filled any gouges with Mr Surfacer and the sanded again
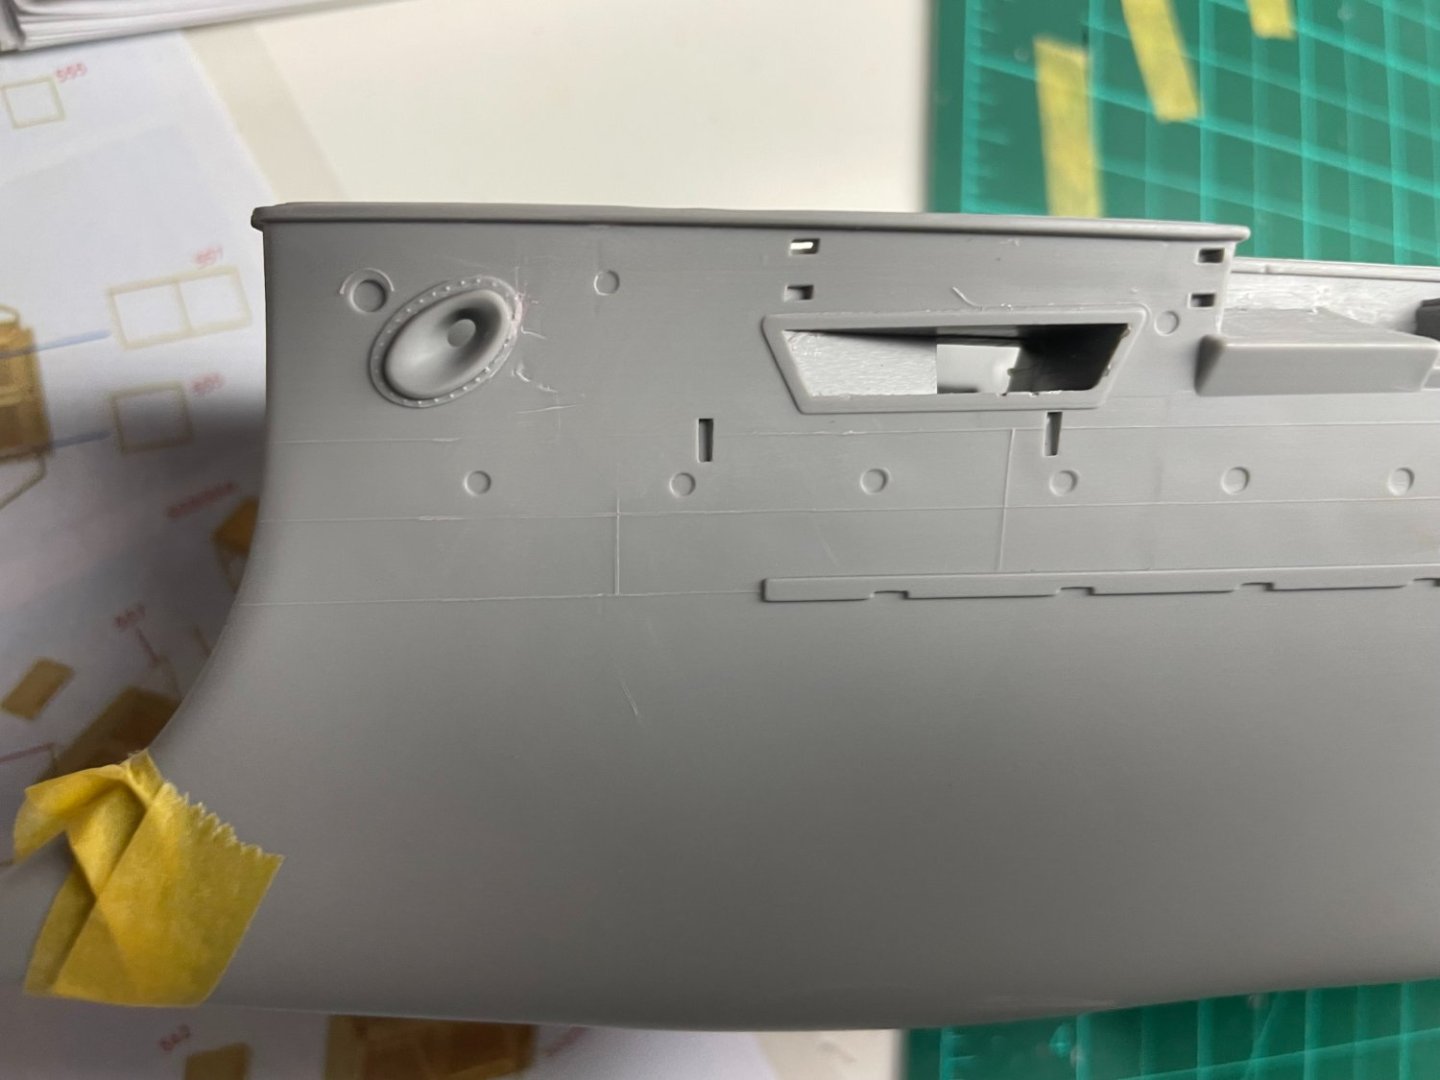
Next I affixed the templates with sellotape and drilled with a Tamiya pin vise and 0.4 drill bit.
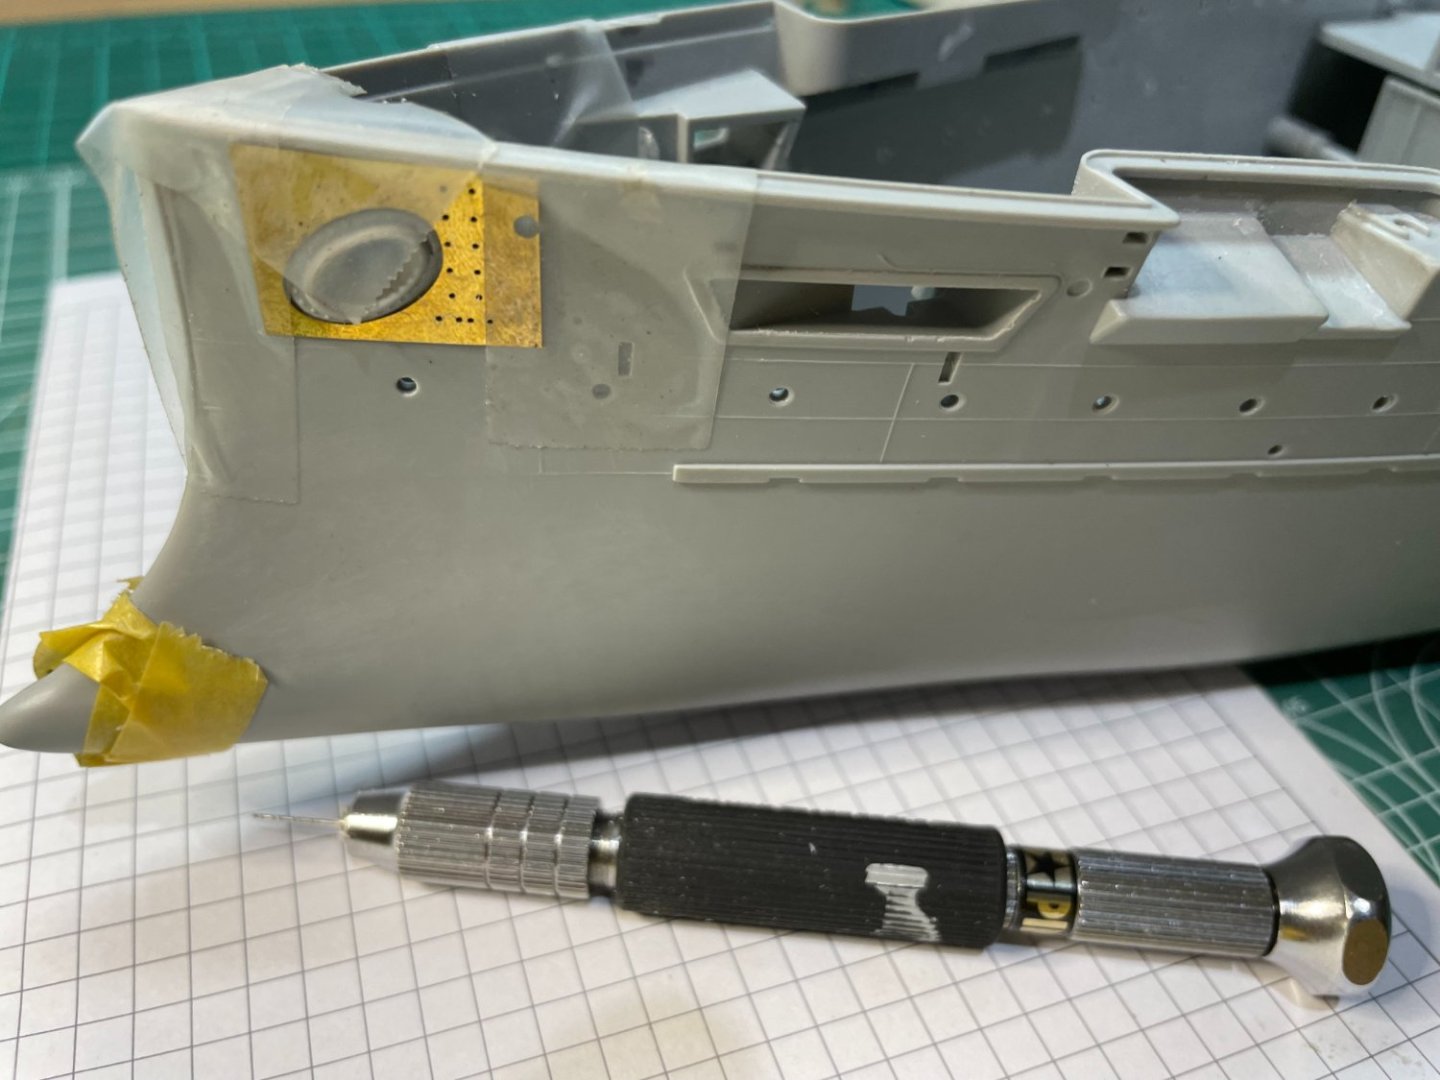
During this sanding operation I have removed seam lines which I will reinstate with styrene before I attach the step irons
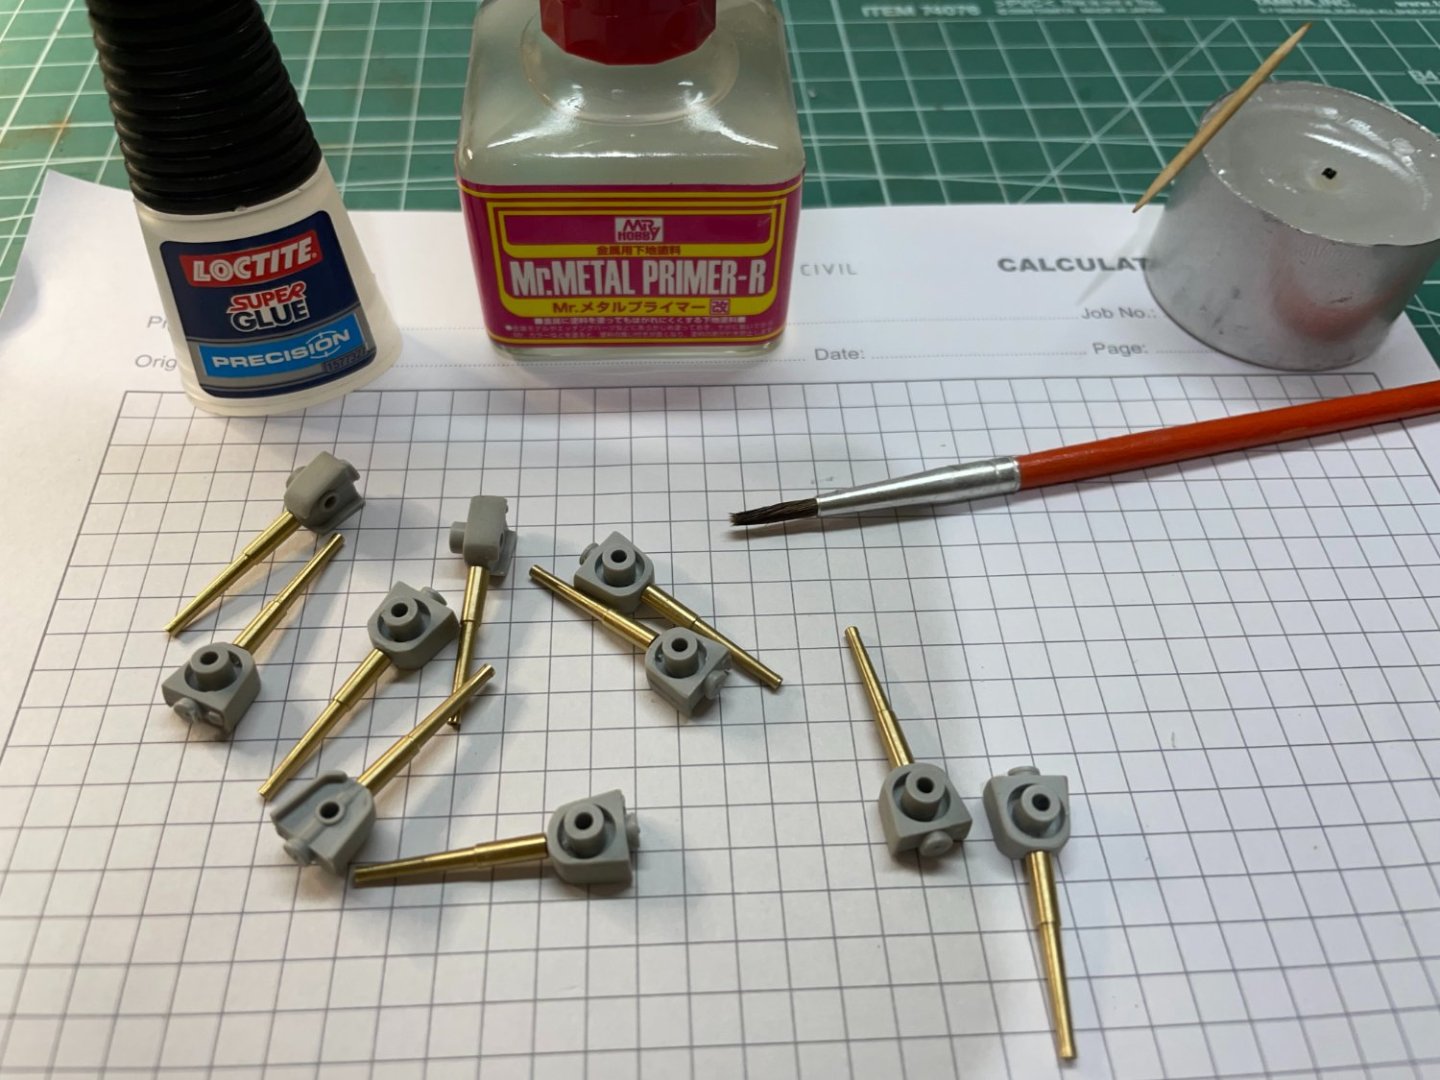
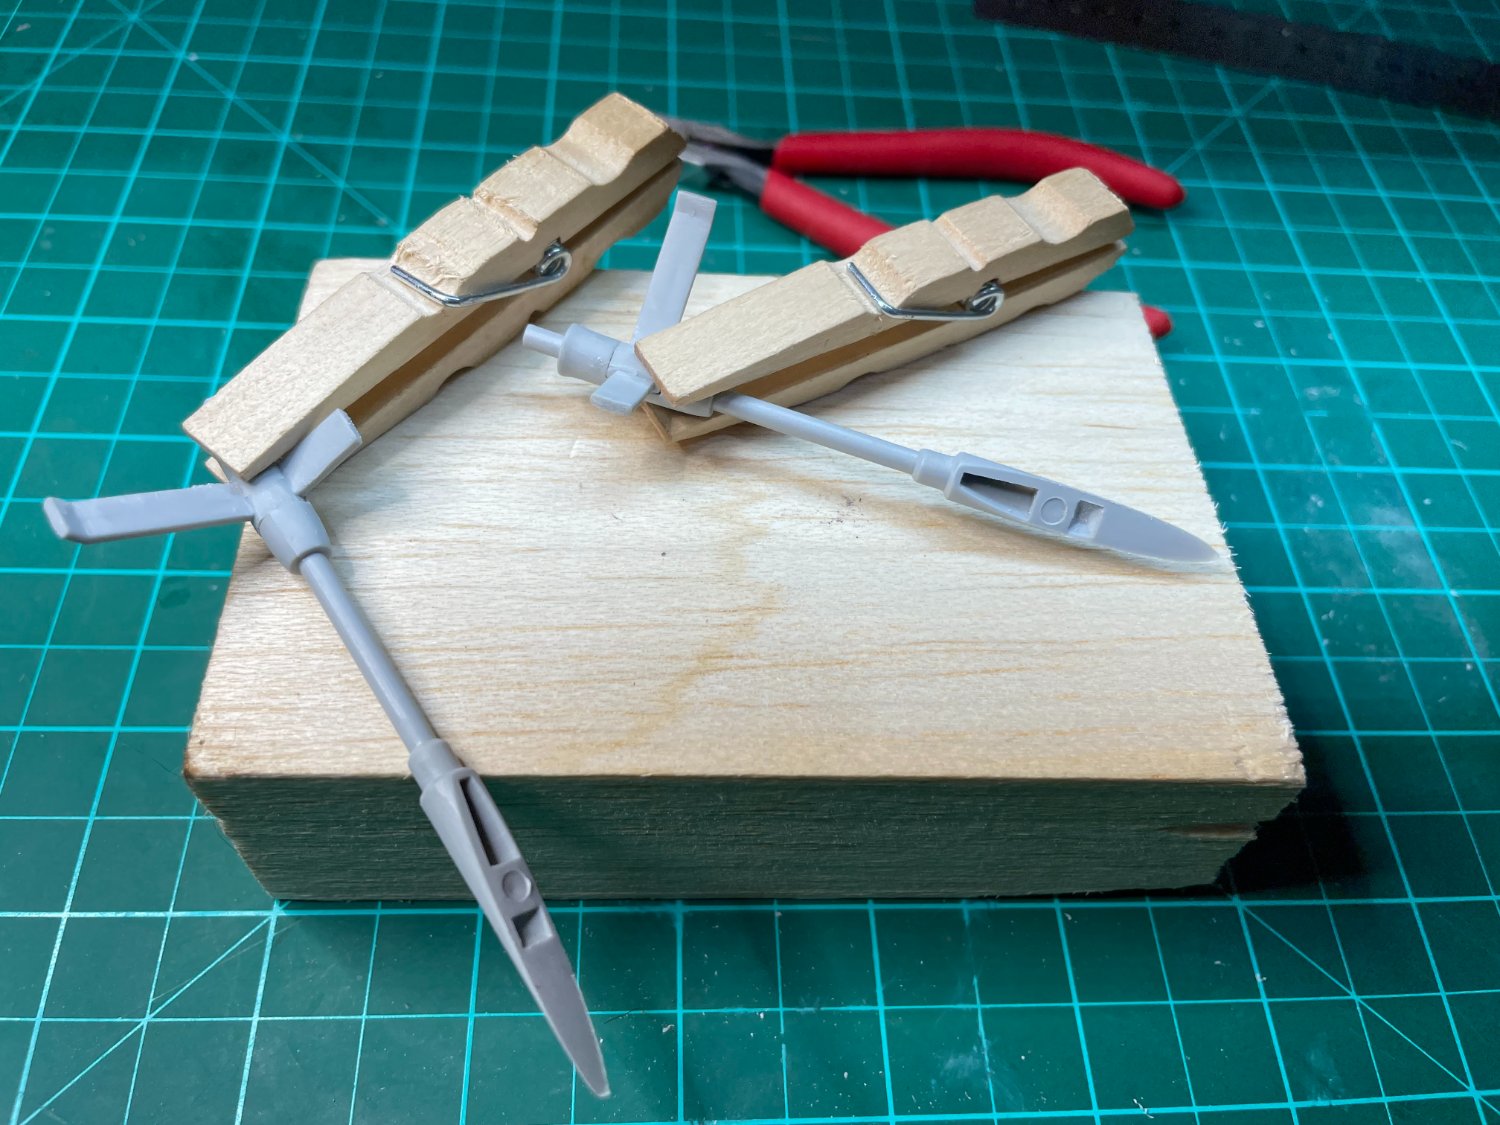
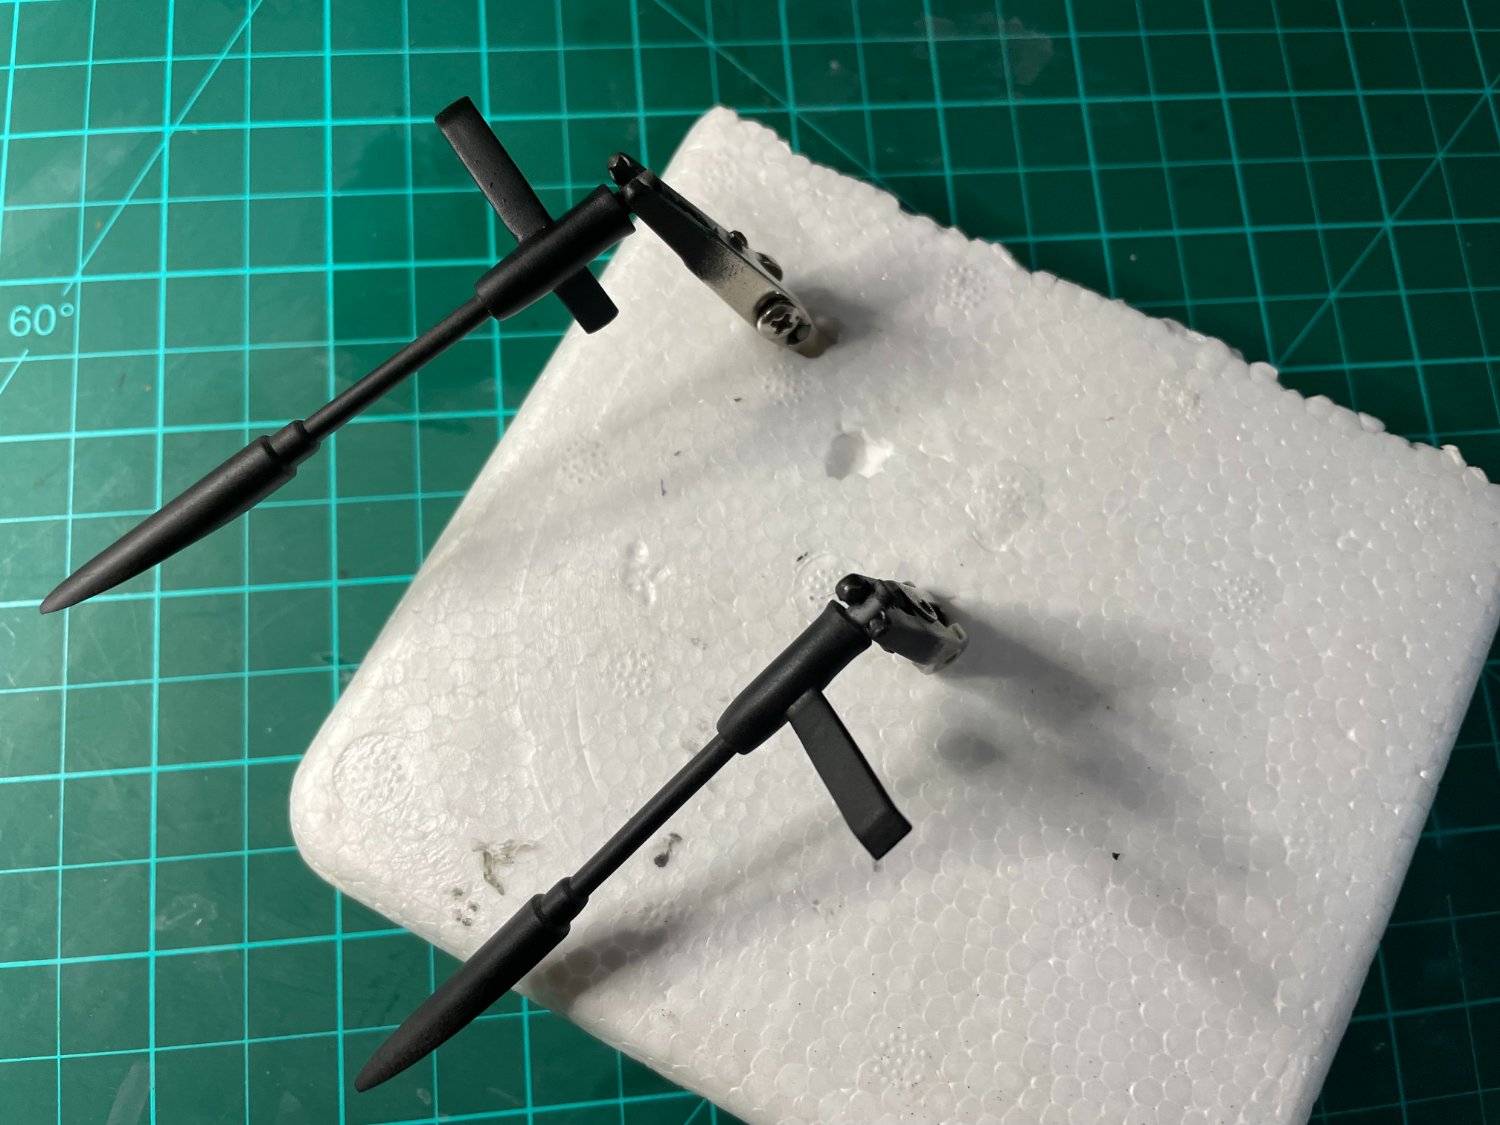
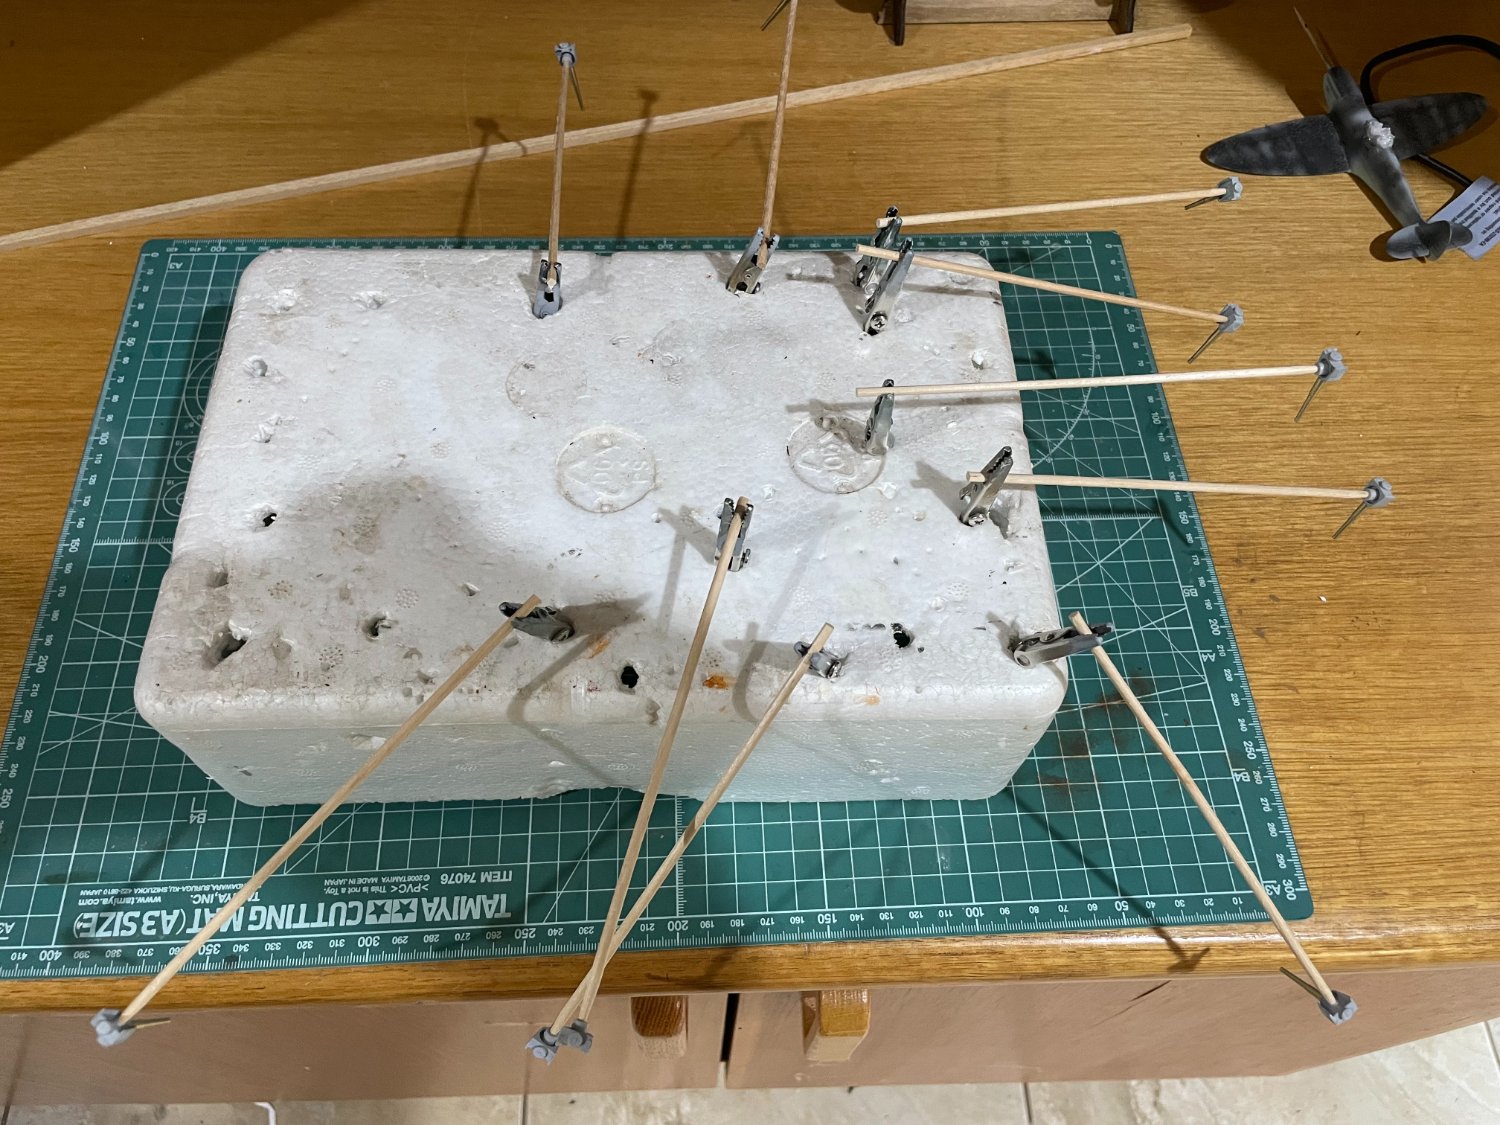
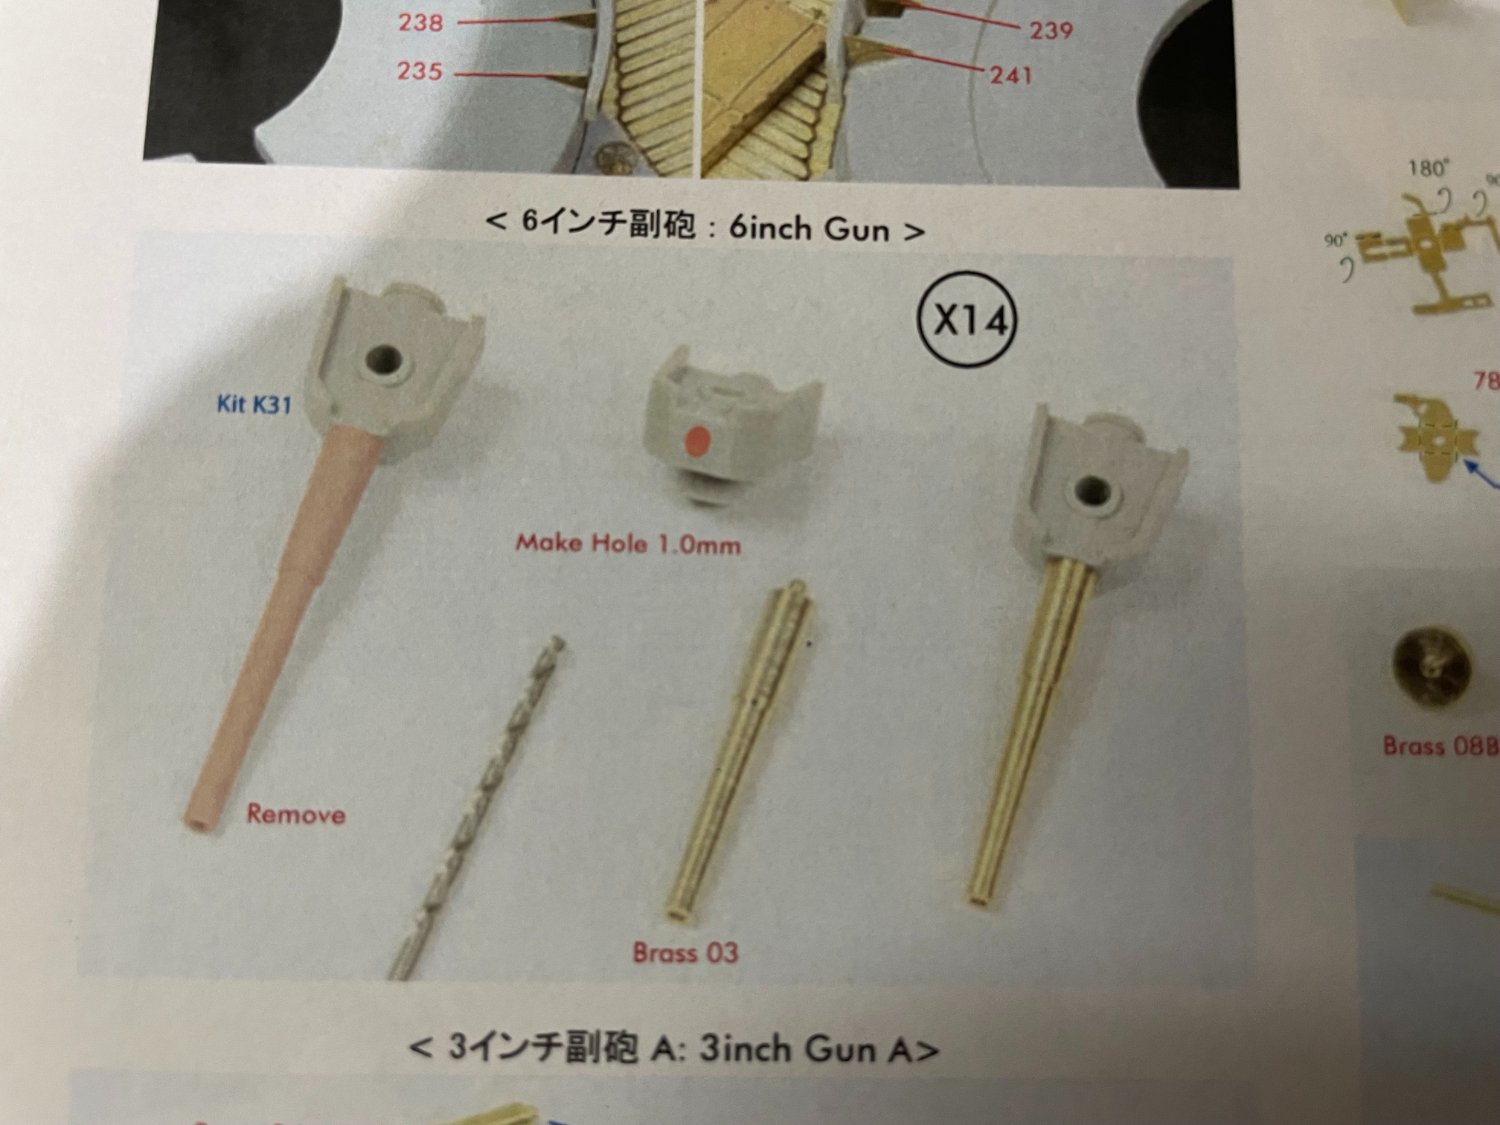
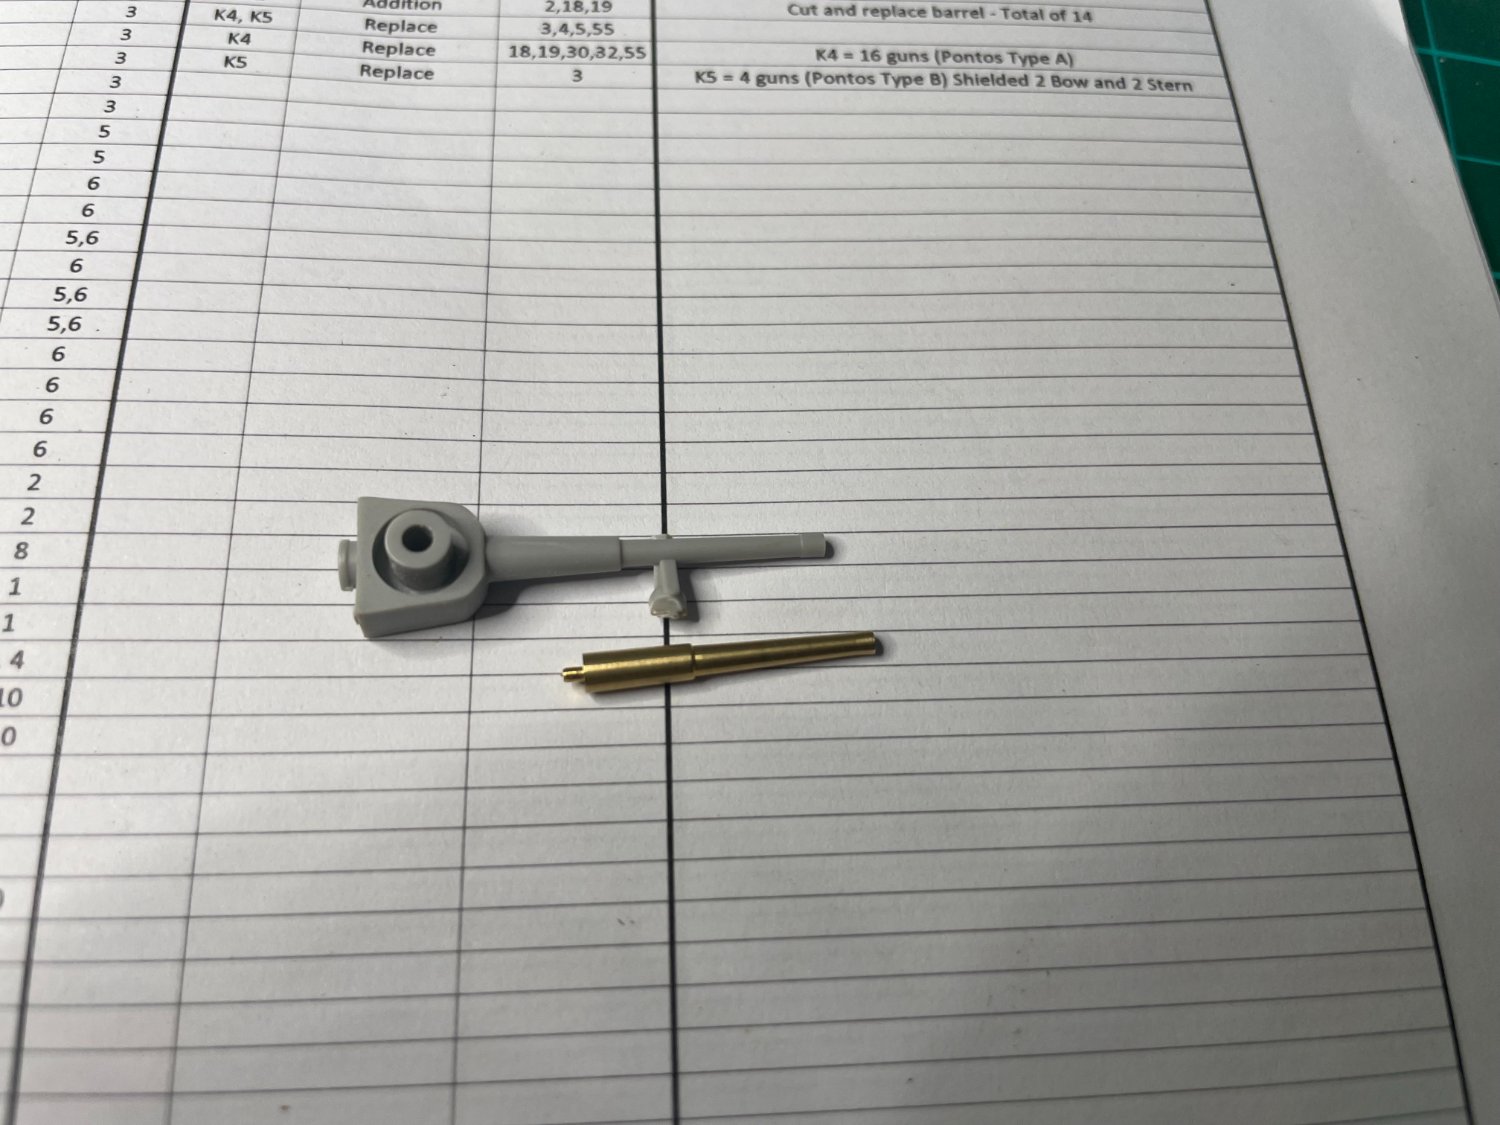
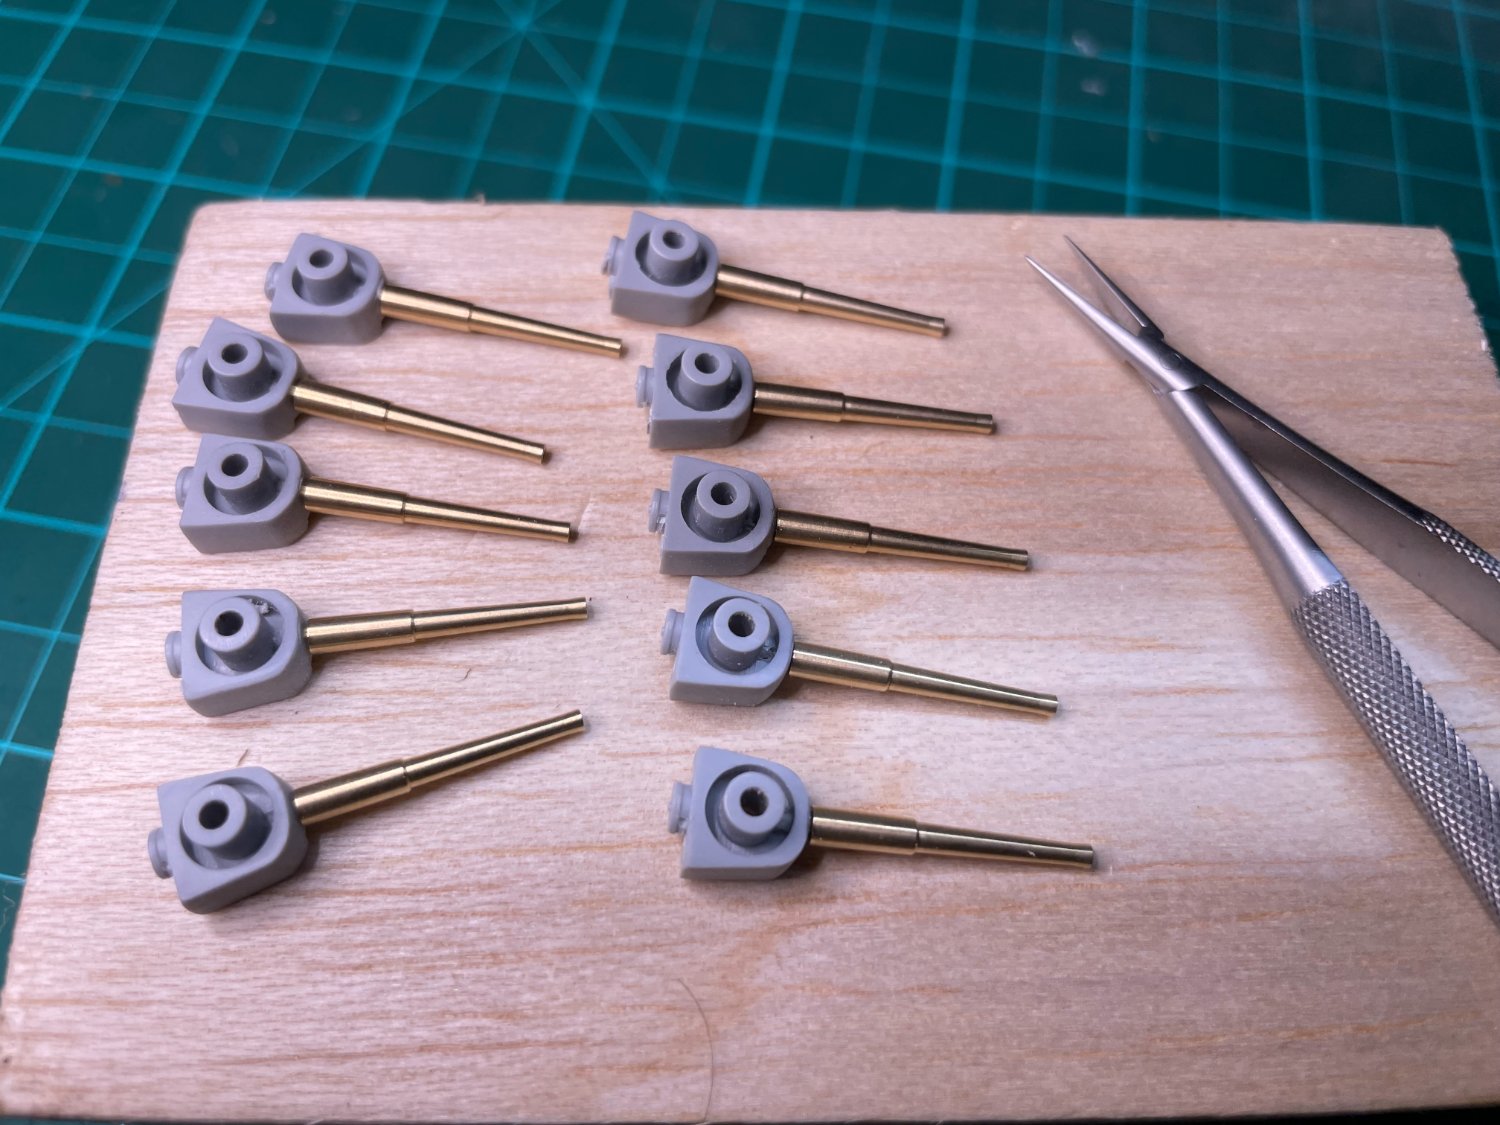
6 Inch Guns
Pontos provide metal barrels for the 6" casemates which are beautifully turned.

Here is a comparison between the parts

First I removed the exiting barrels, I then drilled 1mm hole and cleaned up the part
6" guns dry fitted

I then affixed the turned brass with some off the shelf CA and then primed with the barrels with Mr Metal Primer R
Richmond
- yvesvidal, Prowler901, ccoyle and 6 others
-
9
-
Thanks Slog - I really enjoyed the Video.
I am not sure I have the confidence to relieve the portholes. I may do a test on some thick styrene and see how I go.
Strange as to why Pontos did not do all the steps.
- mtaylor, Canute and Captain Slog
-
2
-
 1
1
-
Thanks for the nice comment Slog.
I removed that injector pin mark, much better, thanks.
Its a Duratech TS1564 electronically controlled soldering station which I purchased from Jaycar sometime back
https://www.jaycar.com.au/48w-temperature-controlled-soldering-station/p/TS1564
- GrandpaPhil, Captain Slog, mtaylor and 1 other
-
3
-
1
-
Week 1 (11/12/22) - 4 Hours (Total Build Time 4 Hours)
A very quick early morning (in Australia) post including:
- a dry fitting of the Mikasa's hull and decks
- a modelling perspective 1/350 Tirpitz
- a modelling /real life perspective 1/200 Bismarck
- Step 2 - Instructions
- Step 2/1 - the 15 cm/40 Type 41 (Model 1908) casemates https://en.wikipedia.org/wiki/QF_6-inch_naval_gun#Japanese_naval_service
- Step 2/2 - seam lines and sprue attachments
- Sprue labelling
Please note I am developing my photography skills and hopefully these will improve as the build progresses
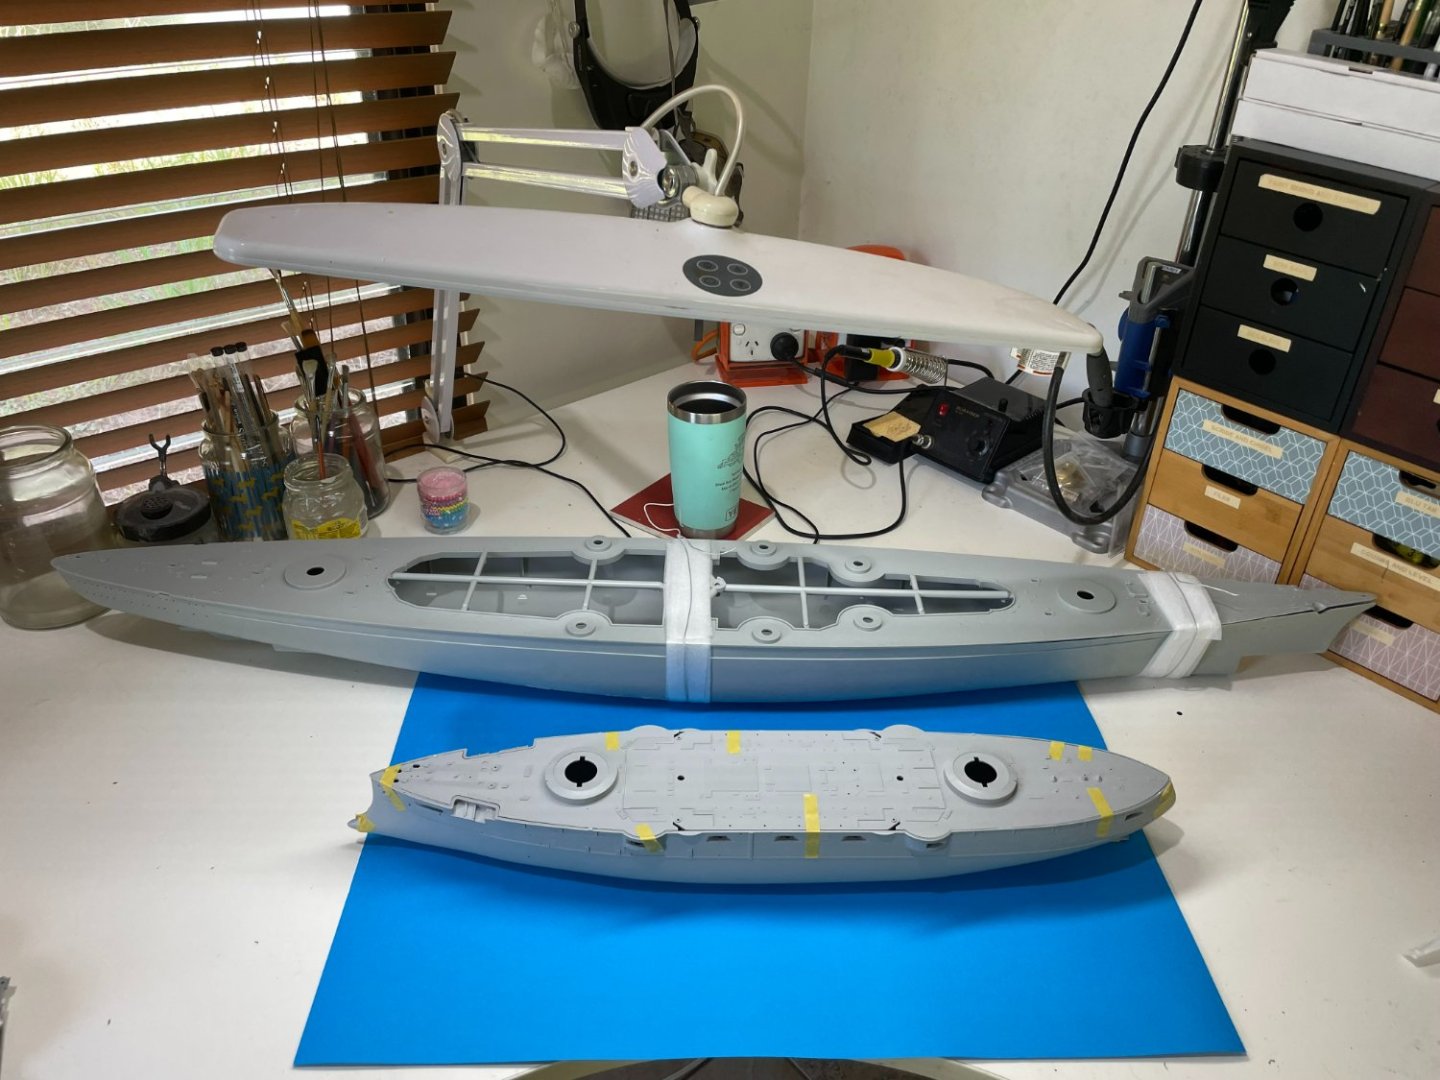
1 - Dry Fit
Here is the dry fit using Tamiya 10 mm tape - my only concern (bear in mind I haven't finished clean up) is the fit between the deck the the hull structure - I think a bit of clamping will be required to make it snug which in turn will squeeze the cement - this may mean a change of plan as I was hoping to fit the wooden deck 'off the ship'.

2 - Perspective - Tirpitz (1/350)
For a sense of modelling perspective here is Mikasa next to the 1/350 Tirpitz - perhaps manufacturing 1/200 pre-dreadnoughts would be a good marketing ploy for those who do not have room to build/store WW2 1/200's

3 - Perspective - Bismarck (1/200)
For a real life perspective here is the Miskasa next to the Bismark
4- Step 2 Instructions
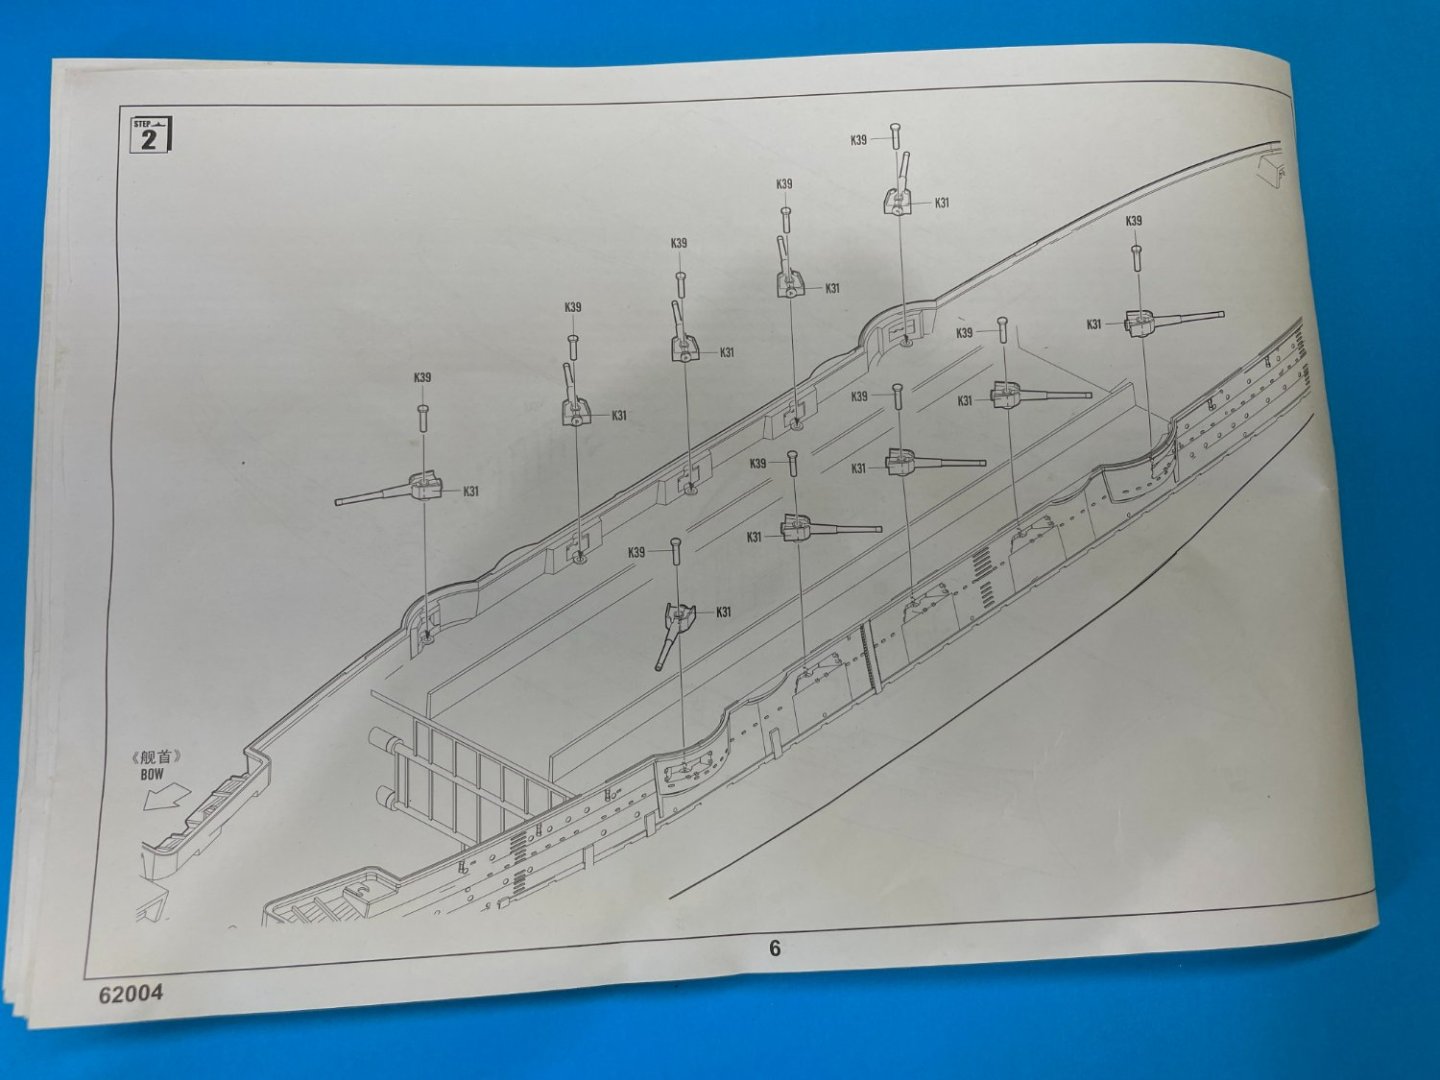
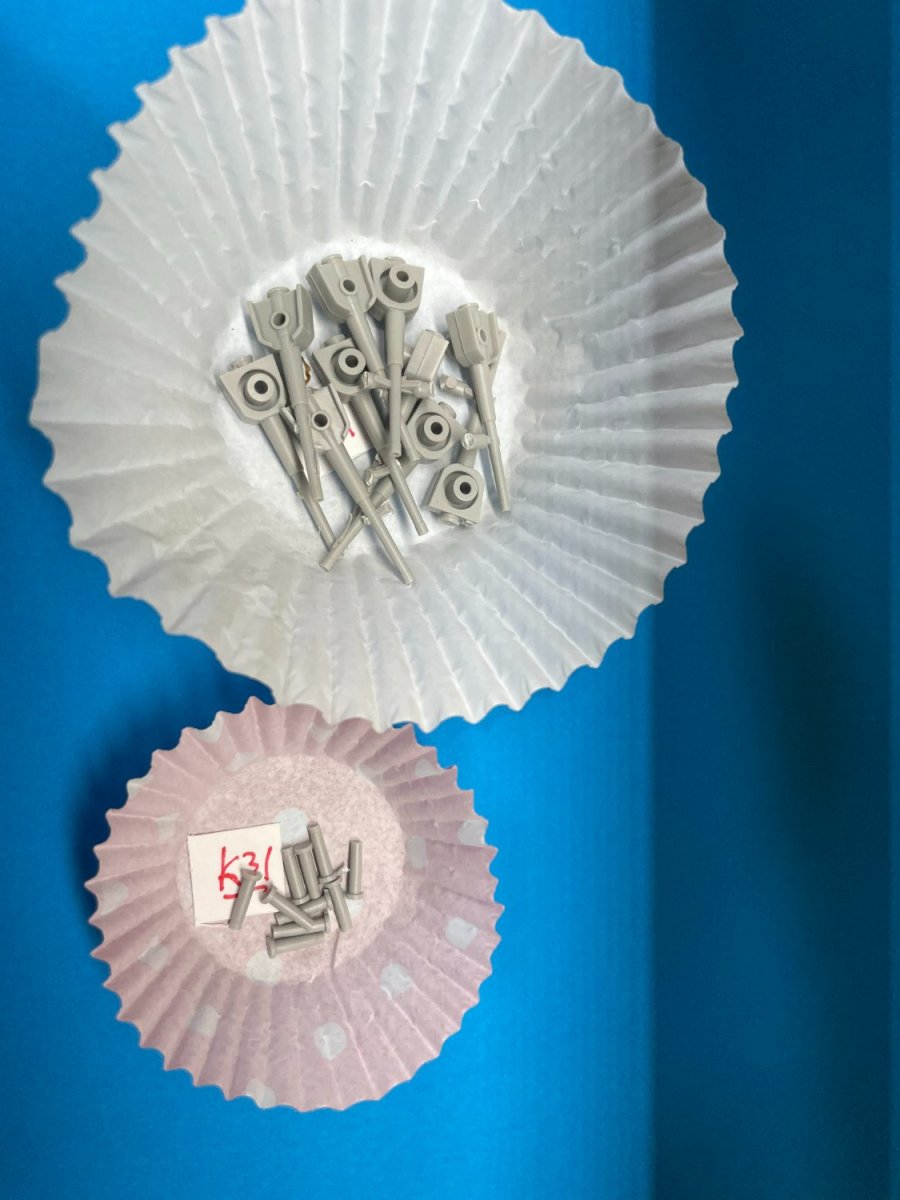
5 - Step 2/1
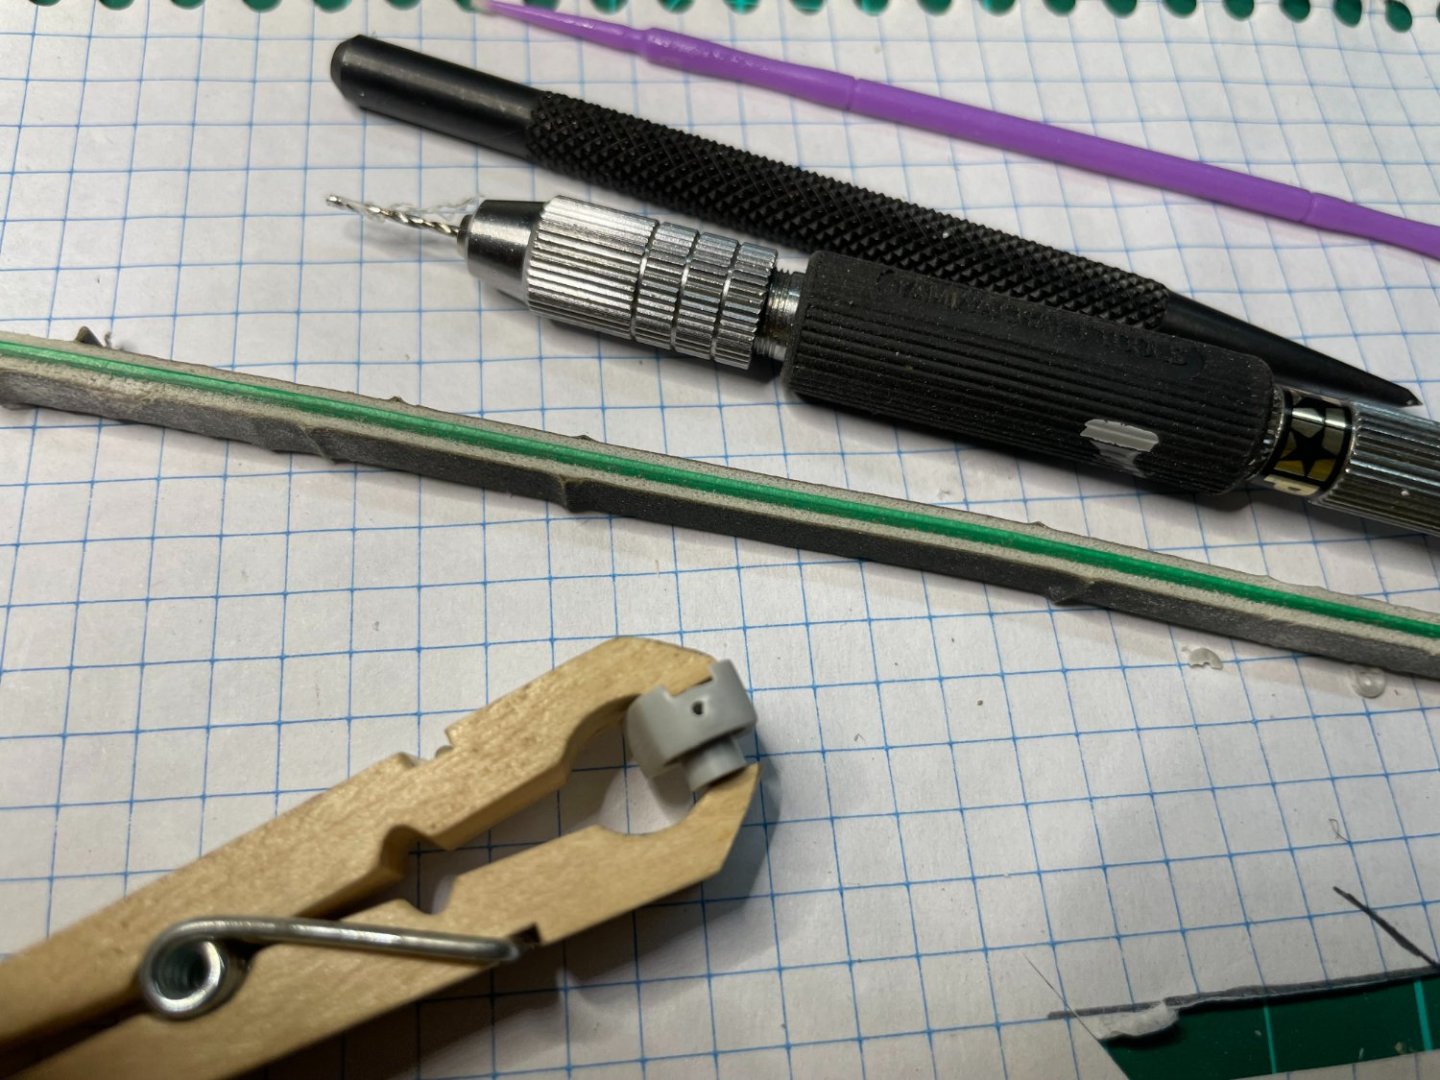
Here are the parts cut out for the QF 6 inch casemates and associated fixing pivots - I am using cake holders to hold duplicated parts which is a tip I picked up from @Captain Slog on his Ad Nak build.

6 - Step 2/2
Here is a close up photo of one of the QF 6 inchers - note the the sprue attachments and seam lines which will require clean up.
The plastic seems quite soft on this kit so will need to be careful when scraping. I actually damaged a few barrels when trying to do close up cuts. The barrels will be replaced by the Pontos set.
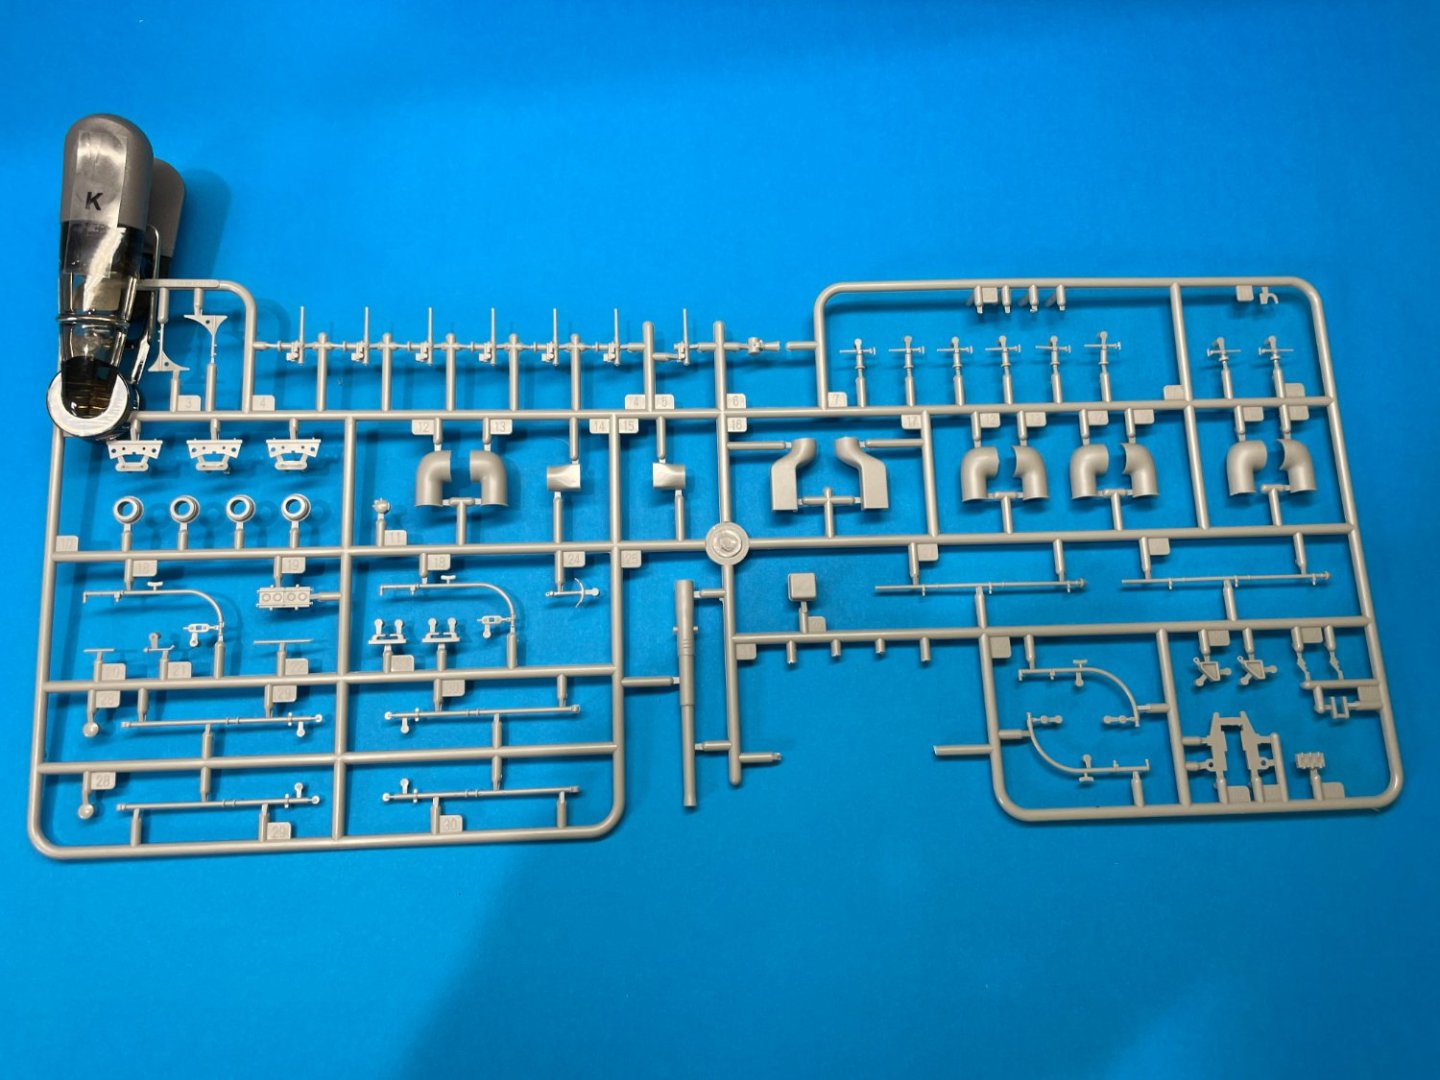
7 - Sprue Labelling
Here is how I manage my sprues with clothes pegs - this for sprue K
I plan to load another post or two over the weekend
Richmond
- ccoyle, mtaylor, Ryland Craze and 3 others
-
6
-
Nice introduction Slog, really looking forward to building along with you and the videos will be a great guide. Unfortunately I don't have the skills for video production, at the moment there is a greater need to get my photography skills sorted!
- mtaylor, Canute, Captain Slog and 3 others
-
6
-
This will be a ‘group’ build with @Captain Slog.
Slog will be posting under his own log as we believe posting both builds under 1 log would create confusion and unnecessary clutter
Here is a link to Slogs log
We will be in contact with each other throughout the build. We both have side projects we are working on which we can attend to if one of us falls behind, but the aim is to keep progress as synchronised as far is possible. I had planned to have a different side project , the Hasegawa Mikasa 1/700 as I thought this would be unique method of building both together however I cannot locate a wooden deck at present and will not build it without this.
Progress from both of us may be somewhat slow as I am working 3 weeks interstate every month with 1 week working from home, however I have ‘agreed’ with my company that within any 1-month period I must spend two full weekends at home. The build is planned to commence at the start of the Christmas break (unless Slog convinces me to start earlier 😊) which for me is 3 weeks so hopefully good progress can be made in this initial period.
Slog has put together some spreadsheets to help with the Pontos /Mk.I conversions which will speed up the build somewhat. I did not purchase the Mk.I set so there will be some obvious variances between our builds
We have both done some dry fitting of the hull and decks; Slog has assured me he hasn't glued anything yet 😊
Anyway, enough of that, my kit is a re-boxing of the Merit, Wave and the Hobby Boss kits. I will not be posting any introduction pertaining to box art and sprues, for those interested please refer to https://www.scalemates.com/kits/i-love-kit-62004-japanese-battleship-mikasa-1905--1373804 - the details at this link include release history, box-art, instructions and sprue photographs or perhaps refer to other builds (Jeff, Tim, Craig et al).
Brief History of the ship can be found here: https://en.wikipedia.org/wiki/Japanese_battleship_Mikasa a slightly more detailed version appears on Japanese Wikipedia at this location https://ja.wikipedia.org/wiki/三笠_(戦艦) I thought it was interesting to note that Japanese Wikipedia states the Mikasa was part of the Shikishima-class rather than a sole ship as normally classed in the West.
Unfortunately, there is little literature on this ship from which to increase the accuracy of the build so there will be no planned modifications, well not from from myself anyway, beyond the detail set.
I am really looking forward to working on what will be my first ever group build!
Finally I thought I would note that I have classified this topic in the 1901 + section which aligns with the existing builds on this topic - however its my belief it should be classified in the previous era.
-
On 7/29/2022 at 9:32 PM, ccoyle said:
Yeah, those are a new thing. I just read about them yesterday in my FB feed. They also sell separate sets for blocks, yards, and sails (with an additional set for studding sails). The blocks set is the one that will put a dent in your wallet, and if one buys all of the available detail sets, the total price really ain't cheap -- but at least it's an option.
I wonder if these detail up sets are the same as the ones GPM used to produce and have just been rebadged ? - I have the GPM detail up version for this kit.
- catopower and GrandpaPhil
-
2
-
Thanks Craig
After reviewing your log at the weekend noted a lot of discussion re rigging.
Not sure if someone had already pointed you in the direction of these - perhaps a bit late now?
Really liked your rigging deck attachment idea. I will do similar.
Richmond
-
-
Did this ever get up and running?
I am currently trying to input a lot of wooden kits including all box art changes into the Scalemates database and this would been a useful resource.
I have spent a 2 weeks or so on Billing Boats - they seem to release each kit about 5 -6 times! Its difficult keeping up with them! I must have entered over 250 kits (well say 70 kits x up to 5 different boxes ) - I still have some work to do as well.
More recently have been working on Caldercraft, Occre, Mantua and have just started looking at Amati - I am also looking at Constructo but it is hard to find good references as they don't seem to have a website.
-
Just a small point if you are using Tamiya acrylics use X20-A thinners and for Tamiya enamels use X-20 thinners
I use Tamiya acrylics all the time but use the (Gunze/Mr Hobby) Mr Color Leveling thinners which is great value as they sell in 400ml bottles - the results are superb.
I agree if you are using true acrylics such as those produced by Vallejo, MIG etc then as someone stated above you need to use the own brand thinners - them guys certainly know how make money!
- Rik Thistle, thibaultron, mtaylor and 1 other
-
4
-
-
Scaledecks used to manufacture decking for this model in 1:96 and 1:192 scales , not sure if this company is still in existence, irrespective I assume they would pop up on Ebay from time to time.
https://www.scalemates.com/kits/scaledeckscom-196-001-uss-constitution-deck--944037
https://www.scalemates.com/kits/scaledeckscom-96-001-uss-constitution-old-ironsides-deck--944022
I think the 1/196 version is a typo and should be 1/192
-
I use a dual action airbrush and its something you get use to - after while your finger sort of automatically knows how far back to the pull the trigger. I also use quick drying paints (Tamiya or Mr Colour) plus I live in the tropics so you can paint the next coat almost immediately, so there no need to be impatient. Also I don't lay anything paint or varnish that hasn't been thinned to at least 50/50. Primers even less.
It didn't mention it specifically in the article but maybe you could thin your paint further for any bleed protection activities, I suppose it all comes down to trial and error.
-
Nice work on such an old mould
Citadel Agrax Earthsade is what a lot of figure painters use to wash their models and bring out the detail. This guy is pretty good as he keeps it nice and simple.
https://www.youtube.com/results?search_query=how+i+paint+things


Mikasa by Captain Slog – Merit International/Pontos Model/KA-Model – 1/200 – PLASTIC - Group Build with Richmond
in - Kit build logs for subjects built from 1901 - Present Day
Posted
Thanks Slog nice update and video.
I really like the look of the Tamiya LP's, its getting great reviews from a lot of modellers - I think I should start swapping them out - however I note not all XF colours are available in LP.
I think with my extra week of AL (sorry not rubbing it in") ) I may jump slightly ahead but then work takes me off to the Gold Coast again for 3 weeks. To get here has taken a lot longer than I expected.
) I may jump slightly ahead but then work takes me off to the Gold Coast again for 3 weeks. To get here has taken a lot longer than I expected.
My only concern thus far is will the temporary ply base board impeding the build - I like to lay models on their side when working on hull and my board is 290 wide and probably heavier than your board - Ill have to devise some sort of soft rest. Maybe I will swap out to an MDF and not go as wide as did with my ply?