


VTHokiEE
-
Posts
1,528 -
Joined
-
Last visited
Content Type
Profiles
Forums
Gallery
Events
Posts posted by VTHokiEE
-
-
Thanks! I wish I could take full credit for the rope details but I gathered them from here and there with small tweaks.
I ended up using cheap cotton from Walmart for the sails. I’ll look up the silkspan tutorial and see if it helps me. I was having issues with consistency in the overlap. Oddly enough, I enjoyed using the sewing machine so I may simply put some more energy there to get better at it.
- thibaultron and Duanelaker
-
 2
2
-
Your build is coming along really nicely! I also enjoy the tangent figure paintings as well! Where do you pick up your figures? I was thinking about picking up some 1/64 English sailors for my upcoming Alert build (assuming that I can find some).
-
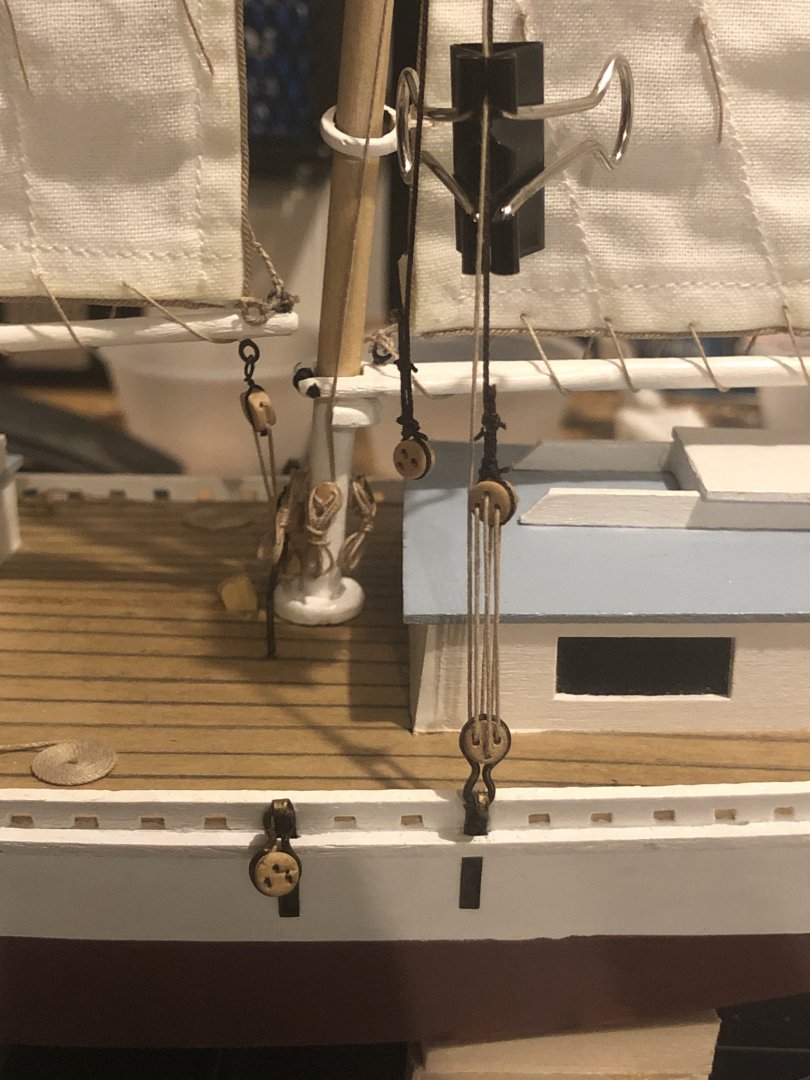
I've been hard at work stepping the masts and finishing up the rigging.
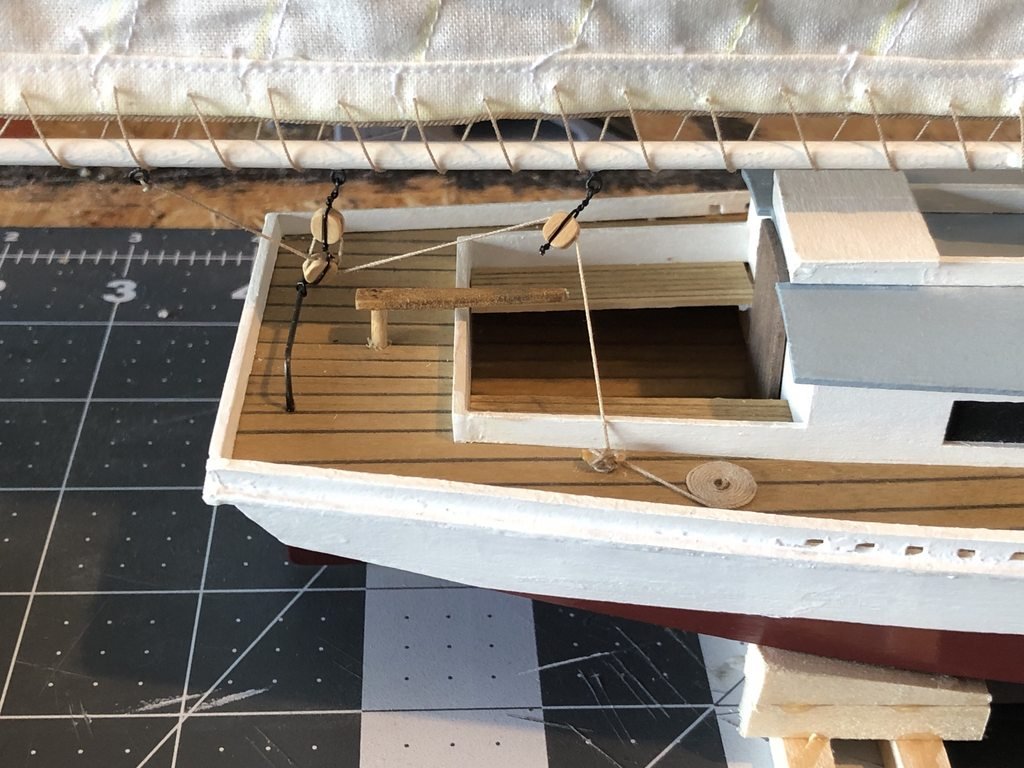
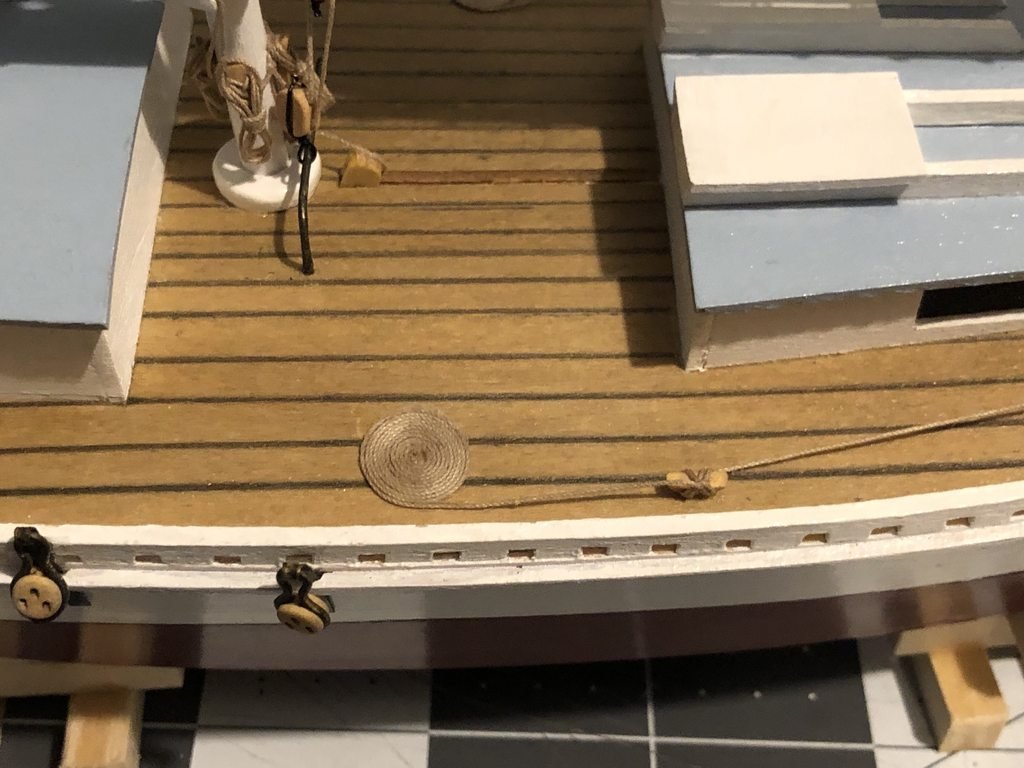
Next up is a closer look at how I created the rope coils. Basically I press the rope into some tape and slowly rotate it. Once the coil is completed I apply so white glue and wait for it to dry. After it dries I can remove it from the tape, flip it over and glue it to the deck. Next time I won't be using such a large piece of wood under the tape so that I can get the coil closer to the cleat.

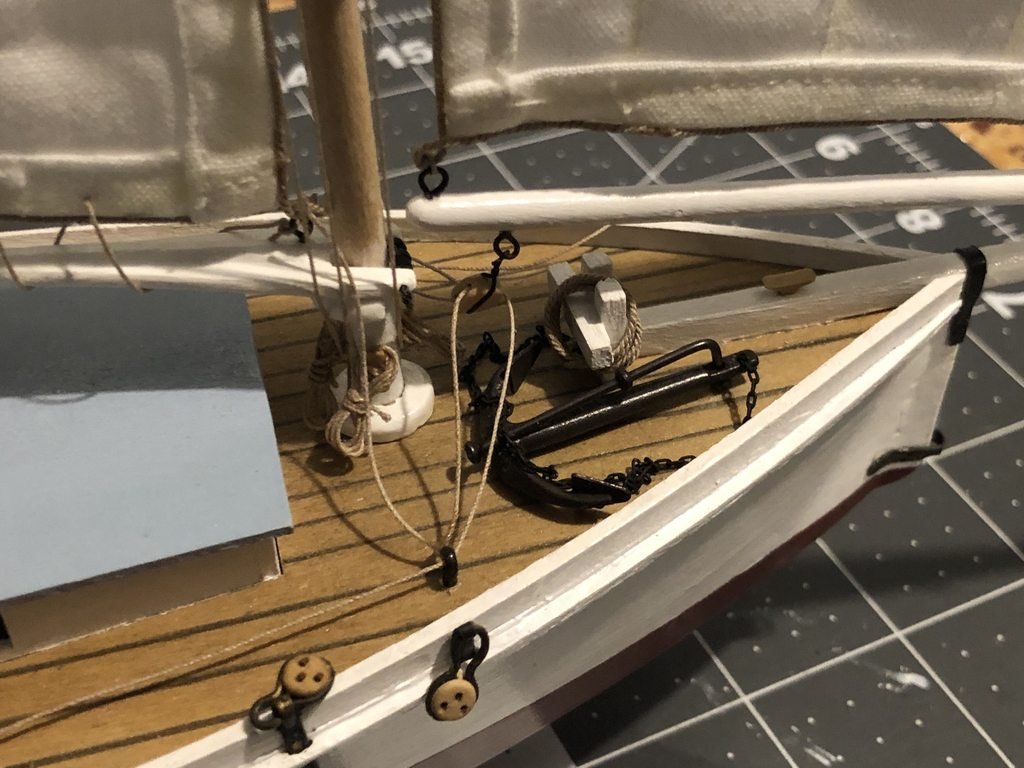
I added the anchor (bought already black from Cornwall Model Boats):
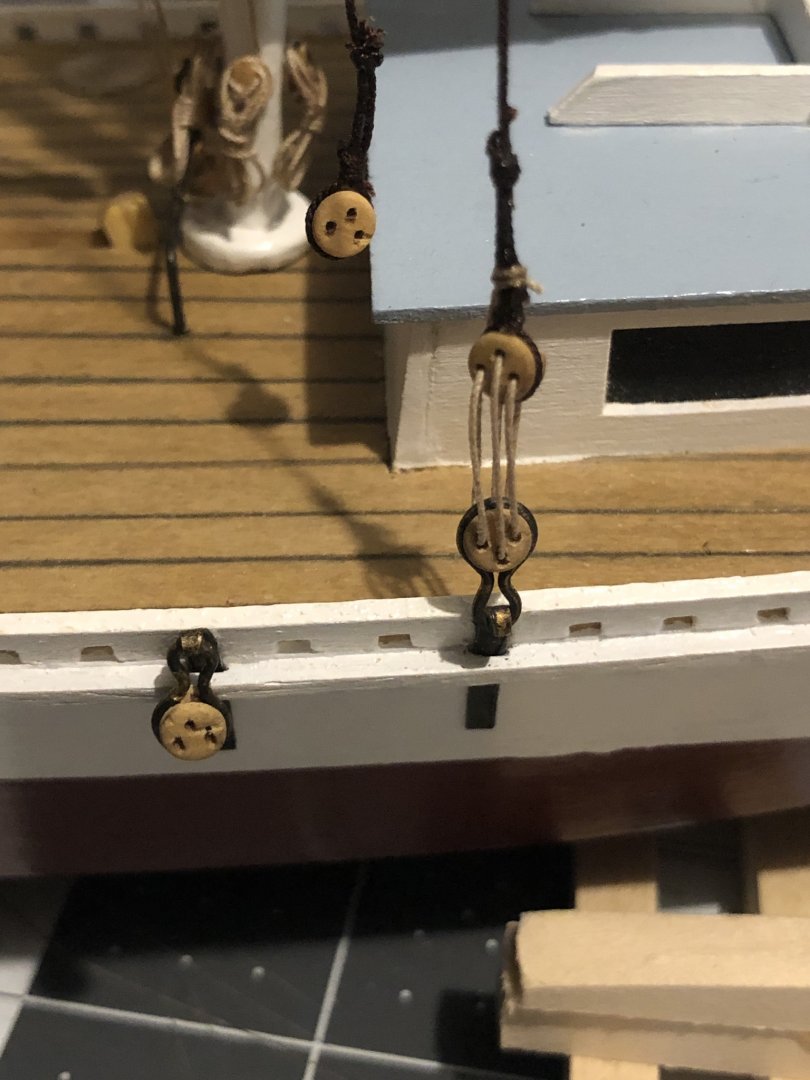
Finally I rigged the deadeyes
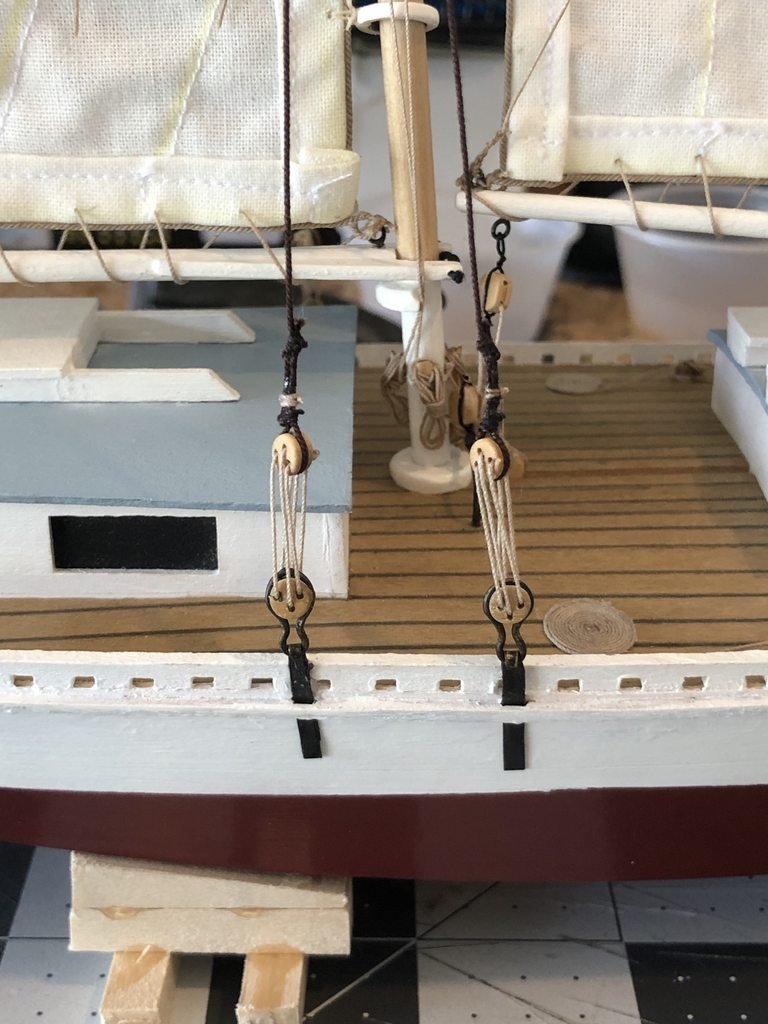
All I have remaining is to cut 4 brass rods, blacken them and glue them above the deadeyes on the shrouds (which if I do it correctly should remove the twist in the lanyards). I'm not certain exactly what I want to do for the display base if anyone has any suggestions. I had originally planned on two dowels (one slotted for the keel) but I'm concerned about the front of the ship not having anything to really connect to on the front dowel and slipping around.
-
10 minutes ago, cdrusn89 said:
I seem to recall somewhere a "rule of thumb" of 3 or 4 times the diameter of the deadeye for the space between them.
That looks pretty close to me.
I appreciate this, it is really helpful.
-
That looks really nice; I’m really impressed by the models that you’ve built! Want to build me an A-10? (joking of course :-). I can’t wait to see what you have in store next!
- mtaylor, CDW, Old Collingwood and 4 others
-
7
-
Thanks Richard! I had an aha moment a few days ago (and it’s really a ridiculous notion that I should have been doing for awhile) when I saw a picture detailing how to tie a lanyard on the forum. Basically, I should be using some reference books to help me.
I had bought “Ship Modeling from Stem to Stern” by Milton Roth and it has some decent descriptions for rigging and a whole host of other details but I had gotten way to used to simply web searching and I wasn’t finding the right answers. Now I’m using this book for help as much as possible and I’m slowly building out a library for reference.
- Retired guy and thibaultron
-
2
-
-
Very nice work! I received this key for Christmas and I can’t wait to dive into it (although I plan on sticking closer to the kit contents as it will be my first planking kit). I really appreciate your log and I’m certain that I will reference it if I get the urge to indulge the build. Have a happy new year!
-
Okay here is a redo on the shroud and lanyard. I think it looks much better.
-
1 minute ago, thibaultron said:
I would say, no more than half. A quarter would not allow much adjustment on the real thing.
Thanks! This is all being done by eye for now so fingers crossed 🙂
-
-
3 minutes ago, Retired guy said:
I would agree with you, what dimension does the drawing say
Regards
Richard
Thanks!
Unfortunately I’m ad-libbing at the moment. The kit doesn’t have deadeyes, I added them because I liked the look from other build logs, but they didn’t mention a dimension. I think I’m going to at least half the distance, but maybe even take it down to a quarter.
-
I'm going to have a much larger post soon, but I have a quick question. In my opinion these deadeyes are too far apart. What do you all think?
-
While looking through build logs for a different reason I ran across this one that may be useful to you:
This build log of a crabbing skiff references a book which may help regarding the oar lock question and oarlocks are included in their build.
-
17 hours ago, EricWilliamMarshall said:
Any suggestions for the metal work to attach the rudder? What thickness of brass and what favorite tools or methods?
You might want to take a look at these posts for some ideas:
The above log mentions a book which may have more details for rudders on similar style boats.
Here is a picture of a hinge one a different flattie build:
You can follow this third one through for yet another idea for a potential hinge:
I'm sorry that I can't help much with what hinge would typically have been used though, but hopefully those links give you an idea.
I grabbed a thin sheet of brass stock (I believe it was a 4"x5"x0.01" thick sheet) from Lowes (which according to the website doesn't sell it anymore) for the metalwork on my Sharpie. I have seen some sheets in HobbyLobby though that would probably work as well (as well as many other places online. I then (using a metal ruler as a guide) scour lines of whatever width I need and break the piece off with a pair of pliers (I should caveat this with an "I'm still learning as I go and there may be much better ways to do this" but now you've been warned). Now I cut the strip down to size and bend it to whatever shape I need (and silver solder if necessary). Finally I blacken and CA glue the part in place. Good luck!
-
41 minutes ago, Duanelaker said:
Also curious if anyone would suspect this boat would also have oars and oarlocks? I imagine there were times they needed to paddle?
After getting stuck in the Chesapeake Bay on a sunfish (and attempting to paddle with the centerboard) with my father he always kept a paddle on board as a safety measure. I don’t see any oarlocks on pictures of current crabbing skiffs though.
- thibaultron and Duanelaker
-
2
-
At this stage in my model building career I have no need for a Byrnes saw but boy do I like new toys and I’m so happy for all of you that are getting saws!
- Canute and paulsutcliffe
-
2
-
13 minutes ago, Duanelaker said:
Thank you so much! I have maxed out my paypal on eBay buying all the Midwest models I can find 😝...I believe I have found them all!
Ha! I almost did the same thing. I enjoyed the Flattie and am having a lot fun with the Sharpie (almost finished). They are fun kits and have room for adding accessories and little details if you want.
-
You may want to take a look at a balsa filler if you’re having trouble filling the gaps on the transom. I didn’t have much luck with the sawdust and glue route (I’m certain operator error there though). Looking good so far! Have you given any thought to a paint scheme?
-
-
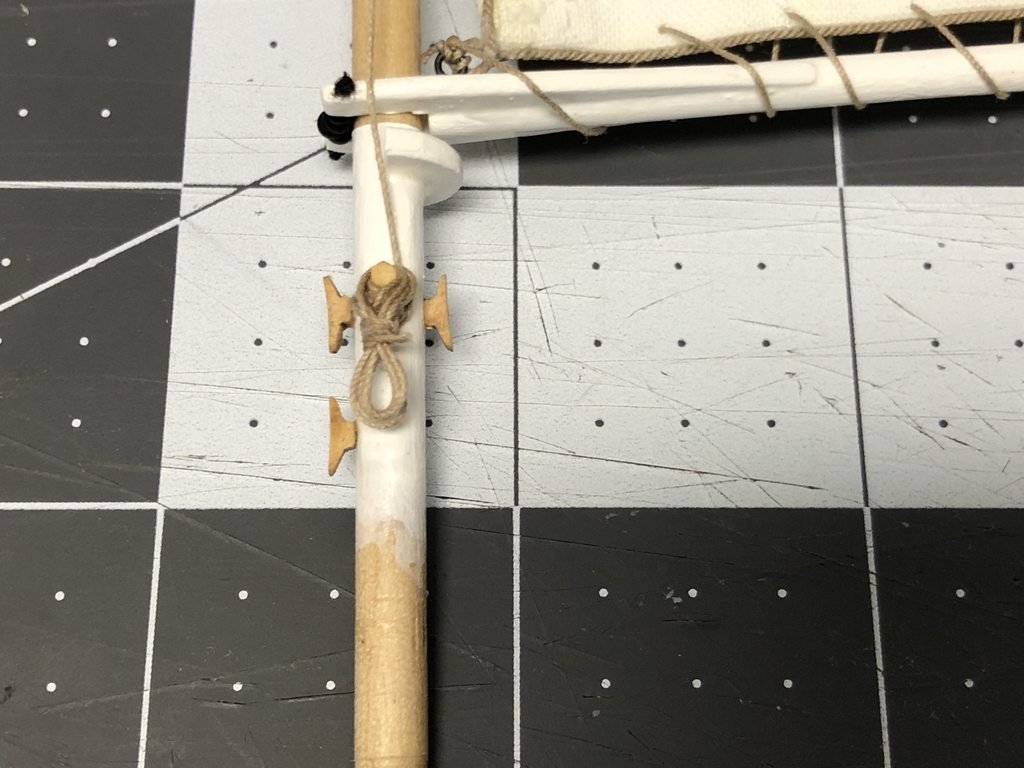
I printed a small jig to create rope coils after rigging the lines. First I tie off the line with a cleat hitch (for the first few I simply glued figure 8s to the cleat).
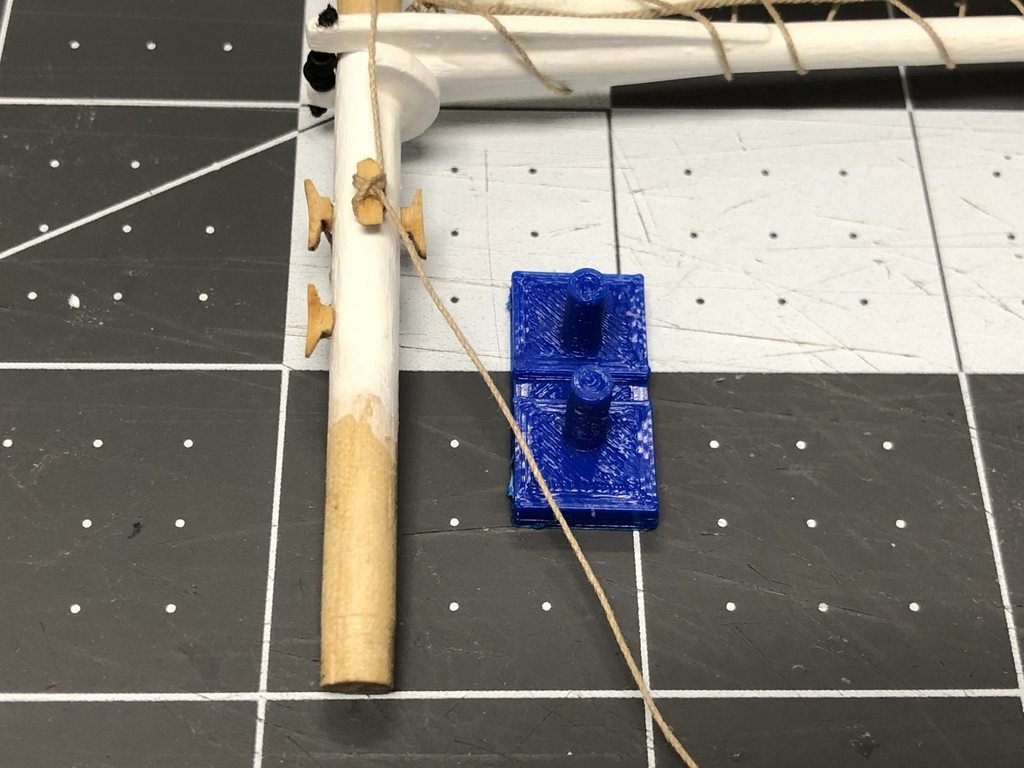
Next, I wrapped the line around the jig a few (3 or 4) times.
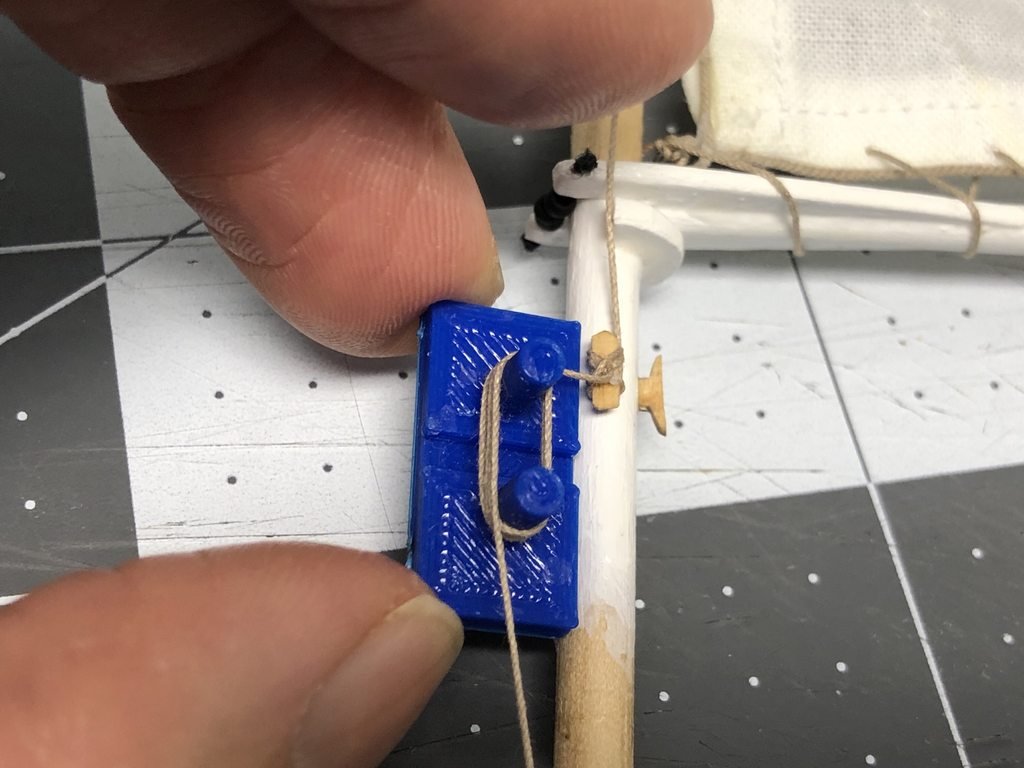
The I used the channel to thread the line around a few times.
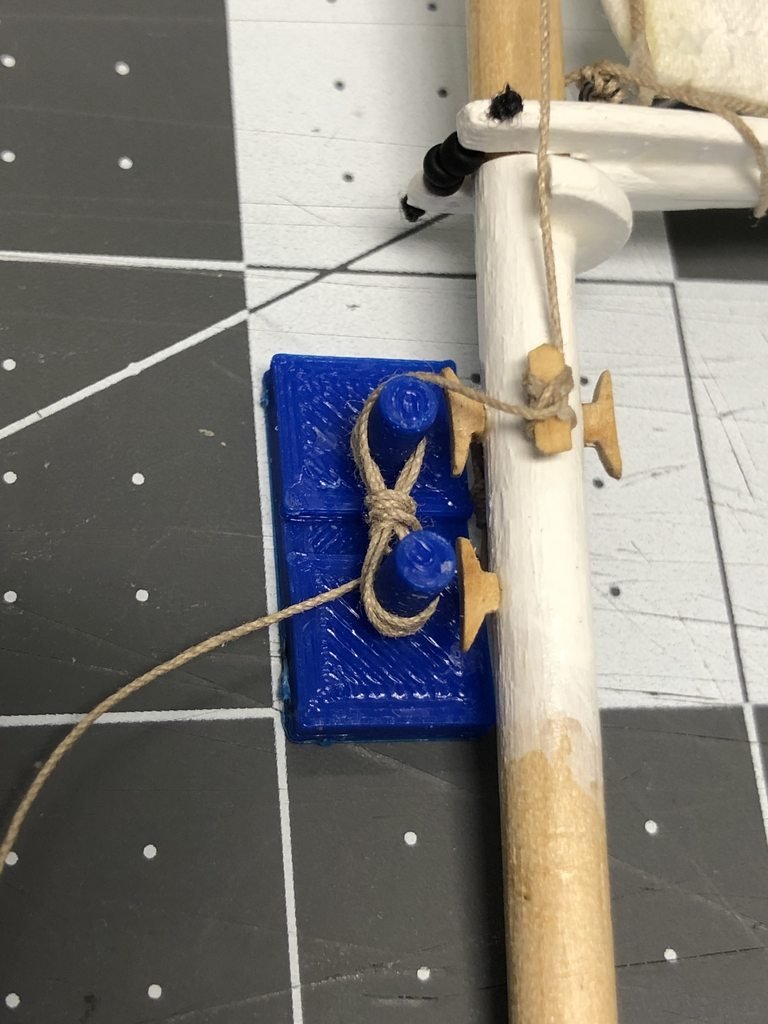
I added a drop of glue to the coil and after it drying i slid the coil off the jig and glued it to the cleat.
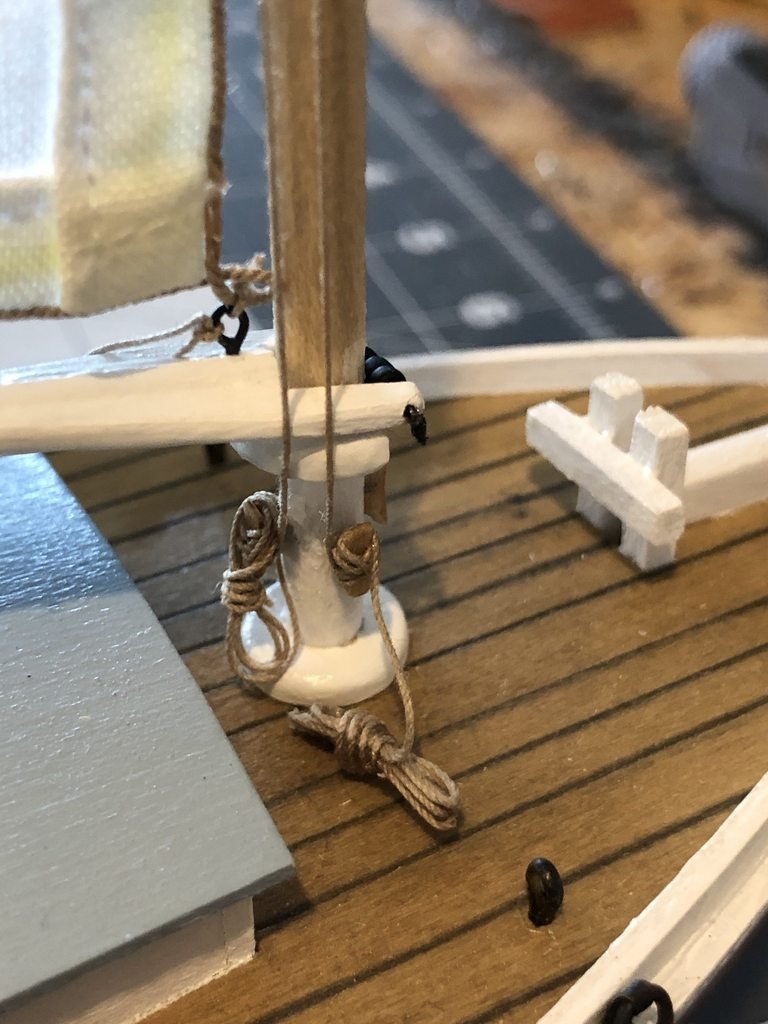
Here is a shot of the foremast dry fitted.
-
Also, sometimes I find using a needle helps me tie the knot sometimes.
-
I don’t properly tie them off either (yet, I’m hoping to do a better job with using the proper knots on the next build). Right now I simply do a few figure 8s and then glue it. Personally, I glue all my knots because the last thing I want is a knot to come loose later and be frustrated trying to tie it back on with a short rope.
- thibaultron and Duanelaker
-
2
-
Out of curiosity, what causes you issues with the cleats?
Sharpie Schooner by VTHokiEE - FINISHED - Midwest Products - 1:32
in - Kit build logs for subjects built from 1901 - Present Day
Posted
I still have to make a display base (and maybe a case) but I think I'm going to call this build finished. Not everything is quite as tight and perfect as I'd like it to be, but overall I'm very happy with how this turned out for my second build. Please pardon the ugly fence background, after I get the base finished I'll try to do some proper shots and post a gallery.
Thank you all for the likes and comments; they were very encouraging and I simply appreciate this community!