


VTHokiEE
-
Posts
1,528 -
Joined
-
Last visited
Content Type
Profiles
Forums
Gallery
Events
Posts posted by VTHokiEE
-
-
10 minutes ago, SpyGlass said:
your earlier pics are a bit weird
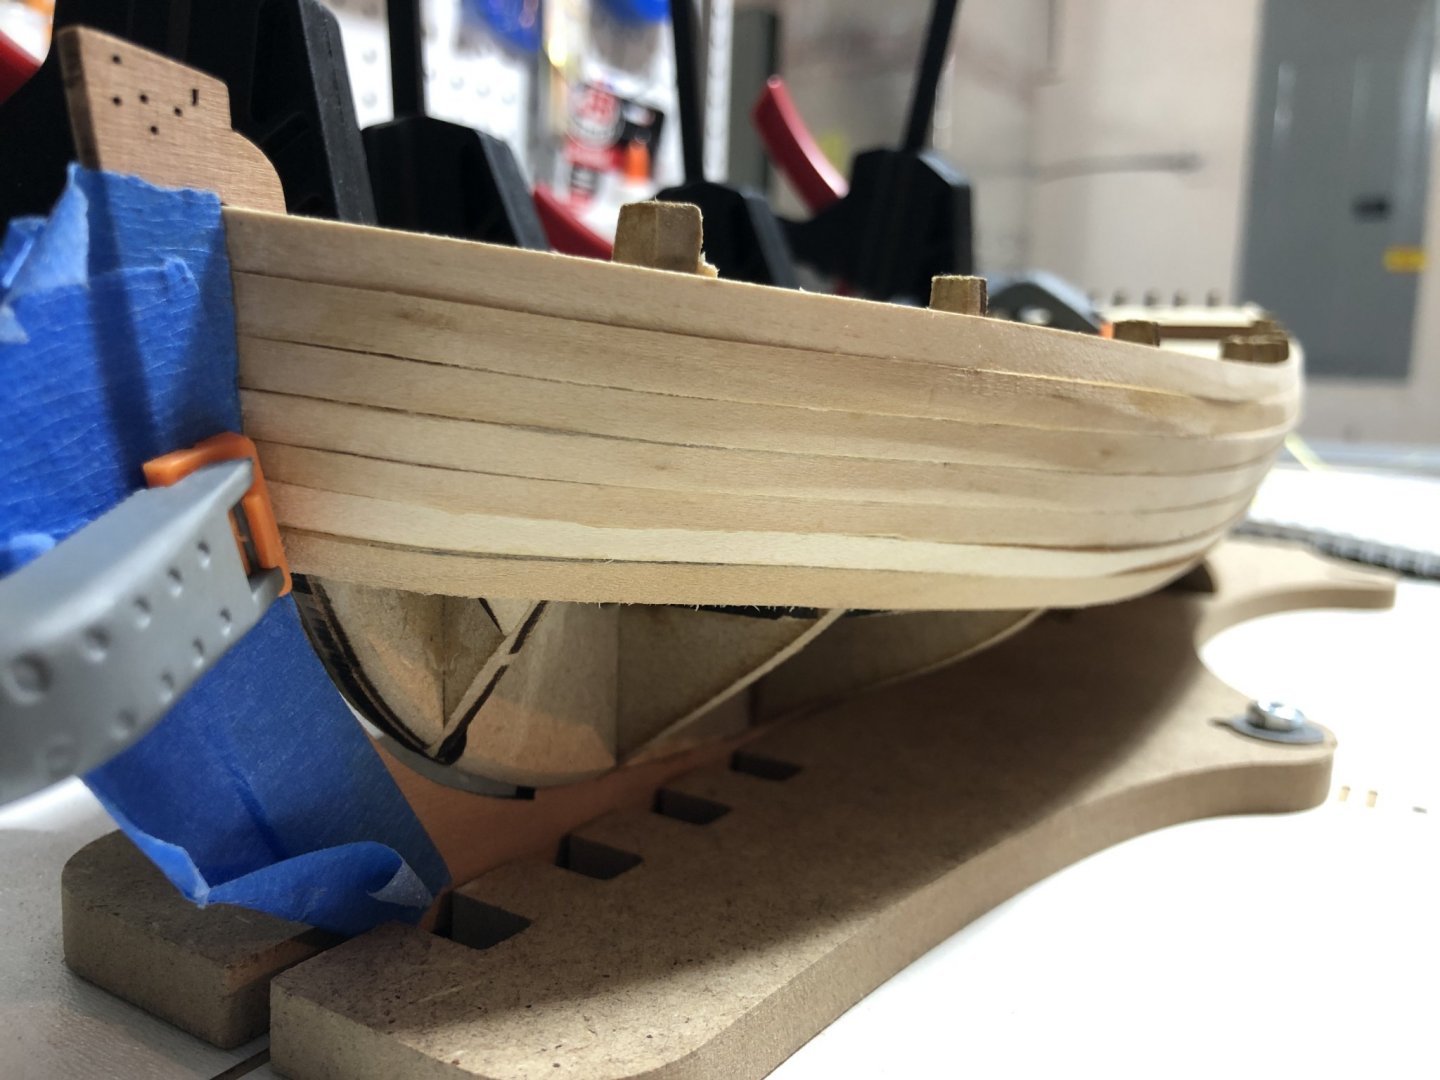
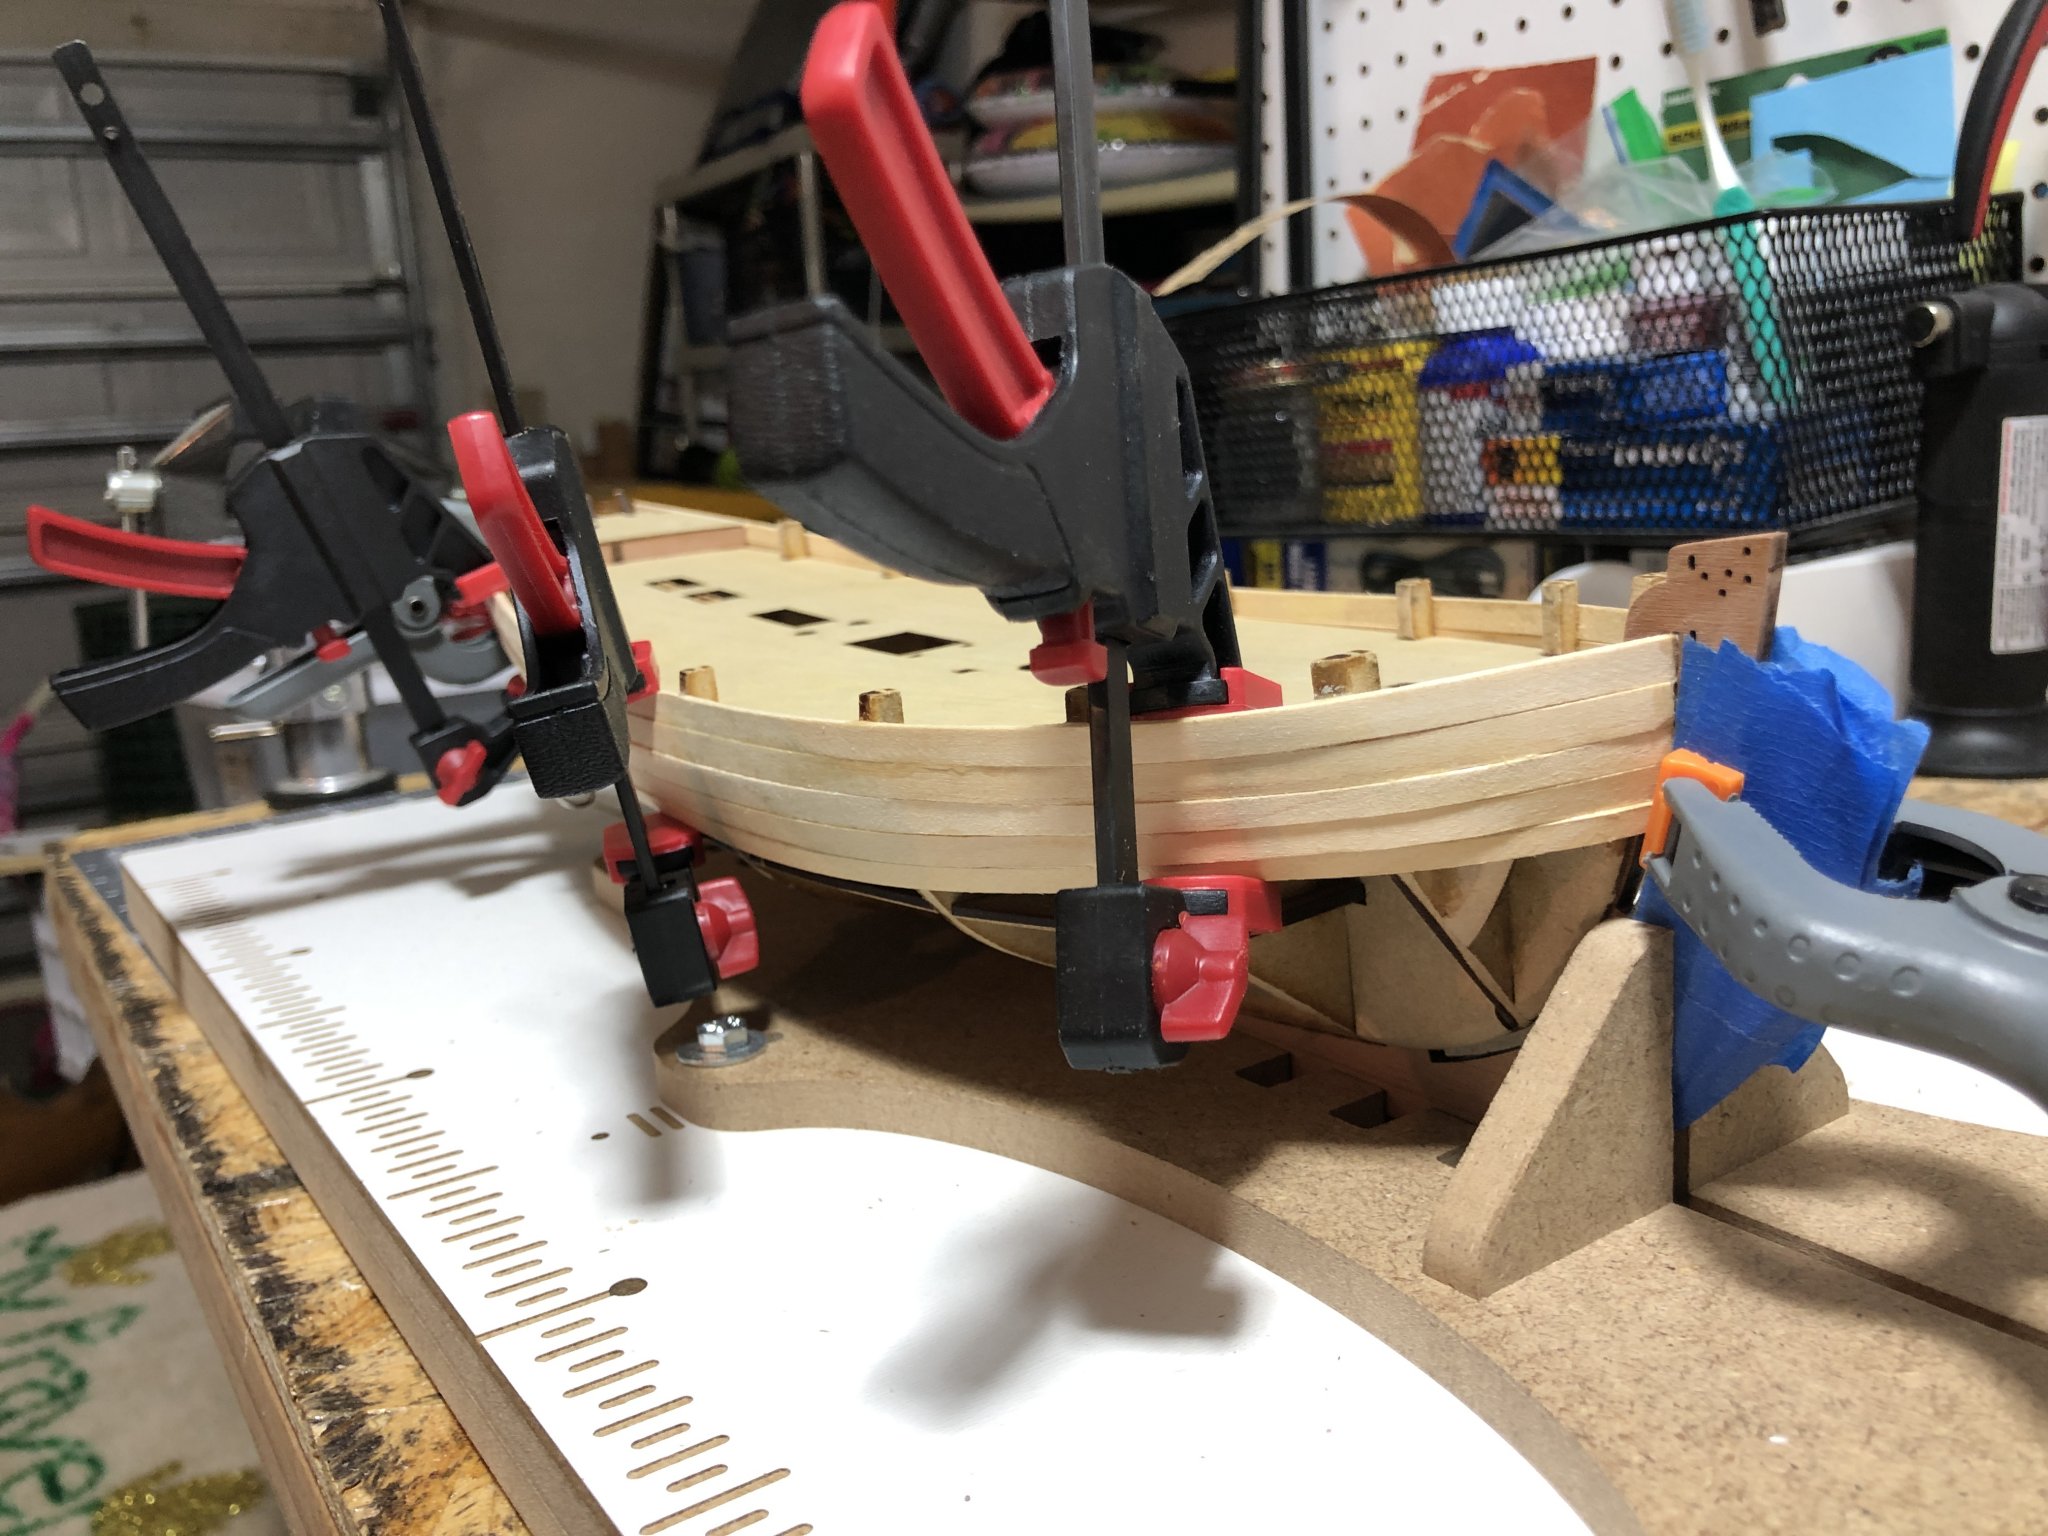
Those are still to be faired. The last picture is me making headway on the other side :-).
11 minutes ago, SpyGlass said:You are seeing why I never put the stem or keel etc on permanently til I have finished first planking !!
Kind of wishing that I didn’t learn that the hard way; but it’s salvageable at least.
9 minutes ago, prototypep3 said:Your build is coming along nicely VTH, and your log is helping me to avoid some easy pitfalls
I’m glad! I hope you have a much easier time with your first planking run. I was tempted to simply press onwards and not post the partial planking pictures since they were so bad. I’m really glad I didn’t do that now.
-
8 hours ago, SpyGlass said:
Pictures please?
This was the issue, it might be hard to see but the planks weren’t laying flat.

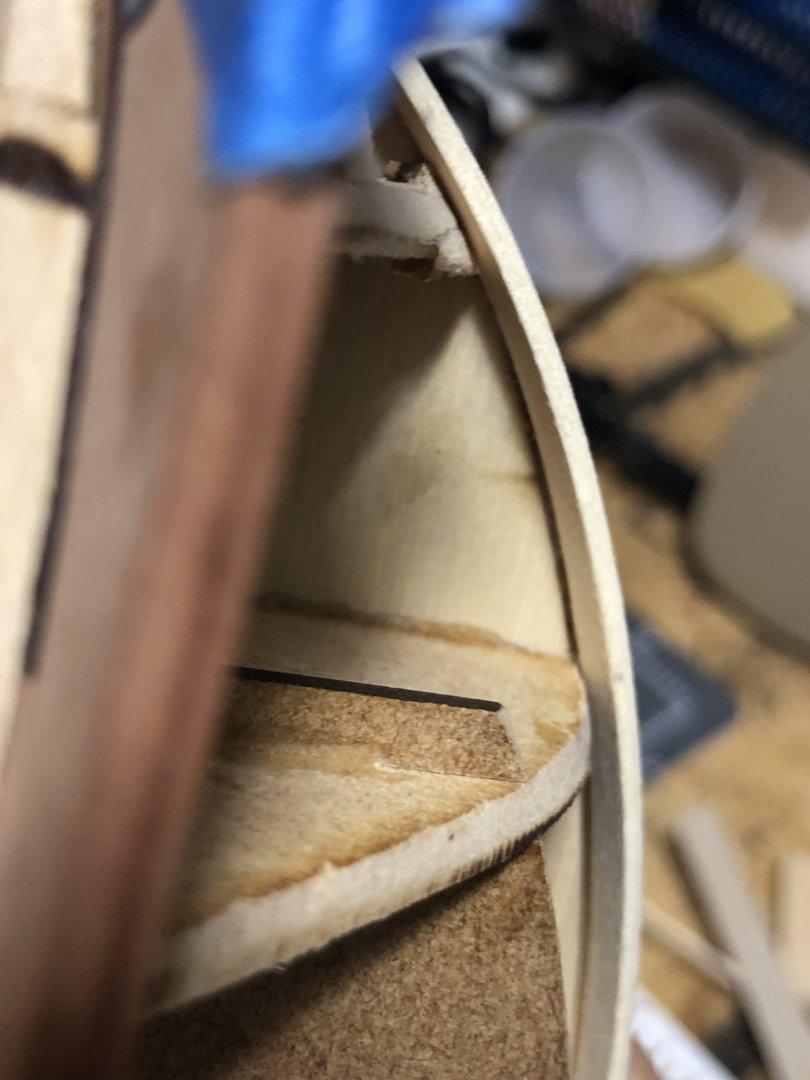
However after significantly fairing that front filler block things are looking up.
I still have a good bit of fairing to do on one side (and make certain that it’s good for the full run in both sides). It’s a tough place to get into with the stem on but I’m getting there.
-
2 hours ago, SpyGlass said:
Brave move but I think wise.
Now FAIR !!
The general rule I use is that you always need a bit more off than you thought - as long as you leave the appropriate one edge of the BH untouched. And the stern BHs especially true.
The edge of the deck ply gives a good guide to roughly the angle that the BH needs to be at the top.
You can also use the cutout scrap from the deck piece as a template.
Thanks, I’ve been sanding away and things look better. The planks touch all the way around at the top edge of the plank but seem to have a tough time “twisting” at the bow to make contact all the way through to the bottom of the plank. I soaked a plank and clamped it against the bow to let it dry today in the hopes that it helps. This is quite the learning process (and I can see how you can frustrate yourself quite quickly).
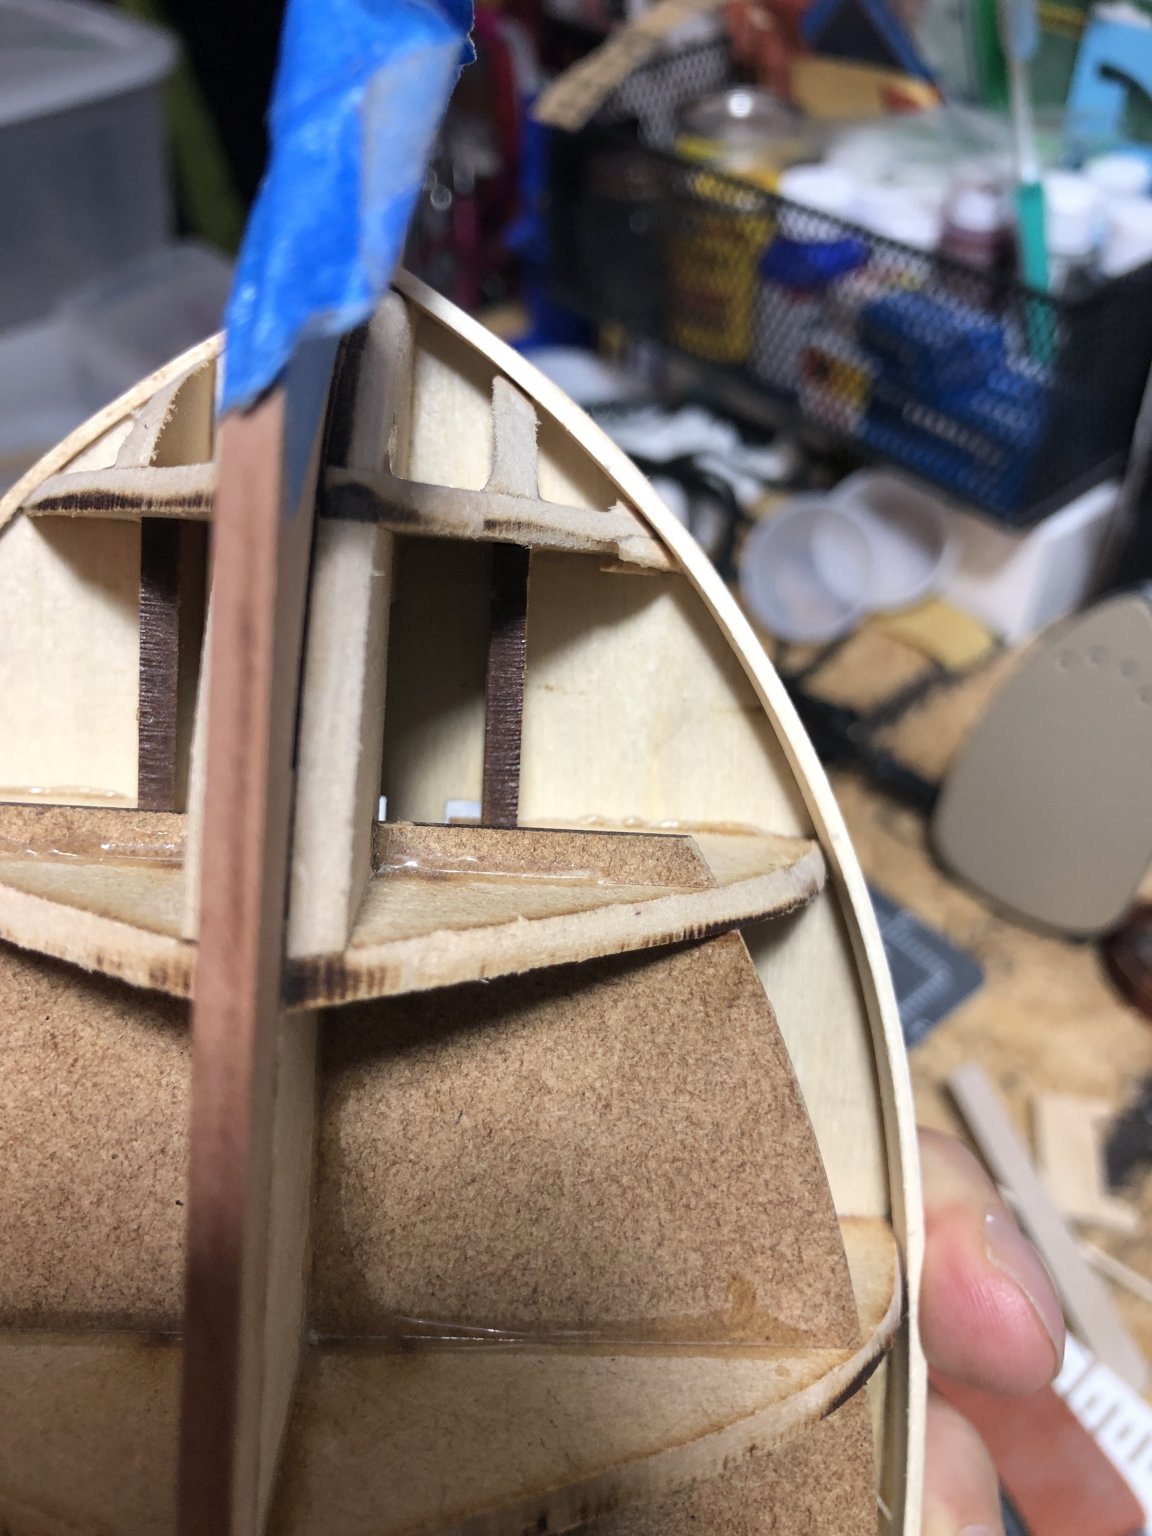
EDIT: Thinking further I think the filler block right on the stem is my issue. With the stem in place this is a very tight spot to sand. I’ll have to think about how to address this.
-
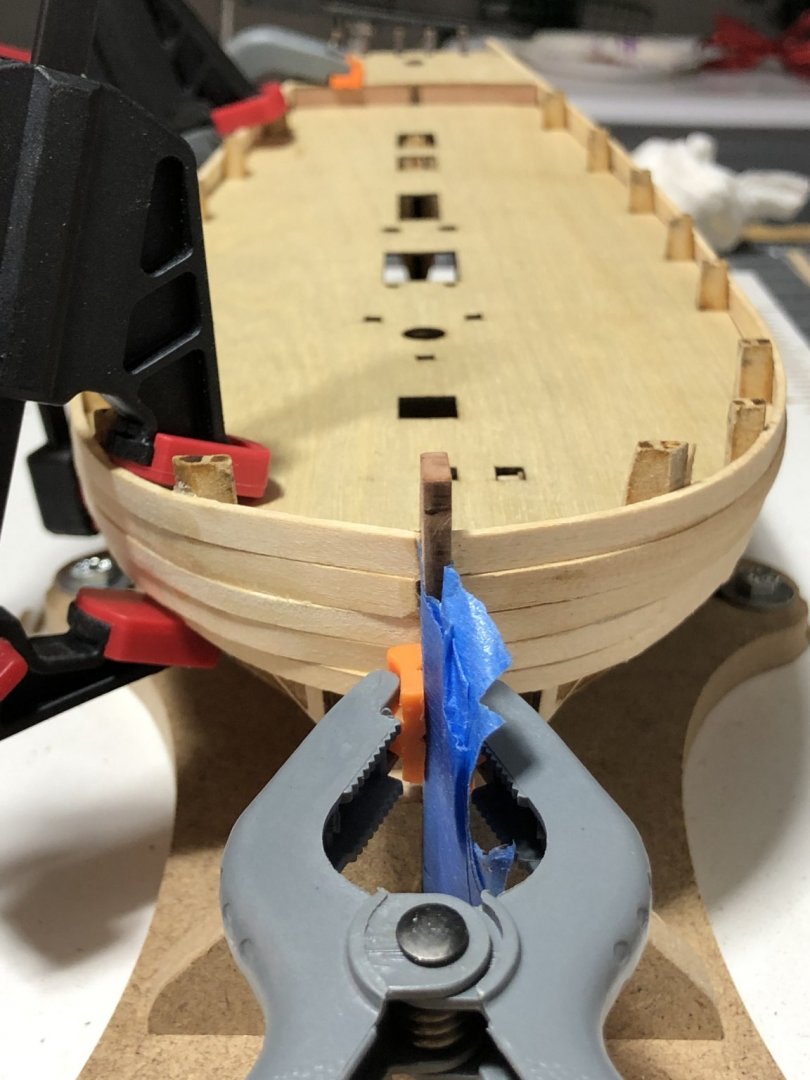
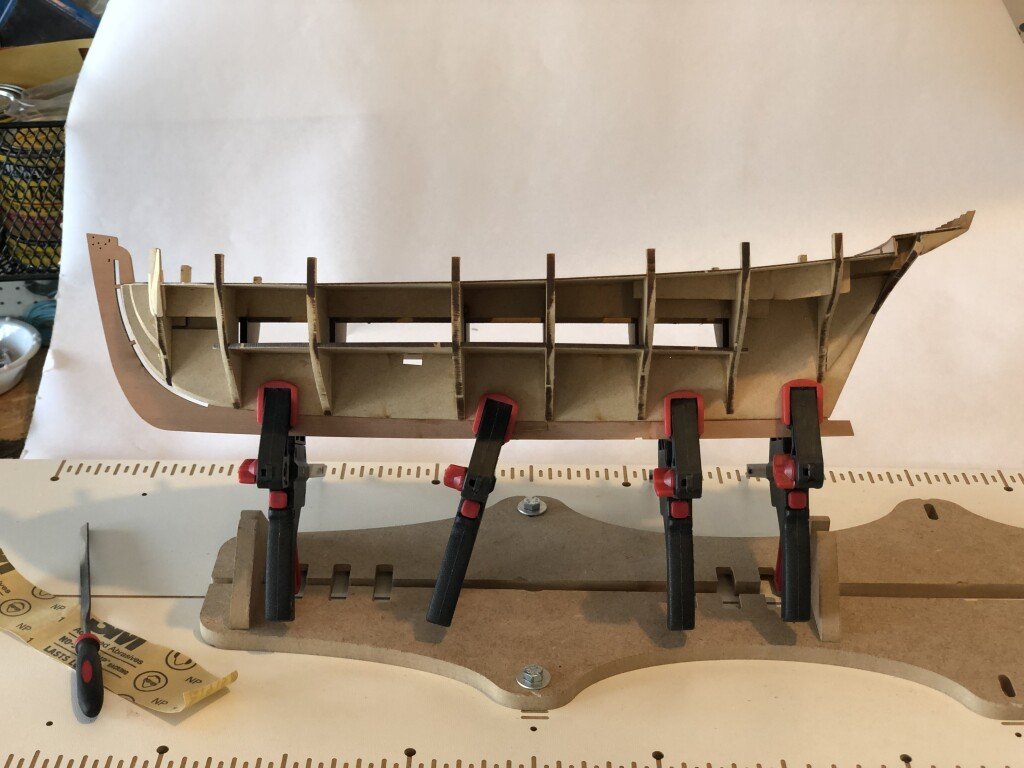
Planks are off, that was much easier than I thought. I soaked them in some isopropyl alcohol and gently pulled them off. They came off in “sheets” though so there will be no reuse.
It looks like Cornwall sells the right lime replacement planks so I’ll probably order replacements there. I think (?) basswood strips would work as well but the OCD side of me fines it hard to mix and match.
-
1 minute ago, Blue Ensign said:
you have towards the stern looks far too much, I don't think I needed to taper very much at the upper stern on the first planking
Thanks for the feedback, given this I think I need to order more planks.
-
2 minutes ago, Heronguy said:
I'm used to seeing the planks narrow at the bow. I wonder if that will improve the lay of the planks for you?
It may not look like it in the picture but the planks are tapering. I made some tic strips to guide that process so I feel relatively confident about the taper.
-
20 minutes ago, SpyGlass said:
I would further recommend when planking that you soak and clamp the strips to position and let dry there - much easier to shape and get correct a strip which is already bent to fit
This is what led me to believe the issue is with the bulkhead fairing since no amount of soaking/heat would solve my problems 😞.
21 minutes ago, SpyGlass said:Remove the planking you have done .
As much as I dread this, it’s be foolish to ignore someone with more experience. I used PVA glue (but glued the edges of the planks). I’ll try to pull off the planks and restart.
Do you think that I could number the planks and maybe reuse them? If not I need to order more planks...
9 minutes ago, mcpwilk said:is a lot easier to plank a clinker hull from the keel upwards than try from the wales
Thanks, unfortunately I didn’t want a clunker hull, my inexperience in planking simply created one. Time to restart and hopefully salvage what I’ve done.
-
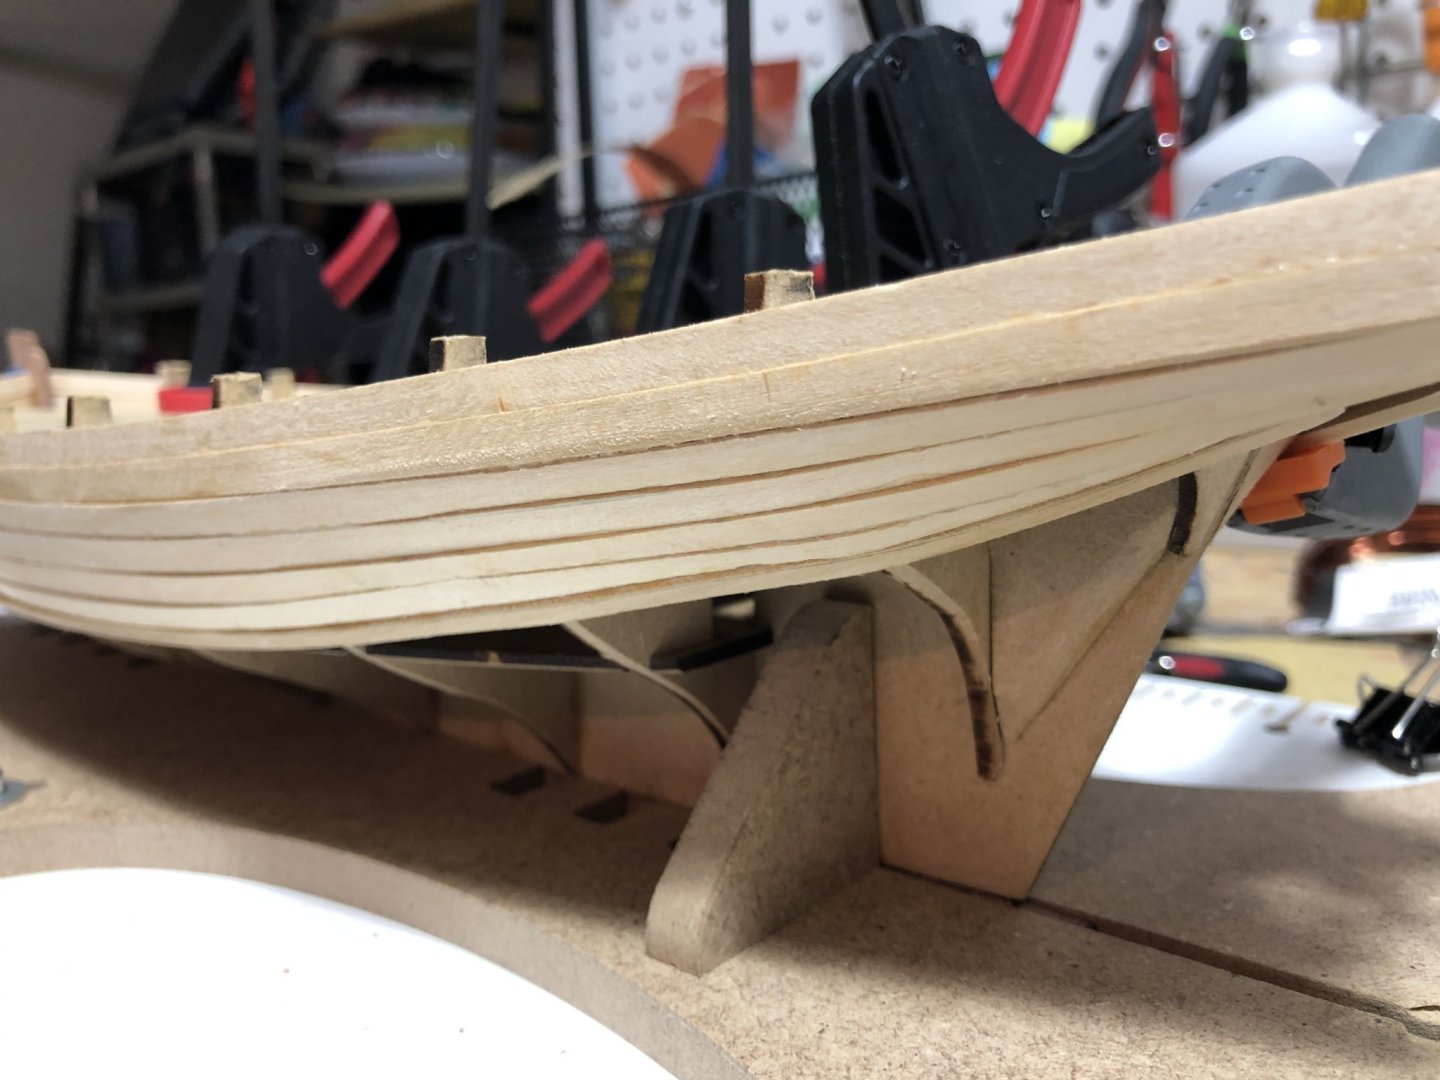
I read everything I could on planking, I watched Chuck’s videos and I thought to myself my first layer of planking (and first planking ever) is going to be so smooth and beautiful.
I was wrong, completely wrong. I’m not completely certain but I think that I didn’t fair the bow of the ship anywhere near as well as I thought that I had. I believe this caused a clunker effect to develop which, to put it lightly, was quite disheartening. I think the pictures make it look a little worse than it really is, but a beauty it is not. I’m learning a lot in this process and, since this is a first layer, I’ll be able to use some filler and I believe everything will clean up just fine but I need to, and have, reset my expectations for this build. I blame you all with your beautiful masterpieces (sarcasm) 😁.

- bruce d, CiscoH, Rik Thistle and 8 others
-
 11
11
-
The only thing that I would add on to the above is various clamps in all shapes and sizes (also “odd” clamps including binder clips, rubber bands, etc).
- JeffT, Osmosis, EricWilliamMarshall and 2 others
-
5
-
-
3 hours ago, glennard2523 said:
I hope it will fit Ok without and need to enlarge the slots
If you feel that the deck is flexing I would highly recommend (based on my experience laying the false deck on my Alert) to check and see if the upper bulkhead gets cut away like it does on the Alert (I assume that they do). If they do slightly sand the interior side of the upper bulkheads to allow the deck to slide in easier. I wouldn’t mess with the slots on the deck they’ll be fine when you get it down.
-
3 hours ago, Edwardkenway said:
Winchelsea would be an excellent choice as you have all the laser cut parts from Chuck if you need them.
This is exactly the route I'm currently planning on taking; I might have to pick up a byrnes table saw to rip planks if I want to do it in AYC (which given how nice Chuck's build looks is very tempting)
3 hours ago, Edwardkenway said:As to tools I'm still just using a coping saw and craft knife, not got round to buying a scroll saw yet.
The scroll saw would be my other tool of choice if I wanted to somewhat limit the laser cut parts. Of course I have to consider if I actually have room for both tools (and the time/skill to cut out the bulkheads accurately).
-
From where I’m sitting it looks like you are doing a great job! If my current build goes well I may heavily consider doing the Winchelsea, but I’ll probably do it less scratch and more kit-like. I’m really impressed by your scratch work; someday I’ll have to give it a try (when I have acquired the right tools).
-
I’ll toss a vote in for a pre-dreadnought
-
What a beautiful diorama; I’ve always wanted to build something like that. Would you recommend it as a first time diorama? If so, is there anything else that I would need aside from the water?
- mtaylor, FriedClams, Canute and 1 other
-
4
-
On 2/7/2020 at 12:50 PM, DelF said:
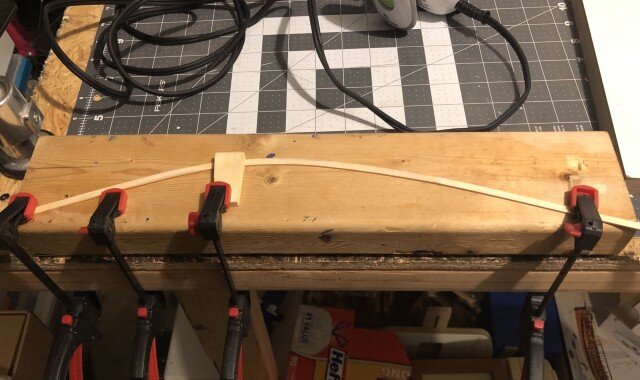
I'd certainly recommend Chuck's edge bending method. I've seen him use a hot air gun and a small travel iron. I've tried both, and both work, but I find the iron works faster and, as it literally irons the wood flat, it reduces any tendency for the strip to bend in a direction you don't want.
Derek
I’ve started using an iron on the first planking of my alert and I think it’s great so far. I haven’t used a hot air gun but a cheap travel iron is working great for me. I can’t wait to see your second planking pictures.
-
Those ikea cannons are really looking nice! 😉 You’re really doing a great job!
- CDW, GrandpaPhil, Old Collingwood and 2 others
-
5
-
-
And so it begins.
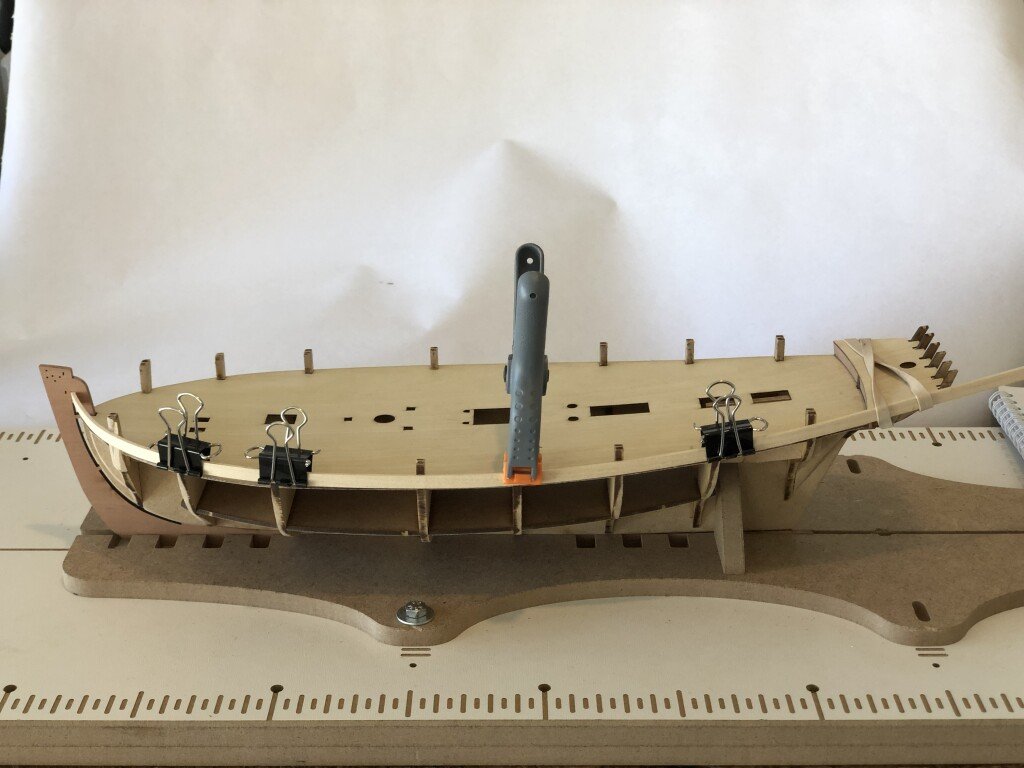
First plank on down 4mm from the bulkhead tops. This feels like a huge achievement for me but I promise not to bore you with pictures of every plank that I lay down. I'm currently prepping the corresponding plank for the opposite side. Given the time it takes me to prep and place a plank this log may go a little silent while I continue to work in the background. I'll post an update when I hopefully have several planks on each side.
- CiscoH, JayCub, Retired guy and 8 others
-
11
-
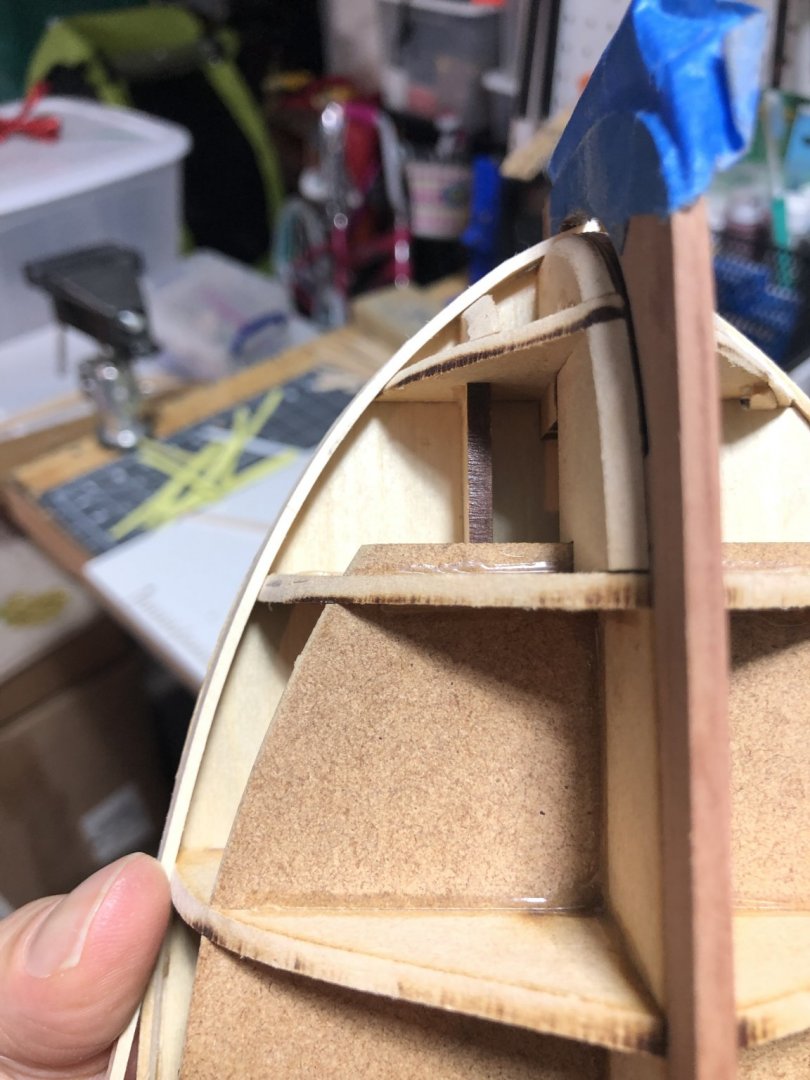
And with the keel on I’m about to start my first planking (thankfully it’s a double planked hull but I’m still a little apprehensive).
-
As a respite from fairing I'll add a small update as I am lowly progressing further along. I attached the pieces in question above to match the curve of the deck.
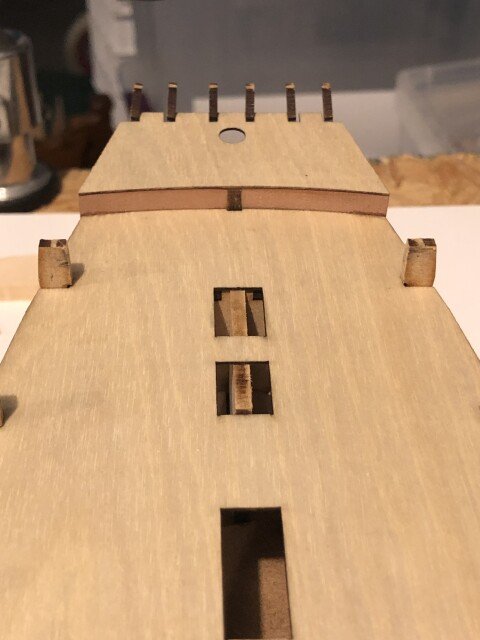
Unfortunately when I went to remove the keel pieces and install the keel I noticed that the laser cutter did something funky and didn't cut all the way through the sheet for this (and one other part) and may have caused some overburn (?):
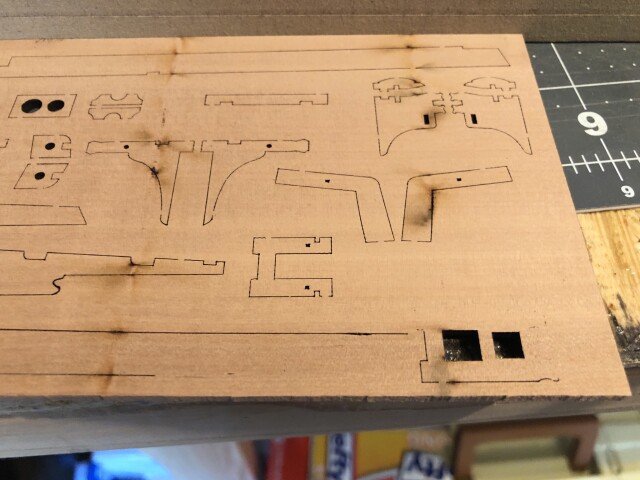
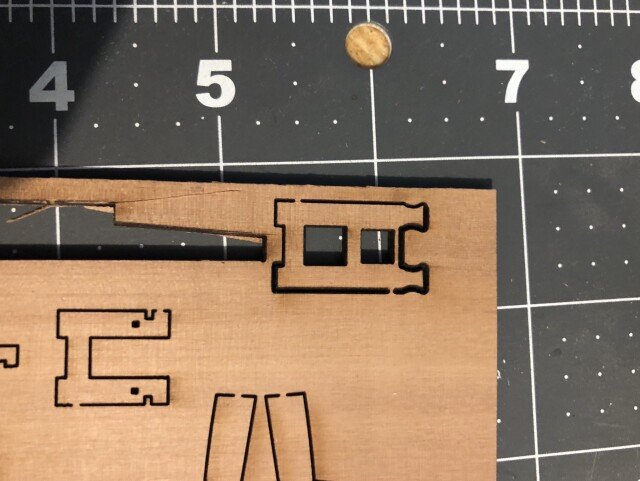
It was a little bit of a struggle to remove the keel pieces (I unfortunately left a touch of it behind as seen in the above image) and creating a tight fit left a small gap at the stern where the rudder post attaches.
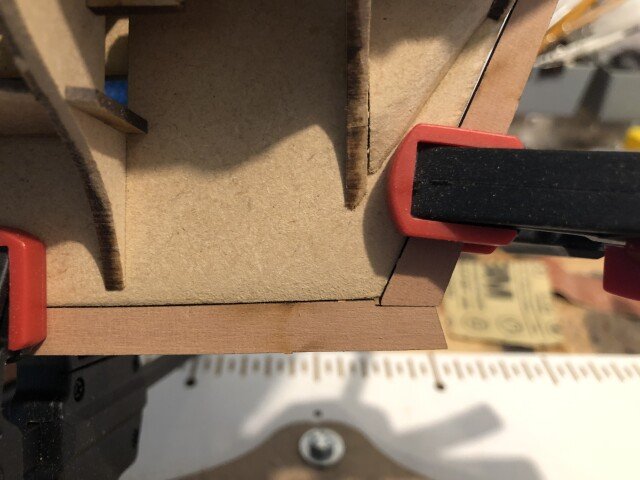
This will all be painted white in the end so my current plan is to taper to rudder post slightly to meet the keel and fill in the hole with some filler. When I get to that other piece that may not be quite symmetrical I'll address whatever modifications are needed (and hopefully do a better job of removing it from the sheet. Now back to fairing...
-
2 hours ago, Duanelaker said:
whenever model expo had a sale that dropped a boat below 100$ I would end up buying it
I keep eyeing the Dusek Greek Trireme whenever model expo has a sale. A few times it has come close to that $100 mark and I’ve almost fell victim to the sale. I work slow, so I’m doing my best to hold off buying models until I’m close to finishing what I’ve started.
(...and I keep buying upgrades to my build so there goes the ship budget anyway 🙂)
-
7 hours ago, Duanelaker said:
Artesania Latina King of mississipi
I’m excited to see this build; I really like the riverboat models (someday I’ll hopefully build one). I’m sure you’ll do a great job on both!
- Duanelaker and thibaultron
-
2
-
It looks really nice! I completely agree about the Midwest kits. They are a great intro for beginners. It’s a shame they aren’t still being made.
What do you think you’ll tackle next?


HM Cutter Alert by VTHokiEE - FINISHED - Vanguard Models - 1:64
in - Kit build logs for subjects built from 1751 - 1800
Posted
None taken, the issue (currently) isn't with his planking process; at the moment the issue with my shoddy fairing 🙂. I tapered the bow about 20%, I could increase that some, but I don't think tapering and edge bending (believe me I tried) can overcome the lack of fairing that I unfortunately did on that bow filler. I think my bow is in better shape; planks fit nicely on the first 3 bulkheads but I haven't had time to really sit down with it and test a plank or two.