


VTHokiEE
-
Posts
1,528 -
Joined
-
Last visited
Content Type
Profiles
Forums
Gallery
Events
Posts posted by VTHokiEE
-
-
-
Welcome! I’m certain you’ll do great. I was nervous about my skill level (and I’m very much a novice) but as long as you enjoy the process, remind yourself that a hobby is supposed to be fun and don’t worry about making mistakes you’ll thoroughly enjoy yourself. What wood kits were you gifted?
-
Thank you for the insight. I’ve tried one of the chemical methods (and I am starting to get good results) but I’ll have to see if I can replicate your work with paint. Do you use a specific type of paint? I really appreciate the help and again very nice work on your build.
-
-
May I ask what your method is to paint over the brass? I haven’t had much luck (but I haven’t don’t much experimenting either).
-
You might want to look at Cornwall Model Boats out of the UK their shipping (to the US at least) is very reasonable. At a brief glance the model Shipways prices are a little higher but maybe with shipping the cost will be better in the end.
https://www.cornwallmodelboats.co.uk/acatalog/model_shipways.html
-
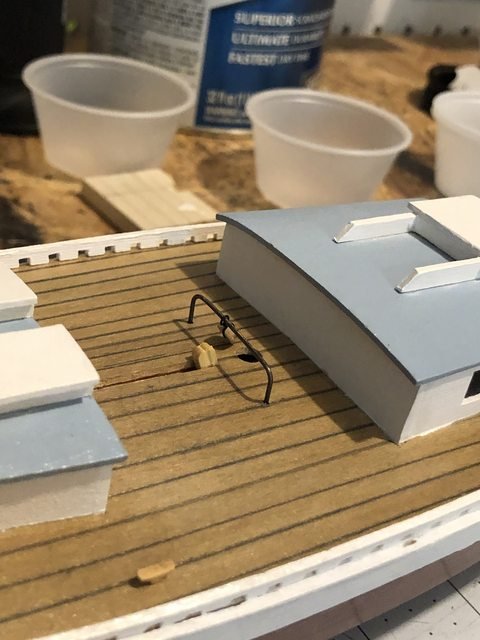
Small update, added the mast deck rings and worked on the gaffs. I also began fabricating all the metal work for the masts (making all these pieces is a time consuming affair for a novice, but I think they are turning out well 🙂).
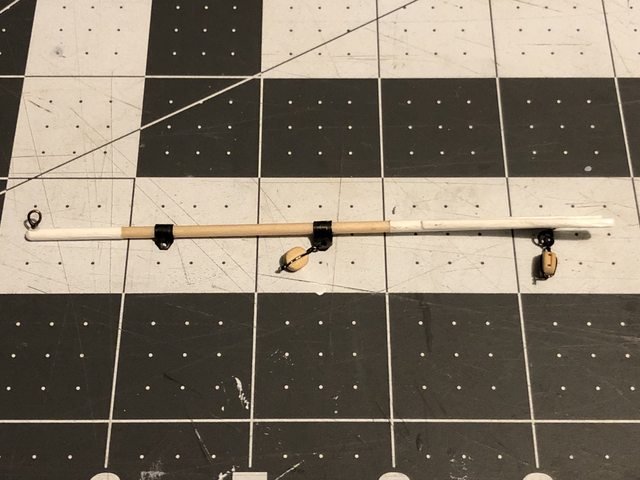
EDIT: I forgot to ask, the anchor is white metal and the chain appears to possibly be copper (?). I don't believe either will blacken in the birchwood casey brass black that I have. Does anyone have any suggestions? I'm considering whether to purchase some Jax or replace the components and I'm open to suggestions. Thanks!
- thibaultron, GrandpaPhil, ccoyle and 5 others
-
 8
8
-
EDIT: Currently spoken for.
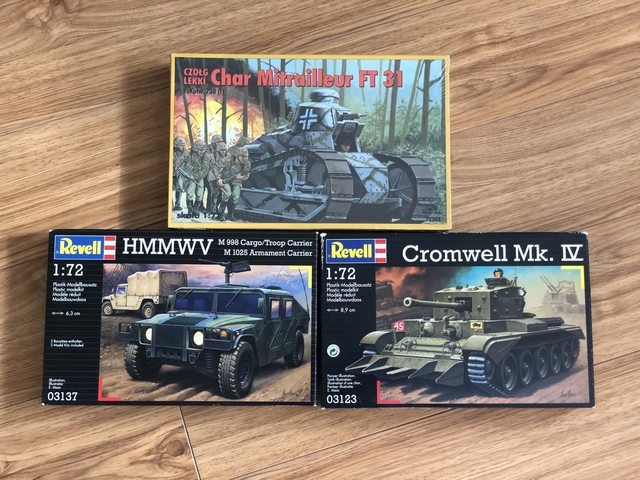
I bought these three kits many moons ago but now that I've dabbled in wooden ships I severely doubt these will see the light of day. I started the Cromwell (and used too much glue) but the other two are still sealed. I always wanted to build a really nice plastic model but c'est la vie. Anyhow if anyone wants these kits I will gladly send them for the price of shipping; I'm more than willing to ship it internationally but I can't see how that would make financial sense.
-
-
-
I wanted to stop in and say your work looks really nice, I'm enjoying watching you progress through the build!
-
Welcome to MSW, this link should help you get a gallery set up: https://modelshipworld.com/gallery/submit/?_new=1
Without the link click gallery in the navigation bar towards the top and then add images on the left.
-
Looks like a very fun project! I’m excited to watch it progress.
-
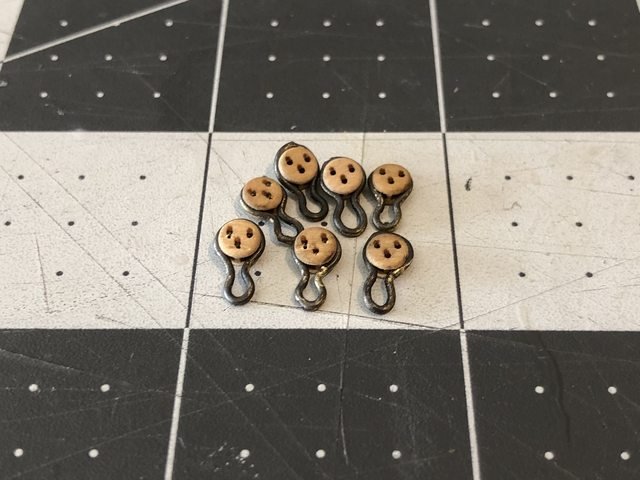
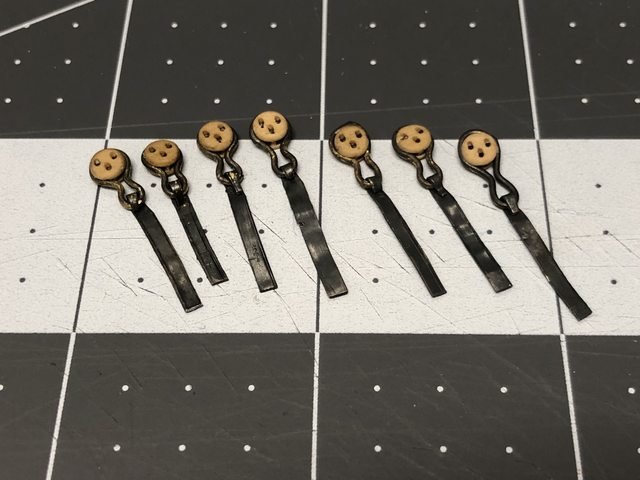
I made up two blocks for my travelers, blackened the travelers (I need to do some more practice blackening, I think I'll look into the sparex route for cleaning):
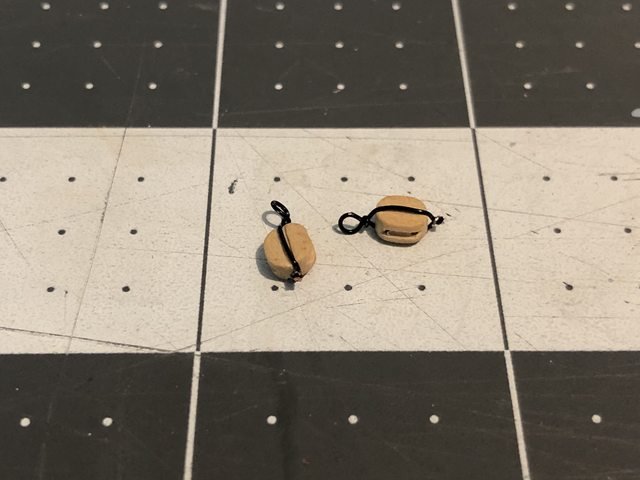
Next I made the deadeye strops from some brass wire:
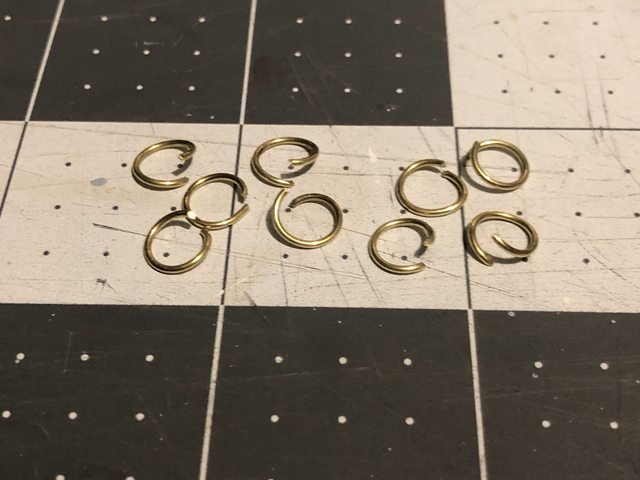
I made 9 rings, 2 were poorly soldered and broke so I had to go back and make an 8th, but I didn't go back and retake the pictures. I did a trial rund with the thin brass strips for the deadeye chain plate and decided that it looked reasonable.
After I attach these to the hull (hopefully this afternoon), I'll start tacking the metalwork on the booms and spars.
- thibaultron, Duanelaker, Blue Ensign and 1 other
-
4
-
More pictures to come later, but does anyone have a suggestion on what to use for a deadeye chain plate? I finished my deadeye strops and I was planning on using a thin strip of brass, but now that I’m about to make them I’m not certain (the strips feel too flexible, 0.01mm, maybe I need thicker brass?).
Picture of deadeyes if it helps:
-
27 minutes ago, thibaultron said:
I like your jig for making the scuppers!
Thanks! It was my first ever jib, so while it wasn't much I was pretty proud of myself :)
-
13 hours ago, Azzoun said:
You're speeding along, this model took me 6 months to build! haha
Thank you for this; I actually felt like I was crawling along at a snail's pace, but having great works to look at (like your gallery really help). This forum has so many talented builders sometimes you have to remind yourself that everyone's pace is different. I'll probably start slowing down now though as I'm reaching the area (getting my blocks and metalwork set up for rigging) which I'm not entirely certain how to do. I'll probably try to closely emulate Hopeful's and your builds. You wouldn't happen to have any closeup shots of your spars, gaffs, and blocks?
-
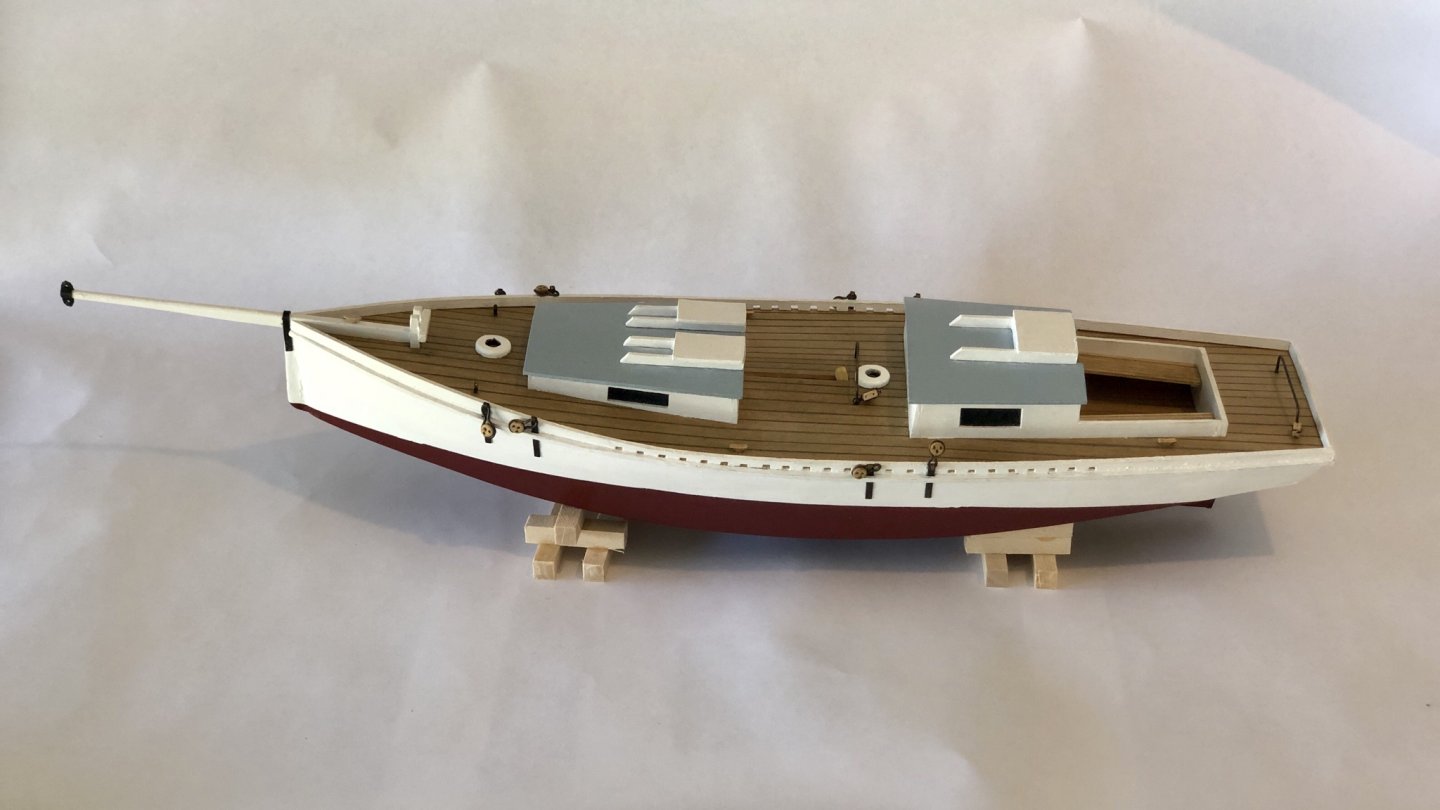
Waterline taped off:
Painting in progress:
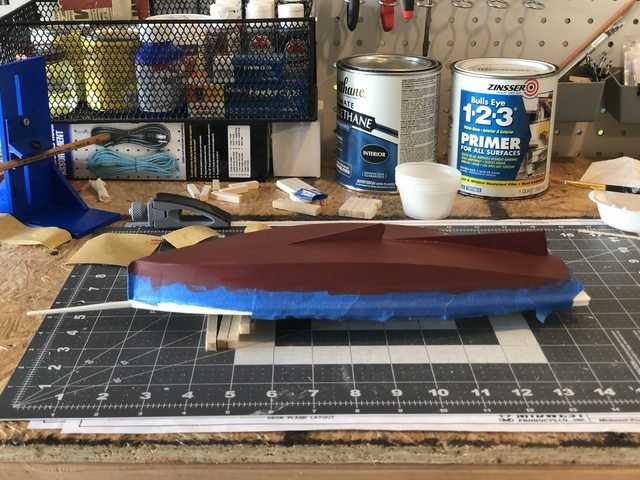
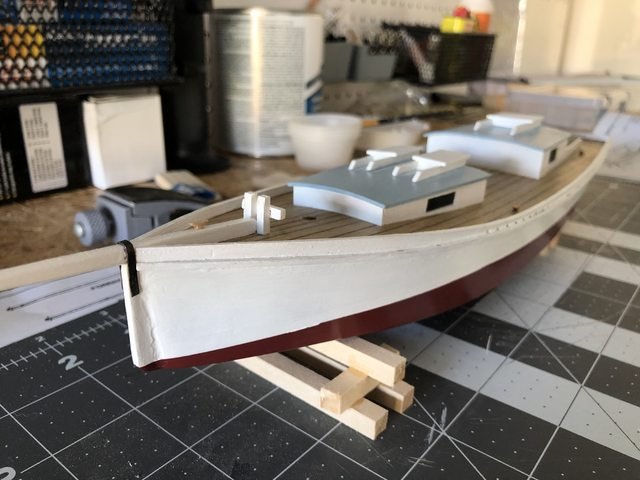
And completed (it isn't perfect, but overall I was pretty happy with it):

The supplied door hatch wasn't the correct size (as the kit was opened and purchased off eBay, I assume it had broken, but I didn't see the missing part). I had some 1/16" Walnut around (the original hatch was 1/32", but I didn't have anyway to plane the walnut to match) and I fashioned a new hatch:

Finally, I fashioned a gammon iron and attached the deck cleats (using replacements from Syren since the kit provided cleats were plastic):
-
Thanks Allan! I am in the US and I'll order a syringe (or a few) and start practicing. After researching the technique, I think I might be applying too much heat (placing the torch too close to the ring) and I think I could used a ceramic "plate" to place the rings on while I solder. Fingers crossed
")
- mtaylor and thibaultron
-
2
-
14 minutes ago, wefalck said:
And you need the appropriate heat-source, a torch, as the melting point would be around 600°C as opposed to 350°C or lower for soft-solder. There are silver-soldering pastes, btw.
Any thoughts on specific pastes? I’m considering ordering some solder called Stay Brite which seems to have a favorable reputation on the forum, but it isn’t a paste (at least not that I saw during a quick glance).
- mtaylor, thibaultron and Canute
-
3
-
31 minutes ago, davyboy said:
You really need silver solder for joining brass wire. Ordinary solder is useless for this.
Dave

Thanks, I’ll try a different solder. I was under the (apparently mistake) impression that this solder paste was silver solder.
- thibaultron and Canute
-
2
-
I decided to try my hand at making some deadeye strops this morning and I seem to be failing spectacularly. I create a ring out of brass wire and then attempt to solder the joint together. When I place the deadeye in the ring and begin to crimp the ring the joint breaks and I can't seem to figure out what I am doing wrong. I was using Solder-it Paste but that seemed to be dripping everywhere and I am contemplating getting solder wire as that may be a little more comfortable for me. I realize there isn't much information here, and that's probably my issue, I'm probably missing a step or two.
Alternatively, does anyone know where I can buy small brass loops until I figure out my solder issue?
Thanks for any guidance!
-
Welcome to MSW from Central FL! Have you looked at any of the build logs for the kit? There looks to be a lot of finished builds that might shed some light on your issue.
- mtaylor, JeffT and Scooter4Travel
-
3
-
Goodness, is there a contest for most adopted build logs ;-)? Looking forward to seeing how this one turns out as well!
- popeye the sailor and Elijah
-
2
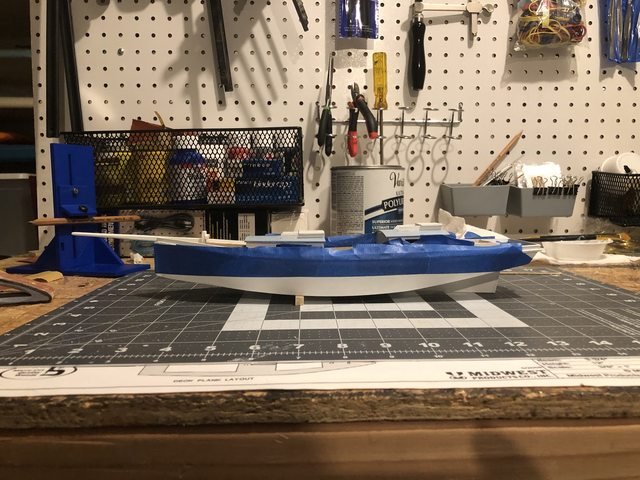
Chesapeake Bay Crabbing Skiff by Duanelaker - FINISHED - Midwest Products - Small
in - Kit build logs for subjects built from 1851 - 1900
Posted
I’m also not a paint master so double check this, but I’ve done the same but instead of clear (which is frequently mentioned) used the same color as is under the tape (in this case white) to seal the edge.