


kondzik
-
Posts
121 -
Joined
-
Last visited
Content Type
Profiles
Forums
Gallery
Events
Posts posted by kondzik
-
-
-
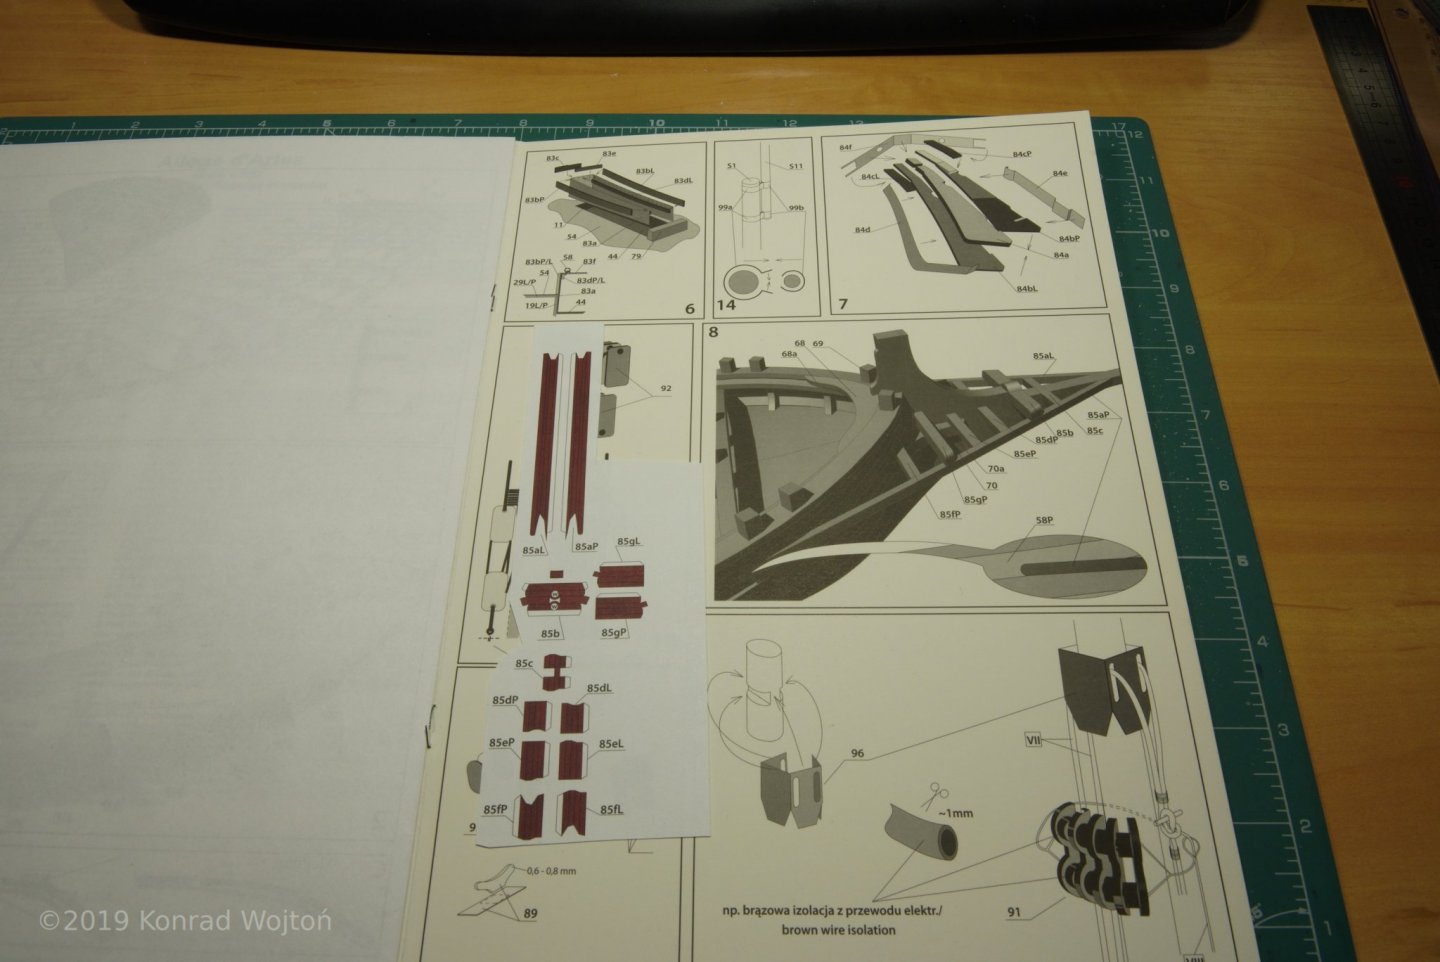
1. Before cutting any part I have treated all sheets of kit with nitro based varnish undercoat (Kapon Super from Polifarb Dębica, quite popular in card modellers community in Poland). I've used it straight from the can, with broad brush, one layer for each side, but in future projects I will probably coat only printed side. Varnish should soak into sheets, I try to rub it into sheets to avoid heavy brush traces (light ones are not a problem). Varnish helps prevent print from fading during work with parts but it has a couple of downsides. First it smells awfully so I can use it only in heavily ventilated area (I try not to start builds during winter) and I use 3M face mask with proper filtration. Second downside - it can dissolve digital print so before application you need to try it on some small piece (I tend to try it on part numbering with small brush), offset prints seem to be immune to this effect but I test them anyway. Third - PVA glues tend to not stick to well onto sufraces treated with it so before I glue treated surfaces I rub them a little with 600 grit sandpaper or use butapren instead of PVA as it seems it dissolve nitro layer (but it also smells so I tend to avoid it
") ).
).
Right now I'm debating wether to use nitro based varnish in my next build or find something acrylic based.
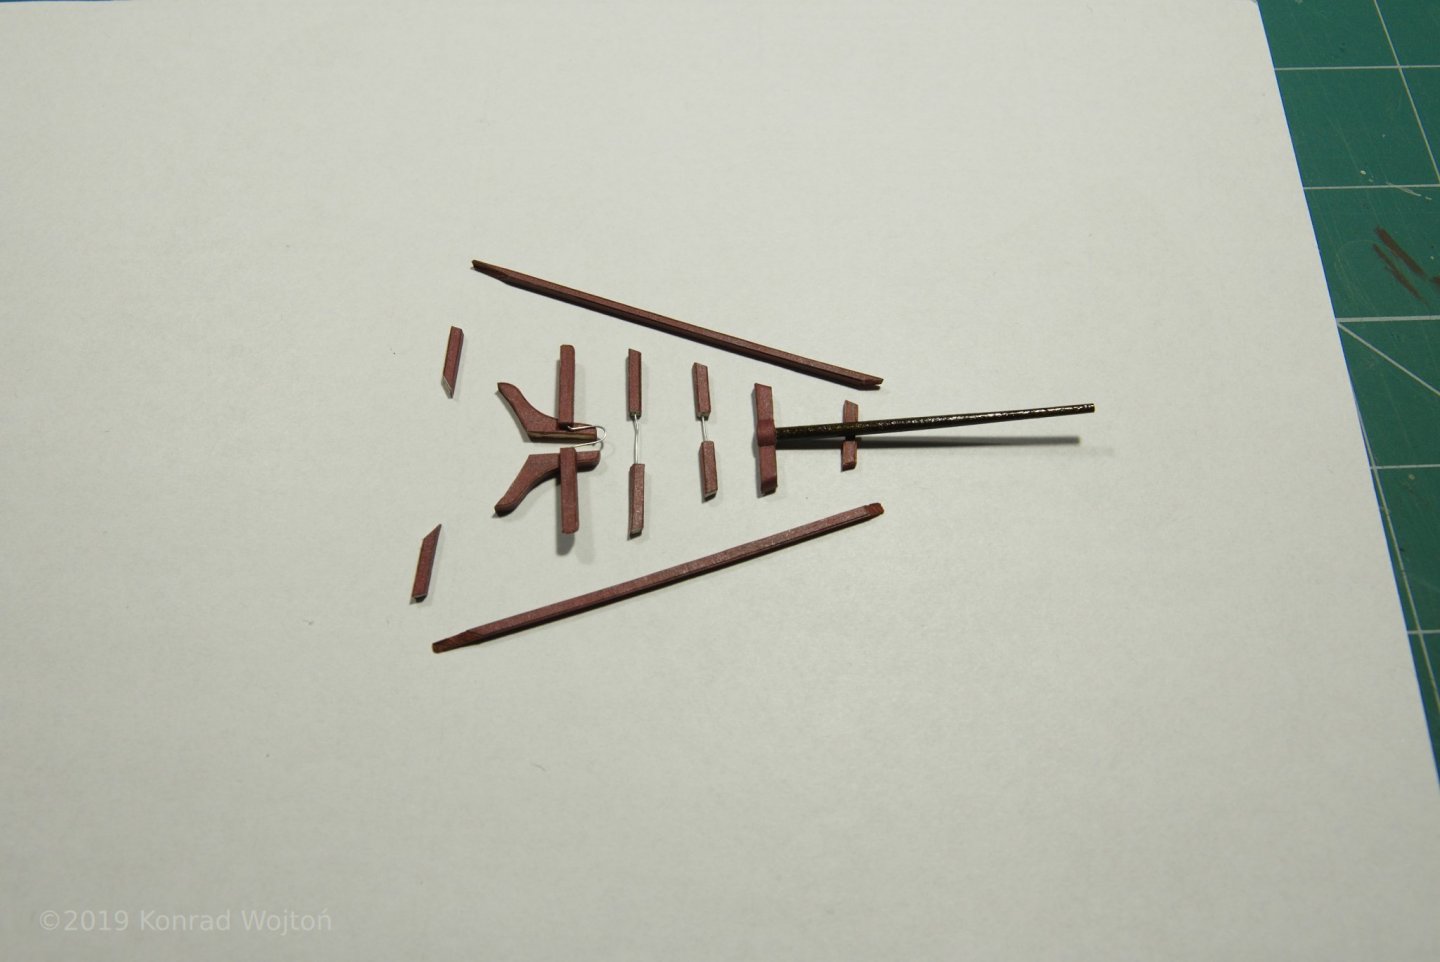
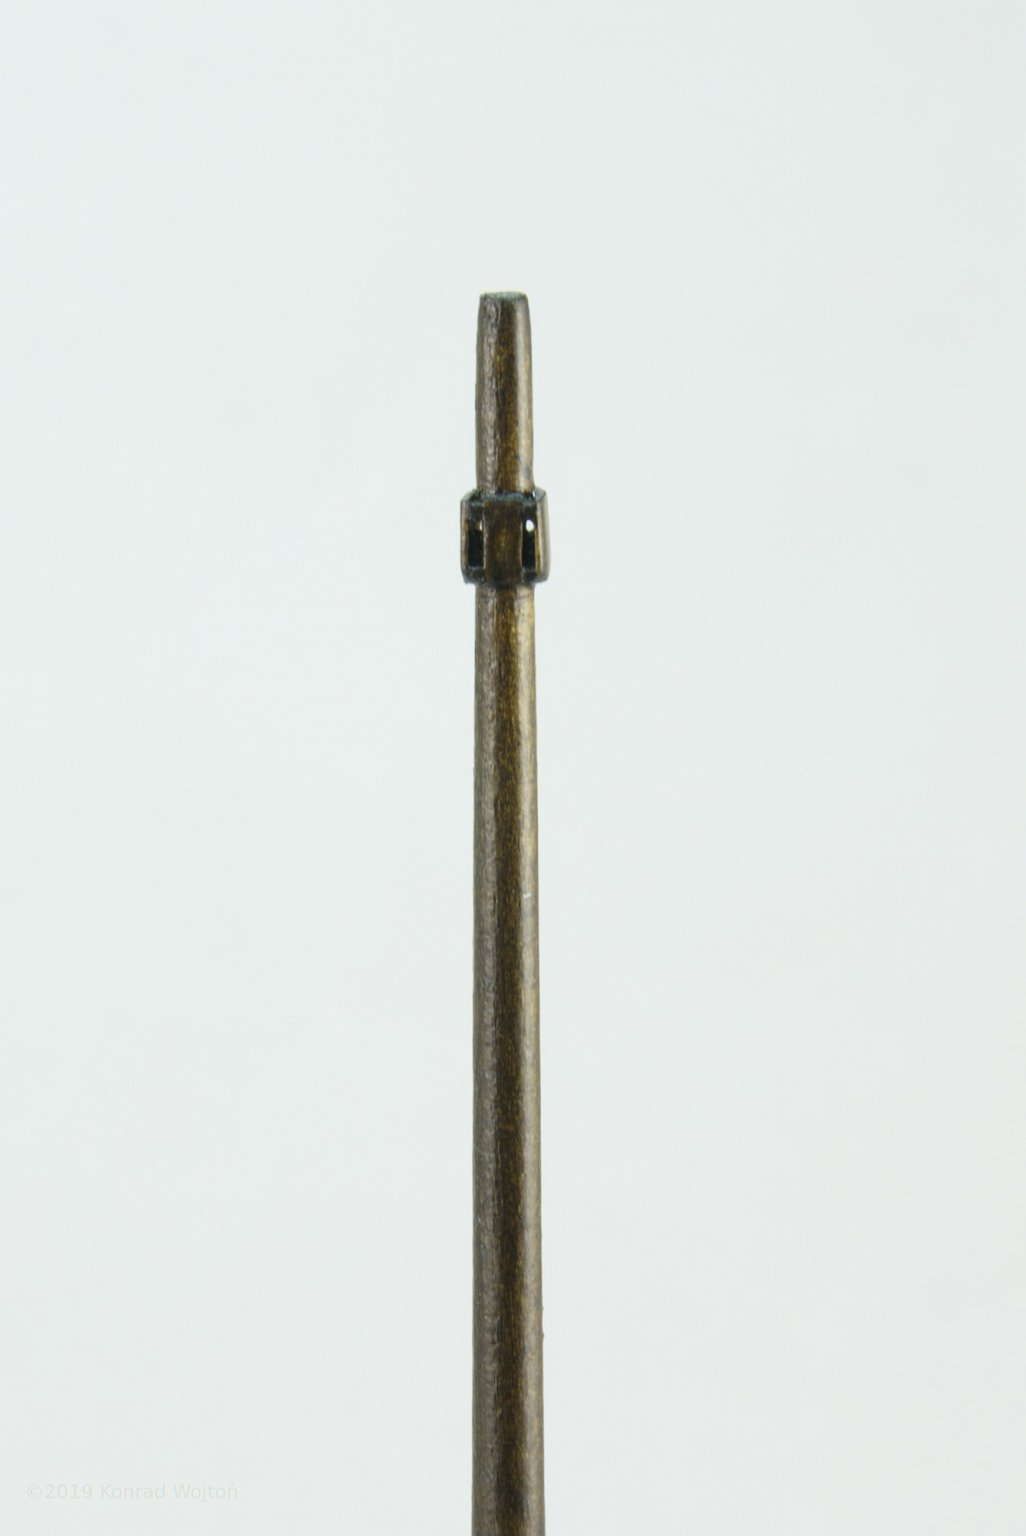
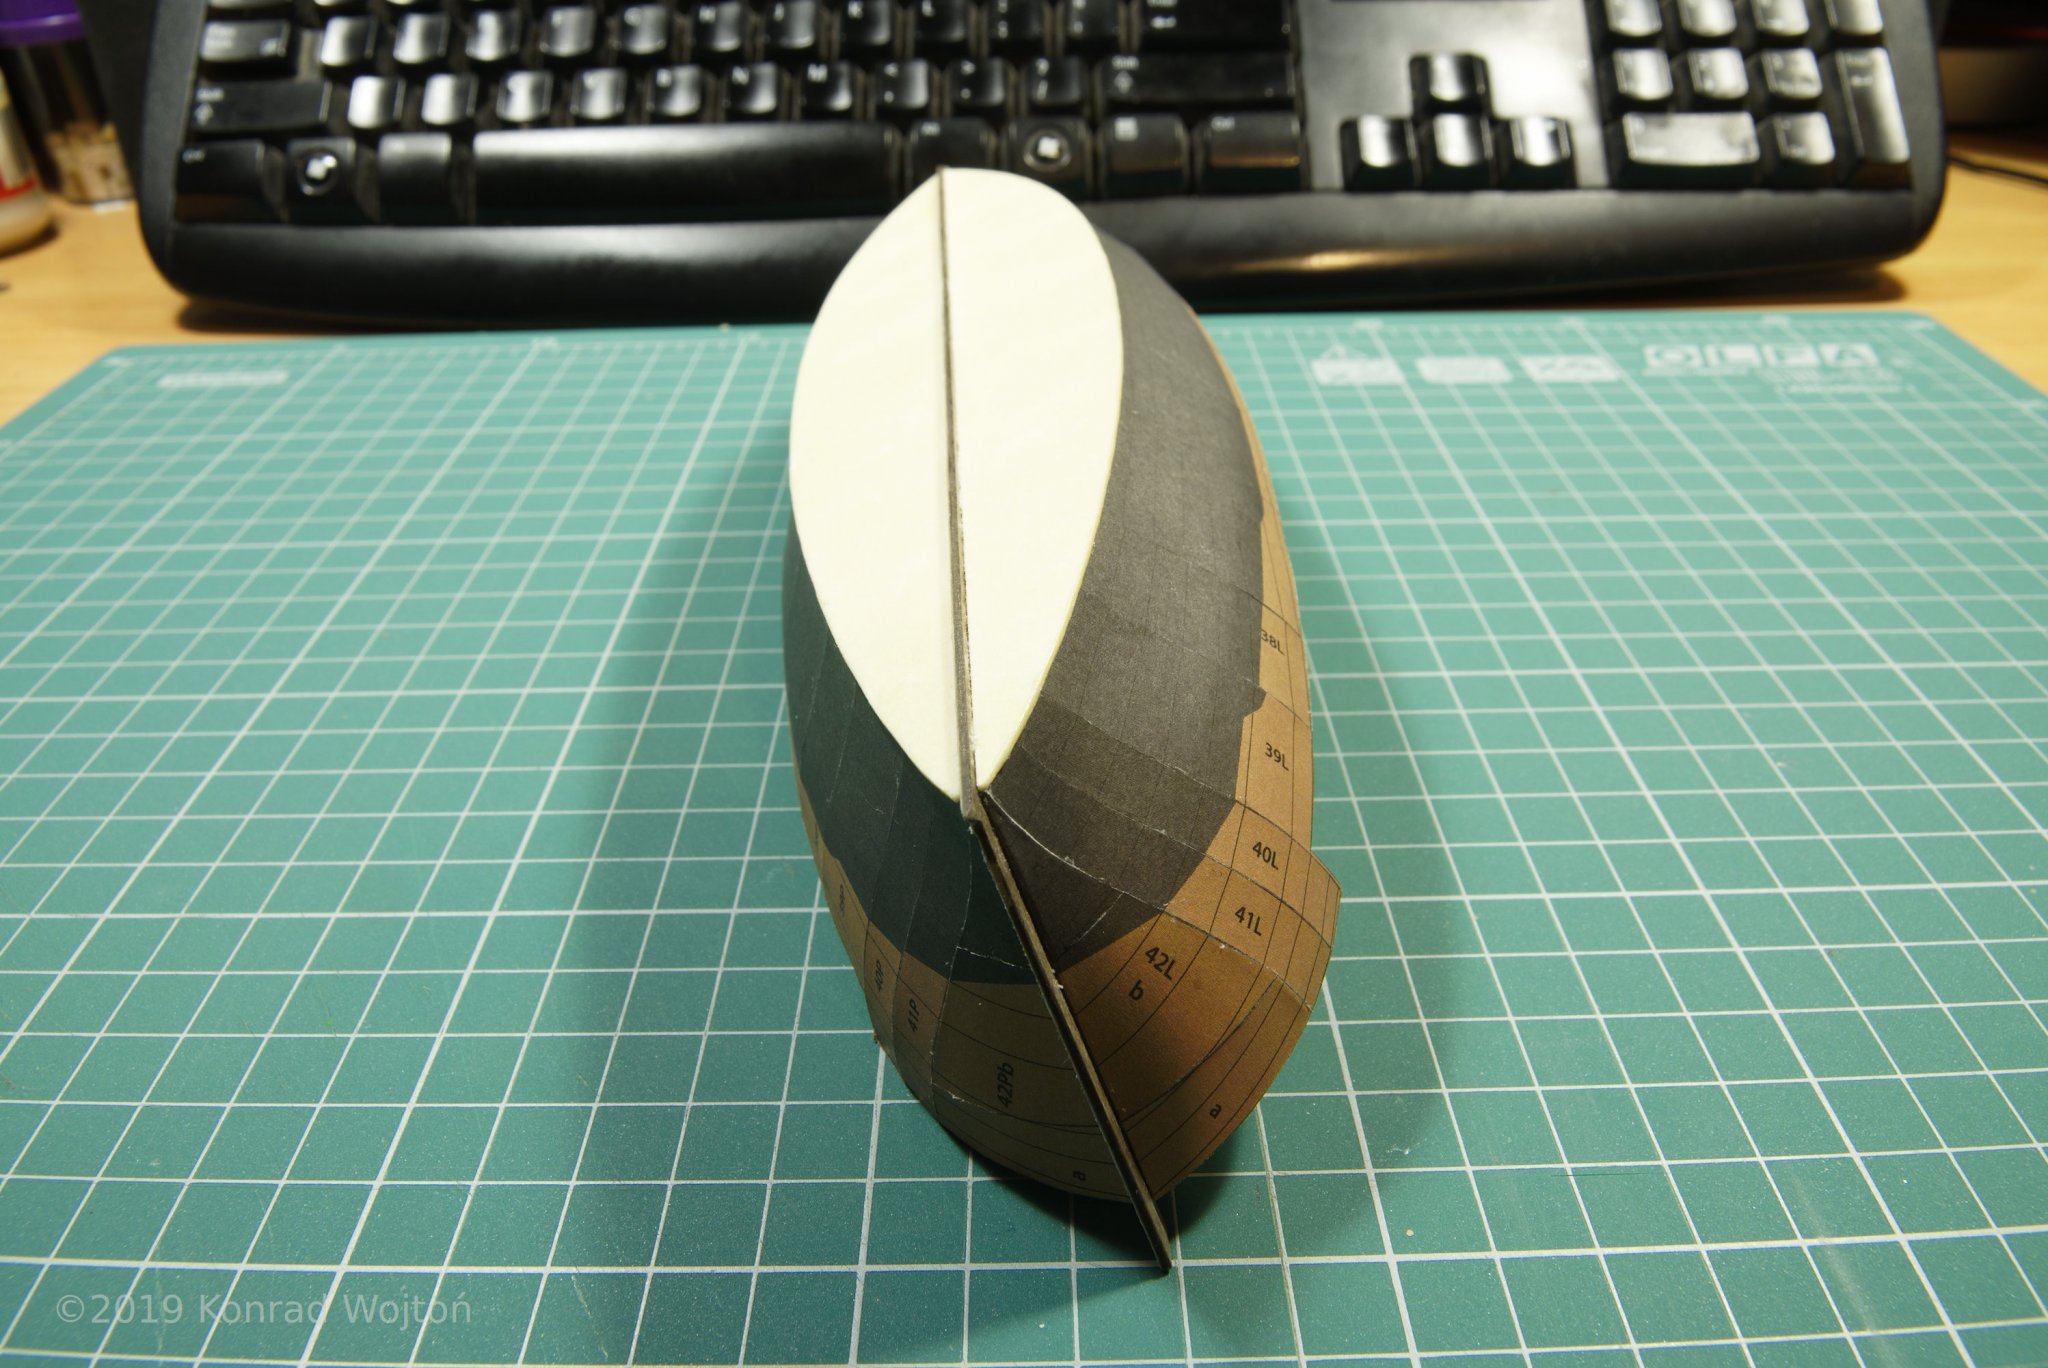
Sometimes I soak frame parts with thin CA (in my first post darker stains on framing are tell tale of soaking with CA). I've also used CA soaking with parts of bow and stern construcion. They are made with 1mm x 1mm square bars from card stock. This bars were then soaked with CA and after soaking I've used kit parts as "skin". But I need to find alternative to CA since I think I've developed allergy to it. Anchor part were made from styrene exactly beacuse of this allergy. Otherwise I would problably soak some piece of card stock, cut and then sand anchors from it.
2. Mostly brushes but after I finish some subassembly I use rattle cans with varnish as final coat. During this build I've used aryclic AK Interactive Glossy and Matt varnishes. I've wanted to use some Dupli Color clear varnishes but my tests showed that they react with my nitro undercoat (I've used it in my ealier build without side effects so it puzzled me for a bit). I'm thinking about getting myself an airbrush but I haven't convinced yet myself enough to warrant such expense.
Sails where painted with broad brush, four thin layers each side of water diltued acrylic paint (Talens Amsterdam in tubes) with a bit of PVA glue. After I've made all reinforcements and reef lines I've sprayed them with rattle can to help with shaping.
3. Square edges - if You mean during cutting, well they are not always square and sometimes sand a bit. I don't use scissors during cutting. Every single part during this build was cut with Olfa AK3/AK5 blade, straight lines with help of metal ruler, cuves - slowly free hand. Laminated parts sometimes three or four light passes with blade before they were free.
4. Except of blocks I haven't used any laser cut parts for this build. For blocks I've used Shipyard laser cut parts - 2 and 3 mm blocks, some double and violin blocks. For example this ones http://shop.model-vessel.com/index.php?id_product=20&controller=product&id_lang=2. They saved me a lot of time and are good enough for my needs. When I bought this kit dedicated laser cut blocks where not available but it changed during past 3 months and I would use them now as they are much cheaper than Shipyard ones. I tend to not use laser cut frame parts for two reasons. First - price, sometimes they seem to cost as much as kit itself and they don't save me enough time to be worth it in my opinion. Second more philosophical I think - laminating and cutting frame parts of new buld is akin to laying down keel of new ship for me. So some very small laser cut parts - yes please, laser cut frame parts - I think I'll pass the expense if they are not bundled
.
-
-
-
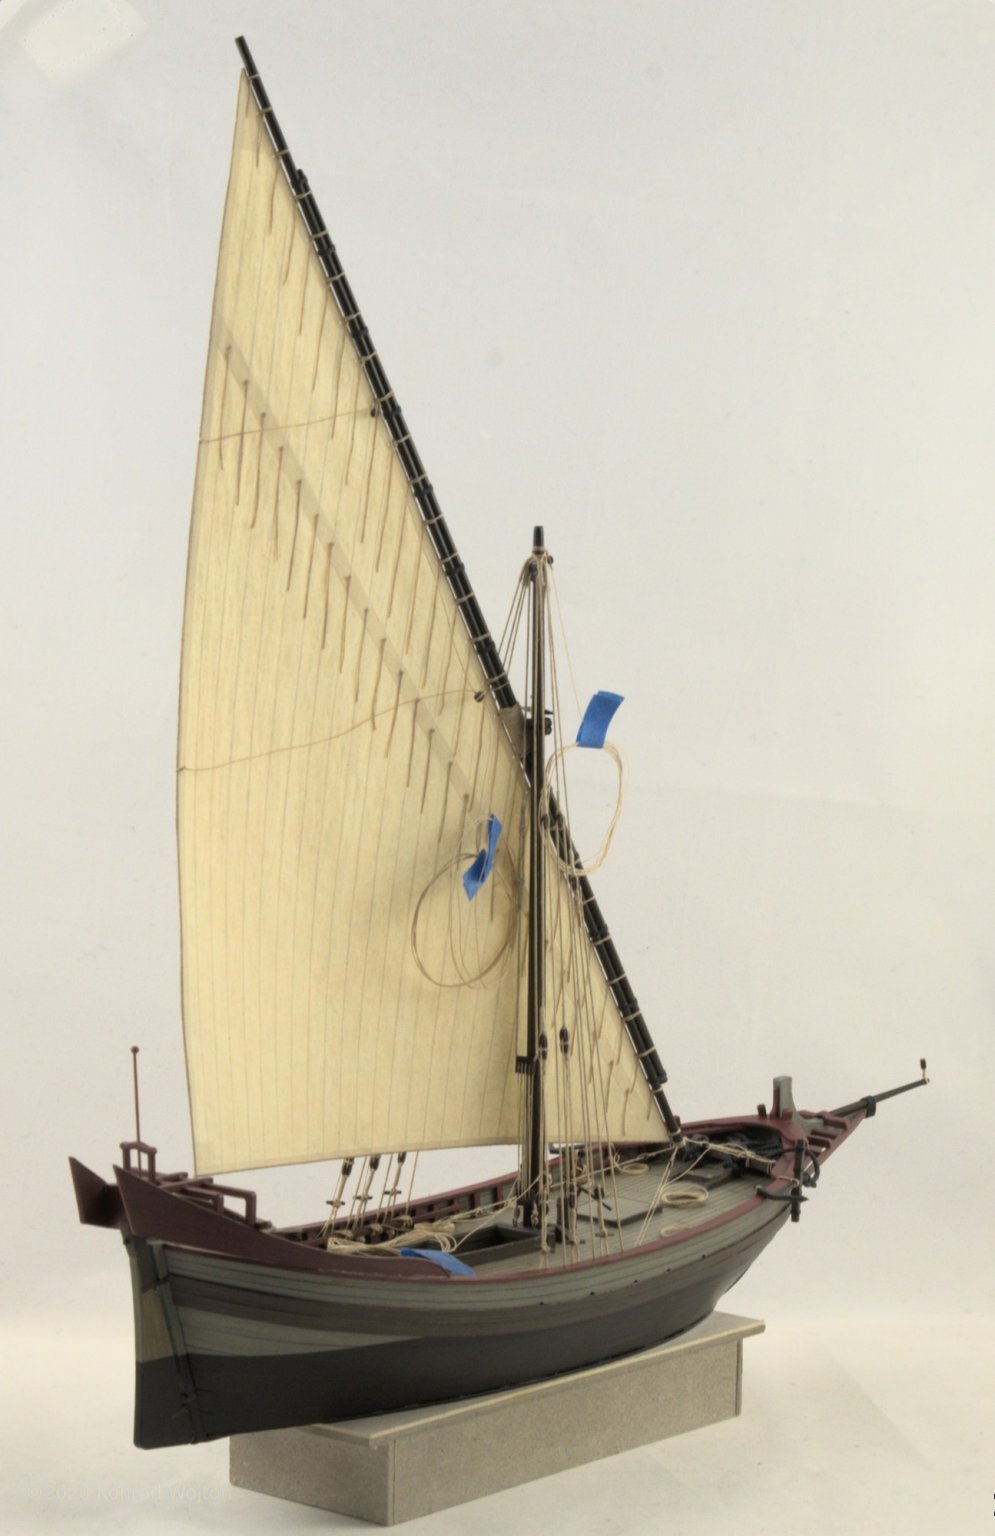
Time for an update in this build log.
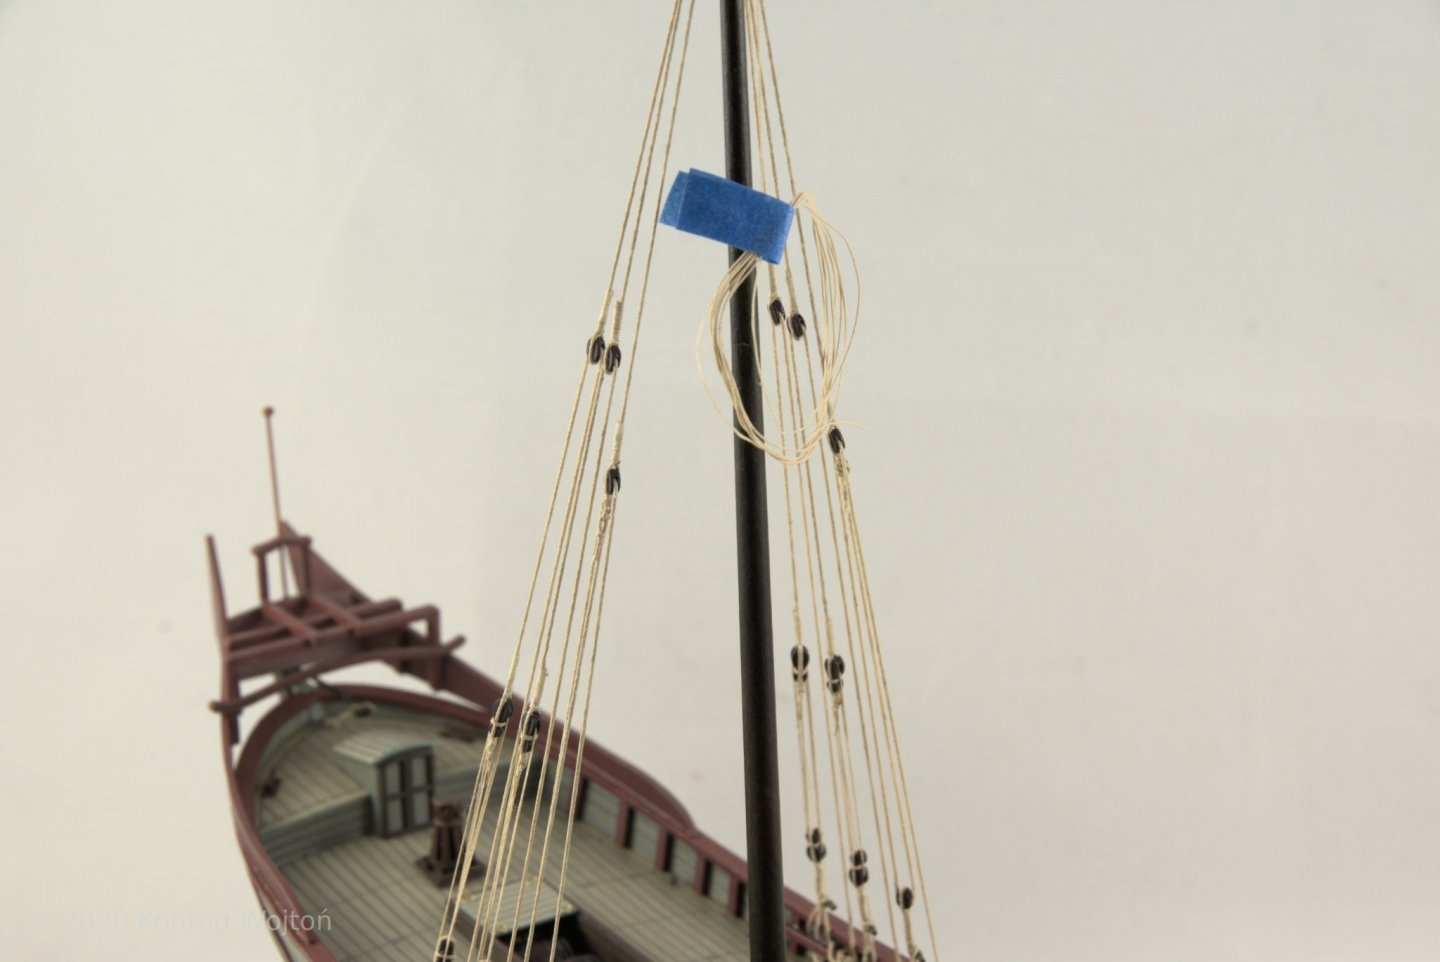
I've managed to make shrouds. During tensioning unfortunetly one of the horizontal bars on sides came unglued which forced me to redo whole thing. Because of this setback I lost interest in the build for a couple of months. Finally recently I've managed to return to the build.
For blocks instead of using kit parts I've aquired laser cut parts from Shipyard. All ropes are made with cotton thread, stained with acrylic paints and then treated with beeswax. Anchor cable made from 1mm cotton line also from Shipyard.
Cargo was not included in the kit ;).


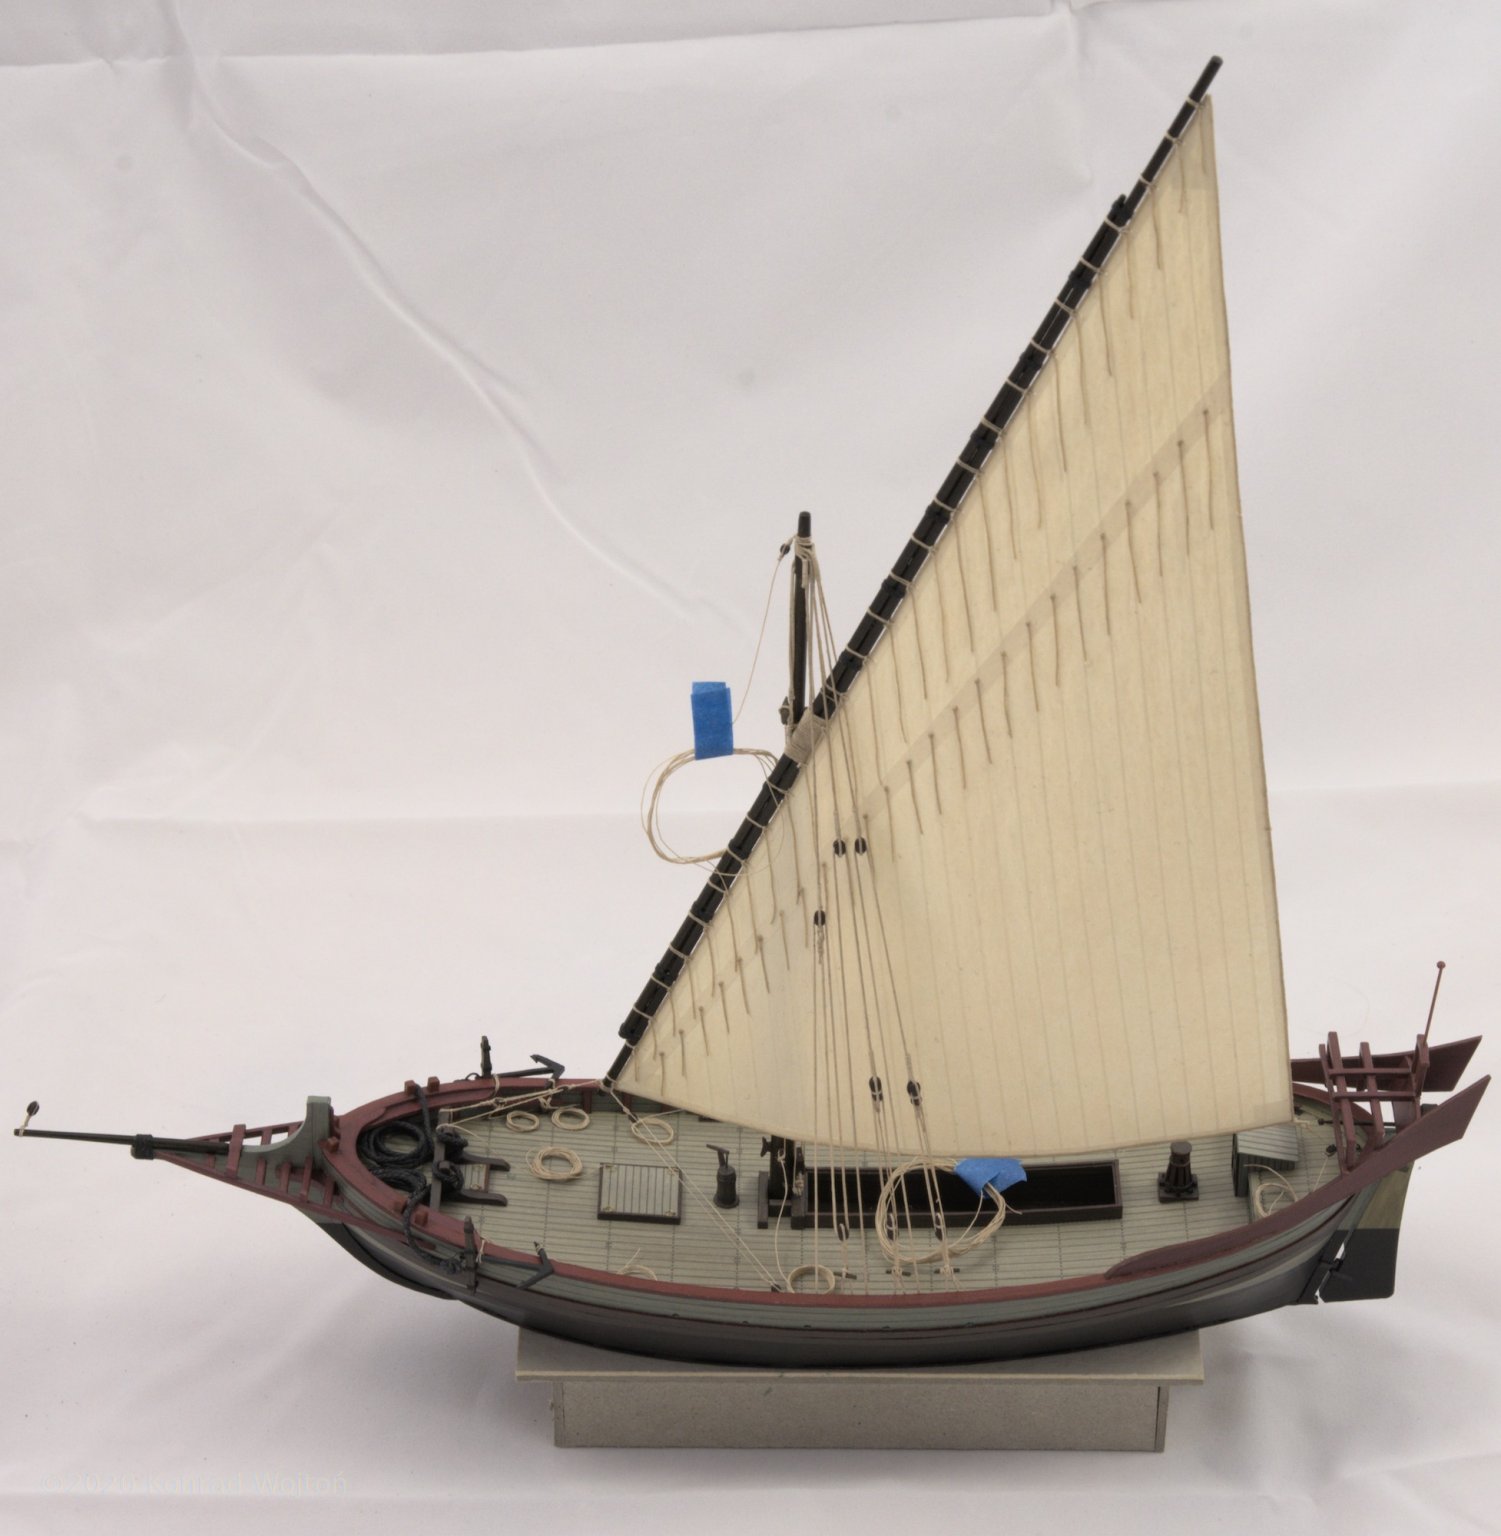
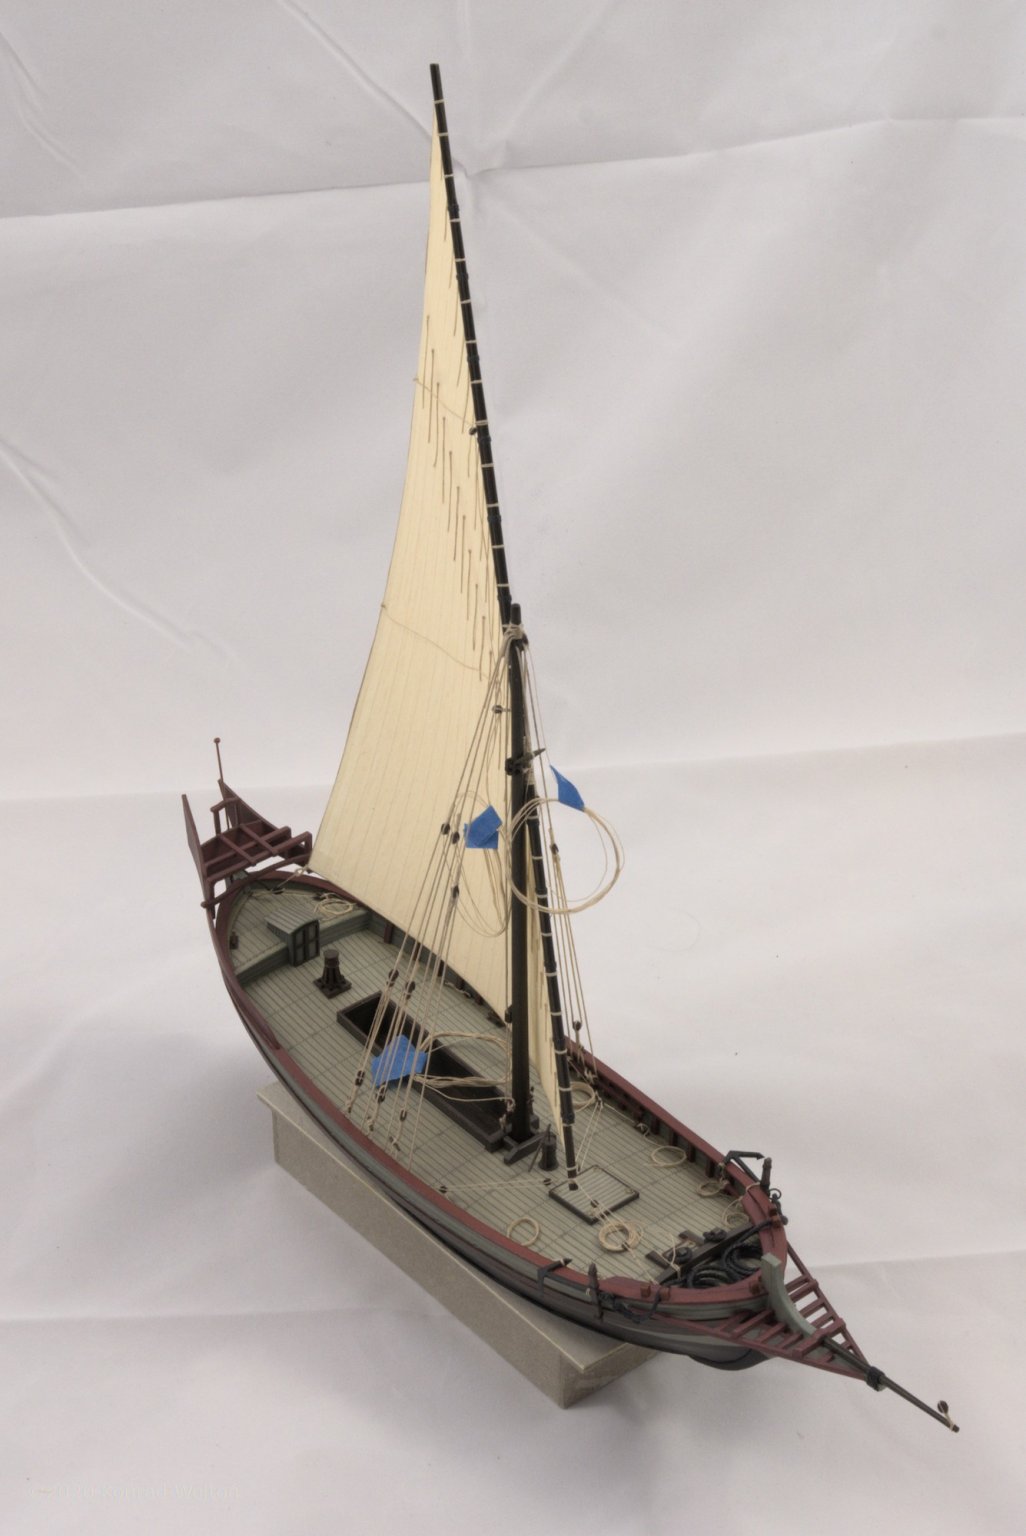
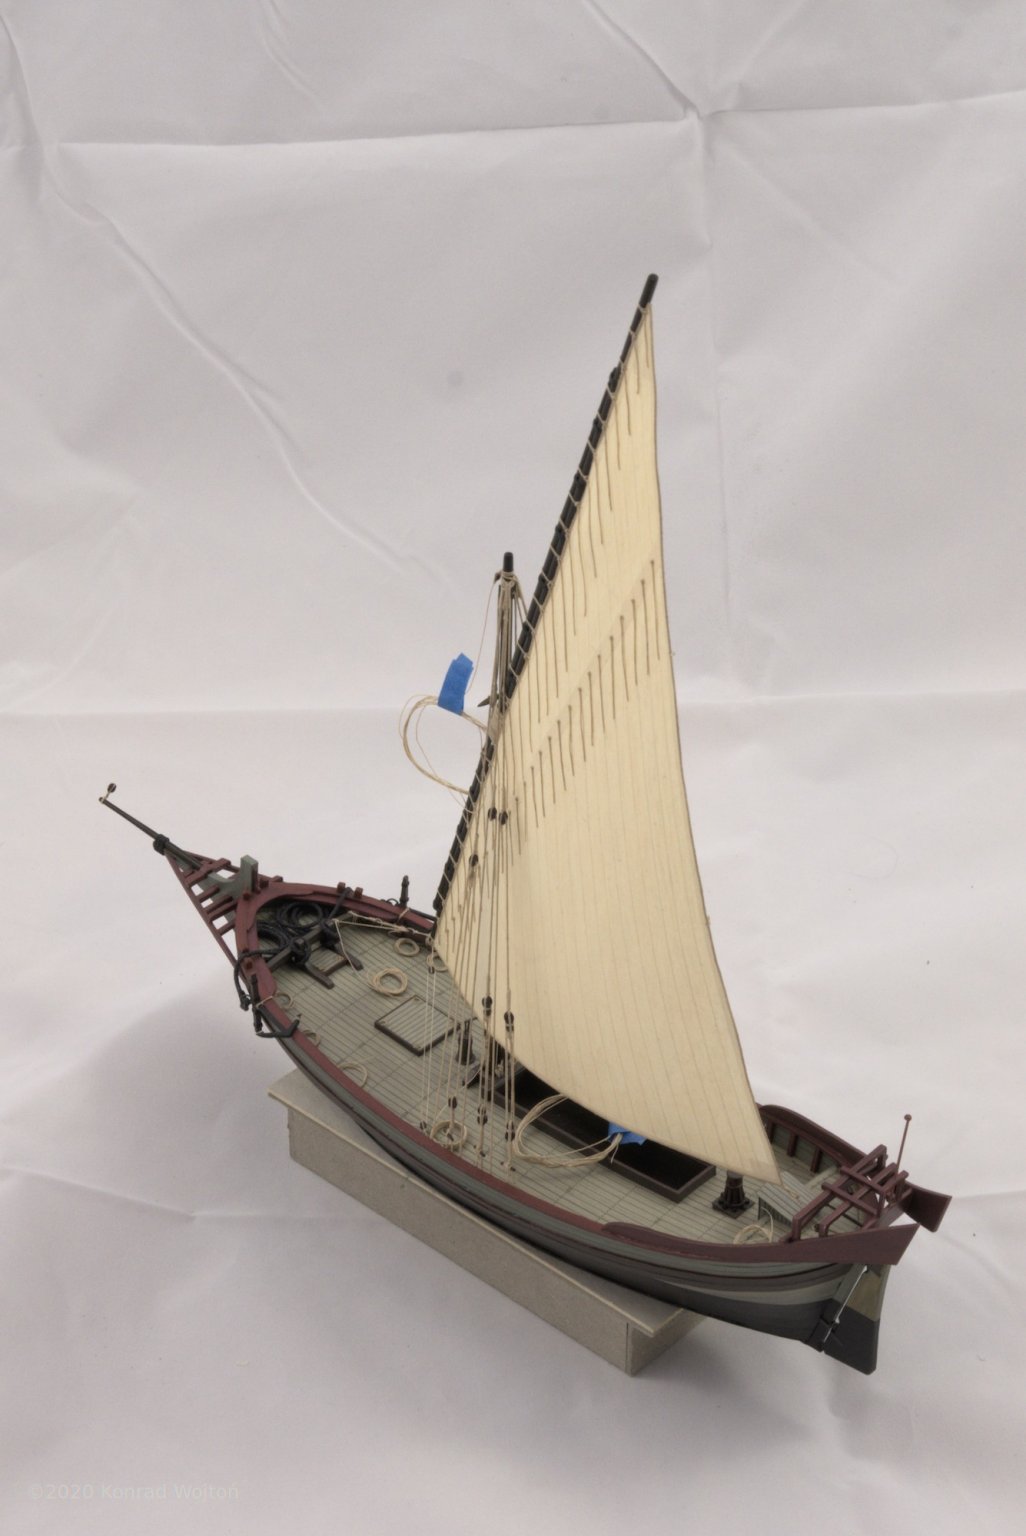
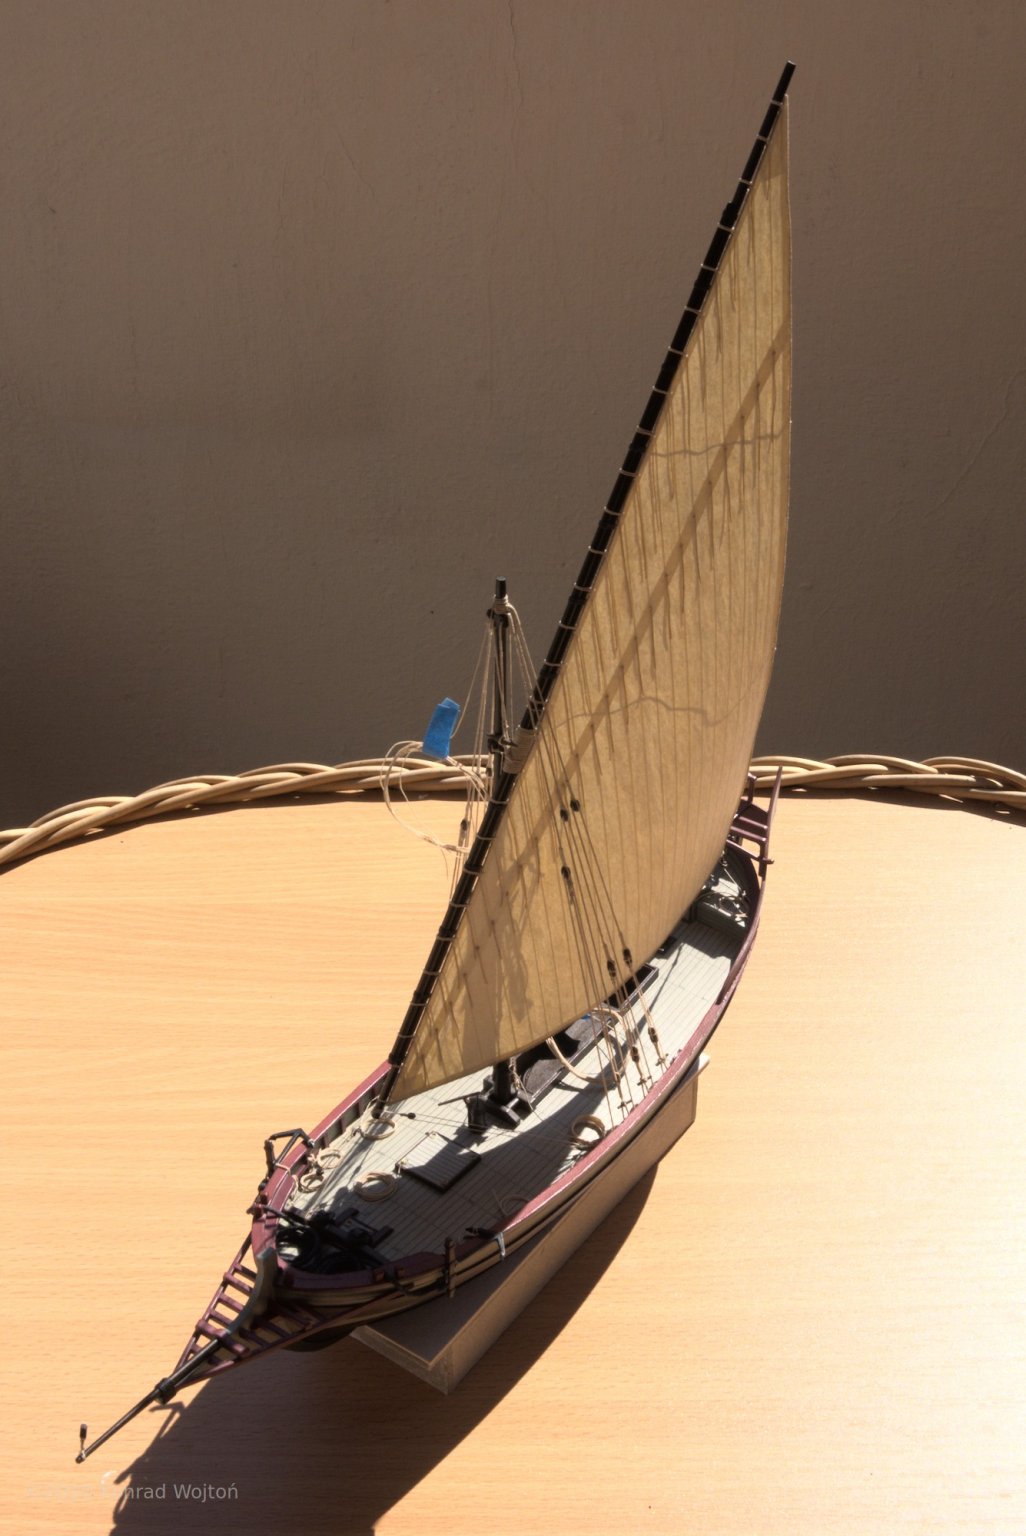
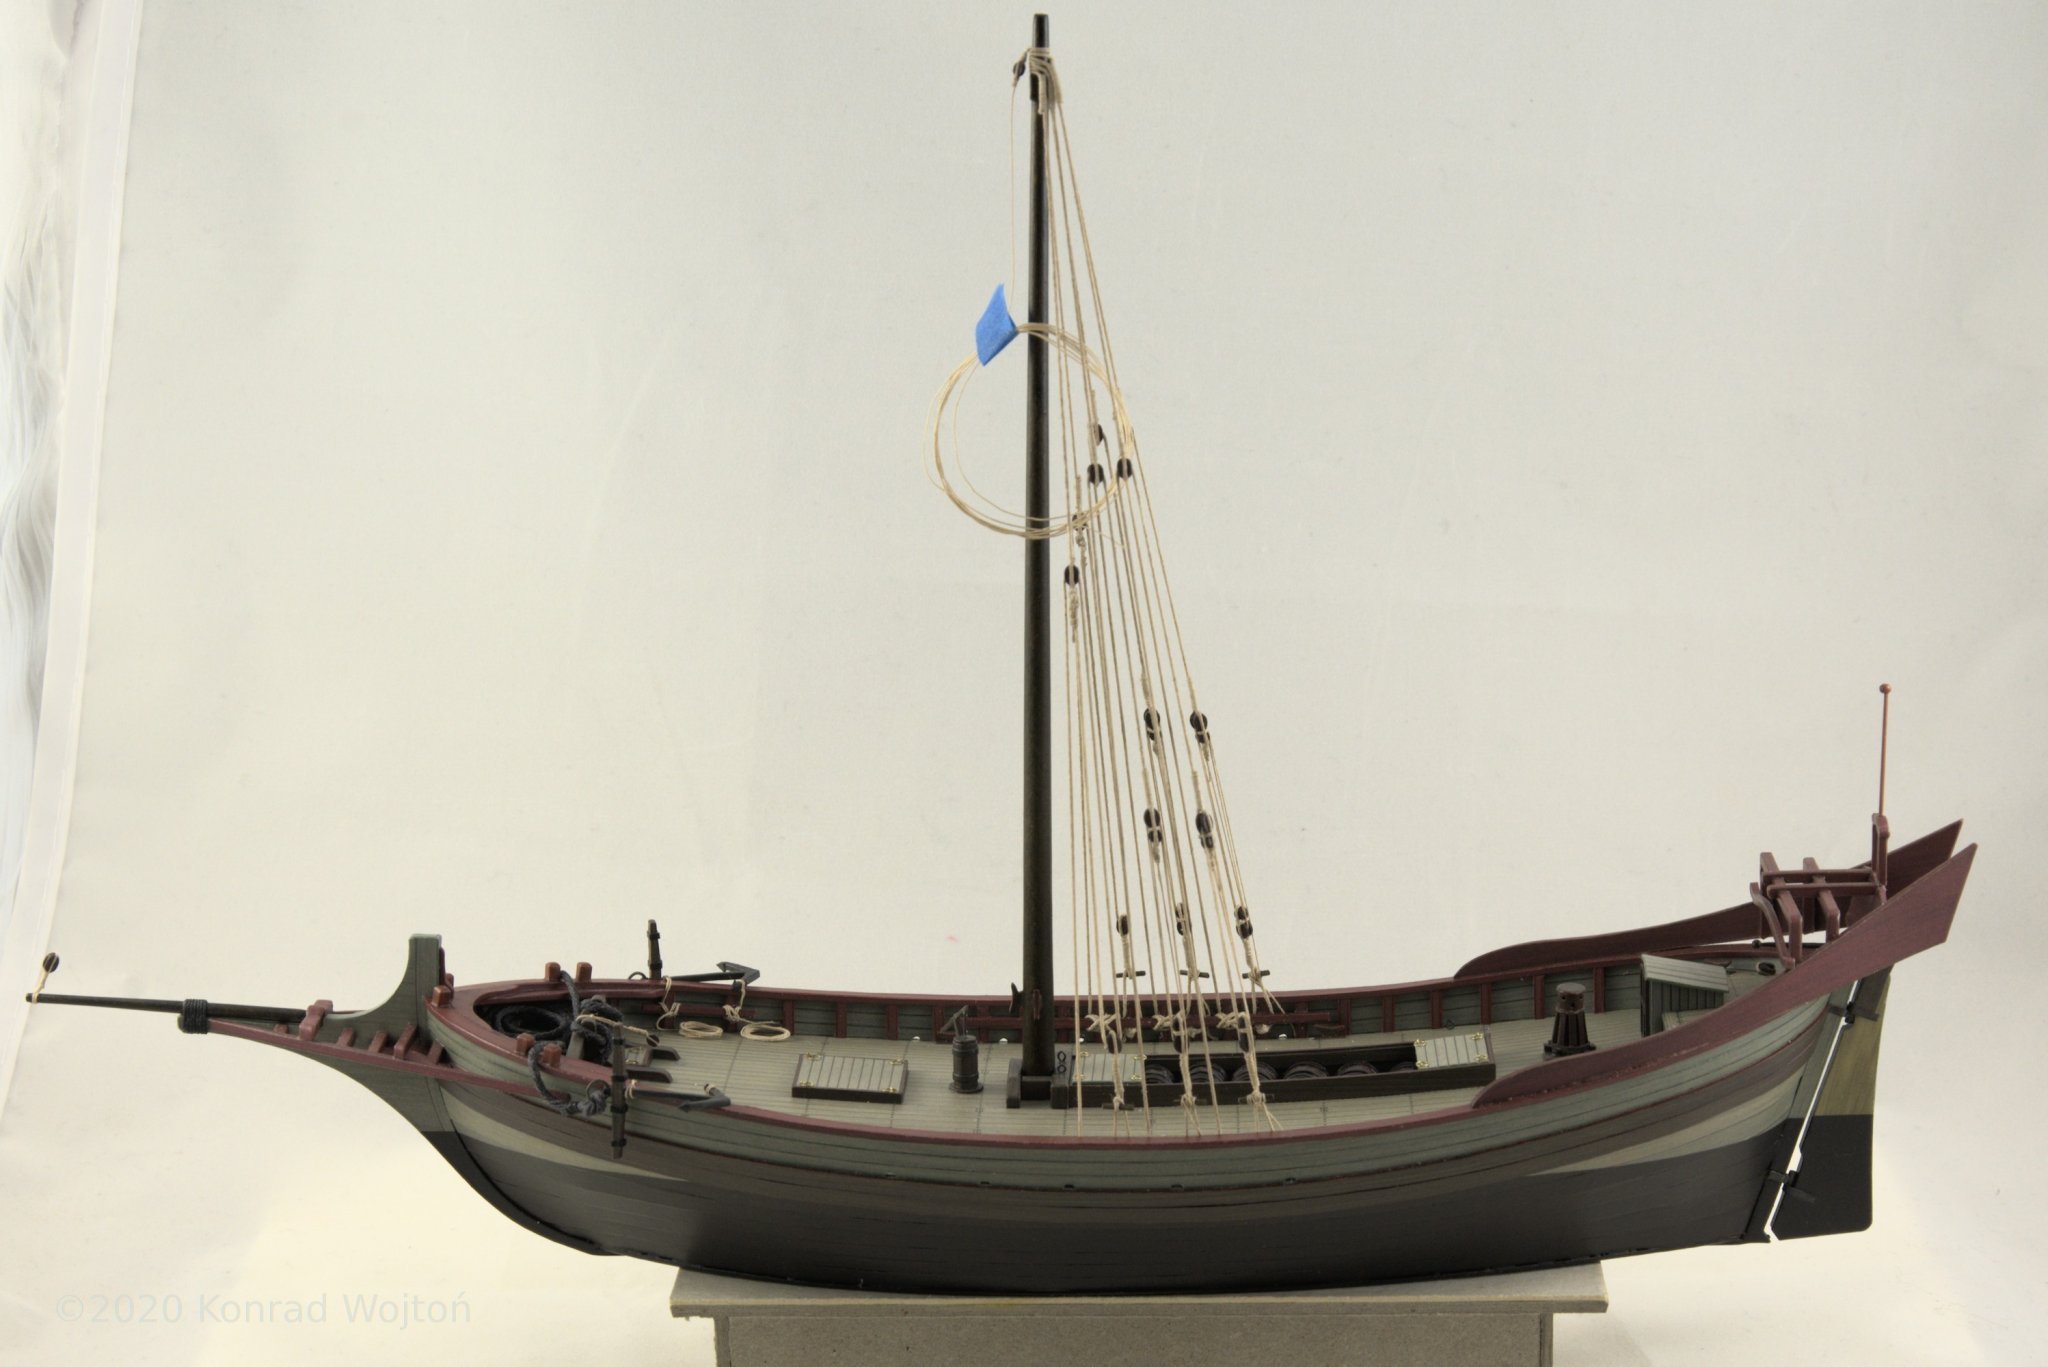
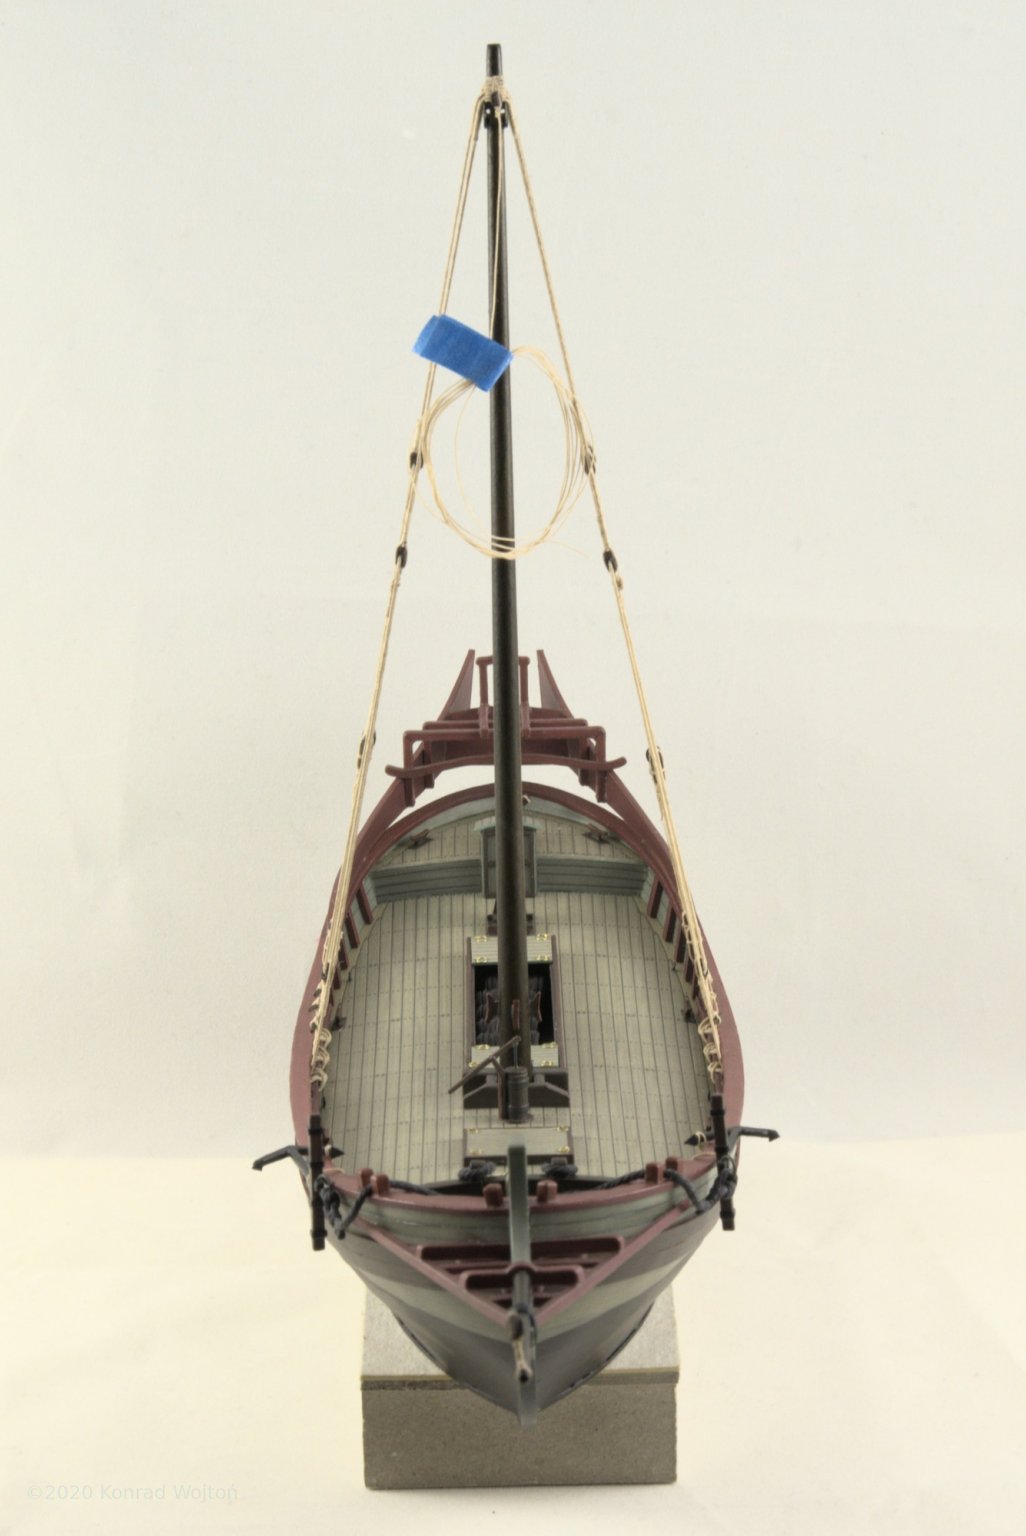
Finish is near as I need to only hang sails and fix all ropes in place.
-
-
5 hours ago, kentyler said:
do you have a link to your build log ?
Here you are: https://modelshipworld.com/topic/21760-allege-darles-by-kondzik-wak-42016-1100-card
-
Nice to see another build of Allege on this forum. There are a couple of minor errors in the design but nothing that could not be fixed with spare colour. You might find photos in my build log as a helpful reference in addition to drawings.
-
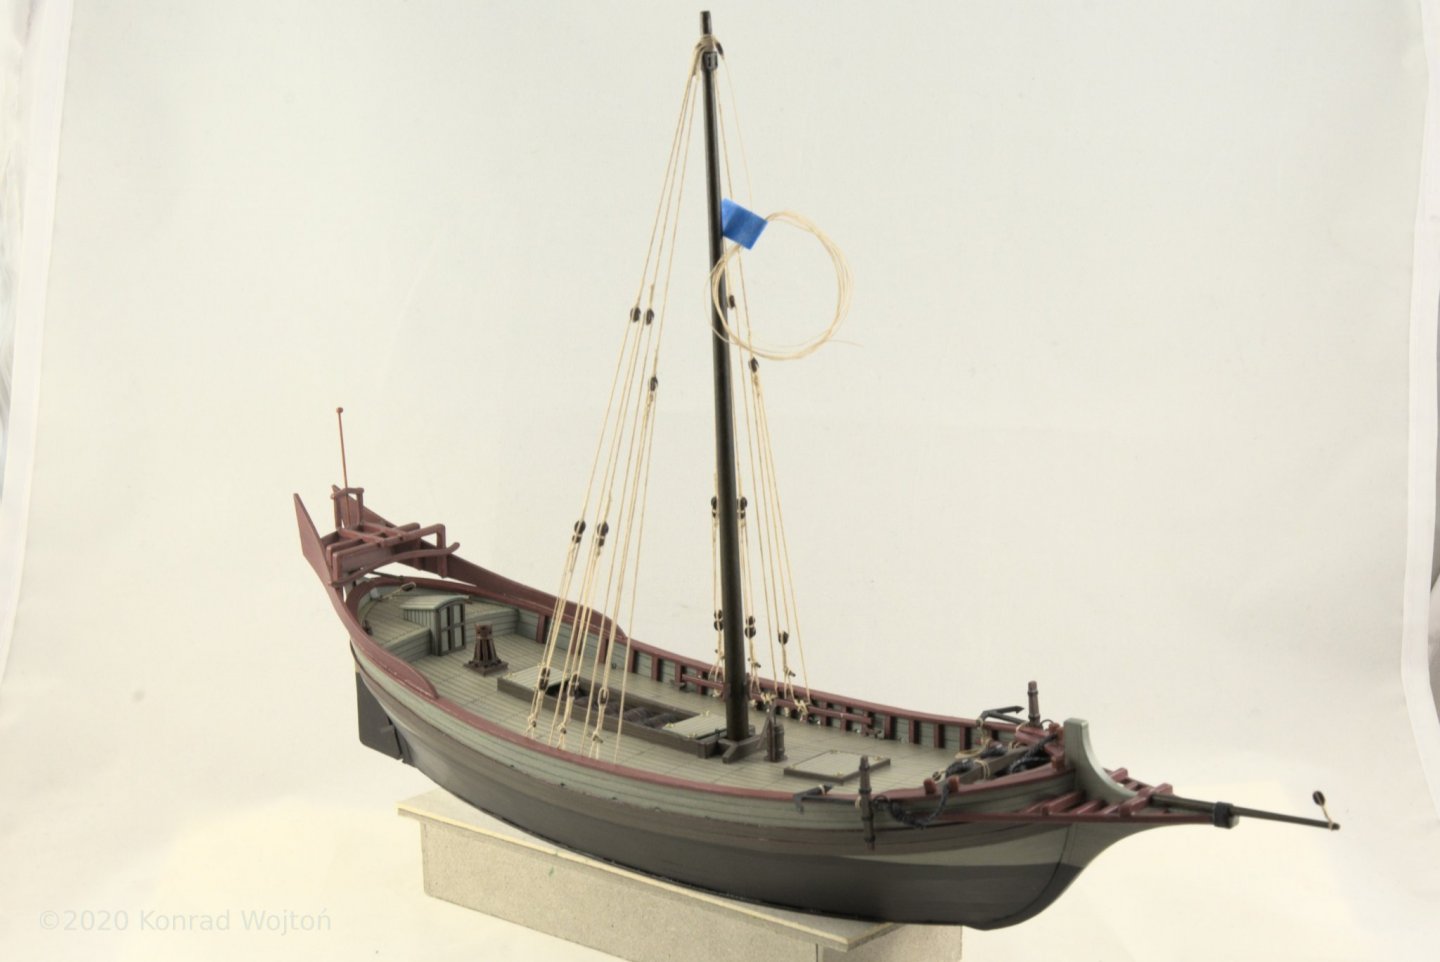
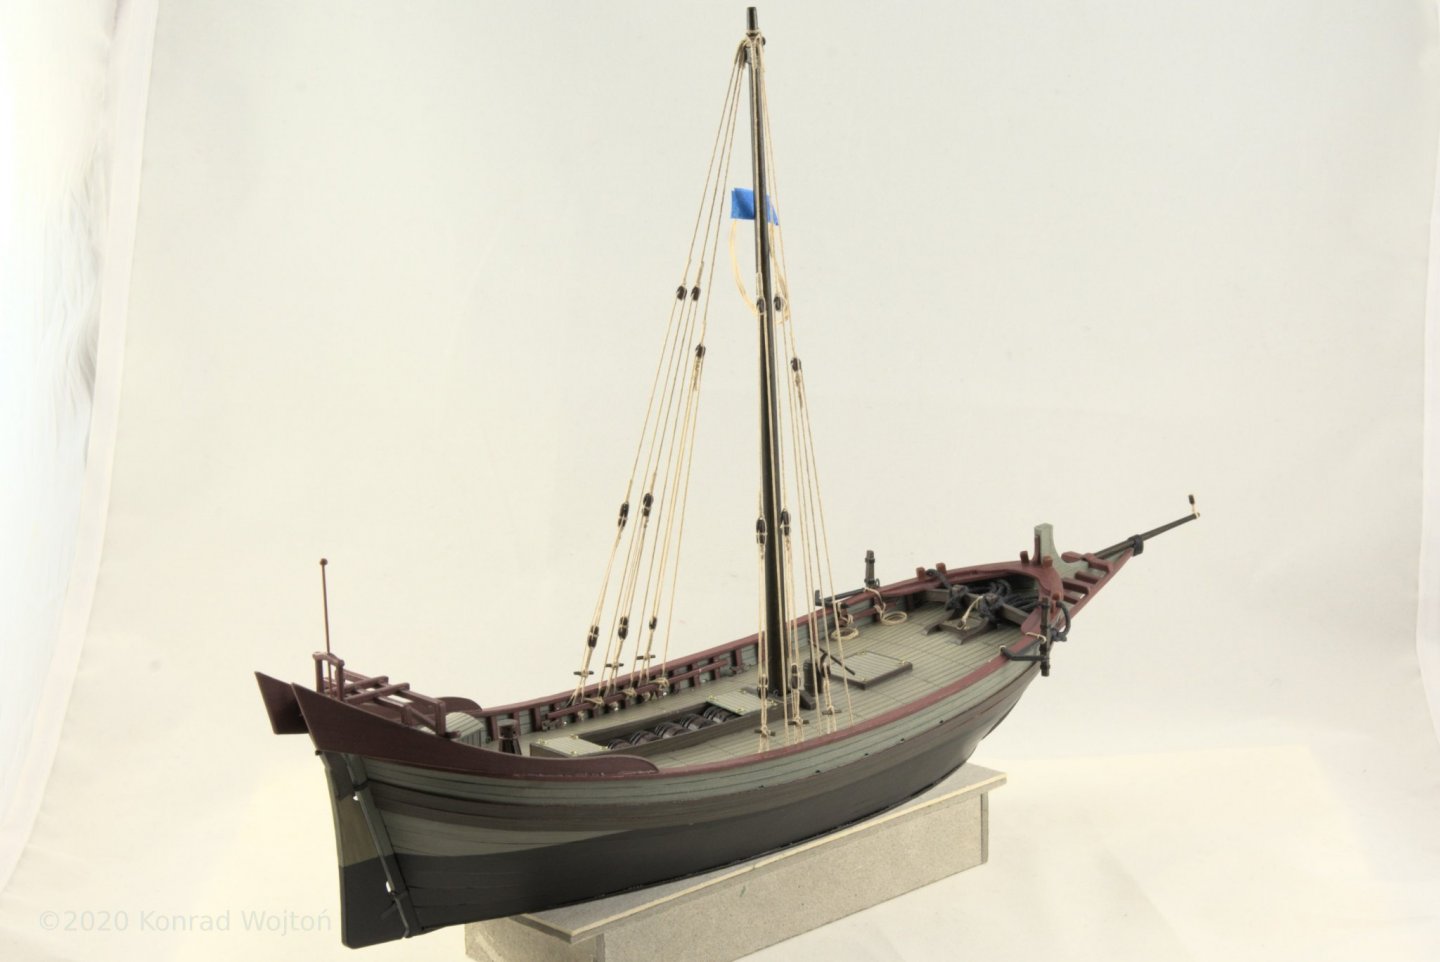
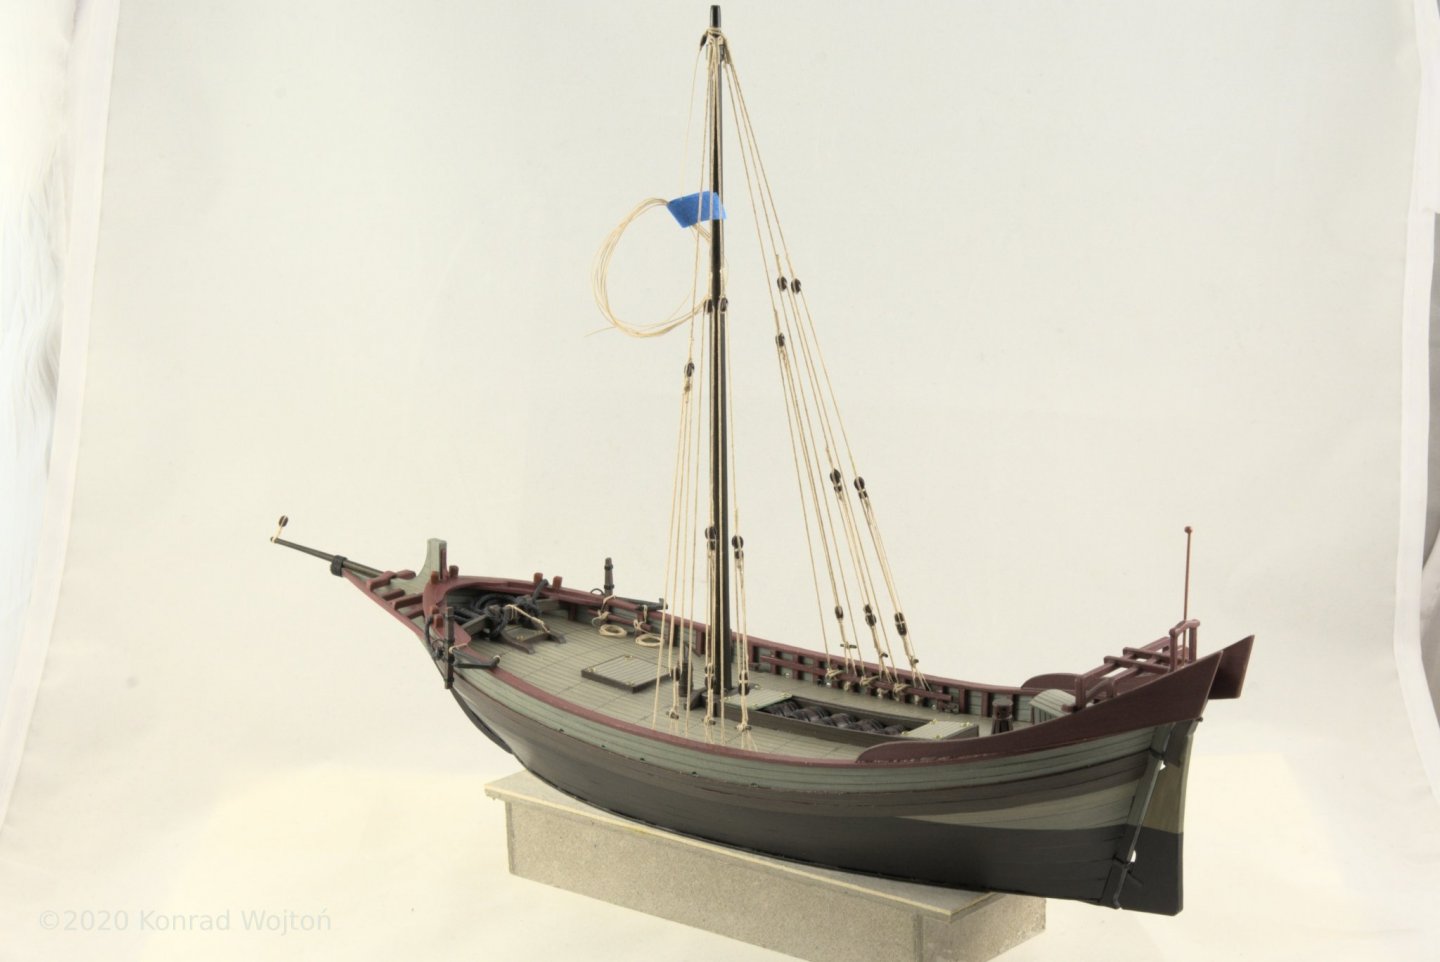
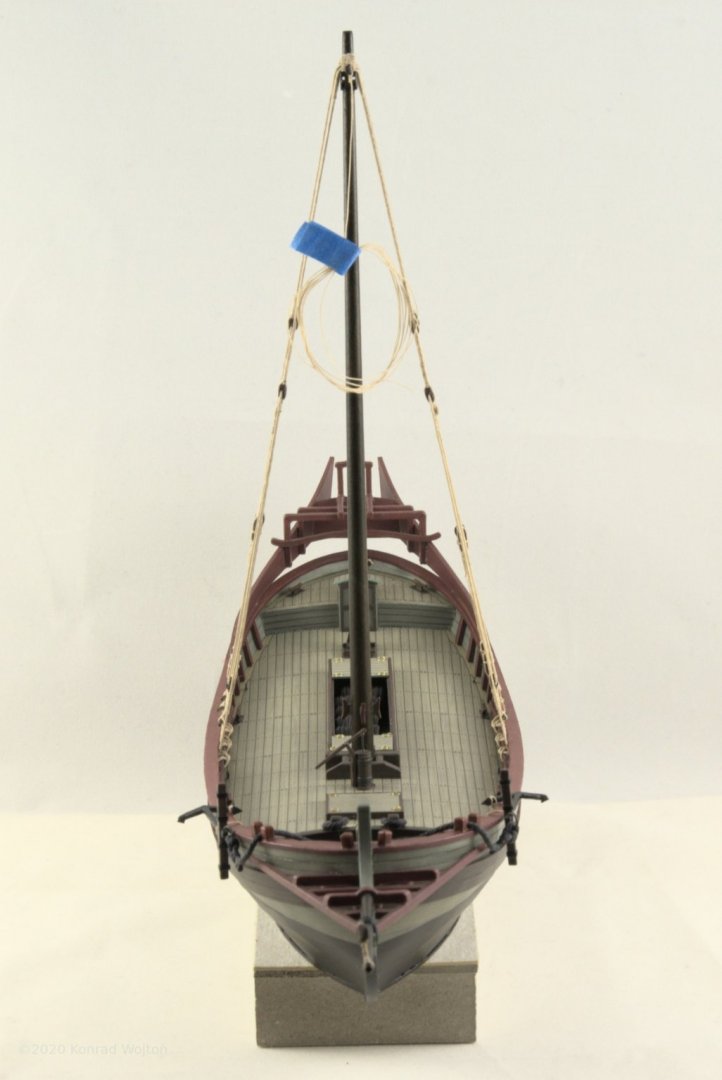
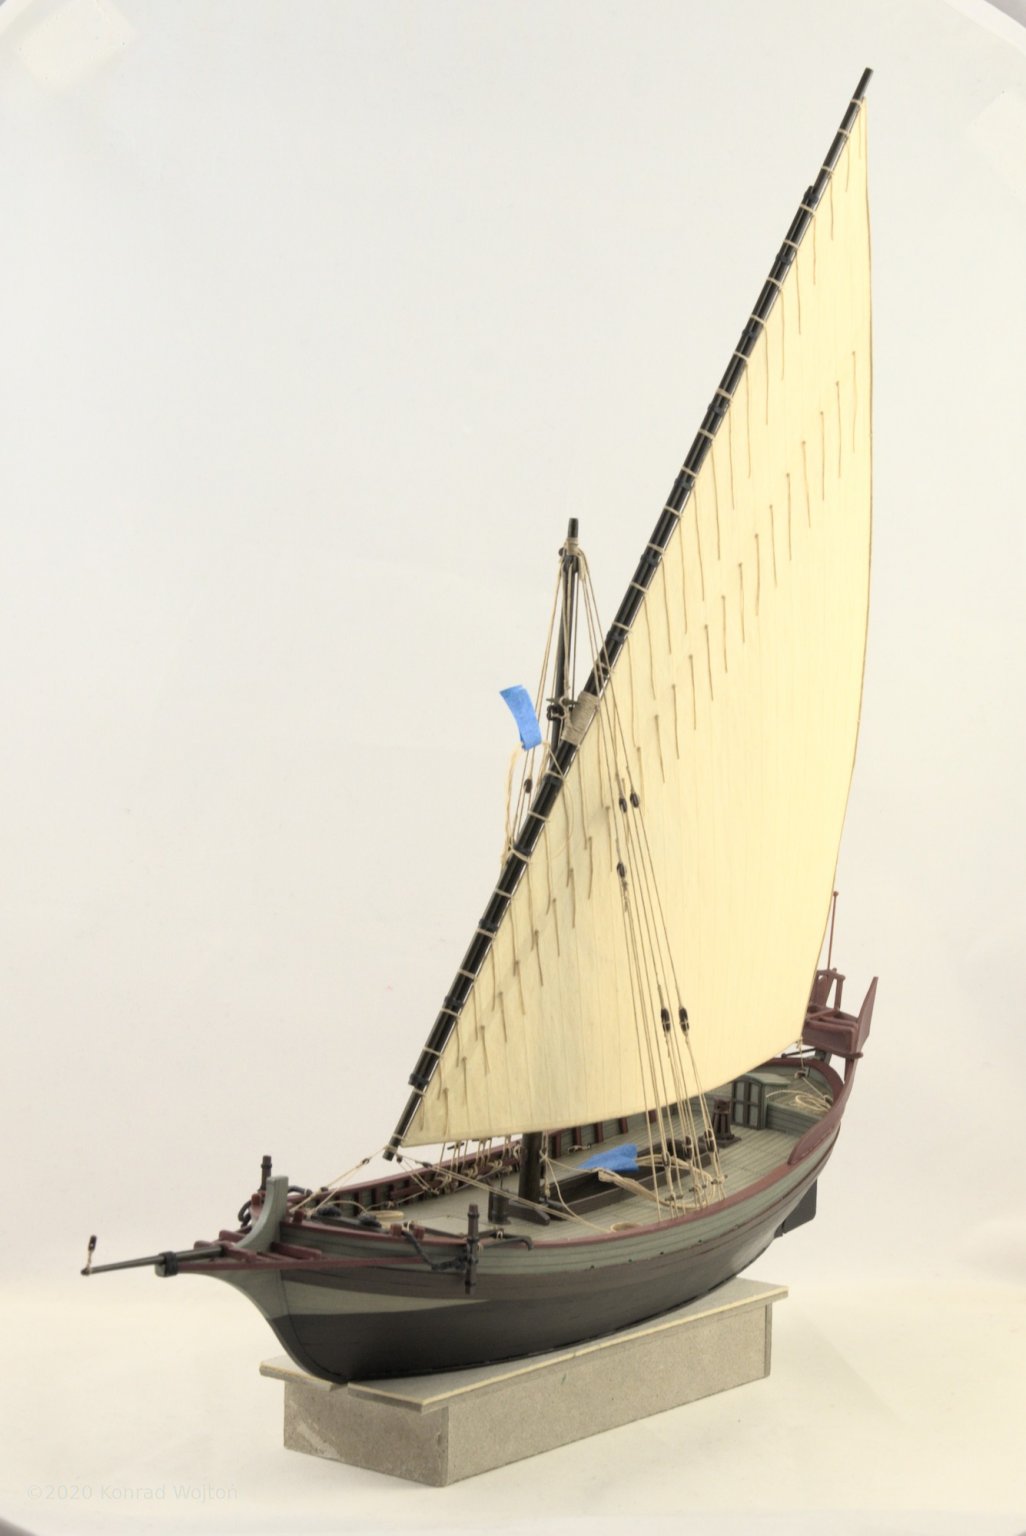
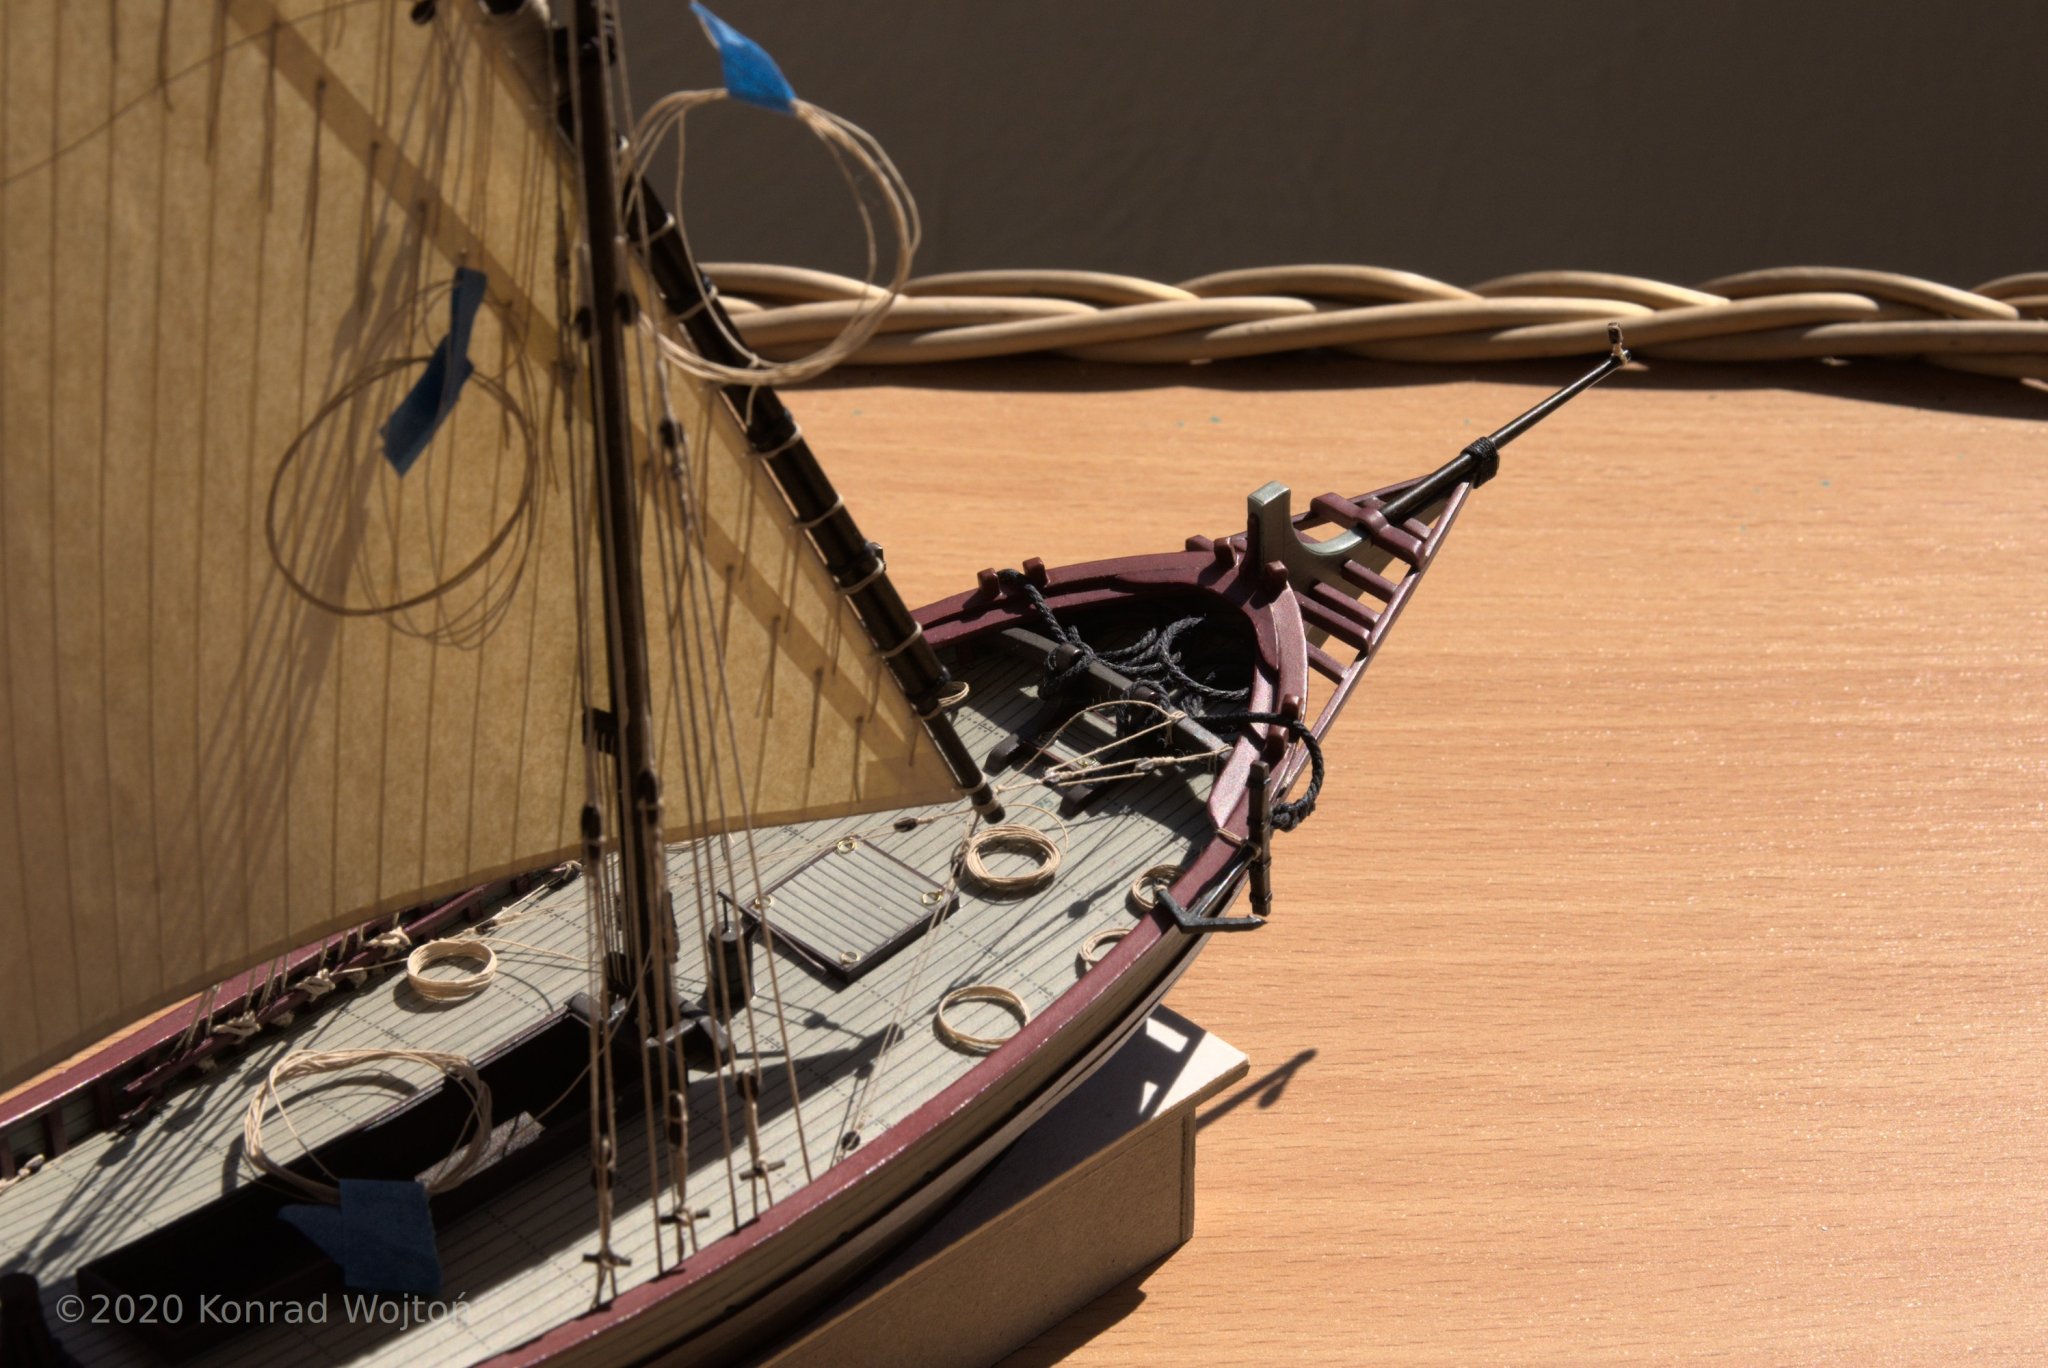
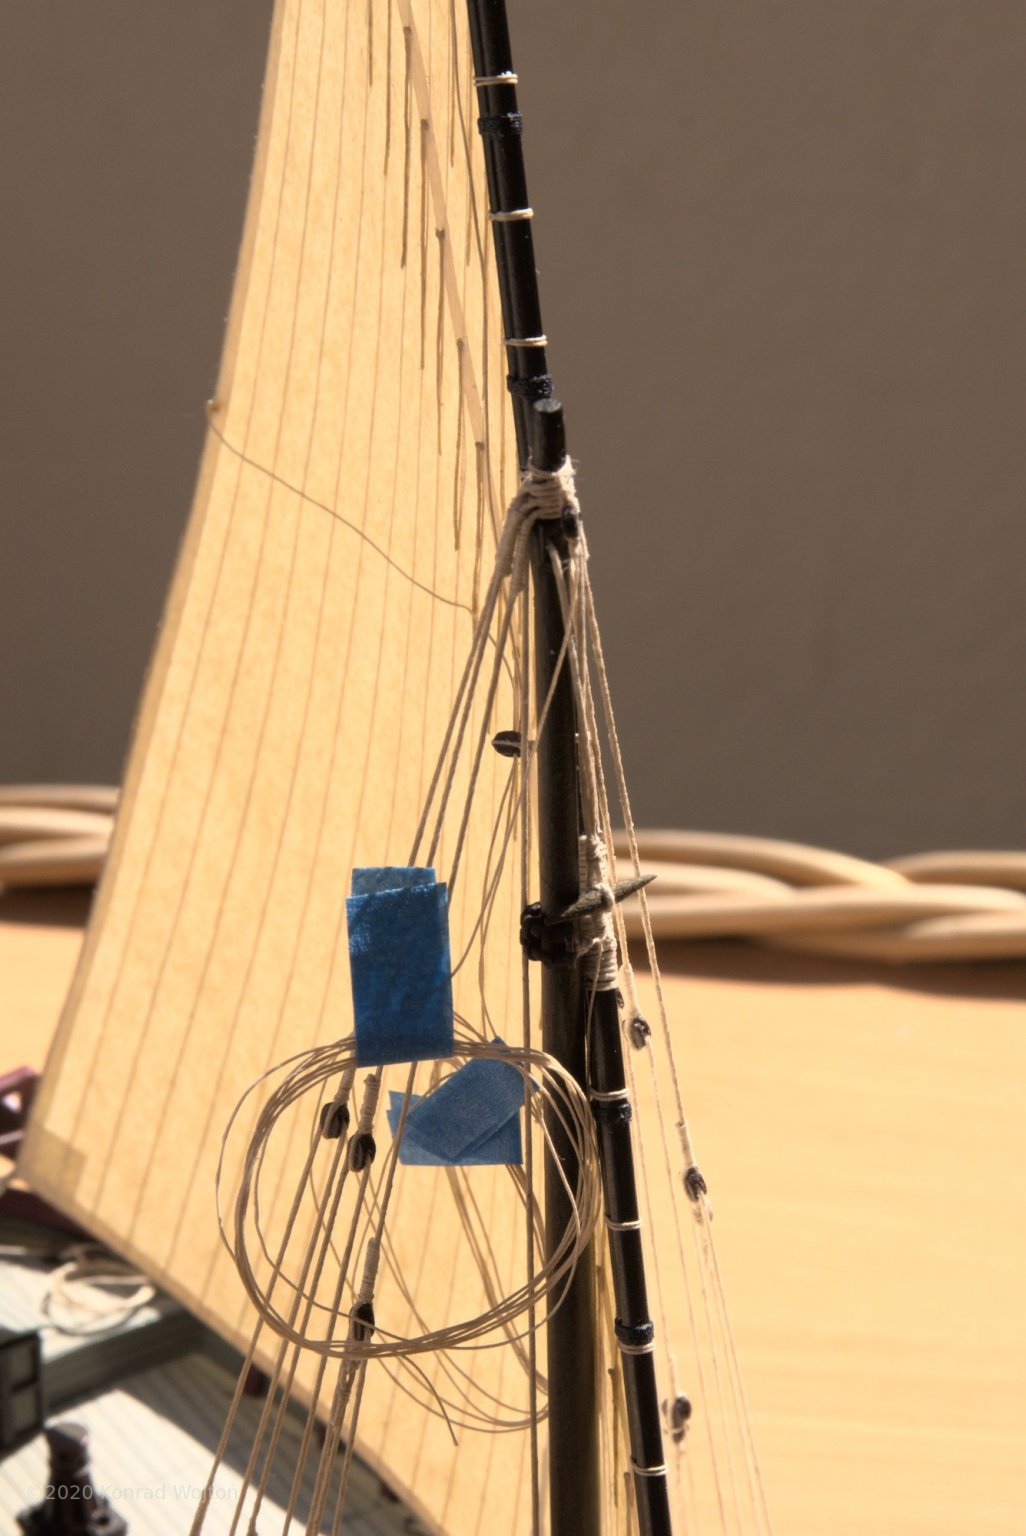
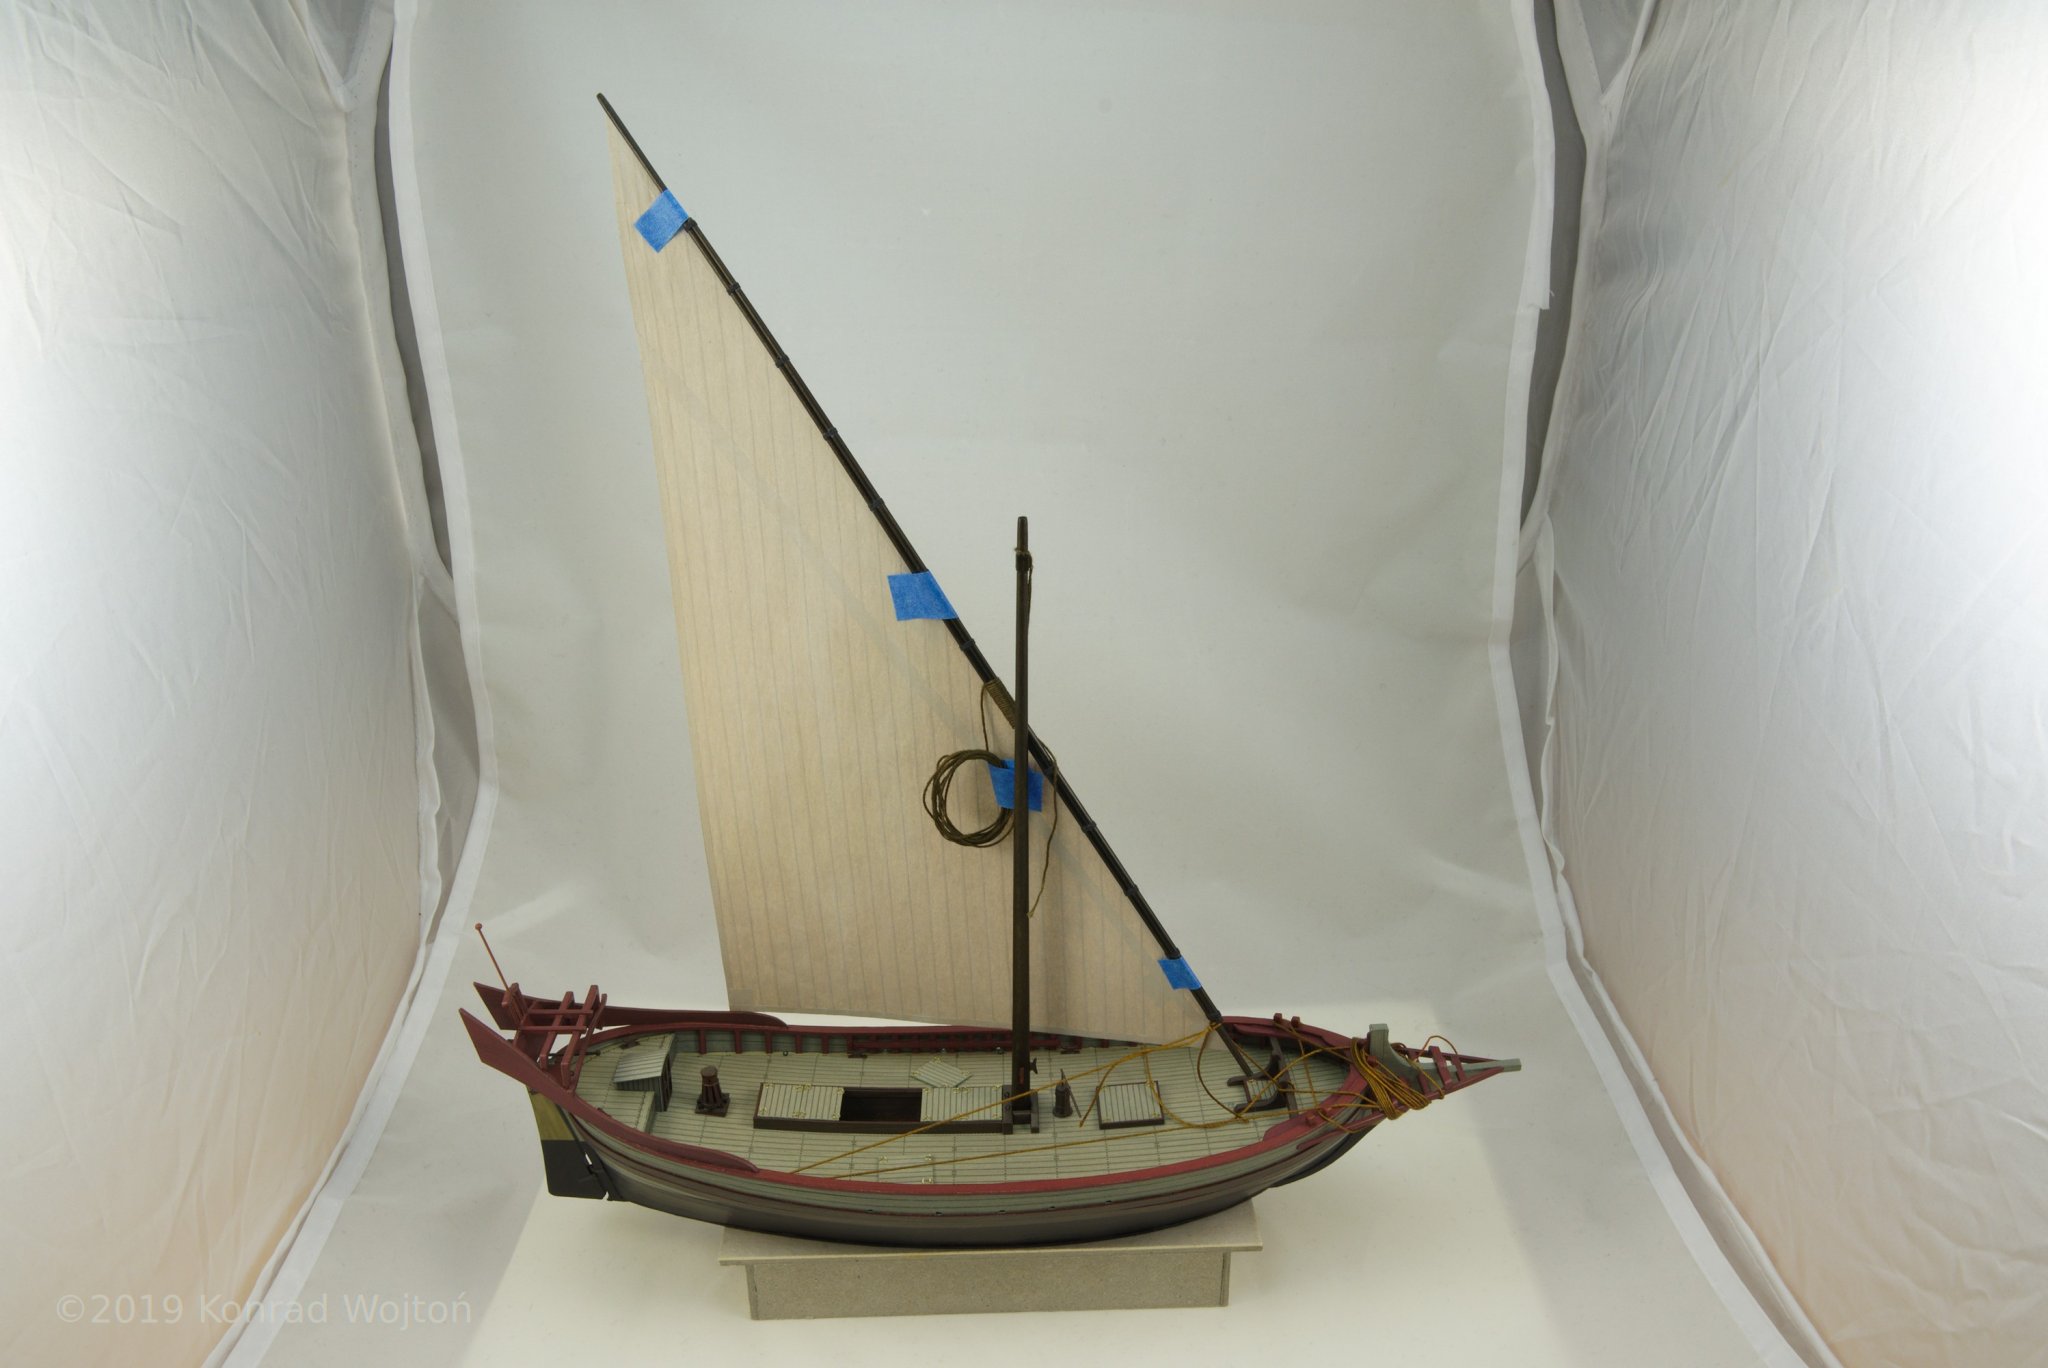
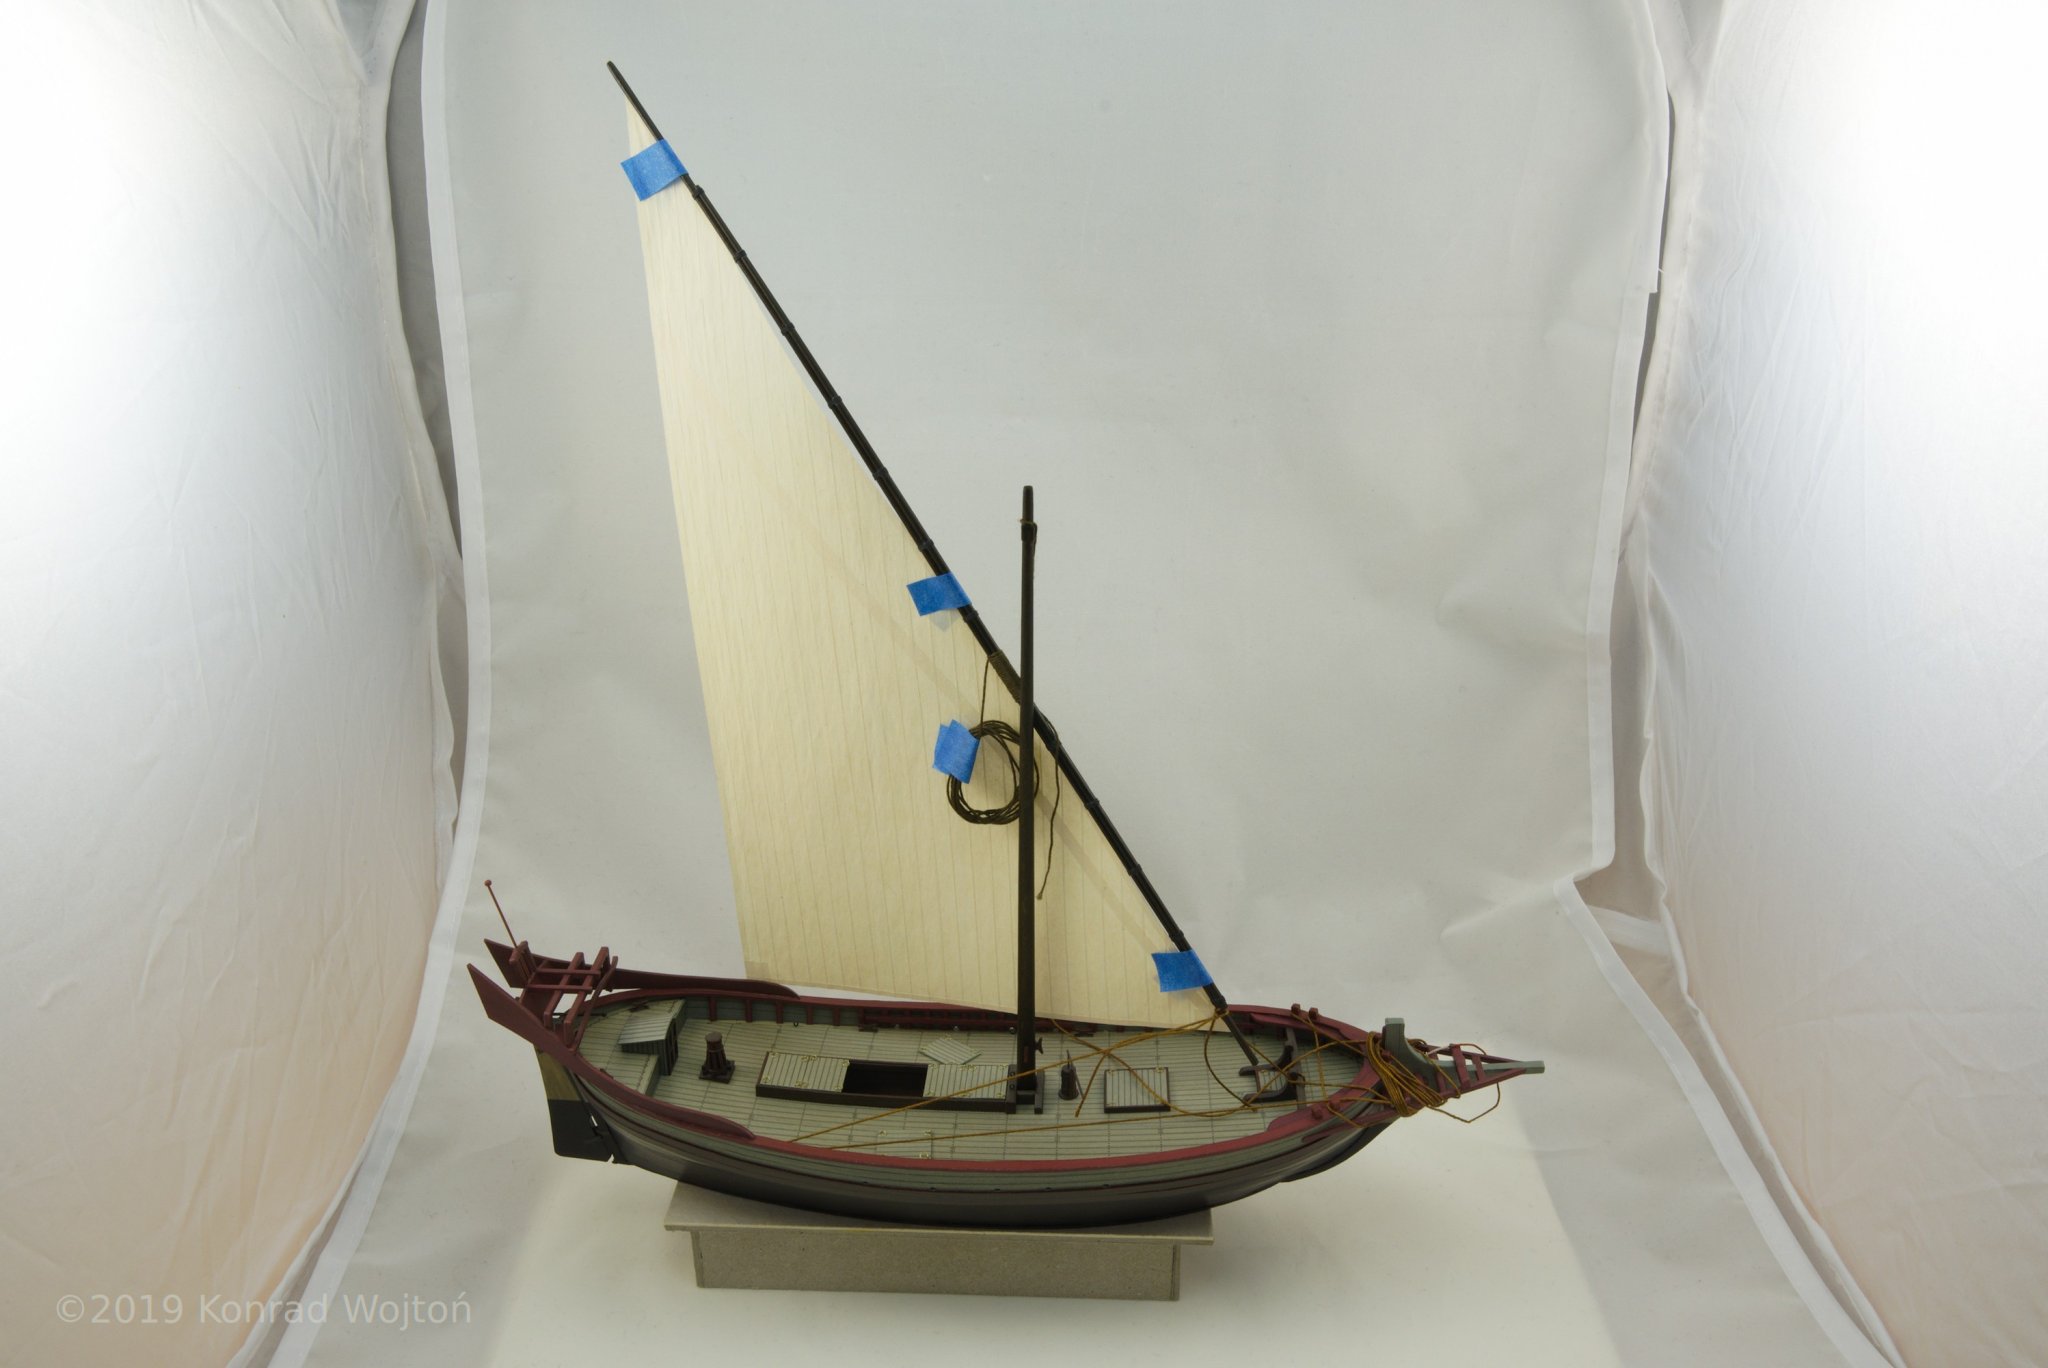
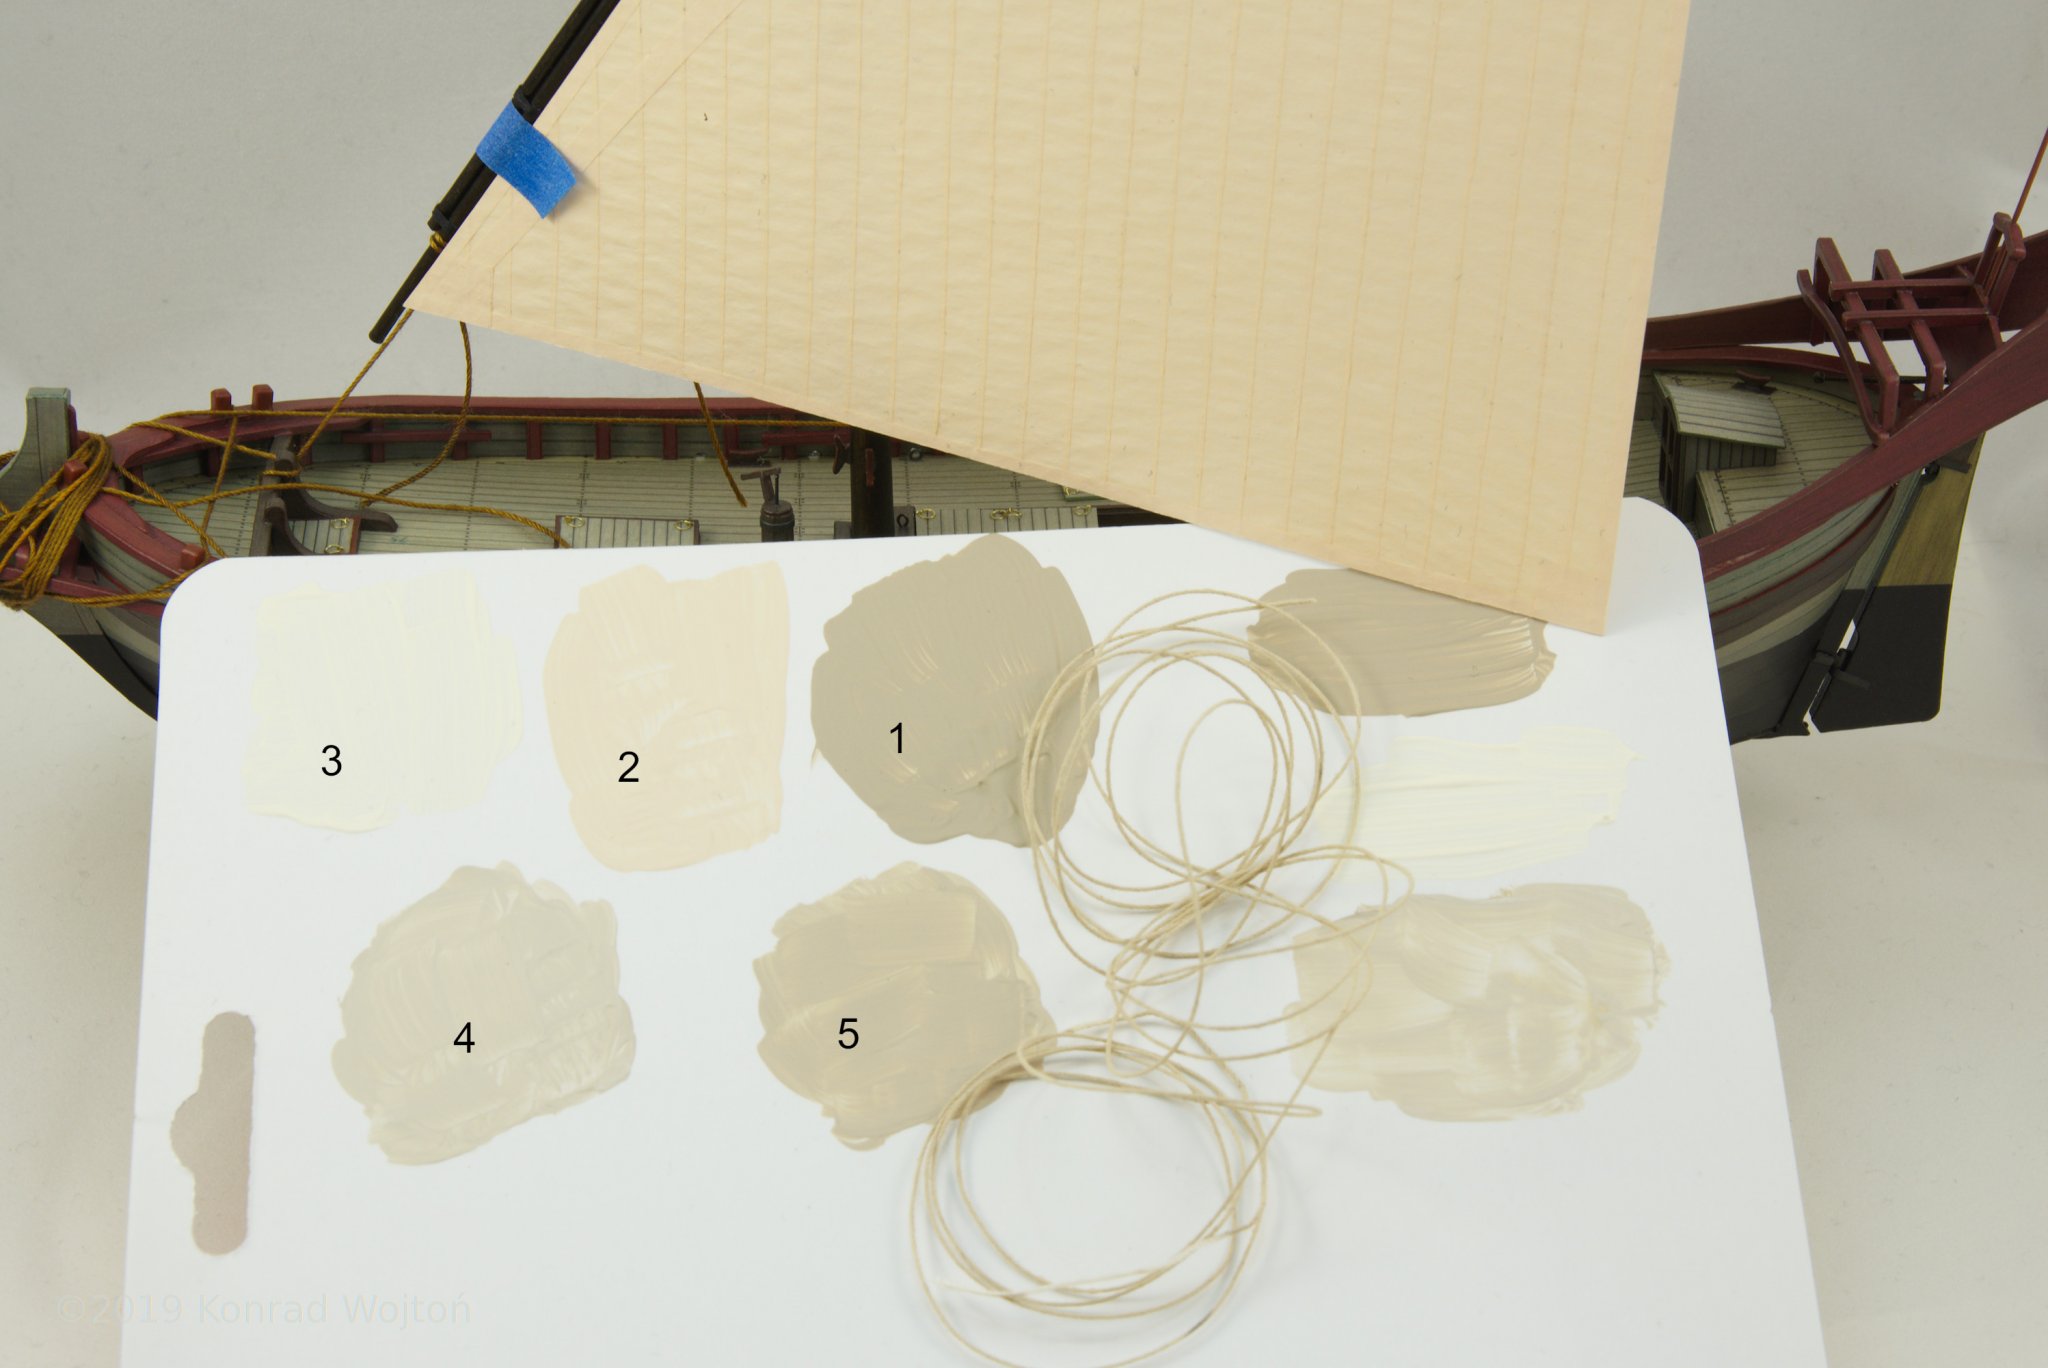
Before I start rigging this boat I need to decide on the colour of rigging. For this purpose I've temporaily fitted yard with main sail. I've prepred three sets of sails for this vessel, each set in slightly different shade:
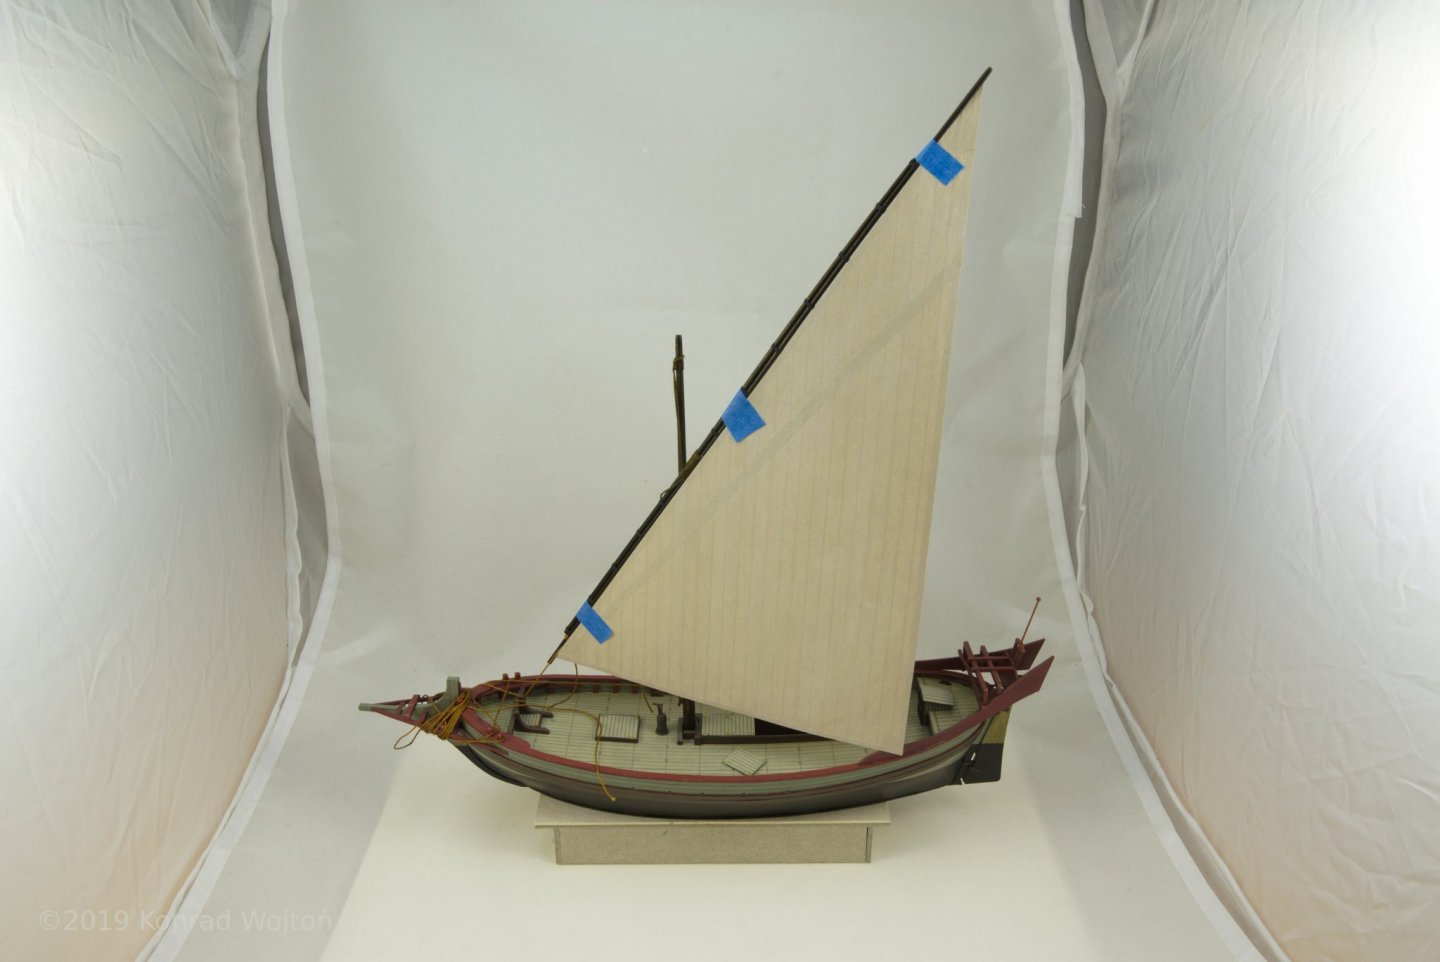
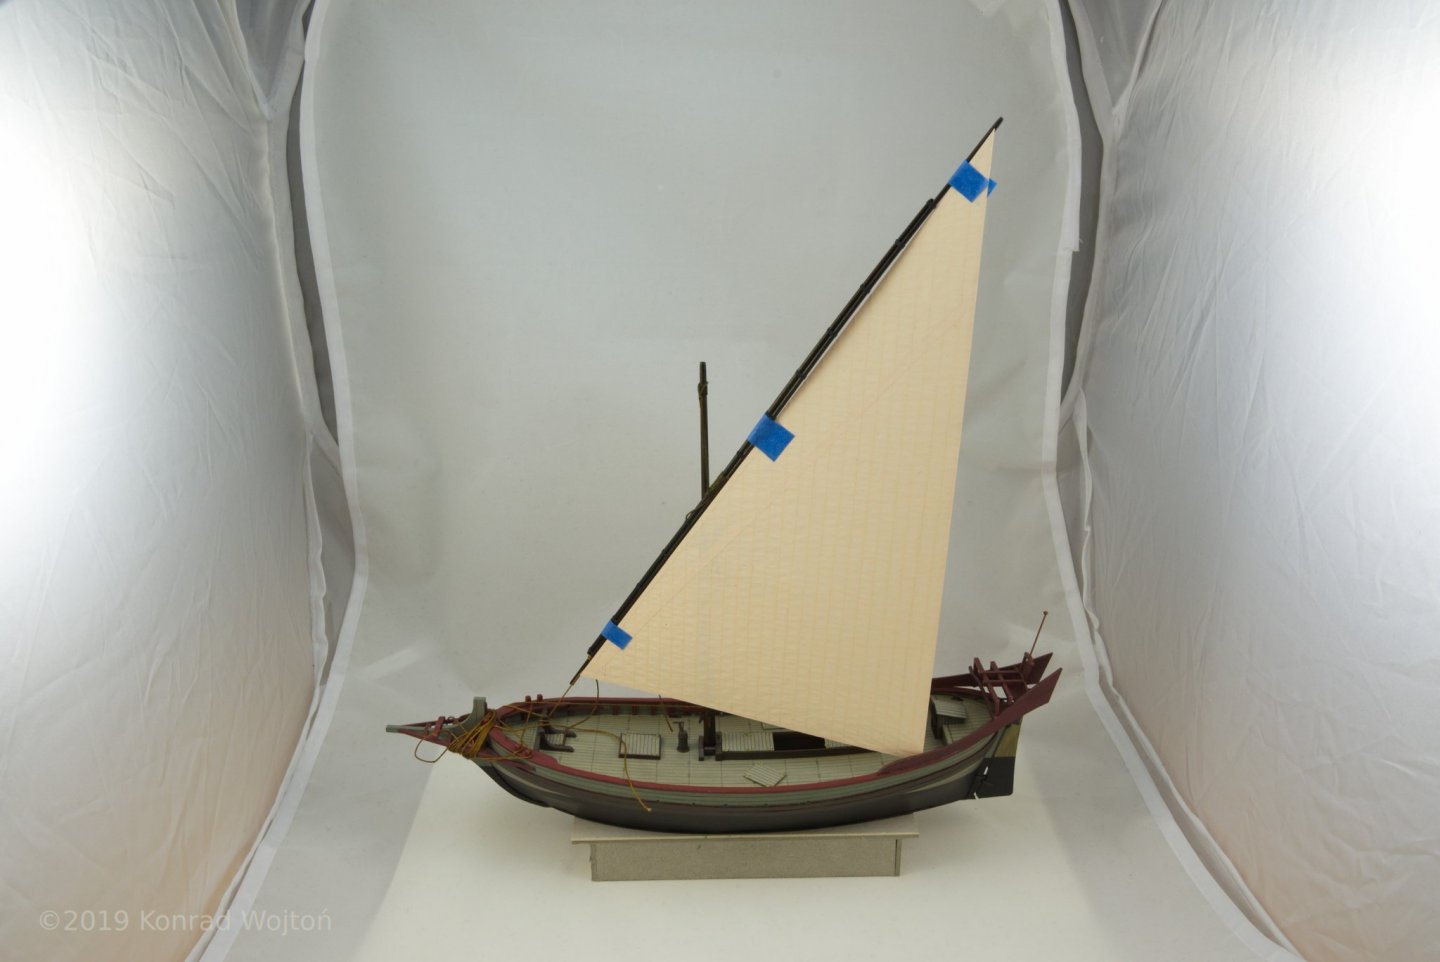
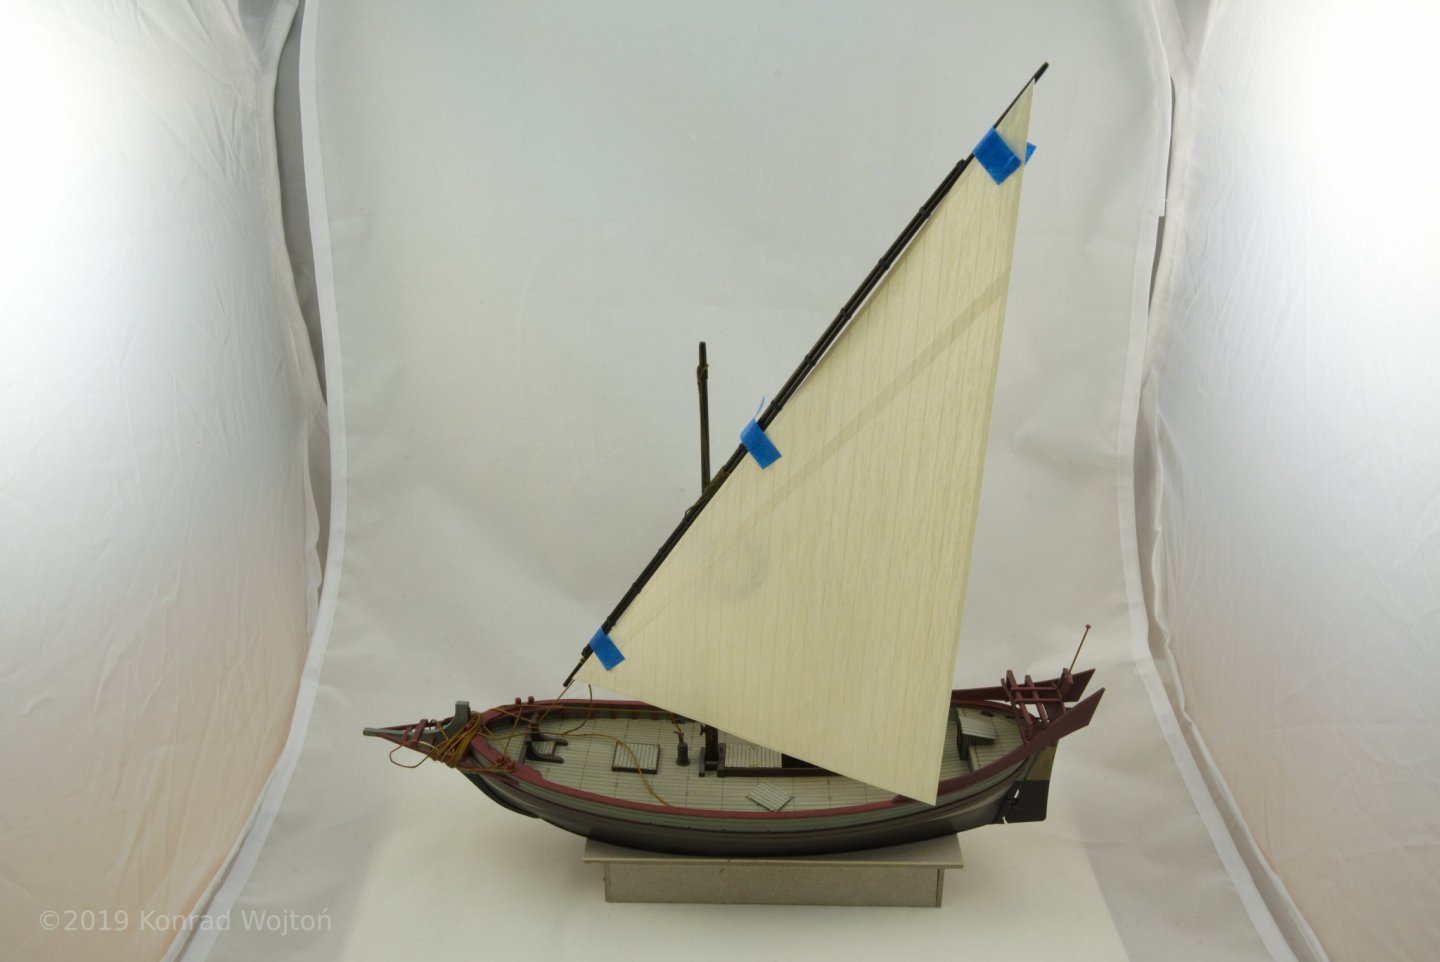
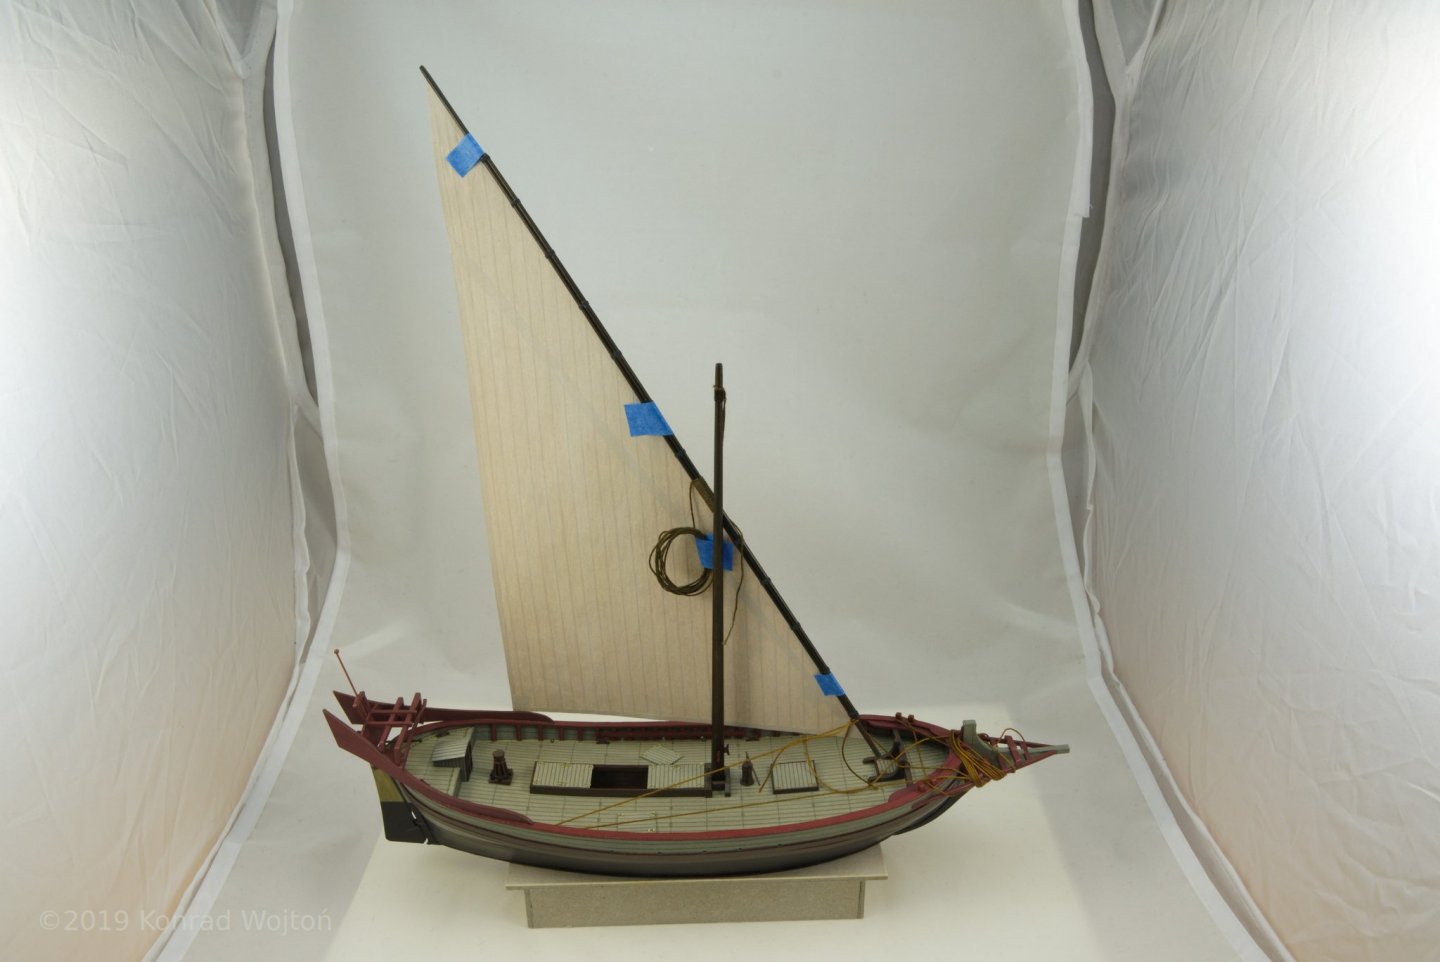
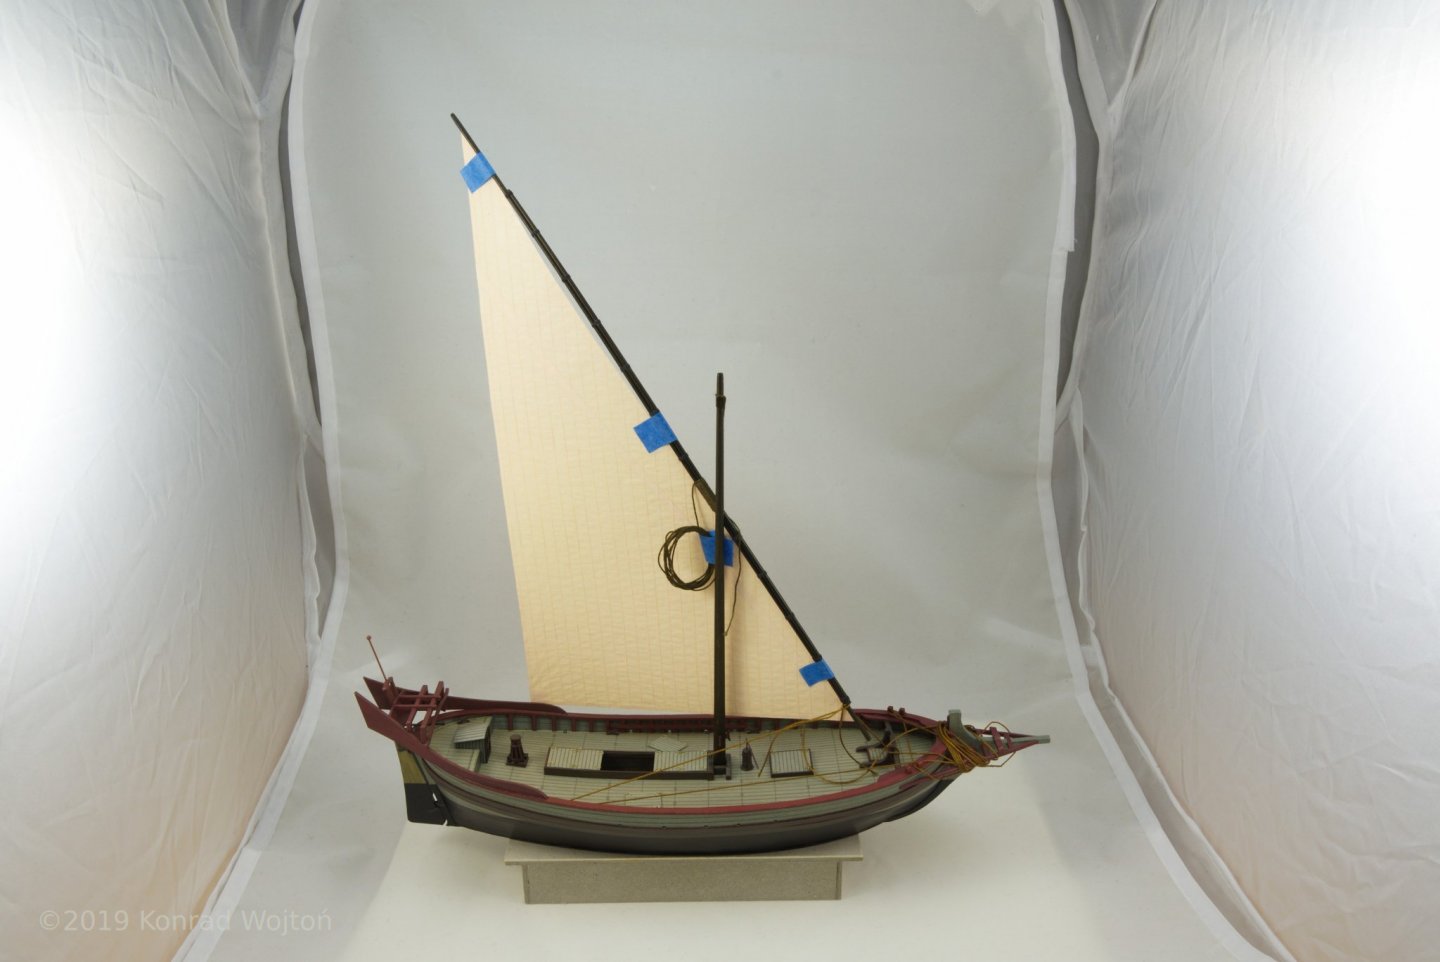
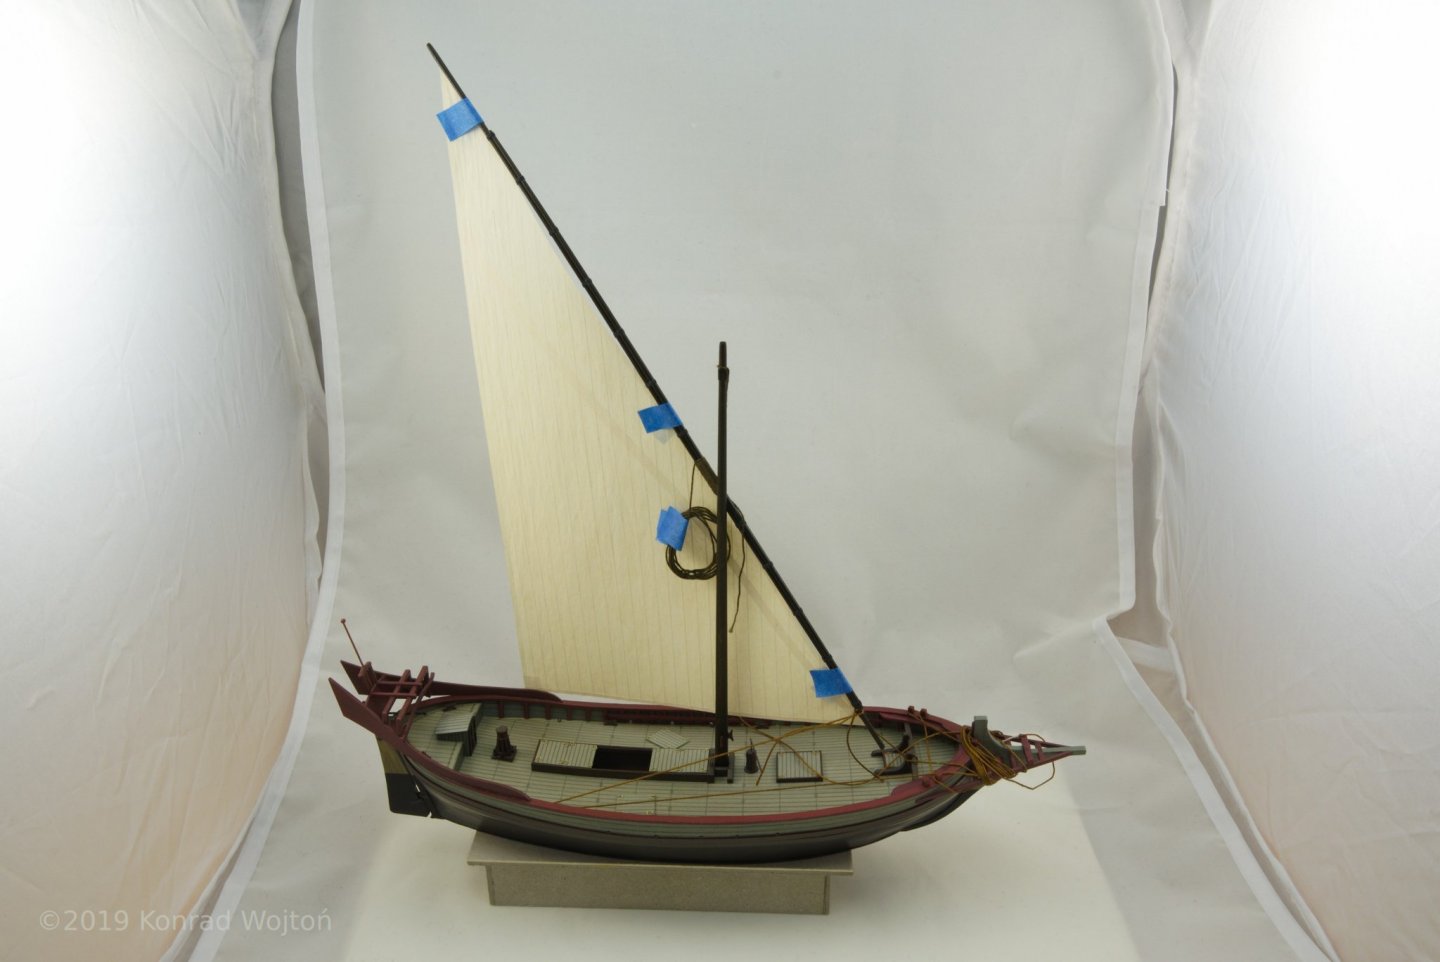
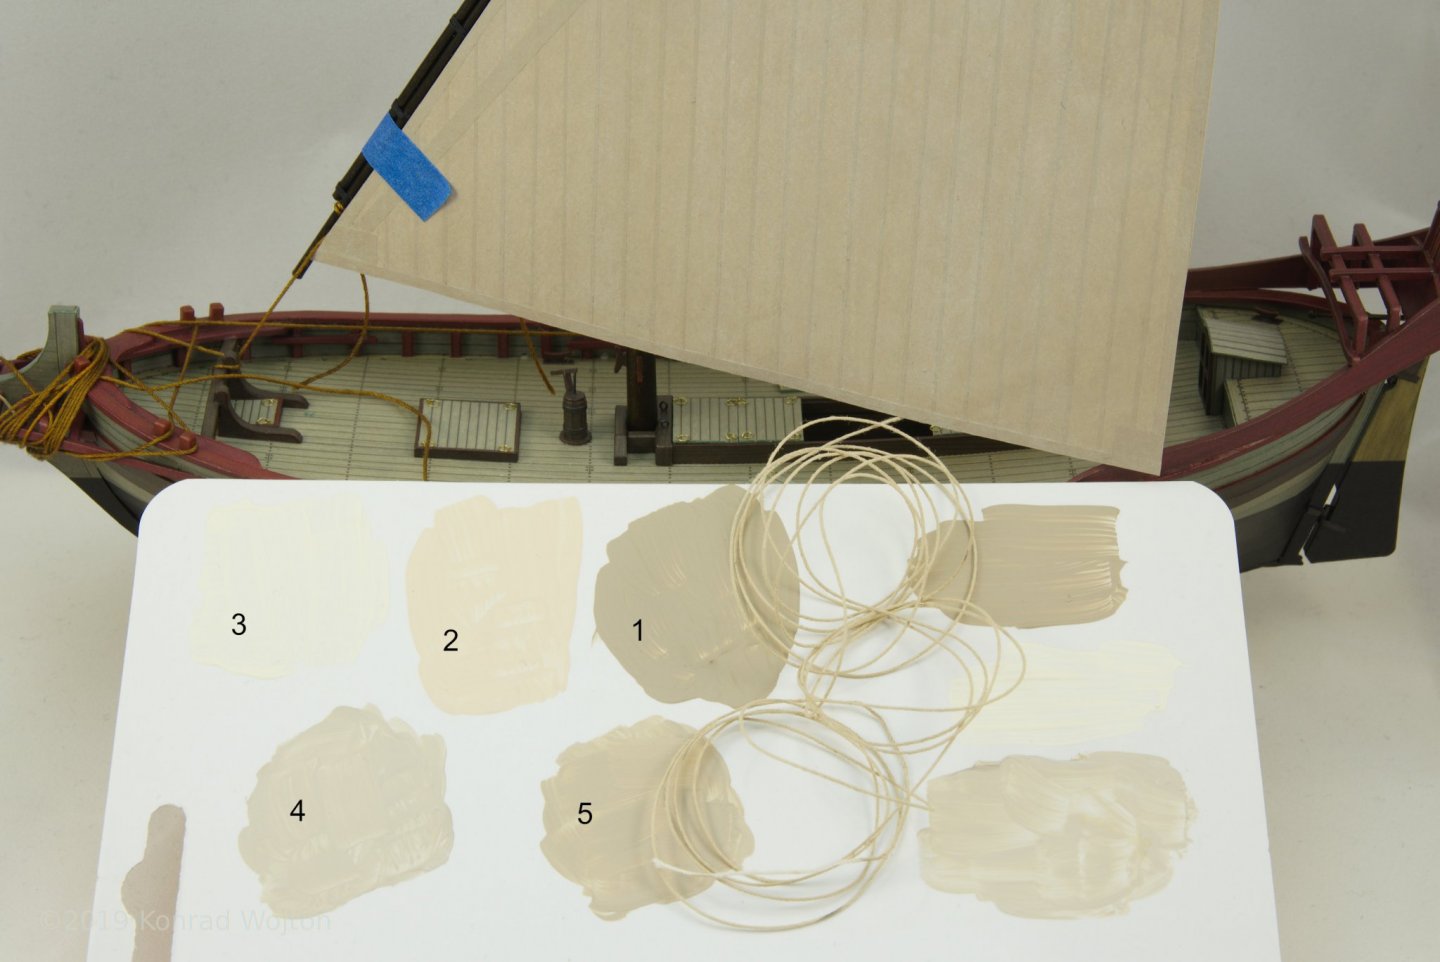

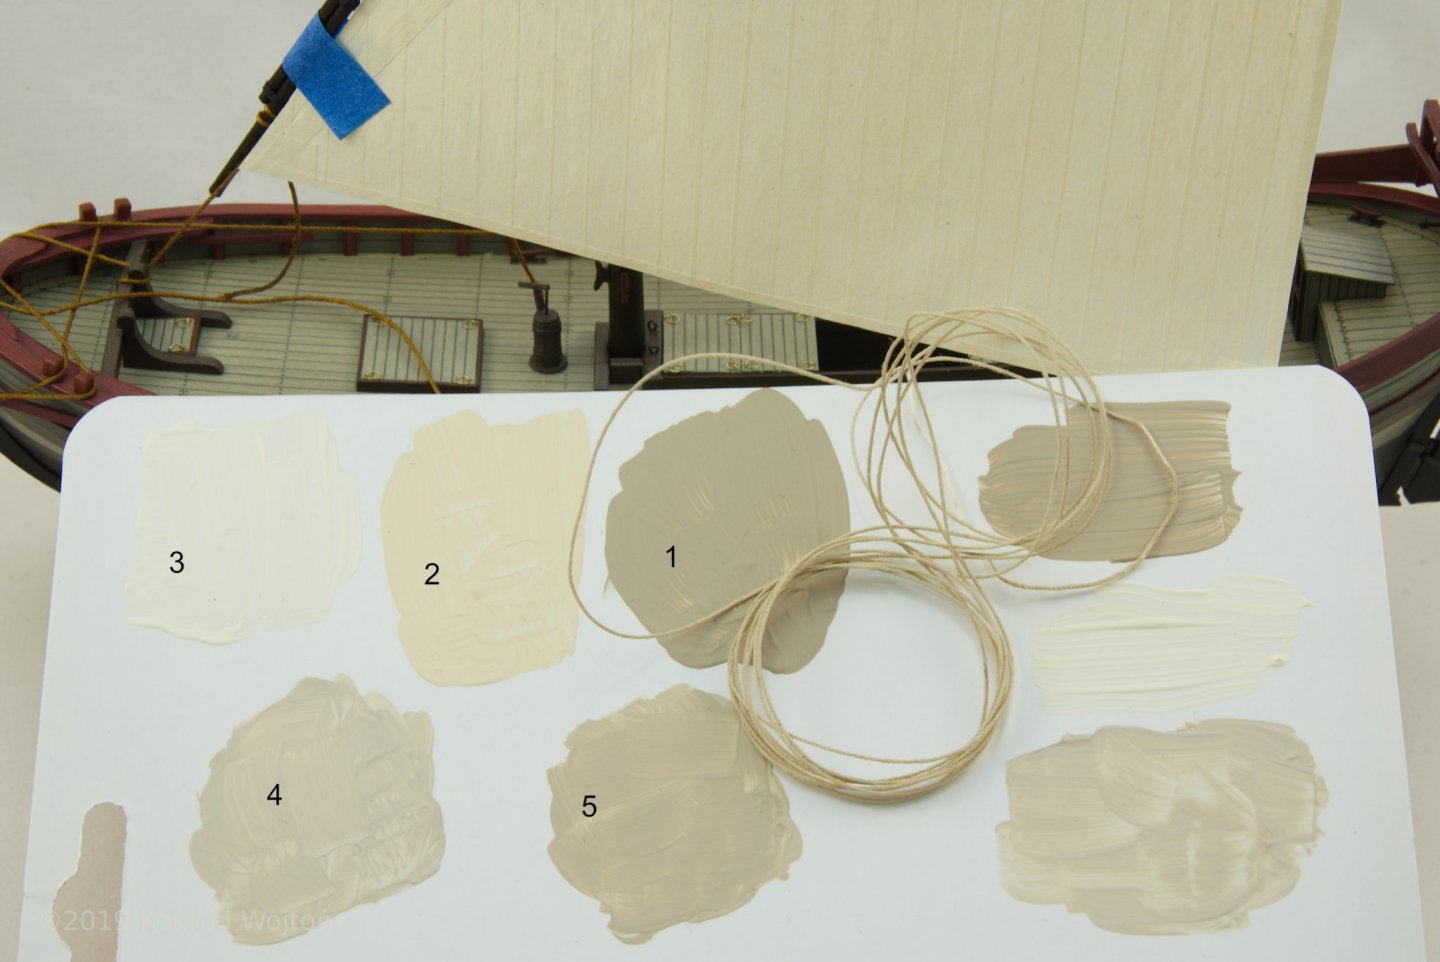
At first I wanted to use third option. But now after trying all of them I am hesitating between 1 and 3. I can delay this decision for a bit becuse I need to make new yard. This one is unfortunetly bent in upper part.
- Rudolf, tkay11, GrandpaPhil and 2 others
-
 5
5
-
6 hours ago, BobG said:
Do you think this would be a good card model for someone who has never built a car model?
As first card model - I would advise against it. There is quite nice intro to ship card modelling (with free model so you can experiment galore) on this site: https://modelshipworld.com/forum/28-card-and-paper-models/. But if you have some experience with card modelling then yes, it is nice intro into sailing vessels made from card (that is how I use it, before I start with Columbus fleet).
-
@BobG
I'm using many different kinds of glue. Below my list with brands that are available in Poland.
1. PVA - general use, putting together hull frame, planking and all that jazz. Because it contains water I don't use it to laminate larger areas on thicker cardstock, as it warrants shrinking and wrapping (ask me how I now :)). I like to use Pattex Express.
2. Contact glue, shoemarkers glue (at least I think that is how it is called in english) - chloroneoprene based glue. I use it to laminate larger areas as it does not contain water. For example I've used it to laminate frame parts onto 1mm card stock, also laminated planks to 0,5mm thickness with it. Many card modelers in Poland glue whole models with it, but I don't like its smell (and it is toxic, so use ventilation). I also sometimes glue metal parts with it (if I'm not in a hurry). I use Pattex Classic (it has classic yellow colour) or Pattex Butapren Bezbarwny (Clear). I think that outside of Poland you can find Butapren made by Dragon, as they export it, but I would caution against it. I've read on Polish card modelers forums that it can fall apart after two - three years.
3. CA glue, thin and gel - as fast contact glue for metal parts. Thin glue seeps nicely into cardstock making it hard and nice to sand. The darker areas on hull frame in my first post are evidence of me using CA in this manner. But I am trying to move away from this glue as I think I've developed allergy to it, and my painters mask with charcoal filter is not helping.
4. Two part clear 5 minute epoxy glue - I am exploring it as alternative to CA glue for metal parts. Currently I'am testing some pattex brand.As for sanding, with parts soaked with CA it is no problem. But you cannot soak with CA everything. The more dense the cardstock, the easier it is to sand without much worry. For example plank edges were carefully sanded with 180 grit sandpaper, without soaking with CA, to achieve better fit between them. After sanding I've painted/touched up edges with vallejho acrylics.
Before I start cutting up any kit I cover both sides of every sheet with nitro based varnish - brand of my choice - Capon. I apply it with brush, I try to avoid making brush streaks (at least they don't seem to be visible on photos, and final varnish covers them). With nitro you need to perform test with every kit, as it can dissolve print. If I had airbrush I would probably switch to humbrol clear varnishes (after performing some tests).
All touch ups are made with thin paintbrush.I don't own airbrush yet and because of this I am forced to use varnishes in rattle cans to cover model with final protecting coats.
@GrandpaPhil
I've never scratch built, but I've managed to butcher quite some number of not so good quality paper kits before
@druxey
Thx, have a seat
- GrandpaPhil, mtaylor, BobG and 1 other
-
4
-
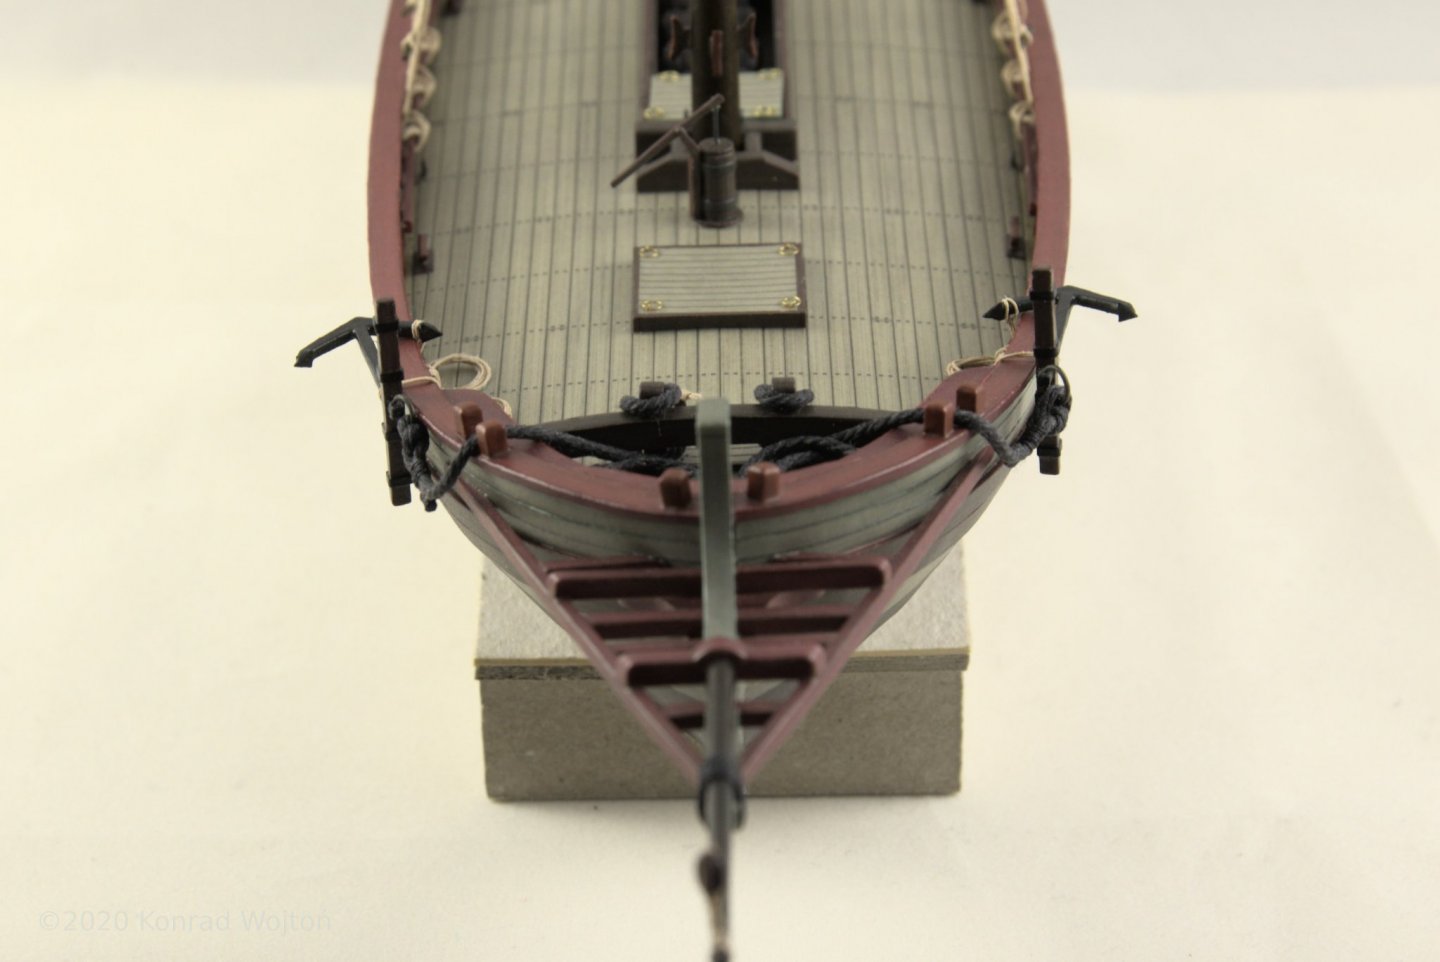
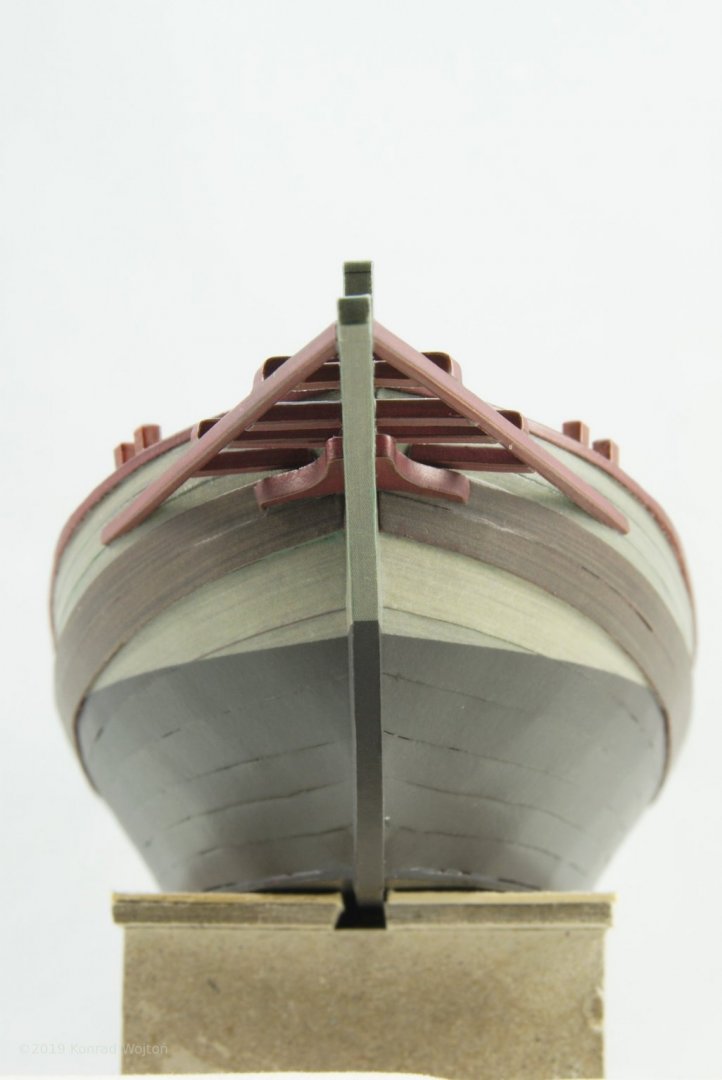
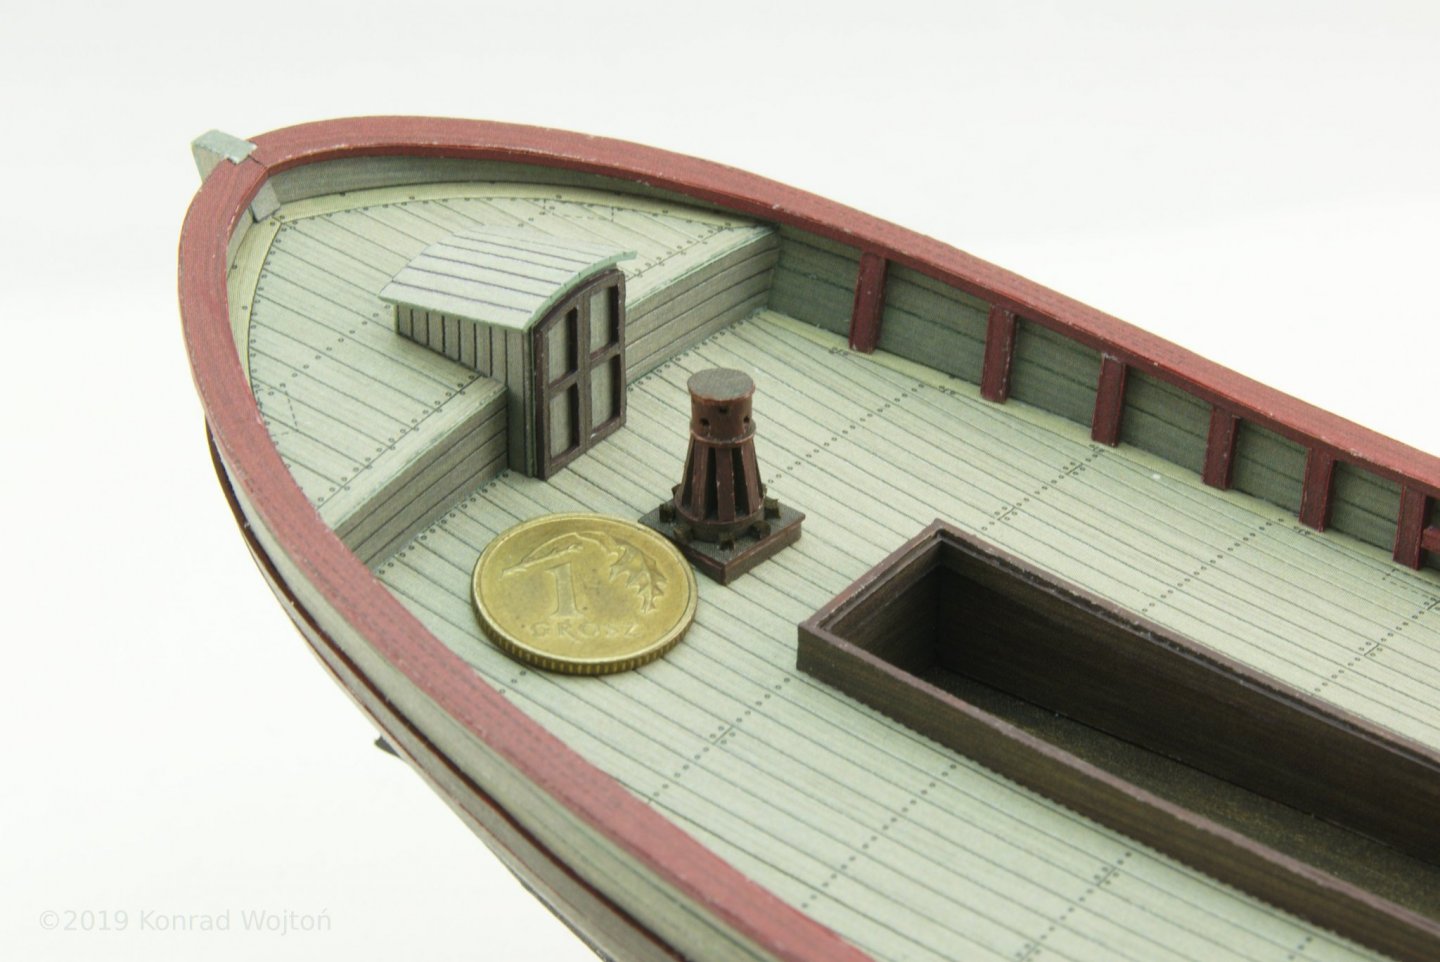
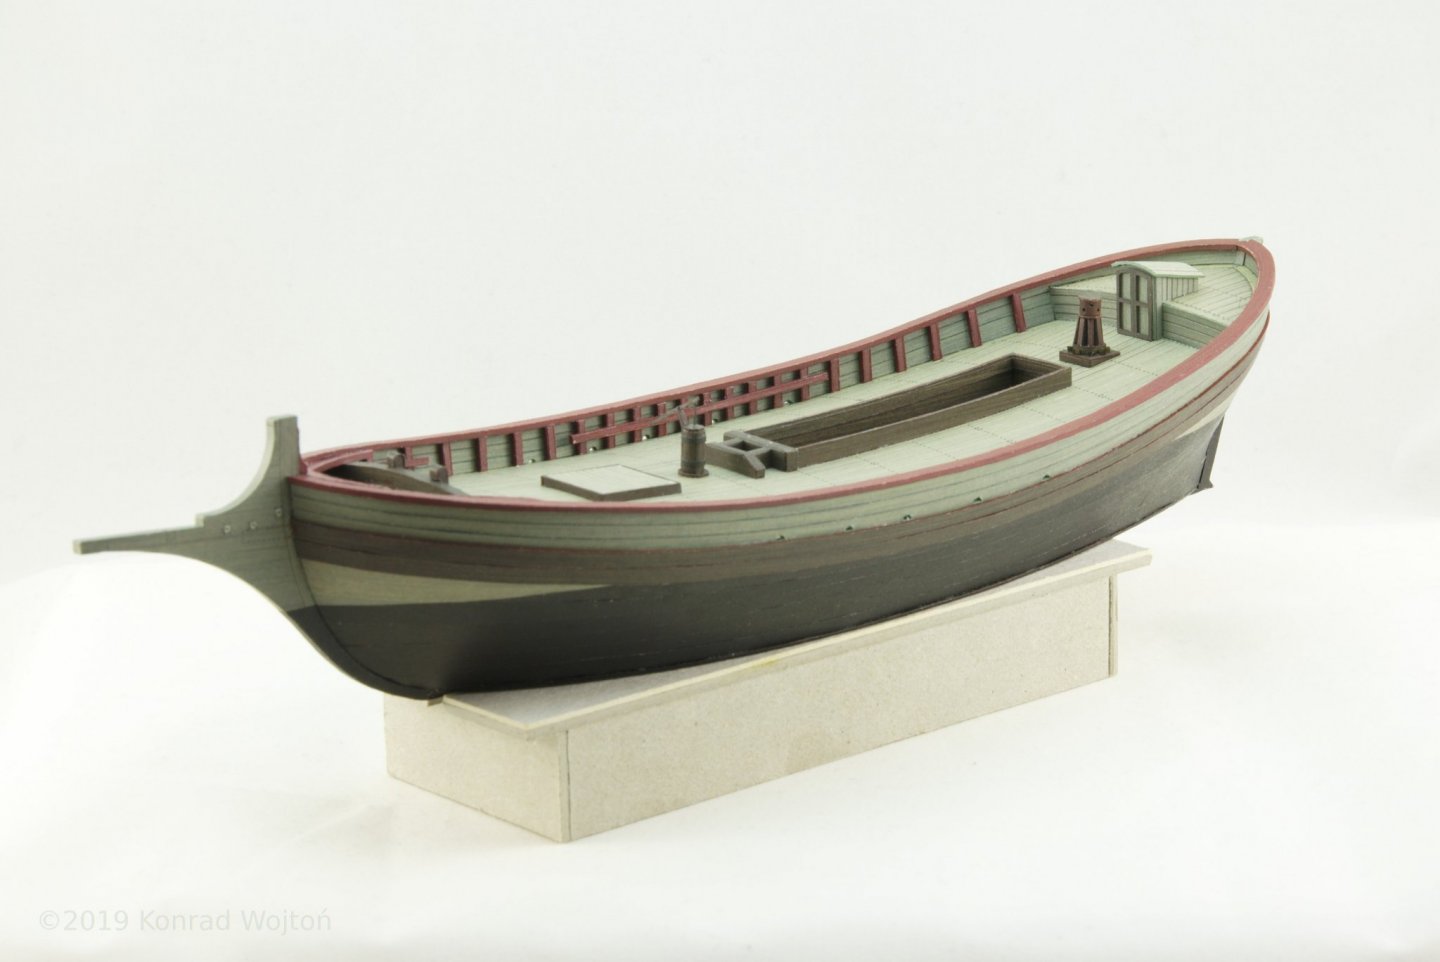
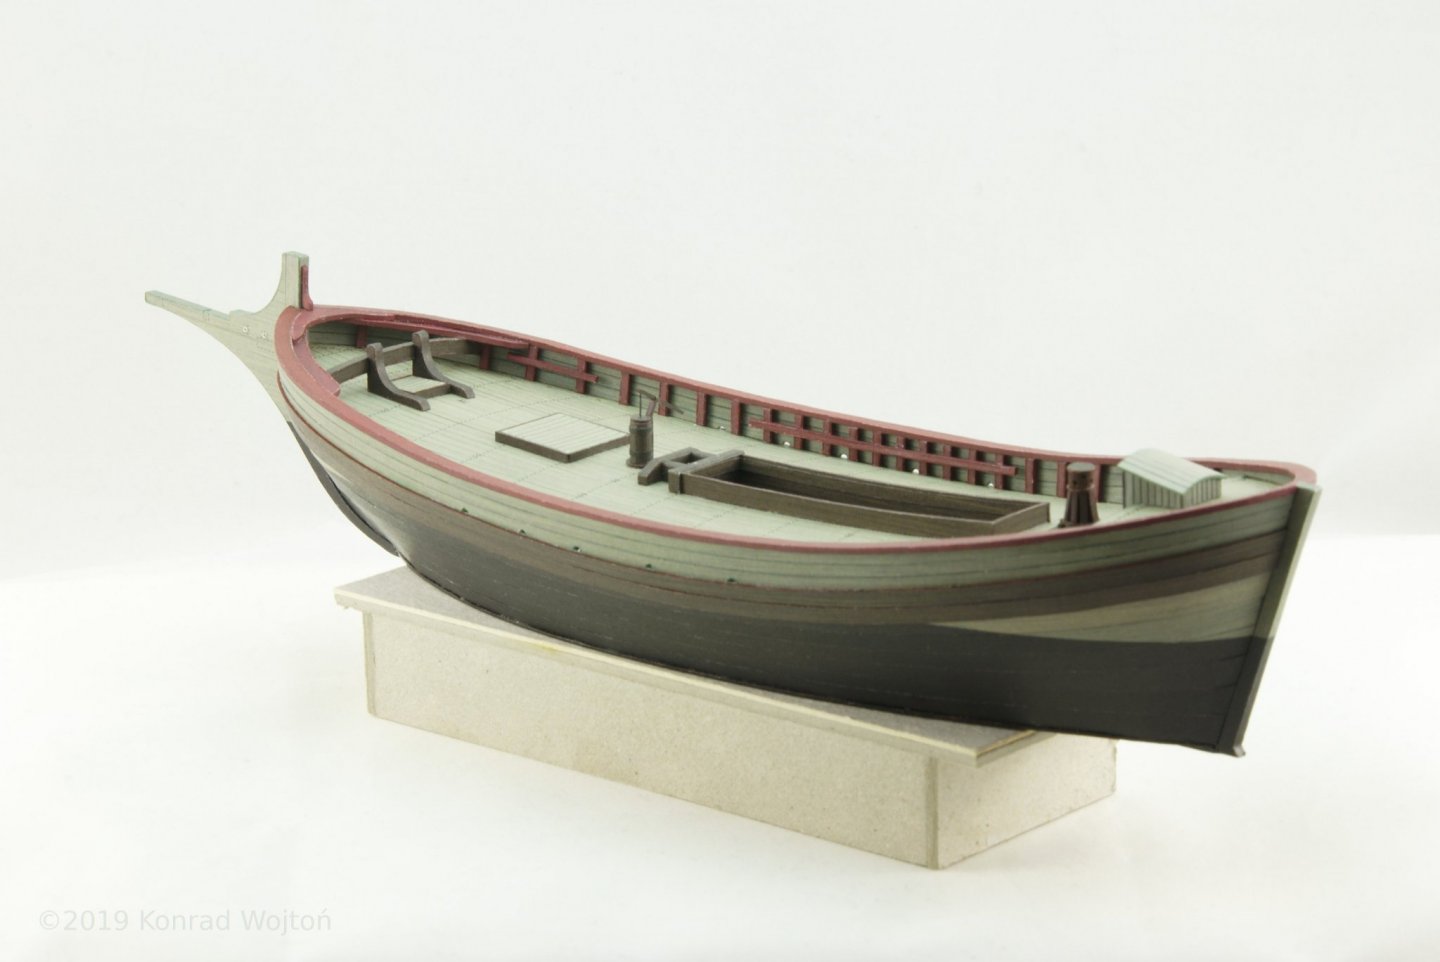
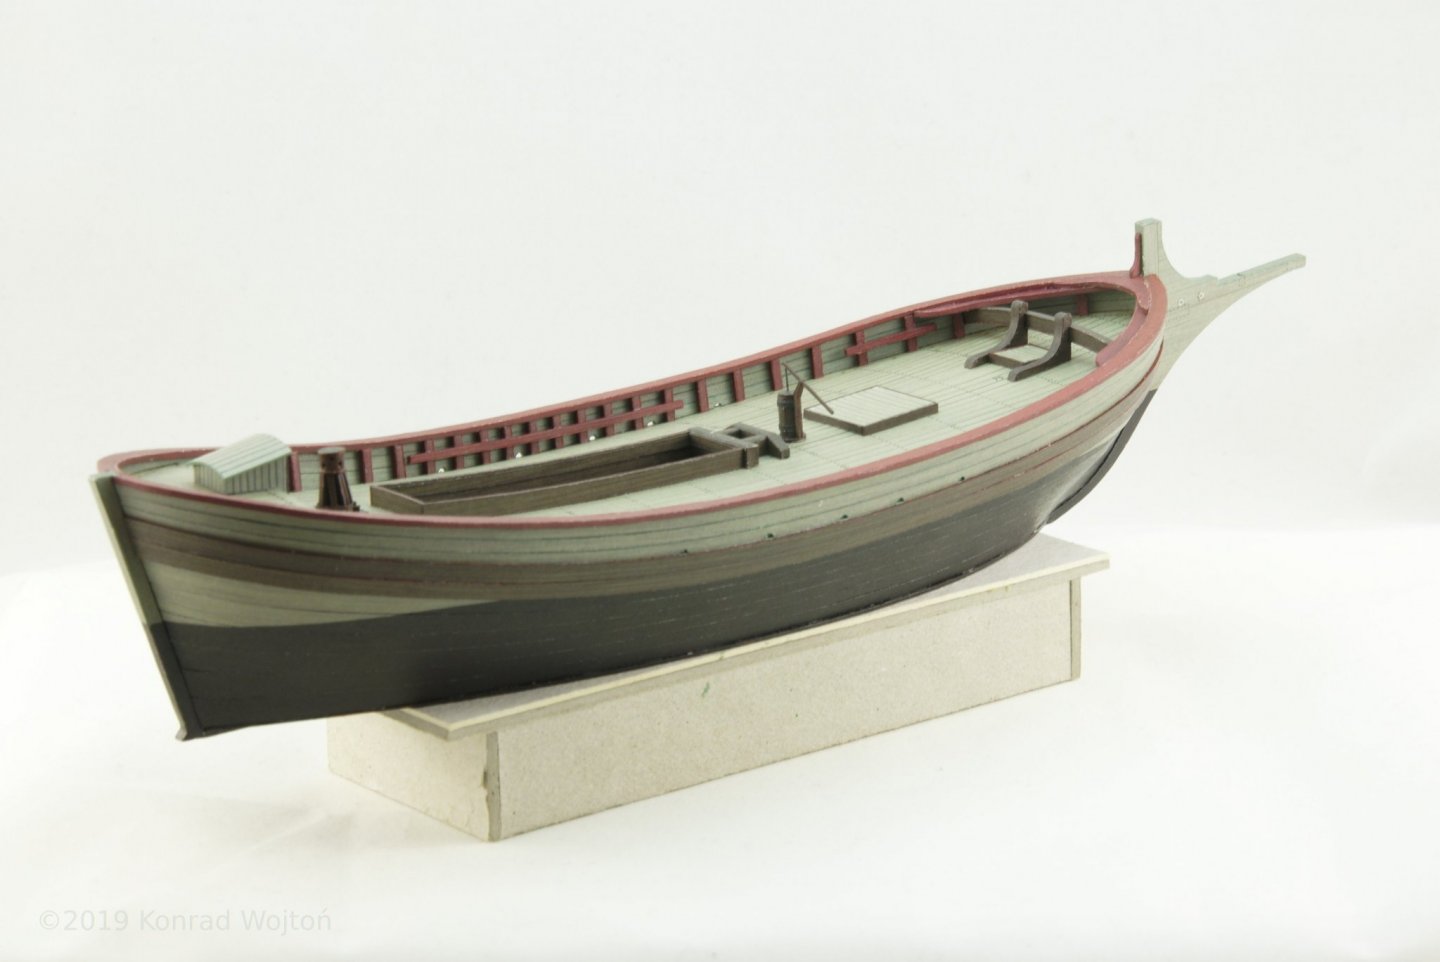
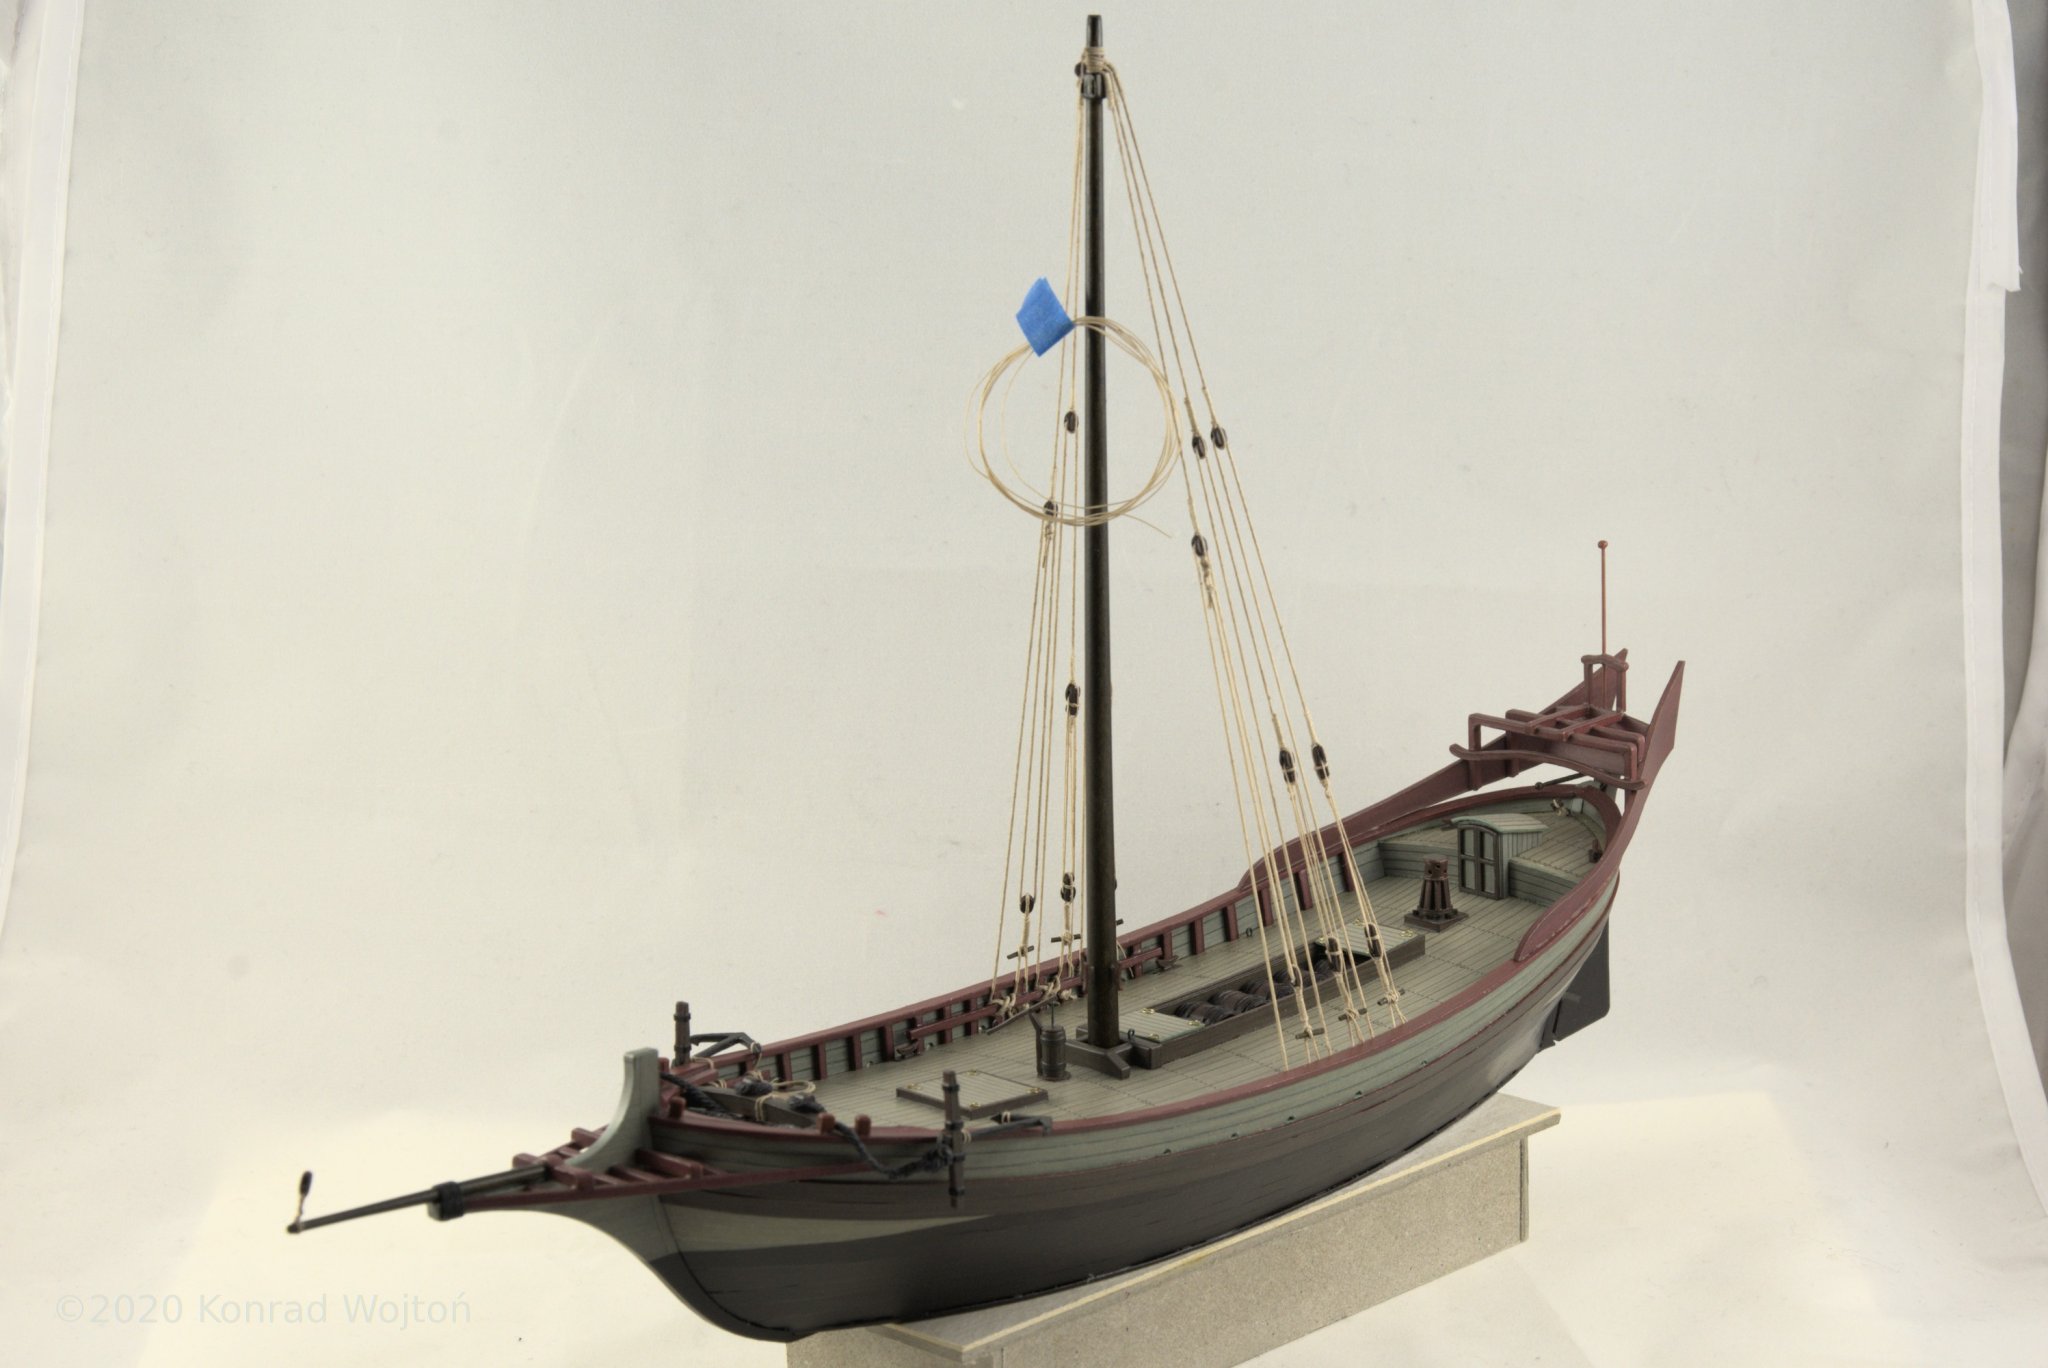
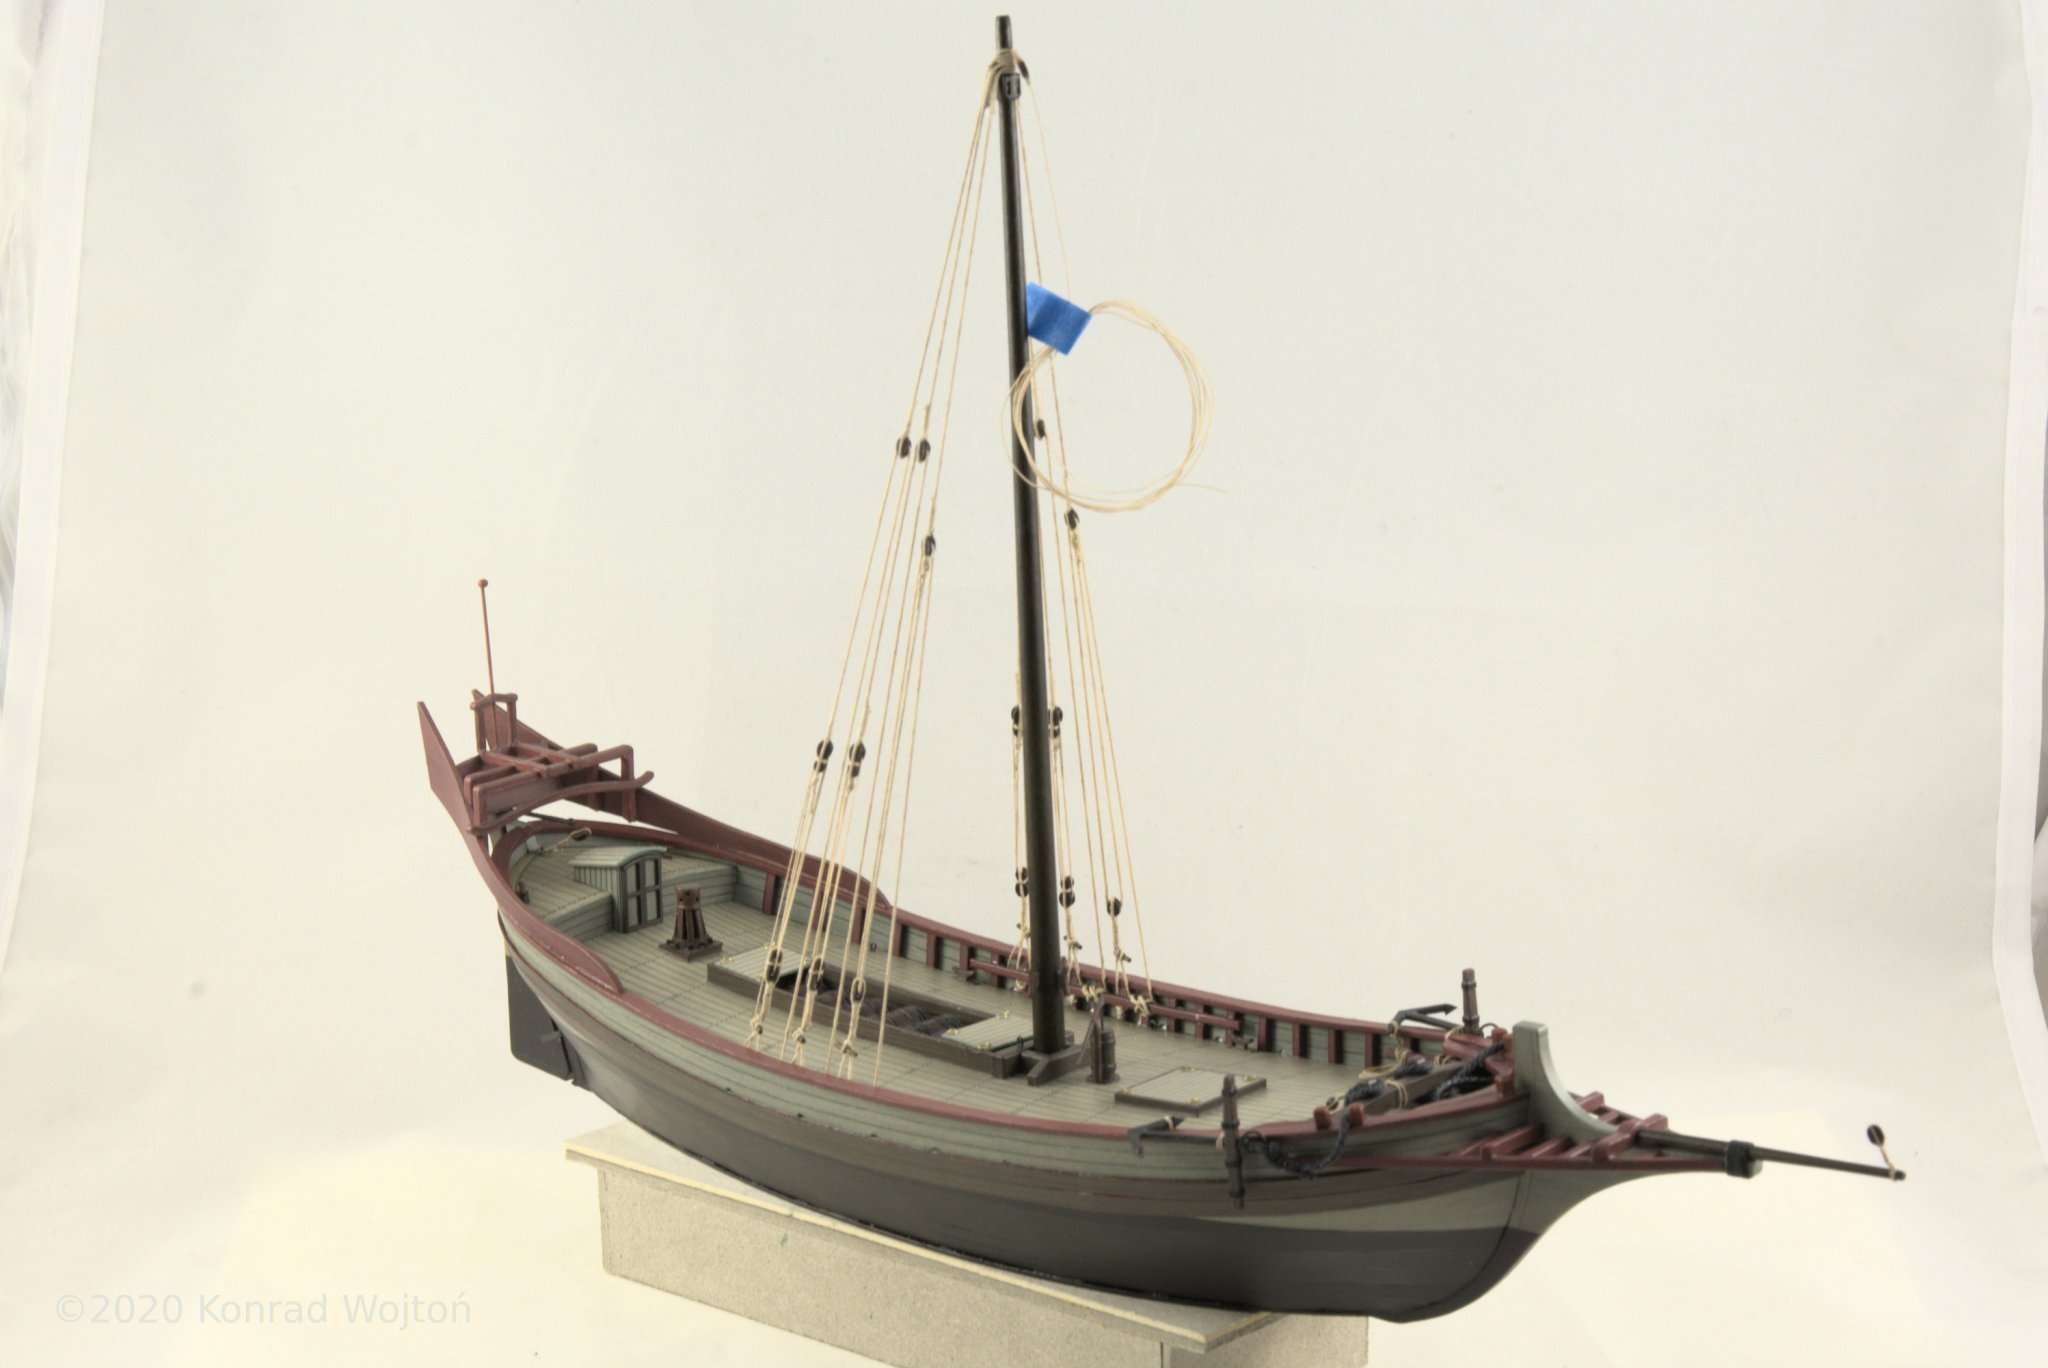
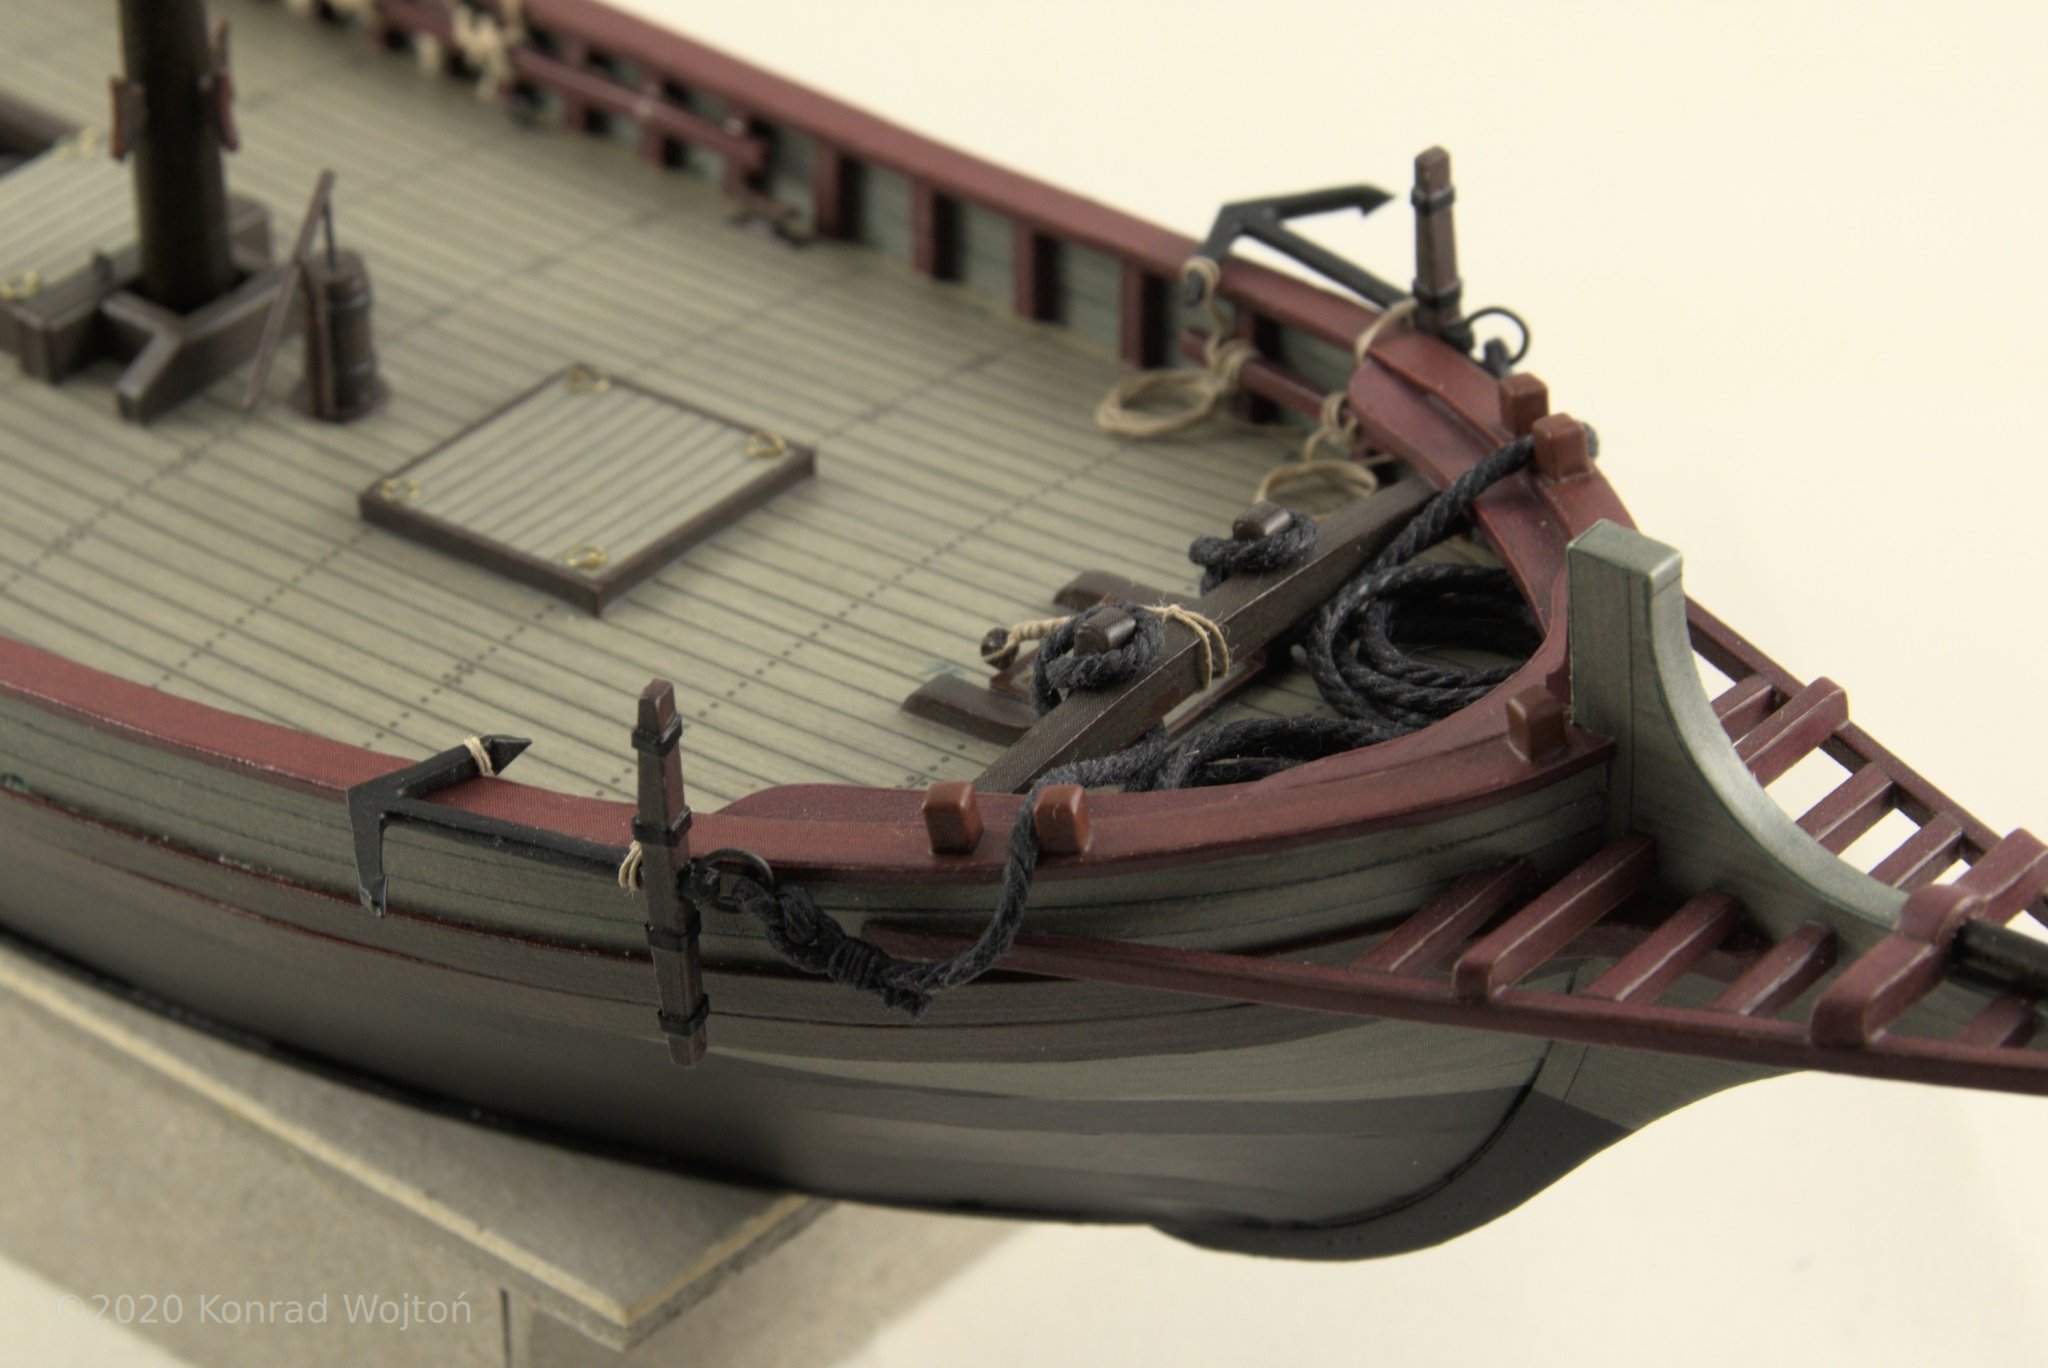
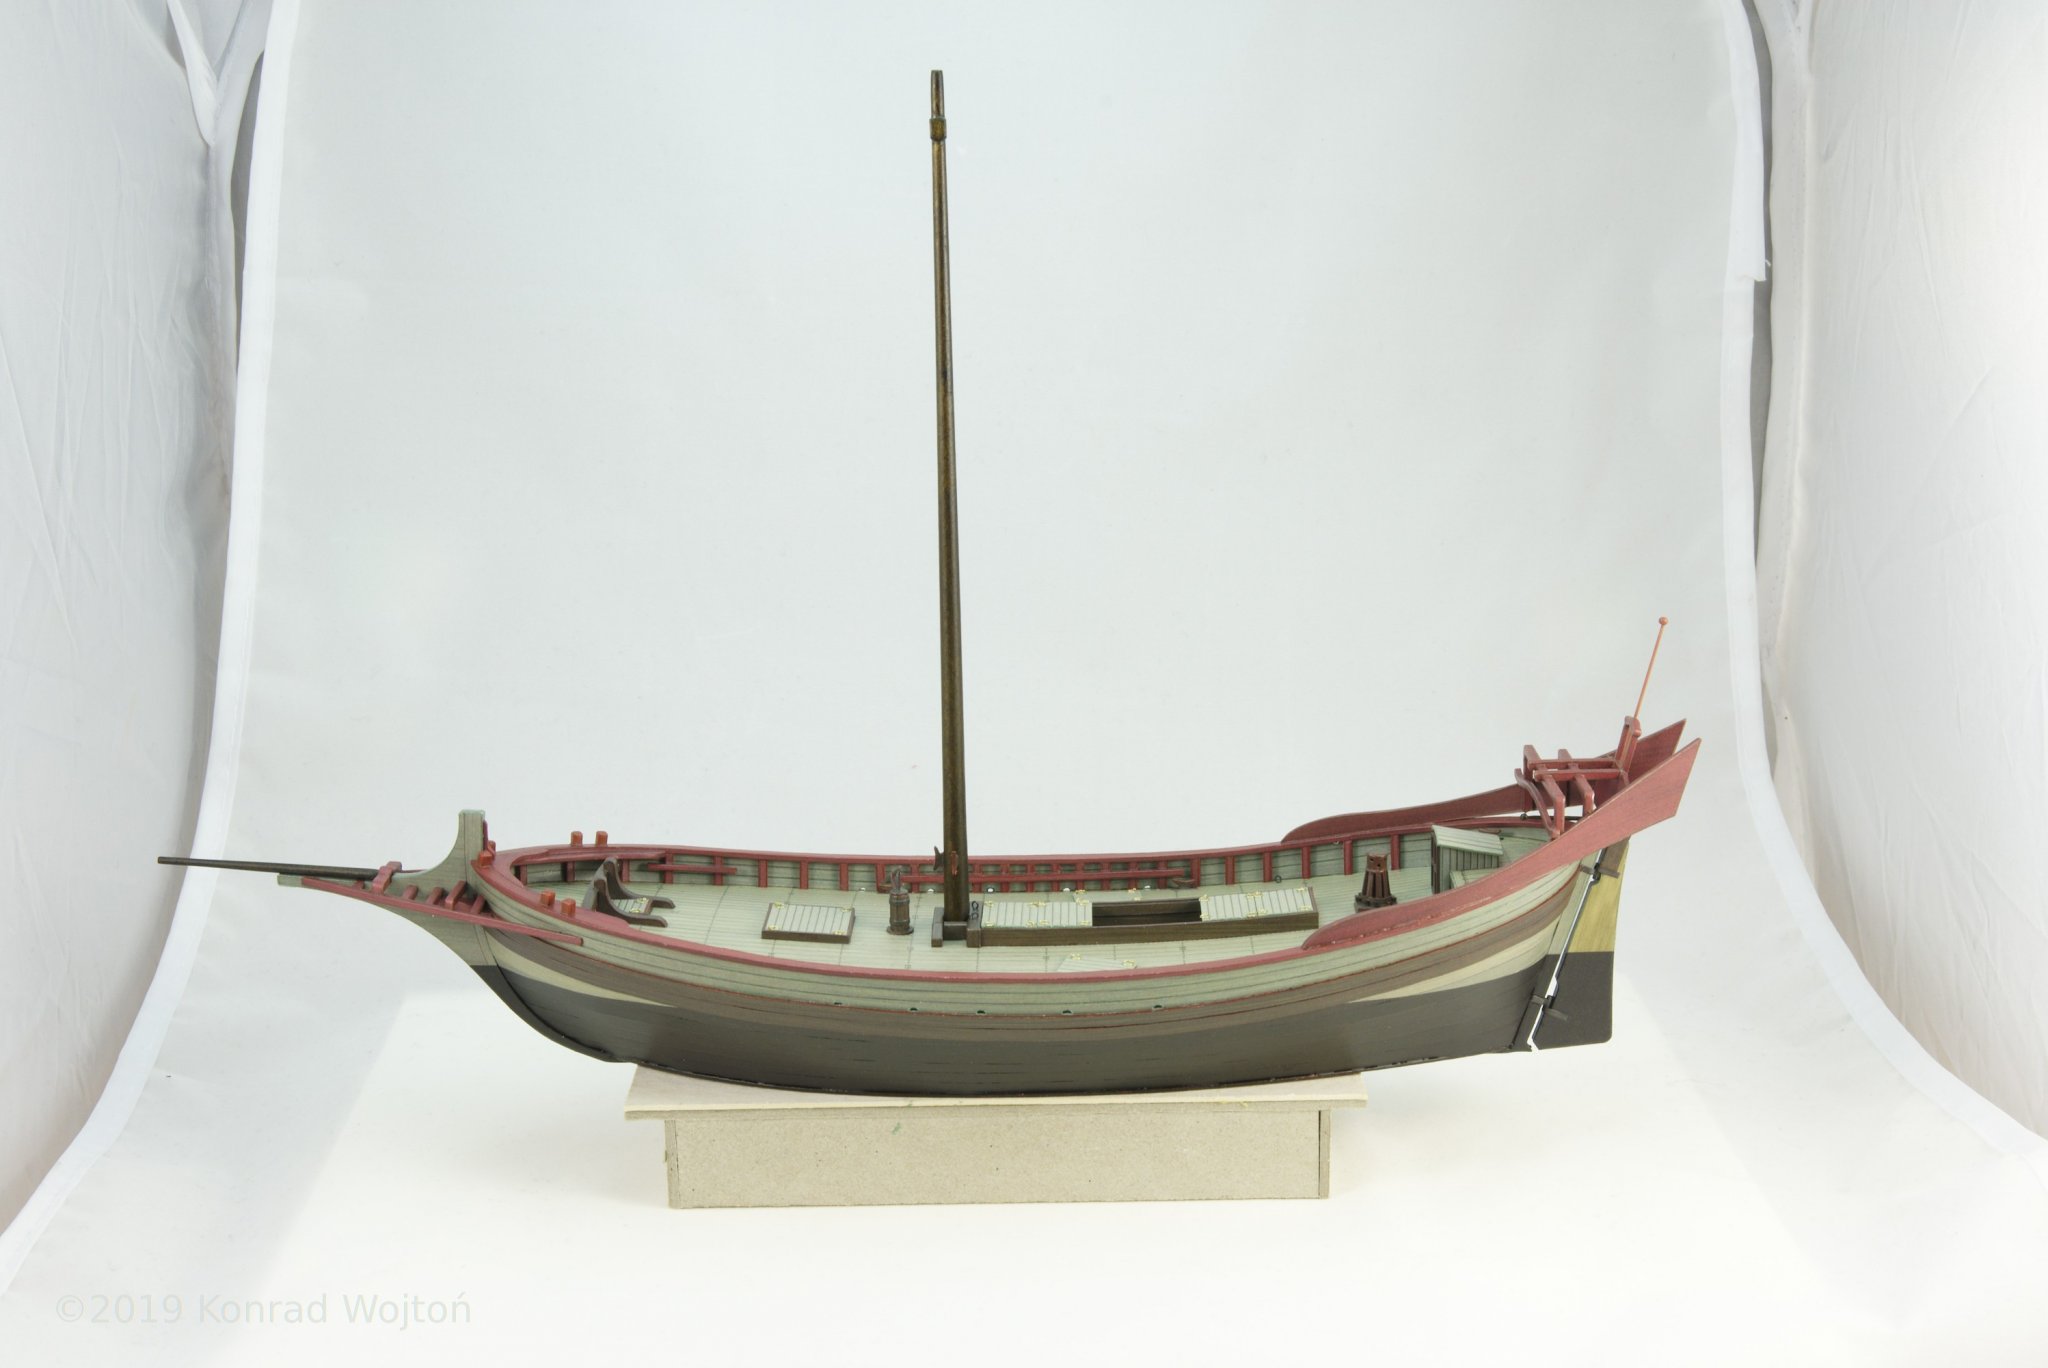
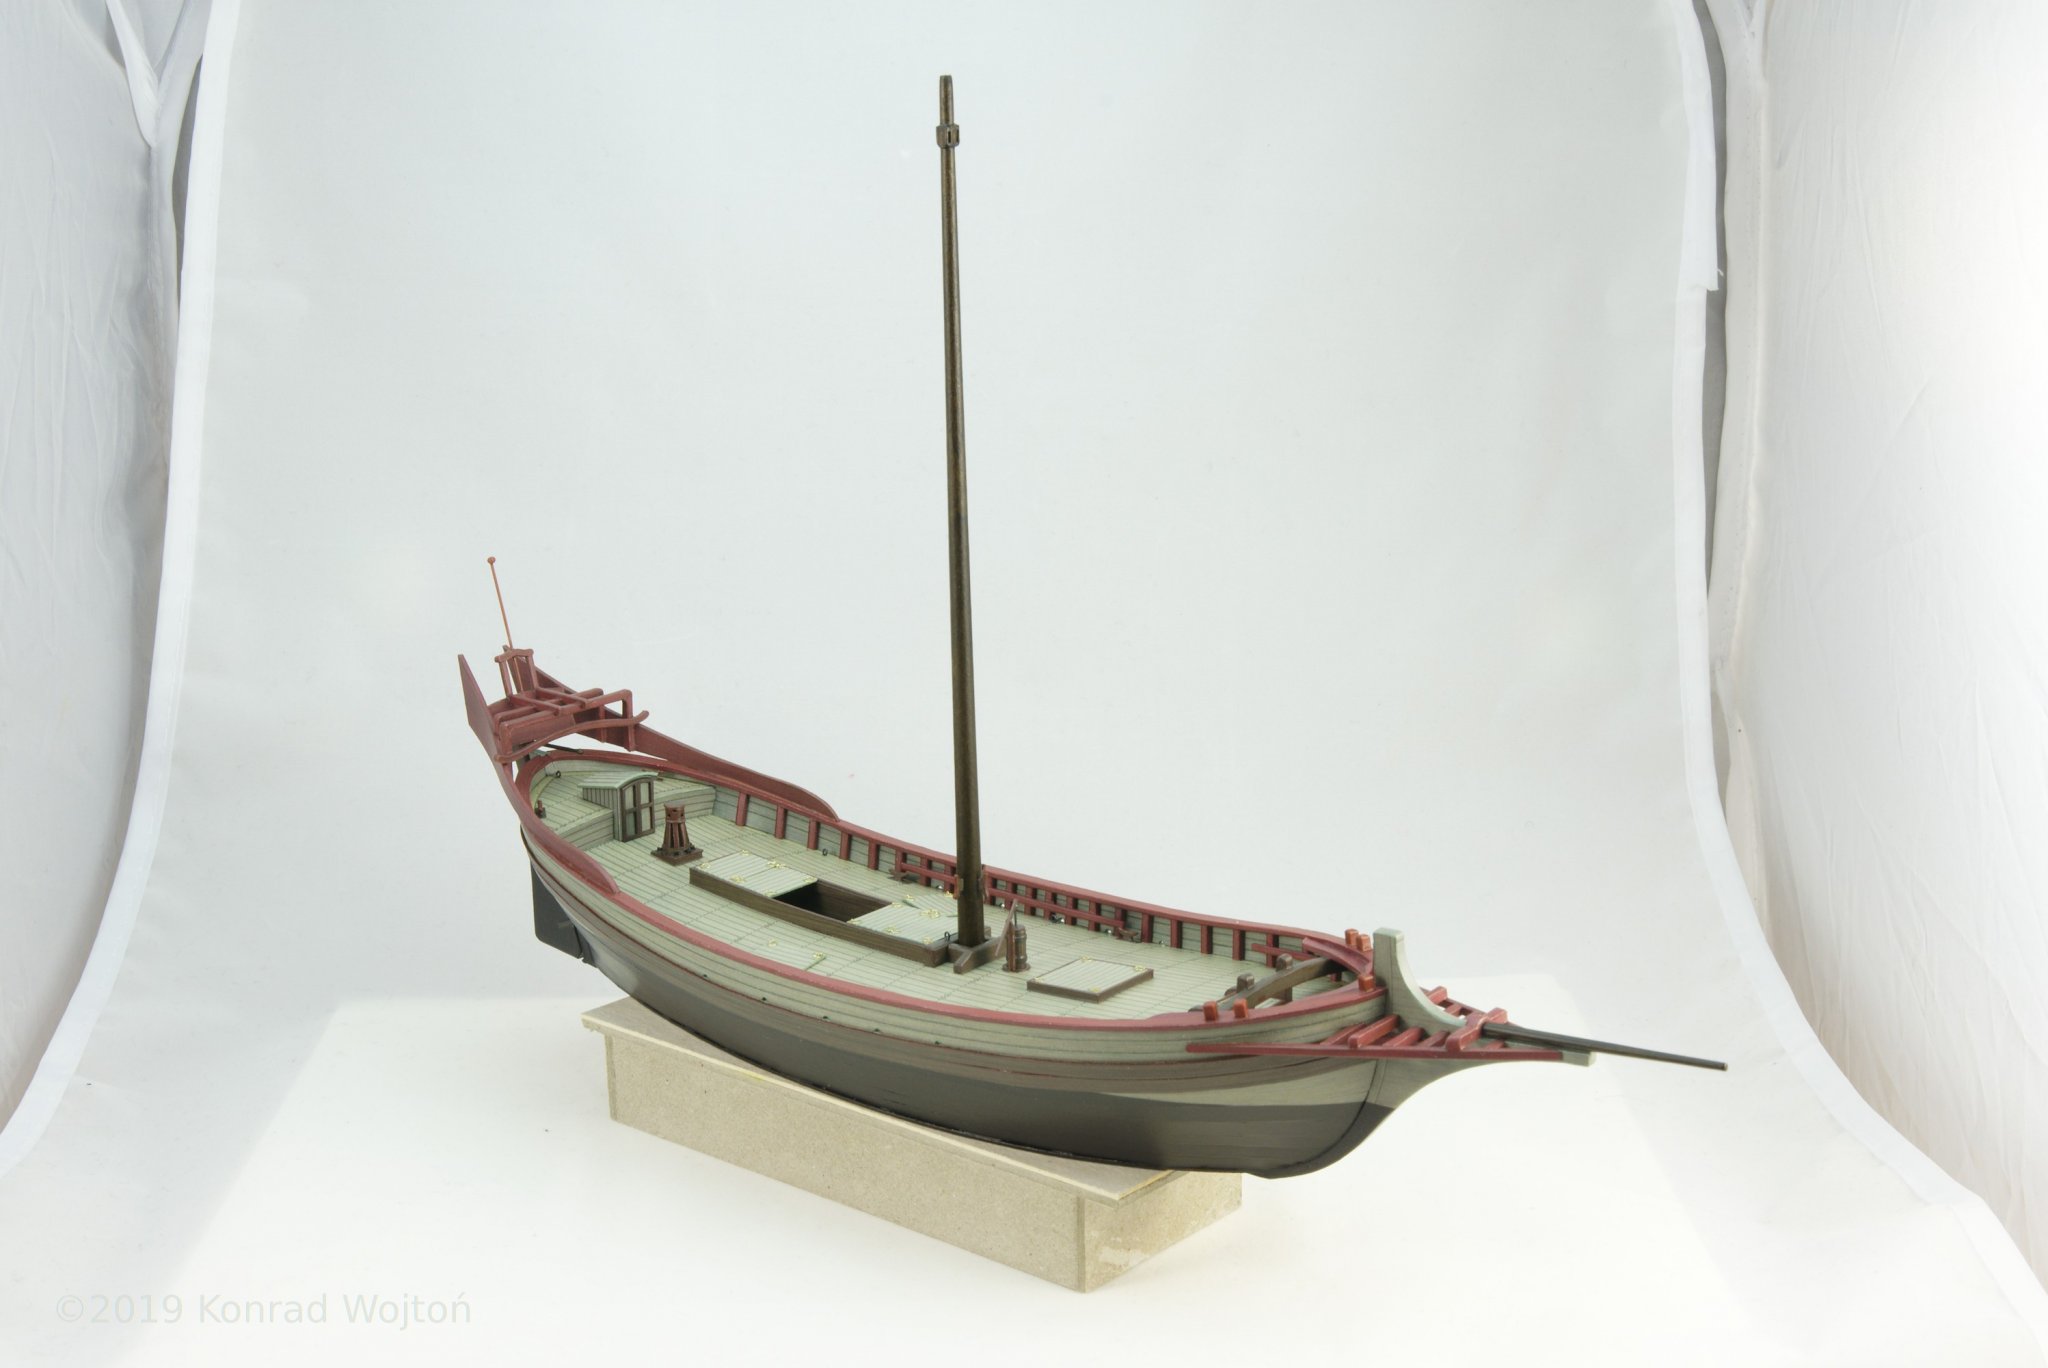
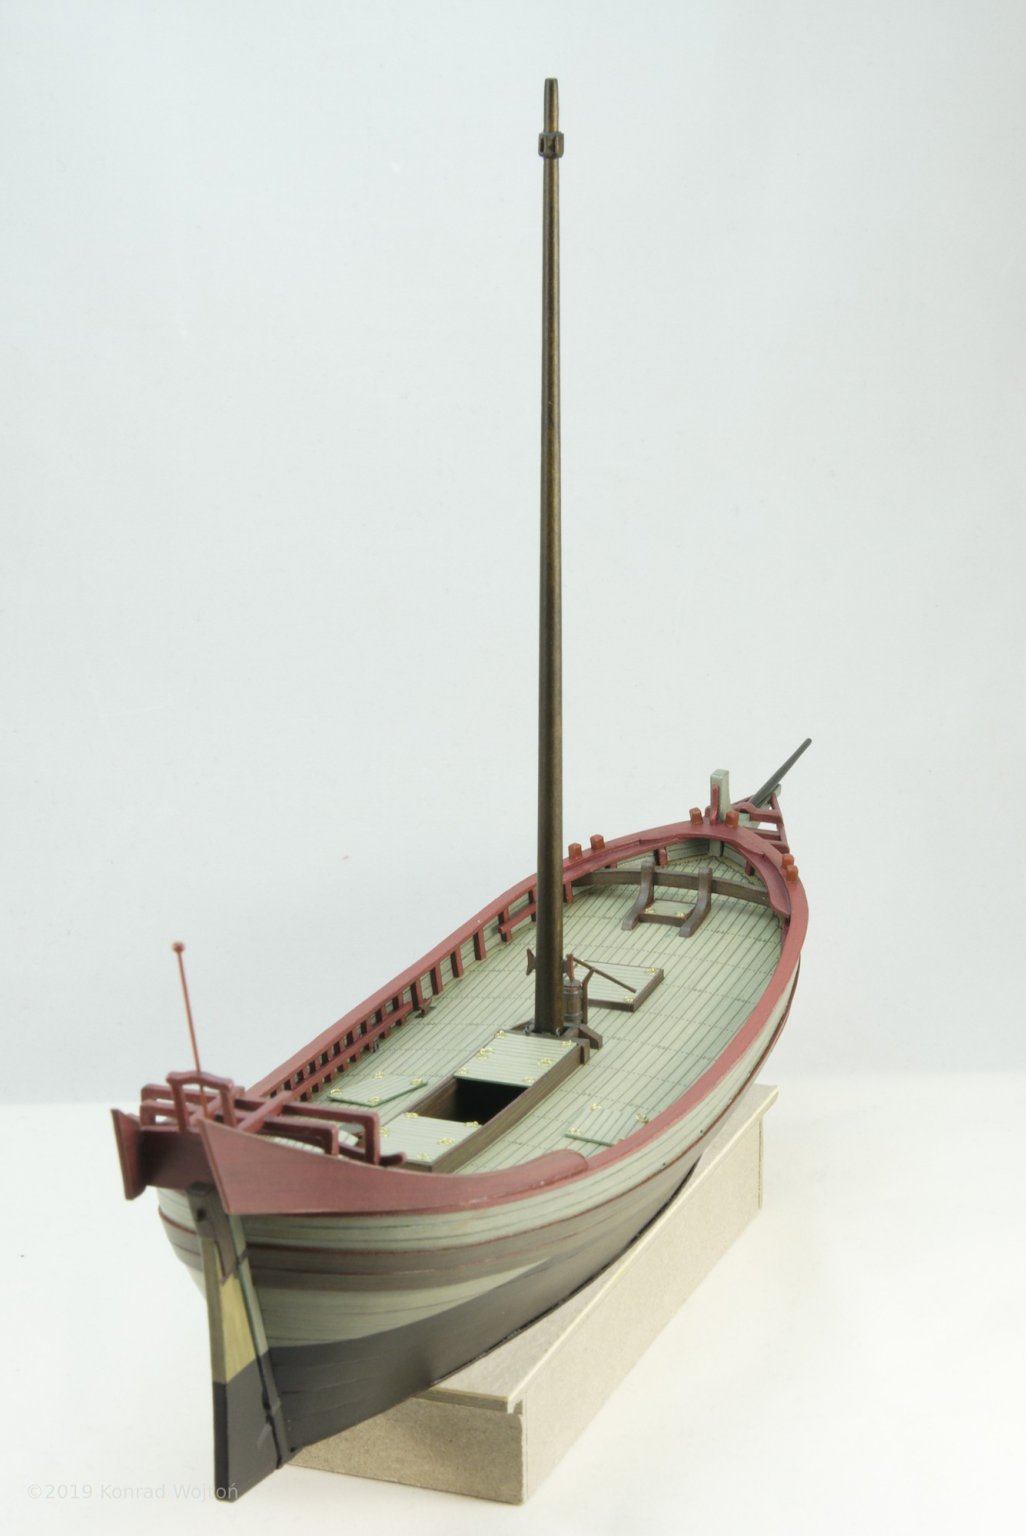
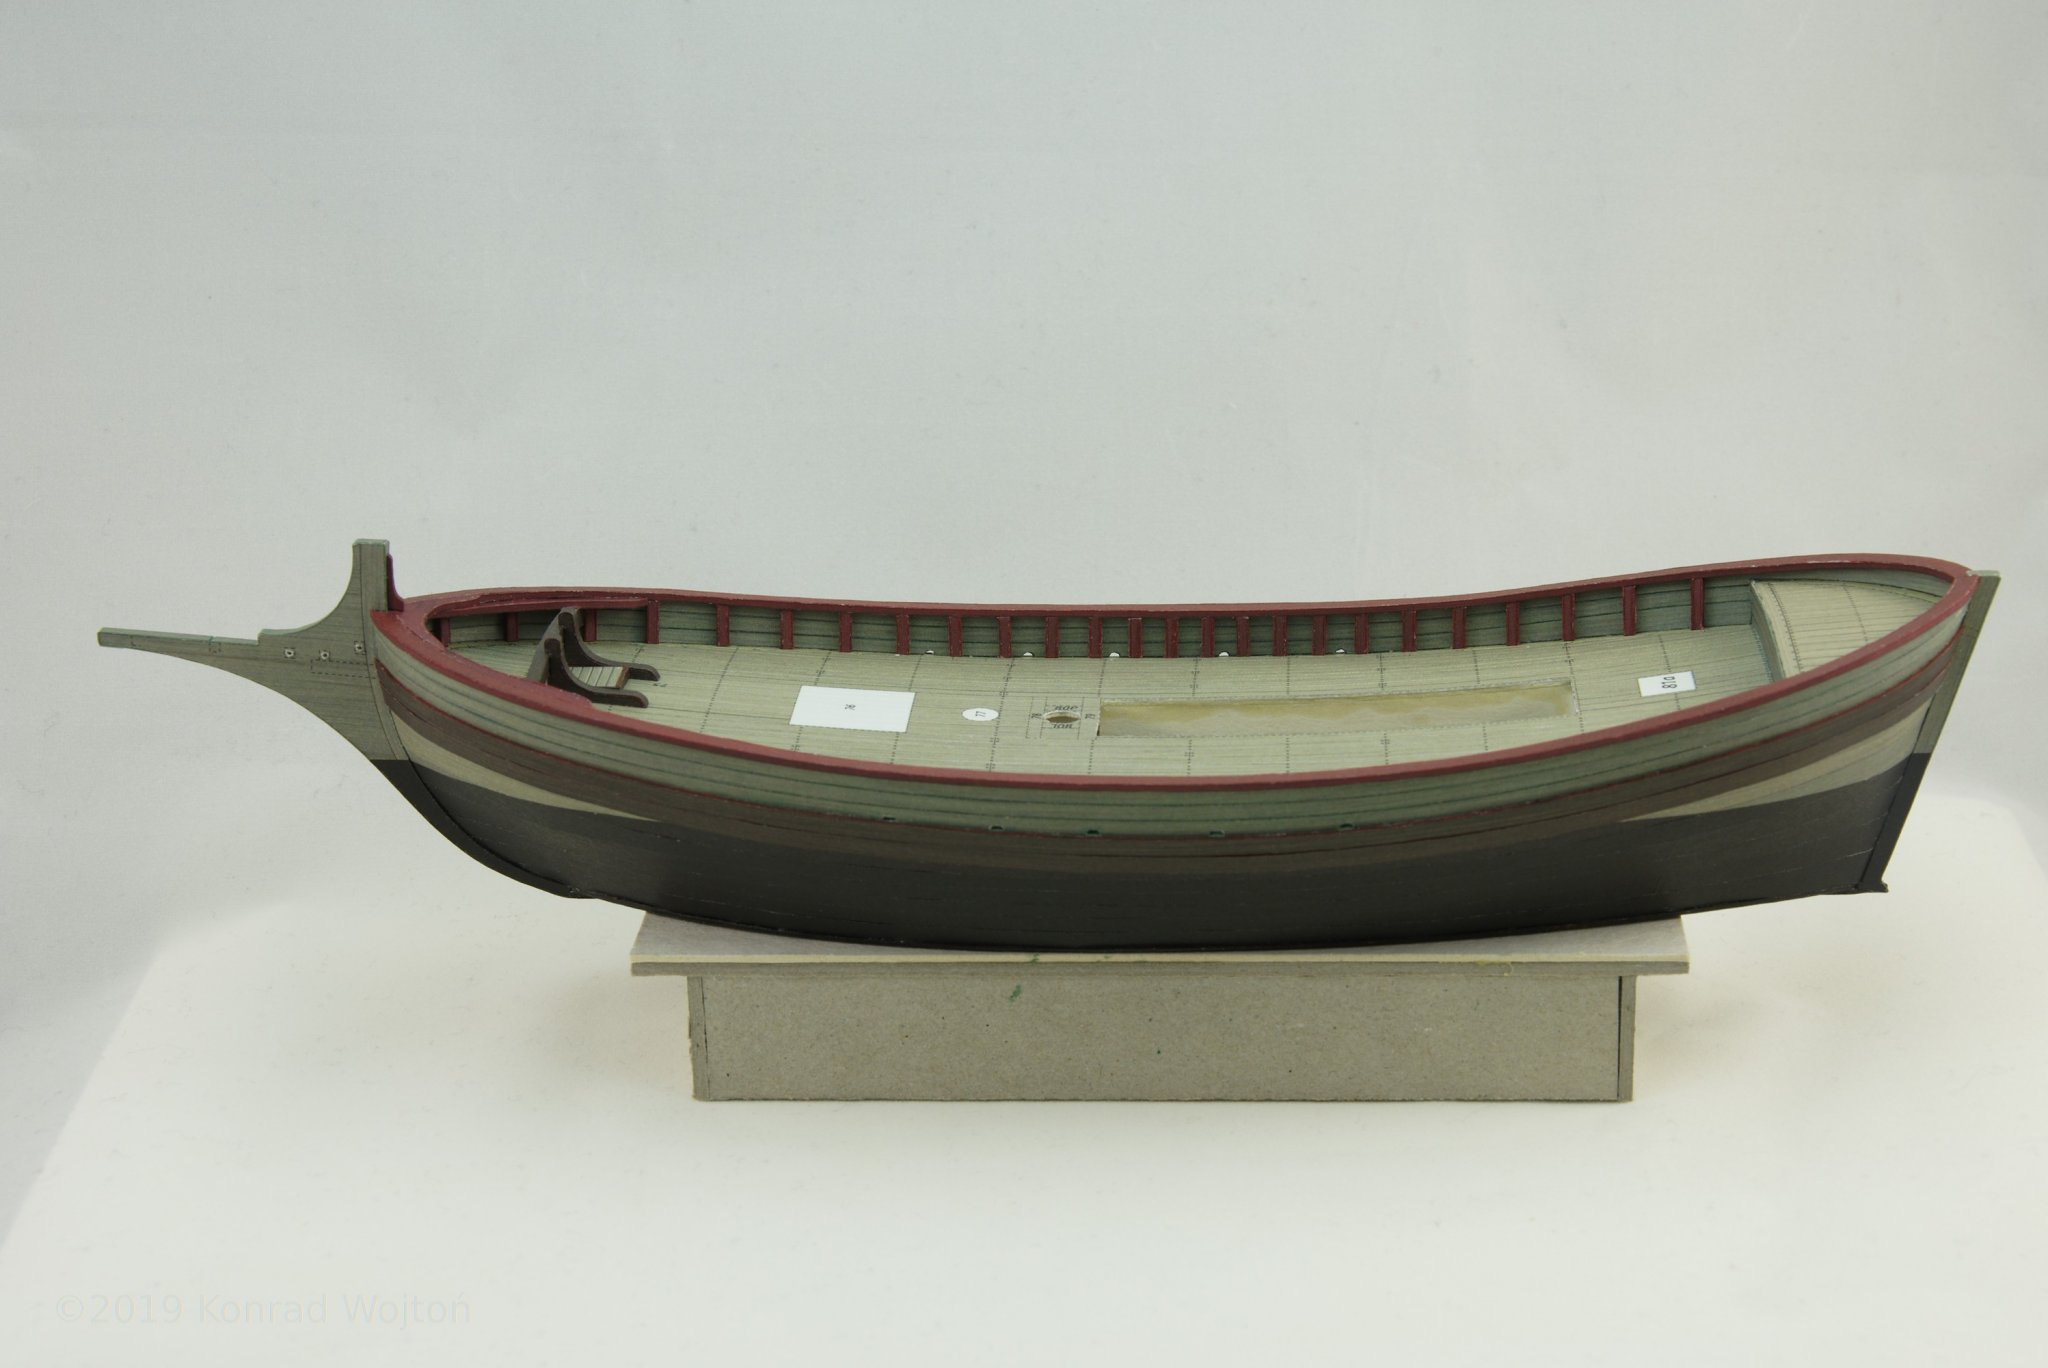
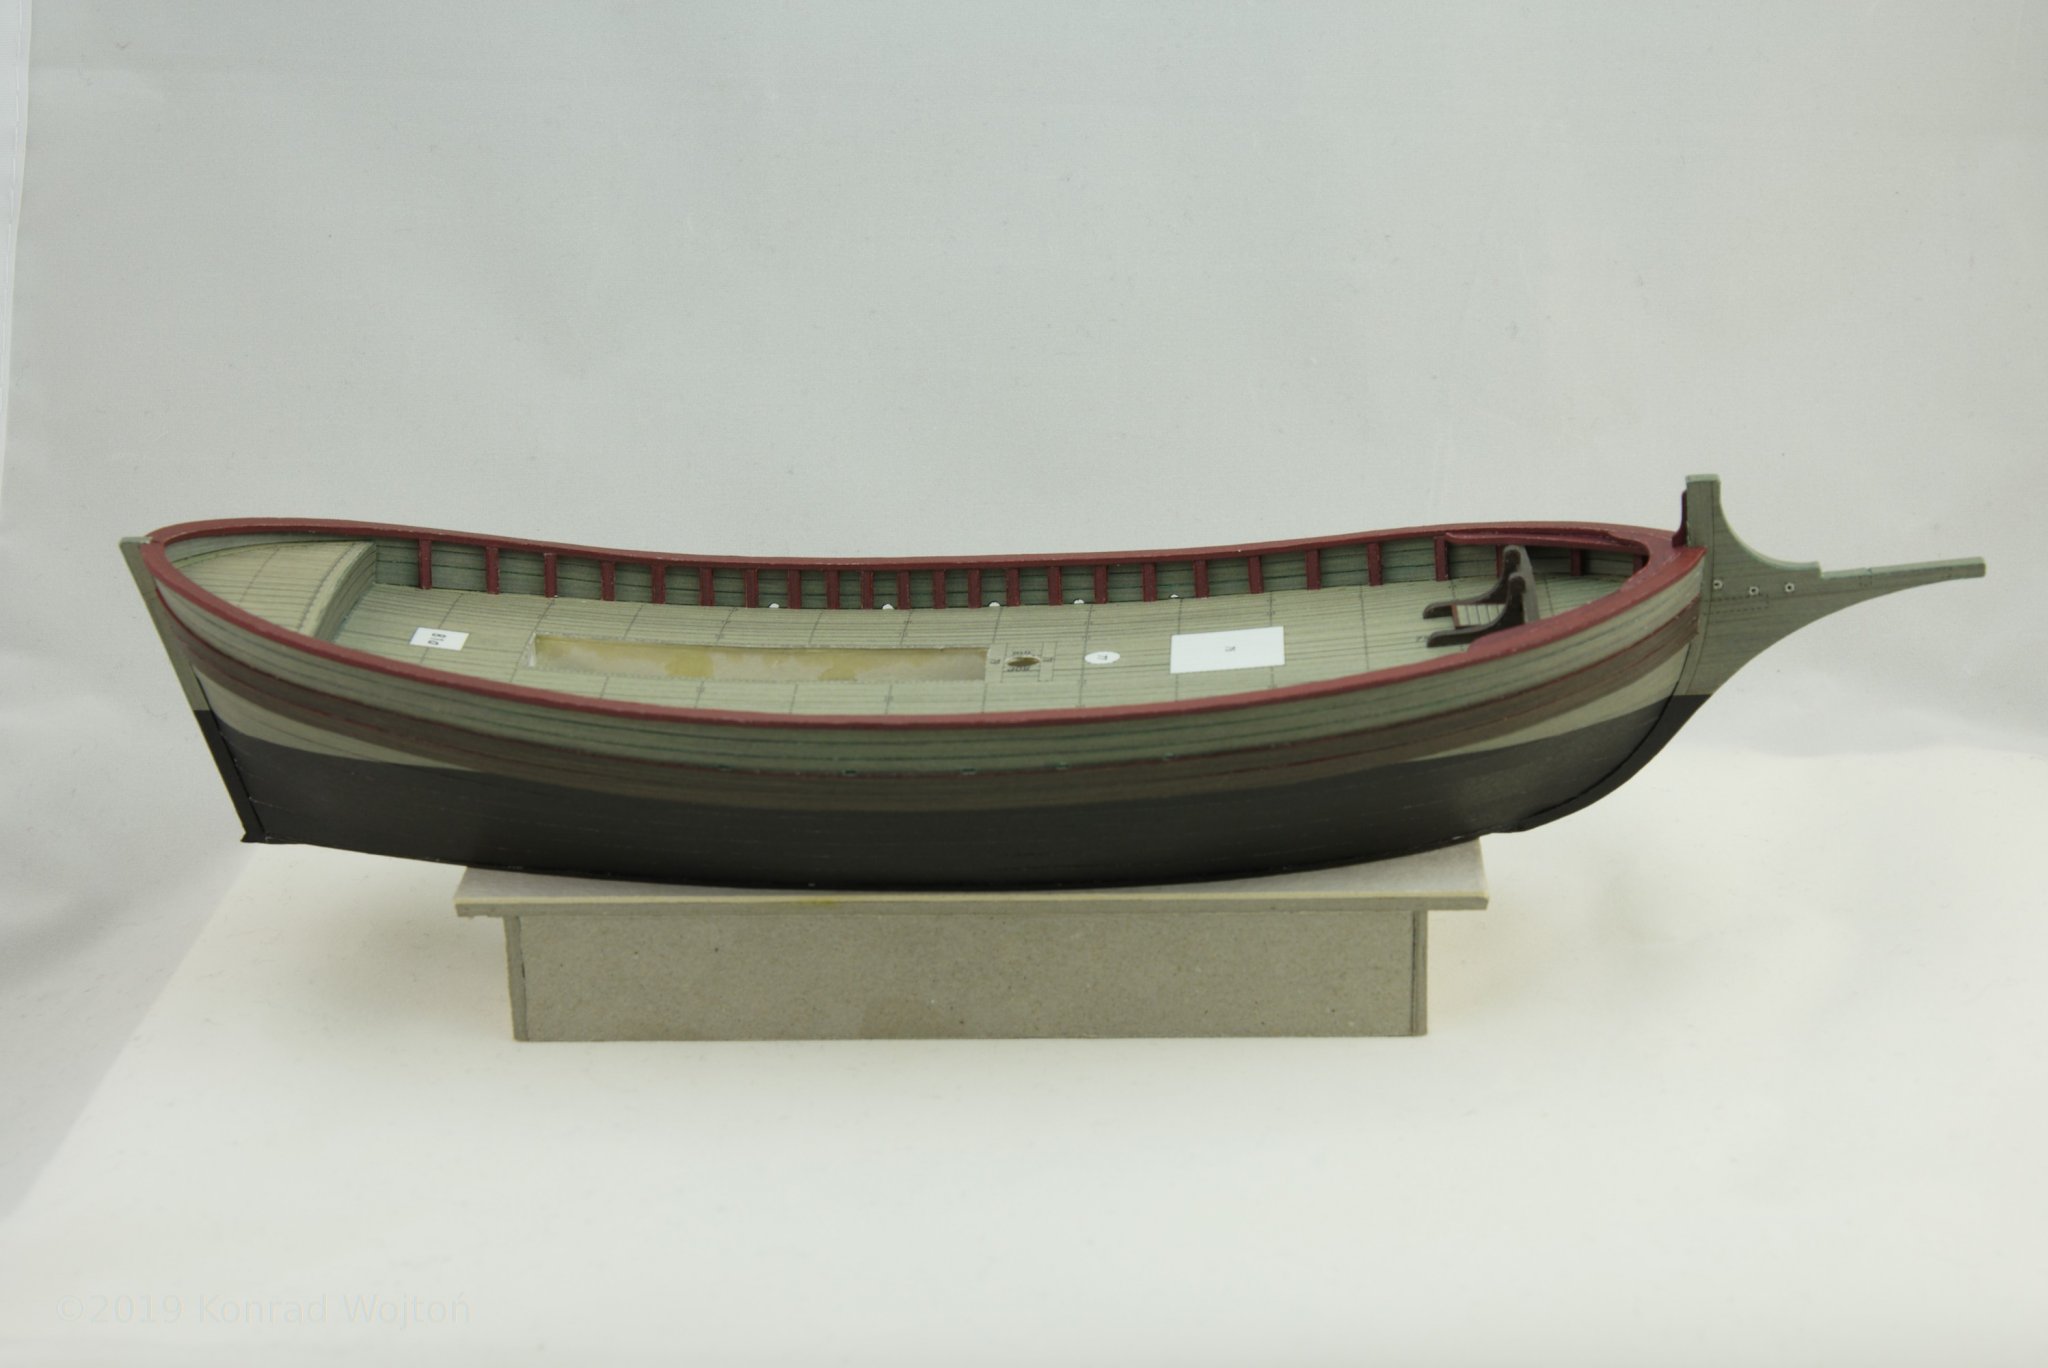
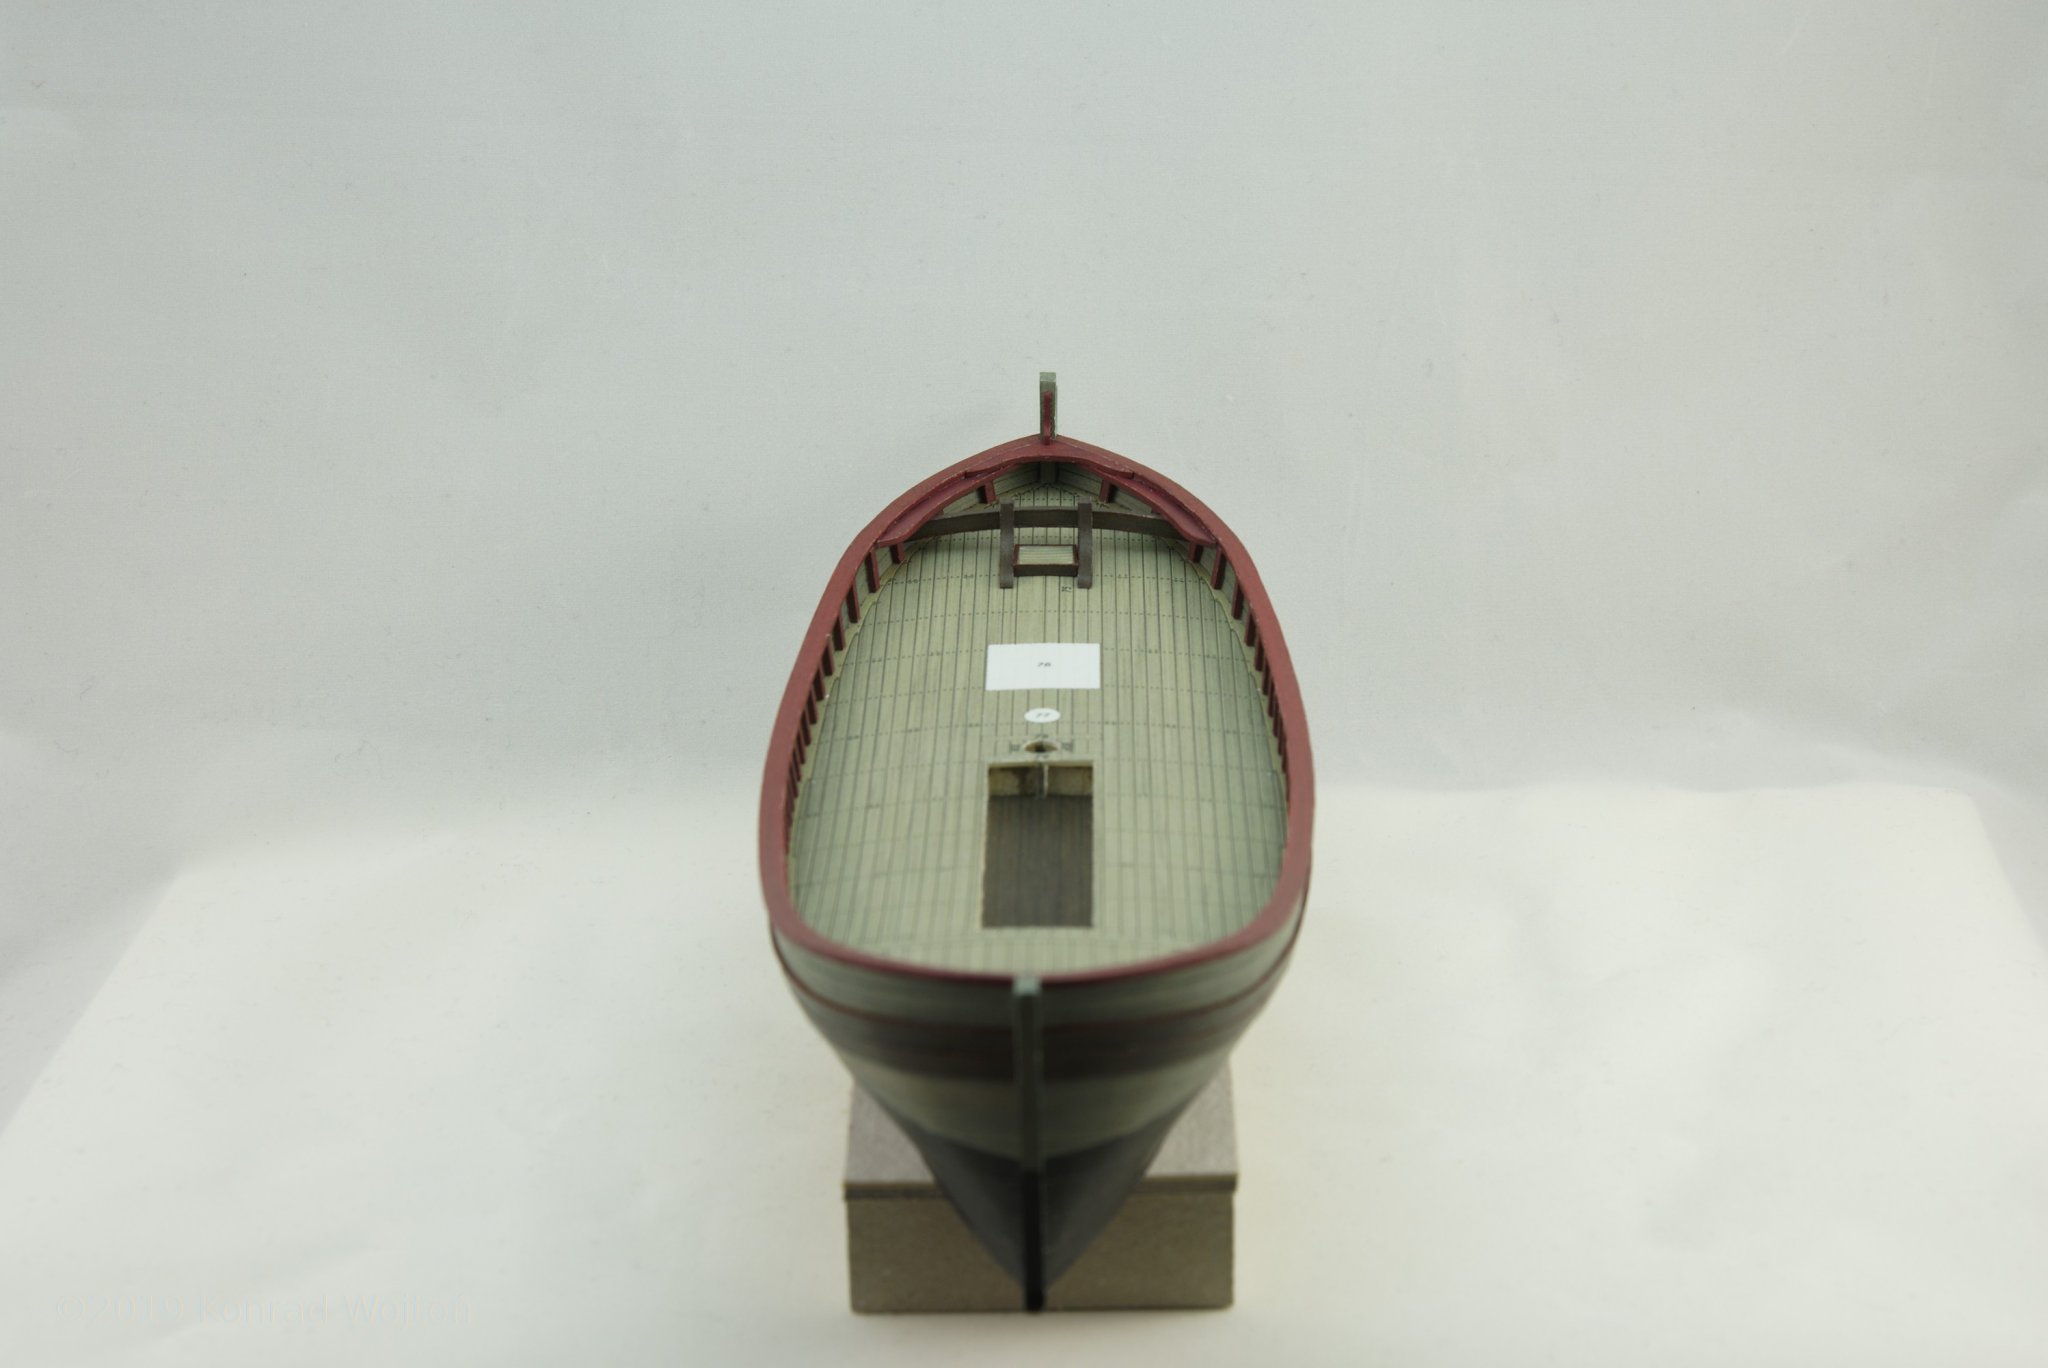
Current look with mast and bowsprit dry fitted (I need bigger shadeless tent :)).
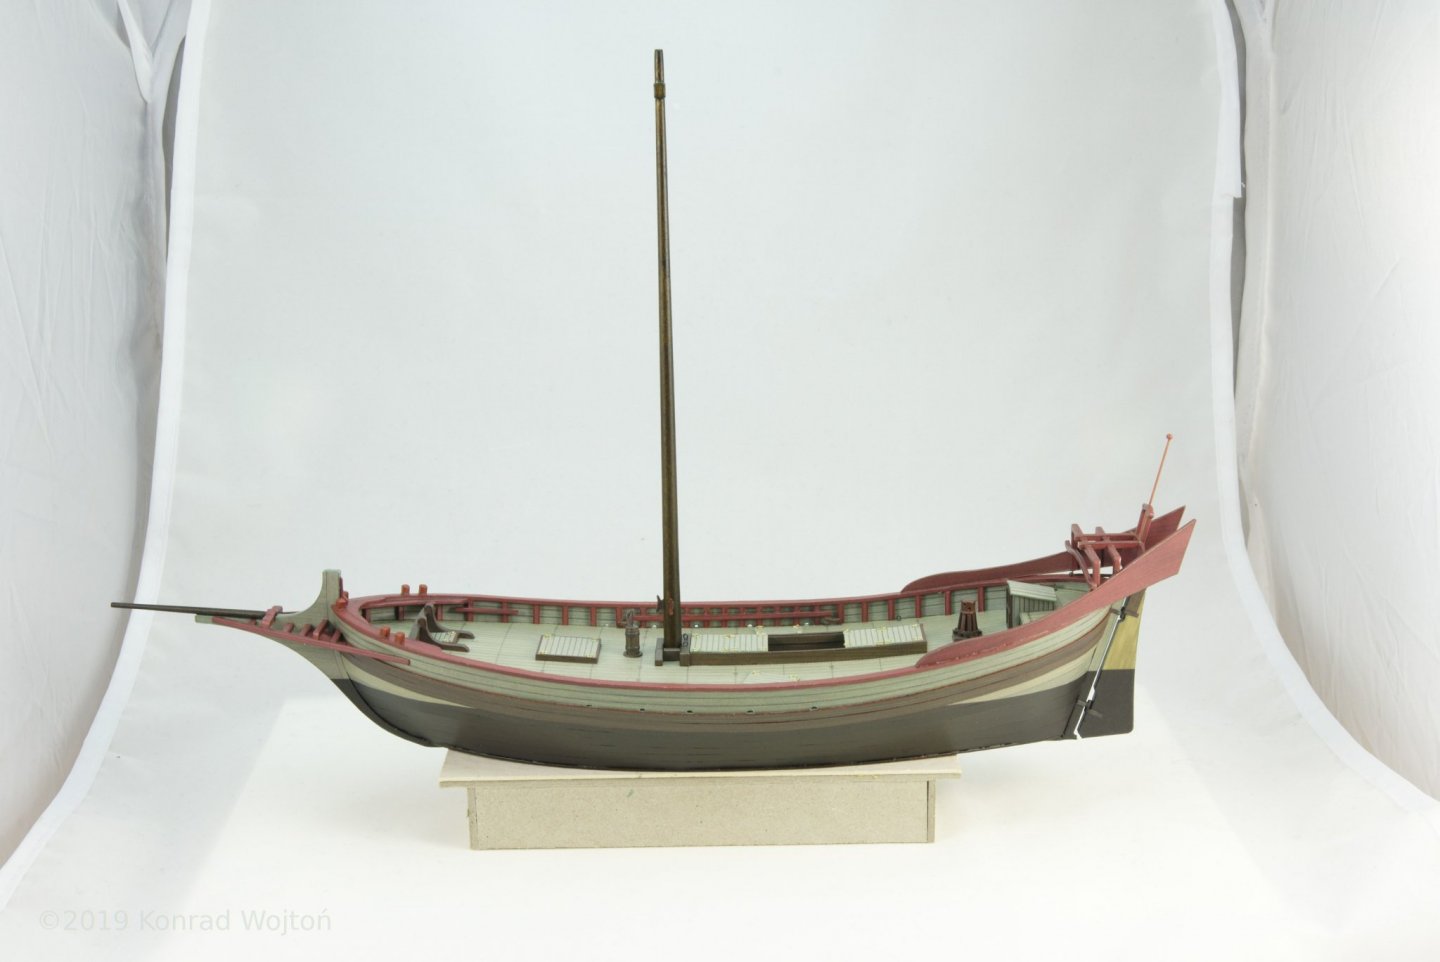

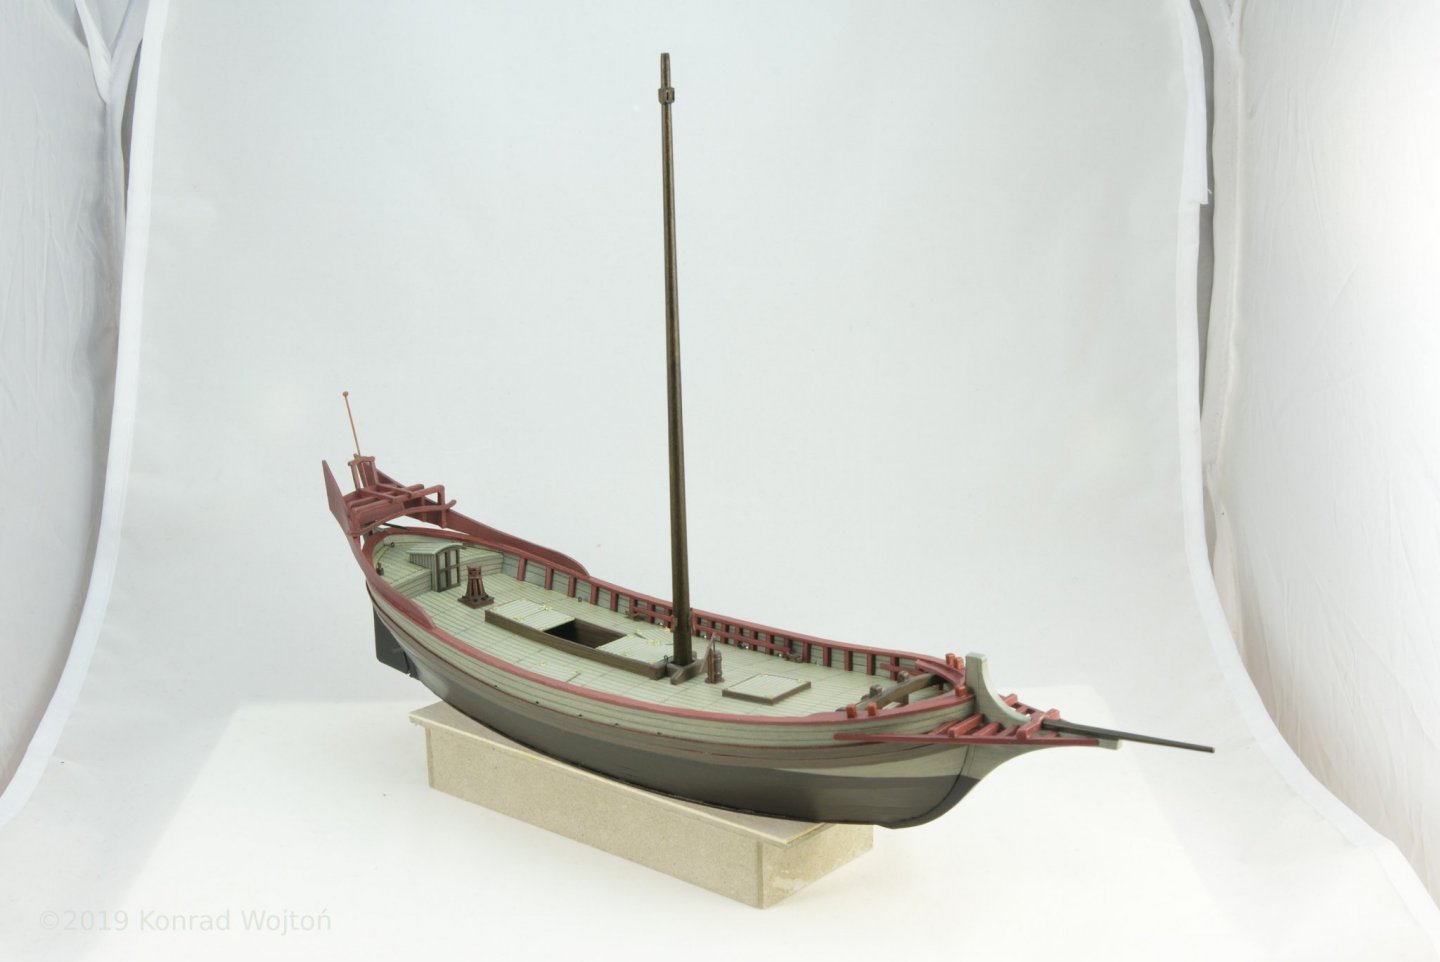
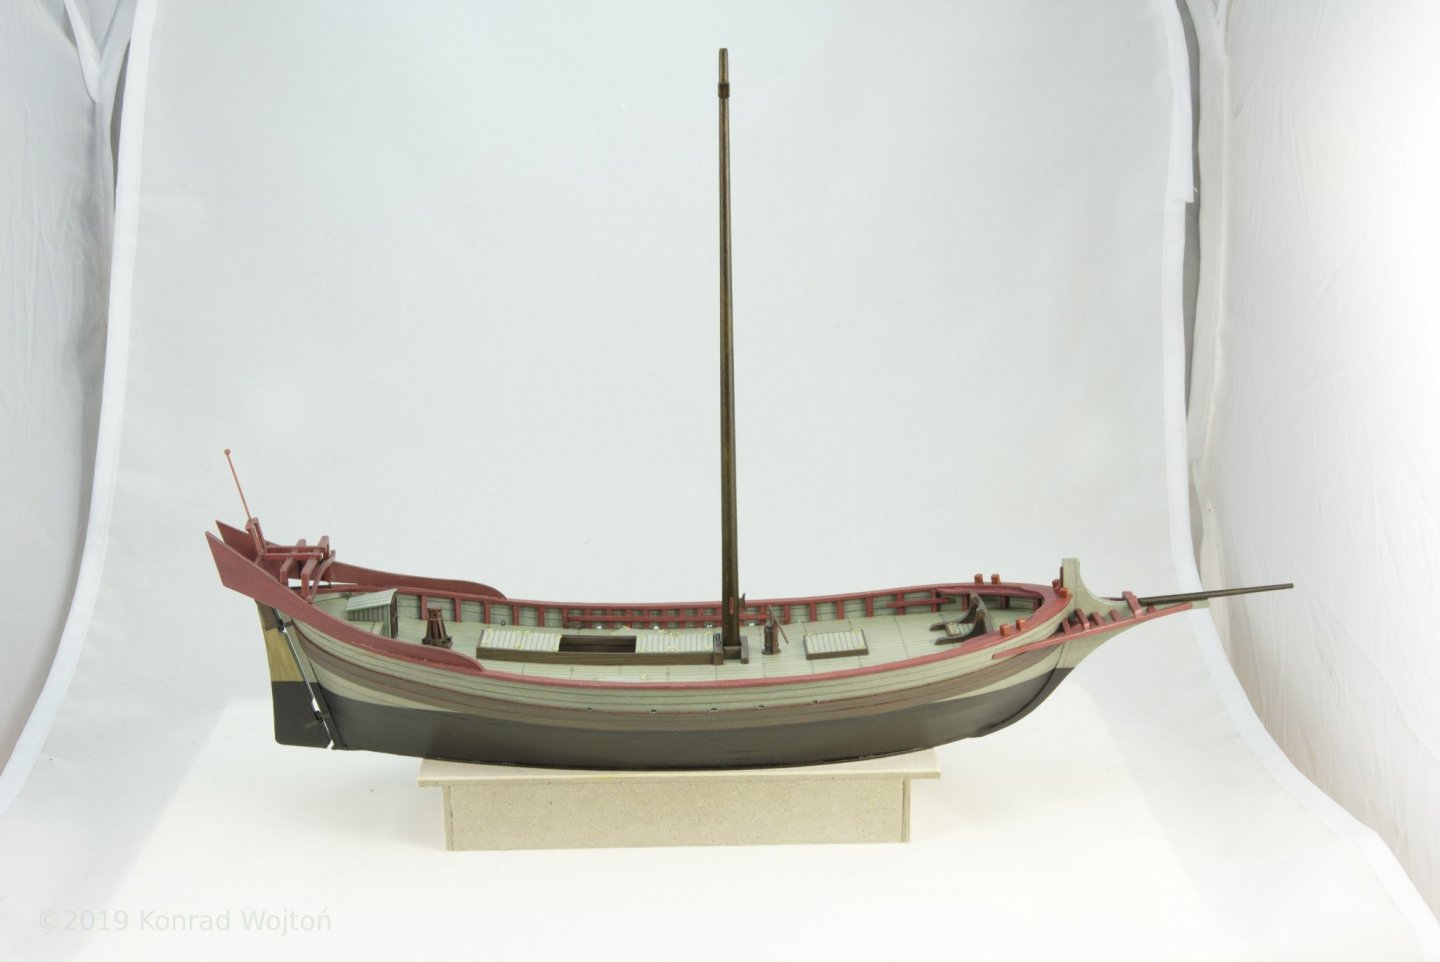

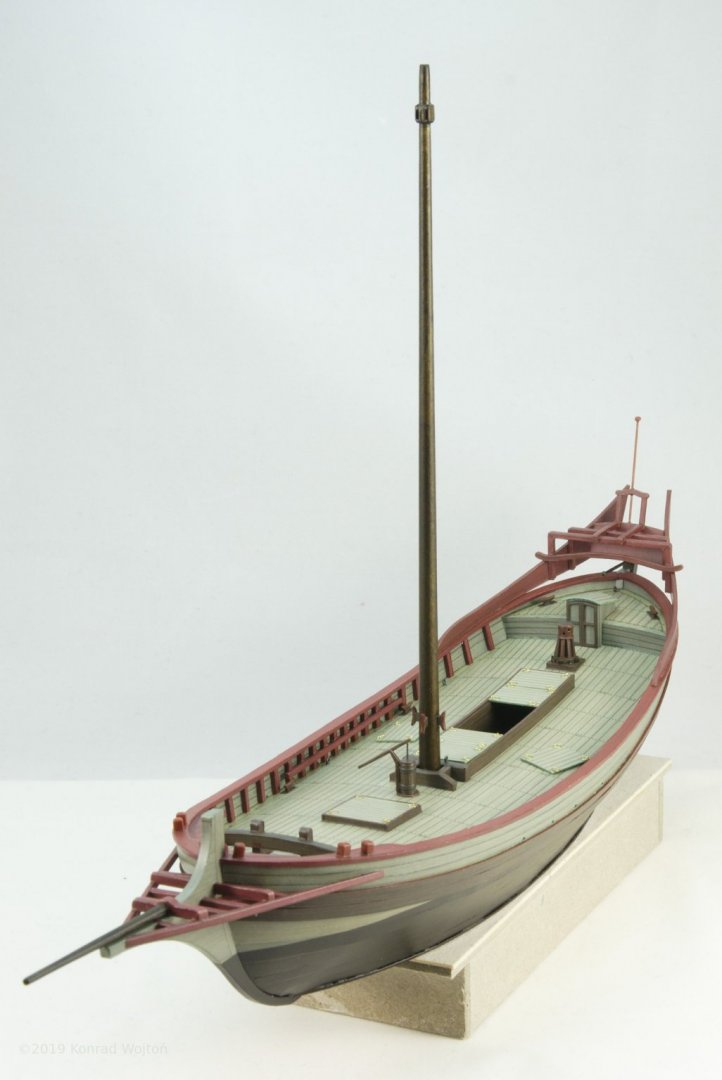
From original kit only anchors are left to do. Then I can start to rig this vessel.
I've covered model with acrylic varnish. Two layers of glossy, and one of matt coat. Unfortunetly it came a bit too thick. I've used AK Interactive Spray.
-
Hello.
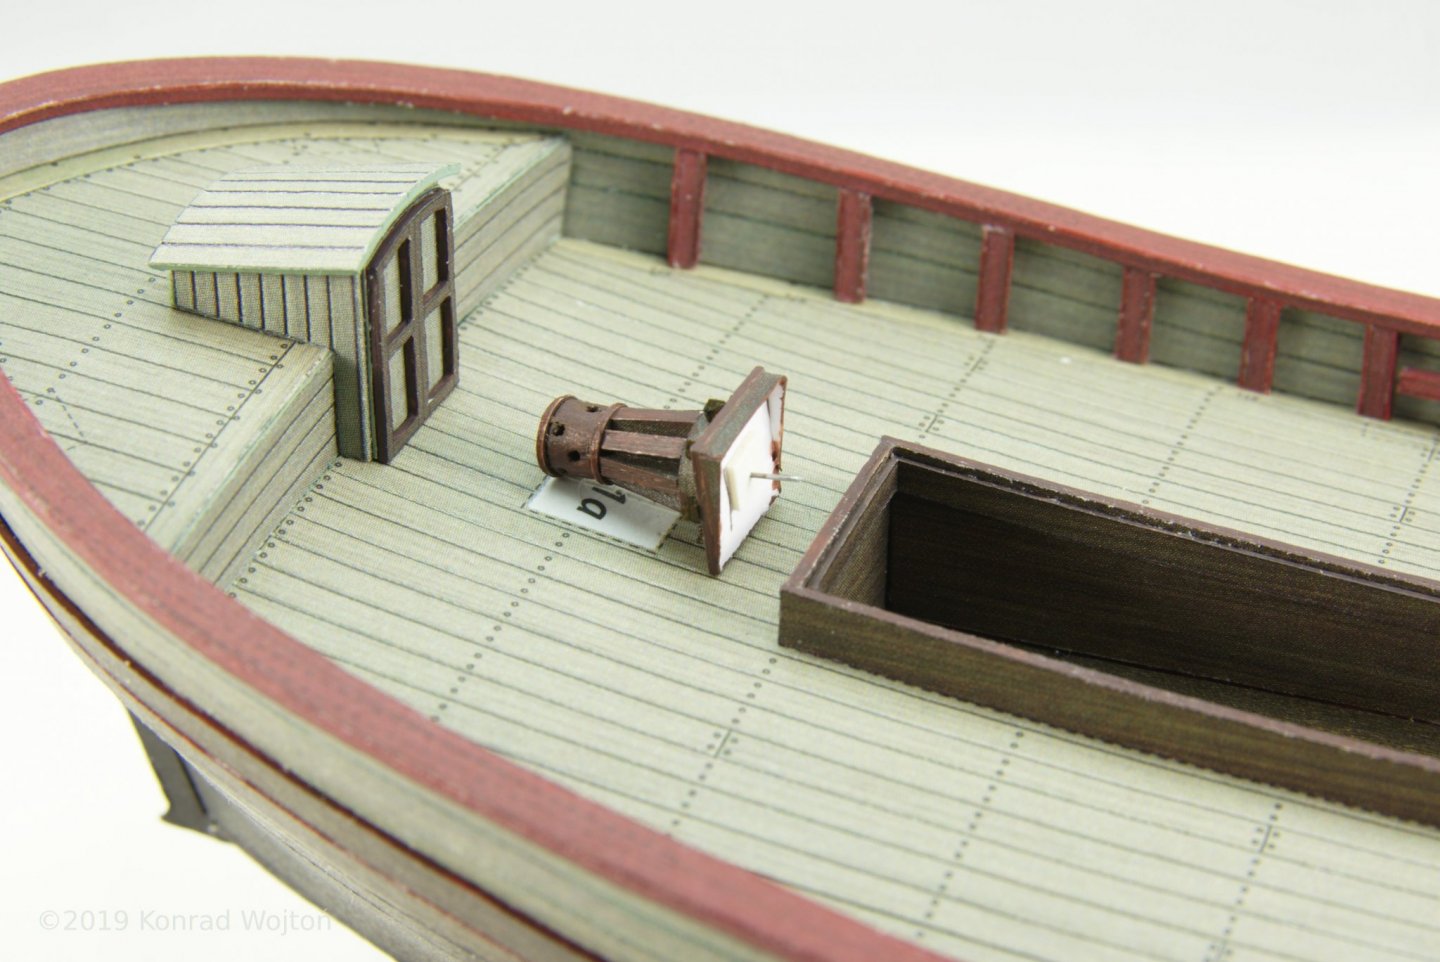
It is time to dust off build log for long overdue update.
For almost past two months I've tried to finish all the details and prepare for rigging.
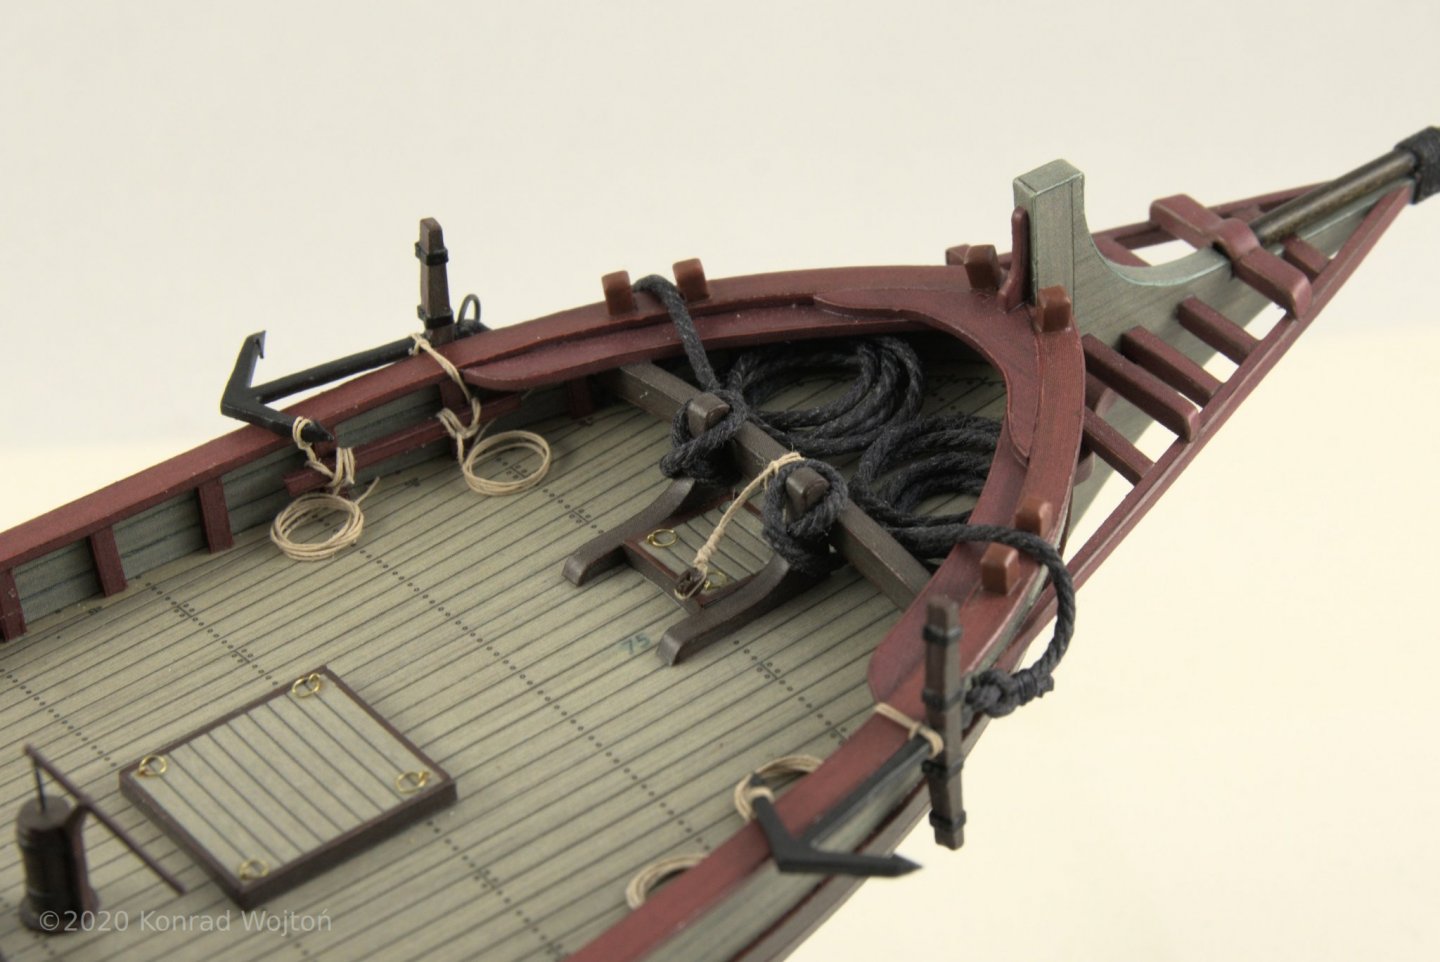
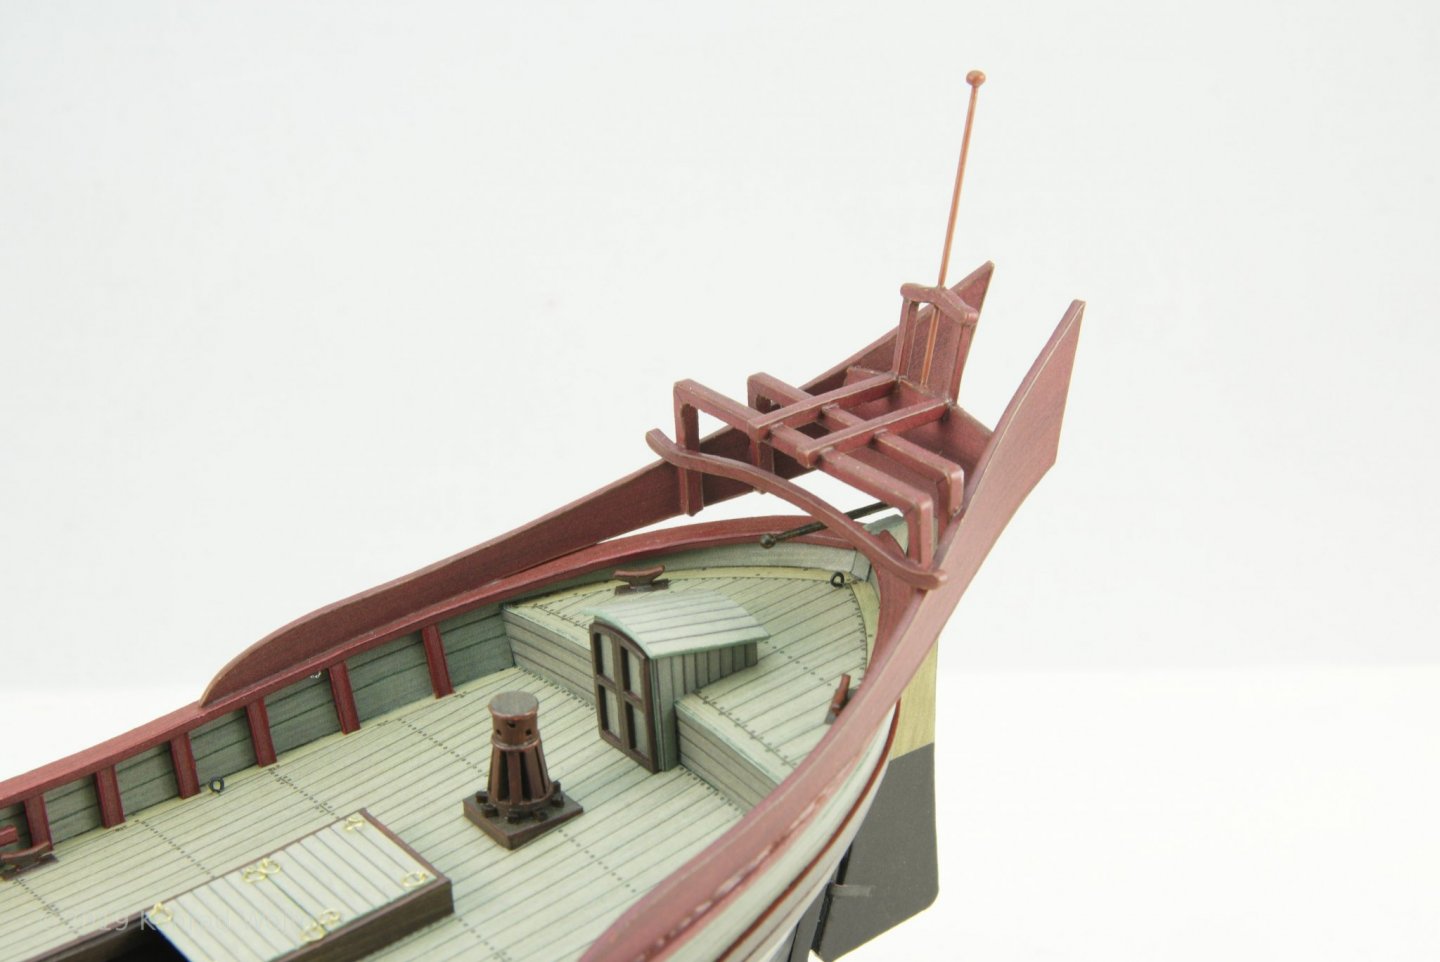
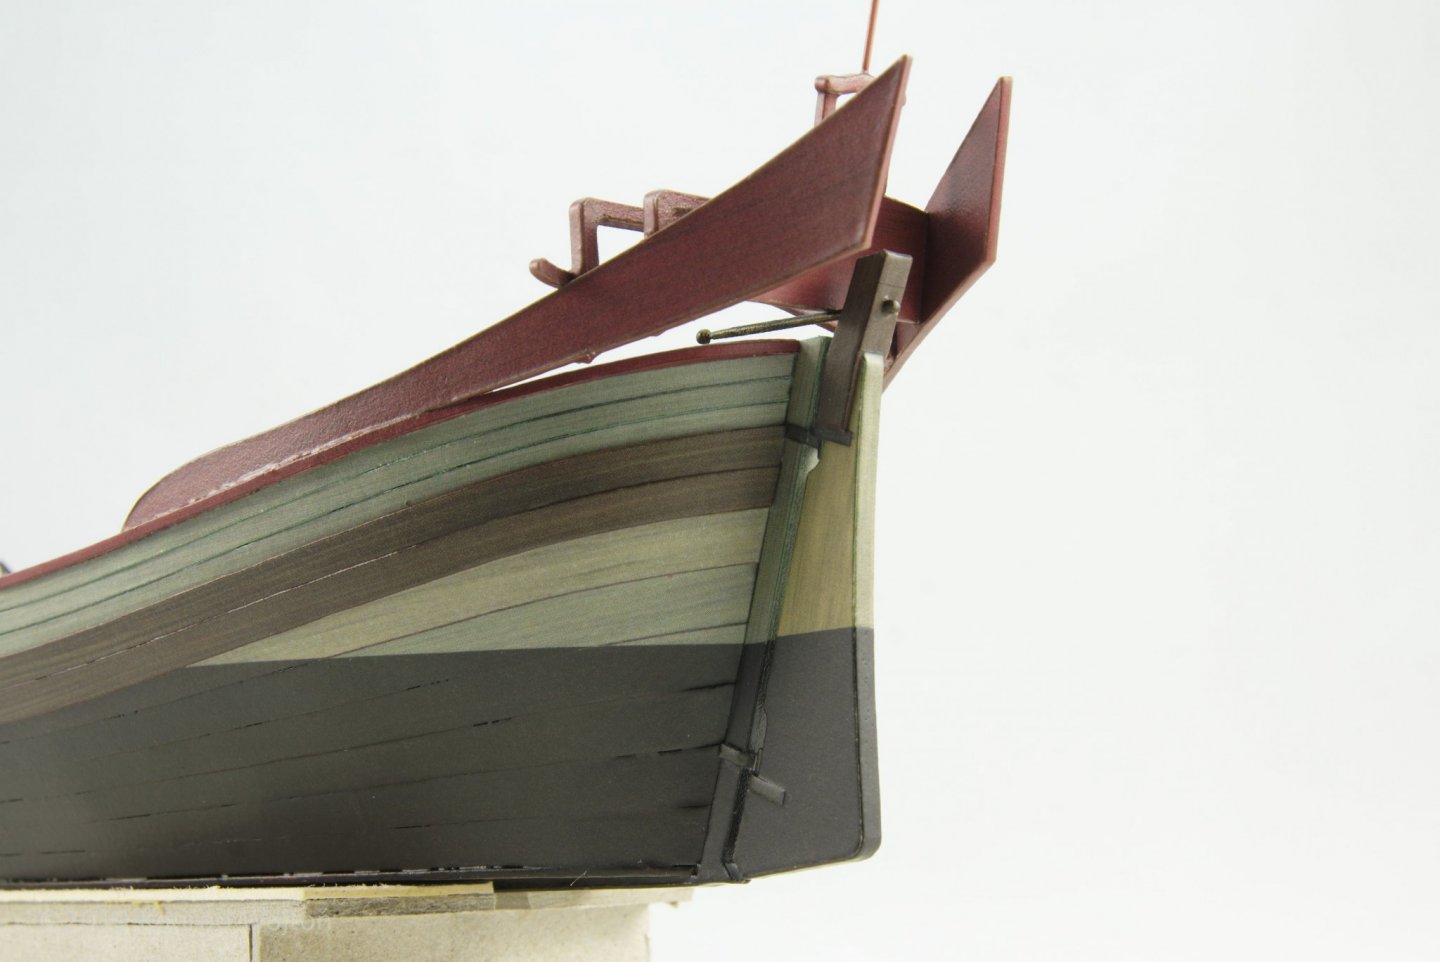
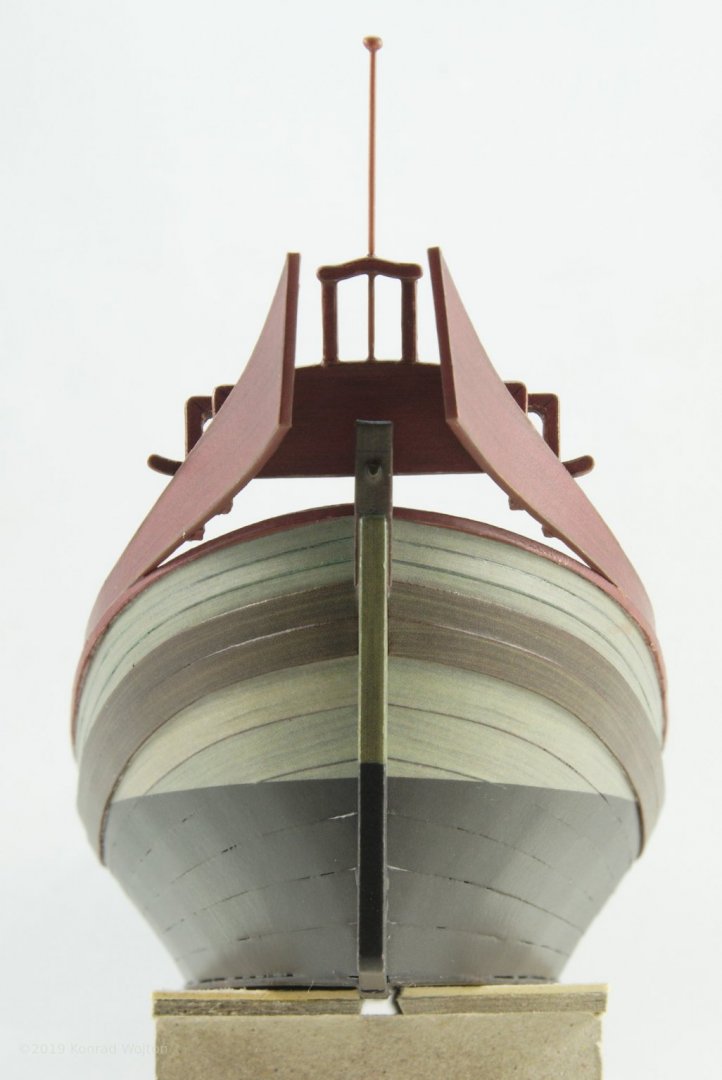
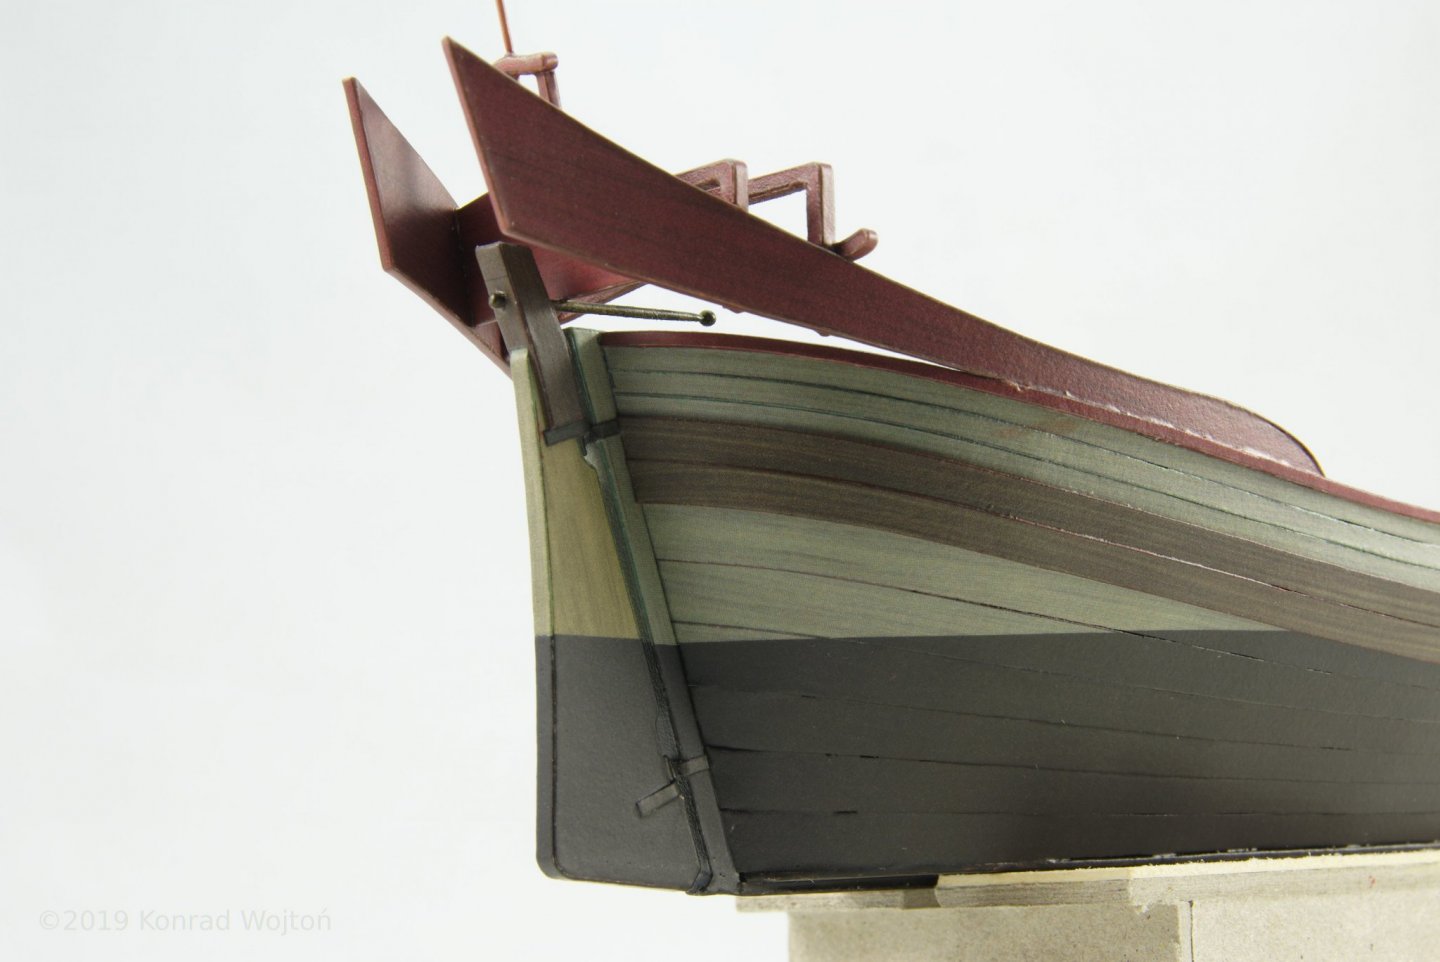
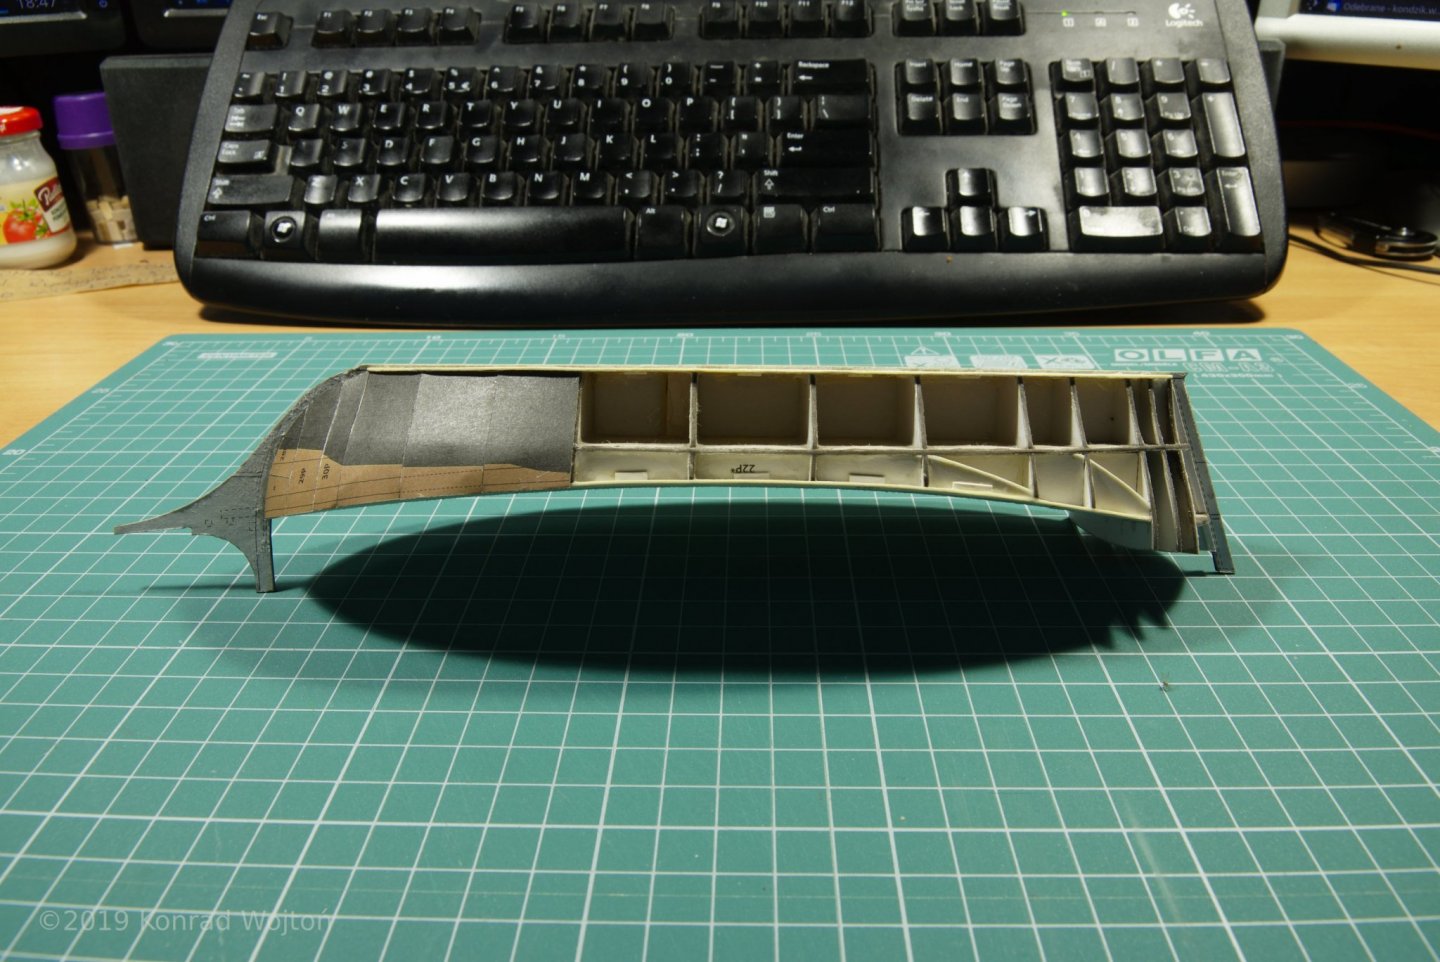
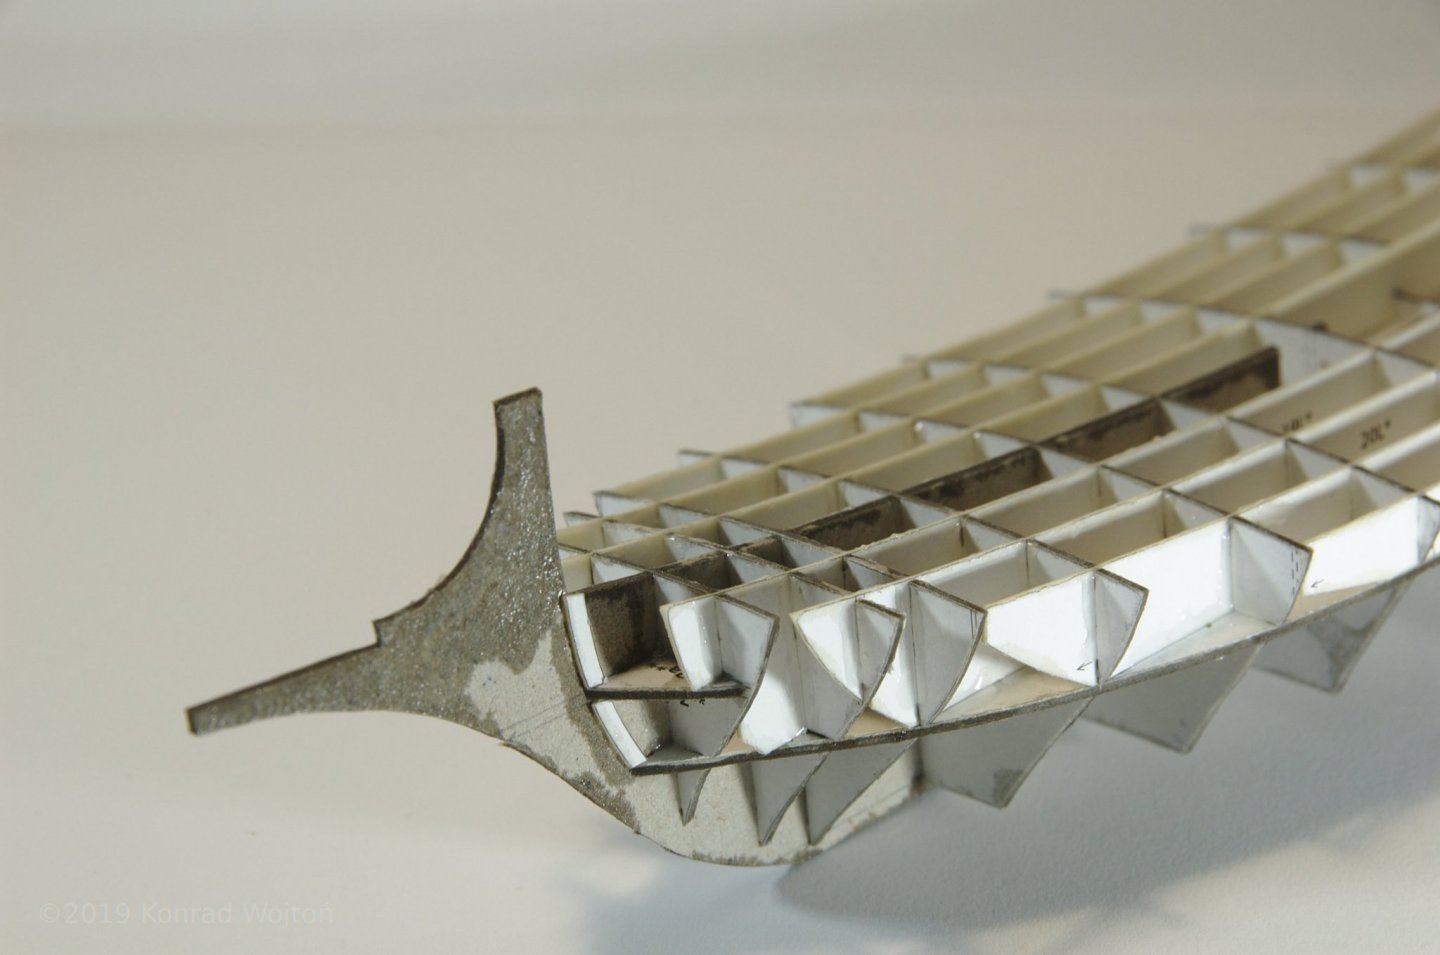
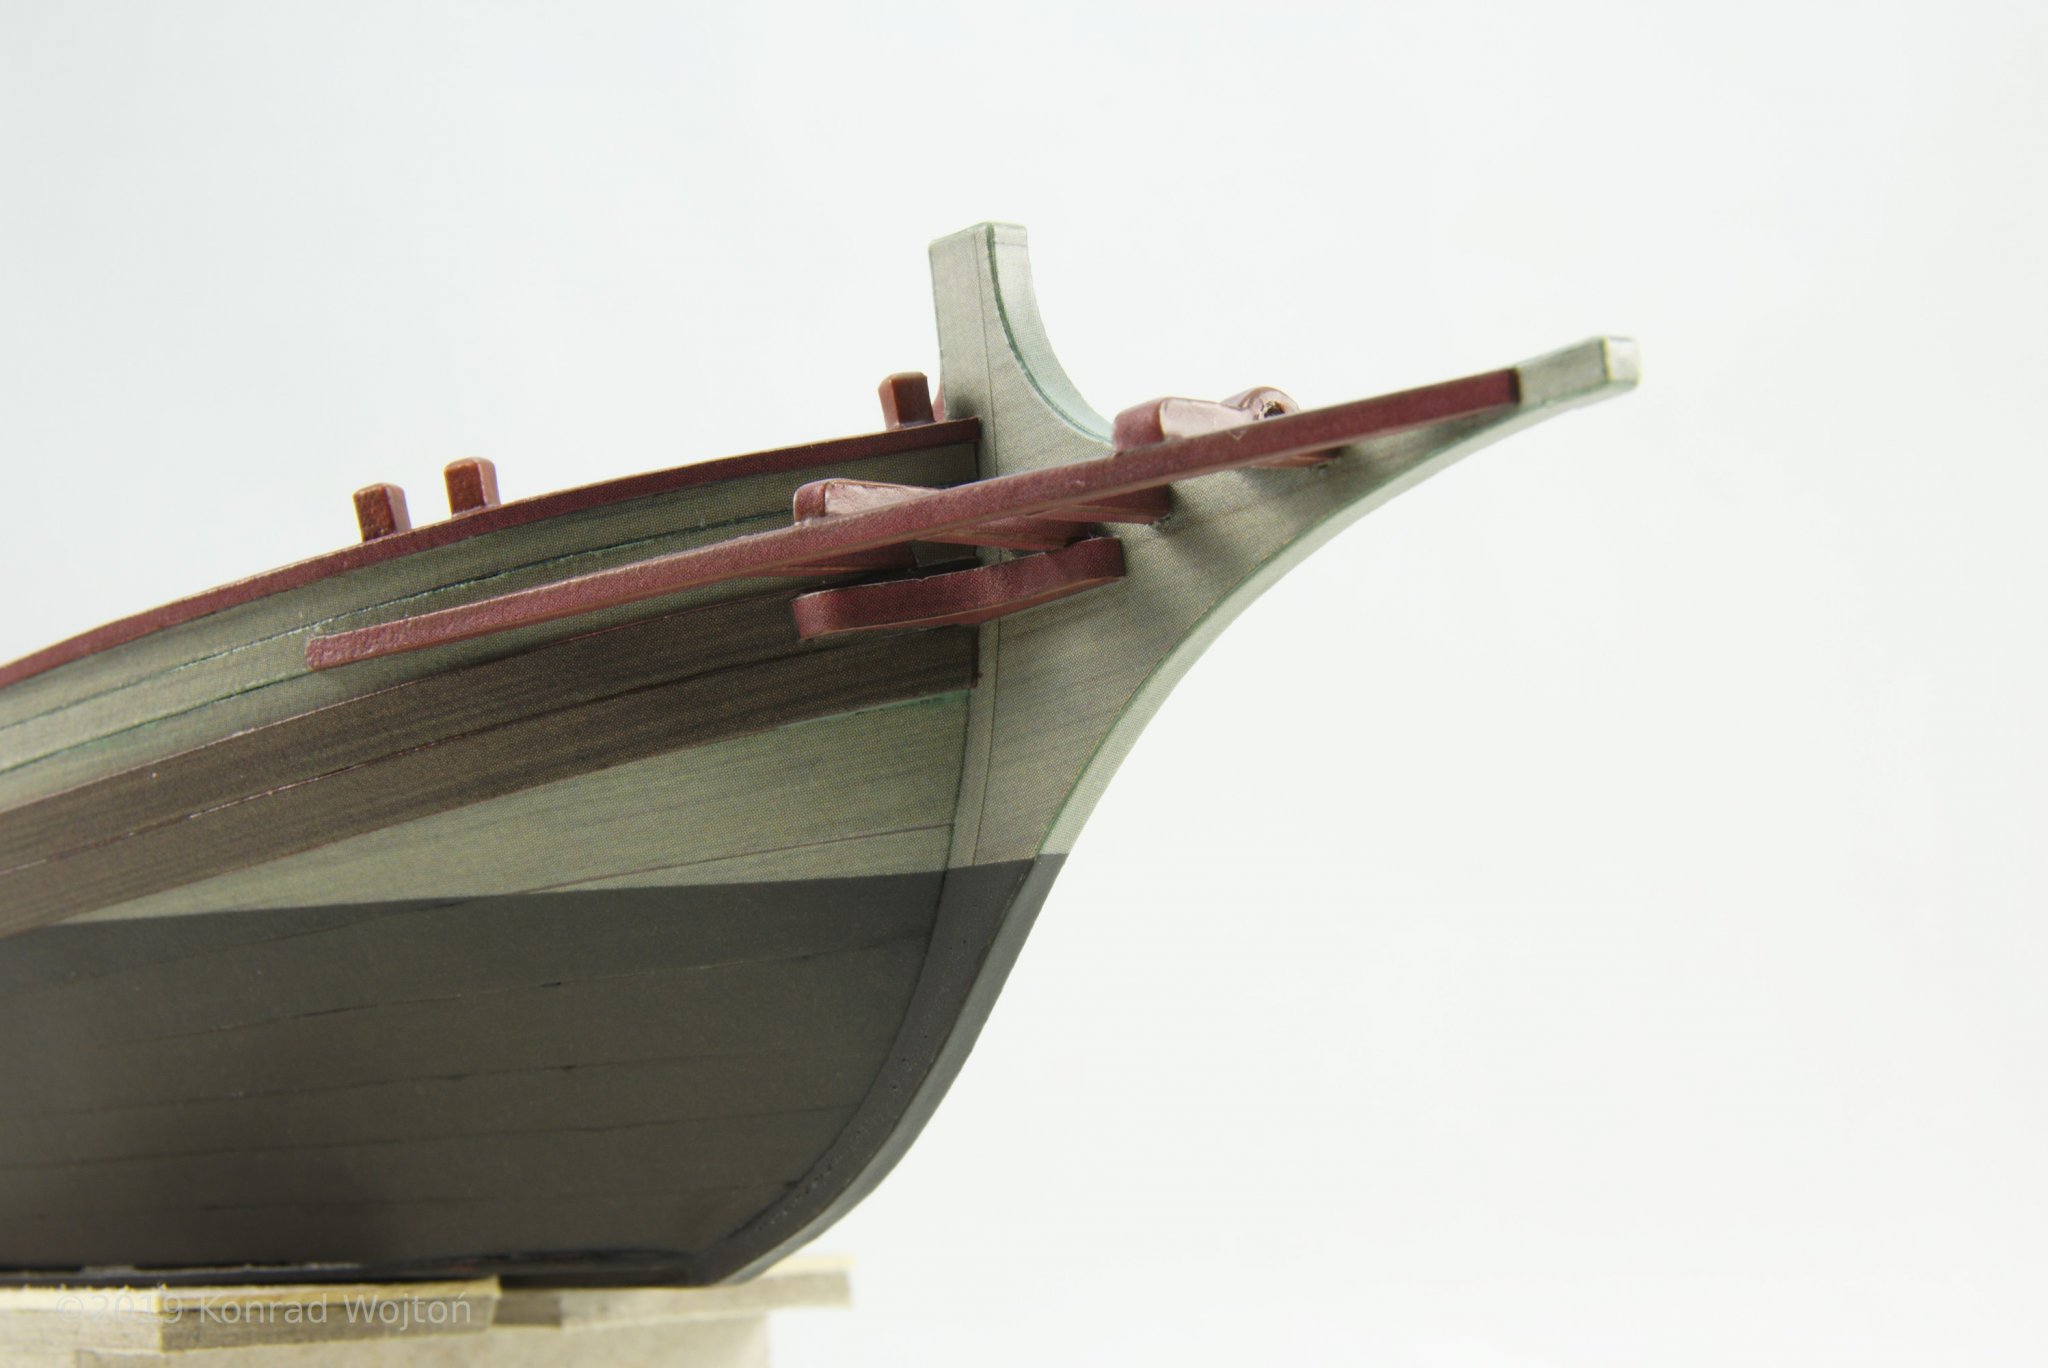
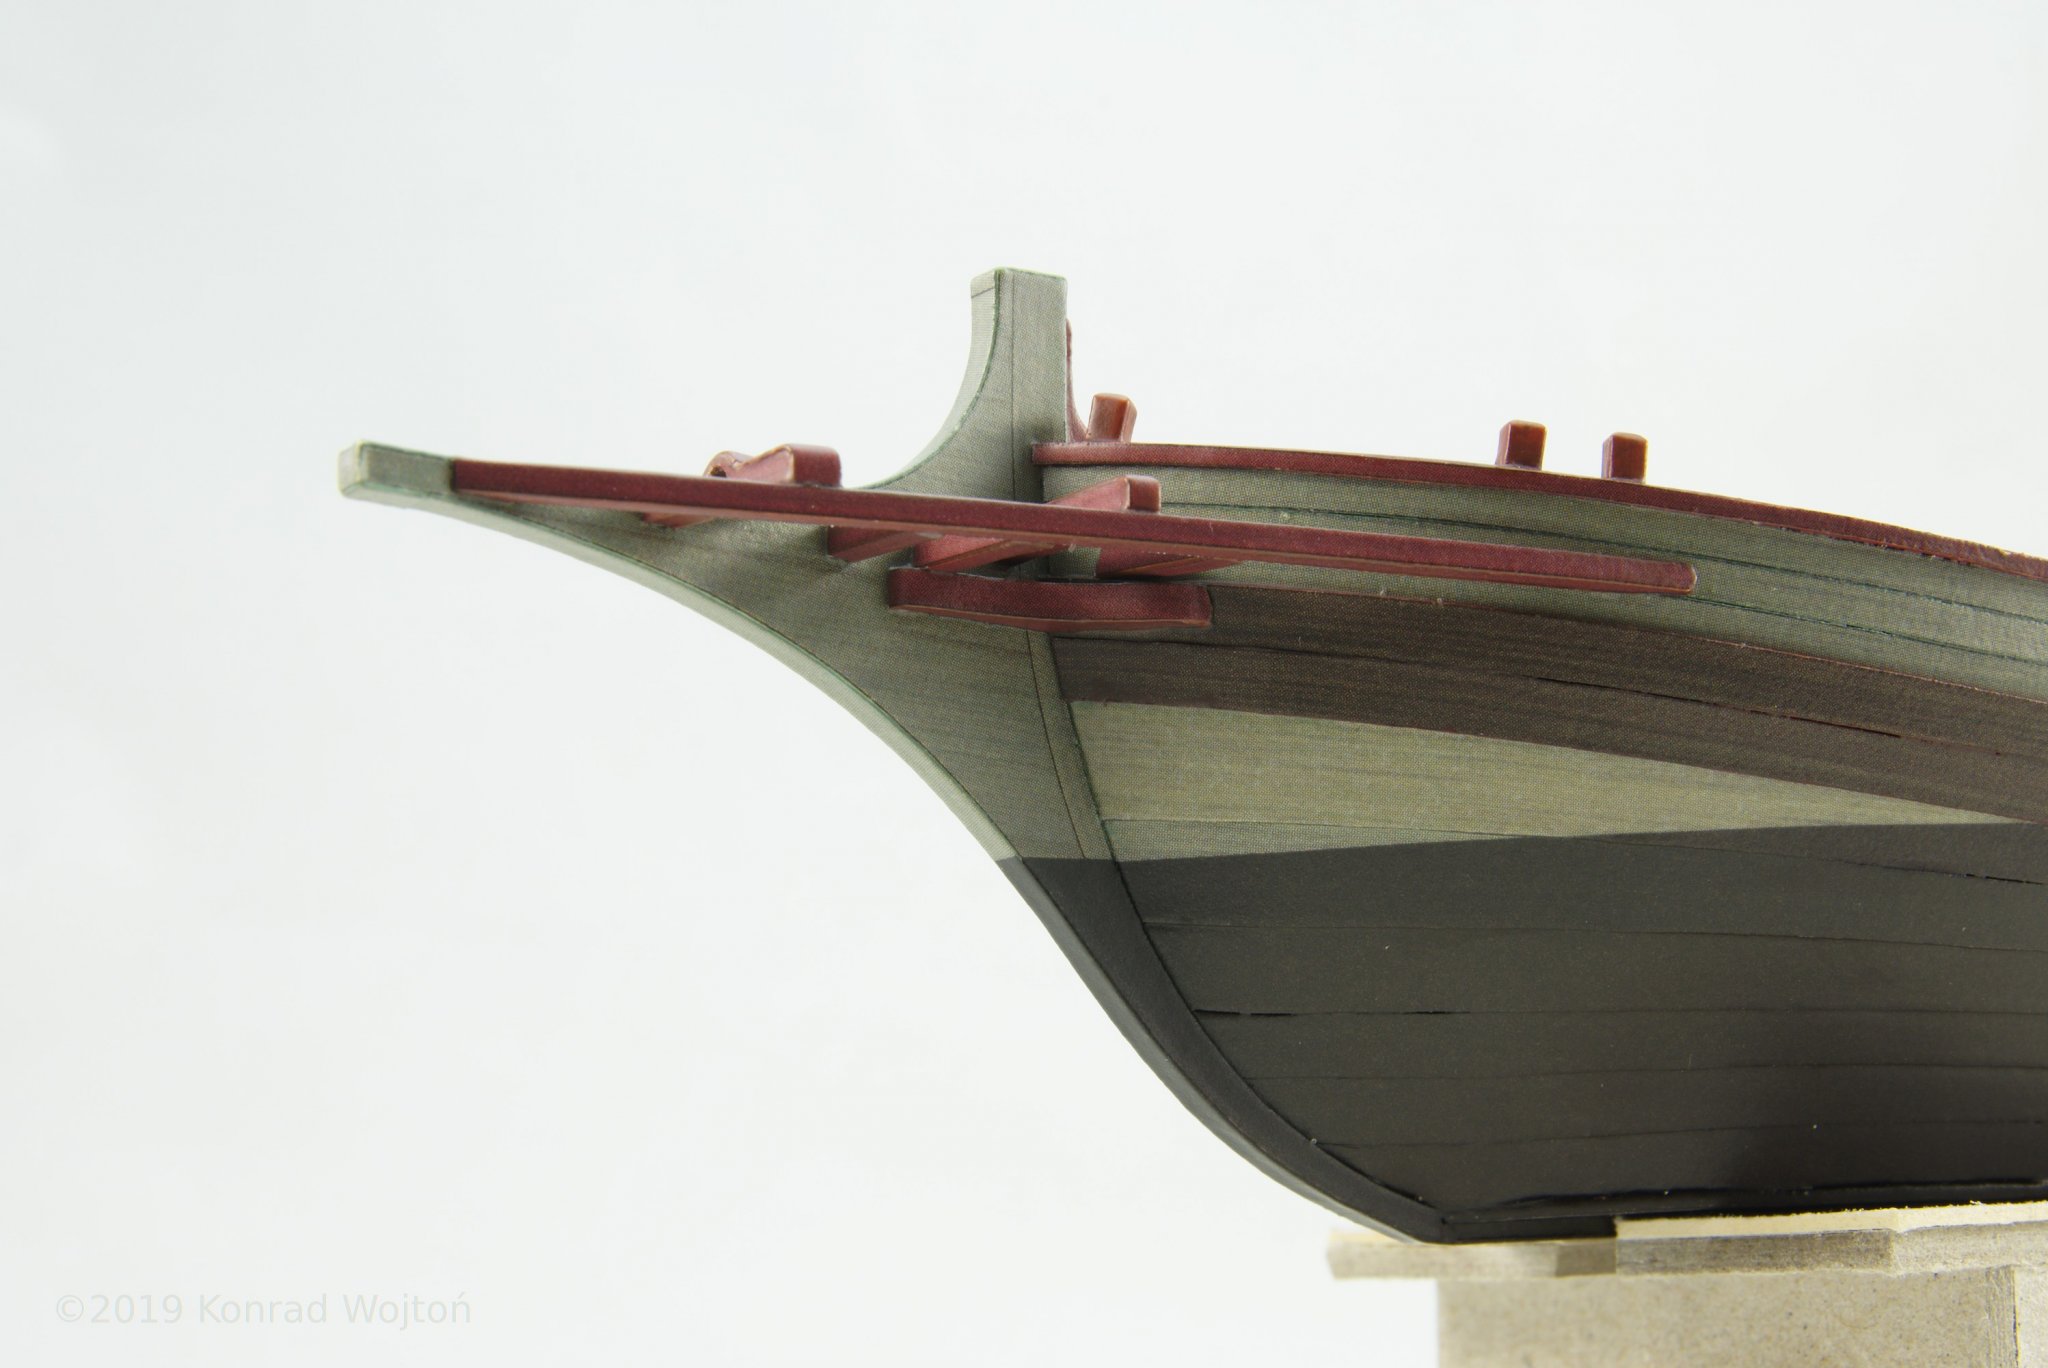
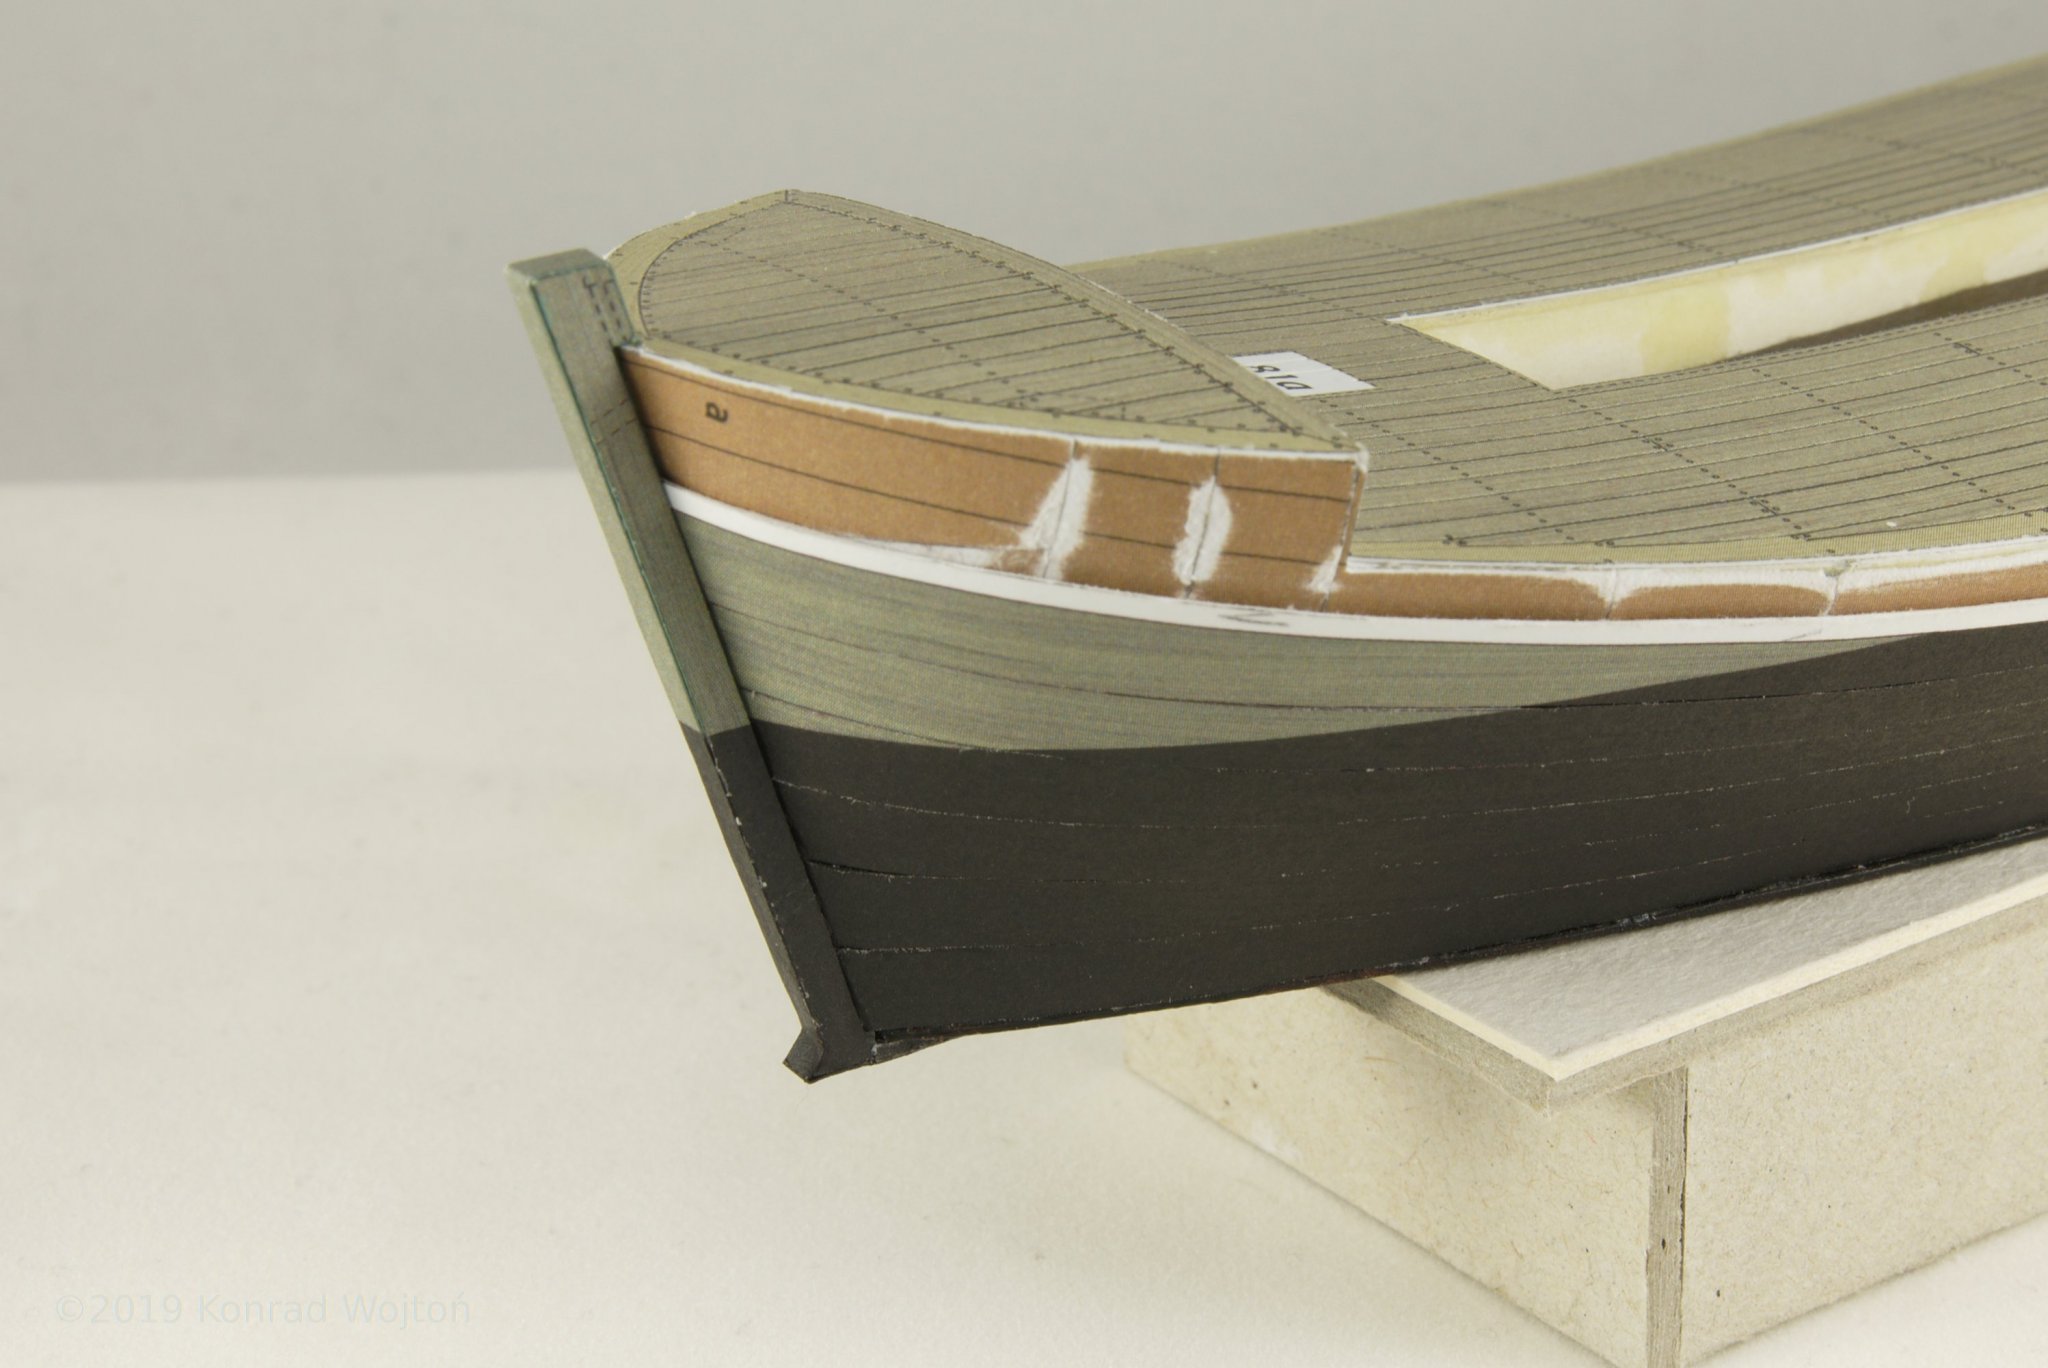
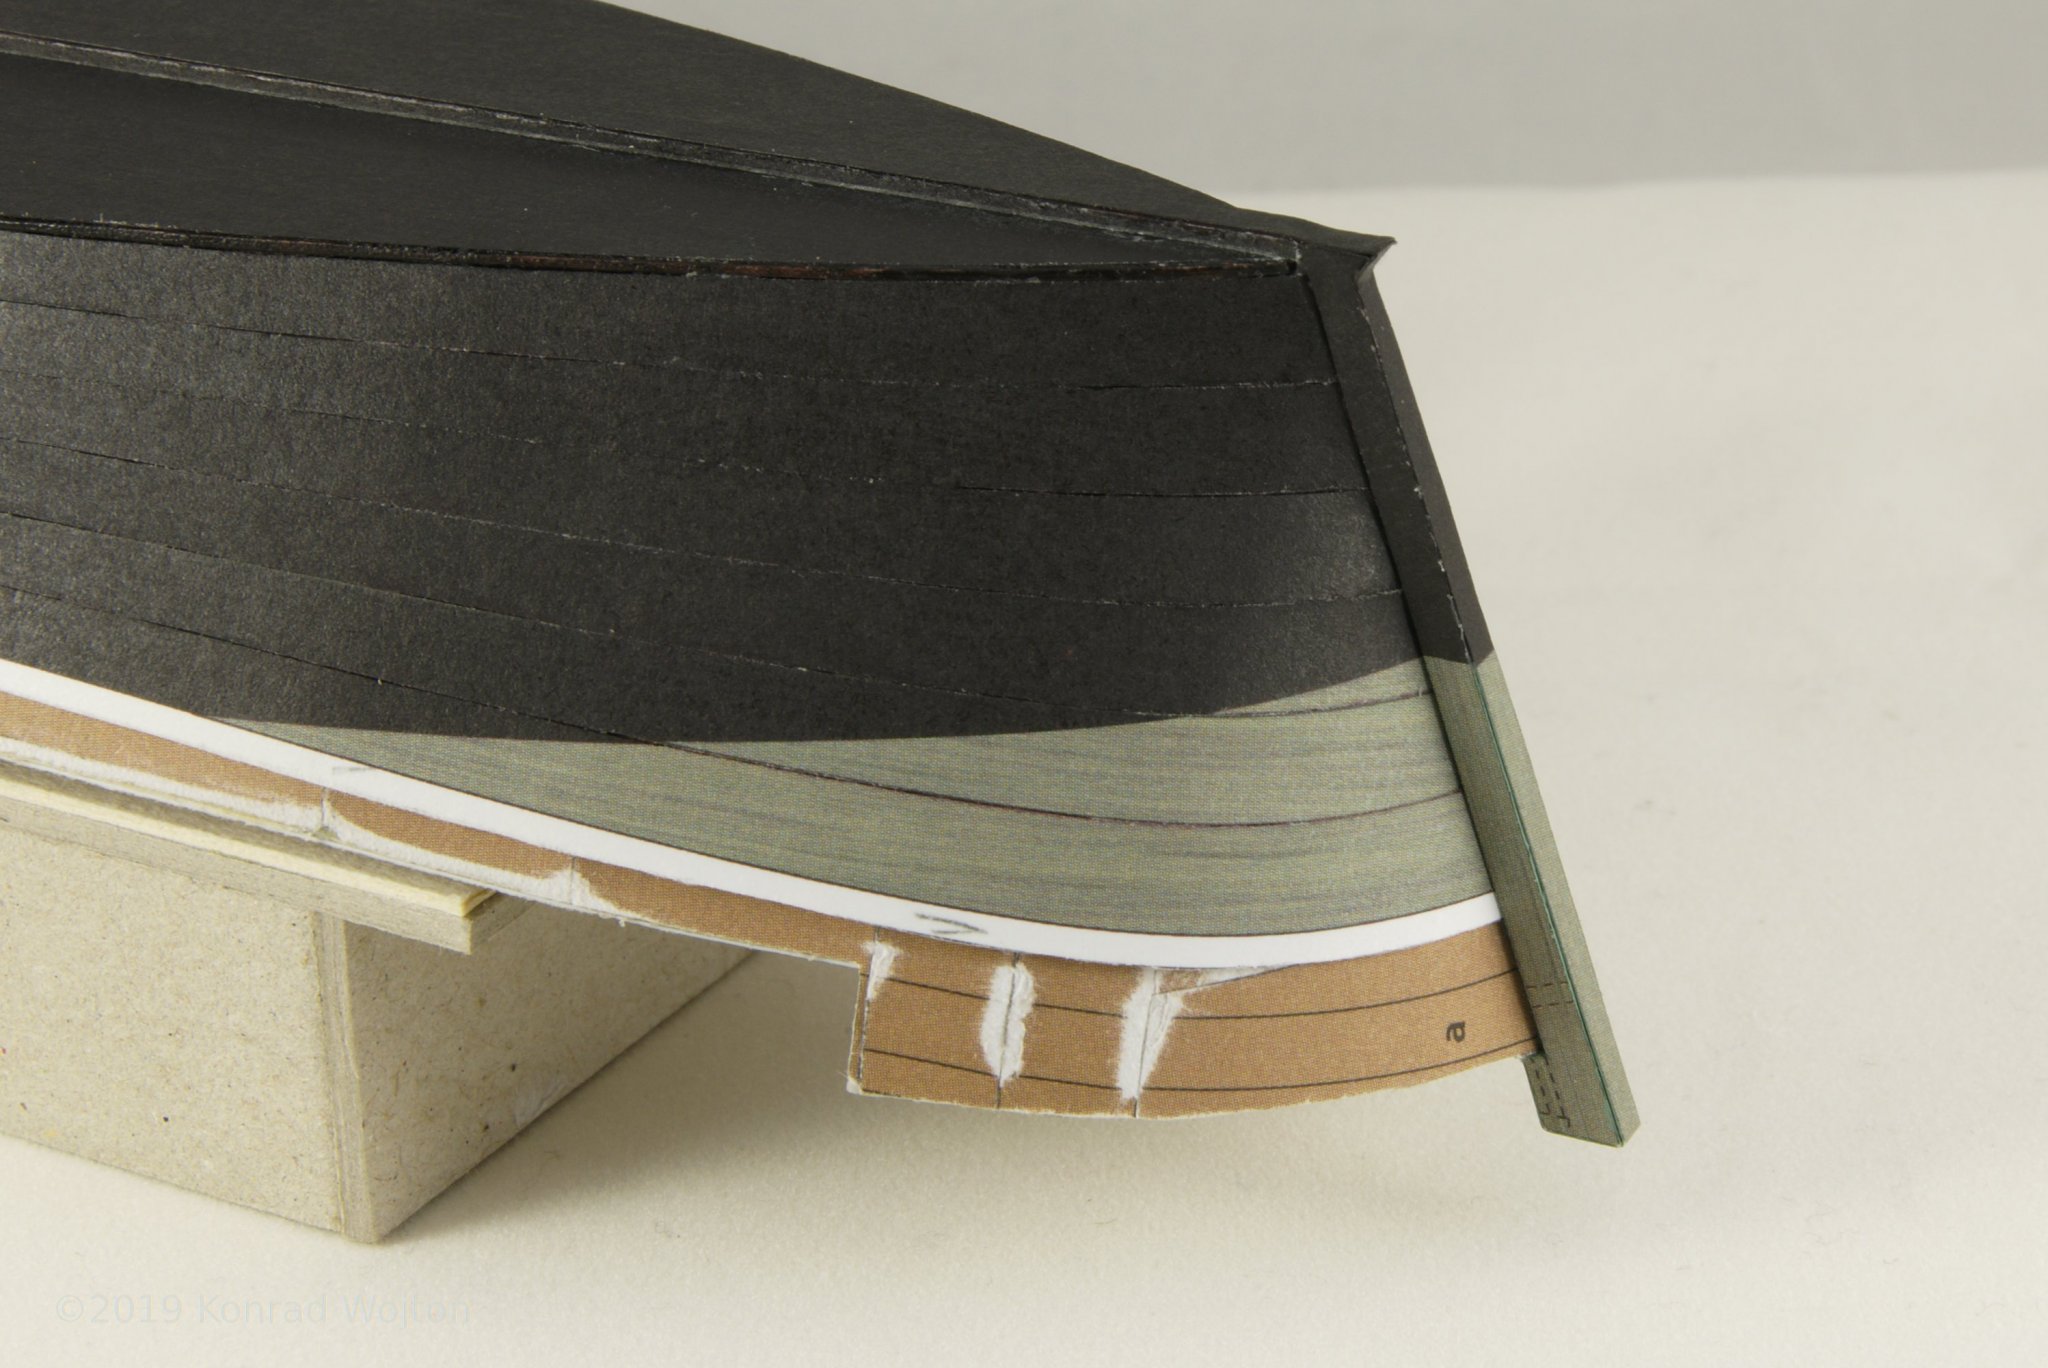
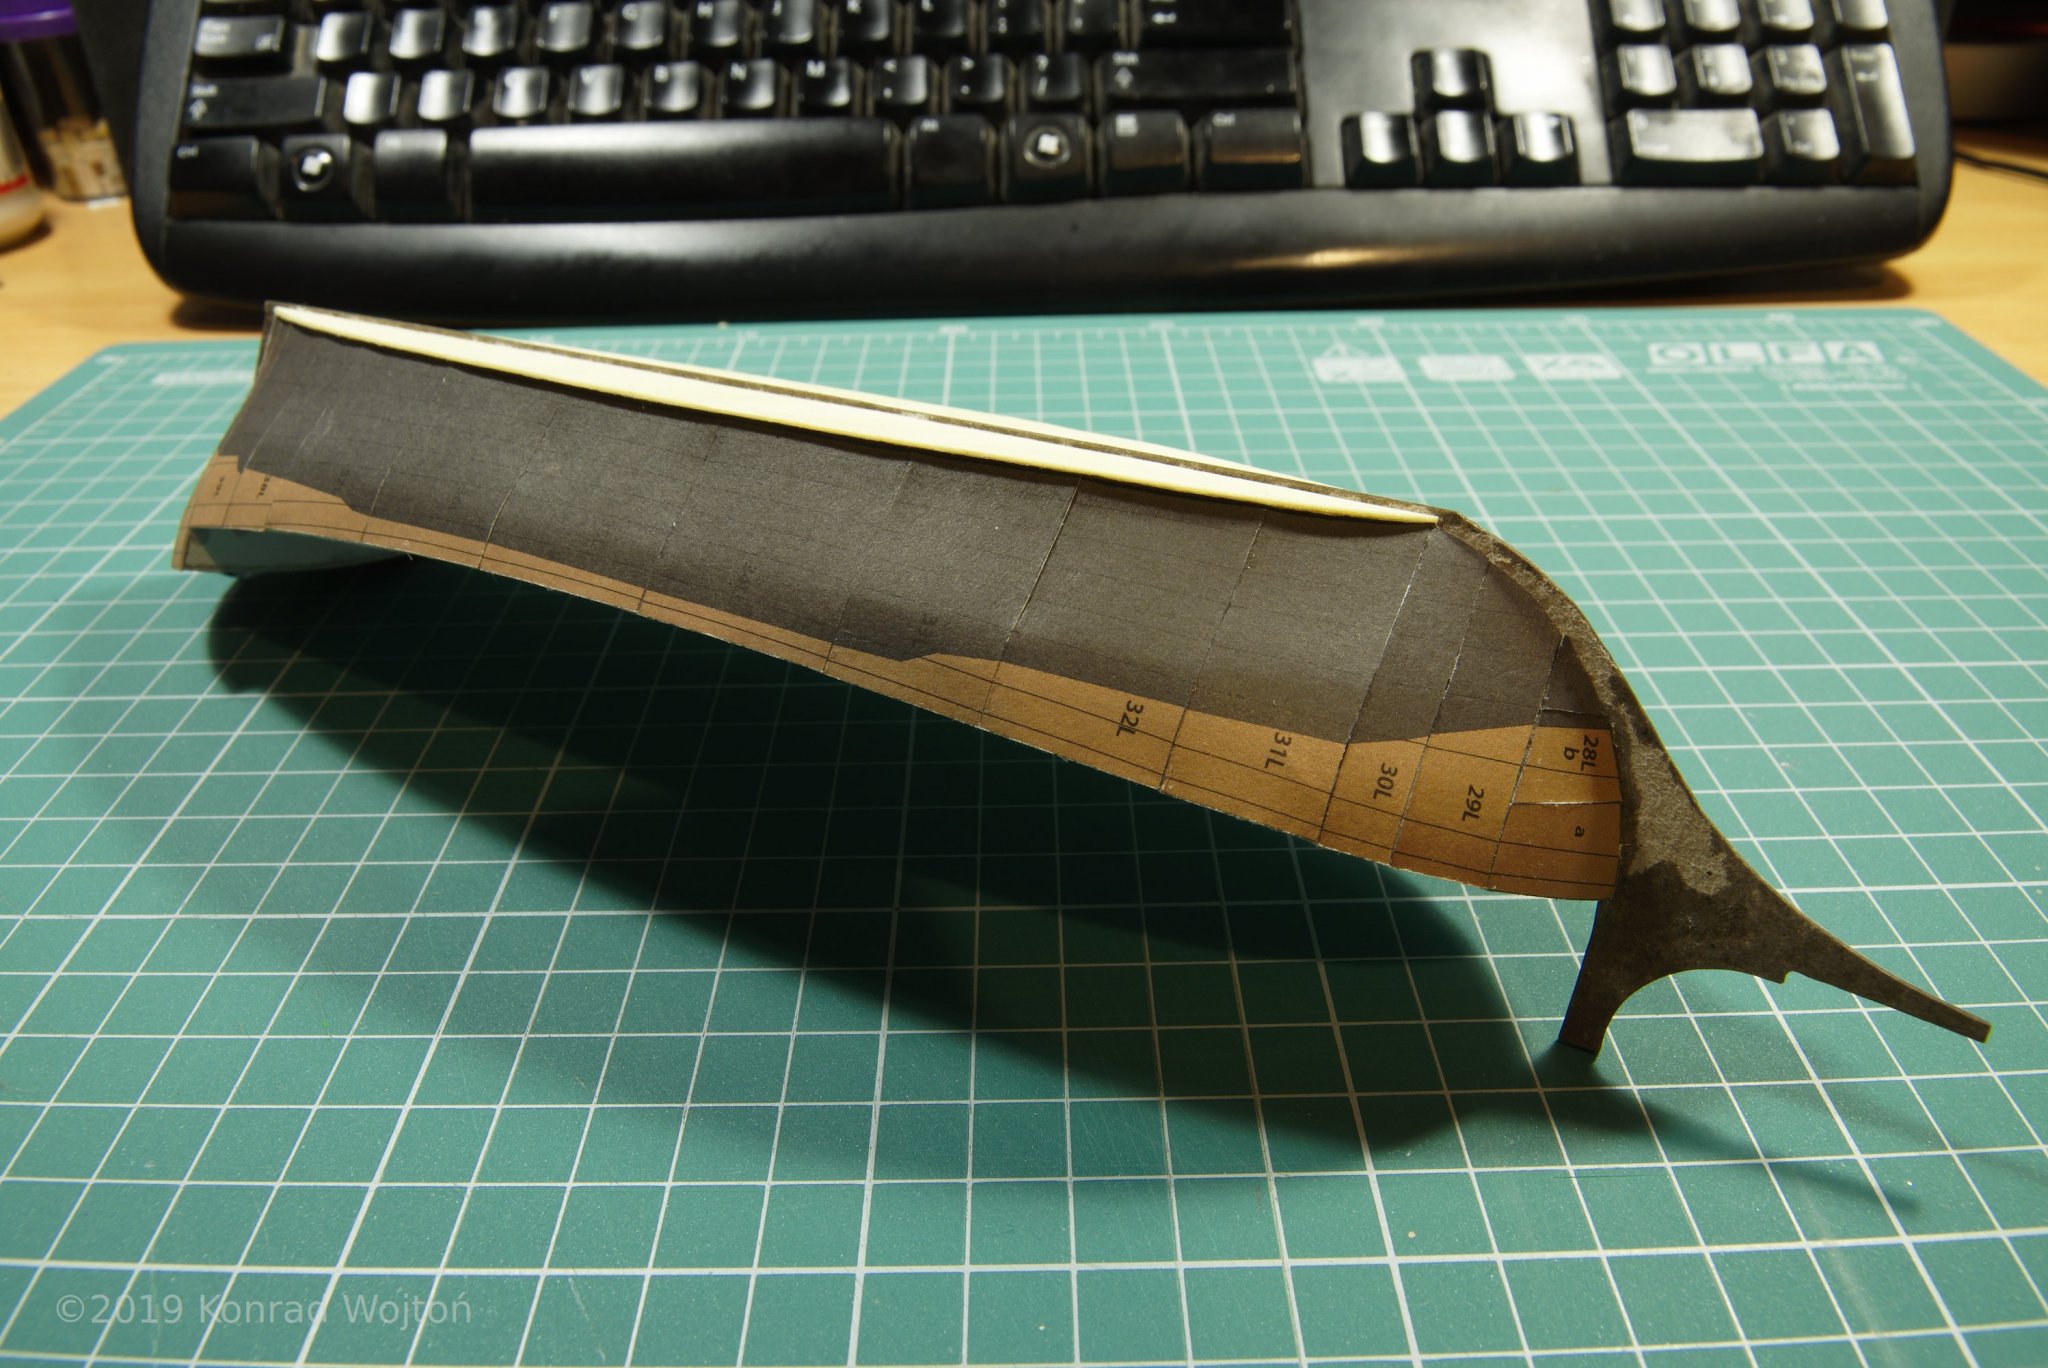
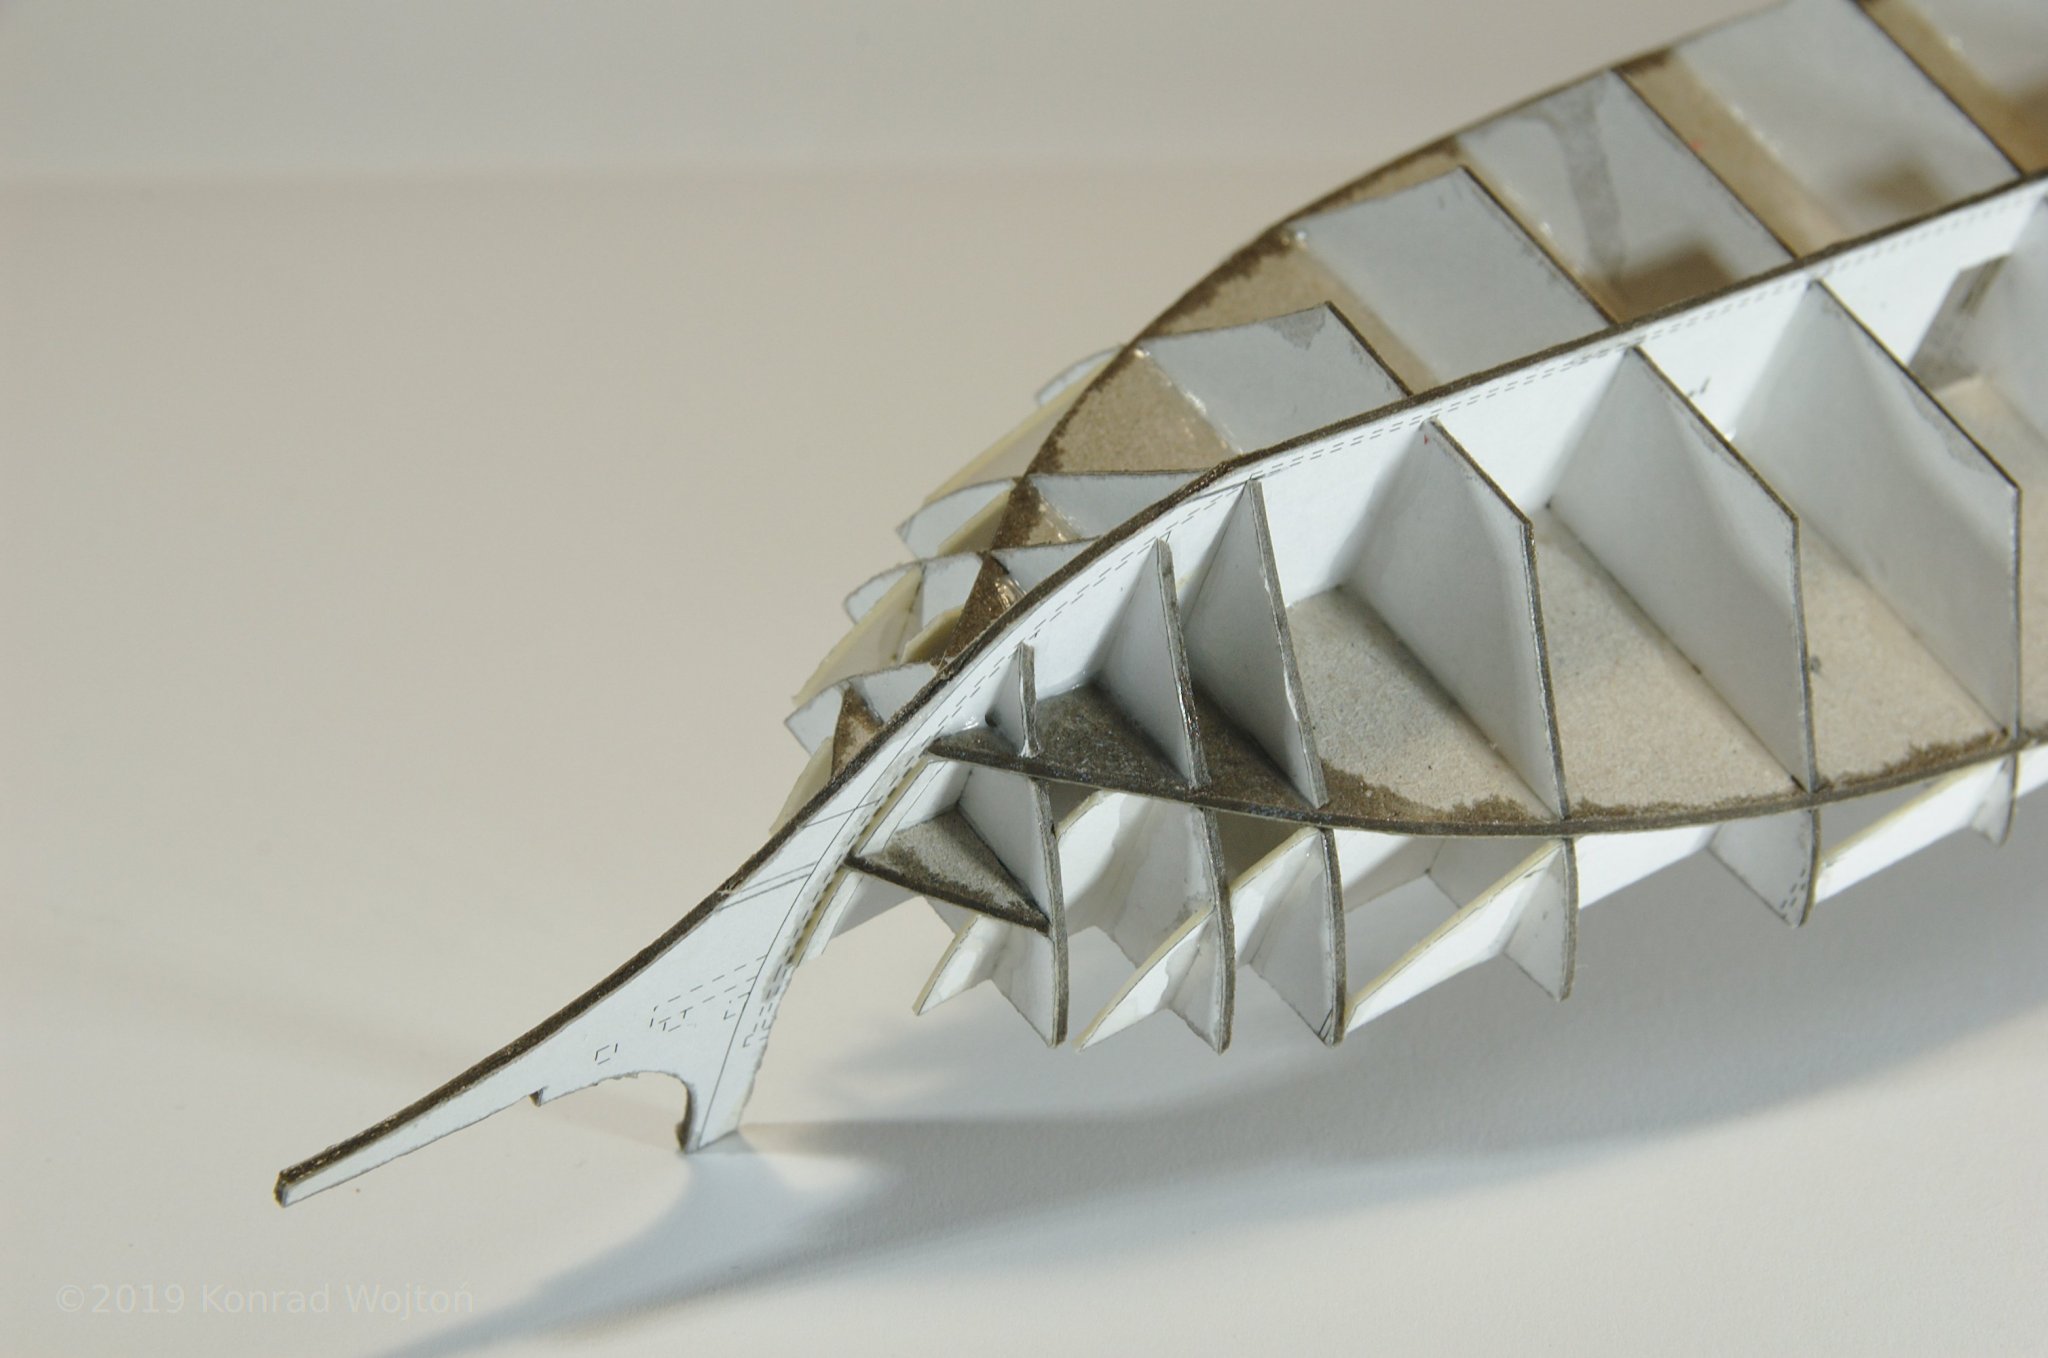
Bow came first. It called for bending and glueing quite long and thin beams. After some tries on photocopied parts I've decided to cut parts along bend lines, then use this cuts and laminate them on beams made from cardstock. I think that pictures will describe it better.
Parts in 2D
After initial assembly, prepared to attach to boat:
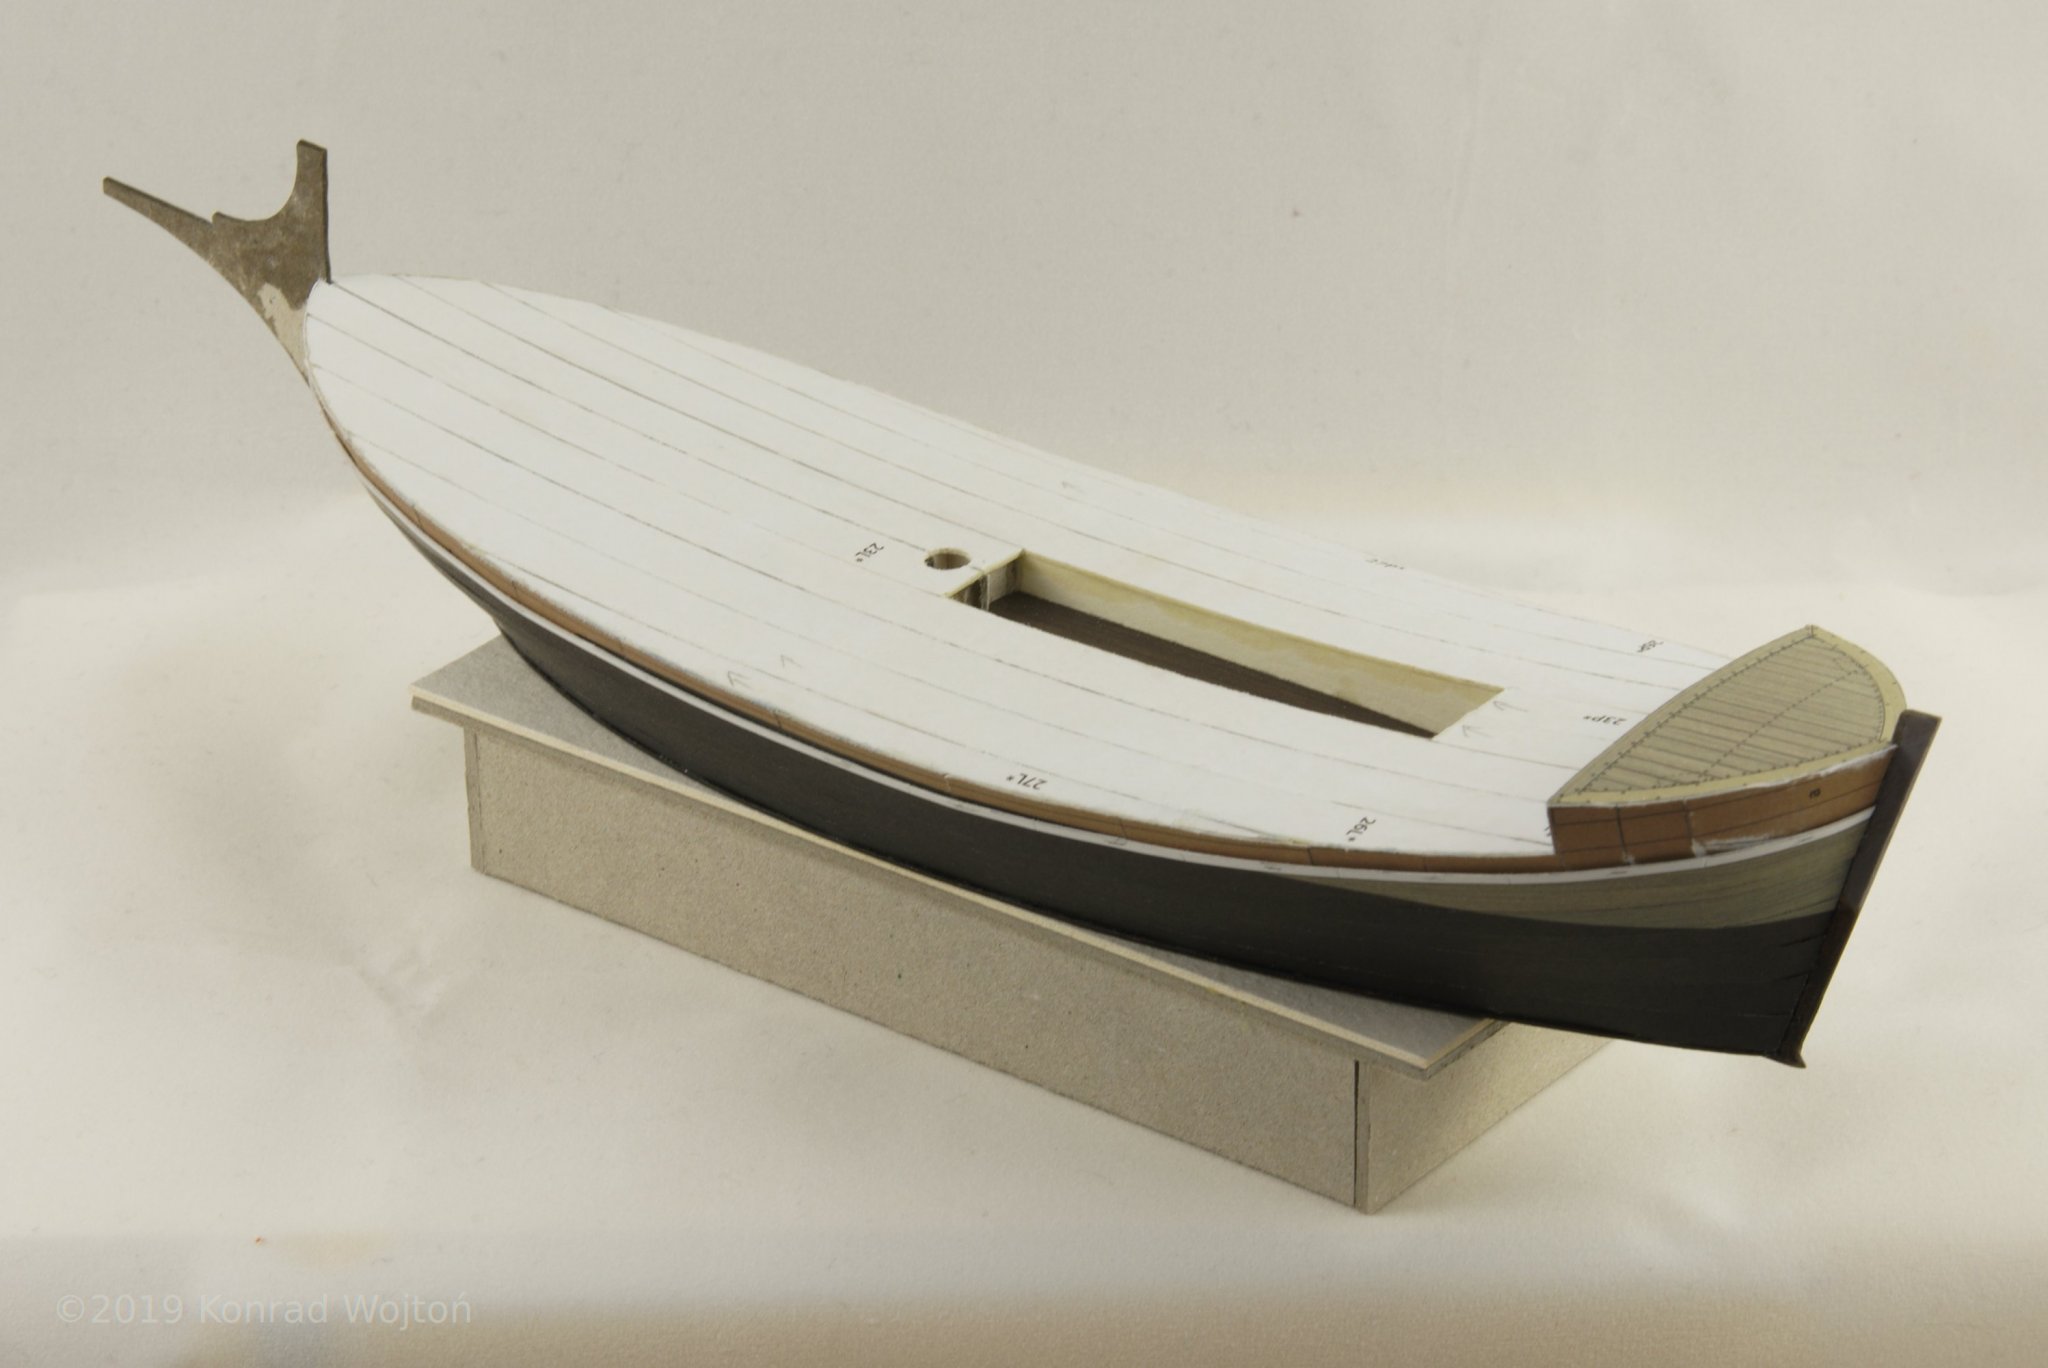
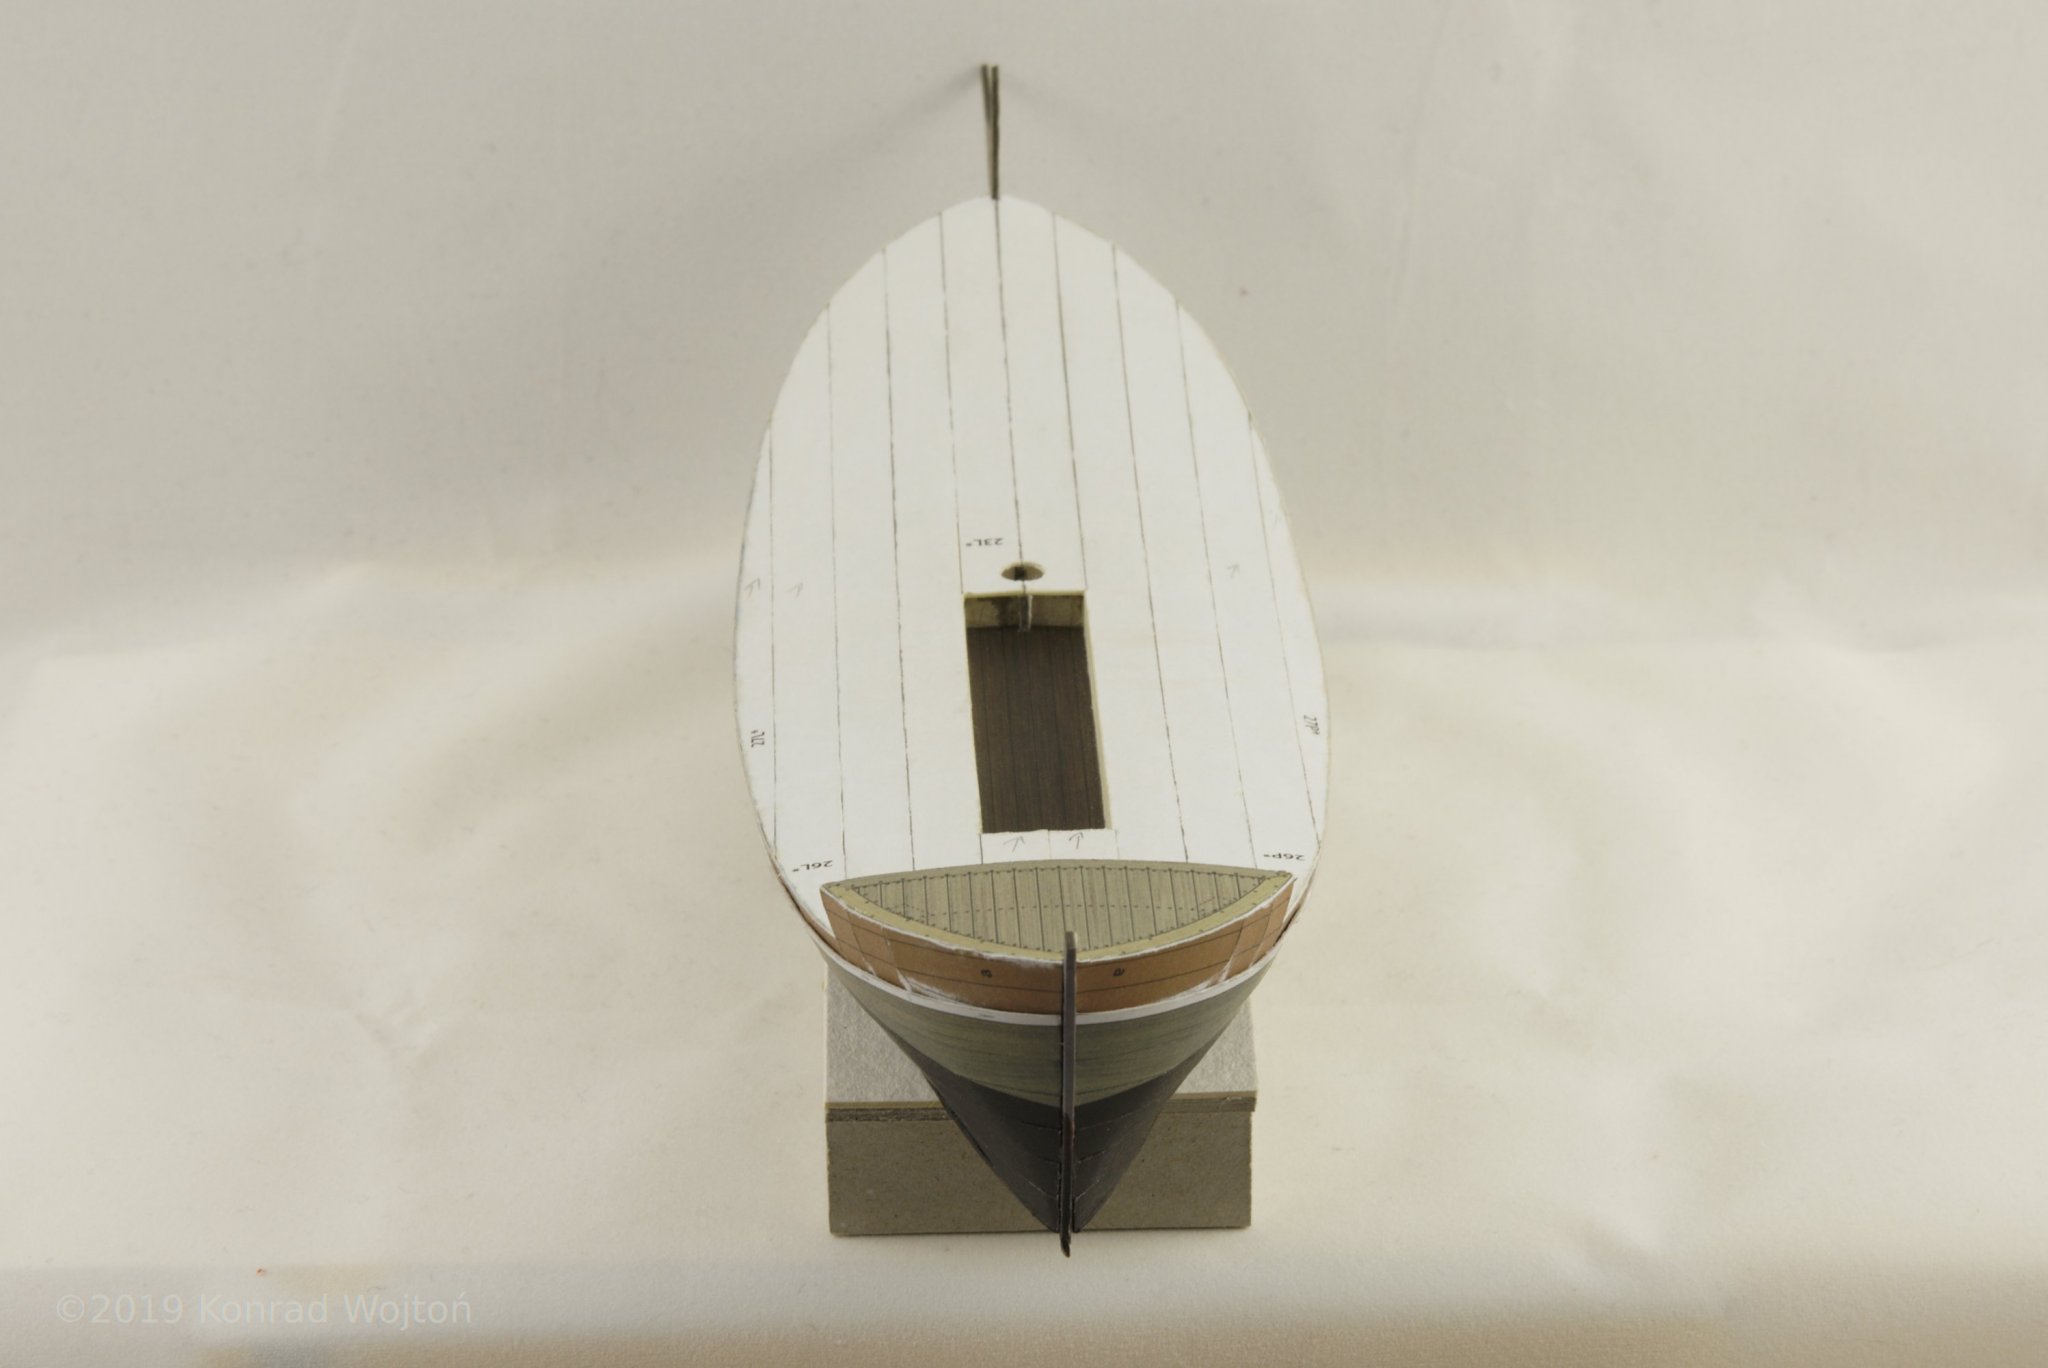
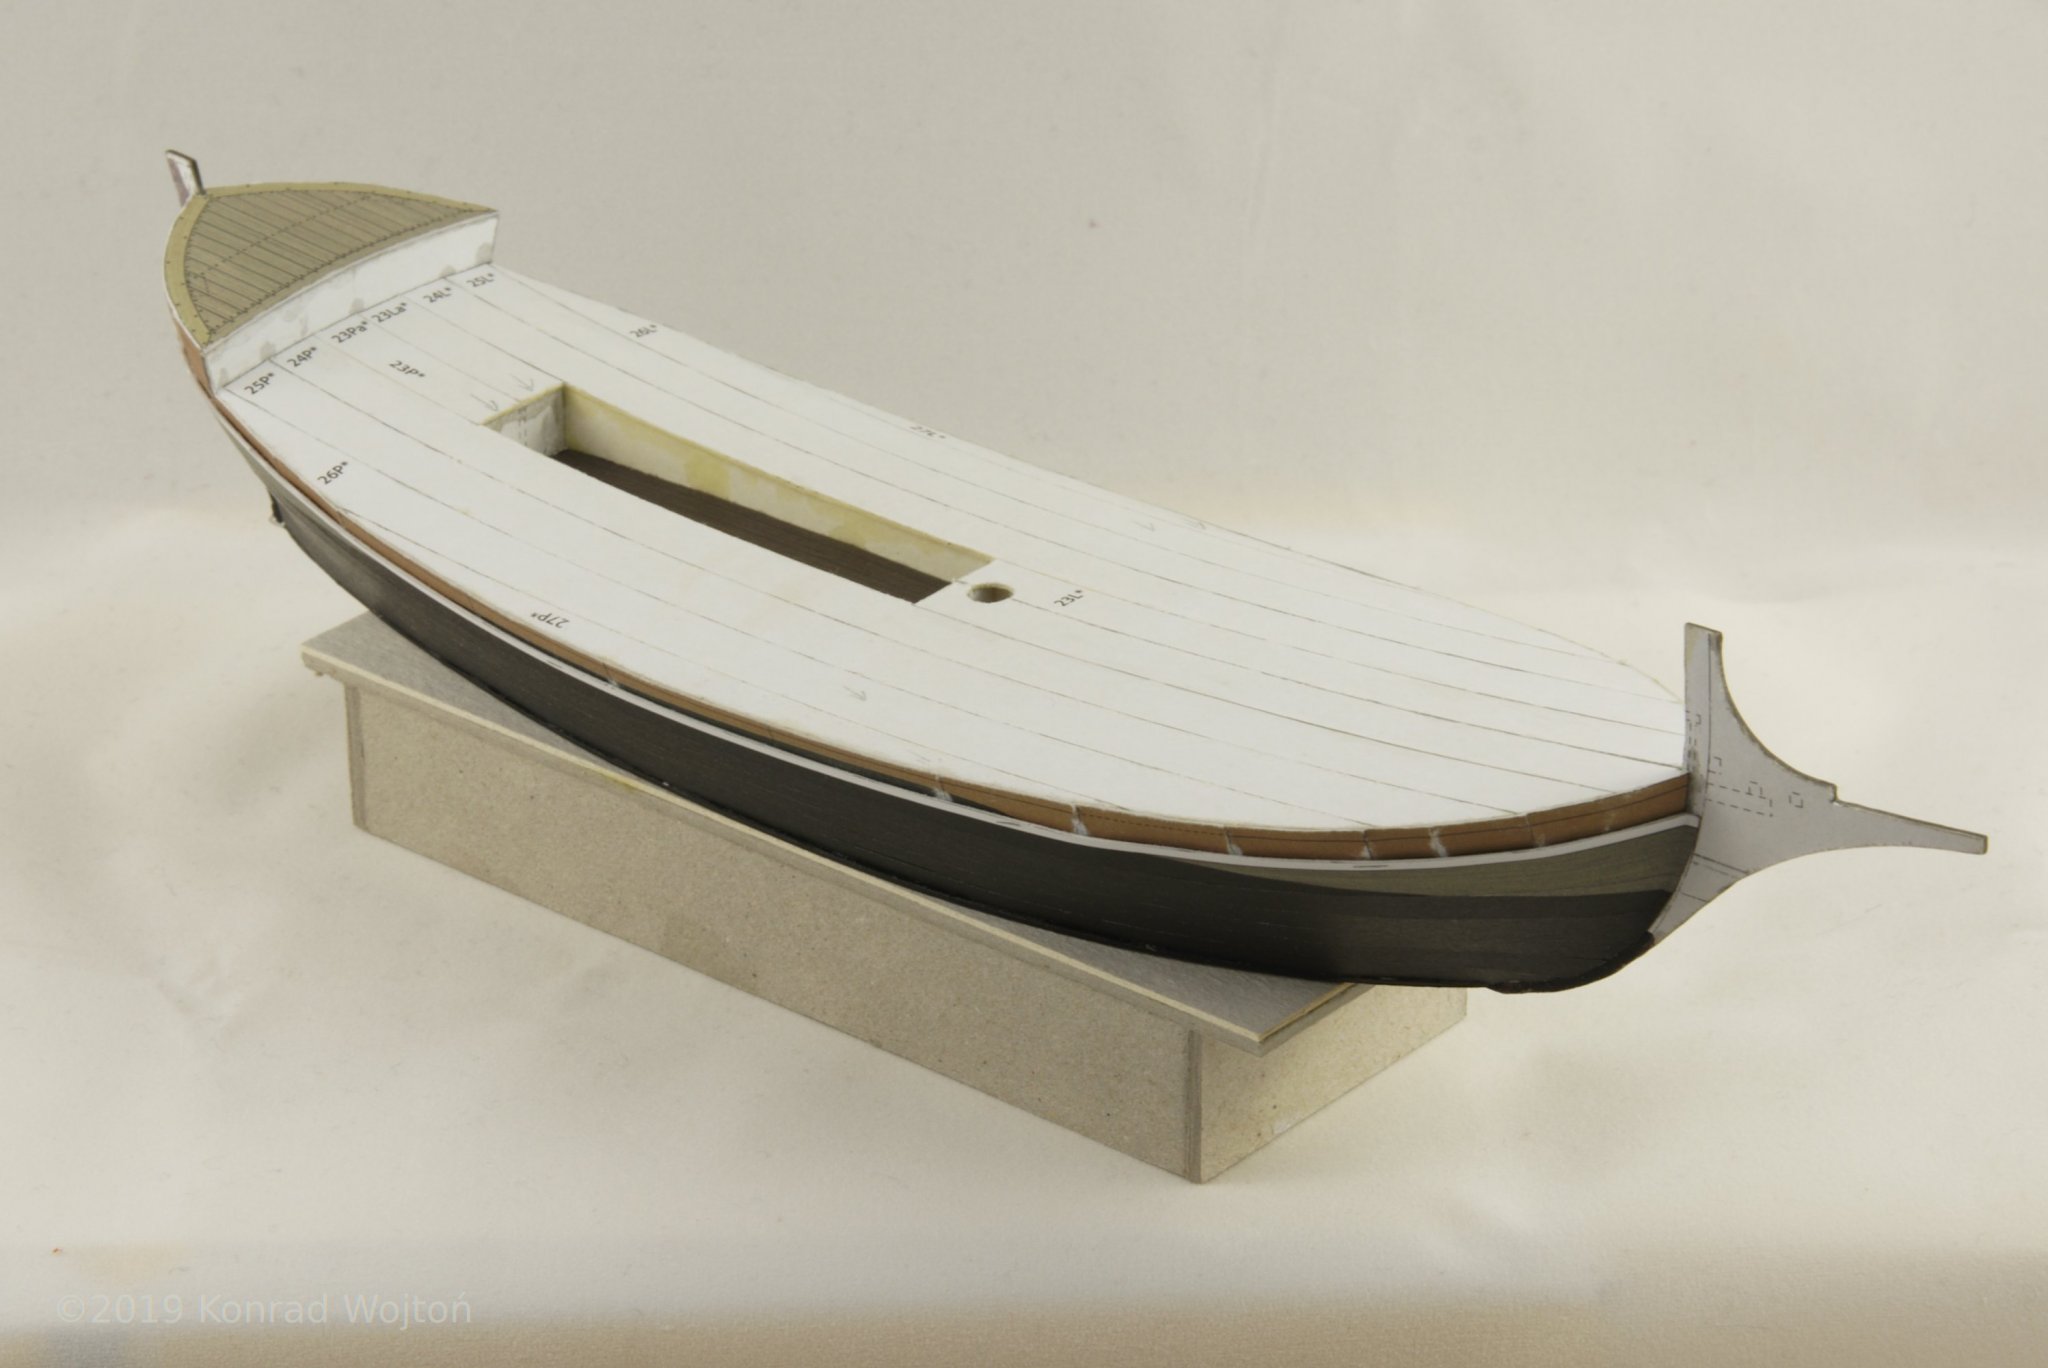
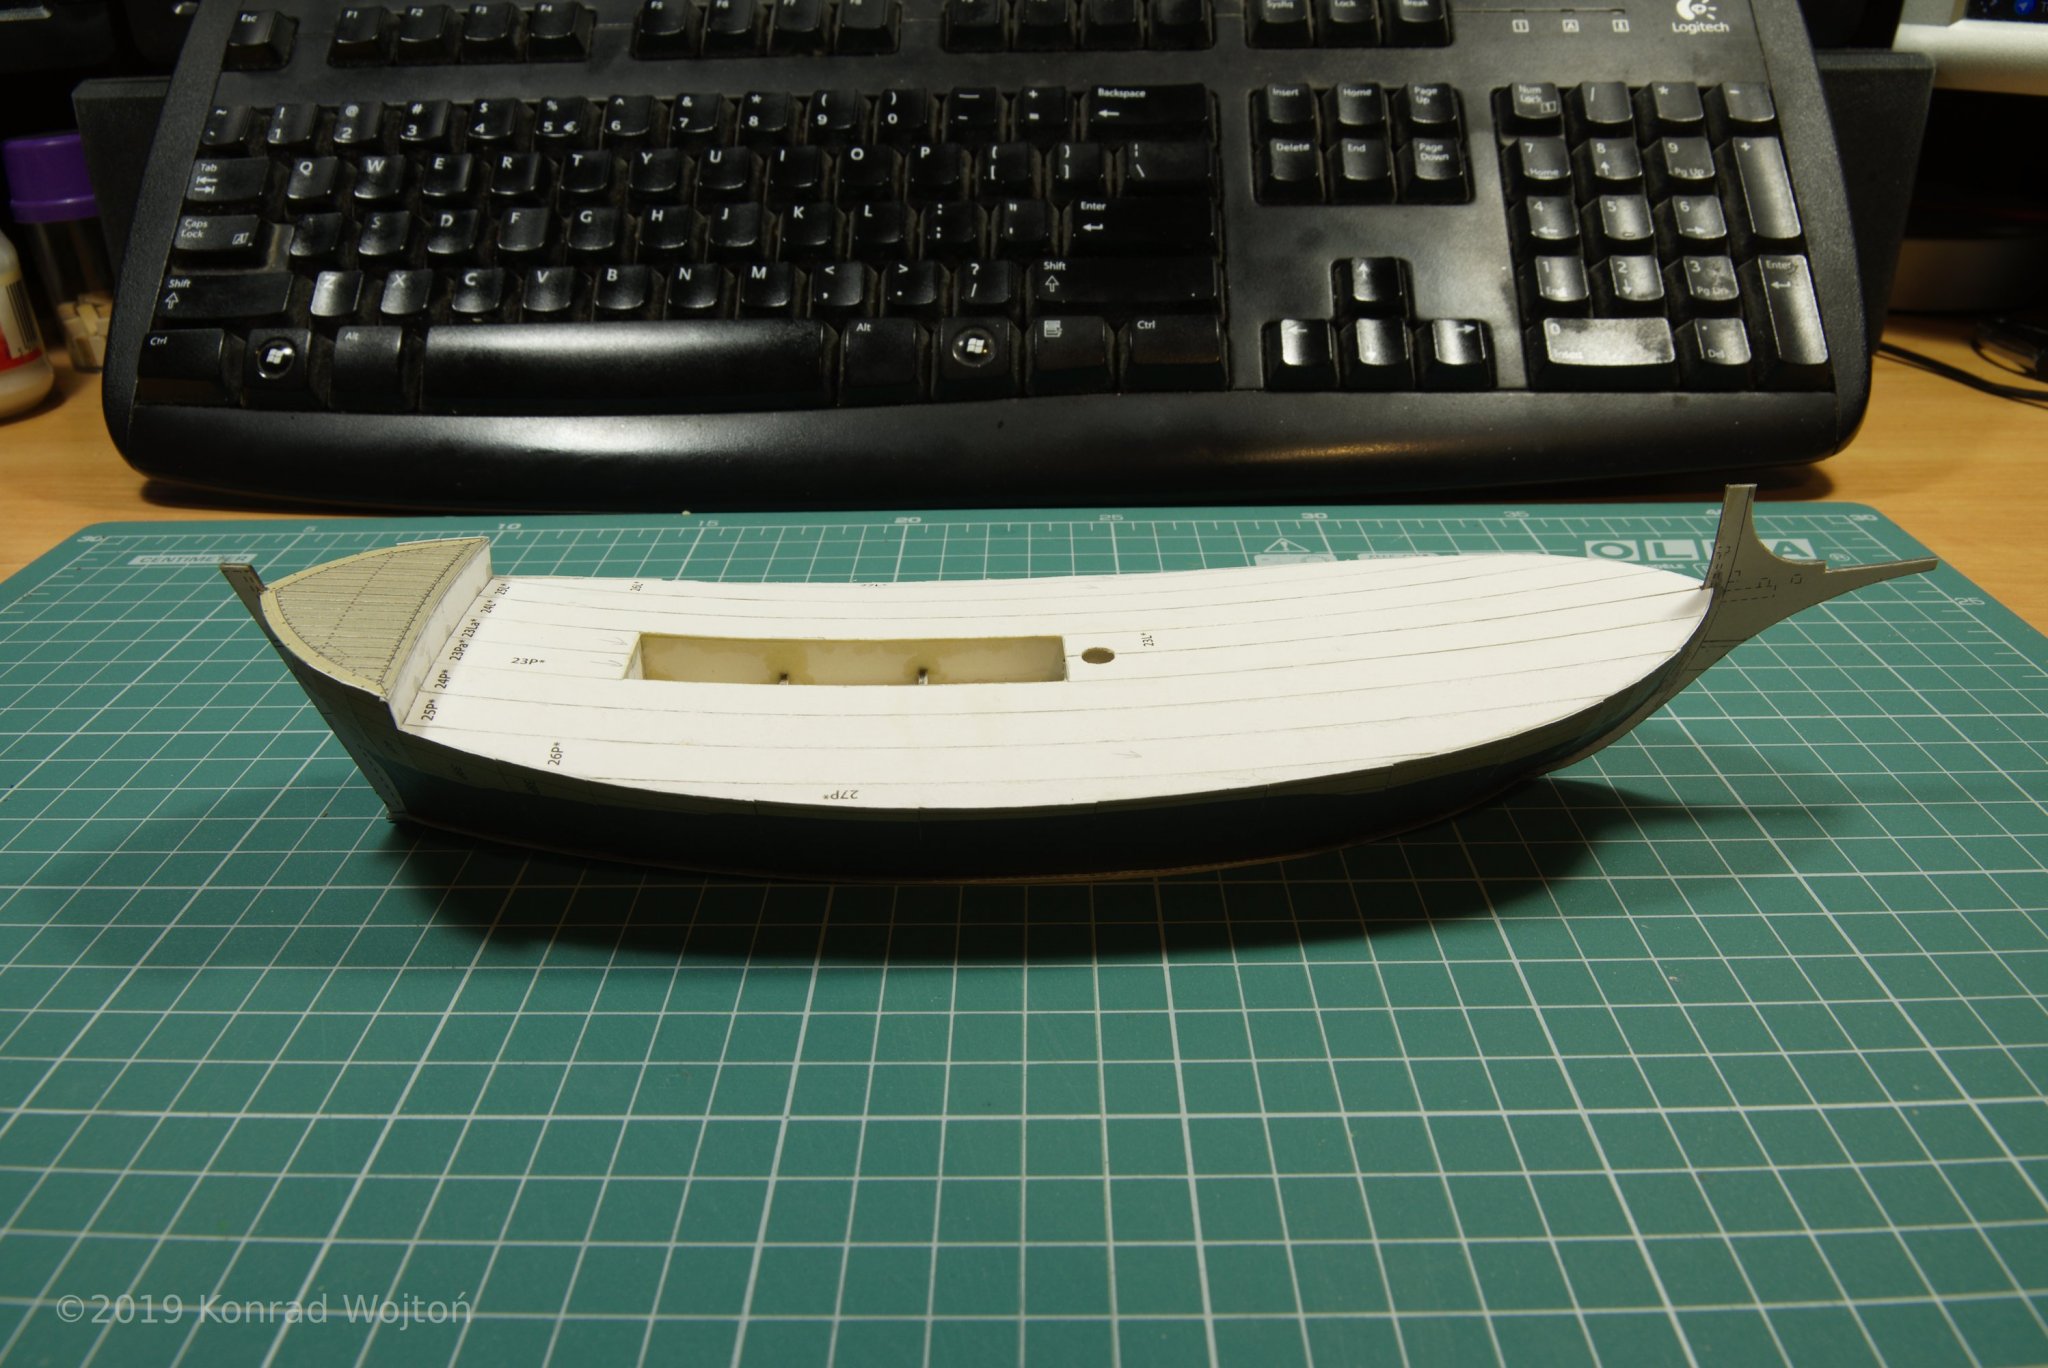
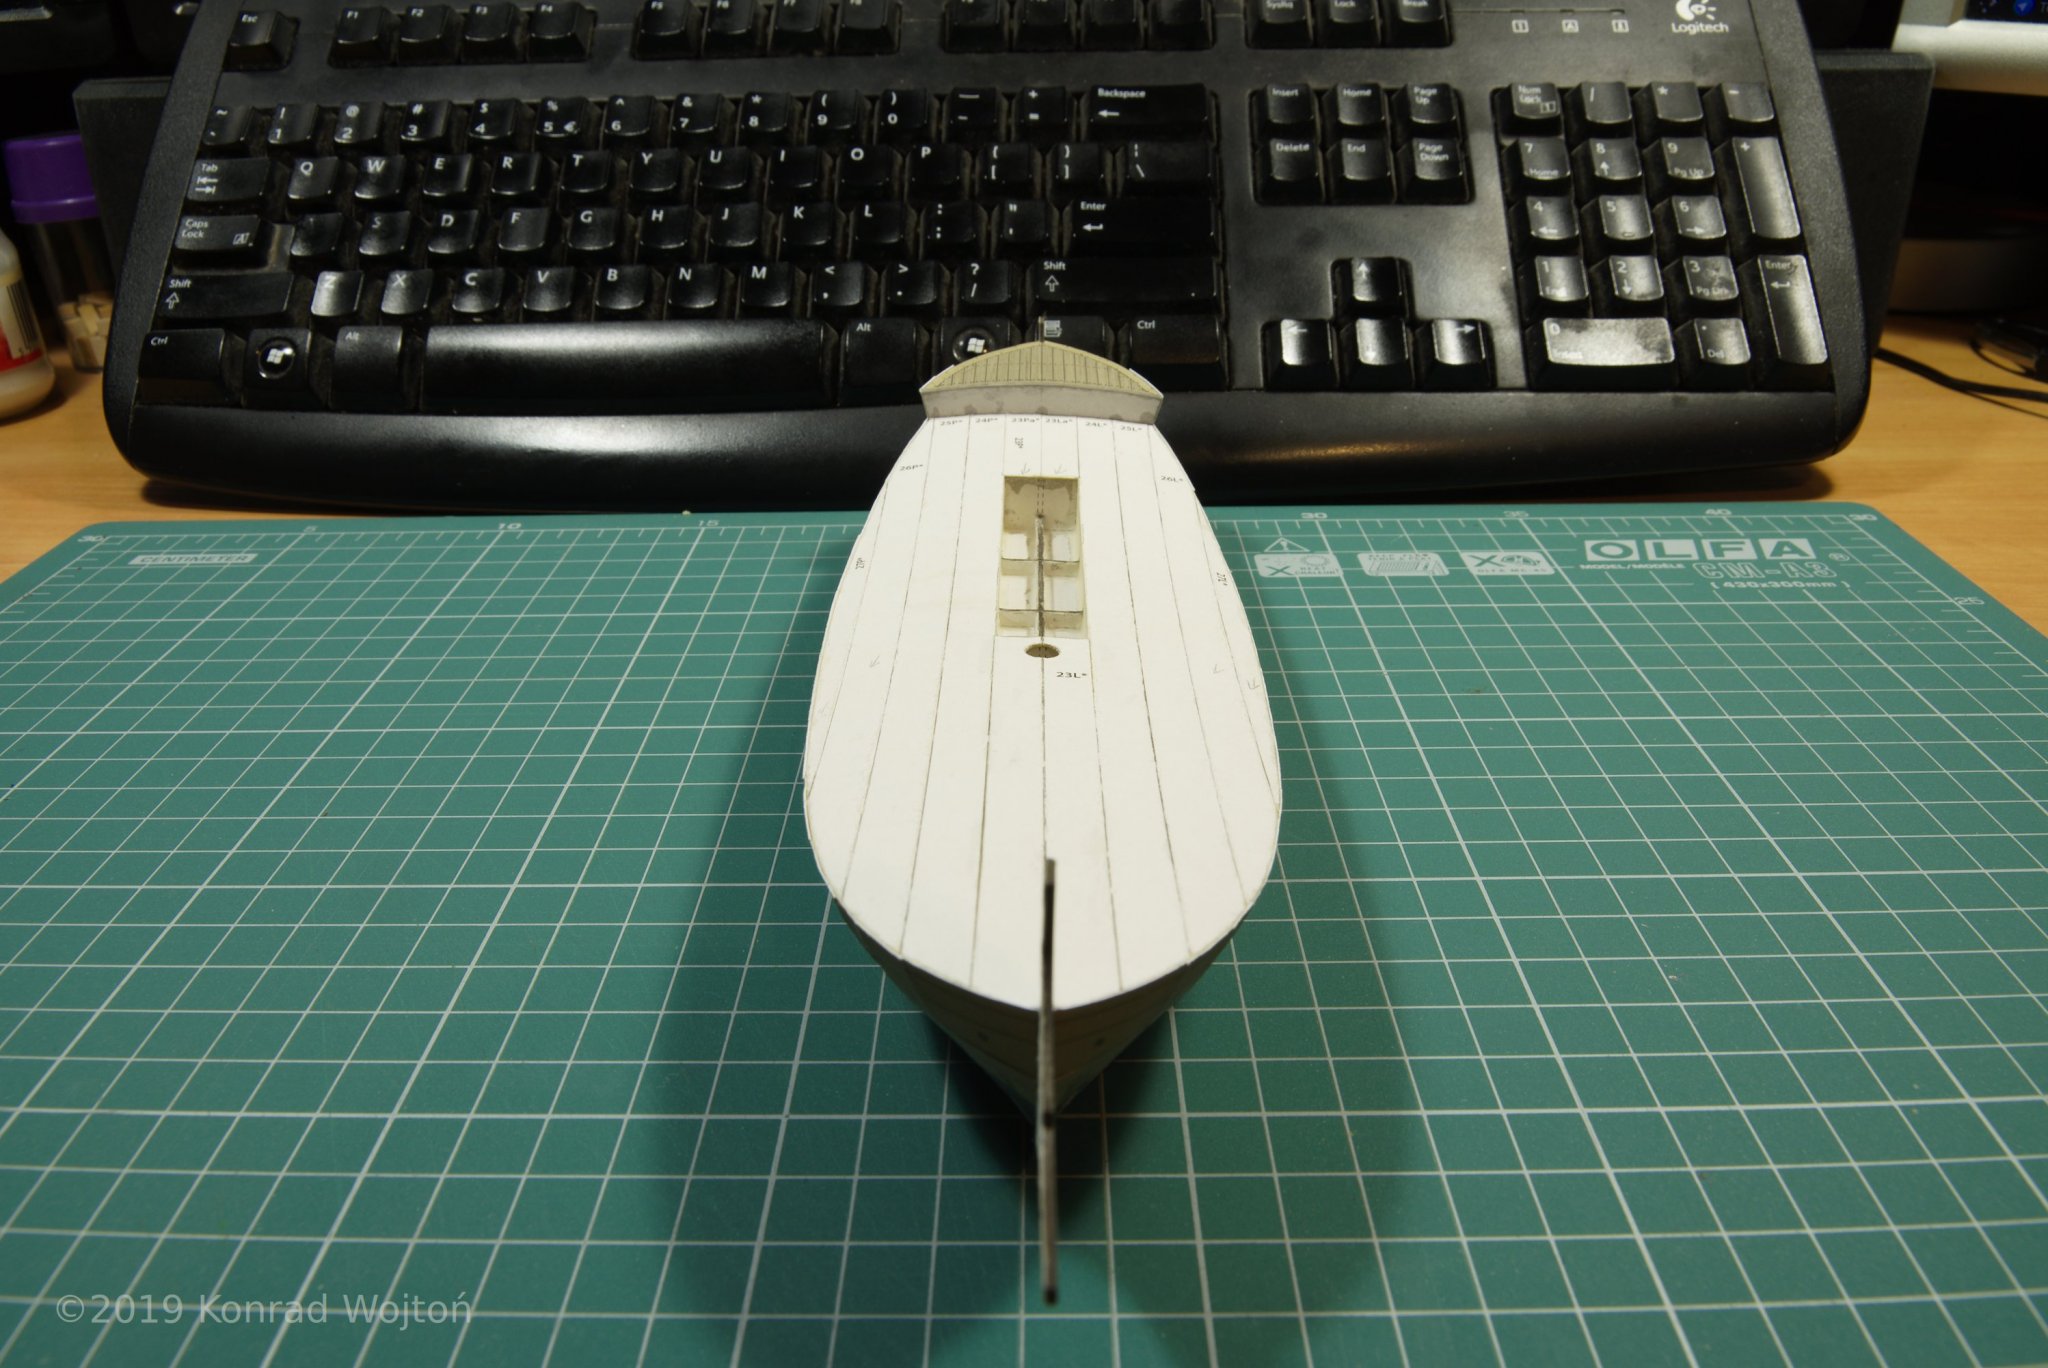
Bow ready:
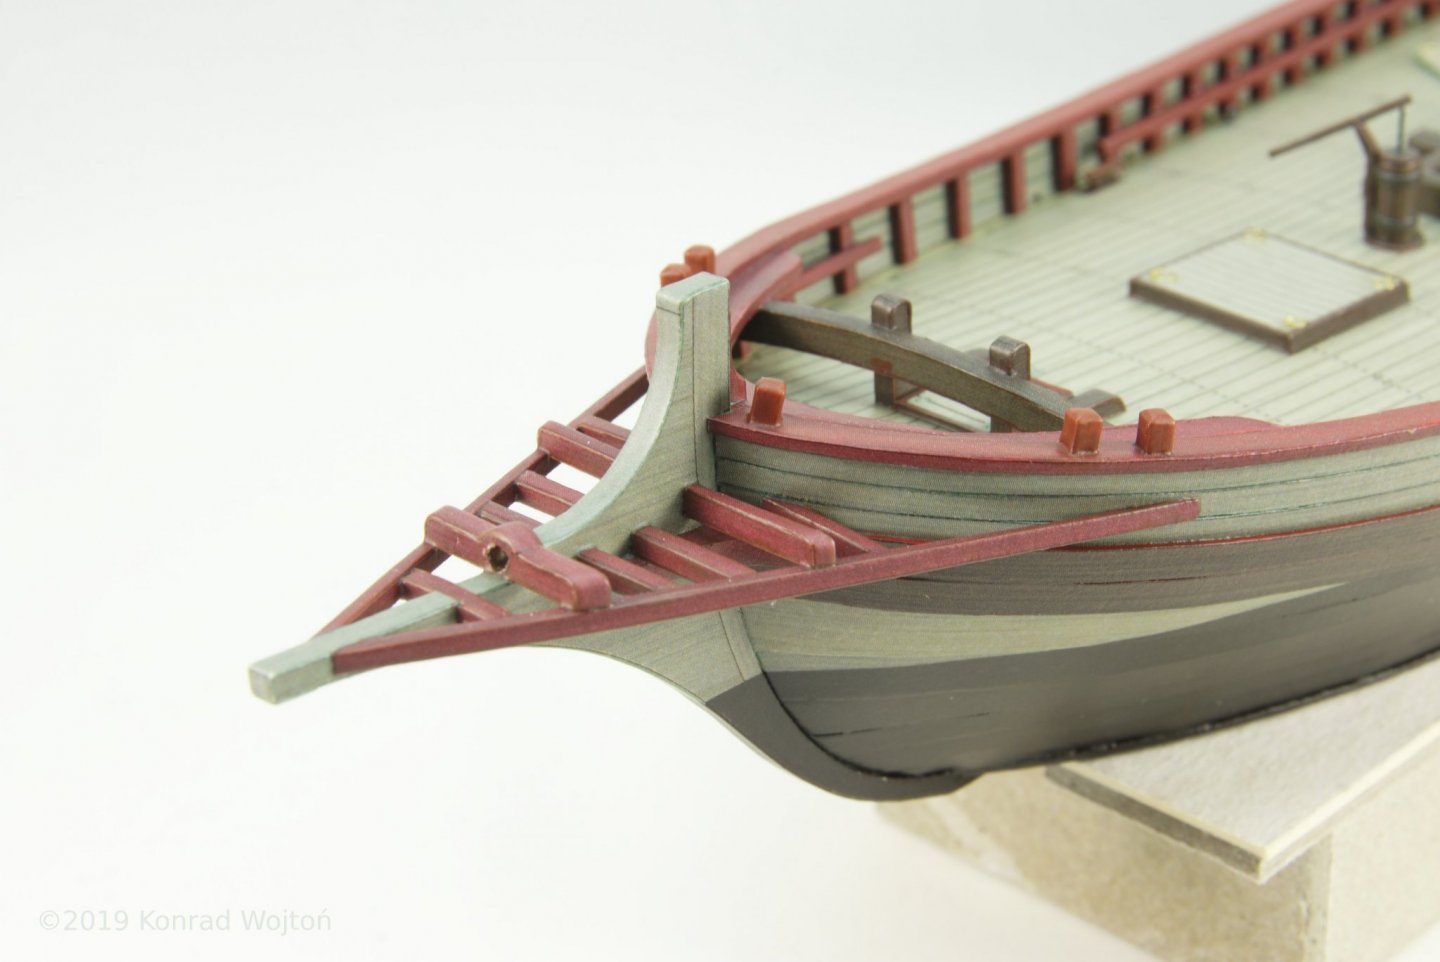
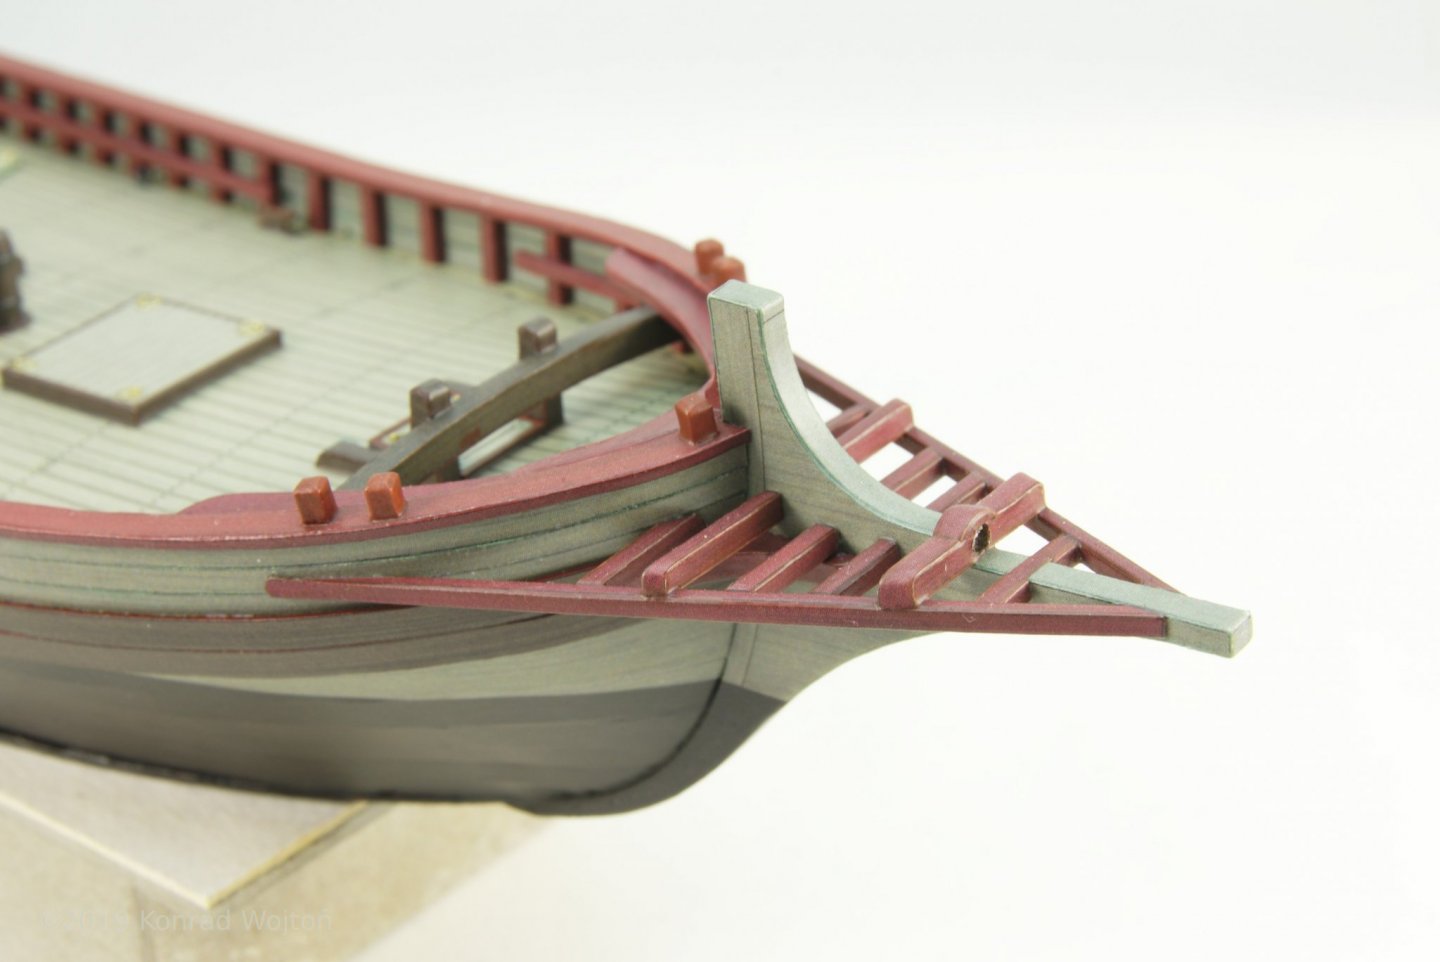


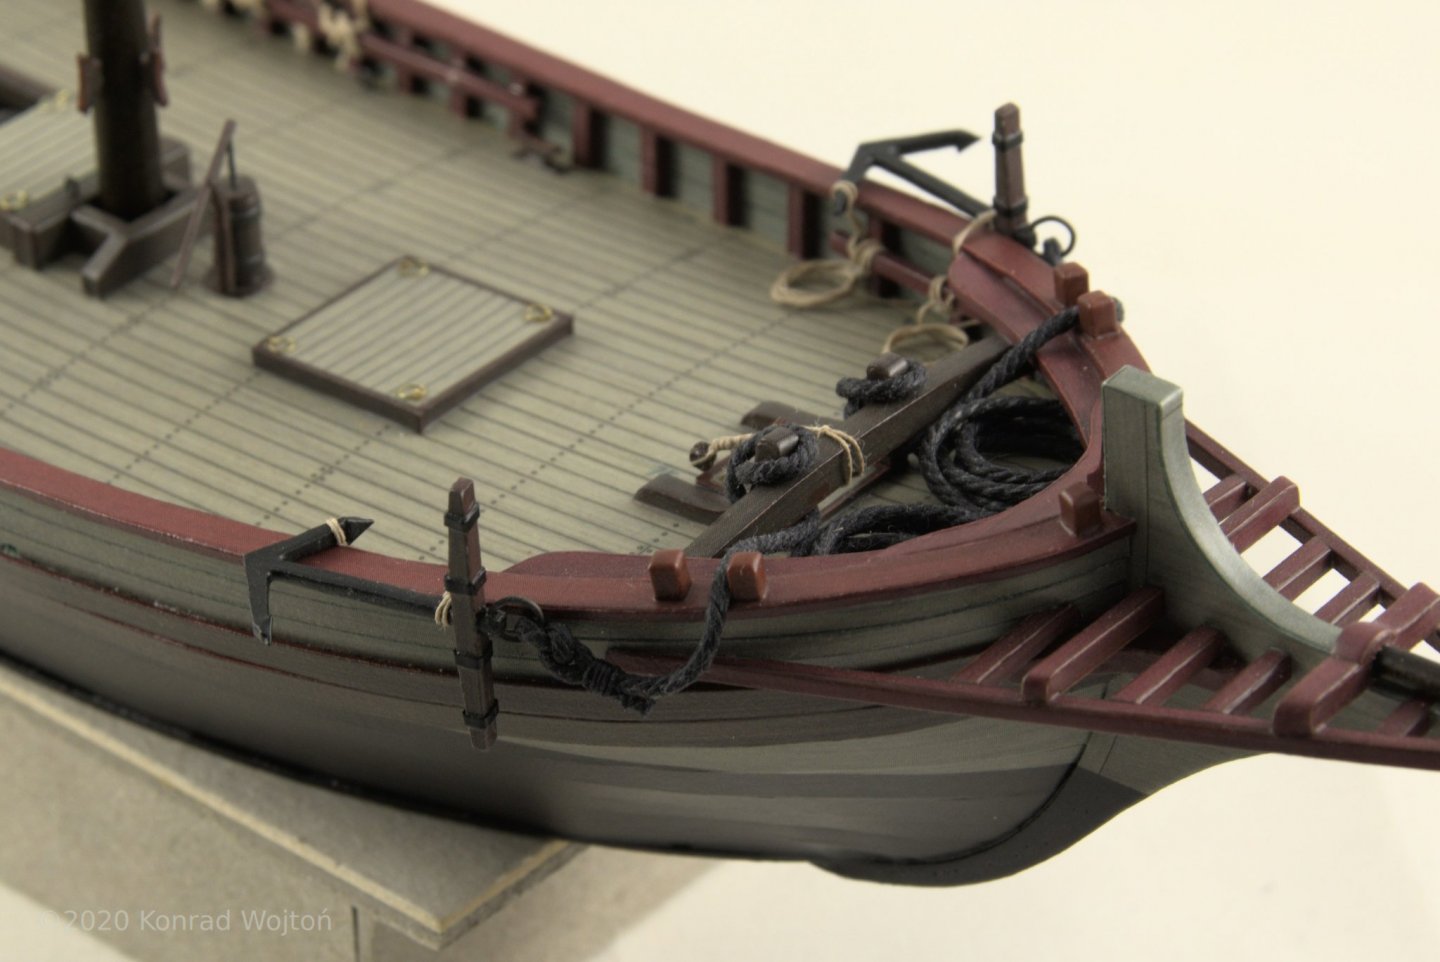
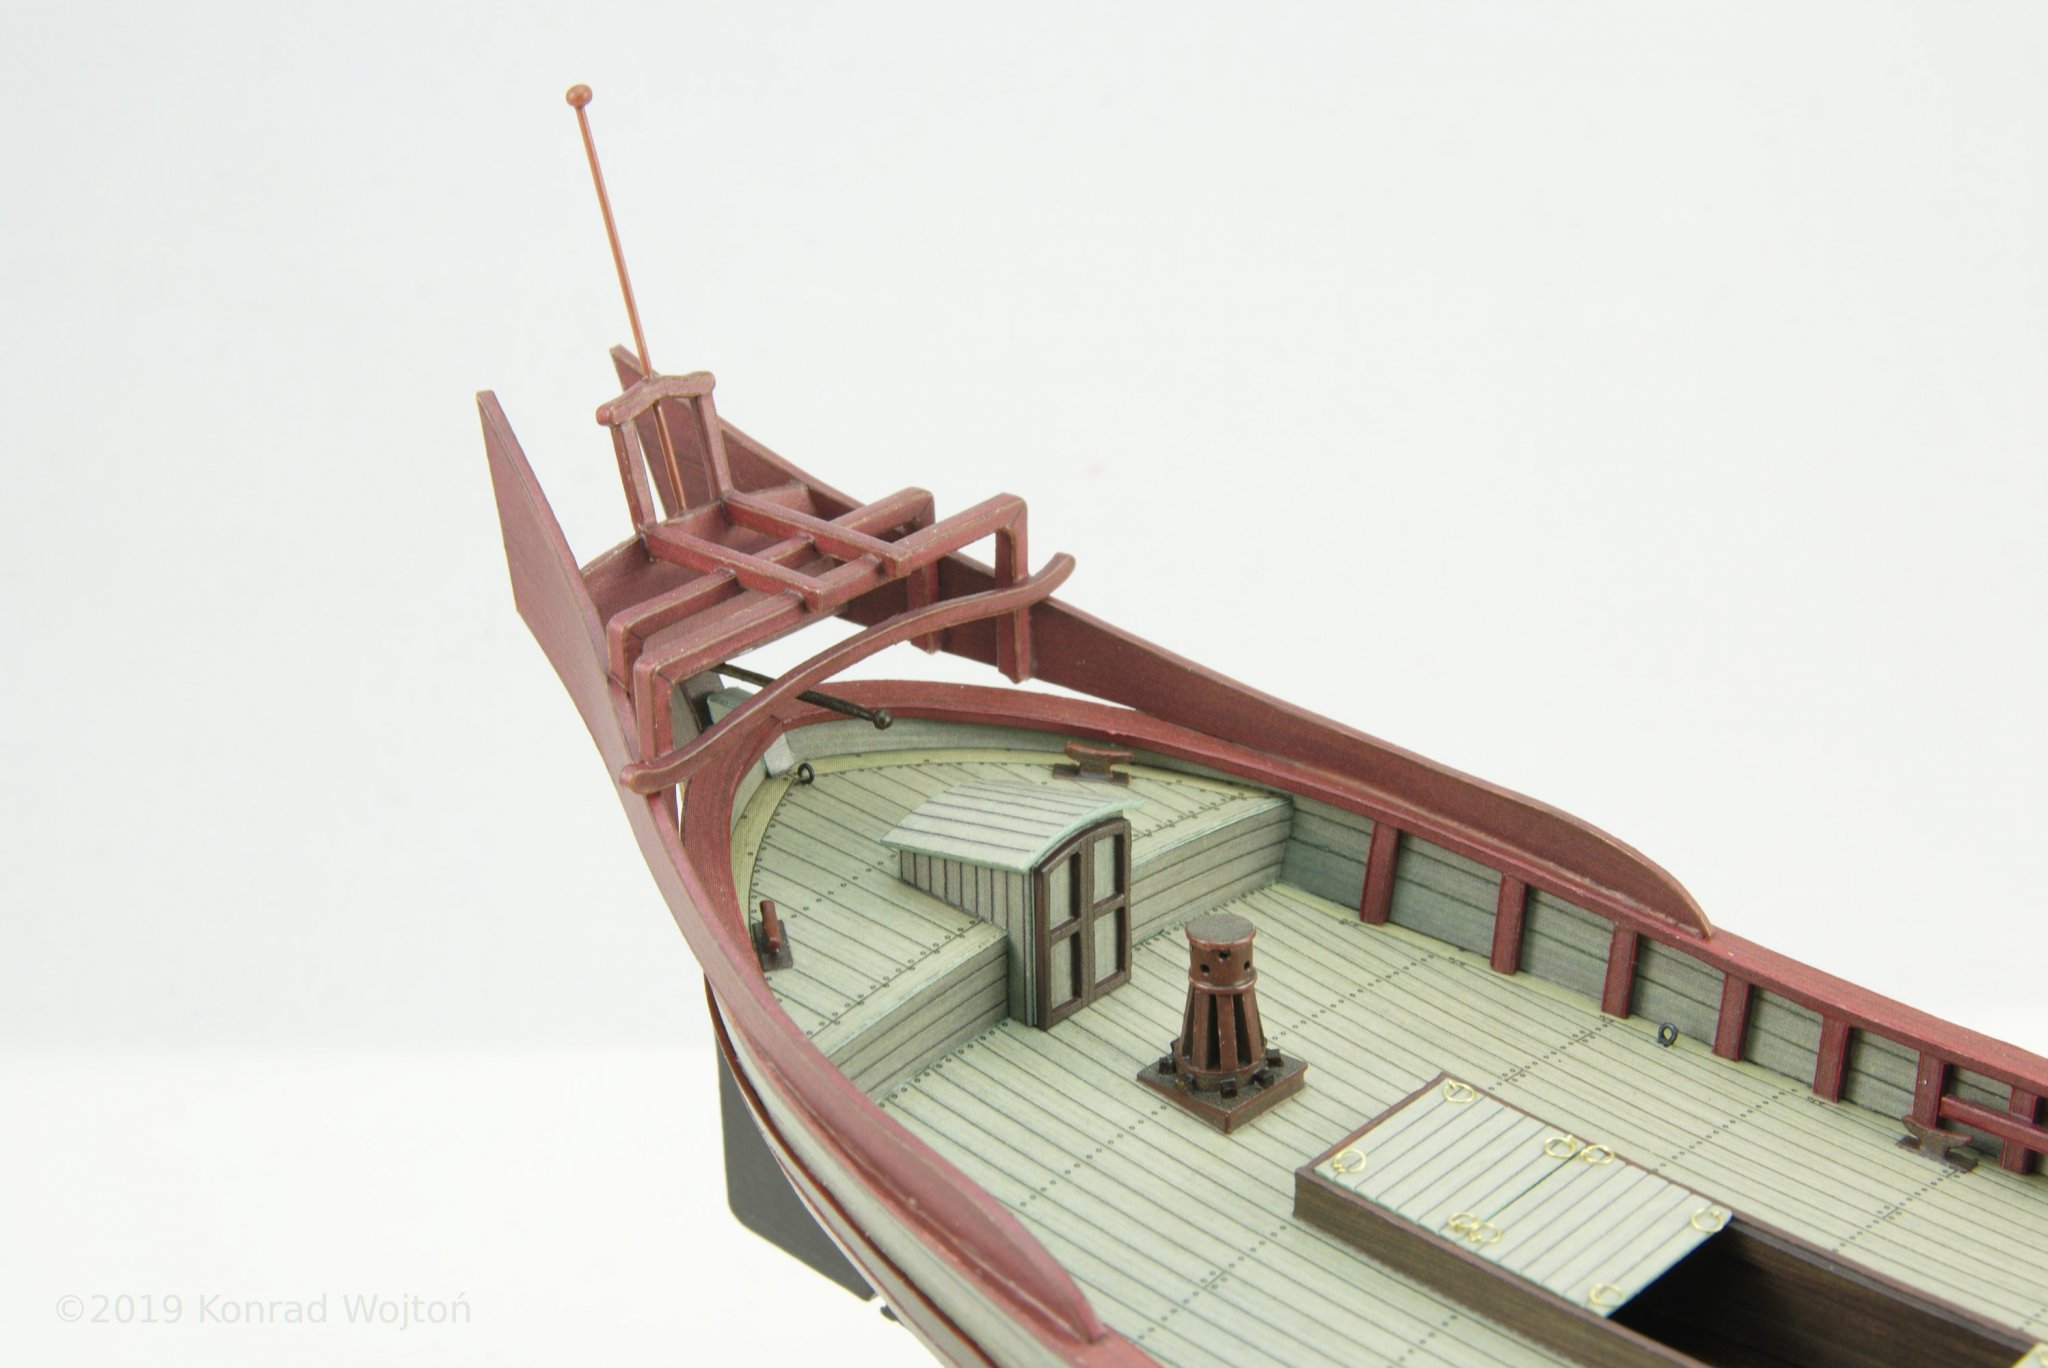
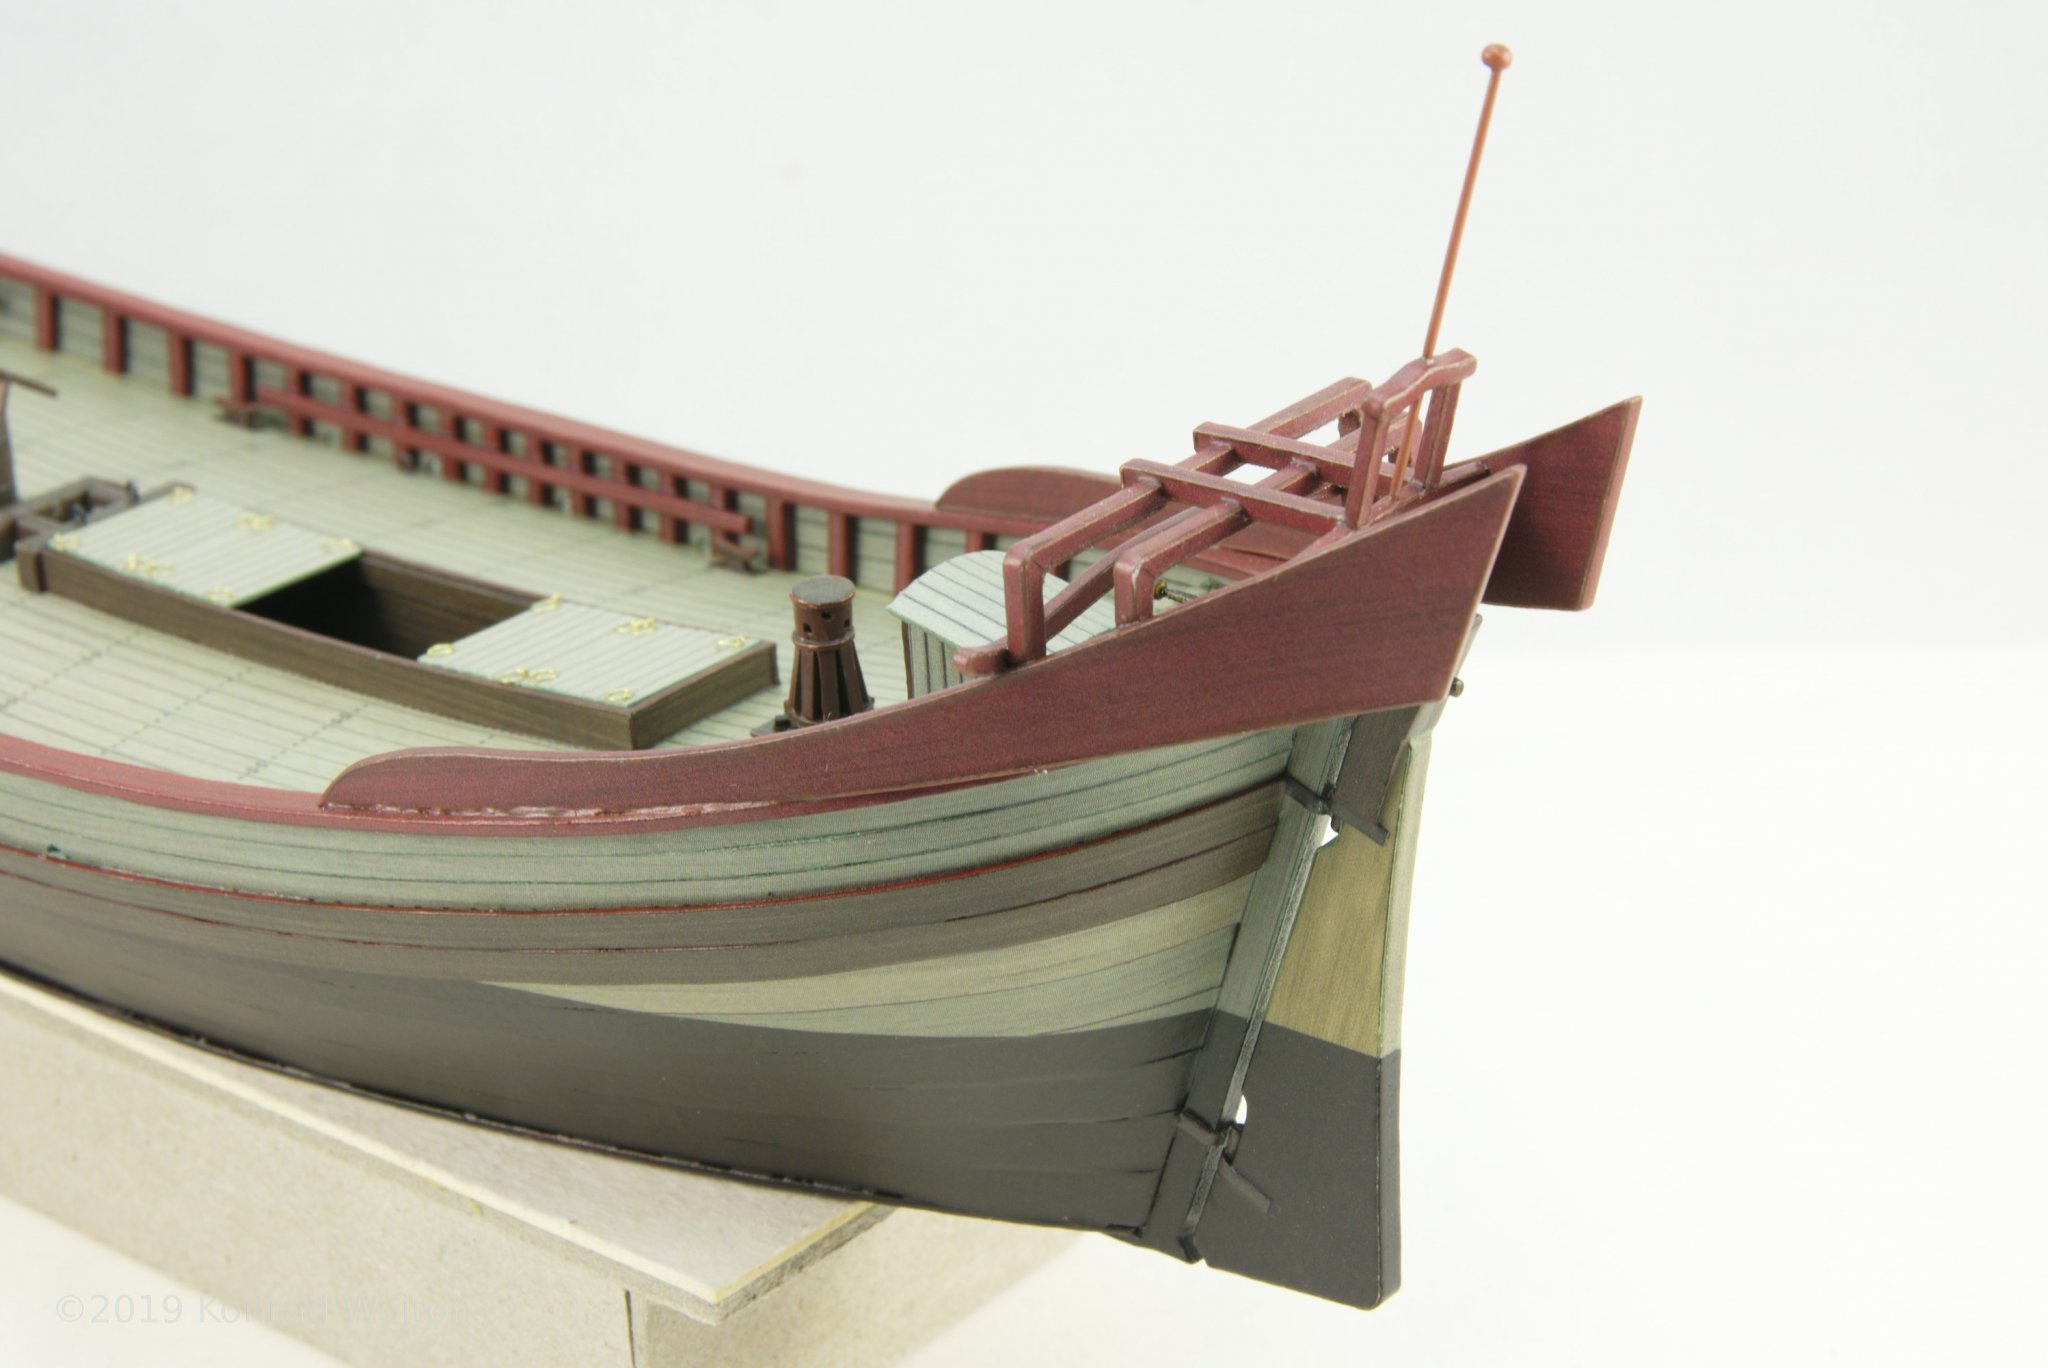
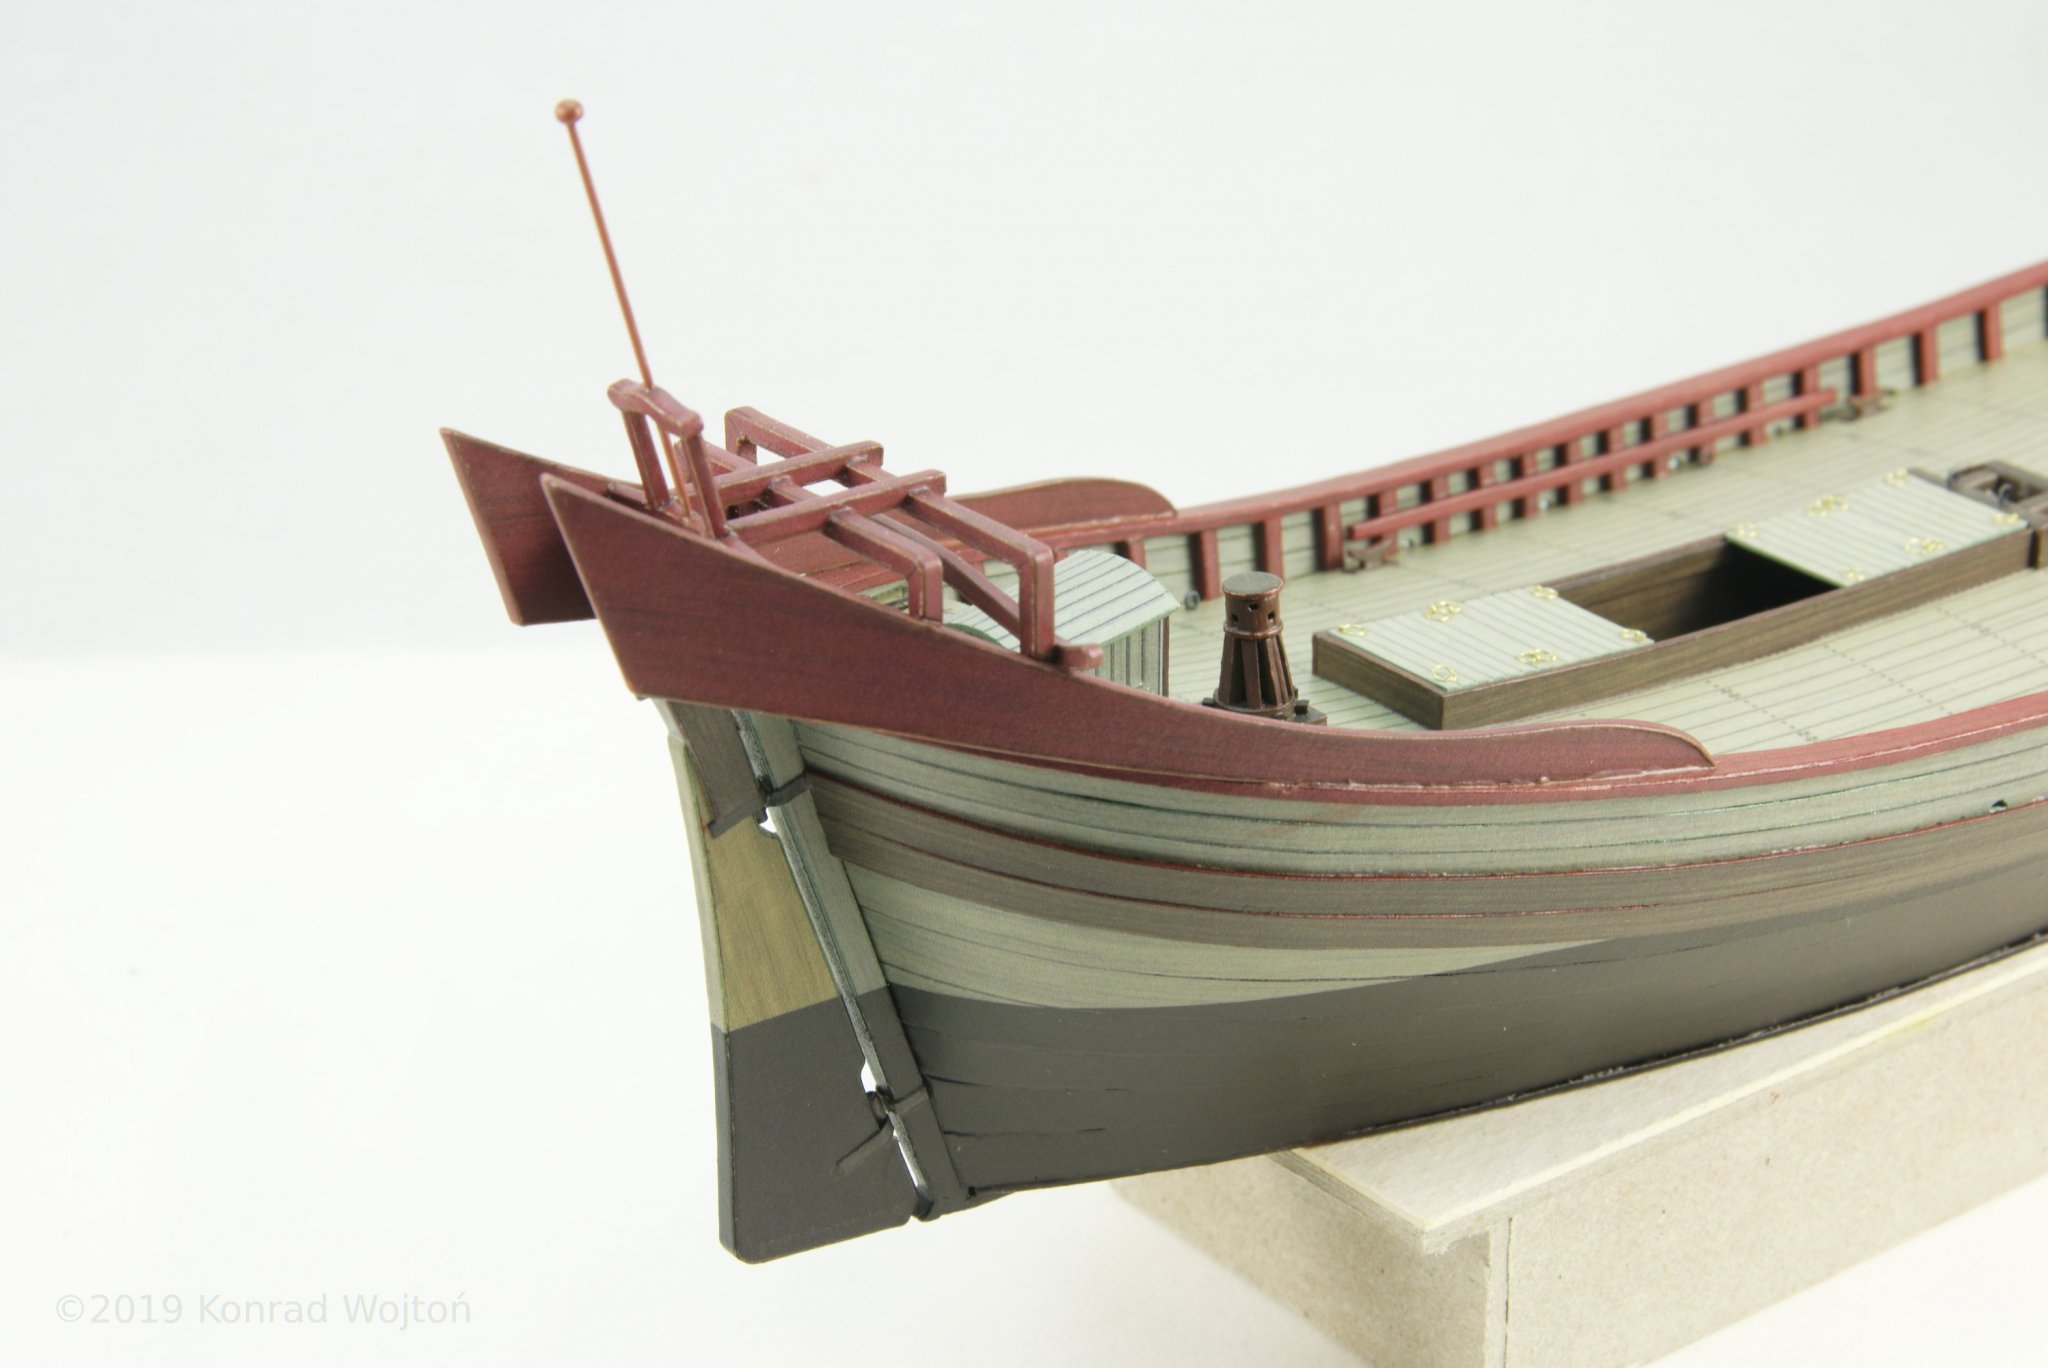
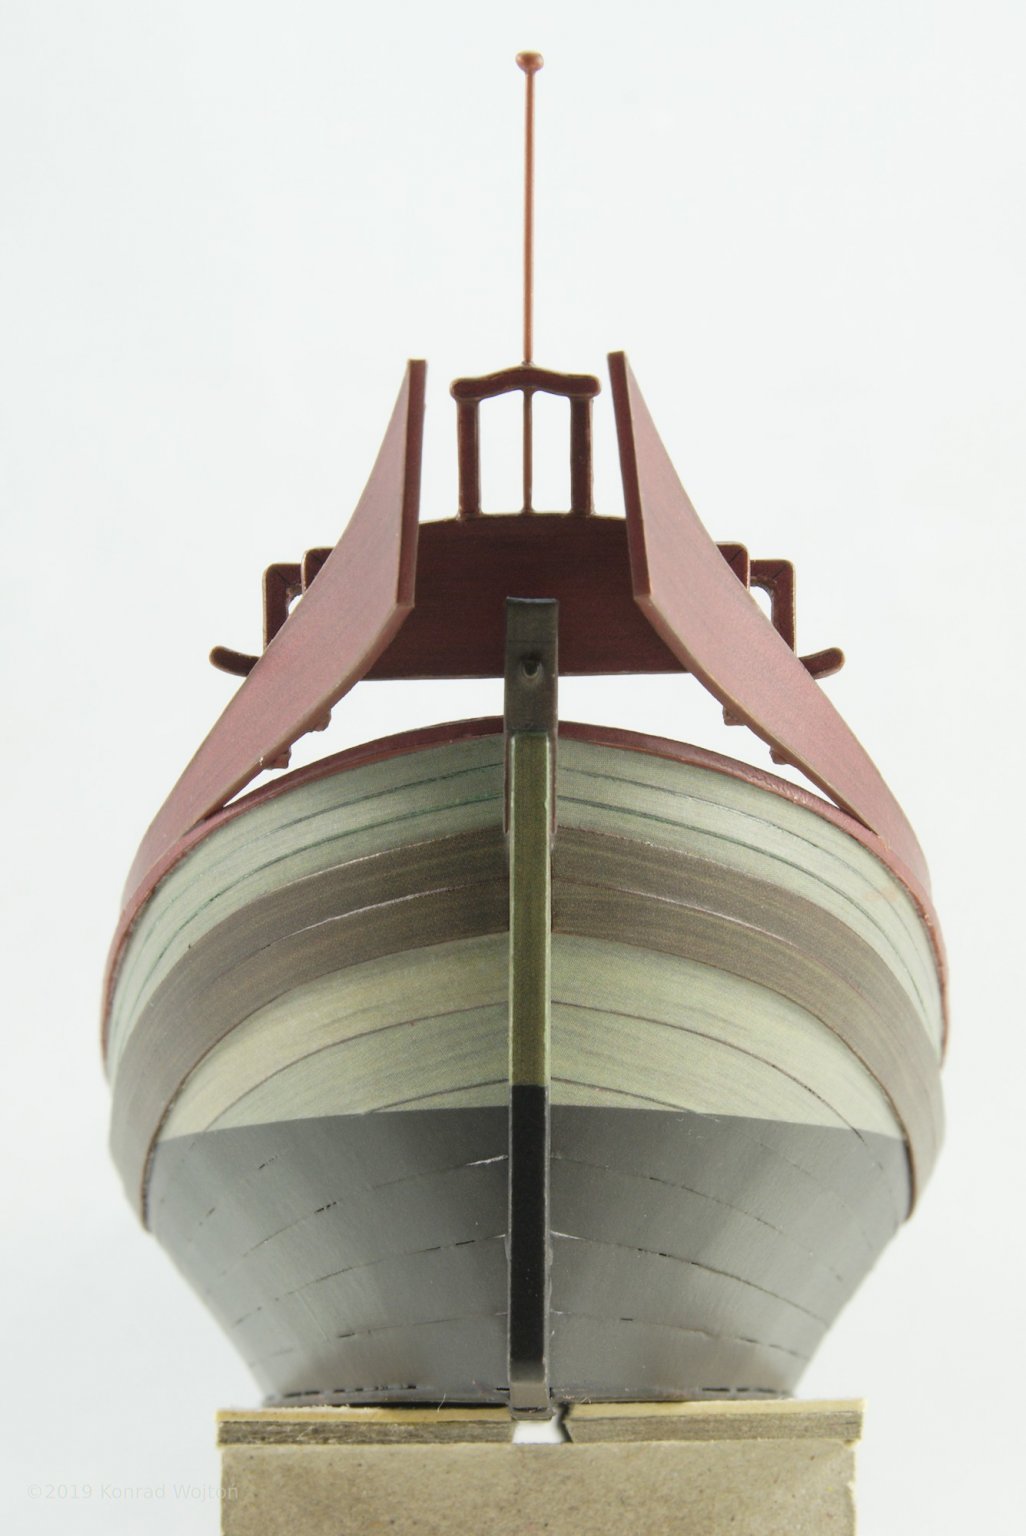
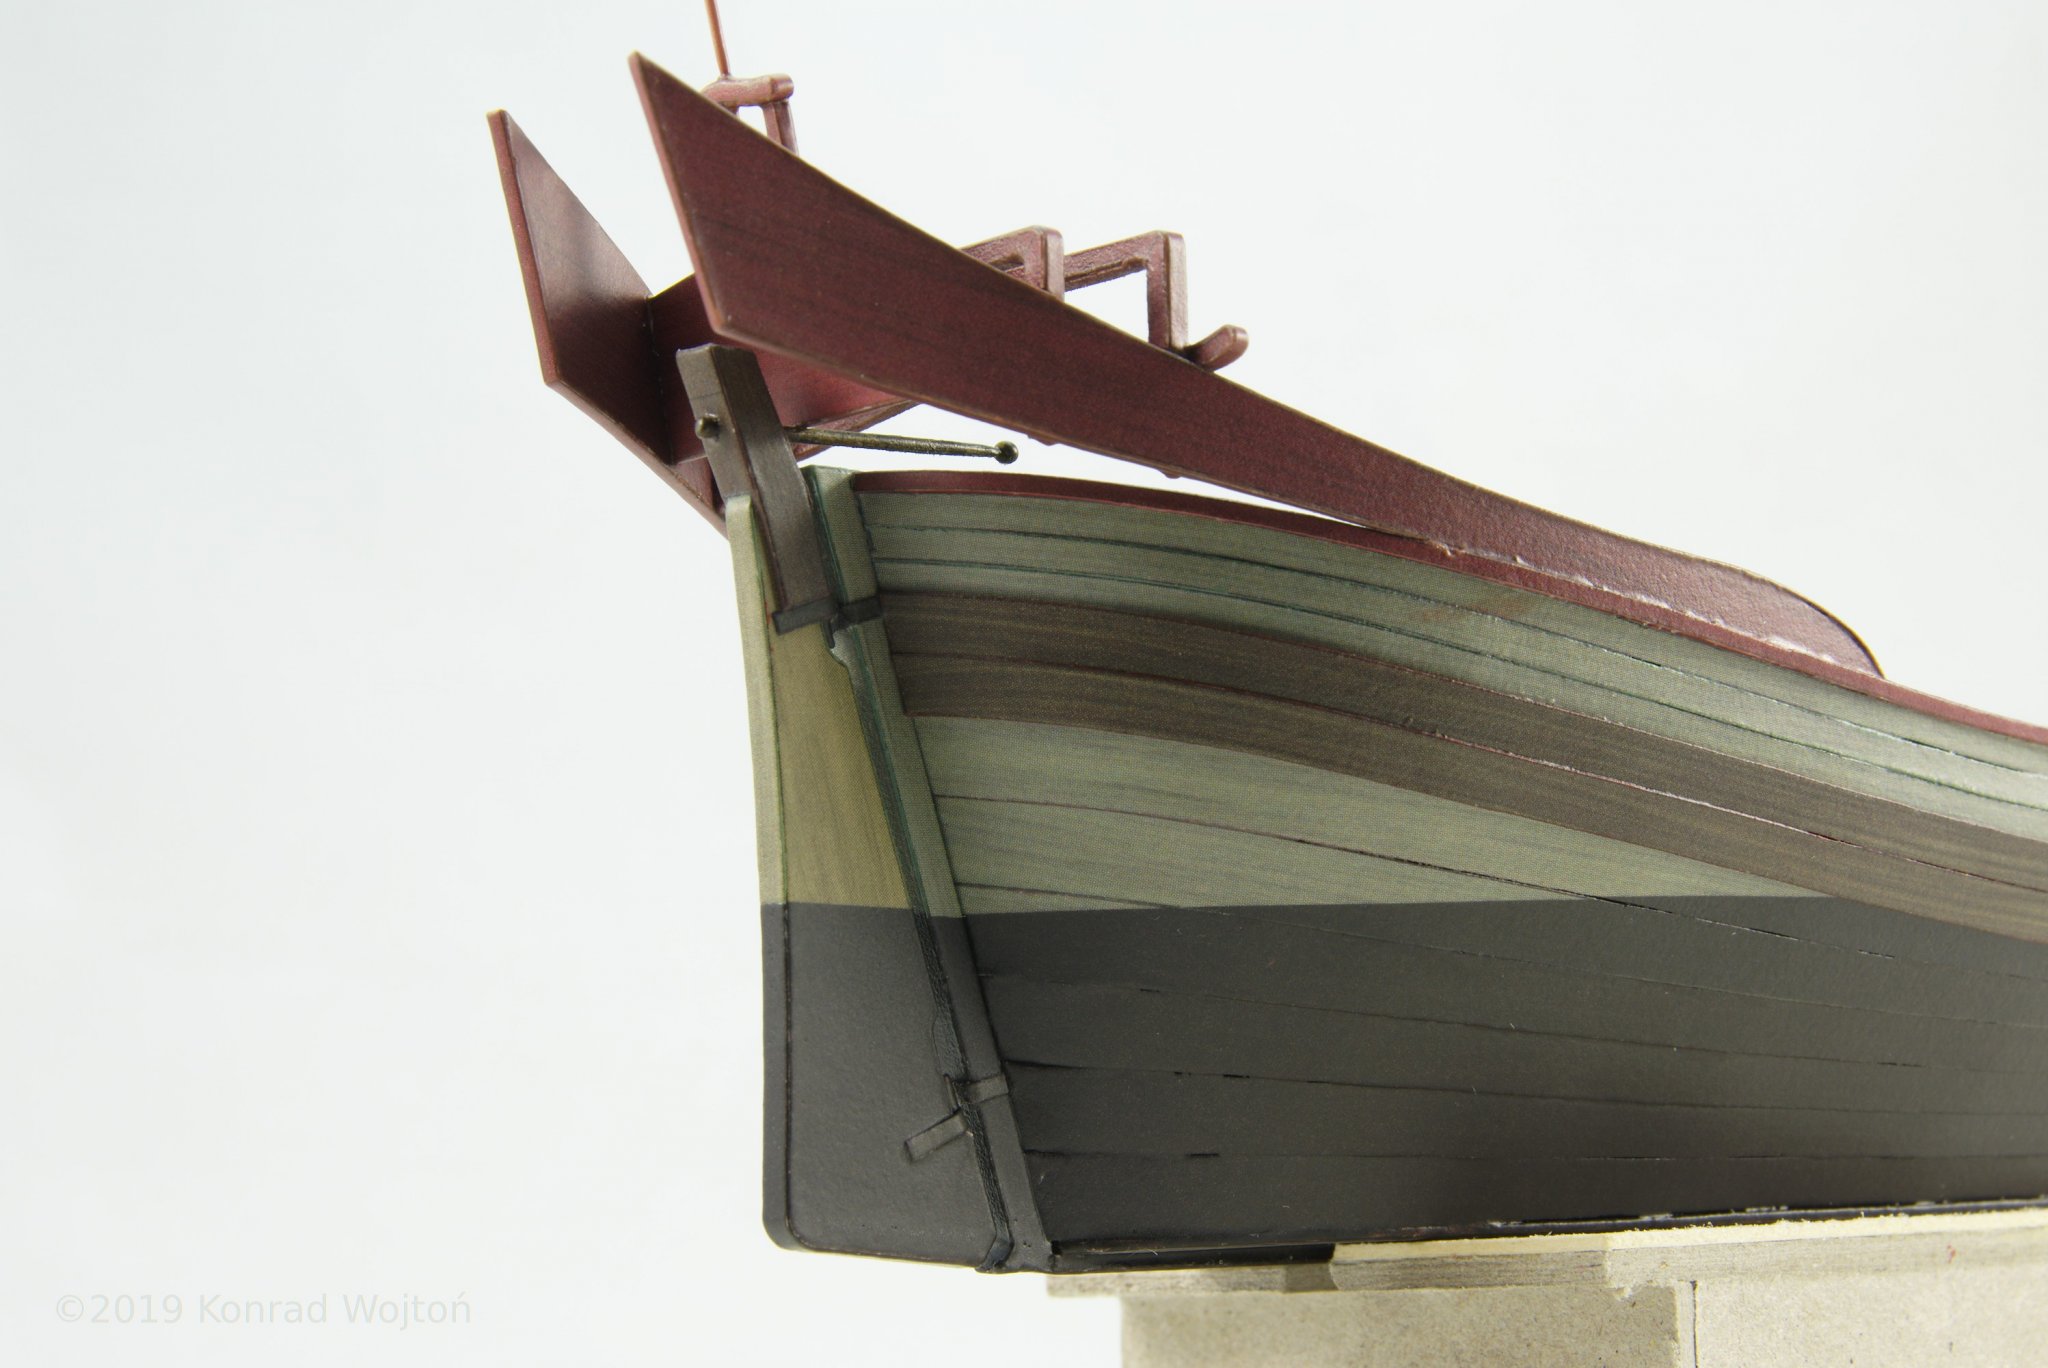
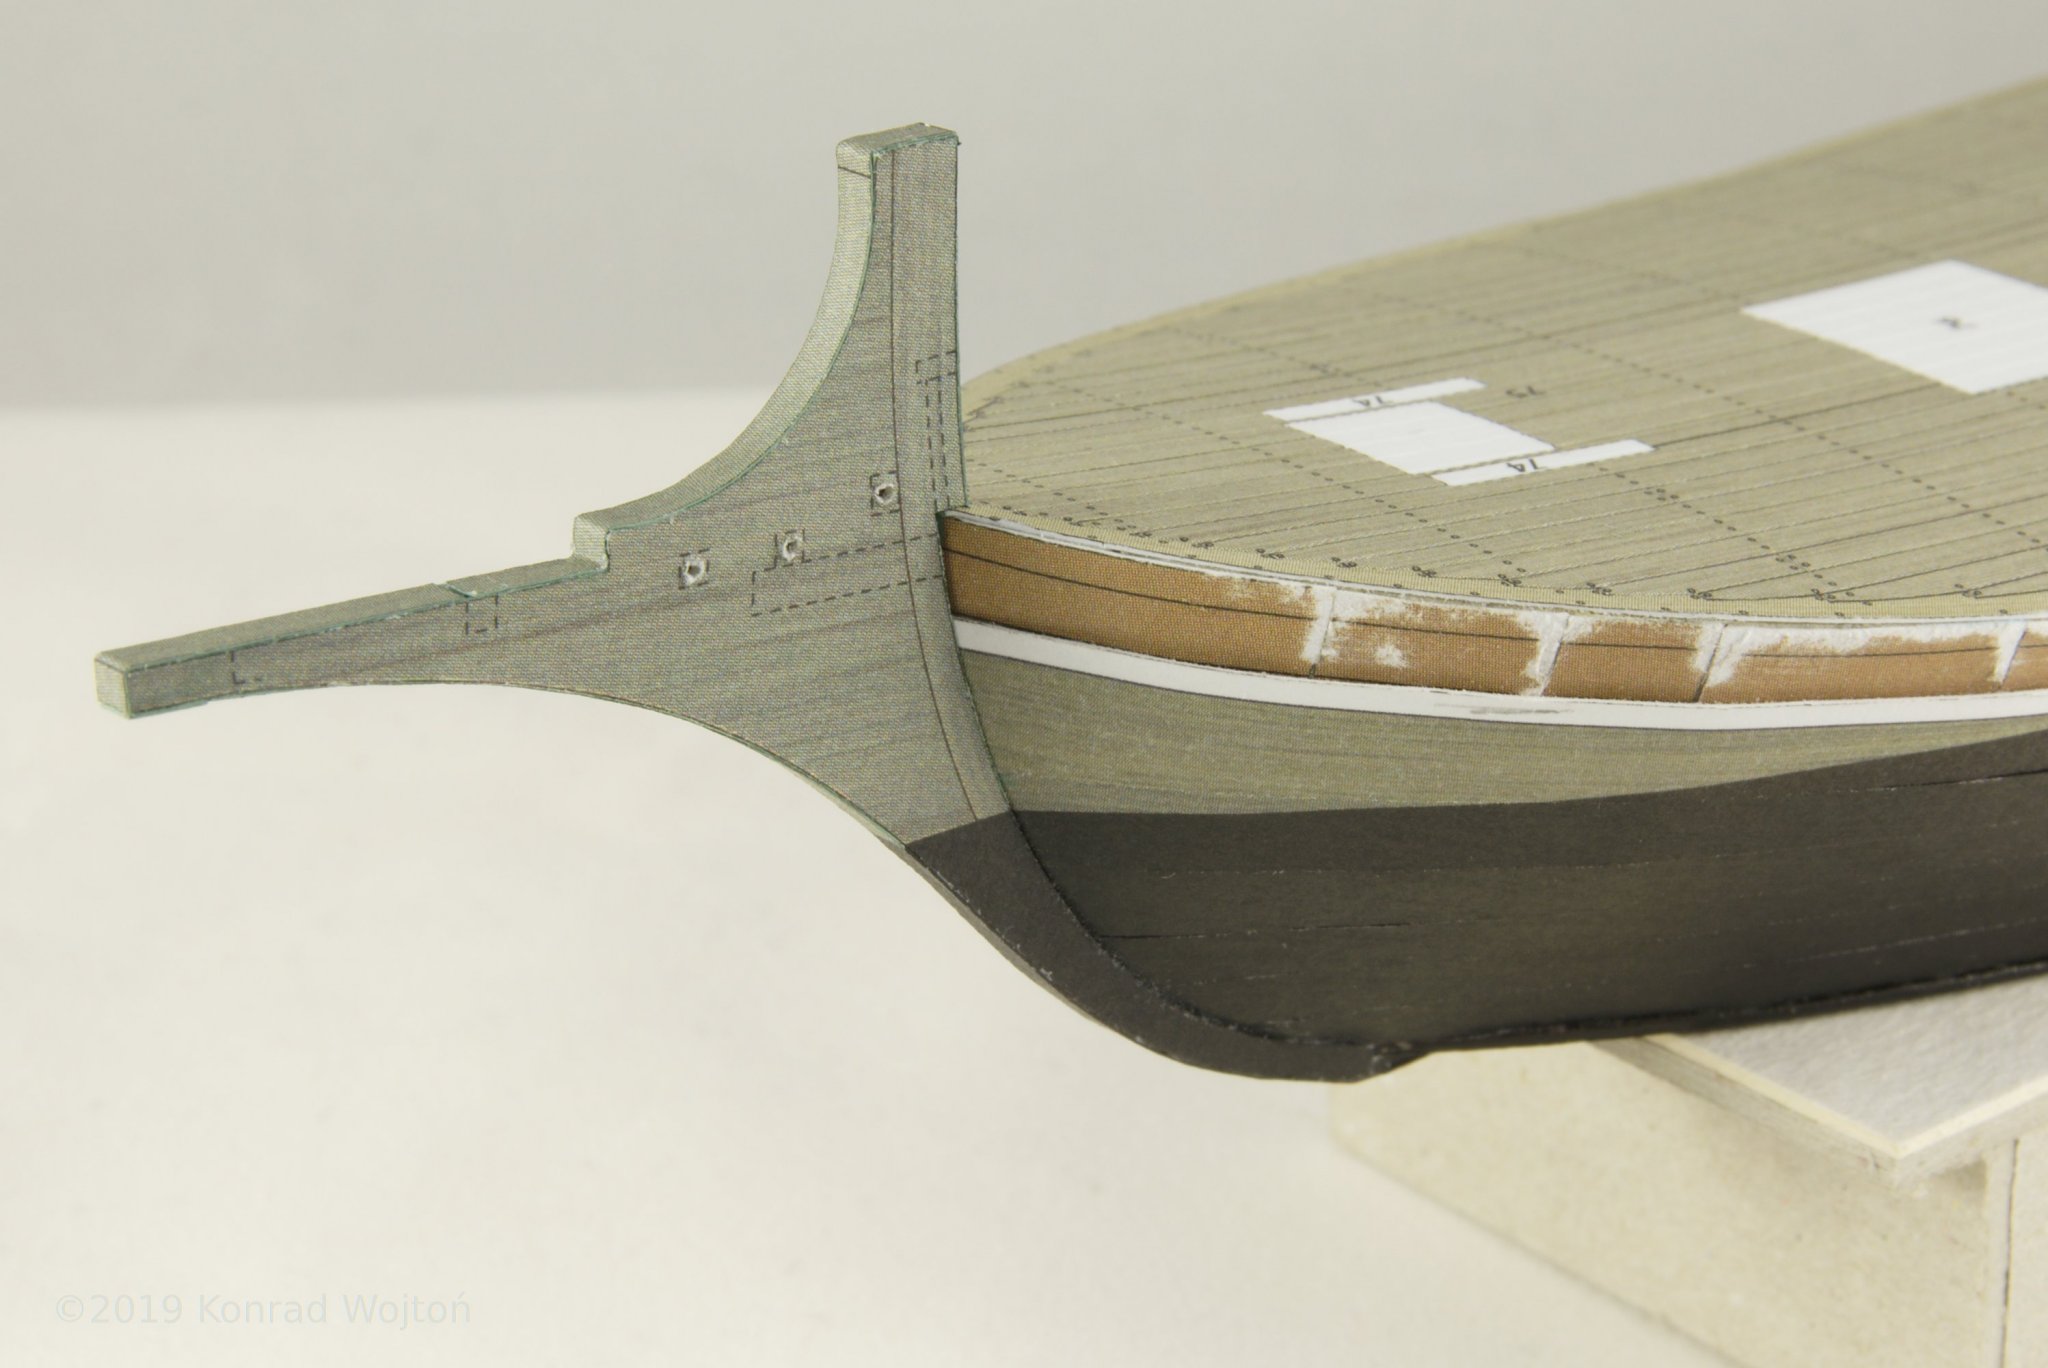
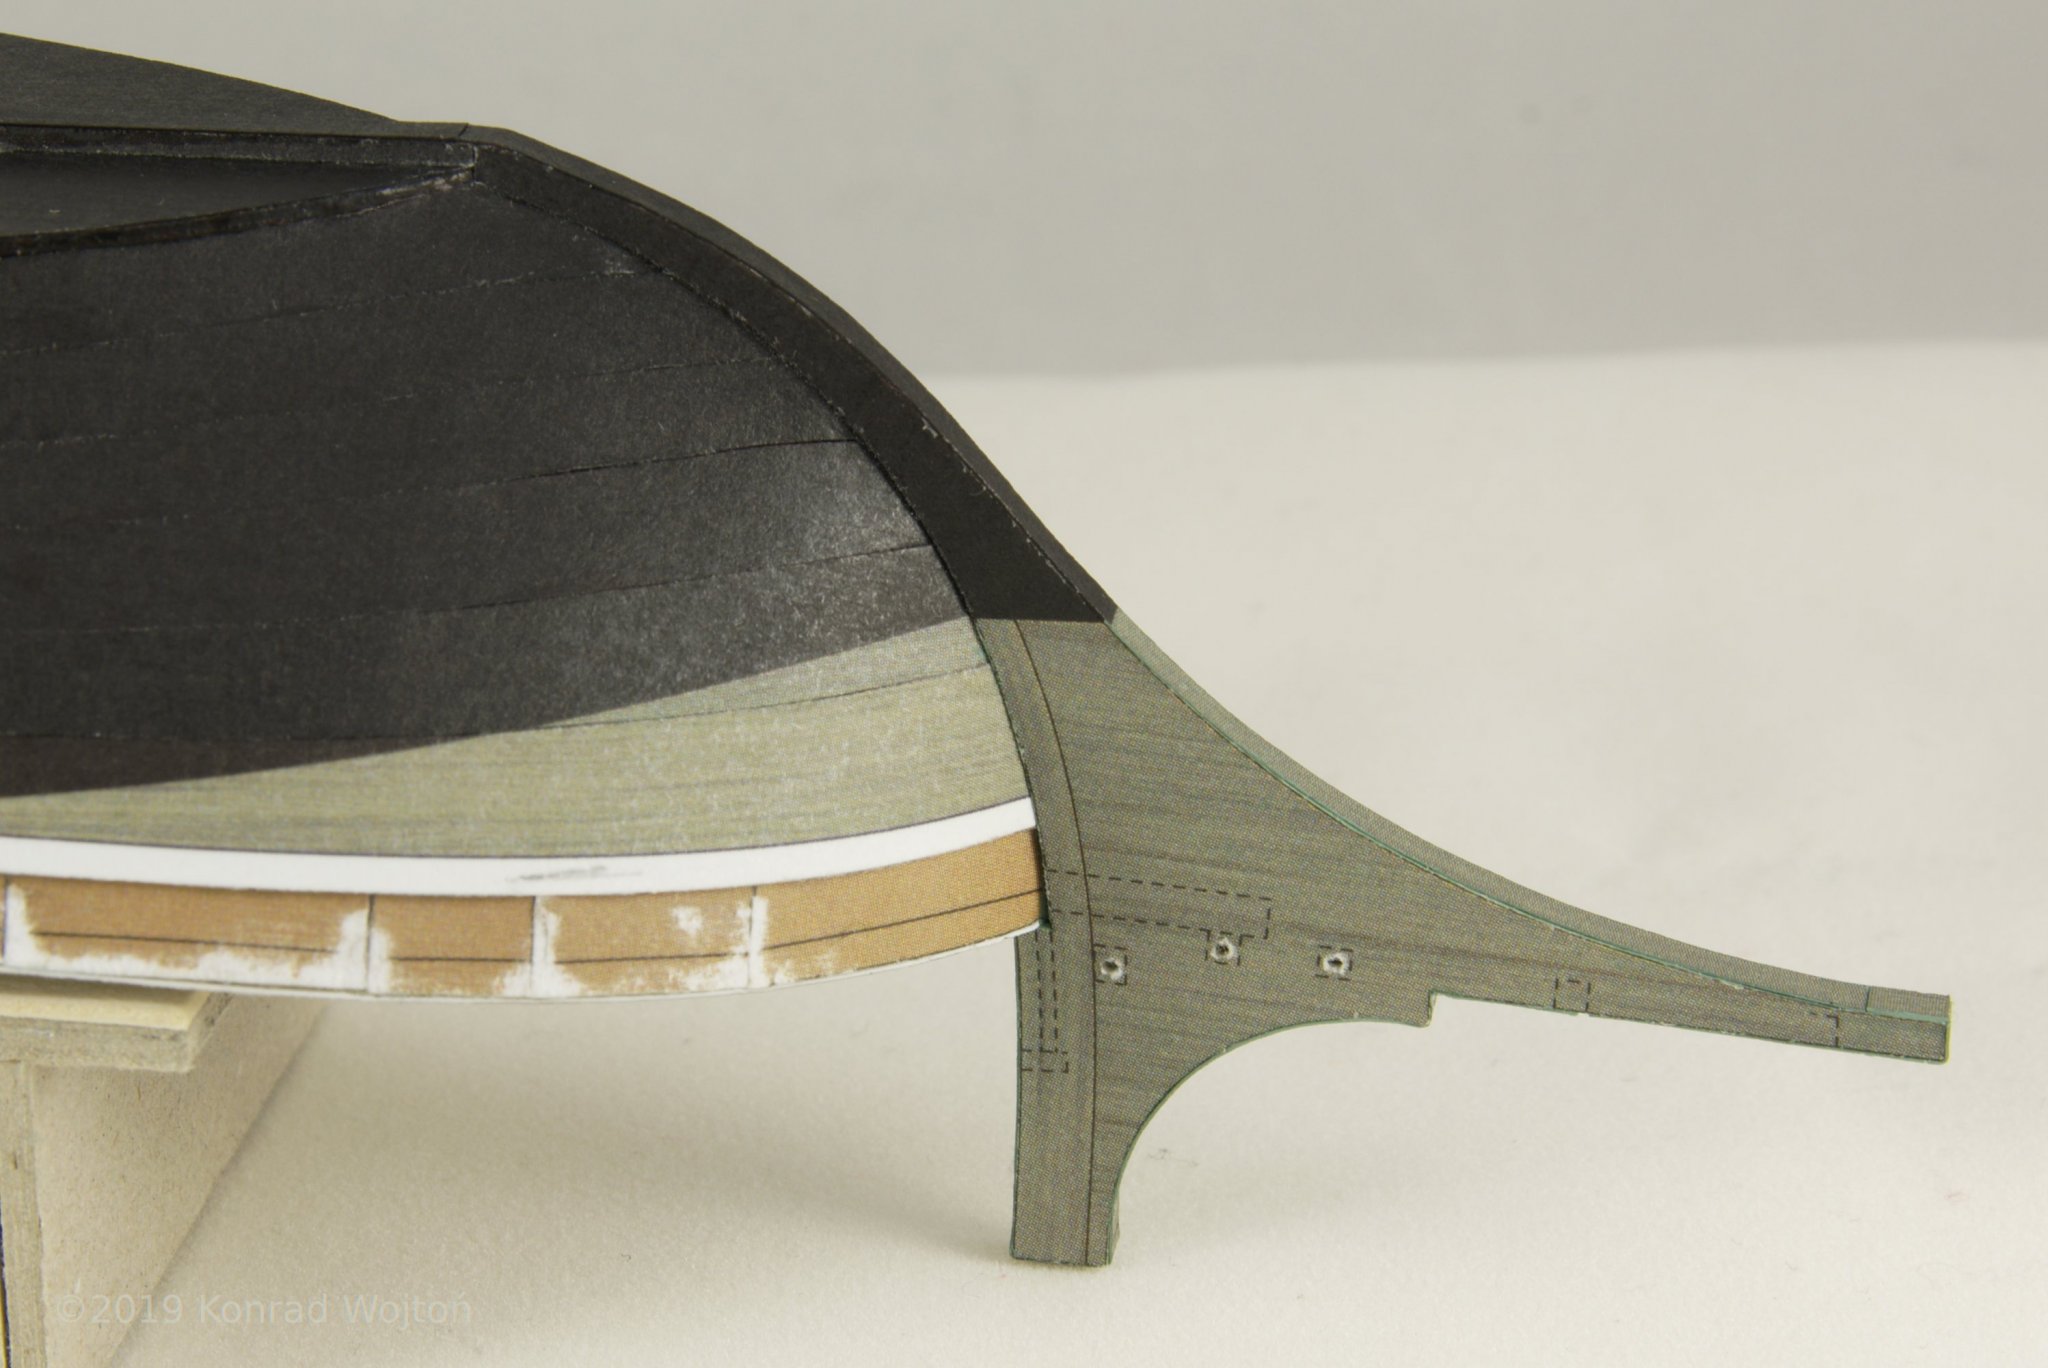
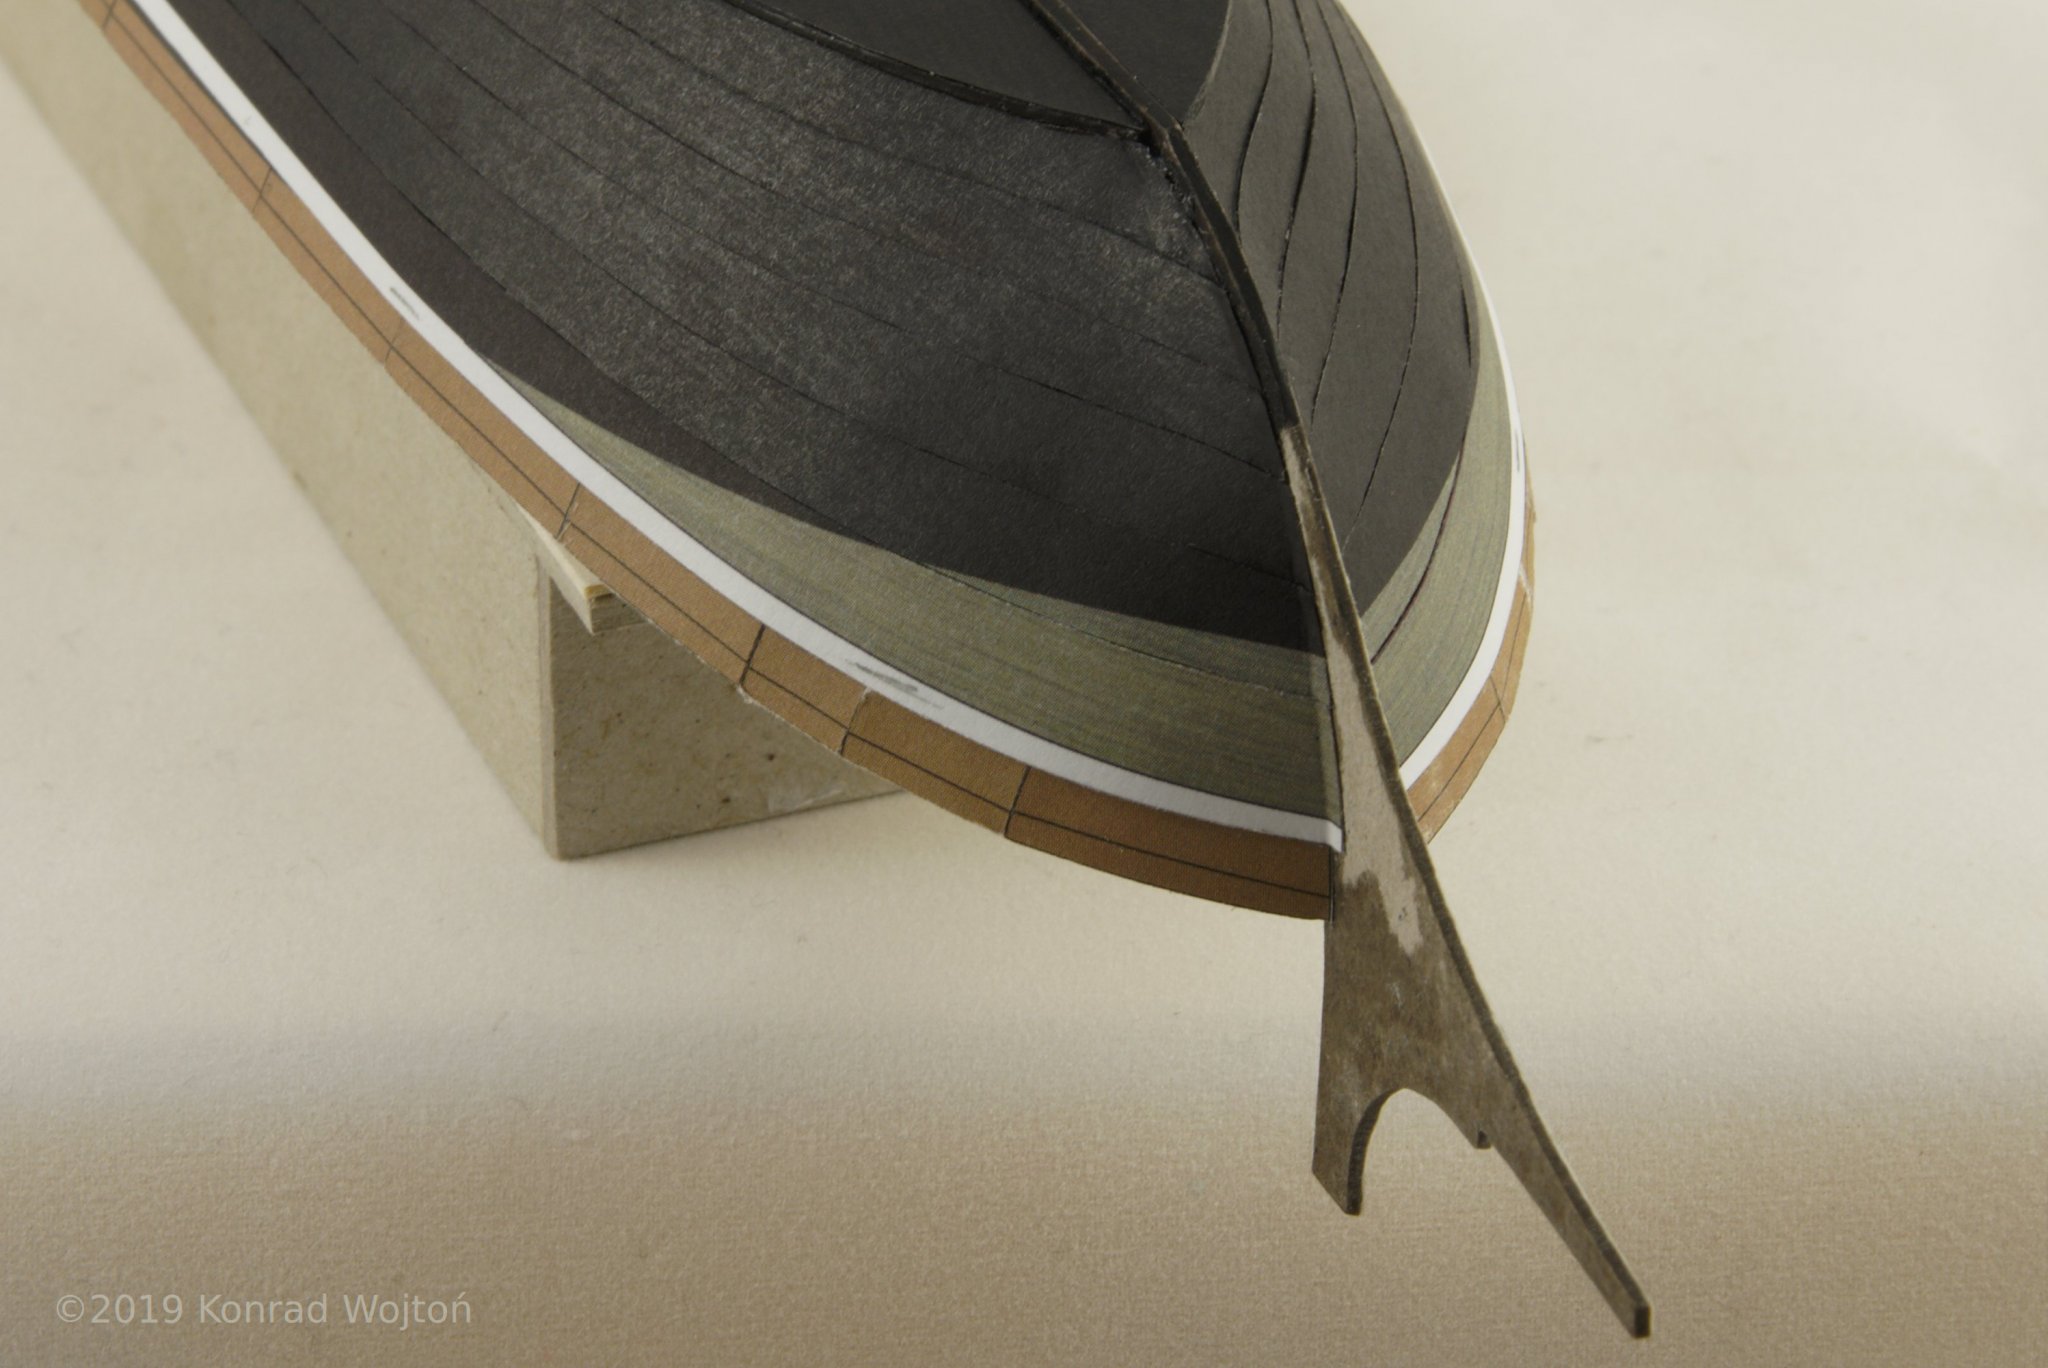
Next came stern construction with rudder fin


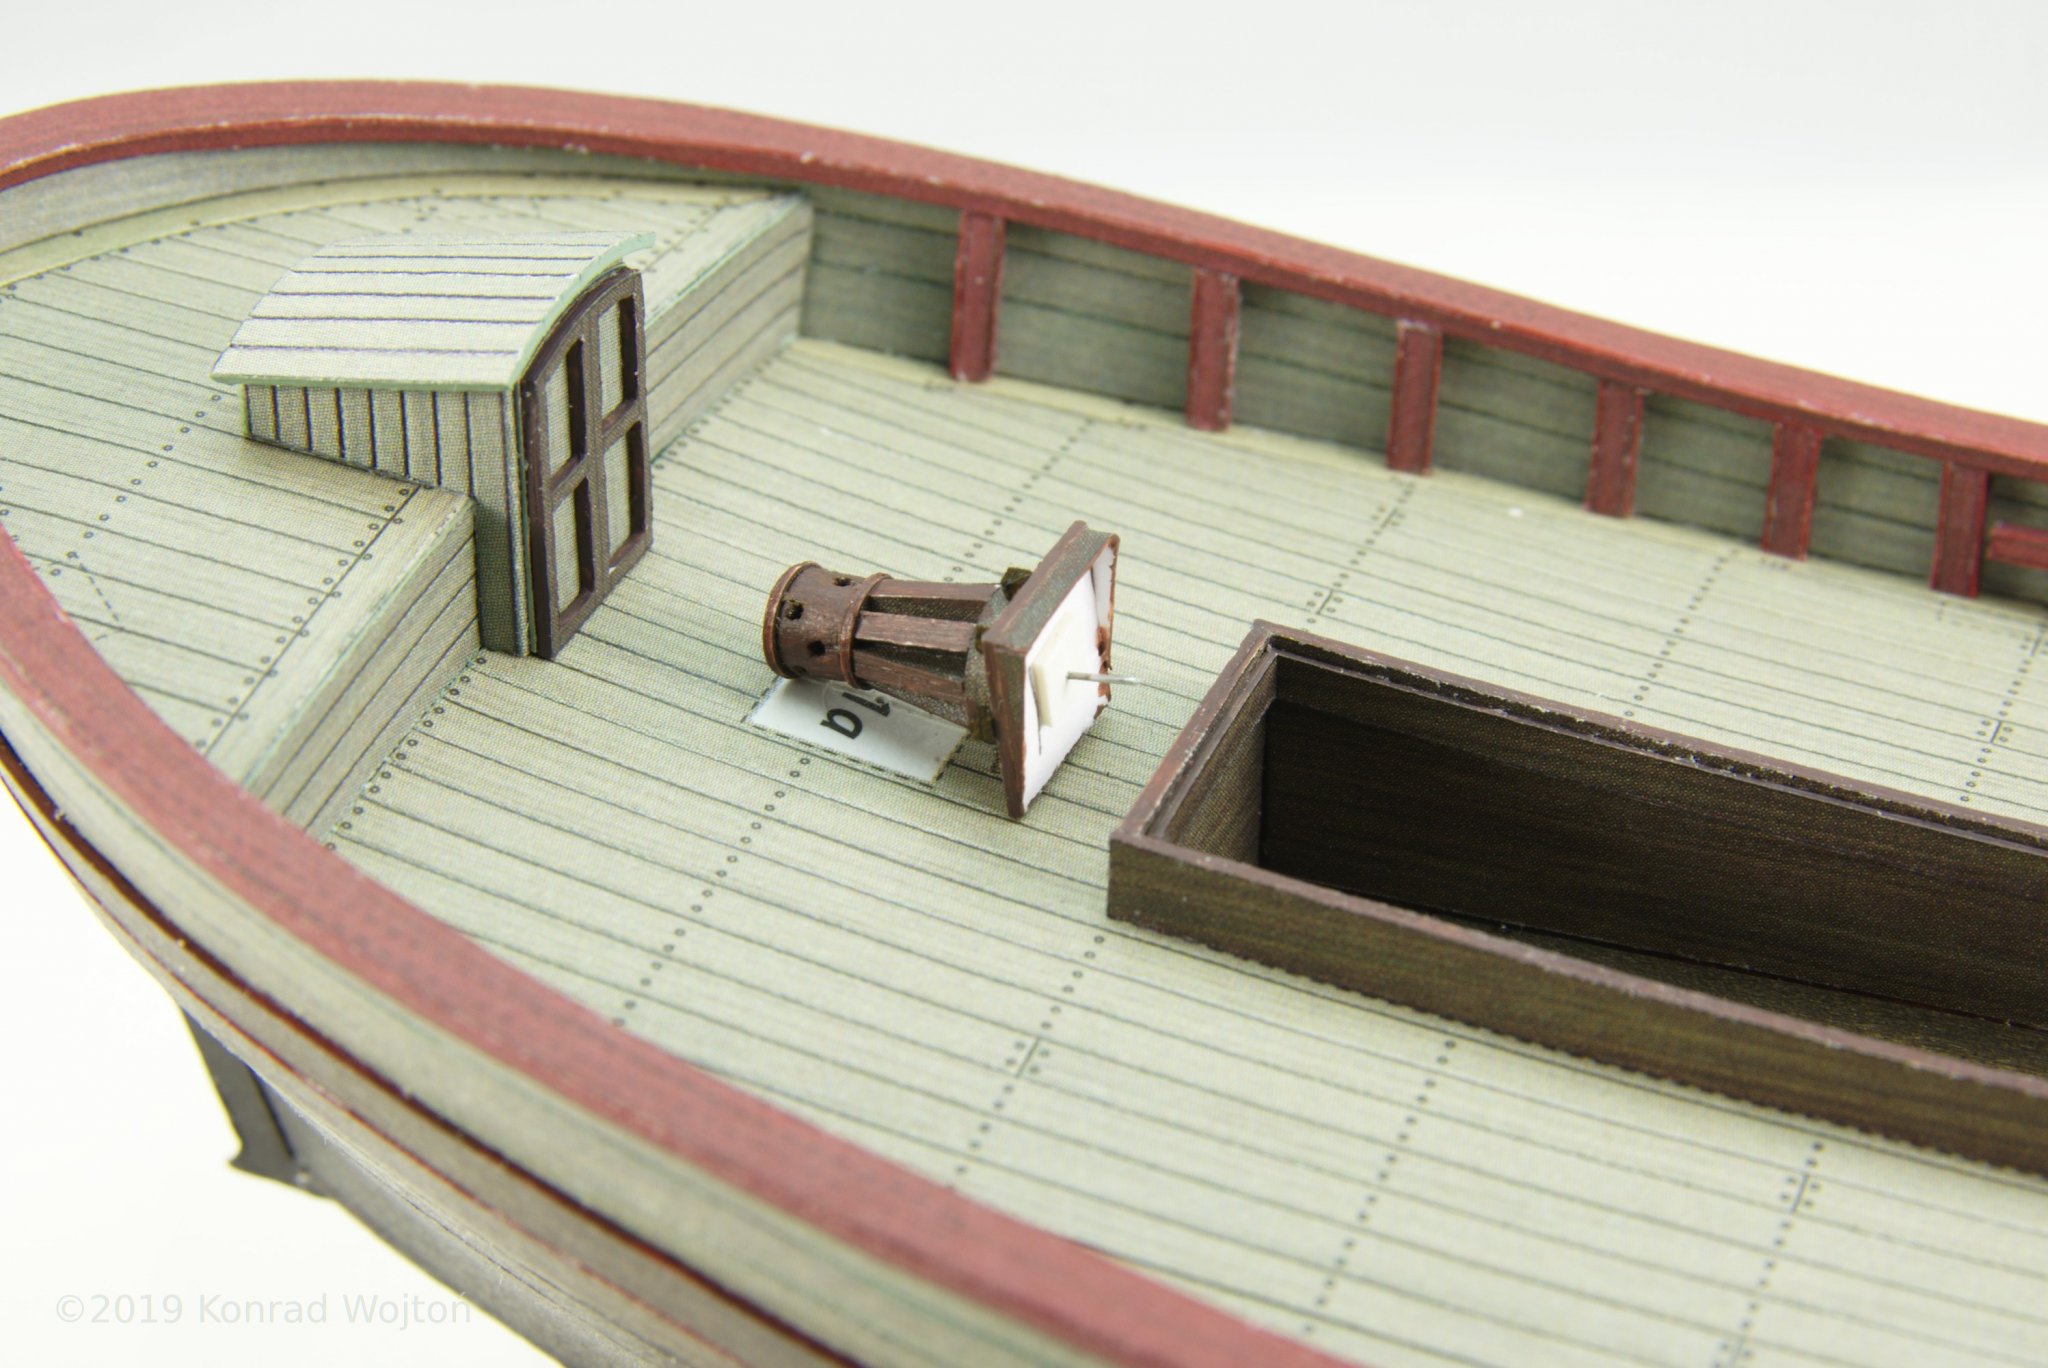
I have also finished mast and cargo hatch covers
Mast and cargo hatch covers are not yet glued in.
- GrandpaPhil, BETAQDAVE, druxey and 1 other
-
4
-
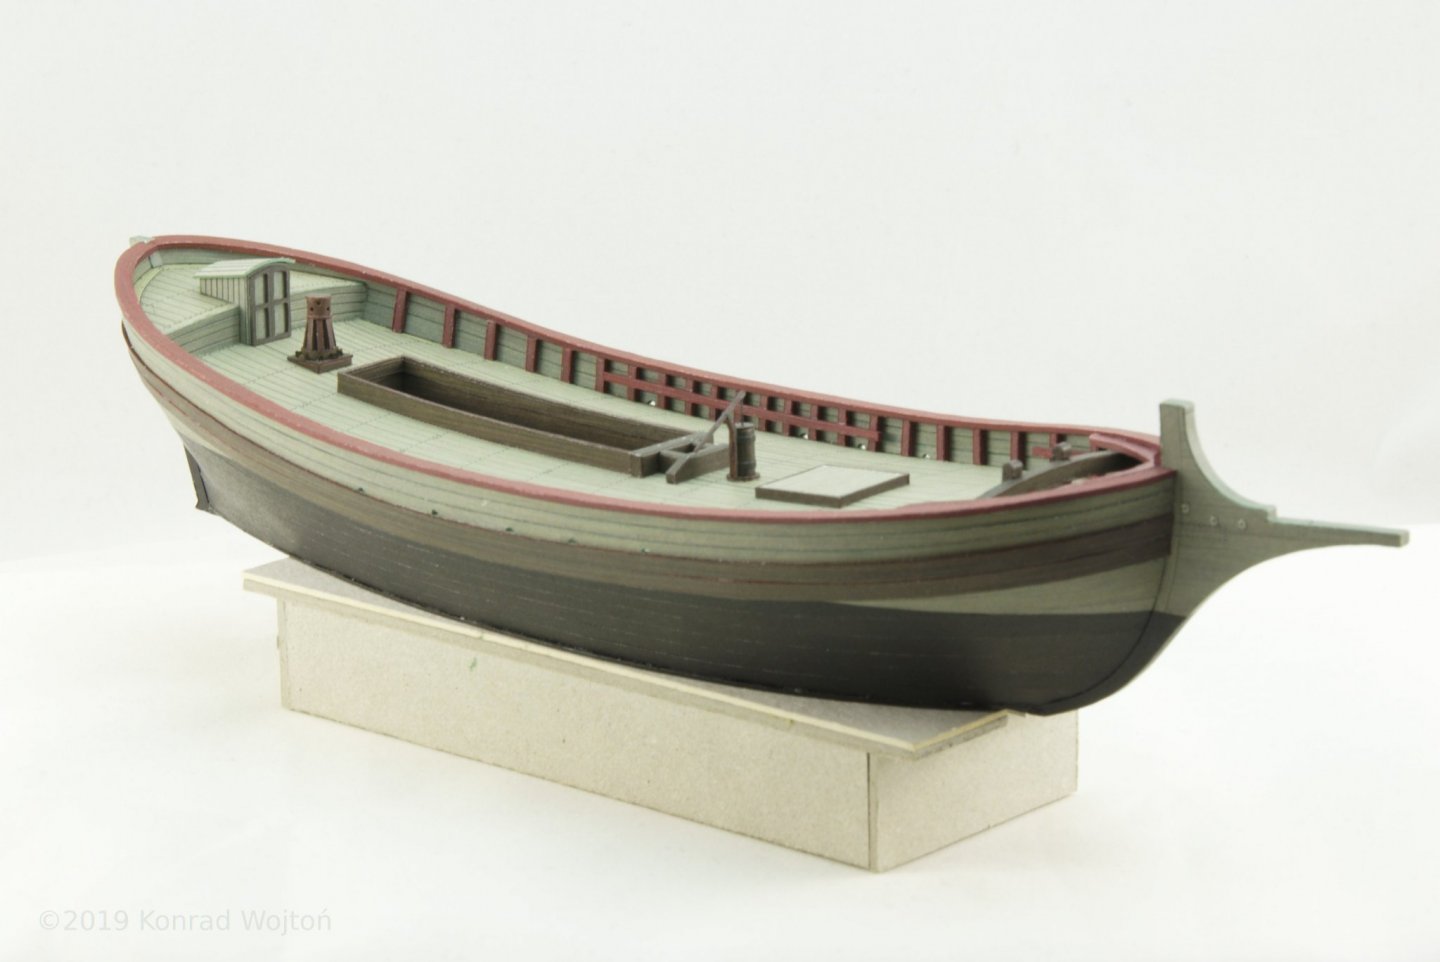
Time for another small update.
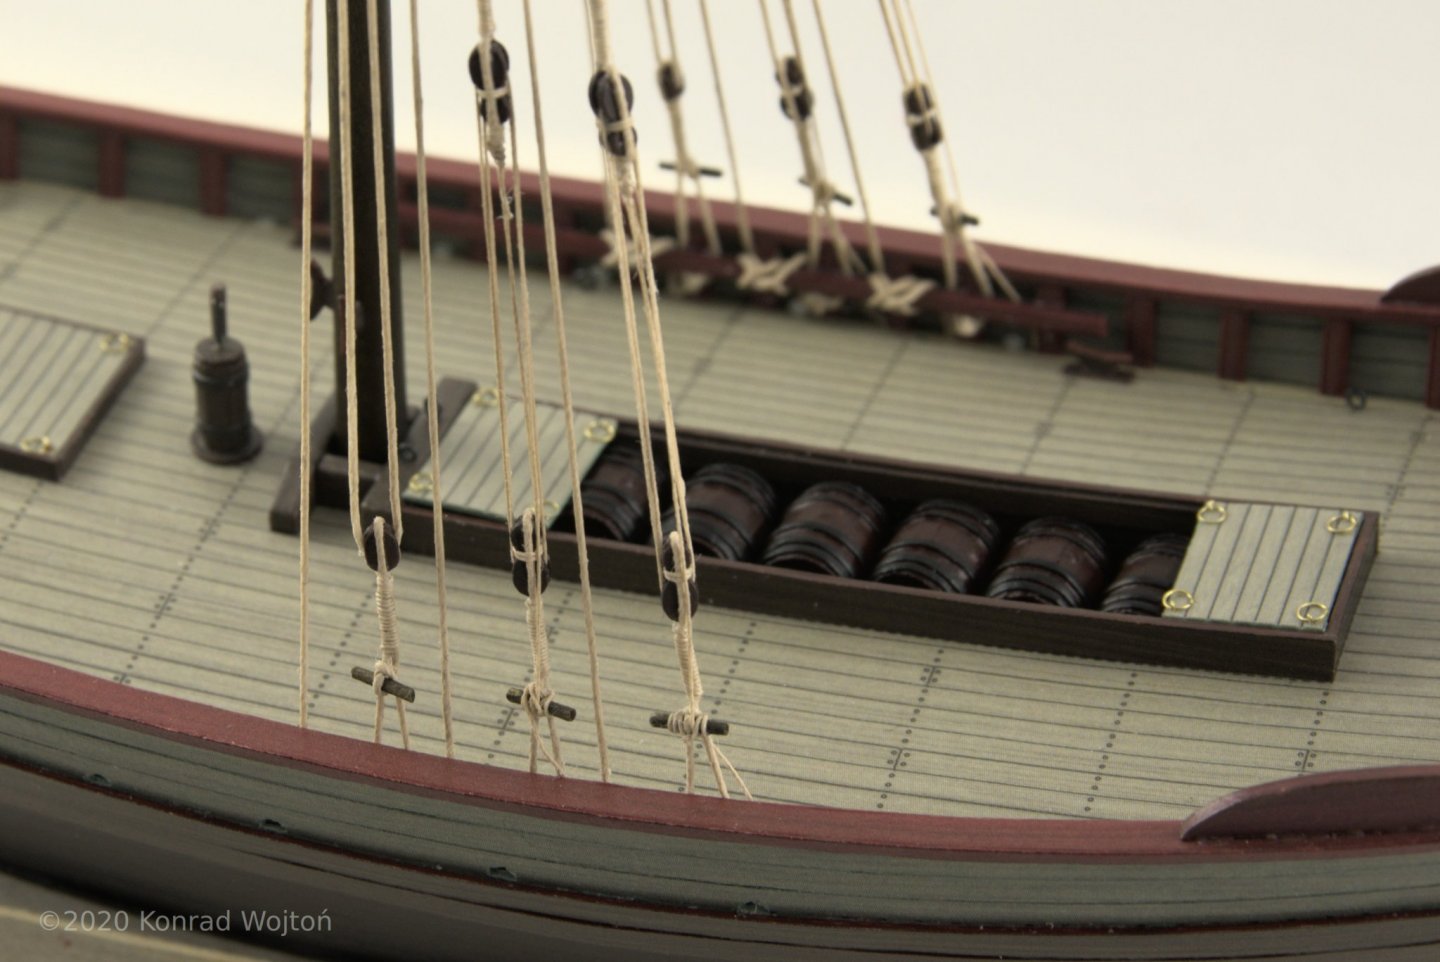
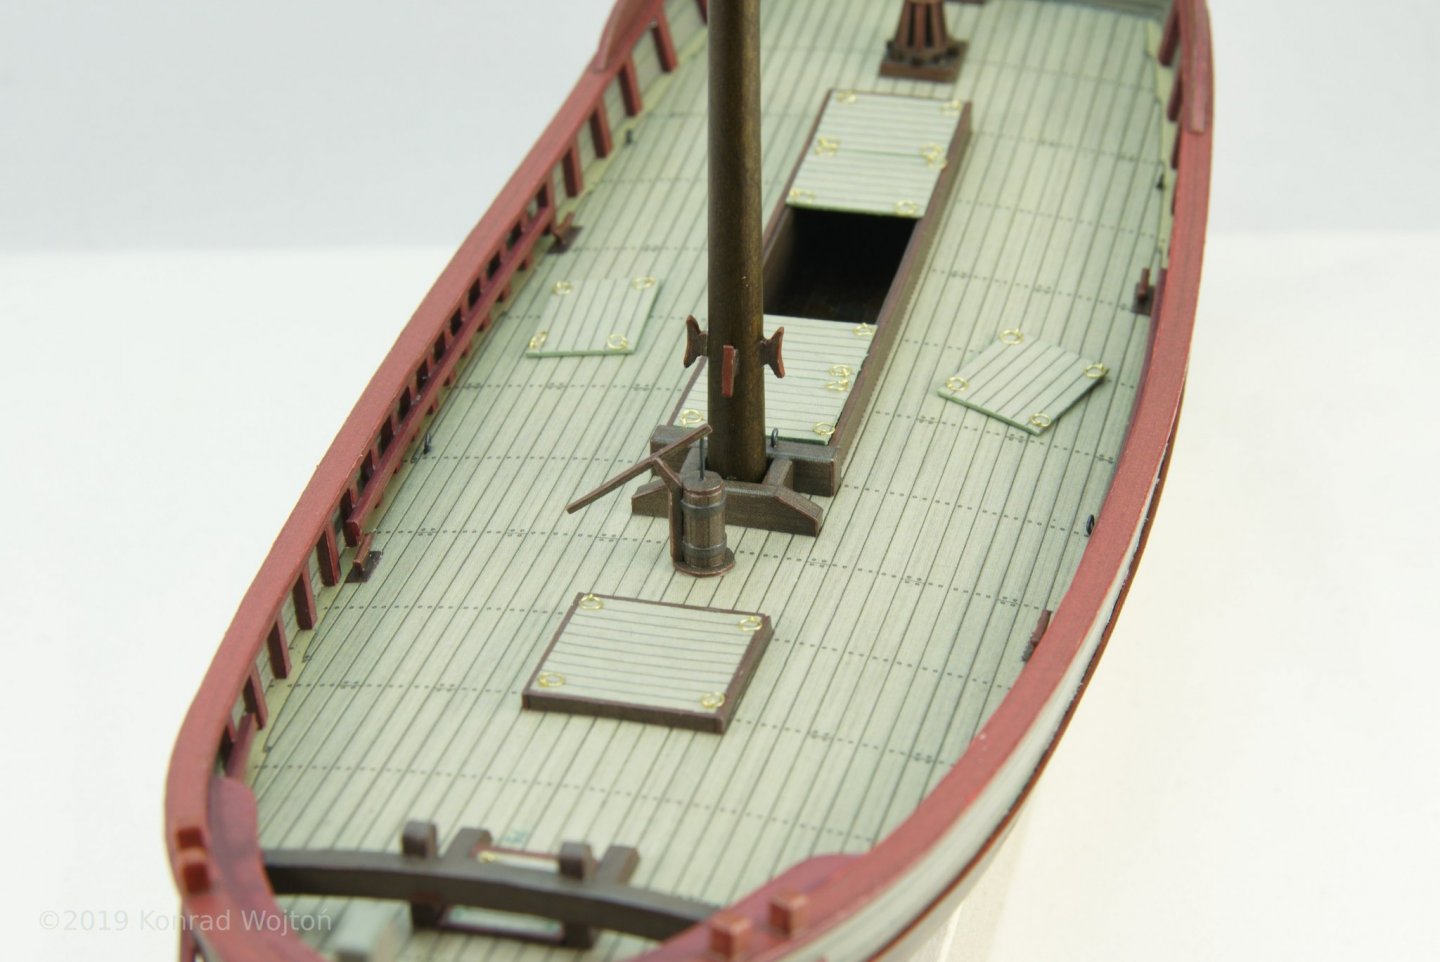
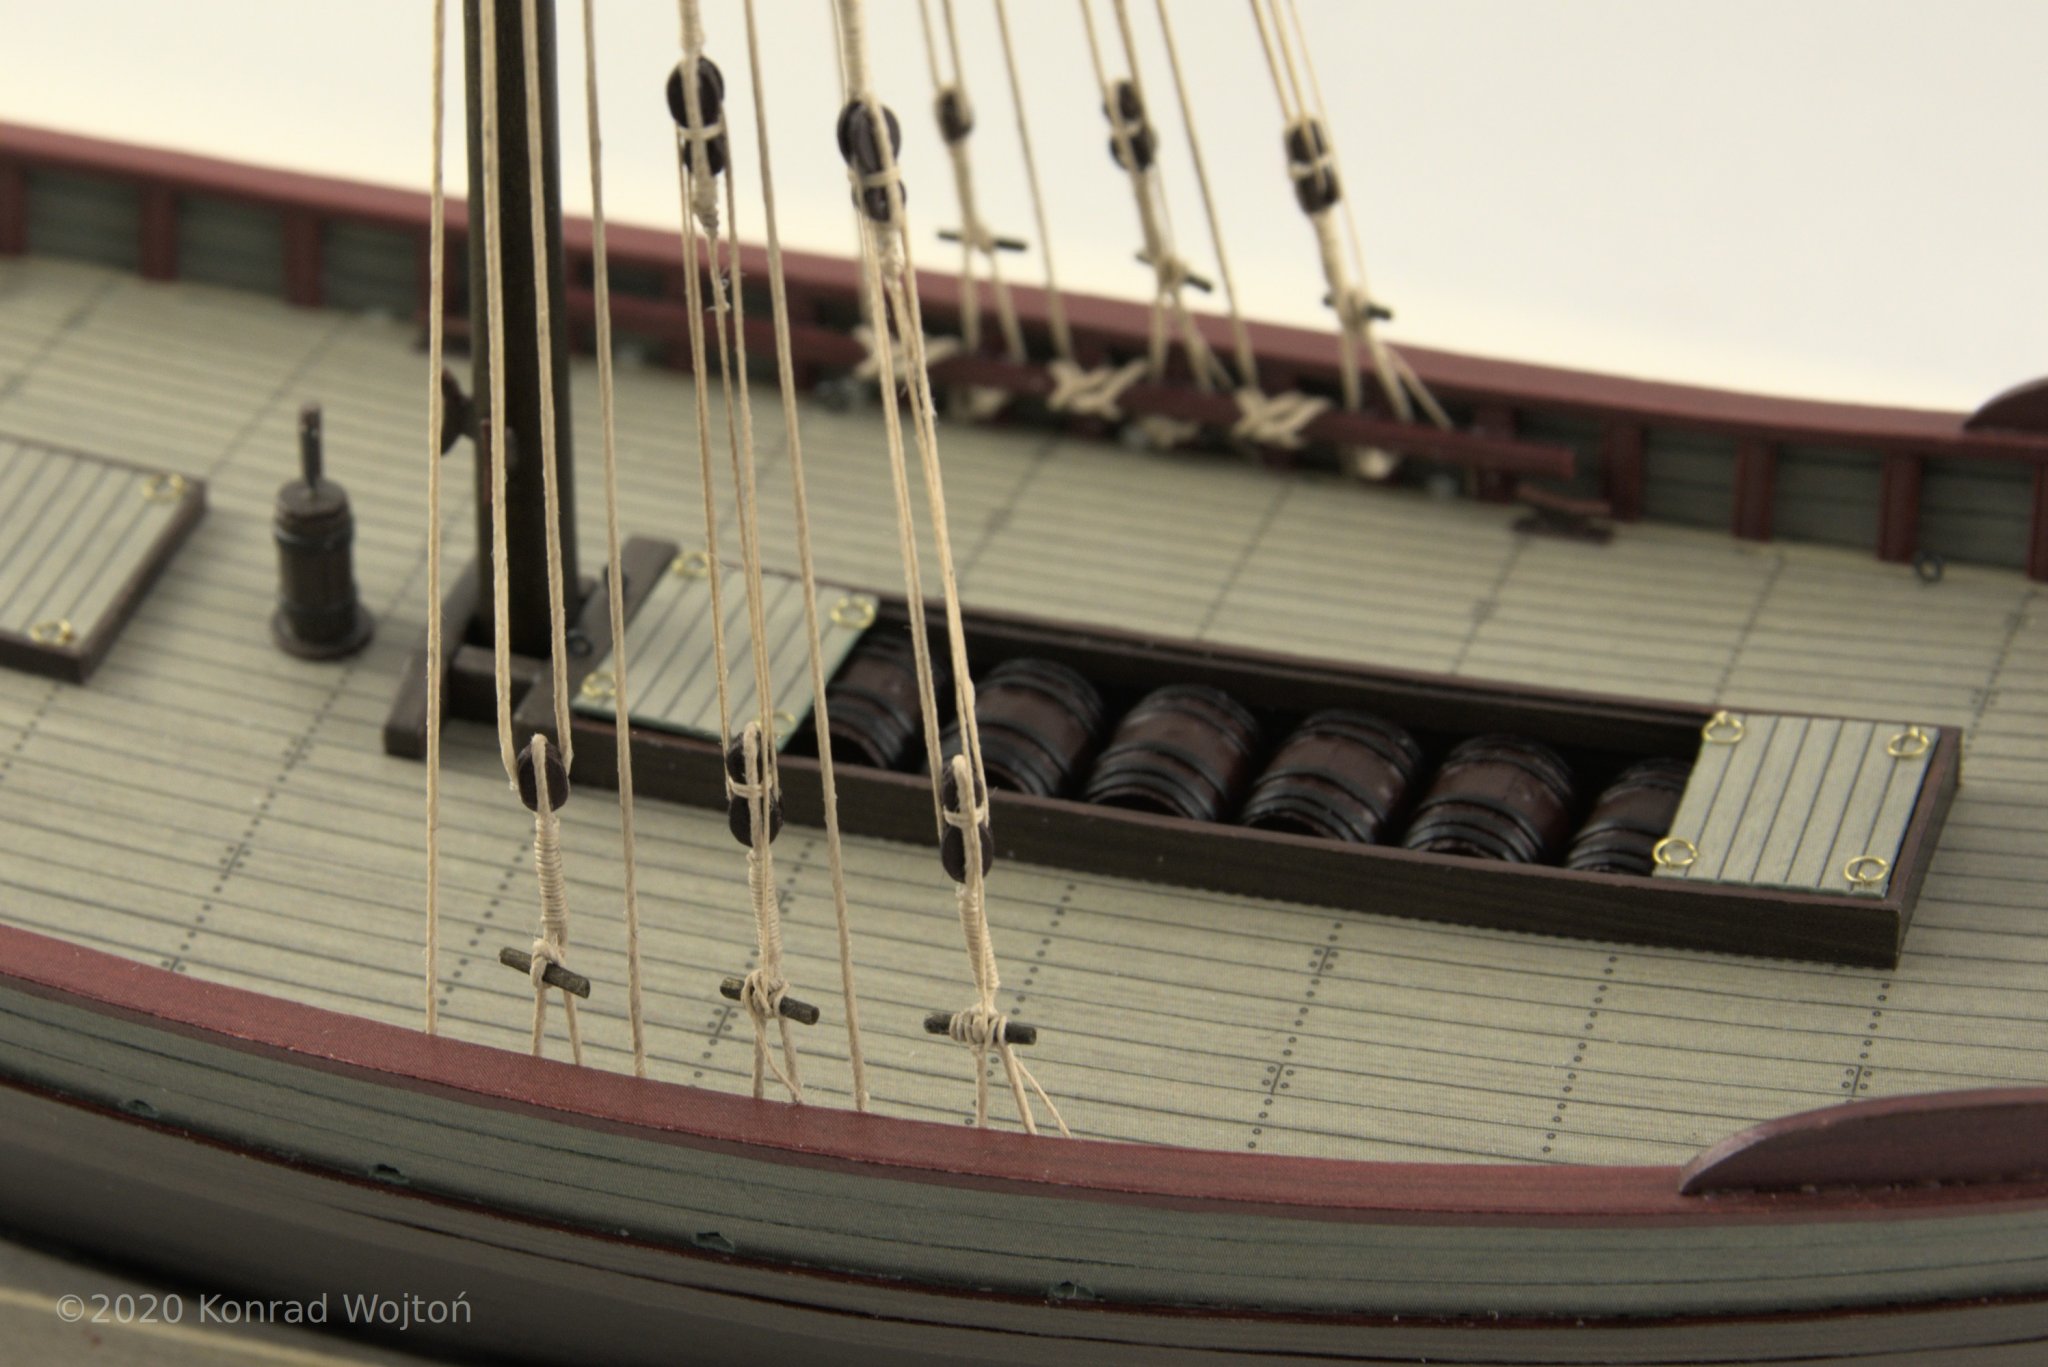
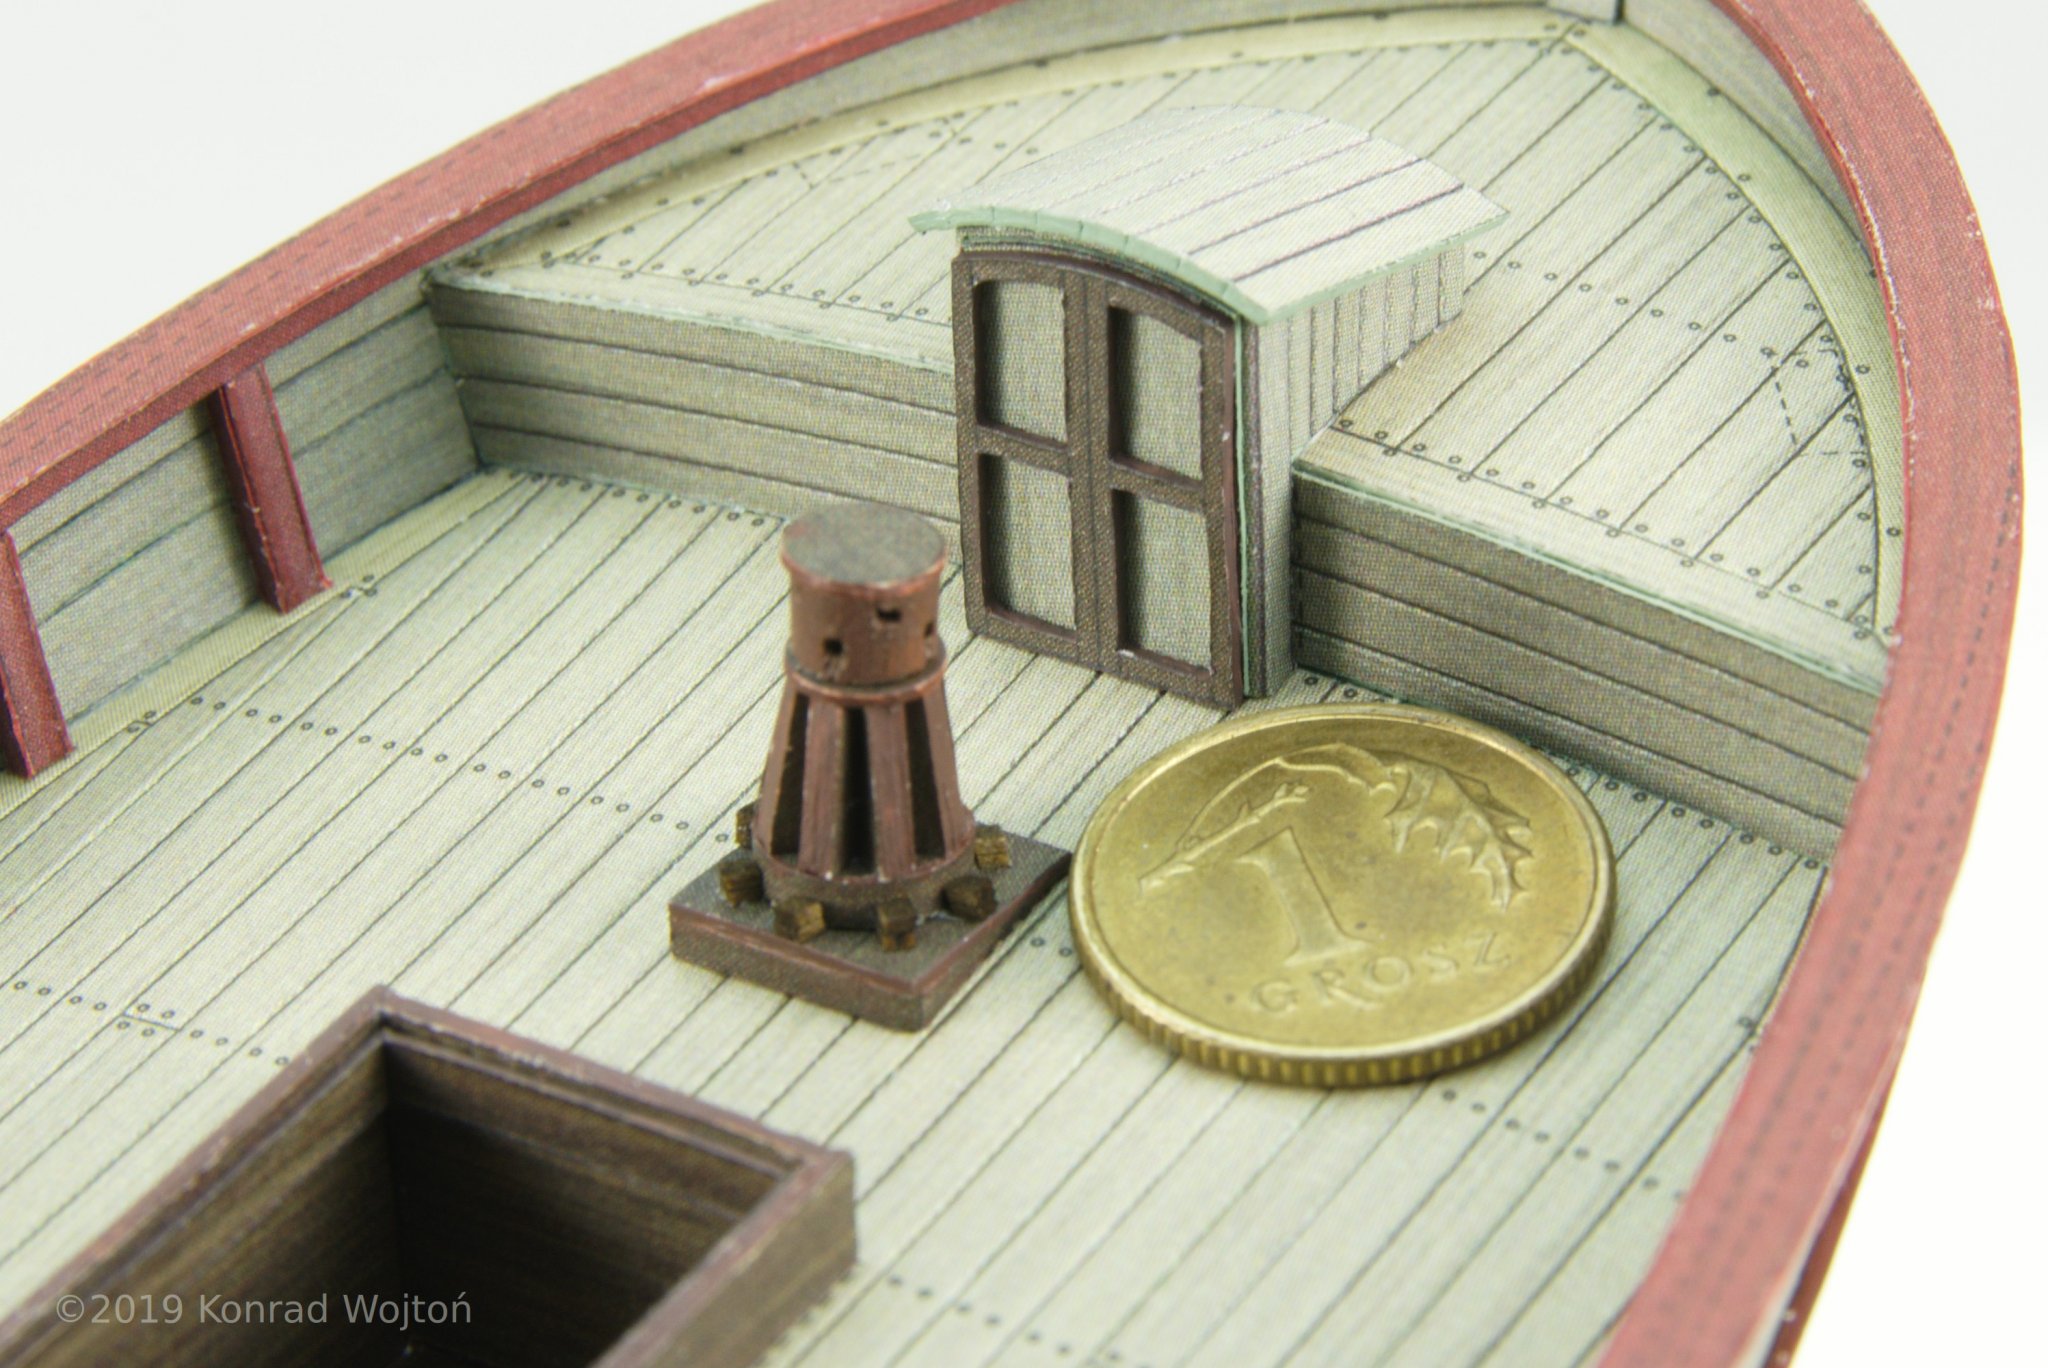
I've managed to make some detailing work on the deck. I've also decided to replace floor in cargo hold - I've messed a bit during gluing previous version. New one is made of pear veneer stained as dark oak.
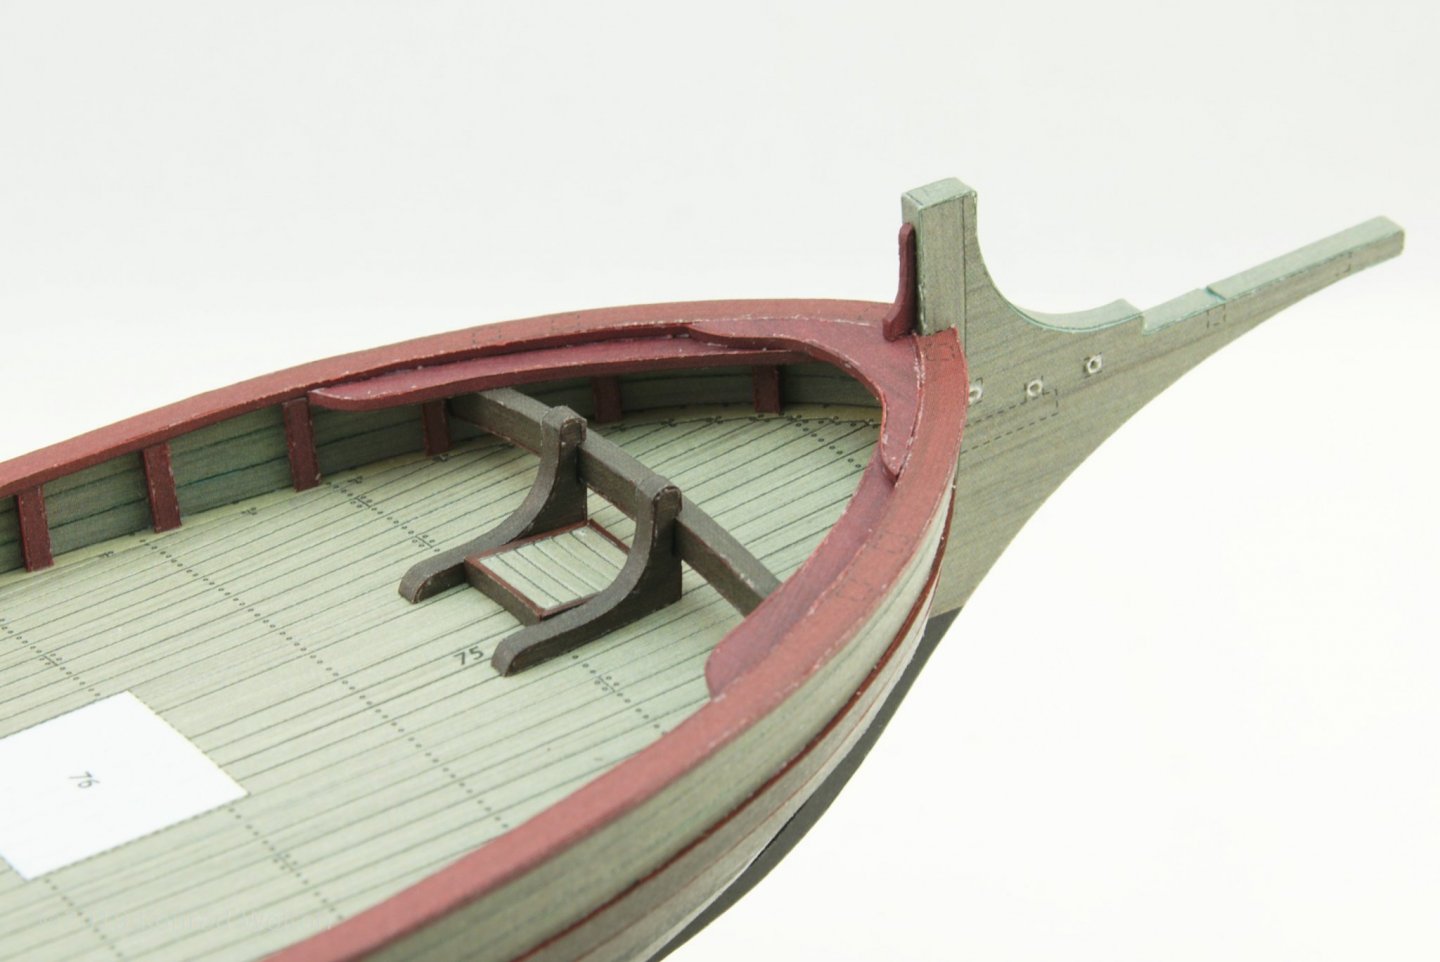
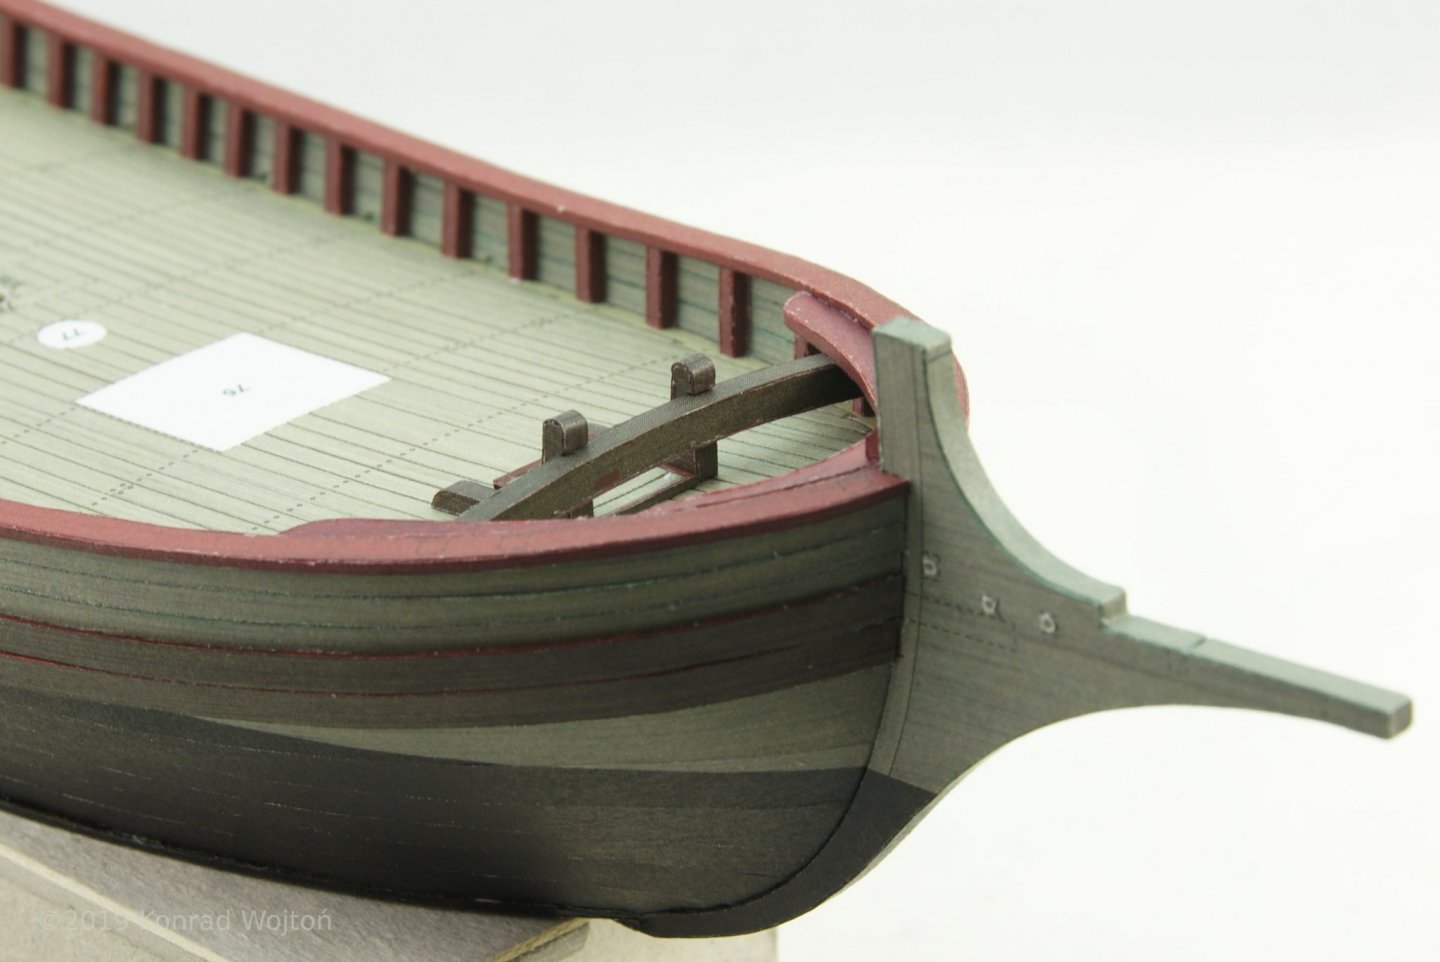
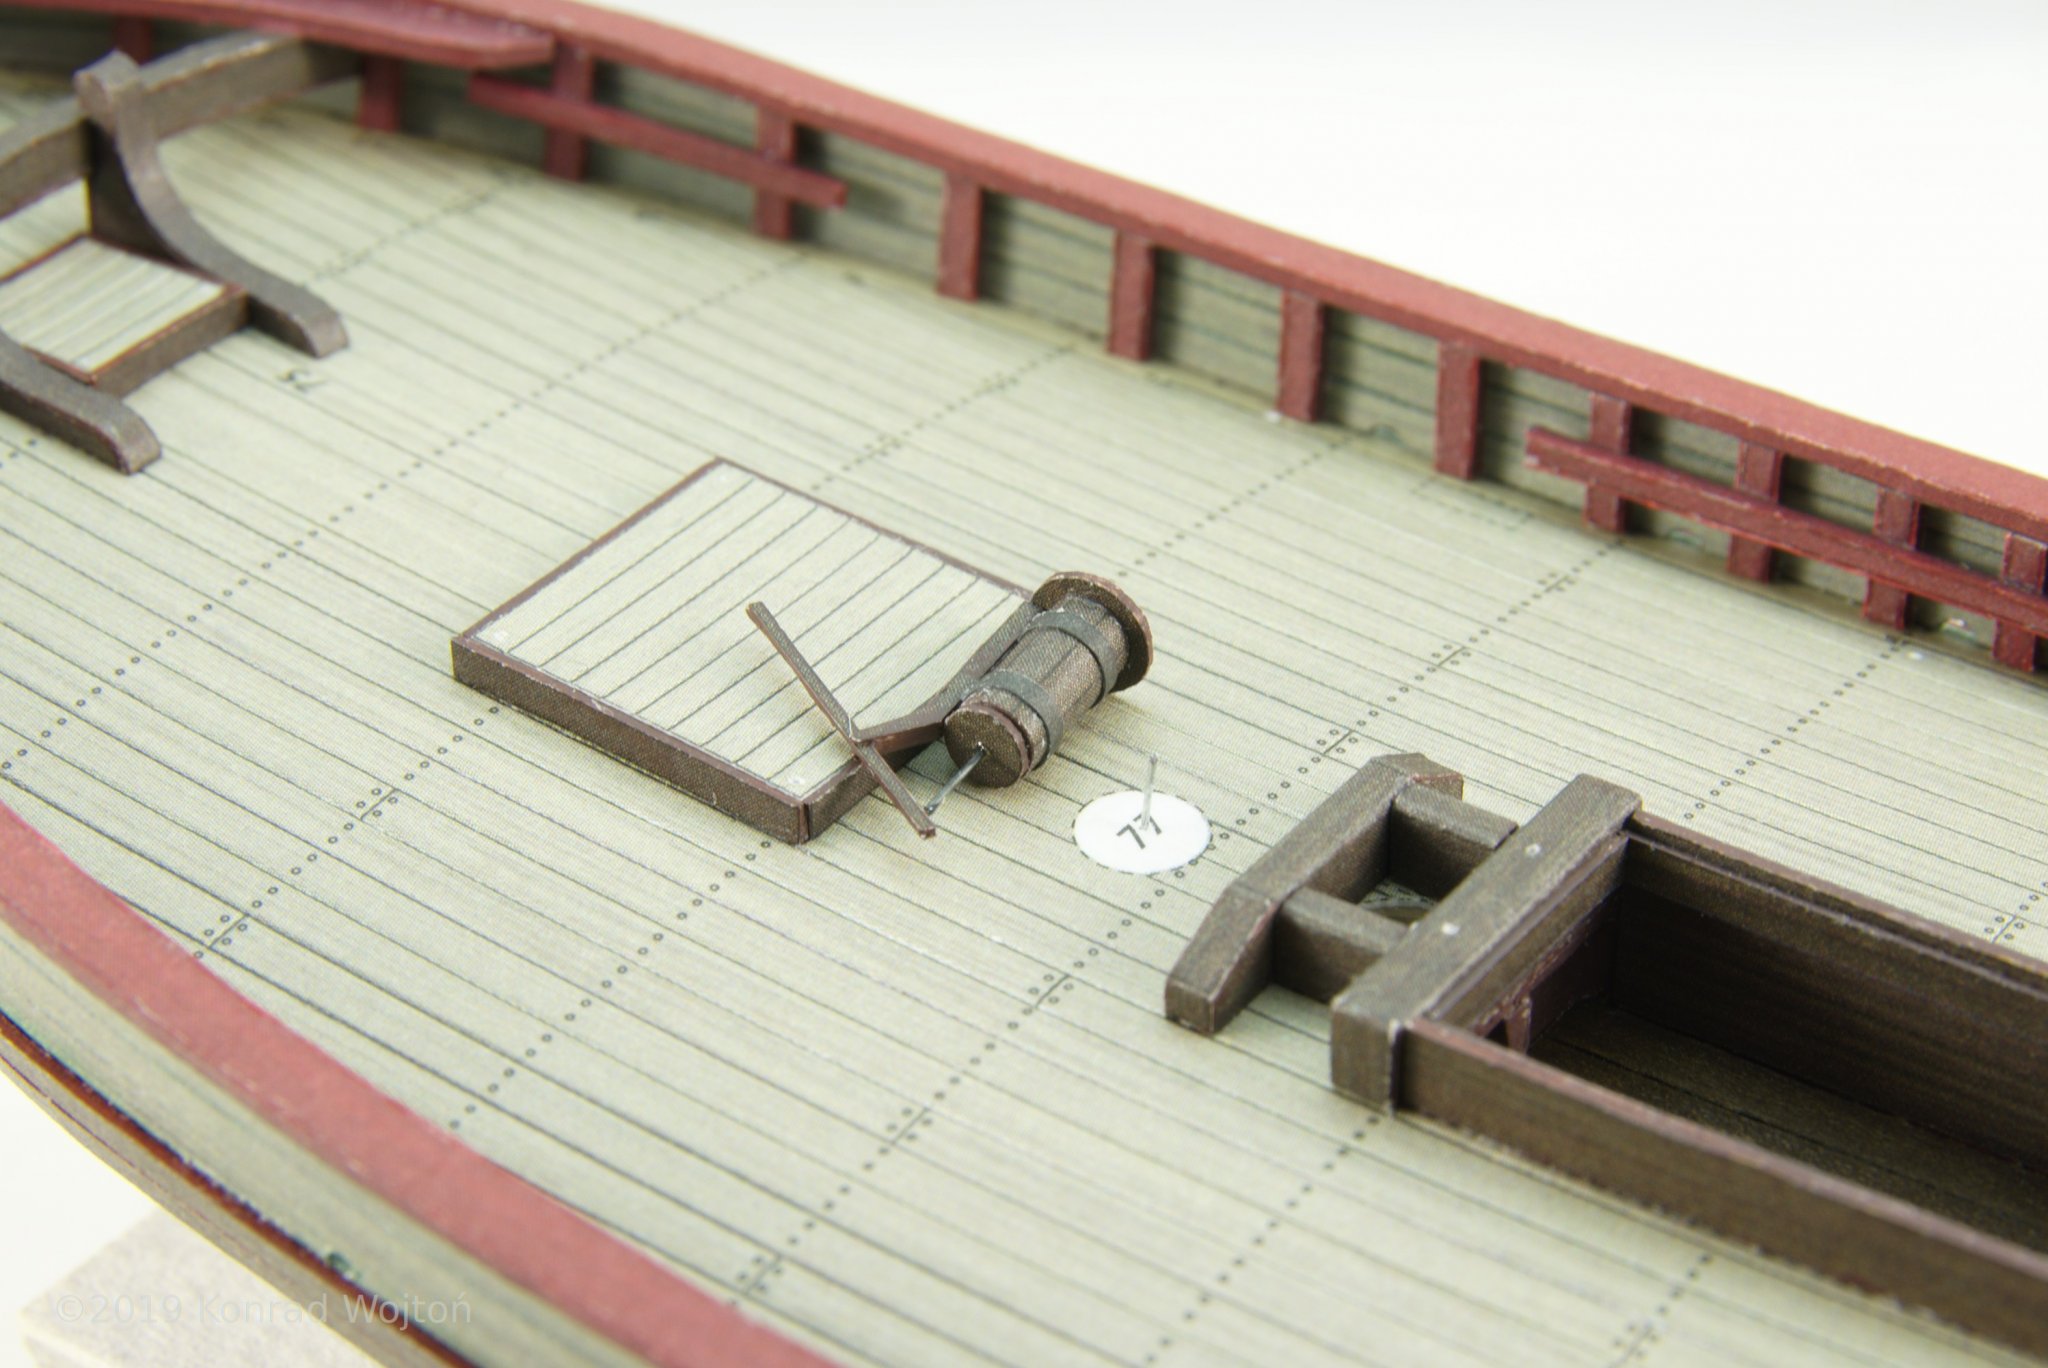
Capstan and companion. I am not going to fit capstan bars into capstan itself, but I wonder where it could be stowed in reality, near sides or under the deck.

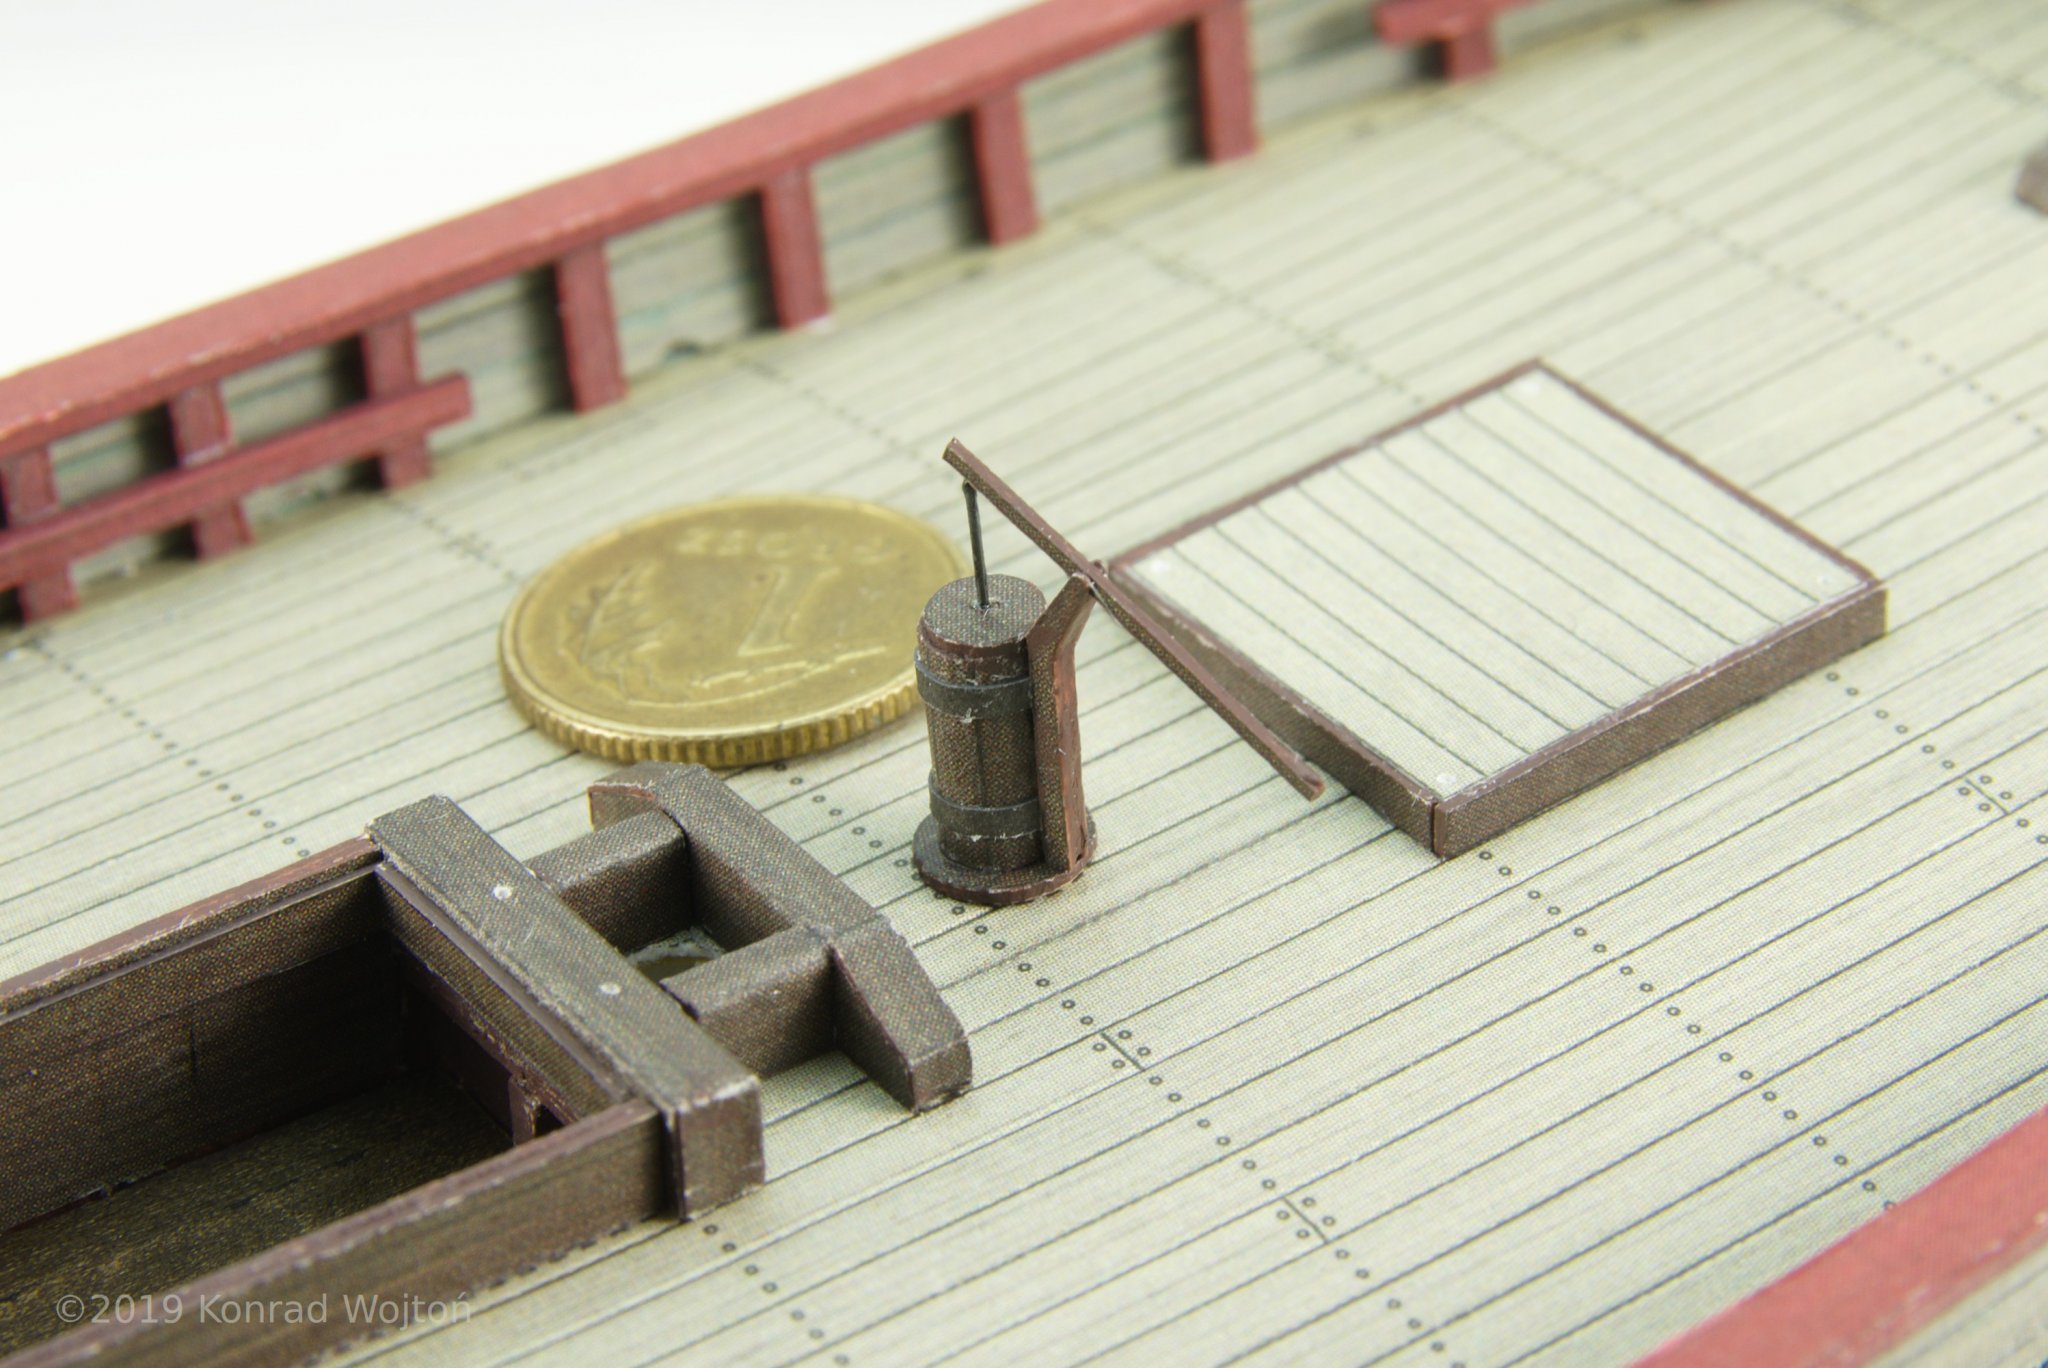
Pump:

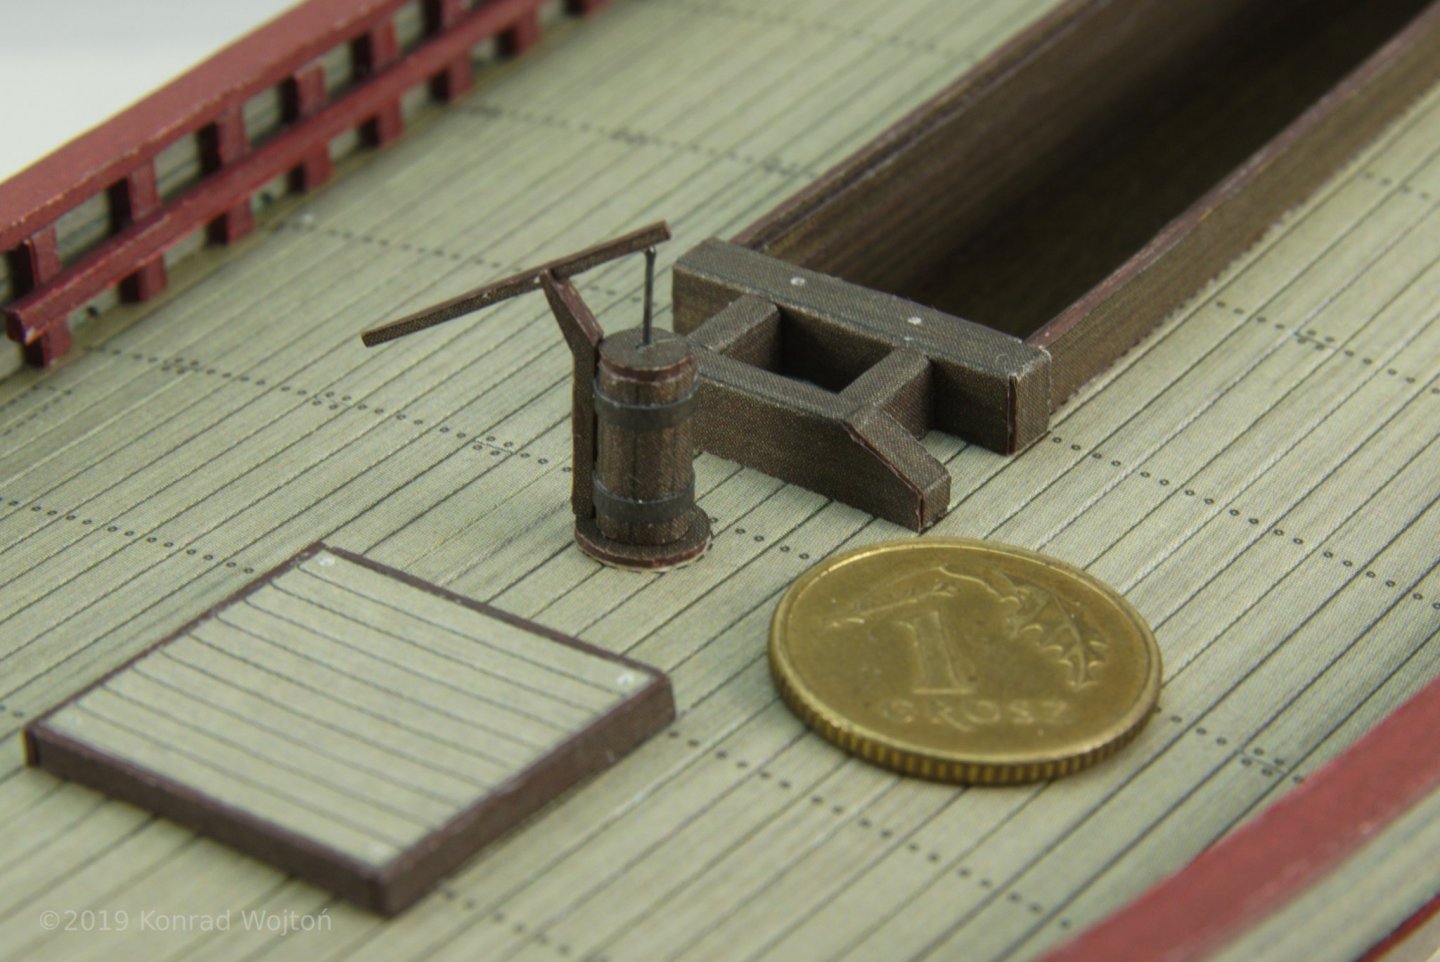
Capstan and pump are not yet glued in so I can remove and not damage them during future works.

And here how it looks now.
-
Hello, some time has passed since last update.
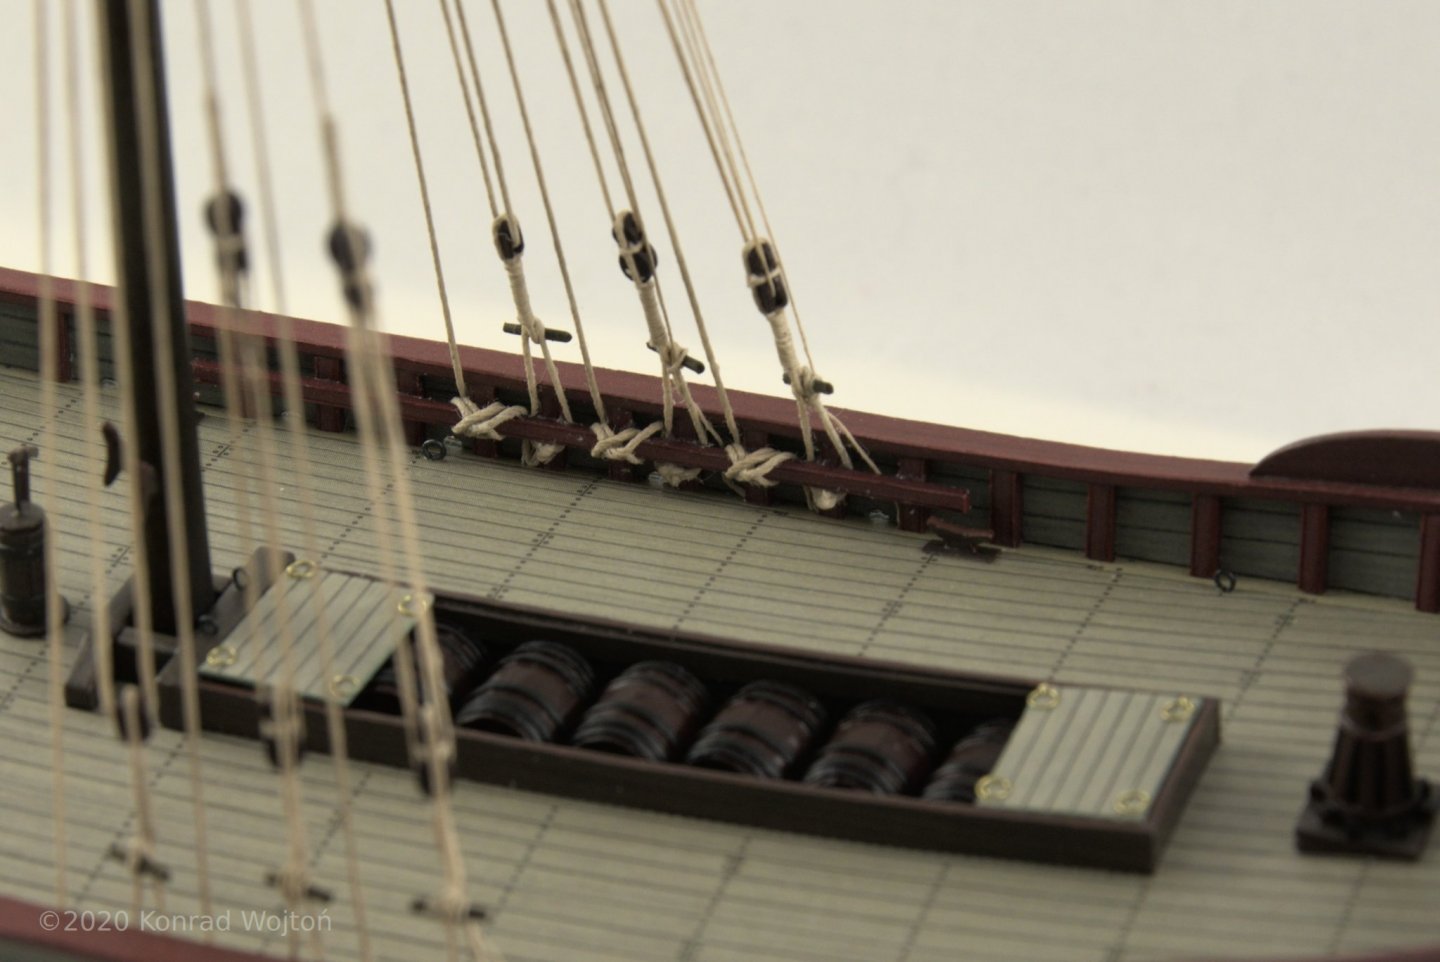
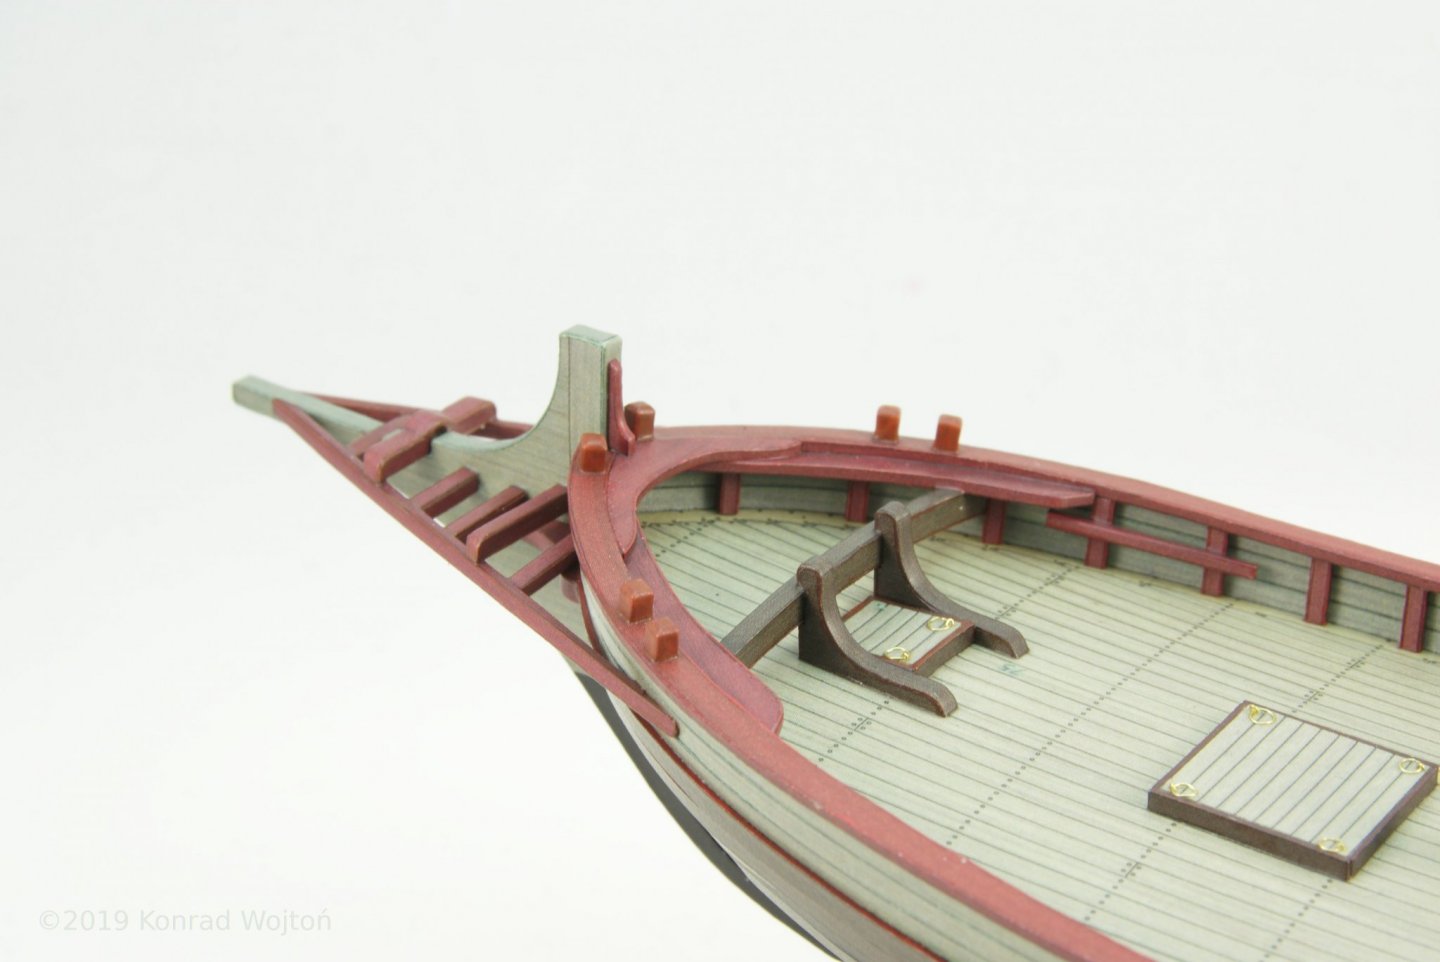
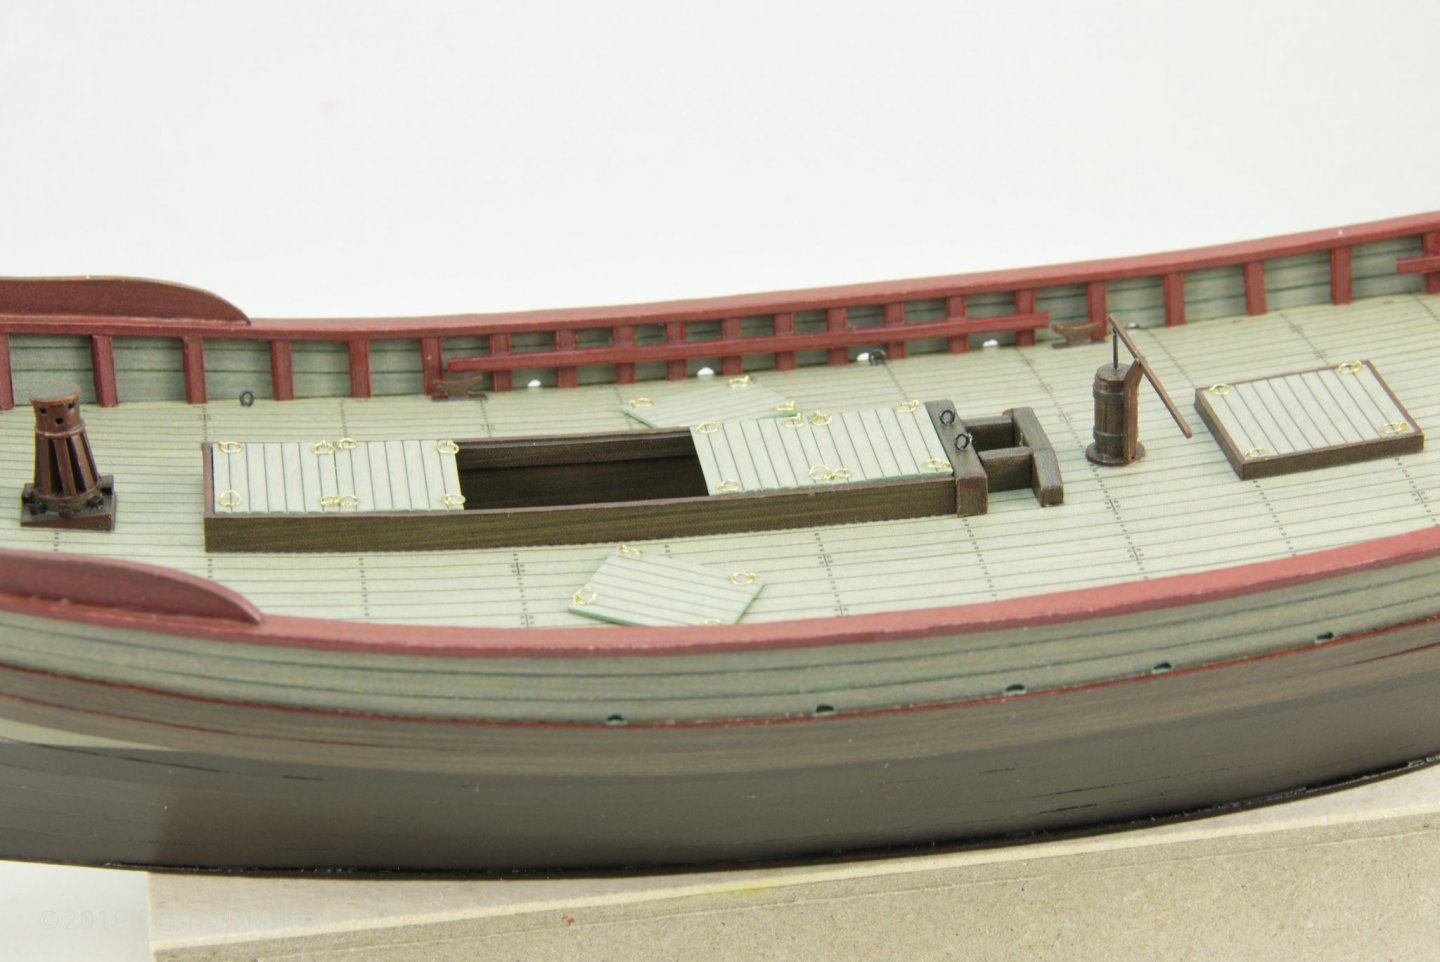
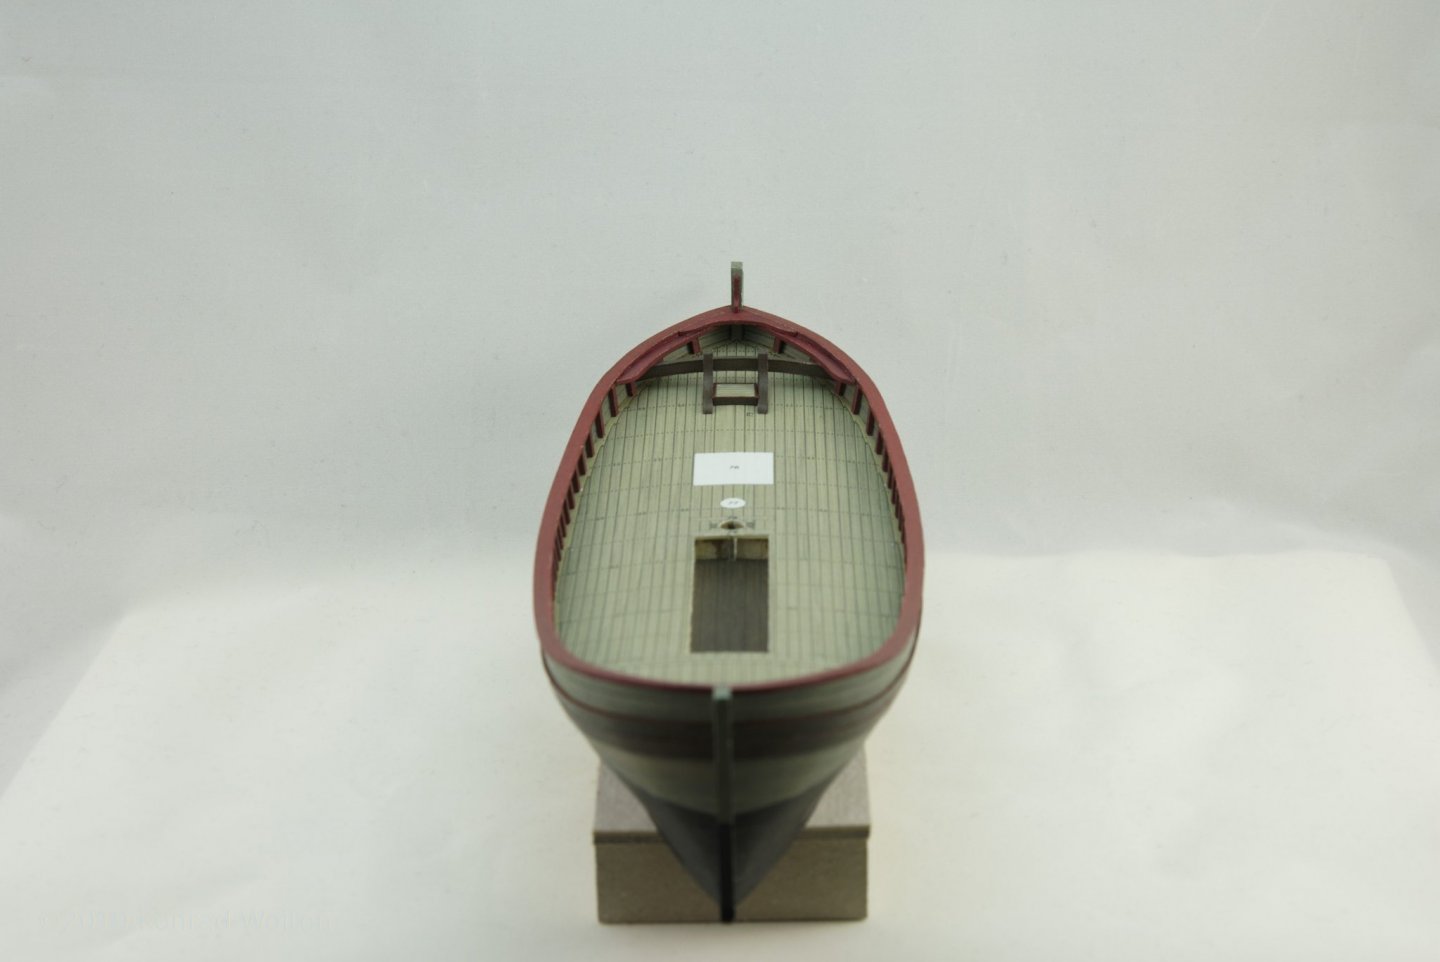
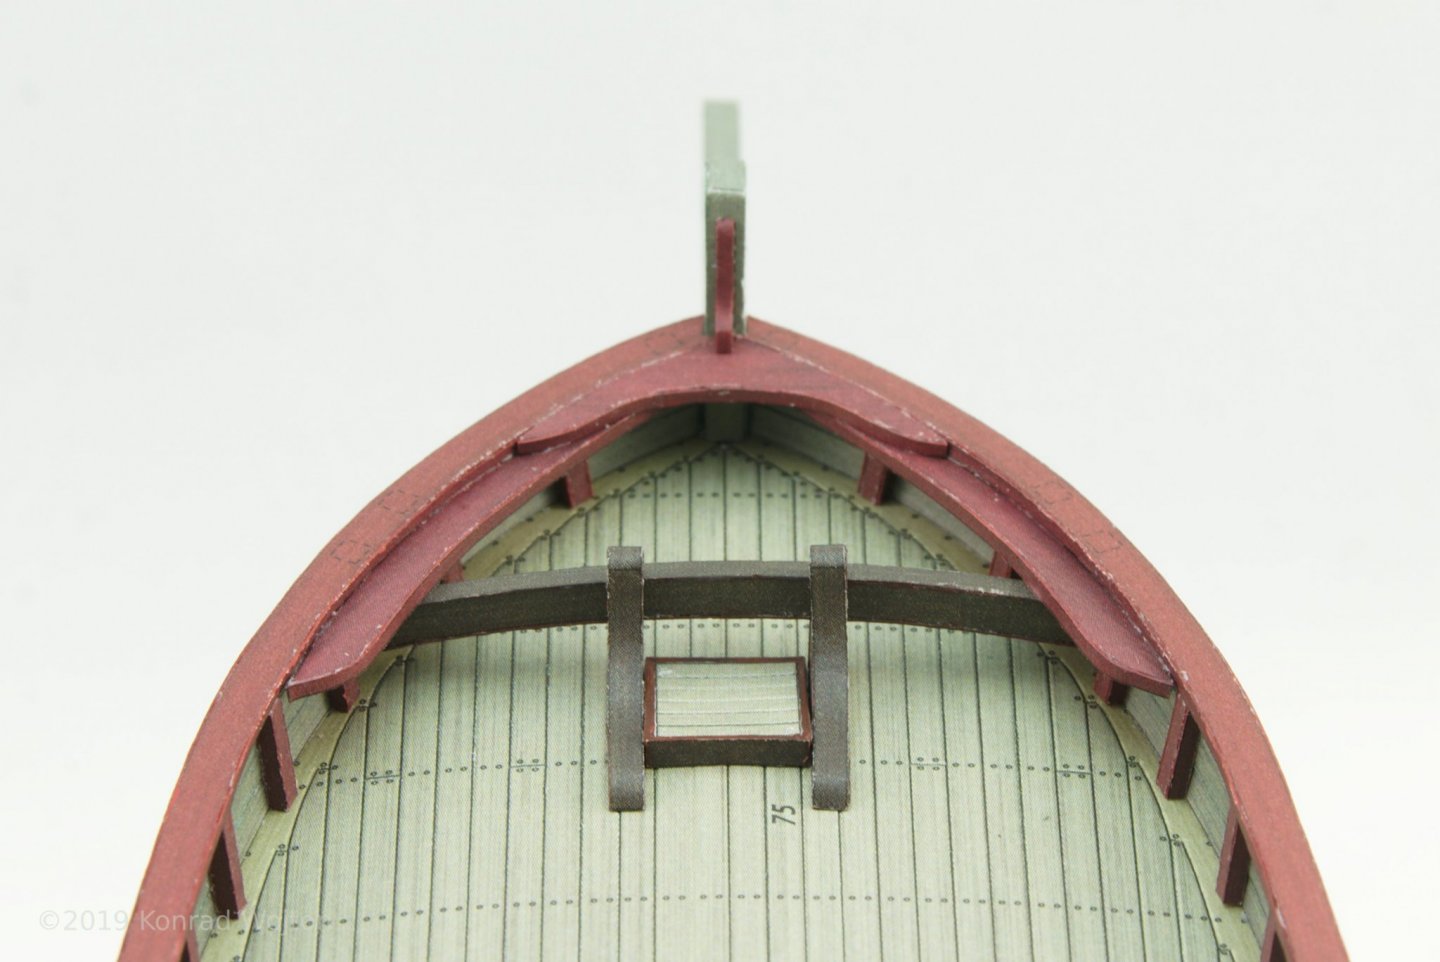
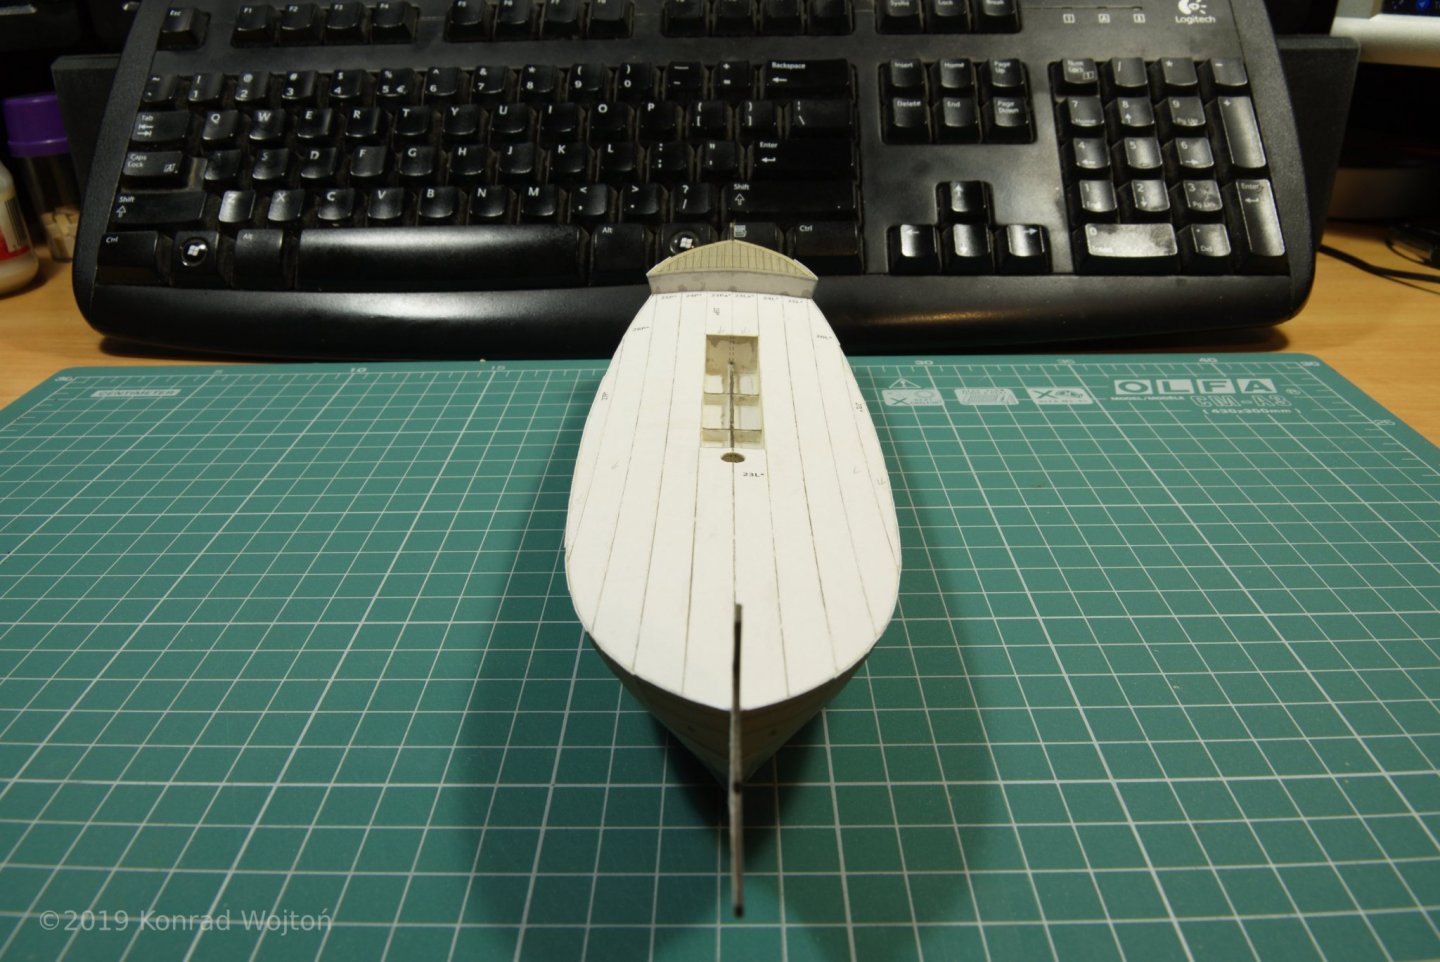
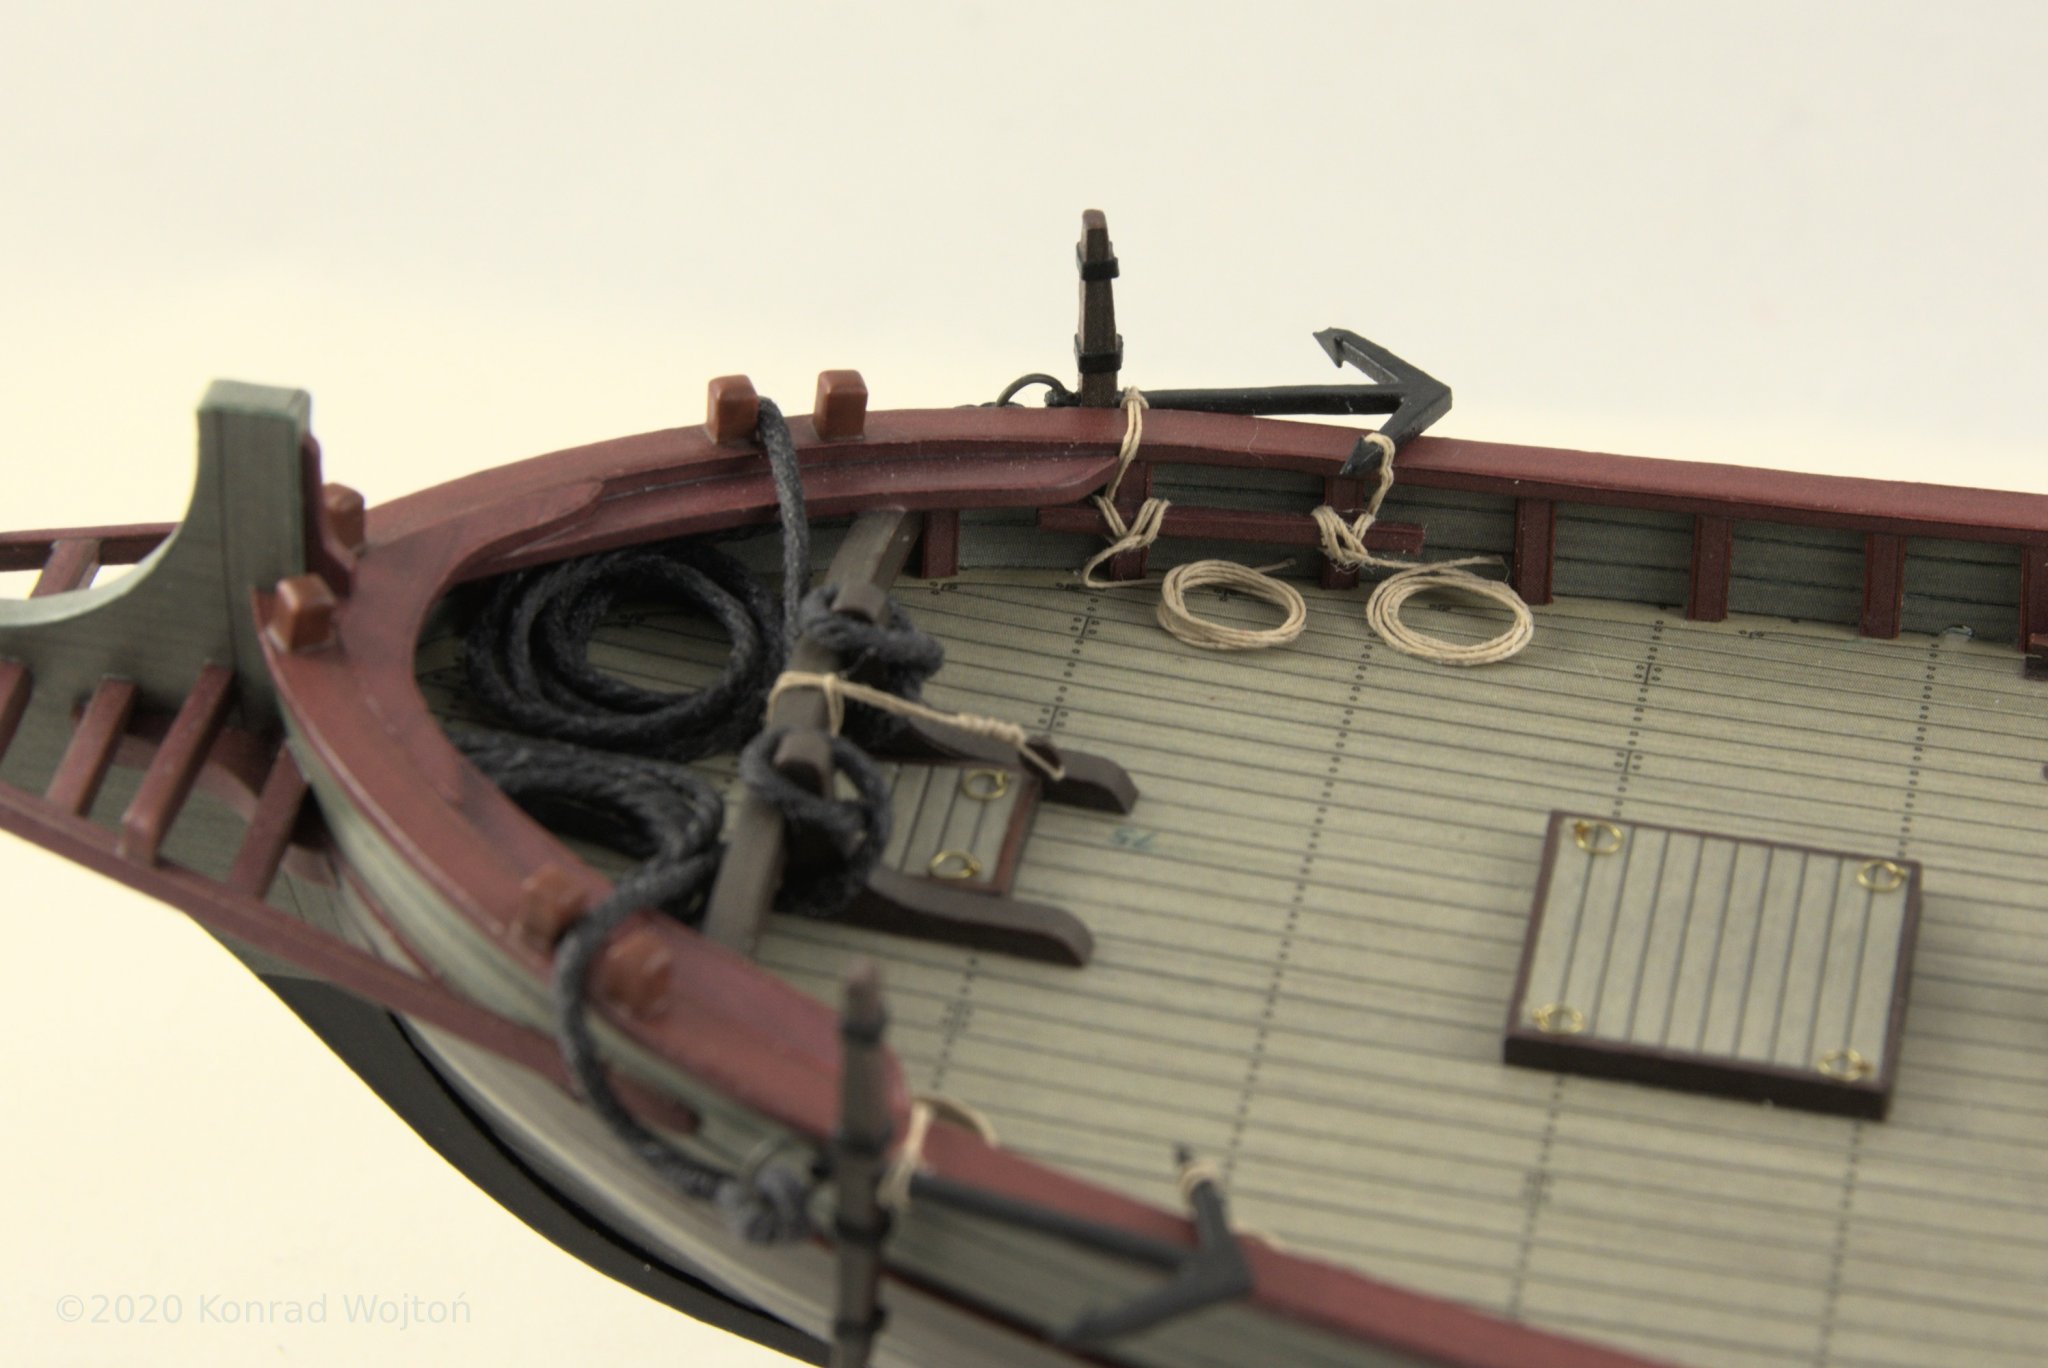
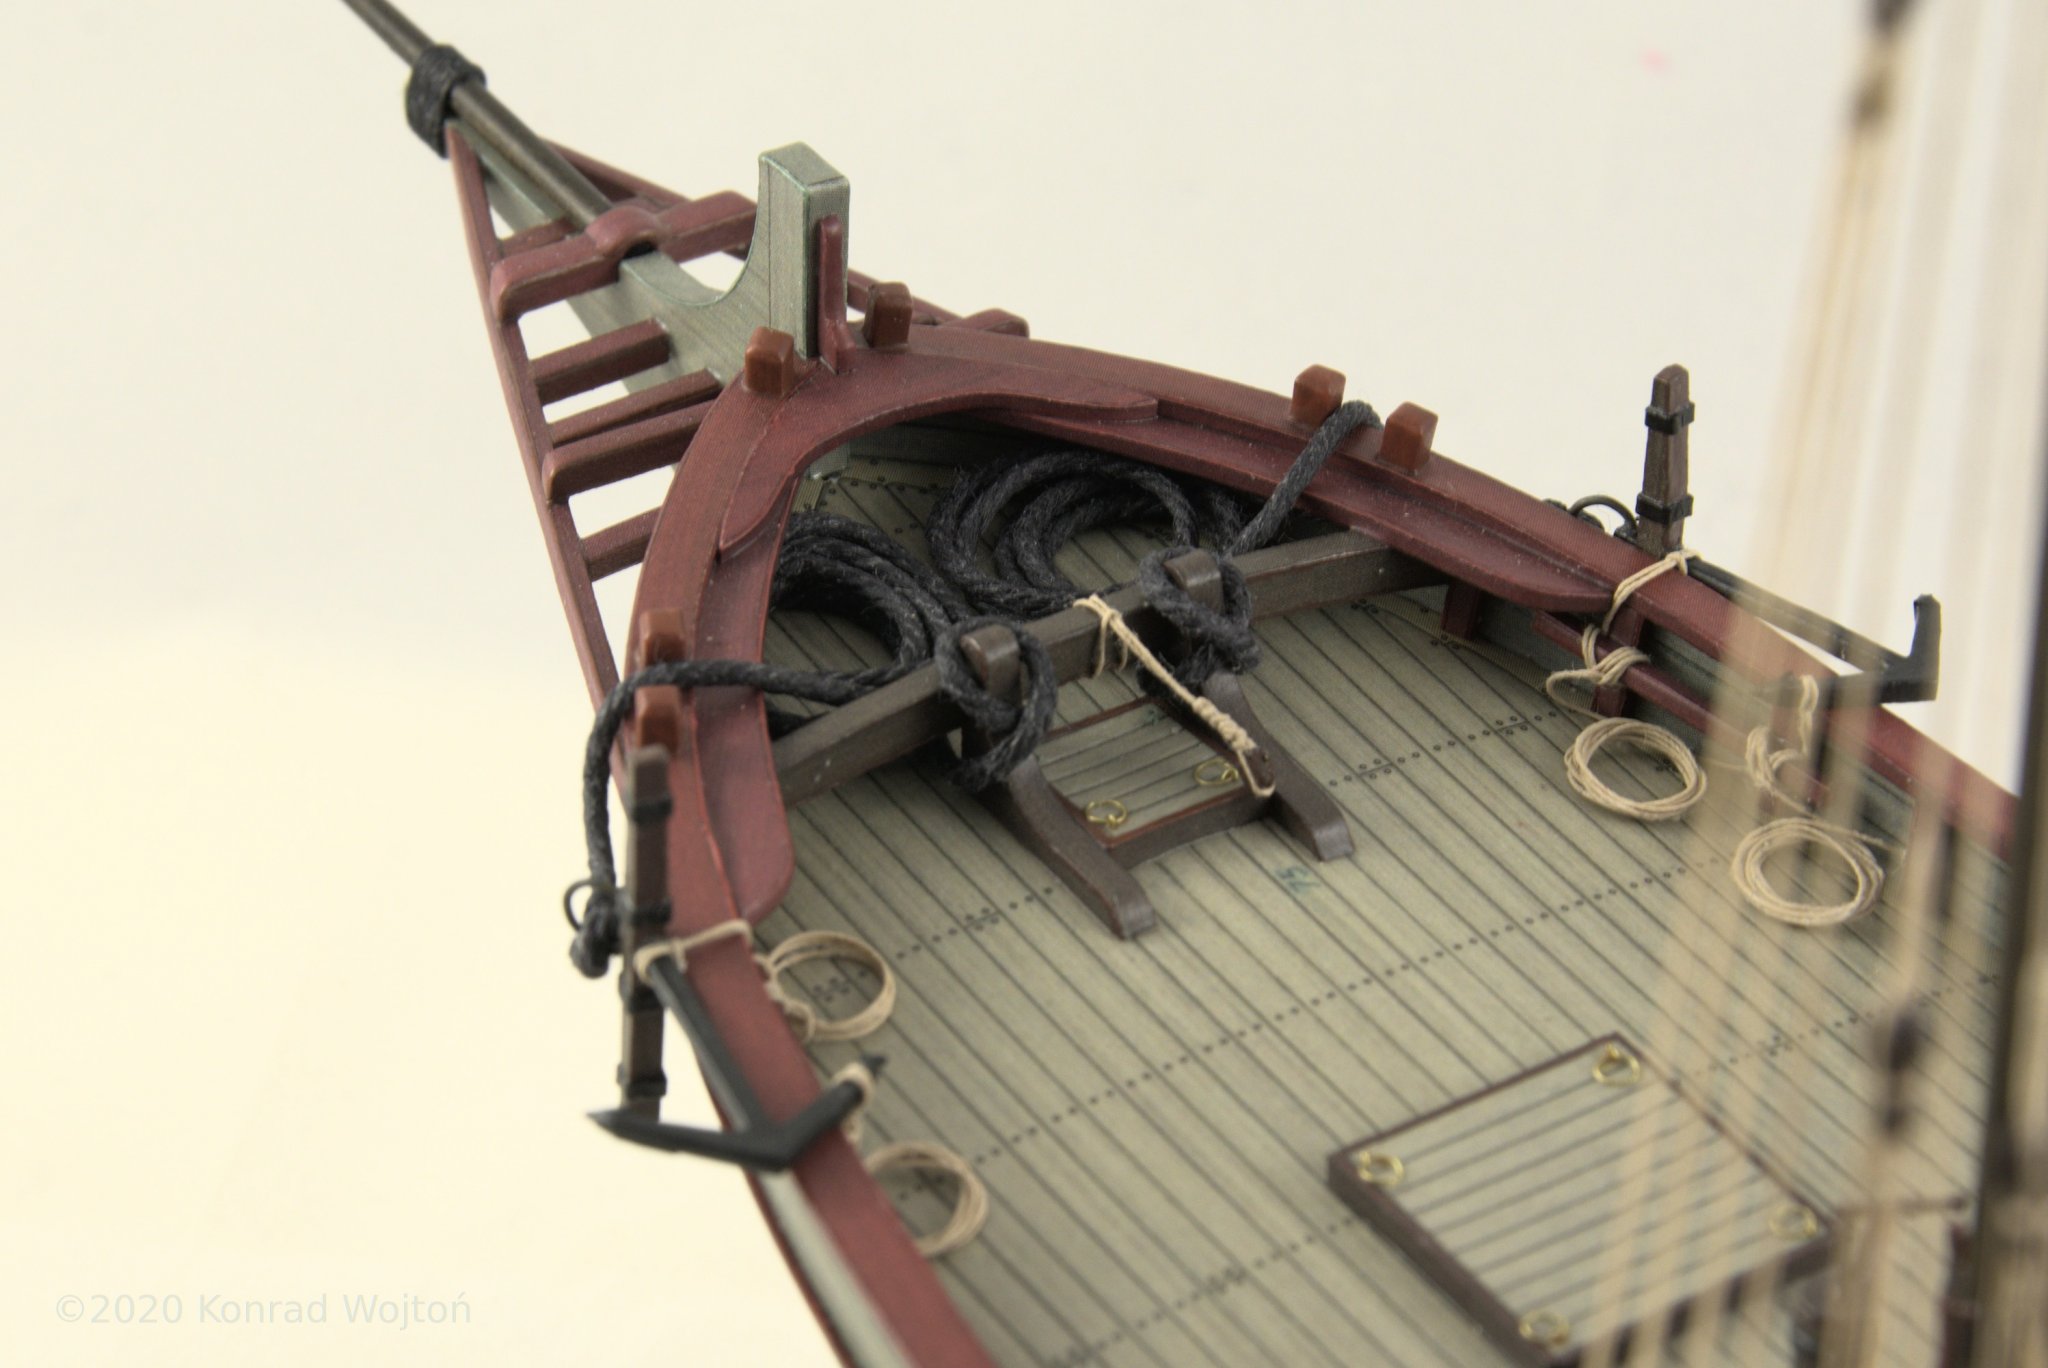
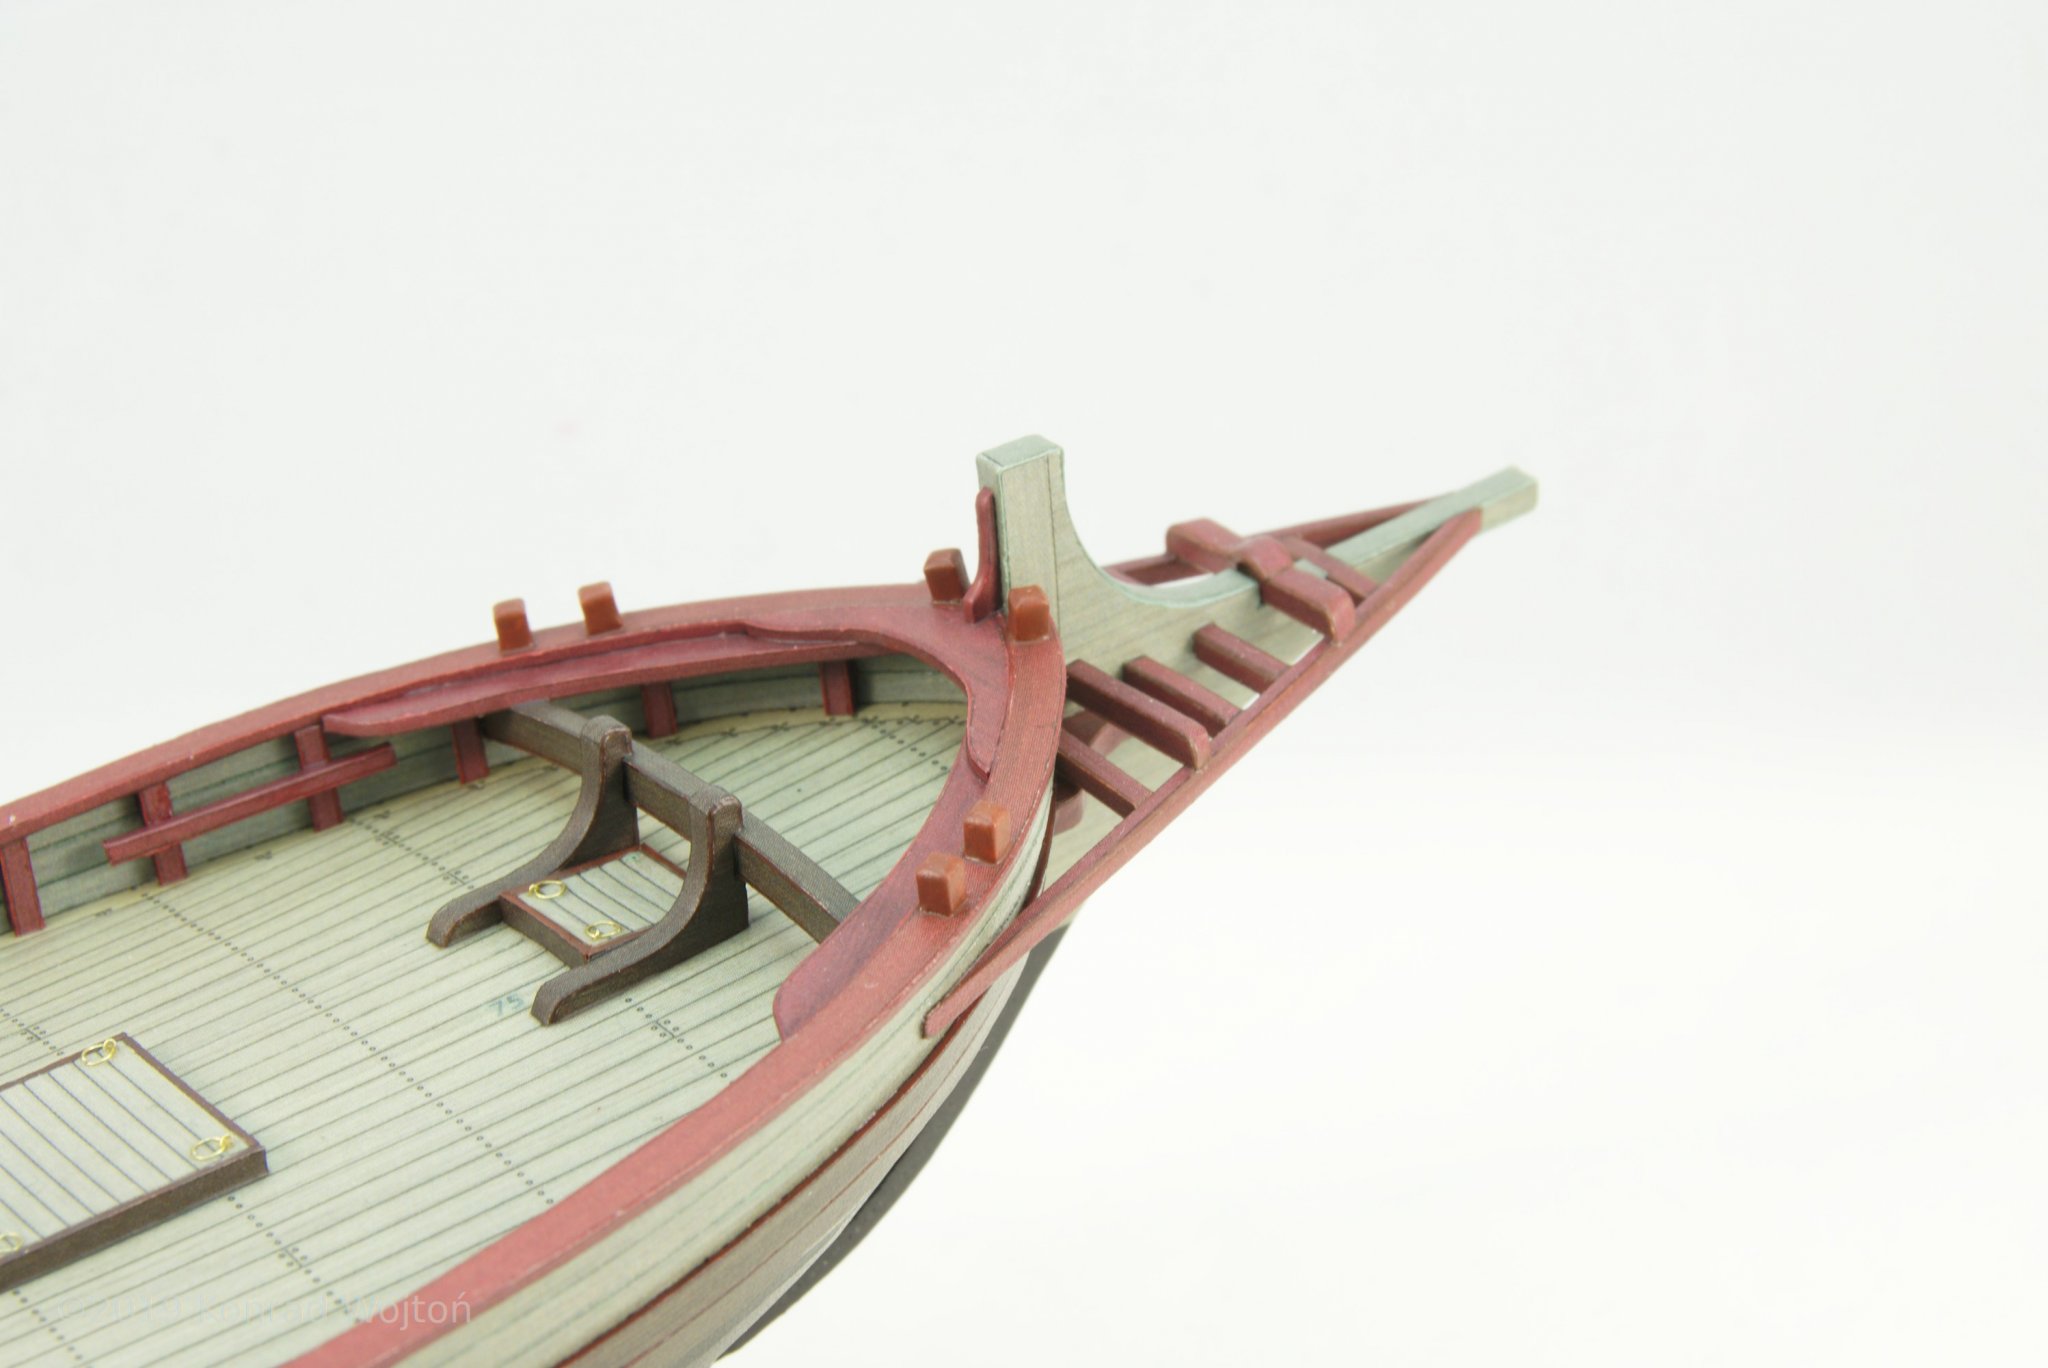
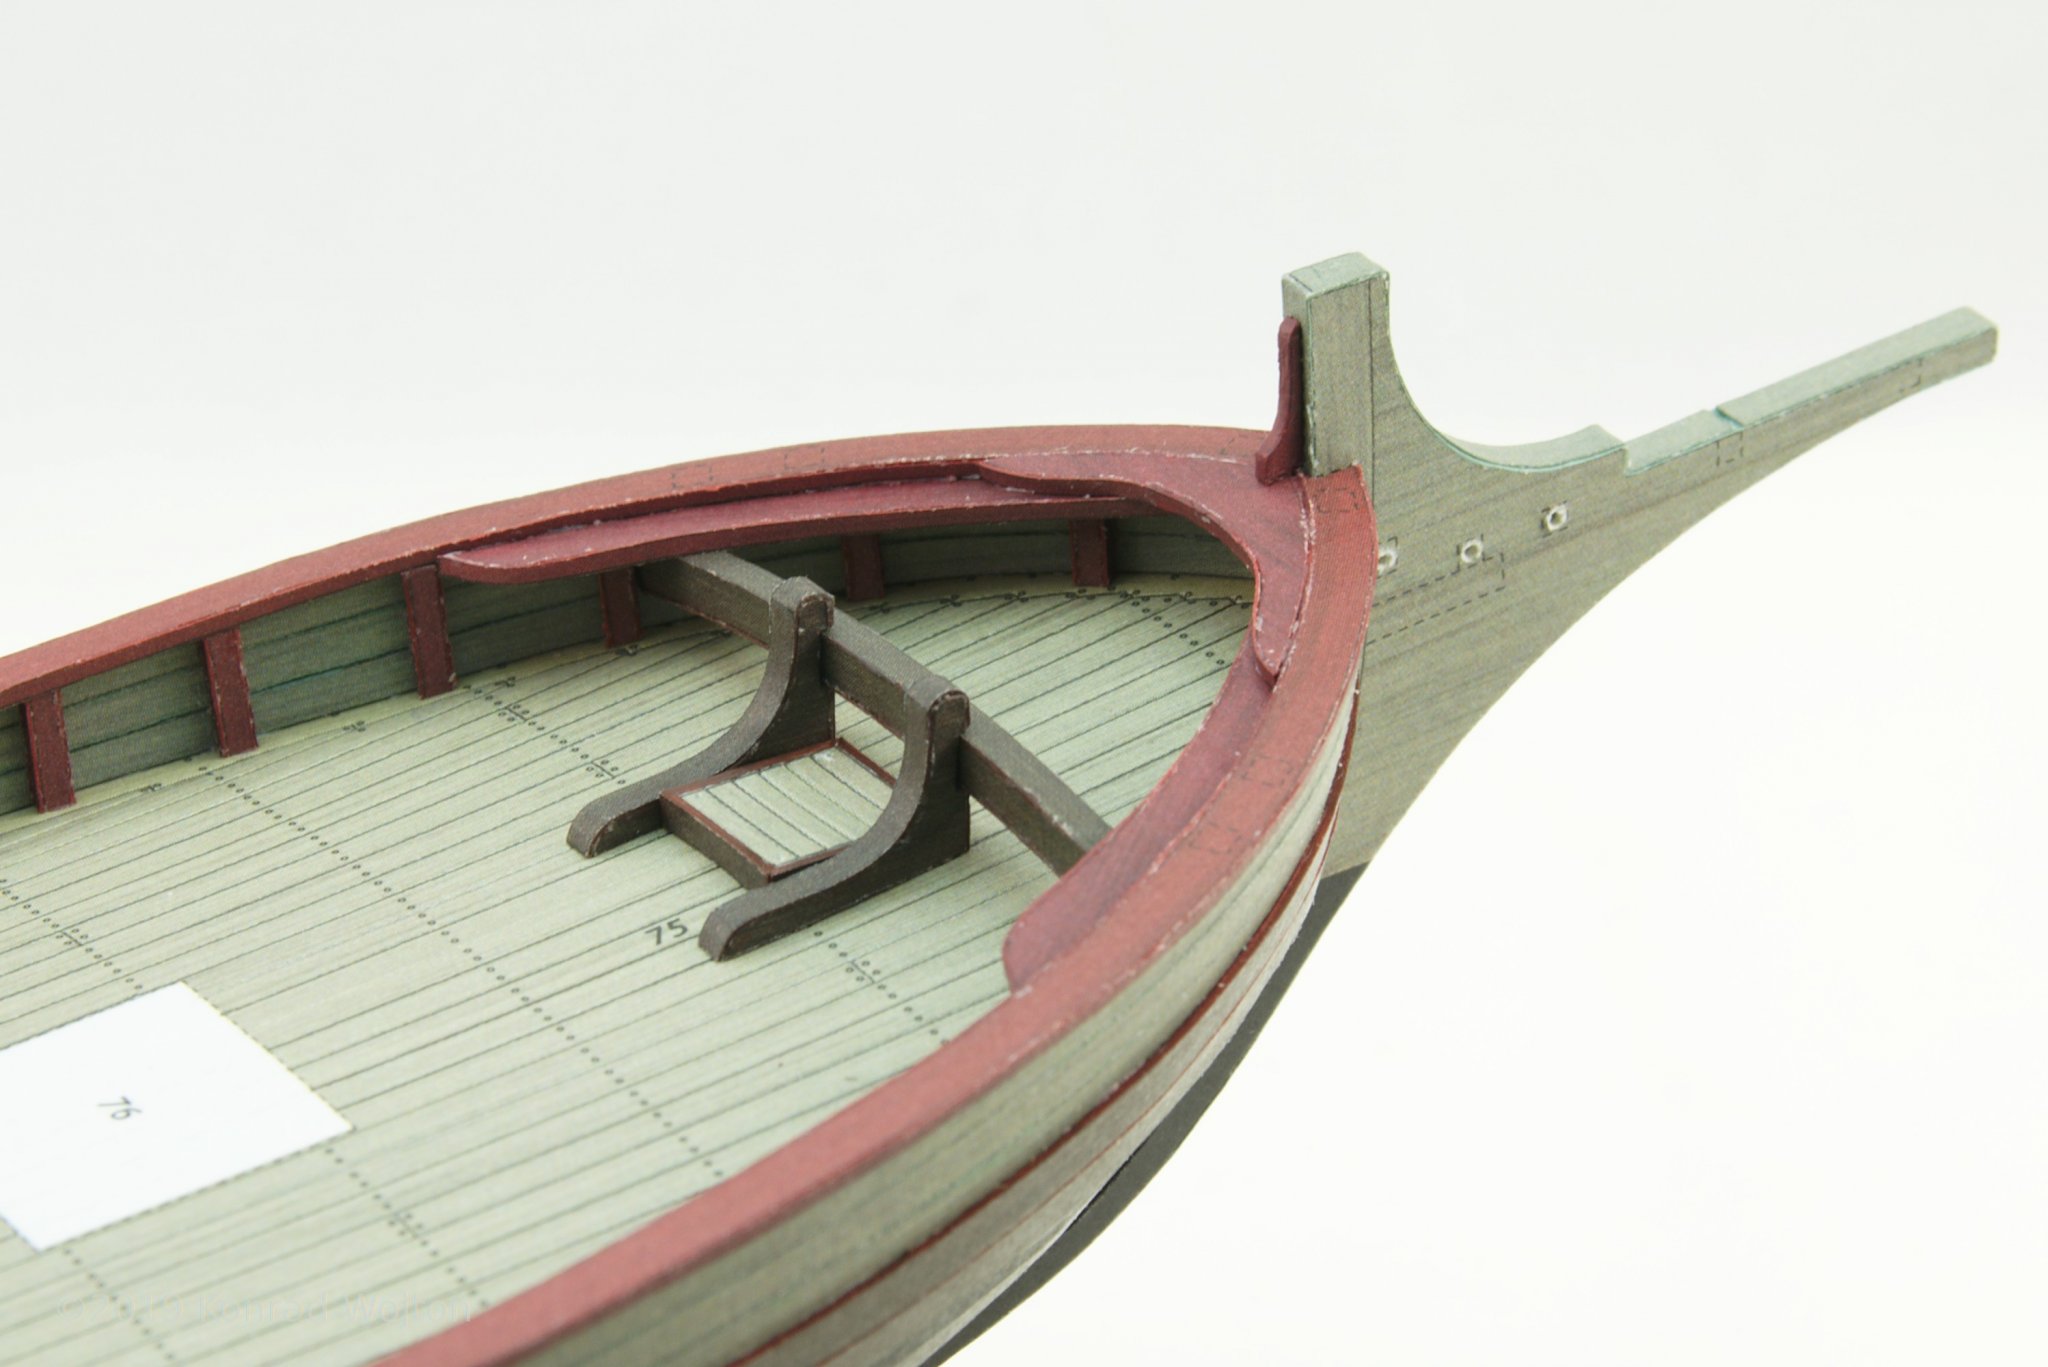
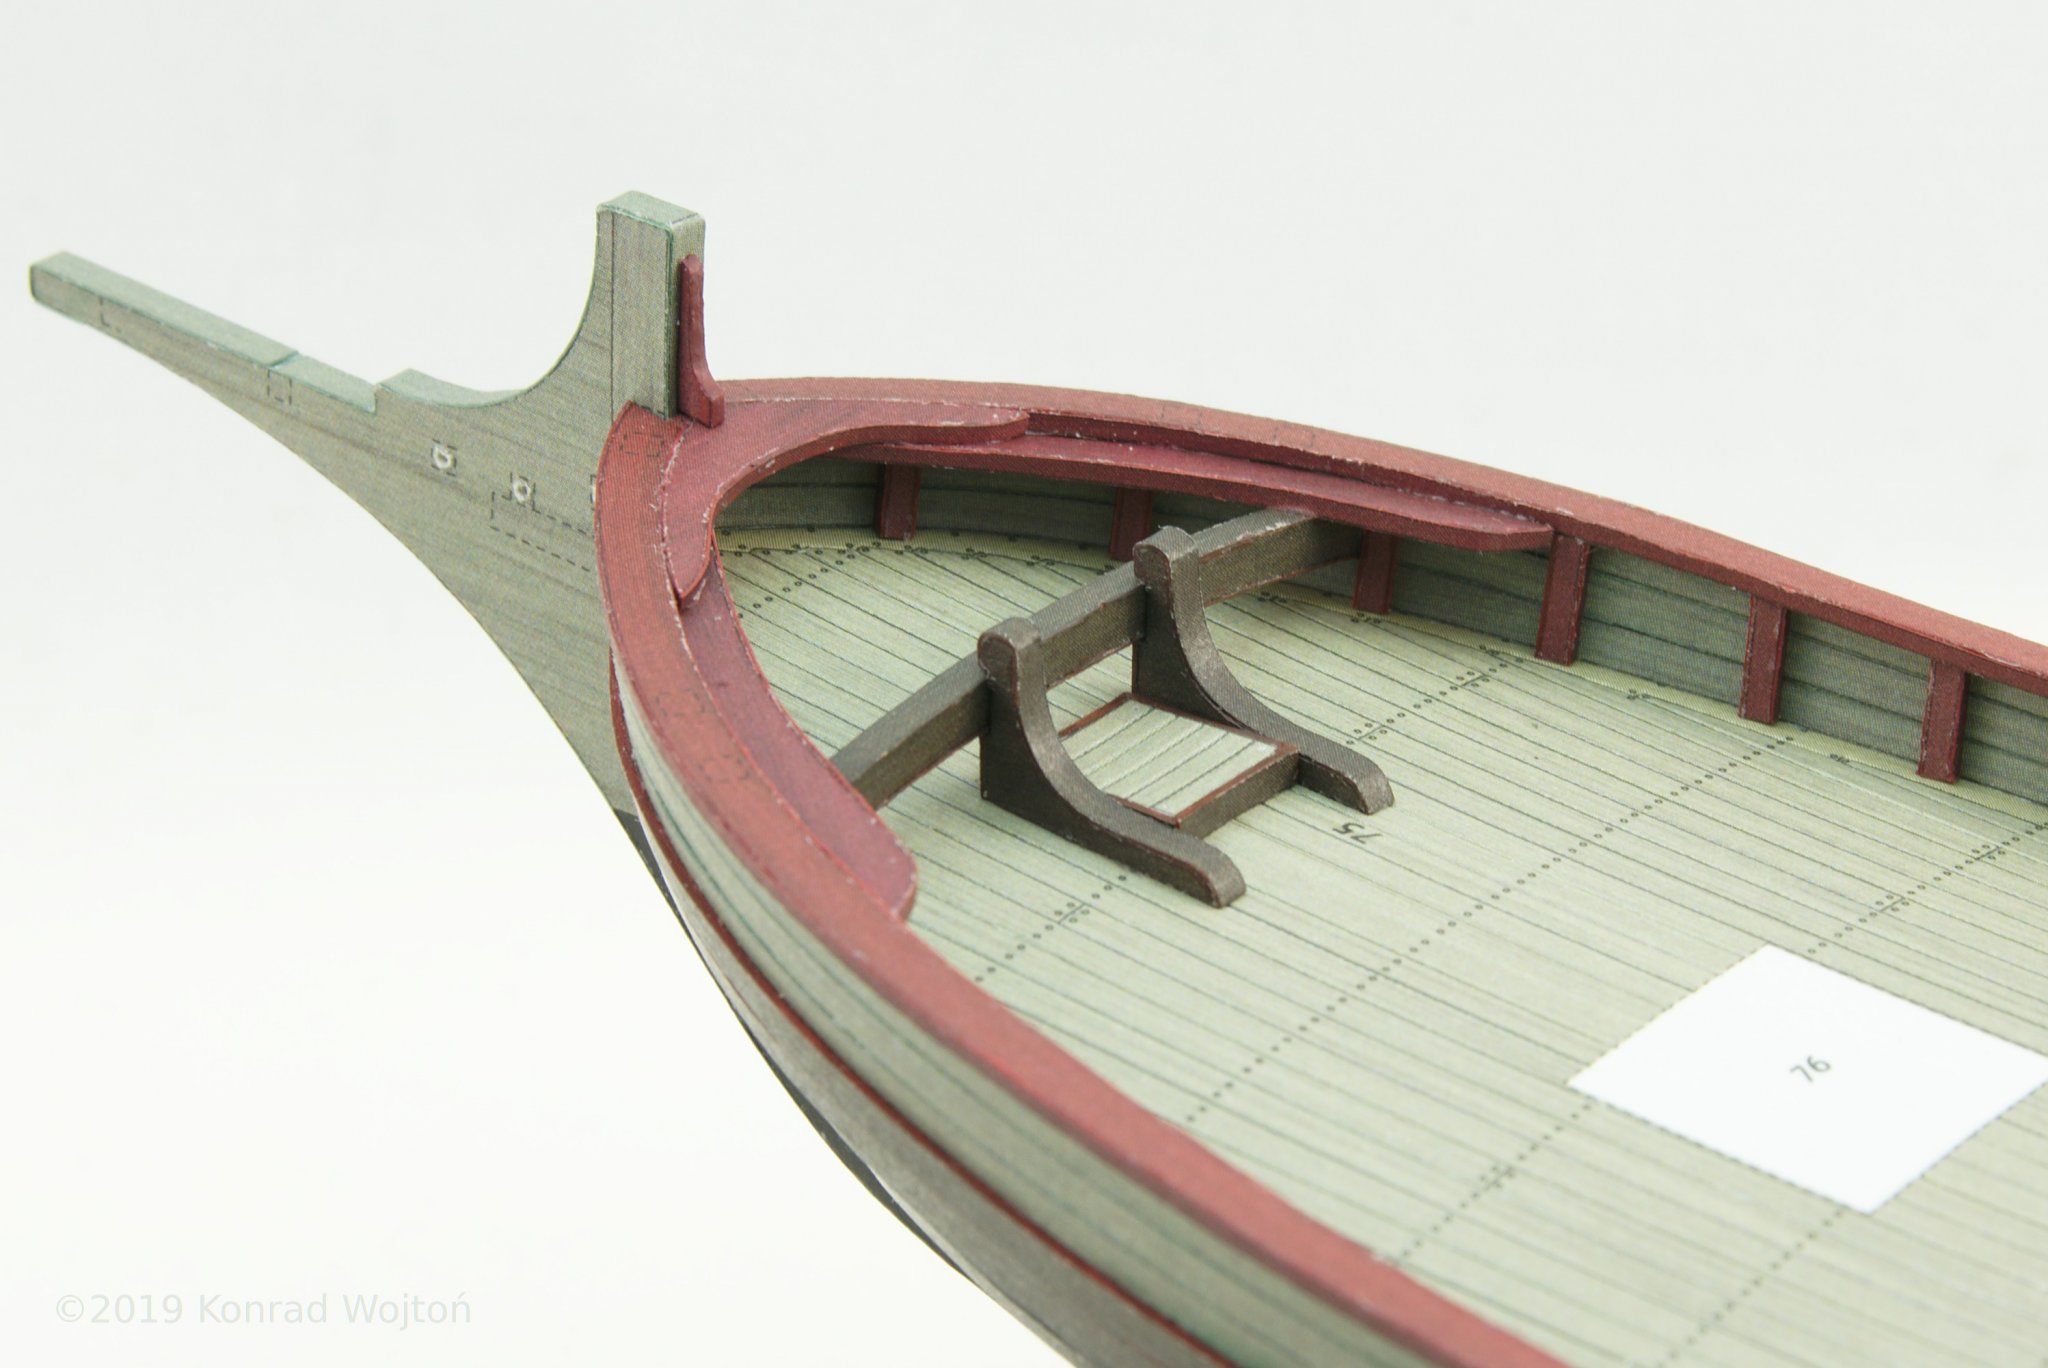
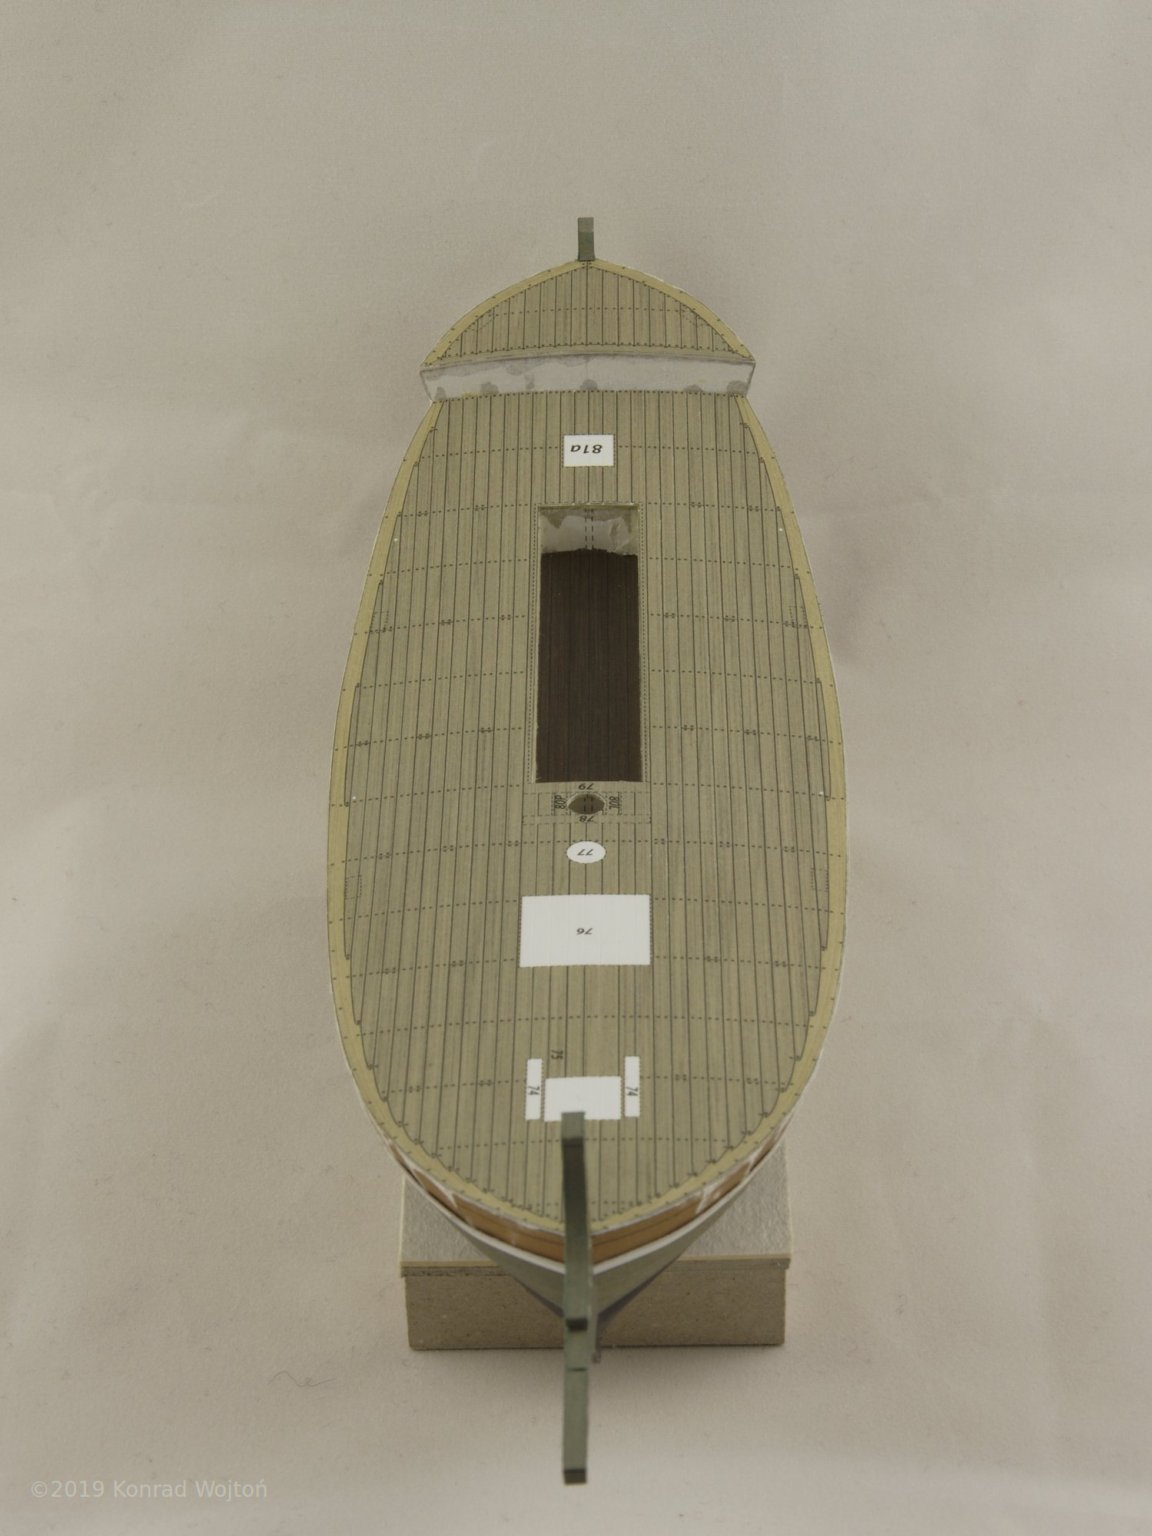
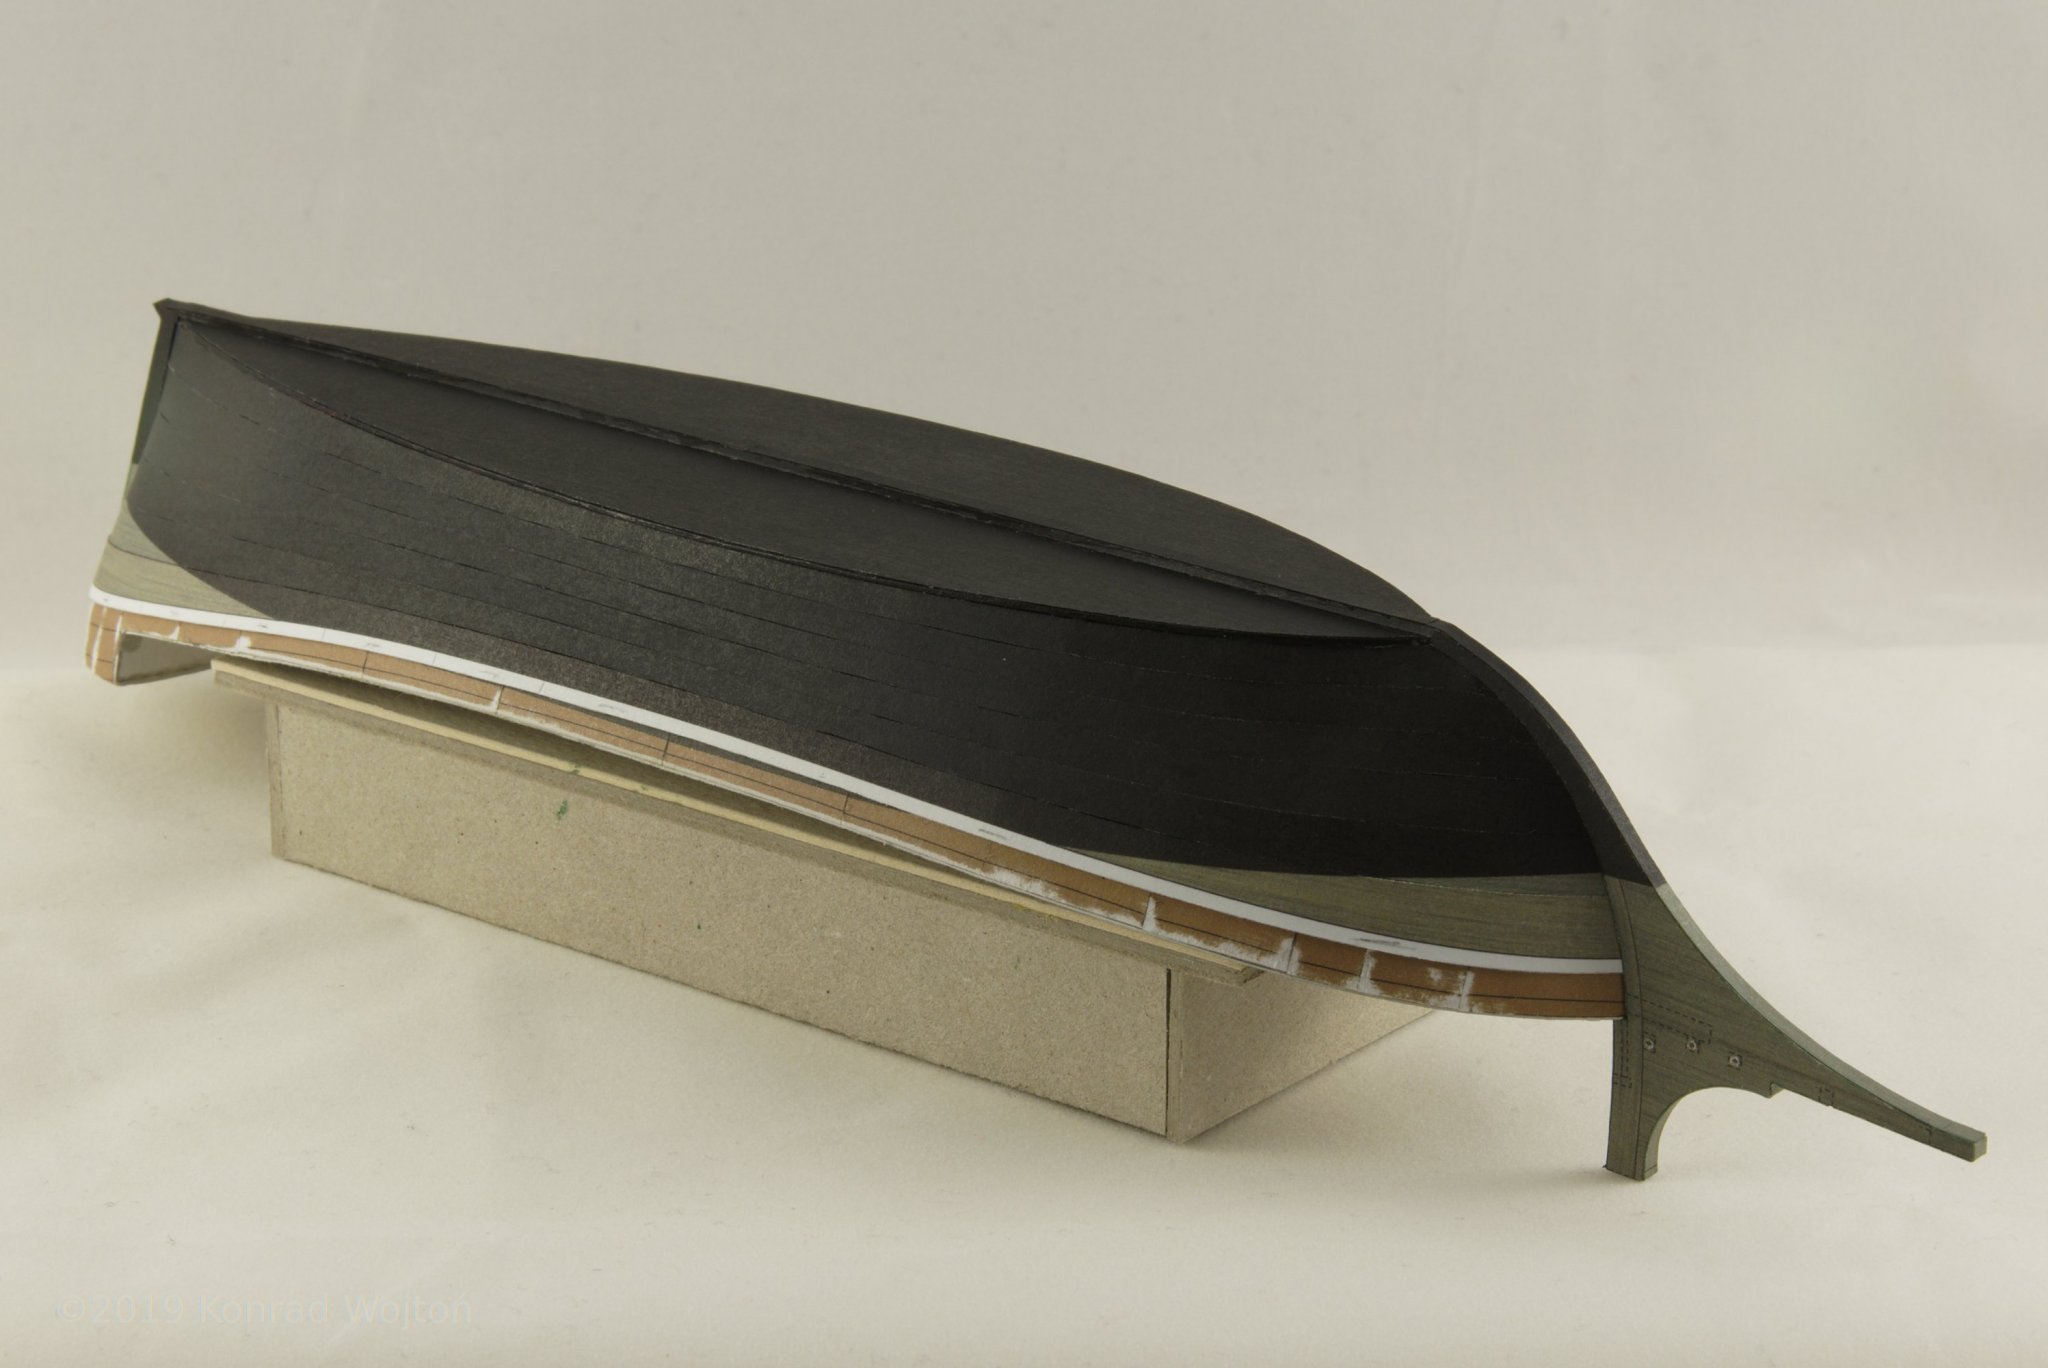
I haven't made much progress, but build still goes well. I've managed to add railing (correct word?) on top of sides. Most boring part was fitting, cutting and gluing bulkhead extensions under the railing. I've also made some details in the bow section of the deck. If anybody is going to build this kit I suggest to not adhere here strictly to parts numbering. The curved beam in the bow section has number 74, and parts that cover it on the sides have number 67. There is also minor printing error. As you can see there is number 75 printed in bow section, and not covered by anything. Part 75 is actually this square hatch under curved beam. I need to figure out how to cover it later, maybe some rope coil or something.

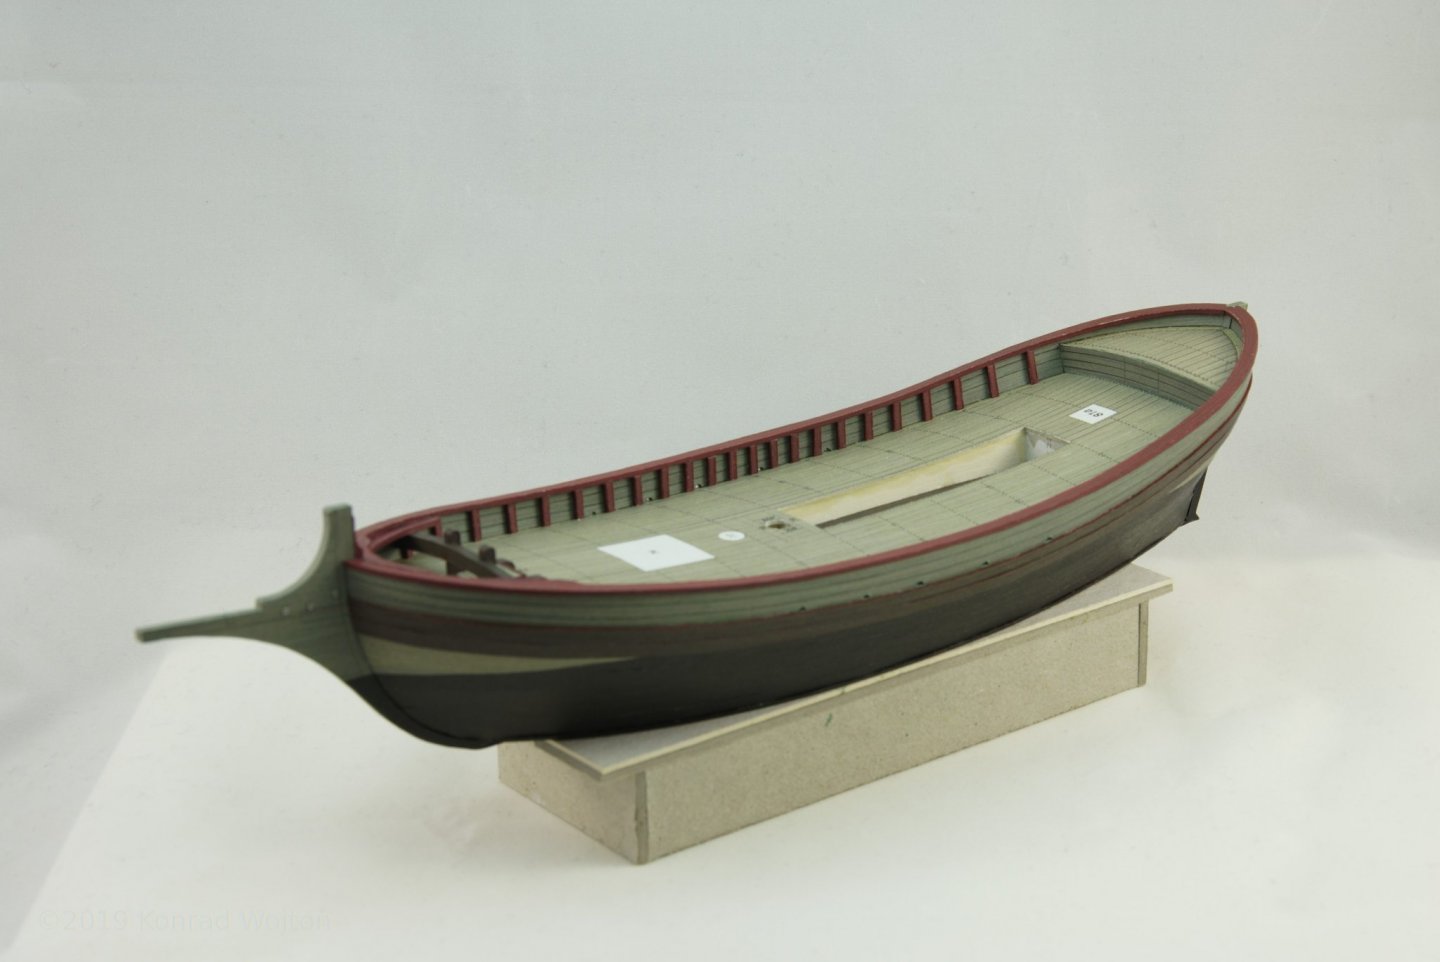
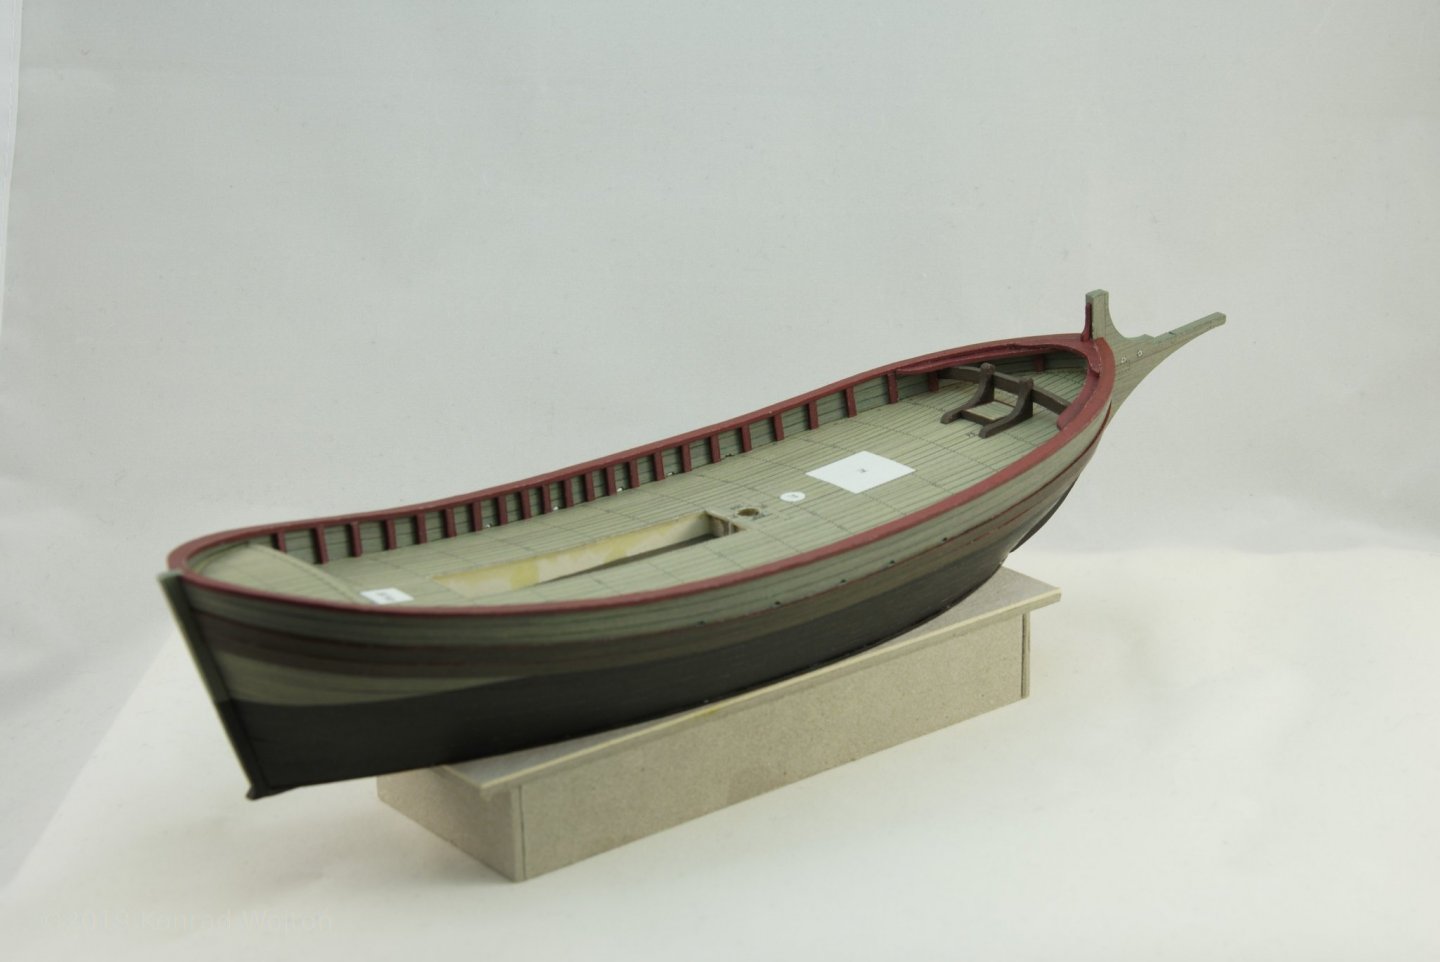
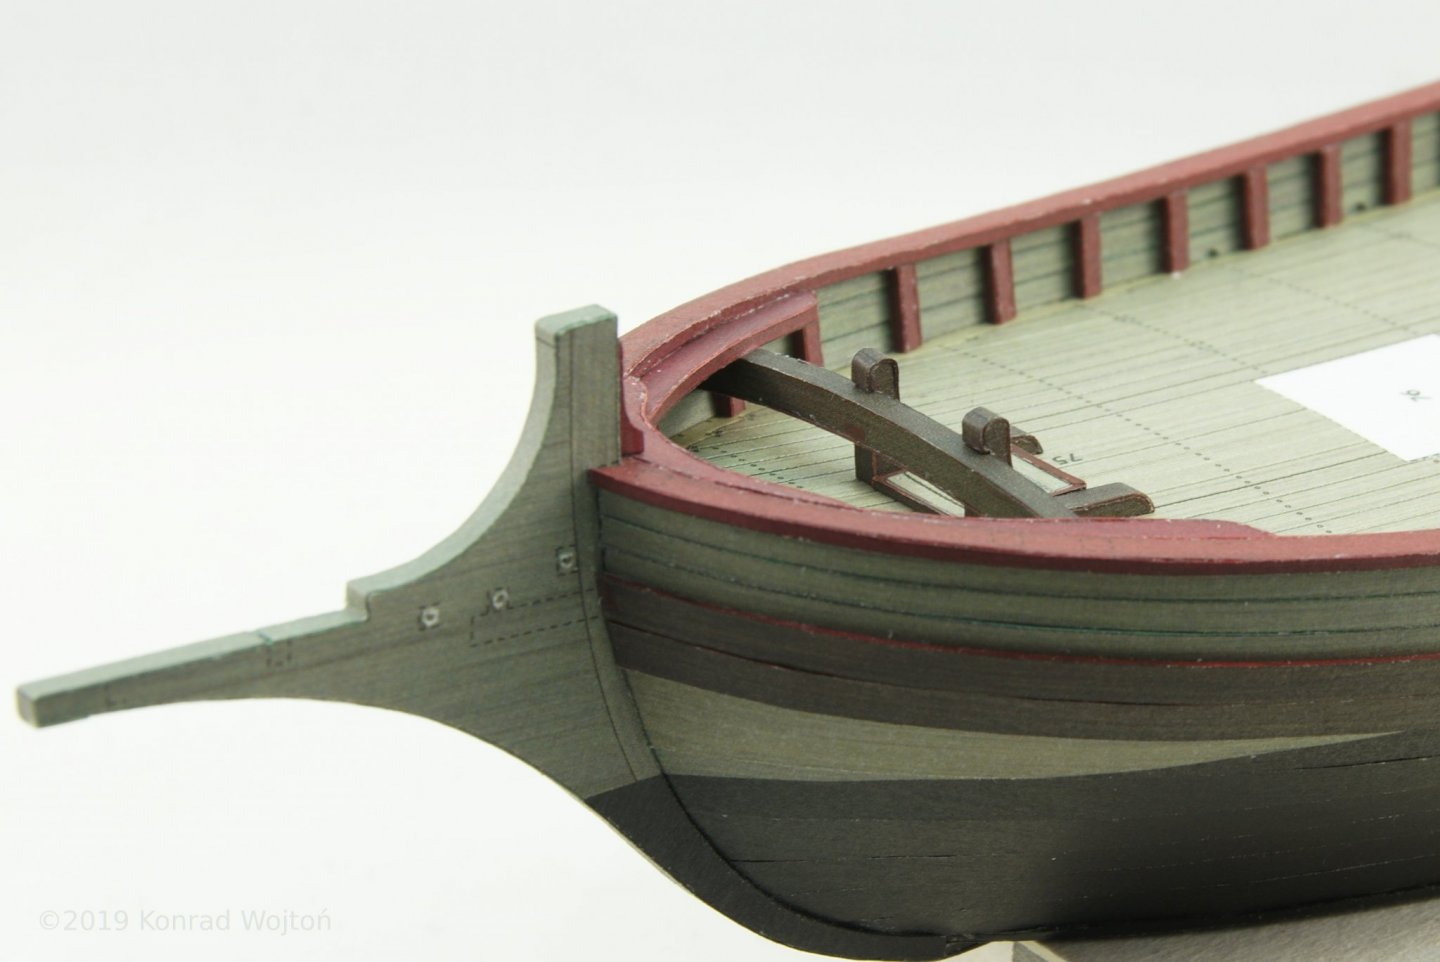
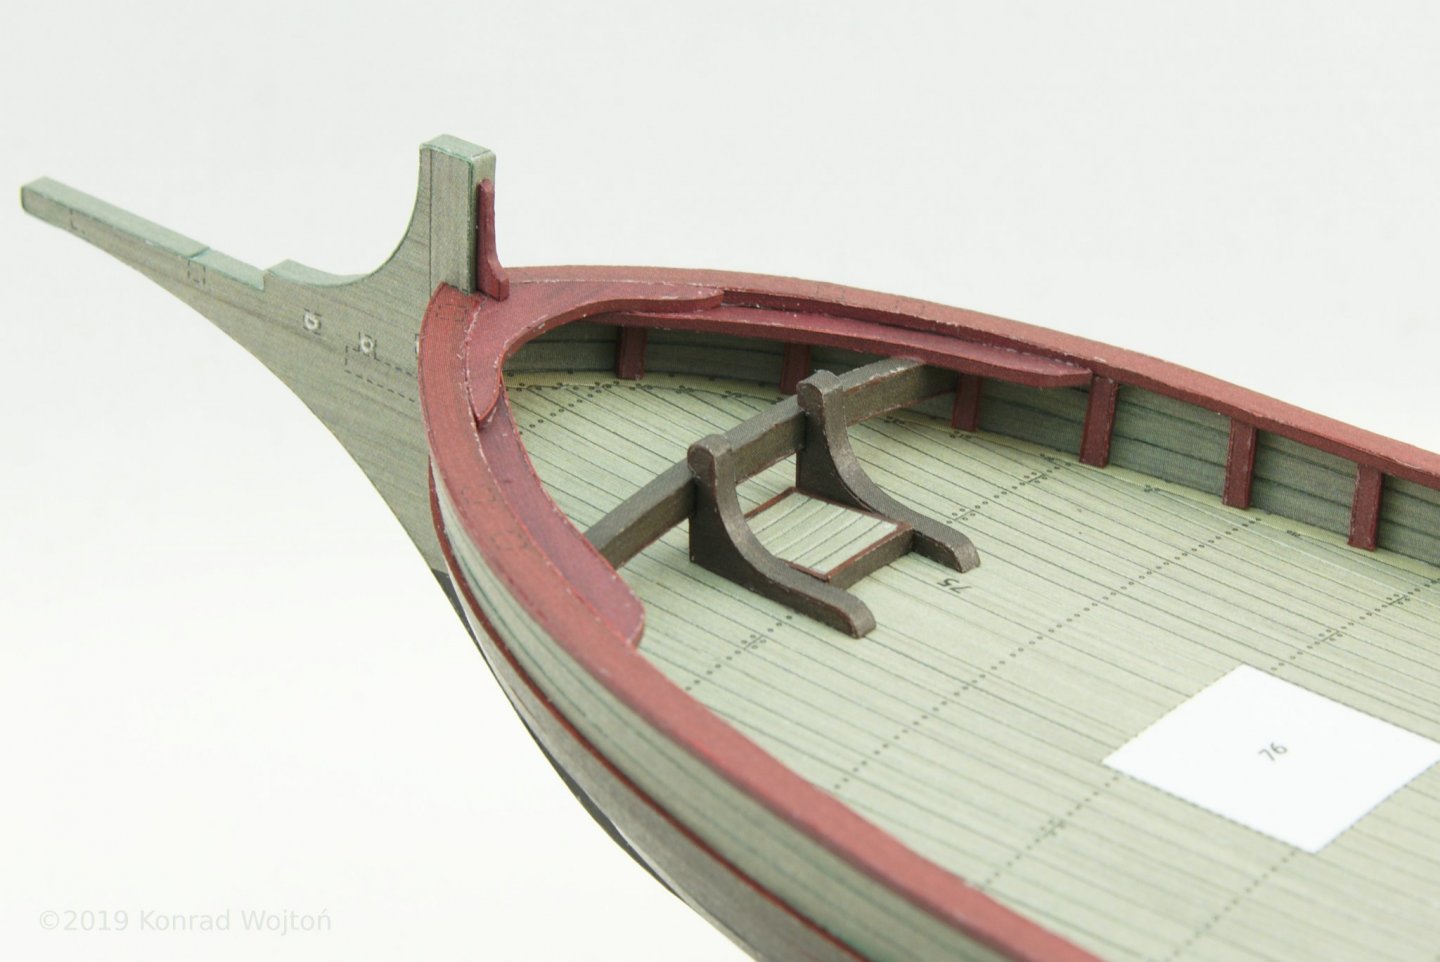
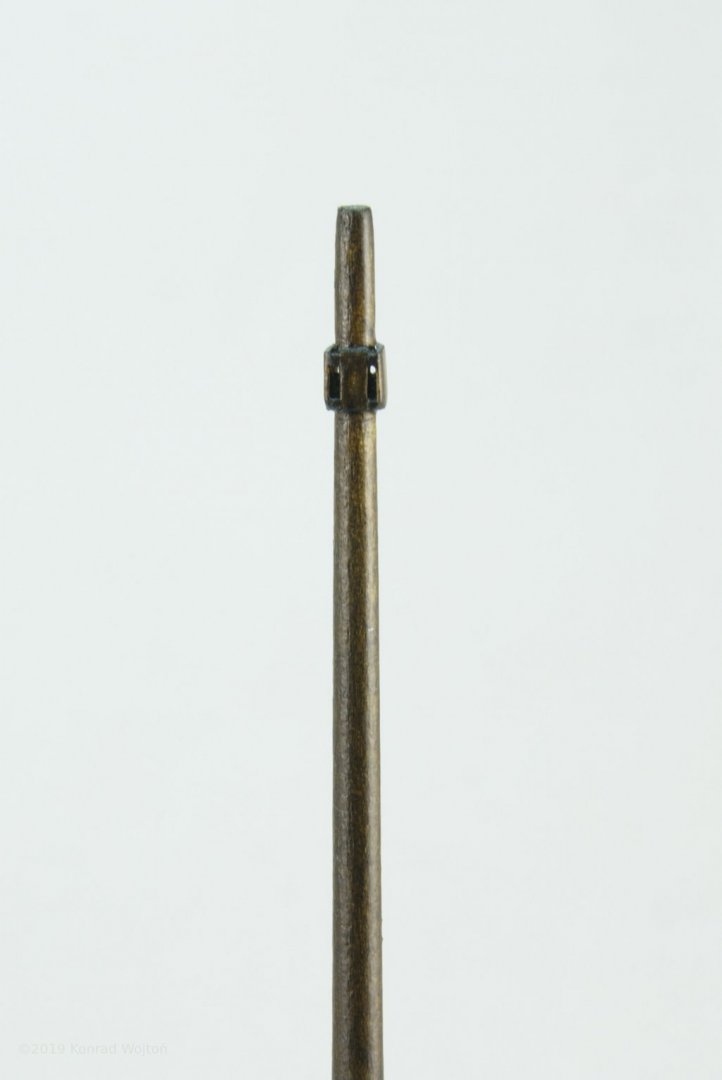
I'm thinking about making mast and yard. As a test I've made one mast with lemon wood, but I'm not sure if it is good wood for this application. I'm waiting for delivery of some spruce and birch wood to test and figure out what to use. -
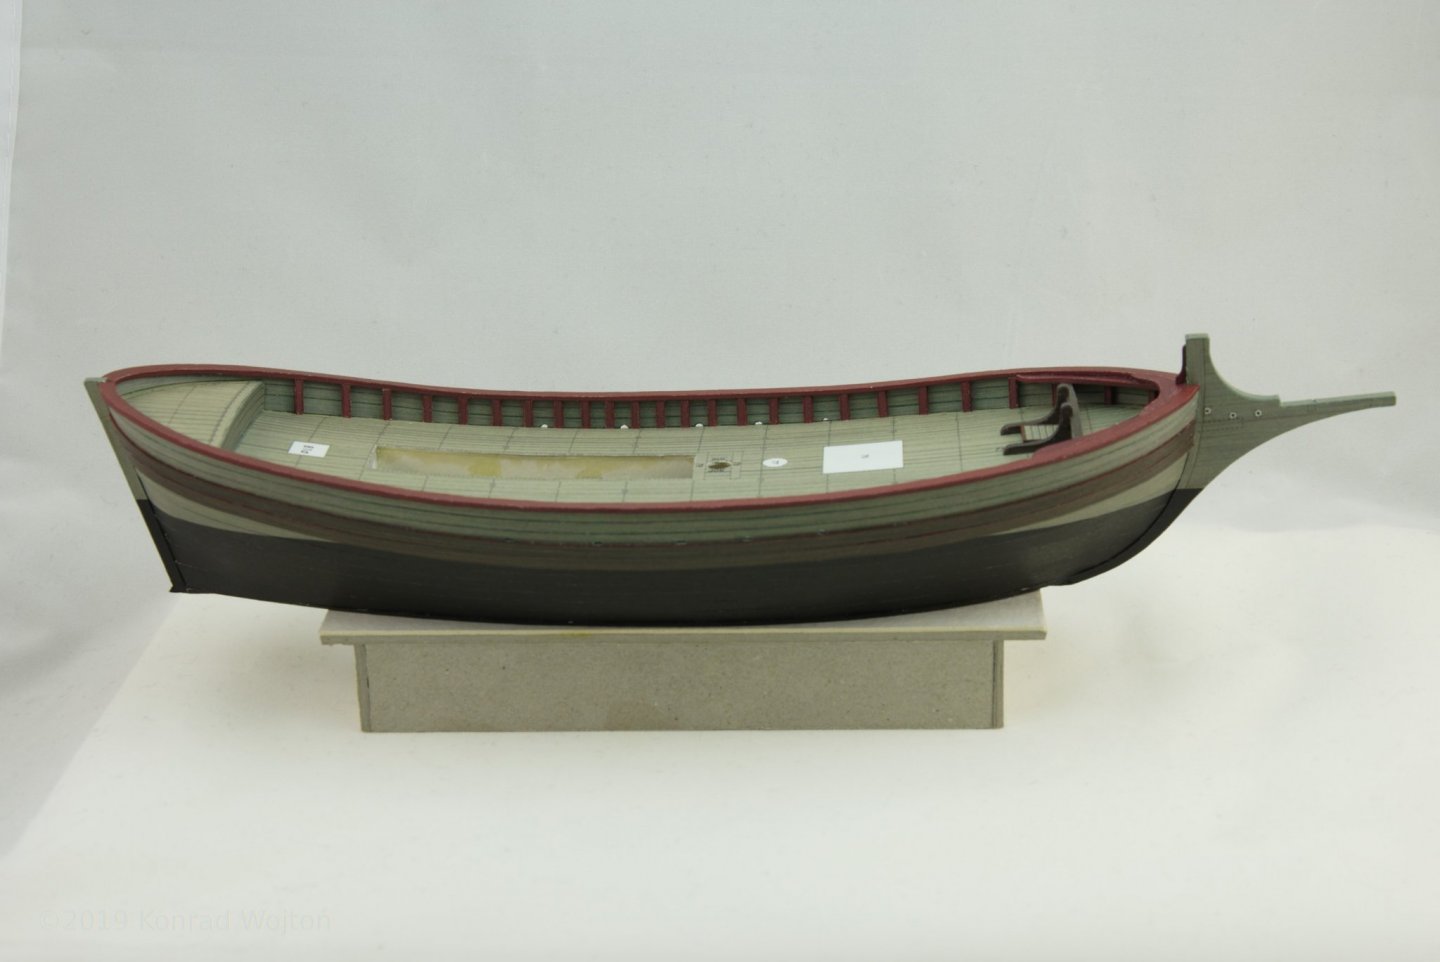
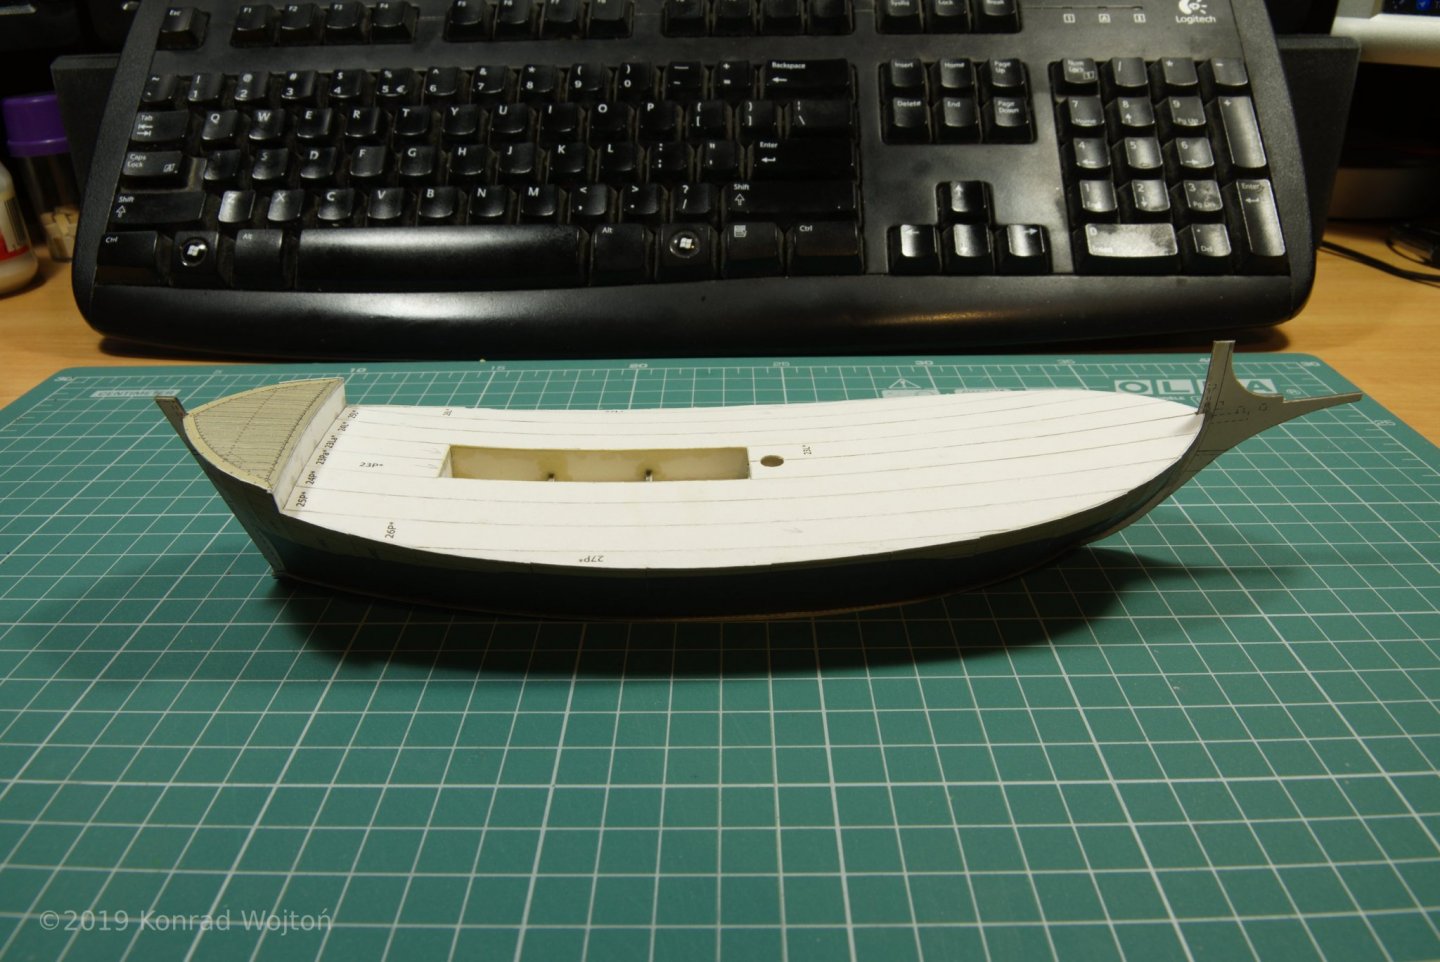
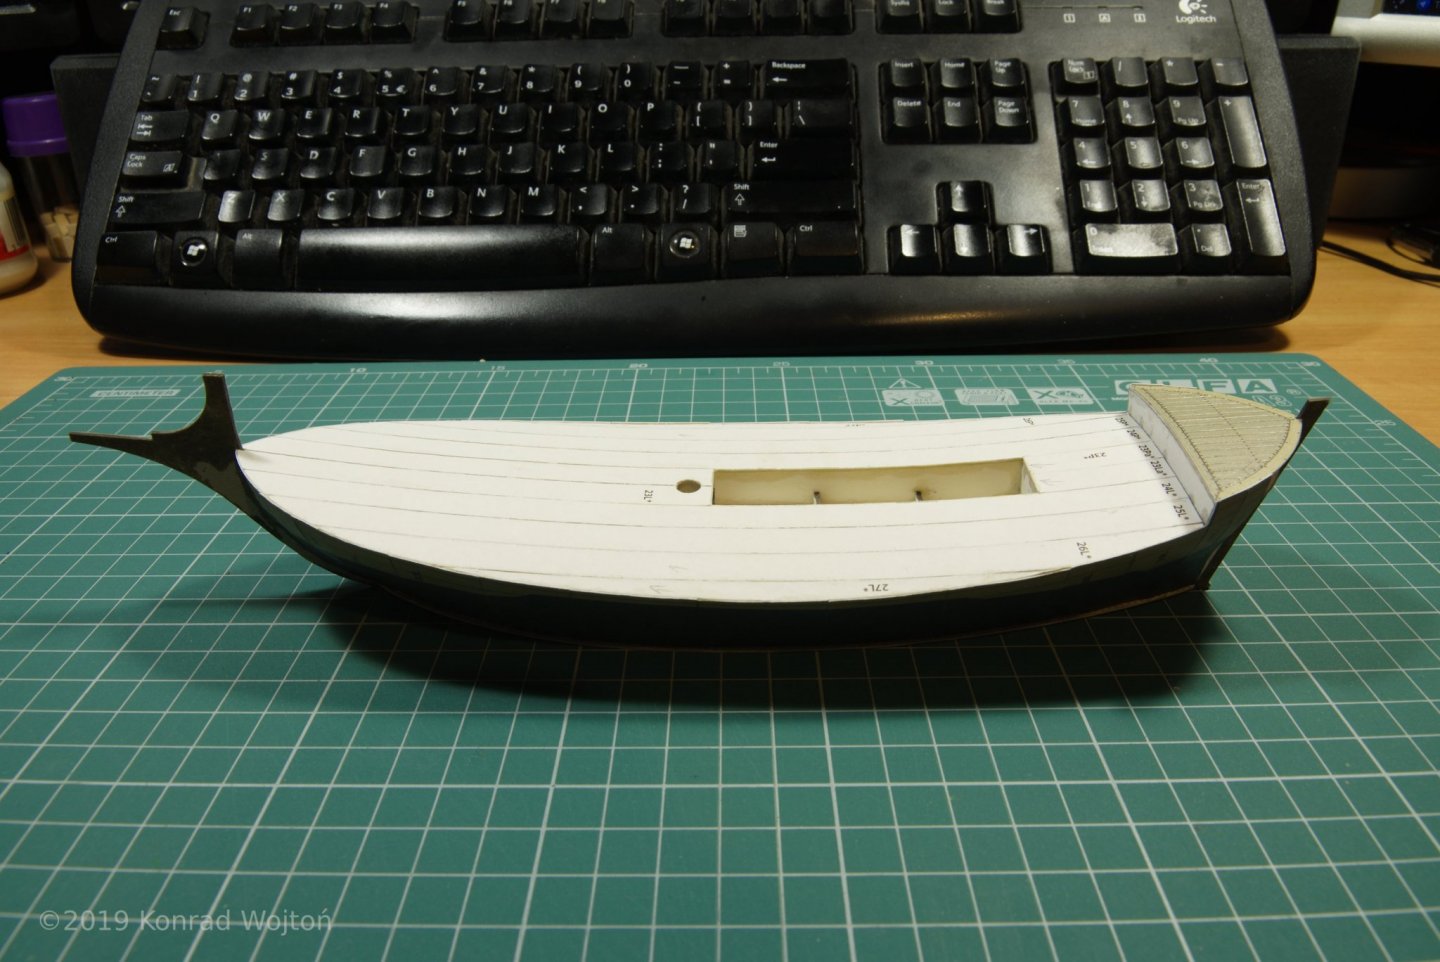
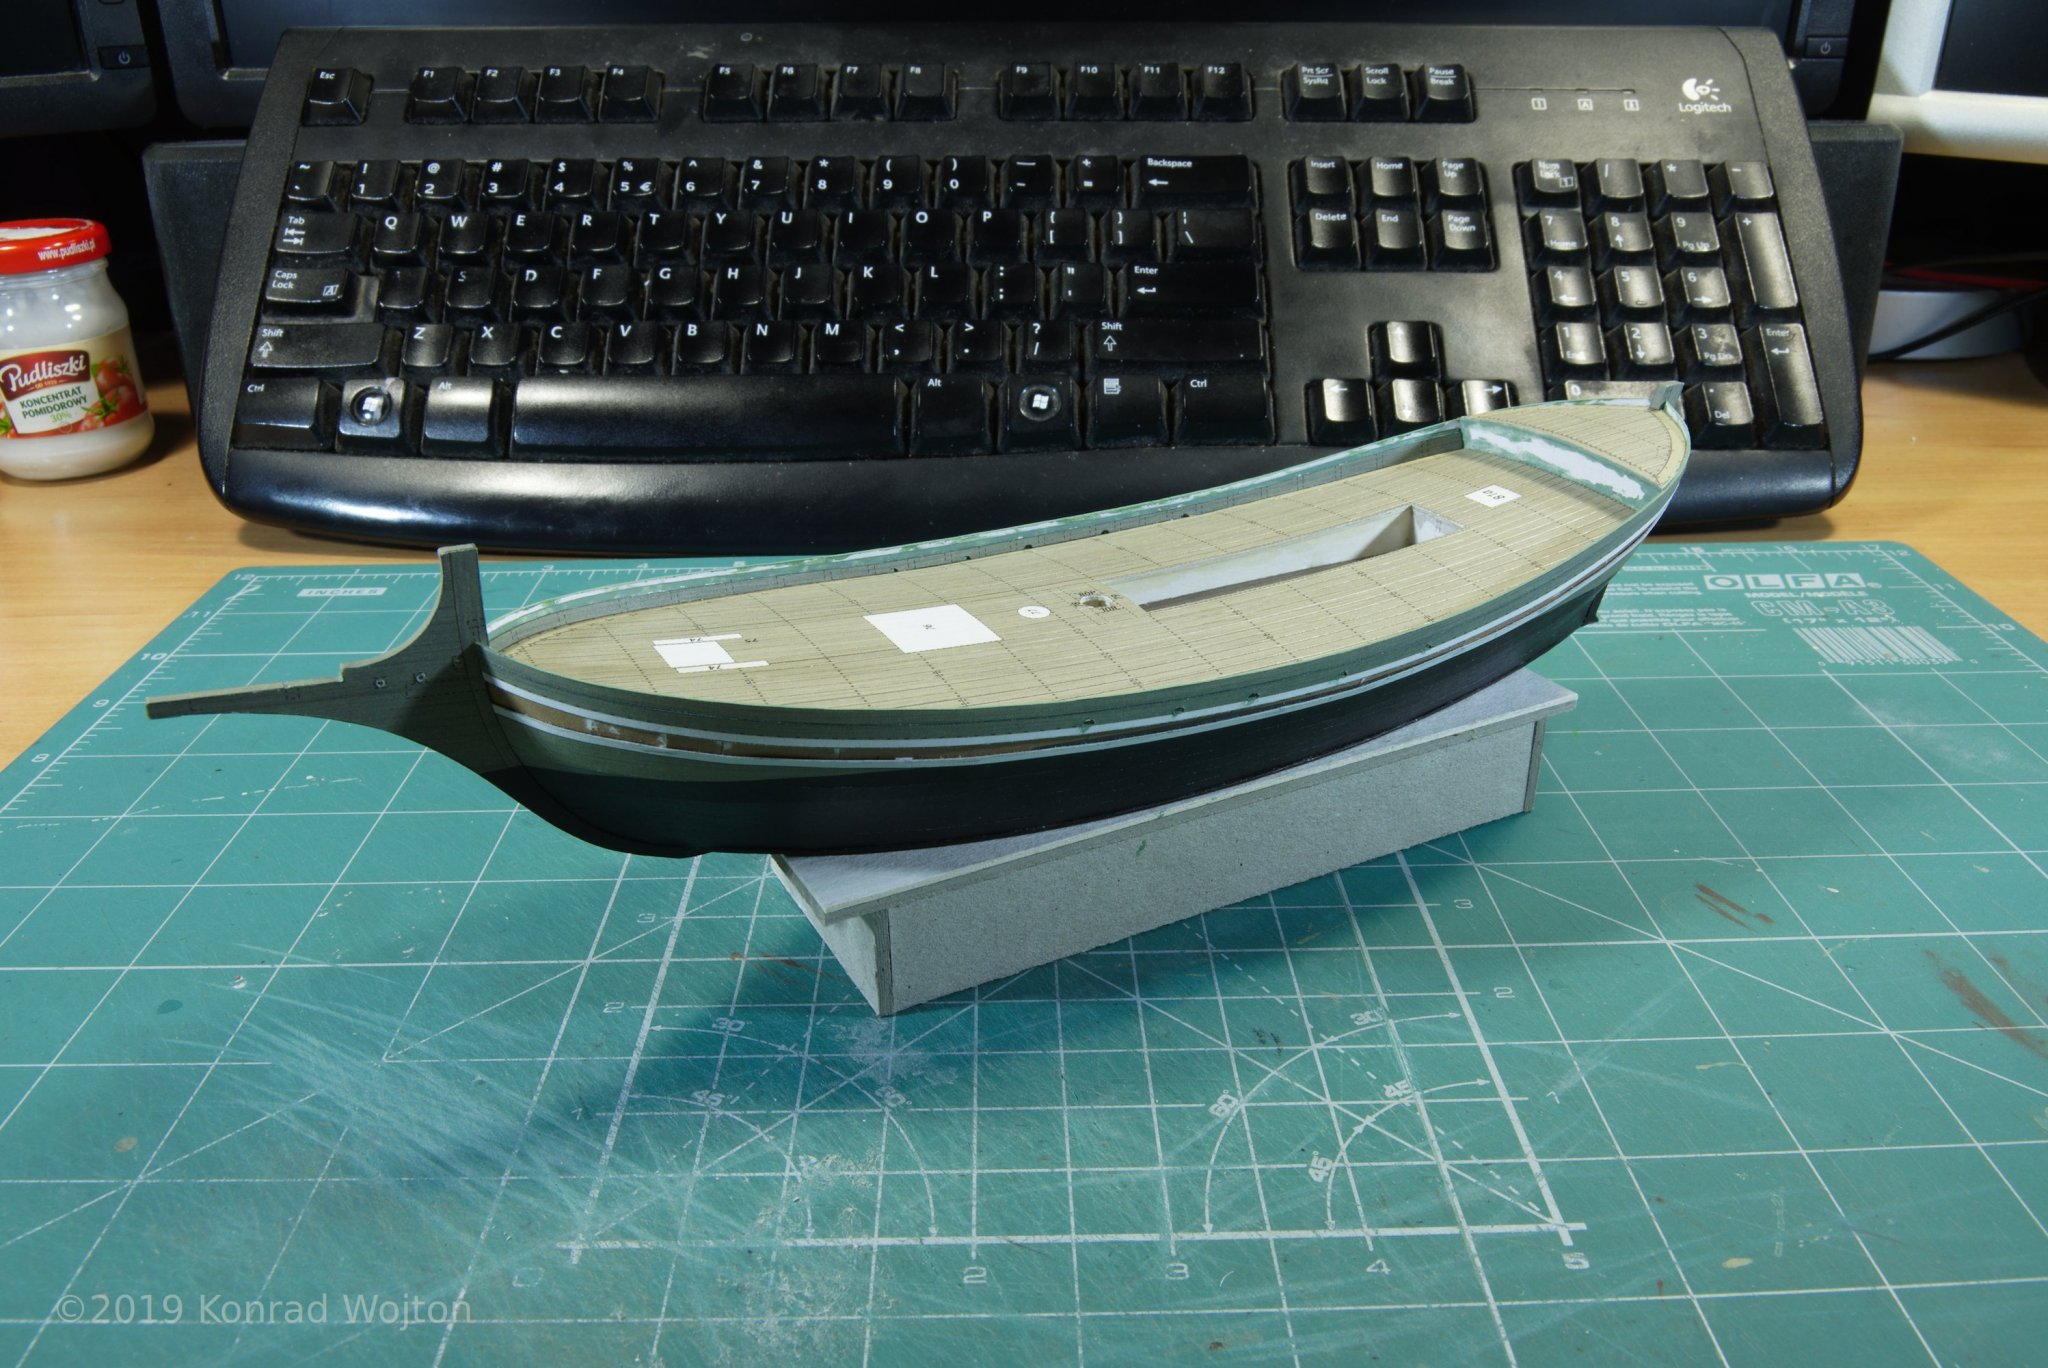
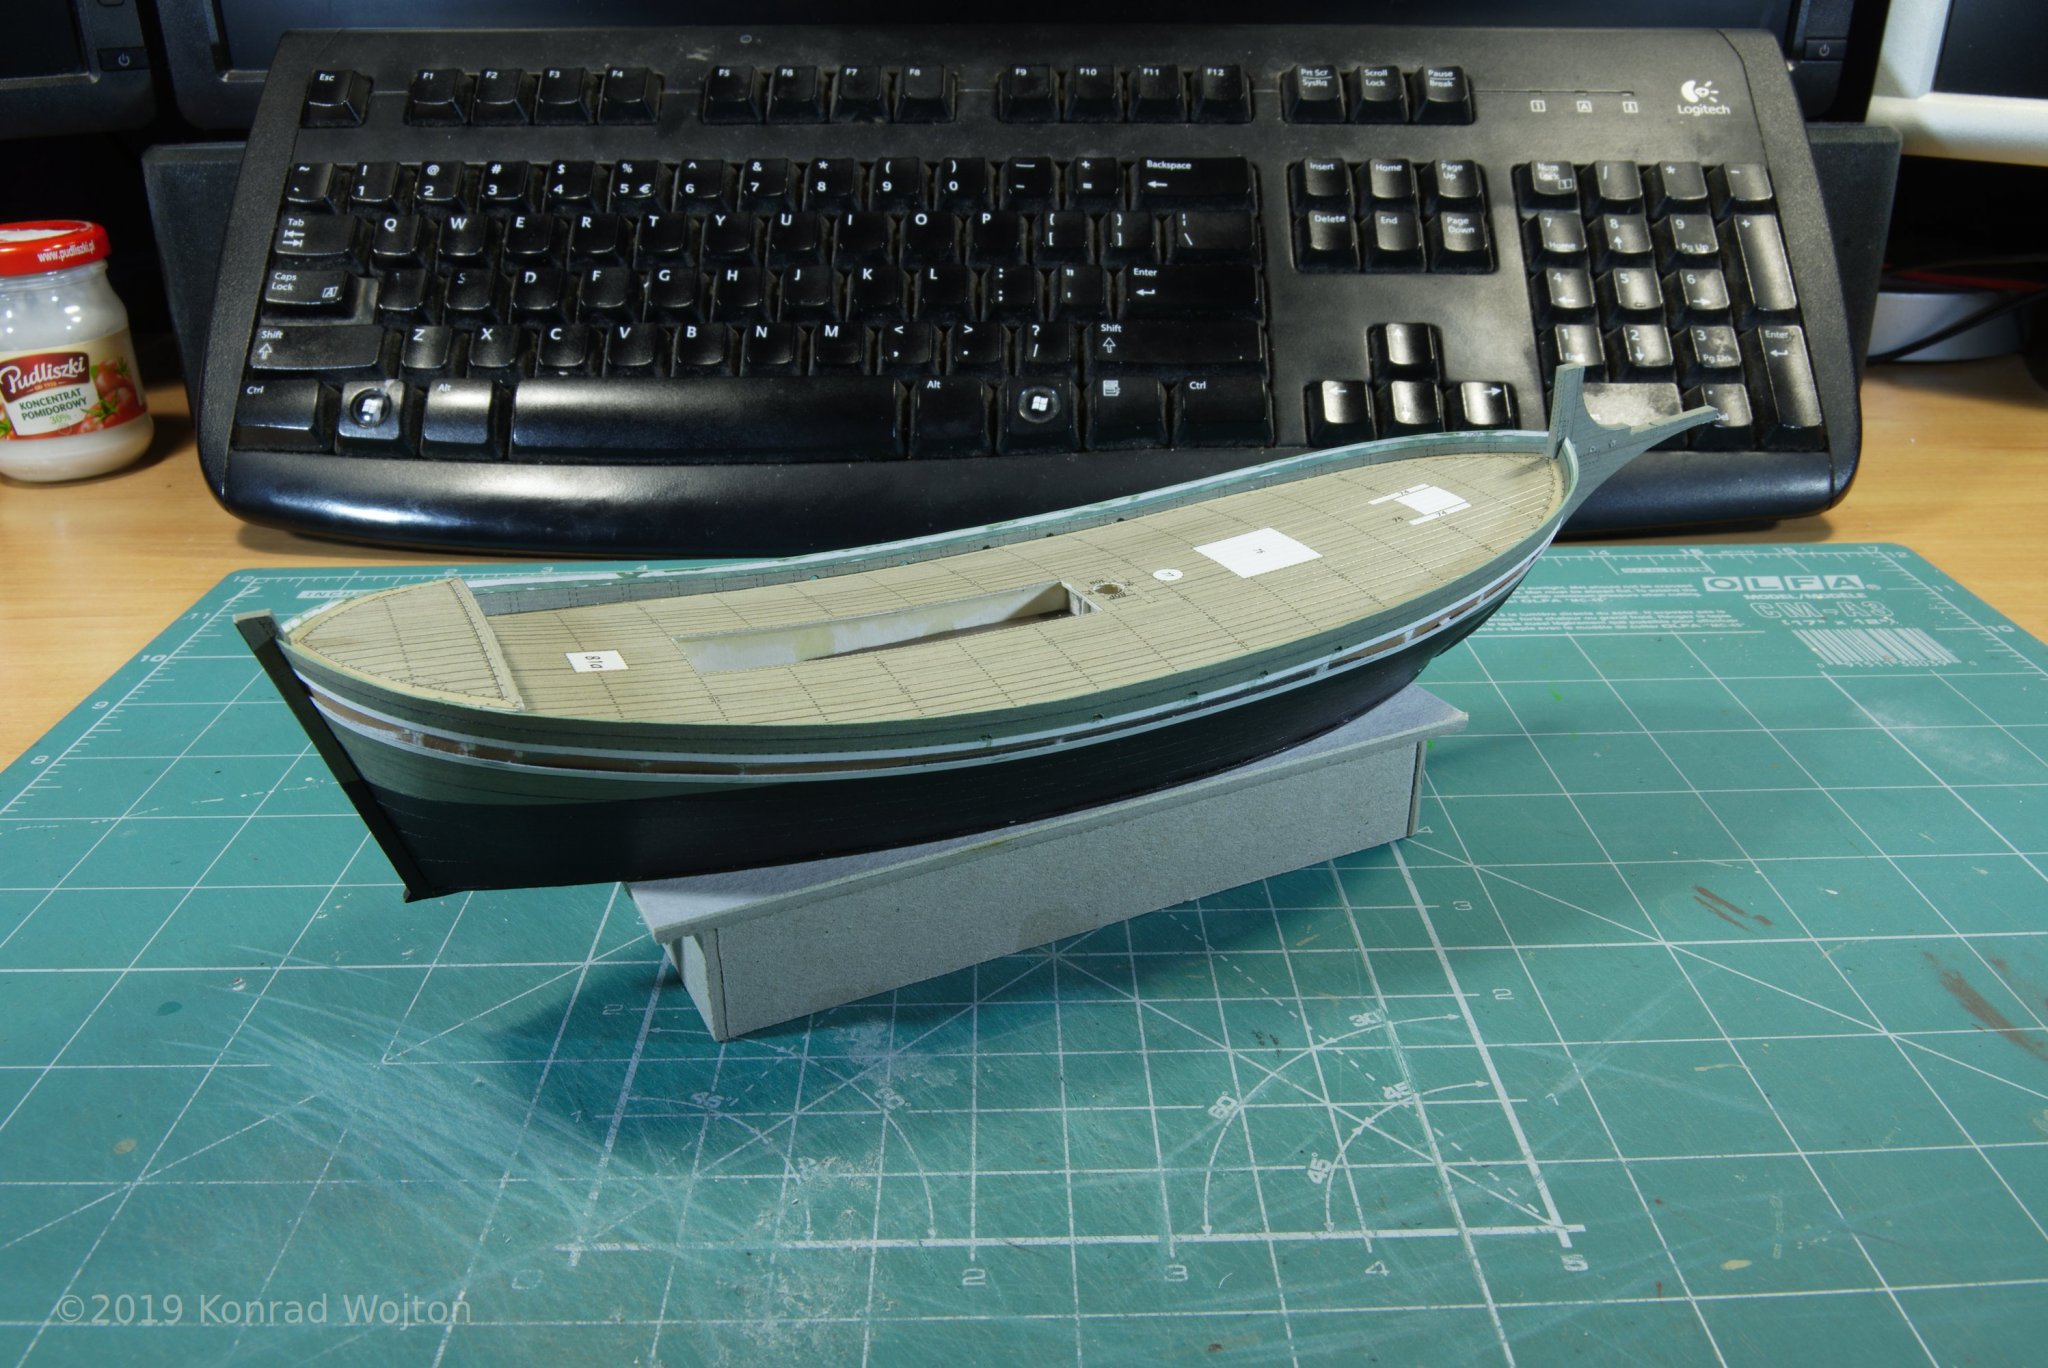
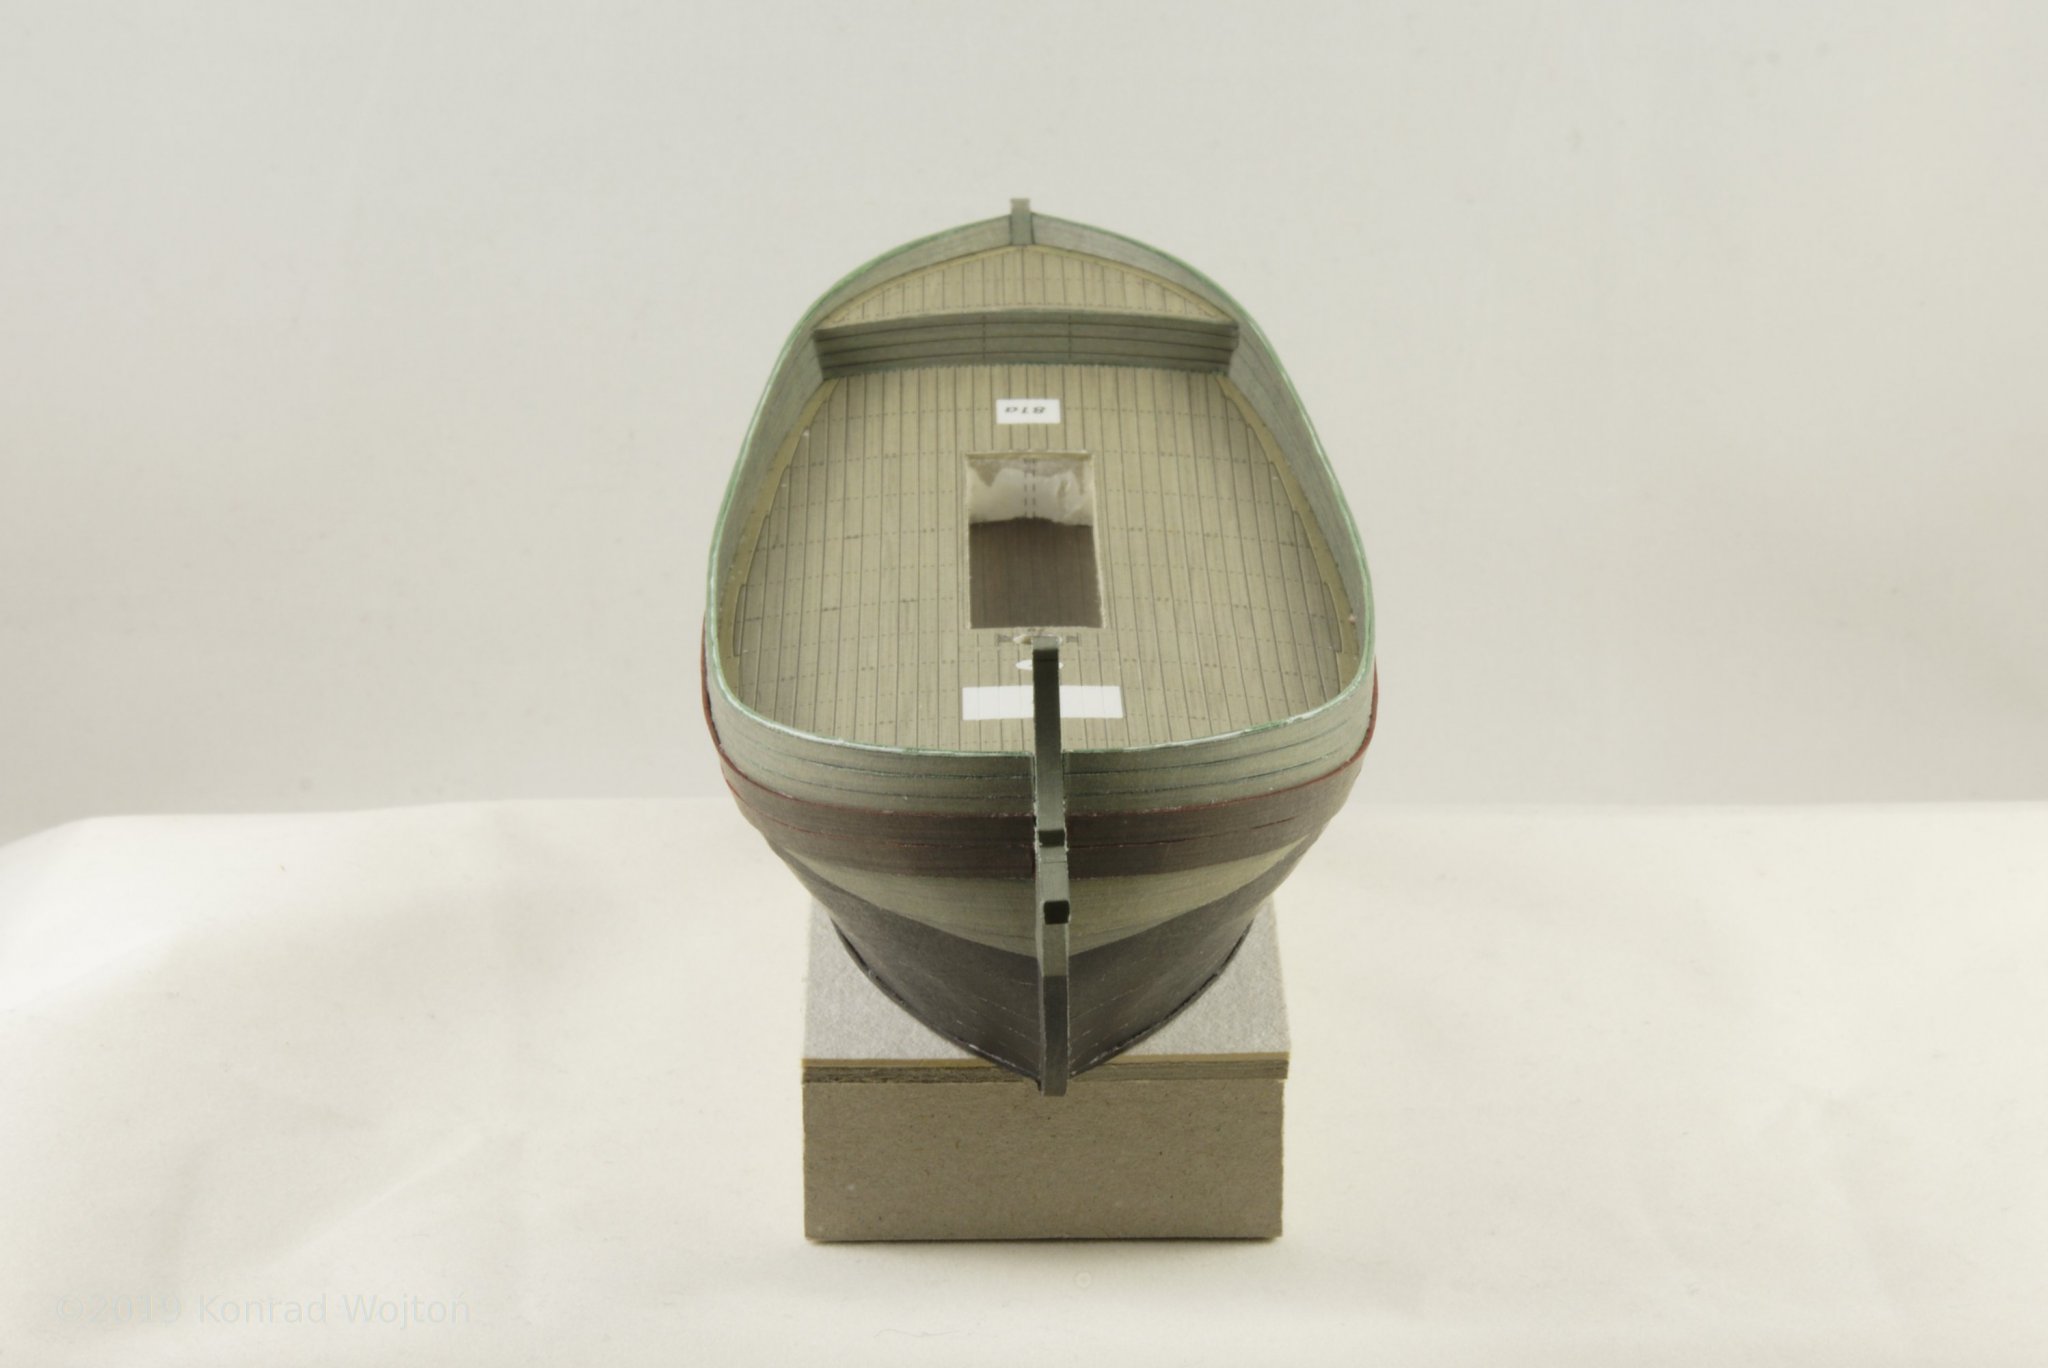
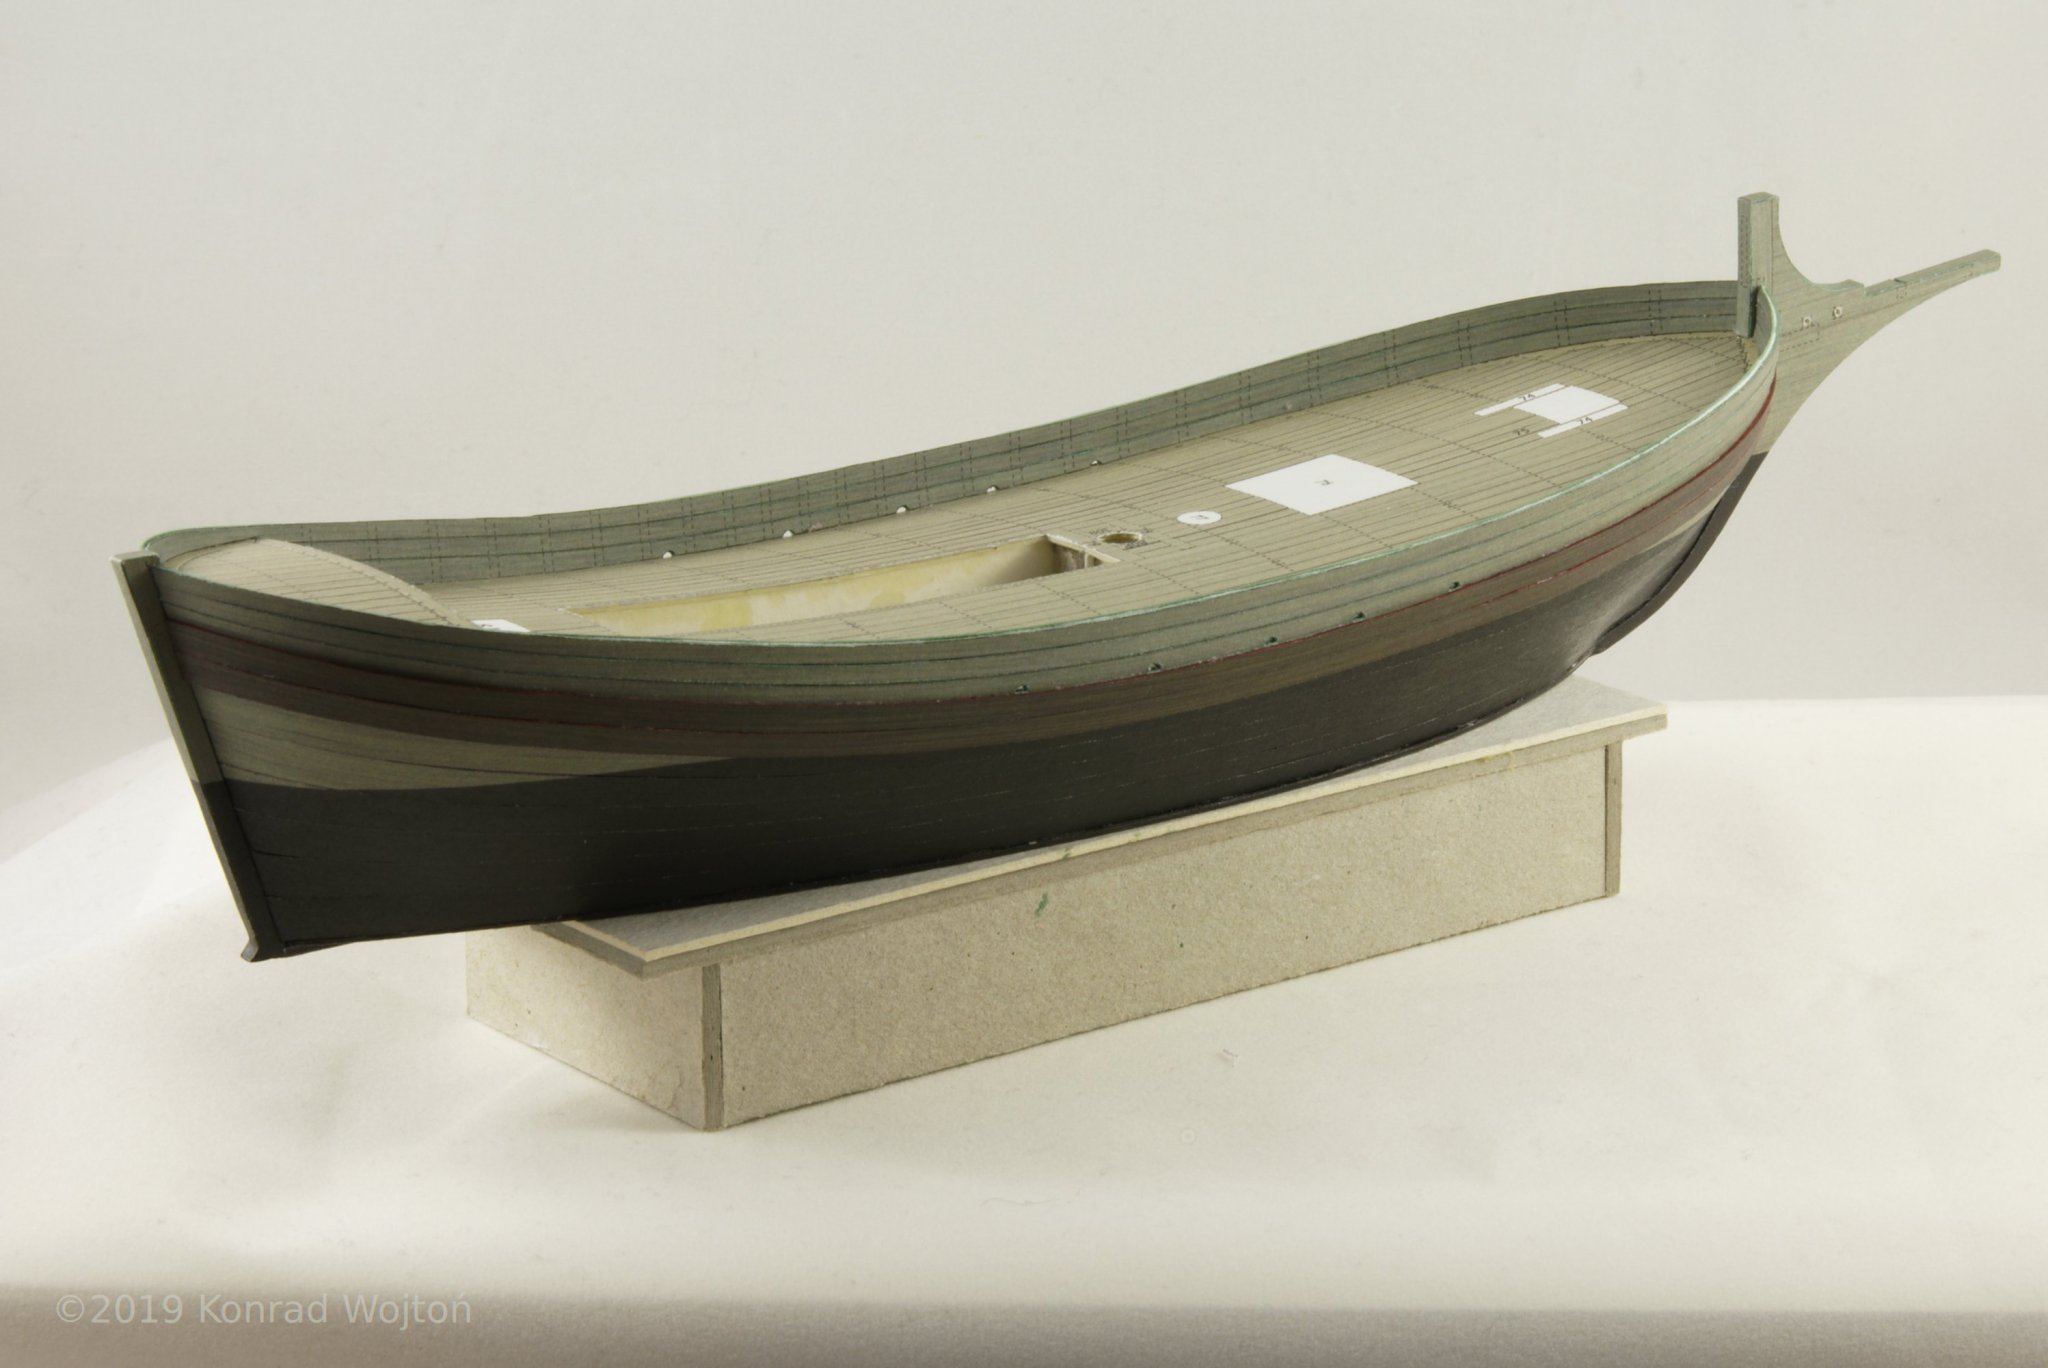
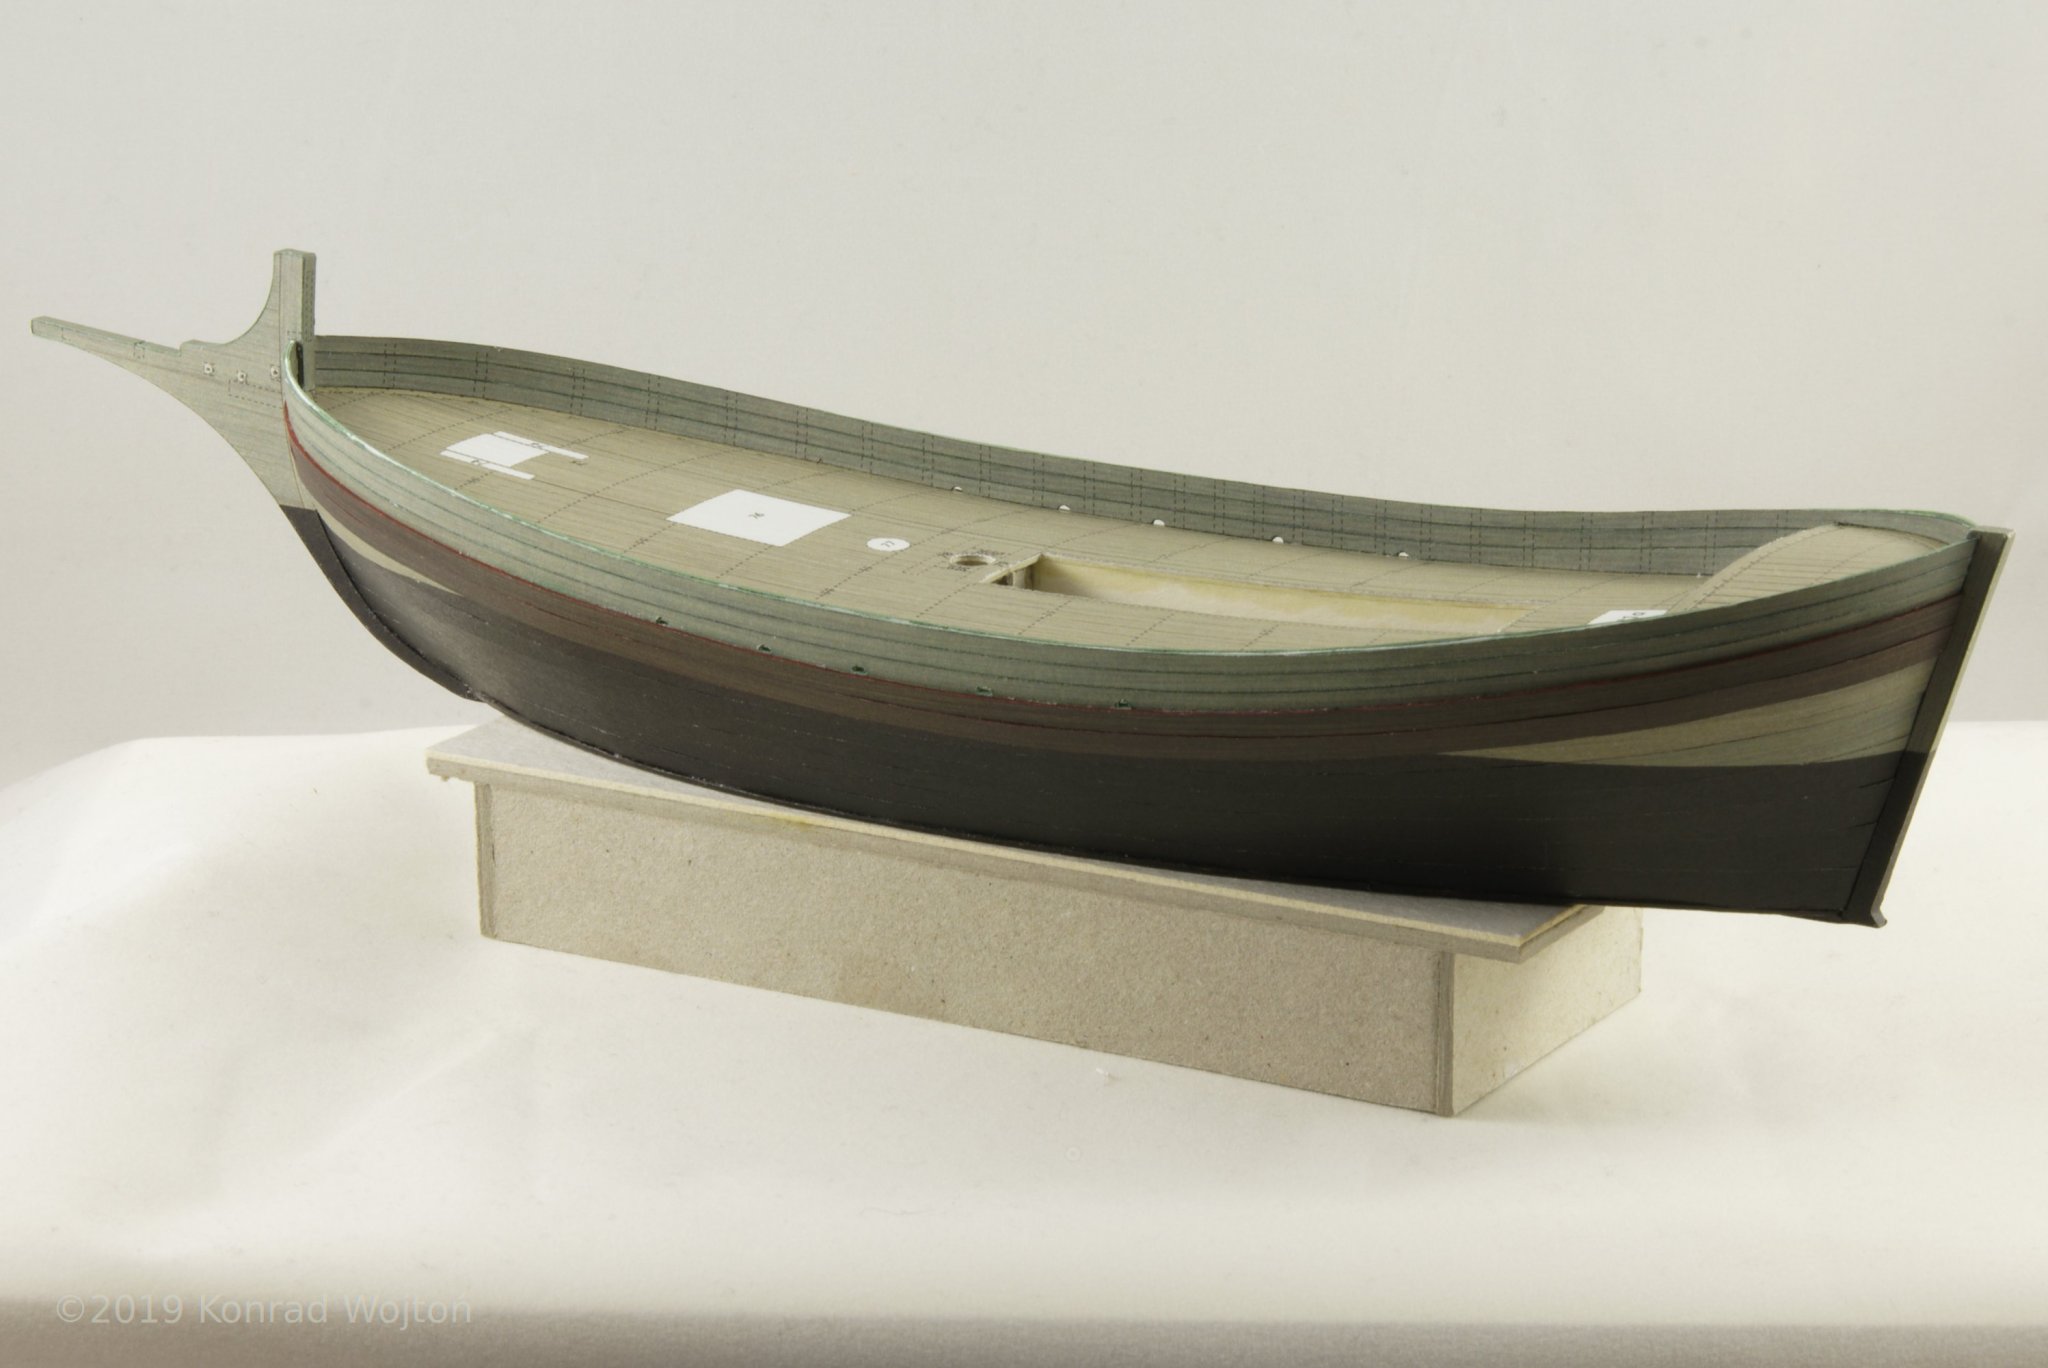
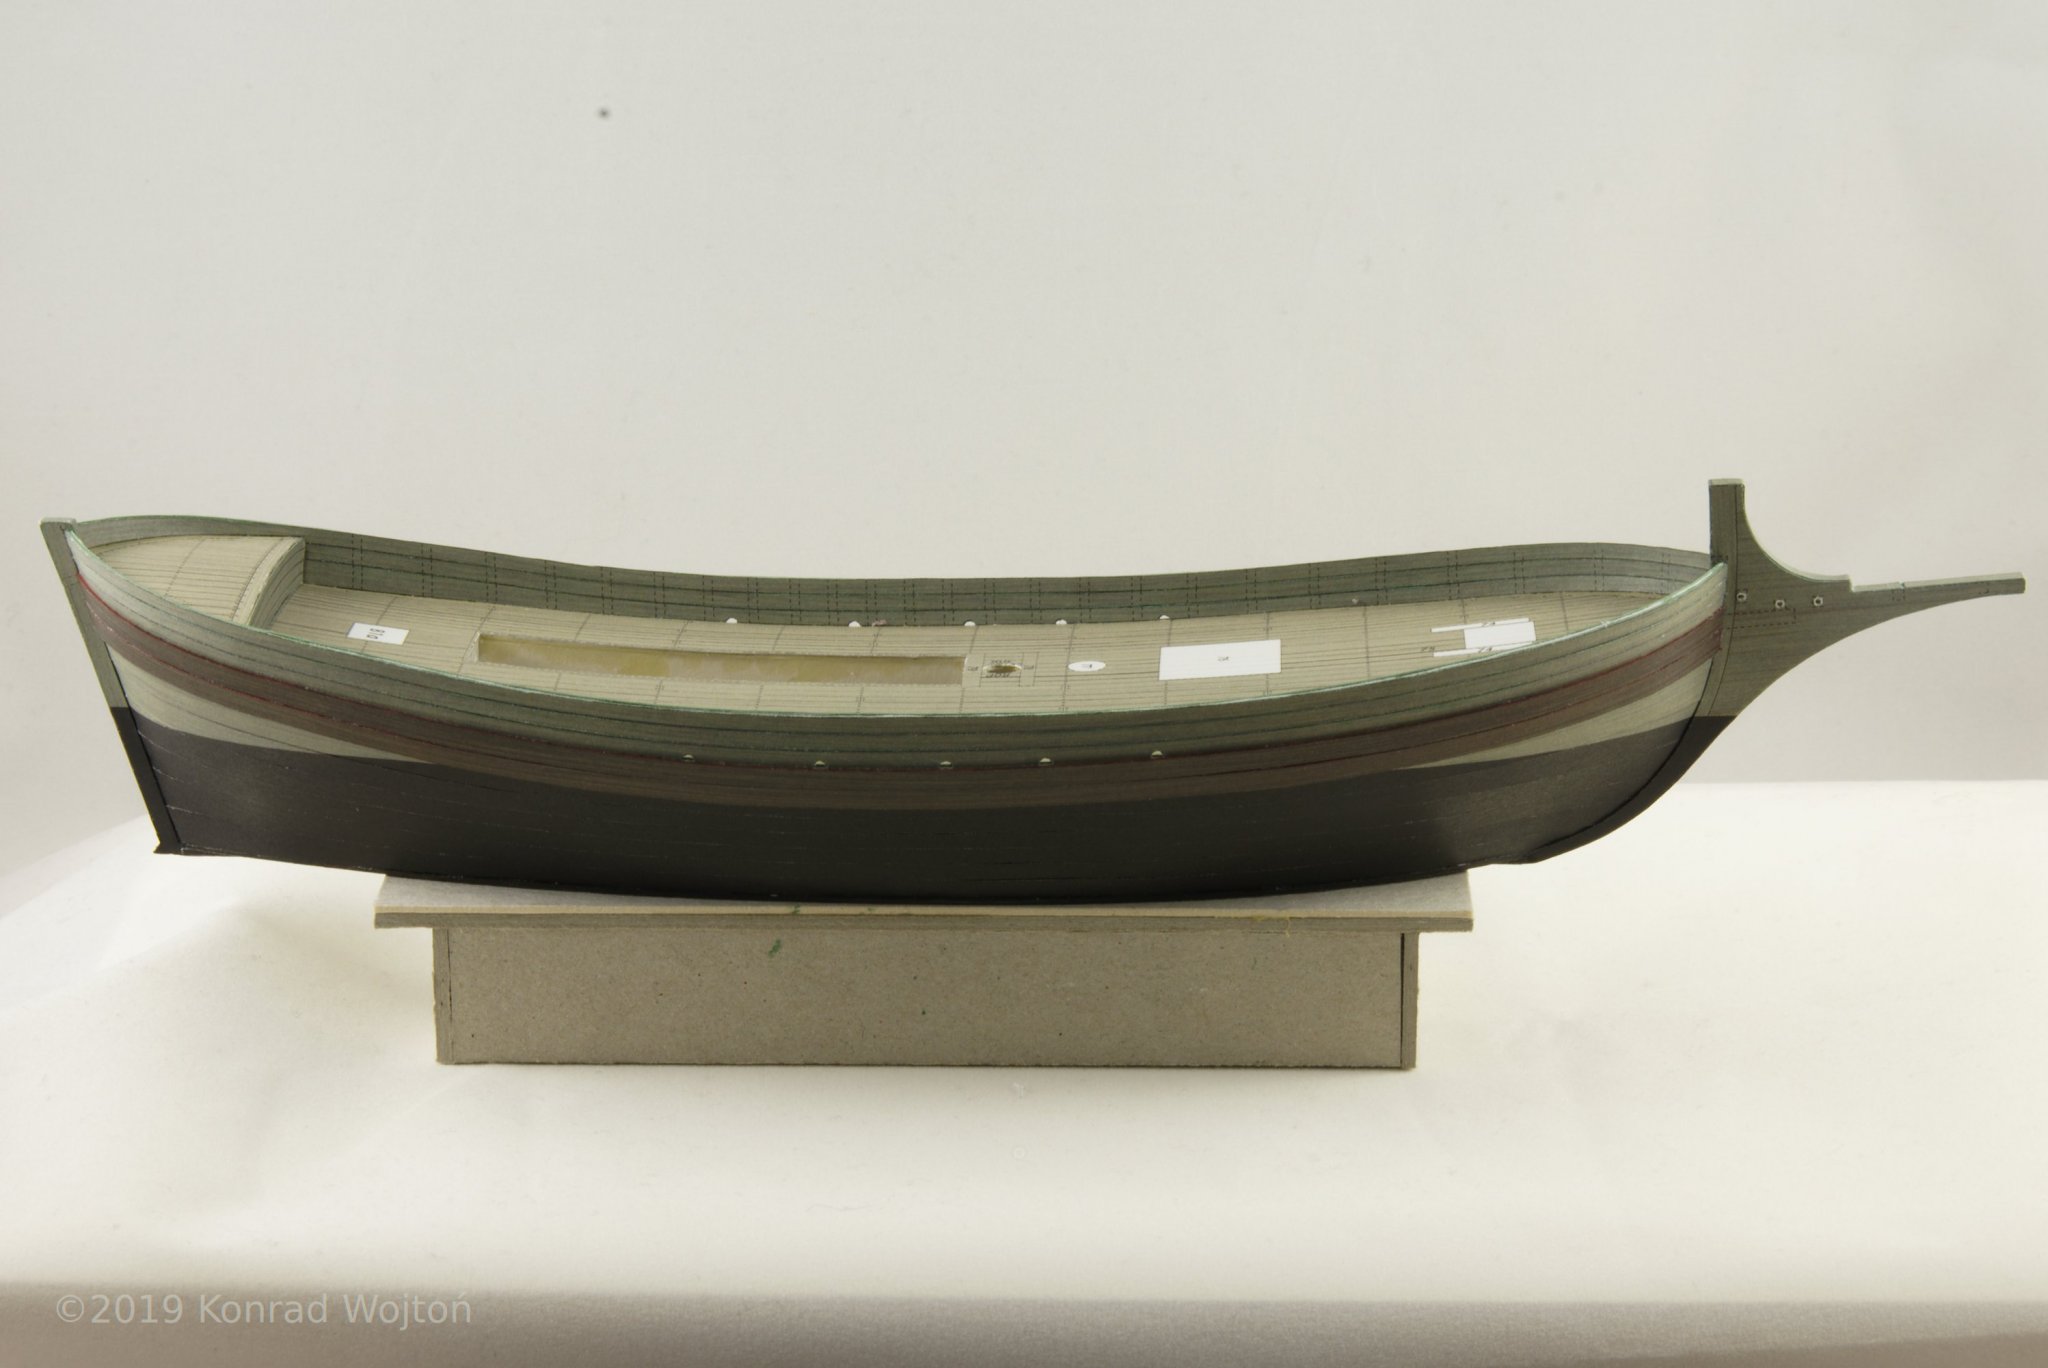
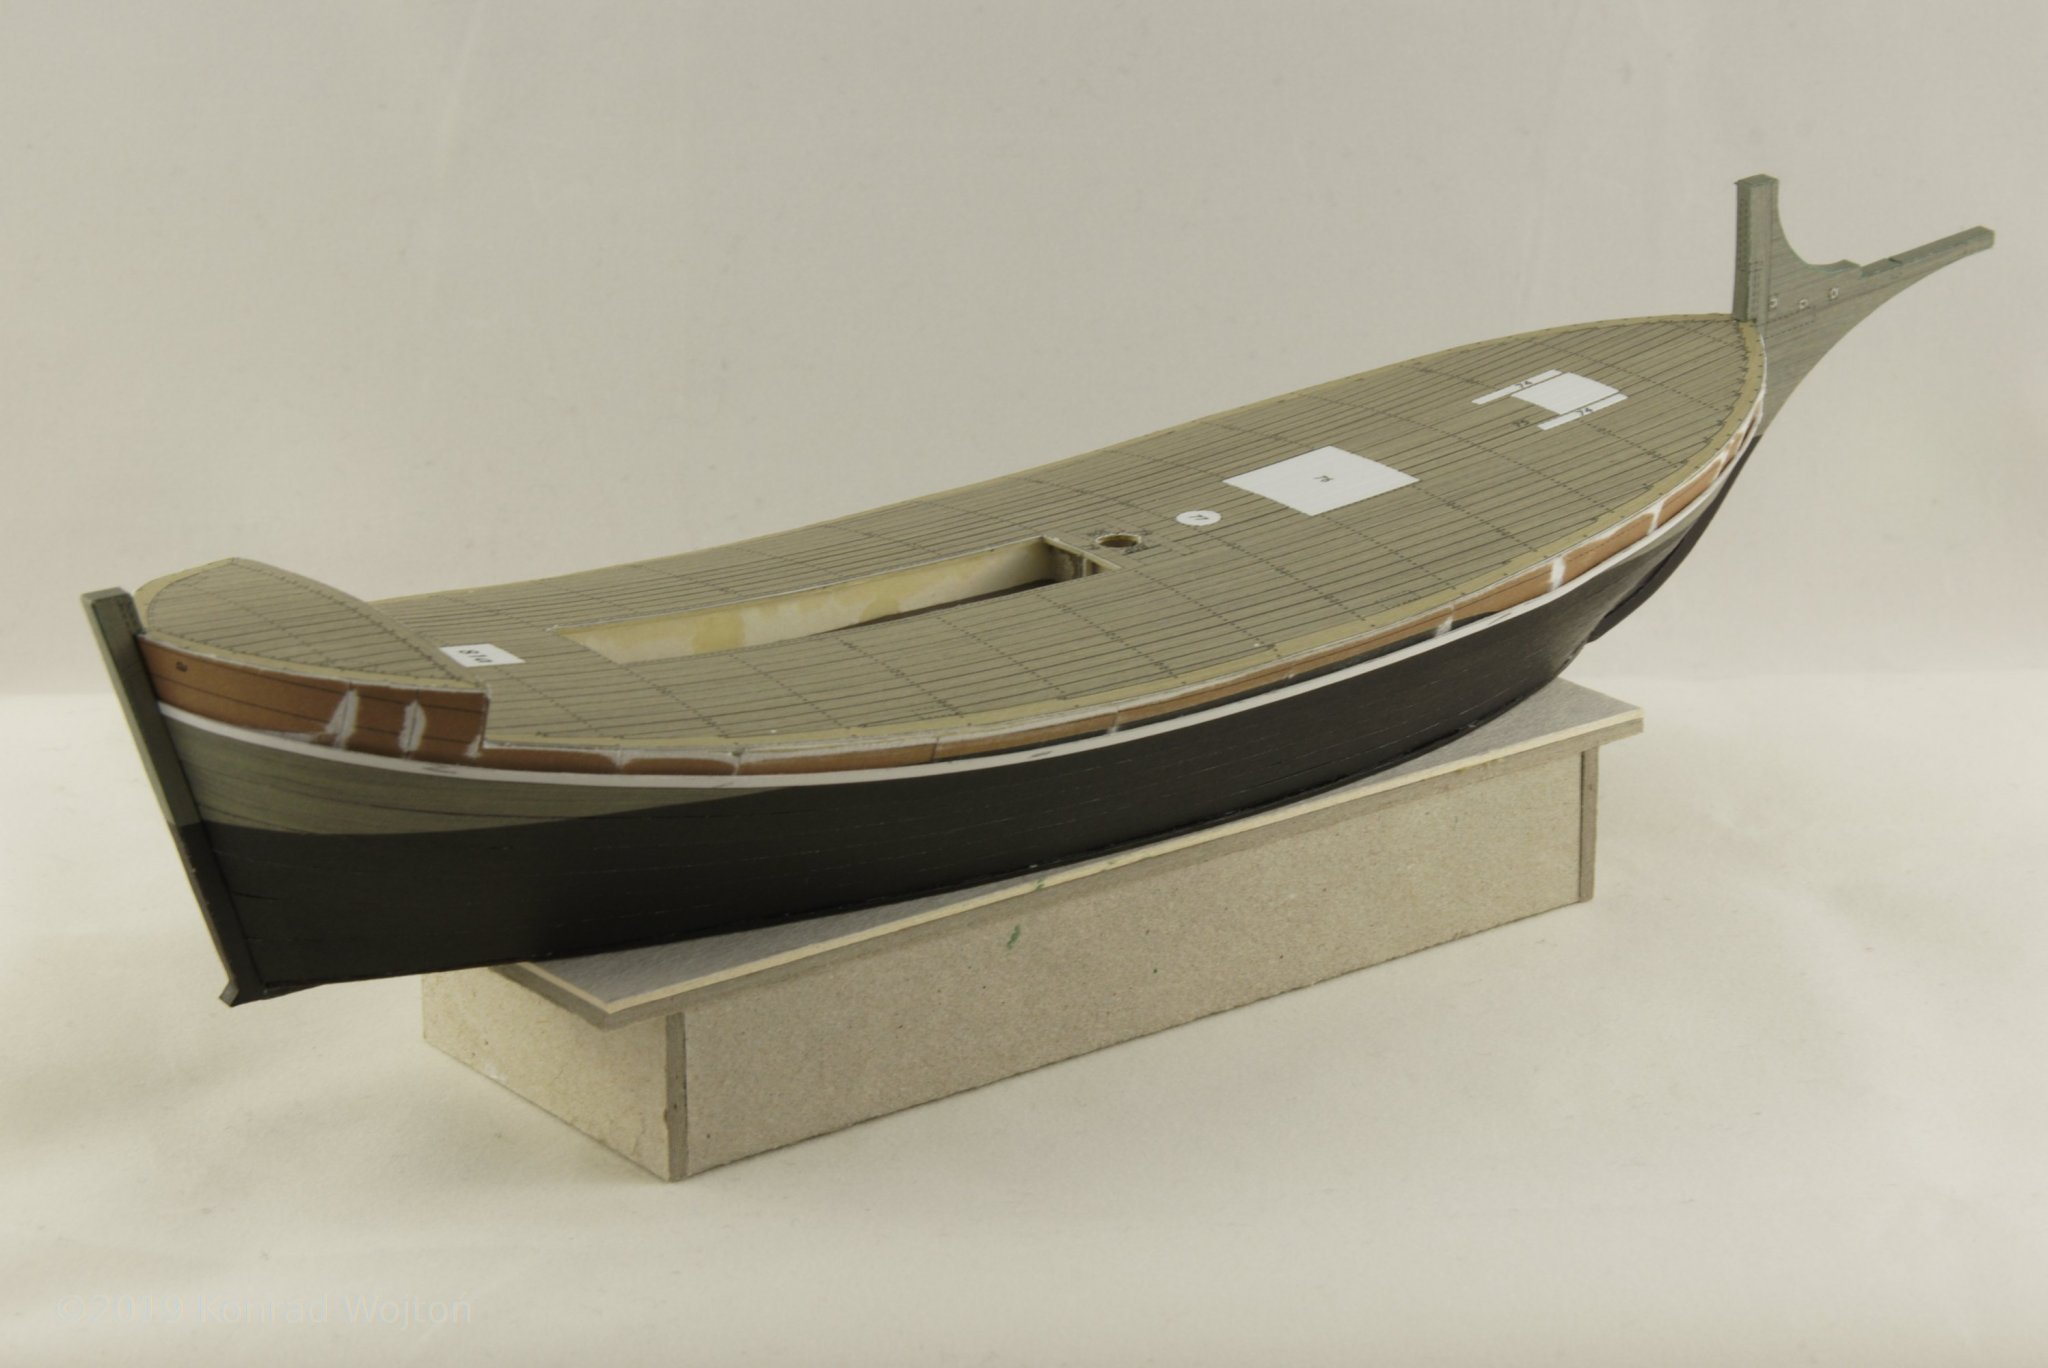
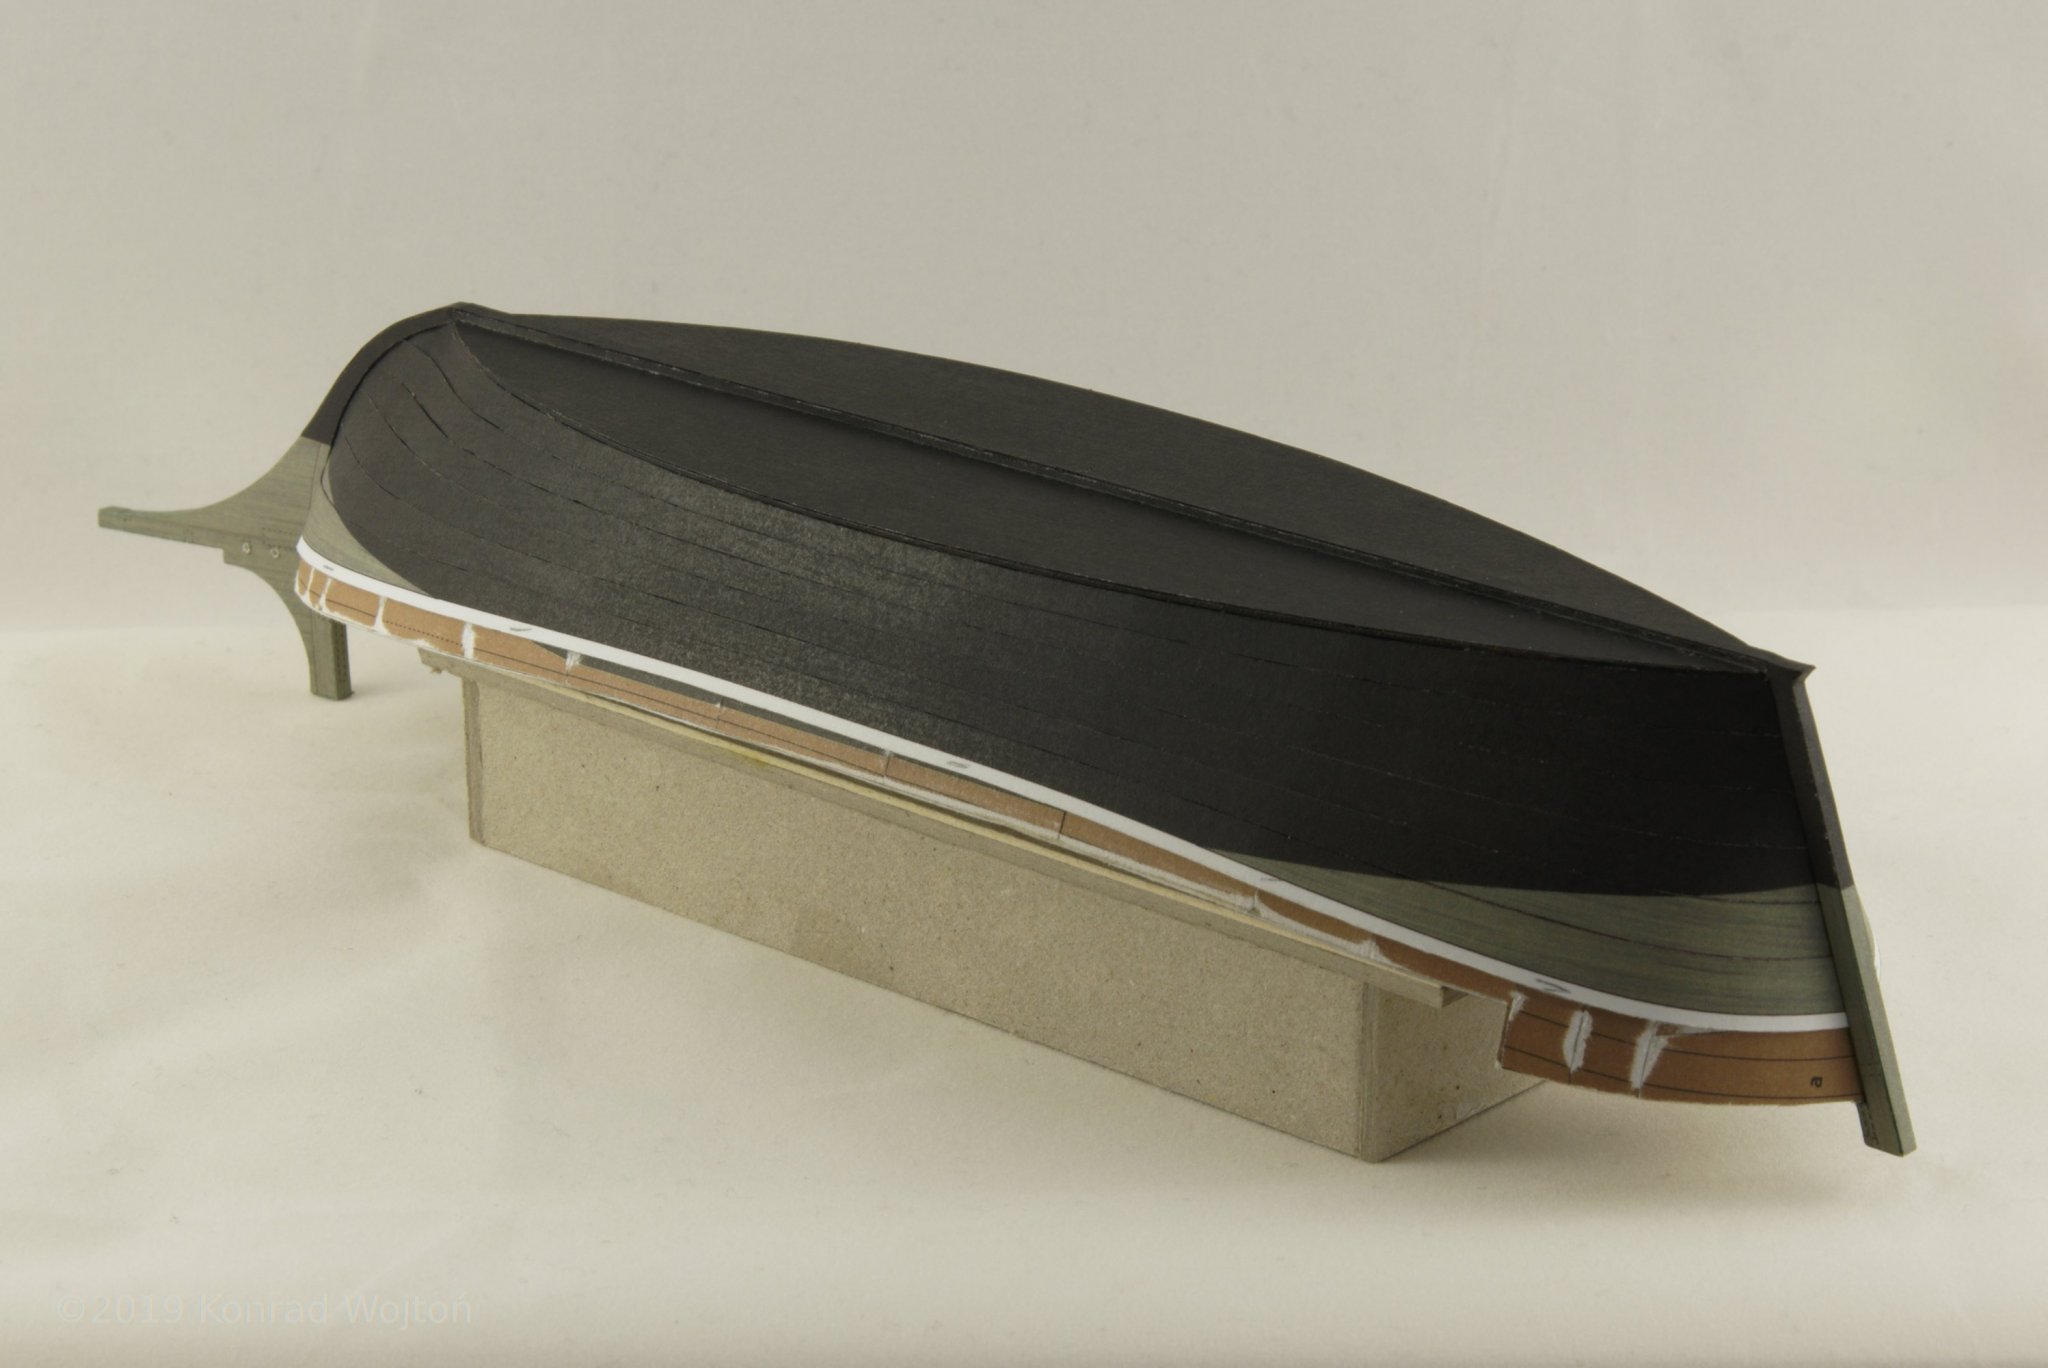
It is time for another small update, I've managed to finish planking the sides. I'am quite happy with the result. I've made some errors but they are not that noticeable.
This is how it looked like a week ago:
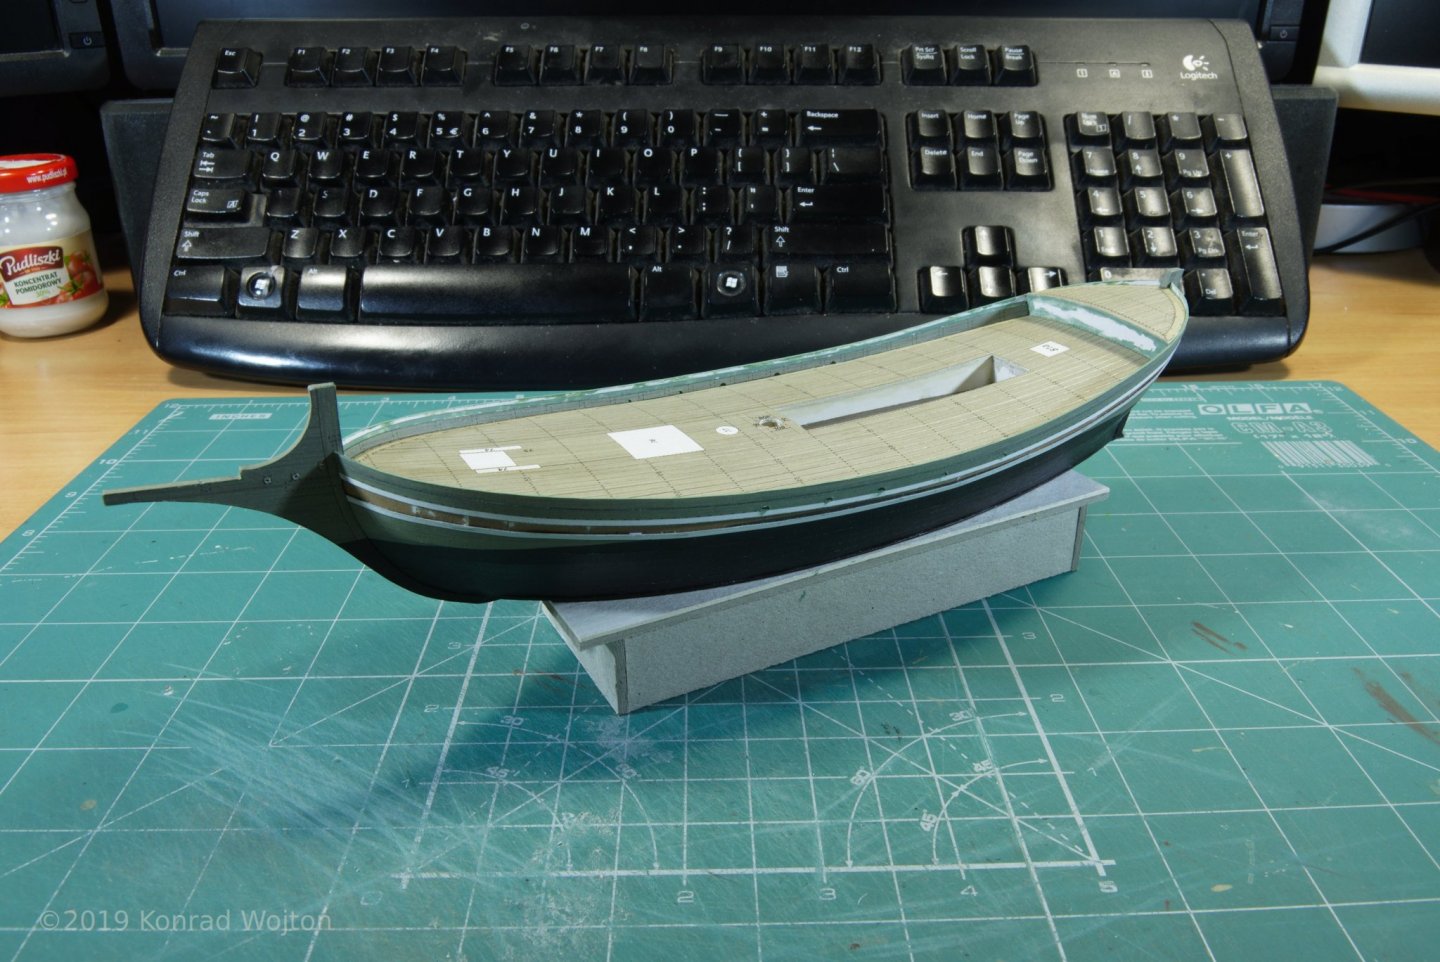
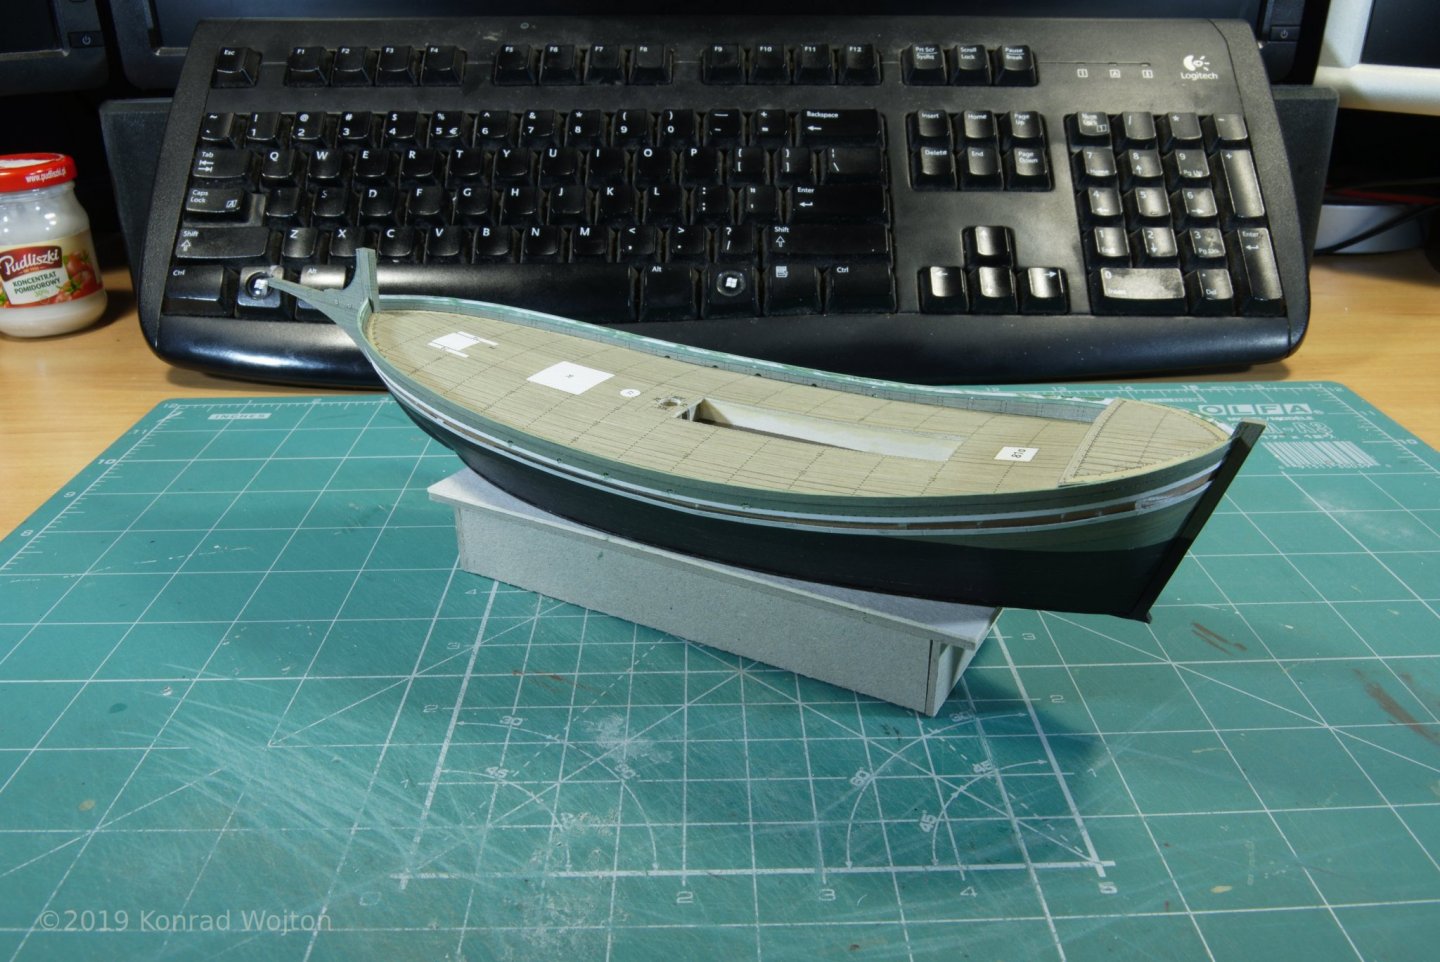

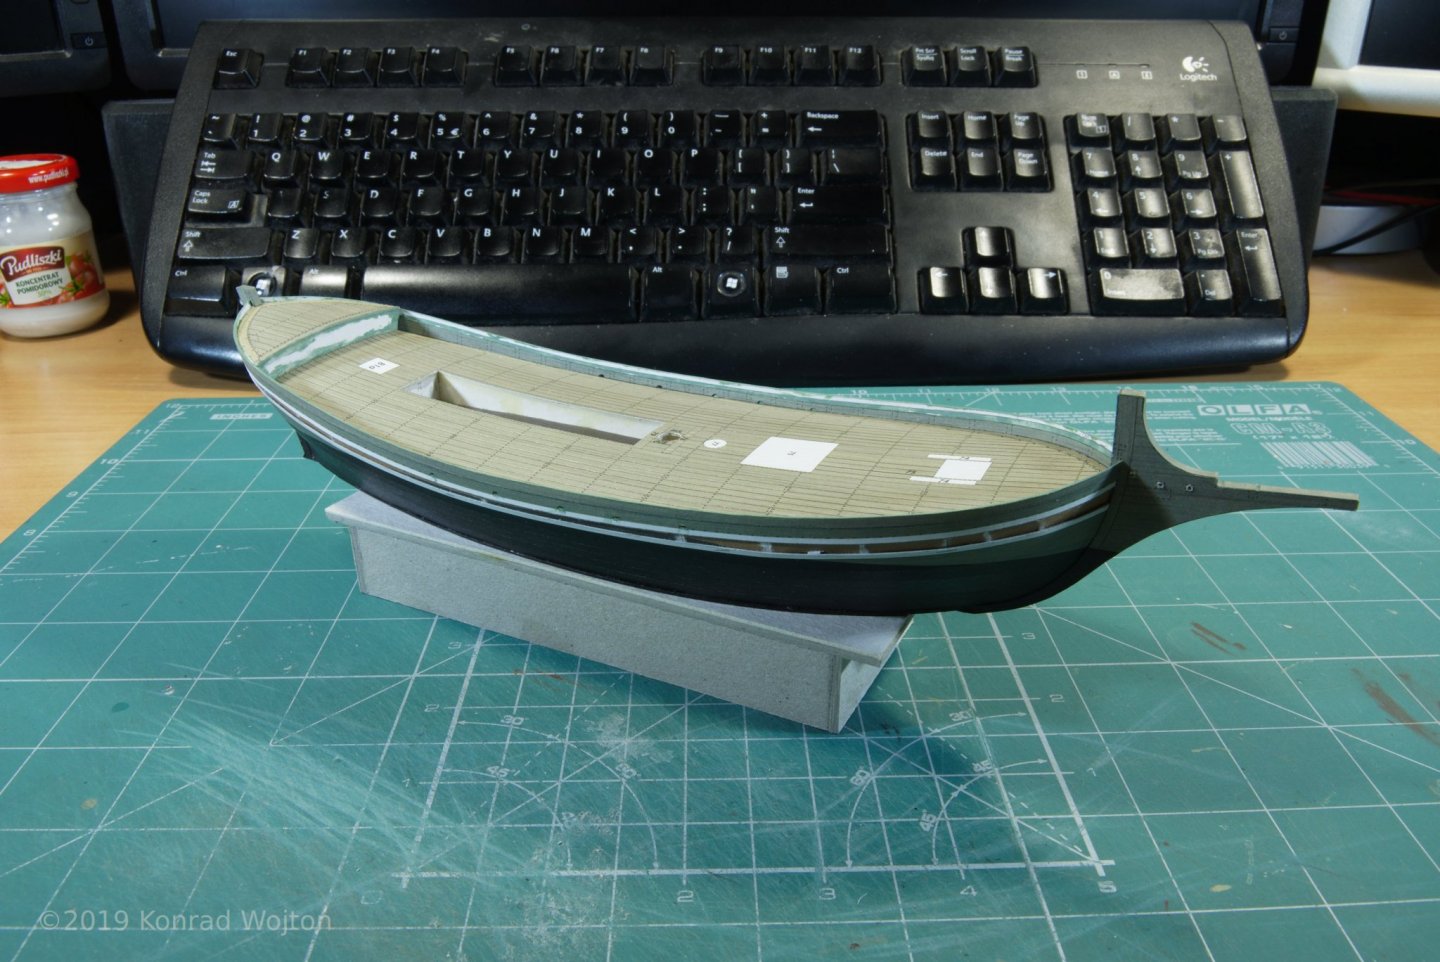
And this is how it looks now:
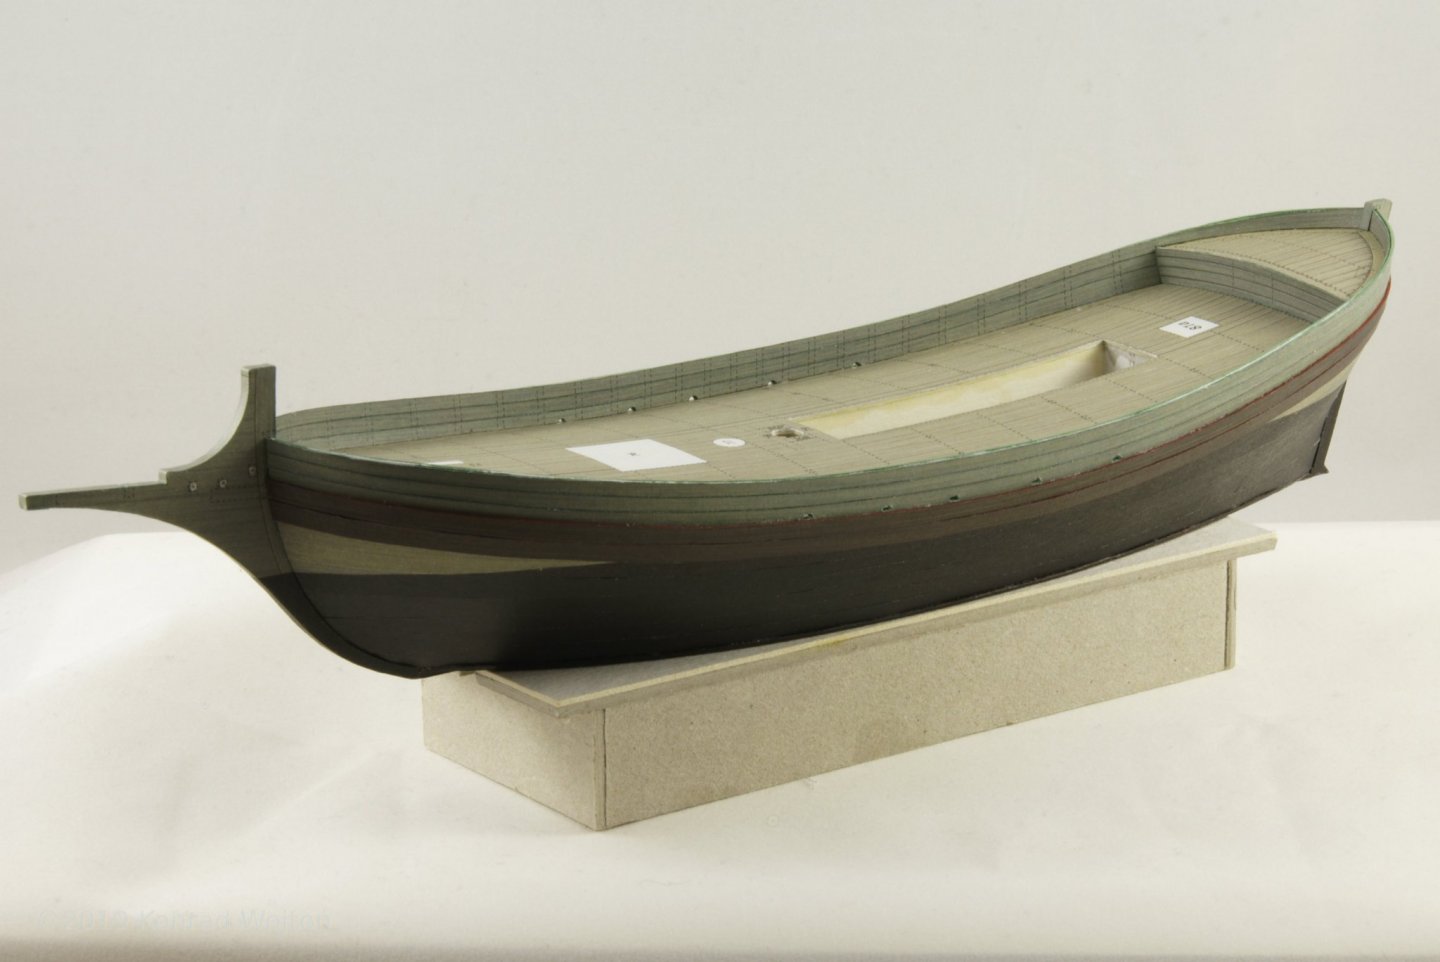
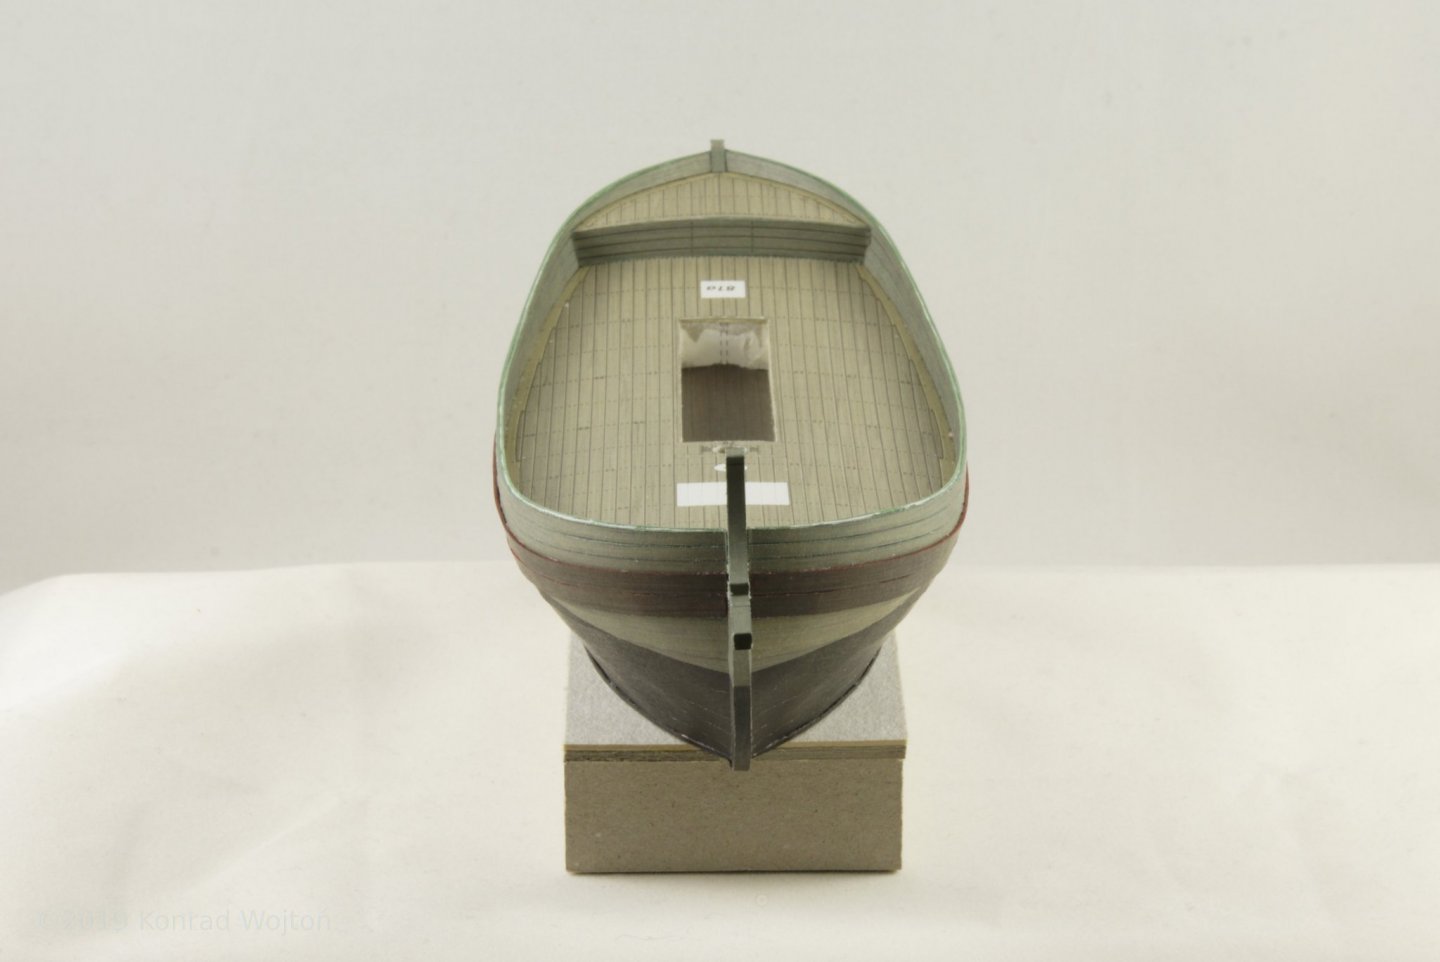
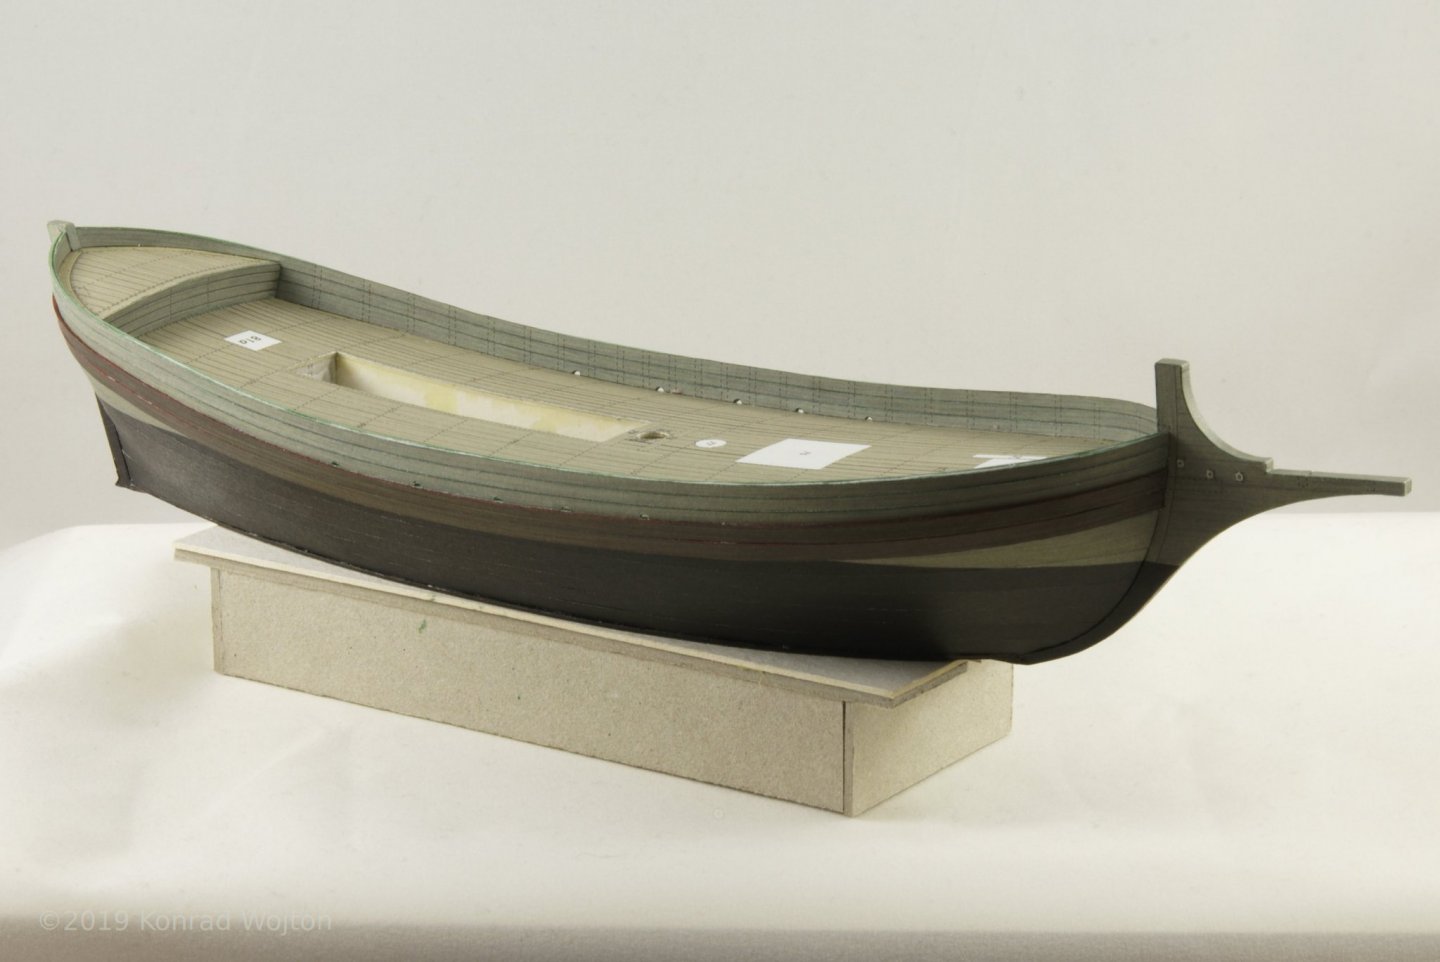

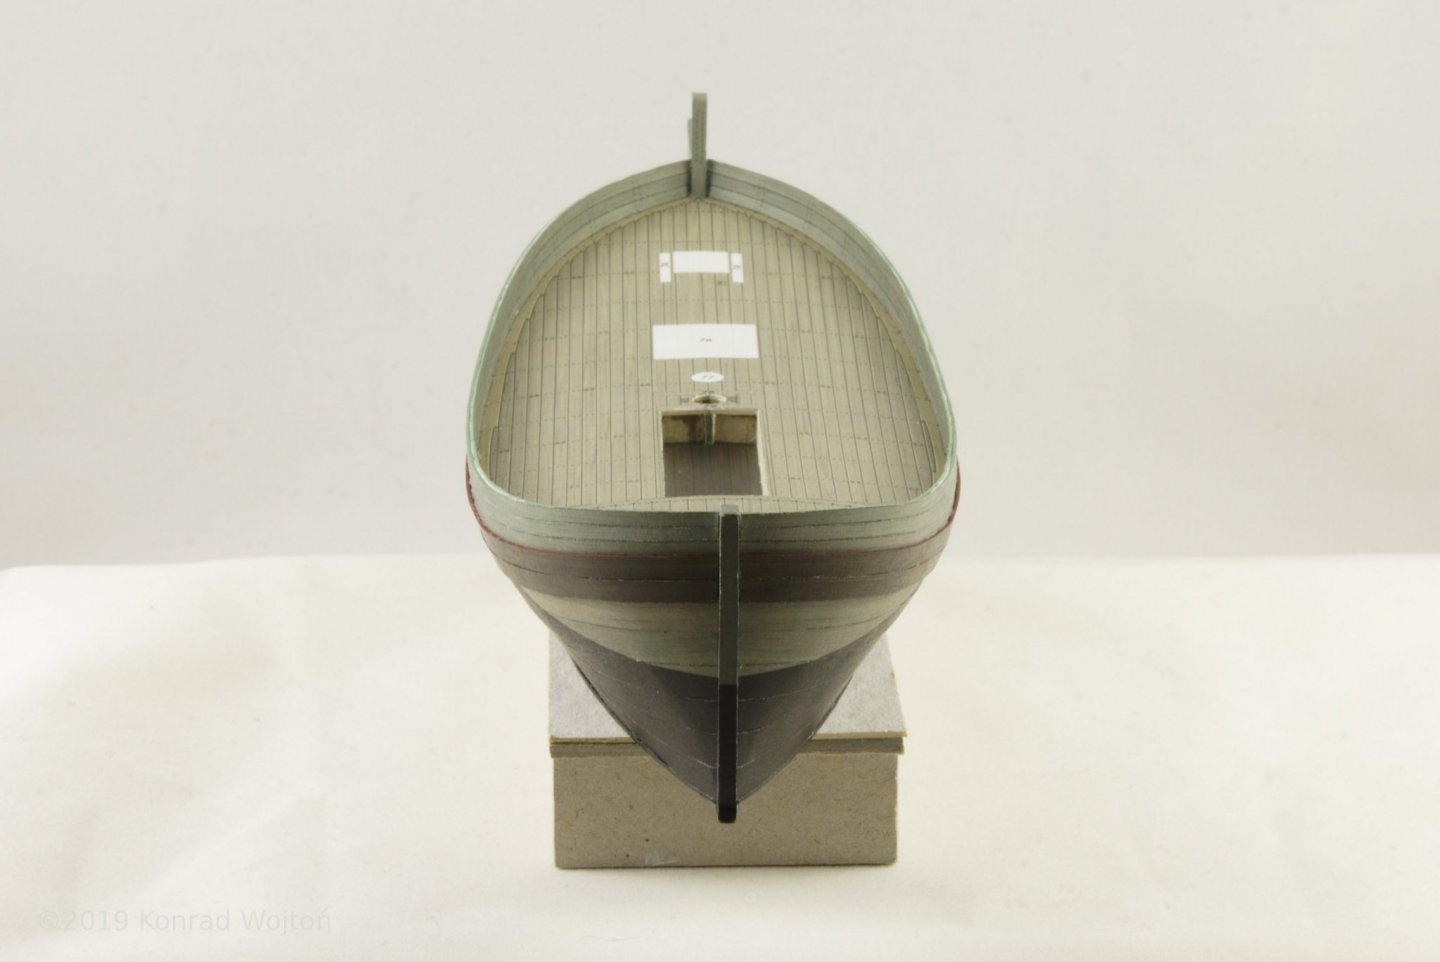

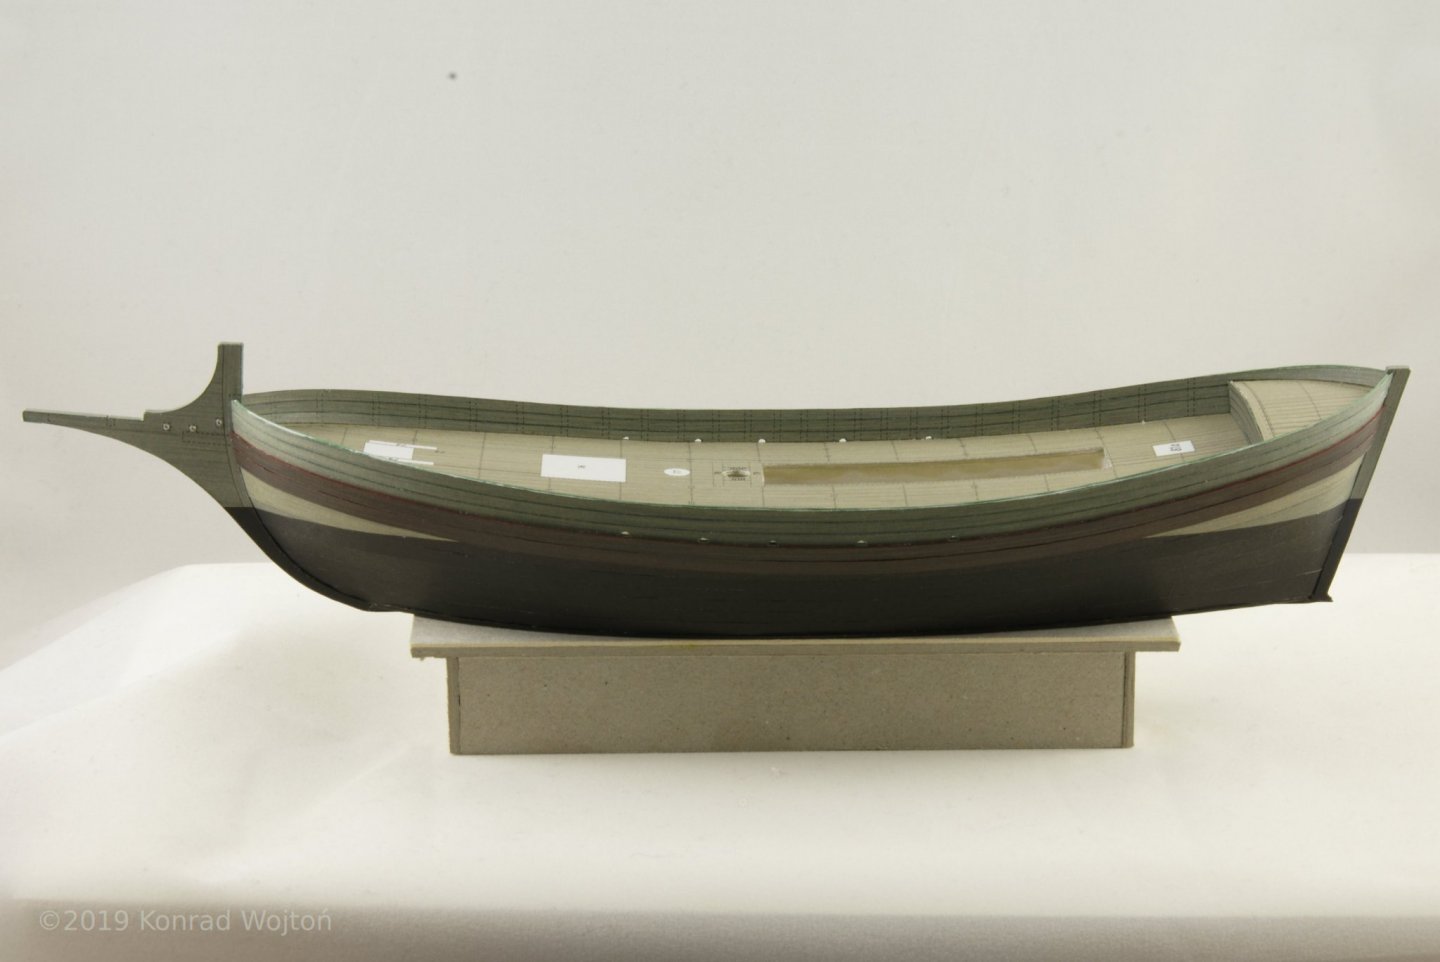

Now it is time to add some details.
- BETAQDAVE, GrandpaPhil, mtaylor and 3 others
-
6
-
-
-
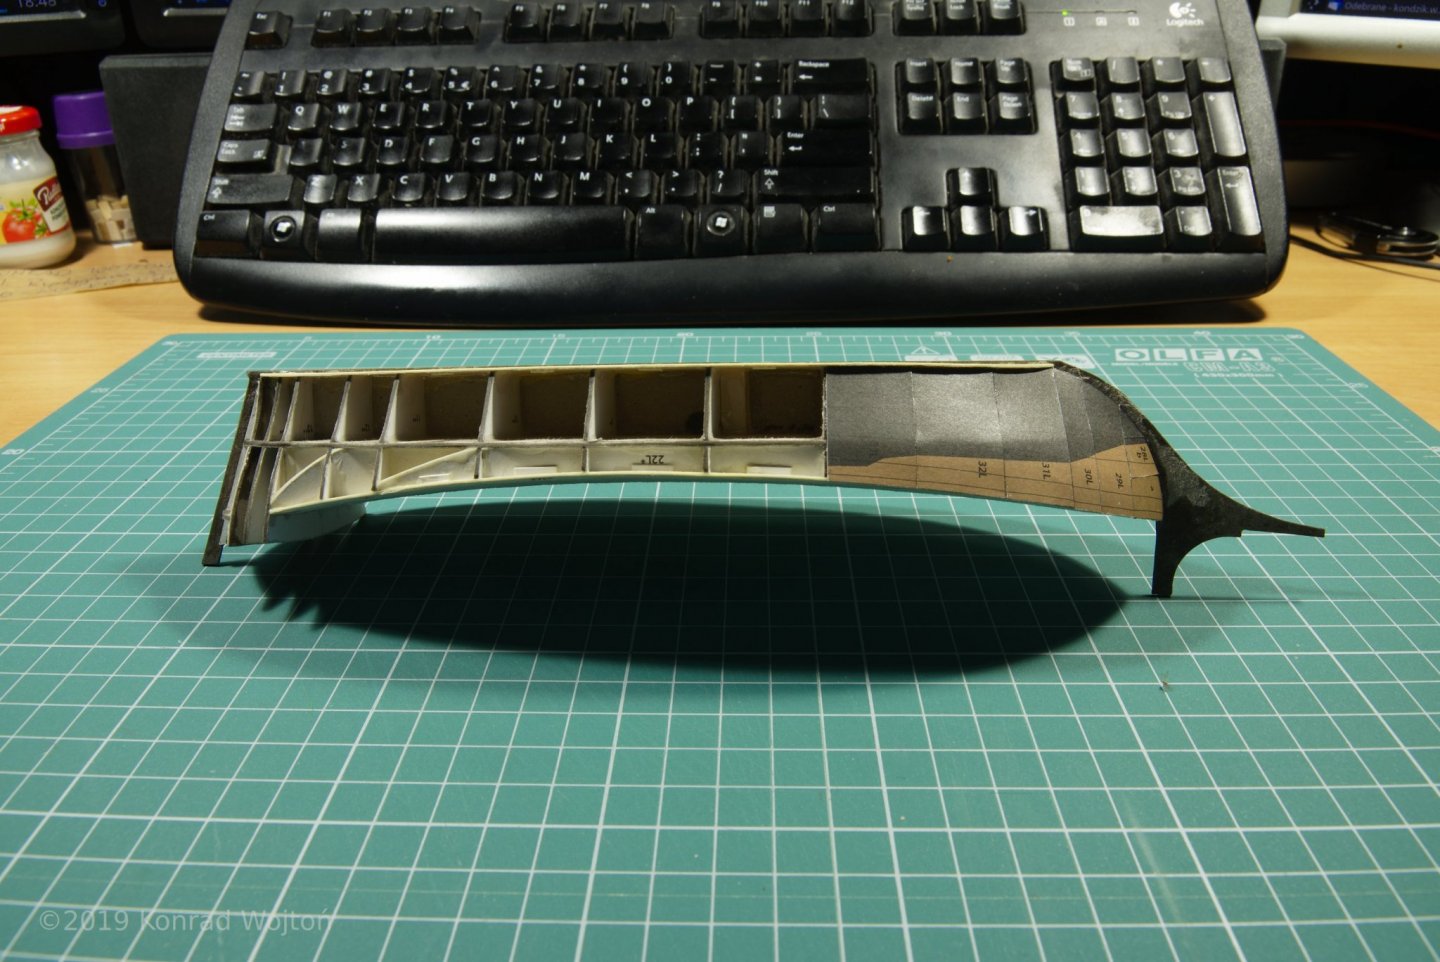
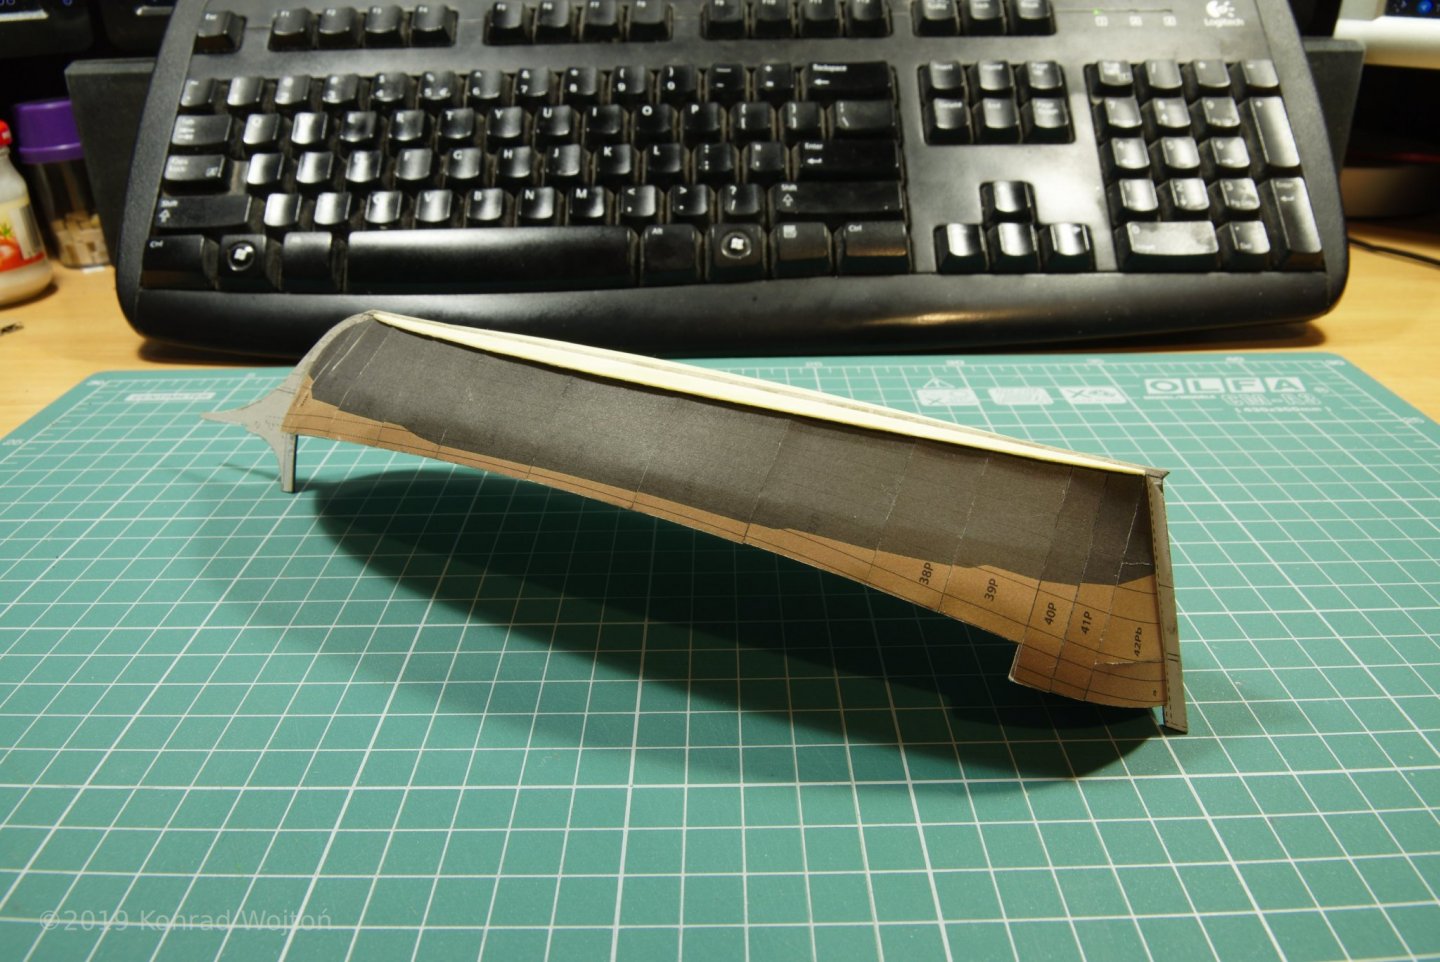
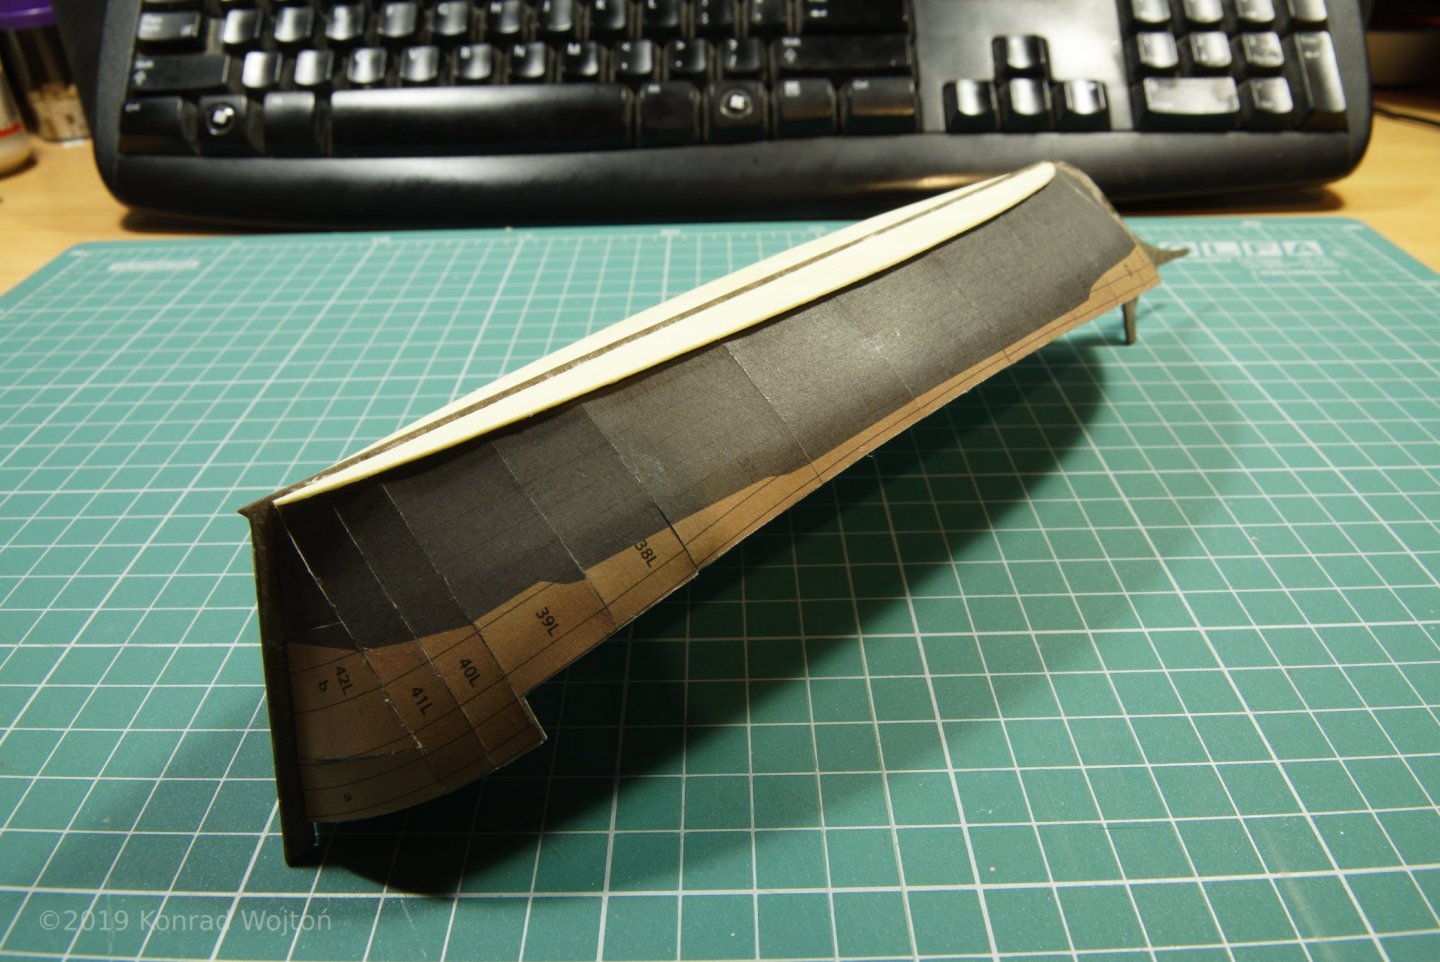
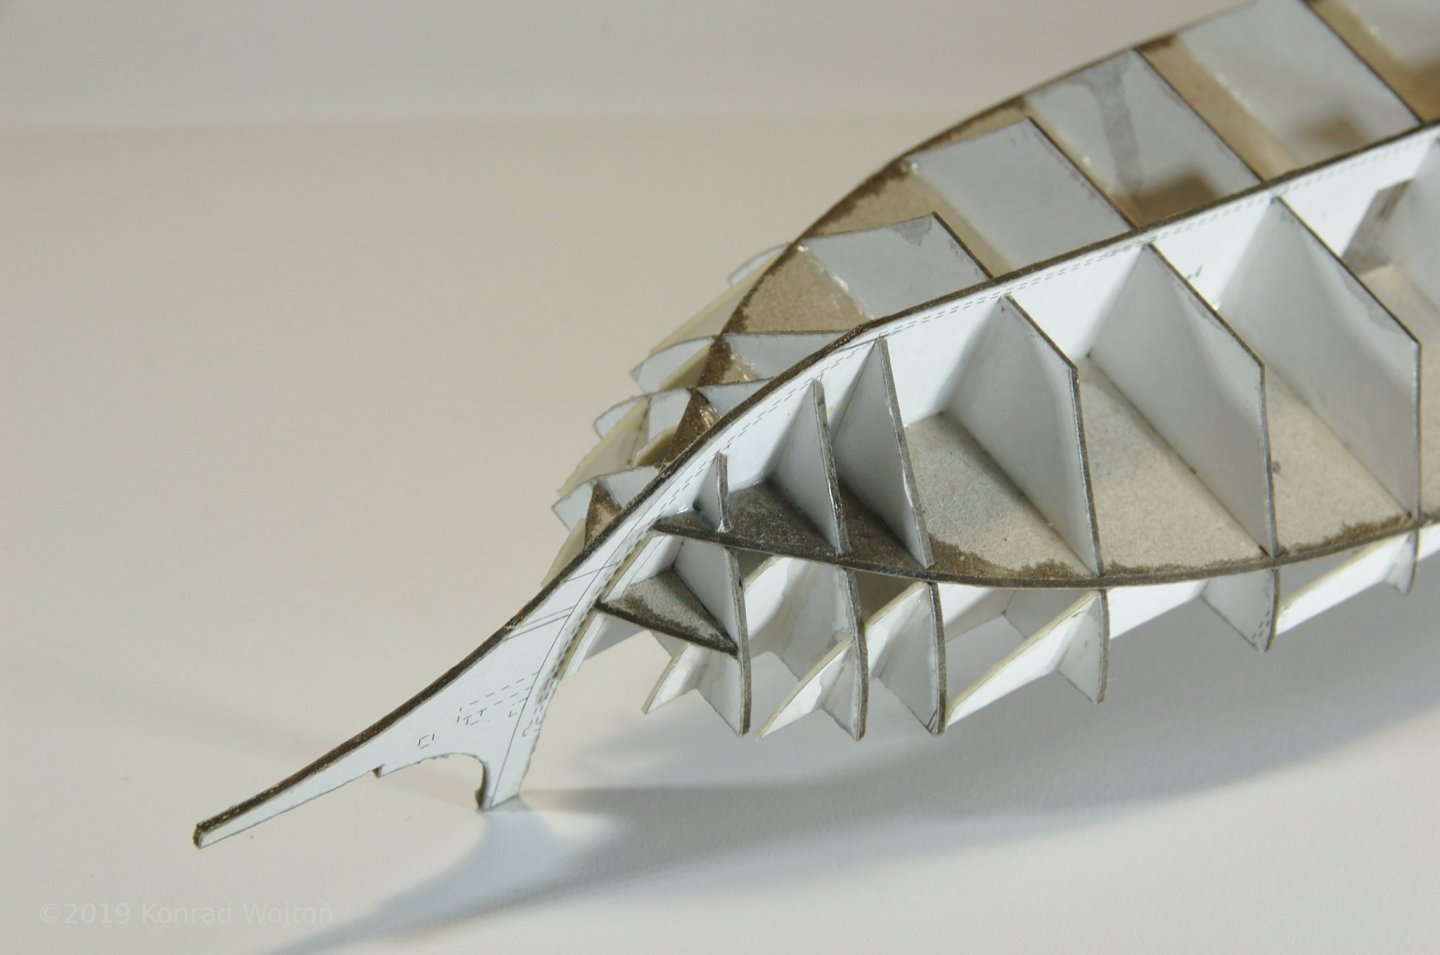
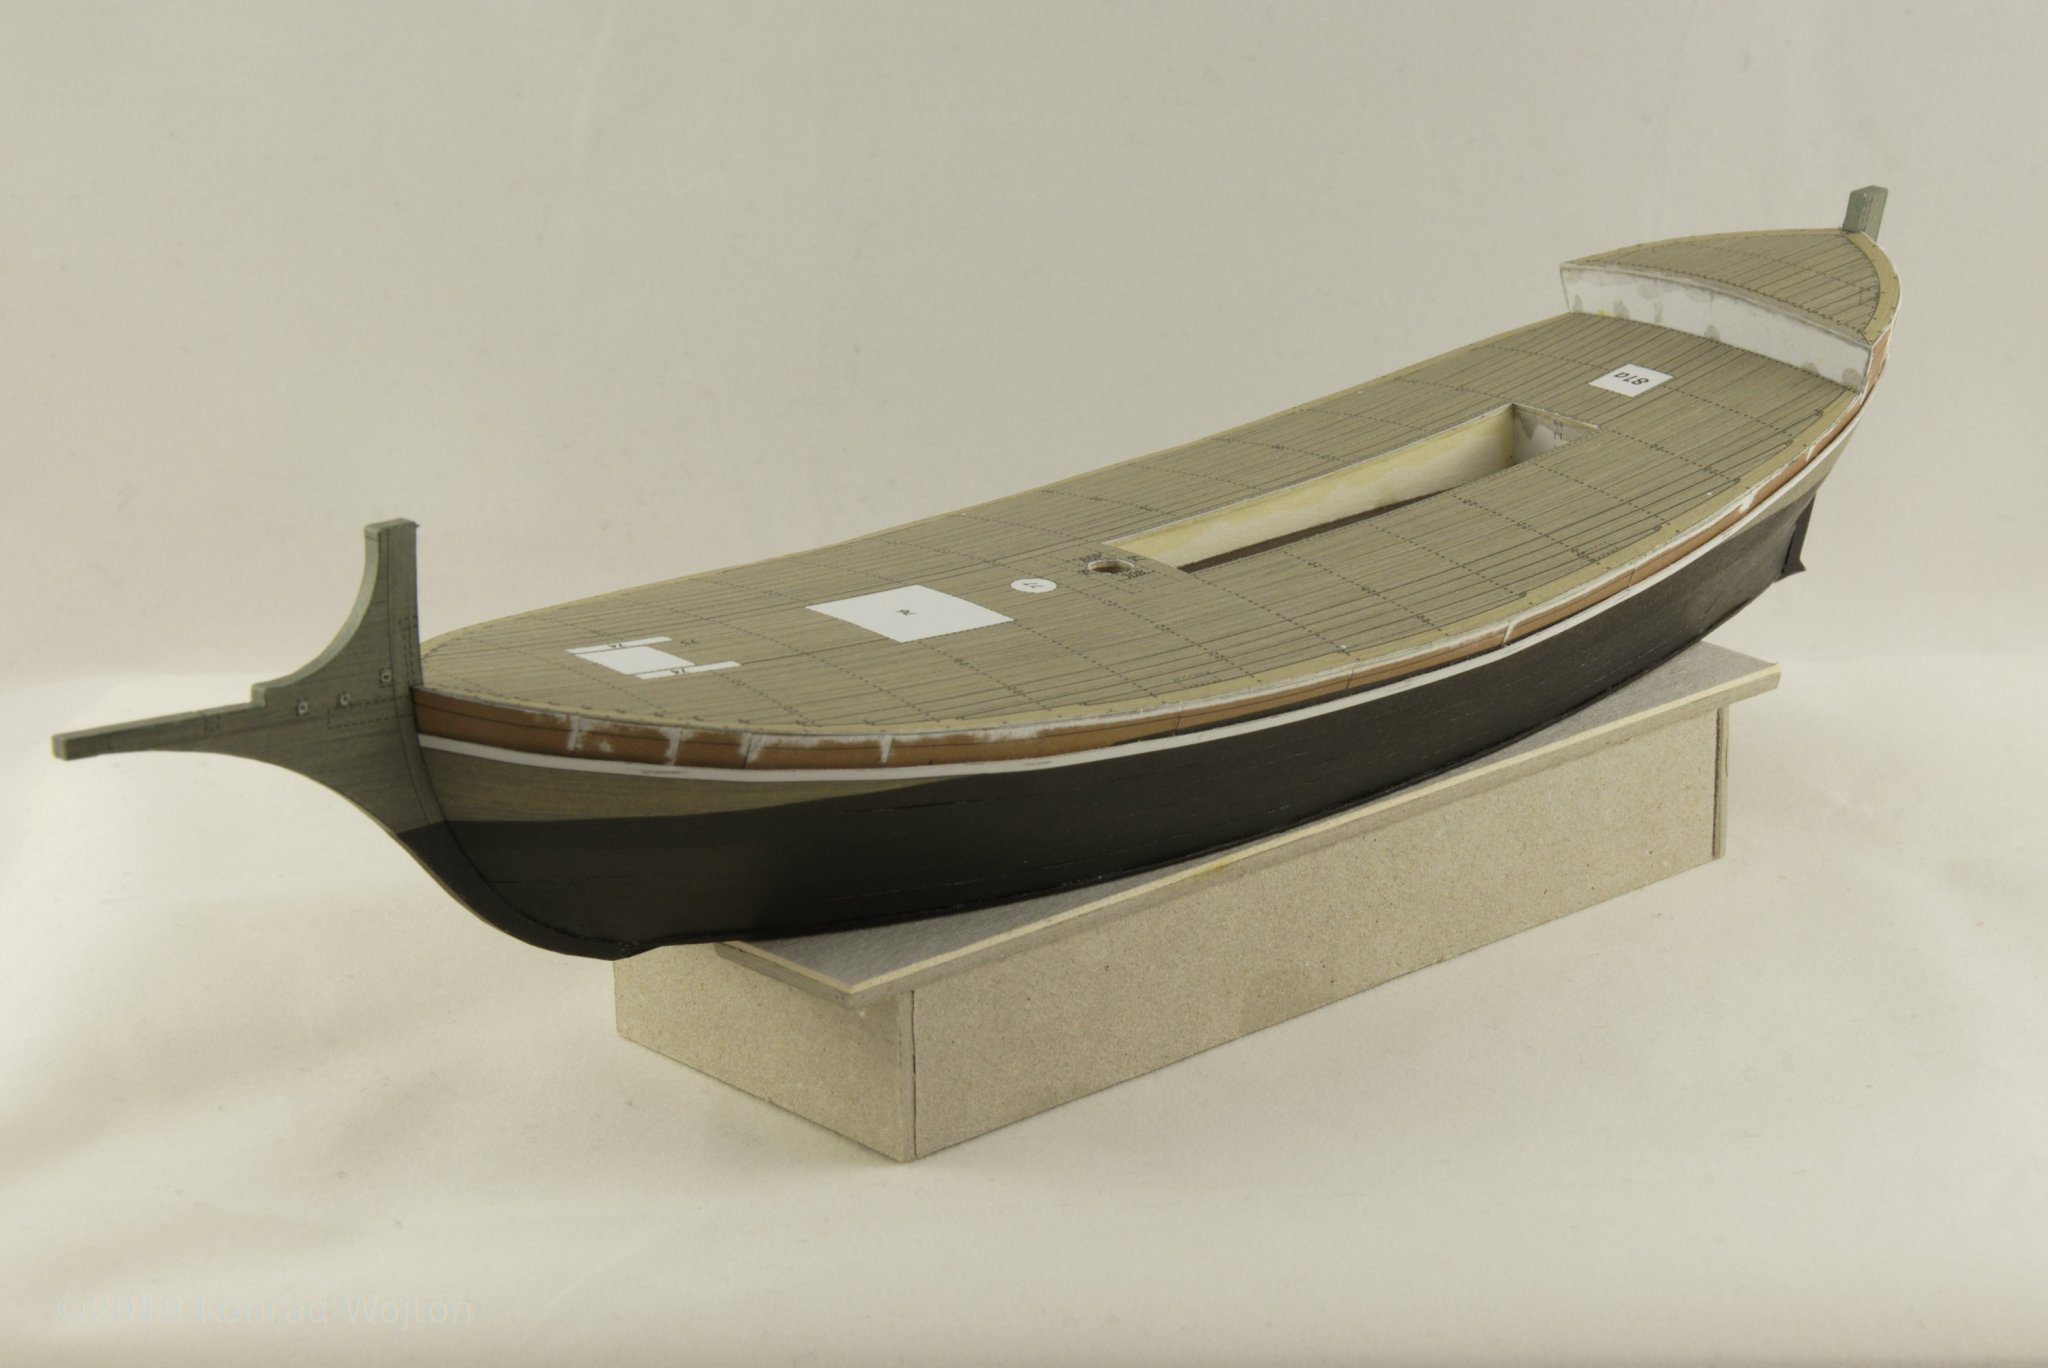
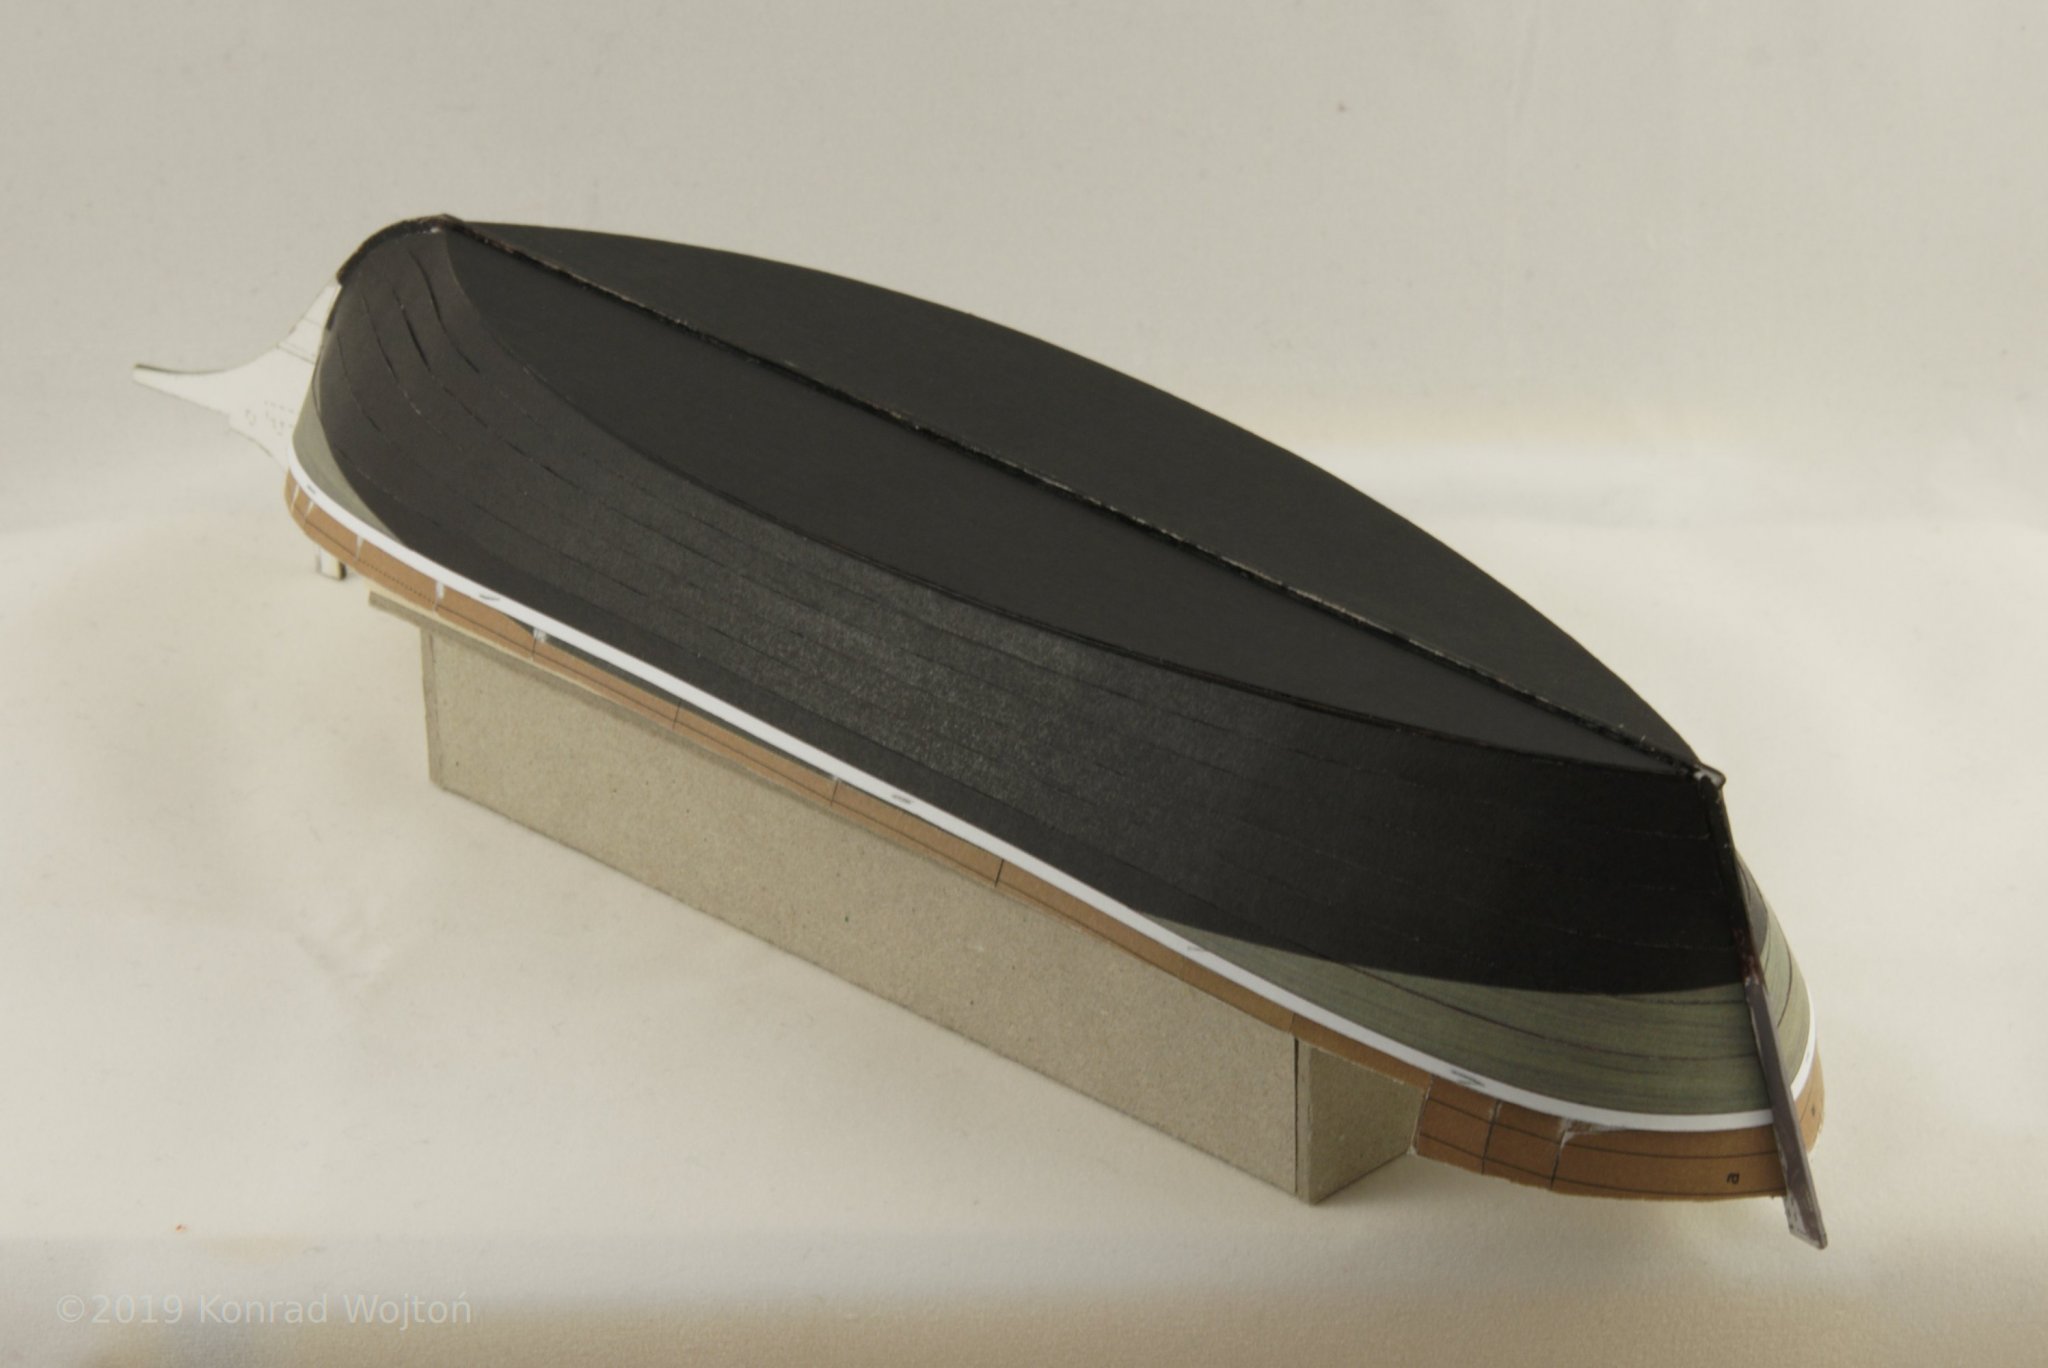
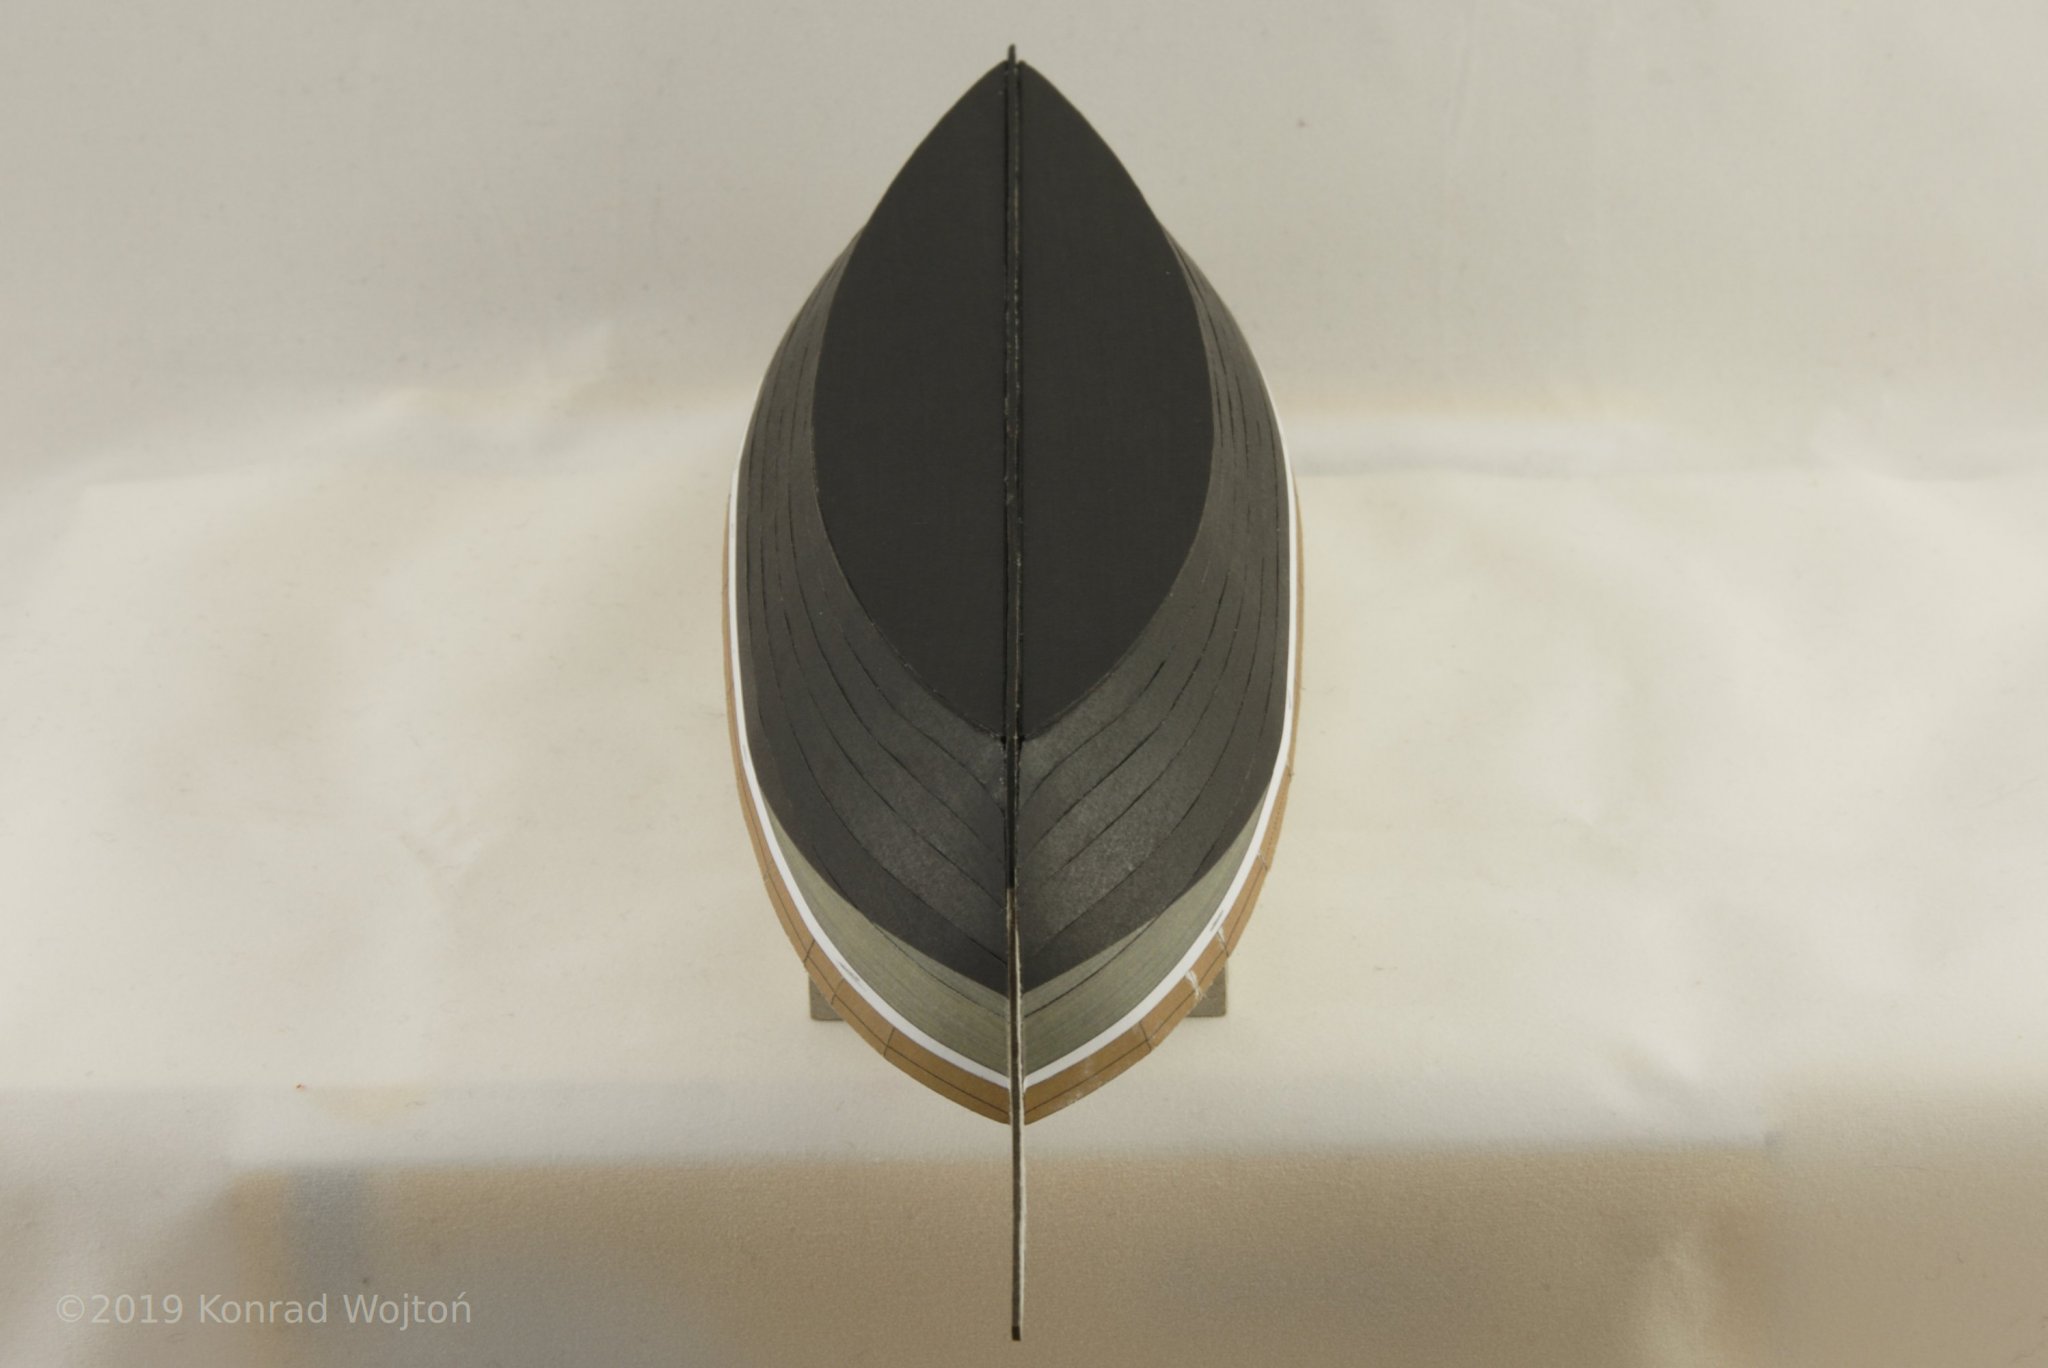
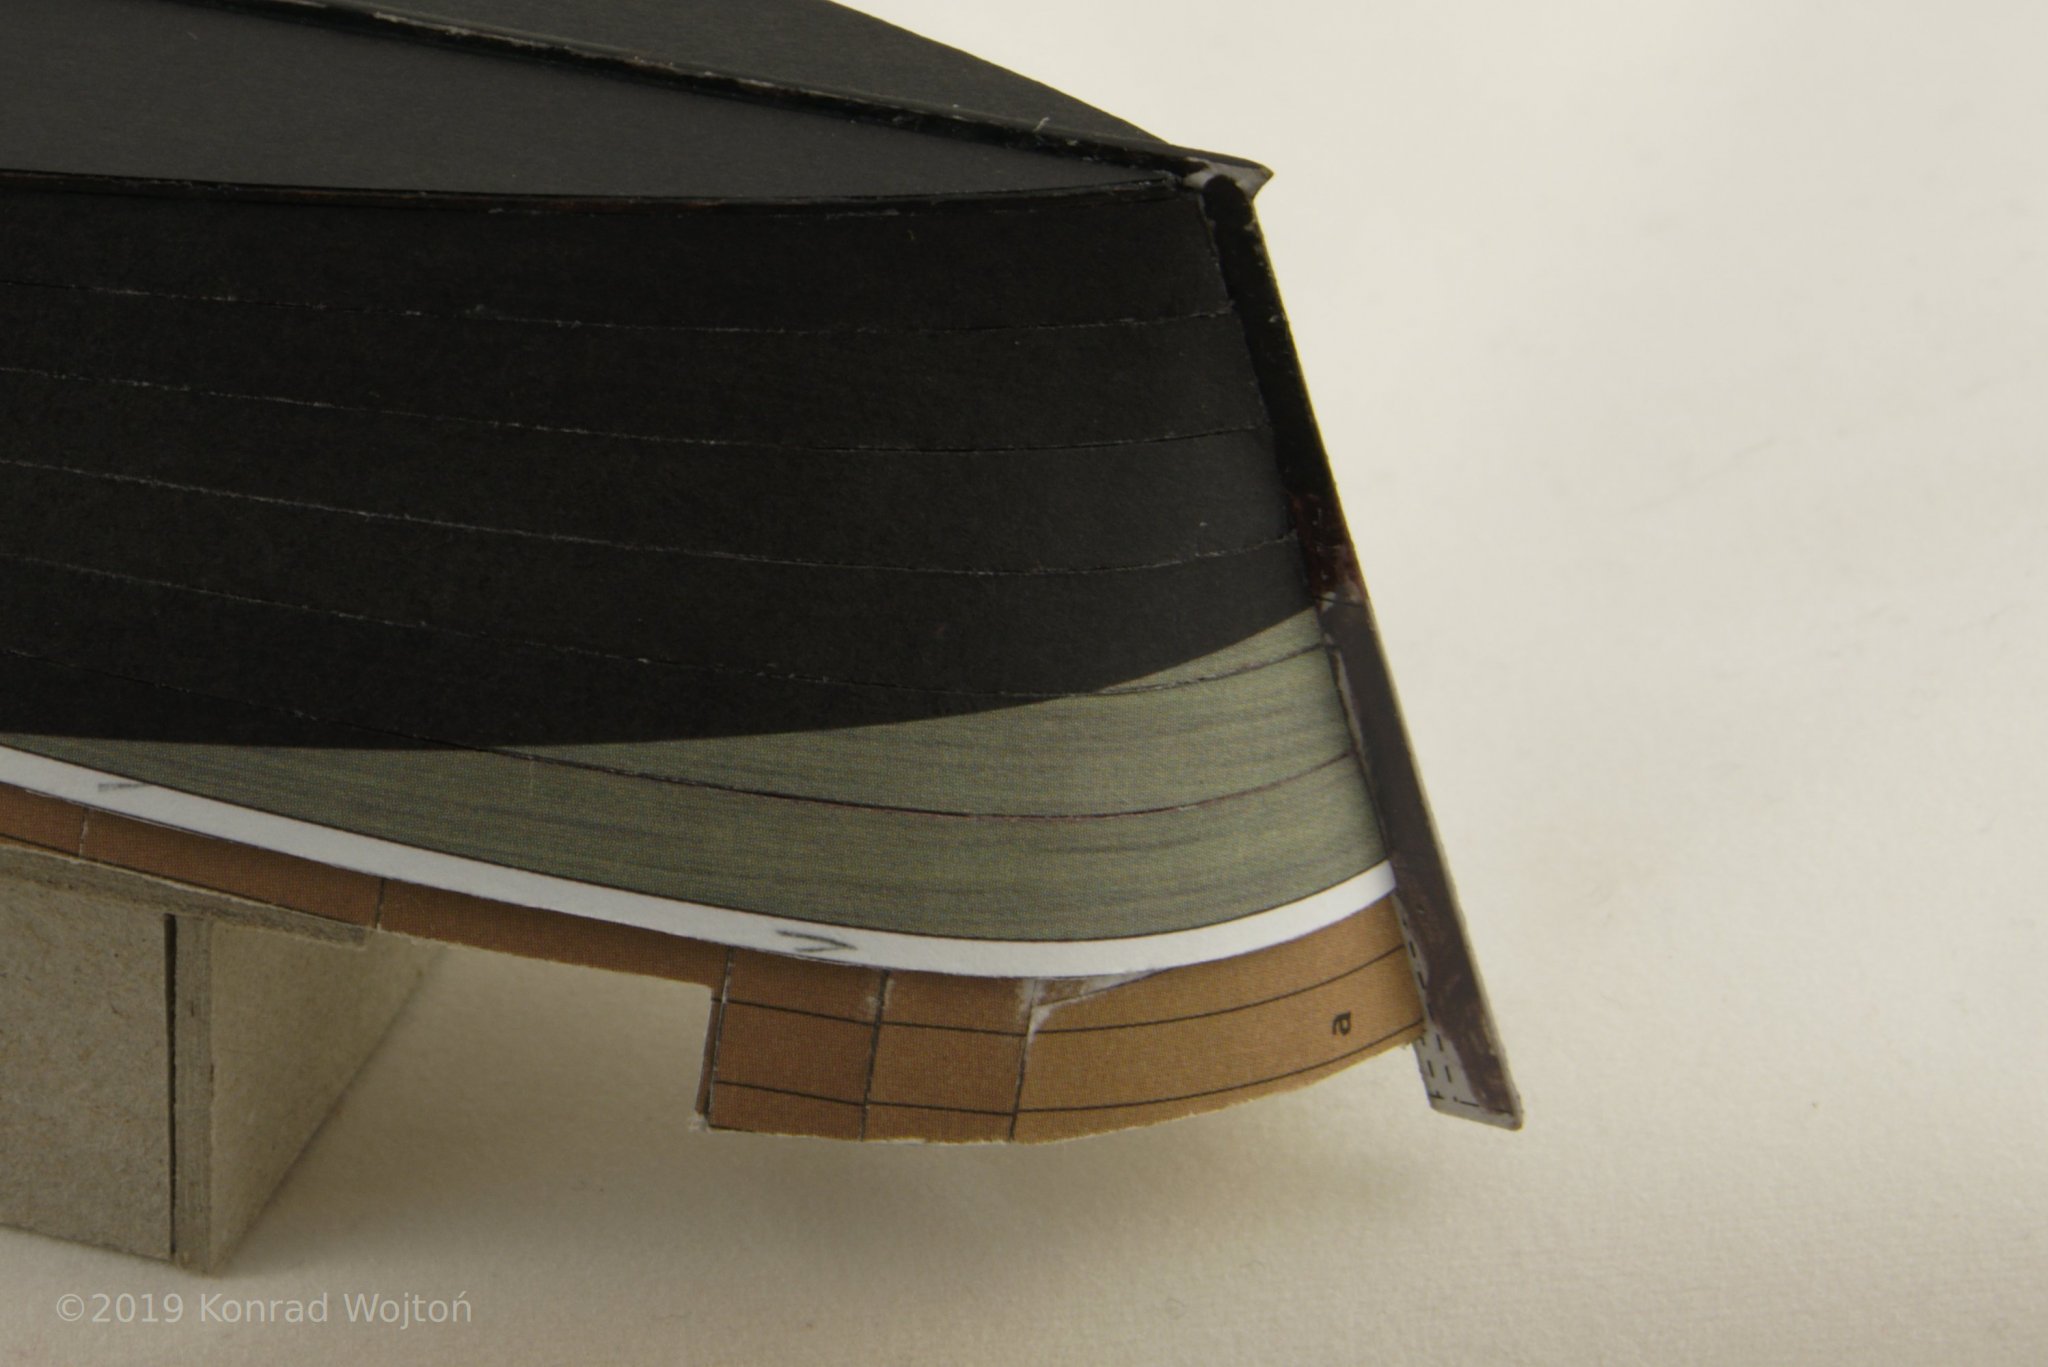
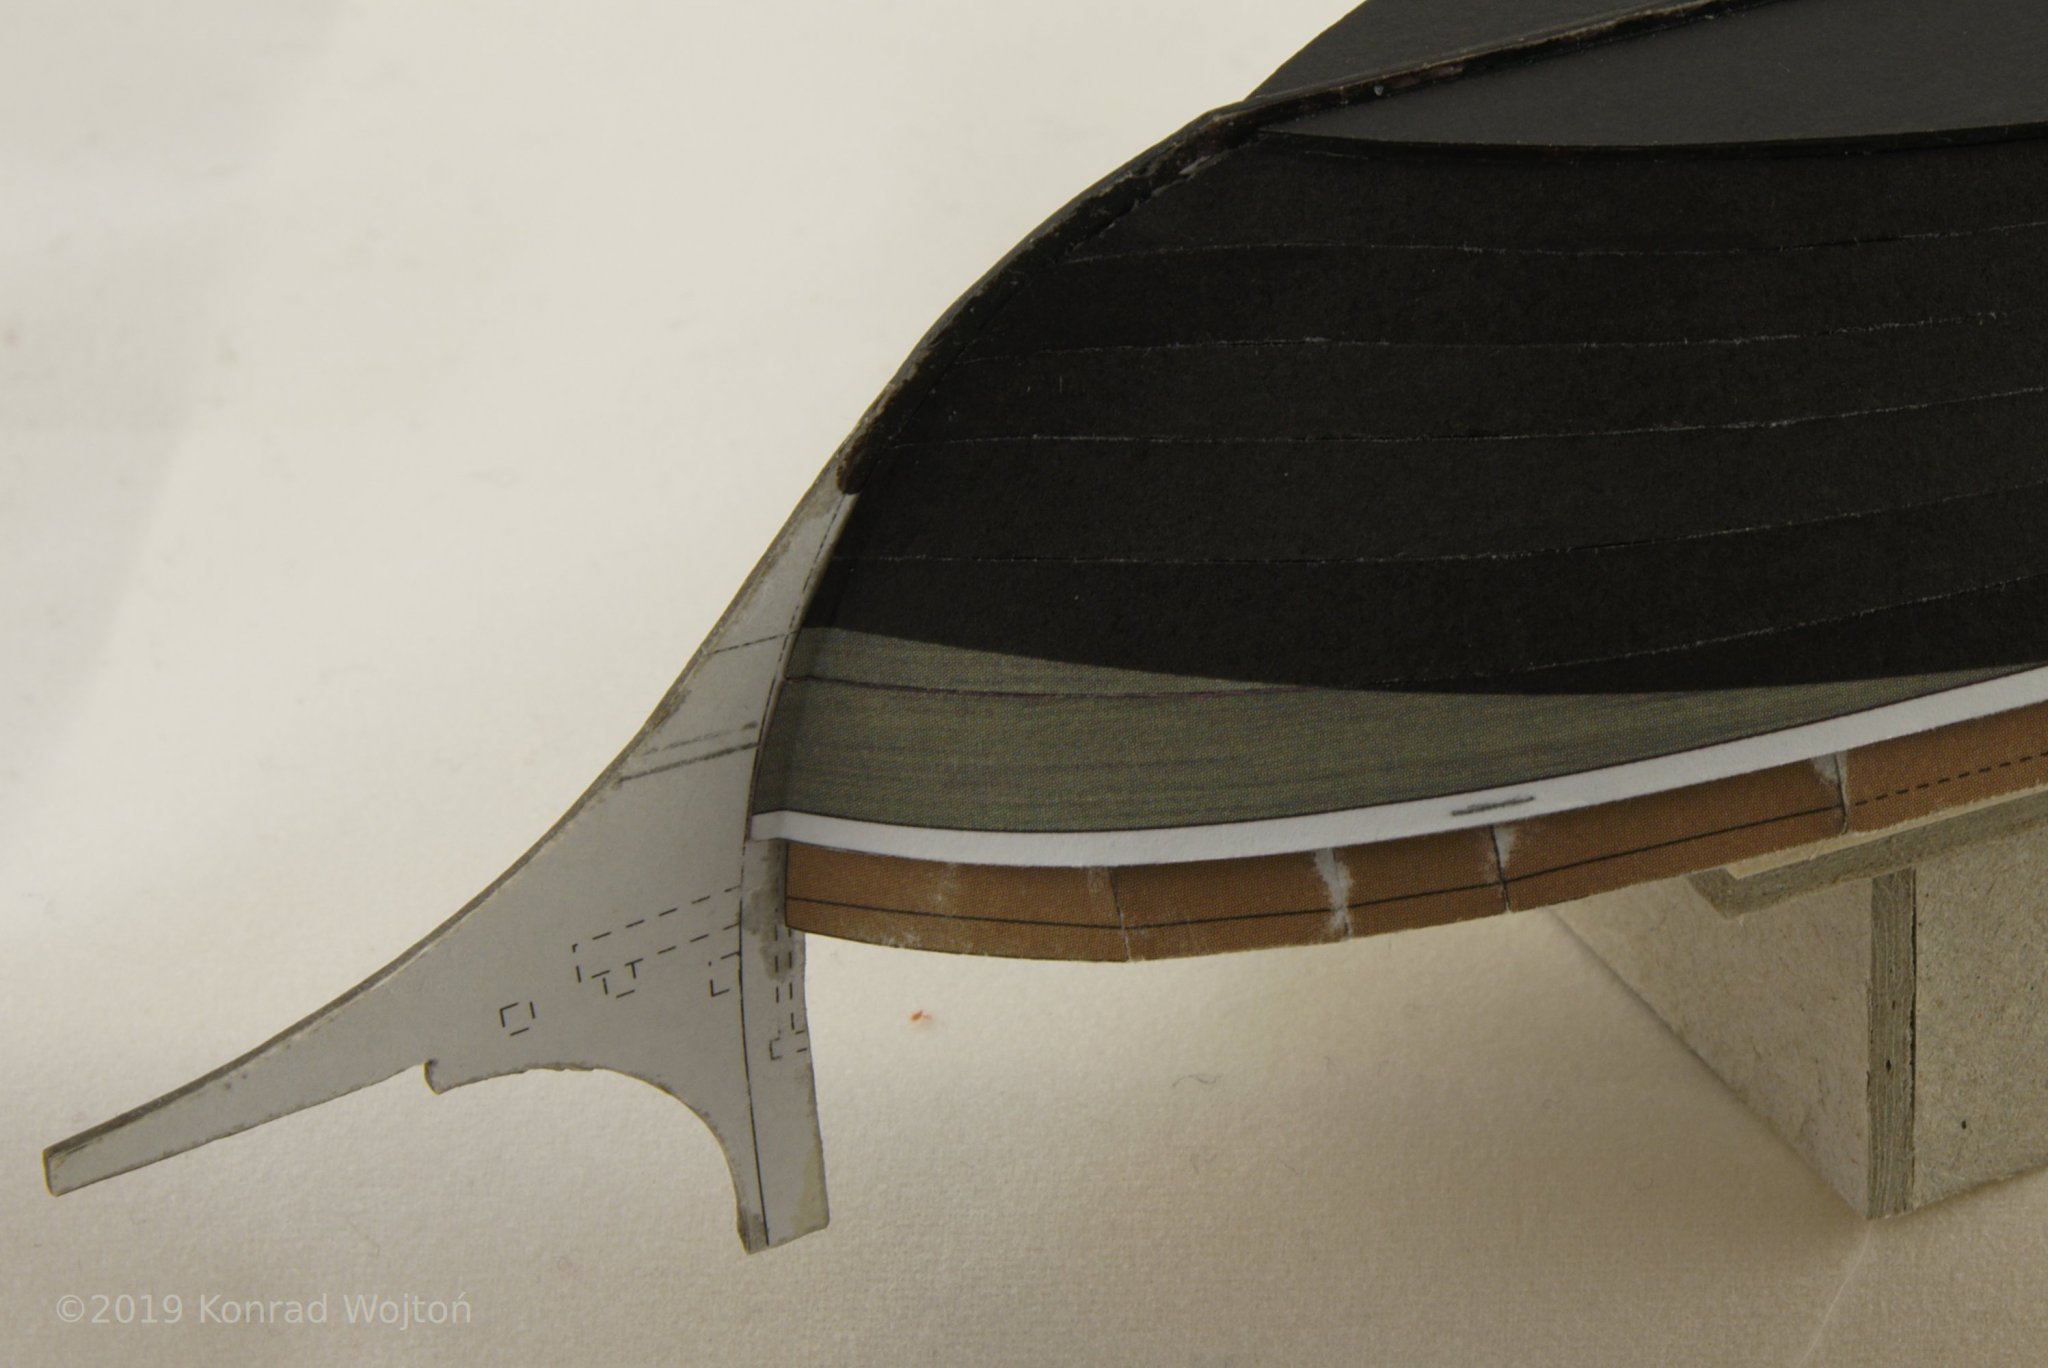
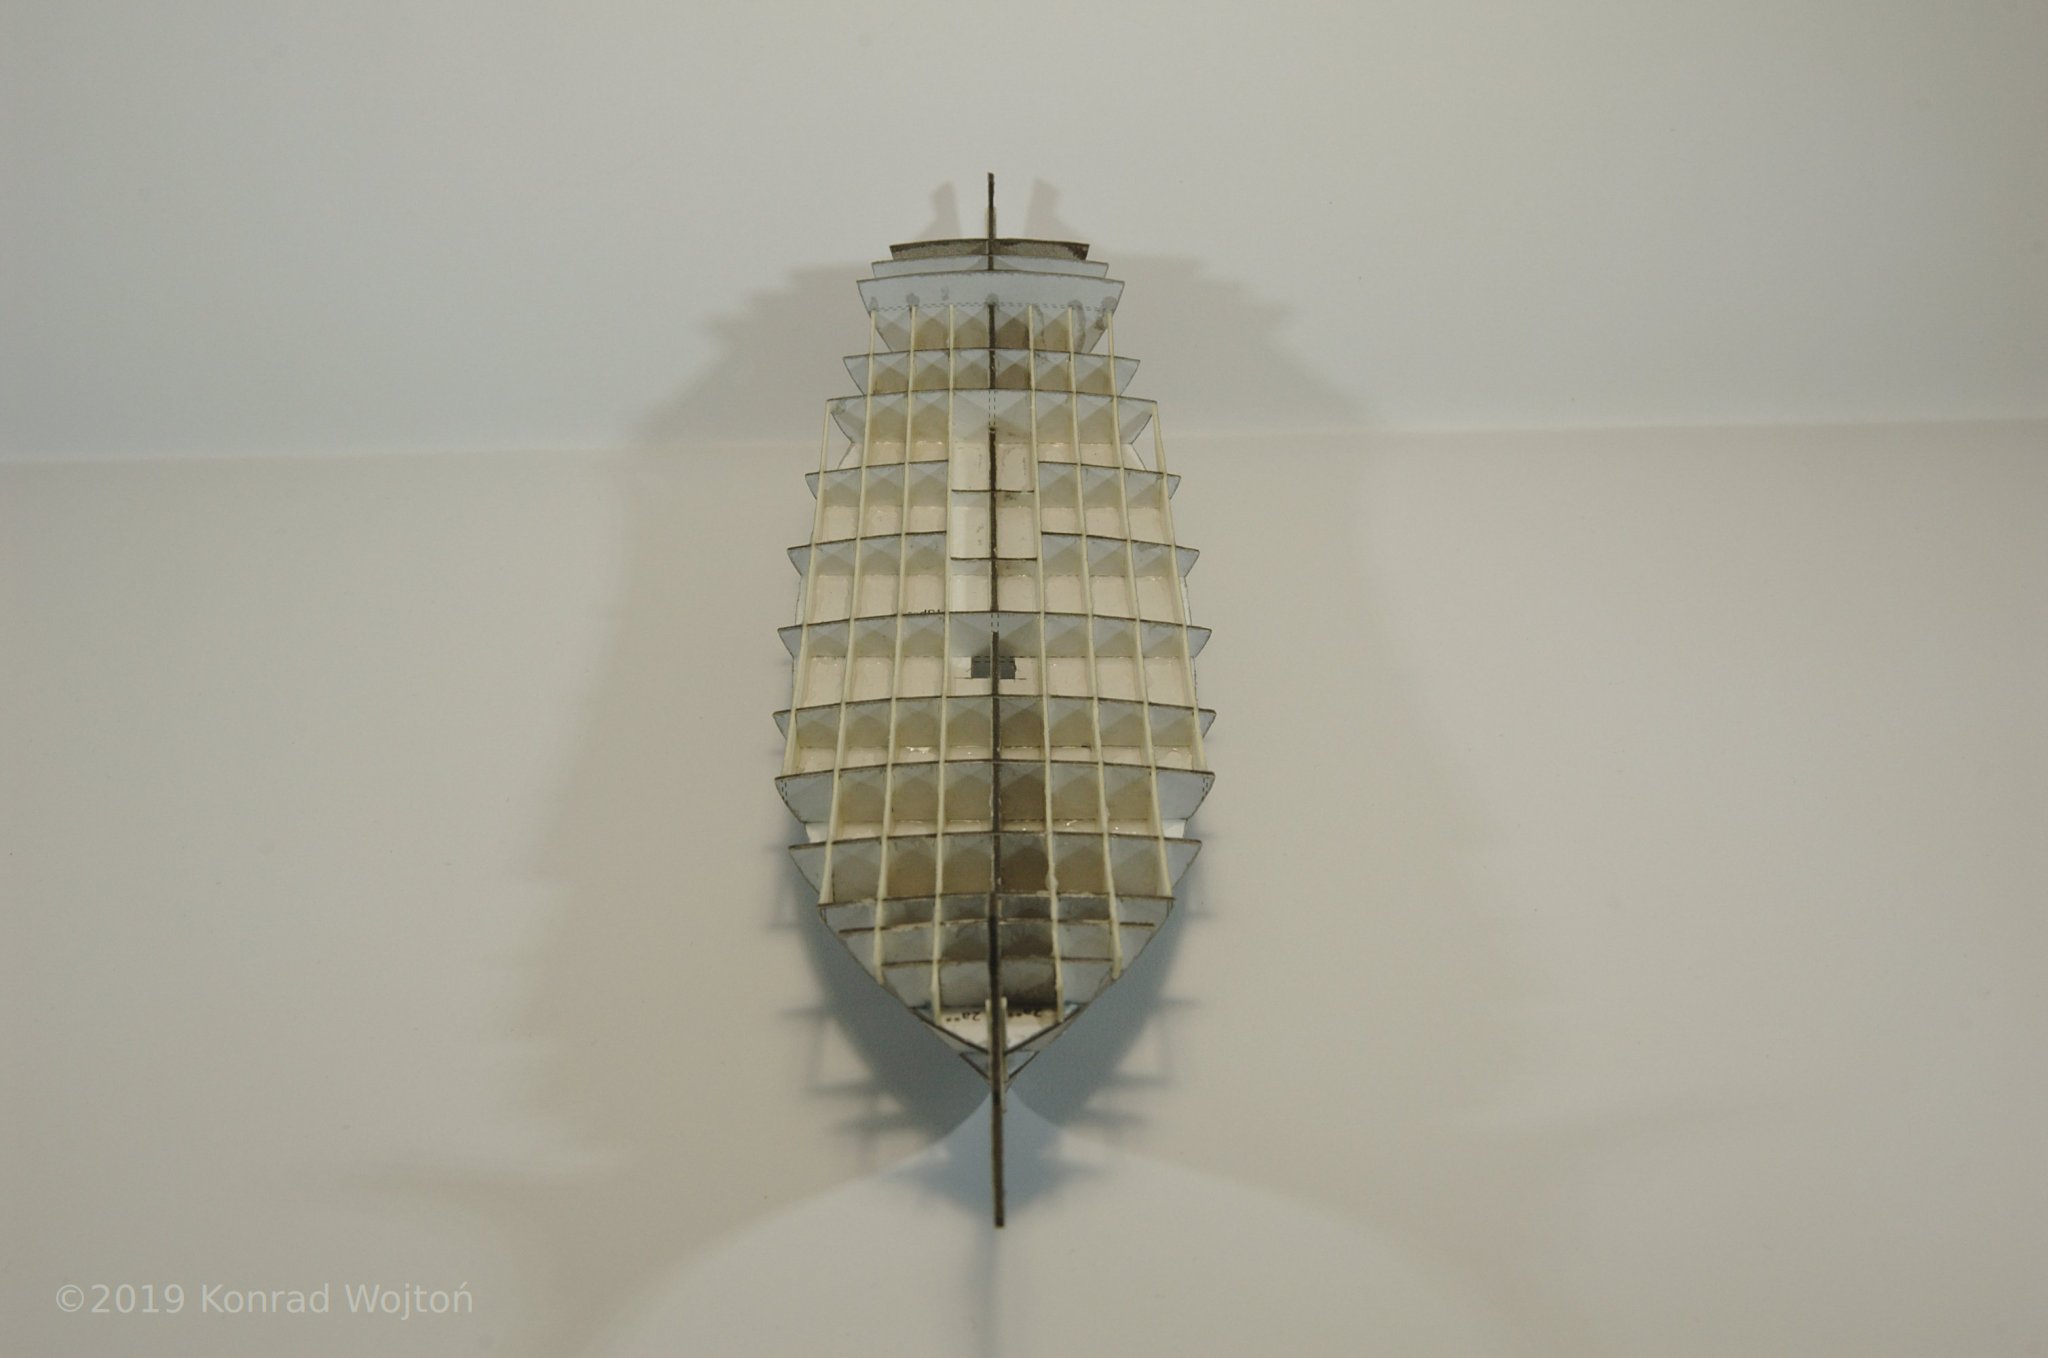
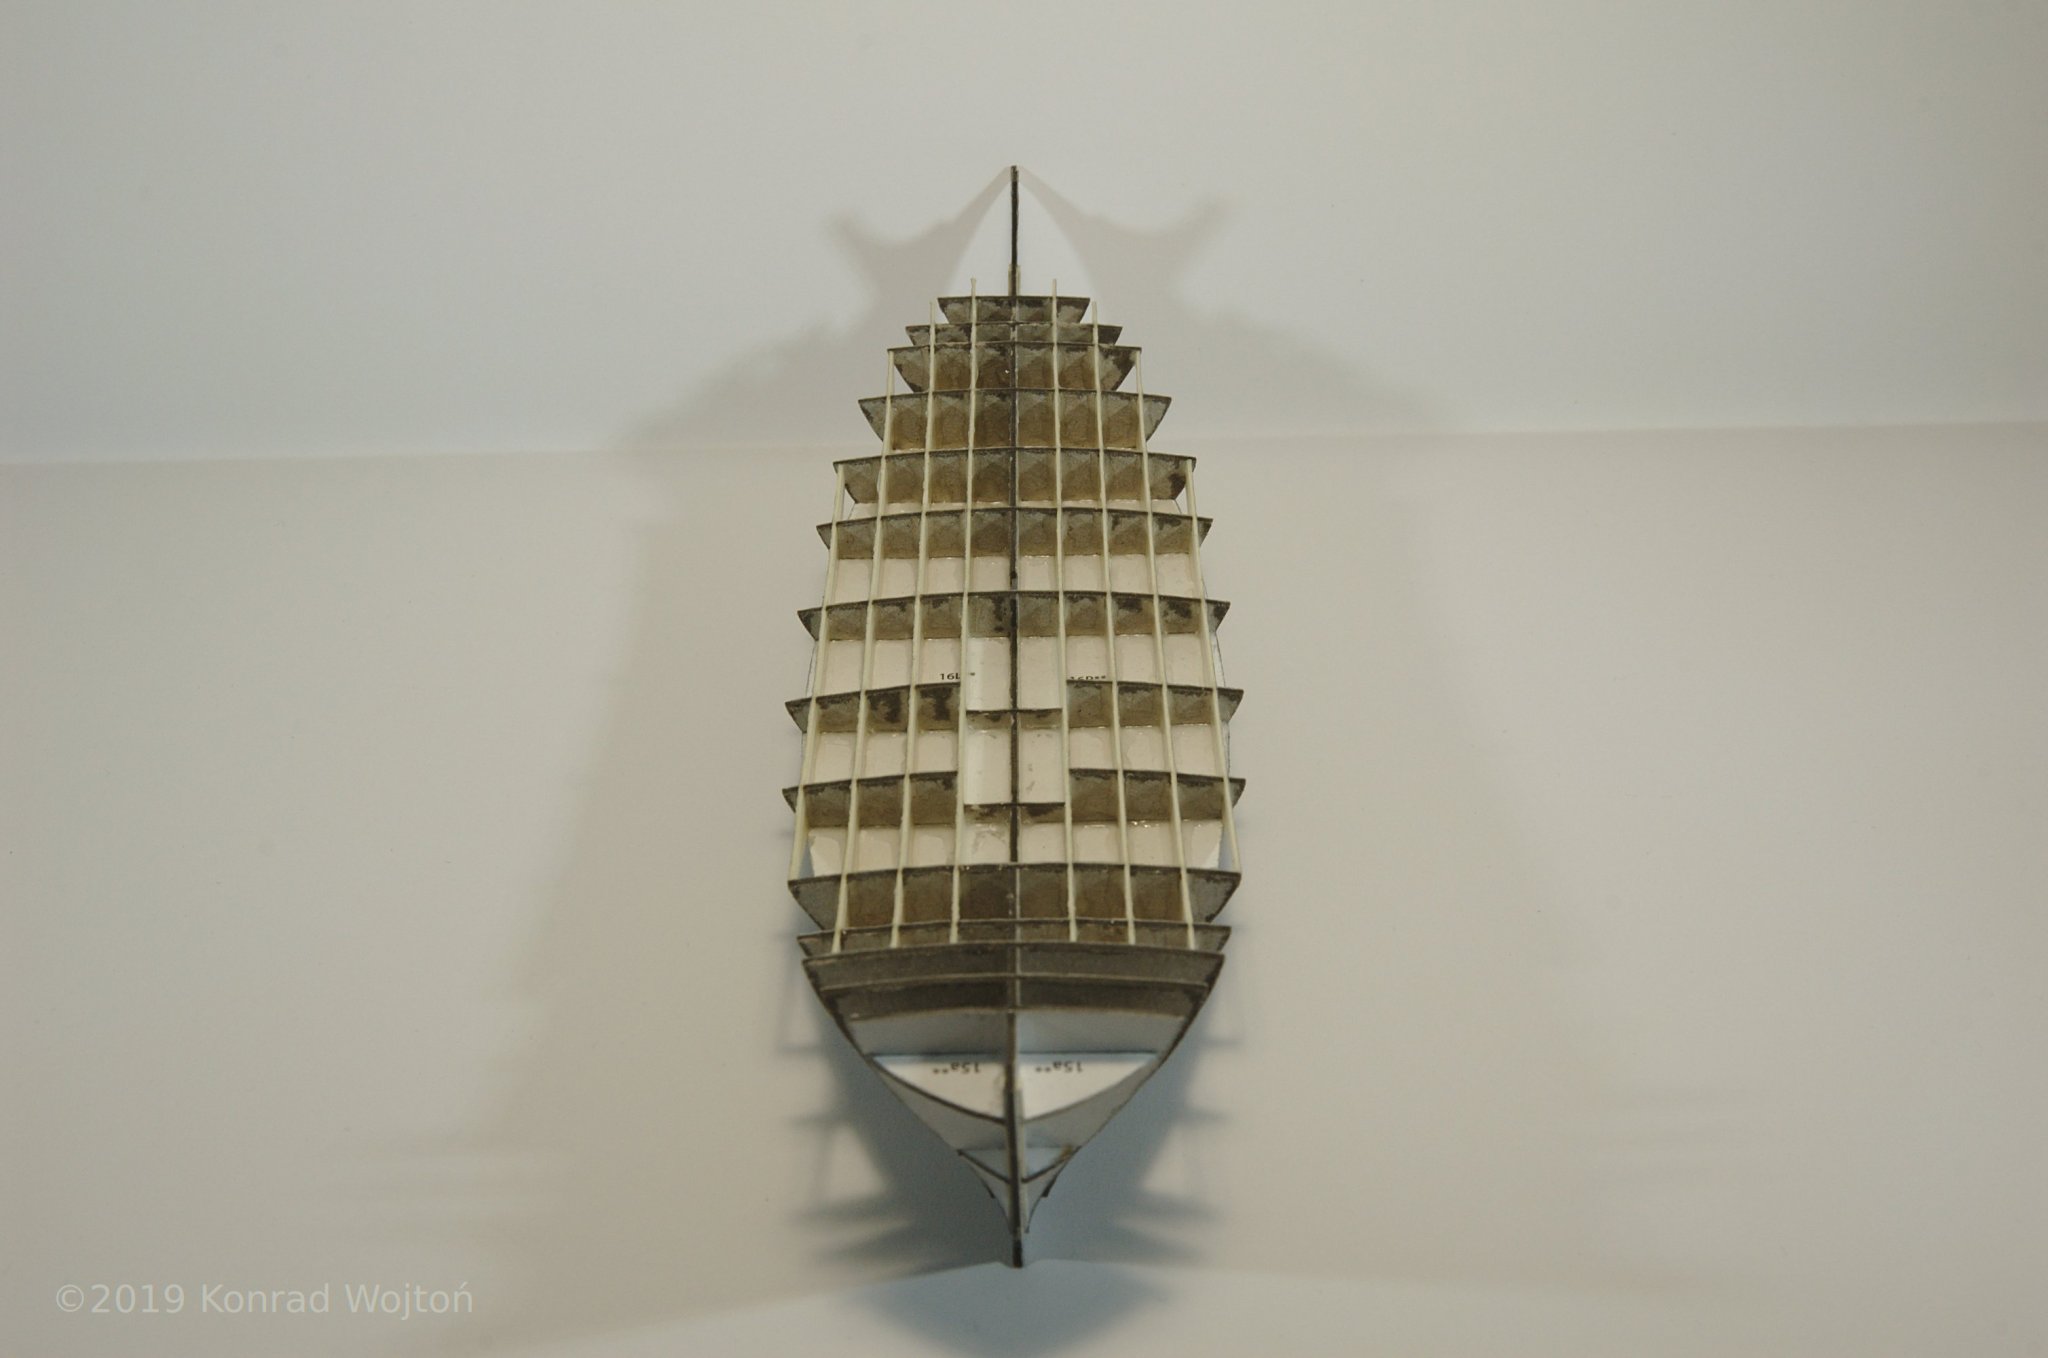
After some sanding it was time to cover the hull frame with first layer of skin. Deck and bottom support was glued as well.


- etubino, GrandpaPhil, BETAQDAVE and 3 others
-
6
-
Hi.
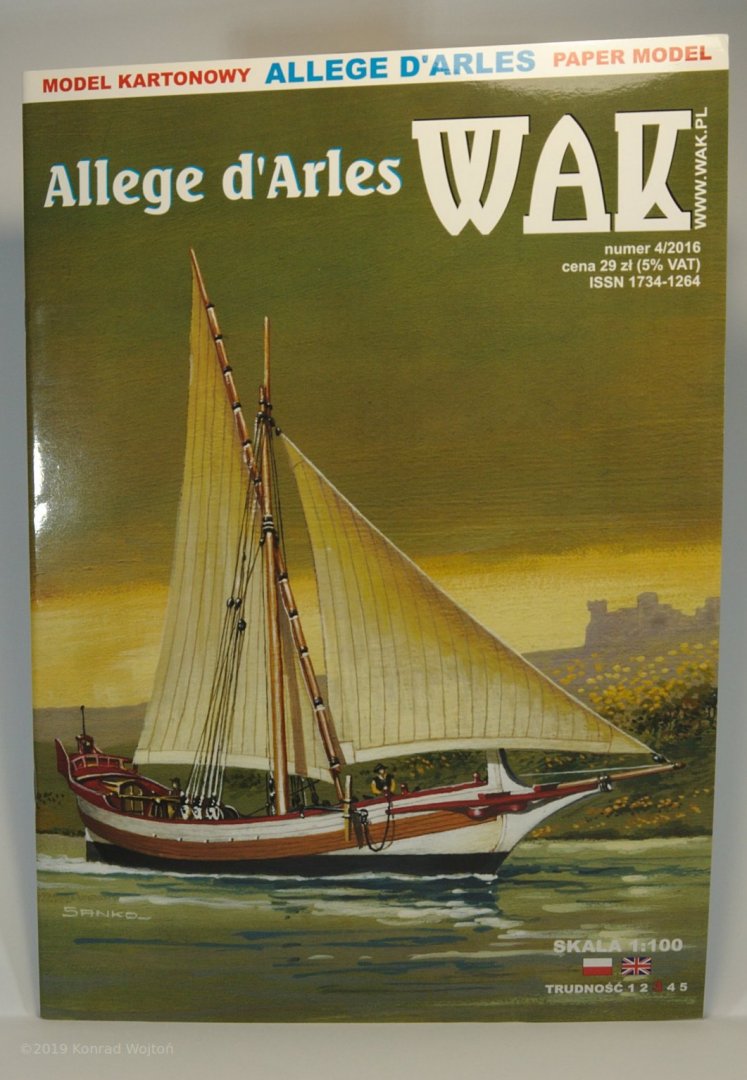
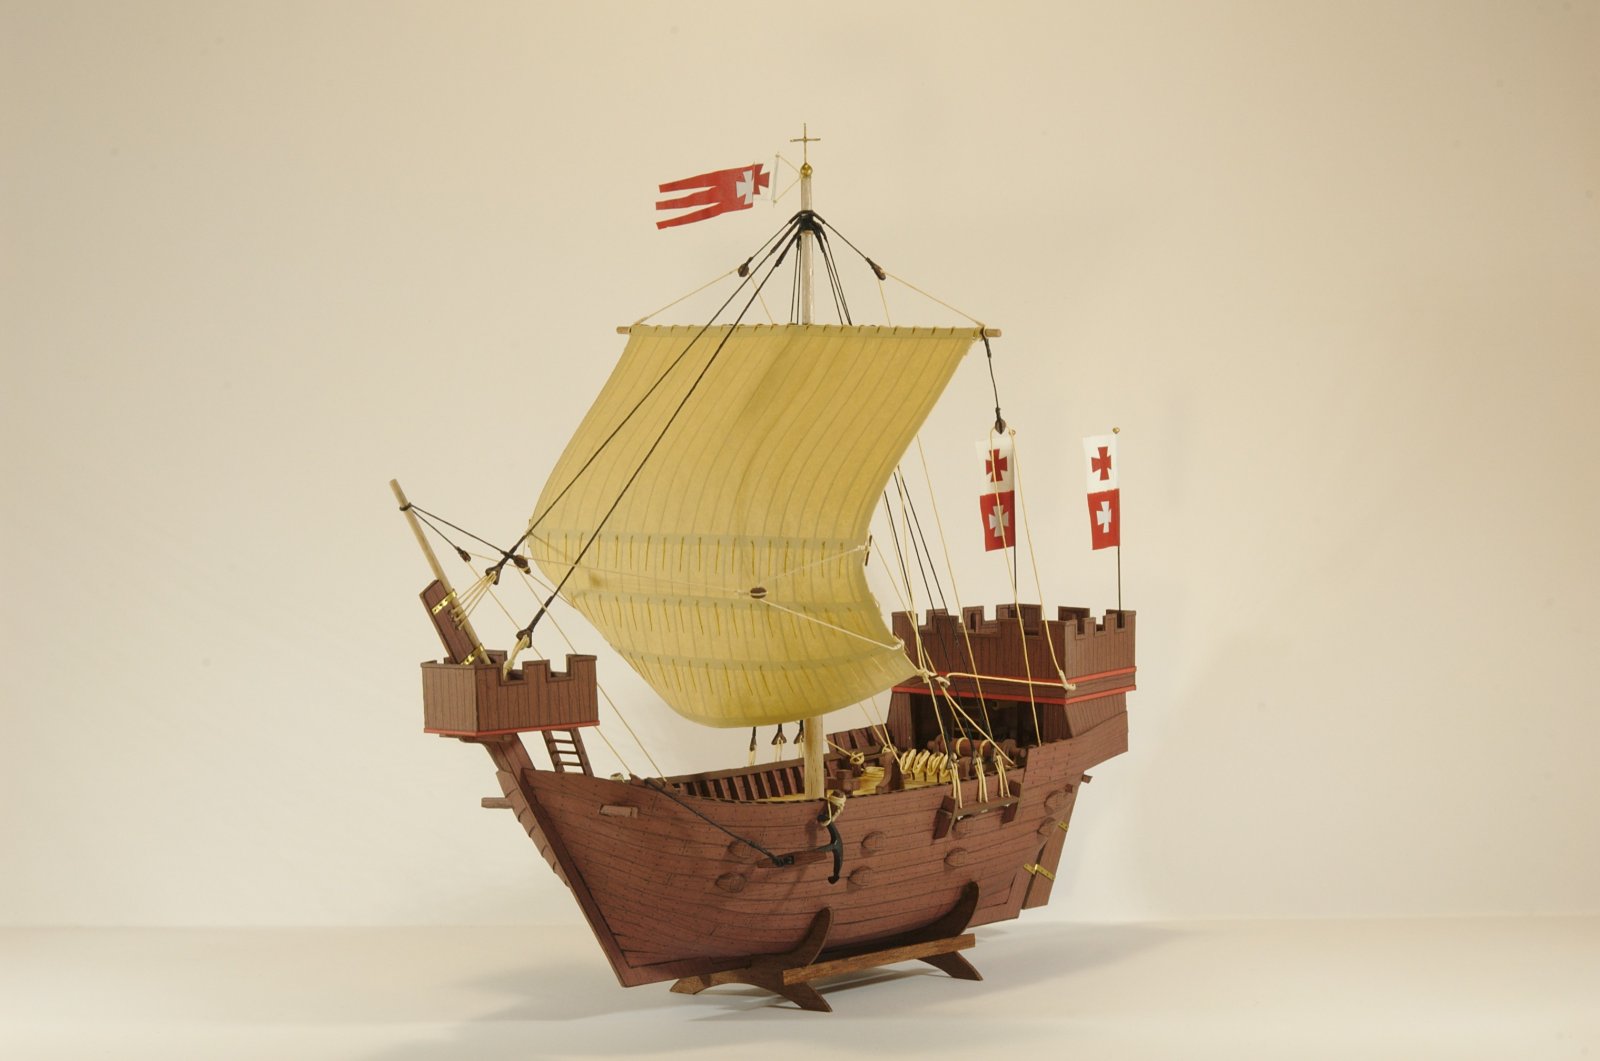
I would like to present you my current build - Allege d'Arles published by WAK in Poland. Card kit was designed by Tomasz Weremko who is lurking on this forum under the name of 0Seahorse.
I made quite a few card kits in my teenage years, but this is my second ever build of sailing ship (first being Koga Elbląska). I hope you will find this build interesting and that we can learn something new together.
According to short brief in kit, Allege d'Alres where small, 25 - 30 meters long merchant vessels used near Rhone estuary on the Mediterranean coast of France.
Cover of the kit:
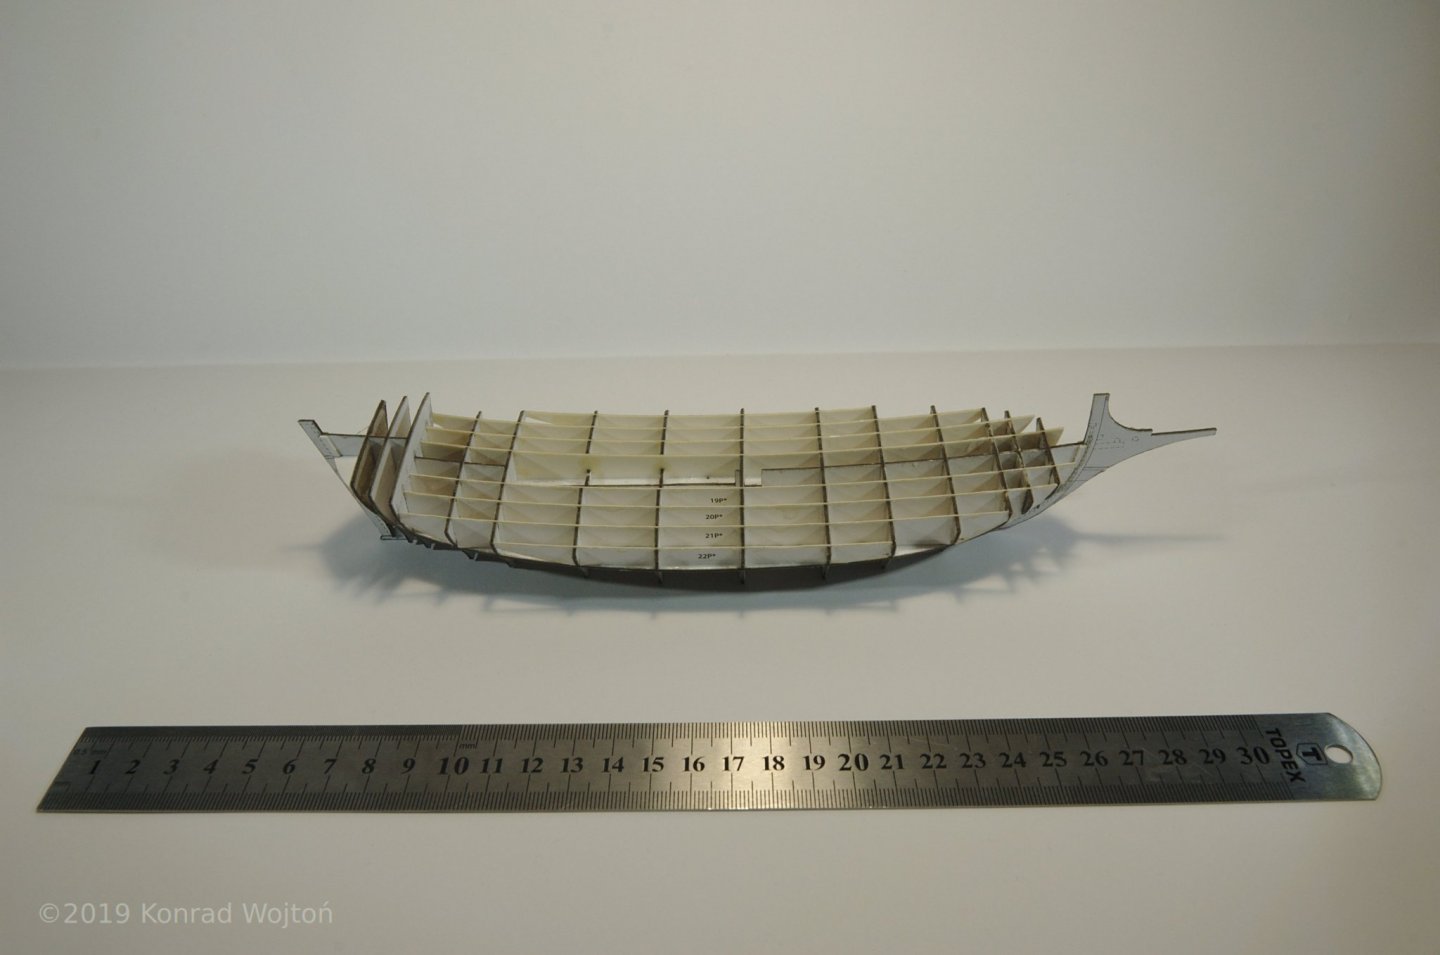
Hull frame:
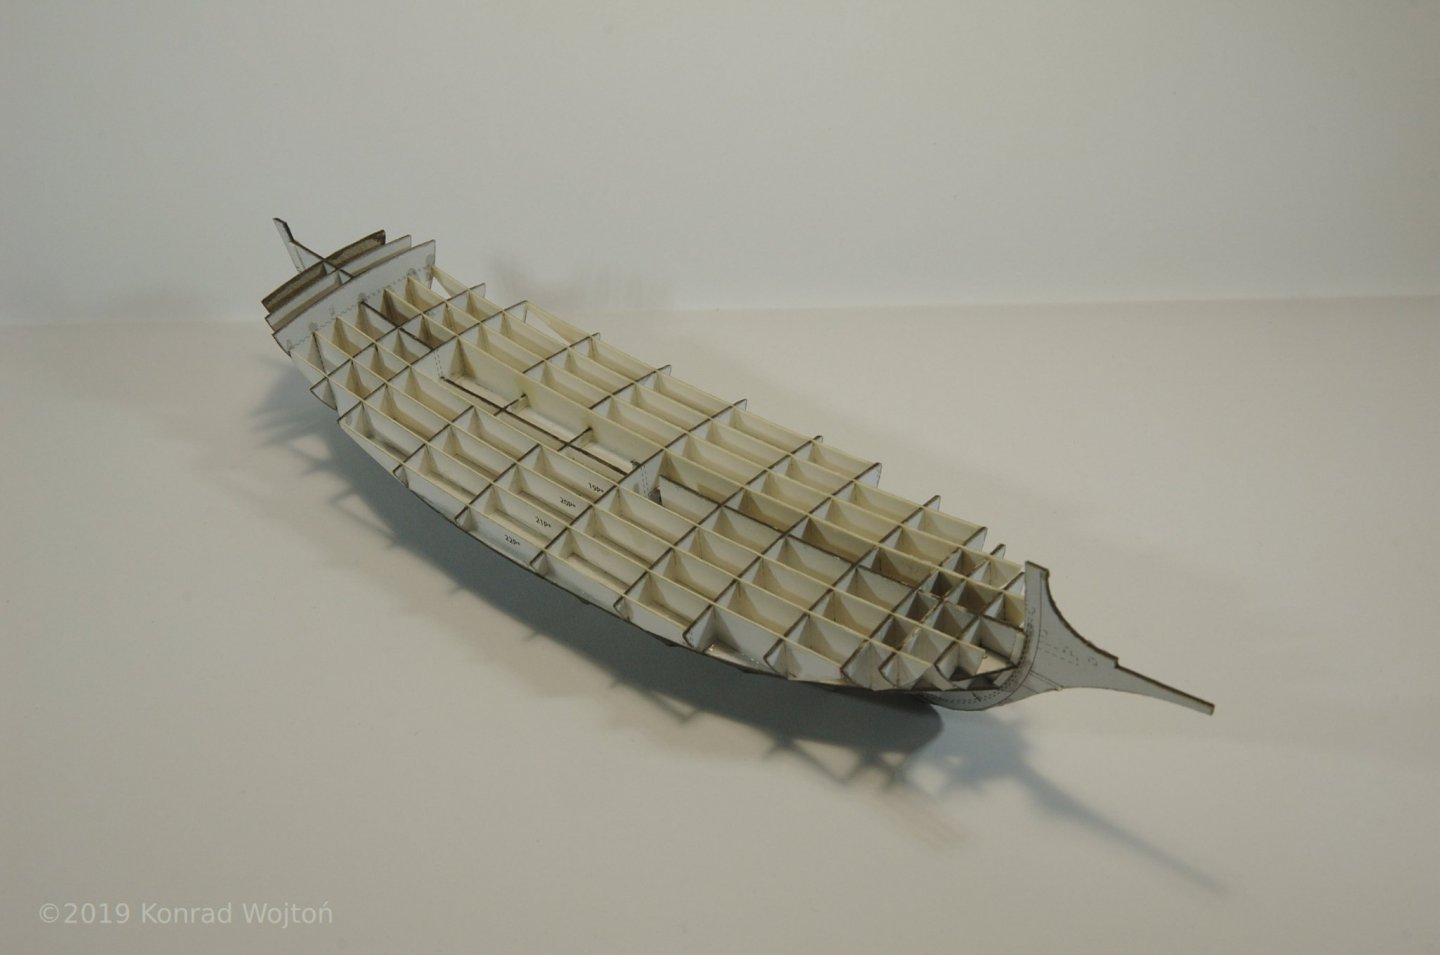
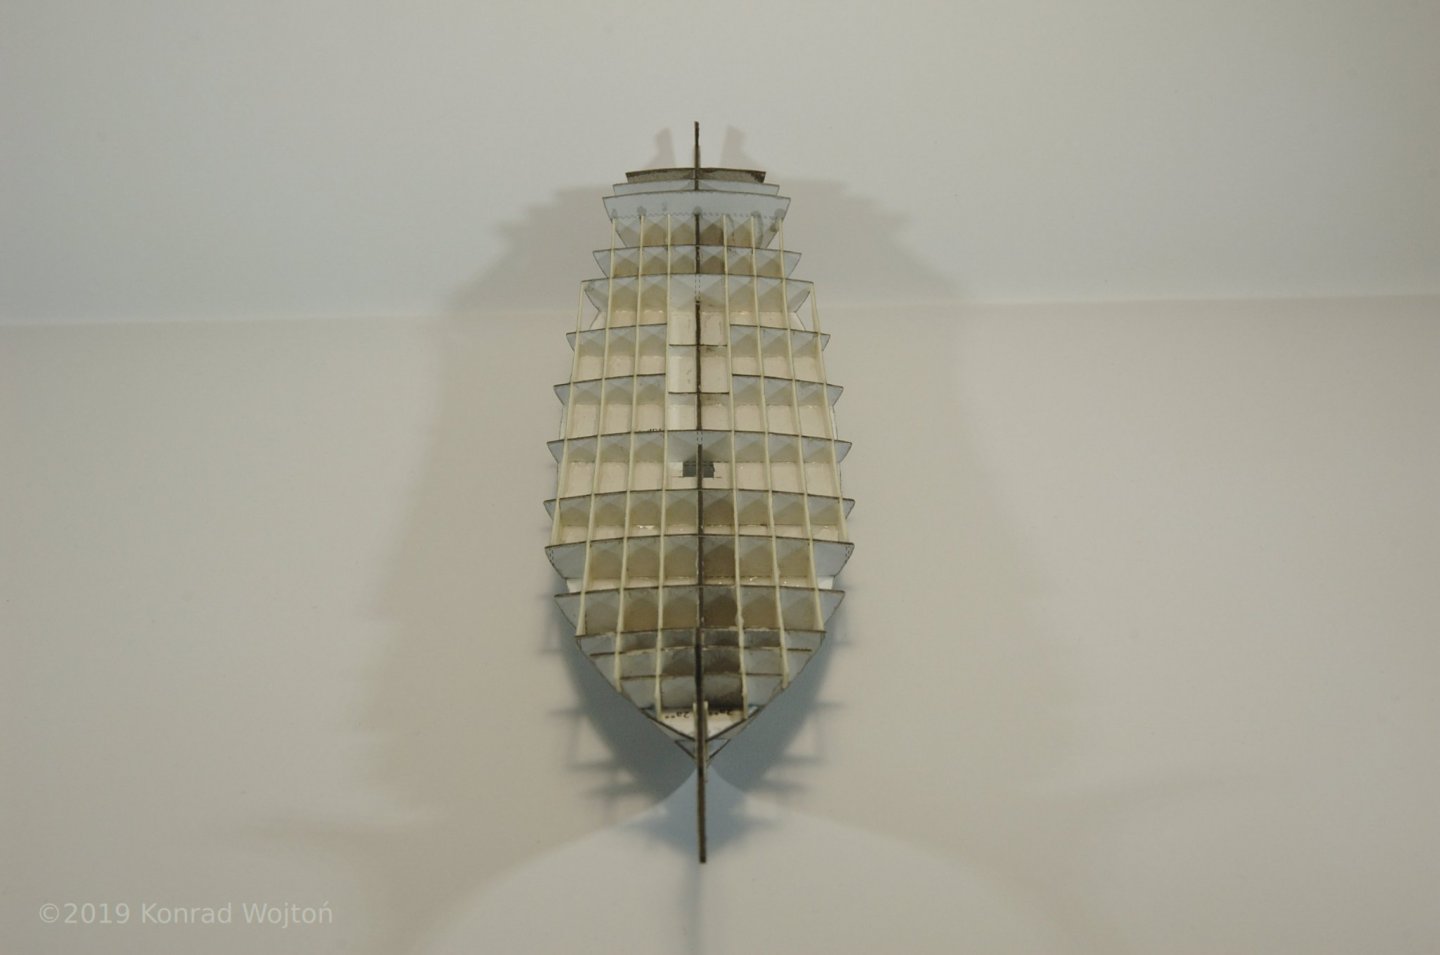
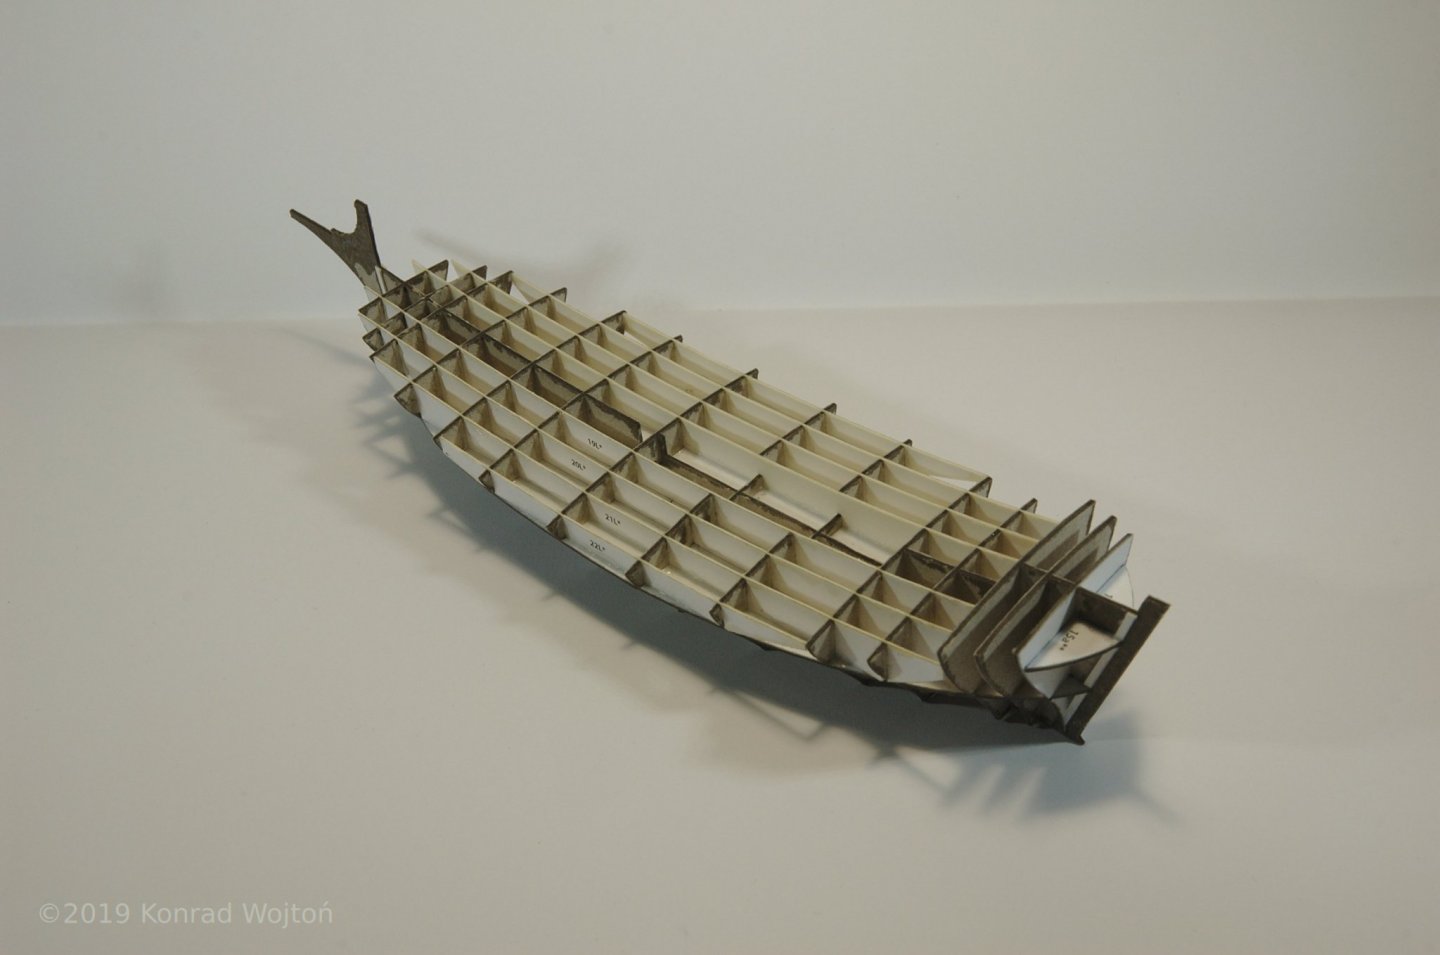


More to follow.
-
Hi, my name is Konrad. I am returning to scale model hobby after couple of years of hiatus. I make mostly card/paper models. My latest creation (my first sailing ship ever) which is good enough to show on the internet is Elbląg Cog which you can see in the completed builds gallery. Small teaser:
Cheers.


Allège d’Arles by Javier Baron - FINISHED - 1:200
in - Build logs for subjects built 1801 - 1850
Posted
Very interesting build.